Pinnacle Studio 15 Manual Ultimate Collection 15.0 Operating Instructions Us
User Manual: pinnacle Studio Ultimate Collection - 15.0 - Operating Instructions Free User Guide for Pinnacle Studio Software, Manual
Open the PDF directly: View PDF ![]() .
.
Page Count: 467 [warning: Documents this large are best viewed by clicking the View PDF Link!]
- Before you start
- 1. Using Studio
- 2. Capturing and Importing Media
- 3. The Album
- 4. The Movie Window
- 5. Video Clips
- 6. Montage® Themes and Theme Editing
- 7. Video Effects
- 8. Two-track Editing
- 9. Transitions
- 10. Still Images
- 11. Disc Menus
- 12. The Classic Title Editor
- 13. The Motion Titler
- 14. Sound Effects and Music
- 15. Audio Effects
- 16. Making your movie
- Appendix A: Setup Options
- Appendix B: Tips and Tricks
- Appendix C: Troubleshooting
- Appendix D: Videography Tips
- Appendix E: Glossary
- Appendix F: Keyboard shortcuts
Pinnacle Studio
Version 15
Including Studio, Studio Ultimate
and Studio Ultimate Collection
Your Life in Movies
ii Pinnacle Studio
Documentation by Nick Sullivan
Copyright ©1996-2011 Avid Technology, Inc. All rights reserved.
Please respect the Rights of Artists and Creators. Content such as music,
photos, video and celebrity images are protected by the laws of many
countries. You may not use other people’s content unless you own the
rights or have the permission of the owner.
This product or portions thereof are protected in the United States by one or
more of the following United States Patents: 5,495,291; 6,469,711;
6,532,043; 6,901,211; 7,124,366; 7,165,219; 7,286,132; 7,301,092 and
7,500,176; and in Europe by one or more of the following European
Patents: 0695094 and 0916136. Other patents are pending.
Mpegable DS 2.2 ©2004 Dicas Digital Image Coding GmbH.
Manufactured under license from Dolby Laboratories. Dolby and the
double-D symbol are trademarks of Dolby Laboratories. Confidential
unpublished works. Copyright 1993 - 2005 Dolby Laboratories. All Rights
Reserved. MPEG Layer-3 audio coding technology licensed from
Fraunhofer IIS and Thomson Multimedia. Portions of this product were
created using LEADTOOLS ©1991-2006, LEAD Technologies, Inc. All
rights reserved. Portions utilize Windows Media Technologies ©1999-
2005 Microsoft Corporation. Real Producer SDK ©1995-2005 Real
Networks Inc. This product contains portions of imaging code owned
and copyrighted by Pegasus Imaging Corporation, Tampa, FL. All rights
reserved. MPEG Layer II Audio by QDesign Corp. This product
contains a YouTube API.
MPEG Audio technology may be included with this product. Audio
MPEG, Inc. and S.I.SV.EL., S.P.A. require this notice: This product
contains MPEG Audio technology licensed by Audio MPEG and SISVEL
only for use in accordance with Avid’s EULA.
No part of this manual may be copied or distributed, transmitted,
transcribed, stored in a retrieval system, or translated into any human or
computer language, in any form by any means, electronic, mechanical,
magnetic, manual, or otherwise, without the express written permission of
Avid Technology, Inc.
Avid
280 North Bernardo Avenue
Mountain View, CA 94943
Printed in the USA.
Table of contents iii
Table of contents
BEFORE YOU START .................................................. XI
Equipment requirements ........................................................................ xii
Abbreviations and conventions ............................................................. xiv
On-line help .......................................................................................... xvi
CHAPTER 1: USING STUDIO ....................................... 1
Undo, Redo, Help, Support and Premium ............................................... 2
Setting options ......................................................................................... 3
Edit mode .................................................................................................... 4
The Player ................................................................................................ 5
Playback controls ..................................................................................... 8
Further editing topics ............................................................................. 11
Expanding Studio .................................................................................. 12
Project Archive and Restore .................................................................... 15
Archiving a Studio project ..................................................................... 16
Restoring an archived project ................................................................ 19
CHAPTER 2: CAPTURING AND IMPORTING MEDIA 23
The Studio Import Wizard ..................................................................... 24
Import Wizard panels .............................................................................. 25
The Import From panel .......................................................................... 26
The Import To panel .............................................................................. 29
iv Pinnacle Studio
The Mode panel ..................................................................................... 33
The Compression Options window ....................................................... 36
The Scene Detection Options window ................................................... 37
The Filename panel ............................................................................... 38
Selecting media for import ...................................................................... 40
Import from file-based media ................................................................ 41
Import from DV or HDV camera .......................................................... 48
Import from analog sources ................................................................... 53
Import from DVD or Blu-ray Disc ........................................................ 54
Import from digital cameras .................................................................. 55
Stop motion ........................................................................................... 55
Snapshot ................................................................................................ 58
CHAPTER 3: THE ALBUM .......................................... 63
The Videos section .................................................................................... 69
Opening a video file .............................................................................. 73
Viewing video ....................................................................................... 77
Selecting scenes and files ...................................................................... 78
Displaying scene and file information ................................................... 79
Comment view ....................................................................................... 80
Combining and subdividing scenes ....................................................... 81
Redetecting scenes ................................................................................. 83
The Transitions section ............................................................................ 84
The Montage® Themes section ................................................................ 86
The Titles section ...................................................................................... 87
The Still Images section ........................................................................... 88
The Disc Menus section ............................................................................ 89
The Sound Effects section ........................................................................ 90
The Music section ..................................................................................... 91
The Project Bin ......................................................................................... 92
Table of contents v
CHAPTER 4: THE MOVIE WINDOW ........................... 97
Movie Window views.............................................................................. 101
Storyboard view ................................................................................... 101
Timeline view ...................................................................................... 102
Text view ............................................................................................. 108
The toolboxes .......................................................................................... 108
The Video toolbox ............................................................................... 110
The Audio toolbox ............................................................................... 112
CHAPTER 5: VIDEO CLIPS ...................................... 115
Video clip basics ..................................................................................... 116
Adding video clips to your movie ....................................................... 116
Working with multiple capture files .................................................... 117
The project video format ..................................................................... 118
Interface features ................................................................................. 121
Trimming video clips .............................................................................. 123
Trimming on the Timeline using handles ............................................ 123
Clip-trimming tips ............................................................................... 127
Trimming with the Clip properties tool ............................................... 128
Resetting trimmed clips ....................................................................... 130
Splitting and combining clips ................................................................ 131
Advanced Timeline editing .................................................................... 132
Insert editing ........................................................................................ 134
Split editing ......................................................................................... 136
The SmartMovie music video tool ......................................................... 140
CHAPTER 6: MONTAGE® THEMES AND EDITING . 145
Using themes ........................................................................................... 147
The Themes section of the Album ....................................................... 149
Creating theme clips ............................................................................ 149
Working with theme clips on the Timeline ......................................... 151
Anatomy of a theme ............................................................................ 153
Opening the Theme Editor tool............................................................ 156
Using the Theme Editor tool ................................................................ 157
vi Pinnacle Studio
CHAPTER 7: VIDEO EFFECTS ................................. 161
Working with the effects list................................................................ 162
Changing effect parameters ................................................................. 164
Keyframing .......................................................................................... 166
Using keyframing ................................................................................ 169
Previewing and rendering .................................................................... 172
Video effects library ............................................................................... 172
Standard effects ...................................................................................... 174
Auto color correction ........................................................................... 175
Dream glow ......................................................................................... 175
Rotate ................................................................................................... 176
Noise reduction .................................................................................... 176
Stabilize ............................................................................................... 177
Speed ................................................................................................... 177
Ultimate effects ....................................................................................... 178
Blur ...................................................................................................... 179
Emboss ................................................................................................ 179
Old film ............................................................................................... 179
Soften ................................................................................................... 180
Stained glass ........................................................................................ 180
Luma key ............................................................................................. 181
2D Editor ............................................................................................. 181
Earthquake ........................................................................................... 181
Lens flare ............................................................................................. 182
Magnify ............................................................................................... 182
Motion blur .......................................................................................... 182
Water drop ........................................................................................... 183
Water wave .......................................................................................... 183
Black and white ................................................................................... 183
Color correction ................................................................................... 183
Color map ............................................................................................ 184
Invert ................................................................................................... 184
Lighting ............................................................................................... 185
Posterize .............................................................................................. 185
RGB color balance............................................................................... 185
Sepia .................................................................................................... 186
White balance ...................................................................................... 186
Table of contents vii
CHAPTER 8: TWO-TRACK EDITING ....................... 187
Introducing the overlay track ............................................................... 187
A/B editing .......................................................................................... 189
The Picture-in-picture tool ................................................................... 190
The Chroma key tool ........................................................................... 196
Selecting colors ................................................................................... 202
CHAPTER 9: TRANSITIONS ..................................... 205
Transition types and their uses ............................................................ 207
Previewing transitions in your movie .................................................. 210
Audio transitions ................................................................................. 210
The Ripple Transition command ......................................................... 211
Trimming transitions ............................................................................. 212
Trimming with the Clip properties tool ............................................... 213
CHAPTER 10: STILL IMAGES .................................. 215
Editing still images ................................................................................. 217
Editing image clip properties ............................................................... 218
The Frame Grabber ............................................................................... 225
The Frame grabber tool ....................................................................... 225
CHAPTER 11: DISC MENUS ..................................... 227
Disc authoring in Studio ...................................................................... 229
Using menus from the Album .............................................................. 230
The DVD Player Control ..................................................................... 232
Editing menus on the Timeline ............................................................ 234
Editing with the Clip properties tool ................................................... 236
The Disc menu tool .............................................................................. 241
CHAPTER 12: THE CLASSIC TITLE EDITOR .......... 243
Launching the Classic Title Editor ...................................................... 244
The editor controls ................................................................................. 245
Title-type buttons ................................................................................. 245
Object toolbox ..................................................................................... 246
Editing-mode selection buttons ........................................................... 249
Object layout buttons ........................................................................... 251
viii Pinnacle Studio
Clipboard and delete buttons ............................................................... 253
Text-styling controls ............................................................................ 253
The Classic Title Editor Album ............................................................. 255
The Looks Browser ............................................................................. 255
The Backgrounds section ..................................................................... 257
The Pictures section ............................................................................. 259
The Buttons section ............................................................................. 260
CHAPTER 13: THE MOTION TITLER ....................... 263
Launching (and leaving) the titler ........................................................ 265
File operations ..................................................................................... 267
The Motion Titler Album ...................................................................... 268
The Videos section .............................................................................. 270
The Photos section ............................................................................... 271
The Objects section ............................................................................. 272
The Looks section ................................................................................ 273
The Motions section ............................................................................ 278
Creating and editing Motion Titles ....................................................... 281
The Background Panel ......................................................................... 283
The Edit window ................................................................................. 285
Working with text ................................................................................ 288
Working with the Layer List................................................................ 292
Working with layer groups .................................................................. 299
CHAPTER 14: SOUND EFFECTS AND MUSIC ........ 303
The Timeline audio tracks ................................................................... 306
The CD audio tool ............................................................................... 308
The Background music tool ................................................................. 309
The Voice-over tool ............................................................................. 311
Trimming audio clips ............................................................................. 314
Trimming with the Clip properties tool ............................................... 314
Audio volume and mixing ...................................................................... 316
Anatomy of an audio clip .................................................................... 317
Adjusting audio on the Timeline ......................................................... 319
Transitions on the audio tracks ............................................................ 322
The Volume and balance tool .............................................................. 322
Table of contents ix
CHAPTER 15: AUDIO EFFECTS .............................. 329
Noise reduction .................................................................................... 330
Ultimate effects ....................................................................................... 332
ChannelTool ........................................................................................ 332
Chorus ................................................................................................. 332
DeEsser ................................................................................................ 333
Equalizer .............................................................................................. 333
Grungelizer .......................................................................................... 334
Leveler ................................................................................................. 335
Reverb ................................................................................................. 335
Stereo Echo .......................................................................................... 336
Stereo Spread ....................................................................................... 336
CHAPTER 16: MAKING YOUR MOVIE ..................... 337
Output to disc media .............................................................................. 340
Output to file ........................................................................................... 344
Output to tape ......................................................................................... 352
Configuring a camera or video recorder... ........................................... 352
Output your movie to videotape .......................................................... 354
Output to the web ................................................................................... 355
APPENDIX A: SETUP OPTIONS .............................. 357
Project preferences .............................................................................. 358
Video and audio preferences ............................................................... 361
Make Disc settings .............................................................................. 366
Make File settings ................................................................................ 371
Make Real Media file settings ............................................................. 375
Make Windows Media file settings ..................................................... 378
Make tape settings ............................................................................... 380
APPENDIX B: TIPS AND TRICKS ............................ 383
Hardware ............................................................................................. 383
Graphics card settings .......................................................................... 385
Studio and computer animation ........................................................... 386
x Pinnacle Studio
APPENDIX C: TROUBLESHOOTING ....................... 387
Technical help on-line ............................................................................ 388
Top support issues .................................................................................. 390
Errors or crashes during installation .................................................... 391
Studio crashes in Edit mode ................................................................ 392
Studio hangs when rendering ............................................................... 397
Studio hangs on launch or does not launch .......................................... 400
“Burning failed” error appears in Make Movie ................................... 402
DVDs do not play back, or appear blank ............................................. 404
APPENDIX D: VIDEOGRAPHY TIPS ........................ 405
Creating a shooting plan ...................................................................... 405
Editing ................................................................................................. 406
Rules of thumb for video editing ......................................................... 410
Soundtrack production ......................................................................... 412
Title ..................................................................................................... 413
APPENDIX E: GLOSSARY ........................................ 415
APPENDIX F: KEYBOARD SHORTCUTS ................ 433
INDEX ........................................................................ 437
Before you start xi
Before you start
Thank you for purchasing Pinnacle Studio. We hope
you enjoy using the software.
This manual covers all versions of Studio, including
Studio Ultimate and Studio Ultimate Collection.
Differences between versions will be noted as
applicable. Most of the time, the word “Studio” will be
used generically to refer to all versions. Similarly,
references to “Studio Ultimate” apply also to Studio
Ultimate Collection unless otherwise stated.
If you have not used Studio before, we recommend that
you keep the manual handy for reference even if you
don’t actually read it all the way through.
In order to ensure that your Studio experience gets off
on the right foot, please review the three topics below
before continuing to Chapter 1: Using Studio.
Also highly recommended to new users is the Studio
Tutorial. To launch the Tutorial, click its link on the
“splash” screen when you start Studio, or use the Help
Guided Tour menu command within the application
itself.

xii Pinnacle Studio
Equipment requirements
In addition to your Studio software, an efficient Studio
editing system requires certain levels of hardware
performance as noted in this section. Remember too
that while specifications are important, they do not tell
the whole story: the proper functioning of hardware
devices can also depend on manufacturer-supplied
driver software. Checking the maker’s web-site for
driver updates and support information can often be
helpful in solving problems with graphics cards, sound
cards and other devices.
Note: Some features mentioned here require free or
paid “activation” via the Internet, depending on your
version of Studio.
Computer
Intel Pentium or AMD Athlon 1.8 GHz or higher
(2.4 GHz or higher recommended). Intel Core™ 2 or
i7 2.4 GHz required for AVCHD editing (2.66 GHz
for AVCHD 1920)
1 GB system memory recommended, 2 GB required
for AVCHD editing
Windows® 7, Windows Vista® with SP2, or
Windows XP with SP3
DirectX 9 or 10 compatible graphics card with 64
MB (128 MB or higher recommended); 256 MB for
HD and AVCHD editing
DirectX 9 or higher compatible sound card
3.2 GB of disk space (plug-ins extra)
DVD-ROM drive to install software.

Before you start xiii
The following items are optional:
CD-R(W) burner for creating VideoCDs (VCDs) or
Super VideoCDs (SVCDs).
DVD-/+R(W) burner for creating DVD, HD DVD
and AVCHD discs.
Blu-ray burner for creating Blu-ray discs (Studio
Ultimate).
Sound card with surround-sound output for preview
of surround-sound mixes.
The hard drive
Your hard drive must be capable of sustained reading
and writing at 4 MB/sec. Most drives are capable of
this. The first time you capture, Studio will test your
drive to make sure it is fast enough. Video in the DV
format occupies 3.6 MB of hard drive space per
second, so just four and a half minutes of DV video
will consume a full gigabyte on the drive.
Tip: For capture from video tape, we recommend using
a separate hard drive in order to avoid competition
between Studio and other software, including
Windows, for use of the drive during capture.
Video capture hardware
Studio can capture video from a variety of digital and
analog sources. Please see “The Import From panel” on
page 26.
Video output hardware
Studio can output video to:
Any HDV, DV or Digital8 camcorder or VCR. This
requires an OHCI-compliant IEEE-1394 (FireWire)

xiv Pinnacle Studio
port (as provided by Pinnacle Studio DV). The
camcorder must be set up to record from DV Input.
Any analog (8mm, Hi8, VHS, SVHS, VHS-C or
SVHS-C) camcorder or VCR. This requires Pinnacle
Studio USB-700, PCI-500, PCI-700, or another
Pinnacle device with analog outputs. Output to
analog camcorders or VCRs is also possible using a
Pinnacle Studio DV or other OHCI-compliant 1394
port if your DV or Digital8 camcorder or VCR can
pass a DV signal through to its analog outputs (see
your camcorder manual and Chapter 16: Making
your movie, for more information).
Abbreviations and conventions
This guide uses the following conventions to help
organize the material.
Terminology
AVCHD: A video data format used by some high-
definition camcorders, and for creating DVD discs that
can be read on Blu-ray players. Successful editing of
AVCHD files requires more computing power than
other formats supported by Studio.
DV: The term “DV” refers to DV and Digital8
camcorders, VCRs and tapes.
HDV: A “high-definition video” format that allows
video in frame sizes of 1280x720 or 1440x1080 to be
recorded in MPEG-2 format on DV media.

Before you start xv
1394: The term “1394” refers to OHCI-compliant
IEEE-1394, FireWire, DV or i.LINK interfaces, ports
and cables.
Analog: The term “analog” refers to 8mm, Hi8, VHS,
SVHS, VHS-C or SVHS-C camcorders, VCRs and
tapes, and to Composite/RCA and S-Video cables and
connectors.
Buttons, menus, dialog boxes and windows
Names of buttons, menus and related items are written
in italics to distinguish them from the surrounding text,
whereas window and dialog names are written with
initial capital letters. For example:
Click the Edit menu button to open your menu in the
Classic Title Editor.
Choosing menu commands
The right arrowhead symbol () denotes the path for
hierarchical menu items. For example:
Select Toolbox Generate Background Music.
Keyboard conventions
Key names are spelled with an initial capital and are
underlined. A plus sign denotes a key combination. For
example:
Press Ctrl+A to select all the clips on the Timeline.
Mouse clicks
When a mouse click is required, the default is always a
left-click unless otherwise specified:
Right-click and select Go to Title/Menu Editor.

xvi Pinnacle Studio
On-line help
Two kinds of immediate help are always available
while you are working in Studio:
Help file: Click the help button in the Studio
main menu bar, or select the Help Help topics
menu, or press F1 to open Studio’s help file.
Tool tips: To find out what a button or other Studio
control does, pause your mouse pointer over it. A
“tool tip” appears explaining its function.

Chapter 1: Using Studio 1
CHAPTER 1:
Using Studio
Creating movies with Studio is a three-step process:
1. Import: Import source video material – your “raw
footage” – to your PC hard drive. Possible sources
include analog videotape (8mm, VHS etc.), digital
videotape (HDV, DV, Digital8), memory cards and
other file-based media, and live video from a video
camera, camcorder or webcam.
Import mode is covered in Chapter 2: Capturing and
importing media.
2. Edit: Arrange your video material as desired by
reordering scenes and discarding unwanted footage.
Add visuals, such as transitions, titles and graphics, and
supplementary audio, such as sound effects and
background music. For DVD, Blu-ray Disc and VCD
authoring, create interactive menus that give your
audience a customized viewing experience.
Edit mode is the arena for most of your work in Studio.
See “Edit mode” later in this chapter (page 4) for a
fuller introduction.
Availability: Blu-ray Disc authoring is supported in Studio Ultimate
and Studio Ultimate Collection only.
2 Pinnacle Studio
3. Make movie: When your project is complete,
generate a finished movie in your choice of format and
storage medium: tape, VCD, S-VCD, DVD, AVI,
MPEG, RealVideo, Windows Media and more.
Make Movie mode is covered in Chapter 16: Making
your movie.
Setting the mode
Select which step of the movie-making process you
want to work on by clicking one of the three mode
buttons at the top left of the Studio window:
When you switch modes, the Studio screen changes to
display the controls needed for the new mode.
Undo, Redo, Help, Support and Premium
The Undo, Redo, Help,
Support and Premium
buttons are always to be found in the top right corner
of the Studio window, no matter which of the three
modes you are currently working in.
Undo allows you to back out of any changes you
have made to your project during the current session,
one step at a time.
Redo reinstates the changes one by one if you undo
too far.
The Help button launches Studio’s built-in help
system.
Chapter 1: Using Studio 3
The Support button opens Studio’s technical support
site in your web browser.
The Premium button lets you expand Studio by
purchasing and installing premium content. (See
page 12 for details.)
All other controls on the Studio screen are dedicated
to tasks within the current mode.
Setting options
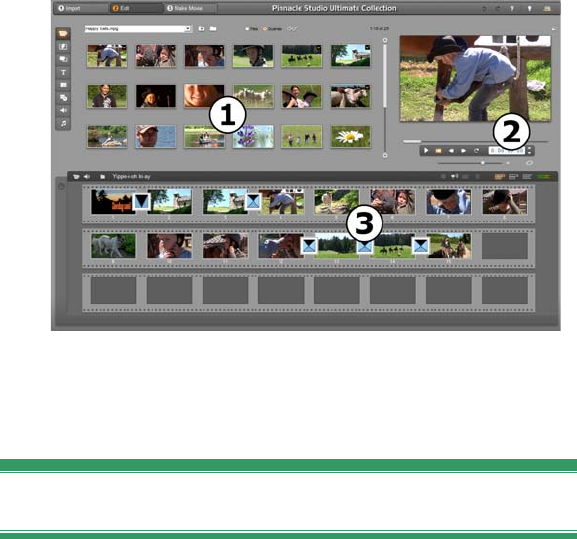
Most options in Studio are set using two tabbed dialog
boxes.
The first lets you control options related to Edit mode.
It has two tabs:
The other dialog box is concerned with options relating
to Make Movie mode. It has three tabs, one for each of
the three movie output types:
Each panel of both dialog boxes can be opened
individually with a corresponding command on the
Setup menu (e.g. Setup Project preferences). Once
either dialog box is open, however, all of its panels are
available through the tabs.
4 Pinnacle Studio
For simplicity, we generally refer to the different
options panels independently, as in “the Project
preferences options panel”.
Detailed explanations of the options in both dialog
boxes are contained in Appendix A: Setup Options.
Additional options for importing are provided on the
Mode panel of the Import Wizard. The options
available depend on the type of media you plan to
import, as explained under “The Mode panel” on page
33.
EDIT MODE
Studio opens in Edit mode each time it is launched,
because that is the mode you use most often. The Edit
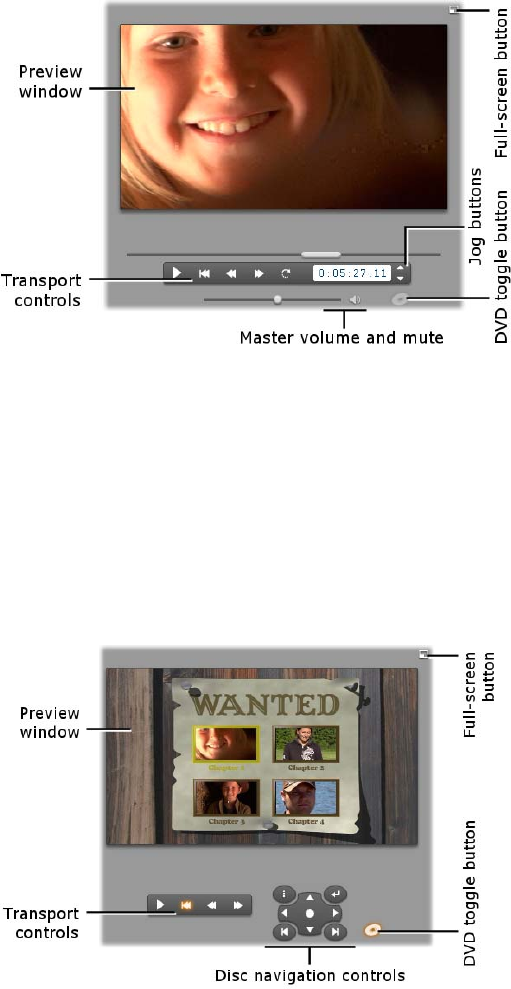
mode display includes three main areas.
The Album stores resources you will use in your
movies, including your captured video scenes.
The Movie Window is where you create your edited
movie by arranging video and sound clips, and by
applying transitions and effects.
The Player provides playback and previewing for
whichever item is currently selected in Studio. That
may be an Album resource – such as a video scene, title
or sound effect – or your edited movie, complete with
transitions, titles, effects and several audio tracks. The
Player is covered below.
Chapter 1: Using Studio 5
See Chapter 3: The Album and Chapter 4: The Movie
Window for detailed information on those topics.
Studio in Edit mode with the Album, the Player,
and the Movie Window, shown here in its
Storyboard view.
The Player
The Player displays a preview of your edited movie, or
of the item currently selected in the Album.
It consists of two main areas: a preview window and
playback controls. The preview window displays video
images. The playback controls allow you to play the
video, or go to an exact position within it. These
controls come in two formats: standard and DVD.
Standard mode
The standard playback controls are similar to those on a
camcorder or VCR. They are used for viewing ordinary
video.
6 Pinnacle Studio
DVD mode
The DVD playback controls emulate the navigation
controls on a DVD player or remote control. Use them
for previewing your DVD or other disc productions,
including menu interaction.
Chapter 1: Using Studio 7
The preview window
This is a point of focus in Studio because you use it so
often, especially for previewing your movie. It can also
be used to display:
Any type of Album content.
Still images or titles from your movie.
Changes to video effects in real time while you
adjust the parameter controls for the effects.
Still frames from your video. While viewing a still
frame, you can step by as little as a single frame in
either direction with the “jog” controls.
Resizing the video preview
If your screen dimensions
permit, Studio lets you
enlarge the Player – and
therefore the video
preview – by means of the
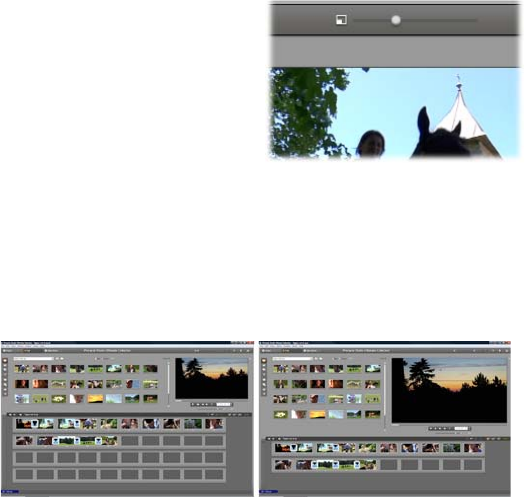
Player size slider. This
control appears above the Player to the left of the Undo
button when reorganizing the display is possible.
Drag the control knob rightwards to increase the Player
size, or leftwards to decrease it. The leftmost knob
position corresponds to the smallest (and default) size.
Resizing the Player optimizes your use of screen “real
estate” to obtain a larger video preview.

8 Pinnacle Studio
The DVD toggle button
Switch between the two playback modes with
the DVD toggle button at the bottom right-hand
corner of the Player. This button is only available when
your edited movie contains at least one menu.
Playback controls
The Player presents either of two sets of playback
controls depending on the playback mode you choose.
When you play your movie back as ordinary video, you
will be using the standard playback controls. If your
movie uses disc menu navigation, you can play it back
as an optical disc with interactive on-screen menus by
using the DVD playback controls. Both groups of
controls are covered below.
The full-screen preview button: This button, just
above the top right-hand corner of the preview
window, switches to a full-screen preview. It is
available in both playback modes. On a single-monitor
system, the full-screen display ends when your movie
ends, or you double-click the screen or press the Esc
key. See the Video preview options in the Video and
Audio Preferences panel (page 361) for settings that
apply to multiple-monitor systems.
The Video preview options on the Video and audio
preferences options panel let you direct the full-screen
preview to the secondary monitor on your system if
there is one. In Studio Ultimate, you can
simultaneously send your preview to an external
device, if desired.

Chapter 1: Using Studio 9
Standard playback controls
These buttons control playback in the Player.
Play / Pause: The Play button previews the
movie from the current position. Once preview
begins, Play becomes Pause. When playback is
paused, the Album scene or Movie Window clip at
which previewing stopped remains selected. The
[Space] key can also be used to start and stop playback.
Go to beginning: This button halts playback and
skips back to the first frame of the material
being previewed.
Fast reverse, Fast forward: These buttons let
you preview your movie at two, four or ten
times the normal speed, in either direction. Use
them to scan for a particular piece of video you want to
work with. Click the buttons repeatedly to loop through
the speed factors.
Loop: This button causes the currently-selected
clips in the Movie Window to play back
repeatedly. This feature is especially convenient whilst
selecting and editing add-on effects and transitions.
Click any playback button to halt looping. The loop
button lights up while looping is active. Looping is
maintained even if you switch playback speeds.
Jog buttons: This pair of controls normally steps
your movie forward and backward by one frame
at a time. To step by seconds, minutes or hours instead
of frames, select the corresponding field in the counter
(see below), then use the jog buttons to modify it.
The Player scrubber
Use the Player scrubber to quickly traverse your
captured video or edited movie in either direction. The
10 Pinnacle Studio
scrubber position corresponds to the position of the
current frame in the captured video file (not just the
current scene) or in the edited movie (not just the
current clip). Thus the scrubber bar always represents
the entire length of the content being viewed.
As you move the scrubber, the preview window shows
the current frame. If you have activated the audio
scrubbing button in the Movie Window, you will also
hear snatches of your movie’s audio as you scrub. See
page 98 for details.
The ability of the preview to keep up with the scrubber
depends on the speed of your computer. If you move
the Player scrubber slowly, the preview display
responds smoothly. As you increase the rate at which
you move the scrubber, the preview will jump frames.
The point at which it does so depends on your
hardware. The smoothness of the preview also
diminishes as the overall length of the material being
scrubbed increases.
The counter
The counter displays the current
playback position in hours, minutes,
seconds and frames. You can
directly modify the counter fields to
select an exact frame to view or at
which to start playback. Simply click on the number
you wish to change and type a new value. To move to a
different field, click again or use the Left and Right
arrow keys.
You can also modify the value in a selected field by
using the jog buttons beside the counter or the Up and
Down arrow keys.
Chapter 1: Using Studio 11
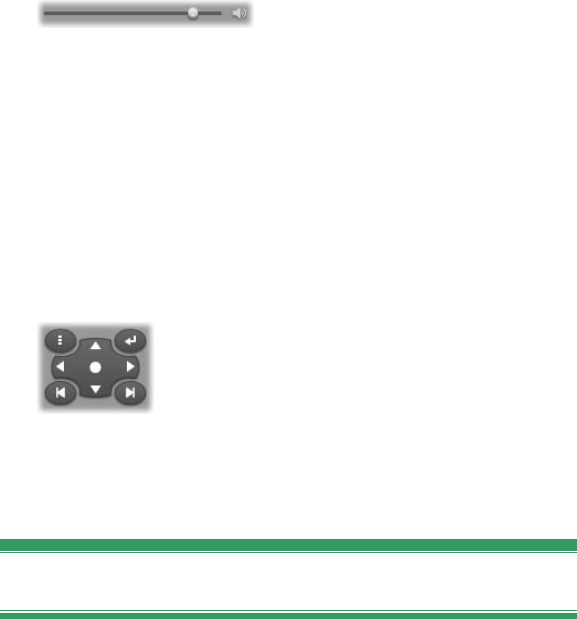
The master volume slider
This control sets the overall audio volume during
preview playback. It is equivalent to turning up the
master volume on your sound card using the system
volume tool. It does not affect the volume of the final
movie Studio creates in Make Movie mode.
The small loudspeaker icon at the right of the control
serves as a master mute button during playback.
DVD playback controls
These controls include the four standard
transport buttons detailed above
(Play/Pause, Fast reverse, Fast forward,
Go to beginning) plus the DVD Player
Control, which is described under “The DVD Player
Control” on page 232.
Further editing topics
Please see the following for details on specific editing
topics:
Chapter 5: Video clips
Chapter 6: Themes and theme editing
Chapter 7: Video effects
Chapter 8: Two-track editing
Chapter 9: Transitions
Chapter 10: Still images
Chapter 11: Disc menus

12 Pinnacle Studio
Chapter 12: The Classic Title Editor
Chapter 13: The Motion Titler
Chapter 14: Sound effects and music
Chapter 15: Audio effects
Expanding Studio
One way to add pizzazz to your productions is to use a
variety of video and audio filters, animated transitions,
titles, VCD and DVD menus, themes and sound effects.
Studio includes an extensive selection of hundreds of
content items and special effects, but it’s also designed
to grow along with your needs. When you want a
particular filter, transition, menu or effect that isn’t part
of the basic set, an easy-to-use upgrade mechanism lets
you find, purchase and install the materials you need
without even leaving the program.
New tools, new media, new frontiers
You can purchase additional media and filters in any of
three ways from within Studio:
With the Help Purchase activation keys
menu command (or the premium shortcut
button at the top right of the Studio screen).
This opens a special browser window in which you
can access a catalog page for any type of premium
content that interests you.
With the Album commands More transitions, More
themes, More sound effects and More menus.

Chapter 1: Using Studio 13
These commands are found on the dropdown lists in
the corresponding sections of the Album. They will
enable you to download, try out and purchase
additional premium content that was not included
with the program installation.
By clicking the activate buttons found in some parts
of Studio.
These buttons can be found whenever premium
content is on display within Studio. The one above,
when seen in the Audio effects tool and the Video
effects tool, would let you activate a pack of audio or
video filters. You may encounter similar buttons in
the Album that let you purchase all the media on a
particular Album page as a theme pack.
How activation works
“Activating” premium content for Studio means to
obtain a license allowing you unrestricted use of the
content on the single machine where Studio is installed.
The licensing mechanism employs two distinct but
mutually related codes:
An activation key for each premium content item you
purchase;
Your Passport, which is a number generated the first
time you install Studio on your computer. You can
view your Passport by selecting the Help My
Passport menu command.
Because the Passport is specific to one computer, you
will need to obtain new activation keys if you install
Studio on a different machine. These will be provided

14 Pinnacle Studio
at no charge, but your user licenses for both Studio and
any premium content you have obtained then apply to
the new machine only.
Note: Although your Passport is specific to an
individual computer, it is not affected by ordinary
hardware modifications such as adding or removing
expansion cards, drives or memory.
If you don’t have an Internet connection...
You can purchase and apply premium content
activation keys even if you don’t have an Internet
connection on the computer where Studio is installed.
When you click one of the unlock links within Studio, a
dialog will be displayed showing information needed
for ordering the specific content you want, including:
An Internet URL where you can activate the content
Numeric identifiers for the Studio program and the
item you want to activate
Your Passport and your Serial Number
Navigate to the given URL from another computer,
enter the information, and complete the purchase as
directed. You will then be given an activation key with
which you can activate the content on the original
computer by using the Help Enter Activation Keys
menu command.
Hiding and showing premium content
If you would prefer not to view the premium content
and features available in Studio, open the Project
preferences options panel and uncheck either or both of
Show premium content and Show premium features.
(See page 358.)
Chapter 1: Using Studio 15
Importing content from past Studio versions
If you are an owner of a past version of Studio, the
chances are that you already own content items,
whether on a “Bonus Content” or “Premium Pack”
disc, or on a hard drive attached to your system. The
Studio “Transfer Content” wizard walks you through
the process of locating all such materials that are
available to you, and importing them for use in the
current version of the software. Among the item types
handled by the wizard are:
Titles
Disc menus
Sound effects
Hollywood FX 3D transitions
RTFx video effects
To launch the wizard, look in the Studio group on your
Start All Programs menu, and select Tools
Transfer Content.
PROJECT ARCHIVE AND RESTORE
As your Studio projects grow in size and complexity,
keeping track of the various media they incorporate can
become a challenge in its own right. The photos and
graphics, video snippets and sound files you include in
a particular movie may come from scattered locations
on your system. To avoid wasting disk space, Studio
does not make separate copies of the files you use. If
you move or delete a media file needed by the project,
however, it won’t be available for previewing or

16 Pinnacle Studio
outputting your movie. When cleaning up your hard
drive, for example, you must be careful not to
inadvertently remove media your Studio projects
require.
Studio’s Archive and Restore feature solves this
problem by allowing you to create a centralized archive
containing a project and all the media it references
(with some exceptions noted below). If the originals of
the files copied into the archive are removed, whether
by accident or design, the project remains secure.
Simply restore the project from the archive and all will
be well.
You can also use this feature for backing up your
project and its media files: just copy the archive after
creation to your backup media. If you plan to restore
the project onto another computer where you have
Studio installed, however, be aware that some types of
resource are not included in the archive. For instance,
effects, ScoreFitter songs, disc menus and so on, from
content packs that either came with your version of
Studio or were obtained separately, will not be
archived. Instead, such resources must be duly installed
and available on both machines. A similar exception
applies to fonts. If you stay with standard fonts, or
those that are installed with Studio, there should be no
problem. Otherwise, you will have to install any
missing fonts before the project will render correctly.
Archiving a Studio project
To begin archiving your project, select the File
Archive Project… menu command. Within a few
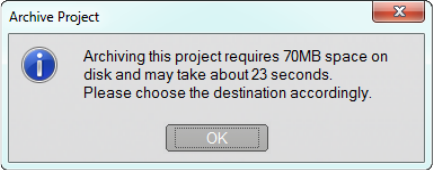
Chapter 1: Using Studio 17
seconds, Studio will respond with a dialog box showing
the amount of disk space your archive will require.
(Note: If your project has unsaved changes, you will be
asked to save them before continuing. This is because
archiving works with your project as it is stored on
disk.)
Since the total media size of a Studio project may be
quite large, take a moment to make sure that the drive
on which you’re planning to store the archive has
ample space available relative to the amount required.
Keep in mind that your system partition (usually with
drive-letter C) needs a good amount of free space; if it
becomes too full, your system will gradually slow
down, and may eventually become unstable. Non-
system drives and partitions can be pushed much closer
to their full capacity if required.
Remember , too, that some media have file size
limitations that may restrict the size of video file your
archive can include. Drives with FAT32 formatting and
USB sticks are both subject to a 4GB file size limit
regardless of the total amount of free space that may be
available.
The estimated timing on the dialog is calibrated for a
USB flash drive as the destination for the archiving
operation. Once archiving is under way, the estimate is
dynamically adjusted to reflect the actual write speed
observed.
18 Pinnacle Studio
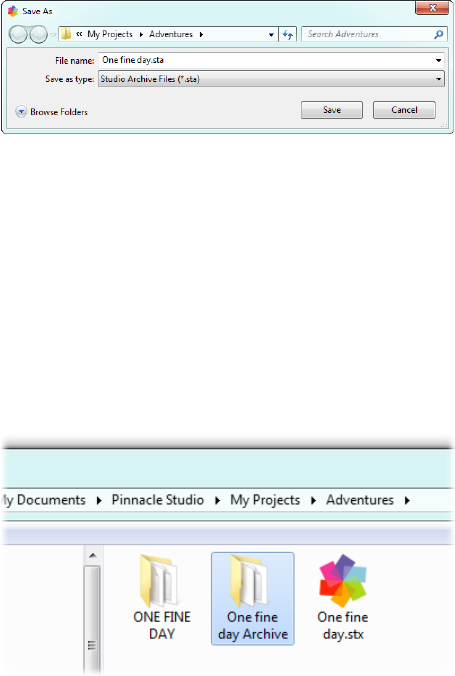
After you dismiss the information window, a Save
dialog appears for selecting the archive name and
location. By default the archive will be created in the
same folder as the project itself, in a folder having the
same name as the project with the word ‘Archive’
appended.
Archiving commences when you click Save. During
archiving, a progress dialog showing the estimated time
until completion. If you click the Cancel button on this
dialog, Studio halts and rewinds the archive operation
without further ado, leaving your system just as it was
before.
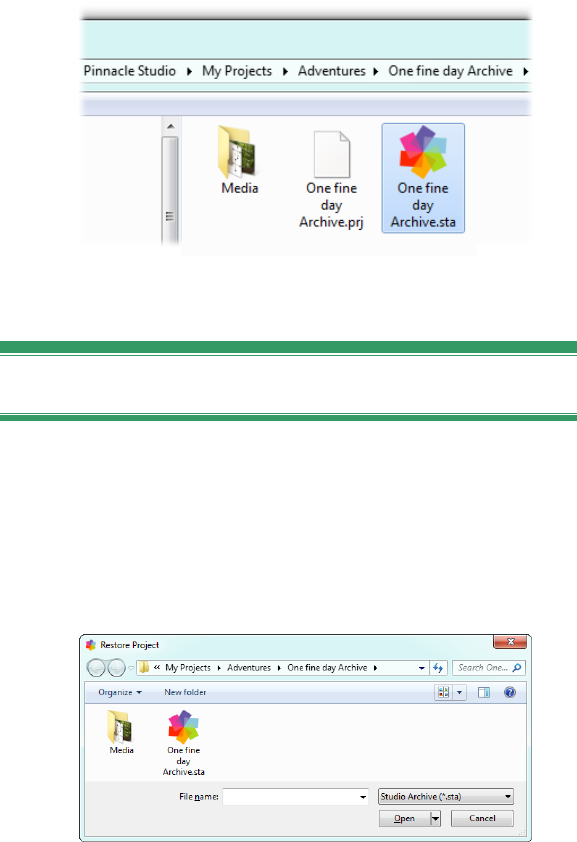
After archiving to the default location, the projects
folder, you will find a new item there: the archive
folder.
Here we see the project file, “One fine day.stx”, the
working files folder, “ONE FINE DAY”, and the
archive folder, “One fine day Archive”. For clarity, our
example folder contains only one project.
Chapter 1: Using Studio 19
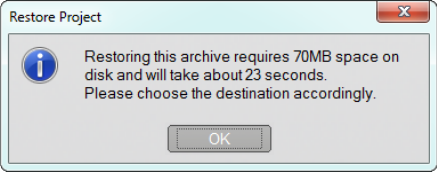
Inside the archive folder, we find two new files,
including the archive file itself (“One fine day
Archive.sta”). A “Media” subfolder has also been
created; all your scattered media are centralized there.
Restoring an archived project
Restoring from the archive is in most ways a mirror
image of the archiving process, beginning with the File
Restore Project… menu, which presents a File Open
dialog. Browse to the archive folder and double-click
the archive file we found just above.
20 Pinnacle Studio
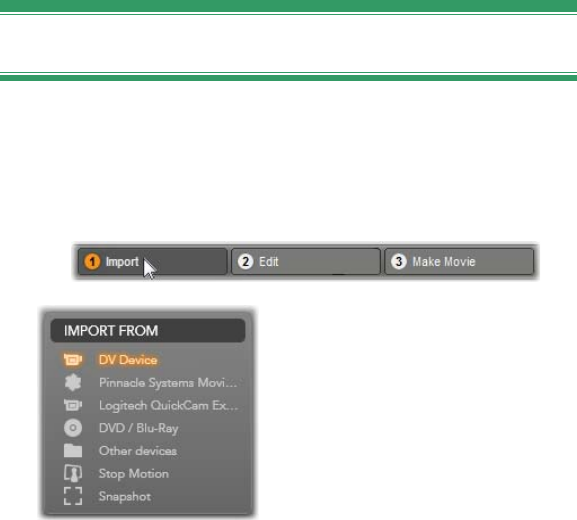
After examining the archive, Studio informs you how
much space will be required on the destination drive for
a successful restore.
The final step before restoring the archive is to select a
destination project name and location. The remarks
concerning drive space during archiving apply again
here. Although Studio will not embark on the restore if
you don’t have space on the target drive to complete
the process, remember that having barely enough space
can also be problematic, especially on the system drive.
To avoid system maintenance headaches, be sure ahead
of time that your restore media have sufficient capacity.
As noted in the section on archiving above, the time
estimate given in this dialog is based on the value
expected for restoring to USB flash storage (3 MB/sec).
For another type of device, the timing may vary:
writing to a hard drive, for instance, should be
considerably faster. However, the estimate will be
continuously updated once the restore actually begins,
becoming rapidly more accurate.
The default project name incorporates the date and time
when the archive was created. Change the name and
destination folder as desired, then click Save.

Chapter 1: Using Studio 21
Studio creates a project of the specified name with all
its media in a single subfolder. A progress dialog let
you monitor the restore process. As with archiving, if
you choose to cancel this dialog, Studio puts everything
back the way it was, then reverts to your previously
open project. Be careful, however, if you choose when
restoring to overwrite a previously-restored version of
the same project. Canceling in that case will remove
both the new and previous versions of the restored
project.

Chapter 2: Capturing and importing media 23
CHAPTER 2:
Capturing and
importing media
Studio lets you incorporate many kinds of media in
your video productions. When these are stored
externally to your computer – on a camcorder tape, say,
or a memory stick from your digital camera – they must
be transferred to local storage before you can use them.
This transfer process is called “capturing” or
“importing”. A distinction has long been made between
“capturing” from tape and “importing” from file-based
sources, but it is less significant nowadays when most
audiovisual recordings are stored in digital form
throughout their lifetimes. Only when recording from
analog sources (such as VHS or Hi8) is there still a
“capture” process involving conversion to digital form.
We will most often use the terms “import” and
“importing” to signify all methods of bringing images
and sound into Studio for use in your productions.
The next step
After Studio has finished importing your media, you
will be able to access the imported files for use in your
productions. See Chapter 3: The Album for details.
24 Pinnacle Studio
The Studio Import Wizard
The very first step in capturing is to open the Studio
Import Wizard by clicking the Import button at the top
left of the screen.
The Import Wizard consists of
a large central area surrounded
by a number of smaller panels.
One of these, the Import
From panel at the top left of
the display, has a pivotal role.
It provides a list of device
types that can serve as the
source of your import operation. Your choice of input
source in turn determines the rest of the Import Wizard
display. Above all, the set of controls offered in the
central area for preview, browsing and selecting
material depends on the chosen import type.
Importing can be regarded as a four-step process:
1. Select the import source on the Import From panel.
2. Confirm or adjust the settings on the other panels.
3. Select material to import from the chosen source.
4. Initiate the import operation.
Studio then begins transferring the requested audio,
video and pictorial material from the source device to
your hard drive, using the locations set in the Import To
Chapter 2: Capturing and importing media 25
panel. Once the import operation is complete, the
Import Wizard closes and returns control to Studio,
where you can access the imported files through the
Album. (See Chapter 3: The Album.)
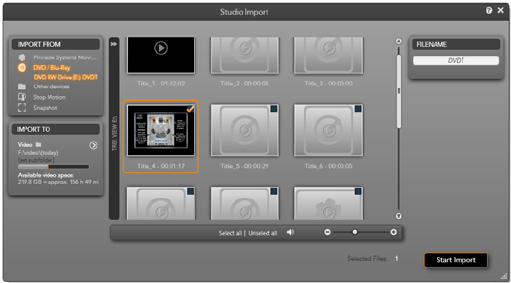
Here the Import Wizard is configured for importing
material from DVD. For disc sources, the central
area lists the ‘chapters’ available for importing.
IMPORT WIZARD PANELS
The actual selection of material to be imported takes
place in the central area of the Import Wizard. Each
import source uses the central area somewhat
differently.
Depending on the input source, the central area shares
the Import Wizard interface with up to four auxiliary
panels with standardized functions.

26 Pinnacle Studio
The Import From panel
This is the top left panel of the Import Wizard, a
position that reflects its vital role in setting up the
import operation.
The photos, music and video footage you want to
import may reside on a variety of device types and
technologies. The supported import sources include:
All types of auxiliary file-based storage media,
including optical drives, memory cards and USB
sticks (see “Import from file-based media”, page 41).
Click Other devices in the Import From panel to
start.
DV or HDV video cameras using an IEEE-1394
(FireWire) connection (see “Import from DV or
HDV camera”, page 48). Devices are listed by name
in the Import From panel by their device names (e.g.
“DV Device”). Select the applicable one.
Analog video cameras and recorders (see “Import
from analog sources”, page 53). Any analog capture
hardware on your system is listed by name (e.g.
“Pinnacle Systems MovieBox”).
DVD and Blu-ray discs (see “Import from DVD or
Blu-ray Disc”, page 54).
Digital still cameras (see
“Import from digital
cameras”, page 55).
Some sources in the Import
From panel are chosen from a
sub-list of actual devices that
is appears when you click the
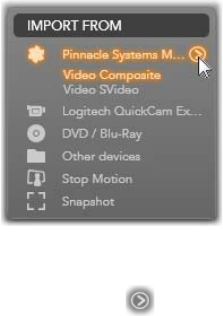
Chapter 2: Capturing and importing media 27
main source entry. In the illustration, DVD / Blu-Ray
has been clicked. The user can now choose between the
two DVD drives installed on this particular system.
Single-frame import
Studio provides two special modes for importing single
frames, rather than continuous footage. These modes
are:
Stop motion: Create an animated film by importing
one frame at a time from a live video source (see
“Stop motion”, page 55).
Snapshot: Import individual images from tape or
from a live source like a webcam (see “Snapshot”,
page 58).
Adjusting analog audio and video levels
Analog capture hardware may
provide additional controls for
modifying parameter levels of
the audio and video signals.
Such a capability is useful for
correcting exposure problems
and the like in the source
material, and when you need
to compensate for differences
in video from multiple sources.
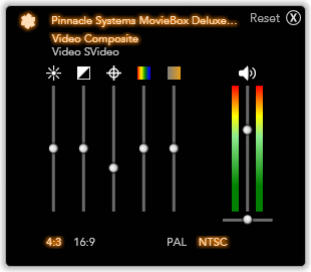
To access the controls, click the more button beside
the source name. This opens the Analog Input Levels
window.
Although you can also adjust these levels with the
appropriate Video effects in Edit mode, setting them
correctly for capture can save you from having to
worry about color correction later on.
28 Pinnacle Studio
The Analog Input Levels window lets you adjust a
number of video and audio parameters. The Hue
slider (fourth from left) is not used with PAL sources.
Setting your audio options correctly as you capture will
help in achieving consistent volume levels and quality.
Particular capture devices may offer fewer options than
are shown and discussed here. For instance, with
hardware that doesn’t support stereo captures, an audio
balance control will not appear.
Video: Choose the type of video you are going to
digitize by clicking the appropriate source button
(Composite or SVideo). The five sliders allow you to
control the brightness (video gain), contrast (ratio of
lightest to darkest), sharpness, hue and color saturation
of the incoming video.
The hue slider can be useful for correcting unwanted
color shifts in NTSC material; it is not available
when capturing from a PAL source.
The saturation slider regulates the “color saturation”
– the amount of color – in the image. (An image with
zero saturation has only black, white and gray tones.)
Audio: The sliders on the right side of the panel let you
control the input level and stereo balance of the
incoming audio.

Chapter 2: Capturing and importing media 29
The Import To panel
After importing, your media items will be accessible as
files on your computer. The Import To panel of the
Import Wizard lets you specify where those files will
be stored. Separate folders are available for video,
audio and picture items, but the Import To panel only
lists those that are relevant to the current import source,
as set in the Import From panel.
As the number of media files on your system grows, it
becomes increasingly useful to give some thought to
how best to organize the material into folders and
subfolders such that in the future you can most readily
retrieve any desired item. The controls on the Import
To panel are designed to automate this process to
whatever degree you choose.
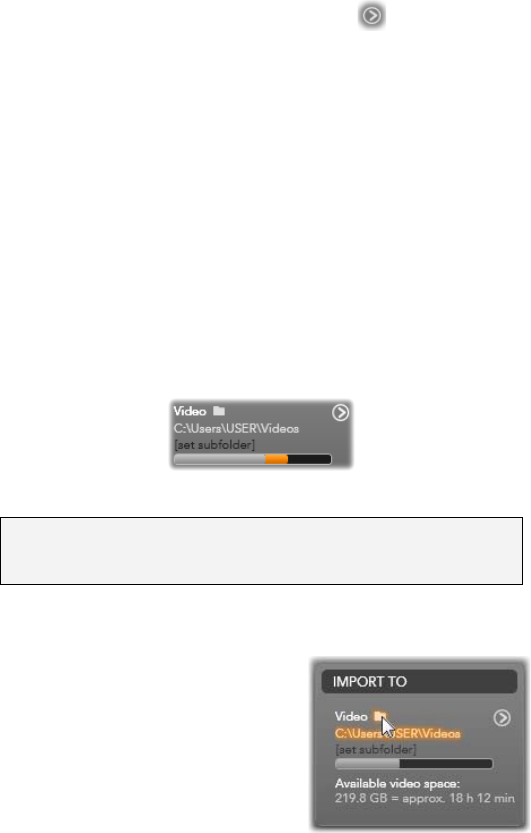
Working with import folders
Until you specify otherwise,
the Import Wizard uses the
standard document folders for
video, music and pictures
within your Windows user
account. The illustration
shows a typical setup in
Windows Vista. To change an
import folder, click either the
small folder button or the
current folder path. (See
“Selecting an import folder” below.)
The folders you choose for each media type, whether
default or custom, serve as base locations for your
imported files. In order to manage your media
30 Pinnacle Studio
collection effectively, you can also specify either a
custom subfolder name or a method of automatically-
generating a name based on either the current date or
the creation date of the imported material. Click either
s“set subfolder” or the more button for the media
type to access the subfolder options. (See “Setting a
subfolder” below.)
For example, if you set your main video folder to
“c:\vid”, and your subfolder naming method to
“Current month”, any video you import will be placed
in a folder with a name like “c:\vid\2009-10”.
Fill level indicator: This bar graph shows for each
import destination how much room is left on the
storage device. The first part of the bar represents space
zzalready occupied on the device. The colored
extension shows how much room any currently-
selected media files awaiting import will require.
Available storage space display
Note: If a destination device reaches 98 per cent full
during import, the operation is halted at that point.
Selecting an import folder
To choose a different base
folder for a given media type,
click the corresponding folder
button or folder name on the
Import To panel. This opens a
folder selection box where
you can navigate to, and if
necessary create, the folder you want to use.
Chapter 2: Capturing and importing media 31
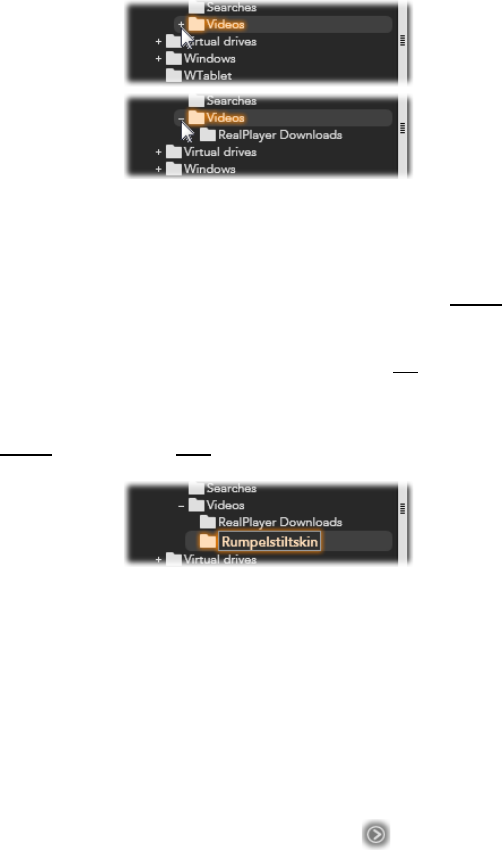
Folders that contain subfolders are indicated with a plus
icon to the left of the folder icon if they are currently
closed, and a minus icon if they are open. Clicking the
icon reverses the state of the folder.
Click the plus icon to view the contents of a folder.
To create a subfolder within the currently-selected
folder, click “New Folder” at the bottom of the file
selector, type a name for the folder, then press Enter.
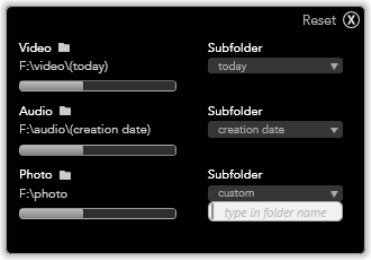
To rename a folder, select it then either click it once
with the left mouse button, or press the F2 key. An in-
place edit box opens, allowing you to type over the old
name with a new one of your choice. Finally, press
Enter to accept or Esc to cancel the name change.
Renaming the selected folder.
After locating and selecting the folder you want to
serve as the base folder, click the OK button to approve
the choice and return to the Import Wizard window.
Setting a subfolder
To designate a subfolder of the base folder as the actual
import destination for the media type, click either “set
subfolder” button or the more button . These buttons
32 Pinnacle Studio
open a dialog window that represents an expanded
version of the Import To panel, one that includes
controls needed to set the subfolder name or naming
method for each media type supported by the currently-
selected import source.
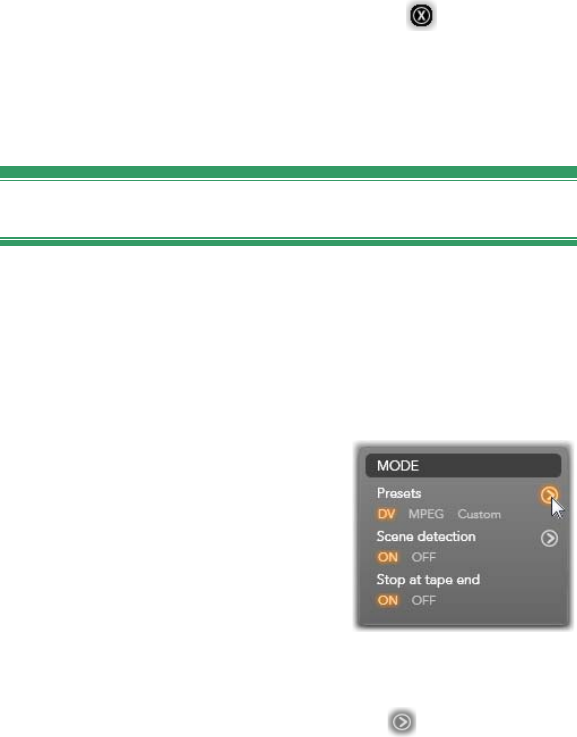
The expanded Import To dialog window for file-
based media. Since files can be of any media type,
controls for all three types are provided. Most other
sources import only video media, and don’t show the
Audio and Photo controls.
The row of controls for each media type includes a
dropdown list of naming options:
No subfolder: With this option, the files you import
will be stored in the base folder.
Custom: When you choose this option, an in-place
edit box appears. Enter the name of the subfolder in
which to store your next import or imports of the
media type.
Today: Your imports will go to a subfolder named
with the current date, in the format “2009-10-25”.
Chapter 2: Capturing and importing media 33
Creation date: Each imported file will be stored in a
subfolder named with the creation date of the media,
in the same format as above. When multiple media
items are brought in as part of a single import
operation, this may entail creating or updating
multiple subfolders.
Current month: This is the same as the Today
option but without the day portion, e.g “2009-10”.
After making your choice, click the button at the
top right of the dialog window to return to the Import
Wizard.
The Mode panel
The Mode panel of the Import Wizard provides a place
to adjust the options offered by several import sources.
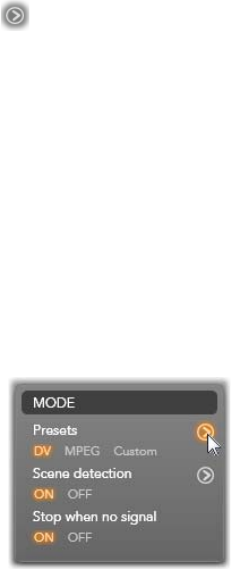
DV / HDV import options
The options for DV and HDV
import are in three groups on
the Mode panel.
Presets: The Presets group
offers two standard
configurations for video and
audio compression, and a
custom setting that lets you fine-tune compression
parameters in the Compression Options window, which
opens when the upper more button is clicked. (See
34 Pinnacle Studio
“The Compression Options window” on page 36.) The
fixed presets are:
DV: This provides full-quality DV capture, using
about 200 MB of disk space per minute of video.
MPEG: MPEG compression produces smaller files
than does DV, but requires more computational
horsepower to encode and decode. This could result
in slower performance on older computers.
Scene detection: When the scene detection feature is
enabled, your footage is divided up on import into
“scenes” that can be displayed and manipulated
separately in the Studio Album. This greatly simplifies
the task of locating material of interest during editing.
Click the lower more button to open the Scene
Detection Options window. (See “The Scene Detection
Options window” on page 37.)
Stop at tape end: This option tells Studio whether to
automatically stop capturing if a blank area of tape is
encountered. A blank area – one without timecode
striping – indicates virgin tape. Provided you have
avoided leaving any blank spots during shooting (by
slightly overlapping neighboring shots), this option
allows for unattended capture.
Import options for analog media
The options for analog import
are similar to those just
discussed for digital sources.
See below for explanations of
the Compression Options and
Scene Detections Options
windows.
Chapter 2: Capturing and importing media 35
Stop when no signal is the analog equivalent of the
Stop at tape end option described above. When set,
Studio will automatically end capture when the signal
from the source device is interrupted.
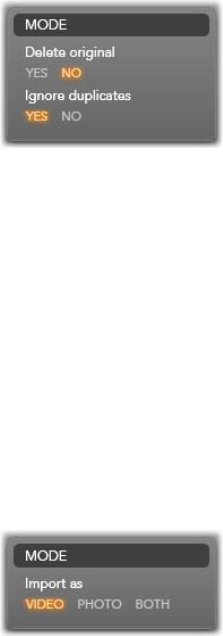
Import options for file-based media
The Mode panel provides two
options affecting importing
from file-based media.
Delete original: When this
option is enabled, the original
copies of the files you import will be deleted after
copying. This option is handy if you are using the
Import Wizard to consolidate your media and don’t
want your hard drive cluttered with redundant copies.
Ignore duplicates: This option helps you deal with
redundant media files you already have, by telling the
Import Wizard not to import extra copies of files that
may be differently-named but are apparently identical.
Import options for stop-motion capture
In stop-motion animation, a
series of individual frames is
captured from a live video
source. Depending on your
plans for the stop-motion sequence, you can instruct the
Import Wizard to integrate the individual frames into a
movie, or simply import each frame as a picture, or
both.
36 Pinnacle Studio
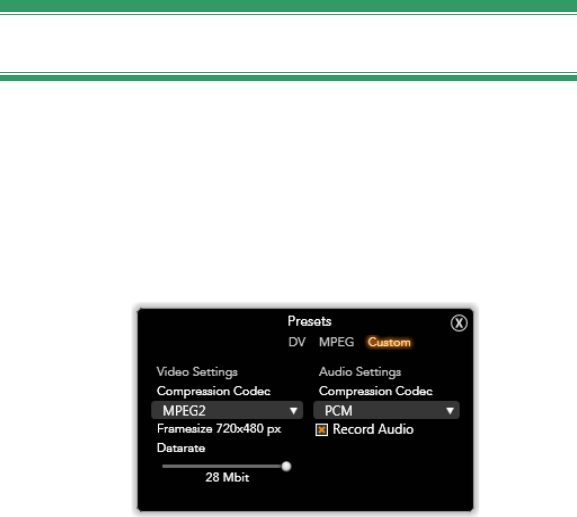
The Compression Options window
The options provided in the Mode panel for both DV /
HDV and analog import include access to this window
for fine-tuning compression preferences. If you select
either of the DV and MPEG presets, you can use this
window to review the actual settings used. Editing the
settings here automatically selects the “Custom” preset.
The Compression Options window for digital and
analog video import.
Because some options are contingent on others, not all
will be visible simultaneously.
Video settings
Compression Codec: Use this dropdown list to select
the codec you want to use.
Framesize: This line shows the dimensions of the
captured video.
Quality, Data rate: Some codecs present quality
options in terms of a compression percentage (Quality),
and others in terms of the required data transfer rate in
KB/sec (Data rate).
Chapter 2: Capturing and importing media 37
Audio settings
Compression: This dropdown shows the codec that
will be used to compress the incoming audio data.
Record audio: Clear this checkbox if you are not
planning to use the captured audio in your production.
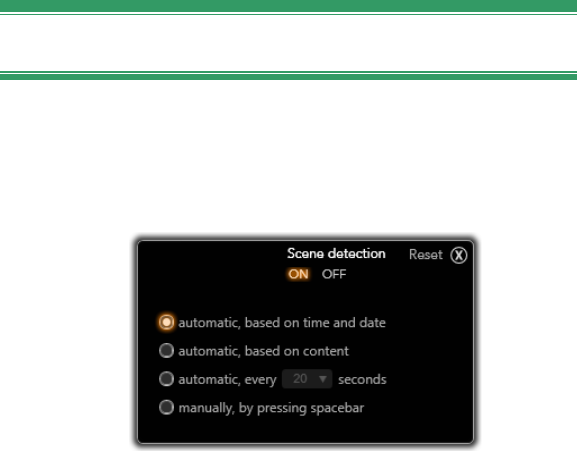
The Scene Detection Options window
The options provided in the Mode panel for both DV /
HDV and analog import include access to this window
for configuring scene detection preferences.
The Scene Detection Options window for DV or HDV
import. When importing from analog sources, only
the the last two options are supported.
Automatic scene detection is a key feature of Studio
when working with DV and HDV sources. As video
capture proceeds, Studio detects natural breaks in the
video and divides it up into scenes. A new icon is
created in the Video Scenes section of the Album for
each scene detected.

38 Pinnacle Studio
Depending on which capture device you are using,
automatic scene detection is carried out either in real
time during capture, or as a separate step immediately
after capture is completed.
The four scene detection options are:
Automatic based on shooting time and date: This
option is available only when you are capturing from
a DV source. Studio monitors the time stamp data on
the tape during capture, and starts a new scene
whenever a discontinuity is found.
Automatic based on video content: Studio detects
changes in the video content, and creates a new
scene wherever there is a large change in the images.
This feature might not work well if the lighting is not
stable. To take an extreme example, a video shot in a
nightclub with a strobe light would produce a scene
each time the strobe flashed.
Create new scene every X seconds: Studio creates
new scenes at an interval you choose. This can be
useful for breaking up footage that contains long
continuous shots.
No automatic scene detection: Select this option if
you want to monitor the entire capture process and
decide for yourself where scene breaks should occur.
Press the [Space] key each time you want to insert a
scene break during capture.
The Filename panel
This panel of the Import Wizard is where you specify
the names under which your imported media files will
be stored.
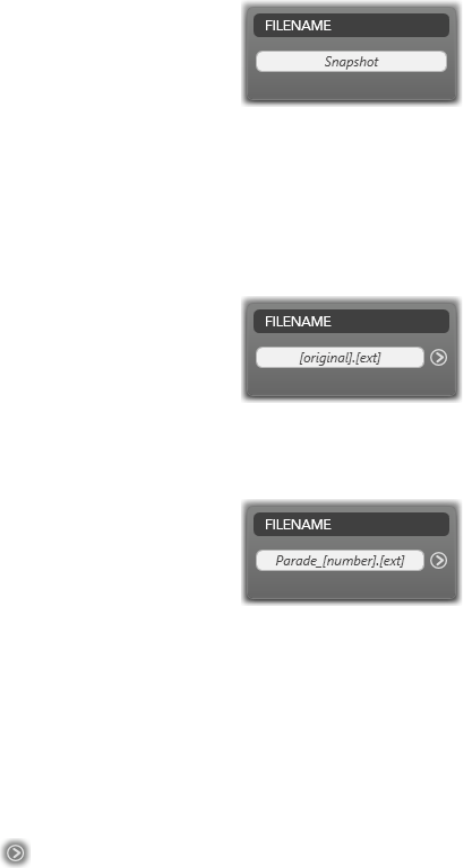
Chapter 2: Capturing and importing media 39
Each type of input source has
a default filename assigned by
Studio. For instance, the
default filename when
importing a Snapshot is “Snapshot”. To change it, click
in the space and type the name you want.
The Import Wizard never overwrites an existing file
when importing. If a file with the same name as the
target name already exists, a sequence number is added
to the name of the incoming file.
When importing from file-
based media, additional file
naming features are available.
By default the naming formula
for a file-based input is given symbolically as
“[original].[ext]”, meaning that the original filename
and extension are used.
If you want a custom name,
enter it into the edit box as
usual; however, in the case of
file-based media the target
filename has two parts: a stem, which you supply, and a
tail, which is generated by one of three simple rules at
the time of import. The default rule adds a unique
sequence number to every filename. While you are
entering your custom name, the edit box shows only the
stem. But when the name is displayed at other times,
the rule for the tail part of appears as well.
To select a different rule for the tail part, click the more
button . This opens a dialog window with two
dropdown lists. The first lets you choose between
“original” and “custom” for the stem. You can use this
if you ever want to revert to importing files under their
original names. The second dropdown, which is
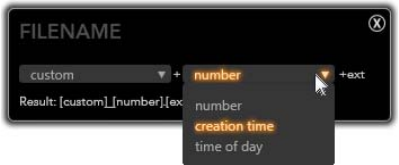
40 Pinnacle Studio
displayed only for custom names, gives the available
rules for generating the tail part:
Number: This is the same rule used by other media
types to avoid name collisions. If your stem is
“Parade”, the first file copied will be named
“Parade” (plus the original file extension), the
second will be named “Parade_001”, and the
numbers then continue in sequence.
Creation time: The time of day when the file was
created, in hours, minutes, and seconds, is used to
generate file names like “Parade_20-30-00” for a file
that was created at exactly 8:30 in the evening.
Time of day: This is like the previous option, but the
time of importing the file is used.
The Import Filename Configuration window.
SELECTING MEDIA FOR IMPORT
Each source supported by the Import Wizard has its
own appropriate set of controls for selecting the
material. When you click the source name in the Import
From panel, the central area of the wizard configures
itself appropriately with the controls you need.
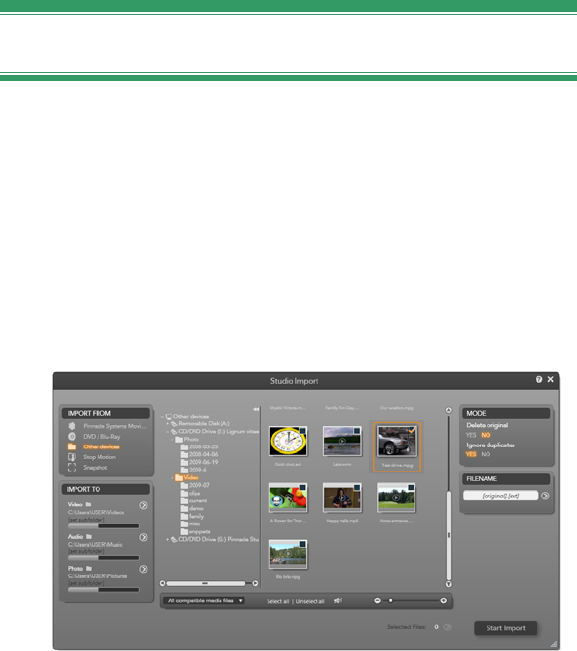
Chapter 2: Capturing and importing media 41
Import from file-based media
Select Other devices in the Import From panel of the
Import Wizard to prepare for importing from file-based
storage media other than local hard drives, including
optical drives, memory cards and USB sticks.
The job of selecting the files to import belongs to the
folder and media file browser in the central area of the
display.
When importing from file-based media, the Import
Wizard provides a folder and file browser in the
central area. This is flanked on the left by the Import
From and Import To panels, and on the right by the
Mode and Filename panels. The Start Import button
at bottom right sets things in motion after the desired
media files have been selected.
A single import operation can take in multiple types of
media file from multiple source folders. Each selected
file will be copied to the correct folder for its media
type (as specified in the Import To panel).
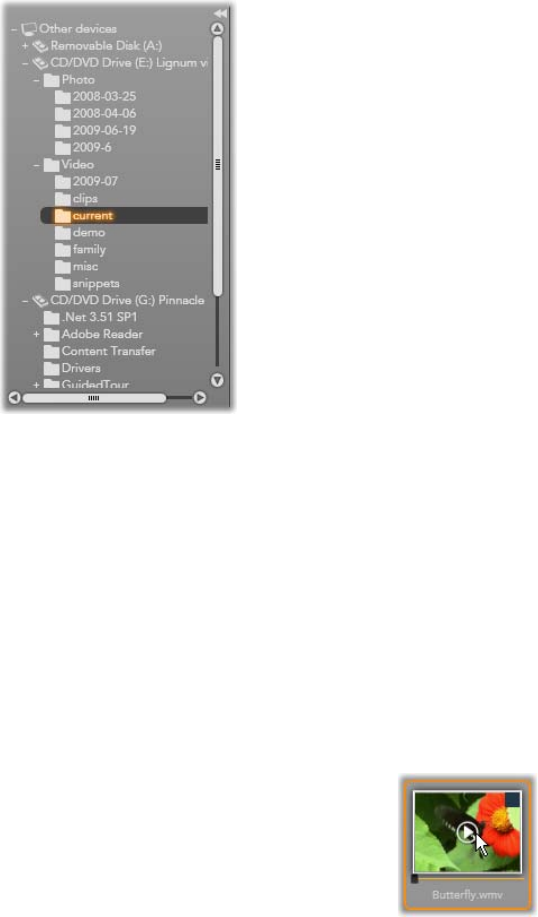
42 Pinnacle Studio
The folder and media file browser
The left hand column of the
browser is a hierarchical
view of all folders on all file-
storage devices attached to
your computer. These
devices include hard drives,
optical disc drives, memory
cards and USB sticks.
Navigation in this “folder
tree” is similar to that in
Windows Explorer and other
programs. Folders containing
other folders are indicated by
a plus sign to the left of the
name when they are closed
and by a minus sign when they are open. Click the sign
to open out (“expand”) or close down (“collapse”) a
folder’s list of subfolders.
Only one entry in the folder tree can be highlighted at a
time. Any media files contained in that folder are
immediately listed in the larger, right-hand division of
the browser. You can preview files on the spot, and
earmark those you intend to import by checking the
box at the top right of corner of each file icon.
Previewing media files
Previewing audio and video: The
media file browser includes built-in
previewing for all supported media
types. Click the play button in the
center of video and audio file icons to
preview the media they represent. For
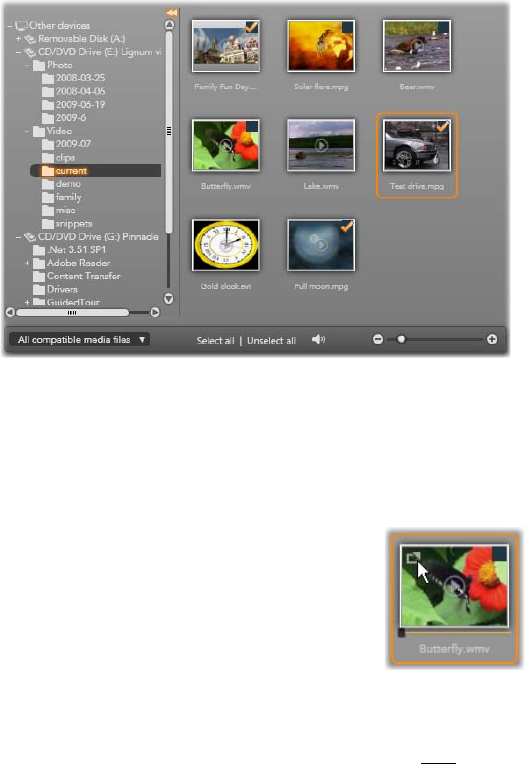
Chapter 2: Capturing and importing media 43
quick viewing, video files play back within the icon
frame itself. Click anywhere on the icon to halt
playback; otherwise the entire file is previewed.
Here, the folder video\current is open, revealing
eight video files. To select (or unselect) a file for
import, click the checkbox in the top right corner of
its icon. In the illustration, three files have been
selected.
Full-screen preview: During video
playback, a full-screen viewing button
is displayed at the top left of the file
icon. This button works similarly to
the Player’s full-screen preview button
in Studio’s Edit mode (see page 8).
Full-screen previewing closes automatically at the end
of the video. To close it manually, press the Esc key or
double-click the display during preview.
To view a digital photos or other picture file at full-
screen resolution, double-click its icon.
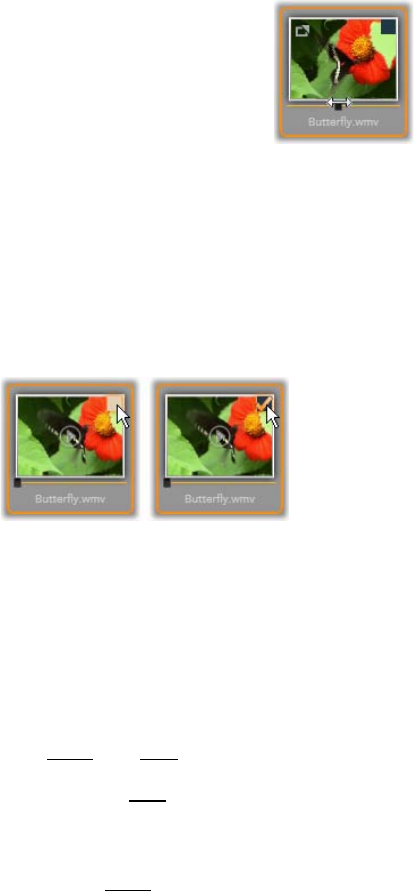
44 Pinnacle Studio
Scrub preview: Audio and video clips
both provide a scrubber control
immediately below the file icon. Click
and drag the scrubber knob to
manually review any part of the file.
The mouse pointer changes to a two-
headed horizontal arrow when it is correctly positioned
for scrubbing.
Selecting media files for import
To select media files one at a time for importing, click
the selection box at the top right corner of the file icon.
Click the selection box to check or uncheck the file.
Multiple selection: The browser also provides a
method of selecting (or unselecting) simultaneously a
group of highlighted files. To highlight an individual
file, simply click on its name or its icon; the
highlighted state is indicated by an orange border. To
highlight additional files, click icons in conjunction
with either of the Shift and Ctrl keys, as follows:
Click while pressing Ctrl to add or remove the
highlighting from one file without affecting the
others in the group.
Click while pressing Shift highlights the clicked icon
and all those between it and the previously clicked
icon, inclusive. Highlighting is removed from any
icons not within the range.
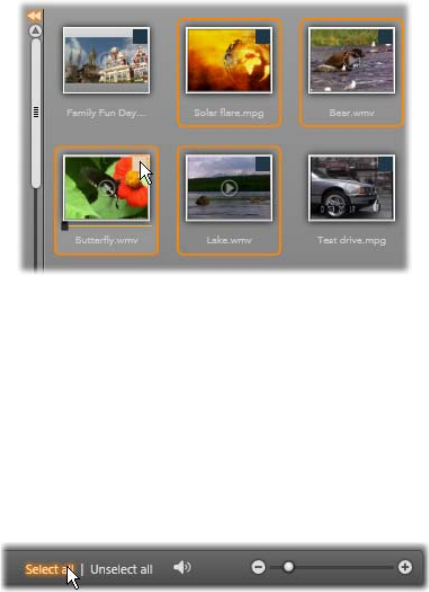
Chapter 2: Capturing and importing media 45
You can also highlight a range of icons directly with
the mouse, by dragging out a rectangle that intersects
the icons you want to include. Click the first icon and
move to the last one before releasing the mouse button.
Having highlighted some icons you want to import,
click the selection box of any one of them to select or
unselect the entire group at once.
A group of four highlighted video file icons.
Selecting or unselecting any one will affect the whole
group.
Select all and Unselect all: Click these buttons along
the bottom of the media file browser to select for
importing either all or none of the media files listed in
the current folder. They do not affect any files currently
selected in other folders.
Use the Select all button to select all the media files in
the current folder.s
Each time a file is added to or removed from the list of
those to be imported, the media browser updates the
selection status indicator at the bottom of the display.
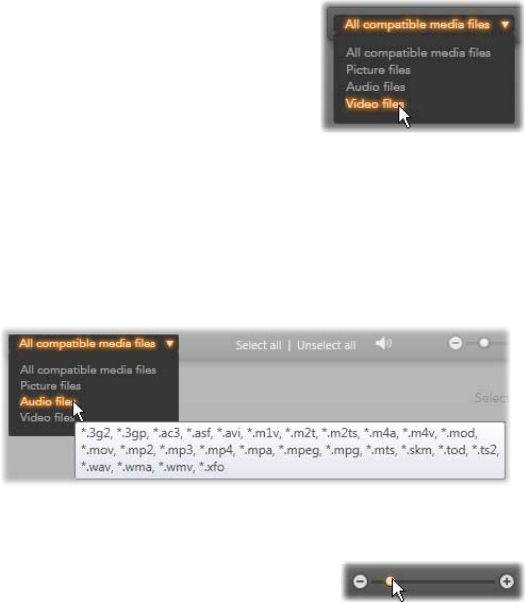
46 Pinnacle Studio
Customizing the browser
Several controls allow you to configure the media file
browser appropriately for your display hardware and
requirements.
Close the folder tree: To maximize the space for
viewing files, click the left-pointing double-arrow icon
at the top of the folder tree scroll bar. This collapses the
folder tree to a vertical bar down the left-hand side. At
the top of the bar is the right-pointing double-arrow
that will reopen the tree. The name of the current folder
is also shown.
Filter the file list: Another way
to optimize your use of the file
area is to limit the files shown
to include only one media type.
This is the function of the media
filter dropdown at the bottom left of the browser. By
default, all supported media file types appear in the
browser, but you can limit the view to picture files,
audio files or video files by your selection here. To see
exactly which file types are included in a selection,
hover on the item for a second or two to pop up the list.
Hovering over the Audio files option brings up a list
of file types from which audio import is supported.
Set preview size: A final tool for
managing screen real estate is the
preview size slider at the bottom right of the browser.

Chapter 2: Capturing and importing media 47
Move the slider leftwards to reduce, or rightwards to
increase, the size of the preview images in the file
browser. There are three ways of moving this slider
with the mouse:
Click on the slider knob and drag to the left or right.
Click beside the slider knob to nudge itin the
appropriate direction.
Click the minus/plus buttons at the ends of the slider
scale to move the knob by a larger amount.
Set preview volume: To set the playback
volume of audio and video clips for
previewing, hover the mouse pointer in the
area of the audio/mute button in the bottom
bar of the media file browser. A volume slider will
appear beside the button. Drag the knob up and down
to control the volume. Click the audio/mute button
itself to toggle audio muting.
Adjusting the import file date and time
The internal clocks of the recording devices are often
set incorrectly, resulting in incorrectly timestamped
media files. The Import Wizard can correct this kind of
problem by setting the date and time of the imported
files according to your specifications.
To correct the file time or date:
Use the more button on the “Selected Files” lines to
open a window that offers two options for adjusting the
timestamps:
Correct time zone: This slider changes the file
timestamp of any media files you import by up to 12
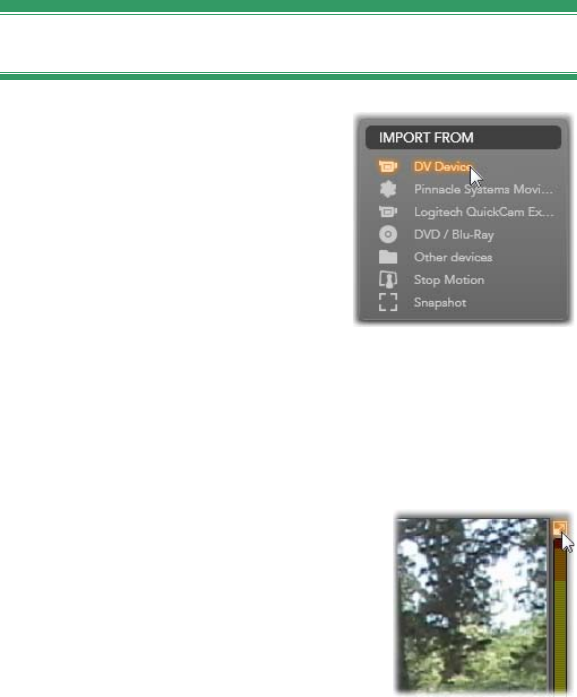
48 Pinnacle Studio
hours in either direction. You can use this adjustment
to compensate for the time difference when you
bring home video from your travels.
Set date/time: These fields lets you enter an exact
date and time of your choice. The file time of any
media files you import will be changed to this.
Import from DV or HDV camera
To prepare for importing
digital video, switch on your
DV or HDV device in play
mode and select it in the
Import From panel of the
Import Wizard.
You will also need to make
sure that your destination
folder, compression presets, and other options are set
up in the other panels the way you want them. (See
“Import Wizard panels”, page 25.)
Previewing video
The video currently playing on the
source device should now be
visible in the preview area at the
central area of the display. Along
the right edge of the video preview
is a scale showing the moment-by-
moment audio level. Above that
scale, by the top right corner of the preview frame, is a
small button that switches to full-screen previewing.
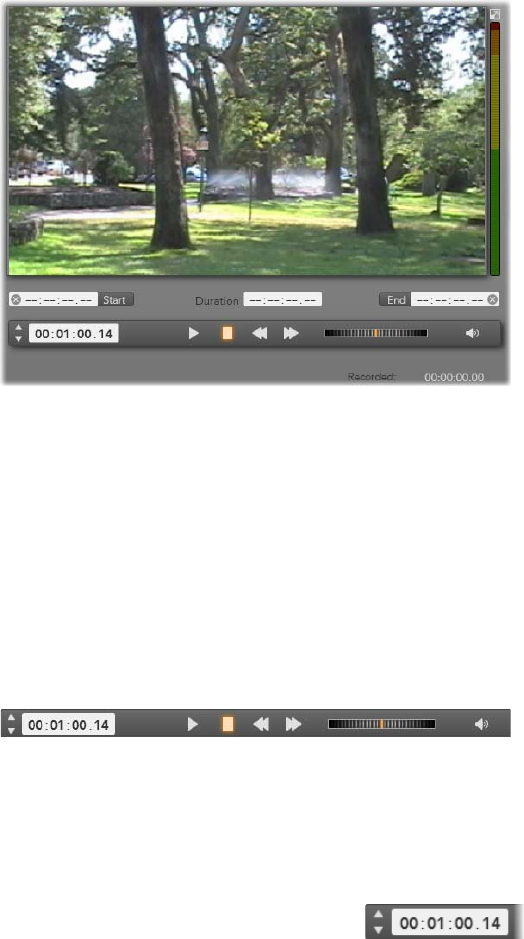
Chapter 2: Capturing and importing media 49
When a DV or HDV source is selected, the central
area of the Import Wizard provides controls for
previewing and importing the taped material.
Below the preview image is a row of controls for
automating capture by setting mark-in and mark-out
points. See “Recording video and audio” on page 51 for
more information.
Another row of controls, the transport bar, serves as
your navigation console for the source device.
The transport bar for DV and HDV import, with
(from left) jog controls and timecode readout,
transport buttons, a shuttle control, and an audio
button with a pop-out slider for controlling the
preview volume.
The current timecode indicator
shows your playback position
according to the timecode recorded onto the tape when
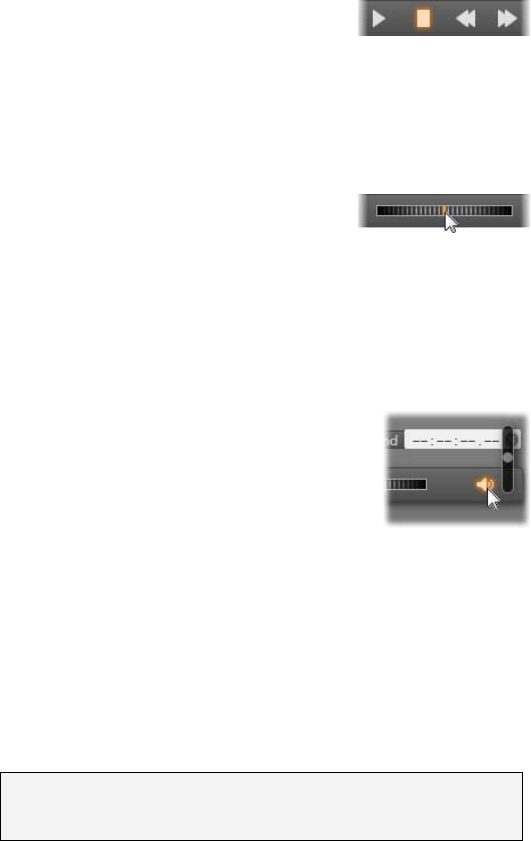
50 Pinnacle Studio
it was shot. The four fields represent hours, minutes,
seconds and frames respectively. To the left of the
indicator is a pair of arrow buttons; use these to jog the
position one frame back or frame forward at a time.
From left to right, the transport
buttons are play/pause, stop,
rewind and fast forward. These buttons relay
commands to your camera. Using them is equivalent to
using the camera’s onboard controls, but typically more
convenient.
Drag the orange needle on the
shuttle control to the left or right to
change the playback position in the reverse and forward
directions respectively. The motor speed increases as
you drag the needle further off center. When you
release the needle, it homes to the center position and
pauses playback.
Set preview volume: To set the
playback volume for previewing,
hover the mouse pointer in the area of
the audio/mute button in the bottom
bar of the media file browser. A
volume slider will appear beside the button. Drag the
knob up and down to control the volume. Click the
audio/mute button itself to toggle audio muting.
Mark-In/Out: Mark In and Mark Out indicate the
planned starting point and ending point of a video
capture. See page 51 for further information.
Note: DV and HDV sources are also suitable for
snapshots; see page 58 for details.

Chapter 2: Capturing and importing media 51
Recording video and audio
The Import Wizard supports two approaches to
selecting a range of video to be imported.
In the manual approach, you simply watch the preview
playback and press Start Capture at the start of the
desired footage. When you reach the end of the
segment, press Stop Capture. If you have continuous
timecode on the source footage, and have set Stop at
tape end to “Yes” in the Mode panel, you can walk
away and leave the Import Wizard to switch off when
the input is exhausted.
The automatic method of capture is good for setting the
endpoints of your capture (the “mark-in” and “mark-
out”) points with single-frame precision, and for
unattended importing that should halt before the end of
the recorded material.
Sometimes you may want to use set the mark-in time
and leave mark-out blank. When you click Start
Capture the Import Wizard will locate your start time
then capture until you tell it to stop (or at tape end).
You can also set a mark-out time and leave the mark-in
time blank. When you click Start Capture import will
begin immediately, and end automatically at the mark-
out point. Entering a duration and entering a mark-out
time are equivalent. Whichever you specify, the Import
Wizard calculates and displays the other one
automatically.
Note: Before starting the import operation, verify that
the settings on the Import To panel and other panels
(see page 25) have been configured correctly.

52 Pinnacle Studio
To capture manually with the Start Capture and
Stop Capture buttons:
1. Make sure that the mark-in and mark-out points are
not set. If needed, use the button associated with
the field to clear it with one click.
2. Manually start playback of the source tape before
the desired starting point of the capture.
3. Click the Start Capture button when the starting
point is reached.
The button caption changes to Stop Capture.
4. At the end of the segment click the button again.
The captured material is stored in the Album.
5. Manually halt playback (unless automatic shutoff is
in effect as noted above).
To capture automatically by setting mark-in and
mark-out points:
1. Use the time counter controls to set the mark-in and
mark out values – the start and end points of the
desired footage.
To set the mark-in point, either
enter a value directly into the
start field, or navigate to the desired point and click
the Start button. A similar approach can be used to
set the mark-out point.
2. Click Start Capture. Studio positions the source
device to the mark-in point and automatically
begins recording.
3. When the mark-out point is reached, import is
terminated and the source device is stopped.
4. The captured material is stored in the Album.
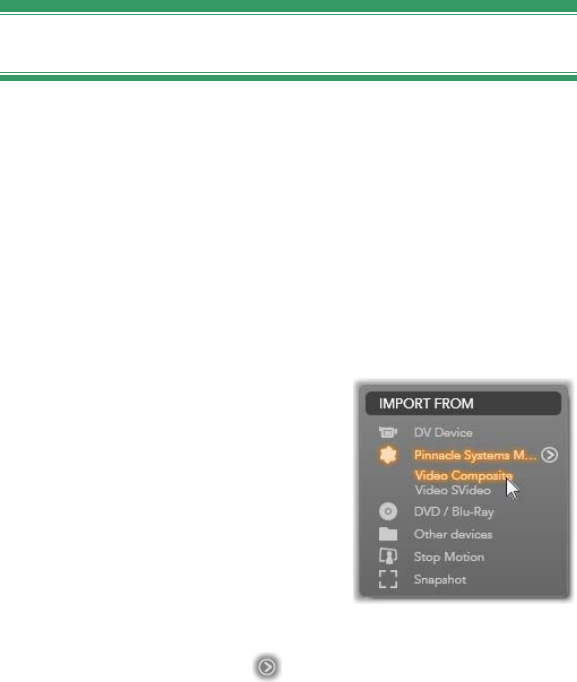
Chapter 2: Capturing and importing media 53
Import from analog sources
To record analog video (e.g. VHS or Hi8) you need a
converter that you can connect to your computer and
that has the appropriate video and audio connections.
This is also the case when recording from analog sound
sources, such as a record player.
Currently supported devices include Pinnacle and
Dazzle products such as USB 500/510, USB 700/710
and DVC 100, and webcams based on DirectShow
technology.
To prepare for importing from
an analog source, switch on
the device and select it by
name in the Import From
panel of the Import Wizard.
Also choose the applicable
input (e.g. “Video
Composite” or “Video
SVideo”). If you wish to
tweak the incoming analog signal prior to digitization,
click the more button , which provides access to the
Analog Input Levels window. (See page 27 for more
information.)
Before starting the capture, make sure that your
destination folder, compression presets, and other
options are set up in the other panels the way you want
them. (See “Import Wizard panels”, page 25.)
To capture from an analog source:
1. Verify that the correct input is connected (e.g.
“Video S-Video”).
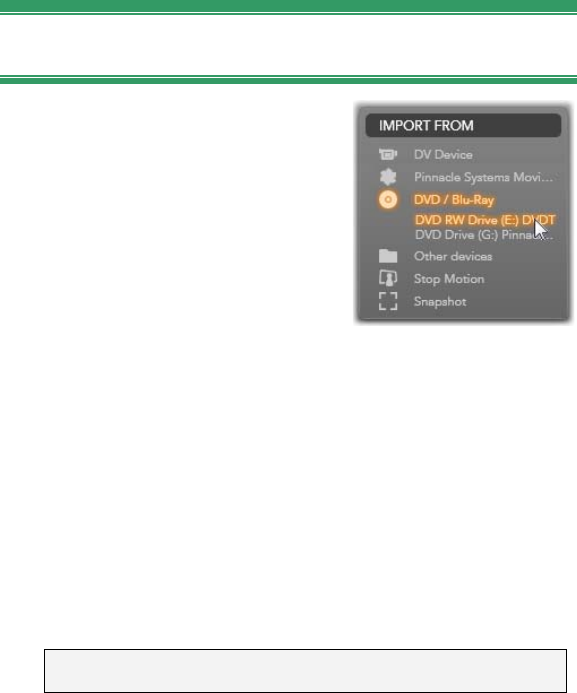
54 Pinnacle Studio
2. Start the playback device just before the point at
which you would like capture to begin.
Video and audio previewing should now be active.
(If not, check cabling and converter installation.)
3. Click the Start Capture button to start recording.
The button caption changes to Stop Capture.
4. At the end of the segment click the button again.
The captured material is stored in the Album.
5. Halt the source device.
Import from DVD or Blu-ray Disc
The Import Wizard can import
video and audio data from
DVDs and BDs (Blu-ray
discs). To begin, insert the
source disc in its drive and
select it in the Import From
panel of the Import Wizard. If
you have more than one
optical drive, choose the
correct device among those listed.
Before starting the capture, make sure that your
destination folder and file name are set up in the other
panels the way you want them. (See “Import Wizard
panels”, page 25.)
Because large files can be involved when importing
from optical discs, selecting the correct import
directory is important. In particular, ensure that the
designated storage location has sufficient space
available (see page 29).
Note: Copy-protected media cannot be imported.
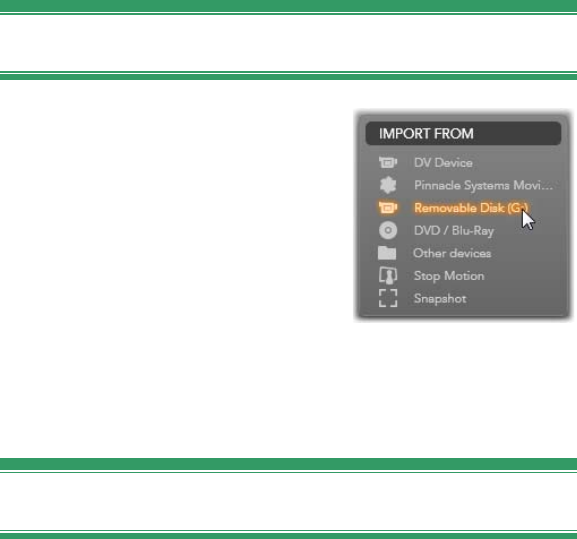
Chapter 2: Capturing and importing media 55
Previewing the disc files
The media on optical discs are accessed through the
computer’s file system. For this reason, the previewing
controls in the central area, the methods for selecting
files, and the procedure for importing, are the same as
for ordinary file-based media (except that the unneeded
folder view starts in the closed position). Please see
page 41 for further information.
Import from digital cameras
Like optical disc drives, the
media on digital cameras is
accessed through the
computer’s file system. The
camera may appear on the
source list as a removable disk
drive. Previewing, selecting
and importing are the same as
for ordinary file-based media (except that the folder
view starts in the closed position). Please see page 41
for further information.
Stop motion
The Stop Motion function of the Import Wizard allows
you to create animated films by stitching together
individual frames grabbed from a live video source,
such as an analog video camera or webcam. The result
of your Stop Motion import will be either a movie at 8
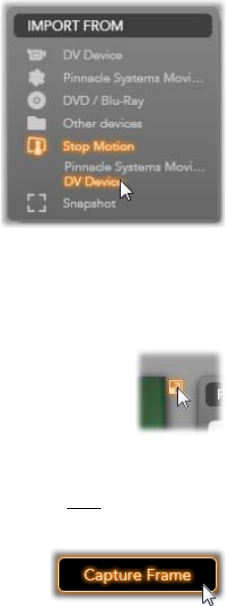
56 Pinnacle Studio
or 12 frames per second, the collection of still images
you grabbed, or both, depending on your Mode panel
settings.
To prepare for Stop Motion
import, make sure the source
device is switched on, then
select it by name under the
Stop Motion heading in the
Import From panel of the
Import Wizard. (See page 27
for more information.)
Before starting the capture, make sure that your
destination folder, options and file name are set up in
the other panels the way you want them. (See “Import
Wizard panels”, page 25.)
If your source equipment is functioning
correctly, you should have a live preview in
the central area of the Import Wizard
window. For a full-screen preview, click the
button at the top right of the embedded preview. To
terminate the full-screen mode, press Esc or click the
close button at the top right of the screen.
When you are ready to capture an
image, click the Capture Frame
button. A thumbnail of the grabbed
frame is added to the Image Tray at the bottom of the
window. (See “Using the Image Tray” on page 60 for
more information.)
Since this is a stop motion sequence, after each image
is grabbed you will generally make small changes to
the scene you are shooting in order to create the illusion
of motion from frame to frame.
To make your task of visualization easier, the Stop
Motion preview includes an “onion skin” effect,

Chapter 2: Capturing and importing media 57
whereby successive frames are shown simultaneously
in translucent layers so that the differences can be
clearly seen. This feature can be configured on the
control bar.
The number of images shot so far and the duration of
the film (based on the number of images, rounded off)
are displayed to the right below the control bar.
The Stop Motion control bar
This bar provides transport and other functions for Stop
Motion import.
From left to right:
Live and File indicators: These let you switch
between previewing the live video feed and
previewing the captured frames in the Image Tray.
You can review – and if necessary replace –
particular frames without having to undo other work.
Counter: This readout shows your current position
within the animation in hour, minutes, seconds and
frames. The counter value depends on the number of
frames you have grabbed and the animation speed in
frames per second. The up and down arrow buttons
to the left of the counter provide single stepping
when previewing your animation.
Navigation buttons: These buttons are for
previewing your animation. A loop button lets you
cycle the animation continuously for easy checking.
Frame rate: This rate, in frames per second,
determines how many frames you will have to create
in order to amass one second of movie time. This
rate influences the apparent speed of the animation.
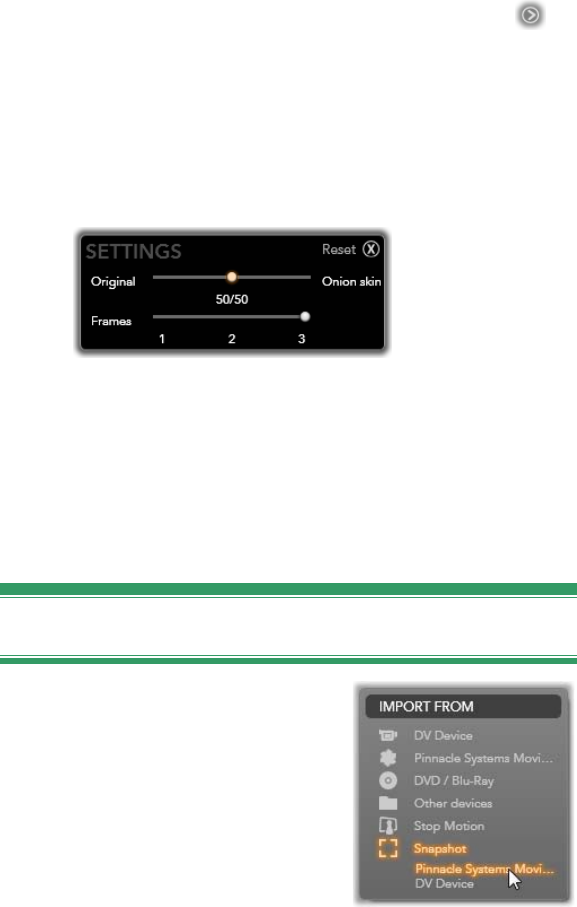
58 Pinnacle Studio
Onion skin settings: Click the more button to
open a small window where the onion skin feature
can be configured. The first slider shows the
difference in transparency between successive
frames, while the second controls the number of
frames, in addition to the current one, that will take
part in the effect. Experiment with both settings until
you find the levels that work best for your movie.
Importing the animation
When you have added all the frames you want to the
animation, click the Start Import button. The Import
Wizard adds your animated movie, and/or the
individual frames you captured, to the appropriate
sections of the Studio Album.
Snapshot
The Snapshot function of the
Import Wizard is used to
record individual frames (still
images) from cameras or
players connected to the
system. To prepare, make sure
the source device is switched
on, then select it by name
under the Snapshot heading in
the Import From panel of the Import Wizard. (See page
27 for more information.)
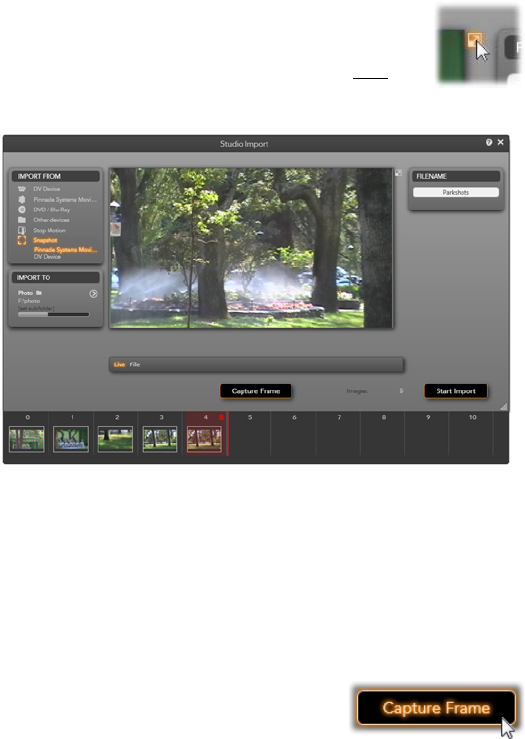
Chapter 2: Capturing and importing media 59
Before starting the capture, make sure that your
destination folder and file name are set up in the other
panels the way you want them. (See “Import Wizard
panels”, page 25.)
Now start your camera, or roll your tape, and start
monitoring the embedded preview display in the central
area of the Import Wizard window.
For a full-screen preview, click the button at
the top right of the embedded preview. To
terminate the full-screen mode, press Esc or
click close at the top right of the screen.
Capturing snapshots in the Import Wizard. While
previewing live or taped video in the central area of
the window, use the Capture Frame button to grab
still images. Grabbed frames accumulate in the
Image Tray at the bottom of the window until you
click the Start Import button to transfer them to the
Studio Album.
When you want to capture an
image as it goes by, click the
Capture Frame button. A
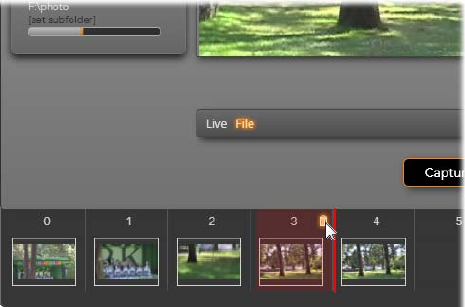
60 Pinnacle Studio
thumbnail of the grabbed frame is added to the Image
Tray at the bottom of the window.
Capture as many additional frames as are required. The
Import Wizard adds each one in turn to the collection
growing in the Image Tray. In the course of capturing,
you can change tapes, re-aim your camera, and so on as
you see fit. The source video doesn’t need to be
uninterrupted as long as there is signal present when
you actually click the Capture Frame button.
Using the Image Tray
For on-the-spot review of a frame you have already
grabbed, click the thumbnail of any but the most recent
frame in the Image Tray. This switches the preview
display from the video source to the captured file, and
activates the File indicator. You can also activate the
indicator by clicking it directly.
Click the File indicator or any thumbnail in the
Image Tray to review images already grabbed. Here,
thumbnail 3 has been clicked, and the mouse is
poised over the trashcan icon to delete it. The heavy
line to the right of the selected thumbnail indicates
where the next grabbed frame would be inserted.
Chapter 2: Capturing and importing media 61
To delete a captured frame, select it in the Image Tray,
then click the trashcan icon that appears in the top right
corner of the thumbnail.
To switch back to previewing video after reviewing
files in the Image Tray, click the Live indicator beneath
the preview display.
Importing the frames
When you have grabbed all the frames you want from
the video source, click the Start Import button. The
Import Wizard adds the grabbed images to the still
images section of the Studio Album.
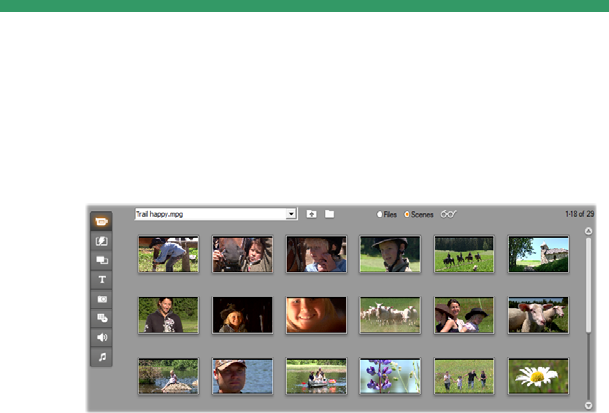
Chapter 3: The Album 63
CHAPTER 3:
The Album
The Videos section of the Album in Scenes mode. The
icons shown here represent the scenes within a
particular movie file. Controls are provided (top) for
accessing other movie files anywhere on your system.
Click the tabs down the left side of the Album to
access the materials in the other sections.
With the current explosion of digital media
technologies, it is easier now than ever before to obtain
high-quality media items and incorporate them in your
productions.
Many types of media and resource can serve as
ingredients in Studio movies in addition to just video.
Starting with visual elements, you can include digital
photographs and art, fancy titles and animated
transitions. As for audio, you can spice up, or even
64 Pinnacle Studio
replace, the source video’s own soundtrack with music,
sound effects and voice-overs.
Then there are the special items. For a DVD disc you
will want to include attractive navigation menus, while
for polish and pizzazz in any production you can turn to
Studio’s Montage® theme templates, which let you
recombine other resources into dynamic and creative
video layouts.
Your Studio software installation already includes an
extensive collection of professionally-authored
resources, and numerous bonus packs are available as
well. Further afield there are practically limitless
possibilities for using all kinds of additional media,
whether of your own creation or from other sources.
Managing your media
Keeping track of this abundance of riches could easily
become a challenging task in itself, but Studio provides
two key management tools that let you navigate and
access your media assets with ease.
The Album provides intelligent browsing of your entire
media collection. It lets you quickly locate and preview
any desired item, then introduce it into your production
simply by dragging its icon into the Movie Window.
All your projects share and make use of the Album,
which is a permanent feature of Studio’s Edit mode.
The Project Bin is a special version of the Album
dedicated to handling the resources needed by the
current project. Media items you add to your movie, are
included in the Bin automatically, but you can also add
items directly so that they will be handy later on. The
Bin lets you collect and file all the materials you need
for a production, and keep them at your fingertips

Chapter 3: The Album 65
throughout the editing process, ready to use whenever
your project is loaded.
In this chapter we first cover the Album proper, but
most of the concepts and operations described apply
equally to the Bin, which is described beginning on
page 92.
Accessing Album media
The source materials you need for making a movie are
stored in the various sections of the Album, each of
which is accessed by its own tab as follows:
Video: This section contains video footage you
have shot or otherwise obtained. The supported
video file formats are: avi, mpg, mpeg, mod, mp2,
mp4, m2ts, mt2, m2t, tod, m1v, m2v, mpv, 3gp,
wmv, mov and skm. You can access and preview files
directly, or you can open an individual file to access its
contained scenes, which are represented by thumbnail
icons. To use some of the scenes in your movie, just
drag their icons into the Movie Window. See “The
Videos section”, page 69.
Transitions: This Album section contains fades,
dissolves, slides, and other transition types,
including the elaborate Hollywood FX transitions. To
use a transition, position it next to or between video
clips and graphics in the Movie Window. See “The
Transitions section”, page 84.
Montage® Themes: A Theme in Studio is a set
of matching templates. You can use the
templates to create effective sequences that combine
your video and still images with built-in animations
and effects. See “The Montage® Themes section”, page
86.

66 Pinnacle Studio
Titles: This section contains editable titles,
which you can use as overlays or as full-screen
graphics. You can create your own titles from scratch,
or use or adapt the supplied ones. Studio supports rolls,
crawls, animated motions, and many typographical
effects. See “The Titles section”, page 87.
Photos and Frame Grabs: This is a section of
photographs, bitmaps and grabbed video frames.
You can use these images full-screen or as overlays on
the main video. Most standard image file formats are
supported: bmp, dtl, gif, jpg, jpeg, pcx, png, psd, tga,
tif and wmf. See “The Photos and Frame Grabs
section”, page 88.
Disc Menus: Studio has an extensive collection
of chapter menus to use in DVD, VCD and
S-VCD authoring. You can use these as they are,
modify them, or create your own. See “The Disc
Menus section”, page 89.
Sound Effects: Studio comes ready with a wide
range of high-quality sound effects. You can also
use files that you have recorded yourself or obtained
from other sources. The formats supported are: wav,
mp3, mpa, m4a, wma, avi and ac3. See “The Sound
Effects section”, page 90.
Music: In this Album section you can locate and
use music files stored on your hard drive. The
formats supported are the same as those for sound
effects. See “The Music section”, page 91.
Using the Album
A dropdown list of folders is displayed in all Album
sections. In some, like the Photos and Frame Grabs
section, where the folders represent actual directories
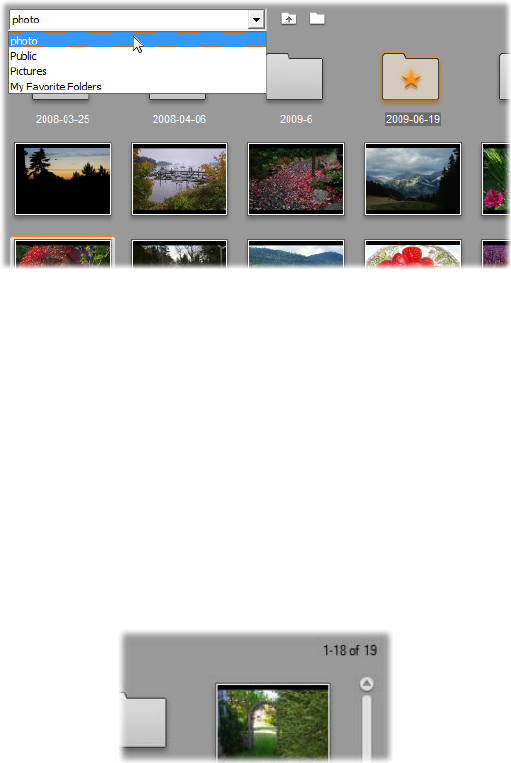
Chapter 3: The Album 67
on your hard drive, additional navigation controls are
also provided.
A dropdown list of folders in the Photos and Frame
Grabs section. Here the current folder contains both
image files and subfolders, one of which has been
designated a ‘favorite’ (starred). Favorite folders
can be quickly retrieved by clicking My Favorite
Folders in the list.
The resources in each folder are represented by icons.
If there are more than will fit the display, a scroll bar
provides access to the rest. At the top right of each
Album page, Studio shows the total number of items in
the folder, and the range that is currently visible.
The readout above the scroll bar shows that the first
18 of 19 icons are currently on display.
All types of Album content can be previewed simply
by clicking on the icons.

68 Pinnacle Studio
This chapter introduces each of the Album sections in
turn, beginning with a detailed discussion of the all-
important Videos section. Actually using the contents
of the Album to create your edited movie will be the
subject of chapters 4 through 15.
Source folders for Album content
Most Album sections contain ordinary media files of
various types, but there are three exceptions. The scene
icons in the Scenes mode of the Videos section
represent segments within a particular video file, while
the icons in the Transitions and Themes sections
represent special resources associated with the Studio
program.
The other five sections, however, and the Files mode of
the Videos section, present the files contained in some
particular disk folder.
The icons in the Titles section represent files stored
in a selected source folder on your hard drive. The
dropdown list at the top of the Album page lets you
select from any of several installed folders of titles.
The folder button beside the list lets you access titles
in folders other than those listed if required. The
Disc Menus section works similarly.
The source folder for each section’s content is listed in
the dropdown list at the top left of the Album, next to a

Chapter 3: The Album 69
small folder button . To change the source of the
current section, either select a folder from the
dropdown list, or click the button, browse to another
folder on your system, and select any file. The file you
select will be highlighted in the repopulated Album
section.
Some Album sections also provide a parent folder
button to facilitate moving around within a group
of folders containing media of the same type.
File-based media in the Album provide a context menu
command, Open Containing Folder, that opens a
Windows Explorer window with the given file selected.
THE VIDEOS SECTION
This is where the editing process really begins –
in the Videos section of the Album with your
captured raw footage and other video source materials.
In a typical production, your first step will probably be
to drag some scenes from the Album down into the
Movie Window (see Chapter 5: Video Clips).
In the Album, scenes are displayed in the order in
which they occur in the video. This order cannot be
changed, since it is determined by the underlying file,
but scenes can be added to your movie in any order you
choose. Similarly, while you can’t trim (edit) Album
scenes themselves, you can use any desired portion of a
scene when it appears as a clip in your movie.

70 Pinnacle Studio
Files mode and Scenes mode
Choosing a particular video scene to use in a movie is a
two-step process. First, you must select the video file
containing the required scene by browsing for it on a
storage device – usually a hard drive – attached to your
system. Second, you choose the scene you want from
amongst those the selected file contains.
To browse for a video file in the Videos section of the
Album, select the Files radio button.
Browse folders and video files on your computer by
selecting Files mode in the Videos section of the
Album. Double-click a video file or select the Scenes
radio button to switch into Scenes mode.
View options
Both the Files and Scenes modes support multiple view
options that let you tailor the display to your needs by
showing more or less information about each Album
item.
Studio provides several methods of accessing these
view options:
Through commands on the View menu.
Through the Album’s right-button context menu.
Through the pop-up menu button that appears
when you click the View button.

Chapter 3: The Album 71
In Files mode, the Videos section supports three
views at varying levels of detail: Icon view,
Details view and Thumbnail view.
The two view options available in Scenes mode are:
Thumbnail view and Comment view.
Interface features
The Videos section offers several special interface
features:
Scenes that have been added to the Movie Window
are distinguished in the Album by a checkmark in
the top right corner of the scene icon. The checkmark
remains as long as any clip in the Movie Window
originates with that scene. A colored background
square in the same corner of the icon indicates that it
has been explicitly added to the Project Bin. Both
indicators can occur together (see below).

72 Pinnacle Studio
To see how a particular Album scene is used in your
current project, use the Album Find Scene in
Project menu command. Studio highlights any clips
in the Movie Window that originate in the selected
scene (or scenes). To go the other way, use the Find
Scene in Album command, which is on the right-
click menu for Movie Window clips.
The symbol in the top-right corner of an icon in the
Album or the Project Bin reveals its status:
unused (no symbol); used in project; added to
Bin; both used in project and added to Bin.
Nearly all menu commands that apply to scenes are
available both on the main Album menu, and on the
pop-up menu that appears when you right-click a
selected scene. When this documentation calls for a
menu command like Album Combine Scenes,
remember that an equivalent command is usually
available on the pop-up “context” menu as well. Many
commands are also available in the Project Bin.
Summary of operations
Because of its central role, the Videos section of the
Album provides an extensive set of operations. These
are covered below in the following topics:
Opening a video file
Viewing video
Selecting scenes and files
Displaying scene and file information
Comment view
Combining and subdividing scenes
Redetecting scenes
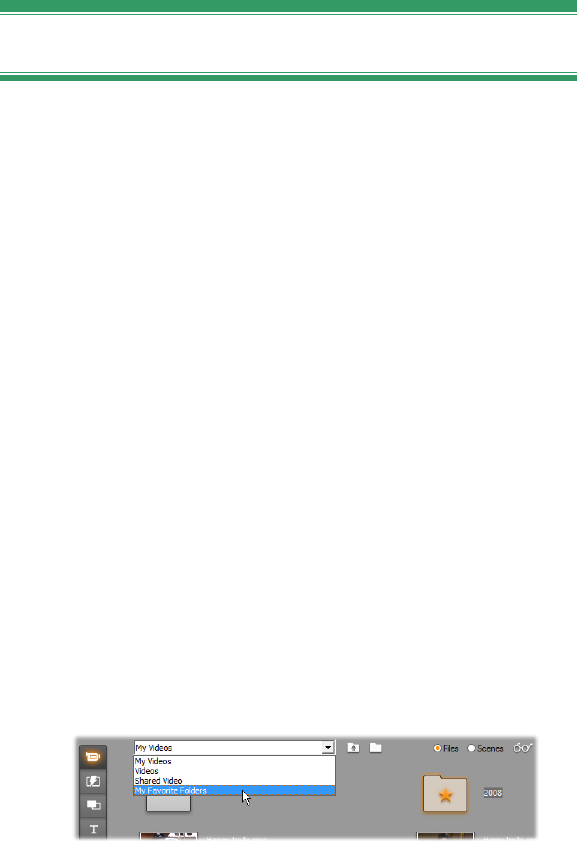
Chapter 3: The Album 73
Opening a video file
The default locations for your video files are the
Windows public video folder and the matching folder
in your user account. When you are viewing the Videos
section in Files mode, both of these locations always
appear on the dropdown list at the top of the Album.
You can also choose other hard drive folders to access
stored video files. Studio lets you navigate to the folder
where your files are located by clicking the icons in the
Files mode. You can also select a file directly by
clicking the Browse for file button in either Files or
Scenes mode. Both the current and previous folders are
also listed, if they are different from the two standard
locations, making four different folders that may appear
in the list at any one time.
The final entry on the dropdown list is “My Favorite
Folders”. If you are working with several different
video folders, Studio’s “favorites” feature makes
navigation easy. To designate any folder a favorite, use
the right-button menu command Set as Favorite folder.
Favorite folders are displayed with a star graphic in the
Album. To return to a favorite, select “My Favorite
Folders”, then the particular folder you have in mind.
Selecting ‘My Favorite Folders’. The folder at right
has been designated a favorite, as shown by the star.
See “The Videos Section” (page 69) for details about
modes and view options when working with video
scenes in the Album.
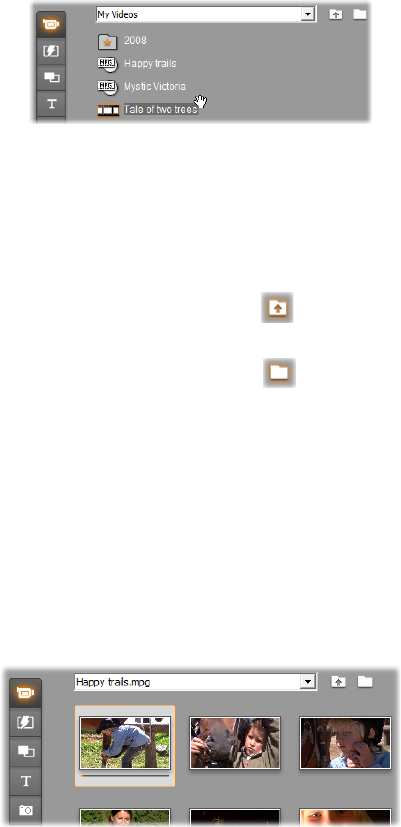
74 Pinnacle Studio
Opening a folder
Folder contents are displayed in Files mode. Both the
subfolders and the digital video files within the current
folder are shown.
Three ways to open a folder:
With the Videos section in Files mode, select the
folder name on the dropdown list, or double-click
any listed folder.
Click the parent folder button in either Files or
Scenes mode.
Click the browse for file button and use the Open
dialog to locate a digital video file in either Files or
Scenes mode. When Studio opens the video file,
switch to Files mode to display the contents of its
parent folder.
Opening a file
When you open a video file, icons are displayed that
represent the scenes in the file:

Chapter 3: The Album 75
Three ways to open a digital video file:
Select the file name on the dropdown list when the
Videos section is in Scenes mode.
Double-click a file listed in Files mode.
Click the browse for file button and use the Open
dialog to locate a digital video file of any supported
type on your hard drive.
Scene detection and thumbnails
When you open a video file, the Album fills with the
file’s detected scenes. Each scene is denoted by a
thumbnail frame – an icon of the scene’s first frame. It
may be that the first frame doesn’t make a good icon
for the scene, so Studio lets you pick a different one if
desired.
To change thumbnails in the Album:
1. Select the scene to be changed.
2. Use the Player to find the frame you want used for
the thumbnail.
3. Click the Album Set Thumbnail menu command.
Video aspect ratios
Most digital video files provide format information that
allows Studio to detect the frame aspect ratio of 4:3 or
16:9 automatically. If the file does not provide aspect
ratio information, Studio defaults to the standard 4:3
format.
The Aspect Ratio 4:3 and Aspect Ratio 16:9 commands
on the Album menu let you manually set whichever
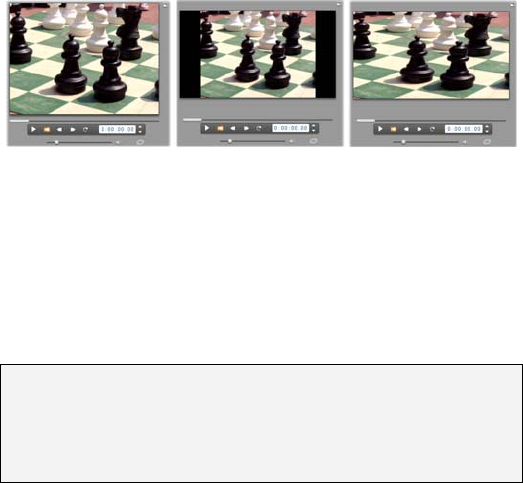
76 Pinnacle Studio
ratio you need. These commands also appear on the
right-button context menu for video in the Album.
Their method of operation is to stretch the original
frames to the new frame size. If you set the ratio of a
4:3 movie to 16:9, for example, people and objects will
appear widened relative to their height.
This is different from the frame-size conversion that
occurs when you add a scene to a movie project with
the “opposite” aspect ratio. In that case, the scene is
scaled in both dimensions equally to fit within the
target frame, and excess area appears as black.
The Aspect Ratio commands become available after the
Studio has opened the file for the first time and indexed
its scenes. Until then the menu items are disabled.
(L) Original 4:3 frame; (C) Same frame with black
sidebars on adding to 16:9 project; (R) Same frame
after Aspect ratio 16:9 command is used. Aspect
ratio mismatches can also be handled in the Movie
Window with the context menu commands ‘Show full
picture’ and ‘Zoom picture to fill frame’.
Note: The movie project’s frame format, which cannot
be changed after the project is created, can be set for
new projects in the Project preferences options panel.
See page 358 for more information.
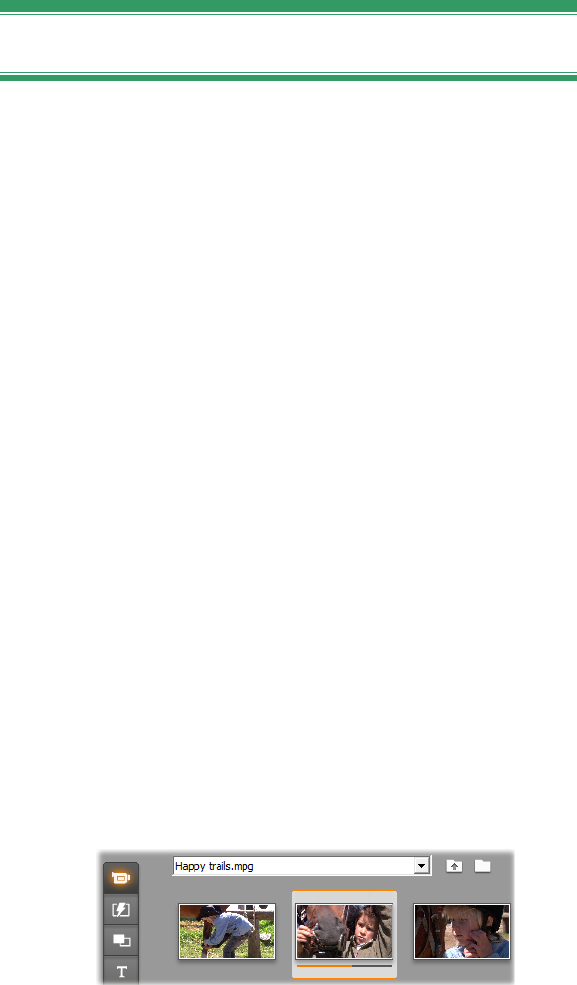
Chapter 3: The Album 77
Viewing video
Individual or multiple scenes in an open video file can
be viewed at any time.
To view video starting at a selected scene:
1. Click on the scene’s icon in the Album.
The Player displays the first frame of the selected
scene.
2. Click the Play button in the Player.
The Player now plays the selected scenes and any
subsequent ones. Progress is indicated in three
ways.
The scenes highlight successively as they are
played.
The Player scrubber shows the current point of
play relative to the entire movie.
Scene thumbnails display a progress bar during
preview. As you continue to view your captured
video, the progress bar moves from one
thumbnail to the next.
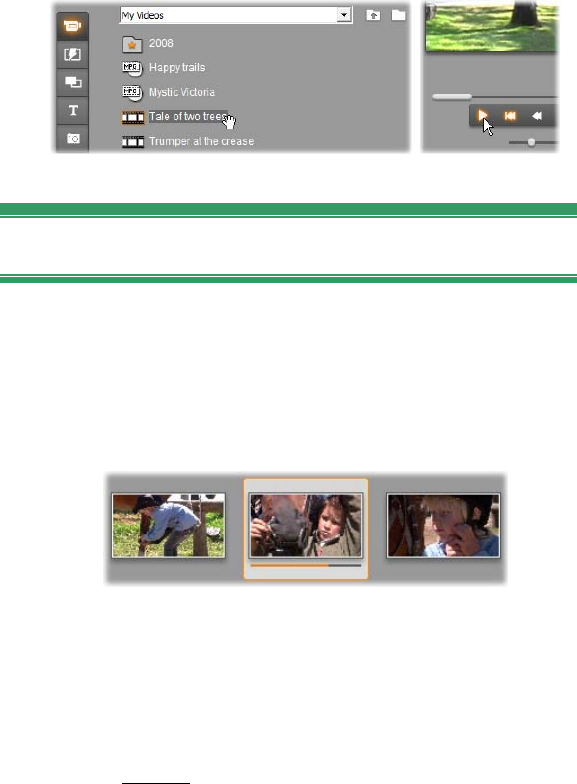
78 Pinnacle Studio
Previewing digital video files
When a video file is selected in Files mode, you can
use the Player to preview the video without actually
opening the file into Scenes mode.
Selecting scenes and files
Studio offers a variety of ways to select scenes, files
and folders in the Videos section of the Album.
Selected video scenes are indicated by a highlighted
border. Selected folders and video files are shown with
text highlighting.
Selected scenes have a highlighted border (center).
Selection techniques follow standard Windows
conventions. Use any of the following, separately or in
combination:
Choose the Edit Select All menu command or
press Ctrl+A to select all the scenes (or files and
folders) currently displaying in the Album, including
those on other pages.
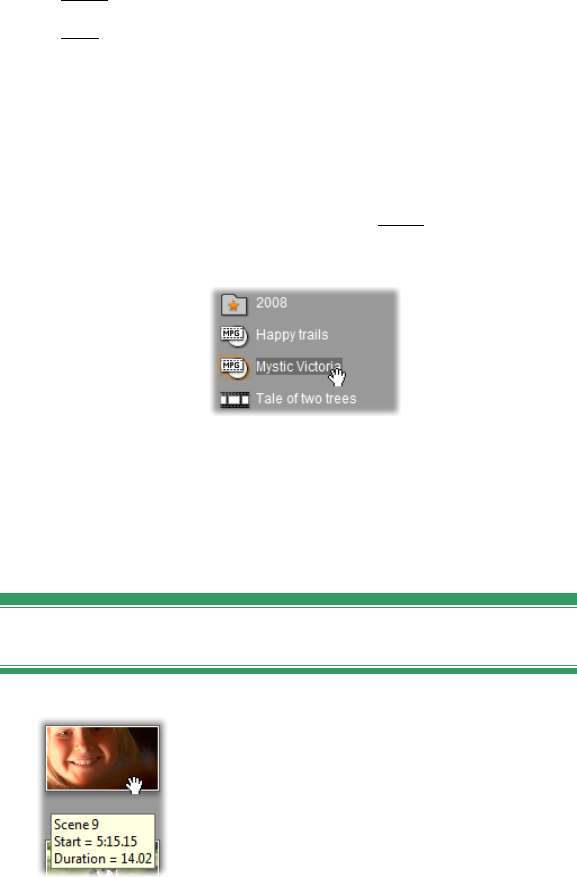
Chapter 3: The Album 79
Shift-click to select a range of neighboring items.
Ctrl-click to add or remove individual items from the
selection.
Starting with the mouse pointer over a blank area of
the Album page, click and drag to “marquee” an
area, selecting all the items that intersect the area.
Use the arrow keys to navigate the Album grid. Use
the arrows in combination with Shift to select items
as you go.
Selected folders and video files have highlighted text.
Note the star on the folder ‘2008’, indicating that it
has been designated a favorite.
Displaying scene and file information
As you move the mouse pointer over
video scenes, the pointer changes to a
grabber symbol. If you pause
momentarily on the scene, the start time
and length is displayed in a pop-up box.
If you leave the grabber on the scene,
the display persists for several seconds. The start time
shown is the timecode from the original source video,
in minutes, seconds, and frames.
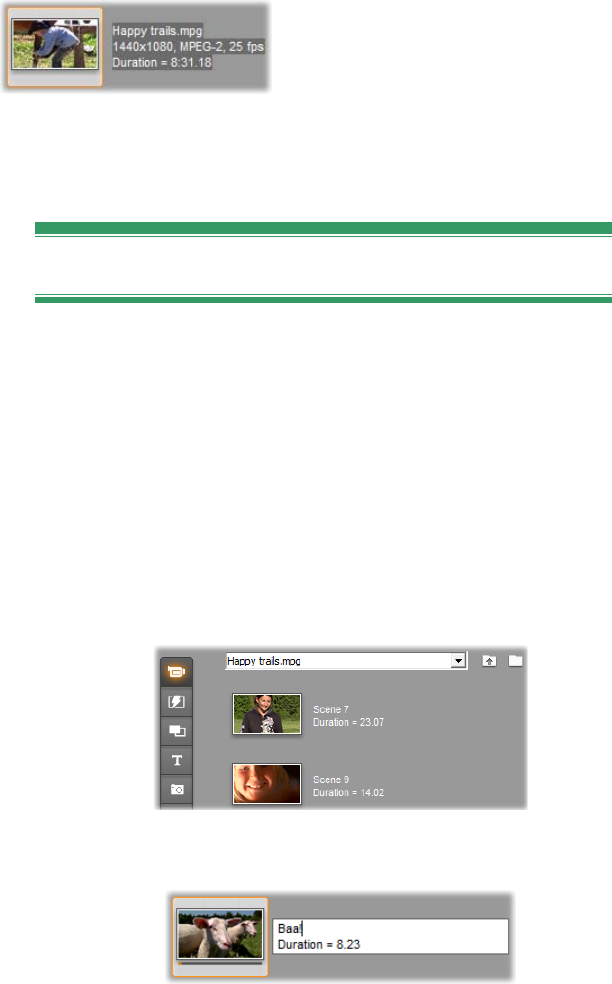
80 Pinnacle Studio
For information regarding video
files when the Videos section is
in folder view mode, select
Details view in the Album’s
right button context menu. The file name, resolution,
aspect ratio, duration and frame rate are displayed.
Switch back to a more compact listing with Icon view.
Comment view
In the default view for the Scenes mode of the Videos
section, known as Thumbnail view, each scene is
represented by a thumbnail frame icon. To see more
information about each scene, switch to Comment view
using any of the methods described on page 70.
In comment view, editable captions are displayed for
Album scenes. The usage of these captions is up to
you: they might be search keywords, or scene names,
or text comments describing the scene content. The
default caption is generated from the scene’s sequence
number and duration (e.g. “Scene 3, 7:21”).
If you click on a video scene, an in-place text field lets
you enter a custom name or comment.
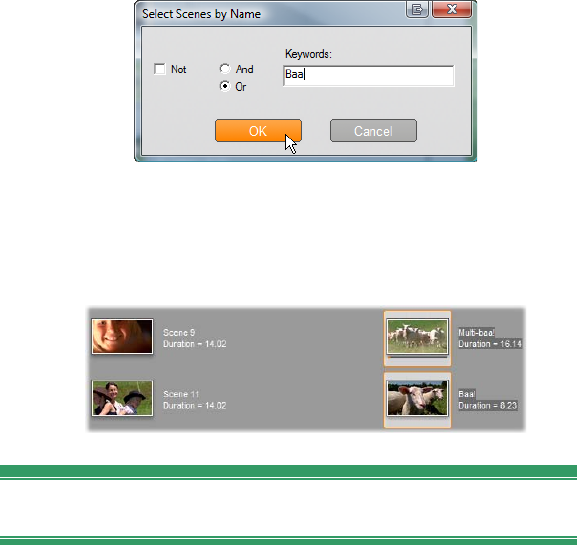
Chapter 3: The Album 81
Selecting scenes by name
A related option lets you select video scenes by
scanning for keywords in the comments. Use Album
Select By Name to open this dialog box:
Enter a keyword into the text field and click OK to
highlight all Album scenes whose caption contains the
keyword. The default captions are not searched – only
the ones you have customized.
Combining and subdividing scenes
After previewing your scenes, you might want to
combine or subdivide some into larger or smaller units.
Such adjustments are easily made.
To combine scenes in the Album:
1. Select the scenes to be combined.
2. Select Album Combine Scenes.
The selected scenes are combined into one.
Only selected adjacent scenes can be combined.
Furthermore, they are joined in the order in which
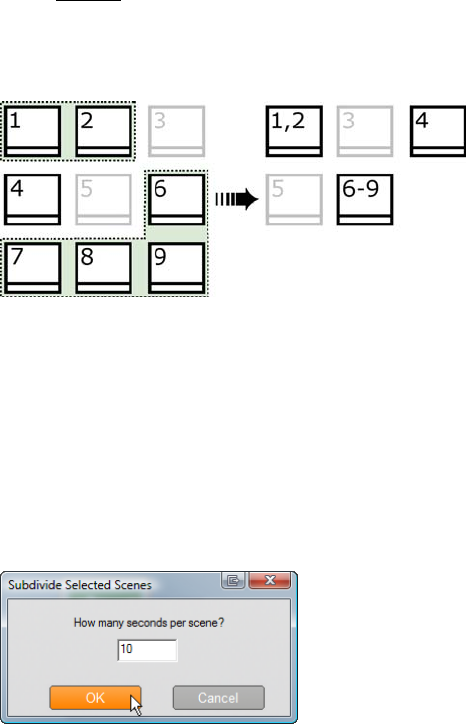
82 Pinnacle Studio
they appear in the Album, regardless of the order in
which they were selected. (Album order proceeds
across rows and then down the page.) To revert,
press Ctrl+Z, or click the undo button.
If the scenes you selected were not all neighbors,
each set of adjacent scenes is combined, but the
different sets are not combined with each other.
Several selected scenes (black) are merged into two
longer scenes. Having no neighbors, scene 4 is
unaffected, even though it was part of the selection.
To subdivide scenes in the Album:
1. Select the scenes to be subdivided.
2. Select Album Subdivide Scenes.
The Subdivide Selected Scenes dialog box appears.
3. Choose the length of the subdivided scenes by
typing in a value.
The smallest allowed subdivision is one second.
Any video remaining after subdivision is added to
the last scene.
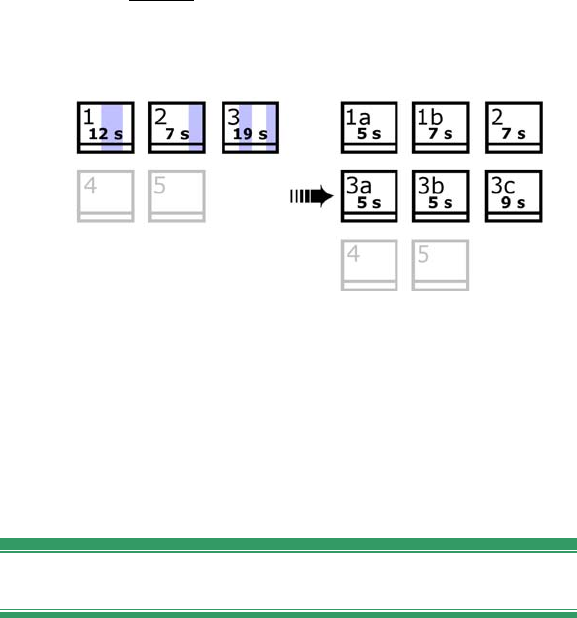
Chapter 3: The Album 83
4. Click OK.
A progress bar appears, the scene is subdivided, and
new scenes are added to the Album. To revert,
press Ctrl+Z, or click the undo button.
You can subdivide these scenes still further, if
desired, down to the minimum duration of one
second.
Three selected scenes are subdivided to a duration
of five seconds. The vertical stripes indicate five-
second divisions within each scene. The uneven clip
timings at right occur because time left after
subdivision is added to the final divided scene; that
is also why scene 2 is ultimately unaffected by the
subdivision operation.
Redetecting scenes
If you combine or subdivide scenes and later decide
that you’d prefer to restore them to their original state,
you may redetect any scene or selection of scenes. The
detection results are identical to those originally
obtained, provided the same scene detection technique
is used.
If you have subdivided scenes, you must first
recombine them. Even if you cannot exactly recall the
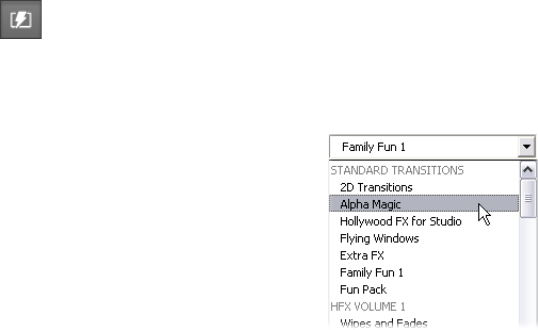
84 Pinnacle Studio
initial state and so recombine more than is necessary,
the detection process will restore the original scene
sequence.
To redetect scenes:
1. If you need to recombine any scenes, first select the
subdivided scenes, then apply the Album
Combine Scenes menu command.
2. Select the scenes you wish to redetect.
3. From the Album menu, select either Detect Scenes
by Video Content or Detect Scenes by Shooting
Time and Date.
A progress window appears as Studio detects the
scenes and repopulates the Album.
THE TRANSITIONS SECTION
The Transitions section of the Album provides a
large set of drag-and-drop clip transitions. To
keep things manageable, the transitions are divided into
groups. Use the dropdown list to select which group of
transitions you want to view.
To learn about transitions, and
how you can use them in your
movies, see Chapter 9:
Transitions.
Studio’s transitions collection
includes 74 standard
transitions, over 100 Alpha
Magic transitions, and a starting set of unrestricted
Hollywood FX 3-D transitions.
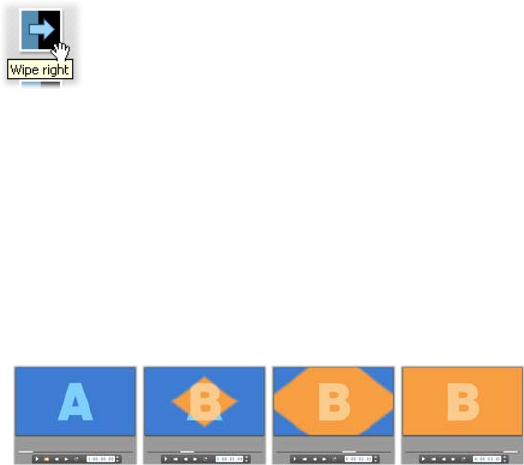
Chapter 3: The Album 85
Obtaining more transitions
Besides those installed with Studio, additional packs of
Hollywood FX transitions are available for purchase
through the Avid web-site.
For more information about purchasing premium
content for Studio, see “Expanding Studio” on page 12.
Displaying the transition name
As you move the mouse pointer over the transition
icons in the Album, the pointer changes to a grabber
symbol (indicating that the transition can be dragged
from the Album to the Movie Window). If you pause
momentarily on the icon, the name of the
transition is displayed. The display persists
for several seconds or until your mouse
pointer moves off the transition.
Previewing transition effects
When you click on a transition icon, the Player
demonstrates the transition using the convention that
“A” represents the original clip and “B” the new clip.
The demonstration cycles for as long as the icon
remains selected.
To see a detailed view, stop the Player and use the jog
buttons (Frame reverse and Frame forward) to step
through the transition one frame at a time.
86 Pinnacle Studio
THE MONTAGE® THEMES SECTION
Editing based on Montage® Themes is a
powerful feature unique to Studio. Each theme
consists of a set of matching templates. Use the
dropdown list to select the Theme whose templates you
want to view.
The templates available
for each theme provide
slots for your own video,
photos, captions and
settings. When you create
a theme clip from the
template (by dragging it
to the Movie Window),
the Theme Editor opens
to accept your
customizations. It can be
reopened at any later time by double-clicking the clip.
Templates give you a fast, easy way to craft visually
effective sequences that combine your own materials
with built-in animations and effects.
For information on using themes in your movies, see
Chapter 6: Montage® themes and theme editing.
Obtaining more themes
Besides those installed with Studio, additional themes
are available for purchase through the Avid web-site.
For more information about purchasing premium
content for Studio, see “Expanding Studio” on page 12.

Chapter 3: The Album 87
THE TITLES SECTION
This section of the Album contains a collection
of text and graphic titles in a variety of styles.
They can be used in your movie as either full-screen or
overlay titles. The difference is that in an overlay title
the transparent background is replaced by other
material (usually a video clip), whereas in a full-screen
title, any transparent areas of the background are
replaced with black.
Studio supports two title formats. Both allow you to
combine decorative text with graphic shapes and
images, but each has specialized properties, and its own
editing tools.
Classic titles are primarily static, but allow simple
animation in the form of text ‘crawls’ and ‘rolls’.
The Classic Title editor also supports advanced text
formatting such as variable character and line
spacing. Most importantly, the Classic Title editor
can also be used for visual editing of disc menus.
Motion titles provide fewer special text operations,
and cannot be used to edit disc menus. As the name
suggests, however, these titles support a rich set of
customizable animation routines, which can be
applied to invidual elements – text or graphic – to
produce dynamic visual compositions. The
thumbnail versions of motion titles are distinguished
by a special symbol in your project.
In the Album, a gray checkerboard is used
to indicate the portion of a title that will be
treated as transparent in overlays. (If you
prefer a black background, use the Album Black

88 Pinnacle Studio
background menu command.) As with video scenes,
titles that have been added to your current project are
indicated in the Album by a checkmark symbol.
With Studio’s built-in title editors, you can readily
create your own titles when needed. However, you may
find it easier still to start with one of the supplied titles,
of either type, and customize it in the corresponding
editor.
The Titles folder: The icons in the Titles section
represent files in the folder named at the top left of the
section. Each folder contains either classic or motion
titles. The special folders “My Motion Titles” and “My
Classic Titles” provide default locations for storing
titles that you have created or modified yourself. You
can also select a different folder to be the source of the
section (see “Source folders for Album content” on
page 68).
For information on using titles in your movie, see
Chapter 12: The Classic Title Editor, and Chapter13:
The Motion Titler.
THE STILL IMAGES SECTION
This section of the Album displays thumbnail
icons of image files, which may include grabbed
video frames, photographs and bitmapped drawings.
Most standard image file formats are supported. As
with video scenes, images that are in use in your
current movie are indicated by a checkmark symbol.
The Still Images folder: The icons in the Still Images
section represent files in the folder named at the top left

Chapter 3: The Album 89
of the section. Images can be added to the section by
storing them in this folder. For instance, you can save
grabbed video frames into the folder from the Frame
grabber tool, copy images using the Import Wizard, or
save your digital photos from a desktop photo-editing
application. You can also select a different folder to be
the source of the section (see “Source folders for
Album content” on page 68).
For information on using still images in your movie,
see Chapter 10: Still images.
THE DISC MENUS SECTION
This section of the Album contains a collection
of artist-designed menus for VCD, S-VCD and
DVD authoring. Menus in Studio are really specialized
“classic” titles: they can be created and edited in the
Classic Title Editor, and either saved from the editor
into a disk folder or incorporated directly into your
movie.
As with video scenes and other visual resources, disc
menus that are in use in your movie are distinguished in
the Album by a checkmark symbol.
For information on using disc menus in your movie,
see Chapter 11: Disc menus.
The Disc Menus folder: The icons in the Disc Menus
section represent files in the folder named at the top left
of the section. Menus can be added to the section by
storing them in this folder. You can also select a
90 Pinnacle Studio
different folder to be the source of the section (see
“Source folders for Album content” on page 68).
The motion background symbol: Some of the menus
supplied with Studio incorporate a background of
moving video rather than a static picture, and you can
also create such menus yourself. This “motion
background” can help give a professional look to your
finished disc.
Availability: The motion background feature is
available in Studio Ultimate only. See “Adding a
motion background” on page 258 for information on
creating or editing a moving video background.
Menus with motion backgrounds are indicated by a
small symbol in the bottom right-hand corner of the
Album icon.
Obtaining additional disc menus
Besides those installed with Studio, additional disc
menus are available for purchase through the Avid
web-site. For more information about purchasing
premium content for Studio, see “Expanding Studio”
on page 12.
THE SOUND EFFECTS SECTION
Studio comes with a wide range of ready-to-use
sound effects. These wav files are installed into a
number of folders, covering categories such as
“animals”, “bells” and “cartoons”.

Chapter 3: The Album 91
The Sound Effects folder: This section of the Album
displays the sound files contained in one disk folder,
named at the top left of the section. You can display the
sounds in a different folder – not necessarily one of
those installed by Studio – by selecting that folder to be
the source for the section (see “Source folders for
Album content” on page 68).
Besides wav (Windows “wave”) files, files in mp3
format, avi animation files, and other types are also
displayed in this section of the Album, and may be
drawn upon for supplemental audio in your
productions.
Any sound clip can be previewed simply by clicking its
name or icon.
For information on using sounds in your movie, see
Chapter 14: Sound effects and music.
Obtaining more sound effects
Besides those installed with Studio, additional sound
effects are available for purchase through the Avid
web-site.
For more information about purchasing premium
content for Studio, see “Expanding Studio” on page 12.
THE MUSIC SECTION
This section of the Album displays the music
files in a folder on your hard drive. To use a file
drag it onto the Music track or another audio track on
the Movie Window Timeline.

92 Pinnacle Studio
The Music folder: The wav, mp3 and other audio files
come from the folder named at the top left of the
section. Other music files can be added to the section
by storing them in this folder. You can also select a
different folder to be the source of the section (see
“Source folders for Album content” on page 68).
For information on using background music in your
movie, see Chapter 14: Sound effects and music.
THE PROJECT BIN
When you begin working with the Project Bin, you will
notice a strong family resemblance between it and the
Album. The essential differences between the two are
the scope and source of their collections. Whereas the
Album is a central library of available resources, the
Bin contains only those items that either already belong
to the current project or that you have specifically
earmarked for possible inclusion. It therefore does not
need or have the Album’s system of source folders and
file navigation. However, it is still possible to introduce
material from the file system directly into the Bin by
drag-and-drop, as described below.
The button to the left of the project name opens the Bin.
An empty Bin is automatically created for each project,
and its contents are loaded and saved along with the
project thereafter. To open the Bin and inspect its
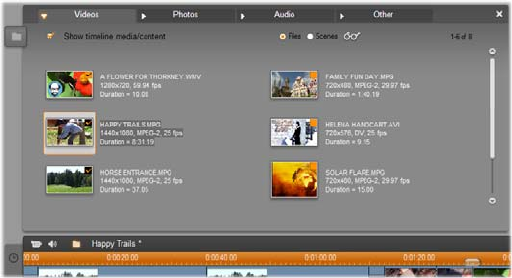
Chapter 3: The Album 93
contents, click the folder button near the left end of the
Movie Window title bar, or use the Toolbox Show
Project Bin menu command.
While open, the Project Bin appears as a panel in the
screen area usually allotted to the Album. A single tab
on the left side bears a folder icon identifying the panel
as the Bin, while tabs along the top provide access to
your project’s resources in four groups:
Videos: Like the corresponding section of the
Album, this tab can house video files of all kinds,
and allows previewing and selecting material in both
file and scene views.
Photos: Again like the Album section, this tab is for
your bitmapped image files, including digital photos
and frame grabs.
Audio: All types of music and sound files can be
stored here.
The Videos section of the Project Bin presents an
almost identical interface to that of the same section
of the Album, lacking only the folder navigation
controls. The checkbox at top left, ‘Show timeline
media/content’, allows you to temporarily hide items
that are already in use by your project.

94 Pinnacle Studio
Other: This tab is for miscellaneous resources –
classic titles, motion titles, disc menus and Montage®
themes.
Adding to the Bin
As noted above, every time you add content items to
your project, the items are also added to the Bin for
further use. You can also add items directly to the Bin
only, leaving for later their possible inclusion in the
project. If you like to begin your projects with a
“gathering” phase in which you assemble the needed
materials prior to editing, the Bin can significantly
streamline this task.
When new items are added, they are automatically
sorted into the appropriate Bin sections, and will be
available the next time the Bin is opened.
The items in the Bin are not new copies of the media
files concerned, but simply references to existing files,
so you can add as many as you like without worrying
about using excessive amounts of storage. If the actual
files corresponding to a Bin item is deleted or moved
from its location, it will no longer be available in the
Bin either.
To add one or more selected items to the Bin, use
any of these methods:
Drag items from the Album onto the Bin button. A
standard drag-and-drop mouse pointer confirms the
operation.
Drag media items from Windows Explorer and
similar applications onto either the Bin button, or the
Chapter 3: The Album 95
Bin itself if it is open. All media types supported by
Studio are allowed, and will be appropriately
classified.
Select the context menu command Add to Bin or Pin
to Bin on any Album item. “Pinning” applies only to
items that are already part of your movie project. An
item that is “pinned” to the Bin will not be removed
from there even if you delete it from the project.
Once an item is in the Bin, you can use the same
techniques for adding it to your project as you would
from the Album, by dragging the icon to the Movie
Window, or right-clicking and selecting Add to project
from the context menu.
A symbol in the top-right corner of an Album or Bin
icon shows both whether the item is currently used in
the project, and whether it has been explicitly added to
the Bin. See page 71 for details.
Removing from the Bin
As just noted, there is a distinction between items that
are added automatically to the Bin only because they
are used in your current movie project, and those that
you have added explicitly. “Pinned” items are those for
which both conditions are true.
To remove an automatically-added item, delete it
from the project.
To remove an item not in the project, click the
Remove from Project Bin command on the item’s
context menu in either the Album or the Bin.
To remove a pinned item, click the Unpin from
Project Bin command on the item’s context menu in
either the Album or the Bin, and also delete the item
from the project.
Chapter 4: The Movie Window 97
CHAPTER 4:
The Movie Window
The Movie Window, where you build your movie from
the raw materials in the Album, occupies the bottom
half of the screen in Studio’s Edit mode. To access the
Movie Window, first switch to Edit mode if you are not
already there:
The Movie Window title bar contains several important
controls and displays. The toolbox buttons at the left of
the title bar open the Video toolbox and the Audio
toolbox, which are discussed on page 108.
Next to the toolbox buttons is the button for the Project
Bin, represented by a folder icon. This button also
serves as a target for material dragged to the Bin from
the Album and from Windows Explorer. See “The
Project Bin” on page 92 for details.
To the right of the Bin button is a text area where the
project file name is displayed. Status and warning
messages are also displayed in this area when required.
The next controls relate to clip markers, which are like
bookmarks attached to clips in your project. In a new
project, the only visible clip marker control is the Add
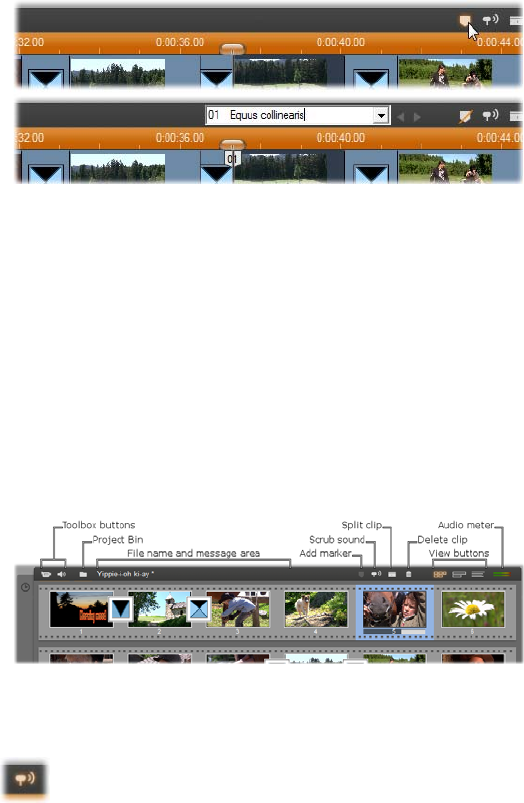
98 Pinnacle Studio
Marker button. When you add your first marker, more
controls appear.
The Add Marker button (top) creates a new clip
marker at the Timeline scrubber position. After you
add a marker to your project, controls for naming
and selecting them become visible (bottom). See
“Clip markers” on page 105 for full information.
Further still to the right are the Audio scrubbing, Clip
split and Clip delete buttons, then three view selection
buttons (see “Movie Window views” on page 101), and
finally a compact version of the Volume and balance
tool’s output level meter (see page 322).
Audio scrubbing button
By default, your project’s audio is previewed
during playback only. Studio’s audio scrubbing
feature, which is turned on and off by the loudspeaker
button, provides audio preview when you are scrubbing
through your movie as well.
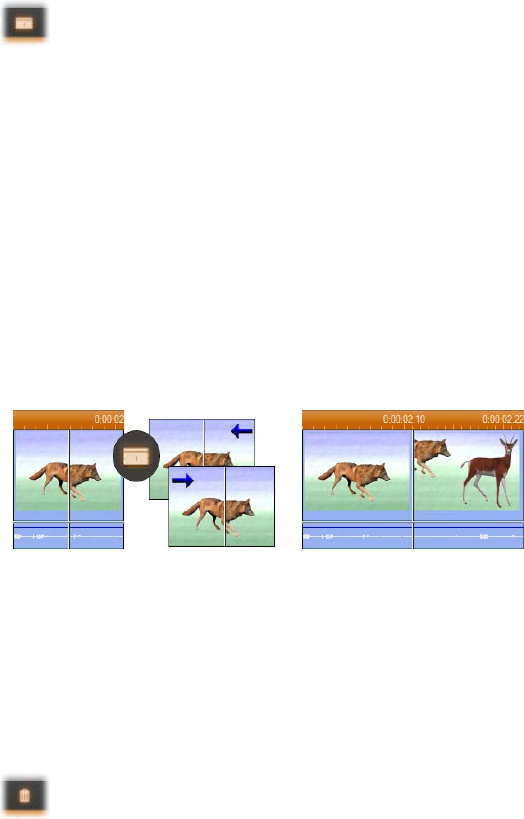
Chapter 4: The Movie Window 99
Audio scrubbing makes life much easier when making
editing decisions that depend on sound cues.
Split clip/scene button – the razorblade
Click this button to split the currently-selected
clip in the Movie Window, or the currently-
selected scene in the Album.
No information is lost. If the item is an Album scene, it
is split at the indicated point into two shorter scenes. If
the item is a clip in the Movie Window, it is duplicated
and automatically trimmed to the split point.
The razorblade button can be used in conjunction with
the track-locking buttons in the Movie Window’s
Timeline view to carry out special operations such as
insert editing, and edits in which the audio leads or lags
behind the video. See “Advanced Timeline editing” on
page 132.
Splitting a clip: The placement of the edit line in the
original clip determines the split point. When you
apply the razorblade tool, Studio duplicates the clip
and trims away the portion after the split point in the
first copy and up to the split point in the second.
Delete Clip button – the trashcan
This button deletes the currently-selected
content in any of the Movie Window views. By
default, when video clips on the main video track of
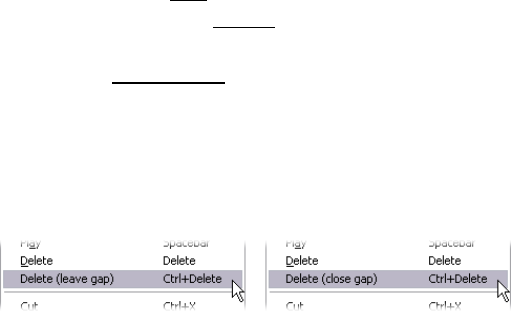
100 Pinnacle Studio
your project are deleted in any view, the gap in your
movie that would otherwise be created by the deletion
is automatically closed up, and clips on other tracks are
removed or shortened as required to keep everything in
sync.
If you delete clips on other tracks, the default behavior
is that gaps between them are not automatically
removed, so the timing of other clips is not affected.
If you press the Ctrl key while clicking the delete
button, or pressing the Delete key, the default behavior
for the current track is reversed. That is, on the main
video track, Ctrl+Delete leaves a gap when the clip is
removed, while on the other tracks, the gap on the track
is closed up. In neither case are other tracks affected.
You can also access the delete operations through the
right-button context menu for clips on the Timeline.
The delete options on the right-button menu for
Timeline clips are not the same for clips on the main
video track (L) as for those on other tracks (R). The
menus summarize the context-dependent keyboard
shortcuts.
Positioning: edit line, scrubbers
The current position is the frame showing in the Player
when you are working with a clip in the Movie
Window. In the Timeline view, it is indicated by the
edit line. The current position can be changed by
moving either the Timeline scrubber (to which the edit
line is attached) or the Player scrubber.
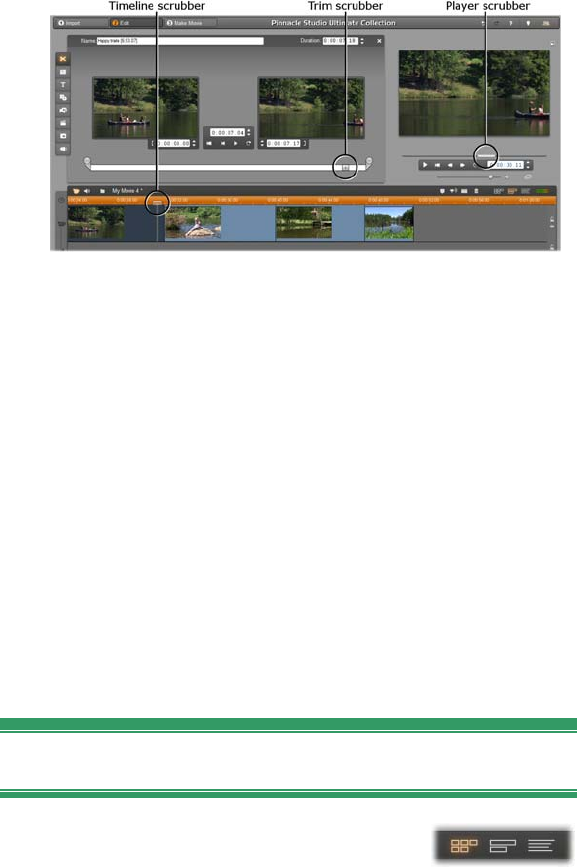
Chapter 4: The Movie Window 101
When the Clip properties tool is open, a third
scrubber, the trim scrubber, is available for
adjusting the current position within the clip during
trimming.
MOVIE WINDOW VIEWS
The Movie Window provides three different views of
your project: Timeline, Storyboard and Text. Select the
one you want to use by clicking the view selection
buttons in the upper right corner of the Movie Window.
Storyboard view
Storyboard view shows the order of
video scenes and transitions. It uses
thumbnail icons for quickly structuring a movie. You
can choose to work with large or small thumbnails with
the Show large storyboard thumbnails checkbox on the
Project preferences options panel.
102 Pinnacle Studio
Timeline view
Timeline view shows the positions and
durations of clips relative to the
Timescale. This view also displays up to eight tracks
on which you can place various types of clip:
Video, plus full-screen disc menus, titles
and graphics: The video track contains the
primary visual material in your production. See
Chapter 5: Video clips, Chapter 10: Still images and
Chapter 11: Disc menus for more information.
Original (or “synchronous”) audio: The
original audio track contains the audio that
was captured along with the video from your camera.
You can manipulate the audio clips on this track to
achieve various effects using insert-editing and split-
editing techniques. See “Insert editing” (page 134)
and “Split editing” (page 136) for more information.
Overlay video and audio: Video and images
placed on the overlay track can be used with
the Picture-in-picture and Chroma key tools
to give your video productions a professional
appearance. Original audio for overlay video
is stored on the linked audio track. See Chapter 8:
Two-track editing for details about the overlay track.
Title and graphic overlays: Images placed
on the title track will be rendered as overlays
upon the main video, with transparent backgrounds.
See Chapter 10: Still images and Chapter 11: Disc
menus for more information.
Sound effects and voice-overs: The audio
clips on this track are mixed with the original
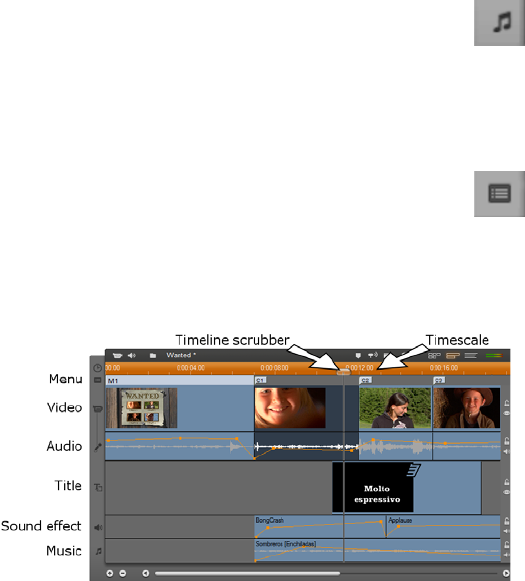
Chapter 4: The Movie Window 103
audio track and the background music track to create
the final soundtrack for your movie. See Chapter 14:
Sound effects and music for full information.
Background music: The background music
for your movies can be created to any desired
duration with the ScoreFitter tool (page 309) or
imported with the CD audio tool (page 308). Your
soundtrack can also make use of mp3 and other
music files (see page 303).
Disc menus, chapter marks and return-to-
menu links: This is an extra track that
appears above the video track whenever the movie
has at least one disc menu. See Chapter 11: Disc
menus for information.
Because many editing operations can be carried out
only in Timeline view, you should choose it whenever
extensive, detailed or advanced editing is required.
Track locking
The video track normally takes precedence over all
other tracks for trimming or deleting. This has several
consequences:
When you trim a video clip, clips running
simultaneously on other tracks are also trimmed.

104 Pinnacle Studio
When you delete a video clip, the time segment it
used is also removed from any parallel clips.
Clips that fall entirely within a deleted video clip’s
span are also deleted.
These behaviors can be bypassed when necessary with
a feature that allows you to “lock” any track indepen-
dently of the others, thereby excluding it from editing
and playback operations.
The padlock buttons along the
right edge of the Movie
Window, can be clicked to
toggle locking for the
corresponding track. Track-
locking gives Studio insert-edit
and split-edit capability (see
Chapter 5: Video clips).
Track muting and hiding
The audio tracks can be
individually muted with the
mute buttons at the right edge
of the Movie Window. These
buttons have the same function
as the mute buttons in the
Volume and balance tool. (See
page 322 for more
information.)
The equivalent operation for
video tracks is effected with
the hide buttons, which can be
used to temporarily omit a
track’s video from your project.
This is especially handy to see
what’s really going on while
editing overlay video.
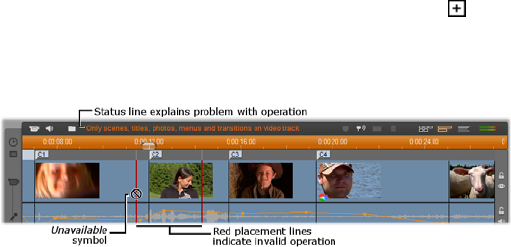
Chapter 4: The Movie Window 105
Placement feedback
Studio gives you several types of feedback about your
actions as you place clips in the Timeline view.
The status line: The status line area on the left of the
Movie Window title bar displays messages as you place
clips and perform other actions.
Placement symbols: While you are dragging a clip
into position on the Timeline, Studio provides feedback
to tell you whether the current placement of the clip is
valid. The mouse pointer shape and the colors of the
vertical placement lines indicate what you can and
cannot do.
For example, if you attempt to drag a sound onto the
video track, the placement guidelines turn from green
to red, the mouse pointer changes from “copy” to
“unavailable”, and the status line tells you, “Only
scenes, titles, photos, menus and transitions on video
track.”
Green placement lines with the “copy” pointer mean
that an action is valid; red placement lines with the
“unavailable” pointer show that it is not.
Clip markers
Studio’s straightforward system of clip markers can
simplify navigation within a project, especially one that
is long or complex.
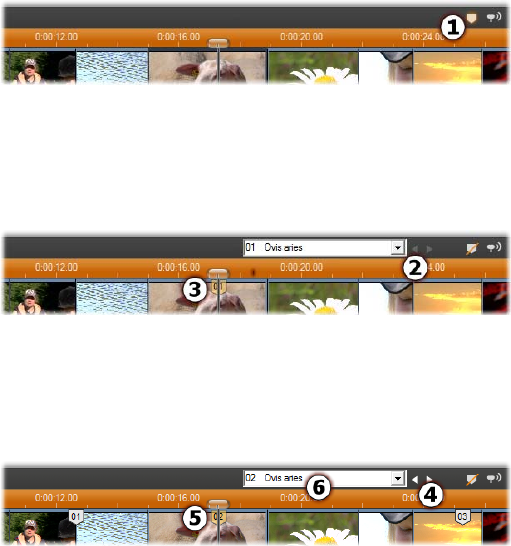
106 Pinnacle Studio
Markers can also be used to define start and end points
for outputting a portion of your movie as a file or to the
Web. See “Create between markers” on page 339 for
details.
Controls relating to clip markers appear in the Movie
Window title bar. In a new project, the only visible
control in the group is the add marker button. The
remaining controls appear only after the first marker
has been added.
In a new project, the only visible clip marker control
is the Add Marker button . Clicking the button (or
pressing your ‘M’ key) creates a marker at the
position of the Timeline scrubber.
Once a marker has been added, the Add Marker
button changes to Delete Marker, and the remaining
controls appear . Notice marker tab ‘01’ at the
scrubber position .
As more markers are added, the Previous Marker
and Next Marker buttons are enabled as needed .
Studio renumbers markers to keep them in
sequence , but leaves unchanged the name you
provided, if any .
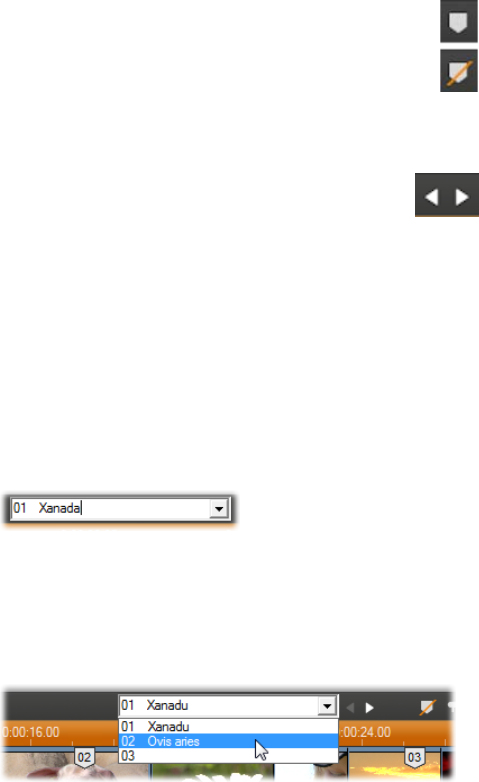
Chapter 4: The Movie Window 107
A clip marker represents a particular frame in a
particular clip. Even if that clip is moved around within
the project, or trimmed, the anchor location remains
unchanged. However, the marker itself can be moved,
even to a different clip, by dragging it with the mouse.
The clip marker controls include:
Add marker, Delete marker: In Timeline
view, the add marker button is enabled
whenever a clip is selected, provided there is
not already a marker at the scrubber position.
If a marker is present, the delete marker button
appears instead.
Previous marker, Next marker: These
buttons allow you to step through the
markers in your project. Unlike the add marker and
delete marker buttons, these buttons are enabled in
all Movie Window views, not just Timeline view.
Clip marker title: If there is a clip marker at the
Timeline scrubber position, its number and name are
displayed in this text field (otherwise the field is
uneditable). The displayed marker number is
assigned automatically, and cannot be changed, but
the optional name can be modified at will.
Clip marker title list: Click the arrow button at the
right of the clip marker title to open this list, which
shows the number and name of each marker in your
project. Selecting a marker moves the Timeline
scrubber to the corresponding position.
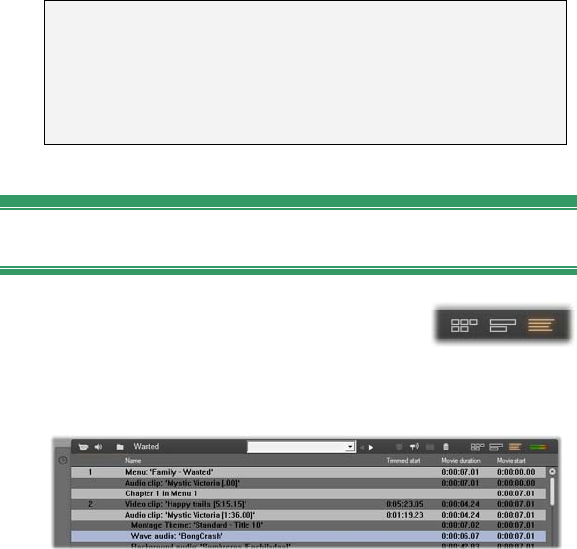
108 Pinnacle Studio
Note: Once you have more than a very few markers in
your project, managing them becomes simpler if you
give them meaningful names. However, names are
optional and, as noted above, Studio helps out by
automatically keeping the list in time order.
Text view
The Movie Window Text view is a list
showing the start and end times of
clips, as well as their duration. In addition, custom
names for clips are visible in this view.
THE TOOLBOXES
The toolboxes provide a convenient point-and-click
interface for editing operations – adding clips to your
movie, modifying existing clips and applying special
effects. Studio provides separate toolboxes for video
and for audio operations.
The toolboxes are available only in Edit mode. They
are opened and closed with the buttons at the top left of
the Movie Window.
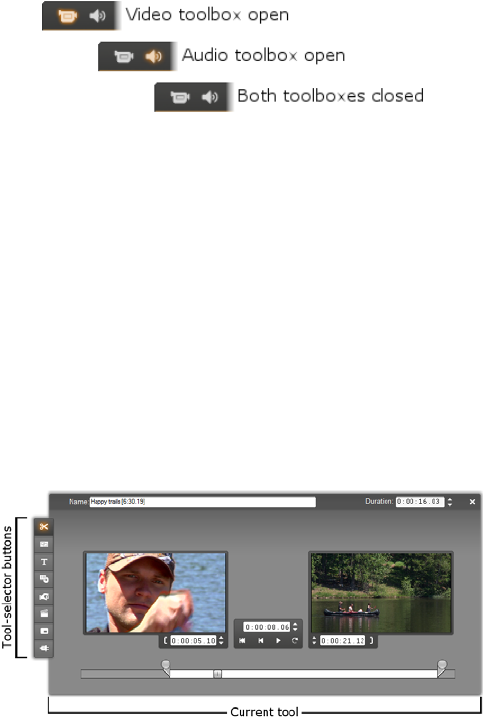
Chapter 4: The Movie Window 109
Select the toolbox you want to open by moving your
cursor over the icons. The individual buttons highlight,
indicating which toolbox will open when you click.
The Album is then replaced by the toolbox display,
which contains two main areas:
Tool selector buttons in a panel on the left. Clicking
one of these opens the corresponding tool.
The currently-selected tool on the right. Double-
clicking a clip in the Movie Window also displays
the corresponding tool (except for title clips, which
are opened directly in the appropriate title editor
when you double-click).
All the tool-selector buttons, except the top one in each
set, open specialized tools. The top button in both
toolboxes is the Clip properties tool. It displays a tool
appropriate for trimming and otherwise editing the type
of clip currently selected in the Movie Window.
The title editors
Studio includes a pair of powerful tools that are not
directly accessed through the toolboxes. These tools,
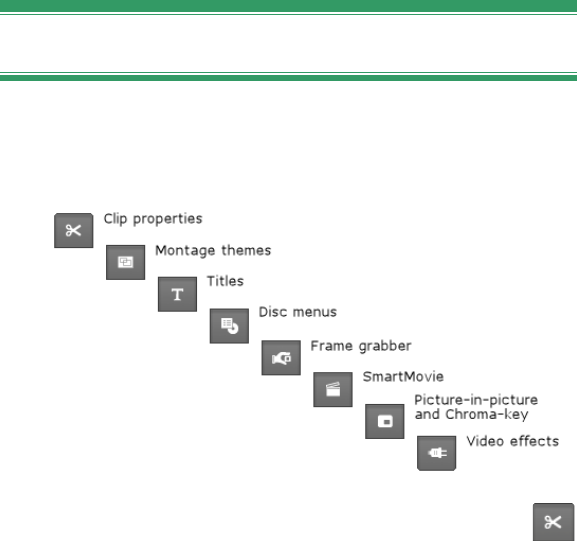
110 Pinnacle Studio
the Classic Title Editor and the Motion Titler, let you
combine text, images and other graphic resources to
make titles and disc menus for your Studio productions.
Access the title editors through the Title and Disc menu
tools, or with the Go to Classic Title/Menu Editor and
Go to Motion Title Editor commands from the right-
button context menu in the Movie Window. See
Chapter 12: The Classic Title Editor, and Chapter 13:
The Motion Titler for full information.
The Video toolbox
The seven tools in this toolbox modify or create visual
clip types, including video clips, themes, titles, still
images and disc menus.
Clip properties: The Clip properties tool adjusts
the start and end times of any type of clip. This is
called “trimming”. The tool also allows you to type in a
descriptive name for the clip. The tool also presents
additional interface components appropriate to the type
of clip being edited. See “Trimming with the Clip
properties tool” on page 128 for more information.

Chapter 4: The Movie Window 111
Themes: The Theme editor tool lets you
customize clips created from “theme templates”.
The tool includes a mini-Album from which you can
import video and photos to be used in the theme clip.
Some theme templates also provide text captions or
other parameters that allow customization. See Chapter
6: Themes and theme editing for more information.
Titles: This tool lets you edit the names and
lengths of titles. Depending on the type of title
you select, the Edit Title button provides access to the
Classic Title Editor or the Motion Titler, where you can
change the text and appearance of the title. See Chapter
12: The Classic Title Editor, and Chapter 13: The
Motion Titler for more information.
Disc menus: The Disc menu tool has a number
of controls for editing the links between the
buttons on a disc menu and entry points into your
movie called chapter marks, which are represented on
the menu track in the Movie Window. The Edit Menu
button opens the Classic Title Editor, where you can
modify the visual appearance of a menu. See “The Disc
menu tool” on page 241 for more information.
Frame grabber: This tool takes a snapshot of a
single frame from your movie. You can use the
grabbed frame in your movie, or save it for use in other
applications. See “The Frame Grabber” on page 225 for
more information.
SmartMovie: This tool automatically combines
your source footage with the digital song file of
your choice to create a music video in any of a variety
of styles. See “The SmartMovie music video tool” on
page 140 for more information.
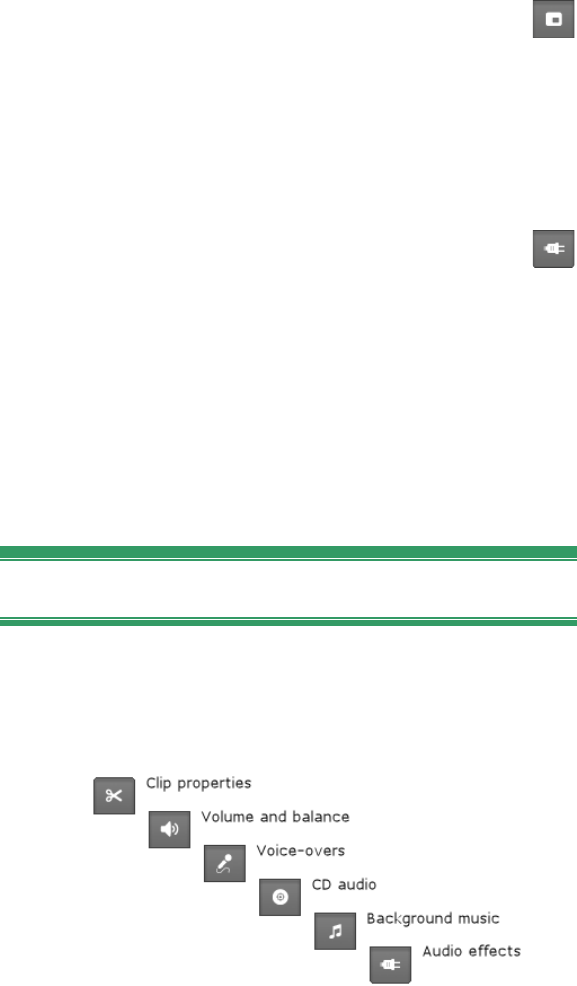
112 Pinnacle Studio
PIP and chroma key tool: The PIP and Chroma
Key controls occupy separate tabs on the same
tool window, so this can be thought of as really two
tools in one. It provides an alternative, graphical
interface to the Picture-in-picture and Chroma key
effects. See “The Picture-in-picture tool” (page 190)
and “The Chroma key tool” (page 196) for more
information.
Video effects: Studio provides numerous plug-in
video effects with this tool. Each video clip,
theme clip or still image in your project can use effects,
whether alone or in combination.
Along with its basic library of useful effects, Studio
provides some “locked” premium effects that you can
try out. See Chapter 7: Video effects for details about
this tool. For information about purchasing premium
content for Studio, including varied collections of video
effects, see “Expanding Studio” on page 12.
The Audio toolbox
The six tools in this set operate on or create audio clips
– “original” audio, voice-overs, sound effects and other
audio files, CD tracks and ScoreFitter background
music.
Chapter 4: The Movie Window 113
Clip properties: The Clip properties tool lets
you adjust (“trim”) the start and end times of any
type of clip. You can also enter a descriptive name for
the clip to replace the default name if desired. (Clip
names are displayed when the Movie Window is in
Text view.) The tool’s other controls vary depending
on the type of clip. See “Trimming with the Clip
properties tool” on page 314 for more information.
Volume and balance: This tool gives you
master volume controls for each of the three
audio tracks: original audio (audio captured with
video), sound effects and voice-overs and background
music. It also enables you to mute any or all of the
tracks, and to add real-time volume fades. Use the
balance and surround control to position each track
independently of the other two in a one-dimensional
stereo or two-dimensional surround-sound space.
When the overlay track is open, the tool provides a
fourth set of controls, which affect the overlay audio
track. See “The Volume and balance tool” on page 322
for more information.
Availability: Surround sound is supported in Studio Ultimate only.
Record voice-overs: To record a voice-over,
simply click the Record button and begin
speaking into your microphone. See “The Voice-over
tool” on page 311 for more information.
Add CD audio: Use this tool to add tracks, in
whole or in part, from an audio CD. See “The
CD audio tool” on page 308 for more information.
Background music: This tool lets you add
background music using ScoreFitter, Studio’s
powerful music generator. Choose a style, song, and

114 Pinnacle Studio
version. Studio will create a musical soundtrack that
matches the duration of your movie. See “The
Background music tool” on page 309 for more
information.
Audio effects: This tool lets you apply plug-in
effects to any audio clip. The popular VST
standard for audio plug-ins is supported, enabling you
to augment your library with add-on and third party
effects. A configurable noise reduction filter is supplied
as a standard effect. Effects available in Studio
Ultimate also include both graphic and parametric EQ,
reverb, chorus and others.
Some “watermarked” premium effects may also be
included for you to try out, with others available
through the Avid web-site by clicking the More
effects… “category” in the audio effects browser. See
Chapter 15: Audio effects for details about this tool.
For information about purchasing premium content for
Studio, see “Expanding Studio” on page 12.

Chapter 5: Video clips 115
CHAPTER 5:
Video clips
The cornerstone of most Studio video projects is the
Album section containing your captured video scenes.
To create your edited movie, you drag scenes from the
Album into the Movie Window, where they are treated
as editable video clips.
This chapter explains how to set the “in” and “out”
(start and end) points for each clip. The Movie
Window’s editing interface makes this “trimming”
process simple, rapid and precise. The methods covered
in this chapter for trimming video (“Trimming video
clips”, page 123) can for the most part also be applied
to the other types of clip (such as titles and sound
effects) that are covered in later chapters.
A later section of the chapter covers more advanced
editing techniques, including split edits and insert edits,
that you can use to give your movies a more
professional look. See “Advanced Timeline editing” on
page 132.
And finally we’ll explore SmartMovie, Studio’s
automatic movie generator. SmartMovie intelligently
combines a music soundtrack with your video footage
to create a beat-synchronized music video, or with a
series of still images to create a slideshow. Both modes
support a variety of style options.

116 Pinnacle Studio
VIDEO CLIP BASICS
The first step in creating a movie is to introduce some
video scenes from the Album into the Movie Window,
where they become editable clips. At some point you
will probably also add some transitions, titles, audio
and other extras, but a set of video scenes is the starting
point for just about any project.
This section explains how to add scenes to your movie,
and how to work with scenes from multiple capture
files. It also covers some interface features that provide
useful feedback as you work.
Adding video clips to your movie
There are two ways to add a video clip to your movie:
Drag and drop: Drag a scene from the Video Scenes
section of the Album and drop it into the Movie
Window. This is normally the easiest and quickest way
to put together a rough cut of your movie. You can drag
multiple scenes simultaneously if you wish.
The clipboard: The standard clipboard operations
(Cut, Copy and Paste) can be used with video clips in
the Movie Window. The Copy operation works on
Album scenes also.
When a scene or clip is pasted into the Movie Window,
it is inserted at the first clip boundary starting at the
edit line position. You can use the standard keyboard
shortcuts for clipboard operations (Ctrl+X for cut,
Ctrl+C for copy, Ctrl+V for paste), or select the desired
operation from the right-button menu.

Chapter 5: Video clips 117
When the Movie Window is in Timeline view, you can
drop a video scene or clip onto any of the following:
The main video track. If the clip has associated
audio, it is added to the original audio track. This
video will serve as the background for any overlay
video or titles on the lower Timeline tracks.
The overlay track. Video on this track is
superimposed on the contents of the video track. The
picture-in-picture and chroma key effects are used to
make a portion of the overlay frame transparent so
that some of the main video can be seen.
The title track. If the overlay track is hidden,
dropping a video clip on the title track causes the
overlay track to open and the clip to be placed upon
it. In other versions of Studio, or when the overlay
track is already displayed, the title track does not
accept video clips.
The sound effects track or the background music
track. Attempting to drop a video clip on either of
these tracks actually drops the clip’s original audio.
Working with multiple capture files
For some projects you may want to incorporate scenes
from multiple source tapes, or from different capture
files made from one tape. To achieve this, load in each
of the files in turn and drag whichever scenes you want
from each file into your movie.
To use multiple capture files:
1. Drag scenes from the first capture file into the
Movie Window.

118 Pinnacle Studio
2. Using the dropdown list or the folder button in the
Video Scenes section of the Album, open the
second capture file. Studio displays scenes from
only the current file in the Album. See “Opening a
video file” on page 73 for detailed information on
this step.
3. Drag scenes from the second captured file into the
Movie Window. Continue in this manner until you
have gone through all the files.
Handling multiple capture files is made easier by use of
the Project Bin, where the files whose scenes you add
to your movie are automatically included. See page 92
for details.
Mixing frame formats
Because any given movie can be in only one of the
standard (4:3) format and the widescreen (16:9) format,
Studio does not let you mix frame formats in the Movie
Window. By default, the first video clip you add to a
movie determines the movie’s frame format, and later
clips are modified as necessary to conform to it. See
“The project video format” below for further
information.
The project video format
The video scenes you add to a project need not all
originate with the same device or be in the same file
format. They need not even have the same frame size,
aspect ratio or frame rate.
When video is played back within Studio, however, a
common frame format must be used. The Project
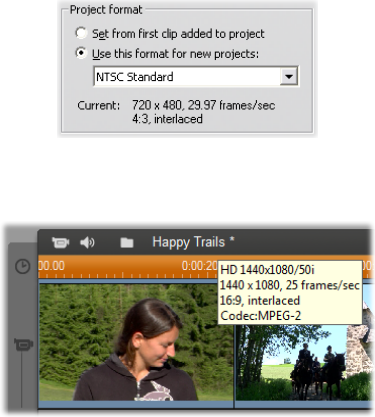
Chapter 5: Video clips 119
format box on the Project preferences options panel
lets you specify the format for new projects either
explicitly (e.g. “NTSC Widescreen”) or implicitly,
from the format of the first clip you add to the project.
The current project format is displayed as a tooltip over
the project title in the Movie Window.
The project format applies to all video and image clips
in the Movie Window, and to the preview of those clips
in the Player. Visual content in the Album, such as your
captured video scenes, is shown by default in its
original format, whether or not that matches the project
format.
If you want to avoid black bars (“letterboxing”) in your
project video, but still want to use scenes shot in the
wrong aspect ratio, there are several approaches you
can consider:
Use the Aspect ratio commands on the Album menu.
These let you stretch the Album scenes to conform to
the proportions of the project frame, at the cost of
some distortion. Please see “Video aspect ratios” on
page 75 for more information.
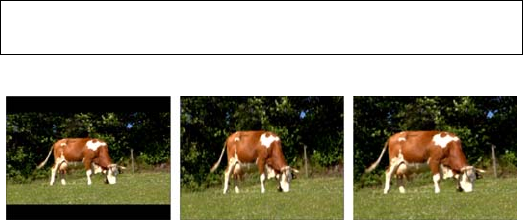
120 Pinnacle Studio
The Zoom Picture to Full Frame context menu
command for clips in the Movie Window expands
the central portion of the original image enough to
fill the frame in the project format. Proportion is
maintained with this method, but some material is
lost.
For a fine-tuned version of the same approach, use
the 2D Editor effect with keyframing to create a
“pan and scan” version your video. Studios often use
this technique to make their movies fit a standard
television screen when they are transferred to
videotape or DVD. A portion of each frame is still
lost, but you have some control over which portion
that is. Careful tracking of the action with the aid of
keyframing generally allows you to obtain
acceptable results despite this problem.
Availability note: The 2D Editor effect and the keyframing feature
are provided in Studio Ultimate only.
Compensating for source video in the “wrong”
aspect ratio by adding black bars (L), stretching to
the full frame (C), and zooming (R). Each method
has its own drawbacks.
Background rendering
The project format is also used as the target format for
rendering, which is the process of generating video for
footage in which HFX transitions, effects or other
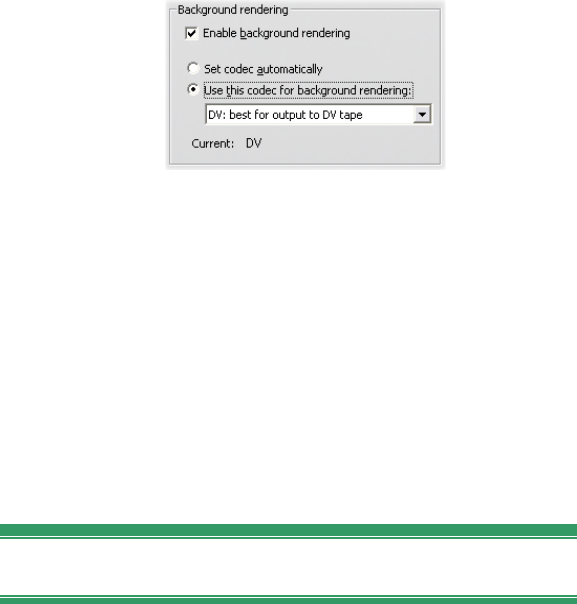
Chapter 5: Video clips 121
computationally demanding features are used. Until
such video has been rendered, it may not display
smoothly and with full detail during preview.
Studio is able to carry out rendering behind the scenes
while you work. This feature is controlled from the
Background rendering box on the Video and audio
preferences options panel.
Following the dialog’s advice regarding the codec to
use for background rendering may help reduce the
rendering time when your final movie is output.
If you are planning to preview your video on an
external device (Studio Ultimate only), you may need
to set the project format and the background rendering
codec to match that device. For instance, if you are
previewing on an analog monitor plugged into your DV
camcorder, you should do your background rendering
in DV.
Interface features
Studio provides a variety of visual cues regarding the
video clips in the Movie Window:
When a clip is added to the Movie Window, a green
checkmark appears on the Album’s icon for the
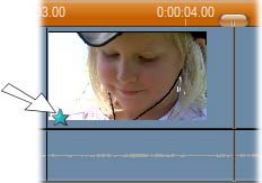
122 Pinnacle Studio
corresponding scene. The checkmark remains as
long as any clip in the Movie Window belongs to
that scene.
To see the original location of a clip in your source
video, use the Find Scene in Album command on the
right-click menu for Movie Window clips. Studio
highlights the Album scene from which the selected
clip is drawn. To go the other way, use Album
Find Scene in Project to show how a particular
Album scene is used in your current project.
When neighboring scenes from the Album are placed
in sequence in the Movie Window, the border
between the clips is displayed as a dotted line. This
is to help you keep track of your clips, and does not
affect how they can be manipulated in the Movie
Window.
In Timeline mode, any special effects you have
applied to a clip are indicated by small icons along
the bottom of the clip. These correspond to the effect
groups shown on the Video effects and Audio effects
tools. You can open the tool for parameter editing by
double-clicking any of the icons.
The star icon below this video clip shows that at least
one effect in the “Fun” category has been applied.

Chapter 5: Video clips 123
TRIMMING VIDEO CLIPS
In general, captured video scenes contain more material
than you actually require for your movie. “Trimming”
– the process of adjusting the in and out points of a clip
to remove unwanted footage – is a fundamental editing
operation.
No data is lost by trimming: Studio sets new start and
end points for the clip in the Movie Window, but the
source of the clip – the original Album scene – remains
intact. This means you can always reset clips to their
original state, or select different trim points.
Studio offers two ways to trim any clip (video scenes,
transitions, titles, still images, audio clips and disc
menus):
Directly on the Timeline (see “Trimming on the
Timeline using handles” below).
Using the Clip properties tool (see “Trimming with
the Clip properties tool” on page 128).
A video clip can be trimmed to any desired in and out
points within the limits of the original scene.
Trimming on the Timeline using handles
The quickest way to trim is by dragging the edges of
clips directly on the Timeline. Watch the Player as you
trim, so you can find the frame on which you want to
begin or end.
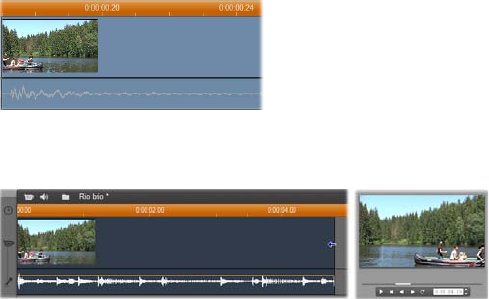
124 Pinnacle Studio
Let’s first consider the simplest trimming case, in a
movie with only one clip. Then we’ll turn to the more
usual situation of trimming a single clip that is
surrounded by other clips.
To trim a single clip on the Timeline:
1. Delete all but one clip from the Timeline. If the
Timeline is empty, drag a scene in from the Album.
2. Expand the Timescale to make fine adjustments
easier.
Position the mouse pointer anywhere on the
Timeline except directly over the edit line. The
pointer becomes a clock symbol. Click-drag it to
the right to expand the Timescale.
This illustration shows maximum expansion, where
each tick mark represents a single frame:
3. Position your mouse pointer over the right edge of
the clip. The pointer becomes a left-pointing arrow.
4. Click-drag to the left while keeping an eye on the
Player, which updates continuously to show the last
frame in the trimmed clip.
As you shorten the clip, the arrow cursor becomes
two-directional, indicating that the clip edge can be
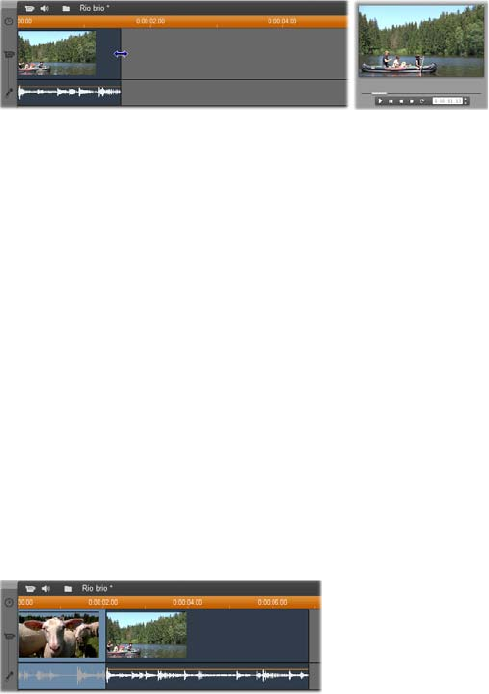
Chapter 5: Video clips 125
dragged both left and right. You can reduce the clip
to as little as a single frame, or increase it up to the
end of the source scene.
5. Release the mouse button. The clip is now trimmed.
Multiple clips
The secret to trimming a clip when multiple clips are
on the Timeline is that you must first select the clip to
be trimmed by clicking on it with the mouse.
To trim with multiple clips on the Timeline:
1. Set up the Timeline with two short clips.
2. Adjust the Timescale until the clip you want to
adjust is a convenient size for editing.
3. Click the second clip. The video track should now
look something like this:
You can trim the right-hand edge of the clip just as
in the single-clip example above. As you do so, the
last frame of the clip is displayed in the Player. As
long as the second clip remains selected, you can
continue to trim more video by dragging the edge to
the left, or restore some of the trimmed video by
dragging the edge to the right.
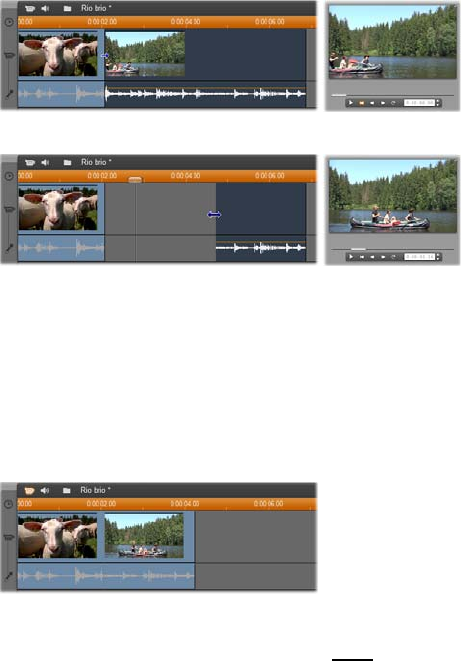
126 Pinnacle Studio
4. With the second clip still selected, move your
mouse pointer over the left edge of clip until the
pointer changes to a right arrow.
5. Drag the left edge of the second scene to the right.
As you drag, the first frame of the clip is displayed
in the Player. As long as the clip remains selected,
you can continue to trim more video by dragging
the edge to the right, or restore some of the trimmed
video by dragging the edge to the left.
6. Release the mouse button. The clip you trimmed
snaps back against the right edge of the first clip.
Gaps and fills: Trimming with the Ctrl key
As we have seen in the example above, when you
shorten a clip on the video track, the clip and any clips
to the right of it move leftwards as necessary so that no
gap is left. At the same time, clips on other tracks are
shortened to keep the whole Timeline in sync. When
you trim a clip on any other track, however, gaps are
not automatically closed up, and no other track is
affected.

Chapter 5: Video clips 127
This default trimming behavior simplifies editing under
most circumstances, but Studio also gives you a way to
invert the behavior when needed. If you press the Ctrl
key before you begin trimming a clip on the video
track, neither that clip nor any other will be
repositioned, and gaps are not closed up. There is no
effect on other tracks.
Meanwhile, using Ctrl when trimming clips on other
tracks again inverts the normal behavior. The clips on
the track will close in to fill any gap left by the trim.
Clips on tracks besides the one being trimmed are again
unaffected.
Note: See page 99 for a description of the parallel
behavior of Ctrl when deleting clips.
Clip-trimming tips
If you are having difficulty manipulating the edges of
clips during trimming, try the following:
Verify that the clip you wish to trim is selected, and
that it is the only one selected.
Expand the Timescale until it is easier to make fine
adjustments.
Avoid expanding the Timescale too far, which makes
clips appear very long. If that happens, undo until the
scale is the way you want it; or reduce the scale by
dragging it towards the left; or select an appropriate
value from the Timescale’s context menu.

128 Pinnacle Studio
Trimming with the Clip properties tool
Although it is possible to trim video clips directly
on the Timeline with full frame accuracy, rapid,
precise trimming is often easier to achieve with the
Clip properties tool. To access this tool, select the clip
you want to change, then use the Toolbox Modify
Clip Properties menu command, or click one of the
toolbox buttons at the top left of the Movie Window.
(Clicking the same button a second time will close the
tool.)
In the case of video clips – in fact, any clips other than
titles – you can also open and close the Clip properties
tool by double-clicking the clip in any Movie Window
view.
The Clip properties tool can be used to modify any
kind of clip. It offers an appropriate set of controls for
each type.
The Name text field: For a video clip, most of the clip
property controls are for trimming. The only exception
is the Name text field, which lets you assign a custom
name to the clip to replace the default one assigned by
Studio.
The Name field is provided on the Clip properties tool
for all clip types. Clip names are used by the Movie
Window’s Text view, and can also be viewed as fly-by
labels when your mouse moves over clips in the
Storyboard view.
Preview areas: Separate preview areas show the in and
out frames of the trimmed clip, together with a counter

Chapter 5: Video clips 129
and jog buttons. The layout of each preview area is
similar to that of the Player during normal editing.
Setting playback position: A scrubber control across
the bottom of the tool lets you set the playback position
anywhere within the clip. You can also set the playback
position using the counter and jog buttons located
between the two preview areas.
Using the counters: The positions reported by all three
counters are relative to the beginning of the clip, which
is position 0:00:00.0. As with the counter on the Player,
you can adjust the counters in the Clip properties tool
by clicking in one of the four fields (hours, minutes,
seconds, frames) to select it, then using the jog buttons.
When none of the fields is explicitly selected, the jog
buttons apply to the frames field.
Transport controls: While the Clip properties tool is
in use, the transport controls in the center area
substitute for those that normally appear on the Player.
These special transport controls include a Loop
play/Pause button that can be used to cycle
repeatedly through the trimmed portion of the clip
while the trim points are being adjusted.
Setting the trim points: The left bracket button
beside the counter in the left preview area, and the right

130 Pinnacle Studio
bracket button beside the counter in the right
preview area, set their respective trim points to the
current position.
You can also adjust either trim point by:
Entering a value directly into its counter
Adjusting a counter field with the jog buttons
Dragging the corresponding trim caliper
The Duration text field: This field shows the length of
the trimmed clip in hours, minutes, seconds and frames.
If you modify the value, either by editing the numbers
directly or by clicking the associated jog buttons, the
effect is to change the out point of the clip. Of course,
you cannot reduce the duration to less than a frame, or
increase it beyond the limits of the original video scene.
Usage tip: If you want to switch from trimming one
clip on the video track to trimming another, just click
on the new clip while the Clip properties tool remains
open, or drag the Timeline scrubber to the new clip.
Resetting trimmed clips
If you change your mind about a particular trim
operation (or group of operations) after previewing,
either use the Undo button (or Ctrl+Z) or manually
reset the trimmed clip using one of these methods:
Drag the clip’s right edge directly on the Timeline
until it stretches no further,
In the Clip properties tool, drag the trim calipers to
the ends of the clip.

Chapter 5: Video clips 131
SPLITTING AND COMBINING CLIPS
If you want to insert one clip on the video track into the
middle of another clip, split the latter into two parts
then insert the new item. “Splitting” a clip actually
results in it being duplicated. Both clips are then
automatically trimmed so that the first ends at the split
point and the second begins there.
To split a clip in Timeline view:
1. Choose the split point.
You may use any method that adjusts the current
position, such as moving the Timeline scrubber,
clicking Play and then Pause, or editing the counter
value in the Player.
2. Either right-click within the clip you wish to split
and select Split Clip from the pop-up menu; or,
make certain the edit line is positioned where you
wish to split the clip, and click the Split clip/scene
(razorblade) button (see page 99).
The clip is split at the current position.
To restore a split clip:
Use the Undo button (or press Ctrl+Z). Even if you
have performed other actions since you split the clip,
the multilevel undo allows you to step back as far as
needed. Or,
If undoing is not desirable because of intervening
actions that you don’t want to discard, you can
replace both halves of the split clip with the original
from the Album. Or,
Delete one half of the split clip, and trim out the
other.

132 Pinnacle Studio
To combine clips in the Movie Window:
Select the clips you wish to combine, then right-click
and choose Combine Clips.
The operation is allowed only if the combination of
clips will also be a valid clip – that is, a continuous
excerpt of the source video. On the Timeline, clips that
can be combined meet along a dotted edge.
ADVANCED TIMELINE EDITING
Note: Other approaches to the kinds of edit described here, making
use of the overlay track, are covered in Chapter 8: Two-track editing.
During most editing operations, Studio automatically
keeps the clips on the various Timeline tracks
synchronized. For instance, when you insert a scene
from the Album onto the video track, the relative
positions of all clips to the right of the insertion remain
unchanged.
Sometimes, though, you might like to override the
default synchronization. You might want to insert a
new video clip into your project without displacing any
clips of other types. Or you might want to edit video
separately from its accompanying original audio – a
valuable technique with several variations, discussed
below.
Such special edits are possible using the track lock
buttons along the right edge of the Movie Window in
Timeline view. Each of the standard tracks (all except
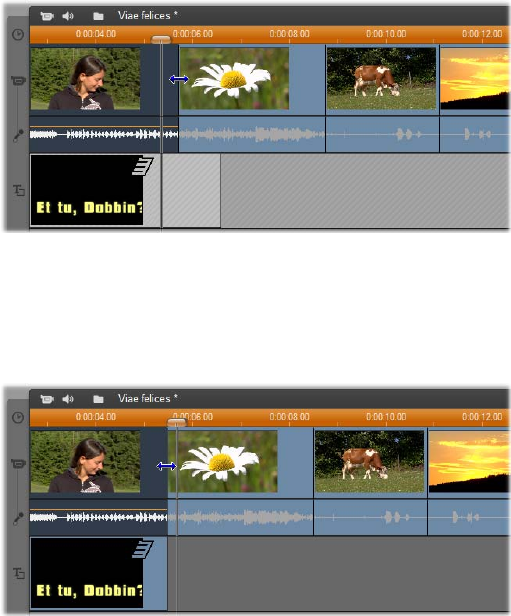
Chapter 5: Video clips 133
the menu track) provides a lock button. See “Track
locking” on page 103 for more information on track
locking.
A locked track is grayed out in the Timeline view,
indicating that the clips on the locked track cannot be
selected or edited in any of the three views; nor are
they affected by editing operations on unlocked tracks.
Apart from the menu track, any combination of tracks
can be locked.
Locking the title track, for example, prevents the
duration of a title from being changed even when you
trim clips on the main video track at the same time
index.
When the title track is unlocked, trimming the main
video clip above it automatically trims the title.

134 Pinnacle Studio
Insert editing
In ordinary Timeline editing, a video clip and the
original audio that was captured with it are treated as a
unit. Their special relationship is symbolized in the
Movie Window by the line connecting the video track
indicator with the original audio track indicator,
showing that the latter is dependent on the former.
The track lock buttons make it possible to deal with the
two tracks independently for operations like insert
editing, which typically means replacing part of a clip
on the video track while the original audio track
continues uninterrupted.
Note: Insert editing may also be carried out on the overlay video and
audio tracks, using analogous methods to those described here. See
Chapter 8: Two-track editing for details.
For instance, in a sequence that shows someone
recounting a story, you might wish to insert a shot of an
audience member smiling (or sleeping!) without
breaking away from the main audio.
To perform an insert edit on the video track:
1. In the Timeline view of the Movie Window, click
the original audio track’s padlock button to lock
the track.
The lock button is highlighted, and the track
itself is grayed to show that its contents will not
be affected by editing operations.
2. Clear space on the video track for the video clip you
want to insert. Position the Timeline scrubber at the
point you want the insertion to start and use the

Chapter 5: Video clips 135
Split clip/scene button. Now move to the point
where the insertion should end and again split the
clip. Finally, delete the portion of video that will be
replaced by the insertion.
Because the audio track is still intact, having been
locked, the video to the right of the insertion point
does not move leftwards to fill the gap you have
made in the Timeline, for the video and audio
would then no longer be synchronized. If you were
to preview your video now, you would see a black
screen as the gap portion played back, but the
soundtrack would be normal.
3. Now all that remains is to place the clip you want to
insert. Drag the clip (whether from the Album, the
Project Bin, or elsewhere on the Timeline) into the
hole in the video track that you’ve just opened up.
If the inserted clip is too long for the space you
created it is automatically trimmed to fit the space.
You can adjust the trimming with the Clip
properties tool.

136 Pinnacle Studio
Insert editing on the original audio track
The converse insert-editing operation, in which a sound
clip is inserted into the original audio track over
unbroken video, is needed less often but is also readily
performed in Studio.
The procedure is analogous to the one for inserting
video: simply reverse the roles of the two tracks at
every step.
Split editing
In “split editing”, a clip’s audio and video are
separately trimmed so that the transition to one occurs
before the transition to the other.
Note: Split editing may also be carried out on the overlay video and
audio tracks, using analogous methods to those described here. See
Chapter 8: Two-track editing details.
In an “L-cut”, the video precedes its sync audio; in a
“J-cut”, the audio comes first.
Tip: For faster, more precise trimming, you may find it
helpful to have the Clip properties tool open when
following the procedures in this section. To open the
tool, just double-click one of the video clips before you
begin.
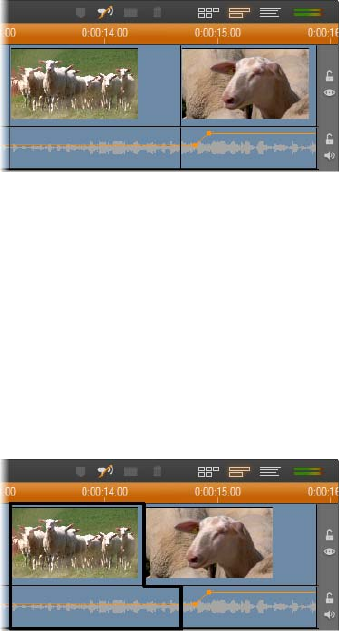
Chapter 5: Video clips 137
The L-cut
In an L-cut, the cut to new video comes before the cut
in the audio.
Imagine a videotaped lecture in which the video
periodically cuts away from the speaker to show travel
or nature scenes illustrating the lecture topic.
Audio and video cut simultaneously.
Instead of cutting the audio and the video
simultaneously, you might decide to let the speaker’s
voice overlap into the following scene. This makes it
clear to the audience that the new scene they are now
watching illustrates whatever explanation the speaker
has been providing.
Notice that the video and audio clip boundaries in the
completed cut form an L-shape.
Audio cuts after video. The resulting “L” shape is
outlined in this illustration.
There are many effective uses of this technique. It can
be considered whenever the second clip’s video serves
to illustrate the first clip’s audio.
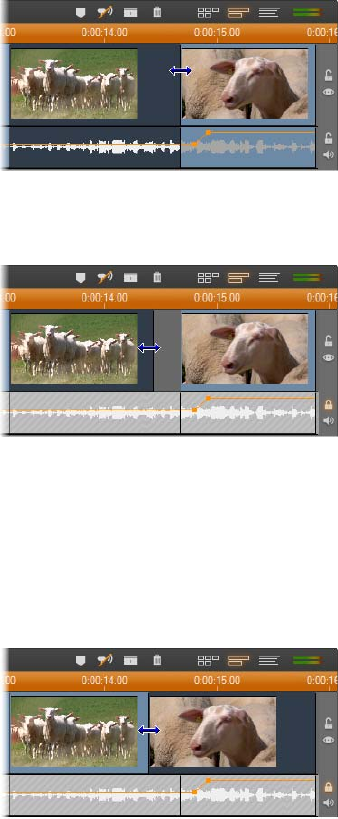
138 Pinnacle Studio
To perform an L-cut:
1. Adjust the Timeline so you can easily count off the
number of frames or seconds you want to overlap.
2. Select the left-hand clip and trim its right edge to
the point where you want the audio to end.
3. Lock the audio track. Now drag the right-hand edge
of the same clip’s video leftward to the point where
the following clip’s video should start.
4. With the audio track still locked, drag the second
clip’s video to the left until it meets the original
clip.
If there isn’t enough excess video at the start of the
second clip to make this trim possible, you will first
need to trim off a sufficient amount from both its
video and audio then try again.
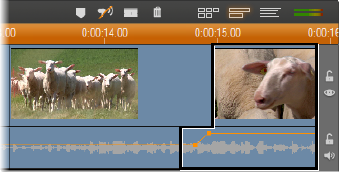
Chapter 5: Video clips 139
5. Unlock the audio track.
The video now cuts away to the second clip ahead
of the audio. Video has been trimmed from the end
of the first clip, and audio has been trimmed from
the start of the second clip.
The J-cut
In the J-cut, the new audio cuts in before the video
switches. This can be effective when the second clip’s
audio prepares the viewer for the material in the scene.
Returning to the videotaped lecture example, let’s say
we are now going to switch back to the speaker at the
end of the interpolated footage. If we let the next part
of the lecture appear on the soundtrack a few moments
before the video shows us the podium again, the change
will be much less abrupt.
This time the clip boundaries outline the letter J:
Audio cuts before video. The resulting “J” shape is
outlined in this illustration.
To perform a J-cut:
1. Adjust the Timeline so you can easily count off the
number of frames or seconds you want to overlap.
2. As before, trim back the right edge of the left-hand
clip, both video and audio, by the overlap interval.

140 Pinnacle Studio
3. Lock the audio track. Now drag the right-hand edge
of the same clip’s video back to the right by the
overlap interval.
4. Unlock the audio track.
The audio now cuts away to the second clip ahead
of the video.
Note: The procedures described above for performing
the L-cut and the J-cut are not the only possibilities.
With the J-cut, for example, another method would be
to trim the right-hand clip to the desired start point of
the video then, with the video track locked, drag the
audio portion leftwards to overlap the audio of the left-
hand clip.
THE SMARTMOVIE MUSIC VIDEO TOOL
Creating a music video seems like a big job, even with
the convenient editing features of Studio. Dozens of
brief clips must be carefully aligned to the beat of the
soundtrack, in order that the music and video are
properly coordinated.
With Studio’s SmartMovie tool, however, you
can construct a dynamic, beat-synchronized
music video almost instantly, in your choice of styles
and using any combination of video footage and music.
You can make slideshows, too. SmartMovie can create
an instant slideshow from any set of still images, in a
choice of styles and with synchronized music.
Tip: The Timeline view of the Movie Window is
recommended when working with audio clips.

Chapter 5: Video clips 141
The SmartMovie tool walks
you through the creation
process with simple step-by-
step instructions. To begin, use
the Album to locate the video
scenes or still images you want
to include, and drag them onto the Movie Window.
With the visuals in place, add a ScoreFitter, CD audio
or digital music (wav, mp3) clip to the background
music track. The duration of this clip – and not the
amount of visual material you supply – determines the
length of your music video. If you don’t supply enough
visual material, SmartMovie will use your video clips
or images multiple times in order to achieve the
required duration. Conversely, clips or images will be
omitted if you provide more than can be used within
the duration of the song.
Exception: When making a slideshow with the Use all
images option checked (see below), it is the number of
images you provide that determines the length of the
finished project, not the duration of the music clip.
SmartMovie styles
Select a style from the dropdown list at the top of the
SmartMovie tool window. A variety of styles is offered
for both music video and slideshow projects.
For video styles, you will get the best results if the
starting duration of your video footage is about double
the length of the soundtrack. Each of the slideshow
styles has its own ideal ratio
between the number of
pictures and the length of the
song. The status balloon
provides guidance for getting
the proportions right.
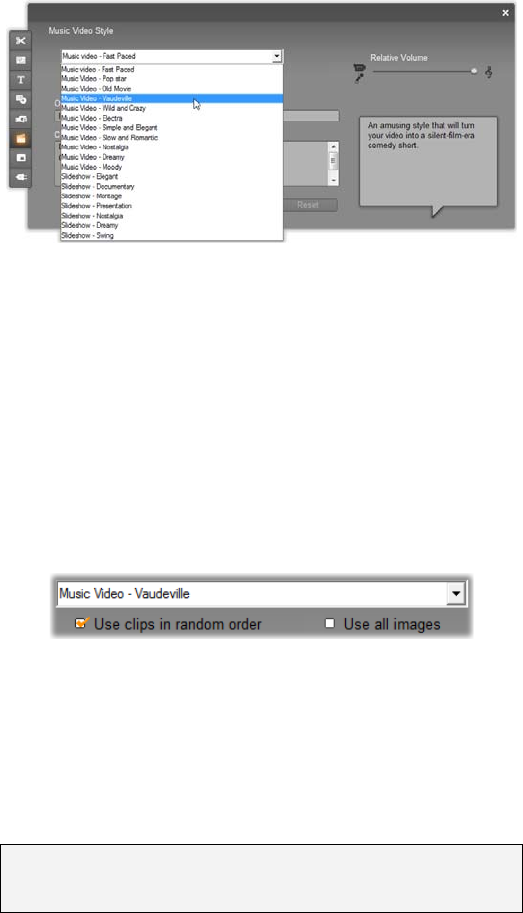
142 Pinnacle Studio
A brief description of each style is displayed in the
status balloon as you scroll through the style list.
SmartMovie options
The Use clips in random order option lets you mix up
the visual material without regard to its initial
sequence. This option is the default with some styles. It
tends to give a finished product with a relatively
uniform texture, but sacrifices narrative continuity.
Check the Use all images option when you want to
ensure that all the still images you have added to your
project are actually used in the slideshow, regardless of
the length of music you have provided. Studio will
repeat or trim the music clip as required to match the
number of images you have chosen.
Note: The Use all images option affects SmartMovie
slideshows only, not music videos.
The Relative volume slider adjusts the prominence of
the background music track relative to the other audio
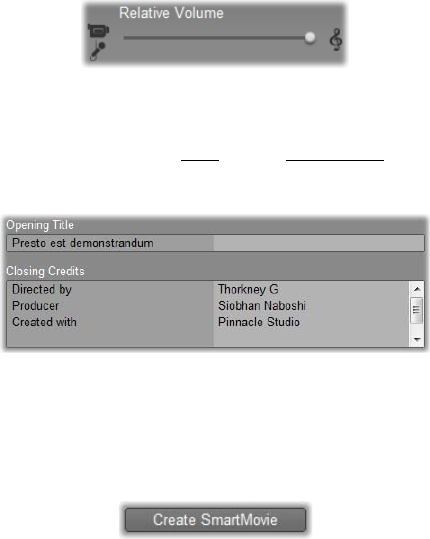
Chapter 5: Video clips 143
tracks. Move the slider all the way to the right if you
want to hear only the music track in the finished video.
The last configuration step is to enter the text to use for
the opening and closing titles. Each text line consists of
two edit fields. Use Tab and Shift+Tab to jump
between the left and right fields.
The big moment…
Finally, click the Create SmartMovie button and sit
back while Studio generates your movie.
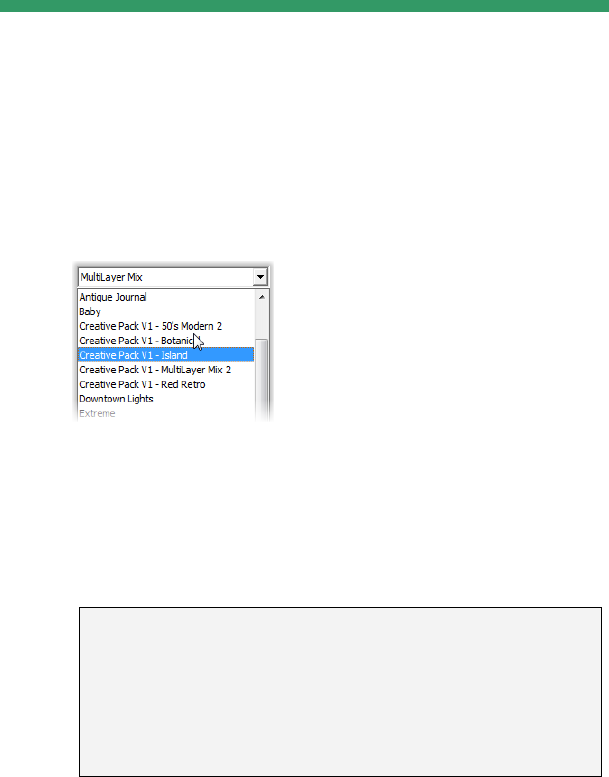
Chapter 6: Montage® themes and theme editing 145
CHAPTER 6:
Montage® themes and
theme editing
Studio’s customizable Montage®
“themes” provide a powerful but
easy to learn method of
achieving slideshow, animation
and multitrack editing effects.
With themes you can quickly
give your videos a more professional look while
maintaining a coherent structure. Each theme consists
of a set of templates that can be added to your project
as “theme clips”. You can create attractive, visually
consistent sequences that integrate artist-created titles
and animations with your own photos and video.
Note: “Titles” created from a Montage theme are not
related to those in the Titles section of the Album, or
created with Studio’s title editors. Themes are easier to
use, and can provide effects not available in ordinary
titles. On the other hand, the title editors give you
much finer control over the appearance of the titles.
The themes provided are each designed to cover a
typical need. Within each theme, the available

146 Pinnacle Studio
templates are designed to complement one another
when used in the same project. For instance, most
themes provide an Opening template and a matching
Ending template. Many themes also provide one or
more Segue templates for transitioning from one video
or image clip to another.
The appearance of a theme clip’s Timeline icon
reflects its structure. Here, from left to right, are an
Opening, a Segue, and an Ending icon. The zig-zag
edges correspond to the placement of full-frame
video in the clip. The video at the end of the
Opening, and at the start of the Ending, can be
edited to match that of a Segue; thus the zig-zag also
indicates graphically how the templates can be used
together.
Each template defines a video or graphic sequence with
blanks to be filled in by you. Most templates provide
one or more slots for video or image clips. Many let
you supply text captions for titles, and some have
additional parameters for other special properties.
Theme templates are stored in their own section of the
Album. The first step in using a chosen template is to
bring it into your project as a theme clip. As usual, this
is done by dragging the icon from the Album to the
Movie Window.
In the Movie Window, the theme clip is treated as an
ordinary, self-contained video clip. To customize the
clip – to fill in the template’s blanks – you will use the
Theme Editor tool.
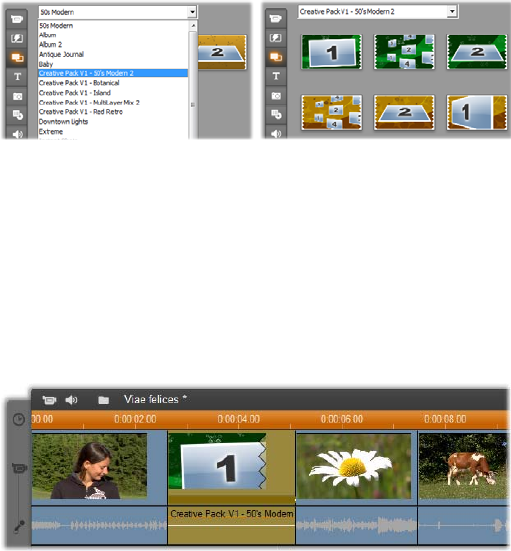
Chapter 6: Montage® themes and theme editing 147
USING THEMES
Theme templates are stored in the Themes section of
the Album. The Album displays all the templates in a
given theme, as selected from a dropdown list. To use a
template, simply drag its icon from the Album into the
Movie Window.
Pick a theme from the dropdown list (L) to show the
templates available (R). To use a template, drag its
icon down into the Movie Window.
When the Movie Window is in Timeline View, theme
clips can be trimmed and edited much like ordinary
video. You can elaborate them with transitions and
effects, adjust their audio, and so on.
The theme clip (selected in illustration) is treated as
a unit in the Movie Window. Its special properties
can be modified with the Theme Editor tool (double-
click the clip to open).
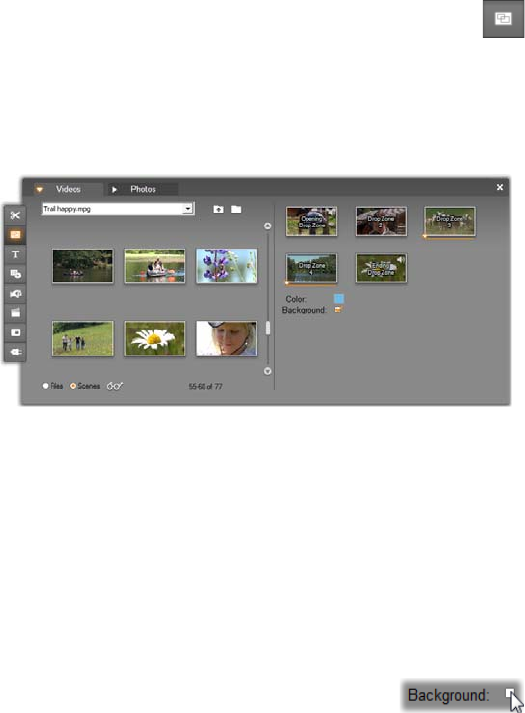
148 Pinnacle Studio
Like disc menus, themes are configured with a special
editing tool, which opens automatically when the clip is
added to the project, or when it is later double-clicked.
The Theme Editor tool allows the user to
customize a theme clip by adjusting its built-in
settings or specifying video and audio subclips for it to
use. The editor can also be accessed with the Toolbox
Edit Theme menu command.
The Theme Editor tool lets you specify theme
elements such as video or image clips, property
settings, and text captions. Clips are added by
dragging them either from the editor’s own mini-
Album (left side of tool) or from the Movie Window.
Theme backgrounds
Some themes have built-in graphical
backgrounds, a selectable background
color, or both. Many of these also provide a
Background checkbox in the Theme Editor tool, which
when checked makes the background transparent. This
allows the theme to be used on the overlay track, with
the video track as its background.

Chapter 6: Montage® themes and theme editing 149
The Themes section of the Album
In the Album, the templates for one theme may
be viewed at a time. As with video scenes, you
use the mouse to select, play or add a theme template:
Single-click loads the template to the Player, where
it can be played back with the transport controls.
Double-click loads the template to the Player and
begins playback immediately.
Dragging the template to the Movie Window, or
right-clicking its icon and clicking the Add To Movie
context menu command, inserts it into your project.
As with menus, a special editor tool opens
automatically when a theme clip is added to the
movie.
Creating theme clips
To create a theme clip, use any of the standard methods
of adding content to your project:
Drag an icon from the Themes section of the Album
to the Movie Window.
Select Add To Project in a theme template icon’s
right-button context menu.
Paste the contents of the Windows Clipboard after
you have cut or copied an existing theme clip.
Each theme is configured to appear on the track that is
appropriate to the theme’s content type:
Themes whose content is a graphic overlay with
transparent background, such as a title or PIP frame,
are usually added to the Title track.
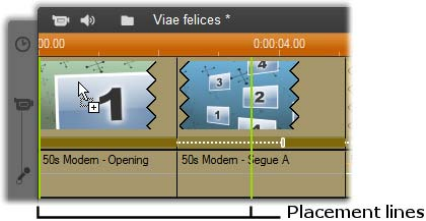
150 Pinnacle Studio
Themes with full-frame video, such as opening
sequences, can be added to the Main video track
(Studio) or the Overlay video track.
The default length of a theme clip depends on the
design of the individual template.
If you drop a new theme clip onto an existing one on
the Timeline, the new clip either is inserted beside the
old one or simply replaces it. The choice of operation
depends on the position of the mouse pointer relative to
the target clip when you release the button.
Inserting a theme clip before or after an existing
clip: If you drop the new clip near the start or end of an
existing theme clip, it is accordingly inserted before or
after the existing clip. The placement lines that show
the position of the new clip on the Timeline are drawn
in green.
A new theme clip, represented by the ‘copy’ mouse
pointer, is dragged near the beginning of the left-
hand clip. Green placement lines indicate where the
new clip will be inserted.
In the illustration above, the placement lines show the
boundaries of the clip that would be created by
releasing the mouse button at the current position,
based on the template’s default length. All existing
clips would be moved rightwards to accommodate the
new one. If you were instead to drop the new clip near
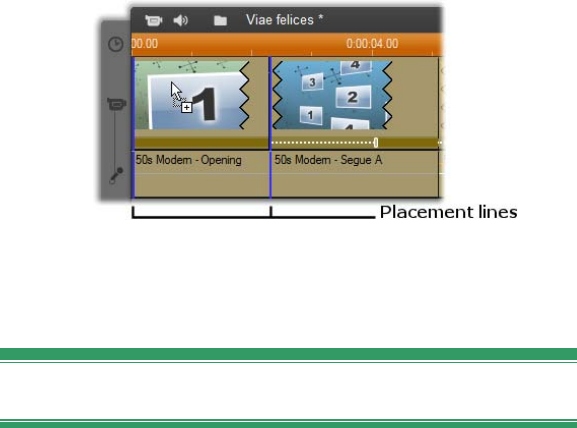
Chapter 6: Montage® themes and theme editing 151
the right-hand edge of the same existing clip, it would
be inserted after the clip.
Replacing an existing clip: If you drop a new theme
clip onto the middle of an existing one, the new clip
replaces the old one. The new clip also takes over any
existing customizations of the old clip. The placement
lines, drawn in blue, show the boundaries of the clip to
be replaced; regardless of its designed default length,
the new clip will inherit these boundaries.
A new theme clip is dropped onto the middle of the
left-hand clip, replacing it. The positions of other
clips are not affected.
Working with theme clips on the Timeline
Theme clips behave like ordinary video clips when it
comes to operations like trimming and adding
transitions.
When a theme clip is trimmed...
Although trimming operations on the Timeline are the
same for theme clips as for video clips, the actual result
produced by trimming depends on the nature of the
clip.
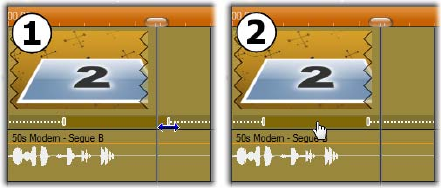
152 Pinnacle Studio
In an all-animated theme, such as a fancy rolled title,
the animation runs to completion at whatever speed the
current clip duration dictates. Shortening the clip thus
causes the animation to run faster, but does not truncate
the sequence.
Clips that include video, in contrast, can be trimmed in
the usual way. Many themes include a variable-length
video subclip. When one of these is present, the clip
can be expanded as far as the length of the subclip will
allow – indefinitely, if the subclip is a still image.
Interior trimming of themes
When a theme clip’s template begins or ends with a
user-settable amount of full-frame video, as many do,
the Timeline provides handles for adjusting the amount
of “lead-in” and “lead-out” times – the durations of the
full-frame portions. Click a handle and drag left or right
to adjust either duration separately. The duration of the
center part of the clip – the animated part – will shorten
or lengthen accordingly. If you want to balance the
lead-in and lead-out without affecting the duration of
the center portion, click between the handles and drag.
Click and drag the adjustment handle to trim the
lead-in or lead-out portion of a theme clip. The
duration of the center portion will increase or
decrease accordingly. Click between the handles
to drag both at once, thereby repositioning the center
in the clip without changing its duration.

Chapter 6: Montage® themes and theme editing 153
For a detailed explanation of theme structure, see
“Anatomy of a theme” on page 153.
Transitions and effects
Transitions can be used at the beginning and end of
theme clips in the same way as with other clip types.
Video and audio effects can also be added to theme
clips as usual, and apply to all the content the clip
embodies. However, a few effects, such as Speed, are
not available for use with theme clips.
Anatomy of a theme
For examples of how themes work, let’s examine the
included “50s Modern” theme, which contains five
templates.
All the templates in this particular theme use the same
backdrop design – an abstract, scrolling pattern. It is
continuously visible except during full-frame video
segments. The coloring of the pattern is set using a
parameter control available in the Theme Editor for
each of these templates.
Now let’s look at each template in turn to see how it is
constructed from the elements – clips and captions –
that you supply in the Theme Editor.
Opening: An Opening template
usually starts with some sort of
animation, including titles, and ends
with full frame video. Our “50s Modern” example
follows that pattern.
The scrolling background animation runs through most
of this sequence. Within the animation, two

154 Pinnacle Studio
customizable captions are displayed. They are
represented in the diagram below by lines on the
“Animation” bar. Both captions are flown into and out
of the frame (dark line color), with a one and a half
second pause for stationary display (light line color) in
between.
Schematic representation of the Opening template in
the ‘50s Modern’ theme, at its default length of about
14 seconds.
Just as the second caption is leaving the frame, an
animated panel containing the running video subclip is
launched. The video zooms to full frame by 11:18 in
the theme clip, and remains so through to the end (the
white portion of the “Video” bar in the diagram).
By default, the length of this theme clip is 13:29. The
embedded video clip starts at a fixed offset of 7:03 and
runs to the end; its length is therefore 6:26. If your
video subclip is long enough, you can lengthen the
overall clip, extending the full-frame video portion.
This capability is indicated in the diagram above by the
arrow at the end of the “Video” bar.
Segue A: Segue templates connect two
full-frame video sequences by means
of some kind of animation. This first
Segue example begins with two seconds of full-frame
video, then zooms out to reveal a formation of multiple
video panels running simultaneously. Zooming in on
the final subclip leads to an expandable section of full-
frame video.
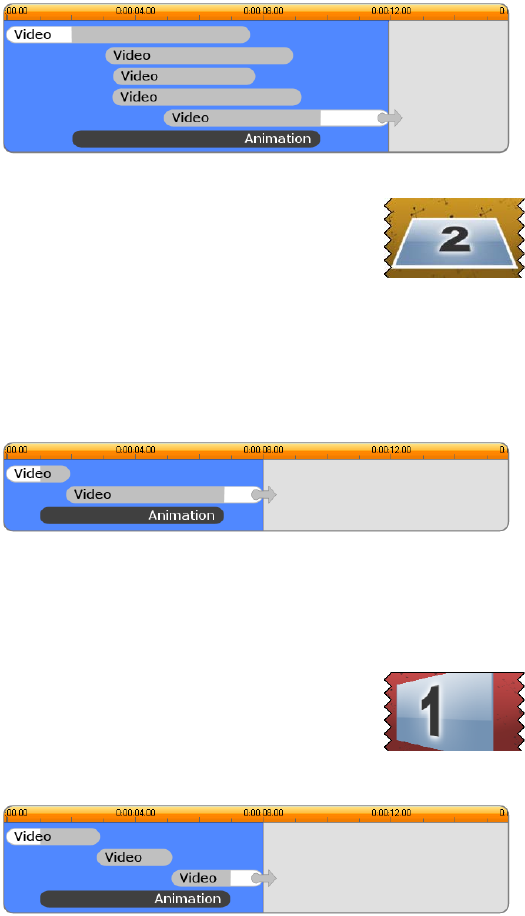
Chapter 6: Montage® themes and theme editing 155
Segue A integrates multiple video sources.
Segue B: This Segue achieves the
basic aim of connecting two video
clips more simply than the previous
one. The first subclip starts at full frame, then zooms
out while rotating away from the viewer. When the
reverse side of its rotating panel comes into view, the
second subclip has replaced the first. The panel zooms
in to fill the frame towards the end of the clip.
Segue B creates a simpler transition.
Once again, the full-screen segment of the second
subclip can be extended by expanding the theme clip
on the Timeline.
Segue C: This is similar to Segue B,
except that the flying video panel takes
an extra spin in the middle to admit
one more subclip into the sequence.
Segue C includes a bridging video subclip.
The final subclip is again expandable.
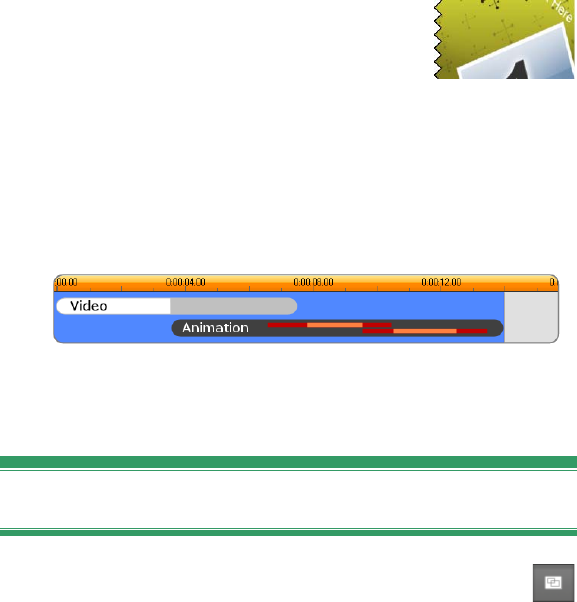
156 Pinnacle Studio
Ending: The purpose of an Ending
template mirrors that of an Opening
template, and in this example the
internal structure is also mirrored almost exactly. Full-
frame video recedes to a flying panel that gives way to
animated captions – exactly the opposite of the
Opening sequence described above. The one difference
is that in this case the full-frame video portion of the
clip is not extendable.
The Ending theme is essentially a mirror image of
the Opening theme.
Opening the Theme Editor tool
The Theme Editor tool allows you to customize a
theme clip by specifying your own subclips and
other customizations. The tool can be invoked from a
theme clip in the project in either of these ways:
Double-click the clip in the Movie Window.
Select Open With Theme Editor on the clip’s context
menu.
You can also open the tool directly:
Click the Theme Editor tool button.
Select Theme Editor in the Toolbox menu.
With these two methods, if a theme clip is currently
selected in the Movie Window, it is automatically
loaded into the editor upon opening.
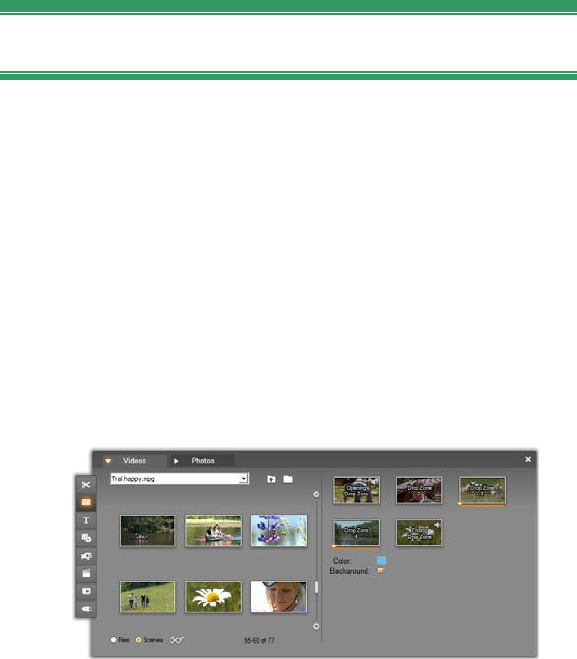
Chapter 6: Montage® themes and theme editing 157
While the editor is open, clicking on a different theme
clip in the Movie Window changes the preview to that
clip without closing the editor.
Using the Theme Editor tool
Each theme template has its own set of slots for video
and photo content, represented by “drop zones” in the
Theme Editor. Most templates have at least one of
these; the maximum is six. Some also provide text
captions and other parameters as required to customize
special features.
The Theme Editor is split down the middle into two
parts. On the left, a mini-Album provides access to
your video and still image libraries; on the right is a
customization panel. Here are the drop zones for your
video and images, along with any text fields or other
controls required by template parameters.
The left side of the Theme Editor tool contains a
mini-Album with tabs for Videos and Photos only.
The right side contains the theme clip’s drop zones,
and controls for setting its parameters. Drag video
or image clips onto a drop zone from either the mini-
Album or the Movie Window. If necessary to create a
longer subclip, you can also select multiple clips of
contiguous video and drag them to the zone as a unit.

158 Pinnacle Studio
Working with drop zones
Clearing drop zones: To delete a subclip from its drop
zone, right-click the zone and select Delete from the
pop-up menu.
Copying subclips to the Movie Window: To copy a
subclip from a drop zone in the Theme Editor to the
Timeline (or other Movie Window view), right-click
the zone and select Add to Timeline from the menu.
This is normally used to add or modify an effect on the
subclip before dragging it back into the theme clip.
Muting subclip audio: Some drop zones are marked
with an audio symbol , indicating that the audio
portion of any video in that zone will be included in the
theme clip’s audio. If you don’t want the audio to be
used, click the audio symbol to mute the subclip.
To set the start frame of a subclip, hold down the left
mouse button while the pointer is over the drop zone,
then drag horizontally. To allow fine trimming, the
amount of change produced by a given mouse
movement is at first small then becomes rapidly
greater with increasing distance. A relatively large
mouse gesture may therefore be required to get the
desired adjustment.
Aligning subclips: Video in a drop zone can be
positioned relative to the zone’s time window with the
mouse. When the mouse pointer enters a drop zone
with excess video available, it changes into a double-
Chapter 6: Montage® themes and theme editing 159
headed arrow. Click and hold the left mouse button
now to control the start of clip slider below the zone.
Move the mouse back and forth to set the starting frame
of the subclip.
As you scroll the start of clip slider, the icon in the
drop zone is updated to show the new starting frame.
At the same time, the Player shows the frame at the
current scrubber position. If the drop zone you are
working with is active at that time index, the preview
will reflect any changes to the start frame. When you
are fine tuning the start frame of a subclip, it’s a good
idea to set the scrubber position to the location where
the Player preview will be of the greatest assistance.
Using the start of clip slider changes neither the
position of the subclip within the theme clip, nor its
duration. Rather you are only choosing which excerpt
of the subclip is used. The Theme Editor does not allow
you to set the start of the subclip so late that the video
would run out while the drop zone is still active. For
example, if you drop a six-second segment onto a drop
zone requiring five seconds of video, you will be able
to set the start point no further than one second into the
subclip.
If the subclip is actually shorter than the drop zone’s
duration, or of equal length, no adjustment of its start
frame is possible. When the theme clip displays, the
last frame of the subclip is frozen if necessary to fill the
time allocated to its drop zone.
Adding effects within drop zones
It is not possible to apply video or audio effects to a
subclip within the Theme Editor itself. Instead, right-
click the drop zone and select Add to Timeline from the
160 Pinnacle Studio
pop-up menu. Locate the clip on the Timeline (at the
scrubber position). From this point in, it’s just another
clip: trim it to taste, and add or edit effects in the usual
way. Finally, drag it back to the drop zone, overwriting
the previous contents. The copy of the clip on the
Timeline can now be deleted.
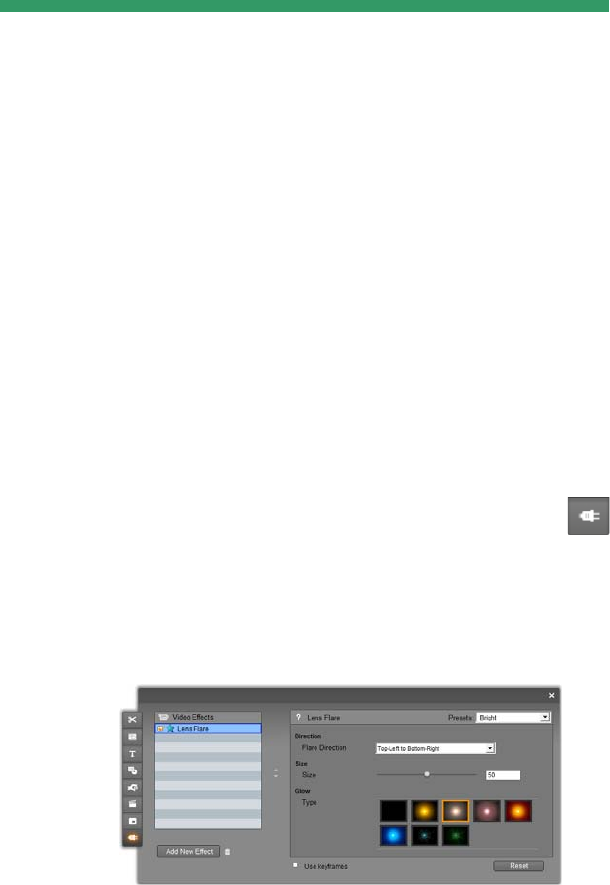
Chapter 7: Video effects 161
CHAPTER 7:
Video effects
Most video editing consists of selecting, ordering and
trimming video clips, of connecting clips with
transition effects and combining them with other
materials such as music and still images.
Sometimes, though, you also need to modify the video
images themselves, manipulating them in some way to
achieve some desired effect. Studio’s Video effects tool
provides an extensive set of plug-in video effects that
can be applied either to video or still images. See page
172 for descriptions of the basic set of effects supplied
with Studio.
The Video effects tool is the eighth tool in the
Video toolbox. It has two main areas: at the left,
an effects list showing which effects are already
attached to the currently-selected clip(s), and at the
right, a parameters panel where you can tune the effect
as required.
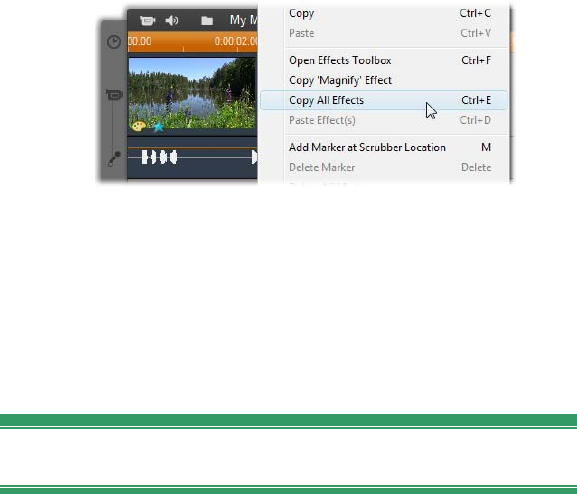
162 Pinnacle Studio
Video effects vs. audio effects
In most respects, the Video effects tool and the Audio
effects tool work identically, except for the type of
material they apply to.
Copying and pasting effects
Once you have added an effect to a clip, and configured
it through its parameters panel, Studio provides the
ability to apply it to other clips on the Movie Window
Timeline as well. This is a time-saver when you are
working on a complex project that makes heavy use of
effects, especially if you take advantage of the
available keyboard shortcuts.
To copy an individual effect from a clip that has
multiple effects, right-click directly on its clip icon and
select the applicable command (Copy ‘Magnify’ Effect
in the illustration.) The effect, along with all of its
parameters and keyframes (if any), then becomes
available to be pasted to other clips in the project.
Working with the effects list
Each video or image clip in your project can be
modified by one or more video effects. Each effect is
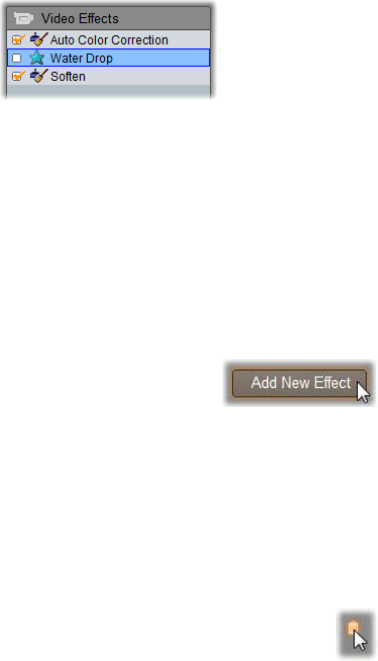
Chapter 7: Video effects 163
applied to the original image in turn, in the order in
which they are listed on the Video effects tool.
The checkboxes next to each effect name allow you to
enable and disable effects individually without having
to remove them from the list (which would cause any
customized parameter settings to be lost). In the above
illustration, the “Water Drop” effect has been disabled
while the other two effects on the list remain in force.
Adding and deleting effects
To add an effect to the list for the
currently-selected clip (or clips),
click the Add new effect button, which opens an effects
browser on the right-hand side of the tool window.
Click an item in the browser’s Category list to display
the names of the individual effects in that category.
Select the effect you want, then click the OK button to
add the effect.
To remove the currently-selected effect from
the list, click the delete effect (trashcan) button.
Premium video and audio effects, like other locked
content in Studio, can be used freely, but cause a
“watermark” graphic to be added to the video when
played back. If you want to use the effect in an actual
production, you can purchase an activation key without
leaving Studio. For information about purchasing
locked video and audio effects, and other premium
content for Studio, see “Expanding Studio” on page 12.
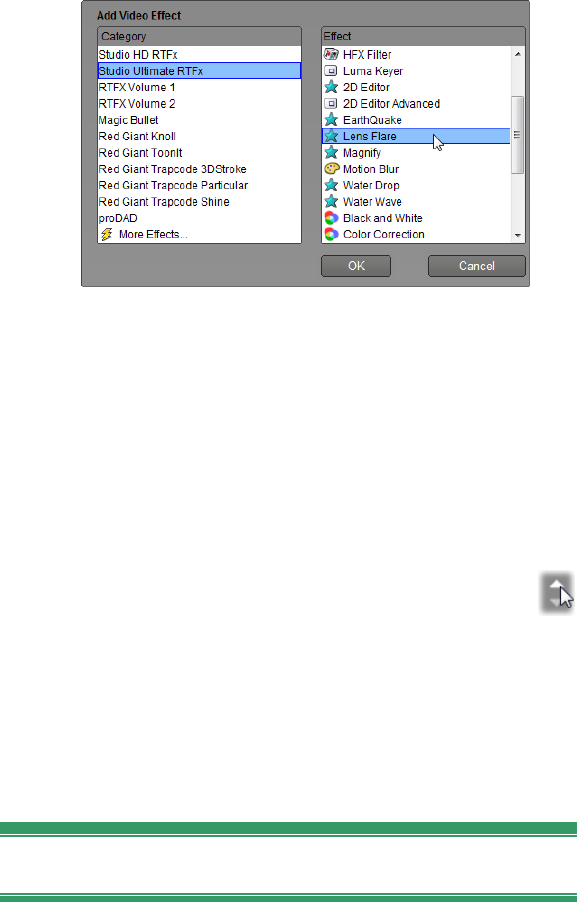
164 Pinnacle Studio
The Video Effects browser is open here to the Studio
Ultimate RTFX page, which contains an additional
set of effects for Studio Ultimate. The other packs
listed contain other premium effects requiring
separate purchase. The last ‘category’, More Effects,
opens a page on the Avid web-site where additional
premium effects are available.
Changing the order of effects
The cumulative result of using more than one
effect on the same clip can vary depending on the
order in which the effects are applied. With the up and
down arrow buttons to the right of the effects list, you
can control the position of each effect in the processing
chain. The buttons apply to the currently-selected
effect.
Changing effect parameters
When an effect is selected in the effects list, the
parameters panel on the right-hand side of the Video
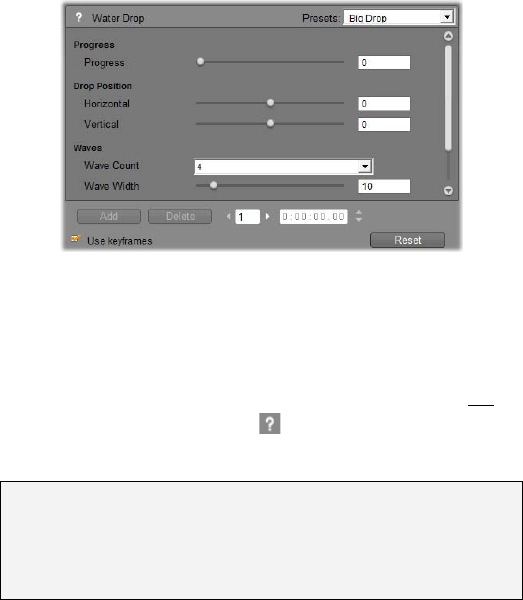
Chapter 7: Video effects 165
effects tool window provides controls for adjusting the
effect’s parameters, if any.
The controls for the basic library of effects supplied
with Studio are described below (beginning on page
174). Add-on effects are described in their own on-line
documentation, which you can access from the
parameters panel by pressing function key F1 or
clicking the help button at the top left of the
parameters panel.
Note: Some plug-in effects may provide their own
parameter windows with specialized controls. In those
cases, the parameters panel on the effects tool displays
a single Edit button, which accesses the external editor.
Using parameter presets
In order to simplify the use of parameters, many effects
offer presets that let you configure an effect for a
particular use simply by selecting a name from a list.
In Studio Ultimate, there are two kinds of preset: static,
which store a single set of effect parameters, and
keyframed, which store multiple sets of parameters in
the form of keyframes (see below).
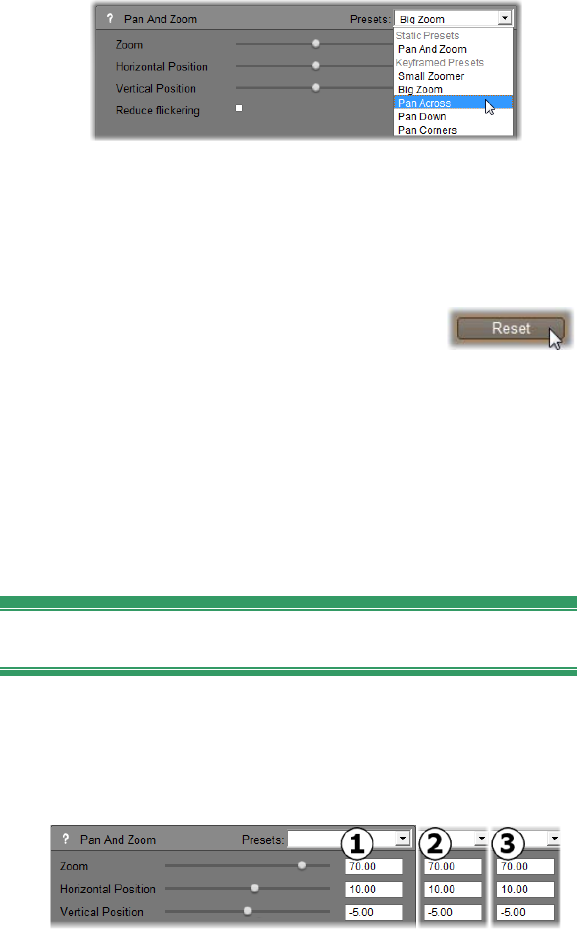
166 Pinnacle Studio
In versions of Studio that do not support keyframing
only static presets are available.
Often, the quickest way to configure an effect is to start
with the preset that comes closest to what you want,
then fine-tune the parameters by hand.
Resetting effects: A special type of
preset is the factory default setting of
each effect. The default can be restored at any time by
clicking the Reset button at the bottom of the
parameters panel.
If Reset is clicked when keyframing is in use, the
default parameter values are assigned only to the
keyframe at the current movie position. That keyframe
is created if it did not already exist.
Keyframing
The parameters for Studio video effects are ordinarily
applied at the first frame of the video clip and continue
unchanged to its end. This is the standard behavior for
each effect you add to the clip.
Ordinarily, an effect’s parameter values do not vary
throughout the video clip the effect belongs to.
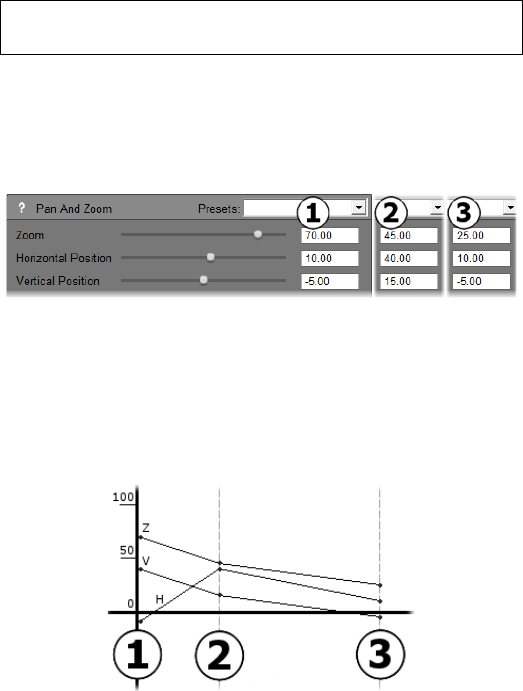
Chapter 7: Video effects 167
Keyframing – the ability to change parameter values
smoothly within a video clip – opens a wide range of
new possibilities for using effects in your movies.
Availability note: The keyframing feature described here is provided
in Studio Ultimate only.
Each keyframe stores a full set of parameter values for
the effect, and specifies at which frame within the clip
those values should be fully applied.
With keyframing, new sets of parameter values can
be applied as often as desired throughout the clip.
Between keyframes, numeric parameter values are
automatically adjusted from frame to frame to connect
the keyframe values smoothly.
A graphical view of the keyframes in the example
above. The values of Zoom (Z), Horizontal Position
(H) and Vertical Position (V) are set by keyframe 1
at the start of the clip, by keyframe 2 about a third of
the way in, and by keyframe 3 at the end. The values
change smoothly over intermediate frames.
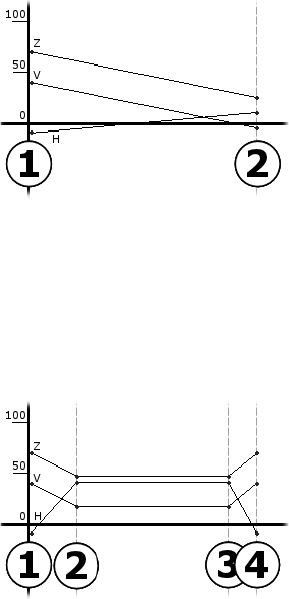
168 Pinnacle Studio
Most effects support keyframing. A few do not, either
because they have no parameters or because, as with
the Speed effect, keyframing doesn’t readily apply.
Keyframing scenarios
For each applied effect, a clip may theoretically have as
many keyframes as it has frames. In practice, you
usually need only a few.
Two keyframes are enough to smoothly vary parameter
values from one setting to another throughout the clip.
Keyframing gives you sensitive control over the way
the effect is applied to the clip. It becomes a simple
matter to ease an effect in and out, for example.
With a set of four keyframes you can ease in one or
more parameter values at the start of a clip and ease
them out again at the end.
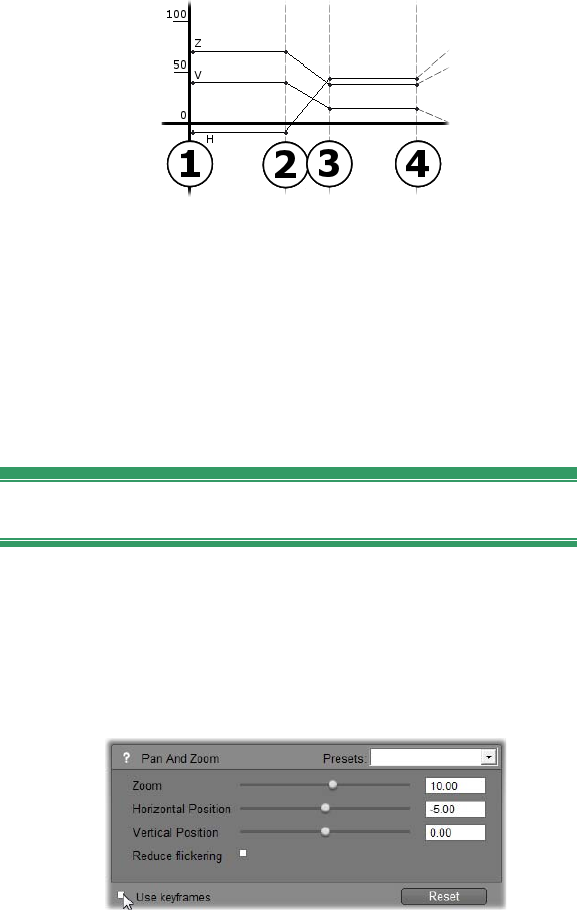
Chapter 7: Video effects 169
A pan-and-zoom slideshow like that described in
under “Editing image clip properties” (page 218)
can be created using the Pan-and-Zoom effect on a
single still-image clip. Two keyframes with identical
parameters define the start and end of each view –
however many are required – within the show.
Using keyframing
In the parameters window for any effect that supports
keyframing, locate and check the Use keyframes box.
Until you do this, the effect maintains a single set of
parameter values throughout the clip.
When you switch on keyframing for an effect, two
keyframes are created automatically. One is anchored
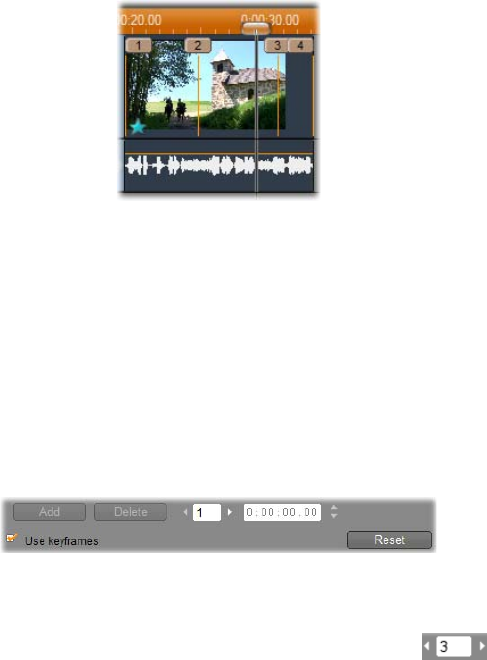
170 Pinnacle Studio
to the start of the clip, and the other to its end. The
parameters for both are set to the non-keyframed value.
On the Movie Window timeline, a keyframe appears as
a numbered flag on the video clip. The keyframe flags
are displayed as long as the effect’s parameter window
remains open.
Keyframes for the effect currently open in the effect
parameters window are shown as numbered flags
over a vertical line. The current keyframe, if any, has
a highlighted flag, like that of keyframe 3 here.
At the same time, additional controls are displayed at
the bottom of the parameters window: the Add and
Delete buttons, the Current keyframe indicator with
forward and back arrows, and the Keyframe time
counter with jog arrows.
New controls appear at the bottom of the parameters
window when keyframes are enabled.
The Current keyframe indicator shows the
number of the keyframe attached to the frame you are
viewing in the Movie Window. Use the arrows to
advance from keyframe to keyframe. As you click, the
Movie Window scrubber jumps to the next keyframe
position.

Chapter 7: Video effects 171
When you are viewing frames of your movie for which
no keyframe has been defined, the indicator shows a
dash. The displayed parameter values are those that
will apply to the current frame during playback.
To create a keyframe at any such point, click the Add
button, or simply start to adjust the parameters: when
you do, Studio adds a keyframe automatically.
Keyframes are numbered in sequence from the start of
the clip. When a new keyframe is inserted, or an old
one is deleted, those that come after are renumbered to
correct the sequence.
The Delete button is available whenever the current
frame has a keyframe; that is, whenever the Current
keyframe indicator shows a number rather than a dash.
The Keyframe time counter shows the time offset
within the clip of the current movie time – the frame
showing in the Player. The first keyframe is therefore at
time zero, and the last is at an offset equal to one frame
less than the duration of the clip.
When the current frame has a keyframe, its time offset
can be changed with the counter’s jog arrows. The
positions of the first and last keyframes cannot be
adjusted. Others can move freely between the current
positions of their neighboring keyframes.
Setting the time of keyframe 3.

172 Pinnacle Studio
Previewing and rendering
While you are working with the Video effects tool,
choosing effects and adjusting parameter settings, the
Player gives a dynamically-updated preview of the
current frame in your movie. Previewing a single frame
may not be very revealing when you are working with
effects that evolve over the duration of the clip (like the
Water drop effect, page 183).In those cases, you will
need to play back the clip to see the full impact of the
effect you are applying.
Because many effects require intensive calculation, a
fully smooth and detailed preview of the full clip won’t
be instantaneously available in most cases. Each time
effects are added or removed, or settings are changed,
Studio commences “rendering” the clip – recalculating
its final appearance – in the background without
interrupting your workflow. A colored bar appears in
the Timescale above the clip while background
rendering is in progress.
Background rendering is optional. You can disable it, if
required, in the Project preferences options panel
(Setup Project Preferences).
VIDEO EFFECTS LIBRARY
The plug-in video effects installed with Studio are
divided into six categories, each symbolized by an
icon:
Cleaning effects help correct defects in the
source video, such as noise and camera shake.

Chapter 7: Video effects 173
Time effects, like Speed, change the tempo of
playback without affecting the appearance of the
video frames themselves.
Style effects like Emboss and Old film let you
apply distinctive visual styles for added impact.
Overlay effects support the overlay features of
Studio, such as Picture-in-picture and Chroma key.
Fun effects like Water drop and Lens flare
provide extra scope for creativity and fun in your
movies.
Color effects let you modify the coloration of a
clip, whether subtly or dramatically.
Plug-in effects are organized into packs of one or more
effects each. In this manual, we cover the nine effects
in the Studio HD RTFX pack (see page 174), which is
included with all versions of Studio. Further on, we
briefly describe each of the more than 20 additional
effects in the Ultimate RTFX pack (page 178), which is
included with Studio Ultimate.
Full documentation of the parameters for the Ultimate
effects is included in their context-sensitive on-line
help, which can be viewed by clicking the help
button at the top left of the parameters panel for each
effect, or by pressing the F1 key when the panel is
open.
Building your effects library
Studio’s plug-in architecture means that you can
continue to add new effects to your video effects
library as they become available. Expansion packs of
effects from Avid and other vendors will integrate
seamlessly with the program.

174 Pinnacle Studio
Some expansion effects are shipped with Studio as
locked, premium content. These include Avid’s RTFX
Volume 1 and 2 packs. Such effects can be previewed
in Studio as usual, but are “watermarked” with a
special graphic during playback.
Purchasing an activation key will remove the
watermark. This can be done without leaving Studio.
For more information about obtaining premium content
for Studio, see “Expanding Studio” on page 12.
Warning: Studio’s plug-in video effects are computer
programs. They are theoretically capable of actions
with the potential to damage or disrupt your system,
such as modifying or deleting files and editing the
system registry. Avid advises against installing third-
party plug-ins except those from trusted vendors.
STANDARD EFFECTS
This section describes six of the effects included in the
Studio HD RTFX group at the top the Studio effects
browser. The others are covered elsewhere: Chroma
key on page 199, Pan and zoom on page 224, and
Picture-in-picture on page 194.
Cleaning effects
Auto color correction, Noise reduction and Stabilize are
classified as cleaning effects, which help correct
defects in the source video, such as noise and camera
shake. Keep in mind that these are effects are general-
purpose filters designed to reduce the most common

Chapter 7: Video effects 175
problems found on a wide range of material. They are
not a panacea. Your results will vary depending on the
original material and the severity and nature of the
problems.
Auto color correction
This effect compensates for incorrect color balance in
your video. The idea is similar to the “white balance”
setting on a camcorder.
Brightness: Color correction may affect the brightness
of the image. You can apply a manual correction, if
needed, with this slider. (Technically, the control
modifies the “contrast gamma” of the image rather than
its actual brightness.)
Note: The Auto color correction effect may introduce
video noise into the clip as a side-effect of processing.
If this happens to a troublesome degree, add on the
Noise reduction effect described below.
Dream glow
Applied to the right material, this effect suffuses the
scene with a spectral glow suggestive of altered reality.
Adjustable Blur and Glow parameters let you fine tune
the appearance. Glow is a uniform brightness boost. As
its level increases, the lighter parts of the image are
replaced by expanding whited-out regions as the
maximum brightness level is reached or exceeded.
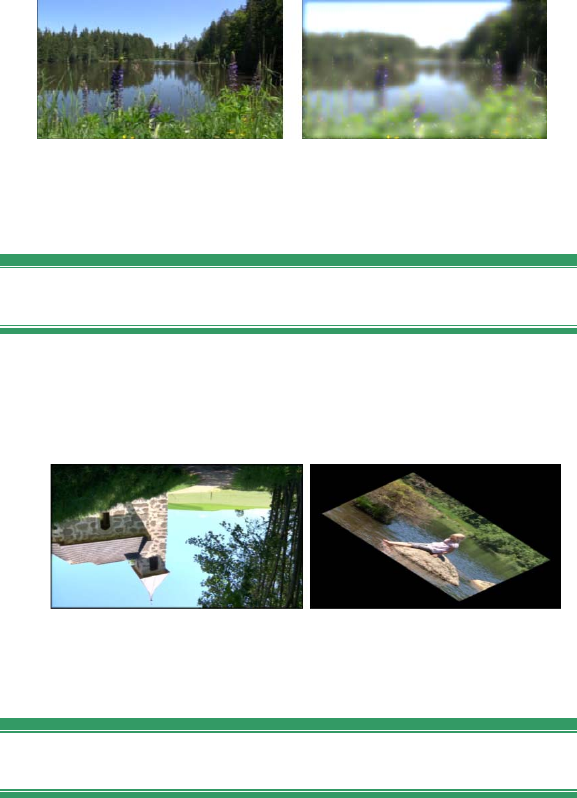
176 Pinnacle Studio
An outdoor scene with (L) and without (R) the
Dream glow effect.
Rotate
This effect allows rotation of the entire video frame,
and also provides controls for independent horizontal
and vertical scaling.
Full-frame 180° rotation (L); rotation with differential
scaling, to produce a simple perspective effect (R).
Noise reduction
This plug-in applies a noise-reduction algorithm that
may improve the appearance of noisy video. In order to
minimize artifacts (image defects caused as a side-
effect of image processing), noise reduction is only
performed in areas of the frame where the amount of
motion falls beneath a certain threshold value.
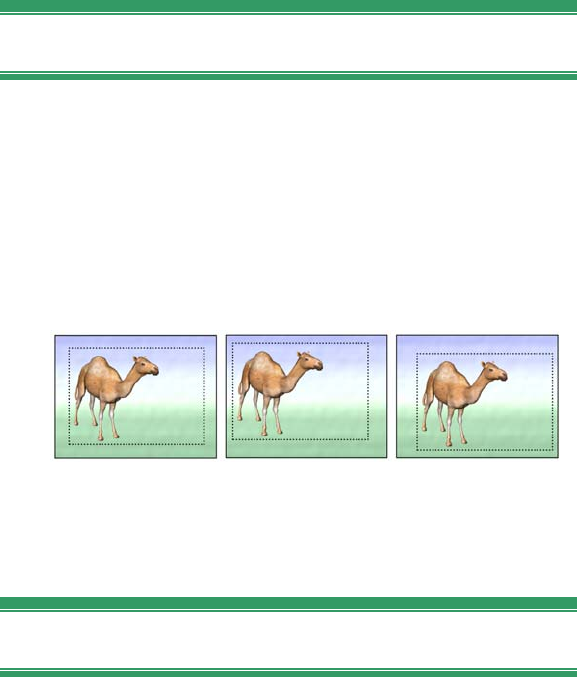
Chapter 7: Video effects 177
Motion threshold: This slider governs the threshold
value. Moving the slider rightwards increases the
amount of motion the effect will tolerate, thus tending
to increase the proportion of the image that will be
affected. At the same time, the danger of introducing
unacceptable artifacts into the video is also increased.
Stabilize
Like the electronic image stabilization feature in many
digital camcorders, this effect minimizes any jerkiness
or jitter caused by camera movement. The edge areas of
the image are discarded, and the central portion is
magnified by about 20% to fill the frame. By adjusting
the boundaries of the selected region on a frame-by-
frame basis, Studio is able to compensate for the
unwanted camera motion.
Stabilize works by expanding a selected area (inner
lines) to full-frame size. The area is adjusted from
frame to frame to compensate for slight aiming
differences caused by camera shake.
Speed
This sophisticated effect allows you to set the speed of
any video clip over a continuous range from 10 to 500
percent of normal, in either forward or reverse motion.
The length of the clip changes as you vary its speed.

178 Pinnacle Studio
If the clip contains audio, that too is sped up or slowed
down. The option of maintaining the original pitch lets
you avoid the sudden introduction of cartoon voices
into your soundtrack.
ULTIMATE EFFECTS
The Studio Ultimate RTFX pack of video effects is
included with Studio Ultimate. Users of other Studio
versions can obtain the effects by upgrading to Studio
Ultimate.
This section gives a brief description of each effect in
the group, except:
Two of the Overlay effects are covered elsewhere
(Chroma key on page 199, and Picture-in-picture on
page 194).
The HFX Filter effect, which allows you to create
and edit animated 3D transitions with Avid’s
Hollywood FX software, opens externally to
Studio, and provides its own on-line help. HFX
Filter uses a special Pinnacle Studio category icon.
The effects appear here in the same order as they do in
the effects browser, where they are sorted by category
(see page 172). Full descriptions, including all
parameters, are available in the context-sensitive help
when the effect parameters window is open in Studio
Ultimate.
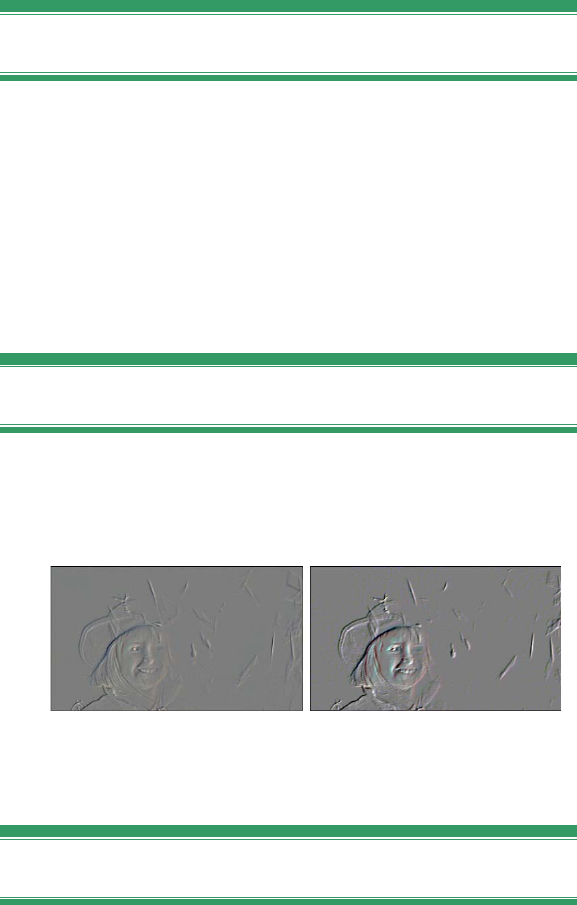
Chapter 7: Video effects 179
Blur
Adding blur to your video produces a result similar to
shooting out of focus. Studio’s Blur effect allows you
to add separate intensities of horizontal and vertical
blurring over the whole frame or any rectangular region
within it. You can easily blur out only a selected
portion of the image, such as a person’s face, an effect
familiar from TV news coverage.
Emboss
This specialized effect simulates the look of an
embossed or bas-relief sculpture. The strength of the
effect is controlled by the Amount slider.
Emboss can often be enhanced by adjusting contrast
and brightness with the Color Correction effect (right).
Old film
Old movies have a number of traits that are usually
considered undesirable: grainy images caused by early
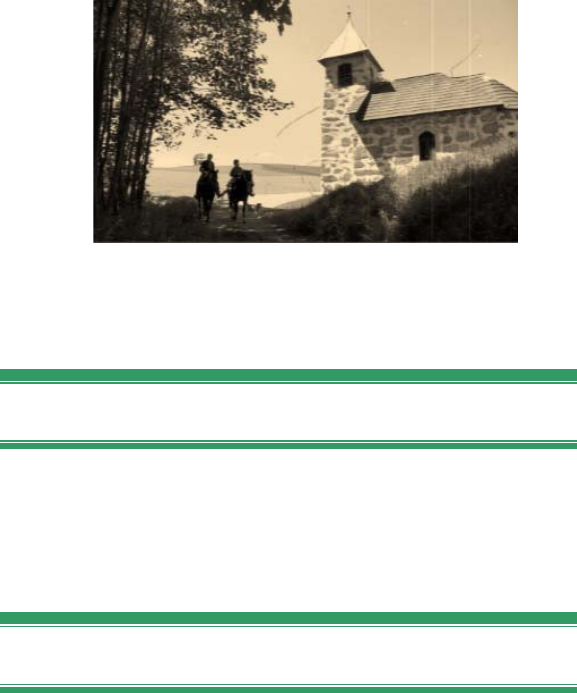
180 Pinnacle Studio
photographic development processes, spots and streaks
from dust and lint adhering to the film, and intermittent
vertical lines where the film has been scratched during
projection.
The Old film effect lets you simulate these defects to
lend your pristine video the appearance of movies that
have suffered the ravages of time.
Soften
The Soften effect applies a gentle blurring to your
video. This can be helpful for anything from adding a
romantic haze to minimizing wrinkles. A slider controls
the strength of the effect.
Stained glass
This effect simulates the appearance of viewing the
video through a pane of irregular polygons arranged
into a mosaic.
Sliders let you control the average dimensions of the
polygonal “tiles” in the image and the width of the dark
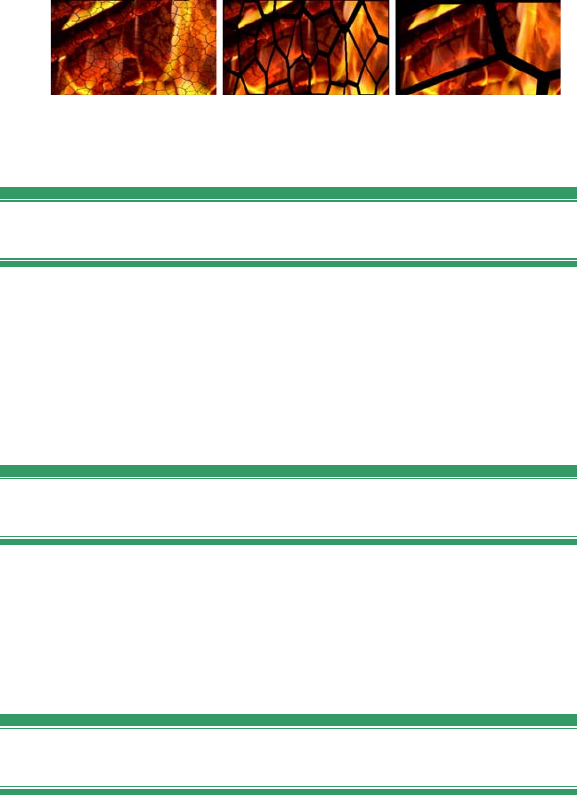
Chapter 7: Video effects 181
edging between neighboring tiles from zero (no edging)
to the maximum value.
Three variations of the Stained Glass effect
Luma key
This overlay effect works very similarly to Chroma
Key (page 199), but in this case the transparent areas of
the foreground image are defined by luminance rather
than color information.
2D Editor
Use this effect to enlarge the image and set which
portion of it will be displayed, or to shrink the image
and optionally add a border and shadow.
Earthquake
The Studio Ultimate Earthquake effect jiggles the
video frame to simulate a seismic event, whose severity
you control with sliders for speed and intensity.
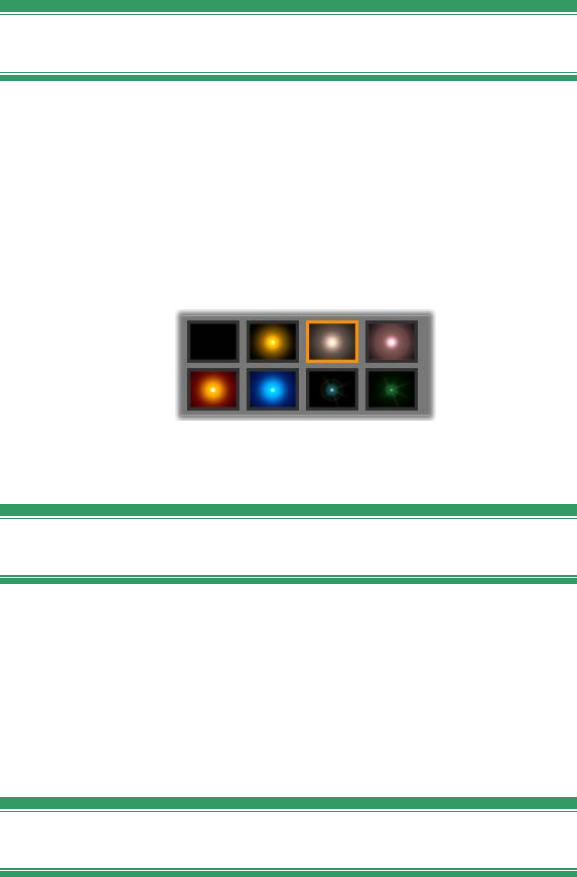
182 Pinnacle Studio
Lens flare
This effect simulates the flaring seen when direct bright
light overexposes an area of a film or video image.
You can set the orientation, size and type of the main
light. The first option of those shown below lets you
remove the light, though its secondary effects – rays
and reflections – are still generated.
The eight Type options.
Magnify
This effect lets you apply a virtual magnifying lens to a
selected portion of the video frame. You can position
the lens in three dimensions, moving it horizontally and
vertically within the frame, and nearer to or further
from the image.
Motion blur
This effect simulates the blurring that results when a
camera is moved rapidly during exposure. Both the
angle and the amount of blurring can be set.
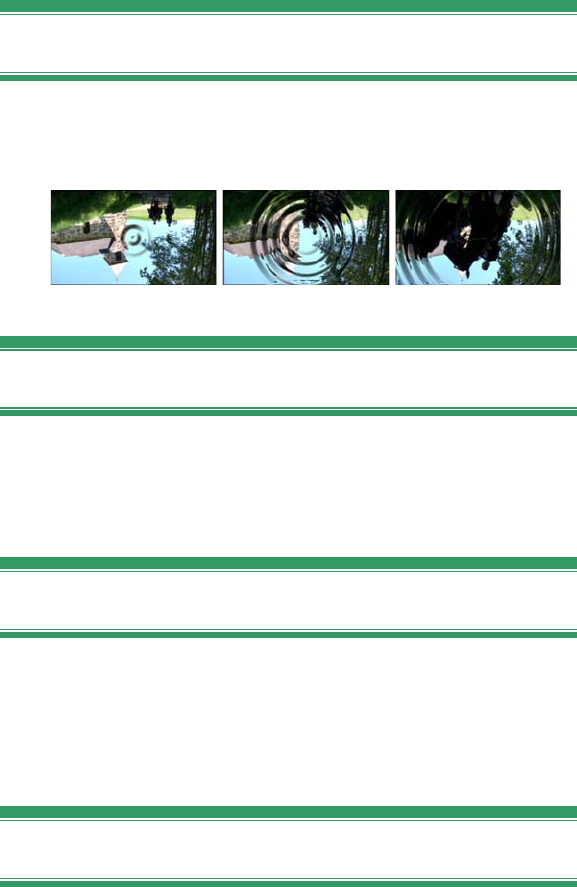
Chapter 7: Video effects 183
Water drop
This effect simulates the impact of a drop falling onto
the surface of water, producing expanding, concentric
ripples.
Stages in the Water Drop effect (“Big drop” preset).
Water wave
This effect adds distortion to simulate a series of ocean
waves passing across the video frame as the clip
progresses. Parameters allow you to adjust the number,
spacing, direction and depth of the waves.
Black and white
This effect subtracts some or all of the color
information from the source video, with results ranging
from partly desaturated (the “Faded” preset) to fully
monochrome (“Black and white”). The Amount slider
controls the strength of the effect.
Color correction
The four sliders in the parameters panel for this effect
control the coloration of the current clip in terms of:
Brightness: The intensity of light

184 Pinnacle Studio
Contrast: The range of light and dark values
Hue: The location of light on the spectrum
Saturation: The quantity of pure color, from gray to
fully saturated
Color map
This effect colorizes an image using a pair of blend
ramps, or color maps. Stylize your footage with bold
color treatments, add duotone and tritone style
colorization, or create striking editorial transitions.
Color map can be used for anything from fine control
of monochrome images to psychedelic color
transformations.
Invert
Despite its name, the Invert effect doesn’t turn the
display upside-down. Rather than the image itself, it is
the color values in the image that are inverted: each
pixel is redrawn in its complementary light intensity
and/or color, producing a readily recognizable but
recolored image.
This effect uses the YCrCb color model, which has one
channel for luminance (brightness information) and two
channels for chrominance (color information). The
YCrCb model is often used in digital video
applications.

Chapter 7: Video effects 185
Lighting
The Lighting tool enables correction and enhancement
of existing video that was shot with poor or insufficient
lighting. It is particularly suitable for fixing backlit
outdoor sequences in which the subject’s features are in
shadow.
Posterize
This Studio Ultimate effect lets you control the number
of colors used to render each frame of the clip, all the
way from the full original palette down to two colors
(black and white) as you drag the Amount slider from
left to right. Regions of similar color are coalesced into
larger flat areas as the palette shrinks.
RGB color balance
RGB Color Balance in Studio Ultimate serves a dual
role. On the one hand, you can use it to correct video
that suffers from unwanted coloration. On the other, it
allows you to apply a color bias to achieve a particular
effect. For example, a night scene can often be
heightened by adding blue and slightly reducing overall
brightness. You can even make video shot in daylight
look like a night scene.

186 Pinnacle Studio
Sepia
This Studio Ultimate effect imparts the appearance of
antique photography to the clip by rendering it in sepia
tones rather than full color. The strength of the effect is
controlled with the Amount slider.
White balance
Most video cameras have a “white balance” option for
automatically adjusting their color response to ambient
lighting conditions. If this option is switched off or not
fully effective, the coloration of the video image will
suffer.
Studio’s White balance effect corrects the problem by
allowing you to specify which color should be taken as
“white” in this image. The adjustment needed to make
that reference color white is then applied to every pixel
of the image. If the reference white is well chosen, this
can make the coloration seem more natural.
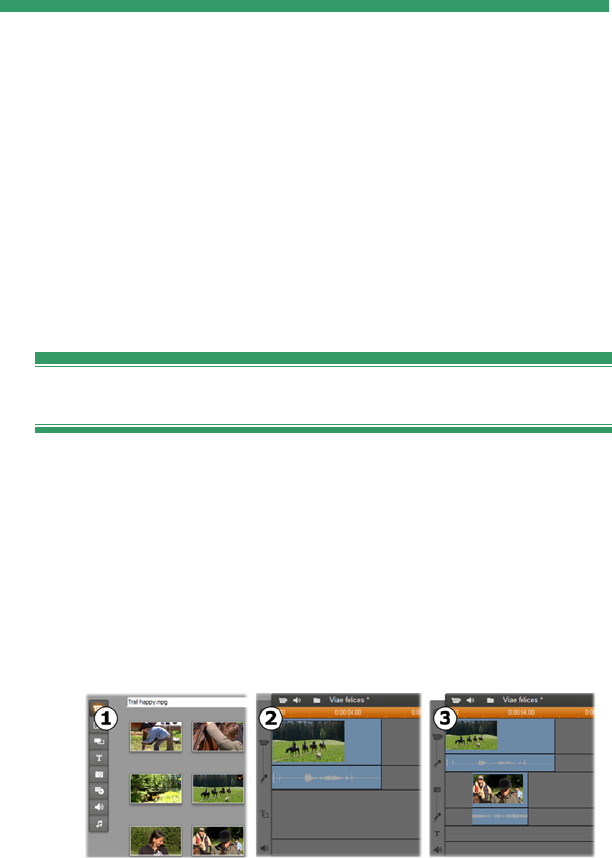
Chapter 8: Two-track editing 187
CHAPTER 8:
Two-track editing
Studio provides the power of multitrack video editing
to Studio through an auxiliary video track on the Movie
Window Timeline called the overlay track. With it you
can use advanced picture-in-picture and chroma-key
effects while retaining the convenience of Studio’s
streamlined and intuitive user interface.
Introducing the overlay track
Upon installation, the Timeline displays the five tracks
familiar to long-time Studio users: the video track with
its original audio track, and the title, sound effect and
music tracks.
To open the overlay track, drag a video clip from the
Album into the Movie Window and drop it on the
title track . The overlay track instantly appears with
the clip properly positioned upon it .
Drop video on the title track to open the overlay track.
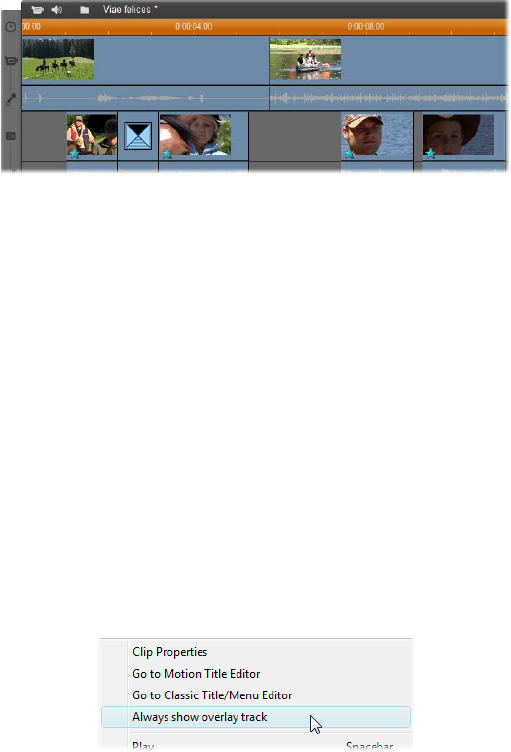
188 Pinnacle Studio
Along with the overlay track, Studio adds an overlay
audio track to accommodate the video clip’s original
audio information.
Once the overlay video and audio tracks have been
opened, Studio no longer accepts video clips on the title
track. Drag clips from the Album directly onto either
the video or overlay track as required.
Video clips on the video and overlay tracks.
Displaying and hiding the overlay track
As we have just seen, the overlay video and audio
tracks are displayed when you add your first overlay
clip. Similarly, when you remove the last clip from
these tracks, Studio again hides them from view.
This default behavior help keep the Movie Window
uncluttered, but if you are making frequent use of
overlay video, you might prefer to have the track
visible at all times. This can be achieved by activating
the Always show overlay track command on the pop-up
“context” menu that appears when you click on the
Movie Window with your right mouse button.
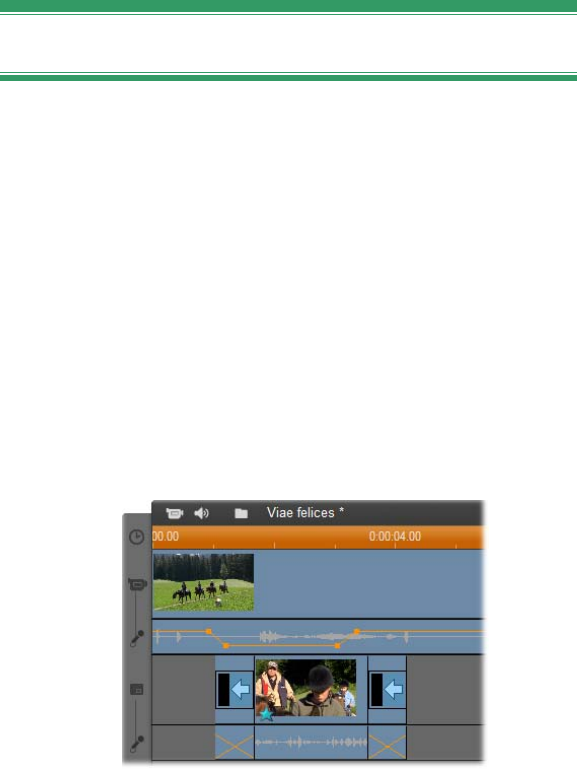
Chapter 8: Two-track editing 189
A/B editing
The second video track in Studio Ultimate often
simplifies the editing tasks – insert edits, L-cuts and J-
cuts – discussed under “Advanced Timeline editing” on
page 132.
An insert edit, for instance, becomes a trivial operation:
simply drag the clip to be inserted onto the overlay
track, and trim it as desired. (See “The Picture-in-
picture tool” below if you want the second video to
appear at reduced size so that only part of the main
video is obscured.)
An insert edit on the overlay track. The main video is
obscured while the B clip is playing.
In the J-cut and the L-cut, the audio portion of a clip
begins a little before (J) or a little after (L) the video.
They are often used together to soften the start and end
of an inserted clip.
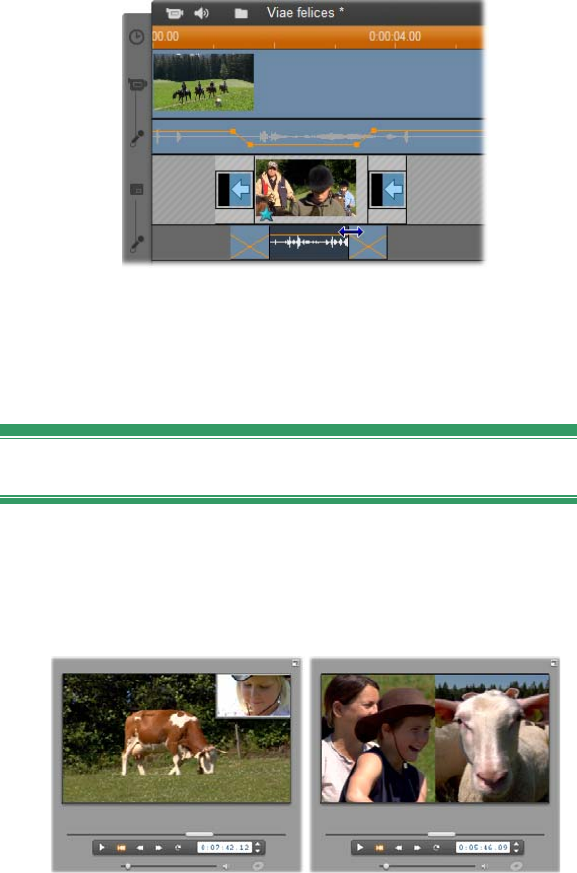
190 Pinnacle Studio
Split editing on the overlay track. The overlay video
track has been locked, allowing the B clip’s audio to
be trimmed. The main audio can be reduced or
muted as needed.
The Picture-in-picture tool
Picture-in-picture (often abbreviated to “PIP”) – the
inclusion of an additional video frame within the main
video – is a versatile effect familiar from its use in
professional TV productions.
Picture-in-picture with optional border, shadow and
rounded corners (left). Split-screen effects, like the
vertical split at right, are among the variations that
show off the versatility of the PIP tool.
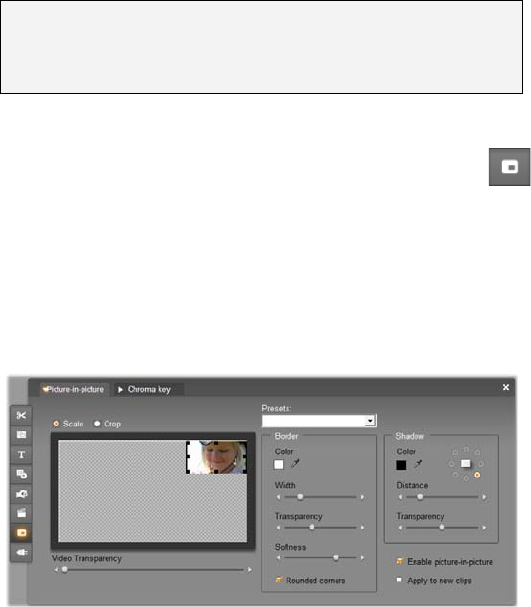
Chapter 8: Two-track editing 191
To use picture-in-picture, start in the usual way by
dragging some video clips onto the Movie Window
Timeline. Drop the clips you want for background
video onto the video track. The foreground clip – the
PIP clip – goes on the overlay track underneath the
main clip.
Note: If you are planning a split-screen effect, like the
one shown at right in the illustration above, it doesn’t
matter which of the two clips goes on which track.
With the clips in place, select the foreground clip
and open the Picture-in-picture and Chroma key
(PIP/CK) tool. It is the seventh tool in the Movie
Window’s video toolbox. We usually refer to the two
aspects of the tool separately as the Picture-in-picture
and the Chroma key tools.
The Picture-in-picture and Chroma key (PIP/CK)
tool is really two tools in one. Because they are used
independently, we treat them as separate tools. This
illustration shows the PIP side of the tool. Click the
Chroma Key tab at the top of the tool to switch.
192 Pinnacle Studio
Picture-in-picture tool controls
Most of the left-hand side of the PIP tool is taken up
with an interactive layout area where you can both
view and modify the dimensions, placement and
cropping of the overlay video. The adjustments that
you make are reflected in the Player preview as you
work.
The layout area has two modes, selected by the Scale
and Crop radio buttons.
Scale mode: The gray, checked region in the layout
area represents the transparent portion of the overlay
frame, through which any underlying video can be
seen. In typical PIP usage, this accounts for most of the
screen, the overlay being sized small enough that the
main video is not unnecessarily obscured. You can
modify the PIP frame in three ways:
Click on the PIP frame and drag it within the layout
area to reposition it within the main video frame.
Use the center control points on the edges of the PIP
frame to change its dimensions arbitrarily.
Use the control points at the corners of the PIP frame
to change its size but not its proportions (“aspect
ratio”).
Crop mode: In this mode the layout area represents the
entire overlay frame, regardless of its actual dimensions
as set in Scale mode. The rectangle defined by the
control points shows which portion of the frame is
visible. Outside the visible area, the frame is semi-
transparent, letting the checked pattern show through.
As in Scale mode, the side control points allow for free
adjustment of the crop rectangle, whereas the corner
control points preserve its aspect ratio.
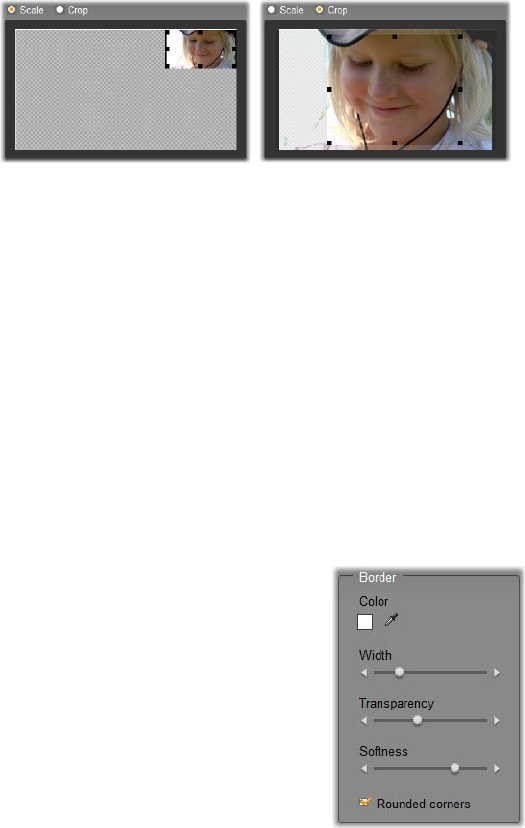
Chapter 8: Two-track editing 193
The PIP tool in Scale (L) and Crop (R) modes.
Presets: Choose a preset name to set up all the PIP
controls at once to the predetermined values associated
with that name. You can choose a preset as a first
approximation to your desired settings, then adjust
them manually until you get exactly what you want.
Transparency: Use this slider if you want the
underlying video to show through the overlay itself.
Moving the slider to the right makes the overlay, with
its border and shadow, increasingly transparent.
Border: These controls set the
color, width and transparency of
the border that will be drawn
around the overlay frame. Set the
width to zero (slider all the way
to the left) if you don’t want a
border at all. See page 202 for
information on how to use the
color controls.
The Softness slider controls the amount of blurring on
the outside edge of the border. Move the slider left for a
hard edge, or right to blend the border with the
background video. Check the Rounded corners box if
you want to round off the corners of the PIP rectangle.
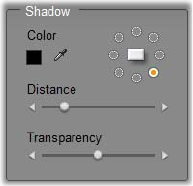
194 Pinnacle Studio
Shadow: These controls set the
color, width, angle and
transparency of the drop shadow
effect that gives the illusion of
the overlay frame floating above
the background video. Set the
width (using the Distance slider)
to zero if you don’t want a shadow to appear.
The dial-shaped shadow-angle control gives you eight
choices for the placement of the shadow relative to the
frame.
Enable picture-in-picture: This checkbox allows you
to turn the PIP effect on and off.
Apply to new clips: This option is handy when you
want to set up the same PIP settings for a number of
different clips. As long the option is checked, PIP will
automatically be applied to each new clip that you drag
onto the overlay track, using the same settings that
were displayed the last time the tool was open.
The PIP effect interface
If you prefer to enter your PIP parameter settings
numerically rather than graphically, you can turn to an
alternative interface provided by the Video effects tool.
You can also combine the two methods, using the PIP
tool’s graphical interface to specify the initial settings,
then fine tuning them with the numerical effect
parameters.
The available parameter settings of the Picture-in-
picture effect are almost identical to those offered by
the PIP tool:
Position: The Horizontal and Vertical sliders set the
offset of the center of the PIP frame from the center of
the background frame.
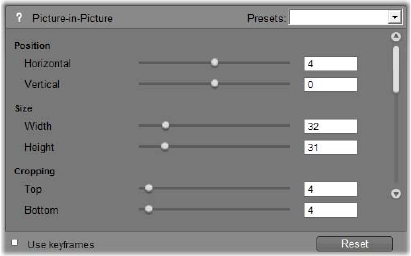
Chapter 8: Two-track editing 195
Parameter settings for the Picture-in-picture effect.
Size: The Width and Height sliders set the size of the
PIP frame as a percentage of its original dimensions.
Cropping, if used, can further reduce the final size of
the PIP frame on the screen.
Cropping: The four sliders in this group trim away a
percentage of the original PIP video frame, allowing
you to remove unnecessary portions of the image and
focus on the main subject.
Video: The Transparency slider lets the background
video show through the PIP overlay to any desired
degree.
Border: The parameters in this group are equivalent to
the Border settings on the PIP tool, allowing you to set
the overlay border’s color, thickness, transparency and
edge softness, and to select the rounded corners option
if desired. One bonus of the effect interface is that there
are separate Width and Height controls to control the
border thickness, rather than the single setting provided
by the tool.
Shadow: As with the Border group, these parameters
are essentially the same as those on the PIP tool, except
that the Horizontal offset and Vertical offset parameters
afford slightly more flexibility in positioning the
shadow than do the tool’s Distance and Angle settings.

196 Pinnacle Studio
The Chroma key tool
Chroma key is a widely-used technique that allows
foreground objects to appear in a video scene even
though they were not present – and often could not
have been present – when the scene was shot. When an
action star tumbles into a volcano, or battles a giant
cockroach, or saves the crew with a daring space-walk,
the chances are that chroma key or a related technology
was involved in the scene.
Chroma key effects are often called “blue-screen” or
“green-screen” effects because the foreground action is
shot in front of a uniform blue or green background.
The background is then electronically removed, leaving
only the foreground action to be superimposed on the
actual background of the final scene, which has been
separately prepared.
Blue and green are the generally-preferred colors for
chroma key use because their removal from an image
will not affect human skin tones, but in principle any
hue can be used with Studio’s chroma key tool.
Creating a scene with chroma key: A clip on the
video track (L) is chosen as the background for a
green-screen clip on the overlay track (C). Chroma
keying removes the green to complete the scene (R).
As with picture-in-picture, the first step in using
chroma key is to drag some video clips onto the
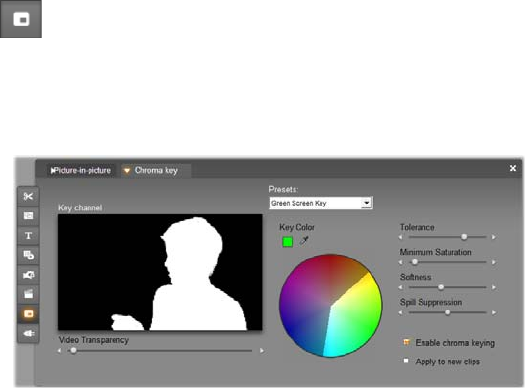
Chapter 8: Two-track editing 197
Timeline. Drop the clips you want for background
video onto the video track. The foreground clip, which
should have a uniform, highly-saturated background
like the center clip in the illustration above, goes on the
overlay track below the main clip.
With the clips in place, select the foreground clip
and open the Picture-in-picture and Chroma key
(PIP/CK) tool. It is the seventh tool in the Movie
Window’s video toolbox. Select the Chroma key tab to
display the controls you will need.
The chroma key side of the PIP/CK tool.
Chroma-key tool controls
The chroma key tool constructs a “mask”, shown in the
Key channel graphic on the left side of the tool, where
the transparent part of the frame is drawn in black, and
the opaque part – the part you will see in the final video
– is drawn in white. Most of the remaining controls are
used to define exactly which areas of the frame will be
included in the transparent part of the mask by setting
the “key color” and related properties.
Transparency: Use this slider if you want the
underlying video to show through the normally opaque
overlay. Moving the slider to the right makes the
overlay, with its border and shadow, increasingly
transparent.
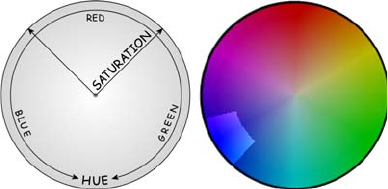
198 Pinnacle Studio
Presets: The tool provides two presets, called “Green
screen key” and “Blue screen key”. These provide good
starting points for setting up the tool if you are using
one of the standard chroma key colors.
Key color: Use the color swatch or eye dropper buttons
to select the color that will be removed from the video
frame leaving only the desired foreground. See page
202 for information on how to use the color controls.
Rather than an actual color, you are really selecting
only a hue, without regard to the other properties –
saturation and intensity – that in combination with hue
make a complete color specification. The chosen hue is
shown by the position of the highlighted region on the
circumference of the color circle display.
The color circle on the Chroma key tool highlights a
range of hues (around the circumference) and color
saturation values (along the radius). Any pixel in the
overlay frame whose hue and saturation fall within
the highlighted region will be treated as transparent.
Color tolerance: This slider controls the width of the
range of hues that will be recognized as belonging to
the “key color”. Moving the slider to the right increases
the angle of the arc covered by the highlighted region
on the color circle.
Saturation minimum: Saturation is the amount of hue
in a color. A pixel with zero saturation (corresponding
to the center of the color circle) has no hue: it falls on
Chapter 8: Two-track editing 199
the “gray scale”, whose extremes are white and black.
Chroma key works most effectively when the
background is highly and uniformly saturated, allowing
a high setting of this slider. In the real world, vagaries
of lighting and apparatus often result in a background
that falls short of the ideal. Moving the slider left
allows a wider range of saturation values to be
matched, indicated by a highlighted region that extends
farther towards the center of the color circle.
Softness: This slider controls the density of the
underlying video. When it is positioned all the way to
the left, the main video is entirely black. As you move
the slider to the right, the main video is brought up to
full density.
Spill suppression: Adjusting this slider may help
suppress video noise or fringing along the edges of the
foreground object.
Enable chroma keying: This checkbox allows you to
turn the chroma key effect on and off.
Apply to new clips: This option is handy when you
want to set up the same chroma key settings for a
number of different clips. As long as the option is
checked, chroma key will automatically be applied to
each new clip that you drag onto the overlay track,
using the same settings that were displayed the last
time the tool was open.
The chroma key effect interface
If you prefer to enter your chroma key parameter
settings numerically rather than graphically, you can
turn to an alternative interface provided by the Video
effects tool. You can also combine the two methods,
using the chroma key tool’s graphical interface to
specify the initial settings, then fine tuning them with
the numerical effect parameters.
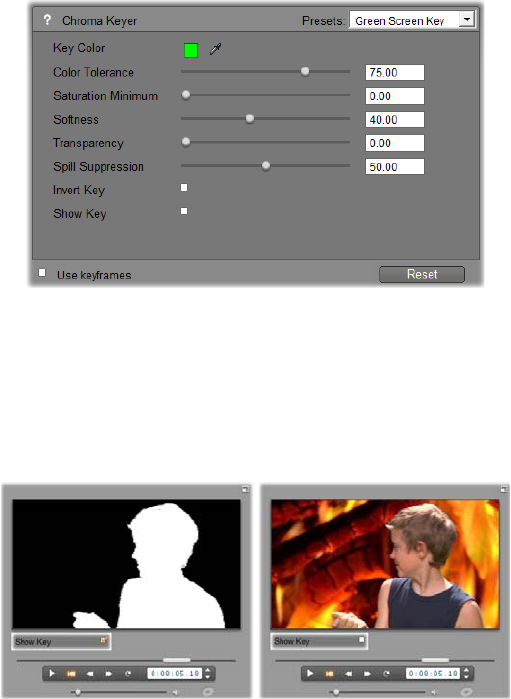
200 Pinnacle Studio
The Chroma key plug-in provides parameter settings
almost identical to those offered by the chroma key
tool, but provides one more option, Invert Key. When
this option is activated, the normally opaque parts of
the key are treated as transparent, and the transparent
parts as opaque, so that the underlying video shows
through everywhere except for the area masked by the
colored screen.
Parameter settings for the Chroma key effect.
The chroma key tool provides a special view of the
transparency key it has generated. To get this view in
the Player while working with the effect parameters,
click the Show Key checkbox.
Using Show Key: At left the key, at right the real thing.
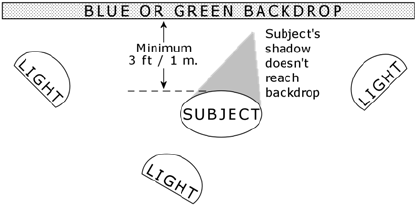
Chapter 8: Two-track editing 201
Chroma key tips
No matter how good your software may be, successful
use of chroma key depends on carefully setting up your
shot, and may require experimentation to get the details
just right. Here are some tips to get you started:
Light the backdrop as evenly as possible: Very often,
background coloring that looks flat to the naked eye
will prove on playback to have areas that are too dark
or too washed out to work well for chroma keying,
which favors even, saturated color. Use multiple lights
on the backdrop to ensure that it is well-lit across its
whole area and without hotspots. Diffuse sunlight, as
produced by a light overcast sky, can work well when
shooting out of doors is an option.
Don’t let the subject shadow the screen: Arrange
your subject and foreground lighting so that no
shadows fall across the backdrop. The subject should
be not less than one meter (three feet) in front of the
backdrop.
Setting up a chroma key shot. The backdrop is well
and evenly lit, and positioned well behind the subject
so that shadows do not interfere. The lighting of the
subject should be arranged to suit the background
that will be keyed into the shot.
202 Pinnacle Studio
Choose foreground colors carefully: Don’t have your
subject wear green if you are shooting on a green
screen, or blue for a blue screen; those areas will be
removed if they are taken to match the key color. You
have to be especially careful about this when working
with less even backdrops that require you to set a wider
color tolerance in the chroma keyer.
Make a smooth profile: Chroma keyers do better with
a smooth edge than a jagged or complex one, so try to
have your subject present a smooth profile to the
camera. Hair is particularly tricky, and should be
slicked down if possible. If the subject can wear a hat,
so much the better.
Use tight framing: The wider your frame, the larger
your background needs to be, and the more difficult it
is to control your shot. One way to keep things simple
is to shoot your subject from the waist up rather than in
full view.
Note: A professional background cloth for chroma key
work is available as an inexpensive purchase at the
Avid web-site.
Selecting colors
To select colors in tools and effects that
provide a color parameter, click either on the
color swatch (left) or the eye dropper button. The first
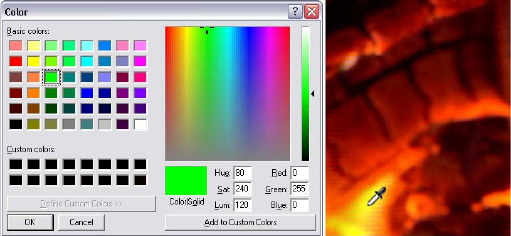
Chapter 8: Two-track editing 203
opens a standard color picker dialog; while the second
lets you choose a color by clicking anywhere on the
screen.
Two ways to set colors: The Windows color picker
dialog (L) opens when you click the color swatch
button provided in some tools and effects. Click the
eye-dropper button to select a color from the Player
preview window or elsewhere using a mouse pointer
in the form of an eye-dropper (R).
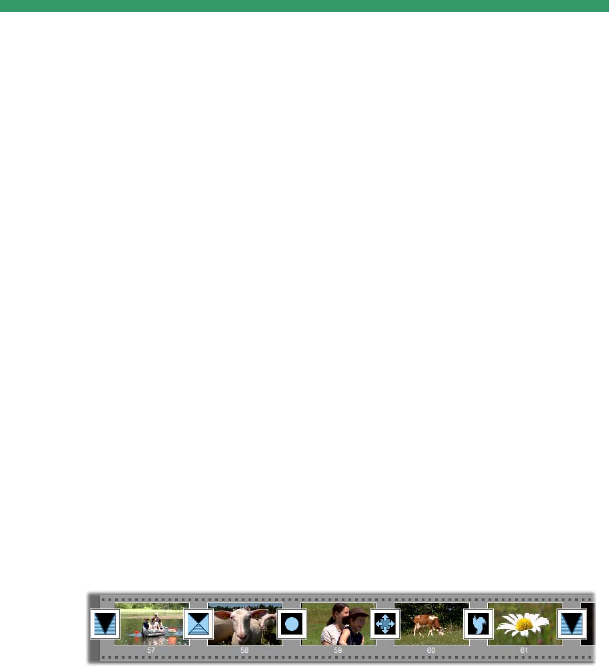
Chapter 9: Transitions 205
CHAPTER 9:
Transitions
A transition is an animated effect that eases – or
emphasizes – the passage from one clip to the next.
Fades, wipes and dissolves are common types of
transition. Others are more exotic, and may even
involve sophisticated 3-D graphics.
Transitions are stored in their own section of the
Album (see “The Transitions section” on page 84). To
use a transition, drag it from the Album into the Movie
Window and drop it beside any video clip, theme clip
or still image. (You can also apply transitions directly
to audio clips. See “Transitions on the audio tracks” on
page 322.)
A series of transitions (the icons between the video
clips) in Storyboard view.
In Timeline view, you can drop the transition on either
the main video track, the overlay track, or the title
track. On the video track, the transition provides a
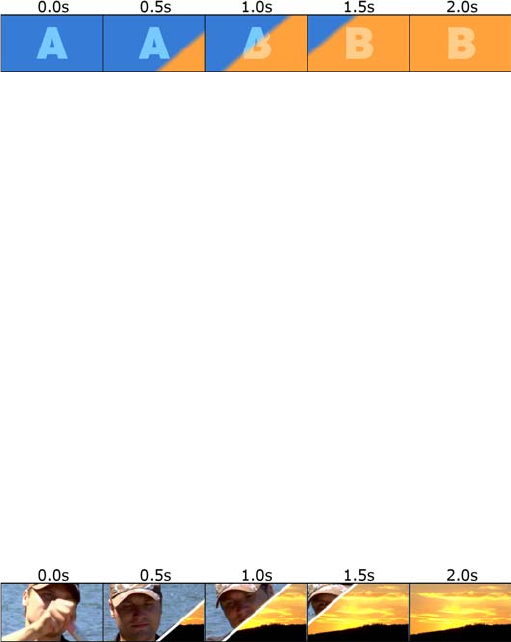
206 Pinnacle Studio
bridge between two full-screen clips (or between one
clip and blackness if the transition has only one
neighbor, as at the beginning of the movie). On the
overlay and title tracks, the transition bridges two
neighboring clips (or one clip and transparency).
Diagram: Five snapshots from the life of a 2-second
diagonal wipe transition.
If a transition is to last for two seconds (the default
transition duration in a fresh Studio installation), the
second clip begins to run two seconds before the first
clip is finished. At the outset, only the first clip is
visible; by the end, the second clip has completely
replaced the first.
The details of what happens in between, as the first clip
is gradually removed and the second gradually appears,
depend on the transition type. Since the video clips
overlap, the total duration of the pair of clips is reduced
by the duration of the transition.
Here is the same transition as above, this time using
actual video. For clarity, the transition boundary in
the three center frames has been emphasized in
white. Both clips continue to run while the transition
is in progress.

Chapter 9: Transitions 207
Transition types and their uses
Like all effects, transitions should be used not for their
own sake but to serve the overall needs of your movie.
Well-chosen transitions can subtly reinforce the
meaning of the movie and how it plays without
drawing attention to themselves. Observing the way
transitions are used in professionally-produced video
on television will suggest many ways to improve your
own movies. Generally, it is advisable to refrain from
overusing transitions that cause abrupt changes or
otherwise draw attention to themselves: there’s a big
difference between a subtle dissolve and a heart-shaped
wipe.
The basic transitions discussed below – fades,
dissolves, wipes, slides and pushes – are all among the
first group of standard transitions (the “2D transitions”)
in the Album.
A set of more elaborate transitions is found in the
Alpha Magic group, which is the second entry in the
dropdown list of transition groups in the Album.
The many other groups on the list all belong to the
Hollywood FX, a large set of complex transitions
featuring three-dimensional graphics. The Hollywood
FX transitions are discussed at the end of this section
(page 209).
Cut: A cut is the minimal transition – an instantaneous
shift from one scene to the next. In Studio, it is the
default transition. A cut is appropriate when there is a
strong inherent connection between one clip and the

208 Pinnacle Studio
next; for instance, when the camera changes position or
angle within a scene.
Fade: This transition fades into the beginning of
a video clip from a black screen, or from the end
of a clip to a black screen. A fade dropped between two
clips creates a fade down followed by a fade up. The
fade transition is the first transition icon in the Album.
A fade is usually used at the beginning and end of a
movie, or when there is a large break in continuity, as
when a new section begins. For example, a movie of a
play might benefit from inserting a fade between acts.
Dissolve: A dissolve is similar to a fade, except
that the new scene begins to fade up even while
the old one is fading down. The visual overlap this
produces is less dramatic than a fade, but less abrupt
than a cut. A short dissolve can take the edge off a cut,
while a long dissolve is useful to suggest the passage of
time.
Wipe, slide and push: In each of these
standard transition types, the incoming
video is gradually revealed behind an edge that moves
across the frame in a certain direction. The Album
icons shown with this paragraph represent a leftward
wipe, a down-and-left slide and a rightward push
respectively.
In a wipe transition, both the old and new video occupy
their normal position in the frame throughout the
transition. The new video comes into view as the
transition edge crosses the frame, rather like new
wallpaper being rolled on over old.
A slide is similar to a wipe, but in this case the frame of
the new video slides across the screen until it reaches
Chapter 9: Transitions 209
its home position. The effect is reminiscent of a blind
being pulled down over a window.
A push is similar to a slide, except that the old video is
pushed out of the frame as the new video enters, like
advancing a filmstrip from one frame to the next.
Hollywood FX for Studio
Avid’s Hollywood FX includes a large number
of dramatic 3-D transitions and effects. These
are ideal for opening sequences, sports and action
footage, or music videos. Hollywood FX satisfies
professional expectations for quality without sacrificing
ease of use.
A basic set of fully-functional Hollywood FX is
included with Studio, and many more are available for
purchase online. For more information, see “Expanding
Studio” on page 12.
Also available for purchase on-line is the HFX Creator
editing tool for Hollywood FX. This software lets you
customize your Hollywood FX, or create new ones
from scratch. HFX Creator includes advanced
keyframe editing for flight paths and all parameters,
powerful warp plug-ins, and a 3D text
generator. You can also create a wide
range of 3D MultiWindow Effects
using external video sources, and add
real-life 3D objects and lighting.
To initiate the purchase of HFX
Creator, click the Edit button in the
Clip properties tool for any Hollywood
FX transition.

210 Pinnacle Studio
Previewing transitions in your movie
Studio lets you preview transitions in the Player. Just
drag and drop a transition into the Movie Window,
click the Play button (or hit [Space]) and see how the
transition works with your material.
You can also preview transitions by scrubbing through
them in the Player or on the Timeline of the Movie
Window.
Background rendering of Hollywood FX
Background rendering is an optional feature in which
the computation needed to create a detailed preview of
Hollywood FX transitions and other effects is carried
out as a “background task” with no interruption of your
workflow. You can configure background rendering on
the Video and audio preferences options panel (Setup
Video and Audio Preferences). See “Video and audio
preferences” on page 358 for details.
Until the rendering of a transition is complete, the
Player will preview it at reduced resolution and frame
rate. A colored bar appears in the Timescale above the
clip while background rendering is in progress.
Audio transitions
Video clips in the Movie Window normally have
synchronous audio. In the absence of a transition, both
video and audio cut from one clip to the next. When a
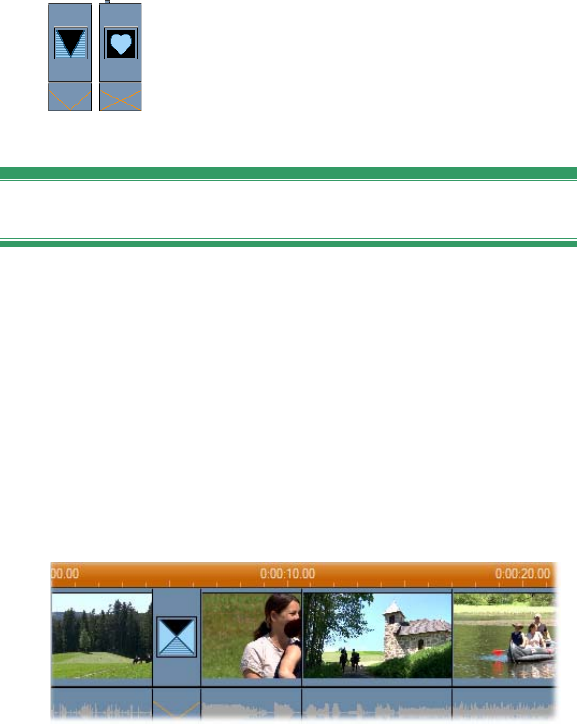
Chapter 9: Transitions 211
transition is placed between two clips, the audio cross-
fades (the audio equivalent of a dissolve).
The only exception to this rule is the Fade transition,
which takes the audio completely out then back in
again.
Normal transitions cause a cross-fade in
the audio (left). In a Fade transition
(right), the audio fades down then up
along with the video.
The Ripple Transition command
This Studio feature is especially useful for creating a
quick slideshow from a set of still images, or a video
pictorial from a set of short clips. Such a presentation is
more interesting if you connect each pair of clips with a
transition. Ripple Transition gives you a quick and easy
way of achieving that.
Begin with a set of a clips on the Timeline, then add a
transition of the desired type between the first two
clips.
Now select all the clips except the first, click on any of
them with the right mouse-button, and select Ripple
Transition from the pop-up menu.
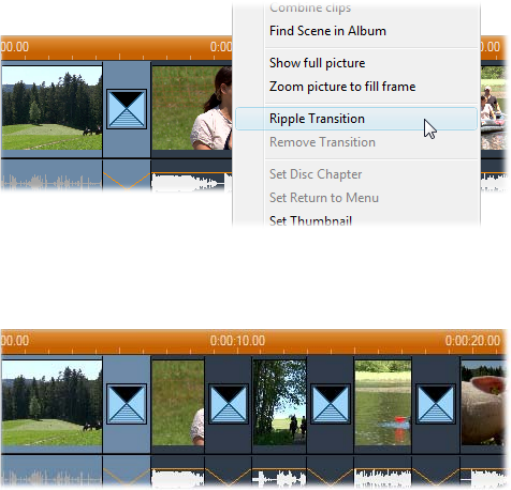
212 Pinnacle Studio
Studio inserts a duplicate of the original transition
between each pair of selected clips.
TRIMMING TRANSITIONS
Although transitions are not true clips, they are handled
very similarly to clips within Studio’s editing
environment. Like clips, you can trim transitions either
directly on the Movie Window Timeline, or by using
the Clip properties tool.
See “Trimming on the Timeline using handles” on page
123 for a discussion of the first method. The maximum
allowed duration of a transition is one frame less than
the shorter of the neighboring clips.

Chapter 9: Transitions 213
Trimming with the Clip properties tool
The Toolbox Modify Clip Properties menu
command invokes the Clip properties tool for the
selected clip. For all transition types, this tool provides
previewing controls, and the ability to set two
properties:
To set the duration of the transition, change the value
in the Duration counter. A transition’s duration must
always be less – if only by a single frame – than the
shorter of its neighboring clips.
The Name text field lets you assign a custom name to
the clip to replace the default one assigned by Studio.
The Name field is provided on the Clip properties
tool for all clip types. Clip names are used by the
Movie Window’s List view, and can also be viewed
as fly-by labels when your mouse hovers over clips
in the Storyboard view.
Many transition effects also support a “reverse
direction” option, which causes the transition animation
to run backwards, allowing a rotary wipe, for example,
to be either clockwise or counterclockwise. The
Reverse checkbox is enabled when the current
transition supports this option.
If you have purchased the HFX Creator application,
you can open it within Studio by clicking the Edit
button on the Clip properties tool for Hollywood FX
transitions. HFX Creator is an external editing program
with many options, whose use is described in its
accompanying documentation.
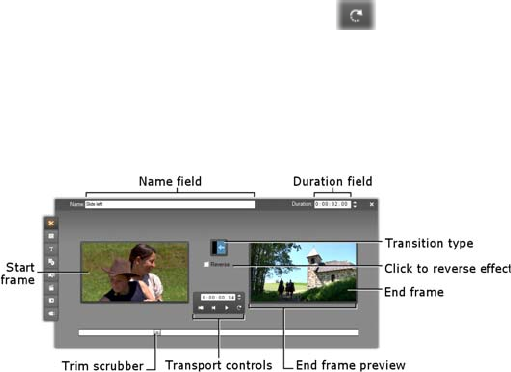
214 Pinnacle Studio
Previewing in the Clip properties tool
The Clip properties tool provides previewing controls
for transitions similar to those for video clips. See
“Trimming with the Clip properties tool” on page 128
for more information.
The preview areas show the last full frame of the
outgoing clip and the first full frame of the incoming
one. The preview frames update as you edit the
Duration field.
The transport controls let you preview the transition
effect in the Player either frame by frame or at full
speed. The Loop play/Pause button cycles through
the transition repeatedly at normal playback speed.
Both the counter (with its associated jog buttons) and
the scrubber give you direct access to any desired point
within the transition.

Chapter 10: Still images 215
CHAPTER 10:
Still images
Video usually means images in motion, but most
productions also include stationary titles or graphics,
and may include other types of still image as well.
The still images you can use in your movies include:
All types of text captions and graphics, including
scrolling credits and “crawled” messages.
Photos or drawings stored in disk-based image files.
Individual video frames obtained with the Frame
grabber tool.
“Disc menus” for DVD, BD and VCD authoring.
These specialized images are covered in Chapter 11:
Disc menus.
Any of these still image types can be treated in either of
two ways, depending on which track you drop them
onto in the Movie Window Timeline:
To add a full-screen image with a solid background,
add the image to the video track.
To add an image so that it appears in your movie
with a transparent background, superimposed over
the clips on the video track, place it on the title track.
To be used in this way, the image must be in either
TIFF (tif) or PNG (png) format, with the transparent
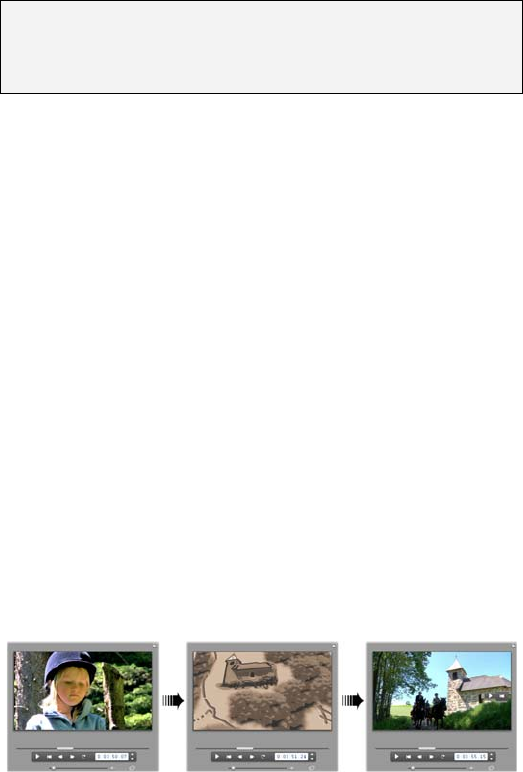
216 Pinnacle Studio
area defined by means of an alpha channel as this
format allows.
Note: Studio provides an additional option, the overlay
track, for adding your images to the Timeline. See
Chapter 8: Two-track editing, for details.
The Album has separate sections for titles, bitmapped
images and disc menus. All these resources are stored
as separate files on your hard drive. You can also create
titles and disc menus of your own in one of Studio’s
title editors and add them directly to your movie
without first saving them as separate files (see Chapter
12: The Classic Title Editor, and Chapter 13: The
Motion Titler). Similarly, still video frames can be
added directly from the Frame grabber tool (see “The
Frame Grabber” on page 225).
Full-screen images
A full-screen image is one that is placed on the video
track. It fills the entire screen, replacing the video.
When the preceding video clip ends, Studio plays the
still image clip. The visual effect is that the video ends,
and is replaced by the graphic until the next clip begins.
Overlay images
An overlay image is one that is placed on the title track.
It is superimposed on the current video clip, without

Chapter 10: Still images 217
replacing the video. The transparent area of the image
must be defined by means of an alpha channel.
Making a slideshow
If you would like to assemble a quick slideshow of still
images or video clips, you may want to take advantage
of Studio’s Ripple Transition feature to quickly insert a
chosen transition between each pair of clips or images.
See page 211 for details.
Applying effects
Most of Studio’s plug-in video effects can be applied to
still images. (The exceptions are effects like Speed that
only make sense for moving video.) See “Using video
effects” on page 161 for detailed information.
EDITING STILL IMAGES
As with other types of clip, you can trim still images
directly on the Movie Window Timeline, or by using
the Clip properties tool.
See “Trimming on the Timeline using handles” on page
123 for a discussion of the first method. The difference
with a still image clip is that you can extend it to any

218 Pinnacle Studio
duration you choose, whereas a video clip can be no
longer than the original Album scene.
Effects like Blur, Posterize and Color correction can be
applied to still image clips in the same way as to video
clips. See “Video effects – the basic set” on page 172.
Editing image clip properties
The Toolbox Modify Clip Properties menu
command opens a version of the Clip properties
tool appropriate for the type of the selected clip. The
topmost tool icon in the video toolbox can also be used.
With bitmapped images, including ordinary photos and
image files, and with disc menus, double-click the clip
for a third way to access the tool. Double-clicking a
title, however, opens it into the appropriate title editor.
All versions of the Clip properties tool allow you to set
the duration and name of the current clip, as follows:
To set the length of time the still image is displayed,
change the value in the Duration counter.
The Name text field lets you assign a custom name to
the clip to replace the default one assigned by Studio.
Clip names are used by the Movie Window’s Text
view, and can also be viewed on the fly-by labels
that appear when your mouse hovers over clips in the
Storyboard view.
The Clip properties tool for disc menus is described in
Chapter 11: Disc menus. See Chapter 12: The Classic
Title Editor and Chapter 13: The Motion Titler for
details about editing the properties of titles.
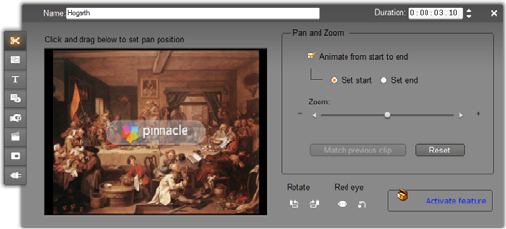
Chapter 10: Still images 219
Editing photos and graphics
The Clip properties tool for editing bitmapped images
allows you to perform several important image-
processing tasks:
Zoom in on your pictures and photos in order to crop
away unneeded material and focus on only the
essential part of the image;
Rotate the image in 90-degree increments to permit
the use of photos taken in “portrait” mode;
Remove the “red-eye” effect that can occur when the
subject of a photograph looks directly into the
camera when the flash goes off;
In Studio Ultimate, put together “pan-and-zoom”
animations in which a high-resolution image is
viewed as a succession of smoothly-connected close-
ups at various degrees of magnification. This
technique is closely associated with the well-known
documentary filmmaker Ken Burns.
The Clip properties tool for photos has pan-and-
zoom controls for focusing on an area of interest. In
Studio Ultimate, pan-and-zoom can be animated to
create the effect of traversing the image from one
focus to another. Animated ‘P&Z’ can be obtained in
other versions by upgrading to Studio Ultimate.

220 Pinnacle Studio
If an image needs rotating by 90 degrees to
bring it into “landscape” mode (wider than
high), start by clicking one of the image
rotation buttons. If needed, click the button more than
once until the clip is properly oriented.
If you want to reframe the image, click directly on
the tool’s preview window and, while holding the left
mouse-button down, drag the image in any direction
until it is properly positioned. Release the button to
complete the operation. Next, use the Zoom slider to
magnify or reduce the image size as desired. Adjust the
position and magnification with these controls until the
image is cropped and framed to your satisfaction.
The Reset button removes all your position and zoom
changes, restoring the original framing of the image.
The red-eye reduction feature helps restore
a natural appearance to photos in which the
subject’s eyes are tinged with red. (This
problem is caused by light from the flash unit bouncing
off the retina of the eye when the subject is looking
directly into the camera.)
To activate red-eye reduction, click the left button in
the red eye group. The button stays down when clicked.
Now click the image preview with the left mouse-
button above and to the left of the area in which red-
eye reduction should be applied. While holding the
button down, drag down and to the right until the area
is fully enclosed. When you release the mouse-button,
the red-eye reduction effect is instantly applied within
the rectangle you have outlined.
It is usually not necessary to be highly precise when
marking out the red-eye reduction area. In fact, a larger
rectangle may even yield a better result than a smaller

Chapter 10: Still images 221
one that encloses the eyes and no more. If the red-eye
reduction does not clear up the problem entirely on the
first attempt, try again with a different rectangle size.
Studio’s red-eye reduction algorithm provides excellent
results with a wide variety of photos. However, some
photos are better-suited to the process than others.
To remove red-eye reduction once applied, click the
right-hand button in the red eye group.
Animating Pan-and-zoom in Studio Ultimate
If you own Studio Ultimate, or purchase an activation
key by clicking the activate button on the pan-and-
zoom controls, you can create effective animations
from your photos and graphic images. Use the highest-
resolution images available with this technique, since
they allow greater magnification levels before there is
perceptible loss of quality.
Start creating a pan-and-zoom
animation by clicking the
Animate from start to end
checkbox to activate the animation feature for the
current clip. This enables the Set start and Set end radio
buttons, with Set start initially selected. Use the pan-
and-zoom controls to set the framing you want to see at
the start of the clip. Finally, click the Set end button,
then use the controls to set up the framing you want for
the end of the clip.
When the clip is played back, Studio will generate the
intervening frames to connect your start and end views
in a smooth animation.
222 Pinnacle Studio
The procedure above describes the simplest form of
pan-and-zoom animation. Effective uses include:
Moving from a full-frame photograph to a detail
view of a person or thing somewhere in the image.
This gives a similar result to zooming in while
shooting video. This might be used to prepare the
viewer for a sequence of shots exploring the same
close-up subject in multiple views, or providing
further close-ups of different parts of the same scene.
Moving out from a detail to the full-frame view, as
though zooming out with the video camera. In the
above scenario, this returns the viewer to the original
context, perhaps closing a chapter or episode within
your movie.
Panning across a wide scene to absorb its details one
by one. This technique can be used to impart a sense
of discovery when a dramatic or humorous detail
finally comes into view.
Complex pan-and-zoom animations
When you apply pan-and-zoom to a number of copies
of the same image in succession, it is as though you are
taking your viewer on a guided tour. In effect you are
telling a story, one that gradually unfolds as you draw
attention to one detail after another.
Story-telling may be difficult or not, but implementing
your story in Studio is very simple. Once you have set
up the first clip, with the first pan-and-zoom “camera
move”, simply copy it as often as necessary, and
change the end setting for each clip.
You almost always want the start framing of a new clip
in the sequence to match the end framing of the

Chapter 10: Still images 223
previous clip, in order that the sequence of moves will
be smoothly connected. On the second clip, and all
those that follow, click the Match previous clip button
wherever you want continuity.
In order to allow the movie to dwell on each detail for a
while after you pan to it, insert a non-animated copy of
the image between each move. Connect these static
clips into the sequence as usual with the Match
previous clip button.
The pan-and-zoom controls are used here to focus in
turn on four vignettes in the satirical painting “An
Election Entertainment” by English artist William
Hogarth. A fifth view pulls back to show as much of
the entire canvas as will fit in a wide-screen frame
without black sidebars. The tool automatically
generates smooth motion from one view to the next,
panning and zooming simultaneously as needed.

224 Pinnacle Studio
Animating pan-and-zoom with keyframes
Studio Ultimate users have another option for
animating their pan-and-zoom productions:
keyframing. The use of this feature enables a string of
pan-and-zoom movements to be associated with a
single clip, instead of having a single movement on
each of a series of clips. See “Keyframing” on page
166.
The pan-and-zoom effect interface
As an alternative to pan-and-zoom with the Clip
properties tool, you can enter the framing properties
numerically with the Pan and zoom video effect. This
alternative interface is provided by the Video effects
tool. You can also combine the two methods, using the
tool’s graphical interface to specify the initial settings,
then fine tuning them with the numerical effect
parameters.
The Pan and zoom effect is found in the Fun Effects
group. The parameters for pan-and-zoom are exactly
parallel to those offered by the tool interface: you can
use the sliders to set Zoom, Horizontal position and
Vertical position. The “red-eye reduction” controls of
the tool interface do not have equivalent parameters,
however.
Parameter settings for the Pan-and-zoom effect.

Chapter 10: Still images 225
THE FRAME GRABBER
The Frame Grabber can capture a single frame from
any video clip in your current project. The grabbed
frame can be added directly to your movie or saved out
to disk in any of a number of standard graphics
formats.
Once you have saved a grabbed frame to disk, you can:
Use it in other software applications.
Manipulate it in image-editing software.
Import it back into your movies as a still image via
the Album or one of the title editors.
The Frame grabber tool
Use the Frame grabber tool in conjunction with
the Player. To access it, open the Toolbox and
click the Frame grabber button.
Scrub or play through your movie or source video until
the frame you want is displayed in the Player, then
click the Grab button. The grabbed frame appears in
the tool’s preview area, ready to be added to your
movie or saved as a file on disk.
Reduce flicker: If the source video of the frame grab
contains a large amount of motion, the grabbed frame
may show flickering, which can be reduced or
eliminated by checking the Reduce flicker option.
Because Reduce flicker also reduces resolution
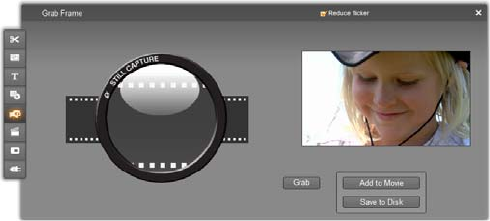
226 Pinnacle Studio
somewhat, you should not use the option if the overall
result is undesirable for a particular image.
The Frame grabber tool after grabbing a frame from
the movie. The grabbed frame can now be added as a
still image to your movie or saved as a picture file.
Grab: Click the Grab button when you have located
the frame you want to grab in the Player and configured
the Reduce flicker option. The grabbed frame is
displayed in the tool’s preview area, and the two output
buttons (Add to Movie and Save to Disk) are enabled.
Add to movie: This button inserts the grabbed frame
into the Movie Window video track ahead of the
currently-selected clip.
Save to disk: This button opens a Save As dialog so
that you can select a folder, file name and image format
for the file in which the grabbed frame will be stored.
The dialog also provides controls that let you set the
resolution of the saved image to any of several standard
sizes, to the original size of the grabbed frame, or to a
custom size that you enter.
If the “aspect ratio” (the ratio of the width to the
height) of the size you choose is different from that of
the grabbed frame, the image is stretched as necessary.
This can introduce visible distortion of shapes; for
instance, people may appear either unnaturally thin or
unnaturally squat.

Chapter 11: Disc menus 227
CHAPTER 11:
Disc menus
When movies are designed for the DVD, Blu-ray Disc,
VCD or S-VCD disc formats, video becomes an
interactive medium, with new possibilities for both
videographer and audience.
Developing – “authoring” – a disc in one of these
formats means going beyond the old idea of creating a
movie to be viewed in strict sequence from beginning
to end. Now the audience can decide which parts of the
movie to view, and in what order.
The essential new feature that makes disc authoring
possible is the menu. A particular disc may have one, a
few or many menus, each consisting of a still image or
short video sequence. Areas within the menus, called
buttons, can be selected by the viewer to activate links
to other content on the disc. Activating a link causes an
immediate transfer to any of:
A normal video sequence, which in this context is
called a “chapter”. Chapter buttons often show a
thumbnail frame from the video to which they link.
Another page of the same menu. Multiple pages, with
the same page design but different chapter buttons,
are used when a menu has too many buttons to fit on
a single page.
A different menu.
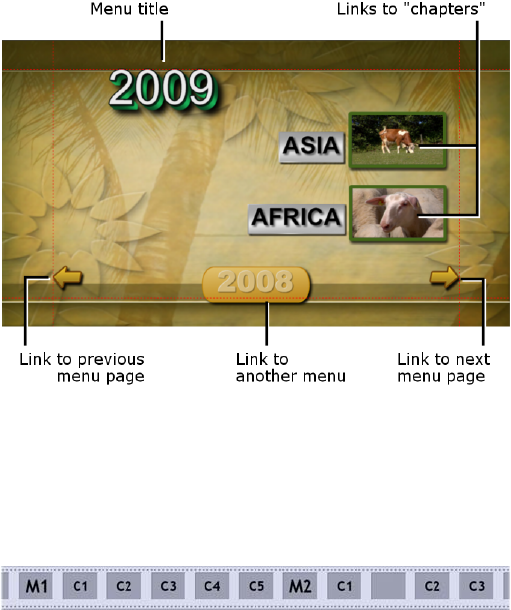
228 Pinnacle Studio
Unlike any other kind of clip, menus automatically
loop. When the end of a menu clip is reached during
disc preview or playback, it is immediately restarted.
This produces a jump in the playback position affecting
all clips that run simultaneously with the menu,
regardless of type – video (if the menu is an overlay),
audio or still image.
The following diagram is patterned after the Movie
Window storyboard. It shows how the menu pictured
above, which appears in the diagram as M1, might fit
into the overall scheme of a simple movie with two
menus.
Each menu is followed in the movie by several
chapters, all but one consisting of a single clip. Our
menu, M1, has links to five chapters. Our menu is
designed to display two chapter links per page, so three
pages are required to accommodate all the links. (The

Chapter 11: Disc menus 229
second page is the one appearing in the illustration.)
We’ve also given each page a link to the M2 menu.
The simple layout of this short movie can easily be
extended to organize large numbers of clips. Much
more complex movies are also constructed from the
same elements: multi-page menus with links to
chapters and to other menus.
Availability: Discs with multiple menus are supported in Studio
Ultimate only.
Disc authoring in Studio
For the purposes of editing in Studio, a disc menu is
just one more type of clip. As with titles, you can use or
adapt the menus provided in the Album, or construct
your own from scratch in the Classic Title Editor (see
Chapter 3: The Album and Chapter 12: The Classic
Title Editor).
To get a feeling for what is involved, try creating the
pair of “instant” projects described below. You don’t
have to go as far as making discs, but you can preview
your movie using the DVD playback controls on the
Player (see “The DVD Player Control” on page 232).
Instant video scene catalog: In an empty project,
multi-select a good number of scenes from the Album
and drag them onto the video track. Now switch to the
Disc Menu section of the Album (the bottom tab) and
drag any of the menus to the beginning of the Timeline.
When Studio asks if you would like it to “create
chapters at the start of each video clip”, click Yes (see
“Using menus from the Album” on page 230). A new

230 Pinnacle Studio
track appears at the top of the Timeline, and a small
“flag” appears over each of your clips. These represent
links from the menu you just added. And that’s it – sit
back and watch the show.
Instant slideshow: This time, start in the Still Images
section of the Album. Drag as many images as you like
onto the video track of an empty project, then drag in
any disc menu as the first clip on the Timeline, and
again click Yes when asked if you want links
automatically created. Turn next to the Transitions
section of the Album, pick any transition, and drag it
between the menu and the first of your still images.
Finally, select all of the still images (click the first,
then shift-click the last), click with the right mouse
button, and choose Ripple Transition from the pop-up
menu. Instant slideshow!
Menus and titles
The similarity noted on page 229 between titles and
disc menus is not just on the surface: a menu is
essentially “a title with buttons”. Any title on the
Timeline’s main video track can be converted to a disc
menu simply by adding one or more buttons in the
Classic Title Editor.
Using menus from the Album
The Disc Menus section of the Album contains a
collection of menus that have been designed for
particular occasions, authoring styles and chapter
counts. Each menu provides a background picture, a
title, a set of chapter buttons (generally with spaces for
Chapter 11: Disc menus 231
thumbnail frames), and a pair of Next page and
Previous page buttons.
The number of chapter buttons per page varies from
one menu design to another, so one criterion for
selecting a menu is the number of clips you want it to
handle. It is generally more convenient for the viewer
to browse a few menu pages with many buttons per
page than many pages of a few buttons each.
During editing, you see all the buttons that the menu
provides. During playback, the only buttons visible are
those to which you have assigned links.
Menus with fewer buttons have more space for
captions; those with many buttons will have abbrevi-
ated captions or none at all. Whether you need
captions, and if so whether they should be simple
(“Chapter 1”) or descriptive (“Cutting the cake”) is a
matter of your authoring style and the content of your
movie.
In the VCD and S-VCD formats, the viewer must select
chapters numerically (by keying numbers on the remote
control), so it is usual to provide button captions that
include the chapter number when authoring for these
formats.
Dropping menus on the Timeline
When you drag a menu from the Album and drop it
onto the video track or the title track, Studio gives you
the option of automatically generating links to all video
clips to the right of the menu on the Timeline. Multiple
clips are combined into chapters if necessary to achieve
the minimum chapter length you specify.
This is the quickest, easiest way to link in a disc menu,
but may not be what you want in a particular authoring
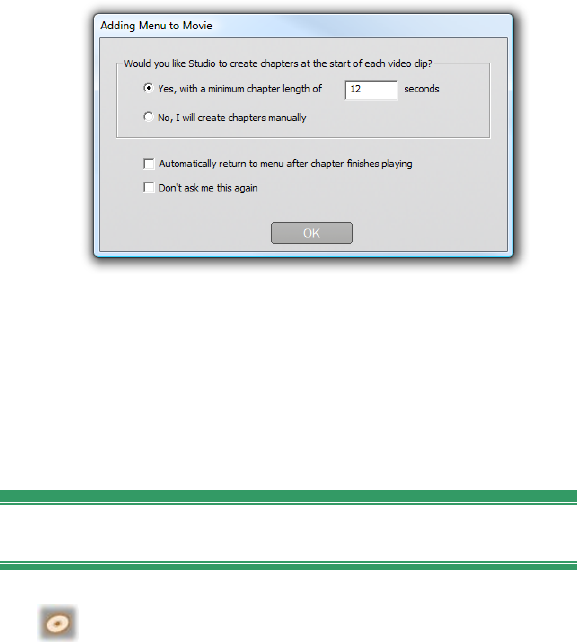
232 Pinnacle Studio
situation. If you check the Don’t ask me again
checkbox, your choice of Yes or No becomes the
default action when you drag in a menu in future. You
can also set the default action, or reinstate the
confirmation window, in the When adding a disc menu
area of the Project preferences options panel (see
“Project preferences” on page 358).
To create your chapter links manually, rather than
using the automatic linking feature, use the Set disc
chapter command on the pop-up context menu for each
video clip you want to add, or use the Set chapter
button on the Clip properties tool for disc menus.
The DVD Player Control
Studio’s Player provides a specialized set of
controls for previewing movies that contain
menus, patterned after the button layout on a typical
DVD remote control. Switch the Player to DVD mode
by clicking the DVD toggle button at the bottom right
corner of the Player.
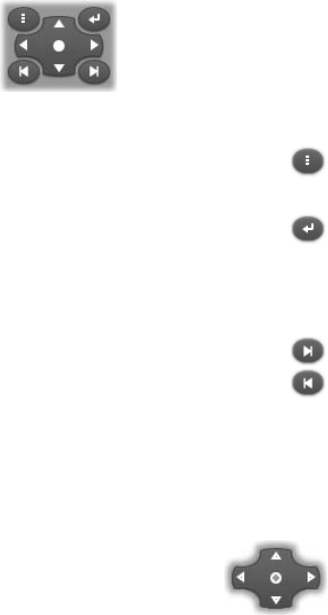
Chapter 11: Disc menus 233
A grouping of DVD controls appears and activates
below the Player preview screen:
Here are the functions of the individual DVD controls:
Main menu: Jumps to the first menu in your
movie and begins (or continues) playing.
Previous menu: Jumps to the most recently
active menu and begins (or continues) playing.
Clicking the button again jumps back from the menu to
the most recent clip.
Previous chapter, Next chapter: Clicking the
Previous chapter button takes you to the start of
the current chapter if you aren’t there already.
Click again to move on to the previous chapter. The
Next chapter button takes you forward to the next
chapter in the movie. Within a menu, these buttons step
backwards and forwards through the menu pages.
Button selection: The four arrow controls
in this cluster move the on-screen cursor
within a disc menu to select one of its
buttons. The oval button in the middle of the cluster
activates the currently-selected on-screen button, which
is indicated by highlighting.
Activating menu buttons directly
One feature of the Player that set-top DVDs don’t have
is the ability to click the buttons directly on the screen.
Whenever a button is visible in the Player preview area
in DVD mode, you can click it to follow the button
link.
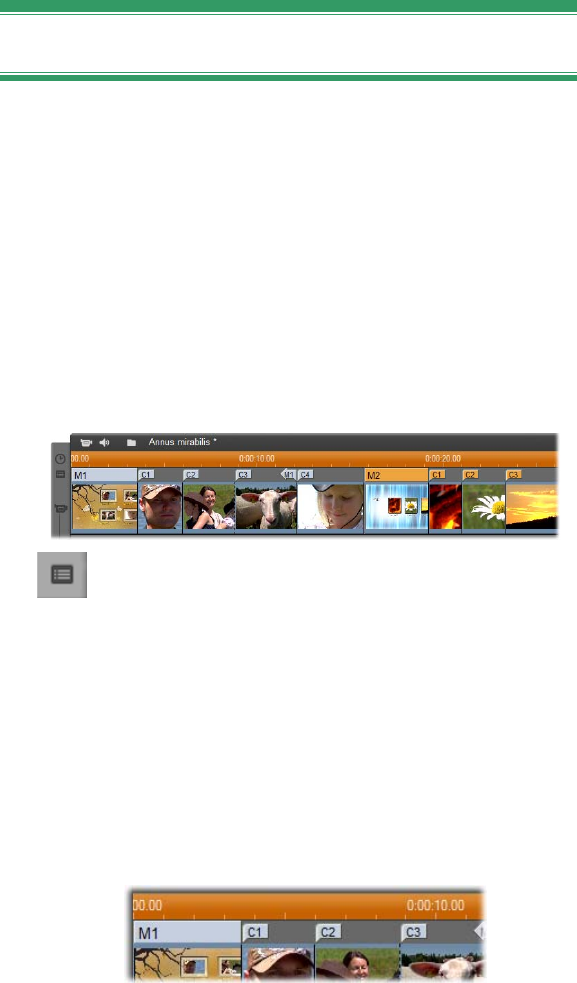
234 Pinnacle Studio
Editing menus on the Timeline
Menus can be trimmed on the Timeline just like any
other still image clip (see “Trimming on the Timeline
using handles” on page 123).
Setting the clip duration is generally less crucial for
menu clips than for other types, since menus cycle
during playback while waiting for user input. If you
want a looping video background or looping audio with
your menus, though, you will want to match the menu’s
duration to that of the clips involved.
The menu track
Menu buttons link to particular points within
your movie. Those points are marked by flags
on the menu track, which materializes above the video
track the first time a menu is added to your movie (and
vanishes again if all menus are removed).
The menu itself is marked by a colored rectangle in the
menu track (M1 and M2 in the illustration above). Each
link to a chapter is shown by a “C” flag. Here is a
close-up of the first part of the Timescale, showing the
rectangle identifying the first menu, and the chapter
flags for three of the clips it links to.
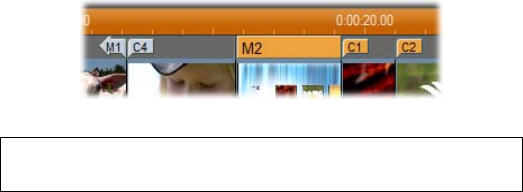
Chapter 11: Disc menus 235
The next part of the Timescale in the overview
illustration above includes the fourth chapter link from
M1, and a link (the left-pointing arrow) from the end of
the previous clip back to the menu. A result of setting
this link is that the C4 clip can only be reached from
the menu. The C4 clip is followed by menu M2, which
– along with the flags that belong to it – is
automatically drawn in a new color.
Availability: Discs with multiple menus are supported in Studio
Ultimate only.
Editing on the menu track
Flags on the menu track can be moved by dragging
them with the mouse, thereby changing the location at
which the link takes effect in the movie. When a video
clip is moved, any flags attached to the clip are moved
along with it.
To create a link:
Right-click the menu track or the video track and
choose either Set Disc Chapter or Set Return to Menu,
depending on the kind of link you want to create.
Return to menu links are always created at the end of
the current clip, rather than at the exact point where
you click. You’ll rarely want to return from the middle
of a clip, but you can drag the link flag to a new
position if the occasion arises.
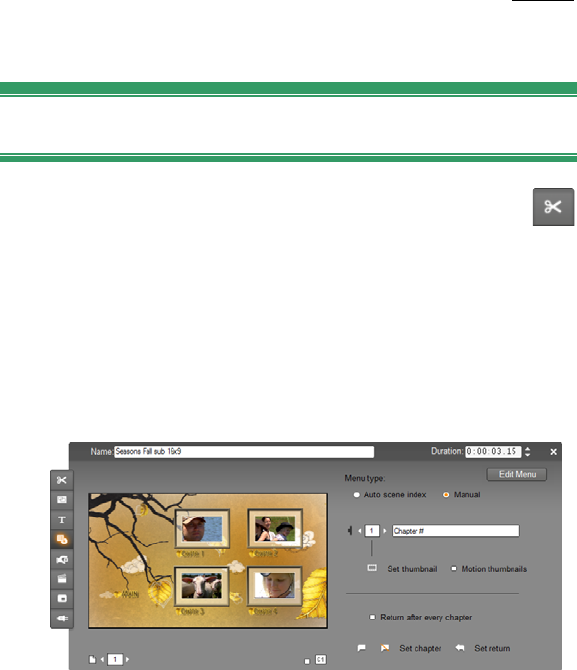
236 Pinnacle Studio
To reposition a link:
Click the flag for the link and drag it along the menu
track to its new position.
To delete a link:
Right-click the link flag and choose Delete from the
pop-up menu; or,
Select the flag, highlighting it, then press the Delete
key.
Editing with the Clip properties tool
The Clip properties tool for disc menus allows
you to create, edit and fine-tune chapter links,
and provides access to the Classic Title Editor for
adjusting the visual content of the menu.
Like the Clip properties tool for other clip types, this
tool lets you set a custom name for the menu by editing
the Name field and trim the clip by editing the
Duration field.
The Edit menu button at the top right of the tool opens
the menu in the Classic Title Editor. There you can

Chapter 11: Disc menus 237
change every visual aspect of the menu: its background
and button images, the appearance and contents of its
captions, and more. For full information about the
many capabilities of the Classic Title Editor, see
Chapter 12: The Classic Title Editor.
The preview area on the left side of the tool shows how
the menu looks and also has interactive features you
can use when establishing chapter links. (These are
described on page 240 under “Chapter-editing
controls”.)
The other controls are in four groups:
Menu-previewing controls
The Menu type options
Link property controls
Chapter-editing controls
Menu-previewing controls
These controls are located below the preview area.
Page selector: For menus with multiple
pages (those with more links than a single
page can accommodate) the arrow buttons let you
select which page is active in the preview area. You
can select any page in the menu for which links have
been defined.
Alternative methods of selecting menu pages:
Step through the pages by clicking the page link
buttons in the preview area.
Use the Button selector control (described on page
238) to choose a button on any page of the menu.
Show link numbers checkbox: Check this box
to cause link numbers to be displayed in the
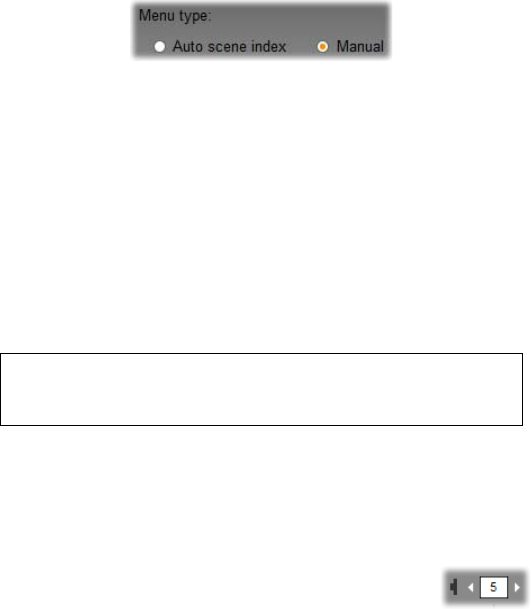
238 Pinnacle Studio
preview area over every button in the menu. The link
numbers match the format and color of the chapter
flags on the menu track.
The Menu type options
This pair of options determines whether you or Studio
will organize the chapter links for this menu.
If you choose Auto scene index, Studio will ensure that
your chapter links are in the same order on the menu as
they are in the movie itself, seven if you shuffle the
order of the clips in the Movie Window. With the
Manual setting, the order in which chapters are shown
on the menu is up to you. If you want to sort your
chapter links yet still retain future control of their order,
you can click Auto scene index first (to sort the links),
then Manual.
Availability: The option of manually ordering menu chapters is
available in Studio Ultimate only. In standard Studio, the Auto scene
index feature is permanently enabled.
Link property controls
The controls in this area set the display properties of
the chapter links on the menu.
Button selector: Every link button in your
menu, no matter which page it is on, has a
unique sequence number. Use the arrow buttons on this
control to select the menu button you want to work on.
The selected button is highlighted in the preview area.
You can also select a button by clicking on it in the
preview area.
Chapter 11: Disc menus 239
Button caption text field: Edit the text for
the current button without opening the
Classic Title Editor. The “#” character in button
captions has a special meaning: Studio replaces it with
the button’s sequence number. Use this to ensure that
your buttons are correctly numbered regardless of
menu layout changes. To edit other characteristics of a
button caption – its position, font, and styling – click
the Edit menu button to invoke the Classic Title Editor.
Set thumbnail button: By default, the thumbnail
frame displayed on a menu button is the frame to
which the button links. You can choose any frame in
your movie to be the thumbnail, however. Just move
the Timeline scrubber to the exact frame you want (as
shown in the Player), and click the set thumbnail
button.
Motion thumbnails checkbox:
Check this option if you would like
your menu’s buttons to show moving video from their
target chapters rather than a static thumbnail frame.
Because this feature requires that the moving
thumbnails be pre-rendered, the results won’t appear
immediately when you preview your movie in the
Player. Instead you will typically see a colored bar
appear in the Timescale over the menu clip. This bar
indicates that the clip is being rendered in the
background, without interrupting your session.
Background rendering is optional. You can disable it, if
required, in the Video and audio preferences options
panel (Setup Video and Audio Preferences). See
page 361 for more information.
Availability: The Motion thumbnails feature is available in Studio
Ultimate only.
240 Pinnacle Studio
Chapter-editing controls
The controls in this area select or modify the individual
chapter buttons within a menu.
The Set chapter buttons: These
buttons set or sever the link
between the selected chapter button and its target clip.
To set a link: Position the Timeline scrubber within a
menu, video, theme or still image clip, and click the
Create chapter button. For video and still image
clips, the chapter point is set to the exact location of the
scrubber within the clip.
To clear a link: Click the Clear chapter button.
Set return button: This creates a “return-to-
menu” link at the end of the current clip, which is
where you almost always want it. During playback, the
link causes an immediate jump to its menu. To create a
return-to-menu link in the Clip properties tool, position
the Timeline scrubber in the clip where you want the
link, and click Set return to menu.
Availability: Set return is available in Studio Ultimate only.
The Return after every chapter checkbox: Set this
option to add a return-to-menu link after every chapter
in this menu. Clicking this checkbox, whether to set or
clear it, removes all existing return-to-menu links for
the menu. Return-to-menu links are normally
draggable, but while this box is checked they remain
anchored to the end of their clips.
Creating links with drag-and-drop
The Clip properties tool for disc menus supports drag-
and-drop as a quick and convenient way to establish
links for menu buttons.
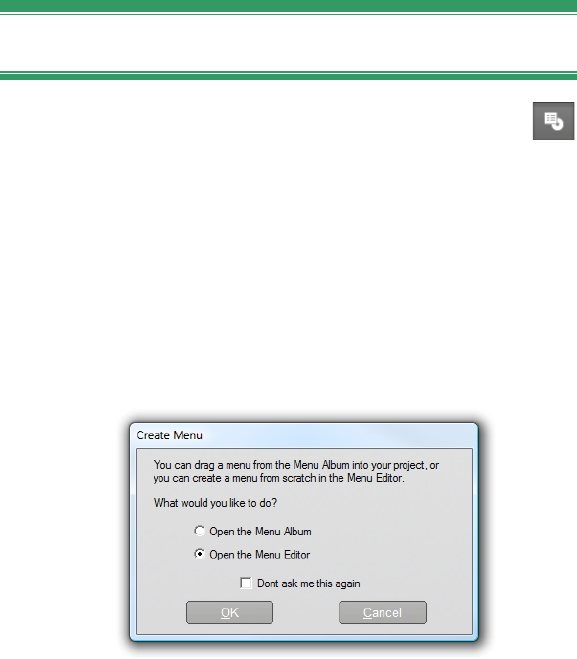
Chapter 11: Disc menus 241
To create a link using drag-and-drop:
Click the clip in the Movie Window that you want to
link to, and drag it onto a button in the Clip
properties tool preview area. The button is linked to
the first frame of the clip. Or,
Click the button for which you want to create a link,
and drag it onto a clip in the Movie Window. In this
case you are linking to the point within the clip at
which you “drop” the button – generally not the first
frame.
The Disc menu tool
If you open this tool while a menu is selected, it
is equivalent to opening the Clip properties tool;
otherwise, it provides a Create Menu button that takes
you into the Classic Title Editor to begin the process of
creating a new disc menu. (See “Editing with the Clip
properties tool”, page 236, and Chapter 12: The
Classic Title Editor.)
Because developing a menu is a relatively intricate
operation, Studio takes the opportunity to remind you
that pre-built menus are available in the Album.
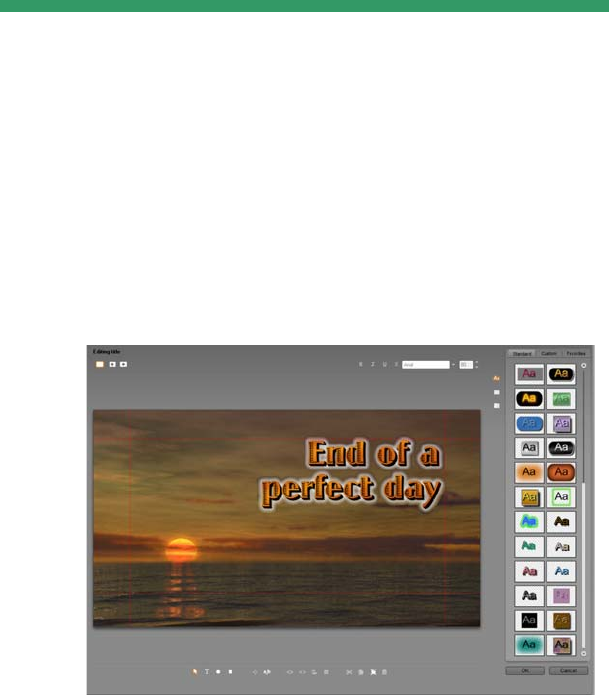
Chapter 12: The Classic Title Editor 243
CHAPTER 12:
The Classic Title Editor
Studio’s built-in Classic Title Editor is a powerful
facility for creating and editing titles and other
graphics. Its extensive suite of text and image effects
and tools provides endless possibilities for the visual
design of your movie.
Creating a title in the Classic Title Editor tool. The
large area containing the picture and the text is the
Edit Window, while the panel occupying most of the
right-hand side is the Classic Title Editor Album.
Other controls are in clusters around the Edit
Window.

244 Pinnacle Studio
The Classic Title Editor is not limited to creating
passive titles. For disc projects, you can also add and
edit the special buttons needed for handling viewer
interaction with the menus of VCD, S-VCD, DVD and
Blu-ray Disc movies.
Note: Studio Ultimate includes a second title-editing
tool, the Motion Titler, with animation capabilities not
found in the Classic Title Editor. The Classic Title
Editor also has some features the Motion Titler does
not, however, including the ability to create navigable
disc menus as well as titles.
Launching the Classic Title Editor
Reflecting the versatility of the Classic Title Editor is
the variety of ways of accessing it from Studio’s Edit
mode, using either one of the tools in the Video toolbox
(see page 110) or a mouse command on one of the
Timeline tracks (see page 102).
To create a full-screen title or menu: Select Go to
Classic Title/Menu Editor from the right-button
context menu in the main Timeline video track.
To create a title from the toolbox: Open the Create
title tool and click Classic Title Overlay or Full
Screen Classic Title.
To create a disc menu from the toolbox: Open the
Create disc menu tool and click Create Menu.
To edit a full-screen classic title: Double-click the
title in any Movie Window view, or right-click the
title and select Go to Classic Title/Menu Editor.

Chapter 12: The Classic Title Editor 245
To edit a full-screen menu: Double-click the menu
in any view and click the Edit Menu button, or right-
click the menu and select Go to Classic Title/Menu
Editor.
To edit an overlay title: Double-click the clip on
the title track or in List View, or right-click it in any
view and select Go to Classic Title Editor.
To edit a title or menu from the toolbox: With the
clip open in the Clip properties tool, click the Edit
Menu or the Edit Classic Title button.
THE EDITOR CONTROLS
The main Classic Title Editor controls are laid out in
clusters around the Edit Window (see the picture on
page 243).
Title-type buttons
The four buttons in this cluster sit on
the left side of the screen above the
Classic Title Editor’s Edit Window. Only one of them
can be selected at a time. Choose the first button if you
are creating a still title. The second creates a roll, in
which the title text and graphics travel upwards on the
screen as the title displays, like the credits at the end of
a move. The third creates a crawl, in which the title is
displayed as a single line of text moving from right to
left across the screen like the bulletins on a TV news
show.

246 Pinnacle Studio
The fourth button is for creating disc menus, which you
can think of as “titles with buttons”. In fact, a menu is
just like any other title except for two attributes:
A menu has at least one button. A title has none.
Adding a button to a title turns it into a menu, and
deleting the last button on a menu turns it into a title.
By the same token, if you click the Menu button
while editing a title, Studio automatically adds a
button to the title.
A menu cannot have rolling or crawling text. The
Classic Title Editor does not allow you to add menu
buttons to a rolled or crawled title.
Because disc menus are allowed only on the main
Video track of the Movie Window Timeline, the button
for creating disc menus does not appear when a title
from one of the other tracks is being created or edited.
Availability: Rolls and crawls are supported in Studio Ultimate only.
Object toolbox
This cluster of four Classic Title Editor
tools is located below the Edit Window.
The first tool (the arrow) is used for
all editing operations upon the
currently-selected object. A selected
object is surrounded by a number of
control points with which you can
change its size, position, proportions,
and other geometrical features.
The other three tools are for creating objects in the Edit
Window – text boxes, ellipses and rectangles.

Chapter 12: The Classic Title Editor 247
Each is used in the same general way.
Click one of the three tools, then
click the Edit Window at the point
where one corner of the object should
be. Drag the mouse to outline the new
object as indicated by the dotted line.
When the object has the size and proportions you want,
release the mouse. Whatever its type, the object is
created with the specified dimensions. Its other
attributes – color, shading, shadow,
etc. – are determined by the currently
selected look in the Classic Title
Editor Album. All attributes can later
be changed at will.
After the object is created, the object tool you used
deselects, and the selection arrow again becomes
active. The object itself is selected – shown in the usual
way by its control points – and can now be manipulated
with the mouse.
Reordering objects in three dimensions
Because objects can overlap one
another, it is easy to get into
situations where an object that
should be completely visible is
partly or wholly obscured by
one or more other objects. In
such cases, use the four reordering commands on the
Classic Title Editor’s Layers menu. These commands
affect the currently-selected object, symbolized by
rectangle “3” in the diagram.
Bring to Front: The object is moved out in front of
all other objects. In the diagram, object 3 is now in
front of object 1.
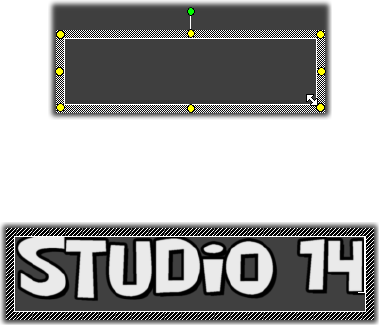
248 Pinnacle Studio
Send to Back: The object moves behind all other
objects. Object 3 is now behind object 5.
Bring Forward One Layer: Object 3 now lies in
front of objects 2, 4 and 5, but still behind object 1.
Send Back One Layer: Object 3 is now behind
objects 1, 2 and 4, but is still in front of object 5.
About text objects
Selecting a text object is different in one important way
from selecting a rectangle or ellipse: the object’s text
field is put into a “ready” state in which any keyboard
activity will cause the field to activate and start
displaying the input text.
The activation of the text field is indicated by a text
insertion cursor, the changed appearance of the object
frame, and the disappearance of the control points.
When a text object is not selected, you can activate its
text field directly by clicking in the middle of the
object. If you want the selection frame and control
points to appear, you must click on the edges of the
object. With other types of object, you can click
anywhere in an object to select it.
To deactivate a text field, click anywhere in the Edit
Window outside the text object.
Because text plays a central role in most titles and
menus, the Text Editor will automatically create and
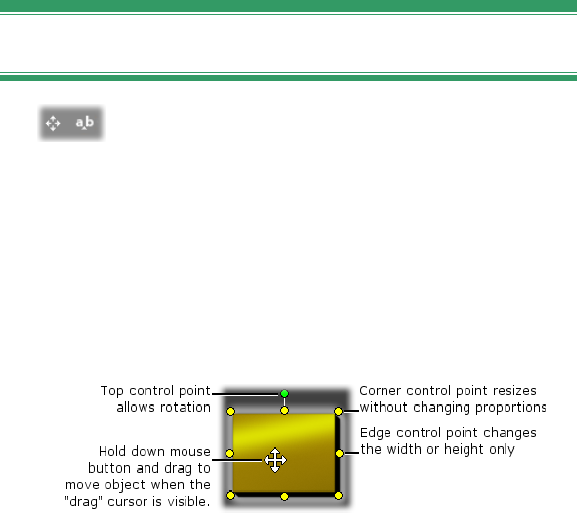
Chapter 12: The Classic Title Editor 249
activate a text object in the center of the Edit Window
if you simply begin typing at a time when no text
object already exists.
Advanced text editing features
As in a word processing program, the Classic Title
Editor allows you to format a selected range of
characters. Simply mark an adjacent set of characters
with the mouse and apply the formatting you desire.
Supported operations on character ranges include text
styling (font, style and look), clipboard operations (cut,
copy, paste), delete, and a number of special
positioning, spacing and scaling commands that are
accessible only from the keyboard. For details on these,
please consult Appendix F: Keyboard Shortcuts.
Editing-mode selection buttons
These two buttons form the second cluster
along the bottom of the Classic Title Editor’s
Edit Window. Their function is to govern which of two
sets of editing operations is available for the currently-
selected object.
The first button is on by default when an object is
newly created. It enables the move, scale and rotate
operations with a selection frame containing nine
control points:
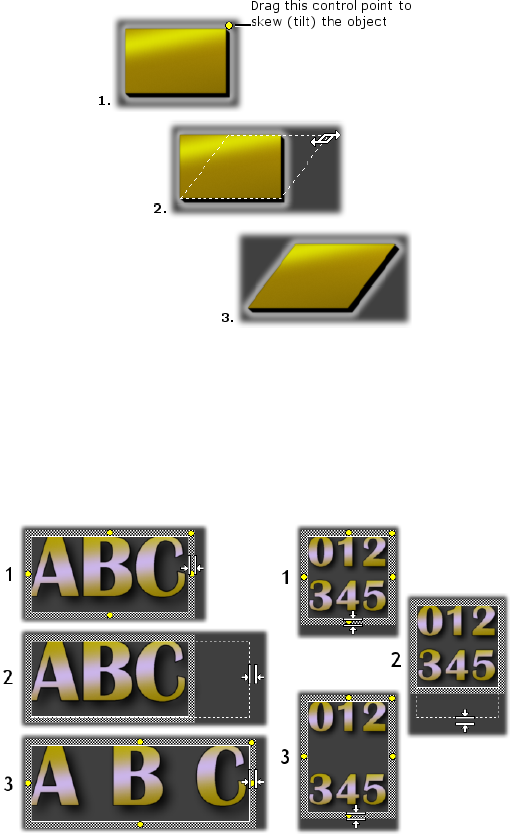
250 Pinnacle Studio
Clicking the second button enables the skew
operation, which requires only a single control point.
With text objects, the second button provides two
further operations, kern and change leading, accessed
by control points in the center of each edge of the text
frame:
Kern (L) and Change leading (R)
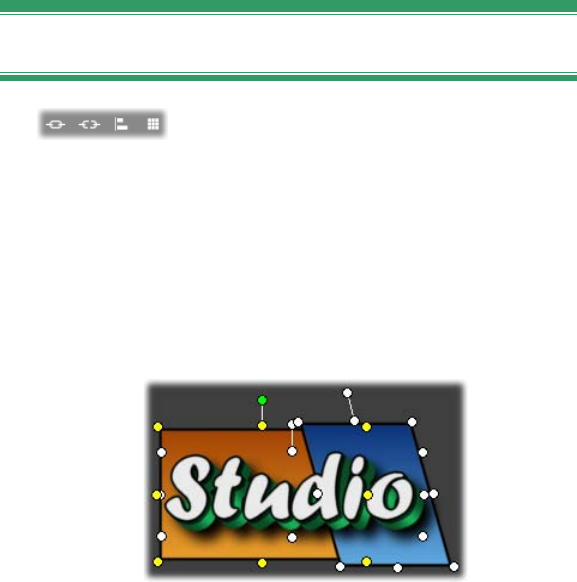
Chapter 12: The Classic Title Editor 251
Object layout buttons
The two left buttons in this cluster are
for grouping and ungrouping Classic
Title Editor objects. The first button is available when
multiple objects are selected. Its action is to link the
objects into a group – a composite object that is treated
as a single entity by editing operations. When a group
is selected, all its control points are visible
simultaneously, and any of them may be used to
manipulate the group.
A grouping of three objects
The second button, which is available whenever a
group object is selected, separates the group into its
constituent objects.
Although it is possible to “group groups”, grouping is
always just one level deep, so ungrouping a supergroup
will result in all the constituent objects being
individuals again.
The next button opens a pop-out menu of 11 operations
that apply only to groups. The first six let you align a
set of objects along any one of their four edges or either
of their two mid-lines. The next pair of commands
provides for spacing the objects at equal intervals in

252 Pinnacle Studio
either the vertical or horizontal directions, and the final
three resize the objects so that they have equal width,
equal height, or both. All of these commands are
particularly useful in menu creation, since you
generally want menu buttons to be laid out in a regular
fashion.
The final object layout button opens another
pop-out menu, this one concerned with
object justification. The nine options here
are in a graphical form resembling a tic-tac-
toe board. Clicking one of the nine areas
moves the object to the corresponding corner of the
screen (as defined by the “text-safe” area delimited by
red dashed lines), or to the center.
Multiple selection of objects
The first step in making a group is to select the multiple
objects that will comprise it. This can be accomplished
in either of two ways:
By clicking and dragging with the mouse to mark out
a selection rectangle (a “marquee”) that encloses all
the objects you want to group; or,
By clicking the first object you want to group, then
Ctrl-clicking each of the others.
Temporary groups
Any selection of multiple objects functions as a
temporary group, and can be moved, aligned, rotated,
colored etc. as a unit. The temporary grouping loses its
identity as soon as you click elsewhere in the Edit
Window, however, whereas a group created with the
group button persists until explicitly ungrouped.
Chapter 12: The Classic Title Editor 253
Clipboard and delete buttons
The buttons in this cluster provide the
familiar editing operations Cut, Copy,
Paste and Delete, all of which operate on groups,
individual objects, or on selected text within a Classic
Title Editor text object. The first three work with the
Windows Clipboard, while the fourth simply deletes
the chosen material without affecting the Clipboard.
Text-styling controls
The controls in this cluster at the top right of the
Classic Title Editor’s Edit Window should look
familiar to anyone who has used word-processing
software. The controls apply both to currently-selected
text and to any new text that may be entered until the
settings are changed again.
At the left are three font style buttons, which select the
bold, italic or underlined styles respectively.
Perhaps surprisingly, the underlined style button –
alone among these controls – can be applied to any type
of object, not just text (try it!). This makes it possible to
use the underlined highlighting style with buttons
created from graphic objects: rectangles, ellipses and
pictures.
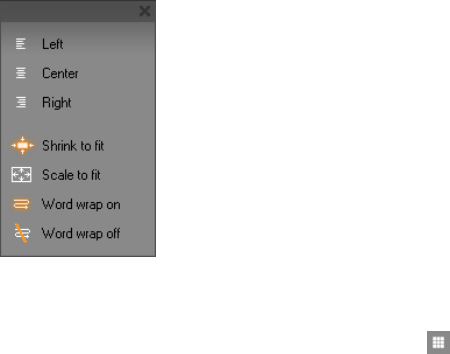
254 Pinnacle Studio
The fourth button opens a pop-out
menu of text-formatting options.
Unlike the other controls in the
cluster, which govern the appearance
of individual characters, the options
on this menu apply to all the text in a
given text box.
The three justification options – Left,
Center and Right – affect the
placement of the text within its box (and not the
placement of the box within the Edit Window, which is
the function of the object justification menu ).
Shrink to fit, Scale to fit, Word wrap on and Word wrap
off are options that determine how your text is treated
when you resize a text box. With Word wrap on, which
is the default for a new text box, resizing the box
results in the text being reformatted – word-wrapped –
to the new box width (while the resulting new height of
the text in turn governs the height of the box). Word
wrap off removes all “soft” line breaks (line breaks
added for word wrapping), then makes the box as wide
as necessary to contain the text. Word wrap mode is
automatically turned on again if you type further
characters into the text box.
With Scale to fit, the text is stretched during resizing to
follow both box dimensions. With Shrink to fit, the text
remains its original size unless the box is made smaller,
in which case the text is resized as in Scale to fit.
Neither to fit command changes the line divisions of
the text.
The font dropdown list and the font-size selector
complete the text-styling controls group.

Chapter 12: The Classic Title Editor 255
THE CLASSIC TITLE EDITOR ALBUM
The Classic Title Editor Album is the rectangular panel
on the right-hand side of the Classic Title Editor screen.
It contains resources for building menus and titles in
the same way that the main Studio Album contains
resources for creating movies.
The Classic Title Editor Album is controlled by
the four buttons shown at right, which are located
between the Edit Window and the Album itself.
Each opens one of the four Album sections: the
Looks Browser, the Backgrounds section, the
Pictures section and the Buttons section.
The fourth of these buttons, the one that opens the
Buttons section, appears only when a menu or a title
from the main Video track is being created or edited.
This is because disc menus (which from the Classic
Title Editor’s point of view are just titles with buttons),
are not allowed on the other Timeline tracks.
The Looks Browser
This section of the Classic Title Editor Album has
three subsections, accessed by the Standard, Custom
and Favorites tabs across the top.
The Standard tab is a collection of styles that can be
applied to the text and other objects you use in your
titles. Each style consists of a color (or color gradient,
or transparency) for each of the “face” (surface), edge
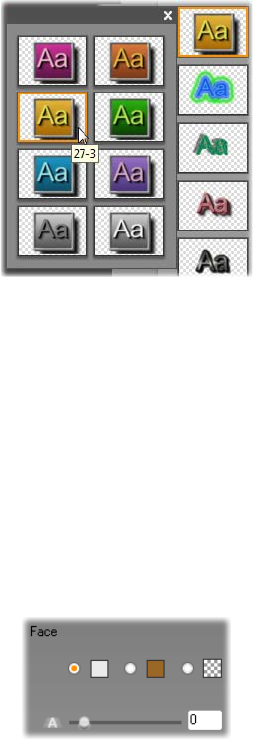
256 Pinnacle Studio
and shadow of the object to which it applies, plus a
separate blurring parameter for each. A final parameter
is shadow direction, with eight possibilities.
To change the look of an existing object, simply click
on the look you want while the object is selected. New
objects are created with the most recently selected look.
Selecting a look in the Looks Browser: Each button
in the Standard tab is available in eight styles, which
are presented to you as a submenu. Double-click the
main button to open the submenu. Each look has a
numeric ID that displays as a tool-tip under your
mouse. Above, the mouse is on look 27-3.
The Custom tab lets you customize the supplied looks
or create your own by adjusting the parameters listed
above. Three identical sets of controls adjust the
parameters for face, edge and shadow respectively.
Here are the face controls:
The three option buttons across the top select a solid
color, a gradient, or no color (transparency). Clicking
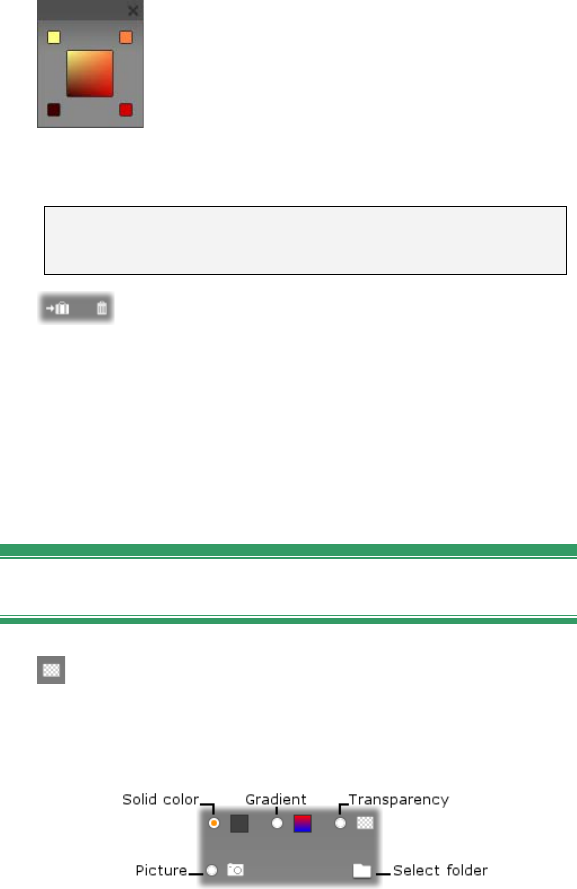
Chapter 12: The Classic Title Editor 257
the color swatch beside the first button invokes an
otherwise standard Windows color-picker dialog to
which an Opacity slider (0-100%) has been added.
The swatch beside the second button pops
up a gradient designer that lets you define
a gradient by assigning the starting colors
to each corner of a square surface. Click
the color swatches in the corners of the
gradient window to set the color for that corner in a
color-picker dialog.
Note: Some of the more elaborate supplied looks em-
ploy special internal features and so cannot be edited.
The Favorites tab lets you save particular
custom looks that you may want to re-use in
the future, to spare you from having to remember or
record the parameters you used. Click the left-hand
button to save the current look as one of your favorites.
Click the right-hand button to delete the currently-
selected “favorite”.
The Backgrounds section
A title or menu can have four types of
background: a solid color, a gradient, transparency (no
background at all) or an image file (such as a drawing,
photograph or saved video frame).
258 Pinnacle Studio
The color and gradient options in the Backgrounds
section of the Classic Title Editor work in just the same
way as those described above for the Looks Browser
(page 255), except that the color or gradient you select
is instantly applied to the background of the title you
are editing.
If you are working on an overlay title, you may find
interesting ways to use the Opacity setting on the color-
picker dialogs for these buttons, especially when the
overlay is coupled with transitions. Normally, though,
you’ll use a transparent background for titles, and
transparency is the default background selection for a
new title or menu.
The final option for backgrounds is picture – an image
file in any standard format. As with many of the
sections of Studio’s main Album, the backgrounds are
drawn from a source folder that may be changed using
the folder button. The image file you select with the
folder button becomes the new background, and the
image files in the folder are displayed as thumbnails on
the Album panel. If necessary, the Classic Title Editor
stretches the background image until it fills the width
or height of the screen but does not change its
proportions.
Adding a motion background
In Studio Ultimate, disc menus can have a background
of moving video, not just a static image. To create such
a motion background, or replace one, simply click the
folder button and browse for a movie file in AVI,
MPEG or WMV format.
The following rules apply when you add or change a
motion menu clip:
The length of the movie you add as a background
does not affect the length of the menu clip in the
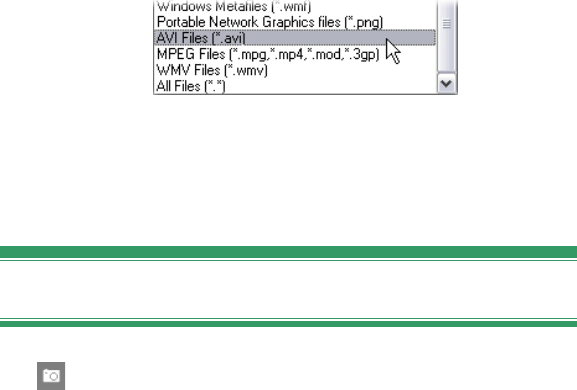
Chapter 12: The Classic Title Editor 259
Movie Window. If the movie is shorter than the clip,
it is simply repeated as necessary to fill out the
required time; if longer, it is truncated. You can
adjust the length of the menu by trimming on the
timeline or in the Clip properties tool as usual.
If you add a widescreen movie as a menu
background in a project in standard format, or a
standard movie to a widescreen project, the movie is
stretched or squeezed as required to match the
project format.
To see movie files listed while browsing for a folder
on your hard drive, select the desired movie type (or
“All Files”) in the “Files of type” box.
The Pictures section
As with the background pictures just discussed,
the images in the Pictures section of the Classic
Title Editor Album can be of any standard type. Instead
of being stretched to fill the Edit Window, however,
these pictures are added to the title as picture objects
and displayed at normal size with eight control points
that allow them to be repositioned and resized (though
not rotated or skewed).
Picture objects behave just like text objects and the two
types of graphic object with respect to grouping,
alignment and similar controls.

260 Pinnacle Studio
The Buttons section
Since buttons are the magic ingredient that turns
titles into interactive menus, this section of the Classic
Title Editor Album is available only when the menu or
title being edited is on the main video track, the only
track on which menus can be placed.
Broadly speaking, a button is an area of the screen with
which the user can interact in some way. Buttons are
classified according to the action they produce when
the user activates them, and not by their appearance,
which generally should be chosen to give a strong clue
to their behavior, but is not required to. The four types
of button are:
Normal: Clicking the button causes playback to
jump to a chapter (that is, ordinary video) or another
menu. The link between the button and its target is
created in the Clip properties tool, not in the Classic
Title Editor.
Thumbnail: This special form of the normal button
type displays a thumbnail frame (or a moving
thumbnail preview) from the part of the movie to
which it links.
Previous: This button appears on the second and
later pages of multi-page menus (menus with more
links from normal or thumbnail buttons than will fit
on one page). It links to the previous menu page.
Next: This button appears on all but the last page of
multi-page menus; it links to the following page.
The button art supplied with Studio includes several
examples of each type. Each button is an image file in
Targa (tga) format. Examination of the files in an art
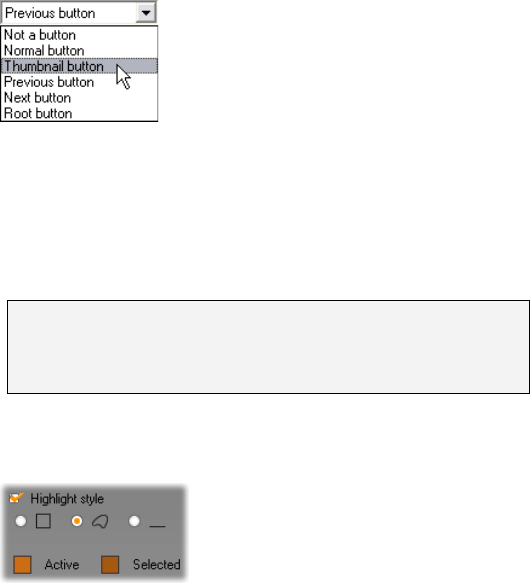
Chapter 12: The Classic Title Editor 261
program like Adobe PhotoShop or Paint Shop Pro will
show that the transparent portion of the button image,
and the special area for the display of thumbnails
(where applicable), are defined by an alpha channel
included with the image.
As usual, a folder button lets you select the disk
directory from which the displayed images are
obtained.
To use a supplied button, simply drag it from the
Album into the Edit Window, where it becomes a
button object – essentially an identical twin of the
picture object.
The default action of the supplied
buttons is determined by their file
names, but a new action can be
assigned to the currently-selected
button object from the dropdown list
in the Buttons section of the Classic Title Editor
Album. The first choice on this list, “Not a button”,
removes the action from the object – now it is merely a
graphic. The other choices correspond to the button
types listed above.
Tip: Remember, it’s not the button’s appearance that
determines its behavior, but the button type you select
from the menu.
Button highlighting
DVD menus (but not VCD and
S-VCD menus), give visual
feedback by highlighting the
current button as the user scrolls
around the menu. Special active highlighting
262 Pinnacle Studio
distinguishes a button that is in the process of being
actuated, just before the action is performed. (You can
preview this highlighting effect in the Player, and
interact with the menu using either the mouse or the
Player’s DVD controls.)
The Classic Title Editor lets you assign the color that
will be used for each type of highlight, and a style
option that governs how the highlights will be drawn.
The controls for these settings are located below the
button-type list.
Click the Active and Selected color swatches to set the
highlight colors that work best with your menu. It may
help to make your menus clearer if you use consistent
highlighting colors for all the menus on a disc.
The three highlight style options, from left to right, are:
Box: The highlighting is drawn as a rectangle
enclosing the button.
Follow shape: The highlighting covers the visible
area of the button, whatever its shape.
Underline: The button is underlined.
These highlight options can be applied to any type of
button made from any type of object, not just the button
images brought in from the Album. Clear the Highlight
style checkbox if you want to disable button
highlighting while working in the Classic Title Editor.
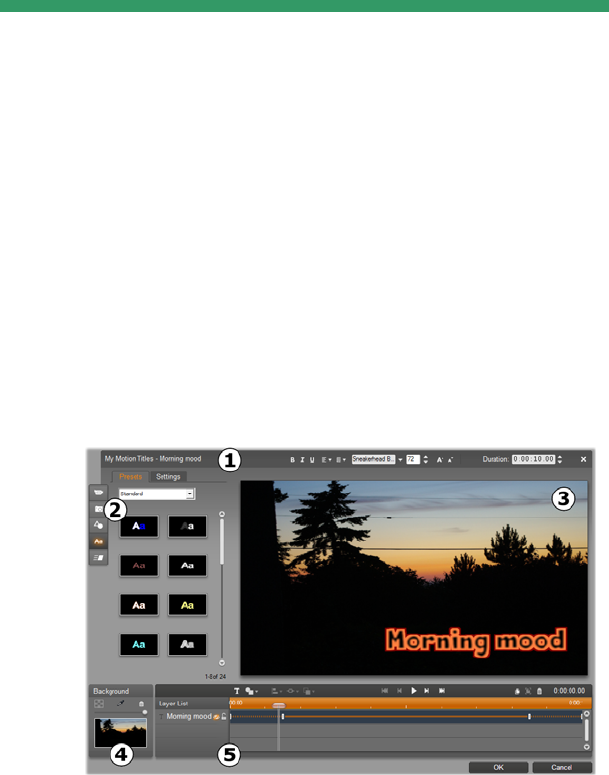
Chapter 13: The Motion Titler 263
CHAPTER 13:
The Motion Titler
Studio’s Motion Titler is a powerful tool for creating
and editing animated titles and graphics. Its extensive
suite of text and image effects and tools provides
endless possibilities for the visual design of your
movie.
Although the Motion Titler has fewer tools in some
areas than the Classic Title Editor, it excels in
animation, special effects, usability and fun.
Areas of the Motion Titler display: the Title Bar;
the Motion Titler Album; the Edit Window;
the Background Panel; and the Layer List.
264 Pinnacle Studio
There are five main areas of the Motion Titler display.
1. The Title Bar has four parts with, from left to right:
the category and name of your title; a set of text
manipulation controls; a duration counter field; and
a close button, which has the same effect as the OK
button in the bottom right corner.
2. The five sections of the Motion Titler Album
provide resources for building your titles. The first
two sections, Videos and Photos, are local versions
of the like-named sections from Studio’s main
Album, with the same controls. The others –
Objects, Looks and Motions – contain specialized
resources for motion titles. All sections are covered
in “The Motion Titler Album”, beginning on page
268.
3. The Edit Window is your main work area when
authoring or editing a title. It provides a scrubbable
preview of your title with hands-on editing. See
page 285 for details.
4. Each motion title has a background layer, which
you can either edit using the Background Panel or
leave transparent. See page 283.
5. Each graphic or textual element constitutes a layer
in the title. The opaque parts of each layer obscure
the layers below; the bottommost layer can obscure
only the background. In addition to listing each
layer by name, the Layer List includes an animation
timeline showing which motions have been
assigned to each layer. Durations on the timeline
can be adjusted by dragging.
The process of building up an image in layers is called
‘compositing’. Because the information in each layer is
maintained separately, to be combined only when the
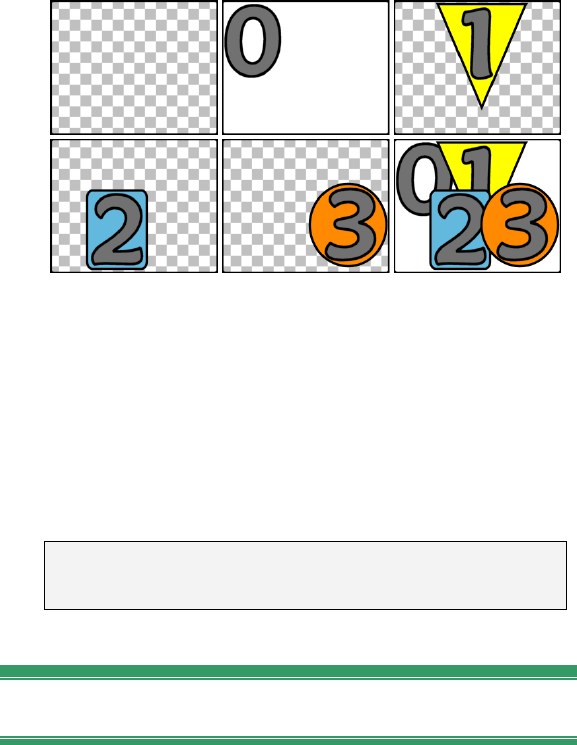
Chapter 13: The Motion Titler 265
image is output, it is possible to return to the
composition at any time and add new layers, and to
adjust, reorder, remove or replace existing ones. The
Motion Titler supports compositions with up to eight
layers in addition to the background.
Building up an image in layers starting with an
empty frame (top left). The checkerboard pattern
indicates transparency. Although backgrounds can
have transparent or translucent areas, here we add
an opaque background (0) for clarity, followed by
successive layers with some opaque content (1, 2, 3).
In the final composition (bottom right), upper layers
obscure those below.
Note: The Motion Titler tool is available in Studio
Ultimate and Studio Ultimate Collection only.
Launching (and leaving) the titler
Like the Classic Title Editor, the Motion Titler can be
invoked in a variety of ways from Studio’s Edit mode,
266 Pinnacle Studio
using either a tool in the Video toolbox (see page 110)
or a mouse command on one of the Timeline tracks
(see page 102).
To create a full-screen motion title: Select Go to
Motion Title Editor from the right-button context
menu in the main Timeline video track.
To create an overlay motion title: Double-click the
Timeline title track, or select Go to Motion Title
Editor from the right-button context menu on either
the title track or the overlay track.
To create a motion title from the toolbox: Open
the Create title tool and click Motion Title Overlay
or Full Screen Motion Title.
To edit a full-screen motion title: Double-click the
title in any Movie Window view, or right-click the
title and select Go to Motion Title Editor.
To edit an overlay motion title: Double-click the
clip on the title track, the overlay track, or in List
View, or right-click it in any view and select Go to
Motion Title Editor.
To edit a motion title from the toolbox: With the
clip open in the Clip properties tool, click the Edit
Title button.
Closing the titler
To close the Motion Titler, use any of the following
methods:
Click the OK button at the bottom right of the
Motion Titler window. This returns you to Studio’s

Chapter 13: The Motion Titler 267
Edit mode. Your new or updated title is now part of
the current project.
Click the button at the top right of the window.
This is equivalent to clicking OK.
Select File Close Title Tool, or File Cancel
Title Tool from the main menu bar while working in
the Motion Titler. The equivalent keyboard
commands are F12 and F11 respectively.
File operations
Most of the menu commands provided in the Motion
Titler duplicate the functions of buttons and context
menus, but several commands in the titler’s File menu
are not otherwise available. They are:
New Title: This is the “start over” command, which
removes all existing layers, and clears the
background. If you make changes to a new or
existing title before giving this command, you will
have an opportunity to save your work back into the
current project before proceeding.
Open Title: With this command you can load a title
from a file folder on your local system or network.
Save Title and Save Title As: These standard
commands, together with the previous, let you export
titles to other computers, and share titles with other
Studio users.
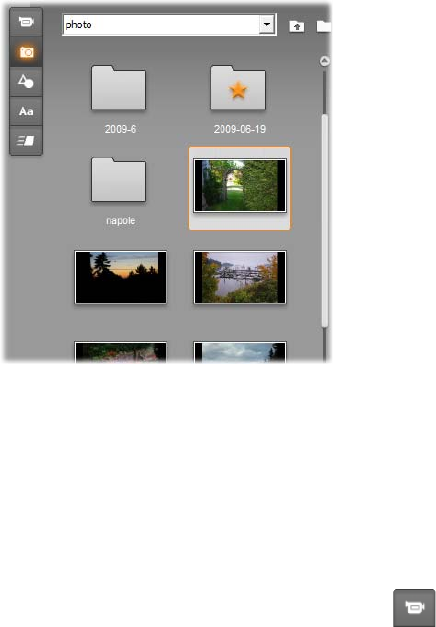
268 Pinnacle Studio
THE MOTION TITLER ALBUM
The Motion Titler Album is a tabbed panel on the left-
hand side of the Motion Titler screen. It contains
resources for building motion titles in the same way
that the main Studio Album contains resources for
creating movies.
The Videos and Photos (shown here) sections of the
Motion Titler Album are functionally identical to the
equivalent sections in Edit mode. The other three
sections contain special resources for motion titles.
The Motion Titler Album has five sections, which are
described in details on the following pages. Each is
opened by its own tab button:
The Videos section provides video materials
for your title. Although the layout is a little
different, this is the same section as in Edit mode,
with the same capabilities. Any changes, such as

Chapter 13: The Motion Titler 269
selecting a new video, or switching to Scenes mode,
affect both simultaneously.
The Photos section is also the same as its
equivalent Album section, Photos and Frame
Grabs.
The Objects section contains a collection of
graphic objects that you can use to decorate
your titles. Individual objects can be sized,
positioned and rotated as needed.
The Looks section is where you can define the
visual styling of a text or shape layer in your
title. You can use one of the numerous preset looks,
or define your own in terms of one or more face,
edge and shadow components.
The Motions section puts the excitement in
your motion titles. Motions are animation
programs that are most often applied to text but will
work with any type of layer. Separate animations can
be applied to the beginning, middle and end phases
of any layer’s lifespan.
Adding Album resources to a title
To add a video, photo or object to the title, double-click
its icon, or drag it from the Album into the Edit
Window, or choose Add to motion title from the icon’s
context menu. In all cases the new element is created at
a default size in the center of the Edit Window,
whereupon you can move, resize or rotate it as you like.
Looks can be applied to the currently-selected text or
shape layer in the Edit Window either by double-
clicking or by drag-and-drop. Looks cannot be used
with layers of other types. If the layer to which a look
is being applied is of the text type, and the text it
contains is only partially selected, the look is applied
only to the selected range.
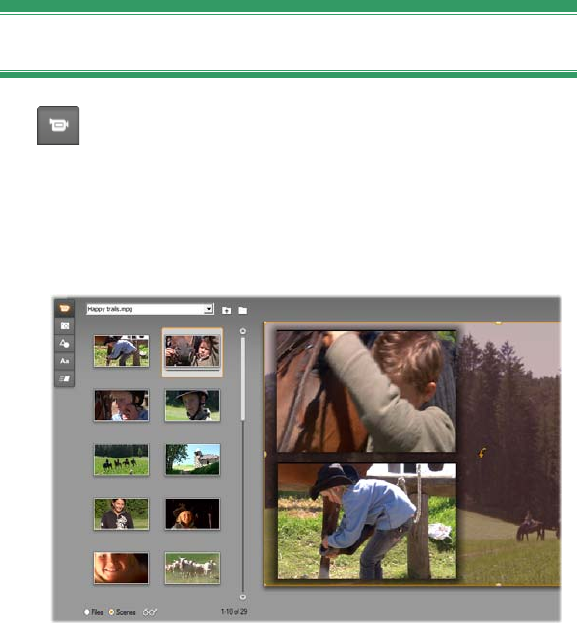
270 Pinnacle Studio
To add a motion to any element, double-click it while
that element is selected, or drag it onto the element
either in the Edit Window or the Layer List. If multiple
layers are selected, double-clicking a look or a motion
adds it simultaneously to all of them.
The Videos section
The Videos section of the Motion Titler Album
will look familiar to anyone who has spent time
in Studio’s Edit mode, for it is simply another view of
the same section in the main Album. Despite minor
differences in the layout of the controls, the
functionality is the same. See page 69 for details.
With the Videos Album in Scenes mode, double-click
scenes to add them to your motion title, or drag them
into the Edit Window, or right-click the scene and
choose ‘Add to motion title’ from the context menu.
Another way to use video is by dragging to the
Background Panel.

Chapter 13: The Motion Titler 271
To add a video file or scene to your motion title as a
layer, use any of the following methods:
Double-click the video in the Album.
Drag the video from the Album and drop it onto the
Edit Window.
Right-click the video in the Album and select Add to
motion title from the context menu.
In all of these cases, the video is added as a full-size
layer to the Edit Window, where it can be resized,
moved and rotated like other layers to fit your
composition.
To add a video file or scene as the background of your
motion title, drag it from the Album to the Background
Panel at the bottom left of the titler display. See “The
Background Panel” on page 283 for details.
The Photos section
The Photos section of the Motion Titler Album is
simply another view of the Photos and Frame
Grabs section of the main Studio Album. The controls
for folder navigation, favorites and viewing are used in
exactly the same way in both locations.
To add a photo or other image file to your motion title
as a layer, use any of the following methods:
Double-click the image in the Album.
Drag the image from the Album and drop it onto the
Edit Window.
Right-click the image in the Album and select Add to
motion title from the context menu.
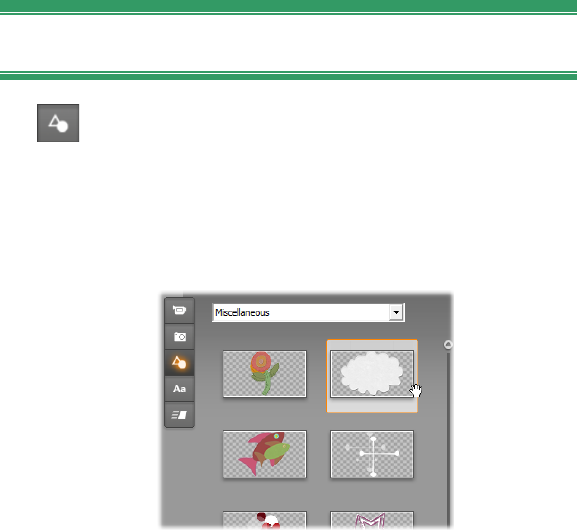
272 Pinnacle Studio
The picture is added to the center of the Edit Window
where it can be manipulated in the same manner as
other layers. The image is automatically resized only if
it would otherwise be too large to fit.
To add an image file as the background of your motion
title, drag it from the Album to the Background Panel
at the bottom left of the titler display. See “The
Background Panel” on page 283 for details.
The Objects section
The Objects section of the Motion Titler Album
contains bitmapped clip art and decorations for
your titles. Except that they are provided as resources
with the Motion Titler rather than as files in an image
folder, they are used in exactly the same way as the
images in the Photos section.
Selecting and dragging an image from the Objects
section for use in a motion title. Use the dropdown
list at the top of the section to select one of the
available image categories.
When added as a background by dragging to the
Background Panel, the images are stretched to fill the
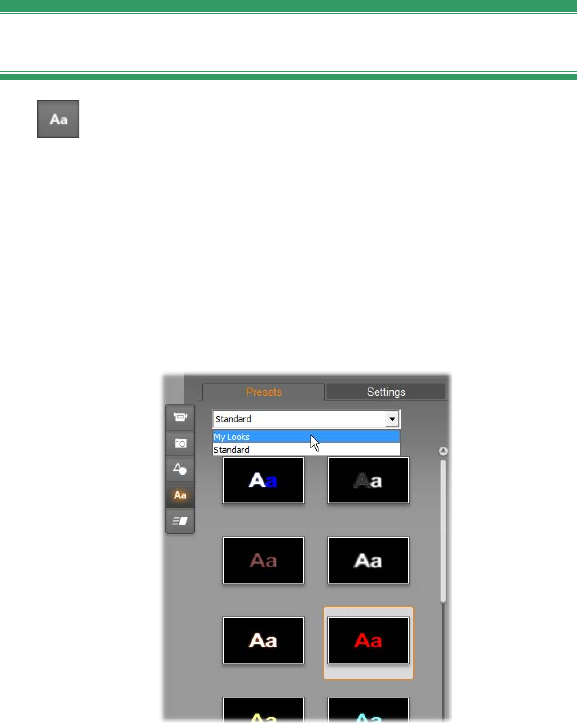
Chapter 13: The Motion Titler 273
available space. When added as an ordinary layer, the
images are initially centered in the Edit Window frame
at their original size. They can then be repositioned,
resized and rotated as needed.
The Looks section
This section of the Motion Titler Album provides
visual styles that can be applied to the text and
shape layers in your motion title.
Preset looks
The easiest way to use looks is to select one of the
icons in the Presets tab. The dropdown list above the
icons lets you choose the built-in presets (“Standard”),
or those you have designed yourself (“My Looks”).
Switching from the Standard (built-in) preset looks to
the customized presets in My Looks. To begin
creating a customized look, select a preset to use as
a starting point, then click the Settings tab.
274 Pinnacle Studio
To apply a preset look to a text or vector graphics layer,
first select the layer with the mouse by clicking in the
Edit Window (page 285) or the Layer List (page 292).
You can affect multiple layers simultaneously using
multiple selection or a layer group (page 299).
Having selected the layer or layers to change, use one
of the following methods to apply a look:
Double-click the icon for the chosen look.
Right-click the icon and select Add to selected
layer(s) from the context menu.
Drag from the icon onto the layer in the Edit
Window (or onto any one of multiple selected or
grouped layers).
Cloning a style
Rather than applying a preset as such, you can also
clone a look as part of a style, which in the case of text
layers includes font information as well as the attributes
of the look itself. Use Copy style on the context menu
of the source layer, and Paste style on that of the
destination layer, to achieve this.
Customizing looks
The Settings tab provides access to the Looks Editor,
where you can examine, modify, add or delete the
individual detail layers that contribute to a look.
There are three types of detail layer: face (surface),
edge and shadow. The three types differ not in the
settings they support, but in the default position at
which they will be inserted in the layer stack. Unless
explicitly dragged out of position, face details always
appear at the top of the stack, followed by edges, and
finally shadows. After a detail has been created,
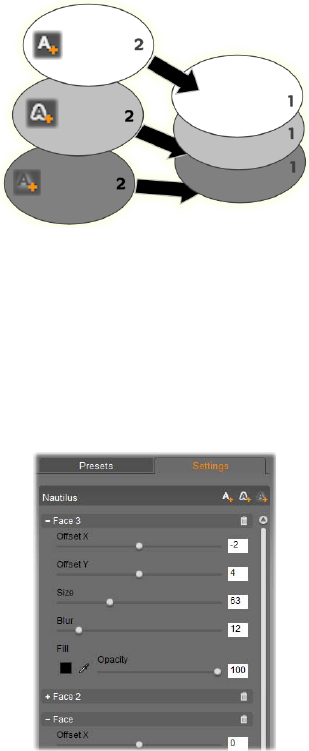
Chapter 13: The Motion Titler 275
however, it can be dragged up or down in the layer
stack as desired.
Face, Edge and Shadow: A new face detail (left, top)
is added above the uppermost existing face layer;
new edge and shadow details are added below the
bottommost layer of their respective types.
The properties of individual detail layers can be
modified by means of controls on collapsible edit
panels in the Looks Editor.
The Looks Editor is opened by clicking the Settings
tab in the Looks section of the Motion Titler Album.
The title bar shows the name of the current look
(‘Nautilus’) and three buttons for creating new detail
layers. The edit panel for the Face 3 detail is open;
below it, the panel for Face 2 is closed.
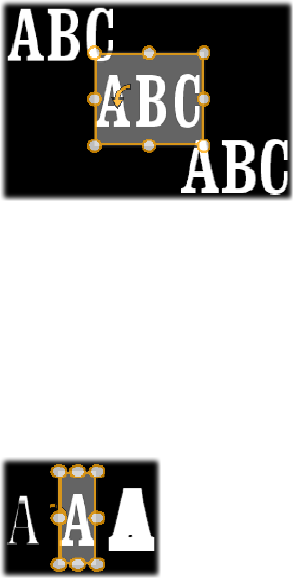
276 Pinnacle Studio
The following detail properties are available:
Offset X and Offset Y: These sliders set the position
of the detail layer relative to the nominal position of
the text or graphic to which the look is applied. The
range of offset is -100 (left, or bottom) to +100
(right, or top). The maximum offsets represent one
eighth the width and one eighth the height of the Edit
Window work area.
In this example, a look with three detail layers has
been applied to a single text layer. The detail layers
are configured identically except for their offset
values, as follows: top left (-100, 100); center (0, 0);
bottom right (100, -100).
Size: This slider sets the thickness of the segments
used to draw the text or graphic, from zero to 200,
where 100 represents the default thickness.
This example includes three detail layers with
varying size values. From left to right: 80, 100, 120.
The visual effect of varying the size depends on the
default thickness of the strokes in the layer. In a text
layer, this depends the font family and size chosen.
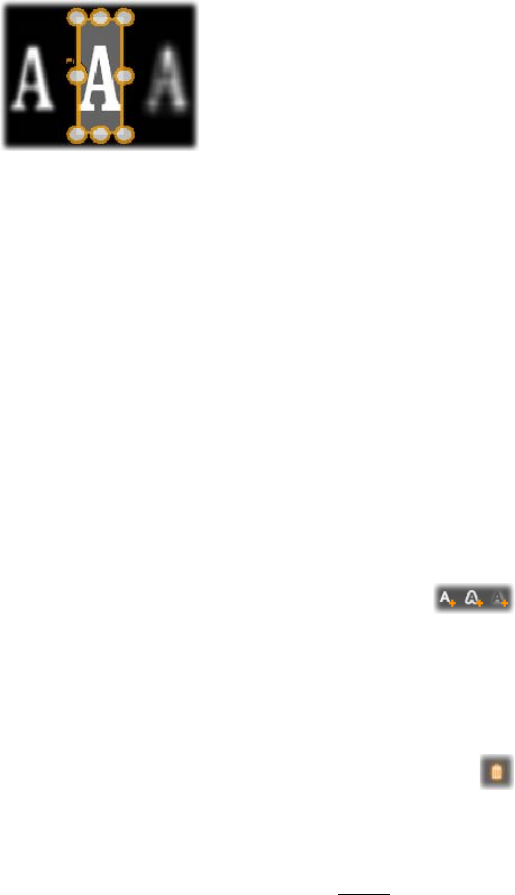
Chapter 13: The Motion Titler 277
Blur: As this slider increases in value from 0 to 100,
the detail layer affected becomes increasingly
ghostly and indistinct.
The detail layers in this example differ only in their
blur settings. From left to right: 15, 0, 30.
Fill: Click the color swatch button to open a standard
color dialog in which the fill color of the detail layer
can be set. You can also use the eyedropper button to
pick up a color from the screen.
Opacity: This slider sets the opacity of the detail
layer from 0 (transparent) to 100 (opaque).
Working with detail layers
In addition to setting the properties of existing detail
layers, the Looks Editor allows you to add details of
any of the three types, to delete details, and to reorder
the detail layer stack.
To add a detail layer, click one of the
three small buttons at the top right of the
Looks Editor. From left to right, these create a new
face, edge and shadow layer respectively. The
placement of the new detail layer in the layer stack is
determined by its type, as explained above.
To delete a detail layer, click the trashcan
button at the right-hand end of the header bar
of the detail’s edit panel.
To rename a detail layer, double-click its name,
type the name you want, and press Enter.

278 Pinnacle Studio
To close down or open up the edit panel of a detail
layer, click the or button at the left-hand end
its header bar.
To reorder detail layers, drag the header bar of the
edit panel to its new location. If the look you are
editing contains more than two or three layers, it can
be easier to follow the action if you close down the
panels first so that the whole stack is visible at once.
Saving a custom look
Once you have finished editing a custom look, you can
save it to “My Looks” by clicking the Save Look button
at the bottom of the Looks Editor. Before saving, it’s a
good idea to rename the look. To do so, double-click
the current name in the header bar of the editor, type a
descriptive name for the look, and press Enter.
The Motions section
The Motions section of the Motion Titler Album
contains the animation routines that give the
Motion Titler both its name and much of its power.
These motions are assigned to and operate on single
layers in your title. The motions are divided into three
classes based on the portion of the layer’s lifespan they
affect: Enter, Emphasis and Exit.
An Enter motion controls the arrival of the layer – its
first appearance within the running title.
An Emphasis motion maintains audience focus on
the content of a layer by giving it an attention-getting
action during its time on-screen.
An Exit motion takes the layer off-stage again,
completing its life cycle.
Chapter 13: The Motion Titler 279
Each layer is allowed to have one motion of each type.
All motions are optional, however, and it’s also quite
possible to have a motion title with no motions at all.
A quick survey of the motions collection
In each of the three classes of motion, most of the
animations can be grouped into several standard types
based on their mode of action:
Letter-based motions operate at the level of
individual letters in a text caption (other layers are
treated as consisting of a single “letter”). For
instance, in the Enter motion “Letters turn”, the
letters in the text layer are first seen edge on, then
rotate in place one by one until all are in their normal
orientation.
Word-based motions work similarly, but with
words as the smallest unit of animation. In the Enter
motion “Words from bottom”, the words in the layer
float up into position one by one from below the
frame.
Line-based motions are meant for layers with
multiple lines of text, each of which is processed in
turn. In the Enter motion “Lines from behind”, each
line of text is brought onto the screen along a
perspective track as though it originated from behind
the viewer’s own position.
Page-based motions affect the entire layer
simultaneously. One example is the Enter motion
“Barrel roll”, which “rolls” the layer into position
from above as though it were painted on the side of
an invisible rolling barrel.
Most Enter motions have a corresponding Exit motion
with which they can be paired if visual consistency is

280 Pinnacle Studio
desired. For example, a layer that enters with the
“Words from infinity” motion could be configured to
exit with “Words to infinity”. However, this kind of
consistency is only an option, not a requirement, and
you can mix and match motions of the three types in
any way you choose.
The Motions section of the Motion Titler Album has
tabs for Enter, Emphasis and Exit motions. Each
layer in a title can use one motion from each class.
Adding motions
To add a particular motion to a particular layer, first
select the layer, then do any of the following:
Double-click the motion icon in the Album.
Drag the motion icon from the Album to an
accessible layer (one not masked by other layers) in
the Edit Window.
Drag the motion icon from the Album to the layer in
the Layer List.
Right-click the motion icon in the Album and choose
Add to selected layer(s) from the context menu.
Chapter 13: The Motion Titler 281
Upon using any of these methods, the motion will be
added to the layer, replacing the existing motion of the
same type on that layer, if any. At the same time, a
looping preview of the title animation will begin to run
in the Edit Window so that you can immediately see the
effect of the motion on the layer in the context of the
overall title. See “Working with the Layer List” on
page 292 for details on working with motions in the
Layer List.
CREATING AND EDITING
MOTION TITLES
A title in Studio’s Motion Titler is built from elements
of four types:
The background layer: By default, the background
is fully transparent. For overlay titles, this is
normally what you want. For special purposes, or for
full-screen titles, you can choose a solid color, an
image, or video for the background. For additional
flexibility, the Background Panel also includes a
variable opacity slider. See “The Background Panel”
on page 283.
Video and image layers: The resources that make
up these layers originate in the Videos, Photos and
Objects sections of the Motion Titler Album. The
layers support the same operations as text and shape

282 Pinnacle Studio
layers except for the application of looks. See “The
Videos section” (page 270), “The Photos section”
(page 271) and “The Looks section” 271 for detailed
information.
Text and shape layers: These are “vector-based”
layers, meaning that they are stored not as bitmapped
images like video and photo files, but as a kind of
“recipe” for recreating the images from straight and
curved line segments to which properties (e.g. color)
and special effects (e.g. blur) can be applied. Like
video and image layers, these vector-based layers
can be dragged, resized, rotated and grouped, and
you can apply motions to them. Unlike the other
layers, however, they can also be customized with
looks from the Looks section of the Motion Titler
Album. See “The Motions section” (page 278) and
“The Looks section” 273 for details.
Motions: Motions are animation routines that can be
applied to any layer in the title composition except
the background. Motions are selected and applied
from the Motions section of the Album. Once a
motion has been applied to a layer, its timing can be
adjusted in the Layer List timeline. See “The
Motions section” (page 278) and “Working with the
Layer List” (page 292) for further information.
Creating text and shape layers
To create a text layer, either click the Add
Text button in the header bar of the Layer
List, or simply double-click an empty area of the Edit
Window. A new layer containing default text will
appear. The text is automatically selected, and will be
replaced if you now begin to type.

Chapter 13: The Motion Titler 283
To create a shape layer, click the Add
Shape button (to the right of Add Text), then
make a selection on the pop-up menu. The available
choices include circle, square, ellipse, rectangle,
horizontal and vertical “pill” shapes, and triangle. Upon
selection, a new layer of the given shape and a default
size appears in the center of the Edit Window.
Editing layers
The remainder of this chapter provides details on
editing layers in the Motion Titler.
To learn about customizing the Background layer,
see “The Background Panel” immediately below.
For information on moving, resizing, rotating and
rearranging all types of foreground layer, see “The
Edit Window” on page 285 and “Working with the
Layer List” on page 292.
To learn about editing text and setting text
properties, see “Working with text” on page 288.
Multiple selection and grouping is covered under
“Working with layer groups” on page 299.
Finally, to learn how about motion editing in the
Layer List timeline, refer to “Working with the
Layer List” on page 292.
The Background Panel
Unlike the foreground layers in a motion title, the
special background layer does not appear in the Layer
List, and is not modifiable in the Edit Window. Instead,
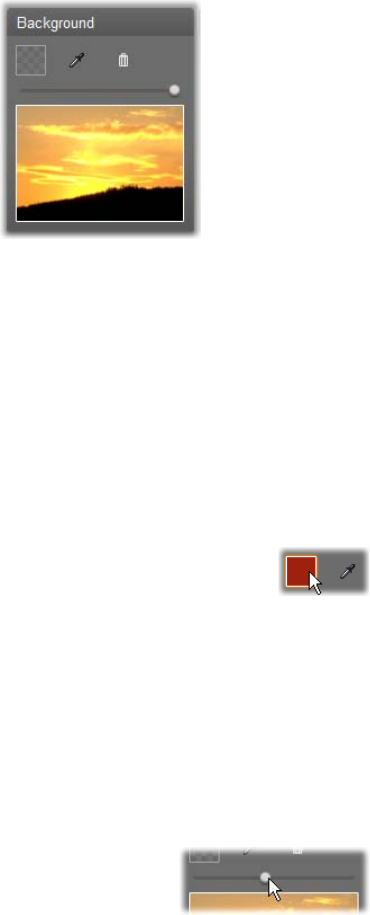
284 Pinnacle Studio
the background is controlled from the Background
Panel at the bottom left of the Motion Titler.
The Background Panel lets you create the
background layer of a motion title. The preview area
at the bottom shows the current content of the
background without transparency or foreground
layers. The area also serves as a target for dropping
videos or images from the Motion Titler Album.
The default background for a motion title is fully
transparent. If your motion title is on Studio’s overlay
track or title track, any video or other images on the
video track will be visible behind the title foreground.
To create a solid background, click either
the color swatch button or the eyedropper
button. The first brings up a standard color selection
dialog, and the second allows you to pick up a color
from anywhere on your computer’s display, inside or
outside Studio’s own window.
To use video or a still image as your background, drag
the item down from the Videos, Photos or Objects
sections of the Motion Titler Album, and drop it on the
preview area of the Background Panel.
To make the background
translucent, position the knob on
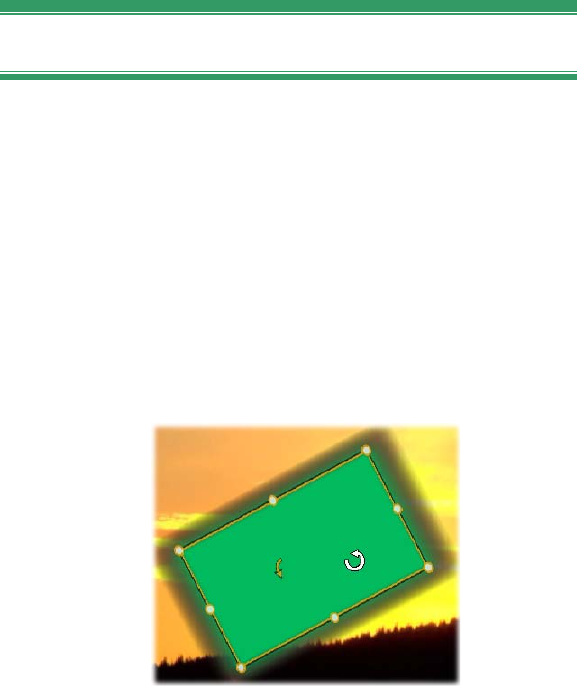
Chapter 13: The Motion Titler 285
the opacity slider anywhere between fully transparent
(all the way to the left) and fully opaque.
To reset the background to its default state, click the
trashcan button.
The Edit window
The Edit Window is the main preview and editing area
of the Motion Titler. This is where you rearrange,
resize and rotate the foreground layers of your title.
A necessary first step for most kinds of editing is to
select the layer or layers your want to affect. Selected
layers are drawn within a frame with eight control
points for sizing and a rotation handle for rotating the
layer in one-degree increments. Most types of layer can
be “grabbed” for dragging to a new position by clicking
anywhere within the control frame.
Rotating a shape object within the Edit Window. The
smaller arrow to the left of the mouse pointer is the
rotation handle for the layer. To rotate a layer, click
down on its rotation handle and drag.

286 Pinnacle Studio
With text and shape layers, some of the layer content
may appear outside the control frame. This occurs if
one of the “details” within the look is defined with a
horizontal or vertical offset that moves the detail away
from the nominal location of the layer. See page 273
for more information.
Layer operations in the Edit Window
The operations described here are for a single layer, but
can be extended to work with multiple layers
simultaneously. See “Working with layer groups” on
page 299 for more information.
To select a layer in the Edit Window, click it with the
mouse. This causes the layer’s control frame to appear,
ready for editing.
Layers respond to mouse clicks anywhere within their
containing rectangle (the rectangle shown by their
control frame when selected). This means that you may
not be able to manipulate a layer that is visible only
because it lies beneath a transparent area within the
rectangle of another layer. To perform any editing with
the mouse in such cases, you should first hide or lock
the upper layer(s) as described under “Working with
the Layer List”. See page 292 for details.
To move any non-text layer, click down anywhere
within its rectangle and drag to the new position.
To move a text layer, position
the mouse near the edge of the
layer’s control frame until you
see the drag pointer (four-way
arrows) appear, then click and
drag normally. Clicking inside
the frame, as you would do a non-text layer, would

Chapter 13: The Motion Titler 287
instead activate text-edit mode. See “Working with
text” below for detailed information.
To resize a layer but retain its proportions, click
down on a corner point of the control frame and drag
outwards or inwards until the desired size is achieved.
To resize a layer and modify its proportions, click a
side point of the control frame and drag. By resizing
with the center control point on two adjacent sides in
succession, you can produce any desired size and
proportion.
To rotate a layer, click down on its rotation handle
and drag. For finer control over the rotation, move the
mouse pointer away from the center of rotation while
dragging. The extra distance makes it possible to define
smaller angles between one mouse position and the
next.
To change the stacking position of a layer, right-click
the layer, and select from its context menu one of the
commands on the Layer submenu: Send to Back, Send
Back One Layer, Bring to Front, Bring Forward One
Layer. Convenient keyboard shortcuts are available for
all four operations; respectively, Alt+Minus,
Ctrl+Minus, Alt+Plus and Ctrl+Plus.
Another approach to reordering layers, which may be
more convenient in titles where several layers overlap,
is to use the Layer List. The Layer List also allows
individual layers to be “locked”, making them
temporarily immune from manipulation. Although
locked layers display at their usual stacking depth, they
do not interfere with the selection of deeper layers by
the mouse. See page 292 for details.
To delete a layer, select it, then – unless it’s a text
layer – press Delete. Alternatively, you can use either

288 Pinnacle Studio
of the context menu commands Delete and Layer
Delete Layer(s). Why have two delete commands? In
the case of a text layer in text-edit mode, the Delete
command (and the Delete key) apply to the layer’s text
only. To get rid of the layer altogether, the Layer
submenu command is needed (or its equivalent, the
trashcan button on the Layer List header bar).
Working with text
For all the graphical sophistication of the Motion Titler,
in many instances the primary reason for using titles is
the text they contain. The titler therefore provides
several specialized options to help you ensure that you
can get your text looking exactly the way you want.
The text operations we will look at below include:
Editing the text
Changing fonts, font sizes and styles
Setting text justification and flow
Copying and pasting text properties
Text-edit mode
As described elsewhere, when dragging a text layer you
have to be careful to click at the edge of the control
frame, rather than anywhere within it, to avoid
accidentally putting the layer into text-edit mode. For
the operations described here, however, text-edit mode
is exactly what we want. In a newly-created text layer,
text-edit mode is already enabled: you can begin to
type immediately and the default text will be replaced.
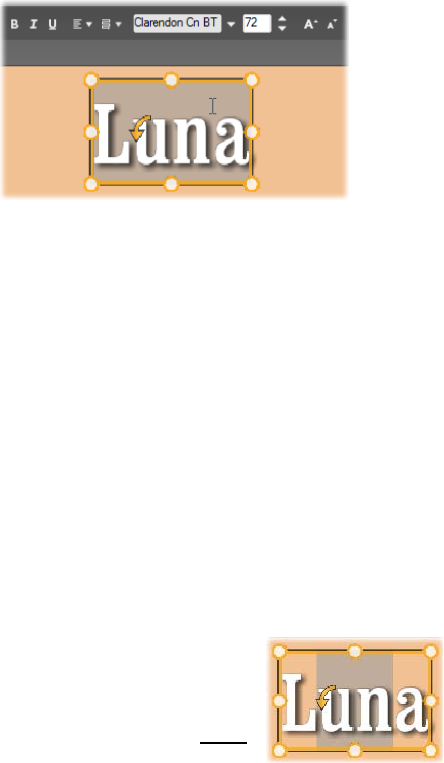
Chapter 13: The Motion Titler 289
To activate editing for an existing text layer, click
anywhere inside the control frame. Text-edit mode
becomes active and – to save you an often-required
step – all existing text in the layer is automatically
selected. As usual, selected text is indicated by
highlighting.
A text layer with all text selected. From left to right,
the text editing controls in the header bar above
govern letter styling (bold, italic, underline); text
alignment and text flow; and font name and size. In
text-edit mode, the mouse pointer over the layer has
the ‘I-beam’ shape as shown here.
To modify the text itself, simply start typing. The
highlighted text disappears and the text you type takes
its place. As you type, the current insertion point (the
place in the text where new letters are inserted) is
indicated by a vertical line.
If you want to add new text without losing what was
already there, click at the desired insertion point after
putting the layer in text-edit mode, or use the arrow
keys to maneuver the insertion point as desired.
You can also highlight (and thus
replace) only part of the text before
typing: drag across the letters with
the mouse, or hold down Shift
while using the arrow keys. Lastly,
if you want to select all the text in layer again, you can
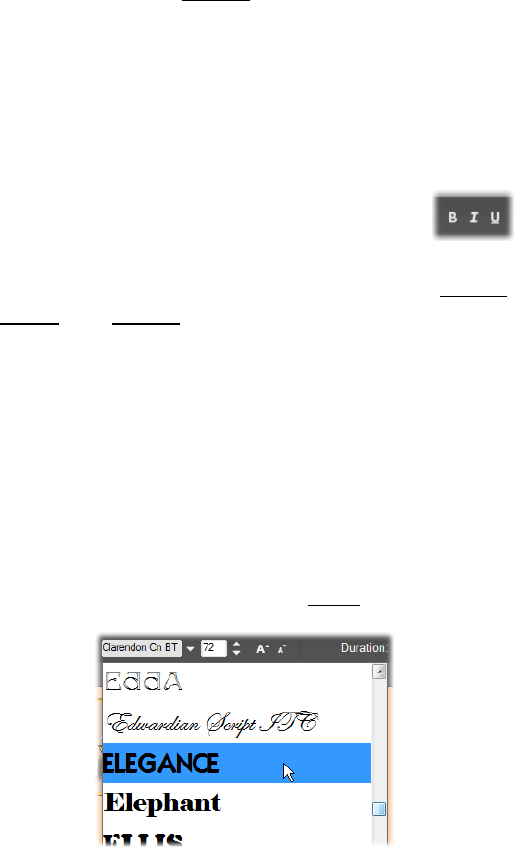
290 Pinnacle Studio
use the mouse or arrow keys as just described, or give
the standard shortcut Ctrl+A.
Styling highlighted text
As we have seen, the Motion Titler provides several
text controls, most of them probably quite familiar to
you from other applications. Those that apply to the
highlighted text only are these:
Font styling: To set or unset the bold,
italic or underline properties of the
selected text, use the toggle buttons in the header
bar, or the standard keyboard shortcuts Ctrl+B,
Ctrl+I and Ctrl+U. The buttons light up when their
respective style options are active.
Font name: Your motion titles are the perfect place
to experiment with fancy display fonts, so you’ll
likely be accessing this dropdown list quite often. If
you have many fonts on your system, the list can be
quite long. For ease of navigation, pressing the first
letter of a font name will take you instantly to the
corresponding alphabetical location in the list. Click
the font you want, or move to the name using the up
and down arrow keys and press Enter.
To select a font, open the dropdown list and click the
one you want. The font is applied to the currently-
highlighted text only.

Chapter 13: The Motion Titler 291
Font size: The Motion Titler provides
several methods of setting the font
size. You can enter a new value directly into the
font-size edit field, or use the neighboring up and
down arrow buttons to change the size in units of one
point. Further to the right, the shrink font and
enlarge font buttons change the size in intervals that
widen as the font size increases.
Styling with looks
As explained in “The Looks
section” on page 273, the
appearance of text and shape layers
can be transformed by the
application of looks from the
Motion Titler Album. In a partially-highlighted text
layer, applying a look affects only the highlighted text.
In principle, each of individual character in your title
could be given its own look.
Copying and pasting text styles
With both text and shape layers, the Copy Style and
Paste Style context menu items let you copy looks from
one layer to another without having to open the Looks
section of the Motion Titler Album.
With text, this operation also clones the font name, size
and style from one text layer to another, and also works
on partial selections within or between text layers.
Text alignment
For titles with multiple lines of
text, the Motion Titler provides
a standard menu of justification
options. The default for new
text layers is center justification
(Align Center on the dropdown
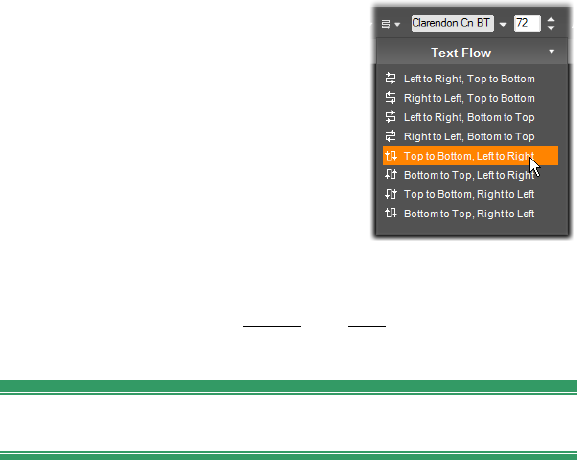
292 Pinnacle Studio
list), in which each separate line is horizontally
centered in the available space. The additional options
provide for Align Left, Align Right and Justify.
In paragraph-oriented text software, the incomplete
final line of a paragraph is usually not stretched across
the full width of the column. In the Motion Titler,
where the graphical appearance of the text is
paramount, even a final line with as few as two
characters is spaced to the same width as the others.
Text flow
To accommodate the various
conventions of different
languages with regard to the
direction in which lines of text
are written, and for maximum
graphical design flexibility, the
Motion Titler offers a menu of
eight text flow options. These
options, which work in concert
with the justification options just discussed, affect not
just the way the text is displayed but also the meaning
of standard keys like Home and End.
Working with the Layer List
The Layer List, which occupies most of the bottom part
of the Motion Titler display, has two columns: one of
layer headers, and one of timeline tracks. In each row,
the header contains the name of the layer, a visibility
button and a lock button. To the right of the header, the
timeline track serves as a graphical editor for
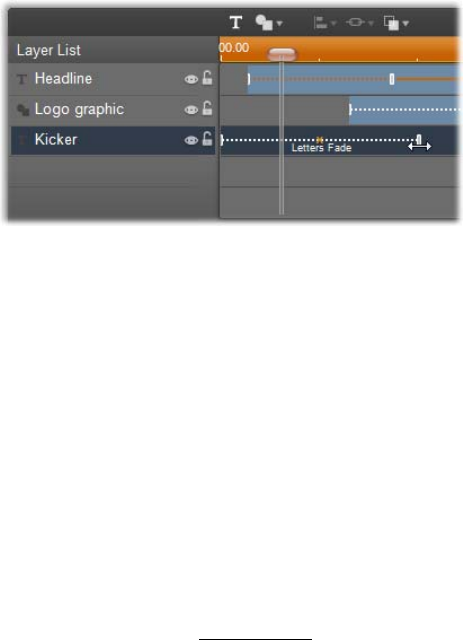
Chapter 13: The Motion Titler 293
controlling the lifespan of the layer within that of the
title as a whole, and the durations of any motions that
have been assigned to the layer. The Layer List
timeline self-adjusts its resolution so as to make visible
the title’s full duration, which you can set either by
trimming in Edit mode or by entering a value directly
into the Duration counter at the top right of the titler.
In addition to the layer headers and timeline, the Layer
List has a header bar that is home to several important
groups of controls (see “The Layer List header bar”
below).
The left-hand portion of the Layer List contains the
layer headers; to the right is an animation timeline
where the timing of each layer, and of any motions
applied to them, is displayed and can be modified.
(Only the leftmost portion of the timeline is shown
here.)
Selecting layers
Clicking a header in the Layer List has the same effect
as selecting the layer in the Edit Window (and vice
versa). The layer name highlights, and the layer’s
control frame appears. Multiple selection is also
allowed, using the standard Windows mouse and
keyboard combinations Shift+Click (extend selection),

294 Pinnacle Studio
Ctrl+Click (toggle selection of one item), and
Shift+Ctrl+Click (extend selection from last item
clicked). See “Working with layer groups” on page 299
for information on how to use multiple selections.
Layer names and renaming
When you create a new layer, the Motion Titler gives it
a default name based on the resource name or file
name. Since the default names are often not very
descriptive of the layer contents, it may be helpful in a
title with a number of layers to give them custom
names that make it easier to tell at a glance which name
goes with which layer.
The name of a new text layer is the same as its default
text, i.e “Text”. Unless you give the layer a custom
name, its default name will continue to match whatever
text you type into the layer. Once you do rename a text
layer, further changes to the text are no longer reflected
in the layer name. The default behavior can be restored
by setting a blank name, however.
To rename a layer, double-click the existing name. An
edit field opens with the existing name selected. Type
the new name, then press Enter or click outside the edit
field to conclude the operation.
Reordering layers
As we saw on page 286 (“Layer operations in the Edit
Window”), the position of a layer in the layer stack can
be altered by means of commands on the Layer context
submenu, or by keyboard shortcuts such as Alt+Plus
(Layer Bring to Front).
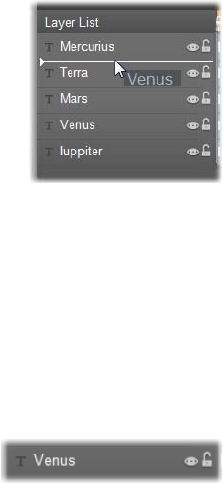
Chapter 13: The Motion Titler 295
The Layer List offers a more
direct approach: simply drag the
layer header to a new position in
the list. This is particularly handy
in situations where overlapping
layers make mouse selection
difficult. As you drag the layer,
an insertion line shows where the layer will appear in
the list when dropped.
Using multiple selection (see “Selecting layers” above)
you can drag several layers at once to a new position.
Hiding and locking layers
A complex title can get
crowded very quickly as you
add layers to the composition, and motions to the
layers. The two buttons at the right-hand end of the
layer header are handy, each in their own way, for
simplifying such situations.
Click the eye-shaped visibility button to temporarily
remove a layer from the Edit Window. The layer’s
information and settings are preserved, but you will be
able to work on other layers for the time being without
the hidden layer obscuring either your view or your
mouse actions. Click again to restore the layer to
visibility.
Click the padlock-shaped lock button to prevent the
layer from responding to mouse actions without hiding
it from view. This allows you to work freely on deeper
layers without losing the visual context that the upper
layers provide. Click again to unlock the layer.

296 Pinnacle Studio
The Layer List header bar
The controls and readouts on the header bar are in five
groups. From left to right:
The Add Text and Add Shape
buttons allow you to create
new “vector-based” layers to
which looks from the
Motion Titler Album can be
applied. Clicking Add Text
immediately adds a new text
layer with a default look and
caption. As a shortcut for Add Text, you can simply
double-click any unused area of the Edit Window.
Clicking Add Shape opens a pop-up menu from
which you can select a particular shape to add.
The Layer Alignment, Grouping and
Layer buttons each open pop-up
menus of commands affecting multiple layers. The
Layer menu provides the same functions as the Layer
context submenu described under “Layer operations
in the Edit Window” (page 286). The Layer
Alignment and Grouping menus are covered below
(“Working with layer groups”).
The transport buttons allow you
to preview your motion title
without leaving the titler. The preview loops
continuously once started; to halt it, click anywhere
on the Edit Window. As usual, the space bar on your
keyboard provides a convenient shortcut for stopping
and starting playback. From left to right, the
functions of the five buttons are: jump to start, go
back one frame, play/pause, advance one frame, and
jump to end.
The copy, paste and delete buttons (or
their standard keyboard equivalents

Chapter 13: The Motion Titler 297
Ctrl+C, Ctrl+V and Delete), allow you to duplicate
or delete layers of all types. Copy and paste
encompass not just the visual properties of the layer
but also any timing changes you have made or
motions you have assigned.
In the case of text layers in text-edit mode, the copy
operation applies not to the layer but to the selected
text within it. To select a text object for copying
without putting it into text-edit mode, either mark out
a rectangle that intersects the layer, or click its
header in the Layer List.
In text-edit mode the Delete key applies to the
selected text; however, the delete button on the Layer
List header bar always deletes the current layer even
for text layers.
The counter shows the current position
of the Layer List timeline scrubber in
the usual hours, minutes, seconds and frames format.
A Motion Title is like a stage on which the layers are
actors who come on for their big scene and then
depart. Trimming the layers in the Layer List
timeline allows you to control precisely the timing of
their entrances and exits.
Editing layers and motions on the Timeline
When a layer is created, its duration is set to the full
span of the title of which it is a part. To delay the first
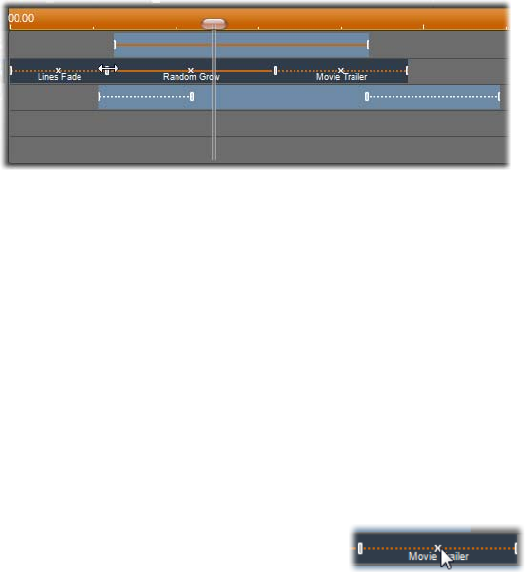
298 Pinnacle Studio
appearance of a layer in the running title, or to banish
the layer before the title itself is complete, drag the
ends of the layer along the timeline in the same fashion
as clip editing on the Movie Window timeline.
Up to three motions – one of each type – are allowed to
each layer; these are also displayed on the timeline,
where their durations too can be adjusted. Enter and
exit motions are each anchored to their respective ends
of the layer lifespan, but the end of the enter motion
and the start of the exit motion can be freely edited with
the mouse. If the layer has an emphasis motion, it
occupies whatever unused duration remains.
Three layers with motions. The top layer has only an
Emphasis motion (solid line), which therefore uses
the full duration. The bottom layer has Enter and
Exit motions, and a static interval between them. The
center layer has motions of all three types. The Enter
motion is being trimmed (note the horizontal arrow
cursor); as its length changes, the Emphasis motion
self-adjusts to consume fully any unused time.
To replace one of the motions used by a layer, simply
add the new motion as usual: an existing one of that
type will be overwritten.
To delete a motion without
replacing it, click the small ‘x’ in
the center of the motion’s timeline graph.

Chapter 13: The Motion Titler 299
Working with layer groups
The Motion Titler allows you to group layers either on
a temporary or a permanent footing.
To create a temporary group, you will use standard
multiple selection techniques either in the Edit Window
or on the Layer List. You can then make changes, such
as applying a look, to all the members of the group
simultaneously. The group remains whole only until
you click another layer or an empty area of the Edit
Window, whereupon the layers resume their individual
existences. In a temporary group, the control frames of
each member are all visible at once.
To create a permanent group, you first create a
temporary group, then give the Group command from
the Grouping menu on the Layer List header bar (or
from any member layer’s Grouping context submenu).
Once created, the group stays together until you
explicitly break it either with another menu command
(Ungroup), or by dragging the member layers out of the
group in the Layer List. The same menu provides one
further command (Regroup) that automatically
reconstitutes the last group to have been ungrouped.
When a permanent group is selected, it has a shared
control frame that encloses all its members. The control
frames of the individual members are not visible.
Permanent groups have their own header entries and
timeline track in the Layer List. The group header can
be expanded or collapsed to reveal or hide the headers
for the member layers. When the group is open, its
member layers are indented with respect to the group
header.
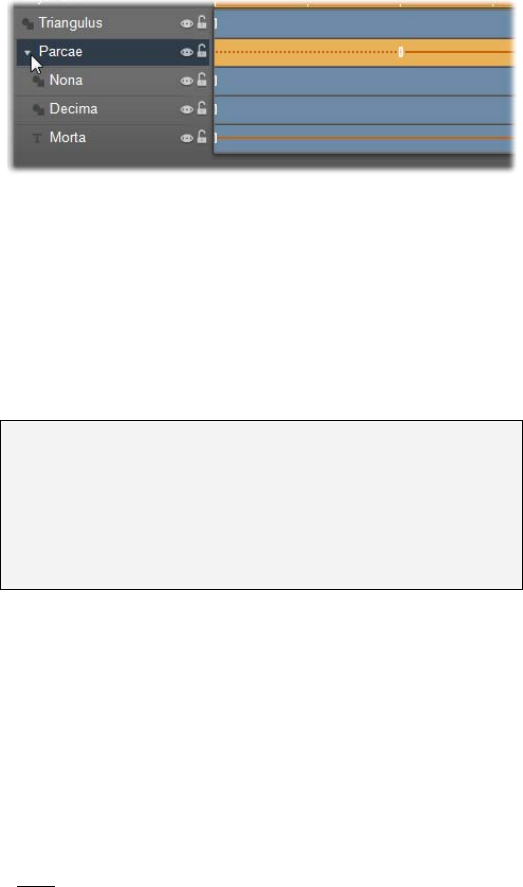
300 Pinnacle Studio
An ordinary layer and a group with three member
layers in the Layer List. The timeline graphics show
that motions have been applied to the group itself
and to one of its members. The mouse pointer is
positioned to collapse the group, which would hide
the names of the member layers.
Temporary groups and permanent groups respond
differently to many commands as detailed below.
Note: Even when a layer belongs to a permanent
group, it can still be individually selected, either in the
Edit Window (unless the group itself is currently
selected) or the Layer List. A member layer can even
be added to a temporary group with other layers inside
or outside the permanent one.
Multiple selection of layers
The first step in making a group is to select the multiple
objects that will comprise it. In the Edit Window, this
can be accomplished in two ways:
By clicking and dragging with the mouse to mark out
a selection rectangle (a “marquee”) that intersects all
the objects you want to group; or,
By clicking the first object you want to group, then
Ctrl-clicking each of the others.
Another approach to multiple selection uses the Layer
List, as described above under “Working with the
Layer List”.
Chapter 13: The Motion Titler 301
Edit Window operations on the group
Both temporary and permanent groups can be
repositioned, resized and rotated:
To reposition any group, drag it to the new position
as though it were an individual layer.
To rotate a permanent group, drag the rotation
handle of the shared control frame. All members of
the group revolve about their common center like
planets revolving around the Sun.
To rotate a temporary group, drag the rotation
handle of any member. All members of the group
rotate about their own centers like planets rotating on
their axes.
To resize a permanent group, drag any control
point of the shared frame. The size of the whole
group changes as though you were stretching a
rubber sheet with all the layers painted on it.
To resize a temporary group, drag any control
point of any member’s control frame. Each layer is
affected individually, expanding or contracting in
place about its own center.
In resizing operations on groups, as with individual
layers, dragging by a corner control point preserves the
aspect ratio of the layer, whereas dragging by a side
control point allows the proportions to be altered.
Applying properties to a group
Once a temporary group is selected, any property
settings you make will affect every member of the
group to whom the property is applicable:
If you apply a look, any text or shape member will
receive it.
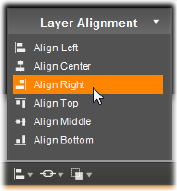
302 Pinnacle Studio
If you add a motion by right-clicking a motion icon
and choosing Add to selected layer(s), the result will
be the same as if you had added it to each member
individually.
If you select a font, or change any other text styling
attribute, every text member of the temporary group
will be updated.
Except in the first case, permanent groups have their
own rules for these operations:
If you apply a look, it works the same as with a
temporary group.
If you add a motion to a permanent group, the
group is treated for the purposes of animation as a
single graphic object, without regard to the letters,
words or lines its members may contain. However,
the individual motions of its members continue to
run along with that of the group as a whole.
Text stylings cannot be applied to a permanent
group.
Aligning layers in temporary groups
The final type of group operation,
one that applies to temporary
groups only, is provided by the
Layer Alignment menu. This is
accessed with a button on the
Layer List header bar, or on the
context menu for any layer that is
currently part of a temporary group.
The commands, of which there are three for horizontal
and three for vertical alignment, affect all the members
of the group except for the first selected, which sets the
position for the others.

Chapter 14: Sound effects and music 303
CHAPTER 14:
Sound effects and music
Video may be thought of as primarily a visual medium,
but the role of sound in your movies is often no less
important than that of the images on the screen.
Feature film and television productions include
numerous types of audio, beginning with the dialog and
other sounds created during live action. In your movies,
that raw soundtrack is brought in along with the video
during Capture mode. It appears in the Movie Window
Timeline view on the original audio track below the
video track. Original audio may also appear on the
overlay audio track.
Most commercial productions also require sound
effects – slamming doors, crashing cars, barking dogs,
etc. – and incidental music, which may consist of music
created especially for the production, songs taken from
recordings, or both. Voice-overs and other customized
audio are also often needed.
You can use all these types of add-on sound in your
own movies:
A good starter set of wav format effects is installed
with Studio, and others are widely available.
The Background music tool automatically creates a
music track of your selected duration and style.

304 Pinnacle Studio
You can drop mp3 files from the Album onto the
Timeline or import audio or MP3 tracks from a CD
with the CD audio tool.
The Voice-over tool lets you add narration or
commentary as you preview your edited video.
Audio, whatever its type, is added to your production
as clips in the Movie Window. These can be moved
around, trimmed and edited in much the same way as
video clips and still images.
Once a sound clip is part of your movie, you can
modify it with fades and other volume adjustments. An
easy way to create audio fades and cross-fades is to add
transitions to your audio clips (see page 322).
You can adjust the positioning of your clips within a
stereo or surround mix, and even change that
positioning arbitrarily within the clip. You can also
apply Studio’s audio effects, including noise reduction
and reverb among others.
Availability: Surround sound is supported in Studio Ultimate only.
About surround sound
A “surround” mix goes beyond the two channels of
stereo to provide a theater-style enveloping sound field
for your DVD productions. Studio lets you set the
apparent position of each audio track independently
within the mix, and to “pan” the track (reposition it,
whether smoothly or abruptly) in any desired direction
as often as necessary over the course of your movie.
To preview surround sound while editing in Studio,
you need a sound card that supports 5.1 channel output.
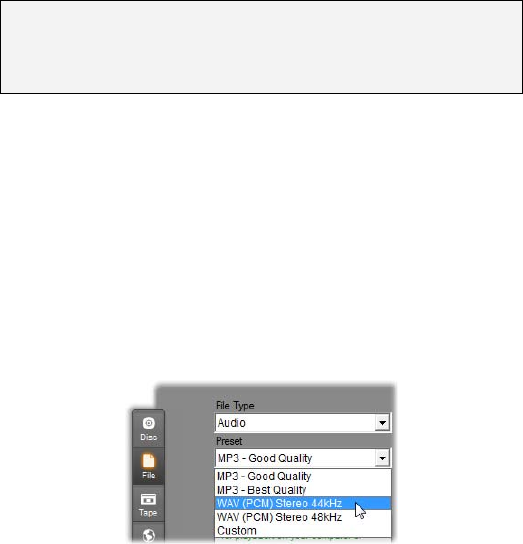
Chapter 14: Sound effects and music 305
A surround soundtrack can be output to the DVD in
either of two forms:
In Dolby Digital 5.1 format, each of the six surround
channels is stored discretely on the disc and will be
routed directly to the corresponding speaker when
played back on a full 5.1 surround playback system.
In Dolby Digital 2.0 format, the surround mix is
encoded onto two channels. When your DVD is
played back on systems with a Pro Logic or Pro
Logic 2 decoder, and a 5.1 or better speaker layout,
the original surround information is recreated. On
other systems, the encoded soundtrack will be heard
as conventional stereo.
Note: Even if you cannot hear your surround mix when
previewing, it will still appear on your DVDs, but a
surround preview allows more accurate mixing.
Creating a soundtrack file
Studio lets you output your movie soundtrack as an
audio file in wav (PCM), mp3 or mp2 format. Simply
open the File tab in Make Movie mode as usual and
select Audio as your file type. Several presets are
available, with some typical settings for standard file
types. The Custom preset lets you configure the type
and settings of the output file as desired.
Soundtrack file output presets
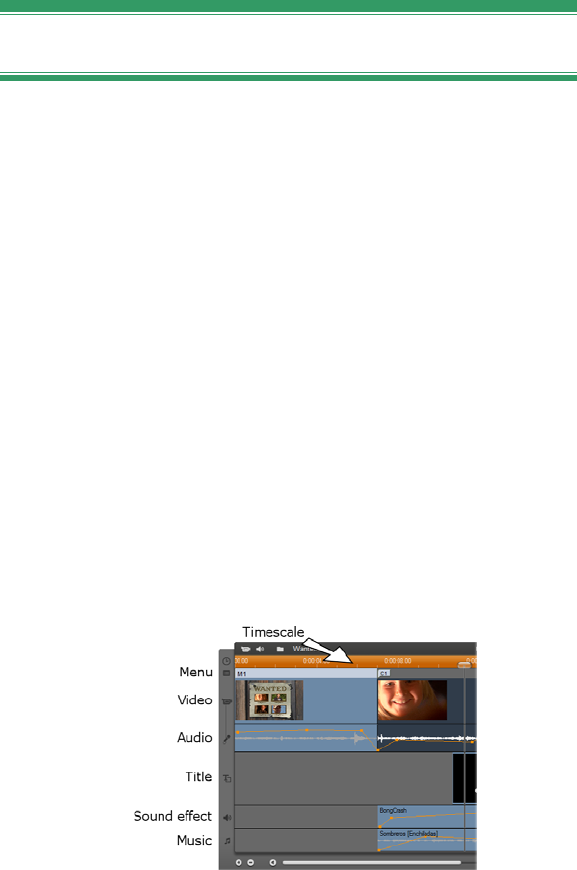
306 Pinnacle Studio
The Timeline audio tracks
The Movie Window’s Timeline view contains several
audio tracks:
Original audio track: This contains the audio captured
along with your video clips. It is sometimes called
“synchronous” audio because it is recorded
simultaneously with the video track.
Overlay audio track: The original audio for video
clips on the overlay track.
Sound effect and voice-over track: Sound effects and
voice-overs are the typical content on this track. Sound
effects are brought into your project from the Sound
Effects section of the Album (see “The Sound Effects
section” on page 90). Voice-overs are created with the
Voice-over tool (described on page 311).
The Timeline audio tracks: original audio, sound
effect and voice-over, and background music. When
the overlay track is visible, a fourth audio track
appears for the original audio for overlay video.
Chapter 14: Sound effects and music 307
Background music track: Use this track to include
mp3 or wav audio files, ScoreFitter background music
generated by Studio, and music (or other content) from
audio compact disks (CDs). Audio files are imported
via the Music section of the Album (see page 91).
Create ScoreFitter clips with the Background music
tool, and CD audio clips with the CD audio tool (see
“The Background music tool” on page 309 and “The
CD audio tool” on page 308).
Switching audio tracks
Although the audio tracks do have their specialized
roles, as described above, these mainly control the
choice of track where new clips will appear. Original
audio will always be placed on the original audio track
when a new video clip is brought in; new voice-overs
will always be created on the sound effects and voice-
overs track; and new CD audio and ScoreFitter clips
will be added to the background music track.
Once a clip has been created, however, you can move it
to a different audio track if it is convenient to do so:
each track is actually able to accommodate any type of
audio clip. This gives you the flexibility to use two
sound effects simultaneously, for example, simply by
placing one of them on the background music track.
The only audio track with special status is original
audio, either for the main video track or, when it’s in
use, the overlay track. By default, audio clips on this
track are edited in parallel with the contents of the
video track at the same time index. To treat the original
audio as a separate clip for trimming, or to drag it onto
another audio track while leaving the video intact, or to
drag other sound clips onto an original audio track, first
lock the video track (by clicking the padlock icon on
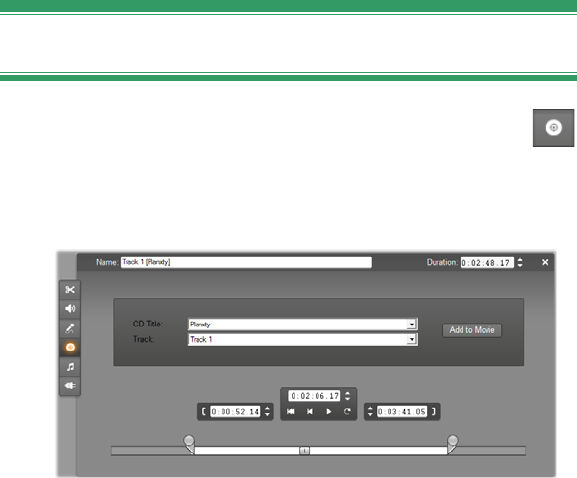
308 Pinnacle Studio
the right side of the Movie Window). See “Advanced
Timeline editing” on page 132 for more information.
The CD audio tool
Use this tool to create an audio clip from a CD
track. You can preview tracks within the tool,
and select either a whole track or an excerpt to add to
your movie.
If there is a CD in the drive that you have not
previously used in a Studio project, Studio will ask you
to enter its name before continuing. The controls on the
tool will become available only when Studio can offer
at least one entry on the CD Title dropdown list.
Select the CD from which you wish to capture audio in
the CD Title dropdown list, and a track on that CD
from the Track list. Since CD Title is also an editable
text field, you can change the name by which Studio
refers to this CD, if desired. The name change applies
to both the current and future sessions.
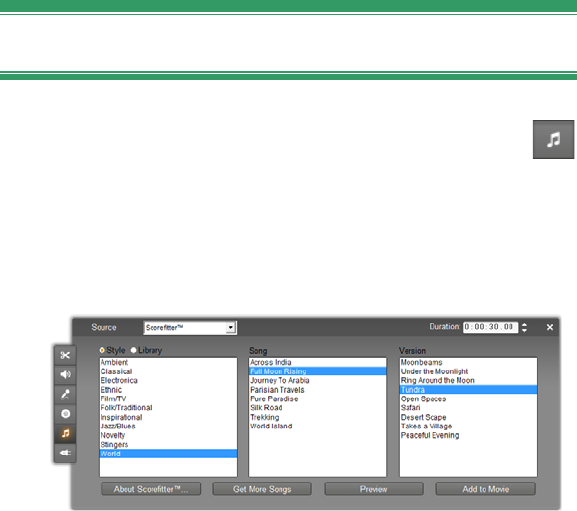
Chapter 14: Sound effects and music 309
Having selected the CD and track, you can now
optionally trim the clip and give it a custom name using
the other controls on the tool. These controls are
common to most audio clip types, and are used for
editing as well as creating clips. They are covered on
page 314 under “Trimming with the Clip properties
tool”.
Finally, click the Add to Movie button. Studio captures
the music clip from the CD drive and adds it to the
background music track beginning at the current time
index (as shown by the Timeline scrubber and the
preview frame in the Player).
The Background music tool
Studio’s ScoreFitter automatically creates
background music in the style of your choice.
Within that style, you select one of several songs, and
within that song, any of a number of versions. The list
of versions available also depends on the duration of
background music you specify.

310 Pinnacle Studio
To create music for a particular set of clips, select those
clips before opening the Background music tool. (To
select your whole movie, use Edit Select All or press
Ctrl+A.) The total length of the selected clips will
determine the initial setting for the music duration,
though you can modify the value at any time by
trimming on the Timeline or directly editing the
Duration counter in the tool.
In the Background music tool, choose a style, song and
version from the lists provided. Each style offers its
own selection of songs, and each song its own selection
of versions. Use the Preview button to audition the
song while the tool is open.
Enter a name for the clip in the Name field and adjust
its duration with the Duration counter, if desired. The
music clip you create will be adjusted to fit exactly the
duration you select.
When you have made your choice, click the Add to
Movie button. Studio creates the new clip on the
background music track beginning at the current time
index (as shown by the Timeline scrubber and the
preview frame in the Player).
Expanding your song collection
ScoreFitter songs come in collections called “libraries”.
The Standard library, which is included with Studio,
includes more than 40 songs in styles ranging from
Folk to Electronica. Additional libraries may be
purchased from within Studio as they become available
by clicking the Get More Songs button. Click the
Library radio button to see your song collection
categorized by library rather than by style.
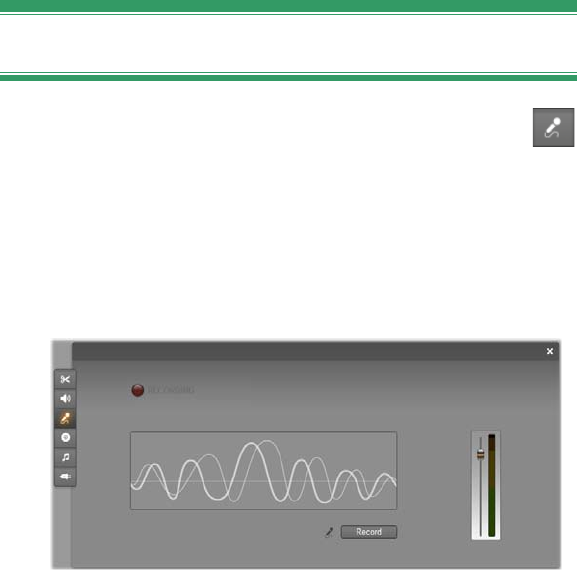
Chapter 14: Sound effects and music 311
The Voice-over tool
Recording a voice-over in Studio is as easy as
making a telephone call. Just open the Voice-
over tool, click Record and speak into the microphone.
You can narrate as you watch the movie play so your
words match the action on the screen. You can also use
the tool as a quick way of capturing ambient music or
home-made sound effects via your microphone.
Before you can record audio using the Voice-over tool,
you need to connect a microphone to the input jack of
your PC sound board. You must also have at least one
video clip in the Movie Window.
Review the video scenes in your movie and decide
where you want the voice-over to begin and end. When
you are ready, open the Voice-over tool. Note that the
recording lamp – the dark rectangle in the upper left of
the above illustration – is not lit.
Select your starting point on the Movie Window
Timeline. You may do this by selecting a clip, playing

312 Pinnacle Studio
the movie and stopping it at the desired point, or by
moving the Timeline scrubber.
Position the microphone for use and try speaking a test
phrase to check your recording level (see “Voice-over
level” below). When you are satisfied, click the Record
button (which toggles to a Stop button). Wait for a few
moments as the recording lamp first signals STAND BY
then steps through a 3-2-1 countdown.
When the recording lamp signals RECORDING, and the
movie begins to play back in the Player, perform your
narration.
Finally, click the Stop button. The lamp goes out, and
the voice-over clip is automatically placed on the sound
effects and voice-overs track. Review the clip by
selecting it then clicking the Play button.
Voice-over level
The record level for a voice-over clip is set
when you create the voice-over and cannot
be changed thereafter. However, you can
adjust the playback volume at any time.
The record level is set with the Recording
level slider and its accompanying level
meter on the Voice-over tool.
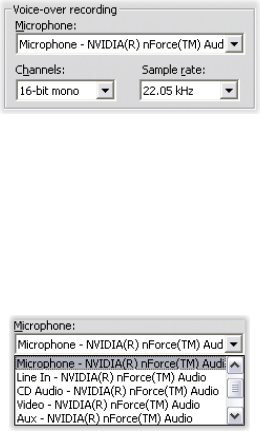
Chapter 14: Sound effects and music 313
Watch this meter to make sure your recording levels
don’t get too high or low. The indicator changes color
from green (0-70% modulation), through yellow, to
red. Generally, you should try to keep your audio
peaking in the yellow (71-90%) and out of the red (91-
100%).
Voice-over recording options
The Studio setup dialogs include several settings that
affect your recording configuration and quality. This
section provides a brief summary. See “Video and
audio preferences” on page 361 for detailed
information.
To access these options select Setup Video and audio
preferences from the main menu bar.
The Microphone dropdown list on this dialog lists the
multiple ways a microphone can be connected to your
particular sound card. The entries on the list should
look something like the following, from a system with
an NVIDIA® sound card:

314 Pinnacle Studio
Choose from this list, then connect your microphone in
the manner indicated (e.g. Microphone or Line In).
The Channels and Sample rate adjustments on the
options dialog control the quality of voice-overs or
other recorded audio. Set them at the highest quality
level you anticipate needing, but keep in mind that
increasing quality requires more disk space.
TRIMMING AUDIO CLIPS
As with other clip types, you can trim audio clips either
directly on the Timeline or by using the Clip properties
tool. See “Trimming on the Timeline using handles” on
page 123 for a discussion of the first method.
Most types of audio clip can be trimmed from a
minimum of one frame up to the full original length of
the clip content. ScoreFitter clips can be trimmed on
the Timeline down to as little as three seconds, and
upward without limit.
Trimming with the Clip properties tool
The Toolbox Modify Clip Properties menu
command invokes the Clip properties tool for the
selected clip. You can also access the tool by double-
clicking any audio clip.
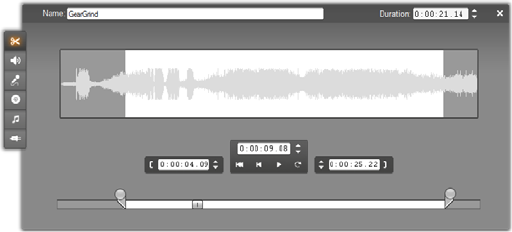
Chapter 14: Sound effects and music 315
To begin with, the tool provides controls that let you
view or edit two properties shared by all clips:
To set the duration of the clip, change the value in
the Duration counter.
The Name text field lets you assign a custom name to
the clip to replace the default one assigned by Studio.
The clip name is used by the Movie Window’s List
view, and can also be viewed as a fly-by label when
your mouse hovers over the clip in the Storyboard
view.
The other controls provided by the tool depend on the
type of audio clip you give it.
Original audio, sound effects and voice-overs
The Clip properties tool provides the same kind of
trimming controls for sound-effect and voice-over clips
as for video clips, but displays a graph of the audio
waveform instead of visual preview areas.
To learn how to trim with these controls, see
“Trimming with the Clip properties tool” on page 128.
Remember that clips on the original audio and the
overlay audio tracks can only be edited independently
when the corresponding video track is locked. See
“Advanced Timeline editing” on page 132.
316 Pinnacle Studio
CD Audio
For CD Audio clips, the Clip properties tool uses the
same trimming controls as above, but additionally
provides dropdown selectors for CD Title and Track.
You can use these to change the source of the clip at
any time. CD Title is also an editable text field, so you
can enter the actual title of the CD.
ScoreFitter
ScoreFitter clips can be edited to almost any length,
except that very short clips at some particular durations
may not be available in every combination of Style and
Song. This tool is essentially identical to the tool for
creating ScoreFitter clips (described under “The
Background music tool” on page 309), except that the
Add to movie button is replaced by the Accept changes
button.
AUDIO VOLUME AND MIXING
The audio levels and stereo positioning of individual
clips can be adjusted either directly on the Timeline, or
with the Volume and balance tool. Each technique
offers its own advantages. Adjusting on the Timeline
gives you a good sense of time versus volume or
balance, whereas the Volume and balance tool
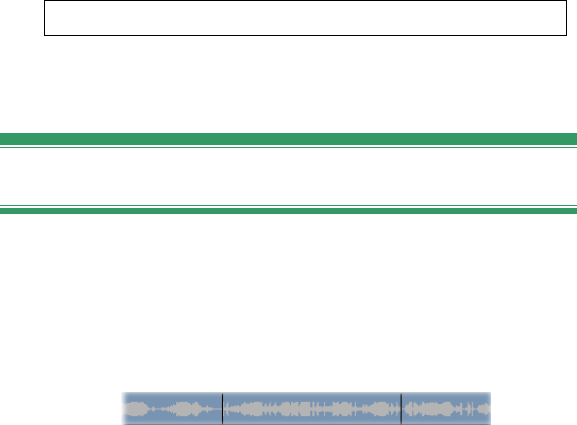
Chapter 14: Sound effects and music 317
facilitates mixing – separately adjusting the volume and
stereo balance of each of the audio tracks.
For disc authoring, the Volume and balance tool lets
you choose to create a surround soundtrack, rather than
stereo. The tool lets you dynamically position any of
the audio tracks from front to rear as well as left to
right.
Availability: Surround sound is supported in Studio Ultimate only.
Anatomy of an audio clip
An audio clip icon on the Timeline has several parts.
The boundaries of each clip are denoted by vertical
bars. The actual content of the audio is indicated by a
waveform graph:
Waveform graph excerpt from three neighboring clips.
The appearance of the waveform graph tells you
something about the character of the sound. A quiet
sound has a narrow waveform, close to the centerline of
the clip. A loud sound has a waveform with larger
peaks and troughs, reaching almost to the borders of the
clip. A continuous sound, such as a car engine, has
many pulses packed closely together. A staccato sound
has brief pulses separated by silences where the
waveform is a horizontal line.

318 Pinnacle Studio
Adjustment lines
The orange volume line graphically models the volume
changes you have made to the track and clip. If you
have not adjusted the volume at all, the line runs
straight along the clip at about three-quarters of the clip
height. This is the “zero gain” (0 dB) level, where the
clip’s original volume has been neither increased nor
decreased.
If you raise or lower the volume of the entire track, the
volume line remains horizontal, but is now higher or
lower than the zero-gain base level.
Finally, if you make volume adjustments within the
clip, the line consists of sloping segments that meet at
volume adjustment handles.
Unlike the waveform graph, or the adjustment lines for
balance and fade (see below), the volume adjustment
line is scaled logarithmically. Perceived volume varies
logarithmically with the strength of an audio signal, so
this feature allows the adjustment line to model more
accurately what you really hear. For instance, an
upward-sloping line segment will produce a smooth,
steady fade up from the starting to the ending level.
The green stereo balance line and the red front-back
balance (“fade”) line work similarly to the volume
line, except that in both cases the neutral position is the
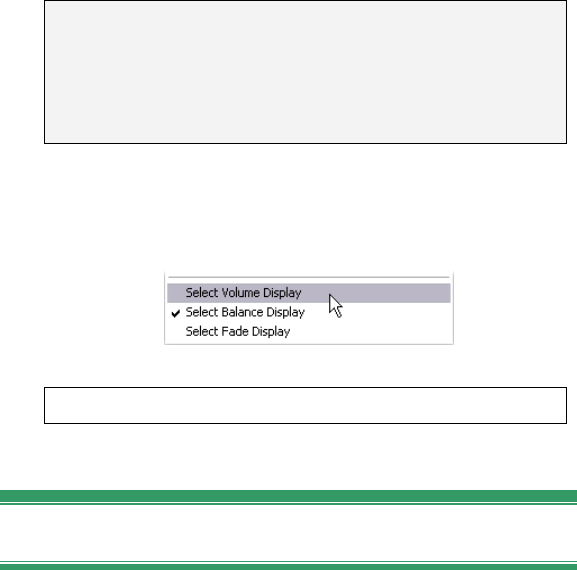
Chapter 14: Sound effects and music 319
vertical center of the clip, and the adjustment scale is
linear.
Raising the stereo balance line positions the audio
clip’s output further to the listener’s left, while
lowering it positions the clip further to the listener’s
right. Similarly, raising the fade line moves the clip
away from the listener, and lowering it brings the clip
towards the listener.
Note: You can only view and edit a clip’s fade line
when the Volume and balance tool is in surround
mode. The effect of adjusting the line can be previewed
only on systems where surround-sound playback is
available.
To select which of the three adjustment lines is
currently displayed, use the audio clip’s right-button
context menu:
.
Availability: Surround sound is supported in Studio Ultimate only.
Adjusting audio on the Timeline
Audio levels can be adjusted directly within a clip on
the Timeline. Use the mouse pointer to adjust the
volume line or either of the balance lines (see
“Anatomy of an audio clip” on page 317).
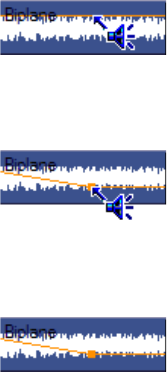
320 Pinnacle Studio
When you add a new audio clip to the Timeline:
The volume adjustment line of the newly-created
clip connects the lines from the preceding and
following clips if any are present.
If no volume adjustments have been made to other
clips on the track, the volume line through the new
clip is horizontal. Its height reflects the overall track
volume as set in the Volume and balance tool.
If no volume adjustments have been made either to
other clips or to the overall track volume, the volume
line through the new clip is at three-quarters height.
To adjust the volume of a clip on the Timeline, select it
(by left clicking), then move your mouse pointer close
to the line.
The volume adjustment cursor will appear:
Click the left mouse button, and drag up or down in the
clip. The volume line bends as it follows the mouse.
When you release the mouse, Studio creates an
adjustment handle on the volume line.
When your mouse pointer is positioned over an
adjustment handle on a selected clip, a highlighted
version of the volume adjustment cursor appears. With

Chapter 14: Sound effects and music 321
this cursor, you can click and drag the adjustment
handle both vertically and horizontally.
Right-click an adjustment handle to access the context
menu command Delete volume setting. This command
removes one adjustment handle. Use Remove volume
changes to remove all the handles from the clip.
Adjusting balance and fade
The left-right and front-back balance lines have the
same editing features as the volume line just discussed,
except that with them the neutral setting is at half the
clip height, instead of three-quarters as it is for volume.
In the case of left-right (stereo) balance, adjusting the
line upwards from the center positions the audio further
to the left. With front-back balance (“fade”), adjusting
the line upwards moves the apparent source of the
audio away from the listener; adjusting it downwards
brings the audio closer (towards the rear speakers).
Removing changes
Audio adjustment handles can be removed either
individually or for an entire audio clip at once. Select
the appropriate command on the clip’s right-button
pop-up menu:
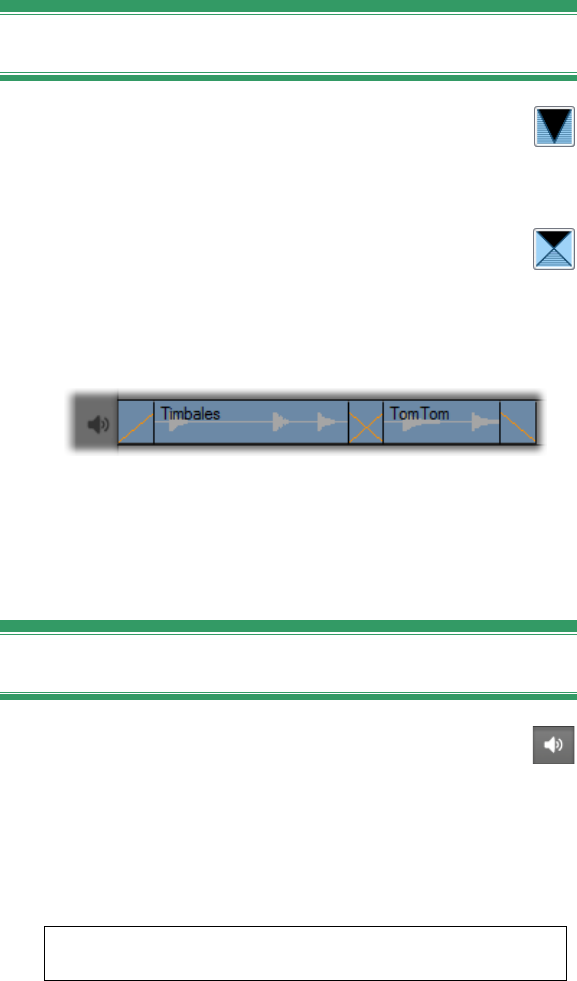
322 Pinnacle Studio
Transitions on the audio tracks
A quick way to create a fade at the beginning or
end of an audio clip is simply to add a Fade
transition as you would for a video clip. See Chapter 9:
Transitions for details.
To get a cross-fade between two adjacent audio
clips, simply drop a Dissolve transition onto the
Timeline track between them. (Actually, any transition
type other than Fade has the same effect, but Dissolve
gives the best visual reminder of a cross-fade.)
Transitions on the audio track: Placed at the
beginning of a clip, the Fade transition fades in;
placed at the end, it fades out. The Dissolve
transition creates a cross-fade between clips.
The Volume and balance tool
Compared to adjusting audio on the Timeline,
the Volume and balance tool offers a greater
degree of adjustment functionality organized into one
convenient location. It also provides both left-right and
surround-sound balance controls. The tool operates in a
similar way to a traditional audio mixer.
Availability: Surround sound playback is supported in Studio
Ultimate only.
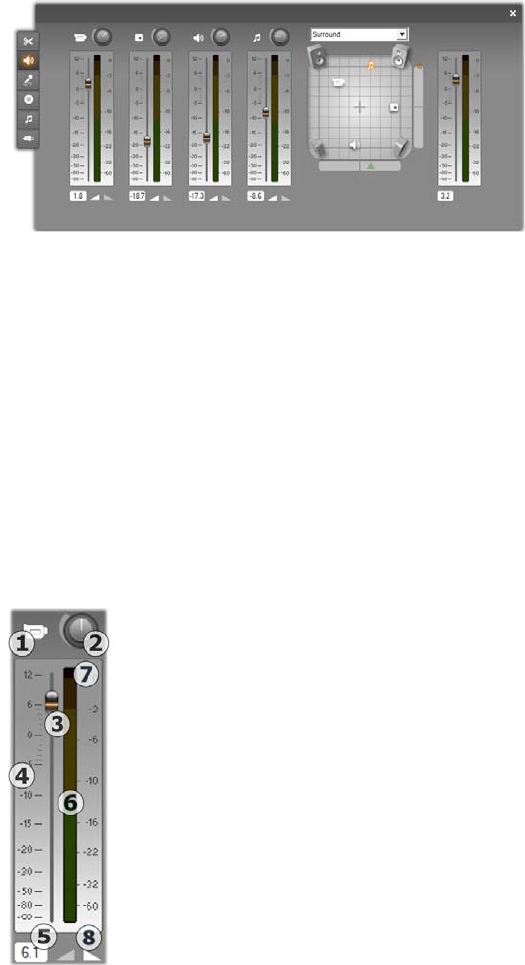
Chapter 14: Sound effects and music 323
The Volume and balance tool provides individual level
controls for each of the audio tracks: original
audio (left in illustration), overlay audio, sound effect
and voice-over, and background music (right). The
overlay audio controls are displayed only when the
overlay video and audio tracks are open in the Movie
Window.
The balance control, located in the right-hand part of
the tool, can position the audio of any clip – or part of
one – in stereo (one-dimensional) or either of two
surround (two-dimensional) modes. The mode is
selected in the dropdown list above the control.
Each audio track has its own set of level
controls. The set for the original audio
track is shown at left.
The individual controls and displays
include a track mute button . When this
button is in its down position, no audio
clips from the track will be used in your
movie. The track mute button’s icon has
a second purpose: it identifies which
track the level controls apply to. This is
the only visible point of difference
amongst the three sets of controls (four if
the overlay track is visible) .

324 Pinnacle Studio
The track level knob raises or lowers the overall
volume for the track. It therefore affects the vertical
position of the volume adjustment lines on all clips on
the track, but does not change their contour. Click on
the knob and drag it with a clockwise rotation (up to
the 2 o’clock maximum position) to increase the
volume. Use a counterclockwise rotation (down to the
6 o’clock minimum) to lower the volume.
Level knobs, full off (L), default (C) and full on (R).
A sliding knob, the track fader , sets the current track
level on a relative level scale , which is calibrated in
decibels (dB). The 0 dB mark corresponds to the level
at which the clip was recorded. The current level is
displayed numerically in a separate readout .
The position of the fader knob shows the volume level
at the current playback position in your movie, relative
to the original level. Drag the knob up or down to
modify the level. The knob is “grayed” (disabled) if
there is no clip on the track at the current time index. If
the track is muted, the knob is grayed and set to the
bottom of its range. Adjusting the fader results in a
volume adjustment handle being added to the track as
described above.
A track’s playback volume contour, or envelope,
combines the overall track level with the relative level
at each point on the track. This combined level, which
is shown graphically by the volume adjustment lines on
audio clips, is applied to the actual audio data to
produce the track’s output level, as represented on the
Chapter 14: Sound effects and music 325
level meter , which illuminates during playback to
show the level at the current time index.
The meter scale to the right of the level meter displays
the output level. The unit is again dB, but on this scale
0 dB corresponds to the maximum digital sample value.
If the track volume reaches or exceeds this value, the
output will be marred by audio “clipping” – the
unpleasant sound produced by attempting to set volume
levels outside the range of a digital signal. To avert
this, adjust the fader such that the output level in the
loudest parts of the track hovers around -6 dB to -3dB.
As a visual monitoring aid, the color of the level scale
changes from green to yellow to orange as the output
level – and thus the danger of clipping – increases.
Avoid letting the level stray above the yellow region. If
clipping occurs, a red zone at the very top of the scale,
the clipping indicator , lights and briefly remains lit
to alert you that clipping has taken place.
The fade buttons produce a fade-in from or a fade-
out to the current position of the movie. For a visual
confirmation of their effect, watch the behavior of the
clip’s volume adjustment line when the fade buttons are
clicked. The fade duration is variable from zero to fifty-
nine seconds. Adjust it in the Project preferences
options panel (Setup Project Preferences) under
Volume fades. Fades are not available too close to the
beginning or end of a clip.
The balance control
This control has three modes, stereo, surround and
dialog, which you select from the dropdown list above
the control. The mode can be changed whenever
desired – even within an individual audio clip.
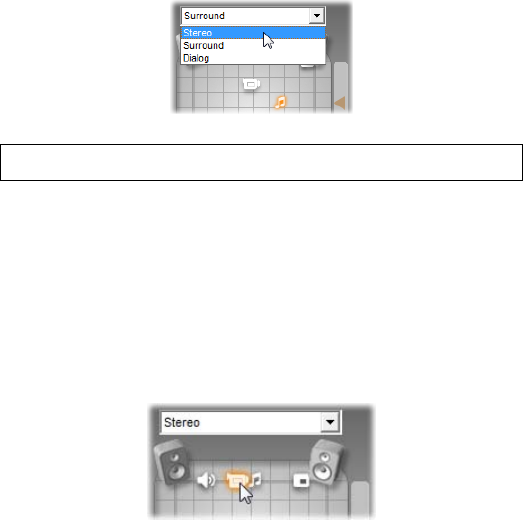
326 Pinnacle Studio
Availability: Surround sound is supported in Studio Ultimate only.
In any mode, the position of each track at each point in
the movie is shown by its speaker icon, or “puck”. The
icon matches the one on the muting indicator for the
corresponding track.
In stereo mode, you set the position of the track by
dragging its puck left and right between a pair of main
speakers:
Positioning the original audio in the middle of a
stereo mix with the sound effects track (L) and the
overlay track (R) on opposite sides. In this example
the music track icon (right of center) is “ghosted”,
indicating either that the track has been muted or
that there is no clip on the track at this time index.
In surround mode, you can position each track from
front to back (“fade”) as well as from left to right
(“balance”). Each track can be independently placed
anywhere within the rectangular listening area defined
by the four corner speakers.
Dialog mode is similar in concept, but includes the
center speaker at the front of the listening area. Sending
a portion of a clip’s audio through the center helps
stabilize the apparent location of the sound within the
shifting surround mix. At the same time, the placement
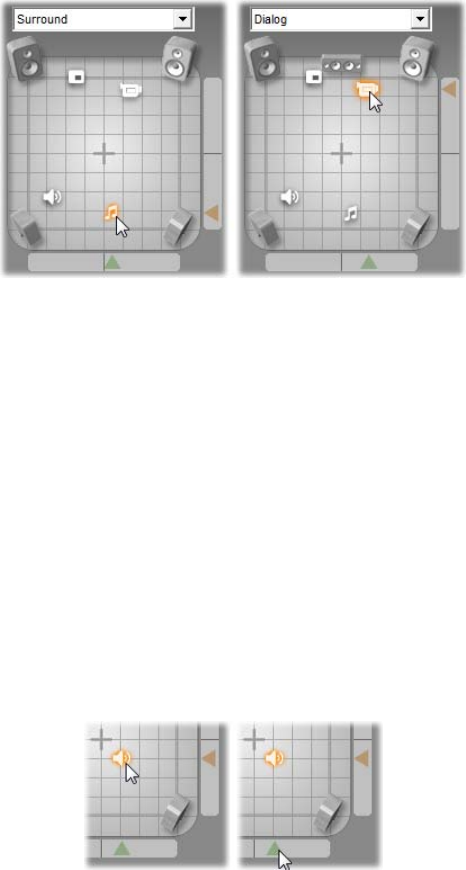
Chapter 14: Sound effects and music 327
of the sound source can be freely varied in two
dimensions as with the standard surround mode.
Surround and Dialog modes: At left, the music track,
in Surround Mode, is positioned at the rear of the
listening field. The original audio track at the same
time index is in Dialog Mode, shown at right. The
Dialog mode focuses the original audio by including
the center speaker in the mix.
There are two ways to set the position of a track’s icon
in the balance control. Either click on any track’s icon
and drag it to the desired position, or move it by
dragging the triangular locator knobs below and to the
right of the control. The locator knob below the balance
control adjusts the left-right positioning of the audio
output from the currently-selected clip, while the knob
on the right adjusts the front-back positioning.
Drag track icon directly (L) or with locator knob (R).
328 Pinnacle Studio
Viewing volume and balance contours
Each audio clip in your project displays a contour line
showing one of its volume, left-right balance or front-
back balance. To select which of the three types of line
is displayed, use the commands on an audio clip’s
right-button context menu (see “Anatomy of an audio
clip” on page 317).
The contour lines can be modified directly on the
Timeline using adjustment handles. For details, see
“Adjusting audio on the Timeline” on page 319.
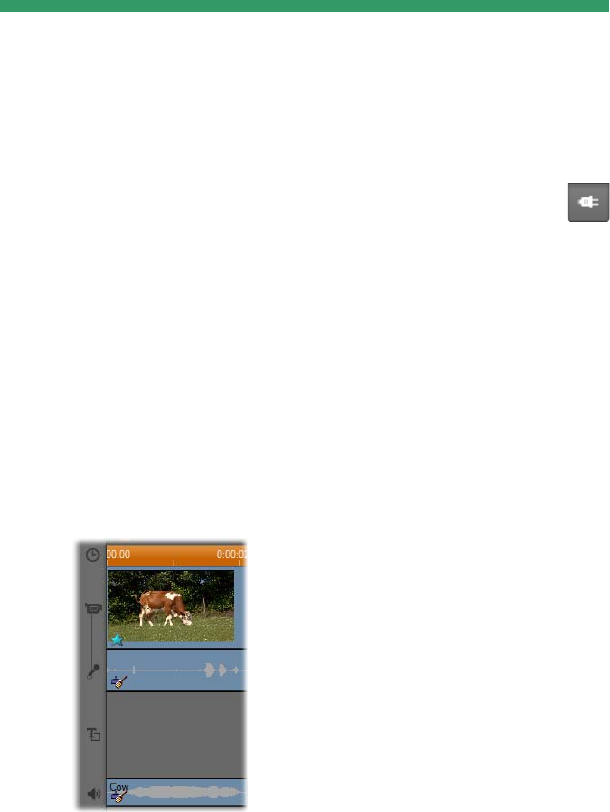
Chapter 15: Audio effects 329
CHAPTER 15:
Audio effects
You can modify any audio clip in your project
using Studio’s plug-in audio effects, which are
accessed with the Audio effects tool, the sixth tool in
the Audio toolbox. The operation of this tool is
identical to that of the Video effects tool. See “Using
video effects” (page 161) for a complete description.
As with video effects, your library of audio plug-ins is
expandable. Any audio effect using the popular VST
standard can be used in Studio just like effects supplied
with the program.
Icons for audio effects
In Timeline mode, any special
effects you have applied to an
audio or video clip are indicated by
small icons along the bottom of the
clip. These correspond to the
categories shown by the Add new
effect browser in the Audio effects
and Video effects tools. Those
categories are explained under
“Video Effects Library” on page
172.You can open the appropriate tool for parameter
editing by double-clicking any of the icons.

330 Pinnacle Studio
In the illustration, the Noise reduction effect has been
applied to both audio clips. The star icon below the
video clip shows that one or more of the effects in the
Fun category has been applied to it.
Copying audio effects
Effects can be copied and pasted between audio clips
just as they can between video clips. See page 162 for
details.
About the effects
The powerful Noise Reduction filter is provided in all
versions of Studio. It is covered immediately below.
Studio Ultimate includes an extra group of audio
effects. These are each briefly described starting on
page 332. Full documentation of the parameters for the
Ultimate effects is included in their context-sensitive
on-line help which can be viewed by clicking the help
button at the top left of the parameters panel for each
effect, or by pressing F1 when the panel is open.
In a special category is the Speed effect (see page 177),
which operates on video and audio simultaneously.
Noise reduction
This advanced filter suppresses unwanted noise in any
audio clip. The filter responds dynamically to the
changing noise conditions within the clip. The preset
you choose provides the starting point from which the
adaptive algorithm proceeds.
You can often further improve your results by adjusting
the Noise reduction and Fine tuning parameters. There
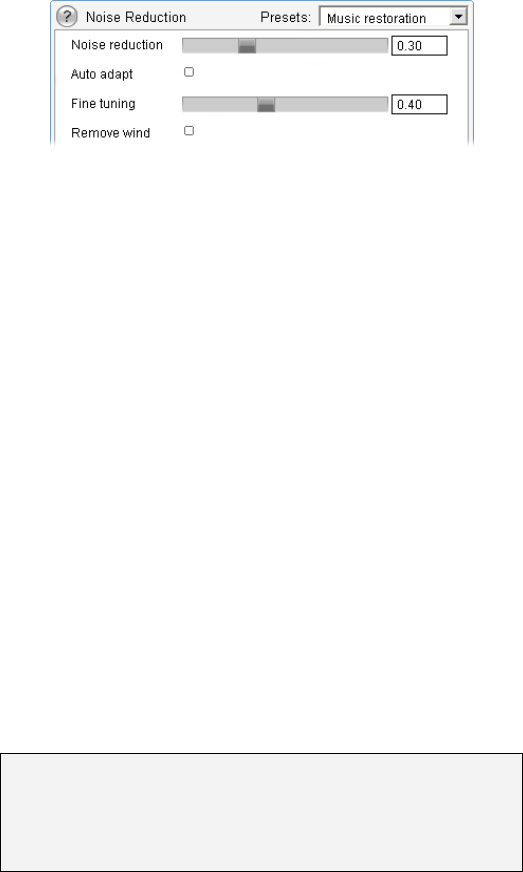
Chapter 15: Audio effects 331
is a lag of about a second before any new setting has an
audible effect, so make changes in small amounts then
pause to check if there is an improvement.
Noise reduction: When a camcorder is used outdoors
with the actors distant from the microphone, the
“source noise” may be very high, and to make matters
worse the internal noise of the camcorder may be
amplified to intrusive levels. If a lapel microphone
connected to the line input of the camcorder were used
when taping the scene, however, the source noise could
be quite low. Adjust this control to match the noise
conditions of the actual signal.
Fine tuning: This controls the amount of cleaning to
be used. It is only needed when the Noise reduction
level is low.
Auto adapt: When this option is checked, the filter
automatically adjusts to changes in the type or amount
of noise in the clip. The Fine tuning is not used when
Auto adapt is active.
Remove wind: This checkbox engages a filter that
reduces wind noise and similar unwanted background
sounds in the audio clip.
Note: The Noise reduction filter will help with a wide
range of material, but it is not a panacea. Your results
will vary depending on the original material and the
severity and nature of the problems.

332 Pinnacle Studio
ULTIMATE EFFECTS
The Studio Ultimate pack of audio effects is included
with Studio Ultimate only. Users of other Studio
versions can obtain these effects by upgrading to Studio
Ultimate.
This section briefly introduces each effect in the group.
Full descriptions, including all parameters, are
available in the context-sensitive help when the effect
parameters window is open in Studio Ultimate.
ChannelTool
The basic action of this Studio Ultimate effect is to
route your stereo audio signal. It allows you to connect
either or both of the left and right input channels to
either or both of the output channels. In addition,
ChannelTool offers special-purpose presets, including
Phase reverse and Voice removal – the “karaoke”
effect.
Chorus
The Studio Ultimate Chorus effect creates a richer
sound by repeatedly reintroducing “echoes” into the
audio stream. By controlling properties like the
frequency with which the echoes recur, and the decay
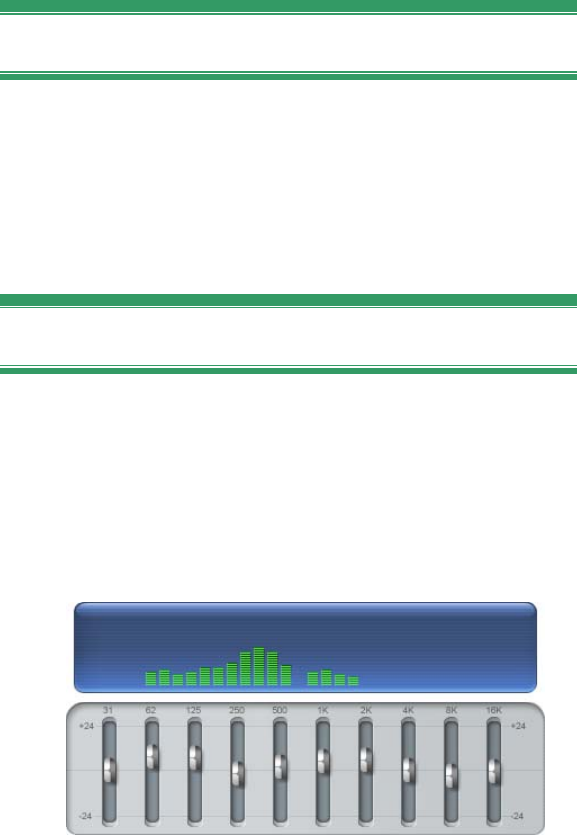
Chapter 15: Audio effects 333
in volume from one repetition to the next, a variety of
results is possible, including flanger-like sounds and
other special effects.
DeEsser
This Studio Ultimate audio filter unobtrusively
removes excessive sibilance from recorded speech.
Parameters allow you to fine-tune the effect to the
particular recording you need to correct.
Equalizer
Graphic equalizers like this one in Studio Ultimate are
similar in concept to the treble and bass “tone” controls
on audio equipment, but provides a much finer degree
of adjustment. Studio’s equalizer divides the audio
spectrum into ten bands, each centered on a different
sound frequency.
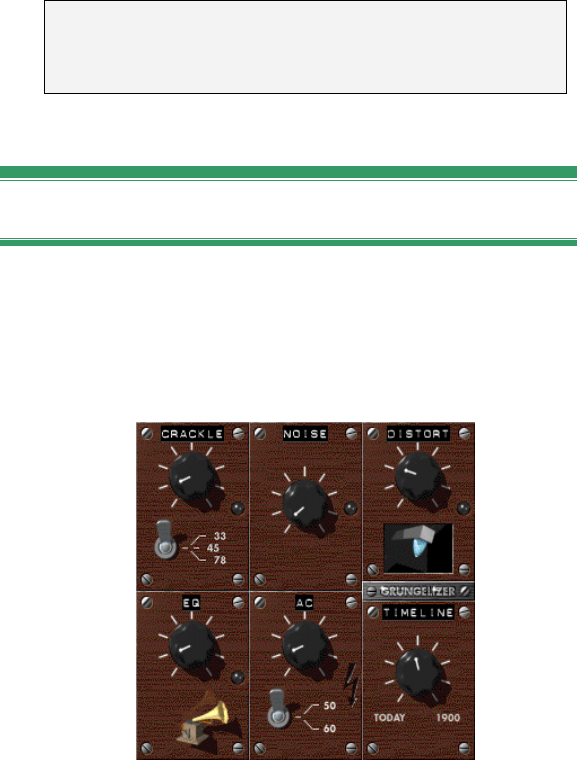
334 Pinnacle Studio
The sliders let you increase or decrease the contribution
of each band’s frequencies to the total sound over a
range of 48 dB (-24 to +24). The adjustment to a band
is applied full strength at the center frequency, and
tapers to zero in either direction.
The display above the slider shows the activity across
the audio spectrum as your project is played back.
Note: In musical terms, each equalization band covers
one octave, and the center frequency is close in pitch to
the note B.
Grungelizer
The Studio Ultimate Grungelizer adds noise and static
to your recordings. It can make your clips sound as
though you were hearing them on a radio with bad
reception or a worn and scratched vinyl record.

Chapter 15: Audio effects 335
Leveler
This Studio Ultimate effect helps compensate for a
common problem in recording audio for video
productions: the imbalance in the recorded volume of
different elements in the original audio. For instance,
your commentary as you shoot the video may be
recorded at such a high level that it overwhelms other
sounds at the location.
The trick in using the Leveler is to find a target volume
somewhere between that of the loud and soft audio in
the original clip. Below that volume, Leveler acts as an
expander, increasing the original level by a fixed ratio.
Above the target volume, Leveler acts as a compressor,
reducing the original level. With careful adjustment of
the parameters, the internal balance of the audio can be
significantly improved.
Reverb
The Studio Ultimate Reverb effect simulates the effect
of playing back the source sound in a room of a given
size and sound reflectivity. The interval between the
arrival of the original sound at the listener’s ears and
the first echoes is greater for a large room than a small
one. The rate at which the echoes die away depends on
both the room size and the reflectivity of the walls.
The presets for Reverb are named for the type of room
they simulate – from the passenger cabin of a car all the
way up to a huge underground cavern.
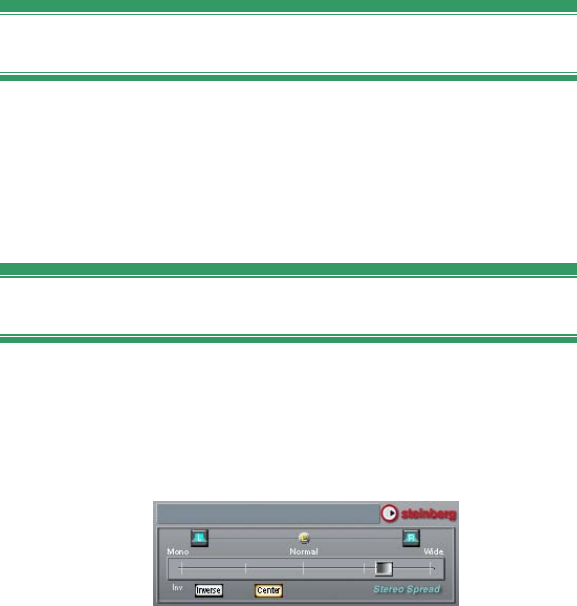
336 Pinnacle Studio
Stereo Echo
The Stereo Echo effect, available in Studio Ultimate,
allows you to set separate delays on each of the left and
right channels, with feedback and balance controls to
provide a variety of interesting sounds.
Stereo Spread
This Studio Ultimate effect allows you to decrease or
increase the apparent width of the stereo listening field
in an audio clip. Most often it is used to create a mix
that sounds more open and spacious.
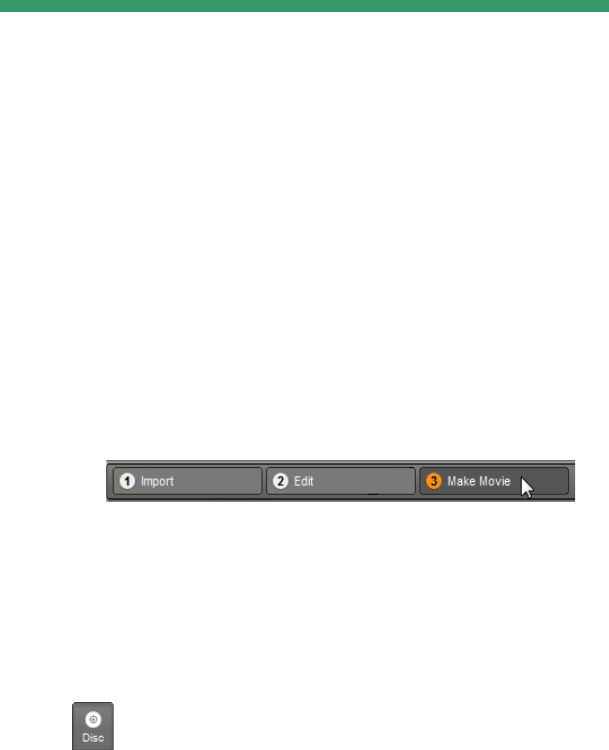
Chapter 16: Making your movie 337
CHAPTER 16:
Making your movie
One of the great things about digital video is the large
and growing number of devices that can make use of it.
Studio lets you create versions of your movie for
whatever video viewers your audience will be using,
from hand-held DivX players and mobile phones to
HDTV home theaters.
When you have finished editing your project, switch to
Make Movie mode by clicking the Make Movie button
at the top of the screen.
This opens the Output Browser, which lets you tell
Studio with a few clicks everything it needs to know to
output your movie in the form you want.
Begin by selecting the media type of your finished
movie from the four tabs at the left side of the window:
Disc, File, Tape or Web.
Disc output lets you copy a movie onto a
recordable disc in your computer’s CD, DVD,
HD DVD or Blu-ray recorder (also called a “burner”).
You can also ask Studio to create for you a copy, or
“image”, of the disc on your hard drive, without
actually burning it. See page 340 for more information.
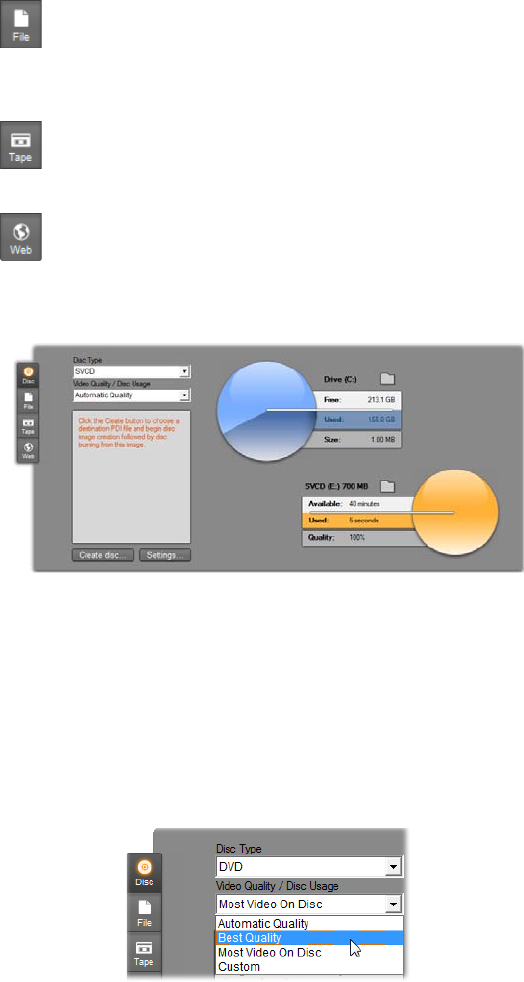
338 Pinnacle Studio
File output creates files that can be viewed from
your hard drive, your web-site, your portable
movie player, or even your mobile phone. See page
344.
Tape output records your movie onto tape in a
camcorder or VCR. This tab also lets you output
the movie to your monitor screen. See page 352.
Web output creates a file including for uploading
to YouTube or Yahoo! Video. On these popular
web sites, your work has a potential audience of
millions. See page 355.
The Output Browser. The tabs at left let you save to
disc, file, tape or the Web. Other controls let you set
output options as needed for the chosen media type.
On the right is a graphical display of disc usage.
Configuring output
Output can be configured quickly within each media
type using the dropdown lists in the Output Browser.
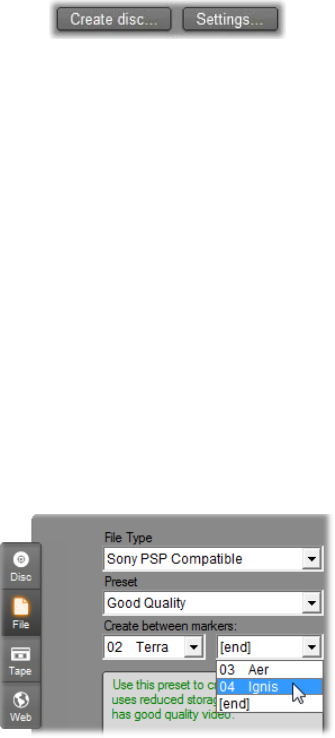
Chapter 16: Making your movie 339
If you need hands-on control, click the Settings button
to open the correct panel of options for your chosen
media type. When you have confirmed your settings,
click the Create button to begin output.
Preparing your movie for output
Before your movie is completely ready for output some
preprocessing will usually be required. In general,
Studio will need to “render” (generate video frames in
the output format for) any transitions, titles, disc menus
and video effects you’ve added to your movie. Any
files generated by Studio during this process are stored
in the auxiliary files folder, a location you can set using
the folder button at the top of the Output Browser.
Create between markers
For output to file or to the Web, the Output Browser
includes a pair of dropdown lists from which you can
choose Timeline markers that define custom start and
end points for output. Use one or both as required to
produce excerpts of your movie for any reason.
Output to file or the Web can be delimited at one end
or both by markers defined in Edit mode. The default
limits – the actual start and end of your movie – are
represented on the lists by ‘[start]’ and ‘[end]’.
340 Pinnacle Studio
OUTPUT TO DISC MEDIA
Studio can output movies directly onto VCD
(VideoCD), S-VCD (Super VideoCD), DVD, HD DVD
and Blu-ray discs, if the requisite disc burning
hardware is available on your system.
Whether or not you have a disc burner, Studio can also
create a “disc image” – a set of files containing the
same information that would be stored onto the disc –
to a directory on your hard drive. The image can
subsequently be burned to disc.
CD formats
If your system is equipped with a CD burner or a DVD
burner, Studio can create VCD or S-VCD discs on
either CD-R or CD-RW media.
Your VCD discs can be played back:
On a VCD or S-VCD player.
On some DVD players. Most DVD players can
handle CD-RW media, but many will not reliably
read CD-R. A majority of DVD players can handle
the VCD format.
On a computer with a CD or DVD drive and
MPEG-1 playback software (such as Windows
Media Player).
Your S-VCD discs can be played back:
On an S-VCD player.
Chapter 16: Making your movie 341
On some DVD players. Most DVD players can
handle CD-RW media, but many will not reliably
read CD-R. DVD players sold in Europe and North
America usually cannot read S-VCD discs; players
sold in Asia often can.
On a computer with a CD or DVD drive and
MPEG-2 playback software.
DVD, HD DVD and Blu-ray
If your system has a DVD burner, Studio can create
three types of DVD disc: standard (for DVD players),
HD DVD format for HD DVD players, and AVCHD
format for Blu-ray players.
If your system has an HD DVD or Blu-ray recorder,
you can record onto any media supported by the device.
Your standard DVD discs can be played back:
On any DVD player that can handle the recordable
DVD format your burner creates. Most players can
handle the common formats.
On a computer with a DVD drive and suitable
playback software.
On any HD DVD player.
Your DVD or HD DVD disc in HD DVD format can
be played back:
On any HD DVD player, including a drive-equipped
Microsoft Xbox 360.
On a computer with an HD DVD drive and suitable
playback software.
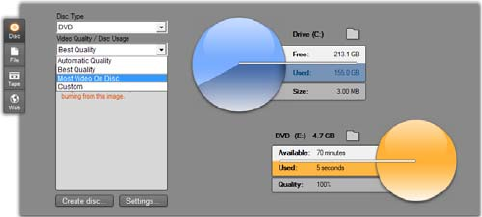
342 Pinnacle Studio
Your Blu-ray disc, or DVD disc in AVCHD format
can be played back:
On the Panasonic DMP-BD10, the Playstation 3, and
other Blu-ray players (not all players support the
AVCHD format, but most do).
On a computer with a Blu-ray drive and suitable
playback software.
Outputting your movie
Studio creates your disc or disc image in three steps.
1. First the entire movie must be rendered to generate
the MPEG-encoded information to store on the
disc.
2. Next, the disc must be compiled. In this phase,
Studio creates the actual files and directory
structure that will be used on the disc.
3. Finally, the disc must be burned. (This step is
skipped if you are generating a disc image rather
than an actual disc.)
To output your movie to disc, or to a disc image:
1. Click the Disc tab to bring up this display:
The two circular displays summarize your disc
usage. The upper one shows the amount of hard

Chapter 16: Making your movie 343
drive storage that will be required during the
making of your movie, and the other shows an
estimate of the time the movie will occupy on your
writable disc.
Use the upper folder button to change the hard
drive location Studio uses for storing auxiliary files.
If you are creating a disc image, it will also be
stored in that folder. The matching button on the
lower display lets you choose which burning
hardware to use, if you have more than one device
available.
2. Select the Disc Type you are using, then whichever
Video Quality / Disc Usage preset best matches
your intent.
If you wish to fine-tune your output settings,
choose the Custom preset then click the Settings
button to bring up the Make Disc options panel (see
“Make disc settings” on page 366).
3. Click the green Create disc button. Studio goes
through the steps described above (render, compile,
and if necessary burn) to create the disc or disc
image you have specified in the Make Disc options
panel.
4. When Studio has finished the burning operation, it
ejects the disc.
344 Pinnacle Studio
Quality and capacity of disc formats
The differences amongst the various disc formats can
be boiled down to these rules of thumb regarding the
video quality and capacity of each format:
VCD: Each disc holds about 60 minutes of MPEG-1
video, with about half the quality of DVD.
S-VCD: Each disc holds about 20 minutes of
MPEG-2 video, with about two-thirds the quality of
DVD.
DVD: Each disc holds about 60 minutes of full-
quality MPEG-2 video (120 minutes if the disc
recorder supports dual-layer recording).
DVD (AVCHD): Each disc holds about 40 minutes
of full-quality AVCHD video per layer.
DVD (HD DVD): Each disc holds about 24 minutes
of full-quality DVD HD video per layer.
DVD HD: Each disc holds about 160 minutes of
full-quality DVD HD video per layer.
BD: Each disc holds more than 270 minutes of HD
video per layer.
OUTPUT TO FILE
Studio can create movie files in all of these formats:
3GP
Audio only
AVI
DivX
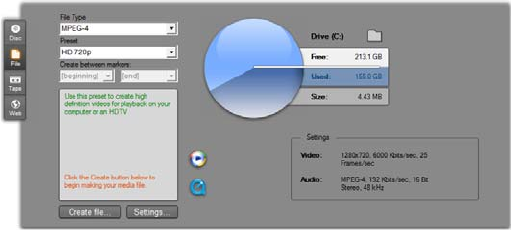
Chapter 16: Making your movie 345
Flash Video
iPod compatible
MOV
MPEG-1
MPEG-2
MPEG-2 TS
MPEG-4
Real Media
Sony PSP compatible
Windows Media
Choose whichever format matches the needs of your
audience and the details of their viewing hardware.
The size of the output file depends on both the file
format and the compression parameters set within the
format. Although compression settings can easily be
adjusted to produce small files, heavy compression
comes at the expense of quality.
The detailed settings for most formats can be adjusted
by choosing the Custom preset and clicking the
Settings button. Other presets load settings designed for
typical situations. See Appendix A: Setup options for
information about options in Studio.
The File tab of the Output Browser
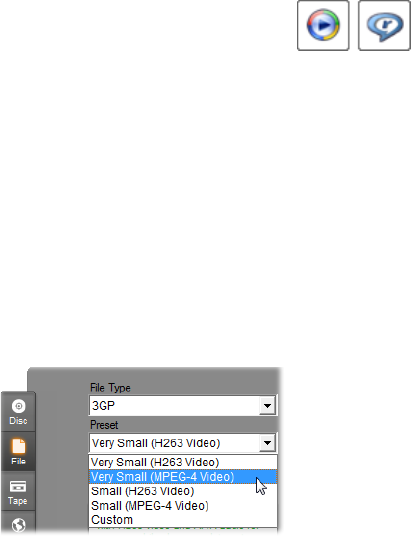
346 Pinnacle Studio
When your output options are in place, click the Create
file button. A file browser opens to let you specify a
name and location for the video file you are creating.
As a convenience, the Output Browser
also provides buttons for launching any
desired media file in Windows Media Player or Real
Player, so you can view your output file in an external
player as soon as you have created it.
3GP
Studio can generate movies in this widely-used file
format using your choice of MPEG-4 or H.263 video
compression, along with AMR audio compression. The
format is adapted to the comparatively modest
processing and storage capabilities of mobile phones.
The list of presets for this file type offers two frame
sizes in either encoder. Choose Small, at 176x144, or
Very Small, at 128x96.
Audio only
Sometimes a movie’s soundtrack can stand alone
without visuals. Live entertainment footage, and video
recordings of interviews and speeches are instances in
which an audio-only version might be desirable.
Studio lets you save your soundtrack in wav (PCM),
mp3 or mp2 format.

Chapter 16: Making your movie 347
Click the preset that best meets your needs; or choose
Custom, then click the Settings button to open the Make
File options panel (see page 371).
AVI
Although the AVI file type for digital video is itself
widely supported, the actual coding and decoding of
video and audio data in an AVI file is performed by
separate codec software.
Studio supplies a DV and an MJPEG codec. If you
wish to output your movie as an AVI in some other
format, you can use any DirectShow-compatible codec
installed on your PC, as long as that codec is also
installed on the PC that will play your movie.
Click the preset that best meets your needs; or choose
Custom, then click the Settings button to open the Make
File options panel (see page 371).
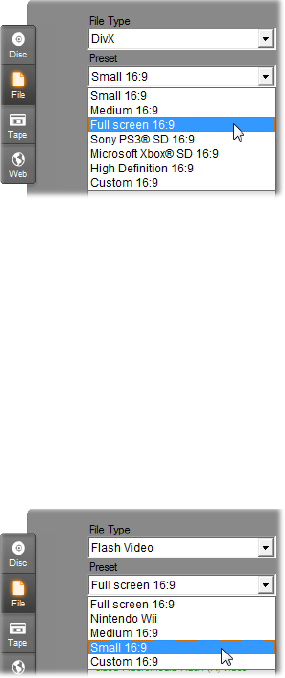
348 Pinnacle Studio
DivX
This file format, based on MPEG-4 video compression
technology, is popular for video files disseminated over
the Internet. It is also supported by a range of DivX-
compatible hardware devices, from DVD players to
portable and handheld units.
Click whichever of the quality presets matches your
needs; or choose Custom, then click the Settings button
to open the Make File options panel (see page 371).
Flash Video
Studio supports output in Flash Video (flv) format,
version 7. Virtually all current web browsers are able to
display this popular format, which has been widely
adopted by social networking sites and news sites.
Click the quality preset that matches your needs; or
choose Custom, then click the Settings button to open
the Make File options panel (see page 371).
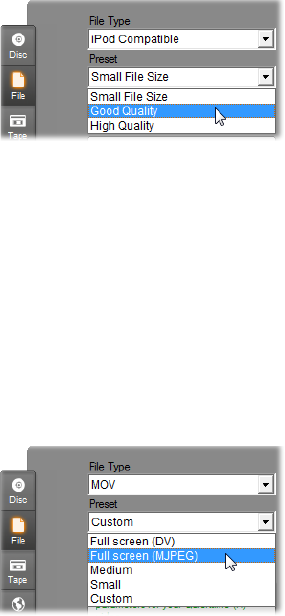
Chapter 16: Making your movie 349
iPod compatible
Like DivX, this file format is based on MPEG-4 video
compression technology. The combination of powerful
compression with a small 320x240 frame size produces
very small output files relative to the more expansive
formats. The generated files are compatible with the
popular Video iPod devices, and may work with some
other devices types as well.
The three quality presets select different data rates,
each providing a different balance of quality and file
size.
MOV
This is the QuickTime® file format. It is particularly
suitable when the movie will be played on the
QuickTime player.
The presets provide a variety of size and encoding
options. The Medium (384x288) preset uses MJPEG
compression; Small (176x144) uses MPEG-4.
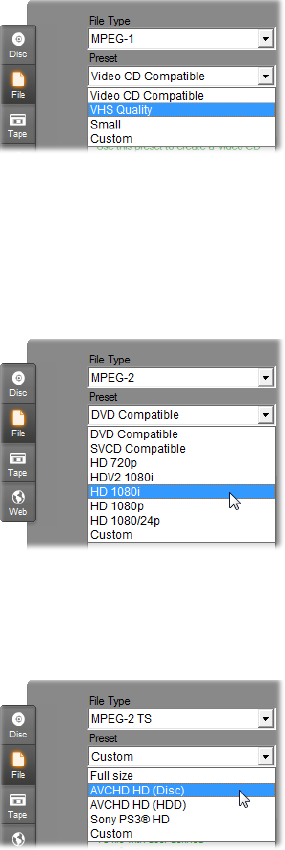
350 Pinnacle Studio
MPEG
MPEG-1 is the original MPEG file format. MPEG-1
video compression is used on VideoCDs, but in other
contexts it has given way to newer standards.
MPEG-2 is the successor format to MPEG-1. Whereas
the MPEG-1 file format is supported on all Windows
95 and later PCs, MPEG-2 and MPEG-4 files can only
be played on PCs with appropriate decoder software
installed. Two of the MPEG-2 presets support HD
(High Definition) playback equipment.
MPEG-2 TS is the “transport stream” version of
MPEG-2. Its applications include HD playback on
AVCHD-based camcorders and Sony’s PlayStation 3
home game console.
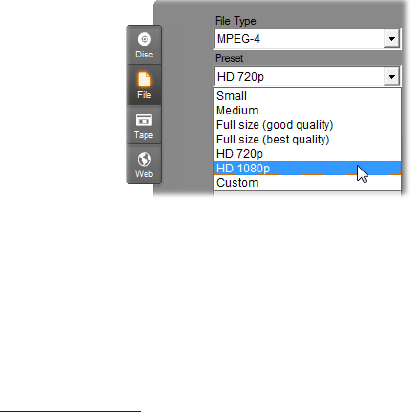
Chapter 16: Making your movie 351
MPEG-4 is another member of the MPEG family. It
offers image quality similar to MPEG-2 but with even
greater compression. It is particularly suitable for
Internet use. Two of the MPEG-4 presets (QCIF and
QSIF) create “quarter-frame” video sized for cell-
phones; two others (CIF and SIF) create “full-frame”
video suitable for handheld viewers.
Custom presets. With all MPEG variants, Custom lets
you configure movie output in detail by clicking the
Settings button to open the Make File options panel
(see page 371).
Real Media
Real Media movie files are designed for playback on
the Internet. Real Media movies can be played back by
anyone around the world who has the RealNetworks®
RealPlayer® software, which is a free download from
www.real.com.
See page 375 for information about configuring your
output with the Make File – Real Media options panel.
Sony PSP compatible
This is another file format based on MPEG-4 video
compression technology. As with the iPod-compatible
type, the combination of powerful compression with a
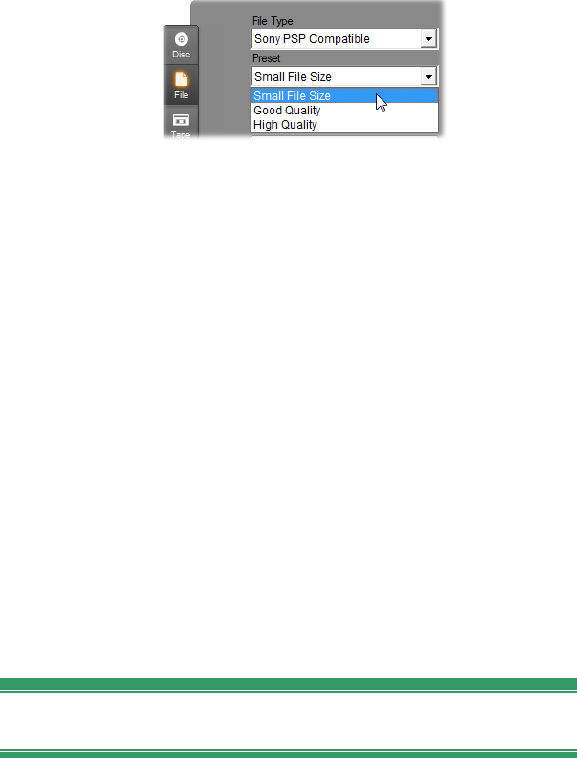
352 Pinnacle Studio
small 320x240 frame size produces very small output
files relative to the more expansive formats. The
generated files are compatible with the popular Sony
PlayStation Portable devices, and may work with some
other devices types as well.
Windows Media
The Windows Media file format is also designed for
streaming Internet playback. The files can be played on
any computer where the Windows Media player – a
free program from Microsoft – is installed.
See page 378 for information about configuring your
output with the Make File – Real Media options panel.
OUTPUT TO TAPE
Choose the Tape tab on the Output Browser when you
want to send your output to an external video device –
a television, camcorder or VCR – or to “VGA”, for
viewing on your monitor screen.
Configuring a camera or video recorder...
Make sure your recording device is properly connected
before you begin to generate the movie.
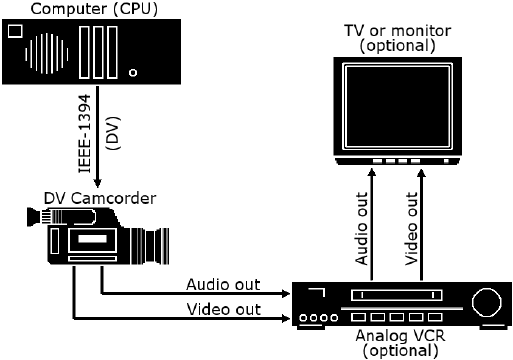
Chapter 16: Making your movie 353
Output via IEEE-1394 cable
If your recording device has a DV input, just connect it
to your digital video hardware with an IEEE-1394 (or
“i.LINK”) cable. The connector at the camcorder end
should be labeled DV IN/OUT.
On machines that don’t support recording back to the
camcorder, including many PAL devices, the DV
connector is called simply DV OUT.
Output with analog audio / video cables
If you have a Studio product with an analog (TV or
video) output, such as Studio DVplus or DC10plus,
connect the video outputs of the capture card to the
inputs of the video recorder and the audio outputs of
the sound card (or the capture card, if it has them) to
the audio inputs of the video recorder.
Connecting a TV set or video monitor
Many camcorders have an integrated display, making it
unnecessary to attach a video monitor.

354 Pinnacle Studio
Otherwise, to view your movie as it is recorded, a TV
set or a video monitor must be attached to the video
outputs of your recorder. Video outputs are not always
available on DV camcorders.
Output your movie to videotape
Verify that the camcorder/VCR is powered on and
configured, and that you have inserted a tape cued to
where you wish to begin recording. You now have two
options:
1. If you are recording your movie onto DV tape,
Studio gives you the option to control the DV
device automatically. Click the Settings button then
activate the check box in the Output options area.
With most DV devices there is a small delay
between receiving the command to record and the
actual start of recording. Since it varies from one
device to another, you may need to experiment with
the Record delay time value for best results with
your particular device.
2. If you are recording onto analog tape, or have not
checked the Automatically start and stop recording
option on the Make tape options panel, start your
VCR recording now.
Finally, click Play in the Player.
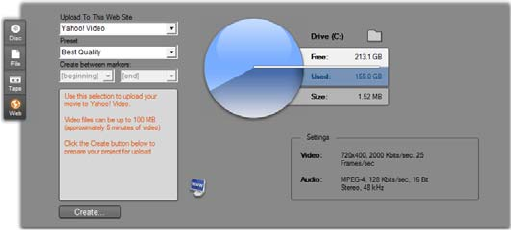
Chapter 16: Making your movie 355
OUTPUT TO THE WEB
Studio can upload your video directly to either Yahoo!
Video or YouTube, for sharing with a potential
audience of millions of other Internet users.
Both options offers two preset formats, Best Quality
and Fast Upload. These provide different combinations
of frame size and video data rate.
No additional format settings are required for either
destination.
After selecting the upload site and preset you want,
click the Create button. This opens the Web Upload
dialog box, where you can enter editorial information
about your production.
Set the title, description and comma-separated search
tags as desired, then check up to three categories in
which your movie should be listed.
If you have previously logged into your Yahoo!
account from Studio, but this time want to use a
different user ID, check the Login as a different user
box.
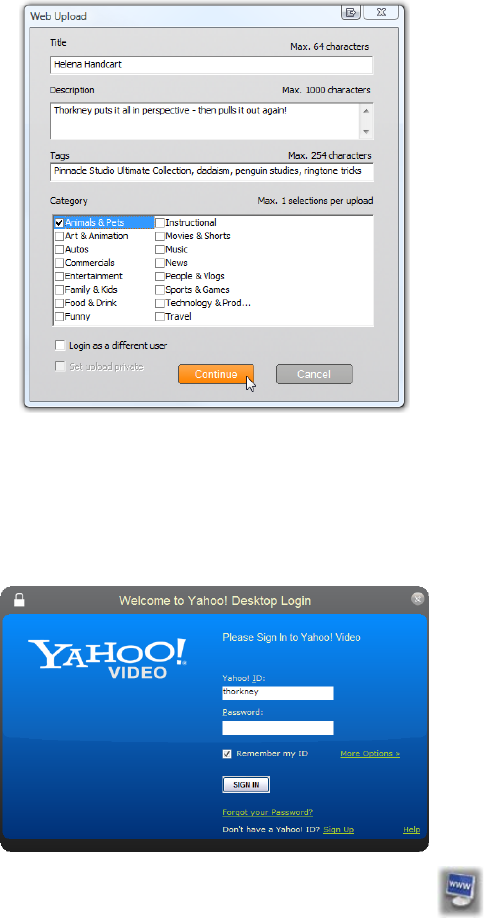
356 Pinnacle Studio
Unless you are already logged in, the Yahoo! Desktop
Login dialog is now displayed. If you have an existing
Yahoo! Identity, enter your user information now;
otherwise, you must first click the Sign up link to set up
a new Yahoo! account.
Studio now automatically creates and uploads
your movie. Click the Watch video online button
if you would like to visit the Yahoo! Video site in your
web browser to confirm the success of the upload.
Appendix A: Setup options 357
APPENDIX A:
Setup options
Settings are provided to adjust various aspects of
Studio’s operation. The default values have been
chosen to work well for the majority of situations and
hardware. However, you may wish to modify them to
suit your work style or your equipment configuration.
About Studio setup options
Studio’s setup options are divided between two tabbed
dialog boxes, both with several panels.
The Main Options dialog box has two panels covering
options relating to Edit mode. Open this dialog box to
the panel of your choice by selecting one of the
commands in the first group on the Setup menu.
The Make Movie Options dialog box has three panels,
one for each of three media types: disc, file and tape.
Access this dialog box by selecting one of the
commands in the second group on the Setup menu.
Option settings in Studio apply to both the current and
future Studio sessions. There is no master reset.

358 Pinnacle Studio
Project preferences
These settings are split into five areas, which are
covered in the subtopics below. Hardware settings
relating to editing are on the Video and audio
preferences panel (see page 361).
Editing environment
Automatically save and load my projects: If this
option is checked, Studio will continually update your
stored project while you work without you having to
save your changes explicitly. If you would prefer to
look after your own loads and saves, leave this option
unchecked.
Show large storyboard thumbnails: Check this box
to get more detail in the thumbnail frames shown by
Storyboard view in the Movie Window.
Show premium content, Show premium features:
Premium content and features allow you to expand
Studio easily and conveniently when you need more
resources or more power to enhance your movies.
Premium content refers to add-on effects, transitions,
titles, menus and sound effects. Premium features
refers to pan and zoom, chroma key, and other
advanced capabilities.
Check the boxes if you would like the premium items
to be listed in the Album and other appropriate places
in Studio.
In general, when you click on a premium item you will
be offered the chance to purchase and install it
immediately, without leaving Studio, if you have an
Internet connection available. See “Expanding Studio”
on page 12 for further information.
Appendix A: Setup options 359
Project format
By default, your Studio movie project is in the same
video format as the first clip you add to it. If you want
to force new projects to a different format, click Use
this format for new projects, and select your desired
format from the dropdown list.
Default durations
These duration times are measured in seconds and
frames. The seconds counter advances every 30 frames
for NTSC, or 25 frames for PAL.
The three settings here control the initial duration value
for transitions, still images and volume fades when
added to your movie. The durations can be trimmed to
custom values during editing. The default values upon
installation are as shown in the illustration above.
When adding a disc menu
When you place a disc menu on the Timeline, Studio
inquires whether you want to generate chapter links
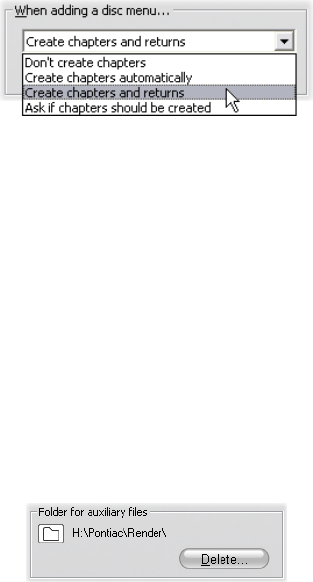
360 Pinnacle Studio
from the menu to all the clips that follow it (at least
until the next menu). The choices on this dropdown list
let you avoid the confirmation dialog by specifying that
you always don’t or always do want the links to be
created, or that you want Studio to create links from a
new menu to its chapters and also return links back to
the menu from the end of each chapter. A final option,
“Ask if chapters should be created”, enables the
confirmation dialog, restoring the factory default.
Minimum chapter length: If you have specified that
Studio should create chapter links automatically when
you add a menu, multiple clips are combined into
chapters if necessary to achieve this minimum duration.
Folder for auxiliary files
Studio generates auxiliary files in many circumstances
as you edit and output your project. These are all stored
under the disk folder specified here. Click the Folder
button to change the auxiliary files’ location – usually
because you need to save space on a particular drive.
Delete: This button opens the Delete Auxiliary Files
dialog, which lets you recover hard drive space by
deleting files created while your project was being
rendered.
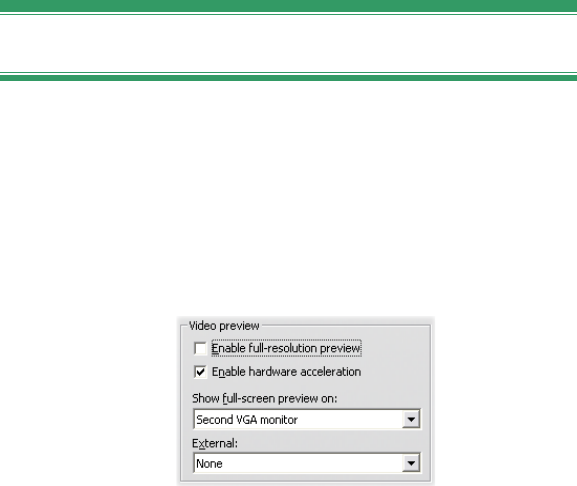
Appendix A: Setup options 361
Video and audio preferences
The five areas on this panel provide hardware and
previewing settings.
Video preview
Because of the central role of previewing during
interactive video editing, Studio provides a number of
settings that affect preview behavior.
For previewing on a computer monitor, the default
preview, at quarter-frame resolution, is probably quite
good enough. If you have exacting requirements for the
preview, and particularly if you are targeting an
external output device for preview (by selecting it on
the External dropdown list), you may need to check
Enable full-resolution preview. On some machines
there may be a noticeable performance cost to this
option.
Enable hardware acceleration takes advantage of the
advanced capabilities of your graphics card where
applicable. The option should be checked unless you
are having display problems during preview.
The Show full screen preview on dropdown list lets you
specify how Studio should preview when you click the
full-screen button on the Player. The options available
on the list depend on your display hardware.

362 Pinnacle Studio
On a single monitor system, a full-screen preview
(other than external) must obviously use the same
screen as Studio’s own interface. This is the Main VGA
monitor option. In this special instance, full-screen
playback begins from the current play position when
you click the full-screen button, and ends either at the
end of the movie or when you press the Esc key.
With a dual-monitor computer system, you would
normally use your second screen as a full-size preview
monitor and leave Studio unobscured on your main
screen. The display on the second monitor is controlled
entirely by the full-screen button, independently of
whether your movie is playing back or paused.
The most straightforward option for full-screen preview
is Second VGA monitor. In this mode, the preview is
scaled to use as much as possible of the monitor display
(without disturbing the aspect ratio of the video). The
Player preview on the main screen remains blank,
conserving processing power. When a second display is
available, this mode is recommended for most users.
The remaining two options are special modes that allow
full-screen output on one monitor while still providing
a normal preview within the Studio window. These
modes are offered only if your dual-output video card
is one of the following types:
ATI Radeon 9600 (or better) with version 5.8
(minimum) of the Catalyst™ display driver.
In order to use the additional preview modes, you
must deactivate the second monitor in the Display
Properties dialog (or the Catalyst control center)
before launching Studio.

Appendix A: Setup options 363
nVidia GeForce Fx5xxx or better, or an equivalent
card in the Quadro series. The minimum driver
versions are 81.85 (GeForce) and 81.64 (Quadro).
Before launching Studio, the second monitor must be
activated as a Windows desktop extension (not in the
Span or Clone modes).
Studio checks on start-up to see if the above conditions
have been met. If they are, the remaining options are
made available:
Second VGA, small preview on main VGA: This option
goes beyond the other full-screen modes by
reconfiguring the monitor display to match the exact
format of your project’s video specifications for frame
format and refresh rate. For instance, if your project
format is 720x480 with the NTSC refresh rate of 60
Hz, the monitor will be put into that mode for the most
accurate possible preview. At the same time, the usual
small Player preview is displayed on the main screen.
Note: Even if you have the correct graphics card, the
desired format may still not be supported by a
particular monitor. If Studio determines that to be the
case, it tries to fall back to the final preview mode
(next paragraph). If any instability occurs with your
hardware set-up, reverting to one of the basic modes
covered above is strongly recommended.
Safe mode second VGA, small preview: In this mode,
Studio matches your project video format as well as
possible to the formats supported by the monitor. For
instance, if the 720x480 frame format is unavailable,
Studio will set the display to 800x600 and center the
frame on the monitor screen. Similarly, if the monitor
does not support 50 Hz (PAL) output at a particular
screen size, it will display at 60 Hz instead.
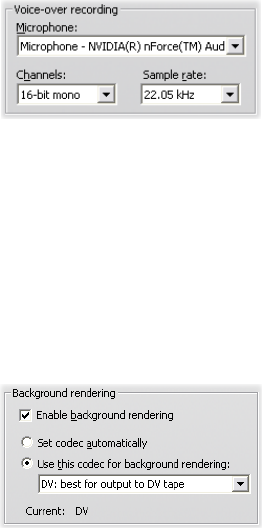
364 Pinnacle Studio
Voice-over recording
Microphone: A dropdown list of choices for attaching
a microphone to your hardware.
Channels, Sample rate: These settings control audio
quality. A typical setting for voice-overs is 16-bit mono
at 22.05 kHz.
Background rendering
Rendering is the process of generating video for
footage that uses HFX transitions, effects or other
computationally demanding features of Studio. Until
such video has been rendered, it may not display
smoothly and with full detail during preview.
Studio is able to carry out rendering behind the scenes
while you work, a feature called background rendering.
Enable background rendering: Uncheck this box if
you do not want to use background rendering at all.
One might do this on a slower computer if intensive
rendering were causing other operations to become
sluggish.
Set codec automatically: Let Studio decide which
codec to use for encoding your rendered video.
Use this codec for background rendering: If you
know that your project is going to DV tape, choosing
Appendix A: Setup options 365
DV as your background rendering format may reduce
the rendering time of your final movie. You would
normally choose MPEG for as the rendering codec for
disc-bound movies for the same reason.
Another consideration arises if you are planning to
preview your video on an external device (Studio
Ultimate only). In such cases you may need to set the
project format and the background rendering codec to
suit the device. For instance, if you are previewing on
an analog monitor plugged into your DV camcorder,
you should do your background rendering in DV.
Surround-sound playback
Check Enable discrete 5.1 playback if the audio system
you use when previewing your Studio project supports
discrete 5.1 audio. Leave it unchecked if you are
previewing in surround-sound with a Pro Logic
compatible system, or in stereo.
CD drive (for ripping audio files)
If you have used any music from CD in your project,
Studio digitally transfers (“rips”) the audio data from
the disc to the computer. The dropdown list here lets
you select which CD device to use for ripping, if you
have more than one available.

366 Pinnacle Studio
Make Disc settings
These settings allow you to adjust options for creating
VCD, S-VCD, DVD, HD DVD or Blu-ray discs, and
for creating a disc image on a hard drive.
To create a VCD or S-VCD requires a CD or DVD
burner; to create a DVD requires a DVD or HD DVD
burner; to create an HD DVD requires an HD DVD
burner; to create a Blu-ray disc requires a Blu-ray
burner.
You can burn DVDs in standard format for DVD
players, in AVCHD format for Blu-ray players, or in
HD DVD format for HD DVD players. For details, see
“Output to disc media” (page 340).
Format
Disc Type: Select VCD, S-VCD, DVD or Blu-ray to
create a disc (or disc image) of the corresponding type.
Select HD DVD to create either a DVD or an HD DVD
for playback in an HD DVD player. If you want to
create a DVD readable in most Blu-ray devices, choose
AVCHD.
Video quality / disc usage: These settings (Automatic,
Best video quality, Most video on disc and Custom) are
available except in the case of VCDs, where the format
is fixed. The first three settings are presets that
correspond to particular data rates. The Custom option
lets you set the data rate to another value. In each case,
an estimate is provided of the amount of video the disc
can accommodate at the current setting.
Appendix A: Setup options 367
Kbits/sec: When the Custom option has been chose in
for the previous setting, this combination dropdown list
and edit field lets you choose or specify the data rate –
and hence the video quality and maximum duration –
of the disc. Higher values correspond to better quality
and lower capacity.
Audio compression: Depending on the format, some
of all of the following methods of storing your movie’s
soundtrack are offered:
PCM encoding for stereo sound is supported by all
DVD players, but takes up more space on the DVD
than MPEG.
MPEG audio, in MPA (MPEG-1 Layer 2) format, is
always provided on PAL DVD players. On NTSC
players it is broadly supported, but theoretically
optional.
Dolby ® Digital 2-channel encoding can be used to
compactly store either a stereo or a surround
soundtrack. To hear the surround mix requires
equipment with Dolby Pro Logic compatibility. On
other systems, it will be heard as a normal stereo
mix.
Dolby ® Digital 5.1-channel encoding stores the
surround channels discretely. To hear the surround
mix on playback requires a surround amplifier and
speaker system.
Use progressive encoding: Each frame of a normal
television picture is displayed as two successive
“fields”, each containing half of the several hundred
horizontal video lines that make up the entire image:
the odd-numbered lines in one field, and the even-

368 Pinnacle Studio
numbered lines in the other. The eye sees the
superimposed fields as a single image.
This system, called “interlaced scanning”, produces
reasonably good results because of the characteristics
of television screens and the human visual system.
However, high-definition TV systems and typical
computer monitors provide “progressive scanning”, in
which the image is drawn from top to bottom at a
higher screen refresh rate, potentially producing a
clearer image with less flicker. If your project mainly
consists of progressive-scanned video, and/or still
images, checking this box may provide superior output
quality. Usually, however, this option should be left
unchecked.
Always re-encode entire movie: This option forces
your movie to be completely re-rendered for output. It
is recommended only if you are experiencing problems
with your output movie and want to narrow the
possible sources of error.
Burn options
Create disc content and then burn: This is the default
option for creating discs. In the first phase, the data that
will be written to disc is generated and stored
temporarily on your hard drive. In the second phase,
the generated data is burned to the optical disc.
Appendix A: Setup options 369
Create disc content but don’t burn:
With this choice, your disc burner is not
used. Instead, the same files that would
normally be saved onto a disc are stored
to a hard drive folder as a “disc image”.
With some disc types, you may have a
choice of disc image formats. Choose
the one you want on the Image Type list in the Media
and device options area (see page 369).
Burn from previously created disc content: Instead
of using your current project directly to burn a disc, a
previously-created disc image is now sent to your
burner. This lets you divide the work of creating a disc
into two separate steps that can be performed in
separate sessions if desired. It is particularly useful
when you want to make several copies of the same
project, or when you want to generate the disc on one
computer but burn it on another.
Media and device options
Target media: Choose an entry from this dropdown
list matching the type and capacity of the disc to which
you are burning your project.
Disc writer device: If you have more than one disc
burner on your system, select the one you want Studio
to use.
Copies: Select or enter the number of copies of this
disc that you want to create.
Write speed: Choose one of the available speeds, or
choose Auto for the default selection.
Image type: When you are generating a disc image
rather than burning an actual disc, this dropdown list
lets you choose amongst available formats, if
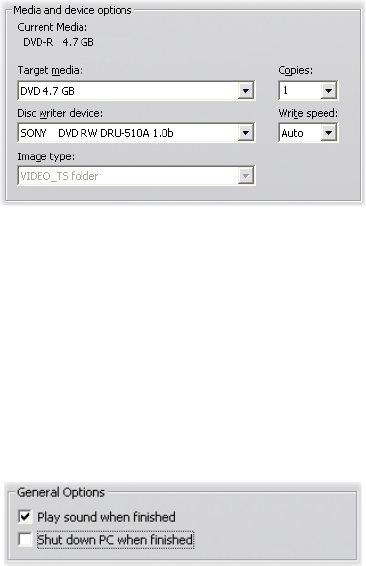
370 Pinnacle Studio
applicable. Your choice may be important if you are
planning to access the image with other software.
Eject disc when done: Check this box if you would
like Studio to automatically eject the disc after the burn
process has been completed.
General options
These options are provided for both the Make Disc and
Make File option tabs. Separately or in combination
they let you specify special actions to be taken after
your movie disc or file has been created.
Play sound when finished: As soon as Studio has
finished outputting your movie, a sound effect will be
played back through your computer’s speakers to alert
you. This is handy if you want work nearby while the
CPU-intensive work of generating the movie gets done.
Make sure that your speakers are switched on and that
the volume is suitably set when you rely on this feature.
Shut down PC when finished: Upon outputting your
movie, Studio instructs Windows to shut down your
computer. This option ensures that the system will be
powered down even if you are away from your desk, or
even asleep, when output is completed.
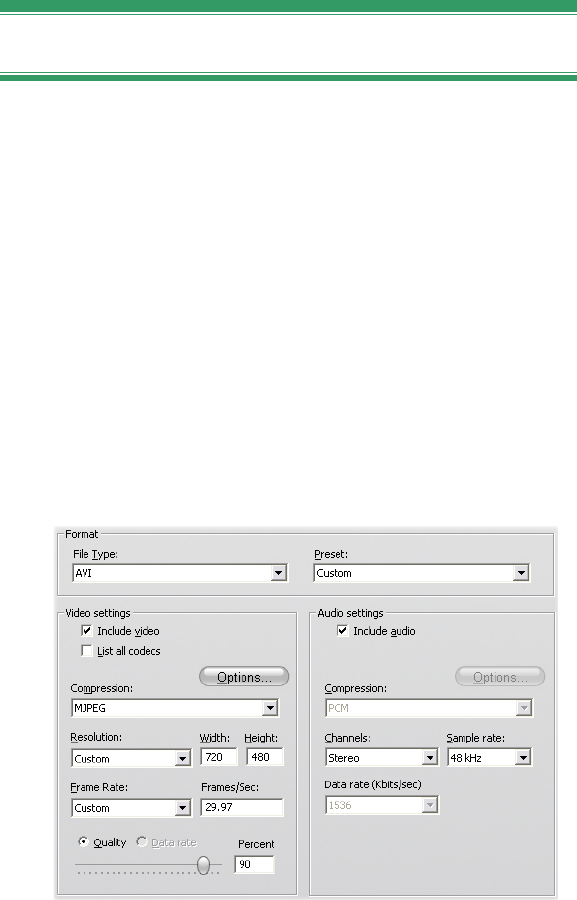
Appendix A: Setup options 371
Make File settings
The File Type and Preset lists, which head the Make
File settings panel for all file types, correspond to the
Format and Preset lists in the Output Browser (see
Chapter 16: Making Your Movie). Most file types share
a common control panel. The Real Media and
Windows Media file types have special-purpose control
panels, covered separately in “Make Real Media file
settings” on page 375 and “Make Windows Media file
settings” on page 378.
The common panel, to be described here, is used by all
the other supported file types: 3GP, AVI, DivX, Flash
Video, MPEG-1, MPEG-2 and MPEG-4 (including
iPod Compatible and Sony PSP Compatible), and the
audio-only types.
The common Make File settings panel is shared by
all file types except Real Media and Windows Media.
Not all the options are available for all file types.

372 Pinnacle Studio
The panel lets you manipulate file and compression
settings when the Custom preset has been chosen. Most
of the file types support customization to some degree.
Custom settings may be used to minimize the size of
the output file, to increase its quality, or to prepare it
for a special purpose (such as distribution via the
Internet) where there may be requirements involving
characteristics such as frame size.
Note: MPEG-2 and MPEG-4 files require special
decoder software. Without a matching decoder
installed on your PC you will not be able to play files
of these types.
Video settings
Include video: This option is on by default. Clearing
the checkbox causes the output file to have audio only.
List all codecs: By default this checkbox is not
checked, so only those codecs are listed that have been
certified by Avid for use with Studio. If you check the
option, all codecs installed on your PC will be listed,
whether certified or not.
Using codecs that have not been certified by Avid may
produce undesirable results. Avid cannot provide
technical support for problems associated with the use
of uncertified codecs.
Options: The Options button opens a codec-specific
option panel if one is available.
Compression: Choose the compressor (codec) that is
most suitable for your intended use. When making an
AVI file, you’ll want to choose your compression

Appendix A: Setup options 373
settings for the capabilities of, and codecs supported
by, the intended viewer’s computer platform.
Resolution: This is a dropdown list of presets
providing standard Width and Height options. The
Custom preset lets you set the dimensions directly.
Width, Height: The frame size is measured in pixels.
The default setting is the resolution at which Studio
captures. Decreasing the width and height greatly
decreases file size.
Frame rate: The standard frame rate is 29.97 frames
per second for NTSC, and 25 frames per second for
PAL. You may want to set the frame rate lower for
applications such as Web video.
Quality, Data rate: Depending on the codec being
used, you can adjust the quality percentage or data rate
with the slider. The higher the percentage or rate you
choose, the larger the resulting file.

374 Pinnacle Studio
Audio settings
If you want to keep file sizes to a minimum, audio for
many digital uses can be set to 8-bit mono at 11 kHz.
As a rule of thumb, try 8-bit 11 kHz for audio that is
mostly speech, and 16-bit stereo at 22 or 44 kHz for
audio that is predominantly music. As a benchmark,
CD-ROM music is 16-bit stereo sampled at 44 kHz.
Another convenient rule of thumb for audio
compression is that 11 kHz is roughly equivalent to
AM radio quality; 22 kHz equates to FM radio quality;
and 16-bit stereo, 44 kHz is audio CD quality.
Include audio: This option is on by default. Clearing
the checkbox causes the output file to be silent.
Options: The Options button opens a codec-specific
option panel if one is available.
Compression: The codecs listed here will vary with
the file type.
Channels: Possible choices on this list include Mono,
Stereo and MultiChannel, depending on the file type.
File size increases when additional channels are used.
Sample rate: Digital audio is produced by taking
regular instantaneous samples of the continuous analog
waveform. The more samples, the better the sound. For
example, audio CDs are recorded at 44 kHz, 16-bit
stereo. Audio can be sampled at frequencies as low as
11 kHz for some digital uses, particularly for speech.
Data rate: This dropdown controls the data rate, and
hence the compression ratio, for audio. Higher data
rates yield higher quality at the cost of larger files.
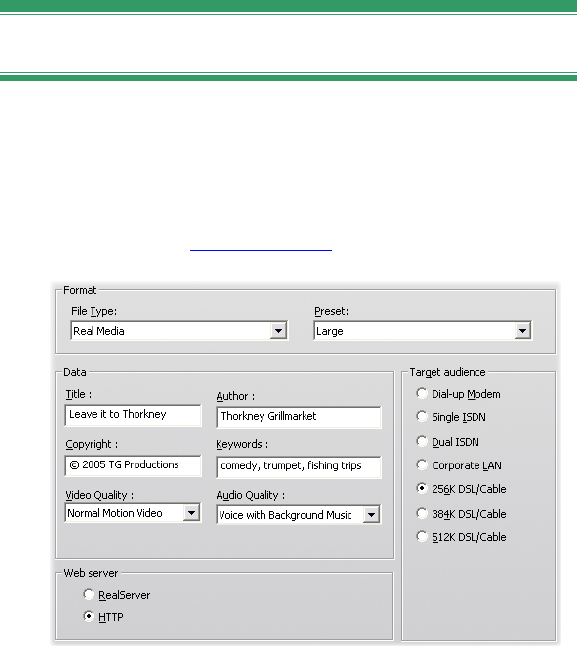
Appendix A: Setup options 375
Data settings
The Sony PSP Compatible file type provides an area
named Data in which you can specify a title for your
saved movie.
General settings
These are the same as described for the Make Disc tab
on page 370.
Make Real Media file settings
The Make Real Media File options panel allows you to
adjust Real Media file settings. These configure the
creation of files that are to be played back with the
popular RealNetworks® RealPlayer®, free for the
download from www.real.com.
376 Pinnacle Studio
Title, Author, Copyright: These three fields are used
to identify each Real Media movie, and are encoded
into it so that they are not visible to the casual viewer.
Keywords: This field accepts up to 256 characters, and
allows you to encode keywords into each movie. It is
typically used to identify the movie for Internet search
engines.
Video quality: These choices let you balance the rival
requirements of image quality and frame rate.
No video: When this selection is made, the output
file will contain audio only.
Normal motion video: Recommended for mixed
content clips to balance video motion and image
clarity.
Smoothest motion video: Recommended for clips
that contain limited action, such as newscasts or
interviews, to enhance overall video motion.
Sharpest image video: Recommended for high-
action clips to enhance overall image clarity.
Slide show: The video appears as a series of still
photos, providing the best overall image clarity.
Audio quality: This dropdown menu lets you choose
the characteristics of your audio track. Studio uses this
information to select the best audio compression for
your Real Media file. Each successive option provides
better audio quality but a larger resulting file.
No audio: When this selection is made, the output
file will contain video only.
Voice only: This option provides adequate quality
for spoken audio in clips without music.
Appendix A: Setup options 377
Voice with background music: This option is
designed for situations where, even though
background music may be present, the spoken audio
predominates.
Music: Use this option for a monaural track in which
music is prominently featured.
Stereo music: Use this option for a stereo music
track.
Web server: The RealServer option allows you to
create a file that can be streamed from a RealNetworks
RealServer. The RealServer supports a special feature
that senses the connect speed of the viewer’s modem,
and adjusts its transmission rate to suit. The option
allows you to select up to seven Target audience data
rates. Because the file size, and your upload time,
increase with each data rate you add, select only those
target audiences you think are actually needed.
To make use of the RealServer option, the ISP hosting
your web-site must have the RealServer software
installed. If you are unsure, contact your ISP for
confirmation, or use the standard HTTP option, which
allows you to optimize playback for exactly one of the
Target audience options.
Target audience: This selects the target audience
modem connect speed. The lower the speed, the lower
the quality of the video. If you wish your viewers to be
able to view your movie as it loads, you should select a
target audience rate that their modems can handle.
When you select a target audience, you are actually
specifying a maximum bandwidth for your RealMedia
stream. Bandwidth, measured in kilobits per second
(Kbps), is the amount of data that can be sent through
an Internet or network connection in a given time span.
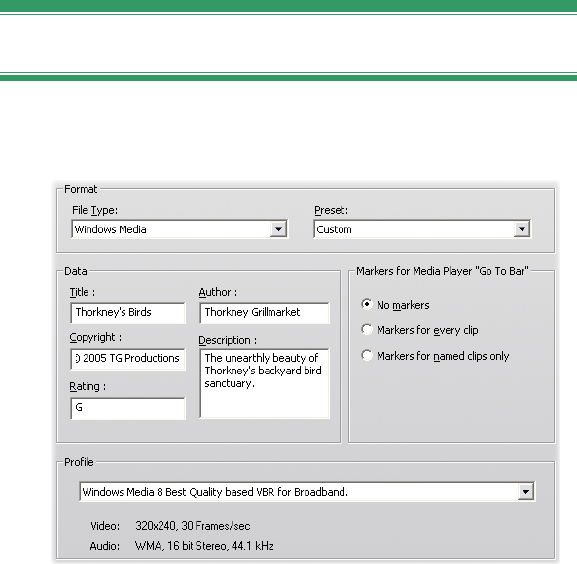
378 Pinnacle Studio
Standard modems (those that use ordinary telephone
lines) are classified by the bandwidth they are able to
process. Common values are 28.8 and 56 Kbps.
In addition to these standard audiences, you can record
clips for connection speeds of 100 Kbps, 200 Kbps, or
higher. These higher bandwidths are suitable for
audiences that use corporate Local Area Networks
(LANs), cable modems or Digital Subscriber Line
(DSL) modems.
Make Windows Media file settings
The Make Windows Media File panel lets you adjust
options for creating Windows Media Player files.
Title, Author, Copyright: These three fields are used
to identify each Windows Media movie, and are
encoded into it so they are not visible to the casual
viewer.

Appendix A: Setup options 379
Description: This 256-character field lets you enter
keywords for encoding into the movie. It is typically
used to identify the movie for Internet search engines.
Rating: Entering a rating in this field if it will be
helpful to your viewers.
Profile: Choose the playback quality of your movie
based on the capability of the target platform – the
computer(s) that will play the movie. The exact audio
and video parameters corresponding to the current
choice are displayed in the space below the list. The
Custom option lets you fine-tune the settings by
selecting from a list of possible combinations.
Markers for Media Player “Go To Bar”: You have
the option of including Windows Media “file markers”
in the movie file. These markers allow viewers to go
directly to the beginning of any marked clip by
choosing its name from a list.
No markers: The movie file will be created without
markers.
Markers for every clip: Markers are automatically
created for every clip in the movie. If you have not
given the clip a custom name, a default one will be
generated for it based on the project name.
Markers for named clips only: Markers are
generated only for those clips to which you have
given a custom name.
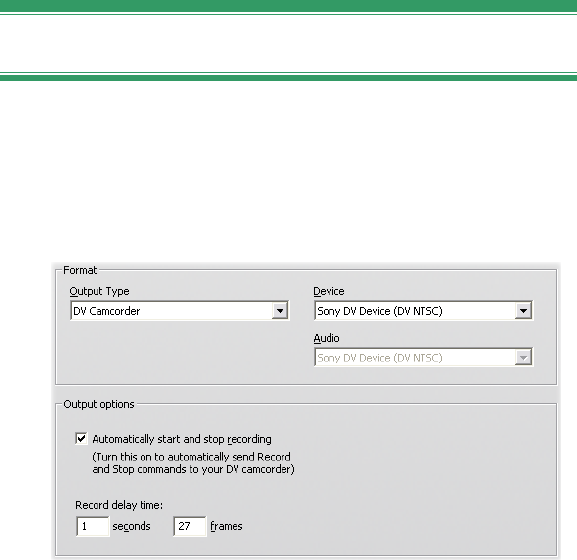
380 Pinnacle Studio
Make tape settings
Studio automatically senses the hardware you have
installed, and configures the Make Tape playback
destination accordingly.
If you are printing (making tape) to a DV device, you
can choose to have Studio start and stop the device
automatically instead of having to do it yourself.
To control printing automatically:
1. Click the Make Movie button on the main menu bar.
The upper half of the screen changes to display the
Make Movie window.
2. Click the Tape tab.
3. Click the Settings button. The Make tape options
panel opens.
Appendix A: Setup options 381
4. Check the Automatically start and stop recording
box to enable the automatic function. This setting
makes it unnecessary to manually start recording in
step 6.
With most DV devices there is a small delay
between receiving the command to record and the
actual start of recording. In Studio, this is referred
to as the “record delay time”. It varies from device
to device, so you may need to experiment with the
value for best results with your particular device.
5. Click OK.
6. Click Create.
Studio renders your movie, then prompts you to
press the play button on the Player. If you did not
check the automatic option (step 4), you must
manually start the device recording before pressing
the play button; otherwise Studio itself sends the
record command. Studio outputs the first frame of
your movie (without audio) for the duration entered
as the record delay time, giving the device time to
bring the tape up to speed and begin recording.
Hint: When you play back your tape, if the first
part of your movie was not recorded, you should
increase the Record delay time setting. On the other
hand, if your movie begins by holding onto the first
frame as though it were a still photograph, you
should decrease the setting.
Hint: If you wish to send black to your recording
device during its record delay time, place a blank
title in the video track just before the start of your
movie (a blank title is video black). If you wish to
record black at the end of your movie, place a blank
title in the video track following the final frame of
your movie.

382 Pinnacle Studio
Analog output
If you are printing to an analog device, the choice of
Composite or S-Video format may be available if
supported by your hardware.
Output to the screen
One of the options on the Video dropdown in the
Playback devices area is “VGA display”. With this
option, your completed project will be played back
onto your monitor screen rather than to an external
device.

Appendix B: Tips and tricks 383
APPENDIX B:
Tips and tricks
Here are some hints from Avid technical specialists on
choosing, using and maintaining a computer system
with video in mind.
Hardware
To use Studio effectively, your hardware should be
optimally prepared and configured.
Preparing your hard drive
Prior to capturing video, consider working through the
following steps, especially if you have an older system,
if your capture drive is running low on space, or if you
have already seen evidence of possible hard drive
problems:
Close down as many other applications and
background programs as possible. This includes
important security software such as anti-virus and
anti-spyware utilities, so Avid recommends strongly
that you also disconnect from the Internet (or set

384 Pinnacle Studio
your firewall to block all Internet traffic) when
taking this step. Software utilities are available to
assist with closing background processes.
Right-click on the name of your capture drive in
Windows Explorer, and select Properties on the pop-
up menu. On the Tools tab of the Disk Properties
dialog, click Check Now and run a detailed scan of
the drive to make sure that it is error free. When this
is complete, click Defragment Now; the system
defragmenter utility will arrange your drive contents
to leave the largest possible contiguous free area for
your capture files.
Scanning and defragmenting a drive are both lengthy
operations, so you may wish to let them run during
times when you are planning to be away from the
computer.
Temporarily turn off your screen saver and any
power management features you have set up on the
Windows Screen Saver dialog box.
Note: Video-editing programs do not multitask very
well. Do not use any other program while outputting
your movie to videotape or optical disc, or when
capturing. You can multitask while editing.
RAM
The more RAM you have, the easier it is to work with
Studio. You will need at least 512 MB of RAM to work
with the Studio application, and we highly recommend
1 GB (or more). If you work with HD video, or are
running Windows Vista, the recommendation rises to
2 GB. Editing AVCHD video calls for 2 GB at
minimum.

Appendix B: Tips and tricks 385
Motherboard
Intel Pentium or AMD Athlon 1.4 GHz or higher – the
higher the better. Windows Vista and AVCHD editing
both demand a more powerful CPU. The minimum
recommendation ranges up to 2.66 GHz for editing
1920-pixel AVCHD video.
Graphics card
To run Studio, your DirectX-compatible graphics card
needs:
For typical use, at least 64 MB of onboard memory
(128 MB preferred).
For Windows Vista, at least 128 MB (256 MB
preferred).
For HD and AVCHD, at least 256 MB (512 MB
preferred).
Graphics card settings
If you need to minimize system load while maintaining
acceptable color performance, Avid recommends
setting your display to use 16-bit color.
To adjust the display in Windows XP:
1. Position your mouse over your Desktop, right click,
and select Properties, When the Display Properties
dialog box appears, click on the Settings tab.
2. If you have multiple monitors, select the one to
which the new setting should apply.
3. Under Color Quality, choose “Medium (16 bit)”.
386 Pinnacle Studio
To adjust the display in Windows Vista:
1. Position your mouse over your Desktop, right click,
and select Personalize. In the “Personalize
appearance and sounds” window click the “Display
settings” link.
The Display Settings dialog box appears.
2. If you have multiple monitors, select the one to
which the new setting should apply.
3. Under Colors, choose “Medium (16 bit)”.
The color setting affects only the display on the
computer monitor. Recorded sequences will appear in
full color and resolution at the video output.
Studio and computer animation
If you are editing computer animation with Studio or
wish to combine animation with digital video,
remember to create your animations using the same
frame size and image refresh rate as your original
video:
Quality TV-Cropping PAL NTSC Audio
DV Yes 720 x 576 720 x 480 44 kHz 16-bit stereo
Failure to do this will result in unnecessarily long
rendering times and the possibility of visible flaws
when the animation is played back.

Appendix C: Troubleshooting 387
APPENDIX C:
Troubleshooting
Before you begin troubleshooting, take some time to
check your hardware and software installation.
Update your software: We recommend installing the
latest operating system updates for Windows XP and
Windows Vista. You can download these updates from:
windowsupdate.microsoft.com/default.htm
Make sure you have the latest version of the Studio
software installed by clicking the Help Software
Updates menu from within the program. Studio will
use the Internet to check for possible updates.
Check your hardware: Ensure that all installed
hardware is functioning normally with the latest
drivers, and is not flagged as having a problem in the
Windows Device Manager (see below). If any devices
are flagged you should resolve the issue before starting
installation.
Get the latest drivers: We also highly recommend
installing the latest drivers for your sound card and
graphics card. During the Studio software launch
process we do verify that your sound card and video
card support DirectX. See “Update audio and video
drivers” on page 393 for help with this process.
388 Pinnacle Studio
Opening Device Manager
The Windows XP and Windows Vista Device
Manager, which lets you configure your system’s
hardware, has an important role in troubleshooting.
The first step in accessing Device Manager is to right-
click on My Computer, then select Properties from the
context menu. This opens the System Properties dialog.
The Device Manager button is on the Hardware tab in
XP, and is listed on the left side panel in Vista.
Ensure that all installed hardware is functioning
normally with the latest drivers, and that nothing has
been flagged in the Device Manager with the yellow
exclamation mark icon indicating an error condition.
In the case of a driver problem that you cannot resolve
yourself, contact the device manufacturer or your
computer vendor for assistance.
TECHNICAL HELP ON-LINE
The Avid Support Knowledge Base is a searchable
archive of thousands of regularly-updated articles about
the most common questions and issues users have
regarding Studio and other Avid products. Use the
knowledge base to find answers to any questions you
may have about installing, using or troubleshooting
Pinnacle Studio.

Appendix C: Troubleshooting 389
Access the knowledge base with your web browser by
visiting:
http://www.pcle.com/selfhelp
The knowledge base home page will appear. You don’t
have to register to browse the knowledge base, but if
you want to send a specific question to technical
support staff you will need to create a knowledge base
account. Please read any knowledge base articles
relevant to your inquiry before contacting technical
support.
Using the knowledge base
In the Product dropdown, select “Studio Version 15”.
If appropriate, you can also select a Sub-Product, a
Category, or both. Selecting a sub-product or category
may reduce the number of irrelevant hits you will get
from your search, but may also eliminate helpful
articles of a more general nature. If you’re not sure
what category to pick, leave the selection at All
Categories.
To search for an article, type a short phrase or group of
keywords in the text box. Don’t get too wordy; the
search works best when given just a few words.
Search example
In the list below of common troubleshooting issues, the
first item is, “Studio crashes or hangs in Edit mode”.
Type “Crash in edit mode” in the search box and click
the Search button. You should get back somewhere
between 60 and 150 hits. The very first one, “Studio
390 Pinnacle Studio
crashes in Edit”, lists the known causes for this issue
and their remedies.
If you search instead on the single keyword “Crash”,
you will get far fewer hits, all relating to crashes in
Studio.
If one search does not turn up an article that seems
relevant to your problem, try modifying the search by
choosing a different set of keywords. You can also use
the Search by and Sort by options to select for specific
or popular articles.
Searching by Answer ID
If you know the Answer ID number of the answer
you’re looking for, you can access the item directly.
For example, if you are getting a capture error when
you press the Capture button, someone might refer you
to knowledge base article 2687, “I am getting a capture
error with Studio”. In the Search by dropdown, select
“Answer ID”, enter the ID number in the text box, and
click Search.
TOP SUPPORT ISSUES
The remainder of this chapter draws on some of the
knowledge-base articles most consulted by users. The
text presented here is generally less detailed than that
provided on-line. For the full text available under each
Answer ID, please refer to the on-line knowledge base.

Appendix C: Troubleshooting 391
Errors or crashes during installation
Answer ID 13122
Errors during the installation of Studio may appear as a
dialog box with the title “CRC Error”, “Feature
Transfer Error” or “I/O Error”. In other circumstances,
the install routine may crash or appear to freeze. In all
such cases, try the following steps in turn until the
problem is resolved:
Inspect the discs: Check each disc’s surface for dirt,
smudges and fingerprints. Clean off the disc with a
soft cloth if necessary. Avoid using paper towels or
any other material that could be abrasive and scratch
the disc. Wipe from the center of the disc to the outer
edge. Don’t use a circular motion. Once the disc is
clean, retry the installation.
If the disc is damaged with deep scratches or cracks
so that it won’t install, please contact Avid support
for a replacement.
Try another drive: If you have a second optical
drive of a compatible type, try installing from it.
Prune your startup: If you are familiar with the
msconfig utility, follow the procedure to eliminate
programs run at Windows startup that could interfere
with the Windows installer. See “Editing startup
applications” on page 402 for details.
Install from the hard drive: In this procedure, you
boot into Window Safe Mode, copy the contents of
the Studio installation disc onto your hard drive, then
execute the install from there. We recommend
consulting Answer ID 13122 on the Avid web-site
for the latest advice on this approach.

392 Pinnacle Studio
Studio crashes in Edit mode
Answer ID 6786
If Studio is crashing, the cause is most likely either a
configuration issue or a problem with a project or
content file. This type of issue can often be fixed with
one of the following methods:
Uninstalling and reinstalling Studio.
Optimizing the computer.
Rebuilding a corrupt project.
Recapturing a corrupt clip.
To help troubleshoot the problem, determine which of
the failure modes listed below best matches the
symptoms you are experiencing, then refer to the
corresponding set of instructions:
Case 1: Studio crashes randomly. There doesn’t
seem to be any one thing that will cause the crash,
but crashes happen frequently.
Case 2: Studio crashes every time you click on some
particular tab or button within Edit mode.
Case 3: Studio crashes each time you carry out some
specific sequence of steps.
Case 1: Studio crashes randomly
Try each of the following solutions in turn:
Get the latest version of Studio: Make sure that you
have the latest version of Studio 15 installed. The latest
version can be found on our website at:
www.pinnaclesys.com/support/studio15

Appendix C: Troubleshooting 393
Be sure to close all other programs before installing a
new version.
Adjust Studio settings: Choose No background
rendering in the Rendering dropdown list, and clear the
Use hardware acceleration checkbox. Both options are
found on the Edit options panel (see page 358).
End background tasks: Close other applications and
unload any background processes before using Studio.
Press Ctrl+Alt+Delete to open the Task Manager. You
probably won’t see much under the Applications tab,
but the Processes tab will show you the software that is
currently running. It can be difficult to be sure which
processes should not be closed, but software utilities
are available that can assist with this procedure.
Defragment your hard drive: Over time, the files on
your hard drive can become fragmented (stored in
multiple parts in different areas of the drive), which
slows down access and may lead to performance
problems. Use a disk defragmenter utility like the one
supplied with Windows to prevent or correct this
problem. Access the built-in defragmenter with the
Disk defragmenter command on your Programs
Accessories System tools menu.
Update audio and video drivers: Make sure that you
have obtained the latest drivers for your sound and
video cards from their manufacturers’ web-sites. Even
a brand-new computer may be sold with outdated
drivers installed, and should be checked for updates.
You can see what sound and video cards you have in
the Windows Device Manager.
To determine what video card you have, click the plus
sign in front of Display Adapters in the Device
Manager list. The name of your video card is now

394 Pinnacle Studio
displayed. Double-clicking the name opens another
dialog, where you choose the Driver tab. Now you can
view information about the driver’s manufacturer, and
the names of the driver’s constituent files.
The sound card is displayed in the Sound, video and
game controllers section of Device Manager. Again,
double-clicking the name lets you access the driver
details.
Go to the manufacturers’ web-sites to get the latest
drivers for your sound and graphics cards. Many users
have NVIDIA or ATI graphics cards, for which the
latest drivers are available at:
www.nvidia.com and www.atitech.com
Those with Sound Blaster audio cards can get updates
here:
us.creative.com
Update Windows: Make sure you have all the latest
Windows updates that are available.
“Adjust for best performance”: Use this system
option to turn off visual extras that consume additional
CPU time. Right-click My Computer, select Properties
from the context menu, then click on the Advanced tab.
Under Performance, click the Settings button to open
the Performance Options dialog. Select the Adjust for
best performance option and click OK.
Update DirectX: Update to the latest version of
DirectX. You can download it from Microsoft here:
www.microsoft.com/windows/directx
Open up space on your boot drive: Make sure you
have 10 GB or more free space on your boot drive for
paging.
Appendix C: Troubleshooting 395
Uninstall, reinstall and update Studio: In case your
Studio installation has become corrupted, try this
procedure:
1. Uninstall Studio: Click on Start Programs
Studio 15 Tools Uninstall Studio 15, then
follow any on-screen instructions until the process
is complete. If the uninstaller asks whether you
want to delete a shared files, click Yes to all.
Disconnect the camera and cable from your DV
board, if you have one.
2. Reinstall Studio: Insert your Studio CD and
reinstall the software. Make sure you are logged in
as the Administrator (or as a user with Admin
privileges) when installing Studio. It is strongly
recommended that Studio be installed in its default
directory on the main OS drive.
3. Download and install the latest version of Studio:
Click the Help Software Updates menu
command to check for updates. If a new version of
Studio is detected on our web-site, you will be
asked to download it. Download this patch file to a
location where you can find it easily (such as the
Desktop), then exit Studio. Finally, double-click the
downloaded file to update Studio.
Rebuild corrupt project: Try rebuilding the first few
minutes of your project. If no problems occur,
gradually add to the project, checking periodically to
ensure that system stability is maintained.
Fix corrupt video or audio: Sometimes the instability
may occur only when you manipulate certain audio or
video clips. In such cases, you should recapture the
audio or video. If the audio or video was created by
another application, recapture it with Studio if possible.
While Studio supports many video formats, the
396 Pinnacle Studio
particular clip you have may be corrupt or in an
uncommon format. If you have a wav or mp3 file that
seems to be problematic, convert the file to the other
format before importing the file. Many wav and mp3
files on the Internet are corrupt or non-standard.
Reinstall Windows: This is quite a drastic step, but if
the previous steps have not helped, Windows itself may
be corrupt. Even though your other applications may
appear to be running properly, the size of the video
files used in Studio may well tax your system to the
point that a latent instability is revealed.
Case 2: Clicking a tab or button crashes Studio
Please start by trying the steps given above for Case 1.
This kind of problem often means that Studio was not
installed properly or has become corrupt. Uninstalling
Studio, reinstalling it, and patching to the latest version
will generally solve the difficulty.
Otherwise, try creating a new project called
“test01.stx” to try to determine if the failure is specific
to a particular project. Open the demo video file and
drag the first few scenes onto the Timeline. Now click
on the tab or button that seems to cause the failure. If
this test project does not crash, it may be that the
problem is with the project you are working on rather
than with Studio or your system. If the test project does
fail, please contact our support staff and provide us
with details on the exact failure mode. We will try to
recreate and solve the problem.
Case 3: Performing certain steps crashes Studio
This is just a more complicated version of Case 2, and
the same troubleshooting steps apply. Since it may be

Appendix C: Troubleshooting 397
quite difficult to determine the exact sequence of steps
that produces the failure, you will need to be
methodical in your approach. Creating a small test
project, as described for Case 2, helps eliminate
variables that may confuse your test results.
Studio hangs when rendering
Answer ID 6386
With this type of problem, Studio “gets stuck” during
rendering (preparing your video for output in Make
Movie mode). To identify the solution in a particular
case, try the troubleshooting steps for whichever of the
following failure modes best matches your situation:
Case 1: Rendering stops immediately after it starts.
Case 2: Rendering stops randomly in a project. It
typically does not stop in the same spot if rendering
is attempted multiple times.
Case 3: Render stops at the same spot in a project no
matter how many times rendering is attempted.
Case 1: Rendering stops immediately
If the hang occurs immediately upon clicking the
Create button, there is some configuration problem on
your system. Try rendering the supplied demo video. If
this fails, the problem is confirmed as a system issue,
since we have not been able to reproduce a render
problem with the demo file during our in-house testing.
398 Pinnacle Studio
Possible solutions:
Uninstall and reinstall Studio.
Uninstall other software that might conflict with
Studio (other video editing software, other video
codecs, etc.).
Try rendering to other file or disc types in Studio.
Try creating MPEG 1 and MPEG 2 files, and an AVI
file in DV format. Can you create VCDs and DVDs?
Knowing what works, and what does not, may be
crucial in identifying and solving the problem.
Make sure that you have installed any available
Windows service packs.
Reinstall Windows over itself (that is, without
uninstalling first). In Windows XP, this procedure is
called Repair.
Case 2: Rendering stops randomly
If the render hangs at random points even within the
same project, the failures may be due to background
tasks, power management or a thermal problem in the
computer.
Possible solutions:
Check your hard drive for errors and defragment it.
End any background tasks, such as virus checkers,
drive indexers and fax modems.
Turn off any power management.
Install cooling fans in the computer case.
Case 3: Render always stops at the same point
If rendering always hangs at the same spot in a
particular project, see if other projects have the same
Appendix C: Troubleshooting 399
problem. If not, the problem project could be corrupt; if
they do, try to isolate a common factor.
Finding a solution to this type of failure is much easier
if you can identify a particular item in the project that is
causing the rendering to stop. Removing the item or
trimming it may allow the rendering to complete,
though in some cases the failure may simply turn up
elsewhere in the project.
Other possible solutions and workarounds:
Look at the clips in the project for corrupt video
frames. These may show up as gray, black, blocky or
distorted frames. If you find any, trim the clip to
exclude the offending frames. You could also try
recapturing the footage.
Defragment your hard drive.
Ensure that you have ample free space – preferably
tens of gigabytes – on the hard drive you use for
video. Rendering may use large amounts of storage,
and can be disrupted if space is insufficient.
If you have a separate capture drive, make sure to
move the auxiliary files folder to that drive.
Copy the section where the render stops and paste it
into a new project. Include 15 to 30 seconds on
either side of the error. Try rendering this excerpt to
an AVI file and, if successful, use the file to replace
the offending section of the original project.
If you are creating a DVD or other optical disc type,
remove all menus from the project and render the
rest to an AVI. If this succeeds, create a new project,
import the AVI file, and add your menus. Rendering
will now consume fewer resources, and thus be more
likely to succeed.

400 Pinnacle Studio
Studio hangs on launch
or does not launch
Answer ID 1596
Problems on launch can manifest in various ways.
Studio may give an error message when launching, or it
may freeze in mid-launch, or it may “hang” – fail to
return control to you – after what had seemed an
uneventful launch.
In all such cases, try any or all the following:
Restart the computer. After the reboot, double-click
the Studio icon.
Wait a few minutes to confirm that the application is
really hung. Even when you suspect Studio has
failed to launch, wait a few minutes more just in
case. On some computers, the launch process may
take longer to complete than you anticipate.
Uninstall and reinstall Studio. (See page 395 for
instructions.)
Start Windows in Safe mode. If Studio still won’t
launch under Safe mode, your installation may be
corrupt. An uninstall and reinstall of Studio should
deal with this.
If Studio does launch under Safe mode, the issue
probably relates to a faulty device driver or an
application conflict.
Try to narrow it down further:
Disconnect capture hardware. Start with Avid
external devices such as Dazzle or MovieBox. If

Appendix C: Troubleshooting 401
Studio now launches, reconnect the device and
reopen Studio. If it fails anew, continue to the next
step.
If you have a webcam, try launching Studio with the
device unplugged, and again with it plugged in. If
the launch succeeds in one of these states but not the
other, make sure to use the same set-up whenever
you launch Studio in the future.
Next, investigate capture cards mounted in your
computer. To see what capture devices are present,
use the AM Capture utility (Start All Programs
Studio 15 Tools AM Capture), and click
on the Devices pull-down menu. One by one, try
physically disconnecting the devices listed. You can
also try uninstalling the applicable drivers.
Download and install the latest drivers for your
sound and graphics cards from the manufacturers’
web-sites. Both must support DirectX. Many users
have either NVIDIA or ATI graphics cards, for
which the latest drivers are available at
www.nvidia.com and www.atitech.com.
If you have a sound card (rather than a motherboard-
based sound device), try removing it from the
system. Some older sound cards may not work well
with newer versions of Windows. This can be
verified by shutting down the computer, removing
the sound card and restarting. If Studio now
launches, you probably need to replace the sound
card.
End background tasks. You can use either the End
Process button in the Windows Task Manager, or
one of the available software utilities designed to
assist with this procedure. Alternatively, you can
prevent unnecessary (and possibly conflicting) tasks

402 Pinnacle Studio
from ever being run by editing your list of startup
programs.
Editing startup applications
To keep applications from loading when your PC is
started (or rebooted):
1. Click on Start Run
2. In the Open box, type: msconfig
3. Click OK
In the System Configuration Utility window, click
on the far right tab called Startup. Remove all
checks from the boxes except for Explorer and
System Tray (SysTray.exe).
“Burning failed” error
appears in Make Movie
Answer ID 13438
If Studio reports “Burning failed” when you are trying
to create an optical disc such as a DVD, try each of the
following in turn until the problem is resolved.
Update to the latest patch: Use the Help
Software Updates menu command to make sure you
have the latest updates to the Studio program.
Use the Safe mode burn option in Make Disc
settings: In Studio, click on Setup Make Disc.
Under the box marked Burn Options, select “Safe
mode: create disc content and then burn”, by clicking
first on the radio button for the setting, then OK.
Stay with this setting until finished troubleshooting.
Appendix C: Troubleshooting 403
Restart Studio: Shut down Studio, then relaunch it.
Now try to create the disc again using the safe mode
setting as above.
Restart the computer: Try opening the door of the
DVD burner. If it won’t open, shut down Studio,
then restart the computer. After relaunching Studio,
try to create the DVD using the safe mode setting.
Verify media: Make sure that there blank, write-
once media or rewriteable media in the DVD burner,
and that your DVD burner supports the media type
you are using. During troubleshooting we normally
recommend using rewriteable media to reduce the
number of wasted discs. However, if you have only
used rewriteable media (RW), we would also
recommend experimenting with write-once (-/+ R)
DVDs. For dependability, Avid suggests using a
name brand of DVD, such as Sony, Apple or
Memorex. When troubleshooting, we recommend
trying a DVD from one or more different
manufacturers.
Edit the registry: This step should only be
attempted if all of the following are true: You have
backed up your registry before making any changes
and know how to restore the registry to the previous
state; you have successfully edited the registry
before; and you are comfortable with the risks
associated with editing the registry. If you wish to
proceed, delete the Recorder key in the following
registry path (capitalization may vary):
HKEY_LOCAL_MACHINE\Software\VOB\CDRApp\
Recorder
This change will force the burn engine to completely
redo the drive scanning.

404 Pinnacle Studio
DVDs do not play back, or appear blank
Answer ID 13092
In some cases, a DVD created by Studio may not play
back in your DVD player. Try these steps:
Check the disc for cleanliness. Ensure that there are
no obvious smudges or scratches on the disc surface.
Verify that the expected folders and files have
actually been created on the burned DVD. Insert the
DVD into a DVD ROM drive. Under My Computer,
right-click the DVD drive and choose Explore. There
should be two folders on the DVD, named
“AUDIO_TS” and “VIDEO_TS”. The audio folder
should be empty. The video folder should contain
.bup, .ifo and .vob files. If the disc is in fact blank,
you are dealing with a burn problem rather than a
playback problem. In that case, please check out
Answer ID 13874 in the on-line knowledge base.
Try playing back the DVD on your computer. The
disc should play back with a software DVD player
like PowerDVD or WinDVD. It should also play
back in an application like Windows Media Player.
Ensure that your DVD player is designed to play the
type of media you are using. Not all DVD players
will play every DVD disc format. The DVD player
manufacturer’s web-site should list the types of disc
formats your particular device supports. Another
good place to check for compatibility is:
http://www.videohelp.com/dvdplayers
Tip: When troubleshooting burn or playback issues,
use rewritable media to avoid wasting discs.

Appendix D: Videography tips 405
APPENDIX D:
Videography tips
To shoot good video, then create from it an interesting,
exciting or informative movie, is something anyone
with a little basic knowledge can achieve. Starting from
a rough script or shooting plan, the first step is to shoot
your raw video. Even at that stage, you should be
looking ahead to the editing phase by making sure you
will have a good set of shots to work from.
Editing a movie involves juggling all your fragments of
footage into some kind of harmonious whole. It means
deciding on the particular techniques, transitions and
effects that will best express your intent.
An important part of editing is the creation of a
soundtrack. The right sound – dialog, music,
commentary or effect – can work with the visuals to
create a whole greater than the sum of its parts.
Studio has the tools to create professional-quality home
video. The rest is up to you – the videographer.
Creating a shooting plan
It is not always necessary to have a shooting plan, but it
can be very helpful for large video projects. The plan

406 Pinnacle Studio
can be as simple or as complex as you like. A simple
list of planned scenes might be enough, or you might
also want to include some notes regarding detailed
camera directions or prepared dialog. The really
ambitious can go all the way to a full-fledged script in
which every single camera angle is described in detail
along with notes about duration, lighting and props.
Title: “Jack on the kart track”
No. Camera angle Text / Audio Duration Date
1 Jack's face with helmet,
camera zooms out “Jack is driving his
first race...”.
Noise of engines in
the background.
11 sec
Tue.
06/22
2 On the starting line,
driver's perspective; low
camera position.
Music is played in
the hall, noise of
engines.
8 sec
Tue.
06/22
3 Man with a starting flag is
accompanied into the
scene to the start
position. Camera stays,
man goes out of the
scene after start.
“Let's go...”.
Carry out the start,
add starting signal. 12 sec
Tue.
06/22
4 Jack on the start position
from the front, camera
follows, shows Jack up to
the bend, now from
behind.
Music from the hall
no longer audible,
fade up same music
from CD over noise
of engines.
9 sec
Tue.
06/22
5 ...
Draft of a simple shooting plan
Editing
Using varying perspectives
An important event should always be shot from varying
perspectives and camera positions. Later, during
Appendix D: Videography tips 407
editing, you can use the best camera angles alone or in
combination. Make a conscious effort to tape events
from more than one camera angle (first the clown in the
circus ring, but then also the laughing spectator from
the clown’s point of view). Interesting events can also
take place behind the protagonists or the protagonists
may be seen in a reverse angle. This can be helpful
later when trying to establish a sense of balance in the
movie.
Close-ups
Don’t be stingy with close-ups of important things or
persons. Close-ups usually look better and more
interesting than long shots do on a television screen,
and they work well in post-production effects.
Long shots / Semi-long shots
Long shots provide the viewer with an overview and
establish the scene of the action. However, these shots
can also be used to tighten longer scenes. When you cut
from a close-up to a long shot, the viewer no longer
sees the details, and it is thus easier to make a
chronological jump. Showing a spectator in a semi-long
shot can also provide visual relief from the main action,
and the opportunity of a transition away from the action
if desired.
Complete actions
Always shoot complete actions with a beginning and an
end. This makes editing easier.
Transitions
Cinematic timing requires some practice. It is not
always possible to film long events in their entirety,
408 Pinnacle Studio
and in movies they often have to be represented in
severely abbreviated form. Nonetheless, the plot should
remain logical and cuts should almost never call
attention to themselves.
This is where the transition from one scene to the next
is important. Even if the action in neighboring scenes is
separated in time or space, your editorial choices can
make the juxtaposition so smooth that the viewer
bridges the gap without conscious attention.
The secret to a successful transition is establishing an
easily-felt connection between the two scenes. In a
plot-related transition, the connection is that of
successive events in an unfolding story. For example, a
shot of a new car might be used to introduce a
documentary about its design and production.
A neutral transition doesn’t in itself imply a story
development or a change of time or place, but can be
used to smoothly connect different excerpts from a
scene. For example, cutting away to an interested
audience member during a podium discussion lets you
then cut back unobtrusively to a later point in the same
discussion, omitting the part between.
External transitions show something apart from the
action. For example, during a shot inside the marriage
registry, you might cut to the exterior of the marriage
registry, where a surprise is already being set up.
Transitions should underscore the message of the film
and must always fit the respective situation, in order to
avoid confusing viewers or distracting from the actual
storyline.
Logical sequence of action
The shots strung together during editing must interact
appropriately in relation to the action. Viewers will be
Appendix D: Videography tips 409
unable to follow the events unless the storyline is
logical. Capture viewer interest from the very
beginning with a fast-paced or spectacular start and
maintain that interest until the very end. Viewers can
lose interest or become disoriented if scenes are strung
together in a manner that is illogical or chronologically
false, or if scenes are too hectic or short (under three
seconds). There should be some continuity of motif
from one scene to the next.
Bridging the gaps
Make an effort to bridge the gaps from one filming
location to another. You can use close-ups, for
example, to bridge chronological jumps, zooming in on
the face, then back out after a few seconds onto a
different scene.
Maintain continuity
Continuity – consistency of detail from one scene to the
next – is vital in providing a satisfying viewing
experience. Sunny weather does not fit with spectators
who opened their umbrellas.
Tempo of cuts
The tempo at which a film cuts from one scene to the
next often influences the message and mood of the
film. The absence of an expected shot and the duration
of a shot are both ways of manipulating the message of
the film.
Avoid visual disjunctions
Stringing together similar shots in succession may
result in visual disjunctions. A person may be in the left

410 Pinnacle Studio
half of the frame one moment and in the right half of
the frame the next, or may appear first with and then
without eyeglasses.
Do not string together pan shots
Pan shots should not be strung together unless they
have the same direction and tempo.
Rules of thumb for video editing
Here are some guidelines that may be helpful when you
come to edit your movie. Of course, there are no hard
and fast rules, especially if your work is humorous or
experimental.
Do not string together scenes in which the camera is
moving. Pans, zooms, and other moving shots should
always be separated by static shots.
Shots that follow one another should be from
different camera positions. The camera angle should
vary by at least 45 degrees.
Sequences of faces should always be shot alternately
from varying angles of view.
Change perspectives when shooting buildings. When
you have similar shots of the same type and size, the
picture diagonal should alternate between front left
to rear right and vice versa.
Make cuts when persons are in motion. The viewer
will be distracted by the ongoing motion and the cut
will go almost without notice. In particular, you can
cut to a long shot from the middle of the motion.
Appendix D: Videography tips 411
Make harmonious cuts; avoid visual disjunction.
The less motion there is in a shot, the shorter it
should be. Shots with fast movements can be longer.
Long shots have more content, so they should also be
shown longer.
Ordering your video sequences in a deliberate manner
not only permits you to produce certain effects, but
even enables you to convey messages that cannot or
should not be shown in pictures. There are basically six
methods of conveying messages through cuts. Let’s
look at each in turn.
Associative cuts
Shots are strung together in a certain order to trigger
associations in the mind of the viewer, but the actual
message is not shown. Example: A man bets on a horse
race and, in very next scene, we see him shopping for
an expensive new car at a car dealership.
Parallel cuts
Two actions are shown in parallel. The film jumps back
and forth between the two actions; making the shots
shorter and shorter until the end. This is a way of
building suspense until it peaks. Example: Two
different cars drive from different directions at high
speed toward the same intersection.
Contrast cuts
The film purposely cuts unexpectedly from one shot to
another, very different shot, in order to point up the
contrast to the viewer. Example: A tourist lying on the
beach; the next shot shows starving children.

412 Pinnacle Studio
Substitutionary cut
Events that cannot or should not be shown are replaced
by other events (a child is born, but instead of
childbirth, the blossoming of a flower bud is shown).
Cause and effect cuts
Shots are related by virtue of cause and effect: without
the first shot, the second would be incomprehensible.
Example: A man fights with his wife and, in the very
next shot, winds up sleeping under a bridge.
Formal cuts
Shots that vary in content can be strung together if they
have something in common – the same shapes, colors,
or motions, for example. Examples: A crystal ball and
the earth; a yellow raincoat and yellow flowers; a
falling skydiver and a falling feather.
Soundtrack production
Soundtrack production is an art, but it is an art one can
learn. Of course, it is no easy task to create a superb
narration, but short, informative comments are often
very helpful for the viewer. Whatever narration there is
should sound natural, expressive and spontaneous, not
wooden or stiff.
Keep comments brief
A general rule applicable to all commentary is that less
is more. Pictures should speak for themselves, and
things that are evident to viewers from the pictures
require no comment.

Appendix D: Videography tips 413
Preserve original sounds
Spoken commentary should be mixed with both the
original sounds and the music in such a way that the
original sounds can still be heard. Natural sound is part
of your video footage and should not be cut away
altogether if at all possible, because video without
natural sound can easily seem sterile and lacking in
authenticity. Frequently, however, the recording
equipment captures noises from aircraft and cars that
do not appear in the scene later. Sounds such as these,
or loud wind noises, which can be distracting or
annoying, should be masked, filtered or replaced with
appropriate narration or music.
Select appropriate music
Appropriate music adds a professional finishing touch
to your movie and can do a lot to reinforce the message
of a video. The music selected, however, should always
be appropriate to the message of the film. This is
sometimes a time-consuming matter and a challenge,
but greatly appreciated by the viewer.
Title
The title should be informative, describe the contents of
the movie, and arouse interest. With the built-in title
editors there are no limits to how creative you can be.
As a rule, you can let your fancy run free when
designing a title for your video.
Use a short, clear title
Titles should be short and in a large, legible font.
414 Pinnacle Studio
Title colors
The following combinations of background and text are
easy to read: white with red, yellow with black, and
white with green. Exercise caution with very white
titles on a very black background. Some video systems
are unable to handle contrast ratios in excess of 1:40
and are unable to reproduce such titles in detail.
Time on screen
As a rule of thumb, a title should be displayed long
enough to be read twice. Allow about three seconds for
a title with ten letters. Allow an additional second of
on-screen time for every five additional letters.
“Found” titles
Besides postproduction titles, natural titles like
directional signs, street signs or title pages of local
newspapers also create interesting possibilities.

Appendix E: Glossary 415
APPENDIX E:
Glossary
Multimedia terminology contains computer and video
terminology. The most important terms are defined
below. Cross-references are indicated by .
720p: A high-definition (HD) video format with a
resolution of 1280x720 and progressive (non-
interlaced) frames.
108i: A high-definition (HD) video format with a
resolution of 1440x1080 and interlaced frames.
ActiveMovie: Software interface by Microsoft for the
control of multimedia devices under Windows.
DirectShow, DirectMedia
ADPCM: Acronym for Adaptive Delta Pulse Code
Modulation, a method of storing audio information in a
digital format. This is the audio encoding and
compression method used in CD-I and CD-ROM
production.
Address: All available saving positions in a computer
are numbered (addressed). By means of these addresses
each saving position can be occupied. Some addresses
are reserved for the exclusive use of particular
hardware components. If two components are using the
same address, this is called an “address conflict”.
416 Pinnacle Studio
Aliasing: An inaccurate display of an image due to the
limitations of the output device. Typically, aliasing
appears in the form of jagged edges along curves and
angled shapes.
Anti-aliasing: A method of smoothing out jagged
edges in bitmap images. This is usually accomplished
by shading the edges with pixels intermediate in color
between the edge and the background, making the
transition less apparent. Another method of anti-
aliasing involves using higher resolution output
devices.
Aspect ratio: The ratio of width to height in an image
or graphic. Keeping the aspect ratio fixed means that
any change to one value is immediately reflected in the
other.
AVI: Audio Video Interleaved, a standard format for
digital video (and Video for Windows).
Batch capture: An automated process that uses an
edit decision list to locate and recapture specific
clips from a videotape, usually at a higher data rate
than the clip was originally captured.
BIOS: Acronym for Basic Input Output System, which
refers to basic input and output commands saved in a
ROM, PROM or EPROM. The essential task of
the BIOS is the control of input and output. When the
system is started, the ROM-BIOS carries out some
tests. Parallel port, IRQ, I/O
Bit: Abbreviation of “BInary digiT”, the smallest
element of a computer’s memory. Among other things,
bits are used to store the color values of pixels in an
image. The more bits used for each pixel, the
greater the number of available colors. For example:
1-bit: each pixel is either black or white.
4-bit: allows 16 colors or gray shades.
Appendix E: Glossary 417
8-bit: allows 256 colors or gray shades.
16-bit: allows 65,536 colors.
24-bit: allows about 16.7 million colors.
Bitmap: An image format made up of a collection of
dots or “pixels” arranged in rows. Pixel
Blacking: The process of preparing a videotape for
insert editing by recording video black and continuous
control track on the entire tape. If the recording deck
supports timecode, continuous timecode will be
recorded simultaneously (also called “striping”).
Brightness: Also “luminance”. Indicates the brightness
of video.
Byte: One byte corresponds to eight bits. With one
byte, exactly one alphanumeric character can be
displayed (i.e. a letter, number).
CD-ROM: Mass storage media for digital data, such as
digital video. CD-ROMs can be read from but not
written (recorded) onto: ROM is an acronym for
Read-Only Memory.
Channel: Classifications of information within a data
file to isolate a particular aspect of the file. For
example, color images use different channels to classify
the color components in the image. Stereo audio files
use channels to identify the sounds intended for the left
and right speakers. Video files use combinations of the
channels used for image and audio files.
Clip: In Studio, any media type that goes on the Movie
Window Storyboard or Timeline, including video
images, trimmed video scenes, images, audio files and
disc menus.
Clipboard: A temporary storage area shared by all
Windows programs, used to hold data during cut, copy,
418 Pinnacle Studio
and paste operations. Any new data you place onto the
clipboard immediately replaces the existing data.
Closed GOP: GOP
Codec: Contraction of compressor/decompressor – an
algorithm that compresses (packs) and decompresses
(unpacks) image data. Codecs can be implemented in
either software or hardware.
Color depth: Number of bits delivering the color
information for each pixel. A 1-bit color depth allows
21=2 colors, an 8-bit depth allows 28=256 colors, and a
24-bit depth allows 224=16,777,216 colors.
Color model: A way to mathematically describe and
define colors and the way they relate to each other.
Each color model has its own strengths. The two most
common color models are RGB and YUV.
Color saturation: Intensity of a color.
Complementary color: Complementary colors are
opposite in value to primary colors. If you were to
combine a color with its complement, the result would
be white. For example, the complementary colors of
red, green and blue are cyan, magenta and yellow
respectively.
COM Port: A serial port located on the back of your
computer for attaching a modem, plotter, printer or
mouse to the system.
Composite video: Composite video encodes luminance
and chrominance information into one signal. VHS
and 8mm are formats that record and play back
composite video.
Compression: A method for making files smaller in
size. There are two types of compression: lossless and
Appendix E: Glossary 419
lossy. Files compressed with a lossless scheme can be
restored unchanged from their original state. Lossy
schemes discard data during compression, so some
image quality is sacrificed. The loss of quality may be
negligible or severe depending on the amount of
compression.
Cropping: Choosing the area of an image to be
displayed.
Data rate: The quantity of data transmitted per unit
time; for example, the number of bytes read from or
written to a hard drive per second, or the amount of
video data processed per second.
Data transfer rate: The measurement of the speed at
which information passes between the storage device
(e.g. CD-ROM or hard drive) and the display device
(e.g. monitor or MCI device). Depending on the
devices used, some transfer rates may offer better
performance than others.
DCT: Discrete Cosine Transformation – part of
JPEG image data compression and related
algorithms. The brightness and color information is
saved as a frequency coefficient.
DirectShow: System extension by Microsoft for
multimedia applications under Windows.
ActiveMovie
DirectMedia: System extension by Microsoft for
multimedia applications under Windows.
ActiveMovie
DirectX: A bundle of several system extensions
developed by Microsoft for Windows 95 and its
successors to make possible video and game
acceleration.
420 Pinnacle Studio
Dissolve: A transitional effect in which the video is
faded from one scene to the next.
Dithering: Increasing the number of apparent colors in
an image by the application of color patterns.
Decibel (dB): A unit of measurement of the loudness
of sound. An increase of 3 dB doubles the loudness.
Digital8: Digital videotape format that records DV-
coded audio and video data on Hi8 tapes. Currently
sold only by Sony, Digital8 camcorders and VCRs can
play both Hi8 and 8mm cassettes.
Digital video: Digital video stores information bit
by bit in a file (in contrast to analog storage media).
DMA: Direct Memory Access.
Driver: A file containing information needed to
operate peripherals. The video capture driver operates a
video capture board, for example.
DV: Digital videotape format for recording digital
audio and video on ¼”-wide metal evaporated tape.
Mini-DV tapes hold up to 60 minutes of content, while
standard DV tapes can hold up to 270 minutes.
ECP: “Enhanced Compatible Port”. Enables
accelerated bi-directional data transfer via the
parallel port. EPP
Edit decision list (EDL): A list of clips and effects in a
particular order that will be recorded onto your output
tape, disc or file. Studio allows you to create and edit
your own edit decision list by adding, deleting and
reordering clips and effects in the Movie Window.
EPP: “Enhanced Parallel Port”. Enables accelerated bi-
directional data transfer via the parallel port;
recommended for Studio DV. ECP
Appendix E: Glossary 421
EPROM: “Erasable Programmable Read-Only
Memory”. Memory chip that after programming retains
its data without power supply. The memory contents
can be erased with ultraviolet light and rewritten.
Fade to/from black: A digital effect that fades up from
black at the beginning of a clip or down to black at the
end.
Field: A frame of video consists of horizontal lines
and is divided into two fields. The odd lines in the
frame are Field 1; the even-numbered lines are Field 2.
File format: The organization of information within a
computer file such as an image or word processor
document. The format of a file is usually indicated by
its “file extension” (e.g. doc, avi or wmf).
Filters: Tools that alter data to produce special effects.
FireWire: Apple Computer’s trademarked name for
the IEEE-1394 serial data protocol.
Frame: A single image in a video or animation
sequence. If using full NTSC or PAL resolution, one
frame consists of two interlaced fields. NTSC, PAL,
field, resolution
Frame rate: The frame rate defines how many frames
of a video sequence are played in one second. The
frame rate for NTSC video is 30 frames per second.
The frame rate for PAL video is 25 frames per
second.
Frame size: The maximum size for displaying image
data in a video or animation sequence. If an image
intended for the sequence is larger than the frame size,
it must be cropped or scaled to fit.
Frequency: The number of repetitions in a periodic
process (like a sound wave or an alternating voltage)
422 Pinnacle Studio
per unit of time. Usually measured in repetitions per
second, or Hertz (Hz).
GOP: In MPEG compression the data stream is
first divided into “Groups Of Pictures” – sections of
several frames each. Each GOP contains three types of
frames: I-Frames, P-Frames (pictures) and B-Frames.
GOP size: The GOP size defines, how many I-Frames,
B-Frames and P-Frames are included in one GOP.
For example, current GOP sizes are 9 or 12.
Hardware codec: Compression method that uses
special hardware to create and play back compressed
digital video sequences. A hardware codec may offer
better encoding speed and image quality than a codec
implemented completely in software. Codec,
Software codec
HD: High Definition video. Most HD formats in use
have a resolution of either 1920x1080 resolution or
1280x720 resolution. A substantial difference exists
between the 1080 and 720 standards: the larger format
uses 2.25 more pixels per frame. This difference
substantially increases requirements for processing
1080 content in terms of encoding time, decoding
speed, and storage. The 720 formats are all progressive.
The 1080 format has a mixture of progressive and
interlaced frame types. Computers and their displays
are inherently progressive, whereas television
broadcasting has been based on interlaced techniques
and standards. For HD terminology, we indicate
progressive with the letter "p" and interlaced with the
letter "i"
HDV: A format for the recording and playback of
high-definition video on a DV cassette tape. has been
established as the "HDV" format". Instead of the "DV"
Appendix E: Glossary 423
codec, HDV uses a flavor of MPEG-2 . There are two
varieties of HDV: HDV1 and HDV2. HDV1 is
1280x720 resolution with progressive frames (720p).
The MPEG transport stream is 19.7 Mbps/s. HDV2 is
1440x1080 resolution with interlaced frames (1080i).
The MPEG transport stream is 25 Mbps/s.
Hi8: Improved version of Video8 using S-Video
recorded on metal particle or metal evaporated tape.
Because of higher luminance resolution and wider
bandwidth, the result is sharper pictures than Video8.
HiColor: For images, this normally means a 16-bit
(5-6-5) data type that can contain up to 65,536 colors.
TGA file formats support images of this type. Other file
formats require prior conversion of a HiColor image
into TrueColor. For displays, HiColor normally
refers to 15-bit (5-5-5) display adapters that can display
up to 32,768 colors. Bit
Huffman coding: Technique used in JPEG and
other data compression methods in which seldom
occurring values receive a long code, while frequently-
occurring values receive a short code.
IDE: “Integrated Device Electronics” – a hard-drive
interface that combines all drive control electronics on
the drive itself, rather than on the adapter connecting
the drive to the expansion bus.
IEEE-1394: Developed by Apple Computers and
introduced as FireWire, this is a serial data
transmission protocol with rates up to 400 Mbits/sec.
Sony offers a slightly modified version for transmitting
DV signals named i.LINK, providing transmission
speeds up to 100 Mbits/sec.
Image: An image is a reproduction, or picture of
something. The term is often applied to digitized
424 Pinnacle Studio
pictures, consisting of pixels, that can be shown on a
computer display and manipulated by software.
Image compression: Method of reducing the amount
of data required to store digital image and video files.
Interlaced: The screen refresh method used by
television systems. The PAL TV image consists of
two interleaved image halves ( fields) of 312½ lines
each. The NTSC TV image consists of two image
halves of 242½ lines each. The fields are displayed
alternately to produce a blended image.
Interleave: An arrangement of audio and video to
promote smoother playback and synchronization or
compression. The standard AVI format equally
spaces audio and video.
I/O: Input/Output.
IRQ: “Interrupt Request”. An “interrupt” is a
temporary break in the main processing stream of a
computer so that housekeeping or background tasks can
be performed. Interrupts can be requested by either
hardware (e.g. keyboard, mouse) or software.
JPEG: Joint Photographic Experts Group, and the
standard developed by them for compressing digital
frames based on DCT.
Kbyte (also KB): One Kbyte (kilobyte) contains 1024
bytes. The “K” here stands for the number 1024
(210), and not 1000 as in the metric prefix.
Key color: A color whose display is suppressed so that
a background image can show through. Most
commonly used when overlaying one video sequence
on top of another, allowing the underlying video to
display wherever the key color appears.
Appendix E: Glossary 425
Key frames: In some compression methods, such as
MPEG, the video data of certain frames – the key
frames – is stored completely in the compressed file,
while any intervening frames are only partially saved.
On decompression these partial frames reconstruct their
data from the key frames.
Laser disc: Medium that stores analog video.
Information on laser discs cannot be modified.
LPT: Parallel port
Luminance: Brightness
M1V: (File extension for) an MPEG file that contains
video data only. MPA, MPEG, MPG
Mbyte (also MB): One Mbyte (megabyte) corresponds
to 1024 Kbytes – 1024 x 1024 bytes.
Mark In / Mark Out: In video editing, the mark in
and mark out times refer to the starting and ending
timecodes that identify the portions of clips to be
included in the project.
MCI: Media Control Interface. Programming interface
developed by Microsoft recording and playing back
audio and video data. It is also used to connect a
computer to an external video source such as a VCR or
laser disc.
Modulation: The encoding of information upon an
empty carrier signal.
Motion-JPEG (M-JPEG): A Video for Windows
format, specified by Microsoft, for encoding video
sequences. JPEG compression is used to compress
each frame individually.
MPA: (File extension for) an MPEG file that contains
audio data only. M1V, MPEG, MPG
426 Pinnacle Studio
MPEG: Motion Picture Experts Group, and the
standard developed by them for the compression of
moving images. Compared to M-JPEG, it offers 75-
80% data reduction with the same visual quality.
MPG: (File extension for) an MPEG file that contains
both video and audio data. M1V, MPEG, MPA
MPV: (File extension for) an MPEG file that contains
video data only. MPA, MPEG, MPG
Non-interlaced: Describes an image refresh method in
which the complete image is generated as a single field
without skipping lines. A non-interlaced image (most
computer monitors) flickers much less than an
interlaced image (most TVs).
NTSC: National Television Standards Committee, and
the color TV standard created by them in 1953. NTSC
video has 525 lines per frame and 60 image fields per
second. It is used in North and Central America, Japan
and other countries. PAL, SECAM
PAL: “Phase Alternation Line”, a color TV standard
developed in Germany and used throughout most of
Europe. PAL video has 625 lines per frame and 50
image fields per second. NTSC, SECAM
Parallel port: Parallel port data is transmitted via an
8-bit data line. This means that eight bits (one
byte) can be transmitted at once. This kind of
transmission is much faster than serial transmission,
but is not appropriate for long-distance connections.
Parallel ports are often named “LPTn”, where n is a
number (e.g. “LPT1”). Serial port
Pixel: The smallest element of a monitor image. The
word is an abbreviation of “picture element”.
Appendix E: Glossary 427
Port: Electrical transfer point for the transmission of
audio, video, control or other data between two
devices. Serial port, Parallel port
Primary colors: The colors that are the basis of the
RGB color model: red, green, and blue. It is possible to
create most other colors on a computer screen by
varying the blend of these primaries.
QSIF: Quarter Standard Image Format. An MPEG-1
format specifying a resolution of 176 x 144 under PAL
and 176 x 120 under NTSC. MPEG, SIF
Quantization: One part of the JPEG image data
compression strategy. Relevant details are represented
precisely, while details that are less relevant for the
human eye are represented with less precision.
Raster: The area of a video display that is covered by
sweeping the electron beam of the display in a series of
horizontal lines from upper left to lower right (from the
viewer’s perspective).
Redundancy: This trait of images is exploited by
compression algorithms. Superfluous information can
be eliminated during compression and restored without
loss during decompression.
Resolution: The number of pixels that can be displayed
on the monitor horizontally and vertically. The higher
the resolution, the more details can be displayed.
Pixel
RGB: Red, Green and Blue: the primary colors in
additive color mixing. RGB designates the method
used in computer technology of encoding image infor-
mation in pixels, each containing some combination of
the three primaries.
428 Pinnacle Studio
ROM: Read Only Memory: Memory storage that,
having been programmed once, retains its data without
requiring electrical power. EPROM
Run Length Encoding (RLE): A technique used in
many image compression methods, including
JPEG. Repeating values are not stored separately
but with a counter to indicate how many times the
value occurs in succession – the length of the “run”.
Scaling: Adaptation of an image to a desired size.
SCSI: Small Computers System Interface. SCSI was
long preferred as the hard drive interface for some
high-performance PCs because of its high data rate. Up
to eight SCSI devices can be connected to a computer
at the same time.
SECAM: “Séquentiel Couleur à Mémoire”, a color TV
transmission system used in France and Eastern
Europe. Like PAL, SECAM video has 625 lines per
frame and 50 image fields per second. NTSC, PAL
Serial port: Data transmitted via a serial port is
processed one bit at a time; that is, “serially” – one
after another. The transmission rate is much slower
than that of a parallel port, where parallel data lines
allow multiple bits to be sent simultaneously. Serial
ports are named “COMn”, where n is a number (e.g.
“COM2”). Parallel port
SIF: Standard Image Format. An MPEG-1 format
specifying a resolution of 352 x 288 under PAL and
352 x 240 under NTSC. MPEG, QSIF
Single frame: A single frame is part of a series or
sequence. When this series is viewed at sufficient
speed, the illusion of a “moving picture” is created.
Appendix E: Glossary 429
Software codec: Compression method that can create
and play back compressed digital video sequences
without special hardware. The quality of the sequences
depends on the performance of the complete system.
Codec, Hardware codec
Still video: Still images (or “freeze-frames”) extracted
from video.
S-VHS: Improved version of VHS using S-Video and
metal particle tape to deliver higher luminance
resolution, resulting in sharper pictures than VHS.
VHS, S-Video
S-Video: With S-Video (Y/C) signals, the brightness
(luminance or “Y”) and the color (chrominance or “C”)
information are transferred separately using multiple
wires, avoiding modulating and demodulating the video
and the resulting loss of picture quality.
Timecode: Timecode identifies the position of each
frame in a video sequence with respect to a starting
point (normally the beginning of the shot). The usual
format is H:M:S:F (hours, minutes, seconds, frames),
e.g. “01:22:13:21”. Unlike a tape counter (which can be
“zeroed” or reset at any point in a tape), timecode is an
electronic signal written onto videotape, and is
permanent once it is assigned.
Transition: The visual connection between adjacent
video clips, ranging from a simple “cut” to a showy
animated effect. The common transitions like cuts,
fades, dissolves, wipes and slides are part of the visual
language of film and video. They can convey passages
of time and changes of viewpoint concisely – and often
subliminally.
TrueColor: The name indicates an image with enough
color resolution to appear “true to life”. In practice,
430 Pinnacle Studio
TrueColor normally refers to 24-bit RGB color, which
allows about 16.7 million combinations of the red,
green and blue primary colors. Bit, HiColor
TWAIN driver: TWAIN is a standardized software
interface allowing graphics and capture programs to
communicate with devices that supply graphical data. If
the TWAIN driver is installed, the capture function of a
graphics application can be used to load images directly
from your video source into the program. The driver
supports 32-bit programs only and captures images in
24-bit mode.
VCR: “Video cassette recorder”.
VHS: “Video Home System” – Popular video standard
for home VCRs. Half-inch tape is used to store
“composite” signals incorporating both brightness and
color information.
VISCA: Protocol used with certain devices for control-
ling external video sources from computers.
Video8: Analog video system using 8mm tape. Video8
recorders generate composite signals.
Video CD: CD-ROM standard that uses MPEG
compressed videos.
Video decoder: Converts digital information into
analog video signals.
Video encoder: Converts analog video signals into
digital information.
Video for Windows: A Microsoft Windows system
extension that can record digital video sequences to
files on a hard drive and subsequently play them back.
Video scan rate: Frequency with which the video
signal is scanned onto an image display. The higher the
Appendix E: Glossary 431
video scan rate, the higher the image quality and the
less noticeable the flicker.
WAV: (File extension for) a popular file format for
digitized audio signals.
White balance: In an electronic camera, this is the
adjustment of the amplifiers for the three color
channels (red, green and blue) so that white areas of the
scene do not show a color cast.
Y/C: Y/C is a color signal with two components:
brightness information (Y) and color information (C).
YUV: The color model of a video signal where Y
delivers the brightness information and U and V the
color information.

Appendix F: Keyboard shortcuts 433
APPENDIX F:
Keyboard shortcuts
The terms Left, Right, Up and Down in these tables
refer to the arrow (cursor) keys.
Standard shortcuts
Ctrl+N New… project (main interface) or title
Ctrl+O Open project or title
Ctrl+S Save project or title
Ctrl+Z Undo
Ctrl+Y Redo
Ctrl+A Select all
Ctrl+C Copy to clipboard
Ctrl+V Paste from clipboard
Ctrl+X Cut to clipboard
Ctrl+B Toggle bold
Ctrl+I Toggle italic
Ctrl+U Toggle underline
Delete Delete without copying to clipboard
Main Studio interface
Space bar Play and stop
J Fast reverse (hit multiple times for
faster playback)
K Halt playback
434 Pinnacle Studio
L Fast forward (hit multiple times for
faster playback)
X or Ctrl+Up Step forward 1 frame
Y or Ctrl+Down Step back 1 frame
A or I Mark in
S or O Mark out
Ctrl+Left Trim in point by -1 frame
Ctrl+Right Trim in point by +1 frame
Alt+Left Trim out point by -1 frame
Alt+Right Trim out point by +1 frame
Alt+Ctrl+Left Rolling trim out point by -1 frame
(trims following clip too)
Alt+Ctrl+Right Rolling trim out point by +1 frame
G Clear mark in and mark out
D Go to mark in (in trimmer tool)
F Go to mark out (in trimmer tool)
E or Home Go to start
R or End Go to end
Left Select previous clip
Right Select next clip
Delete Delete selected clip(s)
Insert Split clip at scrubber position
Ctrl+Delete Delete clip and… close Timeline gap
(video track); leave Timeline gap
(other tracks)
Page up Go to next page in Movie Window
Page down Go to previous page in Movie Window
Numeric pad + Zoom in the Timeline
Numeric pad - Zoom out the Timeline
C Set menu chapter
V Clear menu chapter
M Set return to menu
Ctrl+Page up Go to previous menu chapter
Ctrl+Page down Go to next menu chapter
Ctrl+E Copy all effects in Timeline clip
Ctrl+D Paste effects to Timeline clip
Ctrl+F Open effects tool
Appendix F: Keyboard shortcuts 435
Motion Titler
F11 Cancel (exit titler)
F12 Confirm (exit titler)
Alt+Plus Bring to front
Alt+Minus Send to back
Ctrl+Plus Bring forward one layer
Ctrl+Minus Send back one layer
Ctrl+Period Font grow
Ctrl+Comma Font shrink
Ctrl+D Deselect all
Space bar With cursor in timeline area: Start and
stop playback
Classic Title Editor
F11 Cancel (exit titler)
F12 Confirm (exit titler)
Alt+Plus Bring to front
Alt+Minus Send to back
Ctrl+Plus Bring forward one layer
Ctrl+Minus Send back one layer
Ctrl+0 Text justification off
Ctrl+1 Text justification: bottom left
Ctrl+2 Text justification: bottom center
Ctrl+3 Text justification: bottom right
Ctrl+4 Text justification: middle left
Ctrl+5 Text justification: middle center
Ctrl+6 Text justification: middle right
Ctrl+7 Text justification: top left
Ctrl+8 Text justification: top center
Ctrl+9 Text justification: top right
Ctrl+K Kern, leading and skew
Ctrl+M Move, scale and rotate
Shift+Left Expand character selection left
Shift+Right Expand character selection right
436 Pinnacle Studio
Ctrl+Left Reduce horizontal scale of, or
squeeze (kern), text selection
depending on current edit mode
(move/scale/rotate or
kern/skew/leading)
Ctrl+Right Increase horizontal scale of, or stretch
(kern), text selection
Ctrl+Down Reduce scale or leading of text
selection depending on current edit
mode
Ctrl+Up Increase scale or leading of text
selection
Shift+Ctrl+Left Same as Ctrl+Left (coarse)
Shift+Ctrl+Right Same as Ctrl+Right (coarse)
Shift+Ctrl+Down Same as Ctrl+Down (coarse)
Shift+Ctrl+Up Same as Ctrl+Up (coarse)
Alt+Left In text selection: Move characters
left. No selection: Move left all text
from cursor to end of line.
Alt+Right In text selection: Move characters
right. No selection: Move right all
text from cursor to end of line.
Shift+Alt+Left Same as Alt+Left (coarse)
Shift+Alt+Right Same as Alt+Right (coarse)
Index 437
Index
2
2D editor (video effect), 175
A
A/B editing, 183
Abbreviations, xiv
Activate
Explained, 13
Adding media to the Bin, 88
Album
Aspect ratio, 113
Classic Title Editor. See Classic
Title Editor Album
Clipboard operations, 110
Disc Menus section, 83, 224
Drag-and-drop editing, 110
Favorite folders, 60, 67
Folders, 60, 67
Image sections, 210
Interface features, 65
Menu usage, 66
Motion Titler. See Motion Titler
Album
Music section, 85
Overview, 57
Previewing, 5, 61
Project Bin, 86
Selecting video scenes, 72
Sound Effects section, 84
Source folders, 62
Still Images section, 82
Themes section, 80, 140, 141, 143
Titles section, 81
Transitions section, 78, 199
Video Scenes section, 109
Videos section, 63
Album menu
Combine Scenes, 75
Comment view, 74
Details view, 73
Find Scene in Project, 66, 116
Icon view, 73
Scene detection commands, 78
Select By Name, 75
Set Thumbnail, 69
Subdivide Scenes, 76
Thumbnail view, 74
Album, Motion Titler, 262
Alpha Magic transitions, 201
Analog
Levels during import, 21
Outputting to, 347
Analog video and audio (Import),
47
Anatomy of a theme, 147
Animated pan-and-zoom, 215
Animation, 380, See Stop-motion
animation
Stop motion, 21
With themes, 139
438 Pinnacle Studio
Animation, Stop-motion, 49
Answer IDs (technical support),
384
Aspect ratios (frame formats), 69
Mixing, 112
Audio
Adjusting on Timeline, 313
Analog import options, 21
Background music, 300
Insert editing, 130
Muting, 98
Original, 300
Overlay, 182
Overlay, original, 300
Scrubbing, 92
Settings (for File output), 368
Sound effects, 300
Surround, 316
Synchronized with video, 126
Synchronous, 96, 204, 300
Tracks on Timeline, 300
Transitions, 204, 315
Uses of, 297
Using in Studio, 298
Using without video, 111
Voice-overs, 300
Volume and mixing, 310, 316
Audio clips, 96
Interface details, 311
Trimming, 308
Audio compression, 368
Audio effects, 323
Applied to theme clips, 147
ChannelTool, 326
Chorus, 326
Copy and paste, 324
DeEsser, 327
Equalizer, 327
Grungelizer, 328
Icons, 323
In Studio Ultimate, 326
Leveler, 329
Noise reduction, 324
Reverb, 329
Standard vs. Ultimate, 324
Stereo Echo, 330
Stereo Spread, 330
Tool, 323
Unlocking, 157
Audio levels
In analog import, 21
Audio scrubbing button, 92
Audio toolbox, 107
Audio track
Linked to video track, 128
Audio tracks, 301
Auto color correction (video
effect), 169
Automatic scene detection. See
Scene detection
AVCHD, xiv
Output movie to, 335
AVI files, 85
B
Background
In Classic Title Editor, 251
In Motion Titler, 277
Background music, 94, 96
CD, 302
Formats, 300
ScoreFitter, 303
Tool, 107, 303
Background rendering, 112
Enabling and disabling, 204
Of Hollywood FX, 204
Of moving menu thumbnails, 233
Of video effects, 166
Backgrounds section
Of Classic Title Editor Album, 251
Balance
Adjusting on Timeline, 314
Balance and volume, 107, 310
BD (Import), 48
Bin, Project, 86
Black and white (video effect),
177
Blur (video effect), 173
Blu-ray
Output movie to, 335
Index 439
Blu-ray Disc (Import), 48
Buttons
Add Marker, 100
Audio scrubbing, 92
Chapter. See Disc menus
Clip, 91
Clip delete, 93
Clip marker, 91
Clip split, 91
Delete Marker, 100
DVD toggle, 5, 6
Edit menu, 105
Highlighting, 255
Mode, 2
Playback, 9
Project Bin, 91
Razorblade, 125
Reset (pan-and-zoom), 214
Split clip, 125, 128
Split clip/scene, 93
Tool selector, 103
Toolbox, 102
Track-locking, 126
Undo, Redo, Help, Support and
Activate, 2
View selection, 91
Buttons section
Of Classic Title Editor Album, 254
C
Camcorder Controller, 220
Cameras
Analog (Import), 47
DV, HDV (Import), 42
Capture. See Import
Audio and video levels, 21
Overview, 17
Preparing hard drive, 377
Scene detection, 31
To multiple files, 111
Capture mode
Introduced, 1
Captured video. See Video
Card, memory. See Memory card
CD audio clips
Properties of, 309
CD audio tool, 107, 302
ChannelTool (audio effect), 326
Chapter links. See Links
Chapters
On menu track, 228
Chorus (audio effect), 326
Chroma key
Background cloth for, 196
Tips, 195
Tool, 190
Video effect, 193
Classic Title Editor, 237
Advanced text editing, 243
Launching, 238
Multiple selection in, 246
Classic Title Editor Album, 249
Backgrounds section, 251
Buttons section, 254
Looks Browser, 249
Pictures section, 253
Classic Title Editor controls
Clipboard and delete buttons, 247
Mode selection buttons, 243
Object layout buttons, 245
Object toolbox, 240
Selection tool, 240
Text styling, 247
Title-type buttons, 239
Classic Title Editor objects, 240
Reordering layers, 241
Text, 242
Clip markers, 99
Adding, deleting, naming, 100
Controls, 101
Clip properties
Duration, 212
Name, 212
Clip properties tool, 99, 104, 107
For audio clips, 308
For disc menus, 230
For still images, 212
For transitions, 207
For video clips, 123
Trimming with, 122, 207
Clipboard
440 Pinnacle Studio
With Album and Movie Window,
110
Clips
Audio, 96
Changing name, 122
Combining, 126
Deleting, 93
Splitting, 93, 125
Theme, 141, 143, 145
Trimming on the Timeline, 117
Trimming tips, 121
Video, 96
Close-ups, 401
Color correction (video effect),
177
Color effects
White balance, 180
Color map (video effect), 178
Colors
Selecting, 196
Combine Clips menu command,
126
Compression
Audio, 368
Options (Import), 30
Video, 366
Configuration. See Options
Content
Importing, 15
Continuity (videography tip), 403
Controls
Clip marker, 91
Conventions, xiv
Copy and paste effects
Copy and paste, 156
Copyright protection in DVD, BD
import, 48
Counter, 10
Create between markers, 333
Cross fade
In audio, 204
Cut (transition), 201
Cuts
Associative, 405
Cause and effect, 406
Contrast, 405
Formal, 406
Parallel, 405
Substitutionary, 406
Tempo of (videography tip), 403
D
DeEsser (audio effect), 327
Delete clip button, 93
Deleting clips, 93
Deleting scenes, 93
Dialog boxes
Main Options, 351
Make Movie Options, 351
Options, 351
Digital photo cameras (Import), 49
DirectX, xii
Disc
Image on hard drive, 334
Previewing, 226
Saving movie to, 334
Disc chapter command, 226
Disc menu tool, 105, 235
Disc menus, 221
Automatic link creation, 225
Button captions, 225
Chapter editing, 234
Creating, 237
Described, 221
Editing, 237
Editing links, 230
Editing on Timeline, 228
Link numbers during editing, 231
Loop during playback, 222
Menus vs. titles, 224
Motion backgrounds, 252
Motion Thumbnails option, 233
Name and duration, 230
Obtaining, 84
Opening in Classic Title Editor,
230
Placing on Timeline, 225
Sample movie layout, 222
Section (of Album), 83, 224
Setting thumbnail, 233
Index 441
Supplied, 224
VCD, S-VCD limitations, 225
Discs
Authoring, 1, 60, 83, 209, 223,
254, 310
Dissolve (transition), 202
Drag-and-drop
Editing, 110
From Album, 110, 199
Setting menu links, 234
Dream glow (video effect), 169
Drop zones
Adding effects, 153
Aligning subclips, 152
Clearing, 152
Muting, 152
Durations (of transitions etc.), 353
DV, xiv
Outputting to, 347
DV/HDV camera (Import), 42
DVD
Image on hard drive, 334
Menus, 83, See Disc menus
Output movie to, 335
Playback controls, 6, 11, 223
Player control, 226
Previewing, 226
DVD (Import), 48
E
Earthquake (video effect), 175
Edit
Video clips, 109
Edit line
Clips inserted at, 110
Edit menu button, 105
Edit mode
Interface, 4
Introduced, 1
Edit Theme command, 142
Edit window (Motion Titler), 279
Editing, 400
A/B, 183
Advanced, 97, 181
Disc menus, 228
Insert, 128
Split, 130
Still images, 211
Editing photos and other images,
213
Editor, Menu and Title, 237
Editors, Menu and Title, 257
Effects
Audio. See Audio effects
Copy and paste, 156
Video. See Video effects
Emboss (video effect), 173
Equalizer (audio effect), 327
Equipment requirements, xii
F
Fade
Adjusting balance on Timeline,
314
Fade (transition), 202
Fades
Default duration of, 353
File
Saving movie to, 338
File name
Project, 91
File type
3GP, 340
AVI, 341
DivX, 342
Flash Video, 342
iPod compatible, 343
MOV, 343
MP2, 340
MP3, 340
MPEG, 344
Real Media, 345
Sony PSP compatible, 345
WAV, 340
Windows Media, 346
File types
AVI, 85
Image, 82
442 Pinnacle Studio
MP3, 85
Music, 85
Sound, 85
WAV, 84
Filename panel (Import Wizard),
32
Find Scene in Album command,
66
Find Scene in Project command,
66
Flags
Placing on menu track, 229
Folders
Album, 60
Favorite, 60, 67
Music, 86
Source, 62
Still images, 82
Titles, 82
Fonts, 248
Frame formats. See Aspect ratios
Frame grabber, 219
Tool, 105, 210
Tool, described, 219
Full-screen images
Described, 210
G
Glossary, 409
GOP
Closed, 412
Size, 416
Grab frames tool
Described, 219
Graphics
Editing, 213
Groups
Temporary, In Classic Title Editor,
246
Grungelizer (audio effect), 328
H
Hard drive
Preparing for capture, 377
HD, 416
HD DVD
Output movie to, 335
HDV, xiv, 417
HDV camera (Import), 42
Help button, 2
Highlighting
Of menu buttons, 255
Hollywood FX
And background rendering, 204
Editing, 203, 207
Previewing, 204
Transitions, 201, 203
I
Icons for effects
Audio, 323
Video, 116
IEEE 1394 (FireWire)
Devices (Import), 42
IEEE-1394, xv
Cable, 347
Images. See Still images
Import
All media, 35
Analog video and audio, 47
Audio and video levels, 21
BD (Blu-ray Disc), 48
Copyright protection (DVD, BD),
48
Digital cameras, 49
DVD, 48
From DV or HDV camera, 42
From IEEE 1394 (FireWire), 42
From local disk, 35
Manually-controlled recording, 45
Mark-In, Mark-Out, 44
Photos, 49
Record video/audio, 45
Record with Mark In/Out, 45
Single-frame, 21
Snapshot, 52
Source, 35
Stop-motion animation, 49
Index 443
Import From panel (Import
Wizard), 20
Import mode
Introduced, 1
Import To panel (Import Wizard),
23
Import Wizard
Compression options, 30
Filename panel, 32
Import From panel, 20
Import To panel, 23
Mode panel, 27
Options, 19
Overview, 18
Scene detection options, 31
Selecting media, 34
Importing
Overview, 17
Importing content from past
versions, 15
Insert edit
A/B, 183
Insert editing, 128
Audio, 130
Introduced, 128
Method, 128
Internet
Saving movie to, 349
Invert, 178
J
J-cut
A/B, 183
Defined, 130
Explained, 133
Jog buttons, 9
K
Ken Burns, 213
Keyboard conventions, xv
Keyframing (of video effects
parameters), 160, 163
Knowledge base, 382
L
Layers
In Classic Title Editor, 241
L-cut
A/B, 183
Defined, 130
Explained, 131
Lens flare (video effect), 176
Letterboxing, 113
Leveler (audio effect), 329
Levels, Audio and video
In analog import, 21
Lighting, 179
Links
Adjusting, 229
Automatic creation of, 225
Creating, 229
Deleting, 230
Editing, 230
In disc menu tool, 234
On disc menus, 221
Repositioning, 230
Return to menu, 229
Setting with drag-and-drop, 234
Show numbers while editing, 231
Local disk (Import), 35
Locked content
Activating, 12
Locking tracks, 98
Indication of, 127
Long shots (videography tip), 401
Luma key (video effect), 175
M
Magnify (video effect), 176
Make Movie
Partial, 333
Make Movie mode, 331
Introduced, 2
Making movies, 331
Markers. See Clip markers
Create between markers, 333
Mark-In, Mark-Out
444 Pinnacle Studio
Recording, 45
Mark-In, Mark-Out (Import), 44
Media
Selecting for import, 34
Media Player, 346
Memory card, importing from. See
File-based media
Menu and Title Editor, 237
Menu and Title Editors, 257
Menu buttons
Highlighting, 255
Menu commands, xv
Menu Editor. See Title Editor
Menu links. See Links
Menu track, 228
Editing, 229
Flags, 228
Menus, Disc. See Disc menus
Microphone
Connecting, 307
MMC. See File-based media
Mode panel (Import Wizard), 27
Modes
Edit, 4
Introduced, 1
Make Movie, 331
Setting, 2
Monitors
Dual, 355
Montage. See Themes
Motion blur (video effect), 176
Motion Titler
Background panel, 277
Closing, 260
Create and editing titles, 275
Edit window, 279
File operations, 261
Launching, 259
Layer groups, 293
Layer List, 286
Multiple selection, 293
Multiple selection in, 294
Text operations, 282
Motion Titler Album, 262
Adding resources to title, 263
Looks section, 267
Motions section, 272
Objects section, 266
Photos section, 265
Videos section, 264
Movie
Previewing, 5
Movie Window, 91
Clipboard operations, 110
Drag-and-drop editing, 110
Find scene in Album, 66, 116
Interface features, 115
Positioning, 94
Status message area, 91
Trimming on the Timeline, 117
Views, 95
MP2 files, 340
MP3 files, 85, 340
MPEG
Rendering for output, 333
Multiple capture files
Using, 111
Multiple selection
In Classic Title Editor, 246
In Motion Titler, 294
Multiple selection (in Motion
Titler), 293
Multitrack editing, 181
With themes, 139
Music, 297, See Background
music
Folder, 86
Section (of Album), 85
Selecting (videography tip), 407
Music video. See SmartMovie
Muting audio tracks, 98
N
Names
In Text and Storyboard view, 122
Of clips - changing, 122
Network. See File-based media
Network, importing from. See
File-based media
Index 445
Noise reduction (audio effect), 324
Noise reduction (video effect), 170
O
Objects
In Classic Title Editor, 240
Objects section (of Motion Titler
Album), 266
Obtaining
Disc menus, 84
Sound effects, 85
Themes, 80
Transitions, 79
Old film (video effect), 173
Optical disc. See Disc
Image on hard drive, 334
Optical disc summary, 338
Options, 351
Audio for file output, 368
Compression (Import), 30
Data rate and quality, 367
Frame rate, 367
Import, 19
Include audio, 368
Include video, 366
List all codecs, 366
Main dialog, 351
Make audio file, 365
Make AVI file, 365
Make Disc, 360
Make Movie, 351
Make MPEG file, 365
Make Real Media file, 369
Make tape, 374
Make Windows Media file, 372
Organization of, 351
Output to VGA display, 376
Project preferences, 352
Scene detection, 31
Setting, 3
Video and audio preferences, 355
Video compression, 366
Video for file output, 366
Video preview, 355
Original audio
Properties, 309
Synchronized with video, 126
Original sounds
Preserving (videography tip), 407
Output
Audio only, 340
Browser, 331
Media type, 331
To 3GP file, 340
To AVI file, 341
To DivX file, 342
To file, 338
To Flash Video file, 342
To iPod compatible file, 343
To MOV file, 343
To MPEG file, 344
To optical disc, 334
To Real Media file, 345
To Sony PSP compatible file, 345
To Tape, 346
To videotape, 348
To Windows Media, 346
To world-wide web, 349
Overlay effects, 181
Overlay images
Described, 210
Overlay track, 181
Always show option, 182
Audio, 300
Audio, original, 182
Displaying, hiding, 182
Introduced, 181
Opening, 181
Overlays track
And still images, 209
P
Pan and scan, 113
Pan and zoom
Video effect, 218
Pan-and-zoom
Animated, 215
Complex animations, 216
Photos, 214
Tool, 213
446 Pinnacle Studio
Parameters for effects
Resetting, 160
Parameters for plug-in effects
Presets, 159
Parameters for video effects
Editing, 158
Passport, 13
Perspectives
Varying, 400
Photo cameras. See Cameras,
digital
Photos
Editing, 213
Panning and zooming, 214
Red-eye reduction, 214
Rotating, 214
Photos section (of Motion Titler
Album), 265
Photos, digital (Import), 49
Picture-in-picture
Tool, 184
Video effect, 188
Playback controls, 5
DVD, 6, 11, 223
Fast forward/reverse, 9
Go to beginning, 9
Jog buttons, 9
Loop, 9
Play/Pause, 9
Standard, 5, 9
Playback speed
Changing, 171
Player
During Timeline trimming, 117
Introduced, 5
Previewing transitions, 79, 204
Scrubber, 9
Player control
DVD, 226
Plug-in effects
Unlocking, 157, 168
Posterize (video effect), 179
Premium button, 2
Premium content and features, 14
Presets for effects, 159
Preview window, 5, 120
Preview Window, 7
Previewing
Discs, 226
Hollywood FX, 204
Menus, 6
Transitions, 79, 204
Video effects, 166
Problems and solutions, 381
Product names, xiv
Progressive encoding (advanced
output setting), 361
Project. See Movie
Project Bin
Adding media, 88
Button, 91
Removing media, 89
Using, 86
Project preferences (options
panel), 352
Project video format, 112
Push (transition), 202
R
Razorblade button, 93
Real Media
Files, 345
RealNetworks® RealPlayer®, 345
RealNetworks® RealPlayer®
Viewing files with, 340
Record video/audio (Import), 45
Recording voice-overs, 305
Quality, 307
Recording, manually-controlled
(Import), 45
Red-eye reduction
Explained, 214
Removing, 215
Redo button, 2
Removing media from the Bin, 89
Rendering, 333
Reordering objects
In three dimensions, 241
Index 447
Requirements, equipment, xii
Return to menu link, 229
Reverb (audio effect), 329
RGB color balance (video effect),
179
Ripple transition, 205, 211, 224
Rotate (video effect), 170
S
Save to disc, 334
Save to file, 338
3GP, 340
Audio only, 340
AVI, 341
DixX, 342
Flash Video, 342
iPod compatible, 343
MOV, 343
MPEG, 344
Real Media, 345
Sony PSP compatible, 345
Soundtrack, 340
Windows Media, 346
Save to tape, 346
Save to world-wide web, 349
Scanning, progressive vs.
interlaced, 361
Scene detection, 31, 69
Menu commands, 78
Scenes. See Video scenes
Scenes (videography tip), 404
ScoreFitter
Clip properties, 310
Duration of clips, 308
Scrubber, 9
Scrubbing audio, 92
SCSI, xiii
SD card, importing from. See File-
based media
Selecting media for import, 34
Sepia (video effect), 180
Set Thumbnail menu command, 69
Settings. See Options
Setup menu, 3
Setup options, 351
Slide (transition), 202
Slideshow, 205, 211, 224
Slow motion, 171
Snapshot, 21
Snapshot (Import), 52
Soften (video effect), 174
Sound effects, 96, 297
Obtaining, 85
Properties, 309
Section (of Album), 84
Sound files, 85
Source (for Import), 35
Speed (video effect), 171
Split Clip menu command, 125
Split clip/scene button, 93, 125
In insert editing, 128
Split edit
A/B, 183
Split editing
Introduced, 130
Splitting clips, 125
Restoring from, 125
Stabilize (video effect), 171
Stained glass (video effect), 174
Stereo
Adjusting balance on Timeline,
314
Stereo Echo (audio effect), 330
Stereo Spread (audio effect), 330
Still cameras. See Cameras, digital
Still images
Creating, 210
Default duration of, 353
Described, 209
Editing, 213
Folder, 82
Full-screen, 210
Full-screen vs. overlay, 209
Overlay, 210
Section (of Album), 82
Trimming, 212
Trimming and editing, 211
Types, 209
448 Pinnacle Studio
Still Images
Rotating, 214
Stop motion, 21
Stop-motion animation, 49
Storyboard view, 95
Studio Import Wizard, 18
Studio Ultimate
Audio effects, 324, 326
Keyframing, 160, 163
Video effects, 172
Subclips
Adding effects, 153
Aligning to drop zone, 152
Exporting to Movie Window, 152
Muting, 152
Support button, 2
Surround sound, 316
S-VCD
Menus, 83, See Disc menus
Output movie to, 334
Synchronization (of video and
audio)
Overriding, 126
T
Tape
Saving movie to, 346
Technical support, 382
Templates. See Themes
Text editing
Advanced, 243
Text view, 95, 102, 122
Theme clips
Creating, 143
Insert vs. replace, 144
Track selection, 143
Transitions and effects, 147
Trimming and editing, 145
Theme Editor
Mini-Album, 142
Theme Editor tool, 105, 150
Themes
Adding to movie, 141
Anatomy, 147
Backgrounds, 142
Clips. See Theme clips
Customizing, 140
Drop zones, 152
Introduced, 139
Obtaining, 80
Section (of Album), 80, 141, 143
Subclips, 152
Templates, 139, 141, 143, 147,
151
Thumbnail frames
In Album, 69
Setting in disc menus, 233
With moving video, in menus, 233
Timeline
Adjusting volume on, 313
Audio tracks, 300
Editing disc menus on, 228
Locking tracks, 126
Overlay video, 181
Placing disc menus on, 225
Tracks, 96
Trimming clips on, 117
Timeline view, 95, 96
Advanced editing in, 126
Insert editing, 128
Splitting clips in, 125
Timescale, 96
Title
Choosing (videography tip), 407
Colors (videography tip), 408
Title Editor, Classic. See Classic
Title Editor
Title Editor, Motion. See Motion
Titler
Title editors
Introduced, 103
Title track
Locking, 127
Titles
Classic, 237
Crawls, 239
Creating, 237, 257
Editing, 237, 257
Folder, 82
Motion, 257
Index 449
Rolls, 239
Section (of Album), 81
Titles and overlays track
And still images, 209
Titles tool, 105
Toolbox, 91
Audio, 107
Video, 104
Toolboxes, 102
Tools
Audio effects, 108, 323
Automatic background music, 107
Background music, 303
CD audio, 107, 302
Chroma key, 190
Clip properties, 99, 104, 107, 122,
230, 308
Disc menu, 105, 235
Frame grabber, 105
Pan-and-zoom, 213
Picture-in-picture, 184
PIP and chroma key, 106
SmartMovie, 105, 134
Theme Editor, 105, 142, 150, 151
Titles, 105
Video effects, 106, 155
Voice-overs, 107, 305
Volume and balance, 107, 310,
316
Track lock buttons, 126
Tracks
Audio, 300, 301
Background music, 300
Indication when locked, 127
Locking, 98
Menu, 228
Muting and hiding, 98
Original audio, 300
Overlay, 181
Sound effect and voice-over, 300
Title, 127
Video, 97, 126
Video linked to audio, 128
Transitions
Adding to movie, 199
Alpha Magic, 201
Criteria for selecting, 201
Cut, 201
Default duration of, 353
Described, 199
Displaying type, 79
Dissolve, 202
Effect on clip duration, 200
Fade, 202
Groups, 78
Hollywood FX, 201, 203
In audio, 204
Looping in preview, 208
Naming, 207
Obtaining, 79
On audio tracks, 315
On theme clips, 147
On Timeline, 199
Previewing, 79, 204, 208
Reversing direction, 207
Ripple transition, 205, 211, 224
Section (of Album), 78
Setting duration of, 207
Standard (2D), 201
Three-dimensional, 203
Trimming, 206
Types of, 201
Videography tip, 401
Wipe, slide, push, 202
Trashcan button, 93
Trim scrubber, 99
Trimming
Audio clips, 308
Described, 117
Introduced, 109
On the Timeline, 117
Still images, 211, 212
Tips, 121
Transitions, 206
Undoing, 124
Video clips, 117
With Ctrl key, 120
Troubleshooting, 381
TV set
Simultaneous output to, 347
450 Pinnacle Studio
U
UDMA, xiii
Ultimate audio effects pack, 326
Ultimate RTFX video effects pack,
172
Undo button, 2
Unlocking
Plug-in effects, 157, 168
Premium content, 12
USB stick, importing from. See
File-based media
Use keyframes (checkbox), 163
V
VCD
Menus, 83, See Disc menus
Output movie to, 334
VGA
Output movie to, 376
Video
Album interface features, 65
Analog import options, 21
Aspect ratios. See Aspect ratios
Capture. See Capture
Folders, 67
Frame format. See Aspect ratios
Hiding, 98
Opening file, 67
Output hardware, xiii
Settings (for File output), 366
Video and audio preferences
(options panel), 355
Video clips, 96
Applying effects to, 155
Changing name, 122
Changing playback speed, 171
Combining, 126
Editing, 109
Finding Album scene, 116
Interface features, 115
Properties tool, 123
Shortened by transition, 200
Splitting, 125
Synchronization with audio, 126
Trimming, 117
Trimming on the Timeline, 117
Trimming tips, 121
Undoing trim, 124
Using audio portion only, 111
Video compression, 366
Video effects, 155
2D editor, 175
Adding, 167
Adding and deleting, 157
Applied to theme clips, 147
Auto color correction, 169
Basic, 166
Black and white, 177
Blur, 173
Changing parameters, 158
Chroma key, 193
Cleaning effects, 168
Color correction, 177
Color map, 178
Copy and paste, 156
Dream glow, 169
Earthquake, 175
Emboss, 173
Icons, 116
Invert, 178
Keyframing, 160, 163
Lens flare, 176
Lighting, 179
Luma key, 175
Magnify, 176
Motion blur, 176
Noise reduction, 170
Old film, 173
Pan and zoom, 218
Picture-in-picture, 188
Posterize, 179
Presets, 159
Previewing and rendering, 166
RGB color balance, 179
Rotate, 170
Sepia, 180
Soften, 174
Speed, 171
Stabilize, 171
Stained glass, 174
Index 451
Standard, 168
The effects list, 156
Tool, 155
Ultimate RTFX, 172
Unlocking, 157
Water drop, 177
Water wave, 177
Video formats, 112
Video levels
In analog import, 21
Video monitor
Simultaneous output to, 347
Video preview
External, 355
Full-screen, 355
Options, 355
Video scene catalog, 223
Video scenes
Adding to movie, 109, 110
Combining and subdividing, 75
Comments, 74
Displaying length of, 73
Finding in Album, 66
In-use indicator, 65, 115
Neighboring, 116
Order of, 63
Redetecting, 77
Selecting, 72
Splitting, 93
Thumbnail frames, 69
Viewing, 71
Video toolbox, 104
Video track, 97, 111, 126
And still images, 209
Linked to audio track, 128
Videography, 399
Videos
Section (of Album), 63
Videos section
Views, 74
Videos section (of Motion Titler
Album), 264
Videotape
Output to, 348
Views, Movie Window
Storyboard, 95
Text, 95, 102
Timeline, 95, 96
Voice-over tool, 305
Voice-overs, 96
Properties, 309
Recording, 305
Recording quality options, 307
Volume, 306
Voice-overs tool, 107
Volume
Adjusting on Timeline, 313
Fades, Default duration of, 353
Mixing, 310, 316
Voice-over levels, 306
Volume and balance tool, 107,
310, 316
W
Water drop (video effect), 177
Water wave (video effect), 177
WAV files, 84, 340
Web
Saving movie to, 349
White balance, 180
Windows Media
Files, 346
Player, 346
Windows Media Player
Viewing files with, 340
Wipe (transition), 202
Wizard
Import, 18
Y
Yahoo! Video, 349
YouTube, 349