reMarkable AS RM102 reMarkable paper tablet User Manual
reMarkable AS reMarkable paper tablet
User manual
1
User guide
User guide 1
0.1 Introducing reMarkable 3
0.2 Technical specifications 3
0.3 reMarkable accessories 6
1.1 Setting up your reMarkable 10
1.2 Charging your device 23
1.3 Updating to the latest version 23
1.4 Getting started with reMarkable (guide) 25
2 Basics 28
2.1 Notebooks 28
2.2 Documents 29
2.3 Ebooks 30
2.4 Folders 30
3 Navigating on the reMarkable 31
3.1 My Files 31
3.2 Filter by - Notebooks, Documents or Ebooks 32
3.3 Bookmarks 33
3.4 Notification Center 33
3.5 Settings 34
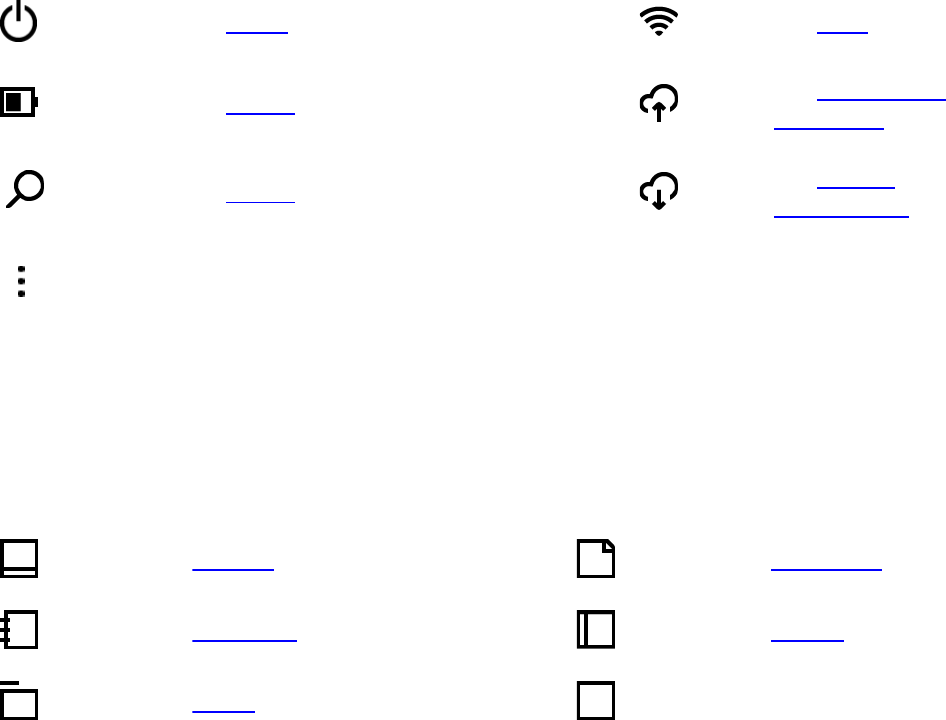
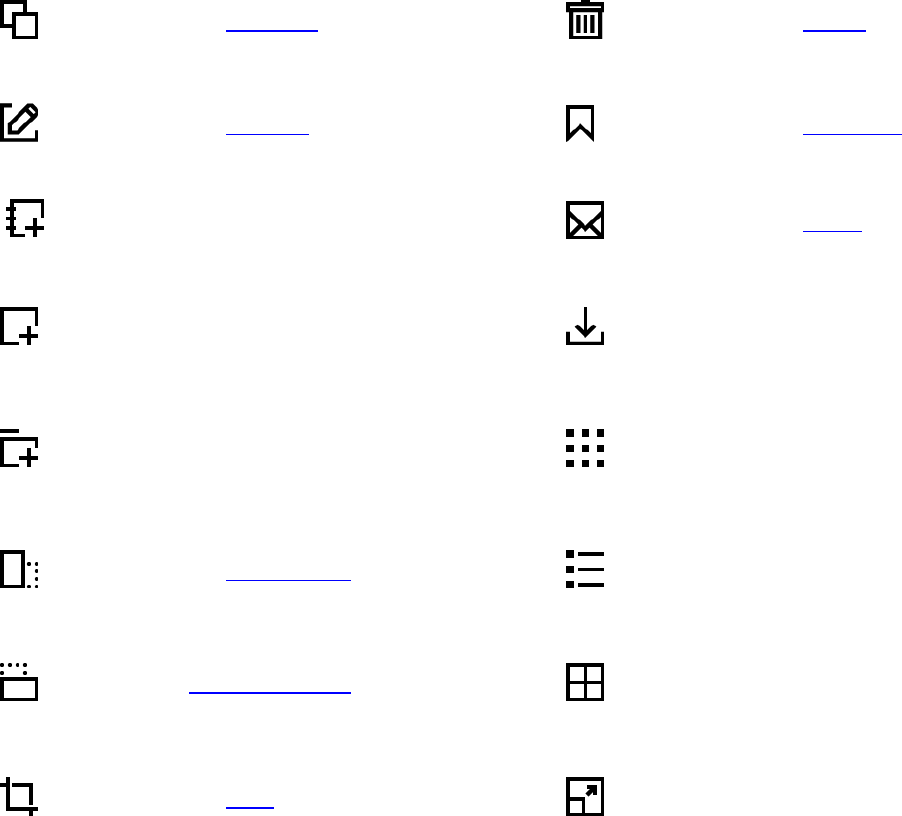
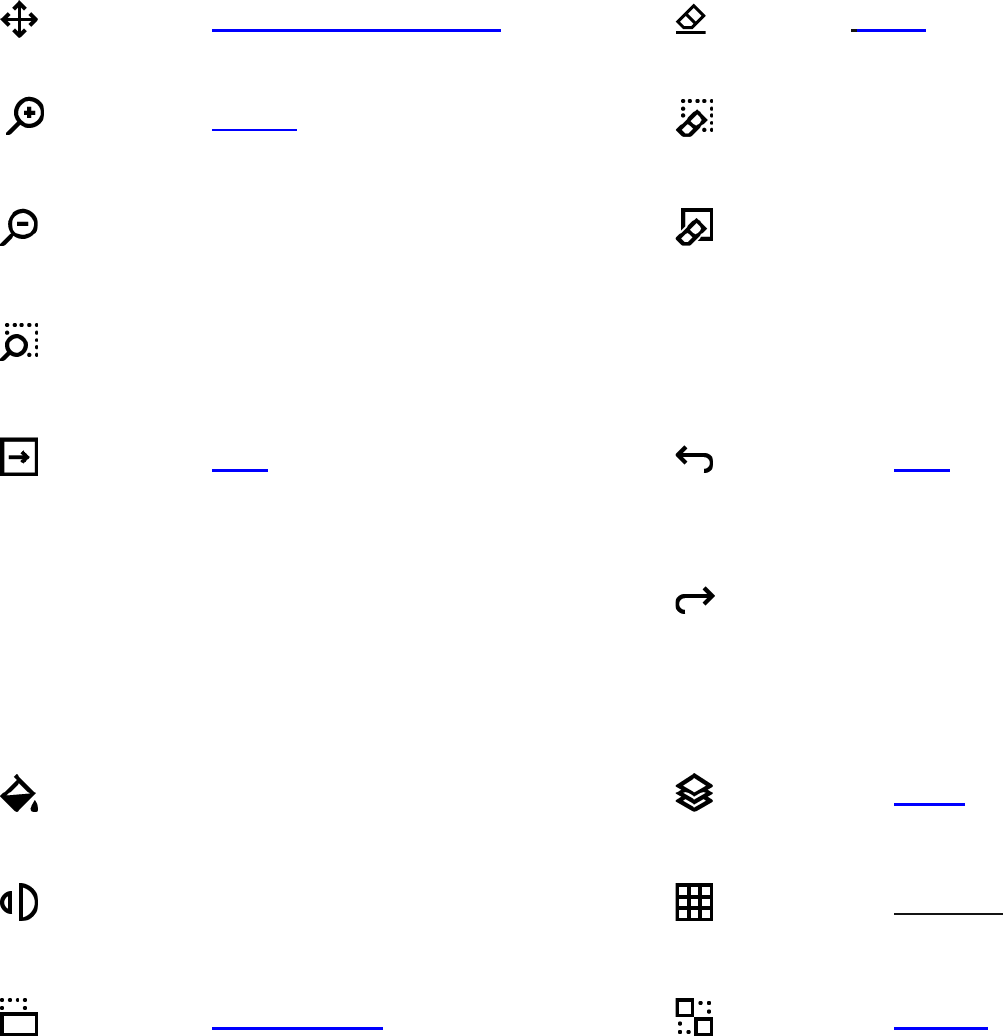
3.6 Icons 36
3.7 Search 38
4 Organizing your files 39
4.1 Import files to reMarkable 39
4.2 Bookmark 41
4.3 Rename 42
4.4 Move 42
4.5 Duplicate 45
4.6 Share 46
4.7 Delete 47
5 Tools 47
5.1 Tools Overview 47
5.2 Hide/Show Toolbar 49
2
5.3 Portrait/Landscape 49
5.4 LiveView 50
5.5 Pen 51
5.6 Pencil 52
5.7 Brush 53
5.8 Highlighter 54
5.9 Eraser 54
5.10 Rotate, Move, Scale & Copy 55
5.11 Undo and Redo 56
5.12 Zoom 56
5.13 Layers 57
5.14 Minimize/Maximize the toolbar 57
5.15 Templates 58
5.16 Adjust view 60
5.17 Text Settings 61
5.18 Handwriting conversion 62
6 Settings 67
6.1 Device settings 67
6.2 Account settings 68
6.3 Wi-Fi settings 70
6.4 Power settings 71
6.5 Storage settings 72
6.6 Security settings 72
6.7 Keyboard settings 73
6.8 Accessibility 73
6.9 About 73
7 Connectivity & Apps 74
7.1 The reMarkable cloud 74
7.2 Desktop app 75
7.3 Mobile app 77
7.4 Transfer files with a USB cable to reMarkable 79
8 Safety, Handling & Support 81
8.1 Important safety & handling information 81
8.2 FCC Compliance statement 84
8.3 IC Statement 85
8.4 Disposal and recycling information 87

3
0.1 Introducing reMarkable
0.2 Technical specifications
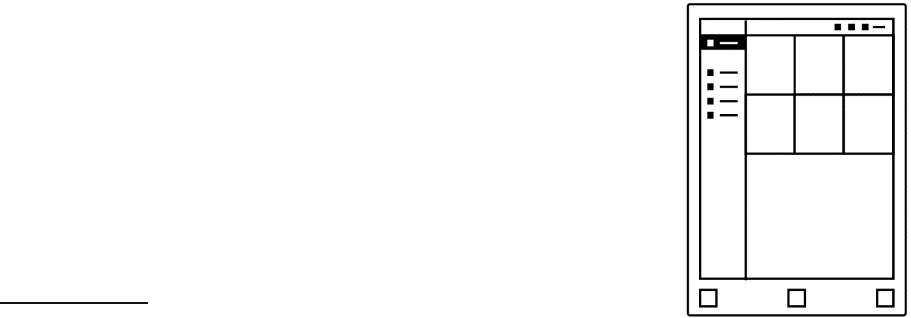
reMarkable overview
Size and weight:
• 177 x 256 x 6.7mm (6.9 x 10.1 x .26 inches)
• 350 gram (.77 pounds)
CANVAS Display
• 10.3” monochrome digital paper display (black and white)
• 1872x1404 resolution (226 DPI)
• Partially powered by E Ink Carta technology
• Multi-point capacitive touch
• No glass parts, virtually unbreakable
• Paper-like surface friction
• Palm rejection
Warning: Do not let the display come in contact with alcohol or any solvent
containing alcohol as this may damage the device. Learn how to clean your device in
8.1 Important safety & handling information.
Storage and RAM
• 8 GB internal storage*
• 512 MB DDR3L RAM
*The OS uses some space, so free available space is about 6.5 GB. This is enough
for 100 000 pages.
Processor
1 GHz ARM A9 CPU
Battery
4
• Rechargeable (Micro USB)
• 3000 mAh
Warning: The battery in this product cannot be easily replaced by users themselves.
Operating system
Codex, a custom Linux-based OS optimized for low-latency e-paper.
Physical buttons
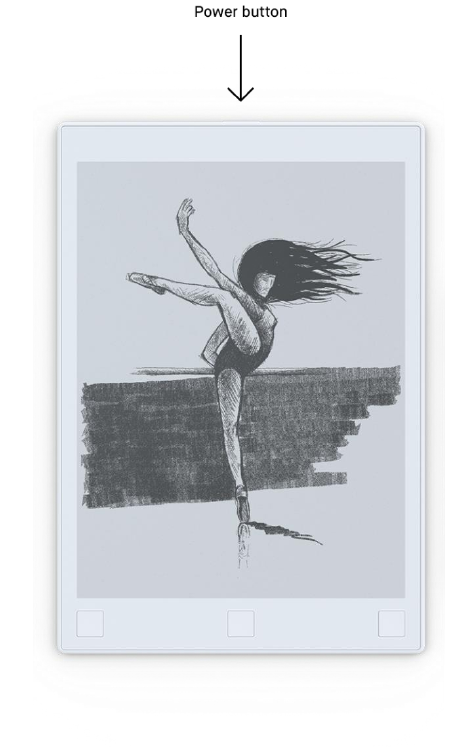
Power button
Use the power button to turn on or wake up the device, put your reMarkable to sleep
or turn it off.
How to:
5
• Put the device to sleep by pressing the power button once. The sleep sign will appear
on the screen.
• Wake the device by pressing the power button once.
• Turn off reMarkable by pressing the power button for 3 seconds. You will then be asked
whether you want to turn off the device or not.
• Turn on reMarkable by pressing the power button until the screen flashes from black to
white.
Read more about Sleep and other power saving modes in Power Settings.
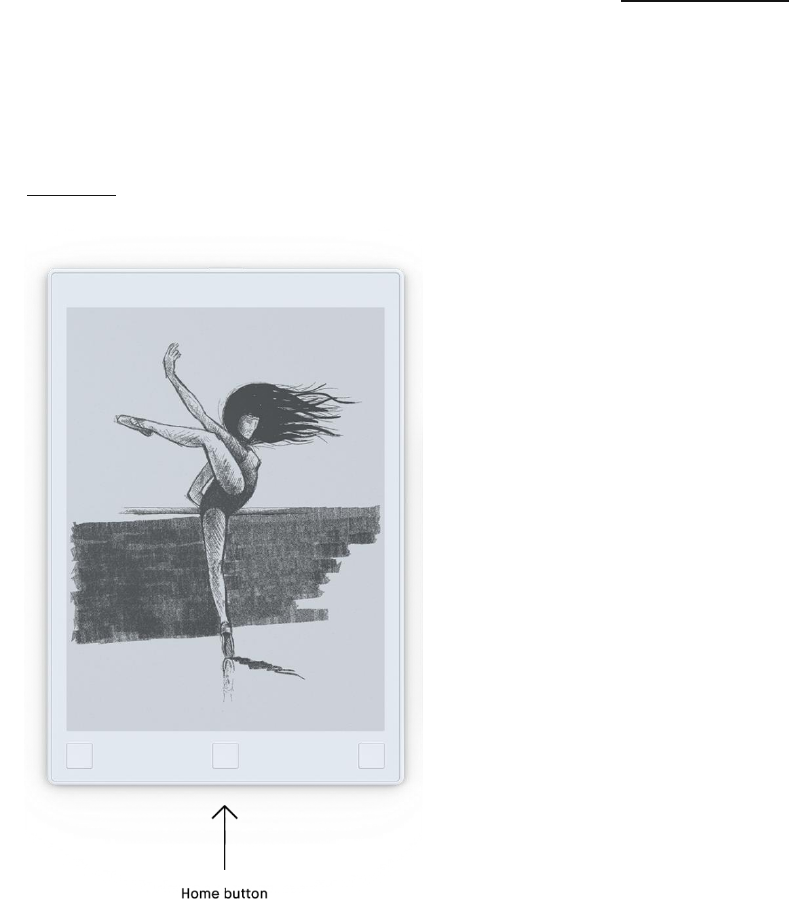
Home button
Use the home button to move up one level. Press the button multiple times to end up
at My Files.
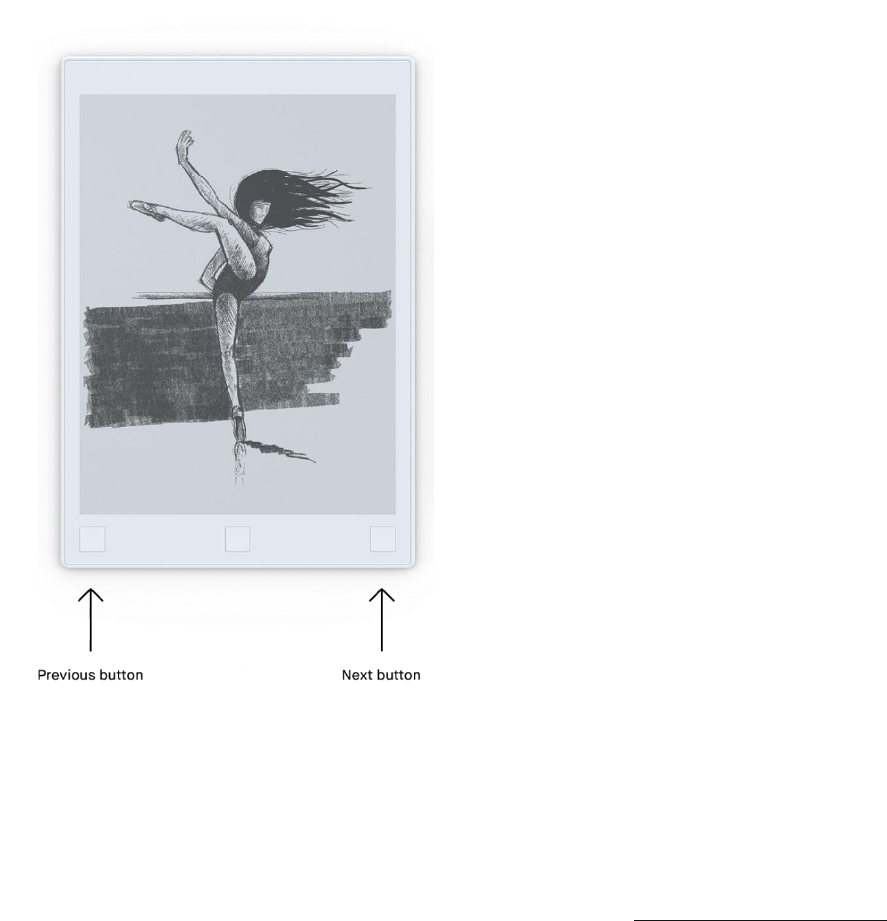
Prev and next buttons
The prev and next buttons allows you to flick pages while reading through your
documents, ebooks or notebooks.
• Page forward press the right corner button.
6
• Page backward press the left corner button.
• Create a new page in a notebook by pressing the next button. Note that you must have
written or sketched on a page before you are able to create a new page.
Micro USB charging port
Use the charging port and the attached Micro USB cable to charge your reMarkable.
0.3 reMarkable accessories
Marker
The high friction marker lets you draw and write with a paper-like feeling.

7
No charging or pairing
The marker can be used instantly, without any need for setup. It is powered by
electromagnetic induction, which means that it does not require charging or
Bluetooth pairing to function.
Pressure sensitivity
The marker is pressure sensitive (2,048 levels to be exact) which allows you to draw
thicker and thinner lines just by adjusting your pressure on the marker.
Tilt
The marker reacts to 512 levels of tilt, which lets you draw and write with a paper-like
feeling. By tilting the marker you can add shading and vary the thickness of your
stroke. The tilt is only available for certain sketching tools. Read more about it here.
Rest your hand on the display
The reMarkable display has palm rejection technology which enables you to draw,
write and navigate while resting your palm on the display.
Marker tips
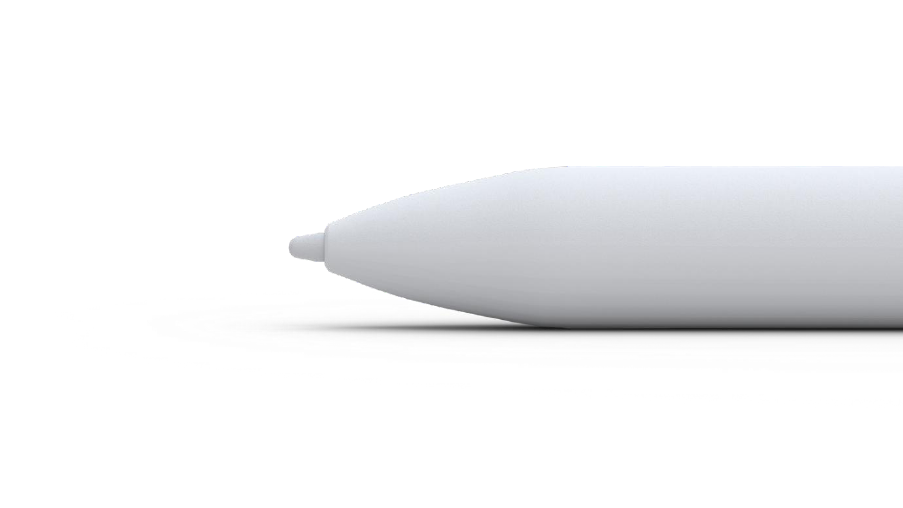
The marker tips are carefully designed to deliver a paper-like feeling. reMarkable
comes with 10 marker tips and a marker tip removal tool. While one is already
supplied at the tip of the pen, an extra marker tip is hidden in the top of the Marker.
Slide the top part upwards to find the tip.
8
How to change the marker tip:
• The marker tip is changed by using the marker tip removal tool.
• Insert the marker into the marker tip removal tool, and press the tool slightly together.
• Pull the tip slowly out of the marker. Gently insert a new tip.
Durability
The durability of the marker tips will vary with writing technique and amount of
usage. Our best estimate for an average user is anywhere between three to seven
weeks, hence, the 10 pen tips are likely to last between six months and upwards to
15 months depending on usage.
You can purchase additional marker tips in the reMarkable Store.
Folio
9
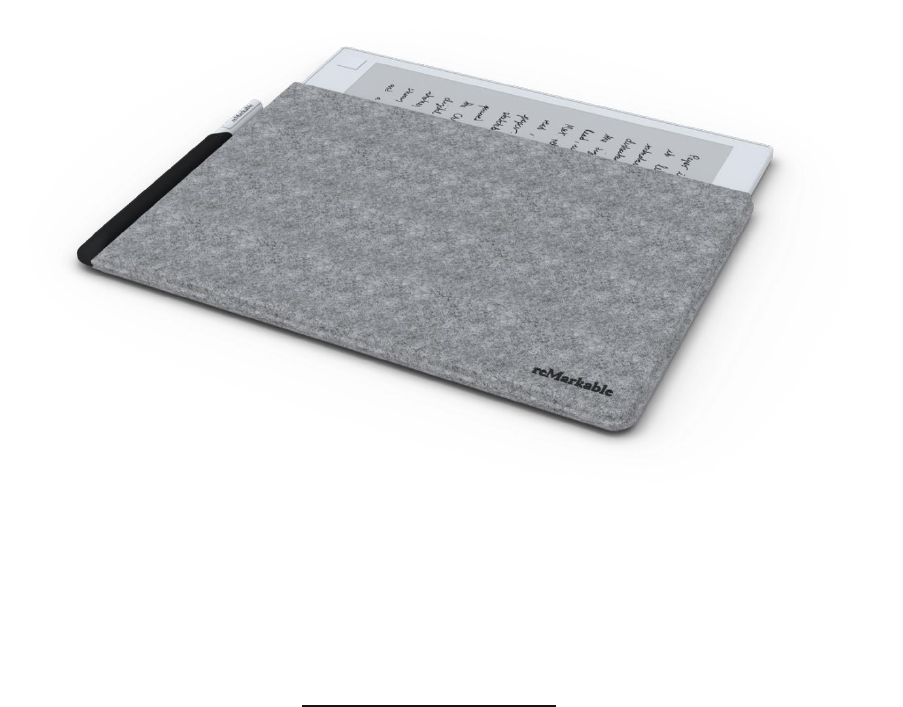
The folio is made from sturdy and durable wool felt and leather, and protects your
reMarkable from scratches. The marker can be kept safely inside the folio. The folio
can be purchased in the reMarkable Store.
Micro USB cable
Use the micro USB cable to charge your reMarkable. By plugging it into the micro
USB charging port. You will need a USB power plug to connect with the cable (not
included with the reMarkable).

10
1.1 Setting up your reMarkable
Warning
To avoid damage or injuries read important safety and handling information before
using your reMarkable.
What you need to get started
• A reMarkable device.
• Micro USB cable + USB power plug.
• A mobile or desktop device.
• Access to a wireless network.
Setup
Turn on your reMarkable and follow the setup assistant on the device. The setup
consists of a few simple steps that will get your reMarkable ready to go. The device
arrives partially charged and does not need to be charged before the setup.
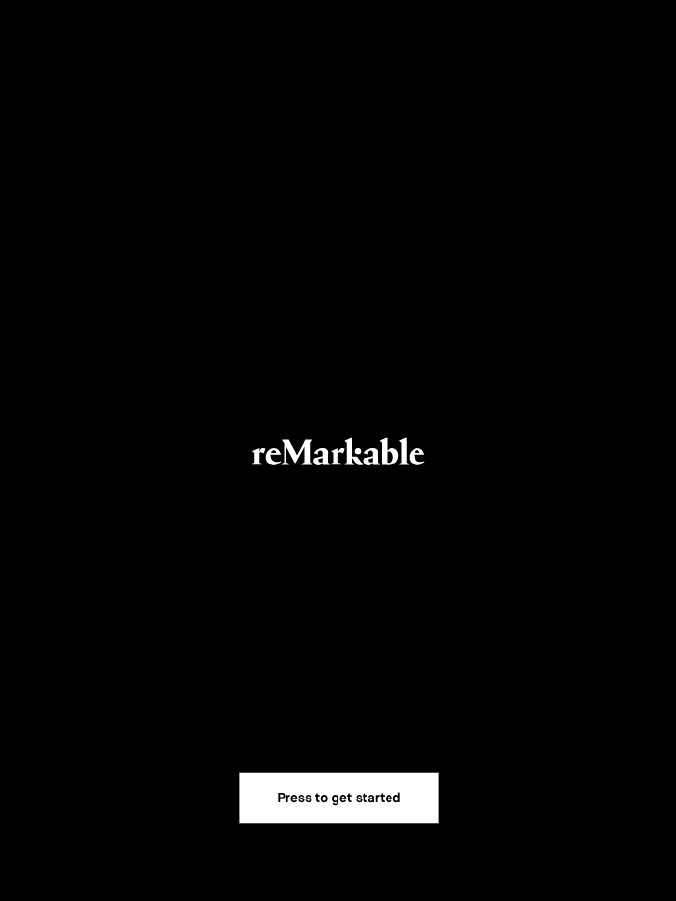
1. Tap Press to get started.
11
Welcome! This is your startup screen.
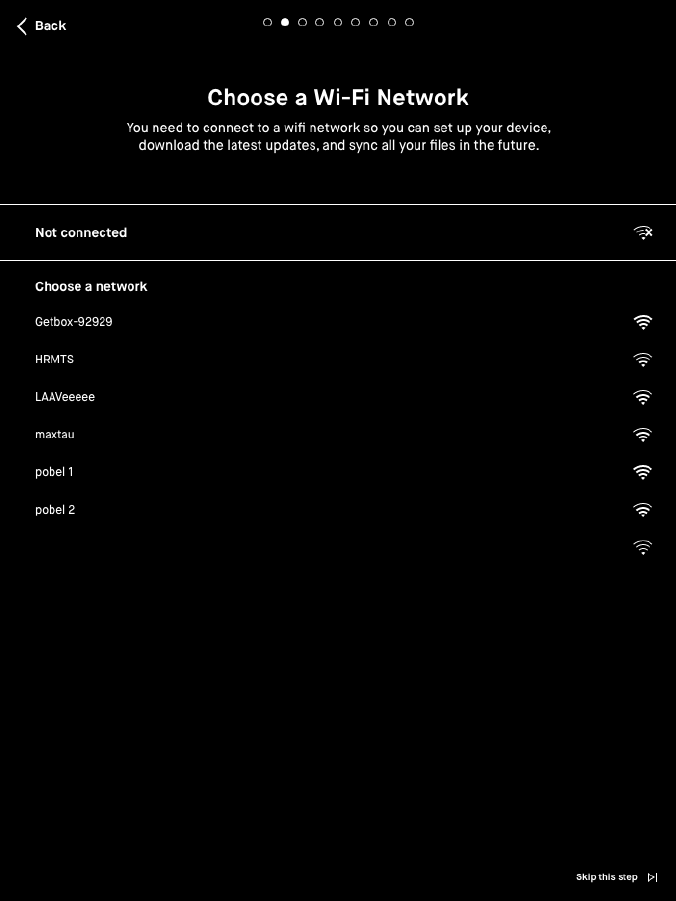
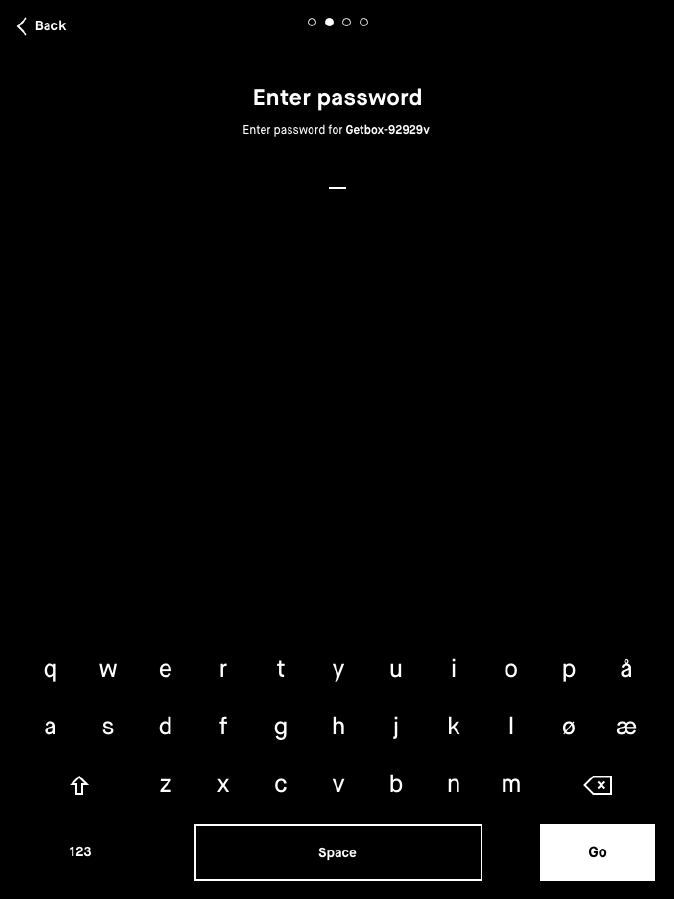
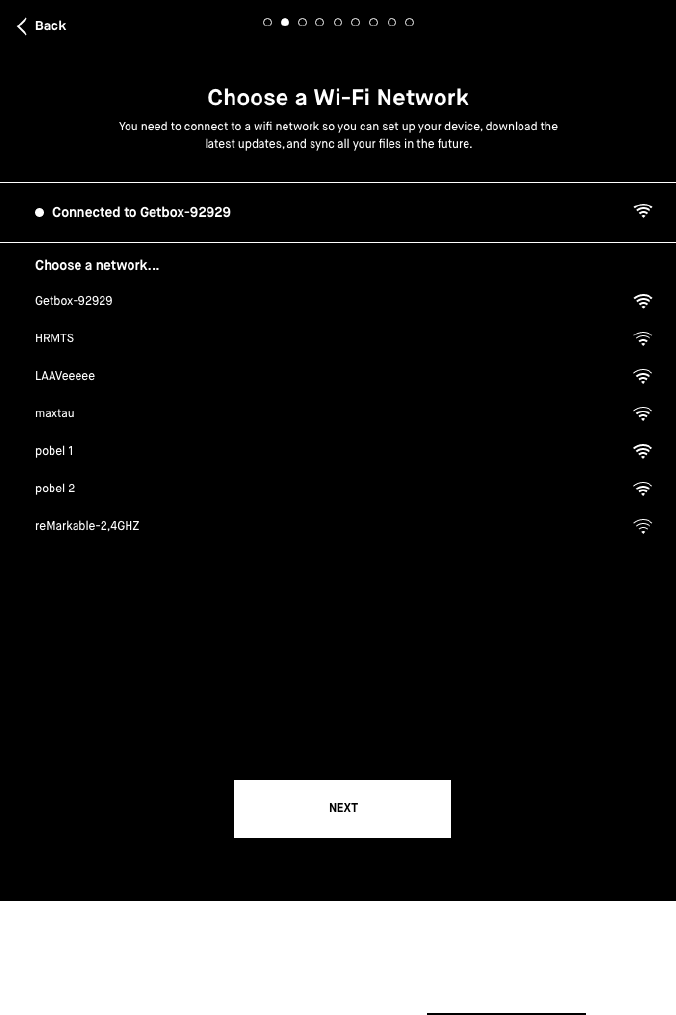
2. Connect to Wi-Fi by choosing an available Wi-Fi network. If necessary, enter a Wi-Fi
password. You are connected when there is a white dot next to the selected Wi-Fi
network. Once connected to Wi-Fi, tap next.
12
Choose your network
13
Type password
14
Success!
Note: You can choose to skip this step and connect to Wi-Fi from Settings later. This is
not recommended, as your device will not be connected to the reMarkable cloud and your
files will not be synced. Wi-Fi is also necessary to get the latest updates for your device.
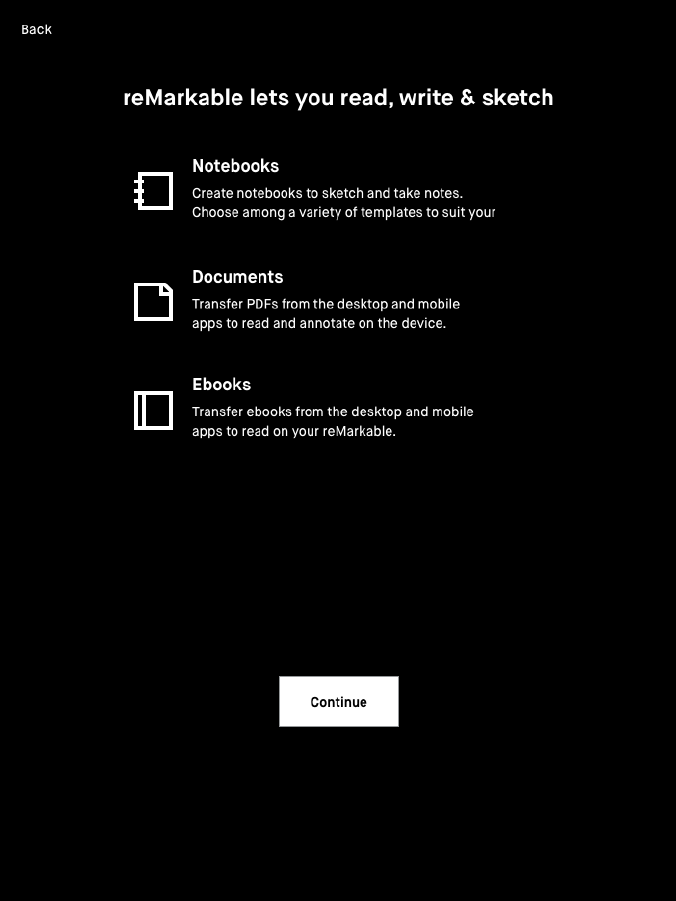
15
After you have connected to WiFi you will be taken to this screen. Tap to continue
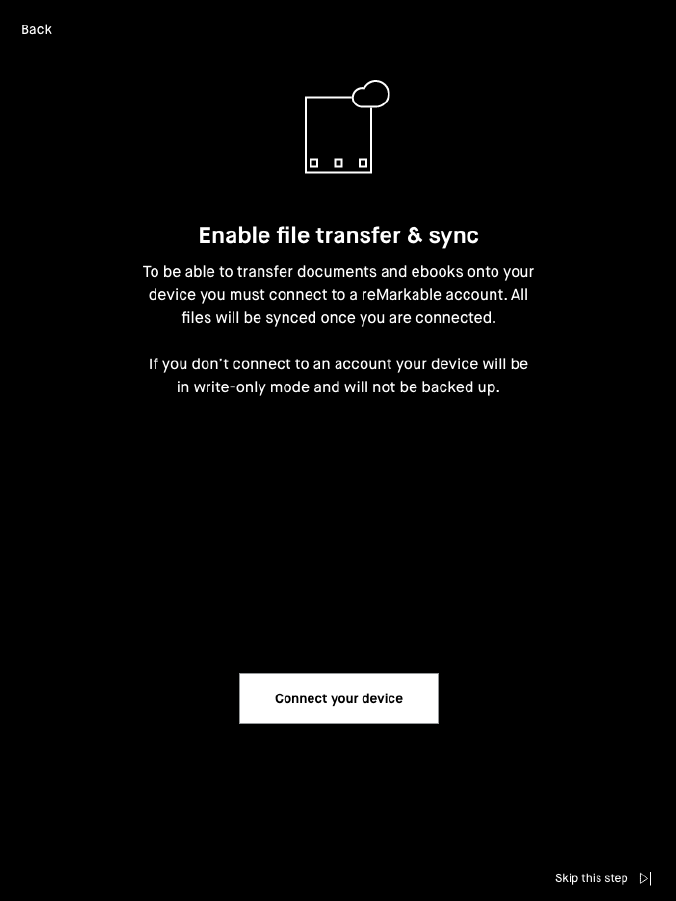
3. Connect your devices to the reMarkable cloud to be able to access documents and
ebooks on your reMarkable. The reMarkable cloud allows you to access your files in the
mobile and desktop applications.
16
Tap the button to connect your device to the cloud.
17
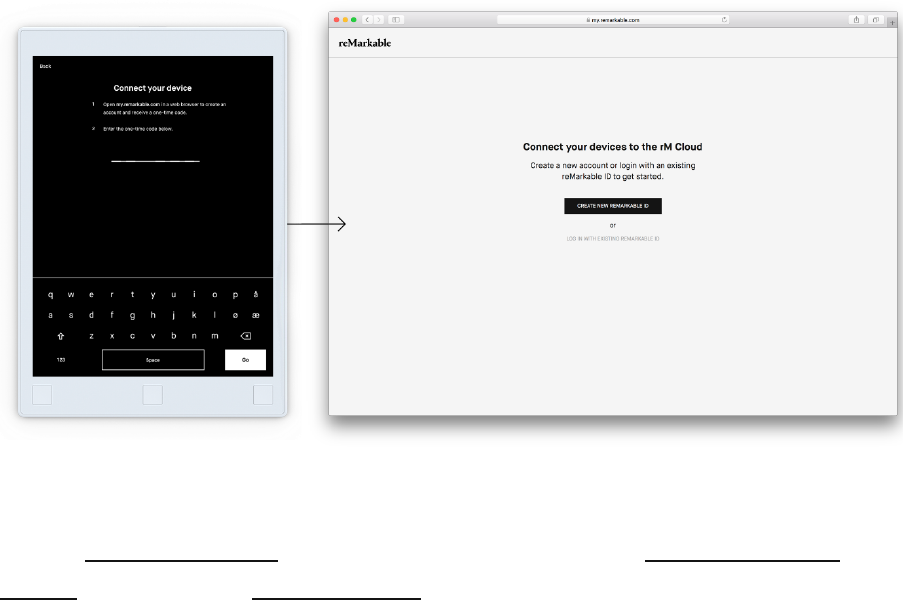
Go to my.remarkable.com on a mobile or desktop device
4. Log into my.remarkable.com from a mobile or desktop device and create a reMarkable
account to connect to the reMarkable cloud. Once logged in, tap Get code for your
reMarkable device. Note that the one-time code is only valid for five minutes.
Note: If you choose to sign up with your email address, you have to confirm your email
address before you can proceed.
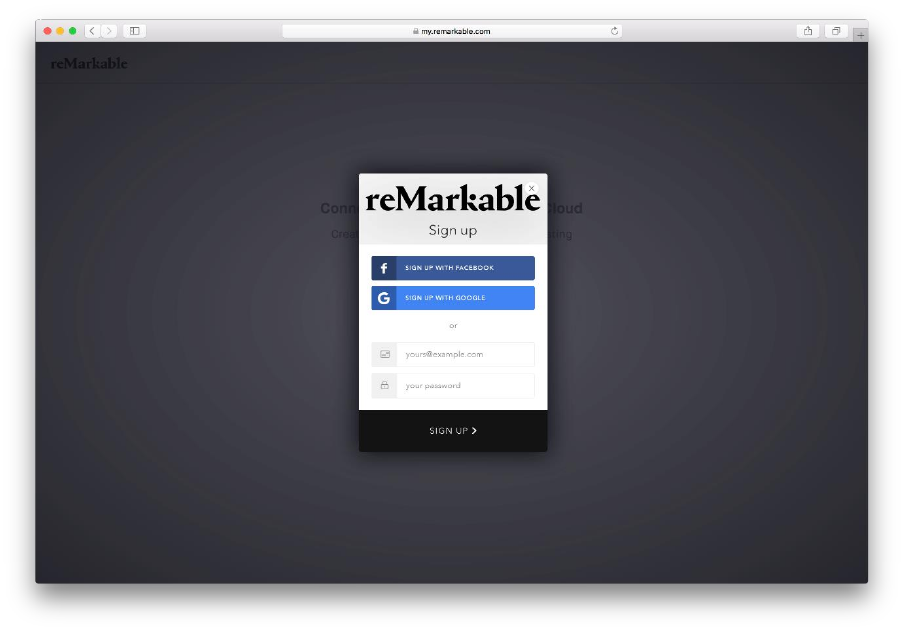
18
Sign up with Facebook, Google or your email address
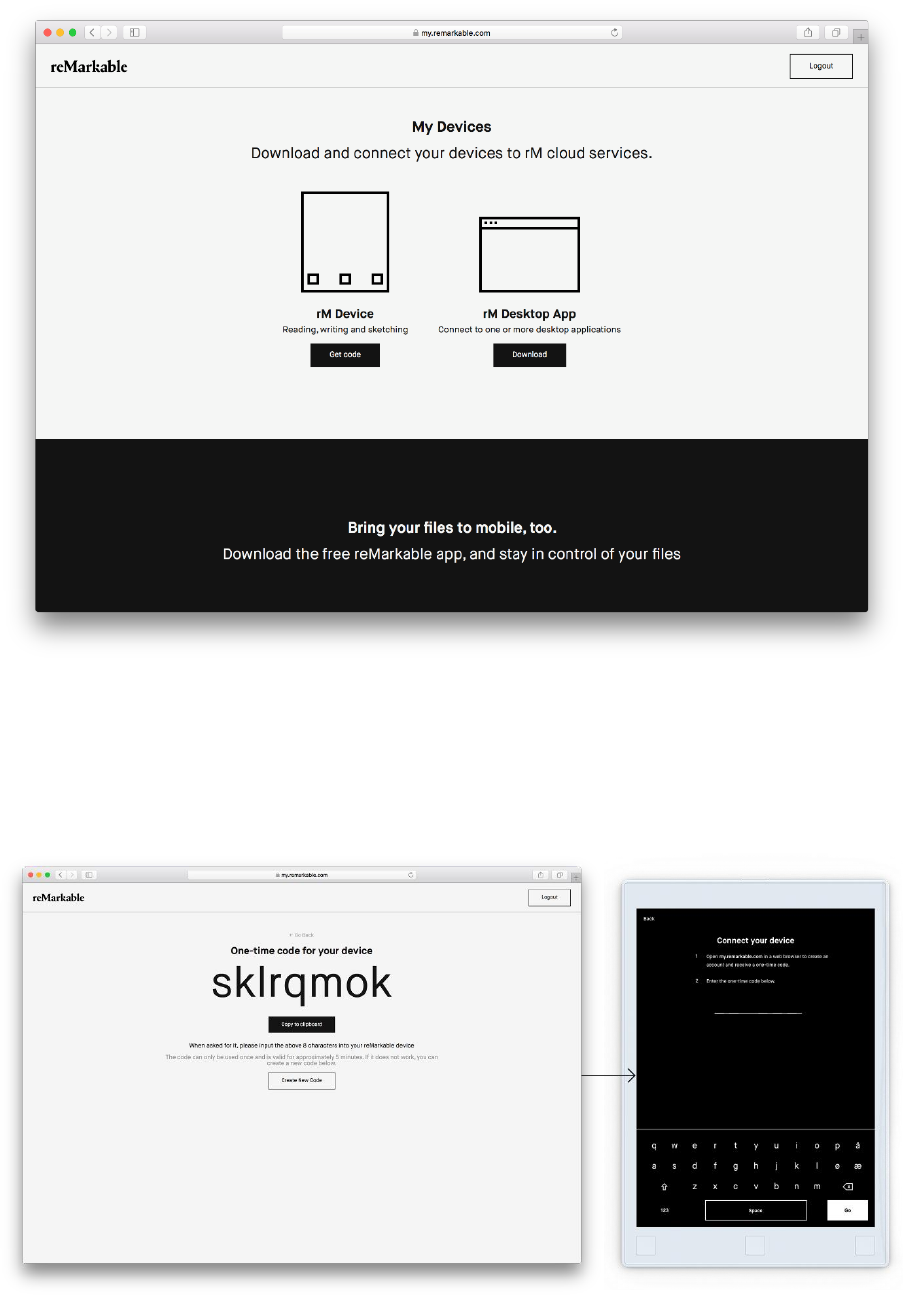
19
You're in! Tap 'Get code' to connect your device.
5. Enter the one-time code on your reMarkable device, and tap Go
Input the 8 character code to your reMarkable
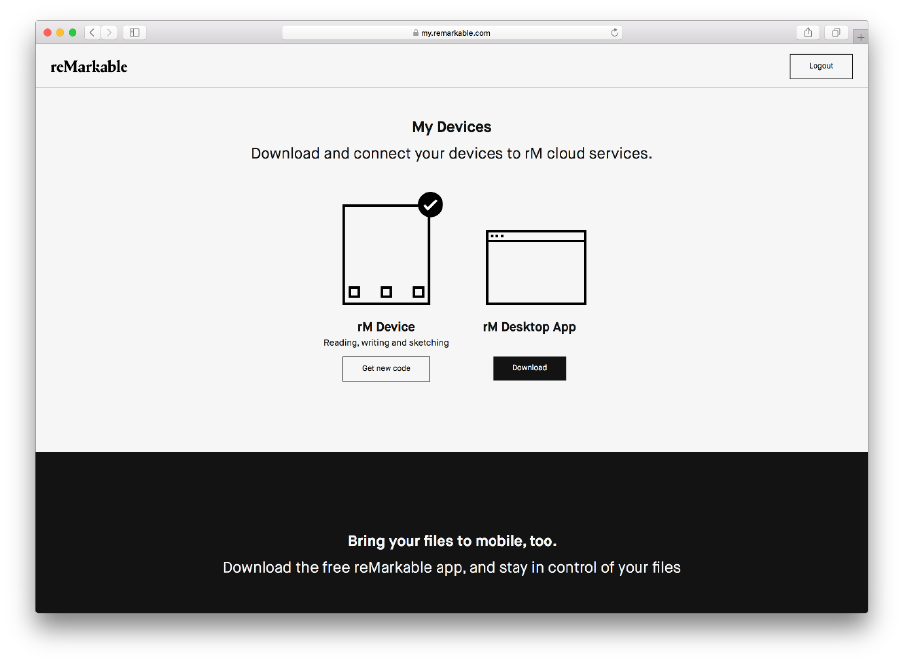
20
6. Your reMarkable is now connected to the cloud!
When connected, the device will be marked with a check mark in the browser
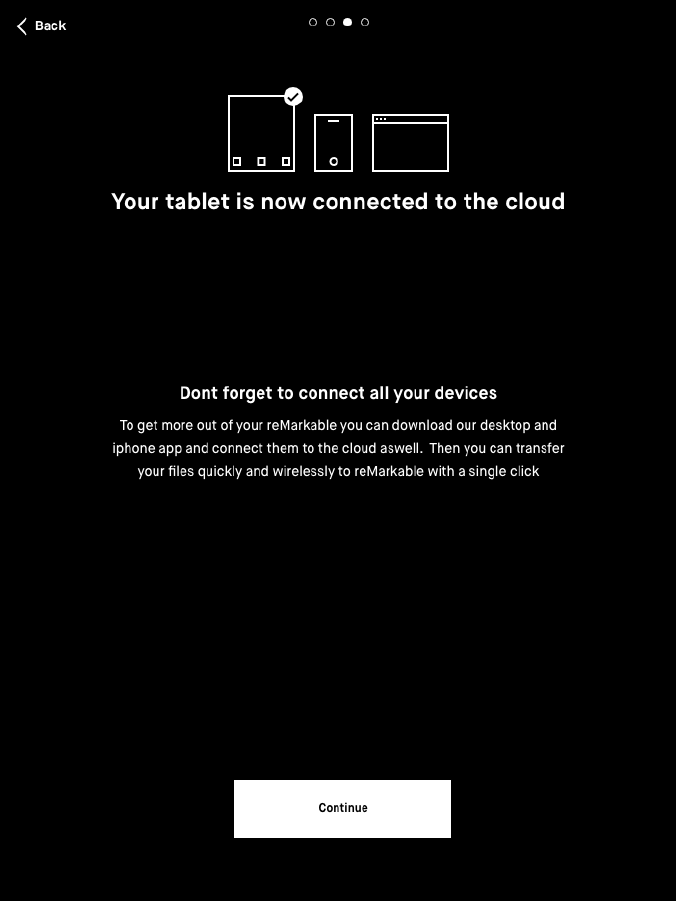
21
Success! You are connected.
7. Tap Continue and choose between right-handed or left-handed mode. This can be
changed later in Accessibility Settings.
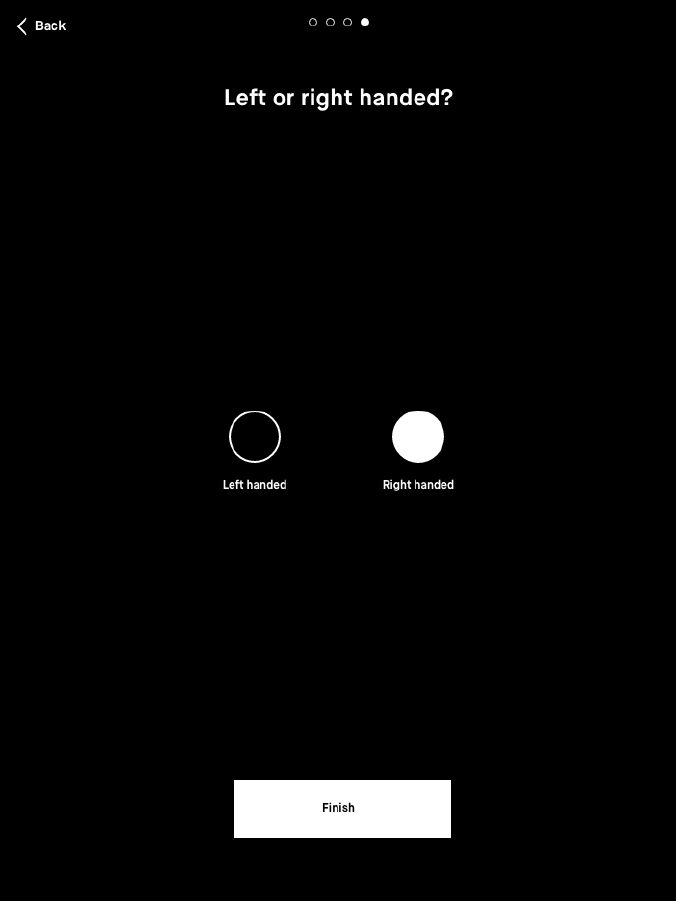
22
Choose between right handed and left handed mode, then tap Finish
8. Click restart to complete the setup. Once restarted, your reMarkable is ready to go with
the latest updates.
23
1.2 Charging your device
Use the micro USB cable from the reMarkable box to charge your reMarkable.
Plug the micro USB cable end to the micro USB charging port and the USB end to a
USB power plug (max 5V, 1.5A), or to your computer.
There are two ways of checking whether your reMarkable is charging when turned
on:
• The Battery indicator on the home screen will change from a battery icon to a charging
icon.
• Power settings in Settings will indicate that the charger is connected while the device is
charging.
Battery Status
Battery charging
The device will flash white if it is turned off when it starts charging.
1.3 Updating to the latest version
It it is critical to have the latest version for reMarkable to work as intended and for
you to get the latest functionality. You find which software version you are running in
Device Settings.
Read about reMarkable's latest software updates on our blog or check out the
Release log for a detailed list of released functionality.
How to update
reMarkable

24
Your device is by default set to auto update, which is recommended for you to
always have the latest updates and the newest functionality.
How to update with auto-update enabled:
1. Look for a notification in the lower left corner on the home screen. This notification will tell
you to restart your device to complete the installation.
2. Restart your device to complete the installation.
How to update manually:
1. Open Settings by tapping the rM-icon in the top left corner in My Files
2. Make sure you are connected to Wi-Fi in Wi-Fi settings.
3. In Device settings, tap Check for updates to see if there are any new updates available.
4. Tap Download version to update to a new version.
5. When the download is finished, click Restart device to complete the update.
Desktop app - Mac & Windows
You will be prompted with a pop-up notification in the application when a new version
is available. If this does not happen, you can always download the latest version on
my.remarkable.com
Mobile app - iOS
If auto-updates are enabled your app will be updated automatically.
How to turn on automatic updates:
1. Go to Settings.
2. Tap iTunes & App Store.
3. Switch Updates on.
How to update manually:
1. Open the App Store.
2. Tap Updates in the bottom right.
25
3. Find reMarkable, and tap Update.
If the reMarkable app is not listed here, your app is on the latest version.
Mobile app - Android
If auto-updates are enabled your app will be updated automatically.
How to turn on automatic updates:
1. Open the Google Play Store.
2. Use the search bar to find reMarkable.
3. Tap the three vertical dots in the top right.
4. Check Auto-update.
If not, you can update the app manually in Google Play Store:
1. Open the Google Play Store.
2. Use the search bar to find reMarkable.
3. Tap Update.
If "Update" is not an option, your app is on the latest version.
1.4 Getting started with reMarkable (guide)
Learn how to make the most out of your reMarkable with these tips & tricks!
Download and transfer the PDFs to your reMarkable and read it on your device.
26
Notetaking
• Find your favorite pen
• Make notes in a hurry with Quick sheets
• Learn how to minimize or hide the toolbar
• Templates
Download PDF
Sketching
• How to use layers
• Three different erasers - and when to use which
• Move, scale, rotate and copy your drawings or notes
• Liveview your notes to a desktop
Download PDF
Reading
• Edit text settings for ebooks
• Highlight documents
• Switch between landscape and portrait mode
• Crop documents for better readability
Download PDF

28
2 Basics
2.1 Notebooks
Notebooks are where you sketch and take notes. Notebooks are created by you on
your reMarkable, and there are no limits to how many pages your notebook can
have. Switch between a minimum and a maximum toolbar to suit your needs.
Notebooks are easily renamed and can be moved into folders. View a filtered view of
all your notebooks in the Notebook section on your home screen, regardless of how
they are organized.
How to
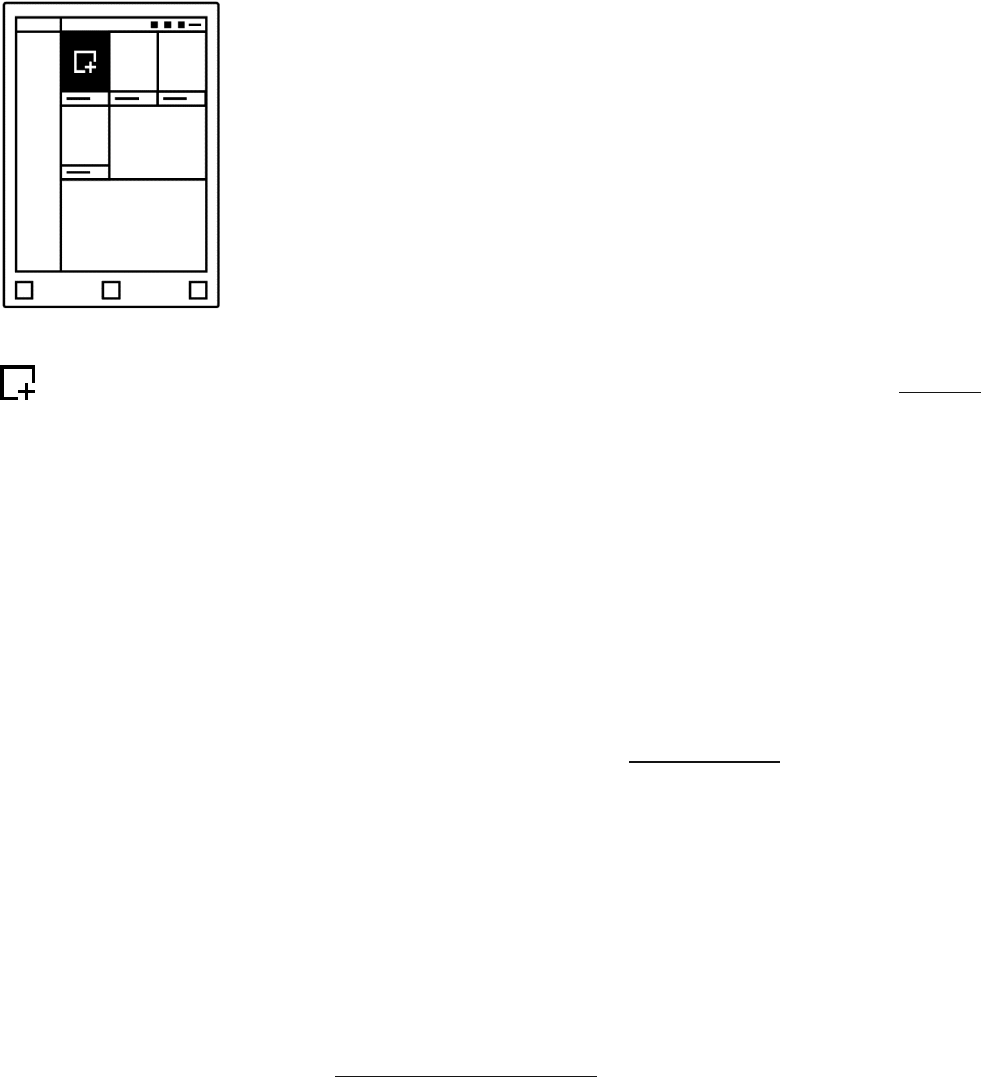
Create a new notebook by tapping the Create new notebook-icon
in My Files or a folder.
Add a new page to your notebook by tapping the new page-icon.
New pages are automatically placed in the end of the notebook.
View all pages inside a notebook by tapping the page overview-
icon. Go back to the one-page view by clicking the one-page
icon.
29
Quick sheets
The reMarkable comes with a default notebook for taking quick
notes on the go, without having to create a new notebook.
Quick sheets are always available from My files, and it cannot
be moved or deleted.
Create a new page by clicking the Quick sheet-button in the upper right corner in My Files.
2.2 Documents
Documents are PDF-files imported through the desktop or mobile application and
onto your device. Read and take notes in a document, and share to email directly
from your device.
View all pages inside a document by tapping the page overview icon. Go back to
the One-Page View by clicking the single page view icon.
Organize your documents by moving them into folders. All your documents will
appear in the filtered Document section on your reMarkable, regardless of how they
are organized.
30
Page Overview
Single page view
2.3 Ebooks
Ebooks are digital books imported through the desktop or mobile application and
onto your device. EPUB is currently the only supported ebook format.
View all pages inside a document by tapping the page overview icon. Go back to
the one-page View by clicking the single page view icon.
Organize your ebooks by moving them into folders. All your ebooks will be
displayed in the ebook section on your home screen, regardless of where they are
located.
Page overview
Single page view
2.4 Folders
Folders helps you organize your notebooks, documents and ebooks. Define your
own file structure with folders and subfolders in My Files.
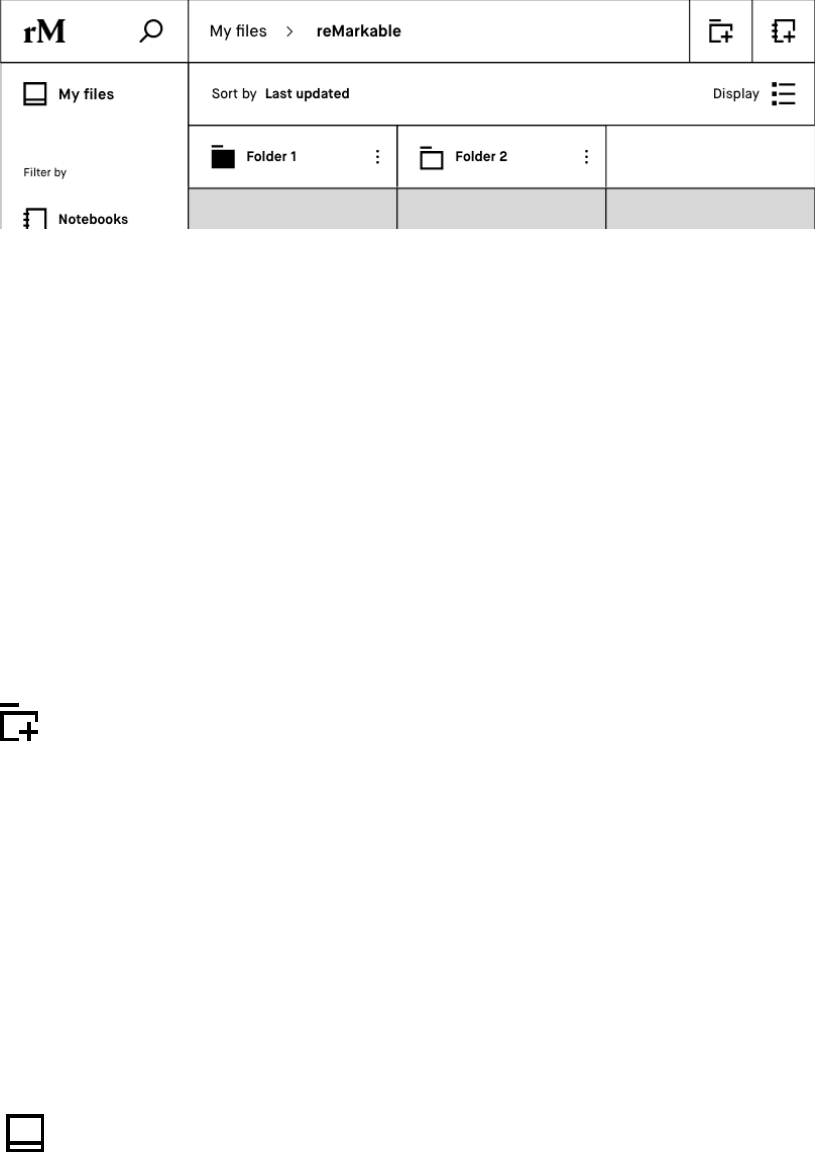
When a folder has content the folder icon changes from white to black.
31
In this example Folder 1 has content, and Folder 2 is empty.
How to:
• Create a New Folder from My Files or a folder by tapping the New Folder icon.
• Add content to a folder by opening the contextual menu (three dots) on the item you
want to add, then click Move and choose the right folder. Confirm the action by tapping
Move here.
New Folder
3 Navigating on the reMarkable
3.1 My Files
My files displays your folders, notebooks, documents and ebooks as organized by
you. Here you can add folders, move and copy content to suit your needs.
My Files
How to:

32
• Sort your files by last updated, size or alphabetical order. Change this by tapping Sort
by.
• View your content in Grid View or in List View. This can be changed by tapping Display.
• Scroll up and down in your file overview by swiping with your marker or your finger.
3.2 Filter by - Notebooks, Documents or Ebooks
If you choose Notebooks, Documents or Ebooks in the side menu, you will see a
filtered view of all your files. This means that:
Notebooks will show all your notebooks.
Documents will show all your imported PDF-files.
Ebooks will show all your imported ePUB-files.
Even when you move your notebooks, documents or ebooks into folders, they will
always appear in the filtered view on the home screen.
33
3.3 Bookmarks
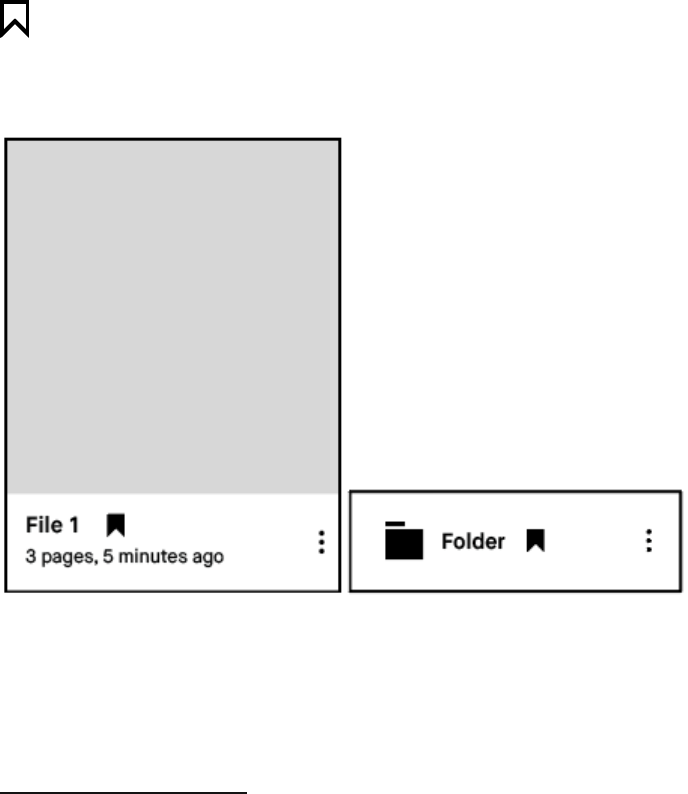
A bookmark is a label you can give to the documents, notebooks, ebooks and folders
that you want quick access to. Everything you bookmark will be stored in the
bookmark section on the home screen.
Bookmarks
Read more
How to Bookmark a file
3.4 Notification Center
The notification center on the home screen keeps you informed about the status of
your reMarkable and when an action is required. A battery indicator and the Wi-Fi
34
connection status is always available on your home screen. The battery indicator will
also indicate when you are charging your device.
Notifications about the following topics may appear:
• Disk Full - Not enough free disk space (clickable). The device has a limit of 8 GB
internal storage including the OS. An override of this limit will disable sync until free
space is available. You can delete files directly on your device or via the desktop or
mobile apps.
• Disconnected - Wi-Fi disconnected. The device is not connected to a Wi-Fi, and you
must connect to a known Wi-Fi to enable sync. This notification may also appear for a
few seconds when you turn on the device after power off.
• Disconnected - Connecting to cloud...Your reMarkable is connecting to a known
network. This notification requires no action from the user.
• Update installed - Click to restart (clickable). If you have enabled automatic update,
this notification will notify you when it is time to restart the device to complete the update.
• Disconnected - Cloud disconnected. The reMarkable is not connected to the cloud and
will not sync any files.
3.5 Settings
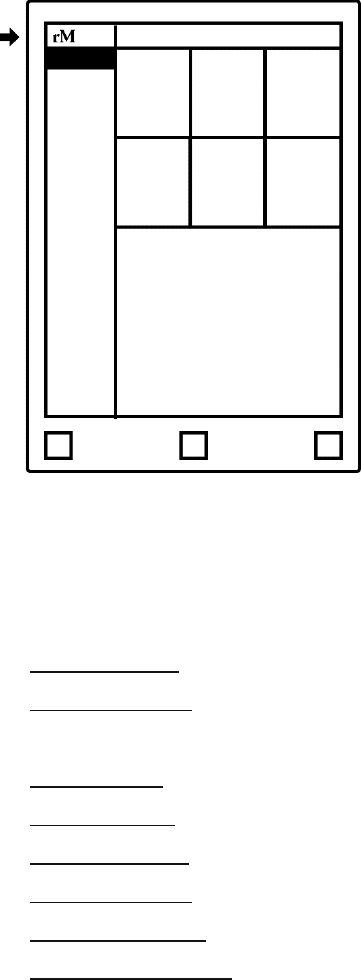
Settings can be reached from the home screen by tapping the reMarkable logo in
the top left corner. On the Settings page you can download the latest software
updates, log into your reMarkable account and more.
35
Settings:
• Device settings enables you to turn auto-update on/ off and download the latest software.
• Account settings is where you log into your account to transfer files between your
connected apps.
• Wi-Fi settings is where you connect to a known Wi-Fi.
• Power settings informs you of your battery status.
• Storage settings gives an overview of how much free space is left on your device.
• Security settings enables you to set a passcode to protect your files.
• Keyboard settings is where you choose among keyboard languages.
• Accessibility settings lets you alter between left- and right hand mode, and modify text
size to suit your needs
38
Settings
Check for new version
Storage
Security
Accessibility / Text Size / Settings
Keyboard
3.7 Search
Use Search to find specific folders, notebooks, documents or ebooks.
Search for a file or a folder
1. Tap the Search icon located on the home screen.
2. Type in the name or parts of the name of what you want to locate > tap Search.
3. Your search result will display on your screen. Tap on the item you want to be directed
to.
Search
39
4 Organizing your files
4.1 Import files to reMarkable
Use the reMarkable desktop app or the reMarkable mobile app to transfer
documents and ebooks onto your device. Once imported, your files will be synced
across your connected devices. reMarkable works best with our custom built apps
for iPhone, Android, PC and Mac.
Transfer files using the desktop app:
Import- button
1. Open the reMarkable desktop app.
2. Click the import button in the top right corner.
3. Select a file from the browser menu, and click open.
or
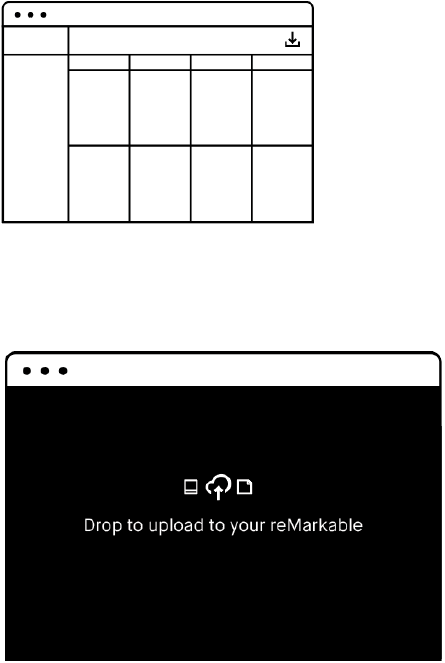
Drag & drop
• Simply drag a file into the application window and the file
will by transferred to your connected devices.
The file will sync automatically to your device if you are connected to Wi-Fi. Only files
in the supported file formats (PDF and ePUB) will be transferred onto your device.
40
Transfer files using the mobile app:
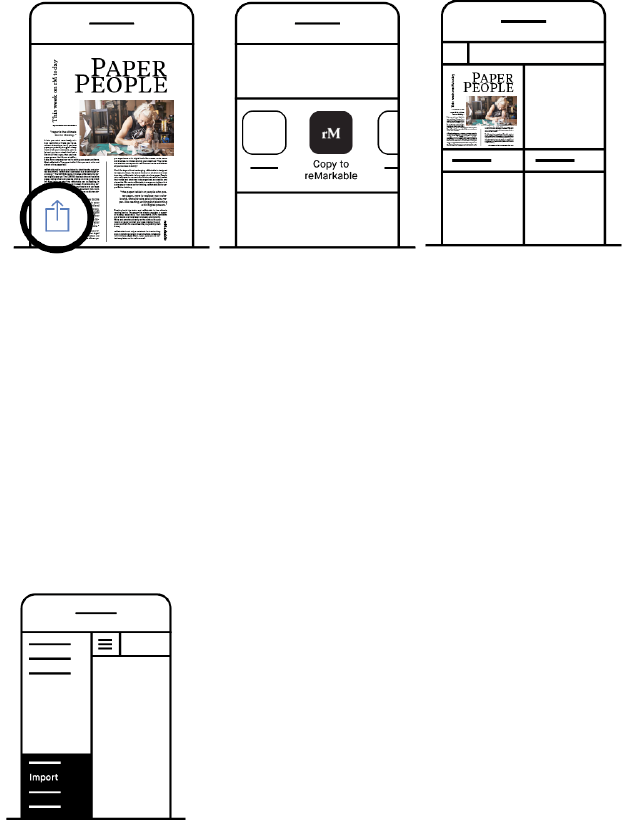
Import on iPhone:
1. Open a PDF or ePUB-file.
2. Tap the share icon in the Apple-menu.
3. Choose Import with reMarkable.
Import on Android:
Files can be imported to the Android app either by import in-app or by sharing a file
to the app. See below:
Import in-app:
1. Tap the main menu (hamburger menu)
2. Tap Import files
3. Choose among your downloaded PDFs and ePUB-files.
4. Tap Accept to agree to give the app access to your files.
Share from file:
1. Open a PDF or ePUB-file.
2. Tap the Share icon.
3. Choose Import with reMarkable.
41
4.2 Bookmark
Use bookmarks to label notebooks, documents, ebooks or folders that you want
easy access to. All your bookmarks are collected in the bookmark section on the
home screen.
How to bookmark a file or a folder:
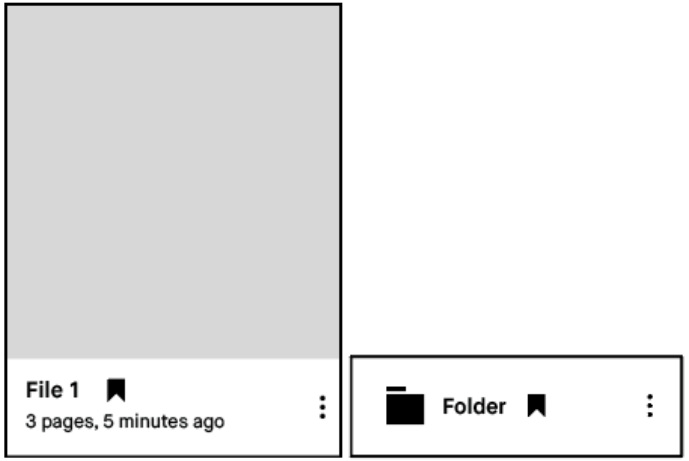
1. Tap the contextual menu (three dots) on the item your want to bookmark.
2. Tap the bookmark icon. The bookmark icon becomes visible next to the file name on the
file you have bookmarked. It can now be found in the bookmark section.
How to remove a bookmark on a file:
1. Tap the contextual menu (three dots) on the item where you want to remove your
bookmark.
2. Tap the bookmark icon in the top menu. The bookmark icon will disappear on your file,
and will no longer be in the bookmark section on the home screen.

42
Bookmark
A bookmarked file or folder
4.3 Rename
How to rename a file or a folder:
1. Tap the contextual menu (three dots) on the file or folder you want to rename.
2. Tap Settings in the top menu.
3. Tap Edit in the name field and use the screen keyboard to write in your new file/folder
name.
4. Tap Done to save the changes. If you want to discard your changes, click Cancel.
4.4 Move
Keep yourself organized by moving your notebooks, ebooks and documents into
folders. A file can only be moved into My Files or into a folder.
Please note that Quick Sheets cannot be moved from My Files.
Move
How to move a file or a folder:
1 Tap the contextual menu (three dots) on the item you want to move.
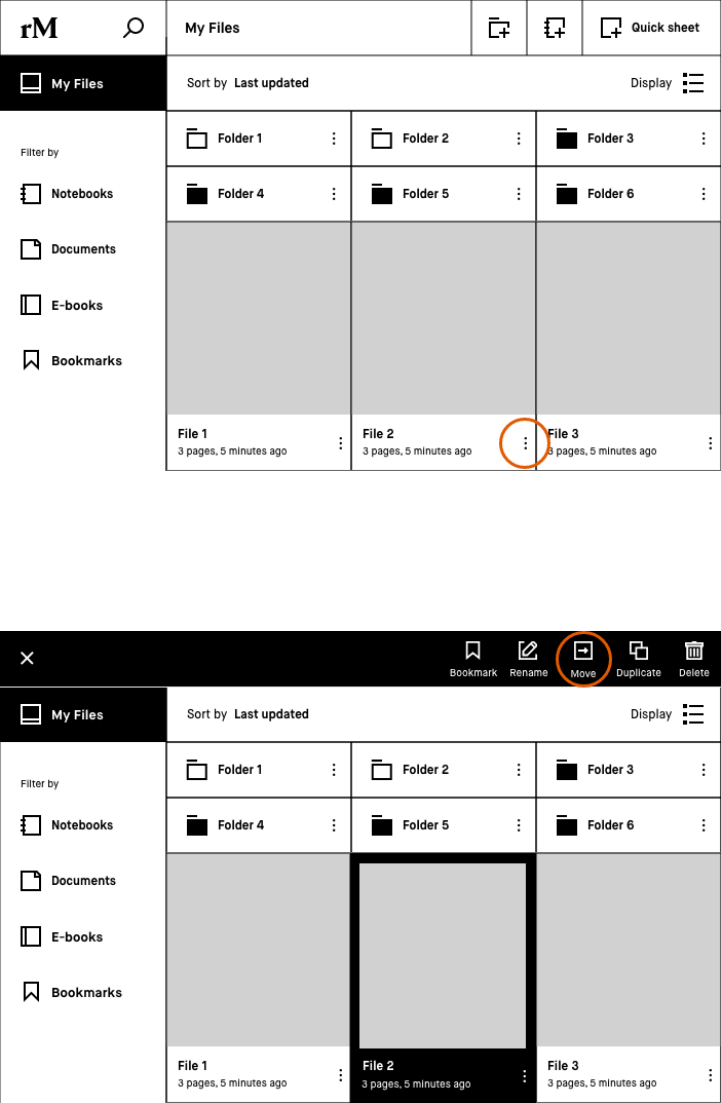
43
2. Tap Move in the top menu
3. Choose your destination folder.
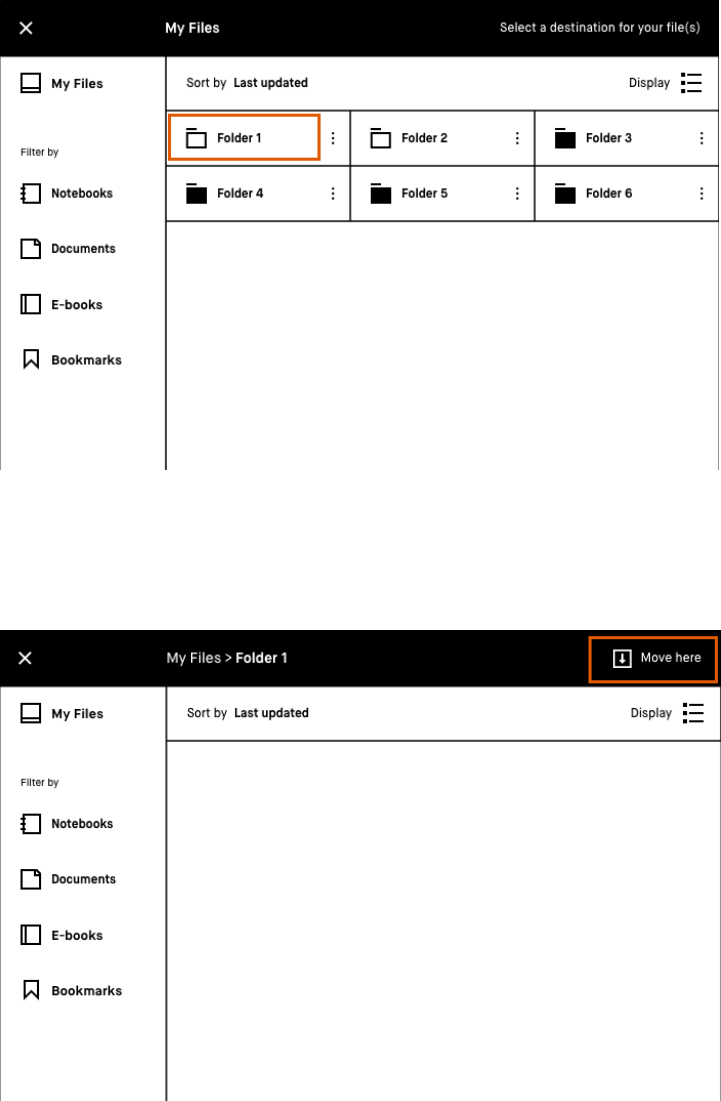
44
3. Tap Move here to confirm the action.
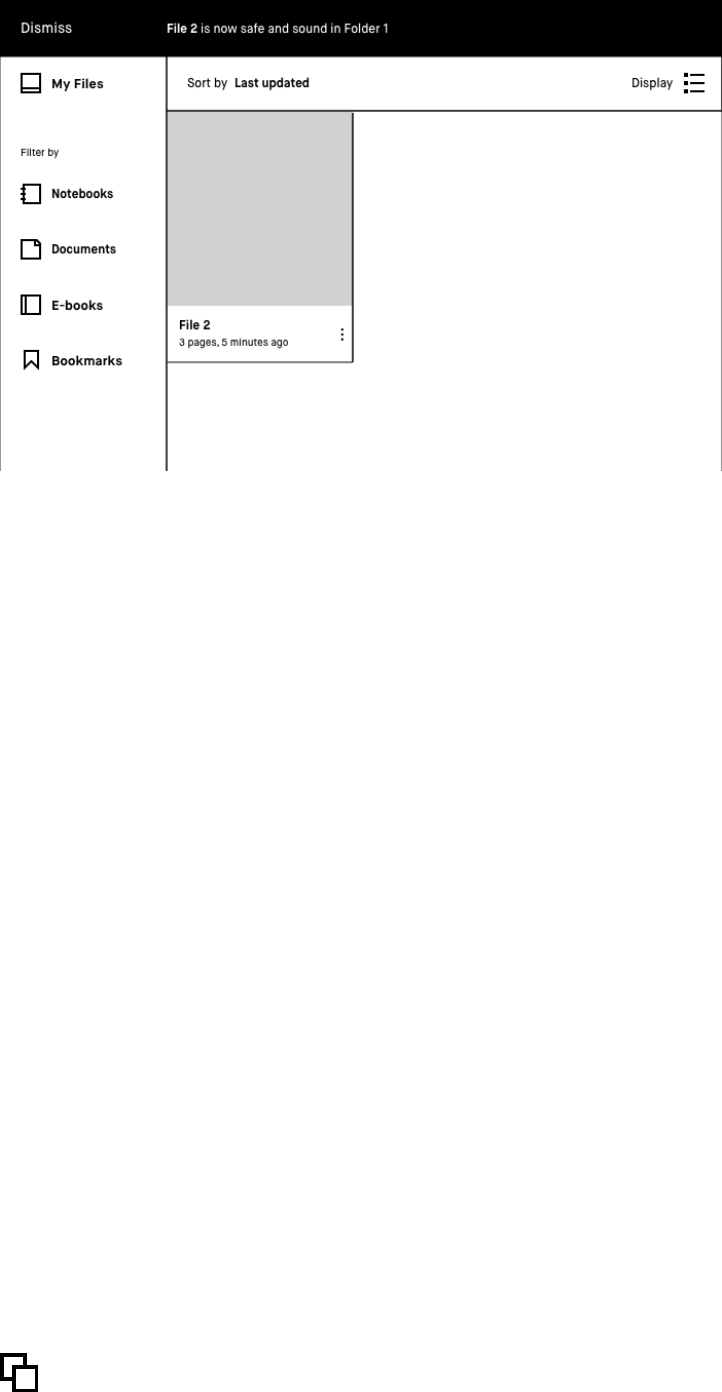
45
4.5 Duplicate
Files (notebooks, documents and ebooks) can be duplicated without any changes
being made to the original file.
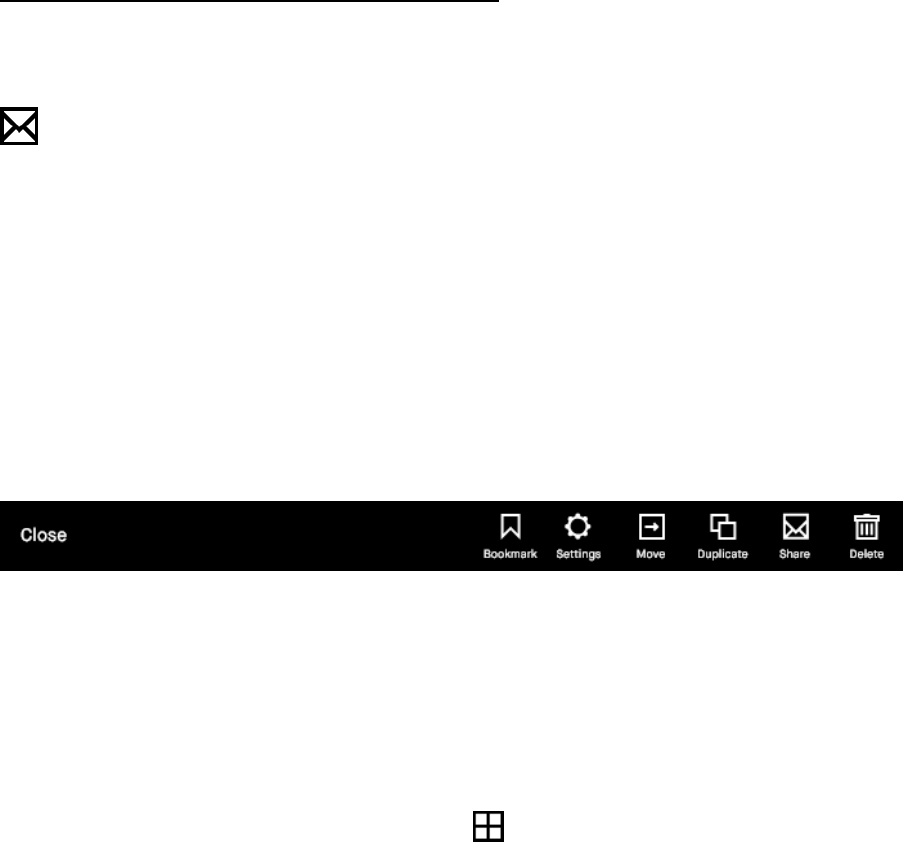
How to duplicate a file:
1. Tap the contextual menu (three dots) on the file you want to copy.
2. Tap duplicate in the top menu.
The new file will be named with the ending “copy”.
Duplicate
46
4.6 Share
Share your notebooks, documents and ebooks to an email address from your
device.
You must be connected to Wi-Fi to share a file. Please note that the Share-button
will not be available if you are not connected to Wi-Fi and not signed in to an
account.
Share
How to share a file:
1. Tap the contextual menu (three dots) on the file you want to share.
2. Tap Share in the top menu.
3. Choose whether to share the file in PDF, PNG or SVG-format.
4. Type in the email address you want to share your file to by using the device keyboard.
You can also choose to use a recently used email address.
5. Tap Send to complete the action.
Tap the Share icon to send files by email
How to share a single page:
1. Open a document.
2. Tap the Page overview icon in the top menu
3. Tap the contextual menu (three dots) on the page you want to share.
4. Select Share in the top left corner.
5. Select Send as PNG.
6. Enter an email address and tap Send.
47
4.7 Delete
How to delete a file or a folder:
1. Tap the contextual menu (three dots) on the file or folder you want to delete.
2. Tap the Delete icon on the above toolbar. Tap Undo if you want to keep your file.
How to delete a page in a notebook:
1. Open the notebook where you want to delete a page.
2. Tap to view all pages by selecting the page overview-icon.
3. Tap the contextual menu (three dots) on the page you want to delete.
4. Tap Delete in the top menu.
Delete
5 Tools
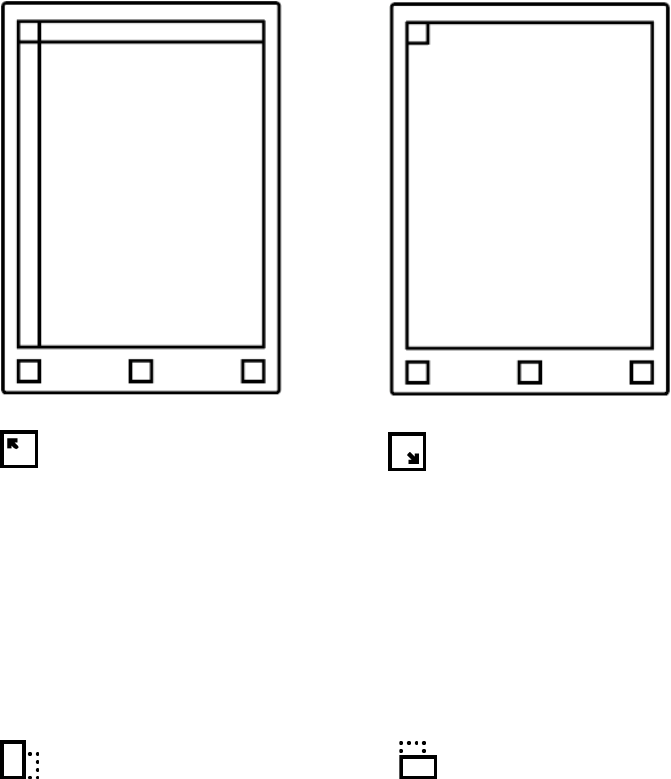
5.1 Tools Overview
Pen
Pencil
Pen - Ballpoint
Pencil - Sharp
Pen - Fineliner
Pencil - Tilt
Pen - Marker
Brush
Highlighter
49
5.2 Hide/Show Toolbar
Need a clean slate? Use the Hide Toolbar function to make the toolbar disappear.
Make the toolbar appear by clicking the Show Toolbar icon.
Hide Toolbar
Show Toolbar
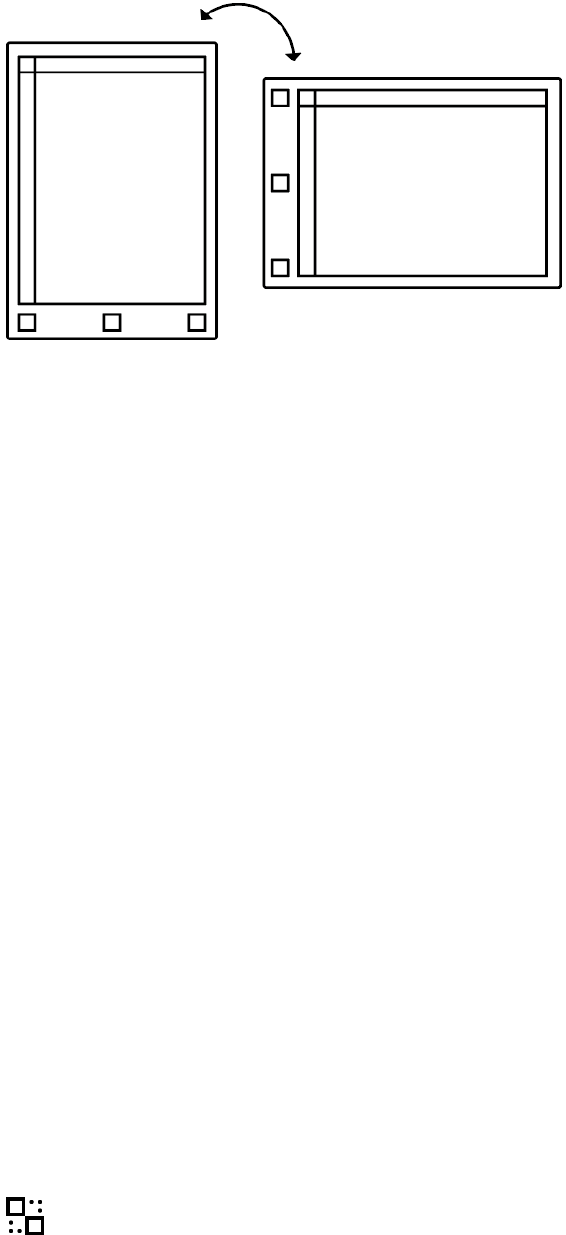
5.3 Portrait/Landscape
When reading, writing or sketching, you can change the screen orientation by
tapping the Portrait/Landscape icon.
Portrait
Landscape
How to change screen orientation:
1. Open a file.
2. Tap the contextual menu (three dots) on the top menu.
3. Tap Portrait/ Landscape. The option displayed is dependent on your current screen
orientation.
50
5.4 LiveView
Use LiveView to instantly show what you are writing or sketching on your computer.
Note that you must be connected to Wi-Fi and logged into your desktop app to be
able to use LiveView.
How to:
1. Open the file you want to LiveView.
2. Tap the contextual menu (three dots) in the top menu, and select LiveView.
3. A window will appear in your desktop app asking you to accept the LiveView invitation.
Tap Accept to start the session.
4. End LiveView by tapping Turn LiveView off on your device.
LiveView

51
5.5 Pen
The pen comes with three different strokes:
• The Ballpoint is your typical pen. It has some pressure sensitivity, but doesn’t react
differently to tilt. The stroke is independent of the speed of the writer.
• The Marker has texture depending on the speed and pressure of the stylus.
• The Fineliner offers a rounded, even stroke that has no texture, regardless of tilt.
Pen
Ballpoint
Marker
Fineliner
How to:
• Change stroke by selecting the pen and tapping the line-icon in the top menu.
• Change stroke thickness by selecting the pen and tapping the icon with two half circles
in the top menu.
• Change color by selecting the pen and tapping the bucket-icon in the top menu. Choose
between grey, white and black color.

52
Stroke Thickness
Change Color
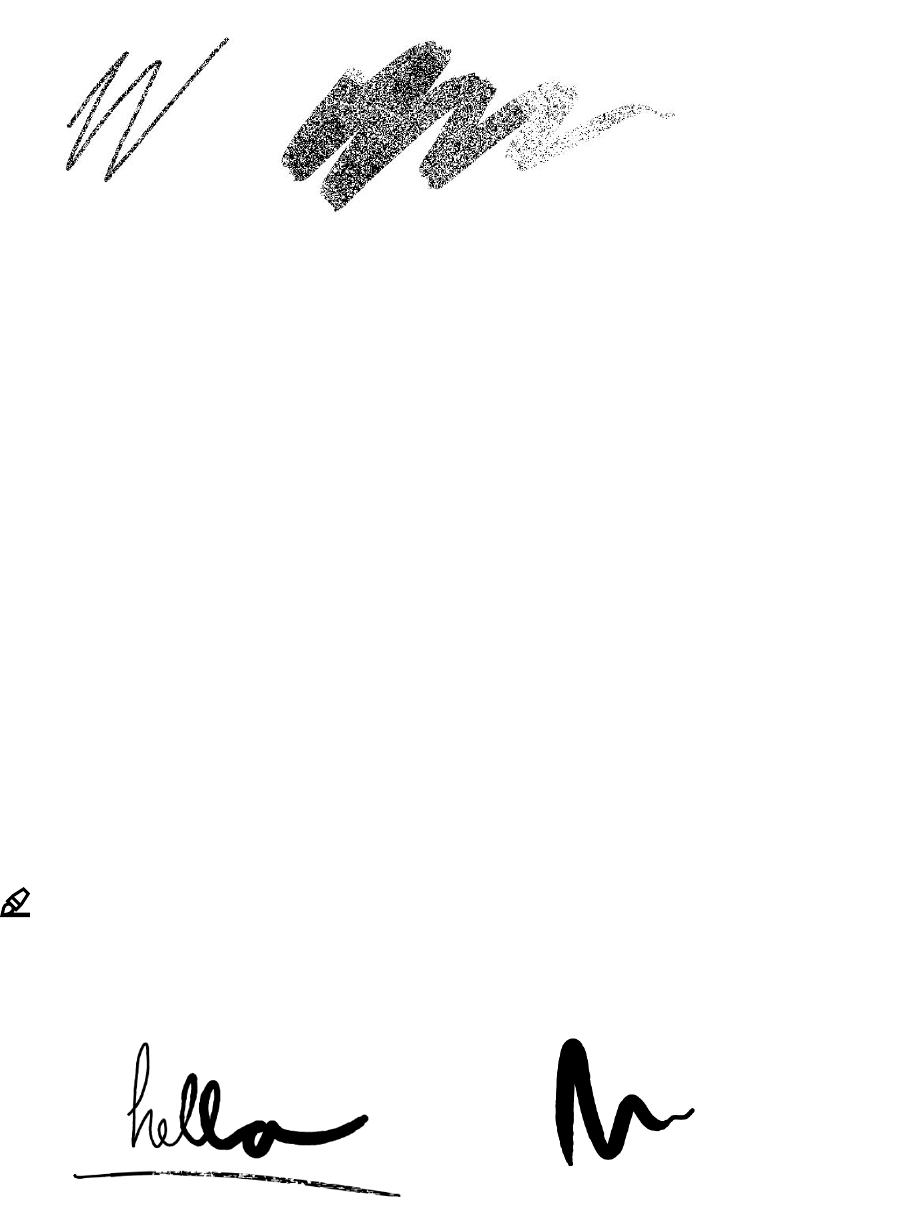
5.6 Pencil
The pencil has textured strokes. It has two modes:
• Sharp pencil gives the same continuous stroke thickness while drawing or writing.
• Tilt pencil responds to the pressure and tilt applied; applying pressure and drawing
several layers increases the saturation, and tilting your pen while drawing affects the
stroke thickness.
How to:
• Change pencil type between sharp and tilt by selecting the pencil and tapping the pencil
type icon at the top of the screen.
• Change stroke thickness by selecting the pencil and tapping the icon with two half
circles in the top menu.
Pencil
Pencil - Sharp
Pencil - Tilt
53
5.7 Brush
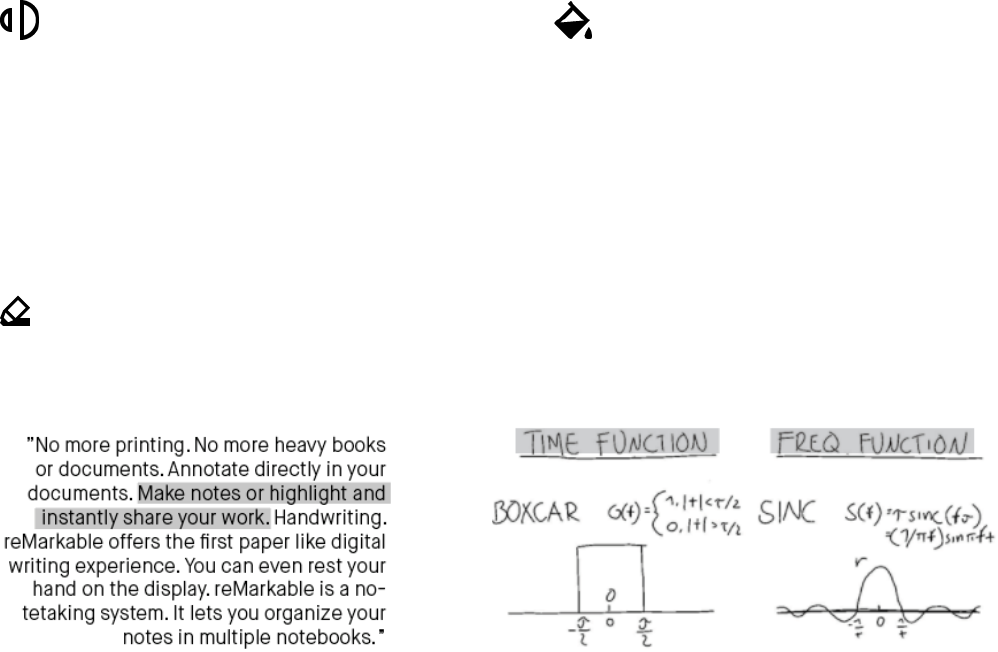
The brush texture is sensitive to the speed and pressure you apply to the digital
paper display and will respond accordingly. For example, a lighter pen stroke will
be thinner than a heavier pen stroke, and a quicker pen stroke will give a lighter
texture than a slower pen stroke which will be fully black.
How to:
• Change stroke thickness by selecting the brush and tapping the icon with two half
circles in the top menu.
• Change color by selecting the brush and tapping the bucket-icon in the top menu.
Choose between grey, white and black color.
Brush
54
Stroke Thickness
Stroke Color
5.8 Highlighter
The highlighting tool lets you highlight text with a light gray color. Use it to
emphasize text in a document or ebook, or in your own notes in a notebook.
Highlighter
5.9 Eraser
This tool enables you to erase whatever you have drawn or written. It is not possible
to erase templates or imported content such as documents or ebooks.
There are three different erasing tools.
• Regular eraser lets you use the marker as an eraser. Choose between three different
sizes in the top menu bar.
• Area eraser. Use the marker to draw around the area you want to erase.
• Erase all. Tap this icon to clear the whole page.

55
Click Undo to undo the change.
Eraser
Erase Area
Erase All
5.10 Rotate, Move, Scale & Copy
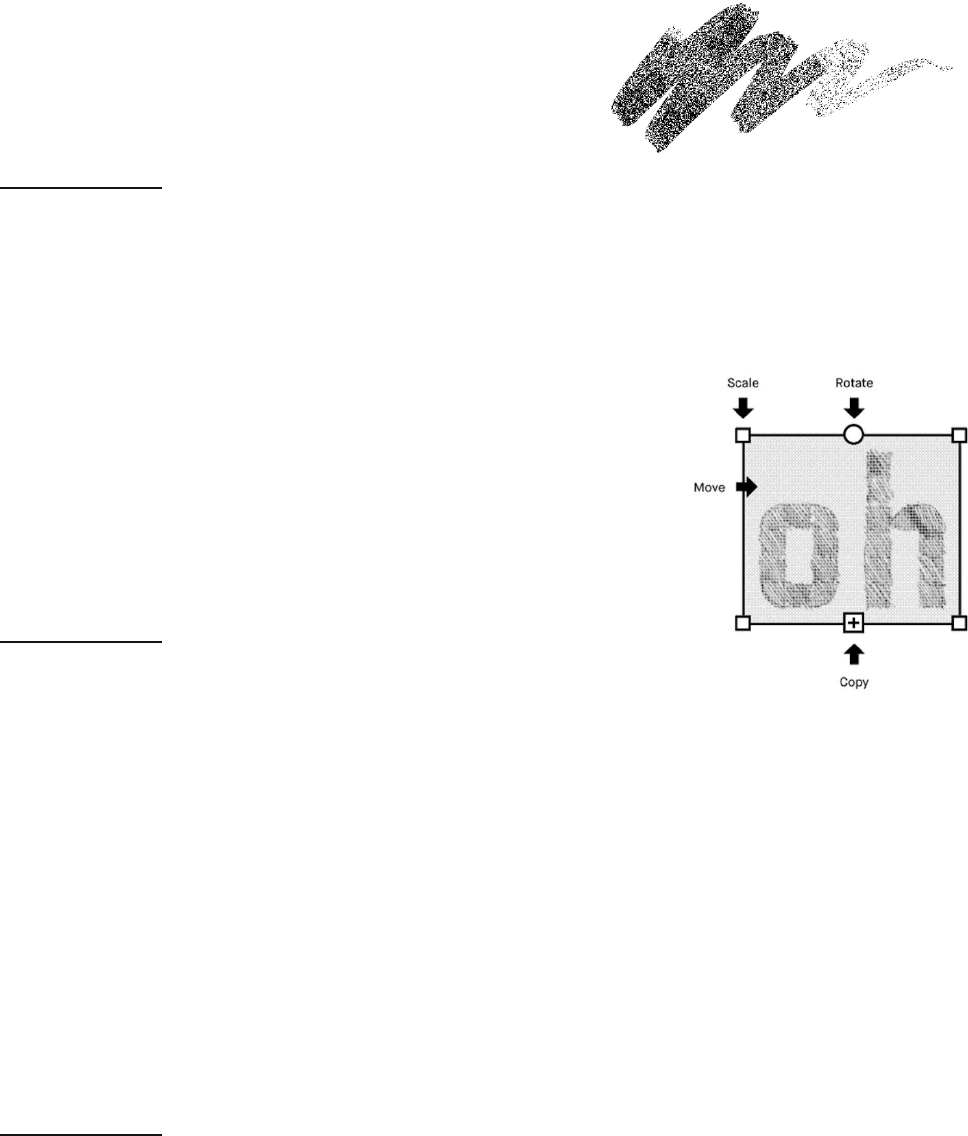
Use this tool to rotate, move, scale and copy text or a drawn object. Note that all
strokes of an object must be within the marked area for you to be able to perform an
action.
• Move an object by using the marker to draw a boundary around the text or object
you want to move. Note that all strokes of the object must be within the marked
area. Tap inside the boundary box and drag the object to the desired position. Tap
outside the marked area to complete the action.
• Scale an object by using the marker to draw a boundary around the text or object you
want to scale. Note that all strokes of the object must be within the marked area. Tap one
of the corners and drag the corners to adjust the size. Tap outside the marked area to
complete the action.
• Rotate an object by using the marker to draw a boundary around the text or object you
want to rotate. Note that all strokes of the object must be within the marked area. Tap the
circle on top of the boundary box and drag in the direction you want it to be rotated. Tap
outside the marked area to complete the action.
• Copy an object by using the marker to draw a boundary around the text or object you
want to copy. Note that all strokes of the object must be within the marked area, and that
56
you can only copy content you have produced on the device. Tap the plus-icon on the
boundary box to create a copy of the object and drag the object to the desired location.
Complete the action by tapping outside the marked area.
Rotate, Move, Scale & Copy
5.11 Undo and Redo
Click Undo to reverse your last action.
Click Redo to redo the action undone by the undo button. Note that undo works
across layers.
Undo
Redo
5.12 Zoom
The Zoom Tool lets you zoom in and out of your page. When using the tool a zoom
window will appear on the top right side, allowing you to zoom in and out, move
around on your page and change to a specific zoom-%.
Zoom
Zoom
Out
Area Zoom
The Area Zoom lets you mark the area you want to magnify. Tap the Area Zoom
icon, and use the marker to circle the object you want to magnify.

57
5.13 Layers
Layers are usually used when making more complex drawings or sketches. Layers
allows you to draw in different levels, and you can hide, delete and rearrange the
layers to get more control and freedom when you’re drawing.
The background layer consists of the selected template, also if you use the default
blank template. The background layer can not be deleted or moved.
How to:
• Create a new layer by tapping Create new layer while in the layer menu.
• Hide a layer by tapping the visibility icon (an eye). When the visibility icon is not
displayed, your layer is hidden.
• Delete a layer by clicking the trash icon.
• Rearrange layers by dragging the layer you wish to move up or down in the list with your
marker. Note that it is not possible to Rearrange Layer 1 or the background layer.
Layers
5.14 Minimize/Maximize the toolbar
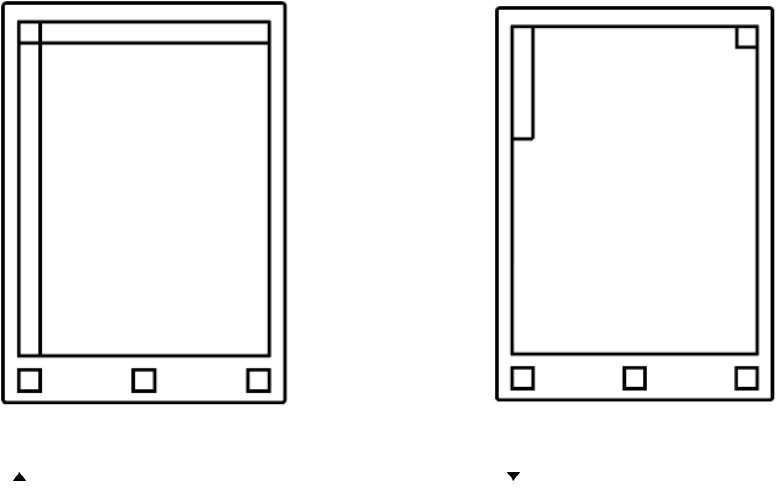
Tailor the toolbar to your needs by switching between a minimum and a maximum
view. The minimal view is tailored for note taking and contains only the necessary
tools for writing. The maximum view offers a full range of tools, including the
possibility to tailor stroke, color and thickness to your needs.
58
How to:
1. Open a notebook, document or ebook.
2. On the left toolbar, tap the arrow pointing upwards to change to minimum view. Tap the
arrow pointing downwards to change to maximum view.
Minimize Toolbar
Maximize Toolbar
5.15 Templates
Templates
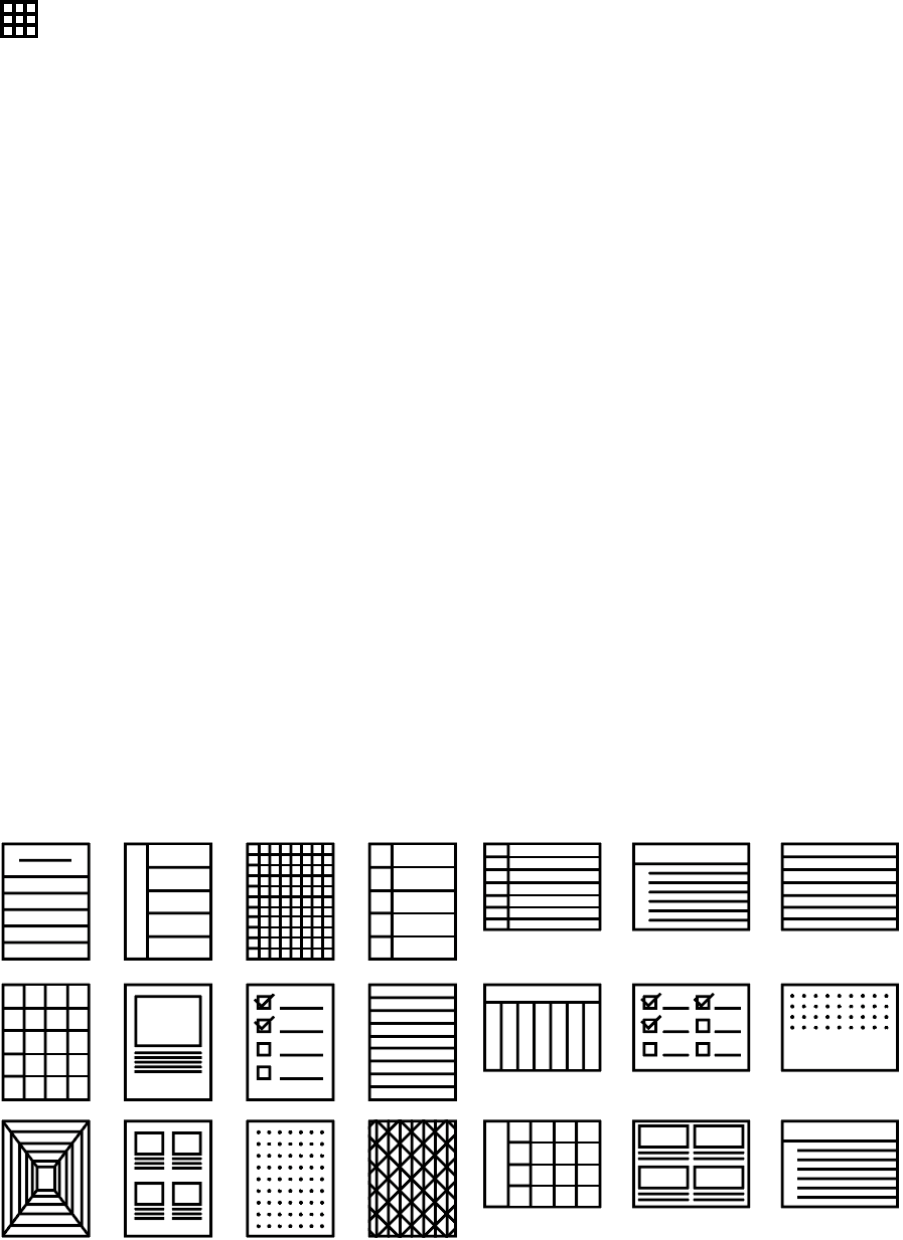
Templates are preset formats that can be used when writing or drawing in your
notebooks. For example, you can choose the ruled template if you want to have lined
paper when you’re writing, the music template if you’re writing musical notes or
weekly schedule if you’re planning your week. Templates are only available for
notebooks.
59
Templates
How to choose a Template:
1. Open a notebook.
2. Tap the contextual menu (three dots) in the top menu.
3. Tap Settings
4. Choose the template you want to use.
The selected Template will be used for all new pages within that notebook. The
Template can be changed at any time.
You also choose templates right away when you open a new notebook, and can see
your recently used templates here. The thumbnails for each template have been
updated to make them easier to separate from each other.
When pressing “View all templates”, the templates are organized under five
categories: All, Creative, Grids, Life/Organize and Lines. In this section you can also
filter between Portrait and Landscape-based templates.
60
5.16 Adjust view
Adjust view in a document
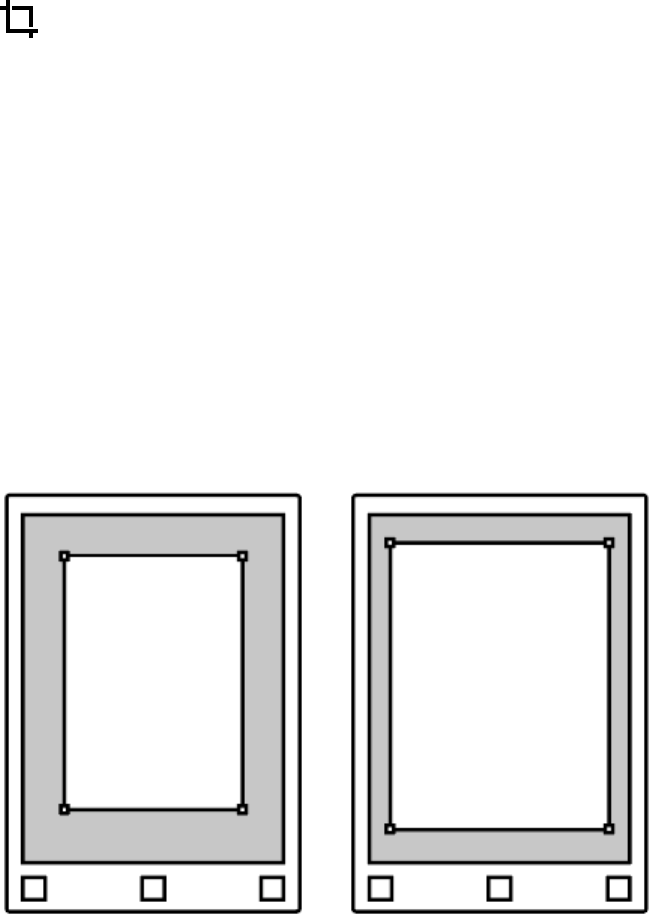
Use the Adjust View tool to hide margins for an improved reading experience. All
pages in the document will be cropped when using the tool. No edits will be made to
your file, and you can adjust and remove the crop whenever you want. Adjust View is
only available for PDF documents.
Adjust View
How to adjust view in a document:
1. Open the document you want to crop.
2. Tap the contextual menu (three dots) on the top menu bar and find Adjust View.
3. Adjust the box to include everything you want to be visible. Tap Adjust View to save the
changes.
4. Tap Reset View to restore the view to default.
61
5.17 Text Settings
Text settings
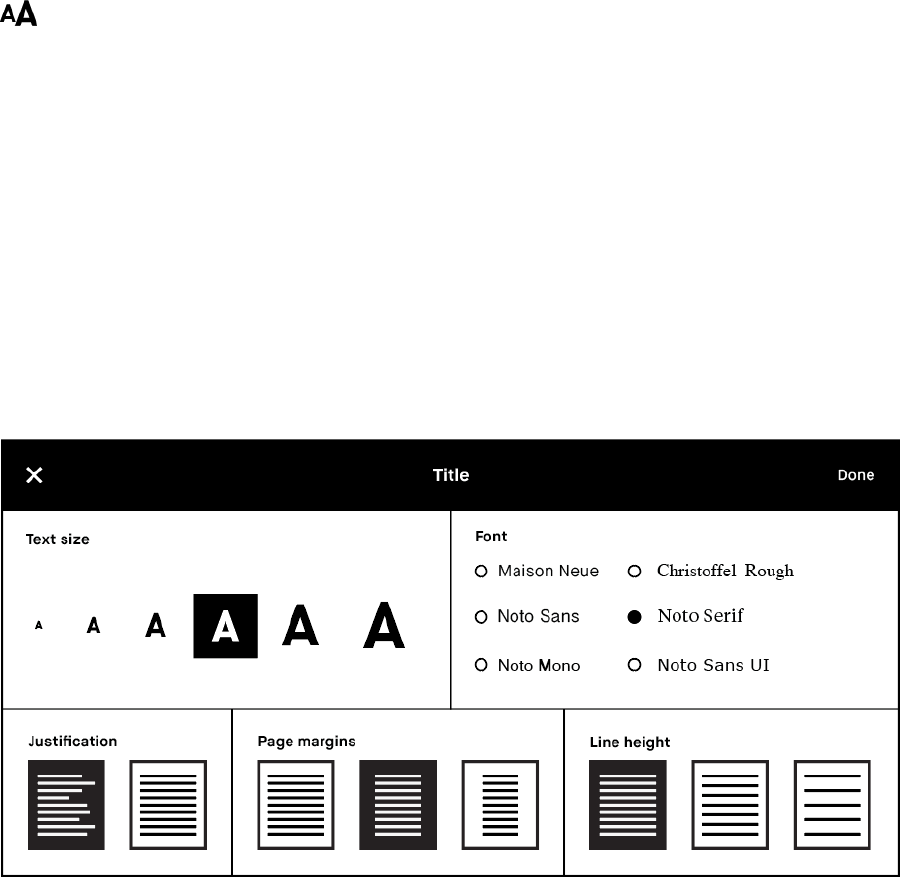
Tailor the ebook view to your preferences by using Text settings, where you can
adjust text size, font, justification, page margins and line spacing. Text settings is
only available for ebooks.
Text Settings
How to change the Text Settings:
1. Open the ebook you want to read.
2. Tap the contextual menu (three dots) on the top menu bar and find Text settings.
3. Tap directly on a menu option to edit the view settings.
4. Tap Done to close the settings.
62
5.18 Handwriting conversion
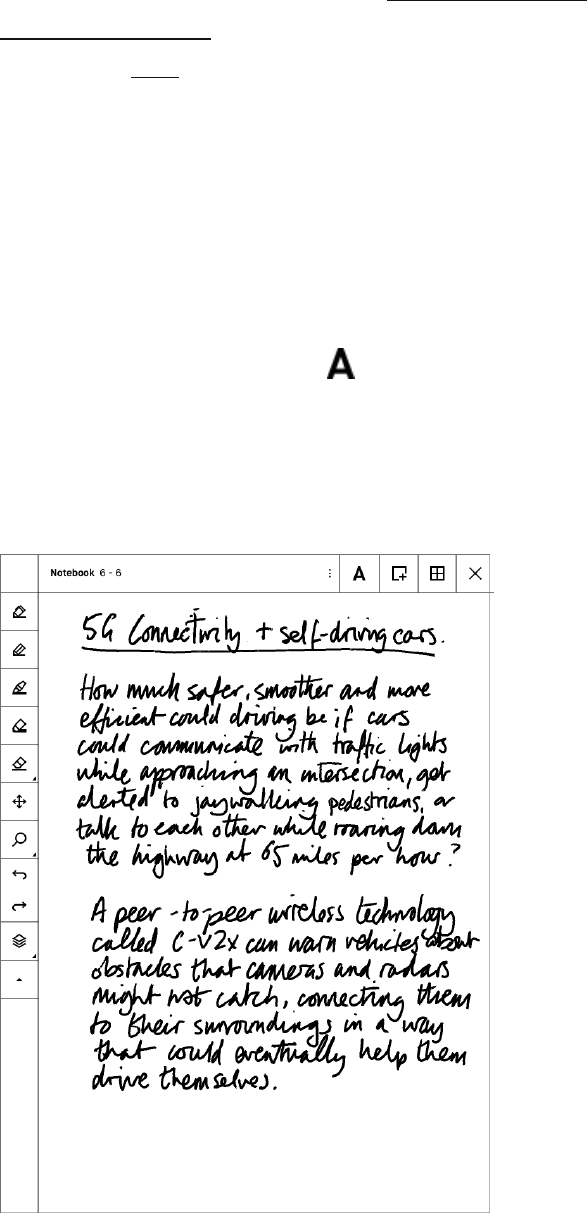
Use the Handwriting conversion feature to quickly convert your handwritten notes to
typed text. Note that you need to be connected to Wi-Fi, signed in to your
reMarkable account and have software version 1.6 installed in order to convert your
notes. Click here for help with updating to the latest version.
How to convert handwritten notes to text:
1. Open a Notebook
2. Tap the Convert to text button
3. Edit or read your notes
4. Select Share and type in the recipient email address
63
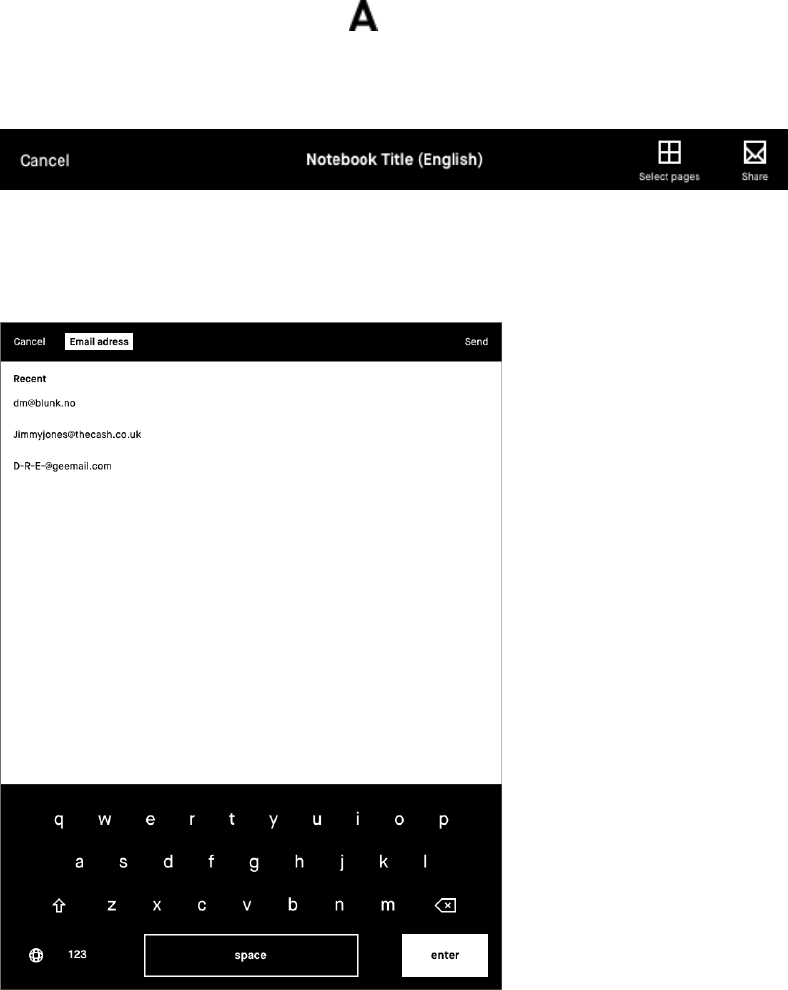
Select the Convert to text button
Edit the typed text and tap Share
Type in the email address and select Send
Handwriting conversion is currently available for Notebooks, not for PDFs or
eBooks. You can edit and share your converted notes via email but they will not be
stored on the reMarkable. This functionality will be expanded in upcoming releases,
allowing you to do more with your typed notes.

64
Convert in your selected language
For the best results when converting text you can specify which language your notes
are written in. To specify your language, go to the Settings page where you will find
the language selection option in the Handwriting Conversion Settings page.
Select the language of your handwritten notes
How to convert multiple pages at once
If you you want to convert more than one page at a time, you can do this by tapping
the Select pages button on the top right corner of the Action bar when the first page
of conversion is complete. You can also convert multiple pages by tapping Page
overview and selecting the Convert button.
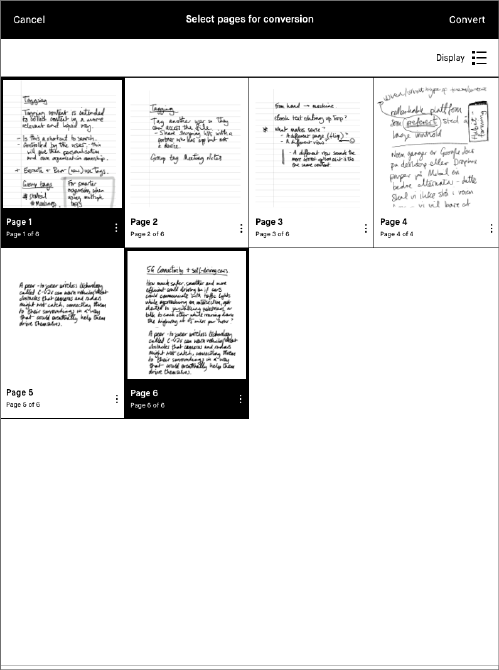
65
Select multiple pages for conversion
Edit your notes before sharing
Once your handwritten notes are converted to typed text they can easily be edited
and shared by email. Editing the typed text does not affect your handwritten
notes. Changes made to the typed text will not be saved if you tap "cancel". Use the
left and right physical buttons, or scroll up and down with your marker or finger, to
read or edit the text while it is being converted.
Here is how to edit your notes before sharing them:
1. Tap the word or letter in the typed text you want to edit
2. Use the onscreen keyboard to make changes
3. Select Share and type in the recipient email address
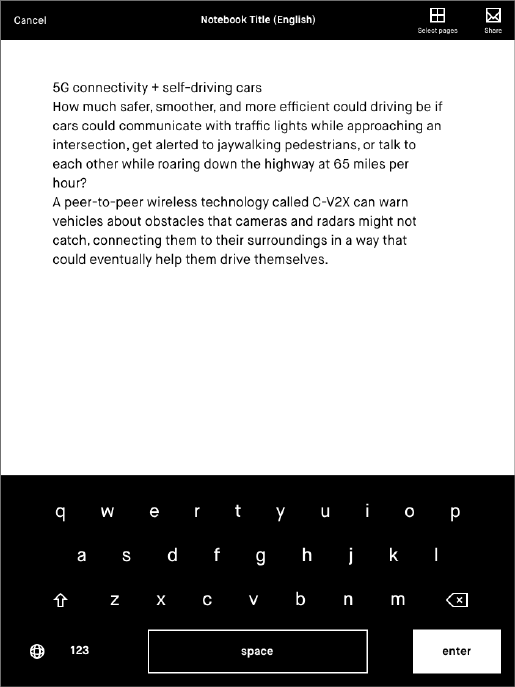
66
Edit the typed text with the keyboard
67
6 Settings
6.1 Device settings
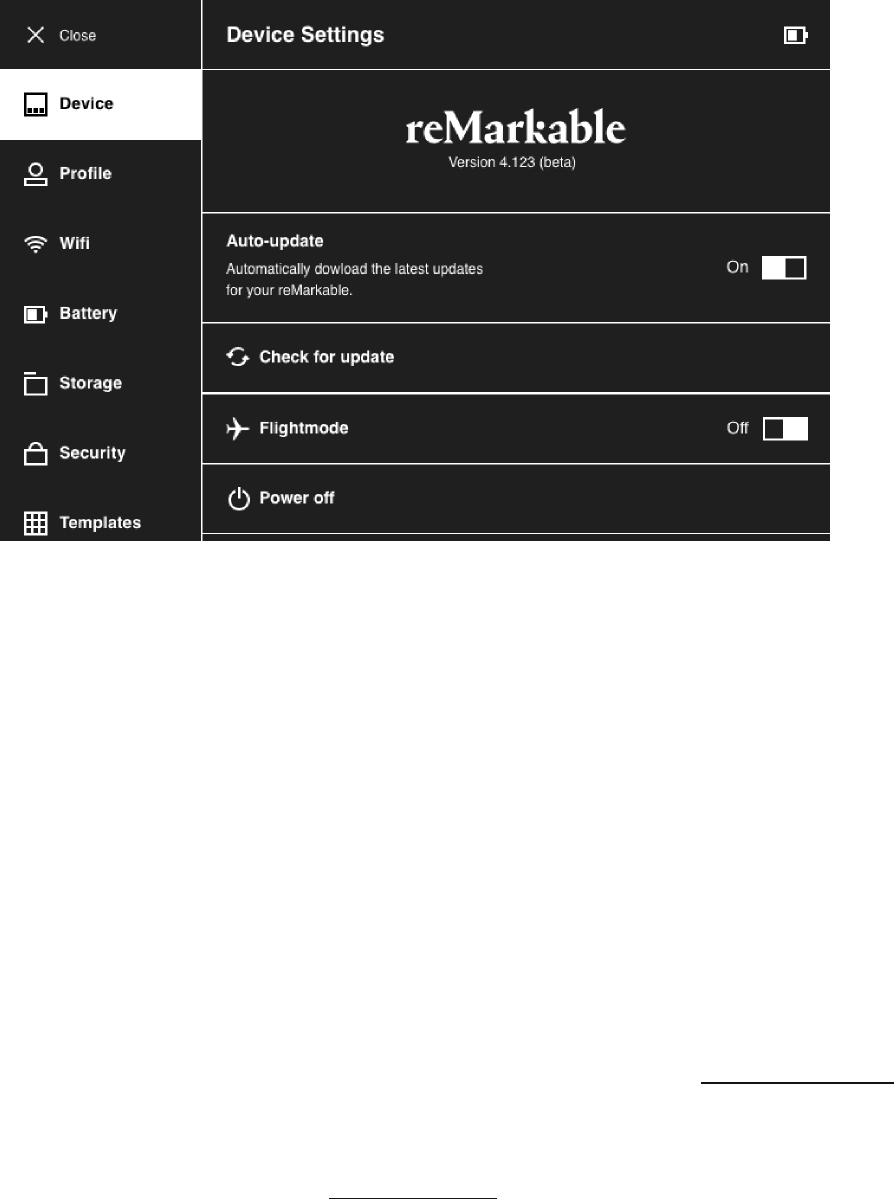
Device settings informs you of which version of the operating system you have and
enables you to download to the latest version. You can find which version your
device is running below the reMarkable-logo (e.g. Codex version 0.0.4.51)
How to update to the latest version:
1. Tap Check for updates to see if there are any new versions available. Make sure you
are connected to Wi-Fi.
2. Tap Download version to update to a new version.
3. When the download is finished, click Restart device to complete the update.
Note: Your device is by default set to auto update, which is recommended for you to
always have the latest updates and the newest functionality. With this enabled you
will get a notification on the home screen to restart the device when the new version
has been downloaded. You can turn auto update off by pressing the on/off-switch.
Flight mode
Some airlines are very strict when it comes to Flight mode, and it is not necessarily
sufficient to show that Wi-Fi is turned off. You can find the Flight mode in Device
settings. There will be an icon on the home screen when Flight mode is enabled.
68
6.2 Account settings
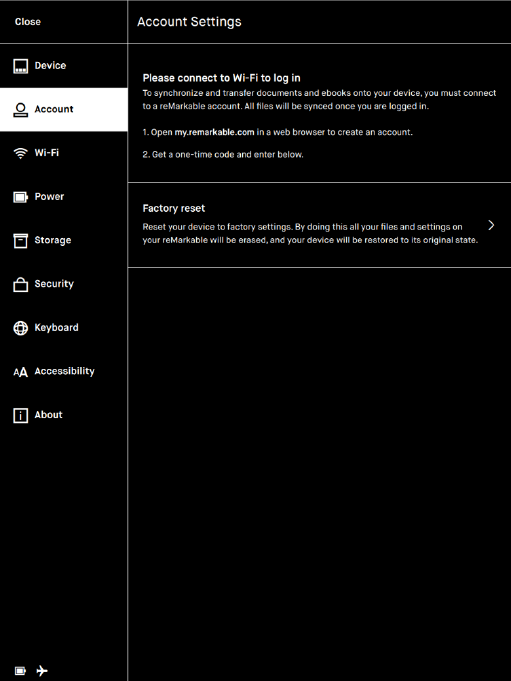
Connect your device to a reMarkable account to import documents and ebooks onto
your device via the reMarkable cloud.
If you did not connect to your account in the setup process you can do this manually
under account settings. You must be connected to Wi-Fi to be able to connect.
How to connect your device to your account:
1. Create a new account or log in to an existing reMarkable account on my.remarkable.com
on a mobile or desktop device.
2. Get a one-time code and enter it on your reMarkable device.
3. You are now connected to the reMarkable cloud.
You can log out of your account at any time by tapping Logout.
69
Note that your account can only be connected to one device at the time.
Factory reset
Many users have requested a safe way to ensure that they have deleted all the
content on their device. This functionality is an easy step-by-step process that can
be found in Account settings.
By doing a Factory reset all your files and settings on your reMarkable will be
erased. If you log back in with a one time code, all the files that are synced to the
cloud will be synchronized and made available again. After the Factory reset is done,
the reMarkable will start up with the Setup and onboarding procedures. NB: Like with
any other operating system, we cannot assure that files are erased permanently as
all files can be restored by using specialized tools for restoring deleted files.

70
6.3 Wi-Fi settings
All available Wi-Fi networks will appear in Wi-Fi Settings. Switch Wi-Fi on/off in the
top right corner.
How to connect to Wi-Fi:
1. Connect to Wi-Fi by choosing the network you want to connect to, and enter a password
if required. The lock icon indicates that a password is required to connect to the Wi-Fi
network.
2. The device will say “Connecting to ---” when your device is connecting to the selected
network.
3. When you are successfully connected a white dot will appear next to the Wi-Fi name, as
well as the text “Connected to …”. The signal strength is indicated by the icon next to the
Wi-Fi name.
reMarkable will automatically reconnect to a known Wi-Fi network.
Please note that it is not possible to connect to Wi-Fi networks that require a browser
window to open.
Wi-Fi fully connected
Wi-Fi disconnected

71
6.4 Power settings
Power settings allows you to enable or disable automatic sleep and automatic power
off. Read more about the different power saving modes below.
Battery Status
Battery charging
Power saving modes
Light sleep
Light sleep allows you to see your content while preserving battery life. reMarkable
will enter light sleep automatically after 20 minutes of inactivity.
How to:
• Wake the device from light sleep by pressing the home button or the prev/next buttons
on the device.
Light sleep can not be activated manually.
Sleep
reMarkable uses a minimum amount of power when sleep mode is enabled, and the
touch screen is not activated. If automatic sleep is activated, reMarkable will go into
sleep after 2 hours 40 minutes in light sleep or after 3 hours of inactivity. The device
is not connected to Wi-Fi while in sleep mode.
How to:
• Put the device to sleep by pressing the power button once. The sleep sign will appear
on the screen.
• Wake the device by pressing the power button.
72
Power off
How to:
• Turn off reMarkable by holding down the power button and tapping Turn off.
• Enable or disable auto power off in Power Settings. If automatic power off is enabled,
reMarkable will turn off 12 hours after inactivity.
If both auto sleep and auto power off are disabled, the device will stay on until the
battery is empty.
6.5 Storage settings
Storage gives an overview of how much free space is left on your device. The
reMarkable device offers 8 GB of internal storage (100,000 pages).
6.6 Security settings
Add extra security by enabling a passcode for your device. You will be asked for
your passcode when the device is turned on or awakened from sleep mode. The
passcode can only be reset from Security settings, but you have an unlimited
number of trials to unlock your device.
After more than five failed password attempts, you will get a lockout timer. The
lockout timer will increase succeedingly for every failed attempt. (Please note that
there is no way to reset a forgotten passcode. Contact our support service if this is
the case)
How to add a passcode:
1. Go to security settings
2. Enter the new passcode.
3. Verify the new passcode. If the passcodes don't match you have to try again.

73
How to change or remove a passcode:
1. Go to security settings
2. Enter your old passcode
6.7 Keyboard settings
reMarkable has an onscreen keyboard that appears when you are required to type in
information. In Keyboard Settings you can find your default keyboard indicated by a
white dot, and can choose to change to another available keyboard.
Tap the number key 123 to enter numbers or symbols and tap the += key to get
more symbols. Tap the letter key abc to return to regular keyboard. Tap the shift key
to enter uppercase characters.
6.8 Accessibility
Accessibility settings enable you to switch between right- and left-handed mode, and
alter the text size by choosing one of the three text size options.
Accessibility / Text Size / Settings
6.9 About
The "About" section of the settings menu contains general information about the
reMarkable, copyright notices, the End User License Agreement (EULA), as well as
information about licenses for different parts of the reMarkable software.
The GPLv3 Compliance section contains information about how to access the device
via SSH, and the password needed to do so.
Note that any changes made to the reMarkable through SSH access is done at the
users own risk.

74
You will also find the IP addresses available to connect to the reMarkable. In order to
find the IP addresses, select the "Copyrights and licenses" tab. The IP addresses are
found in the bottom right corner.
7 Connectivity & Apps
7.1 The reMarkable cloud
The reMarkable cloud is a cloud service you can use to sync all your files. The cloud
stores up to 8 GB of data, which is the same amount you can store on your device.
The reMarkable cloud service is included in the price of the reMarkable paper tablet.
You connect your device to the reMarkable cloud by setting up a reMarkable
account. By connecting to the cloud you can access your files in the mobile and
desktop application, and import files to your reMarkable device. All changes on any
platform are instantly synchronized when connected to Wi-Fi.
Create a reMarkable account
1. Go to my.remarkable.com
2. Click Sign up to create a new account. Choose whether you want to sign up with a
Facebook or Google account, or up by using your email. The latter will initiate an email
verification process.
3. Check your email account and follow the described steps to verify your email.
4. Click sign up. You now have a reMarkable account. Use this to connect your device and
apps to your reMarkable account.
Note: If you choose to sign up with your email address, you have to confirm your
account with the link received via email before you can proceed.

75
Security
The reMarkable cloud is hosted on Google's Cloud Platform. The reMarkable cloud
is secured with Google’s encryption at rest, trusted boot and physical security. All
data is also encrypted on rest and on transfer.
For more information about our privacy policy, please read our Terms and conditions
- Cloud Subscription.
7.2 Desktop app
The reMarkable desktop application enables you to view, liveview, organize, import
and download files.
Once you have set up the desktop and/or mobile application your device is
connected to the reMarkable cloud. All your notebooks, documents and ebooks will
be synced across your devices when connected to a Wi-Fi.
The desktop app supports the following versions:
• Windows 7 and newer
• MacOS
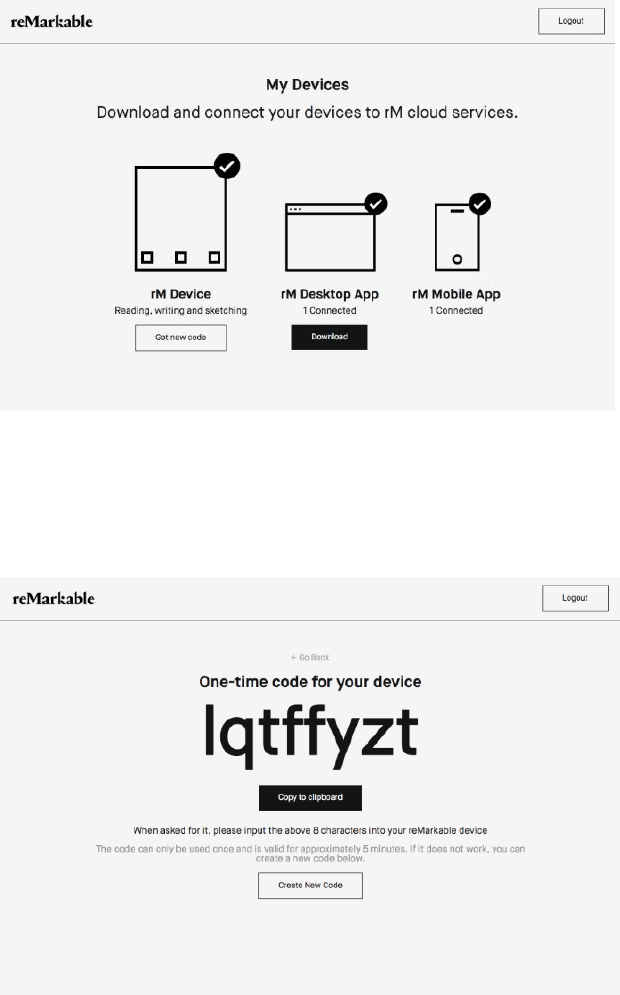
Setup
1. Go to my.remarkable.com and log into your account.
2. Download the desktop app.
3. Open the application and click Obtain a new code to connect to your reMarkable
account. You will be redirected to a browser window to receive a one-time code.
4. Enter the one-time code on your desktop app and click Login.
5. You are now set up!
76
Note that you must first connect to a reMarkable device before connecting to the
desktop app.
Download and connect your devices
Generate a one-time code
77
Organize your files
The desktop app enables you to organize your files and folders, as well as to copy,
move, bookmark and delete files. Tap the specific menu on a file or a folder, and
select one of the options in the side menu, or use drag and drop to move your files.
Import files
Import through the desktop app to get documents and ebooks onto your device.
Once imported, your files will be synced across your connected devices.
1. Open the desktop app.
2. Click the import button in the top right corner.
3. Select a file from the browser menu, and click open. You can also import a file by using
drag and drop.
4. The file will sync automatically to your device if you are connected to Wi-Fi. Only files in
the supported file formats (PDF and ePUB) will be transferred onto your device.
Export files (download to computer)
1. Mark the file you want to export.
2. Right click the file OR click Document in the top left
3. Click Export as PDF or Export as PNG depending on what format you want your file in.
4. Select a location for the exported file on your computer.
5. Your file will now start downloading to your computer.
7.3 Mobile app
The reMarkable mobile application enables you to view, organize and import files to
reMarkable.
Log in with your reMarkable account to connect to the reMarkable cloud and enable
your files to be synced across your devices when connected to Wi-Fi.
78
The mobile app is available in the App Store and Google Play.
Setup
1. Download the app “reMarkable - the Paper tablet” from the App Store or Google Play.
2. Open the app and click “Obtain a new code” to connect to your reMarkable account. You
will be redirected to a browser window where you need to log into your reMarkable
account.
3. Enter the one-time code on your mobile app and tap Login.
Note that you must first be connected to a reMarkable device to be able to connect
to the mobile app.
Organize your files
The mobile app enables you to organize your files and folders, as well as to copy,
move, bookmark and delete files on your mobile. Tap the specific menu on a file or a
folder and select one of the options in the side menu.
Import files
Import through the mobile app to get documents and ebooks onto your device. Once
imported, your files will be synced across your connected devices.
Import on iPhone
1. Open a PDF or ePUB-file.
2. Tap the share icon in the Apple-menu.
3. Choose Import with reMarkable.

79
Import on Android
Files can be imported to the Android app either by import in-app or by sharing a file
to the app. See below:
Import in-app
1. Tap Import files in the main menu.
2. Choose among your downloaded PDFs and ePUB-files.
3. Tap Accept to agree to give the app access to your files.
Share from file
1. Open a PDF or ePUB-file.
2. Tap the Share icon.
3. Choose Import with reMarkable.
7.4 Transfer files with a USB cable to reMarkable
How to transfer files through a USB cable with reMarkable (without Wi-Fi).
NB: This functionality is currently experimental, as we haven't fully implemented it
yet. We will work to improve how this works and looks in future software updates.
How to enable USB transfer on your reMarkable tablet:
1. Open Settings, and then Storage settings.
2. Here you'll see the choice Enable USB web interface. Enable this.
3. Then, connect the device with a USB cable to your computer.
4. Open a browser window on your computer and enter the address 10.11.99.1.
This will show you a web window of the content on your device, and you can drag
and drop content into this window to transfer epub and PDF files onto the device.
80
Even though this happens in a browser window, the file transfer happens through the
USB cable, and not over Wi-Fi. You don't need to be connected to the cloud to use
this functionality.
81
8 Safety, Handling & Support
8.1 Important safety & handling information
WARNING: Failure to follow these safety instructions could result in fire, electric
shock, injury, or damage to the reMarkable paper tablet or other property. Read all
the safety information below before using the device.
Handling
Handle the reMarkable device with care. When transporting it, we advise you to keep
your device in a folio to protect it. The device contains sensitive electronic
components that can be damaged if dropped, cracked, burnt or bent. Do not attempt
to insert foreign objects into the device.
Don’t use the reMarkable device or its accessories in rain or near other wet
locations, as it contains electrical components that can be damaged if it comes in
contact with liquid. If your device gets wet, unplug all cables and let the device go
into sleep mode. Let the device dry completely before turning it on by pressing the
power button. Do not attempt to dry your reMarkable with an external heat source,
such as a microwave oven or hair dryer.
Cleaning
Before cleaning reMarkable, unplug all cables and turn off the device (press the
power button for 4 seconds and tap 'Turn off'). Slightly dampen a soft and lint-free
cloth with water. Do not use window cleaners, solvents, aerosol sprays, household
cleaners, alcohol, ammonia, or abrasives as this may damage the device
permanently. Avoid getting moisture into any of the openings.

82
Operating temperature
Don't expose the reMarkable device to extreme heat or cold. The device is designed
to be used in temperatures between 0° and 35° C (32° and 95° F), and stored in
temperatures between -10° and 45° C (14° and 113° F).
Repairing
If your reMarkable needs service, do not open the device or attempt to repair it
yourself. Disassembling the device may damage the device or cause injury to you.
Please contact our customer support for more information.
Battery
The battery in the reMarkable should only be repaired or replaced by qualified
personnel. Please contact our customer support for more information.
NOTE
Damaged batteries should be treated as hazardous materials. Do not return the
device if the battery is swelling, leaking, or if you in any other way suspect that the
battery is damaged. In this case, please document it with a picture or a video
and make sure you dispose of or recycle the reMarkable and its accessories
according to local laws and regulations. Do not puncture, drop or incinerate the
battery.
Charging
The USB cable included with the device is certified to meet the criteria of the USB-IF
Compliance Program. Charge the device with the cable included with the device or

83
with cables and power adapters that are compatible with USB 2.0 or later and meets
the requirements of USB-IF Battery Charging Spec, Rev 1.2.
Choking hazard
The device and accessories contain small parts that may present a choking hazard,
and must be kept away from small children.
Distraction
Using the reMarkable device can be distracting and may possibly cause dangerous
situations. Avoid using the device while operating a vehicle.
Radio frequency energy exposure and interference
The reMarkable uses radio signals to connect to Wi-Fi. It is designed and
manufactured not to exceed the exposure limits for radio frequency energy as set by
the Federal Communications Commission of the United States (FCC). For more
information read the FCC Compliance Statement or input your device’s FCC ID
(which can be found on the back of your device) into the FCC ID search form
available at https://www.fcc.gov/oet/ea/fccid.
Although the reMarkable complies with the regulations governing RF emission, the
energy exposure from the device may negatively affect the operation of other
electronic equipment.
To prevent possible interference or danger, Wi-Fi on the device should be turned off
in areas where a wireless connection is forbidden, such as within an aircraft system.
Be aware that RF signals could constitute a hazard in areas such as health care
facilities or construction sites, and use of Wi-Fi may be restricted. The device should
not be used or charged with potentially explosive atmospheres.
84
Medical device interference
The reMarkable contains magnets, as well as components and radios that emit
electromagnetic fields. These may interfere with personal medical devices, such as
pacemakers or defibrillators, that are sensitive to magnetic and electromagnetic
fields.
Ensure to maintain a safe distance between the reMarkable and your medical
device, and consult with a physician if interference is observed.
Note that objects with magnetically-stored data may be sensitive to magnetic or
electromagnetic fields. Hence, items such as credit cards and hard drives should not
be placed near the device.
8.2 FCC Compliance statement
Changes or modifications not expressly approved by the party responsible for
compliance could void the user’s authority to operate the equipment.
This device complies with Part 15 of the FCC Rules. Operation is subject to the
following two conditions:
1. this device may not cause harmful interference, and
2. this device must accept any interference received, including interference that may cause
undesired operation.
Note: This equipment has been tested and found to comply with the limits for a Class
B digital device, pursuant to Part 15 of the FCC Rules. These limits are designed to
provide reasonable protection against harmful interference in a residential
installation. This equipment generates, uses, and can radiate radio frequency
energy, and if not installed and used in accordance with the instructions, may cause
harmful interference to radio communications. However, there is no guarantee that
interference will not occur in a particular installation. If this equipment does cause
harmful interference to radio or television reception, which can be determined by
85
turning the equipment off and on, the user is encouraged to try to correct the
interference by one or more of the following measures:
• Reorient or relocate the receiving antenna.
• Increase the separation between the equipment and receiver.
• Connect the equipment into an outlet on a circuit different from that to which the receiver
is connected.
• Consult the dealer or an experienced radio/TV technician for help.
This equipment complies with FCC radiation exposure limits set forth for an
uncontrolled environment. The End user must follow the specific operating
instructions for satisfying RF exposure compliance. This transmitter must not be co-
located or operating in conjunction with any other antenna or transmitter.
The device is designed to meet the requirements for exposure to radio waves
established by the Federal Communications Commission (USA). These
requirements set a SAR limit of 1.6 W/kg averaged over one gram of tissue. The
highest SAR value reported under this standard during product certification for use
when properly worn on the body is 0.647W/kg.
8.3 IC Statement
This device contains licence-exempt transmitter(s)/receiver(s) that comply with
Innovation, Science and Economic Development Canada’s licence-exempt RSS(s).
Operation is subject to the following two conditions:
1. This device may not cause interference.
2. This device must accept any interference, including interference that may cause
undesired operation of the device.
86
L'émetteur/récepteur exempt de licence contenu dans le présent appareil est
conforme aux
CNR d'Innovation, Sciences et Développement économique Canada applicables aux
appareils radio exempts de licence. L'exploitation est autorisée aux deux conditions
suivantes :
1. L'appareil ne doit pas produire de brouillage;
2. L'appareil doit accepter tout brouillage radioélectrique subi, même si le brouillage est
susceptible d'en compromettre le fonctionnement.
1. The device for operation in the band 5150–5250 MHz is only for indoor use to reduce the
potential for harmful interference to co-channel mobile satellite systems;(注:For
devices installed in vehicles point i. is not required.)
2. For devices with detachable antenna(s), the maximum antenna gain permitted for devices
in the band 5725-5850 MHz shall be such that the equipment still complies with the
e.i.r.p. limits as appropriate; and
1. Les dispositifs fonctionnant dans la bande de 5 150 à 5 250 MHz sont réservés
uniquement pour une utilisation à l'intérieur afin de réduire les risques de brouillage
préjudiciable aux systèmes de satellites mobiles utilisant les mêmes canaux4;
2. Pour les dispositifs munis d'antennes amovibles, le gain maximal d'antenne permis (pour
les dispositifs utilisant la bande de 5 725 à 5 850 MHz) doit être conforme à la limite de la
p.i.r.e. spécifiée, selon le cas;
This equipment complies with Innovation, Science and Economic Development
Canada’s radiation exposure limits set forth for an uncontrolled environment. The
End user must follow the specific operating instructions for satisfying RF exposure
compliance. This transmitter must not be co-located or operating in conjunction with
any other antenna or transmitter.
87
The device is designed to meet the requirements for exposure to radio waves
established by the Innovation, Science and Economic Development Canada’s.
These requirements set a SAR limit of 1.6 W/kg averaged over one gram of tissue.
The highest SAR value reported under this standard during product certification for
use when properly worn on the body is 0.647W/kg.
Ce matériel répond à l'innovation, science et développement économique canada
est l'exposition maximale fixée pour un autre environnement. L'utilisateur final doit
suivre les instructions d'exploitation de l'exposition aux radiofréquences spécifiques
pour satisfaire la conformité. Cet émetteur ne doit pas être situées ou opérant
conjointement avec toute autre antenne ou l'émetteur.
Le dispositif est conçu pour répondre aux exigences de l'exposition aux ondes radio
créée par la science et l'innovation, développement économique Canada. Ces
exigences limite de sar de 1.6 W / kg en moyenne pour un gramme de tissu. La
valeur de r - s en vertu de cette norme plus élevée au cours de la certification de
produits déclarés pour une utilisation bien portés sur le corps est 0.647 W/kg.
8.4 Disposal and recycling information
Damaged batteries should be treated as hazardous materials. Do not return the
device if the battery is swelling, leaking, or if you in any other way suspect that the
battery is damaged. In this case, please document it with a picture or a
video make sure you dispose of or recycle the reMarkable and its accessories
according to local laws and regulations. Do not puncture, drop or incinerate the
battery.
