Sony ACID 6.0a User Manual Pro 6.0 Acidpro60
User Manual: sony Acid Pro - 6.0 - User Manual Free User Guide for Sony Acid Software, Manual
Open the PDF directly: View PDF ![]() .
.
Page Count: 290 [warning: Documents this large are best viewed by clicking the View PDF Link!]
- Introducing ACID Software
- Getting Started
- Editing Events
- Using the Media Manager
- Creating a new media library
- Opening a media library
- Adding media files to a library
- Removing media files from a library
- Tagging media files
- Backing up your media libraries
- Opening a Reference Library
- Searching for media files
- Previewing media
- Adding media to your project
- Resolving offline media files
- Customizing the Media Manager window
- Setting Media Manager options
- Working in the Track View
- Using the Chopper
- Working with Tracks
- Using clips with tracks
- Using track effects
- Using track automation envelopes
- Choosing stereo pan types
- Using the Beatmapper
- Understanding stretching properties
- Configuring track properties
- Configuring clip properties
- Working with grooves
- Using folder tracks
- Mixing multiple tracks to a single track
- Exporting loops
- Using Automation
- Using the Mixer
- Recording Audio
- Working with MIDI
- Adding MIDI tracks and files
- Recording MIDI
- Editing MIDI on the timeline
- Processing and filtering MIDI events
- Editing MIDI track properties
- Configuring MIDI input filters
- Setting up MIDI quantize input filters
- MIDI Track Envelopes and Keyframes
- Editing MIDI clip properties
- Using the piano roll editor
- Using the list editor
- Routing tracks to MIDI devices or soft synths
- Resetting MIDI ports
- Rendering projects with MIDI tracks
- Playing MIDI from external devices
- Creating or editing program maps
- Creating or editing drum maps
- Synchronizing using MIDI timecode
- Exporting MIDI files
- Configuring a Mackie Control Universal
- Configuring a Frontier TranzPort
- Configuring a generic MIDI controller
- Working with Video
- Working with 5.1 Surround
- Customizing ACID Software
- Working with ACID windows
- Changing the time ruler format
- Using the project grid
- Using the toolbar
- Using the time display
- Setting default track properties
- Setting ACID preferences
- Using the General tab
- Using the Audio tab
- Using the Audio Device tab
- Using the MIDI tab
- Using the VST Effects tab
- Using the VST Instruments tab
- Using the ReWire Devices tab
- Using the Video tab
- Using the Editing tab
- Using the Sync tab
- Using the Display tab
- Using the Other tab
- Using the Folders tab
- Using the External Control & Automation tab
- Customizing keyboard shortcuts
- Using Control Surfaces with ACID
- ACID Tips and Tricks
- Adding long media files quickly
- Playing with duplicate tracks
- Adding depth with assignable effects
- Playing double time/half time
- Constructing the wall of sound
- Adding through subtraction
- Tweaking the dynamics
- Creating wah-wah effects with automated Track EQ
- Making automated changes more stark
- Making automated frequency changes more natural
- Overriding compress/expand
- Slicing and dicing in the Chopper
- Building instrument solos
- Building scales
- Glossary
- Index

Revised October 27, 2006
After ACID software is installed and you start it for the first time, the registration wizard appears. This wizard offers easy
steps that allow you to register the software online with Sony Media Software. Alternatively, you may register online at
http://www.sony.com/mediasoftware at any time.
Registering your product will provide you with access to a variety of technical support options, notification of product
updates, and special promotions exclusive to registered ACID users.
Registration assistance
If you do not have access to the Internet, registration assistance is available during normal weekday business hours.
Please contact our Customer Service department by dialing one of the following numbers:
Customer service/sales
For a detailed list of customer service options, we encourage you to visit
http://mediasoftware.sonypictures.com/support/custserv.asp. Use the following numbers for telephone support during
normal weekday business hours:
Technical support
For a detailed list of technical support options, we encourage you to visit
http://mediasoftware.sonypictures.com/support/default.asp. To listen to your support options by telephone, please call
608-256-5555.
About your rights in ACID software
ACID is licensed to you under the terms of the End User License Agreement. The End User License Agreement is first
presented to you when you install the software. Please review the End User License Agreement carefully as its terms
affect your rights with respect to the software. For your reference, a copy of the End User License Agreement for ACID is
located at
http://www.sony.com/mediasoftware.
About your privacy
Sony Media Software respects your privacy and is committed to protecting personal information. Your use of the
software is governed by the Software Privacy Policy. A copy of this policy is incorporated into the registration process and
you are asked to agree to its terms prior to accepting the terms of the End User License Agreement. Please review its
Telephone/Fax Country
1-800-577-6642 (toll-free) US, Canada, and Virgin Islands
+608-204-7703 for all other countries
1-608-250-1745 (Fax) All countries
Telephone/Fax Country
1-800-577-6642 (toll-free) US, Canada, and Virgin Islands
+608-204-7703 for all other countries
1-608-250-1745 (Fax) All countries
contents carefully as its terms and conditions affect your rights with respect to the information that is collected by the
software. For your reference, a copy of the Software Privacy Policy is located at http://mediasoftware.sonypictures.com/
corporate/privacy.asp.
Proper use of software
ACID is not intended and should not be used for illegal or infringing purposes, such as the illegal copying or sharing of
copyrighted materials. Using ACID for such purposes is, among other things, against United States and international
copyright laws and contrary to the terms and conditions of the End User License Agreement. Such activity may be
punishable by law and may also subject you to the breach remedies set forth in the End User License Agreement.
Legal notices
Vegas, Vegas+DVD, DVD Architect, Vegas Movie Studio, Vegas Movie Studio Platinum, Vegas Movie Studio+DVD, DVD Architect Studio,
ACID, Music Studio, ACIDized, Sony Sound Series, Groove Mapping, Groove Cloning, Media Manager, CD Architect, Sound Forge, and
Audio Studio are trademarks or registered trademarks of Madison Media Software, Inc. or its affiliates in the United States and other
countries. All other trademarks or registered trademarks are the property of their respective owners in the United States and other
countries.
Thomson Fraunhofer MP3
MPEG Layer-3 audio coding technology licensed from Fraunhofer IIS and Thomson.
Supply of this product does not convey a license nor imply any right to distribute content created with this product in revenue
generating broadcast systems (terrestrial, satellite, cable and/or other distribution channels), streaming applications (via internet,
intranets and/or other networks), other content distribution systems (pay-audio or audio on demand applications and the like) or on
physical media (compact discs, digital versatile discs, semiconductor chips, hard drives, memory cards and the like).
An independent license for such use is required. For details, please visit: http://mp3licensing.com.
Microsoft DirectX programming interface
Portions utilize Microsoft® DirectX® technologies. Copyright © 1999 – 2006 Microsoft Corporation. All rights reserved.
Microsoft Windows Media 9
Portions utilize Microsoft Windows Media® technologies. Copyright © 1999 – 2006 Microsoft Corporation. All rights reserved.
Real, RealMedia, RealAudio, and RealVideo applications
2006 RealNetworks, Inc. Patents Pending. All rights reserved. Real®, Real Media®, RealAudio®, RealVideo®, and the Real logo are
trademarks or registered trademarks of RealNetworks, Inc. in the United States and other countries.
MPEGLA and MPEG 2
USE OF THIS PRODUCT IN ANY MANNER THAT COMPLIES WITH THE MPEG-2 STANDARD IS EXPRESSLY PROHIBITED WITHOUT A LICENSE
UNDER APPLICABLE PATENTS IN THE MPEG-2 PATENT PORTFOLIO, WHICH LICENSE IS AVAILABLE FROM MPEG-LA, LLC, 250 STEELE
STREET, SUITE 300, DENVER, COLORADO 80206.
Manufactured under license from MPEG-LA.
Dolby, Dolby Digital AC-3, and AAC encoding
This product contains one or more programs protected under international and U.S. copyright laws as unpublished works. They are
confidential and proprietary to Dolby Laboratories. Their reproduction or disclosure, in whole or in part, or the production of derivative
works therefrom without the express permission of Dolby Laboratories is prohibited. Copyright 1992 – 2006 Dolby Laboratories. All
rights reserved.
Dolby®, the double-D symbol, AC-3®, and Dolby Digital® are registered trademarks of Dolby Laboratories. AAC™ is a trademark of Dolby
Laboratories.
PNG file format
Copyright © 2006. World Wide Web Consortium (Massachusetts Institute of Technology, European Research Consortium for Informatics
and Mathematics, Keio University). All rights reserved. This work is distributed under the W3C Software License in the hope that it will be
useful, but WITHOUT ANY WARRANTY; without even the implied warranty of MERCHANTIBILITY or FITNESS FOR A PARTICULAR PURPOSE.
http://www.w3.org/Consortium/Legal/2002/copyright-software-20021231.
Apple QuickTime
Apple® QuickTime® application is a trademark of Apple, Inc. in the United States and other countries.
Apple Macintosh Audio Interchange File Format (AIFF) file format.
Apple® Macintosh® Audio Interchange™ File Format (AIFF) is a trademark of Apple, Inc. in the United States and other countries.
Targa file format
The Targa™ file format is a trademark of Pinnacle Systems, Inc.
Tagged Image File Format (TIFF)
Adobe Tagged Image™ File Format is a registered trademark of Adobe Systems Incorporated in the United States and other countries. All
rights reserved.
Main Concept encoder
Main Concept® plug-in is a trademark of registered trademark of Main Concept, Inc. in the United States or other countries. All rights
reserved.
Macromedia Flash
Macromedia and Flash are trademarks or registered trademarks of Macromedia, Inc. in the United States and/or other countries.
Gracenote
CD and music-related data from Gracenote, Inc., copyright © 2000-2006 Gracenote. Gracenote CDDB® Client Software, copyright 2000-
2006 Gracenote. This product and service may practice one or more of the following U.S. Patents: #5,987,525; #6,061,680; #6,154,773,
#6,161,132, #6,230,192, #6,230,207, #6,240,459, #6,330,593, and other patents issued or pending. Services supplied and/or device
manufactured under license for following Open Globe, Inc. United States Patent 6,304,523.
Gracenote and CDDB are registered trademarks of Gracenote. The Gracenote logo and logotype, MusicID, and the "Powered by
Gracenote" logo are trademarks of Gracenote.
ATRAC
"ATRAC," "ATRAC3," "ATRAC3plus," "ATRAC Advanced Lossless," and the ATRAC logo are trademarks of Sony Corporation.
http://www.sony.net/Products/ATRAC3/

The information contained in this manual is subject to change without notice and does not represent a guarantee or
commitment on behalf of Madison Media Software, Inc. in any way. All updates or additional information relating to the
contents of this manual will be posted on the Sony Media Software web site, located at http://www.sony.com/
mediasoftware. The software is provided to you under the terms of the End User License Agreement and Software Privacy
Policy, and must be used and/or copied in accordance therewith. Copying or distributing the software except as expressly
described in the End User License Agreement is strictly prohibited. No part of this manual may be reproduced or
transmitted in any form or for any purpose without the express written consent of Madison Media Software, Inc.
Copyright 2006. Madison Media Software, Inc.
Program Copyright 2006. Madison Media Software, Inc. All rights reserved.
Madison Media Software, Inc.
A subsidiary of Sony Corporation of America
1617 Sherman Avenue
Madison, WI 53704
USA

TABLE OF CONTENTS | 1
Table of
Contents
Introducing ACID Software. . . . . . . . . . . . . . . . . . . . . . . . . . . . . . . . . . . . . . . . . . . . . . . . . . . . . . . . .15
Welcome. . . . . . . . . . . . . . . . . . . . . . . . . . . . . . . . . . . . . . . . . . . . . . . . . . . . . . . . . . . . . . . . . . . . . . . . . . . . .15
System requirements. . . . . . . . . . . . . . . . . . . . . . . . . . . . . . . . . . . . . . . . . . . . . . . . . . . . . . . . . . . . . . . . . 15
Installing ACID . . . . . . . . . . . . . . . . . . . . . . . . . . . . . . . . . . . . . . . . . . . . . . . . . . . . . . . . . . . . . . . . . . . . . . . 15
Using online help . . . . . . . . . . . . . . . . . . . . . . . . . . . . . . . . . . . . . . . . . . . . . . . . . . . . . . . . . . . . . . . . . . . . 15
Online help . . . . . . . . . . . . . . . . . . . . . . . . . . . . . . . . . . . . . . . . . . . . . . . . . . . . . . . . . . . . . . . . . . . . . . . . . . . . . . . . 15
What’s This? help . . . . . . . . . . . . . . . . . . . . . . . . . . . . . . . . . . . . . . . . . . . . . . . . . . . . . . . . . . . . . . . . . . . . . . . . . . 16
Help on the Web . . . . . . . . . . . . . . . . . . . . . . . . . . . . . . . . . . . . . . . . . . . . . . . . . . . . . . . . . . . . . . . . . . . . . . . . . . . 16
Overview of ACID software . . . . . . . . . . . . . . . . . . . . . . . . . . . . . . . . . . . . . . . . . . . . . . . . . . . . . . . . . . . 16
Main window . . . . . . . . . . . . . . . . . . . . . . . . . . . . . . . . . . . . . . . . . . . . . . . . . . . . . . . . . . . . . . . . . . . . . . . . . . . . . . 17
Toolbar . . . . . . . . . . . . . . . . . . . . . . . . . . . . . . . . . . . . . . . . . . . . . . . . . . . . . . . . . . . . . . . . . . . . . . . . . . . . . . . . . . . . 17
Track list . . . . . . . . . . . . . . . . . . . . . . . . . . . . . . . . . . . . . . . . . . . . . . . . . . . . . . . . . . . . . . . . . . . . . . . . . . . . . . . . . . . 18
Track view . . . . . . . . . . . . . . . . . . . . . . . . . . . . . . . . . . . . . . . . . . . . . . . . . . . . . . . . . . . . . . . . . . . . . . . . . . . . . . . . . 20
Window docking area . . . . . . . . . . . . . . . . . . . . . . . . . . . . . . . . . . . . . . . . . . . . . . . . . . . . . . . . . . . . . . . . . . . . . . 22
Keyboard command reference . . . . . . . . . . . . . . . . . . . . . . . . . . . . . . . . . . . . . . . . . . . . . . . . . . . . . . . . . . . . . 24
Audio signal flow . . . . . . . . . . . . . . . . . . . . . . . . . . . . . . . . . . . . . . . . . . . . . . . . . . . . . . . . . . . . . . . . . . . . . . . . . . 31
MIDI signal flow . . . . . . . . . . . . . . . . . . . . . . . . . . . . . . . . . . . . . . . . . . . . . . . . . . . . . . . . . . . . . . . . . . . . . . . . . . . 33
Getting Started . . . . . . . . . . . . . . . . . . . . . . . . . . . . . . . . . . . . . . . . . . . . . . . . . . . . . . . . . . . . . . . . . . . .35
Starting projects . . . . . . . . . . . . . . . . . . . . . . . . . . . . . . . . . . . . . . . . . . . . . . . . . . . . . . . . . . . . . . . . . . . . .35
Setting project properties . . . . . . . . . . . . . . . . . . . . . . . . . . . . . . . . . . . . . . . . . . . . . . . . . . . . . . . . . . . . . . . . . . 35
Opening existing projects . . . . . . . . . . . . . . . . . . . . . . . . . . . . . . . . . . . . . . . . . . . . . . . . . . . . . . . . . . . . . . . . . . 36
Getting media files . . . . . . . . . . . . . . . . . . . . . . . . . . . . . . . . . . . . . . . . . . . . . . . . . . . . . . . . . . . . . . . . . . . 36
Previewing media from the Explorer window . . . . . . . . . . . . . . . . . . . . . . . . . . . . . . . . . . . . . . . . . . . . . . . 36
Adding media to the project . . . . . . . . . . . . . . . . . . . . . . . . . . . . . . . . . . . . . . . . . . . . . . . . . . . . . . . . . . . . . . . 37
Obtaining or editing CD information using Gracenote . . . . . . . . . . . . . . . . . . . . . . . . . . . . . . . . . . . . . .39
Understanding clip types . . . . . . . . . . . . . . . . . . . . . . . . . . . . . . . . . . . . . . . . . . . . . . . . . . . . . . . . . . . . . 40
Loops . . . . . . . . . . . . . . . . . . . . . . . . . . . . . . . . . . . . . . . . . . . . . . . . . . . . . . . . . . . . . . . . . . . . . . . . . . . . . . . . . . . . . 40
One-shots . . . . . . . . . . . . . . . . . . . . . . . . . . . . . . . . . . . . . . . . . . . . . . . . . . . . . . . . . . . . . . . . . . . . . . . . . . . . . . . . . 41
Beatmapped . . . . . . . . . . . . . . . . . . . . . . . . . . . . . . . . . . . . . . . . . . . . . . . . . . . . . . . . . . . . . . . . . . . . . . . . . . . . . . 41
MIDI . . . . . . . . . . . . . . . . . . . . . . . . . . . . . . . . . . . . . . . . . . . . . . . . . . . . . . . . . . . . . . . . . . . . . . . . . . . . . . . . . . . . . . . 41
Folder tracks . . . . . . . . . . . . . . . . . . . . . . . . . . . . . . . . . . . . . . . . . . . . . . . . . . . . . . . . . . . . . . . . . . . . . . . . . . . . . . . 41
Adding and editing events . . . . . . . . . . . . . . . . . . . . . . . . . . . . . . . . . . . . . . . . . . . . . . . . . . . . . . . . . . .41
Painting events . . . . . . . . . . . . . . . . . . . . . . . . . . . . . . . . . . . . . . . . . . . . . . . . . . . . . . . . . . . . . . . . . . . . . . . . . . . . 41
Changing the length of events . . . . . . . . . . . . . . . . . . . . . . . . . . . . . . . . . . . . . . . . . . . . . . . . . . . . . . . . . . . . . 43
Erasing sections of events . . . . . . . . . . . . . . . . . . . . . . . . . . . . . . . . . . . . . . . . . . . . . . . . . . . . . . . . . . . . . . . . . . 43
Moving events . . . . . . . . . . . . . . . . . . . . . . . . . . . . . . . . . . . . . . . . . . . . . . . . . . . . . . . . . . . . . . . . . . . . . . . . . . . . . 43
Editing MIDI events . . . . . . . . . . . . . . . . . . . . . . . . . . . . . . . . . . . . . . . . . . . . . . . . . . . . . . . . . . . . . . . . . . . . . . . . 43
Using the cursor. . . . . . . . . . . . . . . . . . . . . . . . . . . . . . . . . . . . . . . . . . . . . . . . . . . . . . . . . . . . . . . . . . . . . . 43
Positioning the cursor with the mouse . . . . . . . . . . . . . . . . . . . . . . . . . . . . . . . . . . . . . . . . . . . . . . . . . . . . . 44
Positioning the cursor with the keyboard . . . . . . . . . . . . . . . . . . . . . . . . . . . . . . . . . . . . . . . . . . . . . . . . . . . 44
Positioning the cursor with the Go To command . . . . . . . . . . . . . . . . . . . . . . . . . . . . . . . . . . . . . . . . . . . . 44
Making selections . . . . . . . . . . . . . . . . . . . . . . . . . . . . . . . . . . . . . . . . . . . . . . . . . . . . . . . . . . . . . . . . . . . . 44
2 | TABLE OF CONTENTS
Selecting an event . . . . . . . . . . . . . . . . . . . . . . . . . . . . . . . . . . . . . . . . . . . . . . . . . . . . . . . . . . . . . . . . . . . . . . . . . 44
Selecting multiple events . . . . . . . . . . . . . . . . . . . . . . . . . . . . . . . . . . . . . . . . . . . . . . . . . . . . . . . . . . . . . . . . . . 44
Creating time selections . . . . . . . . . . . . . . . . . . . . . . . . . . . . . . . . . . . . . . . . . . . . . . . . . . . . . . . . . . . . . . . . . . . 45
Creating event selections within time selections . . . . . . . . . . . . . . . . . . . . . . . . . . . . . . . . . . . . . . . . . . . . 46
Working with tracks . . . . . . . . . . . . . . . . . . . . . . . . . . . . . . . . . . . . . . . . . . . . . . . . . . . . . . . . . . . . . . . . . . 46
Reordering tracks . . . . . . . . . . . . . . . . . . . . . . . . . . . . . . . . . . . . . . . . . . . . . . . . . . . . . . . . . . . . . . . . . . . . . . . . . . 46
Resizing tracks . . . . . . . . . . . . . . . . . . . . . . . . . . . . . . . . . . . . . . . . . . . . . . . . . . . . . . . . . . . . . . . . . . . . . . . . . . . . . 46
Changing track colors . . . . . . . . . . . . . . . . . . . . . . . . . . . . . . . . . . . . . . . . . . . . . . . . . . . . . . . . . . . . . . . . . . . . . . 47
Renaming tracks . . . . . . . . . . . . . . . . . . . . . . . . . . . . . . . . . . . . . . . . . . . . . . . . . . . . . . . . . . . . . . . . . . . . . . . . . . . 47
Duplicating tracks . . . . . . . . . . . . . . . . . . . . . . . . . . . . . . . . . . . . . . . . . . . . . . . . . . . . . . . . . . . . . . . . . . . . . . . . . 47
Deleting tracks . . . . . . . . . . . . . . . . . . . . . . . . . . . . . . . . . . . . . . . . . . . . . . . . . . . . . . . . . . . . . . . . . . . . . . . . . . . . 47
Copying, cutting, and pasting tracks . . . . . . . . . . . . . . . . . . . . . . . . . . . . . . . . . . . . . . . . . . . . . . . . . . . . . . . . 47
Adjusting the mix . . . . . . . . . . . . . . . . . . . . . . . . . . . . . . . . . . . . . . . . . . . . . . . . . . . . . . . . . . . . . . . . . . . . . . . . . . 48
Muting tracks . . . . . . . . . . . . . . . . . . . . . . . . . . . . . . . . . . . . . . . . . . . . . . . . . . . . . . . . . . . . . . . . . . . . . . . . . . . . . . 48
Soloing tracks . . . . . . . . . . . . . . . . . . . . . . . . . . . . . . . . . . . . . . . . . . . . . . . . . . . . . . . . . . . . . . . . . . . . . . . . . . . . . 49
Working with groups of tracks . . . . . . . . . . . . . . . . . . . . . . . . . . . . . . . . . . . . . . . . . . . . . . . . . . . . . . . . . . . . . 49
Using undo and redo . . . . . . . . . . . . . . . . . . . . . . . . . . . . . . . . . . . . . . . . . . . . . . . . . . . . . . . . . . . . . . . . . 49
Using undo . . . . . . . . . . . . . . . . . . . . . . . . . . . . . . . . . . . . . . . . . . . . . . . . . . . . . . . . . . . . . . . . . . . . . . . . . . . . . . . . 49
Undoing all edits . . . . . . . . . . . . . . . . . . . . . . . . . . . . . . . . . . . . . . . . . . . . . . . . . . . . . . . . . . . . . . . . . . . . . . . . . . 49
Using redo . . . . . . . . . . . . . . . . . . . . . . . . . . . . . . . . . . . . . . . . . . . . . . . . . . . . . . . . . . . . . . . . . . . . . . . . . . . . . . . . 49
Clearing the undo history . . . . . . . . . . . . . . . . . . . . . . . . . . . . . . . . . . . . . . . . . . . . . . . . . . . . . . . . . . . . . . . . . . 50
Playing the project . . . . . . . . . . . . . . . . . . . . . . . . . . . . . . . . . . . . . . . . . . . . . . . . . . . . . . . . . . . . . . . . . . . 50
Using the transport bar . . . . . . . . . . . . . . . . . . . . . . . . . . . . . . . . . . . . . . . . . . . . . . . . . . . . . . . . . . . . . . . . . . . . 50
Using playback options . . . . . . . . . . . . . . . . . . . . . . . . . . . . . . . . . . . . . . . . . . . . . . . . . . . . . . . . . . . . . . . . . . . . 50
Using the Mixer window. . . . . . . . . . . . . . . . . . . . . . . . . . . . . . . . . . . . . . . . . . . . . . . . . . . . . . . . . . . . . . 51
Viewing the Mixer window . . . . . . . . . . . . . . . . . . . . . . . . . . . . . . . . . . . . . . . . . . . . . . . . . . . . . . . . . . . . . . . . . 51
Using the mixer toolbar . . . . . . . . . . . . . . . . . . . . . . . . . . . . . . . . . . . . . . . . . . . . . . . . . . . . . . . . . . . . . . . . . . . . 52
Renaming mixer controls . . . . . . . . . . . . . . . . . . . . . . . . . . . . . . . . . . . . . . . . . . . . . . . . . . . . . . . . . . . . . . . . . . 52
Using the mixer’s faders . . . . . . . . . . . . . . . . . . . . . . . . . . . . . . . . . . . . . . . . . . . . . . . . . . . . . . . . . . . . . . . . . . . . 52
Saving, rendering, and delivering projects . . . . . . . . . . . . . . . . . . . . . . . . . . . . . . . . . . . . . . . . . . . . 53
Saving projects . . . . . . . . . . . . . . . . . . . . . . . . . . . . . . . . . . . . . . . . . . . . . . . . . . . . . . . . . . . . . . . . . . . . . . . . . . . . 54
Rendering projects . . . . . . . . . . . . . . . . . . . . . . . . . . . . . . . . . . . . . . . . . . . . . . . . . . . . . . . . . . . . . . . . . . . . . . . . 54
Publishing to the Internet . . . . . . . . . . . . . . . . . . . . . . . . . . . . . . . . . . . . . . . . . . . . . . . . . . . . . . . . . . . . . . . . . . 56
Writing to CD . . . . . . . . . . . . . . . . . . . . . . . . . . . . . . . . . . . . . . . . . . . . . . . . . . . . . . . . . . . . . . . . . . . . . . . . 57
Understanding track-at-once and disc-at-once . . . . . . . . . . . . . . . . . . . . . . . . . . . . . . . . . . . . . . . . . . . . . 57
Editing Events . . . . . . . . . . . . . . . . . . . . . . . . . . . . . . . . . . . . . . . . . . . . . . . . . . . . . . . . . . . . . . . . . . . . .61
Copying events . . . . . . . . . . . . . . . . . . . . . . . . . . . . . . . . . . . . . . . . . . . . . . . . . . . . . . . . . . . . . . . . . . . . . . 61
Pasting events . . . . . . . . . . . . . . . . . . . . . . . . . . . . . . . . . . . . . . . . . . . . . . . . . . . . . . . . . . . . . . . . . . . . . . . 61
Using Paste Repeat . . . . . . . . . . . . . . . . . . . . . . . . . . . . . . . . . . . . . . . . . . . . . . . . . . . . . . . . . . . . . . . . . . . . . . . . 62
Using Paste Insert . . . . . . . . . . . . . . . . . . . . . . . . . . . . . . . . . . . . . . . . . . . . . . . . . . . . . . . . . . . . . . . . . . . . . . . . . . 62
Cutting events . . . . . . . . . . . . . . . . . . . . . . . . . . . . . . . . . . . . . . . . . . . . . . . . . . . . . . . . . . . . . . . . . . . . . . . 63
Deleting events . . . . . . . . . . . . . . . . . . . . . . . . . . . . . . . . . . . . . . . . . . . . . . . . . . . . . . . . . . . . . . . . . . . . . . 63
TABLE OF CONTENTS | 3
Reversing events . . . . . . . . . . . . . . . . . . . . . . . . . . . . . . . . . . . . . . . . . . . . . . . . . . . . . . . . . . . . . . . . . . . . .63
Trimming events . . . . . . . . . . . . . . . . . . . . . . . . . . . . . . . . . . . . . . . . . . . . . . . . . . . . . . . . . . . . . . . . . . . . . 63
Splitting events . . . . . . . . . . . . . . . . . . . . . . . . . . . . . . . . . . . . . . . . . . . . . . . . . . . . . . . . . . . . . . . . . . . . . .64
Splitting at the cursor position . . . . . . . . . . . . . . . . . . . . . . . . . . . . . . . . . . . . . . . . . . . . . . . . . . . . . . . . . . . . . 64
Splitting one event . . . . . . . . . . . . . . . . . . . . . . . . . . . . . . . . . . . . . . . . . . . . . . . . . . . . . . . . . . . . . . . . . . . . . . . . 65
Splitting multiple events . . . . . . . . . . . . . . . . . . . . . . . . . . . . . . . . . . . . . . . . . . . . . . . . . . . . . . . . . . . . . . . . . . . 65
Splitting a time selection . . . . . . . . . . . . . . . . . . . . . . . . . . . . . . . . . . . . . . . . . . . . . . . . . . . . . . . . . . . . . . . . . . . 65
Splitting events within a time selection . . . . . . . . . . . . . . . . . . . . . . . . . . . . . . . . . . . . . . . . . . . . . . . . . . . . . 66
Joining events . . . . . . . . . . . . . . . . . . . . . . . . . . . . . . . . . . . . . . . . . . . . . . . . . . . . . . . . . . . . . . . . . . . . . . . 66
Automatic crossfades. . . . . . . . . . . . . . . . . . . . . . . . . . . . . . . . . . . . . . . . . . . . . . . . . . . . . . . . . . . . . . . . . 66
Creating crossfades . . . . . . . . . . . . . . . . . . . . . . . . . . . . . . . . . . . . . . . . . . . . . . . . . . . . . . . . . . . . . . . . . . . . . . . . 66
Changing fade types . . . . . . . . . . . . . . . . . . . . . . . . . . . . . . . . . . . . . . . . . . . . . . . . . . . . . . . . . . . . . . . . . . . . . . . 67
Ripple editing . . . . . . . . . . . . . . . . . . . . . . . . . . . . . . . . . . . . . . . . . . . . . . . . . . . . . . . . . . . . . . . . . . . . . . . .67
Cutting events in ripple editing mode . . . . . . . . . . . . . . . . . . . . . . . . . . . . . . . . . . . . . . . . . . . . . . . . . . . . . . 67
Deleting events in ripple editing mode . . . . . . . . . . . . . . . . . . . . . . . . . . . . . . . . . . . . . . . . . . . . . . . . . . . . . 68
Pasting events in ripple editing mode . . . . . . . . . . . . . . . . . . . . . . . . . . . . . . . . . . . . . . . . . . . . . . . . . . . . . . 69
Slipping and sliding events . . . . . . . . . . . . . . . . . . . . . . . . . . . . . . . . . . . . . . . . . . . . . . . . . . . . . . . . . . . 69
Shifting the contents of (slipping) events . . . . . . . . . . . . . . . . . . . . . . . . . . . . . . . . . . . . . . . . . . . . . . . . . . . 70
Slip-trimming events . . . . . . . . . . . . . . . . . . . . . . . . . . . . . . . . . . . . . . . . . . . . . . . . . . . . . . . . . . . . . . . . . . . . . . 70
Sliding events . . . . . . . . . . . . . . . . . . . . . . . . . . . . . . . . . . . . . . . . . . . . . . . . . . . . . . . . . . . . . . . . . . . . . . . . . . . . . 70
Changing event properties . . . . . . . . . . . . . . . . . . . . . . . . . . . . . . . . . . . . . . . . . . . . . . . . . . . . . . . . . . . 70
Using event envelopes . . . . . . . . . . . . . . . . . . . . . . . . . . . . . . . . . . . . . . . . . . . . . . . . . . . . . . . . . . . . . . . 71
Setting an event’s volume envelope . . . . . . . . . . . . . . . . . . . . . . . . . . . . . . . . . . . . . . . . . . . . . . . . . . . . . . . . 71
Setting an event’s fade-in and -out envelope curve . . . . . . . . . . . . . . . . . . . . . . . . . . . . . . . . . . . . . . . . . 71
Using sections. . . . . . . . . . . . . . . . . . . . . . . . . . . . . . . . . . . . . . . . . . . . . . . . . . . . . . . . . . . . . . . . . . . . . . . . 72
Inserting a section . . . . . . . . . . . . . . . . . . . . . . . . . . . . . . . . . . . . . . . . . . . . . . . . . . . . . . . . . . . . . . . . . . . . . . . . . 72
Adjusting a section's length . . . . . . . . . . . . . . . . . . . . . . . . . . . . . . . . . . . . . . . . . . . . . . . . . . . . . . . . . . . . . . . . 72
Renaming a section . . . . . . . . . . . . . . . . . . . . . . . . . . . . . . . . . . . . . . . . . . . . . . . . . . . . . . . . . . . . . . . . . . . . . . . . 72
Changing a section's color . . . . . . . . . . . . . . . . . . . . . . . . . . . . . . . . . . . . . . . . . . . . . . . . . . . . . . . . . . . . . . . . . 73
Moving (shuffling) sections . . . . . . . . . . . . . . . . . . . . . . . . . . . . . . . . . . . . . . . . . . . . . . . . . . . . . . . . . . . . . . . . 73
Copying a section . . . . . . . . . . . . . . . . . . . . . . . . . . . . . . . . . . . . . . . . . . . . . . . . . . . . . . . . . . . . . . . . . . . . . . . . . 73
Deleting a section . . . . . . . . . . . . . . . . . . . . . . . . . . . . . . . . . . . . . . . . . . . . . . . . . . . . . . . . . . . . . . . . . . . . . . . . . 73
Moving a section label . . . . . . . . . . . . . . . . . . . . . . . . . . . . . . . . . . . . . . . . . . . . . . . . . . . . . . . . . . . . . . . . . . . . . 73
Removing a section label . . . . . . . . . . . . . . . . . . . . . . . . . . . . . . . . . . . . . . . . . . . . . . . . . . . . . . . . . . . . . . . . . . 73
Clearing all events from a section . . . . . . . . . . . . . . . . . . . . . . . . . . . . . . . . . . . . . . . . . . . . . . . . . . . . . . . . . . 74
Using the Media Manager. . . . . . . . . . . . . . . . . . . . . . . . . . . . . . . . . . . . . . . . . . . . . . . . . . . . . . . . . .75
Creating a new media library . . . . . . . . . . . . . . . . . . . . . . . . . . . . . . . . . . . . . . . . . . . . . . . . . . . . . . . . .75
Opening a media library . . . . . . . . . . . . . . . . . . . . . . . . . . . . . . . . . . . . . . . . . . . . . . . . . . . . . . . . . . . . . . 75
Adding media files to a library . . . . . . . . . . . . . . . . . . . . . . . . . . . . . . . . . . . . . . . . . . . . . . . . . . . . . . . . 75
Removing media files from a library. . . . . . . . . . . . . . . . . . . . . . . . . . . . . . . . . . . . . . . . . . . . . . . . . . . 77
Tagging media files . . . . . . . . . . . . . . . . . . . . . . . . . . . . . . . . . . . . . . . . . . . . . . . . . . . . . . . . . . . . . . . . . . 77
4 | TABLE OF CONTENTS
Creating a tag . . . . . . . . . . . . . . . . . . . . . . . . . . . . . . . . . . . . . . . . . . . . . . . . . . . . . . . . . . . . . . . . . . . . . . . . . . . . . 77
Applying a tag to a media file . . . . . . . . . . . . . . . . . . . . . . . . . . . . . . . . . . . . . . . . . . . . . . . . . . . . . . . . . . . . . . 77
Removing a tag from a media file . . . . . . . . . . . . . . . . . . . . . . . . . . . . . . . . . . . . . . . . . . . . . . . . . . . . . . . . . . 78
Deleting a tag from a library . . . . . . . . . . . . . . . . . . . . . . . . . . . . . . . . . . . . . . . . . . . . . . . . . . . . . . . . . . . . . . . 78
Merging subtags . . . . . . . . . . . . . . . . . . . . . . . . . . . . . . . . . . . . . . . . . . . . . . . . . . . . . . . . . . . . . . . . . . . . . . . . . . 79
Arranging tags in the tag tree . . . . . . . . . . . . . . . . . . . . . . . . . . . . . . . . . . . . . . . . . . . . . . . . . . . . . . . . . . . . . . 79
Editing tag names or images . . . . . . . . . . . . . . . . . . . . . . . . . . . . . . . . . . . . . . . . . . . . . . . . . . . . . . . . . . . . . . . 79
Viewing or creating palettes . . . . . . . . . . . . . . . . . . . . . . . . . . . . . . . . . . . . . . . . . . . . . . . . . . . . . . . . . . . . . . . 79
Saving tags and properties to media files . . . . . . . . . . . . . . . . . . . . . . . . . . . . . . . . . . . . . . . . . . . . . . . . . . . 80
Backing up your media libraries. . . . . . . . . . . . . . . . . . . . . . . . . . . . . . . . . . . . . . . . . . . . . . . . . . . . . . . 80
Opening a Reference Library. . . . . . . . . . . . . . . . . . . . . . . . . . . . . . . . . . . . . . . . . . . . . . . . . . . . . . . . . . 81
Using the Sony Sound Series Loops & Samples reference library . . . . . . . . . . . . . . . . . . . . . . . . . . . . . 81
Searching for media files . . . . . . . . . . . . . . . . . . . . . . . . . . . . . . . . . . . . . . . . . . . . . . . . . . . . . . . . . . . . . 81
Searching using a keyword . . . . . . . . . . . . . . . . . . . . . . . . . . . . . . . . . . . . . . . . . . . . . . . . . . . . . . . . . . . . . . . . . 81
Searching using tags . . . . . . . . . . . . . . . . . . . . . . . . . . . . . . . . . . . . . . . . . . . . . . . . . . . . . . . . . . . . . . . . . . . . . . . 82
Sorting search results . . . . . . . . . . . . . . . . . . . . . . . . . . . . . . . . . . . . . . . . . . . . . . . . . . . . . . . . . . . . . . . . . . . . . . 82
Viewing previous searches . . . . . . . . . . . . . . . . . . . . . . . . . . . . . . . . . . . . . . . . . . . . . . . . . . . . . . . . . . . . . . . . . 83
Using advanced search options . . . . . . . . . . . . . . . . . . . . . . . . . . . . . . . . . . . . . . . . . . . . . . . . . . . . . . . . . . . . 83
Previewing media . . . . . . . . . . . . . . . . . . . . . . . . . . . . . . . . . . . . . . . . . . . . . . . . . . . . . . . . . . . . . . . . . . . . 84
Adding media to your project . . . . . . . . . . . . . . . . . . . . . . . . . . . . . . . . . . . . . . . . . . . . . . . . . . . . . . . . 84
Resolving offline media files . . . . . . . . . . . . . . . . . . . . . . . . . . . . . . . . . . . . . . . . . . . . . . . . . . . . . . . . . . 84
Customizing the Media Manager window . . . . . . . . . . . . . . . . . . . . . . . . . . . . . . . . . . . . . . . . . . . . . 85
Automatically hiding the Search pane . . . . . . . . . . . . . . . . . . . . . . . . . . . . . . . . . . . . . . . . . . . . . . . . . . . . . . 85
Docking and undocking the Search pane . . . . . . . . . . . . . . . . . . . . . . . . . . . . . . . . . . . . . . . . . . . . . . . . . . . 85
Resizing columns . . . . . . . . . . . . . . . . . . . . . . . . . . . . . . . . . . . . . . . . . . . . . . . . . . . . . . . . . . . . . . . . . . . . . . . . . . 85
Moving columns . . . . . . . . . . . . . . . . . . . . . . . . . . . . . . . . . . . . . . . . . . . . . . . . . . . . . . . . . . . . . . . . . . . . . . . . . . . 86
Showing or hiding columns . . . . . . . . . . . . . . . . . . . . . . . . . . . . . . . . . . . . . . . . . . . . . . . . . . . . . . . . . . . . . . . . 86
Adding custom columns . . . . . . . . . . . . . . . . . . . . . . . . . . . . . . . . . . . . . . . . . . . . . . . . . . . . . . . . . . . . . . . . . . . 86
Setting Media Manager options. . . . . . . . . . . . . . . . . . . . . . . . . . . . . . . . . . . . . . . . . . . . . . . . . . . . . . . 86
Working in the Track View. . . . . . . . . . . . . . . . . . . . . . . . . . . . . . . . . . . . . . . . . . . . . . . . . . . . . . . . . .89
Using project markers and regions. . . . . . . . . . . . . . . . . . . . . . . . . . . . . . . . . . . . . . . . . . . . . . . . . . . . 89
Working with standard markers . . . . . . . . . . . . . . . . . . . . . . . . . . . . . . . . . . . . . . . . . . . . . . . . . . . . . . . . . . . . 89
Working with time markers . . . . . . . . . . . . . . . . . . . . . . . . . . . . . . . . . . . . . . . . . . . . . . . . . . . . . . . . . . . . . . . . 90
Working with command markers . . . . . . . . . . . . . . . . . . . . . . . . . . . . . . . . . . . . . . . . . . . . . . . . . . . . . . . . . . . 91
Working with regions . . . . . . . . . . . . . . . . . . . . . . . . . . . . . . . . . . . . . . . . . . . . . . . . . . . . . . . . . . . . . . . . . . . . . . 93
Using snapping . . . . . . . . . . . . . . . . . . . . . . . . . . . . . . . . . . . . . . . . . . . . . . . . . . . . . . . . . . . . . . . . . . . . . . 94
Choosing snapping options . . . . . . . . . . . . . . . . . . . . . . . . . . . . . . . . . . . . . . . . . . . . . . . . . . . . . . . . . . . . . . . . 95
Changing tempo, time signature, and key. . . . . . . . . . . . . . . . . . . . . . . . . . . . . . . . . . . . . . . . . . . . .95
Changing project tempo . . . . . . . . . . . . . . . . . . . . . . . . . . . . . . . . . . . . . . . . . . . . . . . . . . . . . . . . . . . . . . . . . . . 96
Changing project time signature . . . . . . . . . . . . . . . . . . . . . . . . . . . . . . . . . . . . . . . . . . . . . . . . . . . . . . . . . . . 96
Changing project key . . . . . . . . . . . . . . . . . . . . . . . . . . . . . . . . . . . . . . . . . . . . . . . . . . . . . . . . . . . . . . . . . . . . . . 96
Working with tempo/key/time signature change markers . . . . . . . . . . . . . . . . . . . . . . . . . . . . . . . . . . . 97
TABLE OF CONTENTS | 5
Changing a clip’s key . . . . . . . . . . . . . . . . . . . . . . . . . . . . . . . . . . . . . . . . . . . . . . . . . . . . . . . . . . . . . . . . . . . . . . 98
Changing an event’s key . . . . . . . . . . . . . . . . . . . . . . . . . . . . . . . . . . . . . . . . . . . . . . . . . . . . . . . . . . . . . . . . . . . 98
Adjusting time . . . . . . . . . . . . . . . . . . . . . . . . . . . . . . . . . . . . . . . . . . . . . . . . . . . . . . . . . . . . . . . . . . . . . . . 99
Inserting time . . . . . . . . . . . . . . . . . . . . . . . . . . . . . . . . . . . . . . . . . . . . . . . . . . . . . . . . . . . . . . . . . . . . . . . . . . . . . 99
Fitting to time . . . . . . . . . . . . . . . . . . . . . . . . . . . . . . . . . . . . . . . . . . . . . . . . . . . . . . . . . . . . . . . . . . . . . . . . . . . . . 99
Using the Chopper. . . . . . . . . . . . . . . . . . . . . . . . . . . . . . . . . . . . . . . . . . . . . . . . . . . . . . . . . . . . . . . 101
Working in the Chopper window . . . . . . . . . . . . . . . . . . . . . . . . . . . . . . . . . . . . . . . . . . . . . . . . . . . .101
Viewing the Chopper . . . . . . . . . . . . . . . . . . . . . . . . . . . . . . . . . . . . . . . . . . . . . . . . . . . . . . . . . . . . . . . . . . . . .101
Changing the Chopper grid . . . . . . . . . . . . . . . . . . . . . . . . . . . . . . . . . . . . . . . . . . . . . . . . . . . . . . . . . . . . . . .101
Changing Chopper snapping options . . . . . . . . . . . . . . . . . . . . . . . . . . . . . . . . . . . . . . . . . . . . . . . . . . . . .101
Magnifying the Chopper . . . . . . . . . . . . . . . . . . . . . . . . . . . . . . . . . . . . . . . . . . . . . . . . . . . . . . . . . . . . . . . . . .101
Previewing in the Chopper . . . . . . . . . . . . . . . . . . . . . . . . . . . . . . . . . . . . . . . . . . . . . . . . . . . . . . . . . . . . . . . .101
Using Chopper toolbar and keyboard commands . . . . . . . . . . . . . . . . . . . . . . . . . . . . . . . . . . . . . . . . . .102
Inserting markers and regions in the Chopper . . . . . . . . . . . . . . . . . . . . . . . . . . . . . . . . . . . . . . . . . . . . .102
Creating selections in the Chopper. . . . . . . . . . . . . . . . . . . . . . . . . . . . . . . . . . . . . . . . . . . . . . . . . . .102
Placing files in the Chopper . . . . . . . . . . . . . . . . . . . . . . . . . . . . . . . . . . . . . . . . . . . . . . . . . . . . . . . . . . . . . . .102
Creating selections . . . . . . . . . . . . . . . . . . . . . . . . . . . . . . . . . . . . . . . . . . . . . . . . . . . . . . . . . . . . . . . . . . . . . . .103
Creating selections of a specific musical length . . . . . . . . . . . . . . . . . . . . . . . . . . . . . . . . . . . . . . . . . . . .103
Inserting increments . . . . . . . . . . . . . . . . . . . . . . . . . . . . . . . . . . . . . . . . . . . . . . . . . . . . . . . . . . . . . . . .103
Creating increments . . . . . . . . . . . . . . . . . . . . . . . . . . . . . . . . . . . . . . . . . . . . . . . . . . . . . . . . . . . . . . . . . . . . . .104
Creating increments of a specific musical length . . . . . . . . . . . . . . . . . . . . . . . . . . . . . . . . . . . . . . . . . . .104
Creating increments of a custom musical length . . . . . . . . . . . . . . . . . . . . . . . . . . . . . . . . . . . . . . . . . . .105
Inserting selections in the track view . . . . . . . . . . . . . . . . . . . . . . . . . . . . . . . . . . . . . . . . . . . . . . . . .105
Using the Insert Selection button . . . . . . . . . . . . . . . . . . . . . . . . . . . . . . . . . . . . . . . . . . . . . . . . . . . . . . . . . .105
Using copy and paste . . . . . . . . . . . . . . . . . . . . . . . . . . . . . . . . . . . . . . . . . . . . . . . . . . . . . . . . . . . . . . . . . . . . .105
Dragging selections . . . . . . . . . . . . . . . . . . . . . . . . . . . . . . . . . . . . . . . . . . . . . . . . . . . . . . . . . . . . . . . . . . . . . .105
Moving the insert position in the track view . . . . . . . . . . . . . . . . . . . . . . . . . . . . . . . . . . . . . . . . . . . . . . .105
Saving Chopper selections as new files. . . . . . . . . . . . . . . . . . . . . . . . . . . . . . . . . . . . . . . . . . . . . . .105
Using the Chopper with one-shots. . . . . . . . . . . . . . . . . . . . . . . . . . . . . . . . . . . . . . . . . . . . . . . . . . .106
Working with Tracks . . . . . . . . . . . . . . . . . . . . . . . . . . . . . . . . . . . . . . . . . . . . . . . . . . . . . . . . . . . . . 107
Using clips with tracks . . . . . . . . . . . . . . . . . . . . . . . . . . . . . . . . . . . . . . . . . . . . . . . . . . . . . . . . . . . . . . .107
Adding clips to tracks . . . . . . . . . . . . . . . . . . . . . . . . . . . . . . . . . . . . . . . . . . . . . . . . . . . . . . . . . . . . . . . . . . . . .107
Using track effects. . . . . . . . . . . . . . . . . . . . . . . . . . . . . . . . . . . . . . . . . . . . . . . . . . . . . . . . . . . . . . . . . . .110
Using track effects . . . . . . . . . . . . . . . . . . . . . . . . . . . . . . . . . . . . . . . . . . . . . . . . . . . . . . . . . . . . . . . . . . . . . . . .110
Creating or adding to track plug-in chains . . . . . . . . . . . . . . . . . . . . . . . . . . . . . . . . . . . . . . . . . . . . . . . . .111
Arranging plug-in chain order . . . . . . . . . . . . . . . . . . . . . . . . . . . . . . . . . . . . . . . . . . . . . . . . . . . . . . . . . . . . .112
Bypassing plug-ins in a chain . . . . . . . . . . . . . . . . . . . . . . . . . . . . . . . . . . . . . . . . . . . . . . . . . . . . . . . . . . . . . .112
Bypassing effect automation . . . . . . . . . . . . . . . . . . . . . . . . . . . . . . . . . . . . . . . . . . . . . . . . . . . . . . . . . . . . . .112
Removing plug-ins from chains . . . . . . . . . . . . . . . . . . . . . . . . . . . . . . . . . . . . . . . . . . . . . . . . . . . . . . . . . . .112
Saving plug-in chains as packages . . . . . . . . . . . . . . . . . . . . . . . . . . . . . . . . . . . . . . . . . . . . . . . . . . . . . . . . .112
Removing or bypassing all effects on tracks . . . . . . . . . . . . . . . . . . . . . . . . . . . . . . . . . . . . . . . . . . . . . . . .113
Using track automation envelopes. . . . . . . . . . . . . . . . . . . . . . . . . . . . . . . . . . . . . . . . . . . . . . . . . . .113
6 | TABLE OF CONTENTS
Choosing stereo pan types . . . . . . . . . . . . . . . . . . . . . . . . . . . . . . . . . . . . . . . . . . . . . . . . . . . . . . . . . .113
Using the Beatmapper. . . . . . . . . . . . . . . . . . . . . . . . . . . . . . . . . . . . . . . . . . . . . . . . . . . . . . . . . . . . . . .114
Understanding stretching properties . . . . . . . . . . . . . . . . . . . . . . . . . . . . . . . . . . . . . . . . . . . . . . . .115
Configuring track properties. . . . . . . . . . . . . . . . . . . . . . . . . . . . . . . . . . . . . . . . . . . . . . . . . . . . . . . . .115
Audio track properties . . . . . . . . . . . . . . . . . . . . . . . . . . . . . . . . . . . . . . . . . . . . . . . . . . . . . . . . . . . . . . . . . . . .115
MIDI track properties . . . . . . . . . . . . . . . . . . . . . . . . . . . . . . . . . . . . . . . . . . . . . . . . . . . . . . . . . . . . . . . . . . . . .115
Configuring clip properties . . . . . . . . . . . . . . . . . . . . . . . . . . . . . . . . . . . . . . . . . . . . . . . . . . . . . . . . . .115
Managing a track’s clips . . . . . . . . . . . . . . . . . . . . . . . . . . . . . . . . . . . . . . . . . . . . . . . . . . . . . . . . . . . . . . . . . . .116
Adjusting general clip properties . . . . . . . . . . . . . . . . . . . . . . . . . . . . . . . . . . . . . . . . . . . . . . . . . . . . . . . . . .116
Adjusting stretching properties for loop or Beatmapped clips . . . . . . . . . . . . . . . . . . . . . . . . . . . . . .116
Reloading files . . . . . . . . . . . . . . . . . . . . . . . . . . . . . . . . . . . . . . . . . . . . . . . . . . . . . . . . . . . . . . . . . . . . . . . . . . . .119
Replacing files . . . . . . . . . . . . . . . . . . . . . . . . . . . . . . . . . . . . . . . . . . . . . . . . . . . . . . . . . . . . . . . . . . . . . . . . . . . .120
Saving file properties . . . . . . . . . . . . . . . . . . . . . . . . . . . . . . . . . . . . . . . . . . . . . . . . . . . . . . . . . . . . . . . . . . . . .120
Adjusting clip properties for MIDI tracks . . . . . . . . . . . . . . . . . . . . . . . . . . . . . . . . . . . . . . . . . . . . . . . . . . .120
Working with grooves . . . . . . . . . . . . . . . . . . . . . . . . . . . . . . . . . . . . . . . . . . . . . . . . . . . . . . . . . . . . . . .120
Applying or removing grooves . . . . . . . . . . . . . . . . . . . . . . . . . . . . . . . . . . . . . . . . . . . . . . . . . . . . . . . . . . . .120
Creating grooves . . . . . . . . . . . . . . . . . . . . . . . . . . . . . . . . . . . . . . . . . . . . . . . . . . . . . . . . . . . . . . . . . . . . . . . . .122
Editing grooves . . . . . . . . . . . . . . . . . . . . . . . . . . . . . . . . . . . . . . . . . . . . . . . . . . . . . . . . . . . . . . . . . . . . . . . . . . .124
Using folder tracks . . . . . . . . . . . . . . . . . . . . . . . . . . . . . . . . . . . . . . . . . . . . . . . . . . . . . . . . . . . . . . . . . .124
Creating a folder track . . . . . . . . . . . . . . . . . . . . . . . . . . . . . . . . . . . . . . . . . . . . . . . . . . . . . . . . . . . . . . . . . . . .125
Adding existing tracks to a folder track . . . . . . . . . . . . . . . . . . . . . . . . . . . . . . . . . . . . . . . . . . . . . . . . . . . .125
Removing tracks from a folder track . . . . . . . . . . . . . . . . . . . . . . . . . . . . . . . . . . . . . . . . . . . . . . . . . . . . . . .125
Muting a folder track . . . . . . . . . . . . . . . . . . . . . . . . . . . . . . . . . . . . . . . . . . . . . . . . . . . . . . . . . . . . . . . . . . . . . .125
Soloing a folder track . . . . . . . . . . . . . . . . . . . . . . . . . . . . . . . . . . . . . . . . . . . . . . . . . . . . . . . . . . . . . . . . . . . . .125
Editing events in a folder track . . . . . . . . . . . . . . . . . . . . . . . . . . . . . . . . . . . . . . . . . . . . . . . . . . . . . . . . . . . .125
Mixing multiple tracks to a single track. . . . . . . . . . . . . . . . . . . . . . . . . . . . . . . . . . . . . . . . . . . . . . .125
Exporting loops . . . . . . . . . . . . . . . . . . . . . . . . . . . . . . . . . . . . . . . . . . . . . . . . . . . . . . . . . . . . . . . . . . . . .126
Using Automation . . . . . . . . . . . . . . . . . . . . . . . . . . . . . . . . . . . . . . . . . . . . . . . . . . . . . . . . . . . . . . . 127
Showing or hiding automation controls. . . . . . . . . . . . . . . . . . . . . . . . . . . . . . . . . . . . . . . . . . . . . .127
Track automation . . . . . . . . . . . . . . . . . . . . . . . . . . . . . . . . . . . . . . . . . . . . . . . . . . . . . . . . . . . . . . . . . . .127
Mute automation . . . . . . . . . . . . . . . . . . . . . . . . . . . . . . . . . . . . . . . . . . . . . . . . . . . . . . . . . . . . . . . . . . . . . . . . .127
Volume or pan automation . . . . . . . . . . . . . . . . . . . . . . . . . . . . . . . . . . . . . . . . . . . . . . . . . . . . . . . . . . . . . . .128
Bus automation . . . . . . . . . . . . . . . . . . . . . . . . . . . . . . . . . . . . . . . . . . . . . . . . . . . . . . . . . . . . . . . . . . . . . . . . . .128
Assignable effects automation . . . . . . . . . . . . . . . . . . . . . . . . . . . . . . . . . . . . . . . . . . . . . . . . . . . . . . . . . . . .129
Adding or removing track effect automation . . . . . . . . . . . . . . . . . . . . . . . . . . . . . . . . . . . . . . . . . . . . . .130
MIDI controller automation . . . . . . . . . . . . . . . . . . . . . . . . . . . . . . . . . . . . . . . . . . . . . . . . . . . . . . . . . . . . . . .131
MIDI program change automation . . . . . . . . . . . . . . . . . . . . . . . . . . . . . . . . . . . . . . . . . . . . . . . . . . . . . . . .132
Working with track envelopes . . . . . . . . . . . . . . . . . . . . . . . . . . . . . . . . . . . . . . . . . . . . . . . . . . . . . . .132
Adjusting envelopes . . . . . . . . . . . . . . . . . . . . . . . . . . . . . . . . . . . . . . . . . . . . . . . . . . . . . . . . . . . . . . . . . . . . . .132
Using the Envelope tool . . . . . . . . . . . . . . . . . . . . . . . . . . . . . . . . . . . . . . . . . . . . . . . . . . . . . . . . . . . . . . . . . .134
Hiding track envelopes . . . . . . . . . . . . . . . . . . . . . . . . . . . . . . . . . . . . . . . . . . . . . . . . . . . . . . . . . . . . . . . . . . .135
Removing track envelopes . . . . . . . . . . . . . . . . . . . . . . . . . . . . . . . . . . . . . . . . . . . . . . . . . . . . . . . . . . . . . . . .135
TABLE OF CONTENTS | 7
Automating 5.1 surround projects . . . . . . . . . . . . . . . . . . . . . . . . . . . . . . . . . . . . . . . . . . . . . . . . . . .136
Automation recording modes . . . . . . . . . . . . . . . . . . . . . . . . . . . . . . . . . . . . . . . . . . . . . . . . . . . . . . .136
Recording automation settings . . . . . . . . . . . . . . . . . . . . . . . . . . . . . . . . . . . . . . . . . . . . . . . . . . . . . . . . . . .137
Editing sections of your recorded settings in Touch mode . . . . . . . . . . . . . . . . . . . . . . . . . . . . . . . . . .137
Overwriting recorded settings in Latch mode . . . . . . . . . . . . . . . . . . . . . . . . . . . . . . . . . . . . . . . . . . . . . .138
Editing individual envelope points or keyframes . . . . . . . . . . . . . . . . . . . . . . . . . . . . . . . . . . . . . . . . . . .138
Setting the automation recording mode for a track . . . . . . . . . . . . . . . . . . . . . . . . . . . . . . . . . . . . . . . .138
Using the Mixer. . . . . . . . . . . . . . . . . . . . . . . . . . . . . . . . . . . . . . . . . . . . . . . . . . . . . . . . . . . . . . . . . . 141
Using busses . . . . . . . . . . . . . . . . . . . . . . . . . . . . . . . . . . . . . . . . . . . . . . . . . . . . . . . . . . . . . . . . . . . . . . . .141
Adding busses to the project . . . . . . . . . . . . . . . . . . . . . . . . . . . . . . . . . . . . . . . . . . . . . . . . . . . . . . . . . . . . . .141
Routing tracks to busses . . . . . . . . . . . . . . . . . . . . . . . . . . . . . . . . . . . . . . . . . . . . . . . . . . . . . . . . . . . . . . . . . .141
Routing busses to system hardware . . . . . . . . . . . . . . . . . . . . . . . . . . . . . . . . . . . . . . . . . . . . . . . . . . . . . . .141
Deleting busses . . . . . . . . . . . . . . . . . . . . . . . . . . . . . . . . . . . . . . . . . . . . . . . . . . . . . . . . . . . . . . . . . . . . . . . . . .142
Using assignable effects . . . . . . . . . . . . . . . . . . . . . . . . . . . . . . . . . . . . . . . . . . . . . . . . . . . . . . . . . . . . .142
Adding assignable effect controls . . . . . . . . . . . . . . . . . . . . . . . . . . . . . . . . . . . . . . . . . . . . . . . . . . . . . . . . .142
Working with assignable effects chains . . . . . . . . . . . . . . . . . . . . . . . . . . . . . . . . . . . . . . . . . . . . . . . . . . . .143
Routing tracks to assignable effect controls . . . . . . . . . . . . . . . . . . . . . . . . . . . . . . . . . . . . . . . . . . . . . . . .143
Routing assignable effect controls to busses . . . . . . . . . . . . . . . . . . . . . . . . . . . . . . . . . . . . . . . . . . . . . . .143
Deleting assignable effect controls . . . . . . . . . . . . . . . . . . . . . . . . . . . . . . . . . . . . . . . . . . . . . . . . . . . . . . . .144
Using soft synth controls . . . . . . . . . . . . . . . . . . . . . . . . . . . . . . . . . . . . . . . . . . . . . . . . . . . . . . . . . . . .144
Adding soft synth controls to projects . . . . . . . . . . . . . . . . . . . . . . . . . . . . . . . . . . . . . . . . . . . . . . . . . . . . .144
Modifying soft synth control properties . . . . . . . . . . . . . . . . . . . . . . . . . . . . . . . . . . . . . . . . . . . . . . . . . . .144
Deleting soft synth controls . . . . . . . . . . . . . . . . . . . . . . . . . . . . . . . . . . . . . . . . . . . . . . . . . . . . . . . . . . . . . . .147
Routing MIDI tracks to soft synth controls . . . . . . . . . . . . . . . . . . . . . . . . . . . . . . . . . . . . . . . . . . . . . . . . .148
Using mixer controls . . . . . . . . . . . . . . . . . . . . . . . . . . . . . . . . . . . . . . . . . . . . . . . . . . . . . . . . . . . . . . . .148
Working with mixer controls . . . . . . . . . . . . . . . . . . . . . . . . . . . . . . . . . . . . . . . . . . . . . . . . . . . . . . . . . . . . . .148
Adding effects to soft synth mixer controls . . . . . . . . . . . . . . . . . . . . . . . . . . . . . . . . . . . . . . . . . . . . . . . .149
Working with multiple mixer controls . . . . . . . . . . . . . . . . . . . . . . . . . . . . . . . . . . . . . . . . . . . . . . . . . . . . .151
Automating mixer controls in track view . . . . . . . . . . . . . . . . . . . . . . . . . . . . . . . . . . . . . . . . . . . . . . . . . . .152
Working with ReWire . . . . . . . . . . . . . . . . . . . . . . . . . . . . . . . . . . . . . . . . . . . . . . . . . . . . . . . . . . . . . . . .152
Using ACID as a ReWire mixer . . . . . . . . . . . . . . . . . . . . . . . . . . . . . . . . . . . . . . . . . . . . . . . . . . . . . . . . . . . . .153
Using ACID as a ReWire device . . . . . . . . . . . . . . . . . . . . . . . . . . . . . . . . . . . . . . . . . . . . . . . . . . . . . . . . . . . .154
Recording Audio. . . . . . . . . . . . . . . . . . . . . . . . . . . . . . . . . . . . . . . . . . . . . . . . . . . . . . . . . . . . . . . . . 155
Setting up your equipment . . . . . . . . . . . . . . . . . . . . . . . . . . . . . . . . . . . . . . . . . . . . . . . . . . . . . . . . . .155
Basic setup . . . . . . . . . . . . . . . . . . . . . . . . . . . . . . . . . . . . . . . . . . . . . . . . . . . . . . . . . . . . . . . . . . . . . . . . . . . . . . .155
Setup with mixer . . . . . . . . . . . . . . . . . . . . . . . . . . . . . . . . . . . . . . . . . . . . . . . . . . . . . . . . . . . . . . . . . . . . . . . . .155
Setup with digital multitrack . . . . . . . . . . . . . . . . . . . . . . . . . . . . . . . . . . . . . . . . . . . . . . . . . . . . . . . . . . . . . .156
Preparing to record. . . . . . . . . . . . . . . . . . . . . . . . . . . . . . . . . . . . . . . . . . . . . . . . . . . . . . . . . . . . . . . . . .156
Arming the track for recording . . . . . . . . . . . . . . . . . . . . . . . . . . . . . . . . . . . . . . . . . . . . . . . . . . . . . . . . . . . .156
Selecting recording settings . . . . . . . . . . . . . . . . . . . . . . . . . . . . . . . . . . . . . . . . . . . . . . . . . . . . . . . . . . . . . .157
Using the metronome . . . . . . . . . . . . . . . . . . . . . . . . . . . . . . . . . . . . . . . . . . . . . . . . . . . . . . . . . . . . . . . . . . . .157
Recording. . . . . . . . . . . . . . . . . . . . . . . . . . . . . . . . . . . . . . . . . . . . . . . . . . . . . . . . . . . . . . . . . . . . . . . . . . .157
8 | TABLE OF CONTENTS
Recording into an empty track . . . . . . . . . . . . . . . . . . . . . . . . . . . . . . . . . . . . . . . . . . . . . . . . . . . . . . . . . . . .157
Recording into a time selection . . . . . . . . . . . . . . . . . . . . . . . . . . . . . . . . . . . . . . . . . . . . . . . . . . . . . . . . . . .158
Recording into an event . . . . . . . . . . . . . . . . . . . . . . . . . . . . . . . . . . . . . . . . . . . . . . . . . . . . . . . . . . . . . . . . . .158
Recording into an event with a time selection . . . . . . . . . . . . . . . . . . . . . . . . . . . . . . . . . . . . . . . . . . . . .159
Working with multiple recorded clips . . . . . . . . . . . . . . . . . . . . . . . . . . . . . . . . . . . . . . . . . . . . . . . .159
Specifying where recordings are stored . . . . . . . . . . . . . . . . . . . . . . . . . . . . . . . . . . . . . . . . . . . . . .160
Changing where recorded files are stored for new projects . . . . . . . . . . . . . . . . . . . . . . . . . . . . . . . . .160
Changing where recorded files are stored for individual projects . . . . . . . . . . . . . . . . . . . . . . . . . . .160
Monitoring audio levels . . . . . . . . . . . . . . . . . . . . . . . . . . . . . . . . . . . . . . . . . . . . . . . . . . . . . . . . . . . . . . . . . . .160
Using record input monitoring . . . . . . . . . . . . . . . . . . . . . . . . . . . . . . . . . . . . . . . . . . . . . . . . . . . . . . . . . . . .160
Working with MIDI . . . . . . . . . . . . . . . . . . . . . . . . . . . . . . . . . . . . . . . . . . . . . . . . . . . . . . . . . . . . . . . 163
Adding MIDI tracks and files . . . . . . . . . . . . . . . . . . . . . . . . . . . . . . . . . . . . . . . . . . . . . . . . . . . . . . . . .163
Adding MIDI tracks . . . . . . . . . . . . . . . . . . . . . . . . . . . . . . . . . . . . . . . . . . . . . . . . . . . . . . . . . . . . . . . . . . . . . . .163
Adding MIDI files to a project . . . . . . . . . . . . . . . . . . . . . . . . . . . . . . . . . . . . . . . . . . . . . . . . . . . . . . . . . . . . .163
Recording MIDI . . . . . . . . . . . . . . . . . . . . . . . . . . . . . . . . . . . . . . . . . . . . . . . . . . . . . . . . . . . . . . . . . . . . .164
Setting up a MIDI controller for recording into a track . . . . . . . . . . . . . . . . . . . . . . . . . . . . . . . . . . . . . .164
Recording MIDI in real time . . . . . . . . . . . . . . . . . . . . . . . . . . . . . . . . . . . . . . . . . . . . . . . . . . . . . . . . . . . . . . .165
Using MIDI step recording . . . . . . . . . . . . . . . . . . . . . . . . . . . . . . . . . . . . . . . . . . . . . . . . . . . . . . . . . . . . . . . .165
Using MIDI merge recording . . . . . . . . . . . . . . . . . . . . . . . . . . . . . . . . . . . . . . . . . . . . . . . . . . . . . . . . . . . . . .166
Editing MIDI on the timeline . . . . . . . . . . . . . . . . . . . . . . . . . . . . . . . . . . . . . . . . . . . . . . . . . . . . . . . . .167
Choosing a drum map or kit for a track . . . . . . . . . . . . . . . . . . . . . . . . . . . . . . . . . . . . . . . . . . . . . . . . . . . .168
Navigating the piano roll or drum grid . . . . . . . . . . . . . . . . . . . . . . . . . . . . . . . . . . . . . . . . . . . . . . . . . . . . .168
Audition notes with the keyboard/drum grid . . . . . . . . . . . . . . . . . . . . . . . . . . . . . . . . . . . . . . . . . . . . . .169
Selecting notes . . . . . . . . . . . . . . . . . . . . . . . . . . . . . . . . . . . . . . . . . . . . . . . . . . . . . . . . . . . . . . . . . . . . . . . . . . .169
Adding or deleting notes . . . . . . . . . . . . . . . . . . . . . . . . . . . . . . . . . . . . . . . . . . . . . . . . . . . . . . . . . . . . . . . . .170
Editing note positions . . . . . . . . . . . . . . . . . . . . . . . . . . . . . . . . . . . . . . . . . . . . . . . . . . . . . . . . . . . . . . . . . . . .171
Editing note duration . . . . . . . . . . . . . . . . . . . . . . . . . . . . . . . . . . . . . . . . . . . . . . . . . . . . . . . . . . . . . . . . . . . . .172
Editing note velocity . . . . . . . . . . . . . . . . . . . . . . . . . . . . . . . . . . . . . . . . . . . . . . . . . . . . . . . . . . . . . . . . . . . . . .172
Processing and filtering MIDI events . . . . . . . . . . . . . . . . . . . . . . . . . . . . . . . . . . . . . . . . . . . . . . . . .173
Quantizing MIDI events . . . . . . . . . . . . . . . . . . . . . . . . . . . . . . . . . . . . . . . . . . . . . . . . . . . . . . . . . . . . . . . . . . .173
Editing velocity . . . . . . . . . . . . . . . . . . . . . . . . . . . . . . . . . . . . . . . . . . . . . . . . . . . . . . . . . . . . . . . . . . . . . . . . . . .174
Editing duration . . . . . . . . . . . . . . . . . . . . . . . . . . . . . . . . . . . . . . . . . . . . . . . . . . . . . . . . . . . . . . . . . . . . . . . . . .175
Editing MIDI track properties . . . . . . . . . . . . . . . . . . . . . . . . . . . . . . . . . . . . . . . . . . . . . . . . . . . . . . . .176
Configuring MIDI track output settings . . . . . . . . . . . . . . . . . . . . . . . . . . . . . . . . . . . . . . . . . . . . . . . . . . . .176
Configuring MIDI input filters . . . . . . . . . . . . . . . . . . . . . . . . . . . . . . . . . . . . . . . . . . . . . . . . . . . . . . . .179
Setting up MIDI quantize input filters . . . . . . . . . . . . . . . . . . . . . . . . . . . . . . . . . . . . . . . . . . . . . . . .181
Using the clip pool . . . . . . . . . . . . . . . . . . . . . . . . . . . . . . . . . . . . . . . . . . . . . . . . . . . . . . . . . . . . . . . . . . . . . . . .182
Toggling looped or one-shot painting for a MIDI clip . . . . . . . . . . . . . . . . . . . . . . . . . . . . . . . . . . . . . . .182
Editing a MIDI clip's time signature . . . . . . . . . . . . . . . . . . . . . . . . . . . . . . . . . . . . . . . . . . . . . . . . . . . . . . . .182
MIDI Track Envelopes and Keyframes . . . . . . . . . . . . . . . . . . . . . . . . . . . . . . . . . . . . . . . . . . . . . . . .183
Adding a mute envelope . . . . . . . . . . . . . . . . . . . . . . . . . . . . . . . . . . . . . . . . . . . . . . . . . . . . . . . . . . . . . . . . . .183
Adding a MIDI controller envelope . . . . . . . . . . . . . . . . . . . . . . . . . . . . . . . . . . . . . . . . . . . . . . . . . . . . . . . .183
TABLE OF CONTENTS | 9
Configuring MIDI track controller automation . . . . . . . . . . . . . . . . . . . . . . . . . . . . . . . . . . . . . . . . . . . . .184
Adding a program change keyframe . . . . . . . . . . . . . . . . . . . . . . . . . . . . . . . . . . . . . . . . . . . . . . . . . . . . . .184
Add a Sysex keyframe . . . . . . . . . . . . . . . . . . . . . . . . . . . . . . . . . . . . . . . . . . . . . . . . . . . . . . . . . . . . . . . . . . . . .185
Automating VSTi parameters . . . . . . . . . . . . . . . . . . . . . . . . . . . . . . . . . . . . . . . . . . . . . . . . . . . . . . . . . . . . . .185
Editing MIDI clip properties. . . . . . . . . . . . . . . . . . . . . . . . . . . . . . . . . . . . . . . . . . . . . . . . . . . . . . . . . .186
Editing a MIDI clip with OPT Piano Roll . . . . . . . . . . . . . . . . . . . . . . . . . . . . . . . . . . . . . . . . . . . . . . . . . . . .186
Editing a MIDI clip with OPT Piano Roll . . . . . . . . . . . . . . . . . . . . . . . . . . . . . . . . . . . . . . . . . . . . . . . . . . . .186
Merging controller data from a MIDI clip . . . . . . . . . . . . . . . . . . . . . . . . . . . . . . . . . . . . . . . . . . . . . . . . . . .187
Using the piano roll editor . . . . . . . . . . . . . . . . . . . . . . . . . . . . . . . . . . . . . . . . . . . . . . . . . . . . . . . . . . .187
Viewing the piano roll editor . . . . . . . . . . . . . . . . . . . . . . . . . . . . . . . . . . . . . . . . . . . . . . . . . . . . . . . . . . . . . .187
Previewing MIDI . . . . . . . . . . . . . . . . . . . . . . . . . . . . . . . . . . . . . . . . . . . . . . . . . . . . . . . . . . . . . . . . . . . . . . . . . .188
Adding note events . . . . . . . . . . . . . . . . . . . . . . . . . . . . . . . . . . . . . . . . . . . . . . . . . . . . . . . . . . . . . . . . . . . . . . .188
Editing note events . . . . . . . . . . . . . . . . . . . . . . . . . . . . . . . . . . . . . . . . . . . . . . . . . . . . . . . . . . . . . . . . . . . . . . .188
Toggling note snapping . . . . . . . . . . . . . . . . . . . . . . . . . . . . . . . . . . . . . . . . . . . . . . . . . . . . . . . . . . . . . . . . . .190
Quantizing note events . . . . . . . . . . . . . . . . . . . . . . . . . . . . . . . . . . . . . . . . . . . . . . . . . . . . . . . . . . . . . . . . . . .190
Deleting note events . . . . . . . . . . . . . . . . . . . . . . . . . . . . . . . . . . . . . . . . . . . . . . . . . . . . . . . . . . . . . . . . . . . . .191
Undoing and redoing . . . . . . . . . . . . . . . . . . . . . . . . . . . . . . . . . . . . . . . . . . . . . . . . . . . . . . . . . . . . . . . . . . . . .191
Using the list editor . . . . . . . . . . . . . . . . . . . . . . . . . . . . . . . . . . . . . . . . . . . . . . . . . . . . . . . . . . . . . . . . .191
Viewing the list editor . . . . . . . . . . . . . . . . . . . . . . . . . . . . . . . . . . . . . . . . . . . . . . . . . . . . . . . . . . . . . . . . . . . . .191
Previewing MIDI . . . . . . . . . . . . . . . . . . . . . . . . . . . . . . . . . . . . . . . . . . . . . . . . . . . . . . . . . . . . . . . . . . . . . . . . . .191
Filtering the list . . . . . . . . . . . . . . . . . . . . . . . . . . . . . . . . . . . . . . . . . . . . . . . . . . . . . . . . . . . . . . . . . . . . . . . . . . .192
Editing events . . . . . . . . . . . . . . . . . . . . . . . . . . . . . . . . . . . . . . . . . . . . . . . . . . . . . . . . . . . . . . . . . . . . . . . . . . . .193
Creating events . . . . . . . . . . . . . . . . . . . . . . . . . . . . . . . . . . . . . . . . . . . . . . . . . . . . . . . . . . . . . . . . . . . . . . . . . . .195
Quantizing events . . . . . . . . . . . . . . . . . . . . . . . . . . . . . . . . . . . . . . . . . . . . . . . . . . . . . . . . . . . . . . . . . . . . . . . .195
Deleting events . . . . . . . . . . . . . . . . . . . . . . . . . . . . . . . . . . . . . . . . . . . . . . . . . . . . . . . . . . . . . . . . . . . . . . . . . . .196
Undoing and redoing . . . . . . . . . . . . . . . . . . . . . . . . . . . . . . . . . . . . . . . . . . . . . . . . . . . . . . . . . . . . . . . . . . . . .196
Routing tracks to MIDI devices or soft synths . . . . . . . . . . . . . . . . . . . . . . . . . . . . . . . . . . . . . . . . .196
Resetting MIDI ports. . . . . . . . . . . . . . . . . . . . . . . . . . . . . . . . . . . . . . . . . . . . . . . . . . . . . . . . . . . . . . . . .197
Rendering projects with MIDI tracks. . . . . . . . . . . . . . . . . . . . . . . . . . . . . . . . . . . . . . . . . . . . . . . . . .197
Playing MIDI from external devices. . . . . . . . . . . . . . . . . . . . . . . . . . . . . . . . . . . . . . . . . . . . . . . . . . .197
Adding external devices as MIDI inputs . . . . . . . . . . . . . . . . . . . . . . . . . . . . . . . . . . . . . . . . . . . . . . . . . . . .197
Assigning MIDI inputs to soft synth controls . . . . . . . . . . . . . . . . . . . . . . . . . . . . . . . . . . . . . . . . . . . . . . .197
Creating or editing program maps . . . . . . . . . . . . . . . . . . . . . . . . . . . . . . . . . . . . . . . . . . . . . . . . . . .198
Creating program maps . . . . . . . . . . . . . . . . . . . . . . . . . . . . . . . . . . . . . . . . . . . . . . . . . . . . . . . . . . . . . . . . . . .198
Editing program maps . . . . . . . . . . . . . . . . . . . . . . . . . . . . . . . . . . . . . . . . . . . . . . . . . . . . . . . . . . . . . . . . . . . .199
Assigning a patch map to a MIDI device . . . . . . . . . . . . . . . . . . . . . . . . . . . . . . . . . . . . . . . . . . . . . . . . . . .199
Creating or editing drum maps . . . . . . . . . . . . . . . . . . . . . . . . . . . . . . . . . . . . . . . . . . . . . . . . . . . . . .200
Editing a drum map . . . . . . . . . . . . . . . . . . . . . . . . . . . . . . . . . . . . . . . . . . . . . . . . . . . . . . . . . . . . . . . . . . . . . . .200
Choosing a drum map for a track . . . . . . . . . . . . . . . . . . . . . . . . . . . . . . . . . . . . . . . . . . . . . . . . . . . . . . . . . .201
Synchronizing using MIDI timecode. . . . . . . . . . . . . . . . . . . . . . . . . . . . . . . . . . . . . . . . . . . . . . . . . .201
Generating MIDI timecode . . . . . . . . . . . . . . . . . . . . . . . . . . . . . . . . . . . . . . . . . . . . . . . . . . . . . . . . . . . . . . . .201
Triggering from MIDI timecode . . . . . . . . . . . . . . . . . . . . . . . . . . . . . . . . . . . . . . . . . . . . . . . . . . . . . . . . . . .202
Generating MIDI clock . . . . . . . . . . . . . . . . . . . . . . . . . . . . . . . . . . . . . . . . . . . . . . . . . . . . . . . . . . . . . . . . . . . .202
10 | TABLE OF CONTENTS
Exporting MIDI files . . . . . . . . . . . . . . . . . . . . . . . . . . . . . . . . . . . . . . . . . . . . . . . . . . . . . . . . . . . . . . . . .203
Saving MIDI clips for export . . . . . . . . . . . . . . . . . . . . . . . . . . . . . . . . . . . . . . . . . . . . . . . . . . . . . . . . . . . . . . .203
Exporting the project to a standard MIDI file . . . . . . . . . . . . . . . . . . . . . . . . . . . . . . . . . . . . . . . . . . . . . . .203
Configuring a Mackie Control Universal . . . . . . . . . . . . . . . . . . . . . . . . . . . . . . . . . . . . . . . . . . . . . .204
Configuring a Frontier TranzPort. . . . . . . . . . . . . . . . . . . . . . . . . . . . . . . . . . . . . . . . . . . . . . . . . . . . .204
Configuring a generic MIDI controller . . . . . . . . . . . . . . . . . . . . . . . . . . . . . . . . . . . . . . . . . . . . . . . .204
Working with Video. . . . . . . . . . . . . . . . . . . . . . . . . . . . . . . . . . . . . . . . . . . . . . . . . . . . . . . . . . . . . . 205
Managing video. . . . . . . . . . . . . . . . . . . . . . . . . . . . . . . . . . . . . . . . . . . . . . . . . . . . . . . . . . . . . . . . . . . . .205
Adding or replacing video files . . . . . . . . . . . . . . . . . . . . . . . . . . . . . . . . . . . . . . . . . . . . . . . . . . . . . . . . . . . .205
Removing the video track . . . . . . . . . . . . . . . . . . . . . . . . . . . . . . . . . . . . . . . . . . . . . . . . . . . . . . . . . . . . . . . . .205
Hiding and showing the video track . . . . . . . . . . . . . . . . . . . . . . . . . . . . . . . . . . . . . . . . . . . . . . . . . . . . . . .205
Synchronizing audio and video . . . . . . . . . . . . . . . . . . . . . . . . . . . . . . . . . . . . . . . . . . . . . . . . . . . . . . . . . . .205
Removing the video’s audio . . . . . . . . . . . . . . . . . . . . . . . . . . . . . . . . . . . . . . . . . . . . . . . . . . . . . . . . . . . . . . .205
Changing frame numbering . . . . . . . . . . . . . . . . . . . . . . . . . . . . . . . . . . . . . . . . . . . . . . . . . . . . . . . . . . . . . .205
Editing video events. . . . . . . . . . . . . . . . . . . . . . . . . . . . . . . . . . . . . . . . . . . . . . . . . . . . . . . . . . . . . . . . .205
Moving video events . . . . . . . . . . . . . . . . . . . . . . . . . . . . . . . . . . . . . . . . . . . . . . . . . . . . . . . . . . . . . . . . . . . . .206
Trimming video events . . . . . . . . . . . . . . . . . . . . . . . . . . . . . . . . . . . . . . . . . . . . . . . . . . . . . . . . . . . . . . . . . . .206
Slipping and sliding video events . . . . . . . . . . . . . . . . . . . . . . . . . . . . . . . . . . . . . . . . . . . . . . . . . . . . . . . . .206
Using the Video Preview window . . . . . . . . . . . . . . . . . . . . . . . . . . . . . . . . . . . . . . . . . . . . . . . . . . . .206
Copying a frame to the clipboard . . . . . . . . . . . . . . . . . . . . . . . . . . . . . . . . . . . . . . . . . . . . . . . . . . . . . . . . .207
Using toolbar buttons . . . . . . . . . . . . . . . . . . . . . . . . . . . . . . . . . . . . . . . . . . . . . . . . . . . . . . . . . . . . . . . . . . . .207
Using the shortcut menu . . . . . . . . . . . . . . . . . . . . . . . . . . . . . . . . . . . . . . . . . . . . . . . . . . . . . . . . . . . . . . . . . .207
Viewing the status bar . . . . . . . . . . . . . . . . . . . . . . . . . . . . . . . . . . . . . . . . . . . . . . . . . . . . . . . . . . . . . . . . . . . .207
Previewing on external monitors . . . . . . . . . . . . . . . . . . . . . . . . . . . . . . . . . . . . . . . . . . . . . . . . . . . .207
Scoring video . . . . . . . . . . . . . . . . . . . . . . . . . . . . . . . . . . . . . . . . . . . . . . . . . . . . . . . . . . . . . . . . . . . . . . .207
Working with 5.1 Surround. . . . . . . . . . . . . . . . . . . . . . . . . . . . . . . . . . . . . . . . . . . . . . . . . . . . . . . 209
What is 5.1 surround?. . . . . . . . . . . . . . . . . . . . . . . . . . . . . . . . . . . . . . . . . . . . . . . . . . . . . . . . . . . . . . . .209
Setting up surround hardware . . . . . . . . . . . . . . . . . . . . . . . . . . . . . . . . . . . . . . . . . . . . . . . . . . . . . . .210
Setting up surround projects . . . . . . . . . . . . . . . . . . . . . . . . . . . . . . . . . . . . . . . . . . . . . . . . . . . . . . . .210
Routing to hardware in the mixer . . . . . . . . . . . . . . . . . . . . . . . . . . . . . . . . . . . . . . . . . . . . . . . . . . . . . . . . .211
Assigning audio to the LFE channel . . . . . . . . . . . . . . . . . . . . . . . . . . . . . . . . . . . . . . . . . . . . . . . . . .211
Adjusting volume . . . . . . . . . . . . . . . . . . . . . . . . . . . . . . . . . . . . . . . . . . . . . . . . . . . . . . . . . . . . . . . . . . .212
Adjusting track volume . . . . . . . . . . . . . . . . . . . . . . . . . . . . . . . . . . . . . . . . . . . . . . . . . . . . . . . . . . . . . . . . . . .212
Adjusting assignable effects send or bus send levels . . . . . . . . . . . . . . . . . . . . . . . . . . . . . . . . . . . . . . .212
Adjusting channel levels . . . . . . . . . . . . . . . . . . . . . . . . . . . . . . . . . . . . . . . . . . . . . . . . . . . . . . . . . . . . . . . . . .212
Panning audio . . . . . . . . . . . . . . . . . . . . . . . . . . . . . . . . . . . . . . . . . . . . . . . . . . . . . . . . . . . . . . . . . . . . . .213
Panning tracks . . . . . . . . . . . . . . . . . . . . . . . . . . . . . . . . . . . . . . . . . . . . . . . . . . . . . . . . . . . . . . . . . . . . . . . . . . . .213
Panning mixer controls . . . . . . . . . . . . . . . . . . . . . . . . . . . . . . . . . . . . . . . . . . . . . . . . . . . . . . . . . . . . . . . . . . .214
Using the Surround Panner window . . . . . . . . . . . . . . . . . . . . . . . . . . . . . . . . . . . . . . . . . . . . . . . . . . . . . . .214
Automating panning . . . . . . . . . . . . . . . . . . . . . . . . . . . . . . . . . . . . . . . . . . . . . . . . . . . . . . . . . . . . . . . .217
Turning on panning keyframes . . . . . . . . . . . . . . . . . . . . . . . . . . . . . . . . . . . . . . . . . . . . . . . . . . . . . . . . . . . .217
TABLE OF CONTENTS | 11
Adding panning keyframes . . . . . . . . . . . . . . . . . . . . . . . . . . . . . . . . . . . . . . . . . . . . . . . . . . . . . . . . . . . . . . .217
Working with keyframes . . . . . . . . . . . . . . . . . . . . . . . . . . . . . . . . . . . . . . . . . . . . . . . . . . . . . . . . . . . . . . . . . .218
Rendering surround projects . . . . . . . . . . . . . . . . . . . . . . . . . . . . . . . . . . . . . . . . . . . . . . . . . . . . . . . .220
Burning AC-3 files to DVD . . . . . . . . . . . . . . . . . . . . . . . . . . . . . . . . . . . . . . . . . . . . . . . . . . . . . . . . . . . . . . . . .220
Customizing ACID Software. . . . . . . . . . . . . . . . . . . . . . . . . . . . . . . . . . . . . . . . . . . . . . . . . . . . . . . . . . . . . . . .221
Working with ACID windows . . . . . . . . . . . . . . . . . . . . . . . . . . . . . . . . . . . . . . . . . . . . . . . . . . . . . . . .221
Docking and floating ACID windows . . . . . . . . . . . . . . . . . . . . . . . . . . . . . . . . . . . . . . . . . . . . . . . . . . . . . .221
Changing the time ruler format . . . . . . . . . . . . . . . . . . . . . . . . . . . . . . . . . . . . . . . . . . . . . . . . . . . . . .223
Using the ruler offset . . . . . . . . . . . . . . . . . . . . . . . . . . . . . . . . . . . . . . . . . . . . . . . . . . . . . . . . . . . . . . . . . . . . .223
Using the project grid . . . . . . . . . . . . . . . . . . . . . . . . . . . . . . . . . . . . . . . . . . . . . . . . . . . . . . . . . . . . . . .223
Setting the grid type . . . . . . . . . . . . . . . . . . . . . . . . . . . . . . . . . . . . . . . . . . . . . . . . . . . . . . . . . . . . . . . . . . . . . .224
Using the toolbar. . . . . . . . . . . . . . . . . . . . . . . . . . . . . . . . . . . . . . . . . . . . . . . . . . . . . . . . . . . . . . . . . . . .224
Hiding and displaying the toolbar . . . . . . . . . . . . . . . . . . . . . . . . . . . . . . . . . . . . . . . . . . . . . . . . . . . . . . . . .224
Reordering toolbar buttons . . . . . . . . . . . . . . . . . . . . . . . . . . . . . . . . . . . . . . . . . . . . . . . . . . . . . . . . . . . . . . .224
Adding buttons to the toolbar . . . . . . . . . . . . . . . . . . . . . . . . . . . . . . . . . . . . . . . . . . . . . . . . . . . . . . . . . . . .225
Removing buttons from the toolbar . . . . . . . . . . . . . . . . . . . . . . . . . . . . . . . . . . . . . . . . . . . . . . . . . . . . . . .225
Using the time display . . . . . . . . . . . . . . . . . . . . . . . . . . . . . . . . . . . . . . . . . . . . . . . . . . . . . . . . . . . . . .226
Changing cursor position . . . . . . . . . . . . . . . . . . . . . . . . . . . . . . . . . . . . . . . . . . . . . . . . . . . . . . . . . . . . . . . . .226
Changing the time display . . . . . . . . . . . . . . . . . . . . . . . . . . . . . . . . . . . . . . . . . . . . . . . . . . . . . . . . . . . . . . . .226
Monitoring MIDI timecode . . . . . . . . . . . . . . . . . . . . . . . . . . . . . . . . . . . . . . . . . . . . . . . . . . . . . . . . . . . . . . . .226
Setting default track properties . . . . . . . . . . . . . . . . . . . . . . . . . . . . . . . . . . . . . . . . . . . . . . . . . . . . . .227
Setting ACID preferences . . . . . . . . . . . . . . . . . . . . . . . . . . . . . . . . . . . . . . . . . . . . . . . . . . . . . . . . . . . .227
Using the General tab . . . . . . . . . . . . . . . . . . . . . . . . . . . . . . . . . . . . . . . . . . . . . . . . . . . . . . . . . . . . . . . . . . . . .228
Using the Audio tab . . . . . . . . . . . . . . . . . . . . . . . . . . . . . . . . . . . . . . . . . . . . . . . . . . . . . . . . . . . . . . . . . . . . . .230
Using the Audio Device tab . . . . . . . . . . . . . . . . . . . . . . . . . . . . . . . . . . . . . . . . . . . . . . . . . . . . . . . . . . . . . . .230
Using the MIDI tab . . . . . . . . . . . . . . . . . . . . . . . . . . . . . . . . . . . . . . . . . . . . . . . . . . . . . . . . . . . . . . . . . . . . . . . .232
Using the VST Effects tab . . . . . . . . . . . . . . . . . . . . . . . . . . . . . . . . . . . . . . . . . . . . . . . . . . . . . . . . . . . . . . . . . .234
Using the VST Instruments tab . . . . . . . . . . . . . . . . . . . . . . . . . . . . . . . . . . . . . . . . . . . . . . . . . . . . . . . . . . . .234
Using the ReWire Devices tab . . . . . . . . . . . . . . . . . . . . . . . . . . . . . . . . . . . . . . . . . . . . . . . . . . . . . . . . . . . . .234
Using the Video tab . . . . . . . . . . . . . . . . . . . . . . . . . . . . . . . . . . . . . . . . . . . . . . . . . . . . . . . . . . . . . . . . . . . . . . .234
Using the Editing tab . . . . . . . . . . . . . . . . . . . . . . . . . . . . . . . . . . . . . . . . . . . . . . . . . . . . . . . . . . . . . . . . . . . . .234
Using the Sync tab . . . . . . . . . . . . . . . . . . . . . . . . . . . . . . . . . . . . . . . . . . . . . . . . . . . . . . . . . . . . . . . . . . . . . . . .236
Using the Display tab . . . . . . . . . . . . . . . . . . . . . . . . . . . . . . . . . . . . . . . . . . . . . . . . . . . . . . . . . . . . . . . . . . . . .238
Using the Other tab . . . . . . . . . . . . . . . . . . . . . . . . . . . . . . . . . . . . . . . . . . . . . . . . . . . . . . . . . . . . . . . . . . . . . . .238
Using the Folders tab . . . . . . . . . . . . . . . . . . . . . . . . . . . . . . . . . . . . . . . . . . . . . . . . . . . . . . . . . . . . . . . . . . . . .238
Using the External Control & Automation tab . . . . . . . . . . . . . . . . . . . . . . . . . . . . . . . . . . . . . . . . . . . . . .239
Customizing keyboard shortcuts . . . . . . . . . . . . . . . . . . . . . . . . . . . . . . . . . . . . . . . . . . . . . . . . . . . . . . . . . .240
Using Control Surfaces with ACID. . . . . . . . . . . . . . . . . . . . . . . . . . . . . . . . . . . . . . . . . . . . . . . . . . . . . . . . . .241
Connecting a control surface . . . . . . . . . . . . . . . . . . . . . . . . . . . . . . . . . . . . . . . . . . . . . . . . . . . . . . . .241
Configuring ACID to use your control surface . . . . . . . . . . . . . . . . . . . . . . . . . . . . . . . . . . . . . . . . . . . . . .241
Configuring or customizing your control surface . . . . . . . . . . . . . . . . . . . . . . . . . . . . . . . . . . . . . . . . . . .242
Using your control surface . . . . . . . . . . . . . . . . . . . . . . . . . . . . . . . . . . . . . . . . . . . . . . . . . . . . . . . . . . . . . . . .242
Setting up a Mackie Control Universal. . . . . . . . . . . . . . . . . . . . . . . . . . . . . . . . . . . . . . . . . . . . . . . .242
12 | TABLE OF CONTENTS
Connecting the Mackie Control Universal . . . . . . . . . . . . . . . . . . . . . . . . . . . . . . . . . . . . . . . . . . . . . . . . . .243
Configuring the software to use the Mackie Control Universal . . . . . . . . . . . . . . . . . . . . . . . . . . . . . .243
Configuring channel mappings for Mackie Control Extenders . . . . . . . . . . . . . . . . . . . . . . . . . . . . . .244
Configuring or customizing control mappings . . . . . . . . . . . . . . . . . . . . . . . . . . . . . . . . . . . . . . . . . . . . .245
Using the Mackie Control Universal . . . . . . . . . . . . . . . . . . . . . . . . . . . . . . . . . . . . . . . . . . . . . . . . . .246
Channel section . . . . . . . . . . . . . . . . . . . . . . . . . . . . . . . . . . . . . . . . . . . . . . . . . . . . . . . . . . . . . . . . . . . . . . . . . .246
Footswitches (not shown) . . . . . . . . . . . . . . . . . . . . . . . . . . . . . . . . . . . . . . . . . . . . . . . . . . . . . . . . . . . . . . . . .247
Control buttons . . . . . . . . . . . . . . . . . . . . . . . . . . . . . . . . . . . . . . . . . . . . . . . . . . . . . . . . . . . . . . . . . . . . . . . . . .247
Fader Banks buttons . . . . . . . . . . . . . . . . . . . . . . . . . . . . . . . . . . . . . . . . . . . . . . . . . . . . . . . . . . . . . . . . . . . . . .249
Display buttons . . . . . . . . . . . . . . . . . . . . . . . . . . . . . . . . . . . . . . . . . . . . . . . . . . . . . . . . . . . . . . . . . . . . . . . . . . .249
Markers buttons . . . . . . . . . . . . . . . . . . . . . . . . . . . . . . . . . . . . . . . . . . . . . . . . . . . . . . . . . . . . . . . . . . . . . . . . . .250
Add New buttons . . . . . . . . . . . . . . . . . . . . . . . . . . . . . . . . . . . . . . . . . . . . . . . . . . . . . . . . . . . . . . . . . . . . . . . . .250
Windows buttons . . . . . . . . . . . . . . . . . . . . . . . . . . . . . . . . . . . . . . . . . . . . . . . . . . . . . . . . . . . . . . . . . . . . . . . . .251
View buttons . . . . . . . . . . . . . . . . . . . . . . . . . . . . . . . . . . . . . . . . . . . . . . . . . . . . . . . . . . . . . . . . . . . . . . . . . . . . .251
Modifiers buttons . . . . . . . . . . . . . . . . . . . . . . . . . . . . . . . . . . . . . . . . . . . . . . . . . . . . . . . . . . . . . . . . . . . . . . . . .252
Audio/Video buttons . . . . . . . . . . . . . . . . . . . . . . . . . . . . . . . . . . . . . . . . . . . . . . . . . . . . . . . . . . . . . . . . . . . . .252
Project buttons . . . . . . . . . . . . . . . . . . . . . . . . . . . . . . . . . . . . . . . . . . . . . . . . . . . . . . . . . . . . . . . . . . . . . . . . . . .253
Timeline buttons . . . . . . . . . . . . . . . . . . . . . . . . . . . . . . . . . . . . . . . . . . . . . . . . . . . . . . . . . . . . . . . . . . . . . . . . .253
Transport buttons . . . . . . . . . . . . . . . . . . . . . . . . . . . . . . . . . . . . . . . . . . . . . . . . . . . . . . . . . . . . . . . . . . . . . . . .254
Arrow buttons . . . . . . . . . . . . . . . . . . . . . . . . . . . . . . . . . . . . . . . . . . . . . . . . . . . . . . . . . . . . . . . . . . . . . . . . . . . .255
Jog dial . . . . . . . . . . . . . . . . . . . . . . . . . . . . . . . . . . . . . . . . . . . . . . . . . . . . . . . . . . . . . . . . . . . . . . . . . . . . . . . . . . .256
Using a Frontier TranzPort . . . . . . . . . . . . . . . . . . . . . . . . . . . . . . . . . . . . . . . . . . . . . . . . . . . . . . . . . . .256
Viewing the control mappings . . . . . . . . . . . . . . . . . . . . . . . . . . . . . . . . . . . . . . . . . . . . . . . . . . . . . . . . . . . .256
Adjusting track or bus volume . . . . . . . . . . . . . . . . . . . . . . . . . . . . . . . . . . . . . . . . . . . . . . . . . . . . . . . . . . . .257
Adjusting track or bus panning . . . . . . . . . . . . . . . . . . . . . . . . . . . . . . . . . . . . . . . . . . . . . . . . . . . . . . . . . . . .257
Editing a track's input device . . . . . . . . . . . . . . . . . . . . . . . . . . . . . . . . . . . . . . . . . . . . . . . . . . . . . . . . . . . . . .257
Editing a track or mixer control's output device . . . . . . . . . . . . . . . . . . . . . . . . . . . . . . . . . . . . . . . . . . . .258
Configuring a generic MIDI controller . . . . . . . . . . . . . . . . . . . . . . . . . . . . . . . . . . . . . . . . . . . . . . . .258
Customizing your control mappings . . . . . . . . . . . . . . . . . . . . . . . . . . . . . . . . . . . . . . . . . . . . . . . . . . . . . .258
Loading a control mapping file . . . . . . . . . . . . . . . . . . . . . . . . . . . . . . . . . . . . . . . . . . . . . . . . . . . . . . . . . . . .259
Example of how you can set up MIDI keyboard as a generic control surface . . . . . . . . . . . . . . . . .259
ACID Tips and Tricks. . . . . . . . . . . . . . . . . . . . . . . . . . . . . . . . . . . . . . . . . . . . . . . . . . . . . . . . . . . . . . . . . . . . . . . . .261
Adding long media files quickly. . . . . . . . . . . . . . . . . . . . . . . . . . . . . . . . . . . . . . . . . . . . . . . . . . . . . .261
Playing with duplicate tracks . . . . . . . . . . . . . . . . . . . . . . . . . . . . . . . . . . . . . . . . . . . . . . . . . . . . . . . .261
Detuning paired tracks . . . . . . . . . . . . . . . . . . . . . . . . . . . . . . . . . . . . . . . . . . . . . . . . . . . . . . . . . . . . . . . . . . . .261
Duplicating with offset . . . . . . . . . . . . . . . . . . . . . . . . . . . . . . . . . . . . . . . . . . . . . . . . . . . . . . . . . . . . . . . . . . . .262
Creating ping-pong pan effects . . . . . . . . . . . . . . . . . . . . . . . . . . . . . . . . . . . . . . . . . . . . . . . . . . . . . . . . . . .262
Adding depth with assignable effects . . . . . . . . . . . . . . . . . . . . . . . . . . . . . . . . . . . . . . . . . . . . . . . .262
Playing double time/half time . . . . . . . . . . . . . . . . . . . . . . . . . . . . . . . . . . . . . . . . . . . . . . . . . . . . . . .263
Constructing the wall of sound . . . . . . . . . . . . . . . . . . . . . . . . . . . . . . . . . . . . . . . . . . . . . . . . . . . . . .263
Adding through subtraction . . . . . . . . . . . . . . . . . . . . . . . . . . . . . . . . . . . . . . . . . . . . . . . . . . . . . . . . .263
Tweaking the dynamics . . . . . . . . . . . . . . . . . . . . . . . . . . . . . . . . . . . . . . . . . . . . . . . . . . . . . . . . . . . . .263
Fading in and out of mixes . . . . . . . . . . . . . . . . . . . . . . . . . . . . . . . . . . . . . . . . . . . . . . . . . . . . . . . . . . . . . . . .263
TABLE OF CONTENTS | 13
Adding build ups . . . . . . . . . . . . . . . . . . . . . . . . . . . . . . . . . . . . . . . . . . . . . . . . . . . . . . . . . . . . . . . . . . . . . . . . .264
Creating wah-wah effects with automated Track EQ . . . . . . . . . . . . . . . . . . . . . . . . . . . . . . . . . .264
Making automated changes more stark . . . . . . . . . . . . . . . . . . . . . . . . . . . . . . . . . . . . . . . . . . . . . .264
Abruptly changing volume or pan . . . . . . . . . . . . . . . . . . . . . . . . . . . . . . . . . . . . . . . . . . . . . . . . . . . . . . . . .264
Turning automated effects on and off . . . . . . . . . . . . . . . . . . . . . . . . . . . . . . . . . . . . . . . . . . . . . . . . . . . . .265
Making automated frequency changes more natural . . . . . . . . . . . . . . . . . . . . . . . . . . . . . . . . .265
Overriding compress/expand. . . . . . . . . . . . . . . . . . . . . . . . . . . . . . . . . . . . . . . . . . . . . . . . . . . . . . . .265
Slicing and dicing in the Chopper . . . . . . . . . . . . . . . . . . . . . . . . . . . . . . . . . . . . . . . . . . . . . . . . . . . .266
Chopping new loops for alternate time signatures . . . . . . . . . . . . . . . . . . . . . . . . . . . . . . . . . . . . . . . . .266
Chopping multiple files into a new loop . . . . . . . . . . . . . . . . . . . . . . . . . . . . . . . . . . . . . . . . . . . . . . . . . . .266
Creating drum-roll build ups . . . . . . . . . . . . . . . . . . . . . . . . . . . . . . . . . . . . . . . . . . . . . . . . . . . . . . . . . . . . . .266
Creating drum fills . . . . . . . . . . . . . . . . . . . . . . . . . . . . . . . . . . . . . . . . . . . . . . . . . . . . . . . . . . . . . . . . . . . . . . . .267
Creating one-track remixes . . . . . . . . . . . . . . . . . . . . . . . . . . . . . . . . . . . . . . . . . . . . . . . . . . . . . . . . . . . . . . .267
Creating pseudo-granular synthesis . . . . . . . . . . . . . . . . . . . . . . . . . . . . . . . . . . . . . . . . . . . . . . . . . . . . . . .267
Building instrument solos . . . . . . . . . . . . . . . . . . . . . . . . . . . . . . . . . . . . . . . . . . . . . . . . . . . . . . . . . . .267
Building scales . . . . . . . . . . . . . . . . . . . . . . . . . . . . . . . . . . . . . . . . . . . . . . . . . . . . . . . . . . . . . . . . . . . . . .267
Glossary. . . . . . . . . . . . . . . . . . . . . . . . . . . . . . . . . . . . . . . . . . . . . . . . . . . . . . . . . . . . . . . . . . . . . . . . . . . . . . . . . . . . . .269
Index . . . . . . . . . . . . . . . . . . . . . . . . . . . . . . . . . . . . . . . . . . . . . . . . . . . . . . . . . . . . . . . . . . . . . . . . . . . . . . . .i
14 | TABLE OF CONTENTS

INTRODUCING ACID SOFTWARE | 15
Chapter
1
Introducing ACID Software
Welcome
Congratulations on purchasing a revolutionary software application for Microsoft® Windows®. With ACID® from Sony
Media Software, you can create great music by simply picking, painting, and playing.
System requirements
The following lists the minimum system requirements for using ACID:
• Microsoft® Windows® 2000 SP4 or XP
• 1 GHz processor (1.2 GHz if using video)
• 256 MB RAM, 512 MB recommended
• 150 MB hard-disk space for program installation
• 600 MB hard-disk space for optional Sony Sound Series Loops & Samples™ reference library installation
• Microsoft Windows-compatible sound card
• DVD-ROM drive (for installation from a DVD only)
• Supported CD-recordable drive (for CD burning only)
• Microsoft DirectX® 9.0c or later (version 8.1b included on DVD-ROM)
• Microsoft .NET Framework 1.1 (included on DVD-ROM)
• Internet Explorer 5.1 or later (included on DVD-ROM)
• Internet connection (for Gracenote® MusicID™)
Installing ACID
Prior to installing the software, we recommend that you exit all open applications and temporarily turn off any virus
protection.
1.
Insert the application disc. The setup screen appears (if AutoPlay is enabled for your CD-ROM or DVD-ROM drive).
2.
Click Install. The installation process begins.
3.
Follow the on-screen prompts to install the appropriate version of the software for your computer.
Using online help
You can access two varieties of help within ACID:
• Online help
• What’sThis? help (also referred to as context-sensitive help)
Online help
To access online help, choose Contents and Index from the Help menu or press F1.
Note:
If you have disabled the AutoPlay feature, click the Start button and choose Run. In the Run dialog that the
CD-ROM or DVD-ROM drive letter and add :\setup.exe. Click OK to start the installation.
Note:
Windows Installer is used for all versions of Windows. Windows Installer is installed and then you are asked to
restart your system.
Note:
To view online help, Internet Explorer 5.1 or later must be installed on your system. If you purchased the boxed
version of ACID, Internet Explorer version 5.1 is included on your CD-ROM.
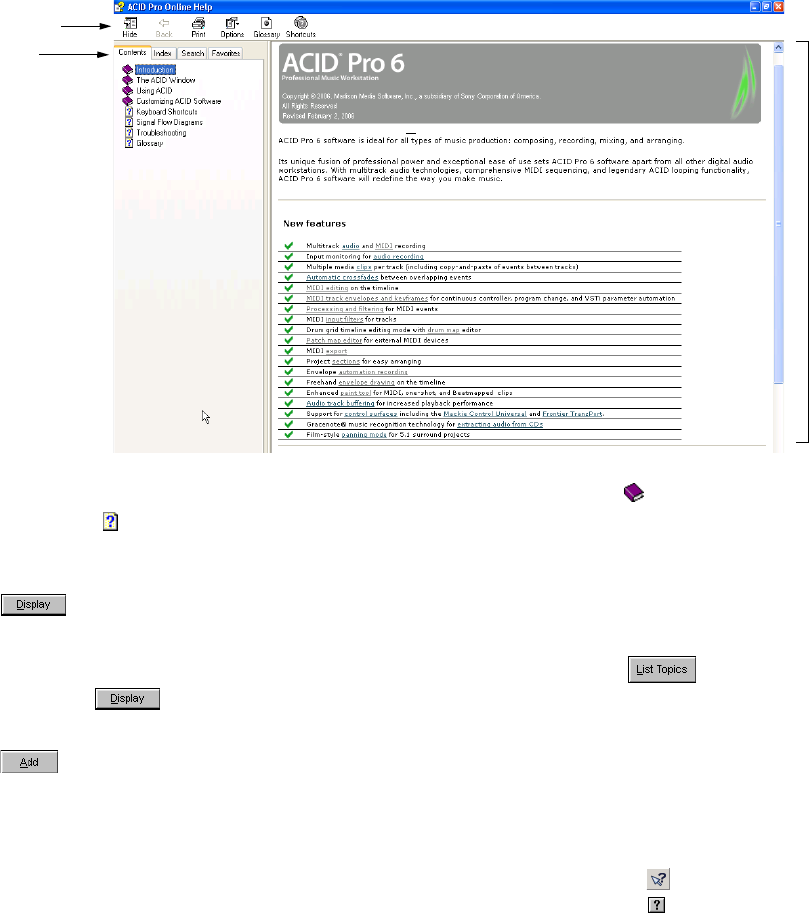
16 | Chapter 1
The Contents tab provides a list of available help topics. Double-click a closed book ( ) to open the pages and then click
a topic page ( ).
The Index tab provides a complete listing of the help topics available. Scroll through the list of available topics or type a
word in the Type in the keyword to find box to quickly locate topics related to that word. Select the topic and click
.
The Search tab allows you to enter a keyword and display all of the topics in the online help that contain the keyword you
have entered. Type a keyword in the Type in the word(s) to search for box and click . Select the topic from the
list and click .
The Favorites tab allows you to keep topics that you revisit often in a separate folder. To add a topic to your favorites, click
on the Favorites tab.
What’s This? help
What’sThis? help allows you to view pop-up window descriptions for ACID menus, buttons, and dialog boxes. Choose
What's This? from the Help menu, press Shift+F1, or click the What’sThis? help button ( ) on the toolbar and then click
any ACID item. To use What’sThis? help in a dialog box, click the question mark button ( ) in the upper-right corner of
the dialog box and then click an item in the dialog box.
Help on the Web
Additional ACID information is available on the Sony Media Software Web site. From the Help menu, choose Sony on the
Web, and choose the desired location from the submenu. The software starts your system’s Web browser and attempts to
connect to the appropriate page on the Sony Web site.
Overview of ACID software
ACID music creation software is designed to be powerful and flexible, yet easy to use. Many of the ACID operations, menu
items, and shortcut keys are common to other Sony Media Software applications.
The following sections provide a tour of the ACID work area.
Toolbar
Tabs
Information
pane
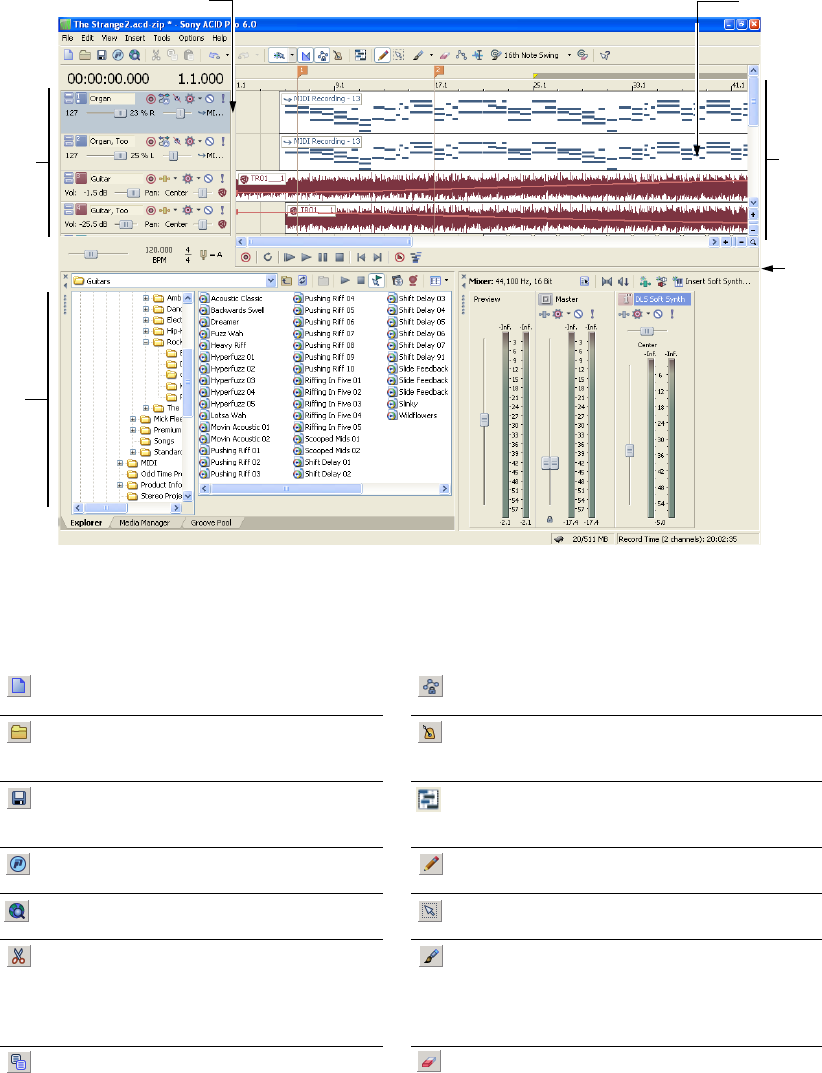
INTRODUCING ACID SOFTWARE | 17
Main window
The ACID workspace includes three main areas: the track list, the track view (or timeline), and the window docking area.
The other parts of the interface are tools and features used while creating and working with your project. You can resize
the track list, track view, and window docking area by dragging the dividers between them.
Toolbar
The toolbar allows you to quickly access the most commonly used functions and features in ACID.
Opens a new project. You will be prompted to
save any changes to the current project.
Locks envelope points so they move with an event
when it is moved along the timeline.
Displays the Open File dialog. From this window,
you can browse all of the available drives to select
an ACID project or audio file to open.
Activates the Metronome to keep time during
recording and playback.
Saves any changes to the current project.
The first time you save a project, the Save As
dialog appears.
Allows editing of MIDI events directly on the timeline.
In this mode, you can draw and erase notes in a piano
roll or drum grid view.
Opens the Publish wizard so you can share your
ACID creation on the Web.
Activates the Draw tool to add and edit events.
Opens a dialog where you can download media
from the Internet.
Activates the Selection tool to select multiple events.
Clears the selected items from the track view and
places them on the ACID clipboard. You can then
paste them to a new location.
Activates the Paint tool to insert events across
multiple tracks.When used in conjunction with the
Ctrl key, the Paint tool can paint an entire one-shot,
MIDI, or Beatmapped media file to an event with one
click.
Creates a copy of the selected items from the
track view on the ACID clipboard. You can then
paste them to a new location.
Activates the Erase tool to erase events or parts of
events. When used in conjunction with the Ctrl key,
the Erase tool can erase an entire one-shot, MIDI track,
or Beatmapped track event with one click.
Track view
Divider
Window
docking
area
Track list
Divider Timeline
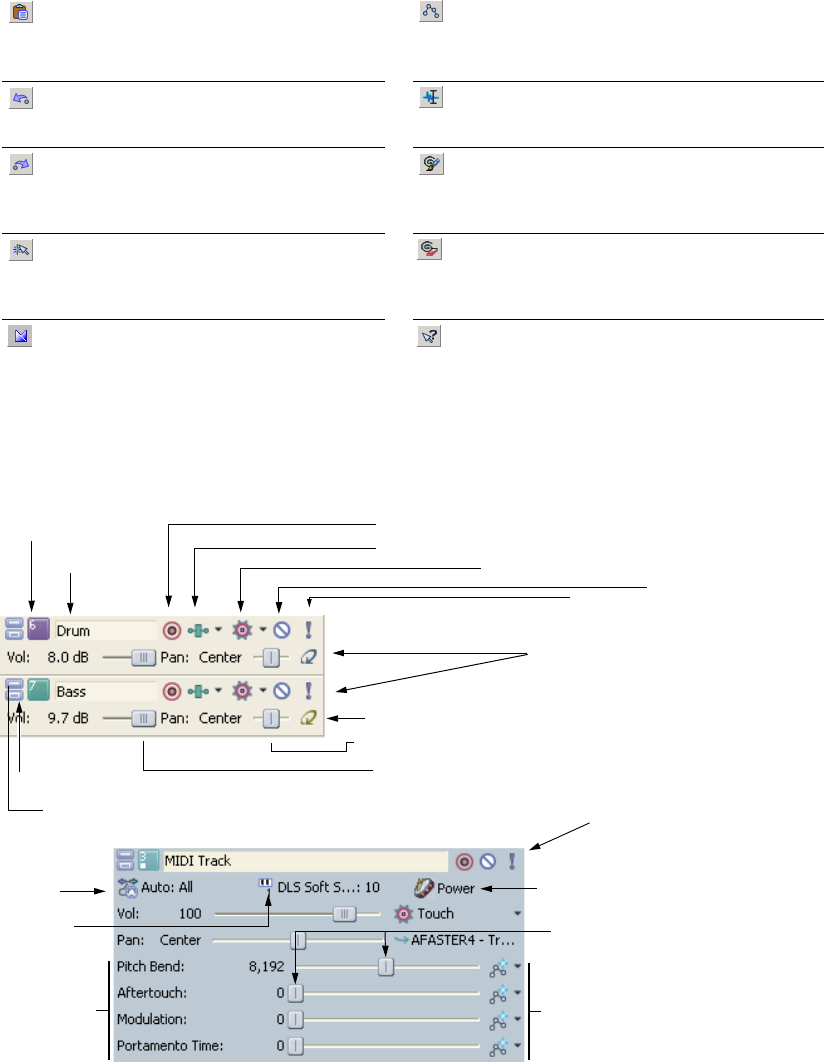
18 | Chapter 1
Track list
This list identifies the track order in your project and contains the track’s controls. The following sections identify and
briefly explain the controls located in the track list.
Minimize/Maximize Track Height buttons
These buttons control the track’s appearance (size) on the track list and the track view.
Track number
This area identifies the track’s number in the project. You can quickly change the track order by dragging selected tracks
within the track list.
Inserts the contents of the ACID clipboard at the
current cursor position. The pasted items cover
any existing events. To make room for pasted
events, choose Paste Insert from the Edit menu.
Activates the Envelope tool to select and modify
envelope points.
Reverses the last action performed. ACID supports
unlimited undos, allowing you to restore the
project to any state since the last save.
Activates the Time Selection tool to quickly select all
events within range of time.
Reverses an undo. Activates the Groove tool to apply a groove to a track.
You can use grooves to manipulate the timing of
tracks by quantizing media to predefined grooves or
by applying the feel of one track to another.
Turns the snapping feature on or off. With
snapping enabled, you can decide whether to
snap to the grid or to all elements (markers,
regions, etc.).
Activates the Groove Erase tool to erase grooves or
parts of grooves. When used in conjunction with the
Ctrl key, the Groove Erase tool can erase an entire
groove event.
Allows you to automatically create crossfades
when you overlap two audio events.
Activates What’sThis? help to obtain information
about a specific option, menu, or part of the ACID
window.
Track name
Track number
Volume slider
Track FX
Mute
Solo
Pan slider
Arm for Record
Paint Clip Selector
Automation Settings
Minimize Track Height
Maximize Track Height
AUDIO TRACKS
MIDI TRACK
MIDI Input
MIDI Output
MIDI controller data
Program
Insert controller envelopes
Controller data sliders

INTRODUCING ACID SOFTWARE | 19
Track name
When you add a file to a project, the track name is initially the same name as the file’s name. Right-click the track name
and choose Rename from the shortcut menu (or double-click) to change the track name.
Bus assignment/Device selection
Clicking the Bus Assignment button ( ) and selecting a letter from the menu allows you to assign the corresponding
track to the specified output bus. However, the button is only available in projects containing multiple busses. For more
information, see Adding busses to the project on page 141.
MIDI Input button
Clicking the MIDI Input button allows you to choose a MIDI input device for recording MIDI. For more information,
see Recording MIDI on page 164.
MIDI Output button
Clicking the MIDI Output button allows you to select soft synths and MIDI devices and the channel you want to use to
play MIDI data on the track. For more information, see Setting up a MIDI controller for recording into a track on page 164.
Program button
Clicking the Program button allows you to change the settings of your soft synth and show/hide keyframes. For more
information, see Changing the track voice on page 178.
For more information, see Adding a program change keyframe on page 184.
Track FX button
The Track FX button ( ) accesses the Audio Plug-In window from which you can add, edit, and apply effects to the track.
For more information, see Using clips with tracks on page 107.
Mute button
Clicking the Mute button ( ) temporarily suspends playback of the corresponding track, allowing you to focus on the
project’s remaining tracks. A muted track appears grayed out in the track view. For more information, see Muting tracks on
page 48.
Solo button
Clicking the Solo button ( ) isolates the track during playback by muting the project’s remaining tracks. For more
information, see Soloing tracks on page 49.
Surround panner
In 5.1 surround projects, the surround panner allows you to view and edit surround panning settings for a track.
Double-click a surround panner to view the Surround Panner window and make fine panning adjustments.
Volume fader
This dedicated volume fader controls how loud a track is in the mix. A value of 0 dB means that the track plays with no
boost or cut from the software. Dragging the fader to the left cuts the volume; dragging to the right boosts the volume.
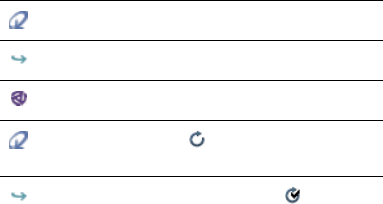
20 | Chapter 1
Pan slider
This dedicated pan slider controls the position of a track in the stereo field. Dragging the slider to the left places the track
in the left speaker more than the right, while dragging the slider to the right places the track in the right speaker.
You can choose among five panning types to determine how a track is panned. For more information, see Choosing stereo
pan types on page 113.
Multipurpose slider
This multipurpose slider allows you to control the following:
• The level of the track’s signal being routed to each of the project’s busses.
• The level of the track’s signal being routed to an assignable effect control.
Each track’s slider position is independent from the others; however, you can move sliders simultaneously by selecting
multiple tracks before making your adjustment. If you do not see this slider, expand the track.
For MIDI tracks, four multipurpose sliders are displayed to allow you to adjust MIDI controller data. For more information,
see Controller automation on page 176.
You may choose what the slider controls by clicking the slider label. Changing the slider type for one track changes it for
all tracks so you can compare levels of the same control across the project. For more information, see Adjusting the mix on
page 48.
Paint Clip Selector button
Clicking the Paint Clip Selector button displays all the clips available for the track, allows the user to add clips, and opens
the Clip Pool.
The Paint Clip Selector button shows the clip type icons.
For more information, see Adding clips to tracks on page 107.
Track view
In the track view, you can view and edit the events in a track. The area in which events display is the timeline. The track
view contains other elements which are described in the following sections.
Clip type icons
Loop
One-shot
Beatmapped
MIDI (if Loop button is selected in the Clip
Pool)
MIDI (if Loop button is not selected in the Clip
Pool)
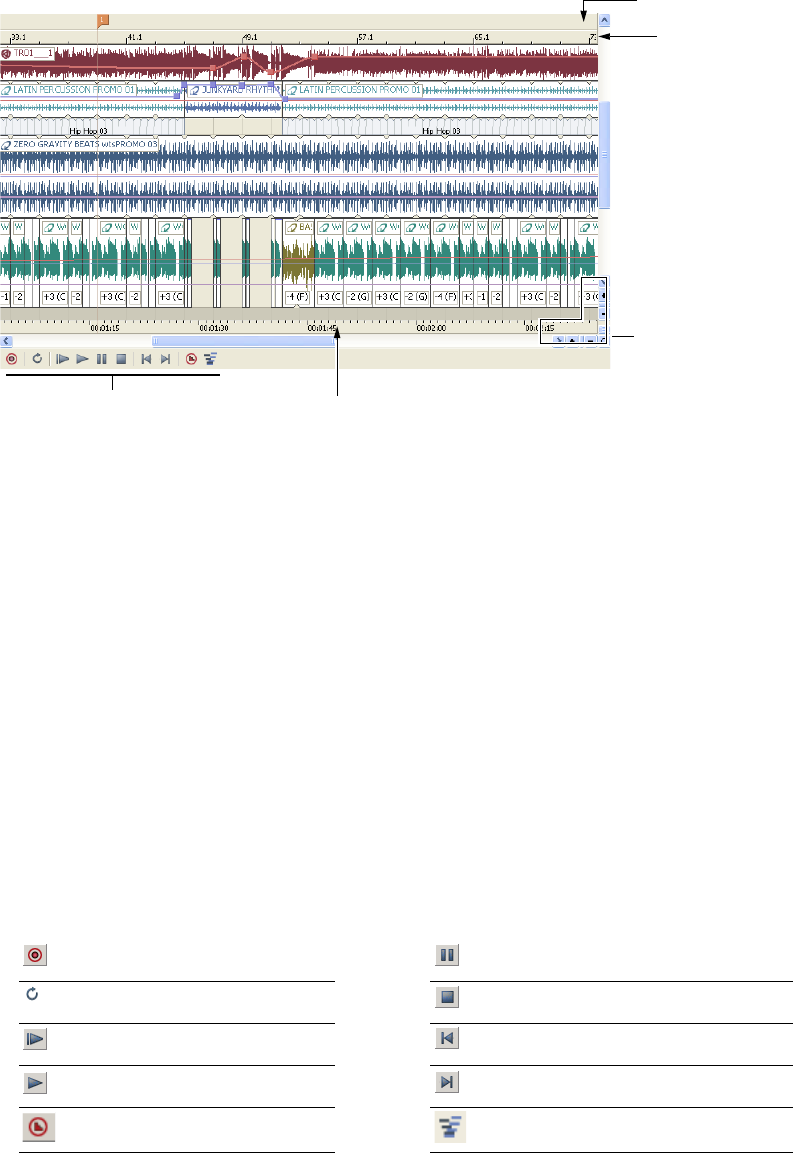
INTRODUCING ACID SOFTWARE | 21
Marker bar
The marker bar runs the length of your project and contains the tags for markers and regions positioned along the
project’s timeline.
Beat ruler
The beat ruler allows you to place events in reference to the musical time of bars and beats. This ruler is fixed and does
not update when you change the tempo. This allows the events in the tracks to maintain their size when you adjust the
tempo.
Time ruler
The time ruler provides a timeline for your project. This ruler can show real time in many different formats. For more
information, see Changing the time ruler format on page 223. The ruler changes with tempo, since the number of beats and
beats per second of real time changes with tempo.
Transport bar
The transport bar contains the playback and cursor positioning buttons frequently used while working on your project.
The software also includes keyboard shortcuts for these playback commands. For more information, see Playback
commands on page 28.
Record new track Pause/resume project playback
Loop playback Stop playback
Play from beginning of project Move cursor to start of project
Play project from cursor position Move cursor to end of project
MIDI step record MIDI merge record
Zoom
controls
Marker bar
Transport
bar Time ruler
(if displayed)
Beat ruler
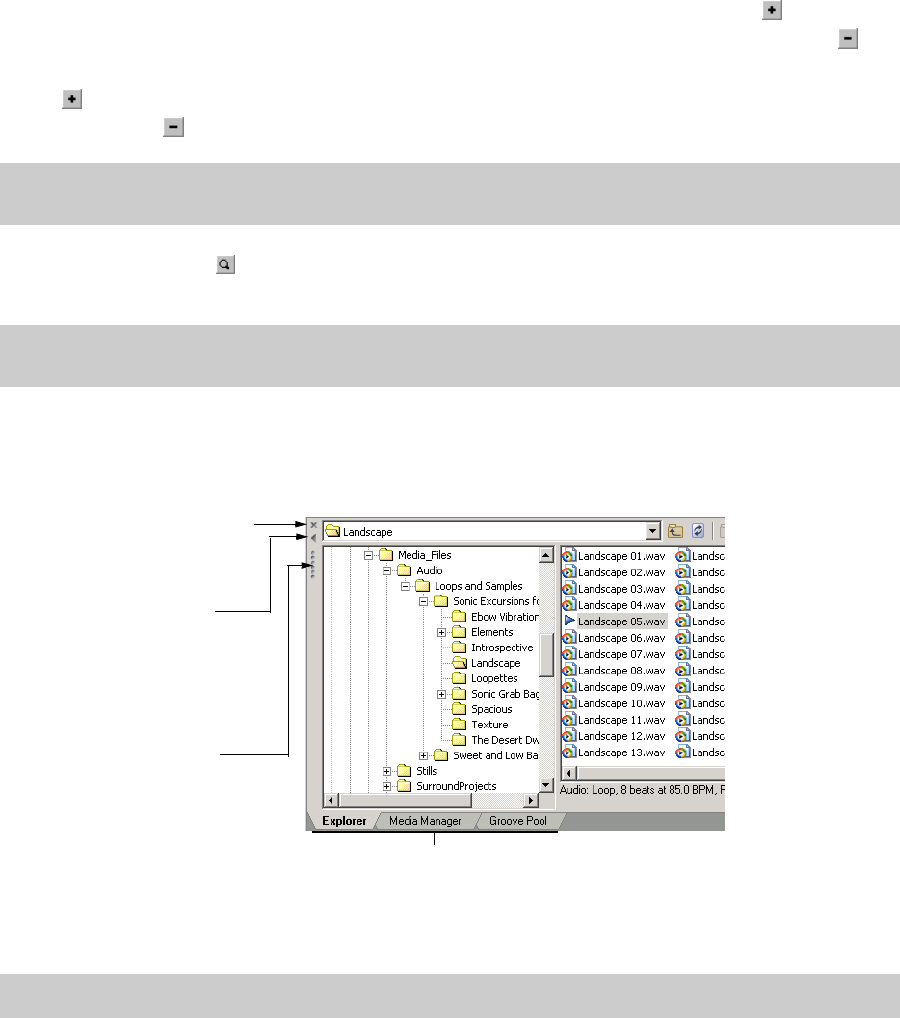
22 | Chapter 1
Zoom controls
To the right of the horizontal scroll bar are the time zoom controls. Clicking the Zoom In Time button ( ) increases the
horizontal magnification of the project. To decrease the level of magnification, click the Zoom Out Time button ( ).
Directly below the vertical scroll bar are the dedicated track height zoom controls. Clicking the Zoom In Track Height
button ( ) increases the vertical magnification of the project. To decrease the level of magnification, click the Zoom Out
Track Height button ( ).
Click the Zoom Tool button ( ) in the corner of the track view to temporarily change the cursor into the Zoom tool.
After you select an area of the track view to magnify, the cursor reverts to the previously active tool.
Window docking area
This area allows you to keep frequently used windows available while working on a project. Windows can be docked side
by side or in stacks in the window docking area. For more information, see Docking and floating ACID windows on page 221.
The default windows display in the window docking area when you start ACID for the first time. Additional windows can
be displayed by clicking the window’s tab or by choosing the desired window from the View menu.
The available windows can be docked anywhere at the bottom of the ACID window or floated over the ACID window or
on a secondary monitor (this setup requires a dual-monitor video card). You can also create floating docks anywhere by
dragging more than one window to the same area.
Explorer window
The Explorer window works similarly to the Windows® Explorer. You can use the Explorer window to locate, preview and
select media files to be added to your project. You can also use the Explorer window to perform common file
management tasks, such as renaming files or creating folders. Display the Explorer by choosing Explorer from the View
menu or pressing Alt+1.
Note:
Double-clicking the horizontal or vertical scroll bars adjusts the magnification so that as much of the project
(either horizontally or vertically) is displayed as possible.
Note:
Double-clicking the Zoom tool adjusts both the horizontal and vertical magnification so that as much of the
project is displayed as possible.
Tip:
You can quickly hide or show the window docking area by pressing F11.
Click a tab to
view a window.
Click the Close button to
remove a window from a
floating dock or the window
docking area.
Click the Maximize/Minimize
button to control the size of
the window in the window
docking area.
Click the handle to drag a
window to a different
location or dock.

INTRODUCING ACID SOFTWARE | 23
Chopper
The Chopper™ isolates audio events so that you can dissect them and reinsert them into a project to produce elaborate
slice-n-dice effects with minimal effort. Display the Chopper by choosing Chopper from the View menu or pressing
Alt+2. For more information, see Using the Chopper on page 101.
Mixer
The Mixer window provides access to output levels, as well as soft synth controls and the project audio properties. Display
the Mixer by choosing Mixer from the View menu or pressing Alt+3. For more information, see Using the Mixer window on
page 51.
Video Preview
This window displays prerendered video files that can be imported and synchronized with an ACID project. The video file
displays during project playback and can be rendered with the project to an appropriate format. Display the Video
Preview window by choosing Video Preview from the View menu or pressing Alt+4. For more information, see Using the
Video Preview window on page 206.
Media Manager
This window displays the Media Manager™, which you can use to search for, manage, and tag your media files. Display the
Media Manager window by choosing Media Manager from the View menu or pressing Alt+5. For more information, see
Using the Media Manager on page 75.
Track Properties
This window allows you to change track attributes. Display the Track Properties window by double-clicking a track’s icon
or by pressing Alt+6. For more information, see Configuring track properties on page 115.
Surround Panner
This window allows you to control panning in a 5.1 surround project. Display the Surround Panner window by double-
clicking the surround panner on a track or mixer control or by pressing Alt+7. For more information, see Working with 5.1
Surround on page 209.
Soft Synth Properties
This window allows you to change the attributes of soft synth controls in the Mixer window. Display the Soft Synth
Properties window by double-clicking a soft synth control’s icon or by pressing Alt+8. For more information, see Using soft
synth controls on page 144.
Audio Plug-In
This window displays plug-ins and settings for track, assignable, bus, and soft synth effects chains. Display the Audio
Plug-In window by clicking a track’s Track FX button ( ), by choosing Audio Plug-In from the View menu, or by pressing
Alt+9. For more information, see Using clips with tracks on page 107 and Adding effects to soft synth mixer controls on page
149.
24 | Chapter 1
Plug-In Manager
This window allows you to view and choose effects plug-ins to be added to a track, bus, or assignable effects chain.
Display the Plug-In Manager window by choosing Plug-In Manager from the View menu or by pressing Ctrl+Alt+1.
Groove Pool
This window allows you to view and edit the grooves in your project. Display the Groove Pool by choosing Groove Pool
from the View menu or by pressing Ctrl+Alt+2. The upper half of the Groove Pool window shows all of the groove maps
currently in your project. The lower half of the window displays the selected groove map in the Groove Editor, which
allows you to make changes. For more information, see Working with grooves on page 120.
Clip properties
For audio (non-MIDI) clips, this window allows the user to change clip types (loop, one-shot, and Beatmapped), and
adjust time stretching, pitch, root notes, tempo, and downbeat.
For more information, see Configuring clip properties on page 115.
For MIDI clips, you can use the Clip Properties window to edit data using the OPT list editor or piano roll.
For more information, see Using the piano roll editor on page 187. For more information, see Using the list editor on page 191.
Keyboard command reference
The ACID keyboard commands are shortcuts that you can use while working on your project.
General commands
Project file commands
Tips:
• To add an effect quickly, drag a plug-in from the Plug-In Manager window to a track, bus, assignable effects chain, or soft
synth bus.
• If the VST plug-in you want to use isn't displayed in the list, you can use the VST Effects tab in the Preferences dialog to add
the plug-in's folder and then click the Refresh button to scan for plug-ins. For more information, see Using the VST Effects
tab on page 234.
• If the DirectX plug-in you want to use isn't displayed in the list, hold Ctrl+Shift while restarting ACID and then select the
Delete all cached application data check box to reset your preferences and rescan for DirectX plug-ins.
Important:
Some keyboard commands listed below are associated with features that are not available in all versions of
ACID. For information on a specific feature and its availability, please refer to the description of the feature in this manual.
Description Keys
Display online help F1
Display What’sThis? help Shift+F1 and click an item
Refresh screen F5
Shortcut menu Shift+F10
Temporarily suspend snapping Shift+drag
Description Keys Description Keys
Create new project Ctrl+N Save project Ctrl+S
Create new project and bypass the
Project Properties dialog
Ctrl+Shift+N Open project properties Alt+Enter
Open existing project or media file Ctrl+O Close the current project Ctrl+F4
INTRODUCING ACID SOFTWARE | 25
Magnification and view commands
Explorer window commands
Cursor placement, loop region and time selection commands
Description Keys Description Keys
Show Explorer window Alt+1 Restore project magnification to
the default settings
F9
Show Chopper window Alt+2 Restore track height to a level
where all track list controls are
displayed
Shift+F9
Show Mixer window Alt+3 Reduce timeline magnification so
the entire length of the project and
as many tracks as possible are
displayed
Ctrl+F9
Show Video/Video Preview
window
Alt+4 Zoom time in/out small increments
(when timeline has focus)
Up or Down Arrow
Show Media Manager window Alt+5 Zoom time in/out large increments
(when timeline has focus)
Ctrl+Up or Down Arrow
Show Track Properties window Alt+6 Zoom in time until each video
thumbnail represents one frame
Alt+Up Arrow
Show Surround Panner window Alt+7 Zoom track height in/out (when
timeline has focus)
Shift+Up or Down Arrow
Show Soft Synth Properties
window
Alt+8 Change track height for all tracks Ctrl+Shift+Up or Down
Arrow
Show Audio Plug-In window Alt+9 Minimize/restore track height for
all tracks
‘
Show Plug-In Manager window Ctrl+Alt+1 Return all tracks to the default
height
Ctrl+’
Show Groove Pool window Ctrl+Alt+2 Minimize/restore the window
docking area
F11 or Alt+’
Show Clip Properties window Ctrl+Alt+3 Show/hide Event Information Ctrl+Shift+I
Shift focus forward through open
ACID windows
F6 Minimize/restore timeline
vertically and horizontally (window
docking area and track list will be
hidden
Ctrl+F11 or Ctrl+Alt+’
Shift focus backward through open
ACID windows
Shift+F6 Minimize/restore the track list Shift+F11 or Shift+Alt+’
Shift focus forward (clockwise)
through track list, timeline, bus
track timeline, and bus track list
(when track view or timeline has
focus)
Tab Show/Hide bus tracks B
Shift focus backward
(counterclockwise) through track
list, bus track list, bus track
timeline, and timeline (when track
view or timeline has focus)
Shift+Tab
Description Keys Description Keys
Add all selected files to the track
list
Enter Add selected file or currently
playing file to the track list
Ctrl+Enter
Description Keys Description Keys
Go to beginning of active loop
region or viewable area (if no
selection)
Home Center in view \
Go to end of active loop region or
viewable area (if no selection)
End Move cursor to corresponding
marker or select corresponding
region
Number keys (not
Keypad)
26 | Chapter 1
Event editing commands
Toggle cursor between beginning
and end of loop region
Numeric keypad 5 Move left/right one pixel Left/Right Arrow
Time select loop region (when
Time Selection tool is selected)
Shift+Q Move to marker(s) Ctrl+Left/Right Arrow
Toggle previous selection Backspace Move left/right to event edit points
including fade edges
Ctrl+Alt+Left/Right Arrow
Go to beginning of project W or Ctrl+Home Move through a video event one
frame at a time
Alt+Left or Right Arrow
Go to end of project Ctrl+End Create or extend loop region/time
selection
Shift+Left or Right Arrow
Move left by grid marks Page Up Double loop region/selection
length
‘ (apostrophe)
Move right by grid marks Page Down Halve loop region/selection length ; (semicolon)
Go to
(using measures, beats, and ticks)
Ctrl+G Shift loop region/selection left , (comma)
Go to
(using absolute time)
Shift+G Shift loop region/selection right . (period)
Set end of time selection
(using measures, beats, and ticks
when Time Selection tool is
selected)
Ctrl+Shift+G
Description Keys Description Keys
Paint the entire media length for all
media except video (only when
Paint tool is selected)
Ctrl+click in timeline Join selected events J
Cycle event clip forward for all
selected clips
CCreate fades F
Cycle event clip backward for all
selected clips
Shift+C Reverse event U
Select Draw tool Ctrl+D Trim events to selection length.
This command has no effect if
there is no selected data. Trimming
does not copy data onto the
clipboard. Available only when the
Time Selection tool is active
Ctrl+T
Select next edit tool in list DSlip Trim: moves the media with
the edge as it is trimmed
Alt+drag edge of event
Select previous edit tool in list Shift+D Slip: move media within event
without moving the event
Alt+drag inside the event
Undo Ctrl+Z Slide: move event while leaving the
underlying media in place
Ctrl+Alt+drag event
Redo Ctrl+Shift+Z Create fades F
Cut selection Ctrl+X Copy selection Ctrl+C
Copy event Ctrl+drag Pitch up one semitone Numeric keypad +
=
Paste from clipboard Ctrl+V Pitch down 4 semitones Shift+Numeric keypad -
Shift+-
Paste repeat from clipboard Ctrl+B Pitch up 4 semitones Shift+Numeric keypad +
Shift+=
Paste insert Ctrl+Shift+V Pitch down one octave Ctrl+Numeric keypad -
Insert event at cursor YPitch up one octave Ctrl+Numeric keypad +
Paste event at cursor Shift+Y Reset pitch Ctrl+Shift+Numeric
keypad - or +
Ctrl+Shift+-/=
Delete selection Delete Change an event’s gain setting Keypad / or *
Move selected event(s) right one
pixel
Numeric keypad 6 Change an event’s gain setting by
10%
Shift+Keypad / or *
Description Keys Description Keys

INTRODUCING ACID SOFTWARE | 27
Move selected event(s) left one
pixel
Numeric keypad 4 Change an event’s gain setting by
25%
Ctrl+Keypad / or *
Temporarily suspend Snap To Shift while dragging an
event (press Shift after
you click)
Set an event’s gain to 0.0 dB Shift+Ctrl+Keypad *
Erase entire event Ctrl+click event with
Erase tool
Set an event’s gain to silence Shift+Ctrl+Keypad /
Split event(s) SRender to new track
Chop to new clip if the Chopper
window has focus
Ctrl+M
Pitch down one semitone Numeric keypad -
-
Description Keys Description Keys
28 | Chapter 1
Playback commands
Timeline commands
Description Keys Description Keys
Start/stop playback Spacebar Record Ctrl+R
Stop playback Esc Go to start of project Ctrl+Home or W
Toggle looped playback QGo to end of project Ctrl+End
Play from start Shift+Spacebar or
Ctrl+Shift+Spacebar
when the timeline or track
view has focus
Shift+F12 from any
window
Skip backward Page Up
Play from cursor Ctrl+Spacebar when the
timeline or track view has
focus
F12 (from any window)
Skip forward Page Down
Pause/resume playback Enter when the timeline
or track view has focus
Ctrl+F12 from any
window
Description Keys Description Keys
Record Ctrl+R Insert/remove track volume
envelope
Shift+V
Go to (using measures.beats.ticks) Ctrl+G Adjust envelope point value in fine
increments without changing the
point’s timeline position
Ctrl+drag envelope point
or segment
Go to (using current time ruler
format)
Shift+G Adjust envelope point value in
normal increments without
changing the point’s timeline
position
Ctrl+Alt+drag envelope
point or segment
Set end of time selection (using
measures, beats, and ticks when
Time Selection tool is selected)
Ctrl+Shift+G Adjust envelope point’s timeline
position without changing its value
Alt+drag
Toggle snapping F8 Insert region R
Temporarily suspend snapping Shift+drag Insert marker (standard) M
Toggle snap to grid Ctrl+F8 Insert time marker H
Ripple edit mode Ctrl+L Insert disc-at-once CD track marker N
Draw tool Ctrl+D Change tempo Alt+drag time marker
Select next edit tool in list DInsert command marker C
Select previous edit tool in list Shift+D Insert tempo change T
Mark in point I or [ Insert key change K
Mark out point for selection O or ] Insert time signature change Shift+K
Render to new track Ctrl+M Insert tempo and key change Shift+T
Insert/show/hide track pan
envelope
PMaximize timeline vertically
(window docking area will be
hidden)
F11
Insert/remove track pan envelope Shift+P Maximize timeline vertically and
horizontally (window docking area
and track list will be hidden)
Ctrl+F11
Insert/show/hide track volume
envelope
VMaximize timeline horizontally
(track list will be hidden)
Shift+F11
INTRODUCING ACID SOFTWARE | 29
Track list commands
Mixer commands
MIDI commands
Chopper commands
For more information, see Using Chopper toolbar and keyboard commands on page 102.
Surround Panner commands
For more information, see Moving the pan point on page 215.
Description Keys Description Keys
Mute selected tracks ZRender to new track Ctrl+M
Solo selected tracks XShow/hide bus tracks B
Record Ctrl+R Insert folder track Ctrl+Alt+F
Cycle through effect automation
envelopes
E or Shift+E Insert audio track Ctrl+Q
Insert new MIDI track Ctrl+Alt+Q
Description Keys Description Keys
Change selection of a mixer control Left/Right Arrow Select multiple nonadjacent mixer
controls
Ctrl+Left/Right Arrow
Move the right channel of the fader
for the selected mixer control
Ctrl+Up/Down Arrow Delete the selected bus or
assignable FX control
Delete
Move the left channel of the fader
for the selected mixer control
Shift+Up/Down Arrow Move the fader of the selected
mixer control (for assignable effect
controls, moves the Out fader)
Up/Down Arrow
Select multiple, adjacent mixer
controls
Shift+Left/Right Arrow
Description Keys Description Keys
Insert new MIDI track Ctrl+Alt+Q Trigger from MIDI Timecode Ctrl+F7
Generate MIDI Timecode F7 Reset all MIDI ports Ctrl+Alt+F7
Generate MIDI Clock Shift+F7 Show velocity information in MIDI
events
F
Copy to new MIDI clip Ctrl+Shift+C Toggle inline MIDI editing mode G
30 | Chapter 1
Mouse scroll-wheel shortcuts
Description Keys
Zoom in on timeline Rotate mouse wheel forward or
back
Vertical scroll Ctrl+wheel
Horizontal scroll Shift+wheel
Auto-scrolling Press mouse wheel and move
the mouse in the desired
direction
Move the cursor in grid increments Ctrl+Shift+wheel
Move the cursor in video frames Ctrl+Alt+Shift+wheel
Adjust slider/fader Wheel up or down while
hovering over slider/fader
handle
Adjust slider/fader in fine
increments
Ctrl+wheel up or down while
hovering over slider/fader
handle
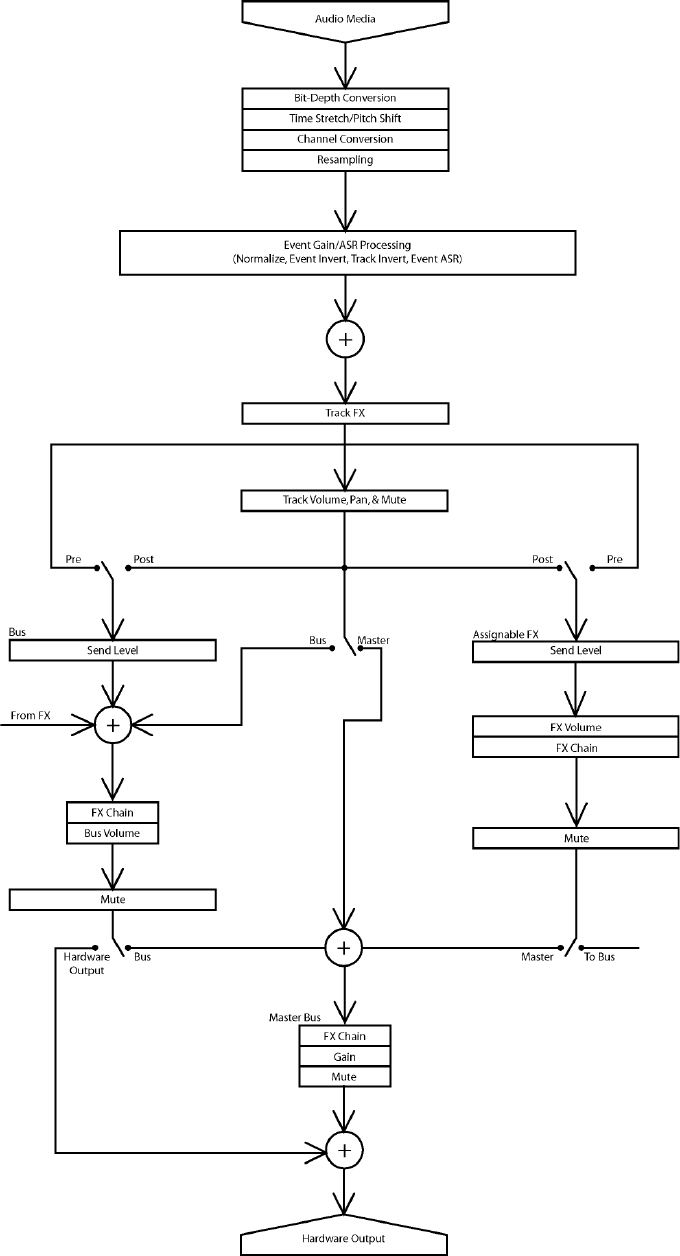
INTRODUCING ACID SOFTWARE | 31
Audio signal flow
32 | Chapter 1
Notes on audio signal flow
• This diagram describes non-MIDI audio events. For MIDI events, see MIDI signal flow on page 33.
• In 5.1 surround projects, tracks routed to the Surround Master bus send surround panning (six-channel) information.
Tracks routed to busses (e.g., Bus A) send stereo panning (two-channel) information.
• Assignable effect chain panning is available only in 5.1 surround projects. In 5.1 surround projects, assignable effect
chains routed to the Surround Master bus send surround panning (six-channel) information. Assignable effect chains
routed to busses (e.g., Bus A) send stereo panning (two-channel) information.
• Bus panning is available only in 5.1 surround projects. In 5.1 surround projects, busses routed to the Surround Master
bus send surround panning (six-channel) information. Busses routed to hardware send stereo panning (two-channel)
information.
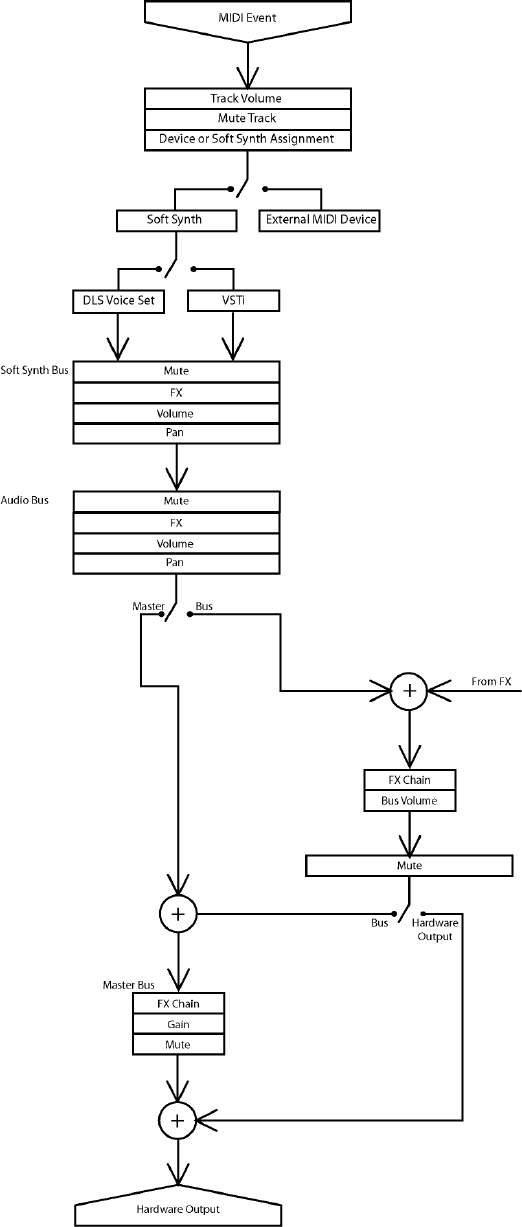
INTRODUCING ACID SOFTWARE | 33
MIDI signal flow
34 | Chapter 1
Notes on MIDI signal flow
• Soft synth panning is available only in 5.1 surround projects. In 5.1 surround projects, soft synth controls routed to the
Surround Master bus send surround panning (six-channel) information. Soft synth controls routed to busses (e.g., Bus
A) send stereo panning (two-channel) information.
• Bus panning is available only in 5.1 surround projects. In 5.1 surround projects, busses routed to the Surround Master
bus send surround panning (six-channel) information. Busses routed to hardware send stereo panning (two-channel)
information.
GETTING STARTED | 35
Chapter
2
Getting Started
Now that you have an understanding of the interface and controls found in ACID® software, you are ready to begin
learning the techniques needed to pick, paint, and play in ACID projects. In this chapter you will learn the skills that will
allow you to create music, from locating media files to writing the finished project to CD.
Starting projects
Double-clicking the ACID icon on the desktop starts the software. You can immediately begin building your ACID project
using the application’s default project properties. However, you may prefer to customize the project properties prior to
beginning the project.
Setting project properties
ACID allows you to configure project properties and add summary information prior to beginning a project. Choosing
New from the File menu displays the New Project dialog. This dialog contains two tabs: Summary and Audio. Selecting
the Start all new projects with these settings check box configures the software to use the parameters and information
in both tabs as defaults when starting all subsequent projects.
Using the Summary tab
This tab allows you to enter information about the project. These boxes may be left blank or if information exists, you may
change it at any time.
Using the Audio tab
This tab allows you to set different characteristics the project uses to handle the audio.
Note:
You can edit project audio properties and summary information at any time. Choose Properties from the File
menu to display the Project Properties dialog, which contains the identical tabs and parameters as the New Project dialog.
Item Description
Title Enter the name or title of the project.
Artist Enter the name of the narrator, band, or artist(s) being recorded into the
project.
Engineer Enter the name(s) of the people who mixed and edited the project.
Copyright Enter the date and ownership rights of the project.
Comments Enter information that identifies and describes the project.
Universal Product Code/Media
Catalog Number
Enter the Universal Product Code (UPC) and the Media Catalog Number (MCN)
to be written to your CD for identification purposes.
Start all new projects with these
settings
Select this check box if your projects’ requirements do not change or you want
consistent settings for future projects.
Item Description
Master bus mode Choose either Stereo for a standard audio project or 5.1 Surround for a surround
project.
Number of additional stereo
busses
Enter the number of stereo busses that you want in your project. You may add up to 26
busses. The busses appear in the Mixer window. For more information, see Using
busses on page 141.
Sample rate Choose a sample rate from the drop-down list or enter your own rate. The sample rate
range is 2,000 Hz to 192,000 Hz. Higher sample rates result in better quality sound, but
also mean larger audio files.
Bit depth Choose a bit depth from the drop-down list. A higher bit depth results in better quality
sound, but also means larger audio files.
Enable low-pass filter on LFE Select this check box to limit the audio sent to the LFE channel in a 5.1 surround
project. For more information, see Working with 5.1 Surround on page 209.
36 | Chapter 2
Opening existing projects
1.
From the File menu, choose Open. The Open dialog appears.
2.
Choose a drive and folder from the Look in drop-down list.
3.
Select a file in the browse window or type a name in the File name box. Detailed information about the selected file
appears at the bottom of the dialog box.
4.
Choose a file type from the Files of type drop-down list to limit the files displayed in the dialog box.
5.
Click Open.
Opening ACID projects with embedded media
When you open an .acd-zip project, the project file and all media files are copied to the temporary files folder.
Any changes you make to the project are saved to the files in this temporary folder until you save the .acd-zip file again.
For more information, see Saving projects on page 54.
Getting media files
Now that you’ve created a new project or opened an existing project, the next step is to add media to the project. You
can use the Explorer window to locate, preview and add media to your project. You can also extract audio from a CD or
download media from the Web. If you have ACID, you can also use the Media Manager to locate and add media files.
Previewing media from the Explorer window
The Explorer window allows you to preview files in looped playback at the current project tempo before adding them to
your project. You can also preview files in the Explorer in conjunction with playing your project, thereby allowing you to
preview how a file will sound in the project.
To preview files, use the Start Preview ( ), Stop Preview ( ), and Auto Preview ( ) buttons at the top of the
Explorer window.
Previewing a media file
1.
Select the media file in the Explorer window that you want to preview.
2.
Click the Start Preview button ( ). The media file begins looped playback. You can monitor its levels on the
preview bus.
Cutoff frequency for low-pass filter Enter a low-pass cutoff frequency value for 5.1 surround projects. Audio sent to the
LFE channel is limited to frequencies lower than the value you enter. Applying a low-
pass filter approximates the bass-management system in a 5.1 decoder and ensures
that you’re sending only low-frequency audio to the LFE channel.
Available only in ACID.
Low-pass filter quality Choose a setting from the drop-down list to determine the sharpness of the low-pass
filter’s rolloff curve. Best produces the sharpest curve.
Available only in ACID.
Start all new projects with these
settings
Select this check box if your project requirements do not change or you want
consistent settings for future projects.
Note:
If one of the media files cannot be located when you open an ACID project, you can choose to leave the media
offline and continue to edit events on the track. The events point to the location of the source media file. If you restore
the source media file at a later time, the project opens normally.
Note:
You can customize the location of the temporary files folder. For more information, see From the Options menu,
choose Preferences to display the Preferences dialog. on page 227.
Item Description
GETTING STARTED | 37
3.
Click the Stop Preview button ( ) to end playback.
Previewing multiple media files
You can use the Explorer’s multiple-selection preview feature to preview a group of files in the order that you select them.
1.
From the Options menu, choose Preferences.
In ACID, click the Other tab of the Preferences dialog and select the Enable multiple-selection preview in Explorer
window check box.
If you want, you can enter values in the Number of times to repeat each Loop box, Seconds of each One-Shot to
play box, and Number of Beatmapped measures to play box to specify how different file types are previewed.
2.
Click OK to close the Preferences dialog.
3.
In the Explorer, select the media you want to preview. Hold Shift while clicking to select multiple, adjacent files or
hold Ctrl while clicking to select multiple, nonadjacent files.
4.
Click the Start Preview button ( ). The first selected file in the list is previewed, followed by each file in the list. A
file’s icon changes to a Play icon ( ) to indicate which file is currently previewing.
Using Auto Preview
Click the Auto Preview button ( ) to toggle automatic playback of media files when you select them in the Explorer. If
your project is currently playing when you select a new file, the new file plays back along with your project. This feature
allows you to listen to the media file in the context of your project.
Adding media to the project
You must add media files to a project before you can paint, arrange, and process them. When you add a file to a project, a
new track is created to accommodate it. New tracks are added at the current volume of the Preview fader in the Mixer
window, unless you have set a default track volume level. For more information, see Setting default track properties on page
227.
There are several methods of adding media files to a project.
ACID temporary files
When you add a media file to a project from a removable device, a copy of the media file is stored in the temporary files
folder. This keeps the media file available for use even if the source of the media is no longer accessible.
Be aware that the temporary files folder is cleared when you close the ACID application. However, files are not cleared
from the folder if the software closes inappropriately.
Adding media files from the Explorer window
You can use the Explorer window, which operates similarly to the Windows® Explorer, to locate media files for use in
projects. Display the Explorer, if needed, by choosing Explorer from the View menu, or by pressing Alt+1.
Note:
To add the currently previewing file to your project, press Ctrl+Enter. Press Enter to add all selected files to your
project.
Notes:
• Proxy files may be created for media whose compression scheme may cause working with them to be inefficient and slow.
For more information, see Proxy File on page 273.
• Before using long Beatmapped or long one-shot files from CDs or shared network folders, copy the media to your local
drive for the best possible performance.
Note:
You can customize the location of the temporary files folder. For more information, see From the Options menu,
choose Preferences to display the Preferences dialog. on page 227.
38 | Chapter 2
There are three ways to add media files from the Explorer window:
• Double-click the desired file.
• Drag the file from the Explorer to the track view or track list. Dragging a file from the Explorer to the track name of an
existing track allows you to replace the original file with the new file, while all events remain in place.
• Right-click and drag a file to the track view or track list to specify the type of track to be created. When you drop the file,
a shortcut menu appears that allows you to choose whether to treat the file as a loop, one-shot, Beatmapped track, or
as an autodetected type.
Adding MIDI files from the Explorer window
You can add MIDI files to your project just as you would add audio files. You can right-click a MIDI in the Explorer window,
you can choose how you want to add it to your project:
•Add to Project.
• Add to Project with Events.
• Add to Project with Events Rippled.
•Open as New Project.
For more information, see Adding MIDI files to a project on page 163.
Adding media files from the Media Manager window
If you have ACID, you can use the powerful Media Manager feature to locate, catalog, and add media files to your ACID
projects. Within the Media Manager window, you can build media libraries of your media that include file attributes, ACID
metadata, and tags that you can assign to classify your media. You can also search for, purchase, and access reference
libraries from outside sources to build your media file base. Display the Media Manager, if needed, by choosing Media
Manager from the View menu, or by pressing Alt+5.
For more information on the Media Manager feature, see Using the Media Manager on page 75.
Adding media files from the Open dialog
There are three ways to add media files from the Open dialog:
• Select the desired file and click Open.
• Right-click the selected file and choose Select from the shortcut menu.
• Double-click the selected file.
Adding media files from outside the application
You can also add a media file to a project by dragging it from Windows® Explorer to the track view.
Adding multiple media files simultaneously
To add multiple media files to the project, Ctrl+click (or Shift+click) to select the files and drag them to the track view or
the track list.
Extracting media files from CD
You can extract 44,100 Hz, 16-bit, stereo data from CDs. Extracted CD tracks are added to new tracks in your ACID project.
1.
Insert a CD in the CD-ROM drive.
2.
From the File menu, choose Extract Audio from CD. The Extract Audio from CD dialog appears.
3.
If you have more than one CD drive, choose the CD drive that contains the audio you want to extract from the Drive
drop-down list.
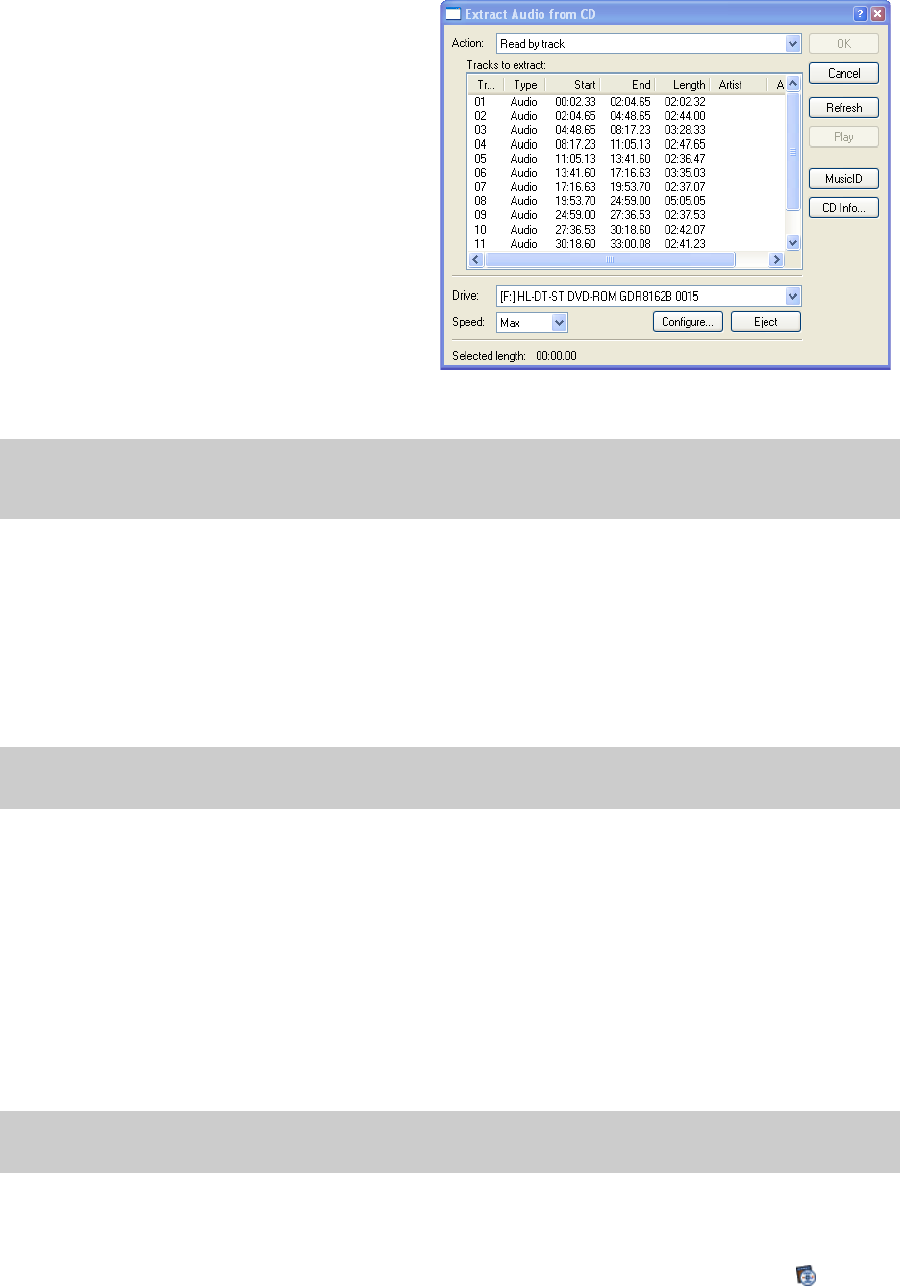
GETTING STARTED | 39
4.
From the Action drop-down list, choose how you
want to extract audio:
• Choose Read by track and select each track
you want to extract. Each track is extracted to a
new track in your project.
• Choose Read entire disc to extract the current
CD to a single file.
• Choose Read by range and enter a starting
time and ending time (or a starting time and
length). The time range is extracted to a new
track in your project.
Click Play to preview your selection. In order to
preview, your CD drive’s audio output must be
connected to your sound card, or you can connect
headphones to the front of the CD drive.
5.
From the Speed drop-down list, choose the speed
at which you want to extract audio.
6.
Click OK. The Save As dialog appears.
7.
Enter a file name and choose a location for the new file(s).
8.
Click Save to start extracting audio.
CD data extraction begins and a progress meter is displayed. If the file is longer than 30 seconds, the Beatmapper™
Wizard appears.
9.
Use the Beatmapper Wizard or choose to open the file as a one-shot. The extracted file is added to a track. For more
information, see Using the Beatmapper on page 114.
You can also double-click a CDA file in the Explorer window (or drag it to the track view) to extract a CD track without
opening the Extract Audio from CD dialog.
Obtaining or editing CD information using Gracenote
If ACID can access information about a track or CD (either from the file or CD itself, or from a local cache), it automatically
reads and displays this information when you insert a CD or browse your computer. However, if this information is not
available, the software can retrieve information over the Internet from Gracenote MusicID.
Once ACID obtains information from Gracenote MusicID, it is saved to a local cache so the information displays more
quickly the next time the tracks are displayed.
If the software cannot connect to the Gracenote Media Database and the appropriate CD information is not available on
your computer, the tracks are simply listed numerically. In this case, you can edit CD information and submit it to the
Gracenote Media Database.
Obtaining CD information
1.
Insert a CD in your drive.
2.
Click the MusicID button in the in the Extract Audio from CD dialog, or browse to the CD and click the button in
the Explorer window. For more information, see Extracting media files from CD on page 38. For more information, see
Tip:
Extracted tracks can be automatically named for you. From the Options menu, choose Preferences, and on the
General tab, select the Autoname extracted CD tracks check box. For more information, see From the Options menu,
choose Preferences to display the Preferences dialog. on page 227.
Note:
When adding media from multiple CDs, you may need to press F5 to refresh the Explorer window to view the new
CD’s contents.
Note:
Using Gracenote MusicID requires an active Internet connection. For more information on using Gracenote
MusicID, refer to www.gracenote.com/.

40 | Chapter 2
Explorer window on page 22.
Gracenote MusicID attempts to obtain matching CD information and displays artist, album, and track data:
• If the service locates an exact match, this information is automatically displayed. No additional action is
necessary.
• If the service locates multiple possible matches, the Match dialog is displayed. Proceed to step 2.
3.
Choose a method for completing the CD information:
• If none of the possible matches is appropriate, click the Submit New button. The Gracenote CDDB Disc
Information dialog is displayed, allowing you to complete information for the CD and submit it for inclusion in
the Gracenote Media Database. For help on submitting CD information, click the Help/Guidelines button in this
dialog.
When you are finished typing information, click the OK button to submit your data.
• Select the appropriate match from the list and click the Accept Match button. The artist, album, and track
information is displayed based on your selection in the right side of the PC pane.
4.
You're now ready to extract tracks.
Editing and submitting CD information
1.
Insert a CD in your drive.
2.
Select a track and click the CD Info button in the Extract Audio from CD dialog, or browse to the CD and click the
button in the Explorer window. The Gracenote CDDB Disc Information dialog is displayed. For more information,
see Extracting media files from CD on page 38. For more information, see Explorer window on page 22.
3.
Use the Gracenote CDDB Disc Information dialog to edit information about the CD. For help on submitting CD
information, click the Help/Guidelines button in this dialog.
4.
When you are finished entering the information, click the OK button to submit it for inclusion in the Gracenote
Media Database.
Downloading media files from the Web
The Get Media from the Web command allows you to view and download various audio and video files available on the
Internet.
1.
From the File menu, choose Get Media from the Web.
2.
Choose an icon from the left frame to specify the media provider from which you want to download files.
3.
Preview the file, select the file you want to open and click Download. The Browse for Folder dialog appears.
4.
Select a folder for the download. The selected file is downloaded to the folder specified in the Destination box.
5.
When you are finished downloading, close the Get Media from the Web dialog. The file is added to your project.
Click Show Details to display additional information about your download. In this mode, you can add files to a download
queue, specify where the downloaded files should be stored, and monitor the progress of your downloads. Click Start to
begin downloading queued files, or click Hide Details to return to basic mode.
Understanding clip types
When you add media to a project, a new track is created for the file. Depending on the type of media you add, one of four
clip types is created to accommodate it: loop, one-shot, Beatmapped, or MIDI. You can identify a track’s type by looking at
the paint clip selector icon in the track header. For more information, see Using clips with tracks on page 107.
Loops
Loops are small chunks of audio that are designed to create a continuous beat or pattern when played repeatedly. They
are usually one to four measures long. Loops are the type of file that you will use most frequently.

GETTING STARTED | 41
One-shots
One-shots are chunks of audio that are not designed to loop, and they are streamed from the hard disk rather than stored
in RAM if they are longer than three seconds. Things such as cymbal crashes and sound bites could be considered one-
shots.
Unlike loops, one-shots do not change pitch or tempo with the rest of a project.
Beatmapped
When you add a file that is longer than thirty seconds to a project, the Beatmapper Wizard starts, allowing you to add
tempo information to the file. As a result, these clips respond to tempo and key changes just like loops. For more
information, see Using the Beatmapper on page 114.
MIDI
A MIDI clip is automatically created when you open a MID, SMF, or RMI file. You can use MIDI clips to record data from and
play back through synthesizers and other MIDI-compliant equipment. For more information, see Working with MIDI on
page 163.
Folder tracks
Folder tracks can contain any combination of tracks. Use folder tracks to group related tracks or sections of a project so
they can be easily expanded or minimized. For example, if you have many drum tracks in your project, you can add a
folder track to consolidate drum tracks and minimize their vertical space in the track list.
When the folder track is minimized, you can also perform edit operations on clustered events in the group, but you
cannot create events with the Draw or Paint tools or perform edge-trimming. Expand the folder track to edit individual
events.
For more information, see Using folder tracks on page 124.
Adding and editing events
You have added media to the project, and tracks have been created for the media files. Now you can add events to the
track view. The following sections describe three basic techniques used when working with audio events: painting,
deleting, and moving.
Painting events
After you add a media file to your project, you must paint it on the timeline in order to hear it. When you paint on the
media file’s track, you create an event that displays the file’s waveform. You can paint events on the timeline using either
the Draw tool or the Paint tool.
Clips can also be painted on the timeline with the Draw and Paint tools. For more information, see Adding clips to tracks on
page 107.
Placing events with the Draw tool
The Draw tool is the most common method of placing events on the timeline. This tool allows you to add events one at a
time. In addition, you can use the Draw tool to select, edit, and move events. For more information, see Adding and editing
events on page 41.
1.
Click the Draw Tool button ( ) or choose Editing Tool from the Edit menu and choose Draw from the submenu.
The pointer displays as a pencil icon.
Tip:
You can change the length of the file that starts the Beatmapper in the Audio tab of the Preferences dialog. For
more information, see Using the Audio tab on page 230.
Note:
Media files must be added to the project before either of these tools can be used to paint events.
42 | Chapter 2
2.
Place the Draw tool at the left edge of any track containing a media file.
3.
Click and hold the mouse button while dragging the Draw tool to the right. A waveform representing the event
appears on the timeline as you drag the mouse.
Notice that if you are placing a loop file on the timeline, small indentations appear along the top and bottom edges
of the event indicating the start and end points of each individual loop.
4.
Release the mouse button to end the event.
5.
Click the Play from Start button ( ) on the transport bar. The event plays back.
Painting events with the Paint tool
Unlike the Draw tool, the Paint tool allows you to quickly paint multiple events across several tracks. This can be useful
when you need to quickly add several seemingly random events to a project. The Paint tool is also best used for painting
multiple one-shot events that will be evenly spaced on the grid lines.
When painting MIDI or one-shot clips, you can click the down arrow next to the Paint tool to set the length of events
that will be created when you drag with the Paint tool.
1.
Click the Paint Tool button ( ) or choose Editing Tool from the Edit menu and choose Paint from the submenu.
The mouse pointer displays as a brush icon.
2.
Click and hold the mouse button while dragging the Paint tool randomly across the several tracks. Notice that events
are painted in every grid space the Paint tool contacts.
3.
Release the mouse button to stop adding events.
4.
Click the Play from Start button ( ) on the transport bar. All new events play back.
Inserting events at the play cursor
You can also insert events at the cursor during playback. You can use this feature to create rhythms on one-shot tracks
while listening to the track you’re editing in the context of the rest of your project. When you’re done creating events, you
can use the Render to New Track command (on the Edit menu) to save the rhythm to a new track, or you can copy and
paste your new events across the timeline.
1.
Create a time selection in the portion of the project you want to edit.
2.
Select the Loop Playback button ( ).
3.
Click the Play button ( ) to start playback.
4.
Click a track header in the track list to set the focus track.
5.
Press Y to add an event at the play cursor (during playback, the edit cursor remains fixed, and the play cursor follows
playback).
If snapping is enabled, events are created at the next snap point. You can use snapping to quantize your events.
6.
Repeat step 5 as needed.
7.
You can press the up and down arrow keys to change the focus track.
8.
Click the Stop button ( ) when you’re finished creating events.
9.
Edit event positions as necessary.
Tip:
Events can be also be drawn from right (end) to left (beginning).
Tip:
With the Paint tool selected, you can use Ctrl+click to paint an entire event for one-shot, Beatmapped, and MIDI
tracks.
Tip:
If you're using this feature to tap rhythms with one-shot tracks, try applying a groove to adjust the timing of your
rhythm.For more information, see Working with grooves on page 120.
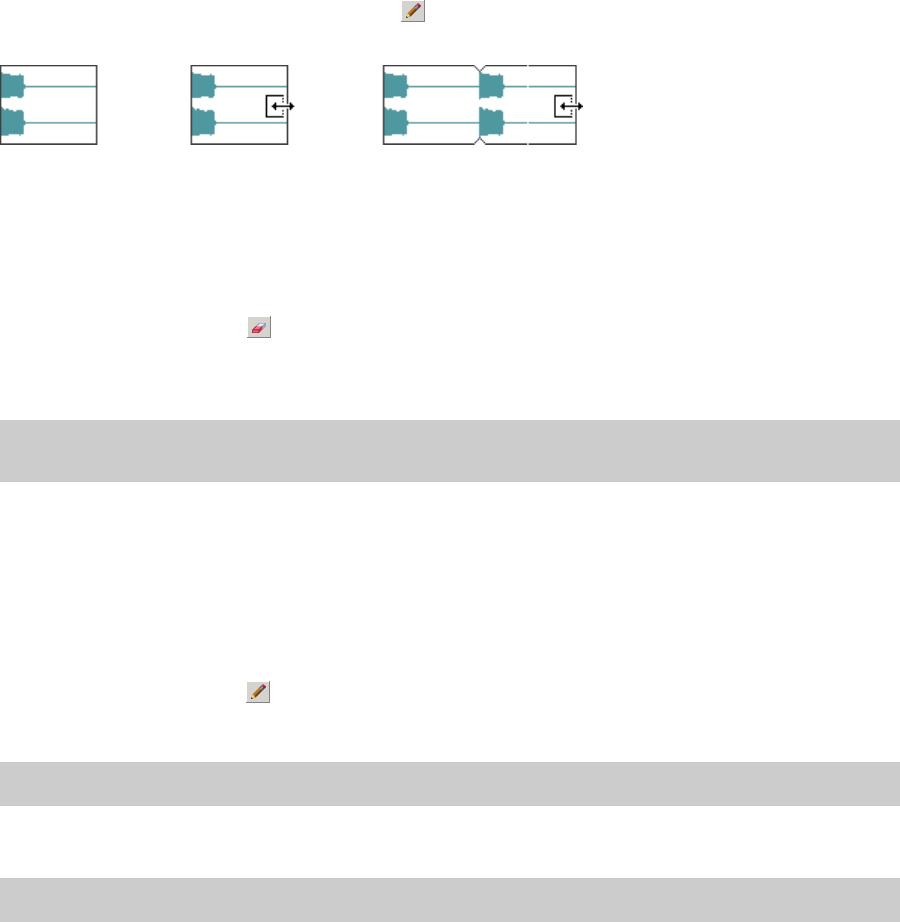
GETTING STARTED | 43
Changing the length of events
After an event is painted on the track view, you may discover that it is too long or not long enough; however, it is easy to
change the length of an event. You may find it helpful to turn snapping options on by choosing Snapping from the
Options menu and choosing Enable from the submenu.
To alter an event’s length, click the Draw Tool button ( ) and drag either end of the event. When you drag the event
past the end of the file, looped files repeat, but one-shot and Beatmapped tracks draw silence.
Erasing sections of events
Occasionally you may need to delete only specific sections of an event and leave the rest of it intact. The easiest method
of deleting a section of an event is to use the Erase tool.
1.
Click the Erase Tool button ( ) or choose Editing Tool from the Edit menu and choose Erase from the submenu.
The pointer displays as an eraser icon.
2.
Drag in the track view to delete event data.
Moving events
The position of the left edge of an event indicates when the event becomes audible during playback. You can move
events along the timeline either individually or as a group.
In addition, you can stack events on top of one another. A longer event placed over a smaller event conceals the smaller
event and makes it inaudible. A smaller event placed over a larger event is audible and renders the section of the longer
event it covers inaudible.
1.
Click the Draw Tool button ( ).
2.
Click the event to be moved. The event is highlighted to indicate that it is selected.
3.
Drag the event to a new location on the track.
Editing MIDI events
You can use the inline MIDI editing mode to edit MIDI events directly in the timeline. In this mode, you can draw and erase
notes in a piano roll or drum grid view. For more information, see Editing MIDI on the timeline on page 167.
Using the cursor
The ACID cursor is a flashing vertical line that spans the track view of the entire project. The cursor position determines
where events split, where playback/recording starts, and where clipboard contents are pasted. In addition, the
positioning of the cursor is essential to the creation of time selections.
Tip:
With the Erase tool, you can delete an entire one-shot, Beatmapped, or MIDI event. Just hold Ctrl while you click the
event.
Tip:
You can hold Ctrl or Shift to select multiple events.
Note:
Multiple selected events move in relation to the event being dragged.
Original event ...to increase its length.Drag the end of
the event...
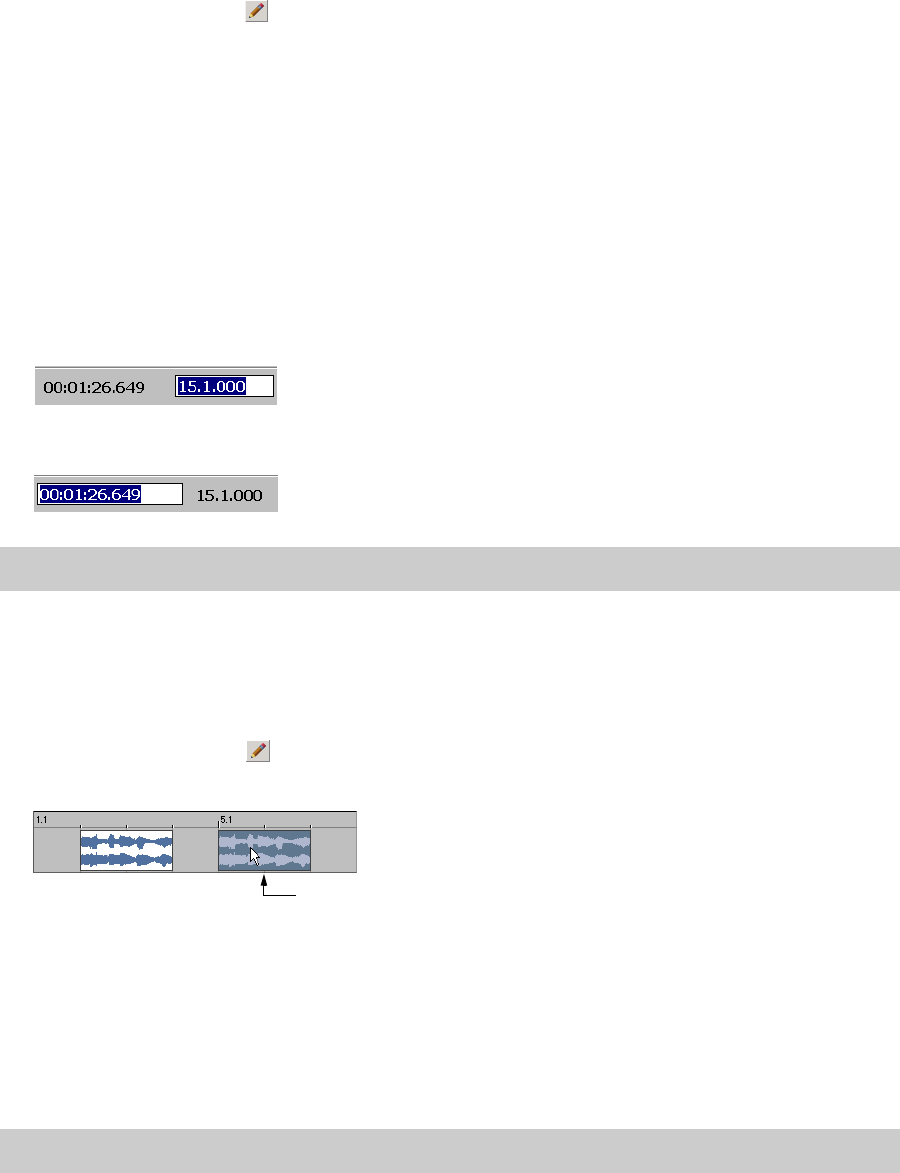
44 | Chapter 2
Positioning the cursor with the mouse
1.
Click the Draw Tool button ( ).
2.
Click in the track view to position the cursor.
Positioning the cursor with the keyboard
While using the mouse to position the cursor in the timeline is quick and intuitive, it is not always precise. For example,
you may want the beginning of a guitar solo to coincide with a snare drum hit, or background vocals to enter exactly 3
minutes and 24 seconds into a song. For these reasons, you can also position the cursor using your keyboard. For more
information, see Cursor placement, loop region and time selection commands on page 25.
Positioning the cursor with the Go To command
The Go To command is used to place the cursor at a specific location in the ACID project.
• Press Ctrl+G to position the cursor based on the position displayed on the beat ruler. Specify a position (in
measures.beats.ticks format) in the box that appears in the time display and press Enter.
• Press Shift+G to position the cursor based on the time displayed on the time ruler. Specify a time in the box that
appears in the time display and press Enter.
Making selections
You must select events before you can move or edit them.
Selecting an event
1.
Click the Draw Tool button ( ).
2.
Click an event. The event is highlighted.
Selecting multiple events
You have several methods of selecting multiple events:
• Press Ctrl or Shift while clicking events.
•Use the Select All on Track command.
•Use the Select Events to End command.
•Use the Select All command.
• Use the Selection tool.
Selecting multiple events using the keyboard and mouse
Holding Ctrl while clicking events allows you to select multiple, nonadjacent events that reside on any track. This method
is useful when you need to move several scattered events by an equal amount within the project.
Tip:
You can also open the boxes in the time display by double-clicking the desired value.
Note:
Unless stated otherwise, selections can only be made using the Draw tool.
Selected event

GETTING STARTED | 45
Holding Shift allows you to select multiple, adjacent events. Selecting any two events while holding Shift automatically
selects all events located between the selected events. Events may be selected from the same track or across tracks. This
method is useful when you want to move several adjacent events by an equal amount within the project.
Selecting multiple events using the Select All on Track command
Right-clicking any track in the track view and choosing Select All on Track from the shortcut menu selects every event on
the track.
Selecting multiple events using the Select Events to End command
Right-clicking an event in the track view and choosing Select Events to End from the shortcut menu selects every event
on the track after the selected event.
You use this command across multiple tracks by holding Ctrl to click events on several tracks and then right-clicking and
choosing Select Events to End from the shortcut menu.
Selecting events that use a specified clip
Perform any of the following actions to select events created from a clip:
• Right-click an event in the timeline and choose Select Events Using This Event's Clip from the shortcut menu to select
all events on the track that use the same clip as the selected event.
• Right-click the timeline, choose Select Events Using Clip, and then choose a clip from the submenu to select all events
on the track that use the specified clip.
• Right-click a clip in the Clip Pool window and choose Select Timeline Events from the shortcut menu.
Selecting events using the Select All command
Choosing Select All from the Edit menu selects all events in a project.
Selecting multiple events using the Selection tool
You can drag the Selection tool across the track view to select events across multiple tracks. This tool allows you to select
events using three methods: vertical, horizontal, and free selection.
1.
Click the Selection Tool button ( ) or choose Editing Tool from the Edit menu and choose Selection from the
submenu.
2.
Place the pointer on the track view. The pointer displays as an arrow with an adjacent dotted box ( ).
3.
Drag the mouse on the track view. A dashed rectangular box appears on the track view and all events within and
adjacent to it are selected.
4.
While holding the left mouse button, click and release the right mouse button (referred to as toggle-clicking). The
selection method changes to vertical and again, all events within and adjacent to the selection area are selected.
5.
Toggle-click the mouse once more. The selection method changes to horizontal and all events within and adjacent
to the selection area are selected.
Creating time selections
You are not limited to selecting events. Frequently, you may want to select only audio events occurring within a time
selection. You can do this using the Time Selection tool.
Method Description Displays as...
Vertical Allows you to select all events on all
tracks within an interval of time.
Parallel dashed line spanning the
vertical length of the project.
Horizontal Allows you to select all events on a track
or several adjacent tracks.
Parallel dashed line spanning the
horizontal length of the project.
Free selection Allows you to select a group of adjacent
events on adjacent tracks. This is the
default selection method.
Dashed line box.
46 | Chapter 2
1.
Click the Time Selection Tool button ( ) or choose Editing Tool from the Edit menu and choose Time Selection
from the submenu. The pointer displays with an adjacent cursor ( ).
2.
Drag the mouse in the track view. The selection area is highlighted on the track view.
3.
Release the mouse button. A time selection is created and all events within it are selected.
Creating event selections within time selections
You can select specific events within a general time selection. This technique is useful for selecting individual instruments
from a particular section of a song. For example, you may want to copy all percussion events from a song’s bridge and re-
use them in the coda.
1.
Click the Time Selection Tool button ( ) or choose Editing Tool from the Edit menu and choose Time Selection
from the submenu. The pointer displays with an adjacent cursor ( ).
2.
Drag the mouse in the track view. The selection area is highlighted on the track view.
3.
Release the mouse button. A selection is created and all events within it are selected.
4.
Hold Ctrl and click any event that extends beyond the time selection. The entire event appears highlighted;
however, only the section of the event contained within the time selection is actually selected.
Working with tracks
The following sections explain several basic track functions and features.
Reordering tracks
When building an ACID project, you may want to reorder the tracks to place similar instruments in proximity to one
another. For example, placing all drum loops together in the track view makes it easier for you to fine-tune the mix of the
song’s overall drum sound.
1.
Drag the track header to a new location in the track list. A heavy black horizontal line appears on the track list to
indicate where the track will be placed.
2.
Release the mouse button. The track is dropped in the new location and the entire track list/track view adjusts
accordingly.
Resizing tracks
You can change the height of a track, thereby affecting how many tracks display in the track view. This is especially useful
when building a project with a large number of tracks. In addition, you can decrease the track’s height until only the
multipurpose slider, Track FX button, Mute button, and Solo button are visible.
1.
Drag the bottom edge of a track up or down in the track list. The pointer displays as a vertical stretch icon ( ).
2.
Release the mouse button to establish the track’s new height.
Note:
If the selection area is automatically snapping to the track view’s grid lines, the ACID snapping feature is turned on.
You can turn snapping off by pressing F8.
Tip:
You can select additional events within the time selection by continuing to hold Ctrl while clicking events. In addition,
holding Shift allows you to select the events of multiple adjacent tracks within a selection.
Tip:
You can reorder multiple tracks by holding Ctrl or Shift while selecting tracks and dragging the tracks as a group.
Tip:
You can set the default height for all new tracks by right-clicking the newly resized track in the track list and choosing
Set Default Track Properties from the shortcut menu. For more information, see Setting default track properties on page
227.

GETTING STARTED | 47
Changing track colors
As mentioned previously, tracks are automatically created to accommodate new media files. These tracks are assigned a
default color. However, you can change track colors to organize the tracks in your project. To change the color, right-click
the track in the track list, choose Color from the shortcut menu, and choose the desired color from the submenu.
Renaming tracks
To rename a track, right-click the track name and choose Rename from the shortcut menu, or double-click the track
name. Renaming a track applies to the project only and does not change the file associated with the track.
Duplicating tracks
To duplicate a track, right-click it and choose Duplicate Track from the shortcut menu. An exact copy of the track is
created and its events and adds it below the original track in the project. The words “Copy of” appear before the name of
the duplicate track to identify it in the track list.
For creative ways to use duplicate tracks, see Playing with duplicate tracks on page 261.
Deleting tracks
You can delete unnecessary tracks from a project by selecting the track and using any of the following methods:
• Choose Delete from the Edit menu.
• Right-click a track and choose Delete Track from the shortcut menu.
•Press Delete.
Copying, cutting, and pasting tracks
Copying a track places an exact copy of the selected track on the clipboard, but leaves the track view unchanged. To copy
a track, select the track and do one of the following:
•Click the Copy button ( ) on the toolbar.
• Choose Copy from the Edit menu.
• Right-click the track header and choose Copy Track from the shortcut menu.
• Press Ctrl+C.
Cutting a track removes it from the track view and places it on the clipboard. To cut a track, select it and do one of the
following:
•Click the Cut button ( ) on the toolbar.
• Choose Cut from the Edit menu.
• Right-click the track header and choose Cut Track from the shortcut menu.
• Press Ctrl+X.
Tracks that are copied or cut to the clipboard can be pasted back into the current project or into a different project an
unlimited number of times. This is a useful way to share tracks between different compositions. You can paste a track in
one of the following ways:
•Click the Paste button ( ) on the toolbar.
• Choose Paste from the Edit menu.
• Right-click the track view and choose Paste Track from the shortcut menu.
• Press Ctrl+V.
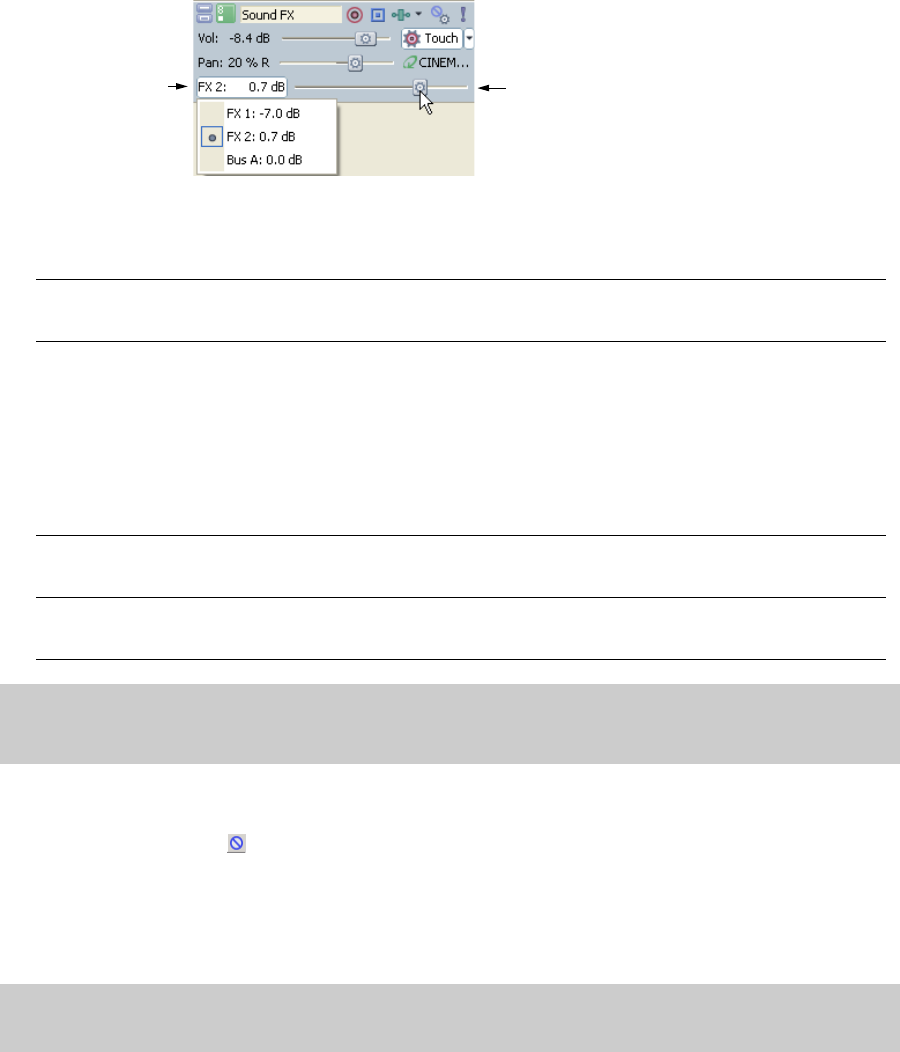
48 | Chapter 2
Adjusting the mix
You can adjust the mix of a specific track in the track header. Volume and pan each have dedicated sliders to make
adjustments.
Assignable effects and busses share a multipurpose slider. Click the multipurpose slider to choose what you want to
adjust.
Once you have chosen what you want to adjust, drag the slider to adjust the level. You can hold Ctrl or Shift to select
multiple tracks and move the sliders together as a group.
Muting tracks
Each track has a Mute button ( ). Clicking this button shades the corresponding track (to indicate that it is muted) and
renders it inaudible during playback. Clicking the Mute button a second time returns the track to its original level in the
mix. Toggle-muting a track is an effective way of determining whether a track contributes to the overall sound of a
project.
You can also press Z to mute a track or group of tracks.
Function Description
Volume This dedicated volume slider controls how loud a track is in the mix. A value of 0 dB means that the track
plays with no boost or cut from the software. Dragging the fader to the left cuts the volume; dragging to the
right boosts the volume.
Pan This dedicated pan slider controls the position of a track in the stereo field. Dragging the slider to the left
places the track in the left speaker more than the right, while dragging the slider to the right places the track
in the right speaker.
Because true stereo panning is used, you can introduce clipping when panning a track to the left or right.
Unlike a left/right balance control—which simply decreases the volume of one channel—the default
panning mode actually adds the audio from one channel to the other. When panning a track, adjust the
track volume accordingly.
You can choose among five panning types to determine how a track is panned. For more information, see
Choosing stereo pan types on page 113.
FX With the multipurpose slider, you can control the level of the track sent to each of the assignable effect
chains that you have created. Dragging the fader to the left cuts the volume; dragging to the right boosts
the volume.
Bus With the multipurpose slider, you can control the level of the track sent to each of the additional busses that
you have created for your project. Dragging the fader to the left cuts the volume; dragging the fader to the
right boosts the volume.
Note:
When adjusting the mix of your tracks, remember to look at the meters on the mixer. Because you are adding the
volumes of all the tracks together, it is easy to clip the audio output. Make sure that the meters never display the red clip
indicator during playback.
Tip:
Press Ctrl and click the Mute button to mute only the selected track (and restore any other muted tracks). If the selected
track is already muted, press Ctrl and click the Mute button to restore all tracks.
Multipurpose slider
Multipurpose slider mode
GETTING STARTED | 49
Soloing tracks
Located next to the Mute button, the Solo button ( ) allows you isolate tracks in a project during playback. When you
click this button during playback, the corresponding track remains audible and all other tracks are muted. Clicking the
Solo button a second time returns all tracks to their original levels in the mix. Toggle-soloing a track is an effective
method of configuring and previewing isolated track effects against how they sound in the project.
You can also press X to solo a track or group of tracks.
Working with groups of tracks
Select a group of tracks by holding the Ctrl key while you click the track header of the desired tracks. Now you can adjust
the volume, panning, track color, and other track attributes simultaneously.
Using undo and redo
You have unlimited undo and redo capabilities in ACID. Each edit you perform in the project is added to an undo history,
which allows you to quickly restore the project to any of its previous states. In addition, undoing an edit automatically
places it in the project’s redo history where it can be quickly re-performed. However, any new edit performed on the
project overwrites the redo history.
Using undo
To undo an edit, click the Undo button () on the toolbar or press Ctrl+Z. Edits are undone in the reverse order they
were performed.
Undoing a series of edits
Clicking the down arrow next to the Undo button ( ) displays the project’s undo history. The history displays as a drop-
down list with the most recent edit located at the top. Undoing an edit in the list requires all subsequent edits to be
undone as well.
1.
Click the arrow to the right of the Undo button ( ). The undo history appears.
2.
Locate the edit to be undone. Notice that all subsequent edits are automatically selected and the total number of
edits to be undone is indicated at the bottom of the drop-down list.
3.
Click the edit to be undone. The project is restored to the state it was in prior to the selected edit.
Undoing all edits
Choosing Undo All from the Edit menu undoes all project edits and automatically adds them to the redo history.
Using redo
To redo an edit, click the Redo button ( ) on the toolbar or press Ctrl+Shift+Z. Edits are re-performed in the reverse
order they were undone.
Tip:
Press Ctrl and click the Solo button to solo only the selected track (and restore any other soloed tracks). If the selected
track is already soloed, press Ctrl and click the Solo button to restore all tracks.
Note:
The undo and redo histories are cleared when you close the project or exit the application.
Tip:
You can also undo the most recent edit by choosing Undo from the Edit menu.
Tip:
You can also redo the most recent undone edit by choosing Redo from the Edit menu.

50 | Chapter 2
Redoing a series of edits
Clicking the down arrow next to the Redo button ( ) displays the project’s redo history. The history displays as a drop-
down list with the most recently undone edit located at the top. Redoing an edit in the list requires all subsequently
undone edits to be re-performed as well.
1.
Click the arrow to the right of the Redo button ( ). The redo history appears.
2.
Locate the edit to be redone. Notice that all subsequently undone edits are automatically selected and the total
number of edits to be redone is indicated at the bottom of the drop-down list.
3.
Click the edit to be redone. The project is restored to the state it was in prior to the selected undone edit.
Clearing the undo history
You can clear the undo and redo histories without closing the project or exiting the application. After the histories are
cleared, new ones are created as you continue building the project.
1.
From the Edit menu, choose Clear Undo History. A confirmation dialog appears, alerting you that this action
permanently deletes the current edit histories.
2.
Click Yes to clear the edit histories or No to retain the current edit histories.
Playing the project
You have several methods for playing your projects.
Using the transport bar
All buttons required to play your project are located on the transport bar. The transport bar should look somewhat
familiar to you, as it contains buttons found on most home CD and cassette players. For more information, see Transport
bar on page 21.
Using playback options
As you build a project, you will likely have different playback needs. For example, you may want to hear the project in its
entirety when checking the final mix, but not when you are working on the ending. Because of this, you have three
playback options:
• Playing the entire project.
• Playing from the cursor position.
• Playing in looped playback.
Playing the entire project
To begin playback from the beginning of the project, click the transport bar’s Play From Start button ( ) or press
Shift+Space. To stop playback, click the transport bar’s Stop button ( ) or press Space.
Playing from the cursor position
To begin playback from the current cursor position, click the transport bar’s Play button( ) or press Space. To stop
playback, click the transport bar’s Stop button ( ) or press Space.
Playing in looped playback
You can also limit playback to a specific loop region on the track view. This playback method uses the transport bar’s
Loop Playback button ( ) and allows you to fine-tune mixes and effects while continually listening to the selected
area. For more information, see Transport bar on page 21.
1.
Drag the handles of the loop bar to create the desired loop region.
Tip:
Clicking the desktop outside the drop-down list cancels the redo operation.
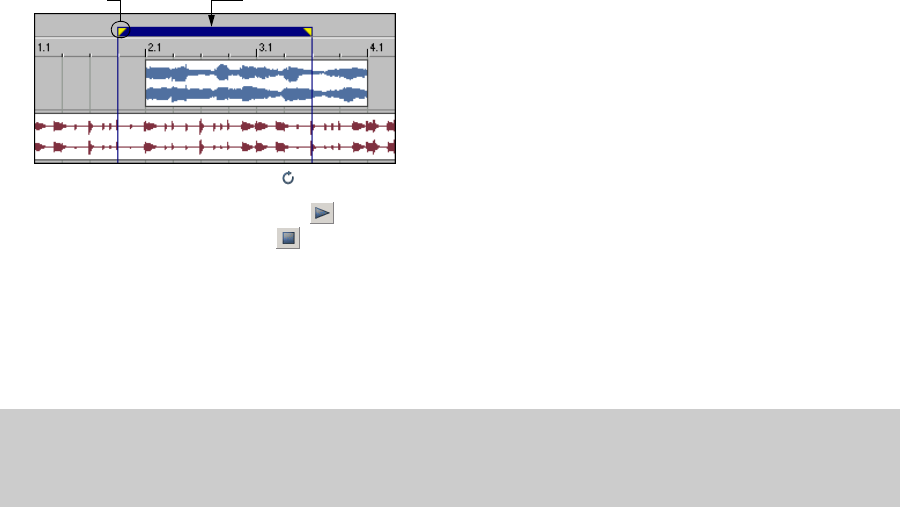
GETTING STARTED | 51
2.
Click the Loop Playback button ( ) to turn on looped playback.
3.
Click the transport bar’s Play button ( ) or press Space. Playback of the selected area begins. To stop playback, click
the transport bar’s Stop button ( ) or press Space.
Bypassing audio effects during playback
If you want to hear your project without your applied audio effects (track, bus, and assignable effects), you can quickly
bypass these effects during playback. From the Options menu, choose Bypass All Audio FX. This option can also
conserve processing power to avoid playback problems.
Using the Mixer window
The Mixer window is a dockable window with a default location in the lower-right corner of the ACID workspace. The
Mixer window contains the following controls:
• A Preview fader, which allows you to adjust the loudness of media files previewed from the Explorer window, Track
Properties window, Beatmapper, or the Chopper tool. Also, the Preview fader’s volume determines the volume of new
tracks added to the project, unless you have set a default track volume level. For more information, see Setting default
track properties on page 227. This allows you to set up a quick mix while you are adding media to your project.
• A Master bus fader, which controls the overall volume.
• Faders for up to 26 project busses when added to the project.
• Faders for up to 32 assignable effect chains when added to the project.
• Faders for up to 32 soft synth controls when added to the project.
The function of the bus, assignable effect, and soft synth controls are beyond the scope of this chapter. For more
information, see Using the Mixer on page 141.
Viewing the Mixer window
The Mixer window appears by default when you start the application, but you can hide it if necessary. To view or hide the
Mixer window, choose Mixer from the View menu or press Alt+3. A check mark appears adjacent to the command to
indicate when the window is displayed.
Note:
When effects are bypassed, you can choose whether bypassed effects remain open. When the Keep bypassed FX
running check box on the General tab of the Preferences dialog is selected, effects remain open so you can bypass/enable
effects with no pause for A/B testing. When the check box is cleared, effects are fully bypassed, conserving processing
power.
Handle Loop bar
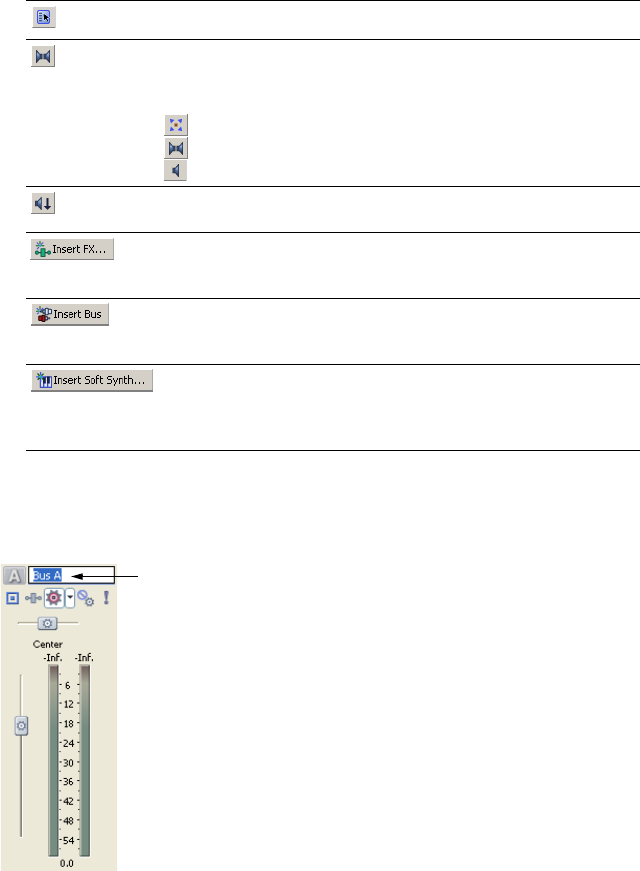
52 | Chapter 2
Using the mixer toolbar
The Mixer window toolbar allows you to access project properties, add busses, and add assignable effects chains to the
Mixer.
Renaming mixer controls
Double-clicking a mixer control name allows you to rename the control. Press Enter to save the change.
Using the mixer’s faders
Adjusting the Preview fader
Drag the fader up or down to adjust the preview volume.
Hiding the Preview fader
Once you have added all desired media files to a project, you may want to hide the Preview fader to make room for
additional busses, assignable effects, and soft synth controls. To hide the Preview fader, right-click within the Mixer
window and choose Show Preview Fader from the shortcut menu. The fader remains hidden until you choose Show
Preview Fader from the shortcut menu again.
Button Description
Displays the Project Properties dialog.
Downmixes your audio from 5.1 surround to stereo or from stereo to mono so
you can ensure your mix will sound the way you intended it, even when your
audience’s hardware has fewer channels than the original mix. The button
represents the current playback mode:
5.1 surround output
Stereo output
Mono output
Attenuates the volume of all busses that are routed to hardware
outputs by 20 dB. Click again to restore original volume.
Adds an assignable effect chain to your project. The Plug-In Chooser
dialog appears so that you can create a plug-in chain. For more
information, see Using assignable effects on page 142.
Adds another bus to your project. The Audio tab in the Project
Properties dialog updates to reflect the new number of busses. For
more information, see Using busses on page 141.
Adds a soft synth control to your project. You can assign MIDI tracks or
external MIDI input devices to the soft synth control and assign the soft
synth control to a DLS set or VSTi® plug-in. For more information, see
Using soft synth controls on page 144.
Enter a new name
for the mixer
control
GETTING STARTED | 53
Adjusting split faders in the mixer
Split faders allow you to adjust the levels of the left and right channels independently. To move the faders individually,
drag the fader for the desired channel and release the mouse when it is in the correct position.
However, you can adjust both channels simultaneously by doing either of the following:
• Drag in the middle of the fader while making your adjustment.
•Click the Unlock Fader Channels button( ) before adjusting the fader.
You can also change the fader level by double-clicking:
• Double-click the fader to reset it to 0.0 dB.
• If you have set each channel differently, double-click either channel to match the remaining channel to its level.
Changing meter resolution
You can select the meter resolution. This is useful when building a project from several media source pools that have
varying volume levels. To change the resolution, right-click a meter and choose the desired resolution from the shortcut
menu.
Adjusting for clipping
The volume of certain media files may cause a meter to clip. Clipping results in a distorted audio signal and displays in a
red indicator at the top of the meter. If the meter clips, lower the volume and click the red clip indicator to reset the meter.
Continue adjusting the fader and resetting the meter until you eliminate the clipping.
Saving, rendering, and delivering projects
Though you are provided with the tools to quickly build impressive musical projects, you may find yourself building
elaborate projects over a period of weeks or even months. While you are working on a project, you should save it in the
ACID native format: the ACID project file (.acd).
When you are finished building a project, you can render projects in a variety of formats. You should determine the
project’s final format (or formats) based on how you will deliver the media. For example, you would render your project to
a streaming media format if you plan to publish it to the Internet.
Note:
Changing the meter resolution of one fader automatically changes all other meters in the mixer to match the
selected resolution.
Tip:
You can also reset a meter by right-clicking it and choosing Reset Clip from the shortcut menu.
Important:
If you save a project originally created in an earlier version of ACID software in ACID version 6.0, it will be
unusable in earlier versions of the software. Use the Save As dialog to save the project with a new name after editing it in
version 6.0.
Note:
Be aware that projects containing MIDI files that are routed to external MIDI ports must be rerouted to internal DLS
sets or VST instruments (VSTi) to be included in the rendered mix. For more information, see Rendering projects with MIDI
tracks on page 197.
54 | Chapter 2
Saving projects
An ACID project file (.acd) is the default file format for saving a new project and should be used for saving unfinished
projects. There are two ACID project file types.
1.
To save a file, display the Save As dialog using any of the following options:
•Click the Save button ( ) on the toolbar.
•From the Edit menu, choose Save.
• Press Ctrl+S.
2.
From the Save in drop-down list, choose the drive and directory where the file will be saved.
3.
Enter a name for the project in the File name box.
4.
From the Save as type drop-down list, choose the desired ACID project file type.
5.
If you want to save a copy of each of the project’s media files to the same location as your project file, select the Copy
all media with project check box. This is available when saving as an ACID project file.
6.
Click Save. The project is saved.
Rendering projects
Rendering refers to the process of converting the ACID project into a file that is formatted for a specific playback method.
Possible playback methods include media player applications, Internet streaming media, CD-ROM, and CD audio. When
an ACID project is rendered, it is not overwritten, deleted, or altered and you are able to return to the original project to
make changes and re-render.
1.
From the File menu, choose Render As. The Render As dialog appears.
Format Extension Description
ACID Project File .acd Contains all information regarding the project including
track layout, envelope settings, and effects parameters.
However, this type of file does not contain actual audio,
only references to the audio files.
ACID Project with
Embedded Media
.acd-zip Contains all information regarding the project including
track layout, envelope settings, and effects parameters.
In addition, all audio files used in the project are
embedded into the project file.
If you save a project in .acd-zip format, the project file
and all media files are copied to a temporary files folder.
If you continue to work on your project after saving the
.acd-zip file, your changes are saved to the files in this
temporary folder.
You can customize the location of the temporary files
folder. For more information, see From the Options
menu, choose Preferences to display the Preferences
dialog. on page 227.
Tip:
Once the project is saved, you can use the Save As command from the File menu to create a copy of the project with
a new name or save to a different ACID project file format.
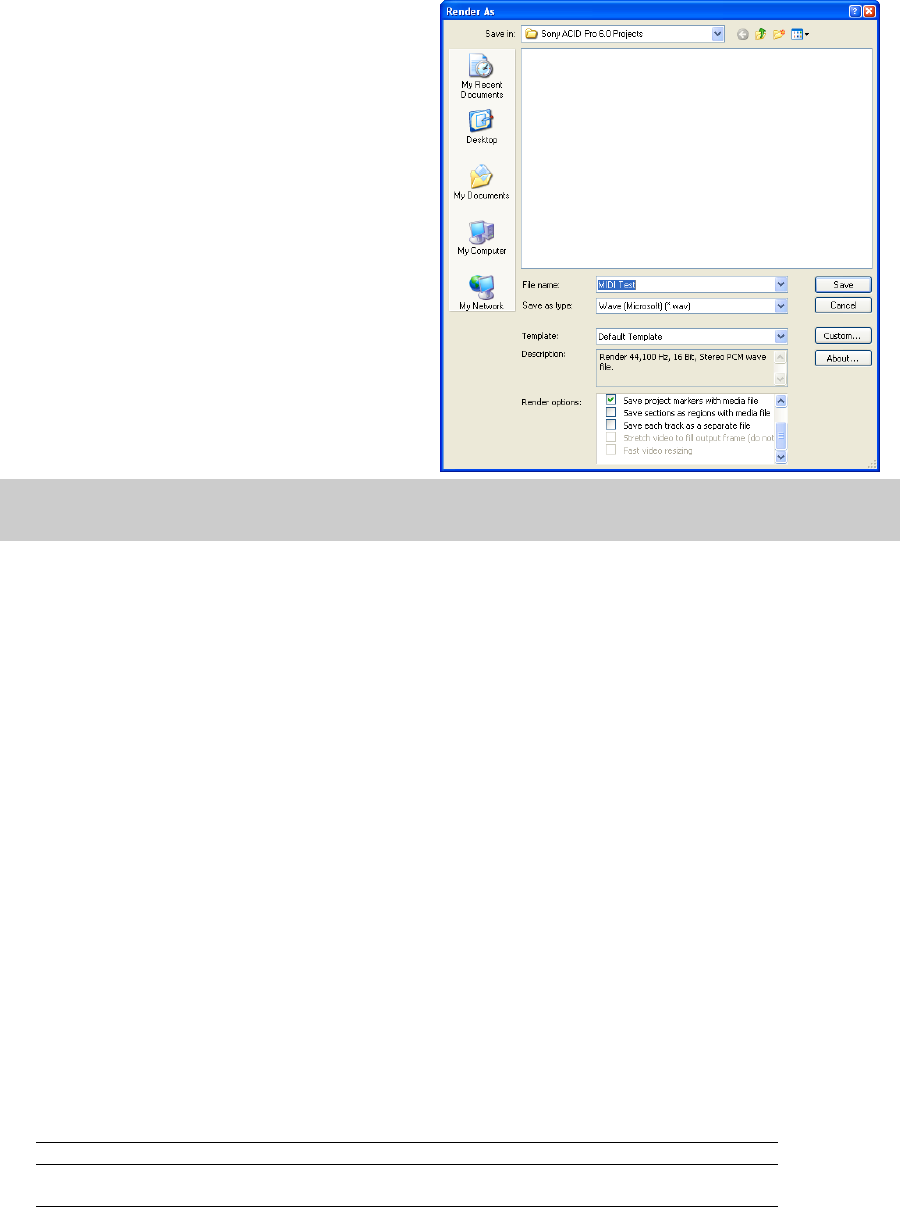
GETTING STARTED | 55
2.
From the Save in drop-down list, choose the drive
and folder where the file will be saved.
3.
Enter a new name for the project in the File name
box.
4.
From the Save as type drop-down list, choose the
desired file format.
5.
If the selected file type supports it, you can choose
an encoding template from the Template drop-
down list, or click Custom to create a new
template. For more information, see Creating
custom rendering settings on page 56.
6.
Select or clear the following check boxes as
needed:
• Select the Save project as path reference in
rendered media check box if you want to
save the project path information with the
rendered file to easily return to your source
project if you use your rendered file in
another project.
• Select the Render loop region only check box if you want to save only the portion of the project that is
contained within the loop region. The loop region does not need to be active for this option to work.
• If the selected file type supports it, you can select the Save project markers with media file check box to
include markers and regions in the rendered media file.
• If the selected file type supports it, you can select the Save sections as regions with a media file check box to
include sections in the rendered media file. If the information cannot be saved to your media file, an .sfl file will
be created (using the same base name as your media file).
• Select the Save each track as a separate file check box to save each track in your project to a separate file. All of
the volume adjustments, panning, FX, and events are saved with the track. You can also use this feature to
create tracks that you can use in multitrack recording software or Macromedia® Flash®.
• If your project contains video, you can select the Stretch video to fill output frame (do not letterbox) check
box to have your video reformatted so that it fills the output frame size listed in the Description box. When the
check box is cleared, the current aspect ratio is maintained and black borders are added to fill the extra frame
area (called letterboxing).
• If your project contains video and you see unacceptable artifacts in the rendered video, you can clear the Fast
video resizing check box. Turning off this option can correct the artifacts, but your rendering time will increase
significantly.
7.
Click Save. A progress dialog appears.
8.
When rendering is complete, you can choose one of the following options:
•Click Open to start the associated media player and play the newly rendered file.
•Click Open Folder to open Windows Explorer and display the location of the newly rendered file.
•Click Close to close the progress dialog and return to the ACID window.
Supported formats for rendering
The following table briefly describes the file formats available for rendering a project.
Note:
If you modify the project file after rendering, the project data will no longer match the rendered file. To edit a
project using a path reference, the project file and all media must be available on your computer.
Format Extension Description
ATRAC .aa3 A Sony proprietary audio compression technology.
AIFF File .aif The standard audio file format for audio used on Macintosh
computers.
56 | Chapter 2
Creating custom rendering settings
The Custom Settings dialog appears when you click Custom in the Save As dialog. You can use the Custom Settings
dialog to create custom encoding templates for many of the file formats available in the software.
1.
From the File menu, choose Render As. The Render As dialog appears.
2.
Choose your preferred file format from the Save as type drop-down list. If the format allows you to create custom
settings, the Custom button becomes active.
3.
Click Custom. The Custom Template dialog appears.
4.
Make the appropriate setting changes for the chosen file format. For help on individual settings, click the
What’sThis? Help button ( ) and click a setting.
5.
Click OK. The Custom Template dialog closes.
Publishing to the Internet
When your project is finished, you have the option of publishing it to the Internet. The most common place to publish
your project is ACIDplanet.com, a virtual community of ACID users. ACIDplanet.com allows you to do the following:
•Share your music.
• Listen to projects built by other ACID enthusiasts.
• Download free loops.
• Enter remix contests co-sponsored by Sony and major record labels.
Publishing your project to the Internet involves two distinct procedures: creating a personal account and uploading the
project.
MPEG-1 and MPEG-2 .mpg MPEG files are a format used when burning audio and video to a
Video CD, Super Video CD, or DVD. MPEG-1 and MPEG-2 file
creation is supported through the use of the MainConcept
MPEG plug-in.
Note: This format requires a separate purchase of the
MainConcept MPEG plug-in.
MPEG-1 Layer 3 .mp3 A highly compressed format used for portable digital players
and Internet sharing of media. 20 free MP3 encodes are
provided. After you have used the free encodes, you must
register the plug-in to continue rendering MP3s.
Ogg Vorbis .ogg A patent-free audio encoding and streaming technology.
QuickTime .mov QuickTime® for Microsoft Windows.
RealMedia .rm The RealNetworks® standard for streaming media via the Web.
This option renders both audio and video into one file.
Sony Perfect Clarity
Audio
.pca A Sony proprietary lossless audio compression format.
Sony Wave64 .w64 A Sony proprietary wave format that does not have a restricted
file size (unlike Windows standard WAV format which is limited
to ~2GB).
Video for Windows .avi The standard video file format used on Windows-based
computers.
Wave .wav The standard audio file format used on Windows-based
computers.
Windows Media Audio .wma The Microsoft® audio format used to create files for streaming or
downloading via the Web.
Windows Media Video .wmv The Microsoft audio and video format used to create files for
streaming or downloading via the Web.
Note:
Some plug-ins, such as MP3, may require registration.
Tip:
To save the custom settings for future use, enter a name for the template in the Template box and click the Save
Template button ( ).
Format Extension Description
GETTING STARTED | 57
Creating a personal account
You can create accounts at Web sites where you can publish your song files. Each Web site that offers publishing directly
through ACID software will guide you through its own account creation process. If you haven’t created an account and
you attempt to publish a song, you will be directed to complete the Publish Setup utility.
1.
From the File menu, choose Publish. The Publish Setup dialog displays.
2.
Follow the on-screen instructions to create an account.
At any time, you can go back and create another account at a different Web site. The Web site you are currently logged
into in the Publish Setup utility is where your song is published when you choose Publish from the File menu.
Uploading a project
Publishing a project file copies your media to the Web so you can share it with other Web users. The following procedure
assumes you already have an account set up with a publish provider. If not, you will first be redirected to set up an
account. After successfully creating an account, you will be directed back to the Publish feature.
1.
From the File menu, choose Publish. The Publish Setup dialog displays.
2.
Log into your publishing account, or follow the on-screen instructions to create one.
3.
Select the appropriate radio button to specify whether the song to be published is the current ACID song or a
different song.
• To publish your current ACID song, choose a streaming format and bit rate.
• To publish a different song, enter the path to the song or click Browse to locate the file. This song must already
be in a streaming format.
4.
Click Next. If you are publishing the current ACID song, it is rendered in the format and bit rate you specified. A
window appears from the publish provider with directions for completing the publishing process.
5.
Follow the instructions provided by the publish provider. The file begins uploading to the provider. A progress dialog
informs you when the upload is finished.
6.
Click OK. The publish provider provides a link to the song on their Web site; however, this may vary depending on
provider.
Writing to CD
You can burn your projects to CD using supported CD-R/CD-RW drives. You can burn CDs for multiple- or single-track
projects and build audio CD layouts automatically or manually. You can also create video CDs that can be played in many
home DVD players and on computers with a CD-ROM drive and VCD player software, and multimedia CDs that can be
played in any computer with the appropriate player.
Understanding track-at-once and disc-at-once
ACID provides two ways to record audio to a CD-R disc: track-at-once and disc-at-once.
Track-at-once
Track-at-once writing records individual tracks to the disc and results in a partially recorded disc. However, the CD-R disc
remains unplayable on most systems until you close the disc. The advantage of track-at-once writing is that you can
record tracks onto the disc as you finish them versus waiting until you have finished your whole album. Track-at-once
writing burns the entire project as a single track.
Disc-at-once (Single Session or Red Book)
Disc-at-once writing is the most common burning method in the music industry. This writing mode is used when creating
a master disc to be sent to a disc manufacturer for mass replication. Disc-at-once works just as it sounds. Multiple tracks of
audio are written to the CD in one recording session.

58 | Chapter 2
Burning single tracks (track-at-once)
1.
Insert a blank CD in a supported CD-R/CD-RW drive.
2.
From the Tools menu, choose Burn Track-at-Once Audio CD.
Notice that the Burn Track-at-Once Audio CD dialog indicates the amount of time that the current project will fill on
the CD as well as the total amount of time remaining on the CD. If the Time needed for audio value exceeds the
Time available on disc value, you are not allowed to write the track to the CD.
3.
Choose a setting from the Action drop-down list:
•Choose Burn audio to begin recording audio to your CD when you click Start. You must close the disc before it
can be played in an audio CD player.
•Choose Test, then burn audio to test whether your files can be written to the CD without encountering buffer
underruns. Recording begins after the test if it is successful.
•Choose Test only to test whether your files can be written to the CD without encountering buffer underruns. No
audio is recorded to the CD.
•Choose Close disc to close your disc without adding any audio when you click Start. Closing a disc allows your
files to be played on an audio CD player. You cannot add tracks to a CD once it has been closed.
•Choose Erase RW disc to erase a rewritable CD when you click Start.
4.
Select your burning options:
• Select the Buffer underrun protection check box if your CD recorder supports buffer underrun protection.
Buffer underrun protection allows a CD recorder to stop and resume burning.
Buffer underrun protection can create a disc that can be played in CD players but may contain a bit error where
burning stopped and restarted. Consider clearing this check box when creating a premaster disc.
• Select the Erase RW disc before burning check box to erase a rewritable CD before you begin burning.
• Select the Close disc when done burning check box to close the CD after burning. Closing a disc allows your
files to be played on an audio CD player. You cannot add tracks to a CD once it has been closed.
• Select the Eject disc when done check box to eject the CD automatically when burning is complete.
• Select the Burn selection only check box to burn only the selected region. Clear the check box to burn the
entire project.
• Select the Render temporary image before burning check box if you want to render your CD project to a
temporary file before recording. Prerendering can prevent buffer underruns if you have a complex project that
cannot be rendered and burned in real time.
5.
From the Drive drop-down list, choose the drive for burning CDs.
6.
From the Speed drop-down list, choose the speed at which you want to burn. Choosing Max uses your drive’s fastest
possible speed; decrease the setting if you have difficulty burning because of buffer underruns.
7.
Click Start.
Note:
The entire project length is written to a CD track. If your project has events on muted tracks that extend beyond the
end of the audible material, the muted events burn as silence at the end of your CD track. To burn just a portion of a project,
create a loop region and select the Burn loop region only check box.
Note:
If there is no CD in the CD-R/CD-RW drive, only the Cancel button is available in this dialog.
Note:
The rendered temporary file will remain until you modify your project or exit. If an image file exists when you
Open the Burn Disc-at-Once Audio CD dialog, the check box is displayed as Use existing rendered temporary image.
Important:
Once the CD writing begins, cancelling the write operation renders the CD unusable.

GETTING STARTED | 59
Disc-at-once (DAO) CD burning
The DAO burning process involves arranging your media on the timeline, adding pauses between tracks as necessary,
inserting track markers, and burning your CD.
Adding pauses
Each CD track in your project should have a two-second pause following it. This default setting is based on the Red Book
specification for audio CDs. The exception to this standard is a continuous recording, such as a live concert CD. For a
continuous recording, you can omit the pauses after tracks for continuous playback. You can manually insert silence
between your audio files to create a pause.
1.
Position your audio files on the timeline in the order in which you want them to play on your CD.
2.
Position the cursor where you want to insert the pause between files.
3.
From the Insert menu, choose Time. The Insert Time dialog appears.
4.
Enter two seconds in the Amount of time to insert box.
5.
Click OK. Two seconds are inserted in the timeline at the cursor position.
Inserting CD track markers
You can use CD track markers in your project to indicate to the CD-R device where to mark the beginning and ending of a
track during the writing process. A Red Book CD can contain up to 99 tracks.
1.
Position your audio files and add pauses between them as necessary. For more information, see Adding pauses on
page 59.
2.
Position the cursor at the start of an audio file.
3.
From the Insert menu, choose CD Track Marker. The marker appears in the marker bar and is automatically
numbered.
4.
Repeat step 3 until you have marked all CD tracks.
Burning a disc (disc-at-once)
1.
Insert a blank CD in a supported CD-R/CD-RW drive.
2.
From the Tools menu, choose Burn Disc-at-Once Audio CD. The Burn Disc-at-Once Audio CD dialog appears.
3.
From the Drive drop-down list, use the CD drive that you want to use to burn your CD.
4.
From the Speed drop-down list, choose the speed at which you want to burn. Max will use your drive’s fastest
possible speed; decrease the setting to prevent the possibility of buffer underruns.
5.
Select the Buffer underrun protection check box if your CD recorder supports buffer underrun protection.
Buffer underrun protection allows a CD recorder to stop and resume burning.
6.
Choose a radio button in the Burn mode box:
•Burn CDs begins recording audio to your CD immediately.
Note:
The Red Book specification also requires a two-second pause at the beginning of an audio CD. This pause is
automatically added when you burn your CD.
Important:
You must place your first CD track marker at the beginning of your project. Audio placed before the first
marker will not be burned to CD.
Tip:
Once you have inserted a marker, you can move or delete them as needed.
Note:
Buffer underrun protection can create a disc that can be played in CD players, but may contain a bit error
where burning stopped and restarted. Consider clearing this check box when creating a premaster disc.

60 | Chapter 2
•Test first, then burn CDs performs a test to determine whether your files can be written to the CD recorder
without encountering buffer underruns. No audio is recorded to the CD during the test, and recording begins
after the test if it is successful.
•Test only (do not burn CDs) performs a test to determine whether your files can be written to the CD recorder
without encountering buffer underruns. No audio is recorded to the CD.
7.
Select the Render temporary image before burning check box if you want to render your CD project to a temporary
file before recording. Prerendering can prevent buffer underruns if you have a complex project that cannot be
rendered and burned in real time.
8.
Select the Automatically erase rewritable discs check box if you’re burning to rewritable media and want to erase
the disc before burning.
9.
Select the Eject when done check box if you want the CD to eject automatically when burning has completed.
10.
Click OK to start burning.
Note:
The rendered temporary file will remain until you modify your project or exit. If an image file exists when you
Open the Burn Disc-at-Once Audio CD dialog, the check box is displayed as Use existing rendered temporary image.
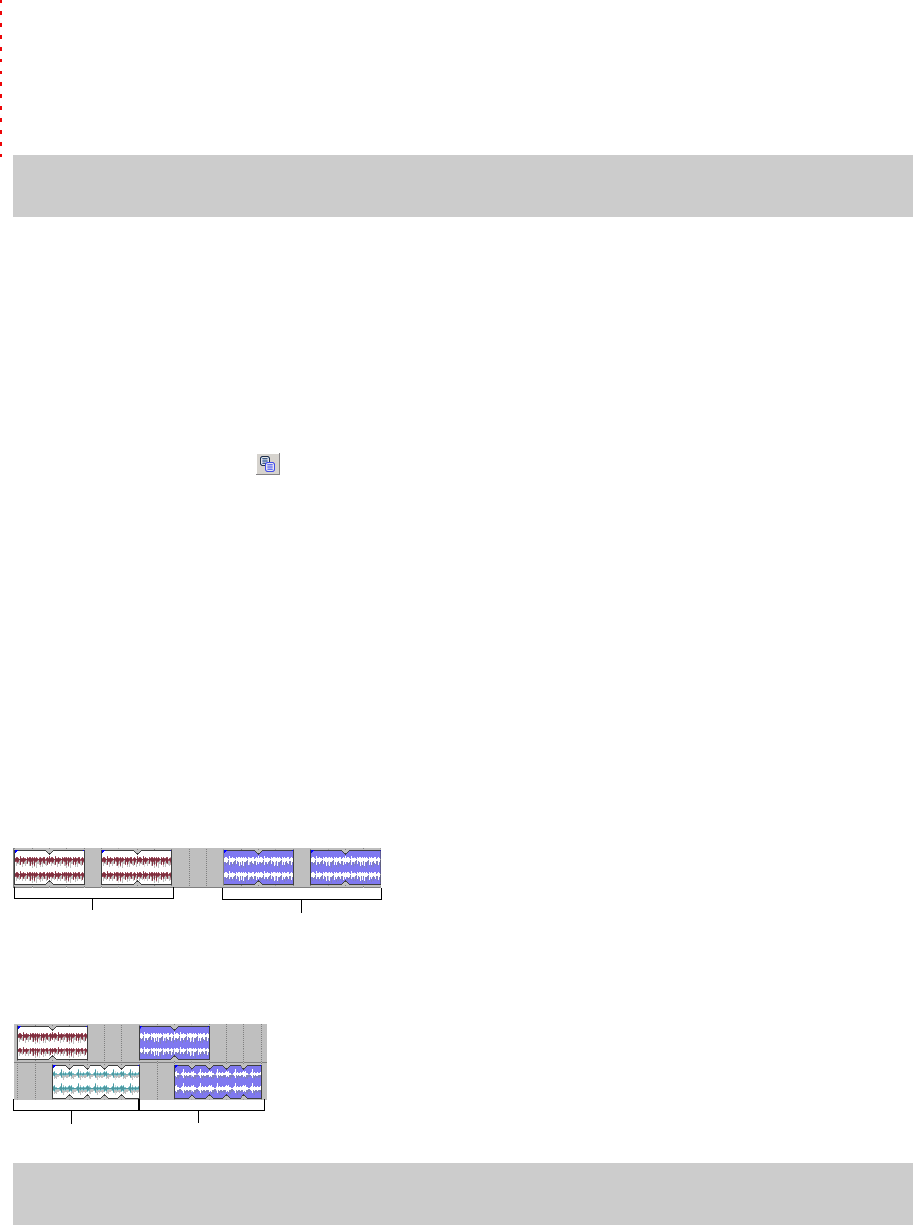
EDITING EVENTS | 61
Chapter
3
Editing Events
In this chapter, you’ll learn about basic event editing techniques such as cutting, copying, pasting, trimming, splitting,
and joining events. You’ll also learn how to use ripple editing to expand the possibilities of timeline editing. Finally, you’ll
take a look at advanced editing techniques such as slipping and sliding events, changing event properties, and adding
event envelopes.
Copying events
Copying an event, a time selection, or event within a time selection places an exact copy of the selected event(s) on the
clipboard, but leaves the track view unchanged. Events copied to the clipboard can be pasted in the project an unlimited
number of times. In addition, clipboard content remains on the clipboard until replaced by new content.
1.
Select the event data you want to copy or make a time selection. For more information, see Making selections on page
44.
2.
Copy the event data using any of the following methods:
•Click the Copy button ( ) on the toolbar.
• Choose Copy from the Edit menu.
• Right-click the selection and choose Copy from the shortcut menu.
• Press Ctrl+C.
Pasting events
The clipboard’s contents can be pasted in a project an unlimited number of times. However, an event is always pasted in
the track it was copied/cut from. In addition, pasting the contents of the clipboard over an existing event results in the
pasted event overlapping the existing event. To avoid pasting over existing events, you have two options:
•Use the Paste Insert command. For more information, see Using Paste Insert on page 62.
• Turn on ripple editing. For more information, see Ripple editing on page 67.
When events are cut/copied to the clipboard and subsequently pasted into a project, the time data inherent in the cut/
copied events is maintained and pasted. For example, if you select two events on the same track that are separated by
five seconds of silence, copying and pasting these events results in the five seconds of silence also being pasted into the
project.
Taking this concept a step further, if you select discontinuous events from several tracks, copying and pasting these
events results in any selected time data being pasted into the project as well. This maintains the relative position of
events in the project.
Using the Paste command
1.
Place the cursor at the desired position on the timeline.
2.
Paste the clipboard contents using any of the following methods:
Note:
For the basic event editing topics in this chapter, make sure that ripple editing is turned off. Verify that the Ripple
Edits command in the Options menu is not selected. For more information, see Ripple editing on page 67.
Note:
You can also paste events across tracks using clips. For more information, see Copying clips and events across
tracks on page 108.
Original events Pasted events
Original events Pasted events
62 | Chapter 3
•Click the Paste button ( ) on the toolbar.
•Choose Paste from the Edit menu.
• Right-click the track view and choose Paste from the shortcut menu.
• Press Ctrl+V.
Using Paste Repeat
When building projects, you often need to paste the contents of the clipboard several times. Rather than repeatedly
pasting and moving the content, the Paste Repeat command allows you to specify the number of times and at what
interval the clipboard’s contents are pasted on the track view. This is a useful way of quickly building a project that uses a
repetitive riff or structure. For example, you can build the backing tracks for a twelve-bar blues, copy them, and use Paste
Repeat to paste several copies of it in the project.
1.
Click the Time Selection Tool button ( ).
2.
Drag the mouse in the track view to create a time selection spanning several events and copy it to the clipboard.
3.
Click the Go To End button ( ) on the transport bar or press Ctrl+End to send the cursor to the end of the project.
4.
From the Edit menu, choose Paste Repeat or press Ctrl+B. The Paste Repeat dialog appears.
5.
Enter a number in the Number of times to paste box.
6.
Select the End to end radio button and click OK. The events are pasted end to end the number of times specified in
step five, starting at the cursor position.
Using Paste Insert
To insert the contents of the ACID clipboard at the current cursor position and force existing events to move in time to
accommodate the pasted events, choose Paste Insert from the Edit menu.
If the cursor is in the middle of an event, the event splits at the cursor position where the new events are pasted. For more
information, see Splitting events on page 64.
Pasting events at the play cursor
You can also paste the contents of the clipboard at the cursor during playback. You can use this feature to create rhythms
on one-shot tracks while listening to the track you’re editing in the context of the rest of your project. When you’re done
creating events, you can use the Render to New Track command (on the Edit menu) to save the rhythm to a new track, or
you can copy and paste your new events across the timeline.
1.
Create a time selection in the portion of the project you want to edit.
2.
Select the Loop Playback button ( ).
3.
Copy the one-shot you want to use.
4.
Click the Play button ( ) to start playback.
5.
Press Shift+Y to paste at the play cursor (during playback, the edit cursor remains fixed, and the play cursor follows
playback).
If snapping is enabled, events are pasted at the next snap point. You can use snapping to quantize your events.
6.
Repeat step 5 as needed.
7.
Click the Stop button ( ) when you’re finished creating events.
8.
Edit event positions as necessary.
Tip:
If you're using this feature to tap rhythms with one-shot tracks, try applying a groove to adjust the timing of your
rhythm. For more information, see Working with grooves on page 120.
EDITING EVENTS | 63
Cutting events
Cutting an event, a time selection, or an event within a time selection removes the audio data from the track view and
places it on the clipboard. Once data is placed on the clipboard, it can be pasted back into the project an unlimited
number of times. Clipboard content remains on the clipboard until it is replaced by new data.
1.
Select the event data you want to cut or make a time selection. For more information, see Making selections on page
44.
2.
Cut the event data using any of the following methods:
•Click the Cut button ( ) on the toolbar.
• Choose Cut from the Edit menu.
• Right-click the selection and choose Cut from the shortcut menu.
• Press Ctrl+X.
All selected events are removed from the track view and placed on the clipboard.
Deleting events
Deleting an event, a time selection, or an event within a time selection removes the data from the track view and discards
it. Deleted events are not placed on the clipboard and do not replace or interfere with current clipboard content. In
addition, deleted events cannot be pasted back into a project.
1.
Select the event data you want to delete or make a time selection. For more information, see Making selections on
page 44.
2.
Delete the event data using any of the following methods:
• Choose Delete from the Edit menu.
• Right-click the selected event and choose Delete from the shortcut menu.
• Press Delete.
All selected events are removed from the track view and discarded.
Reversing events
You can select events in the timeline and reverse their audio and peak data. Select an event in the timeline,
right-click, and choose Reverse (or press U) from the shortcut menu. An arrow appears on the event in the
timeline to indicate that it has been reversed.
Trimming events
Whereas deleting allows you to select event data to be removed from the project, trimming allows you to select the data
that remains. Trimming is performed by creating a time selection or selecting an event within a time selection and
subsequently deleting all unselected data.
1.
Create a time selection or select specific events within a time selection. For more information, see Creating time
selections on page 45.
2.
Press Ctrl+T to trim the data within the selection. All unselected event data is removed from the track view and
discarded.
Note:
Deleted data can only be replaced in a project using the Undo command. For more information, see Using
undo on page 49.
Tip:
To remove the unused media from your project, choose Remove All Unused Clips from the Tools menu. To remove
unused clips from individual tracks, click the Remove Unused Clips button in the Clip Pool window. For more
information, see Using the Clip Pool on page 109.
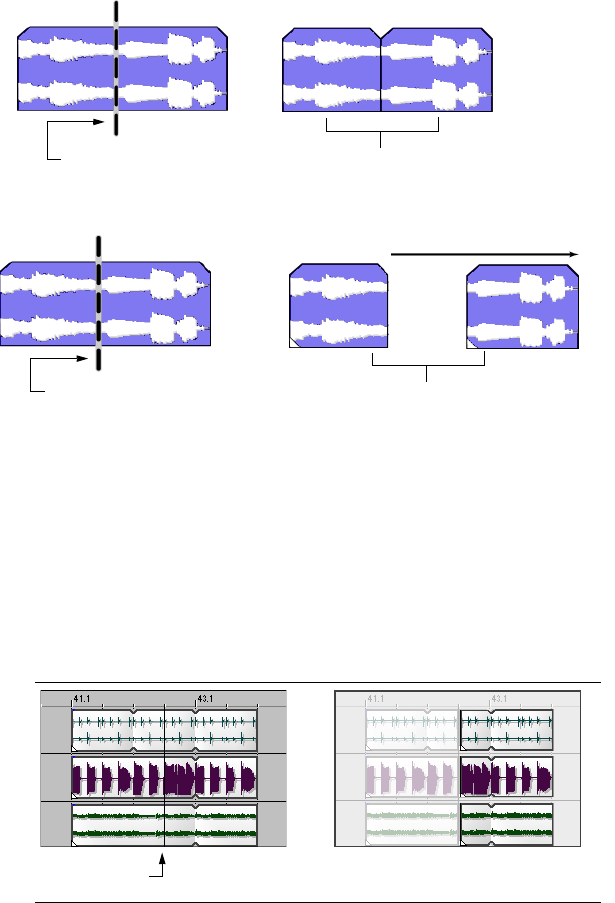
64 | Chapter 3
Splitting events
Splitting is a quick way to create independently functioning events from a single one. You might consider splitting an
event if you want to adjust a small part of the track. For example, you may want to apply pitch shift to a guitar track for a
few measures and then return the track to its original setting.
Splitting occurs at the cursor position or at the in and out points of a time selection. When you split an event, a new
ending point is created for the original event and creates a starting point for the newly created event.
When you split an event, the newly created events abut each other. If Quick fade edges to prevent clicks is selected in
the Event Properties dialog, fades are added at the split point. For more information, see Changing event properties on page
70.
However, you may move either of the events, which creates a gap.
Splitting at the cursor position splits all selected events that the cursor crosses on all tracks.
1.
Select the event(s) that you want to split.
2.
Place the cursor where you want the split to occur or make a time selection.
3.
From the Edit menu, choose Split or press S. The result of the split depends on how events were selected.
Splitting at the cursor position
Splitting at the cursor position splits all events that the cursor crosses on all tracks.
Events before splitting Events after splitting
Split position Two events
Split position Two events
Cursor position
and split point
After the split, the three events become
six events
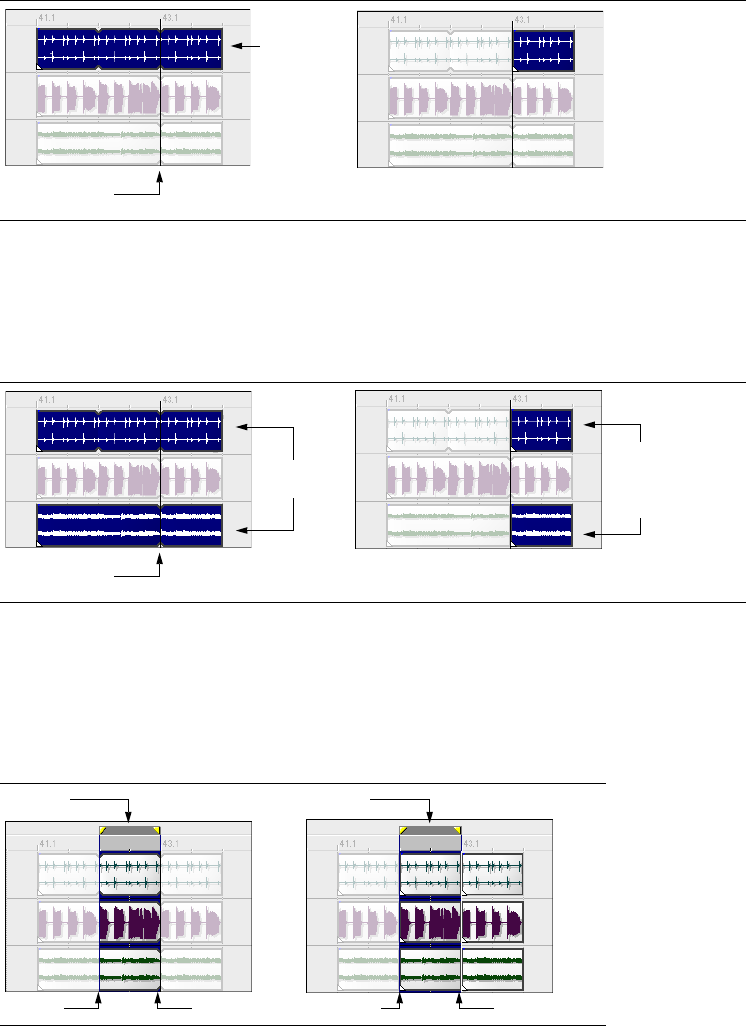
EDITING EVENTS | 65
Splitting one event
Selecting a single event prior to splitting prevents other events from being split at the cursor’s position.
Splitting multiple events
Selecting multiple events splits only the selected events at the cursor’s position. Be sure to set your cursor position before
selecting events. Attempting to set your cursor after selecting events causes you to lose your event selection.
Splitting a time selection
Making a time selection allows you to split events at the time selection’s in and out points across all tracks.
Events before splitting Events after splitting
Events before splitting Events after splitting
Events before splitting Events after splitting
Cursor position
and split point
Event to
be split
Only the selected
event splits at the
cursor position
Cursor position
and split point
Events to
be split
Only the selected
events split at the
cursor position
Loop bar
Out point
In point
Loop bar
Split point Split point
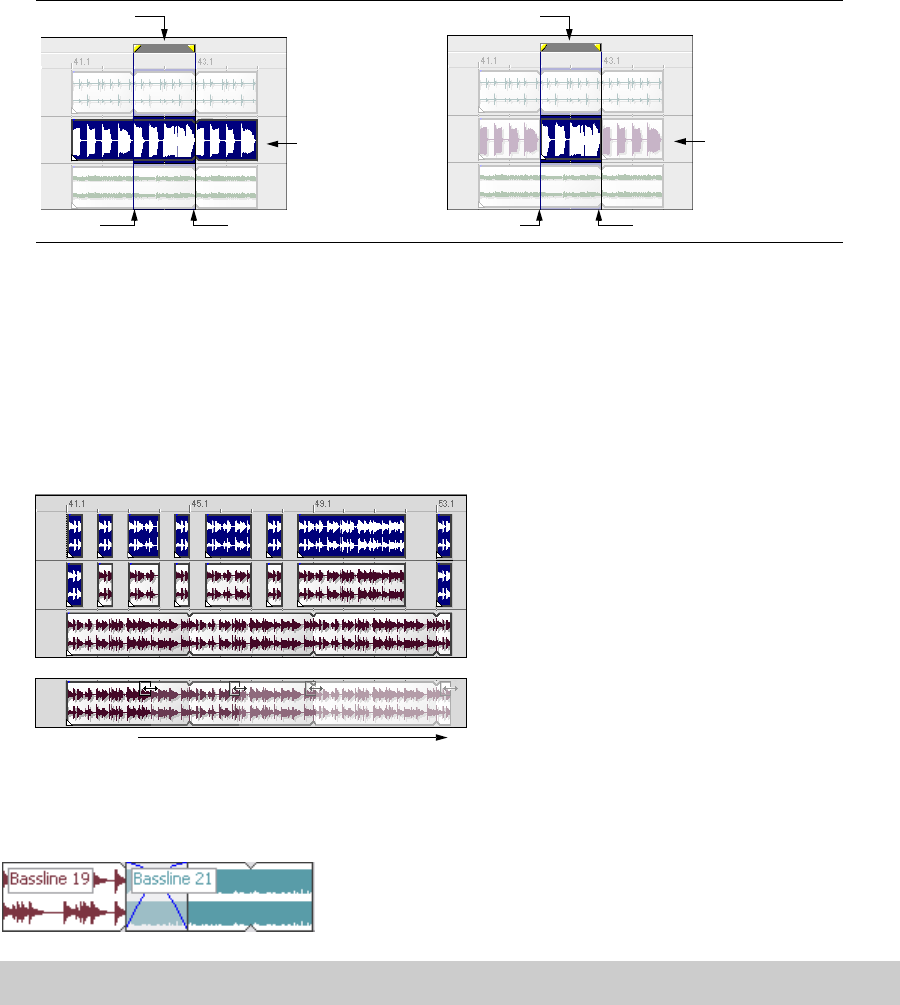
66 | Chapter 3
Splitting events within a time selection
When selecting events within a time selection, only the selected events in the time range split at the in and out points.
Joining events
You may join events on ACID tracks that have been segmented along the timeline. Joining events is an efficient way to
redraw an event and remove any splits or silent regions between events.
You would want to join events if you decided that the event should play uninterrupted over the specified time range.
1.
Select the events or range of events that you want to join. For more information, see Selecting multiple events on page
44.
2.
From the Edit menu, choose Join or press J. The selected events are joined.
Automatic crossfades
From the Options menu, choose Automatic Crossfades if you want to automatically create crossfades when you overlap
two audio events.
Creating crossfades
You can easily create crossfades between events by simply dragging an event.
1.
From the Options menu, choose Automatic Crossfades to turn on automatic crossfades.
2.
Drag and event so that it overlaps another event on the same track.
A crossfade is automatically added to transition smoothly between the two events.
Events before splitting Events after splitting
Note:
Event crossfades are not available for MIDI events.
In point Out point
Selection bar
Event to split at the
time selection’s in
and out points
Split point Split point
Selection bar
Only the selected
event splits at the in
and out points
Select all the events that you want to join.
You can also select the first and last events you
want to join, creating an event selection range.
After you join the events, a single event appears.
Joining events is similar to dragging the edge
of an existing event
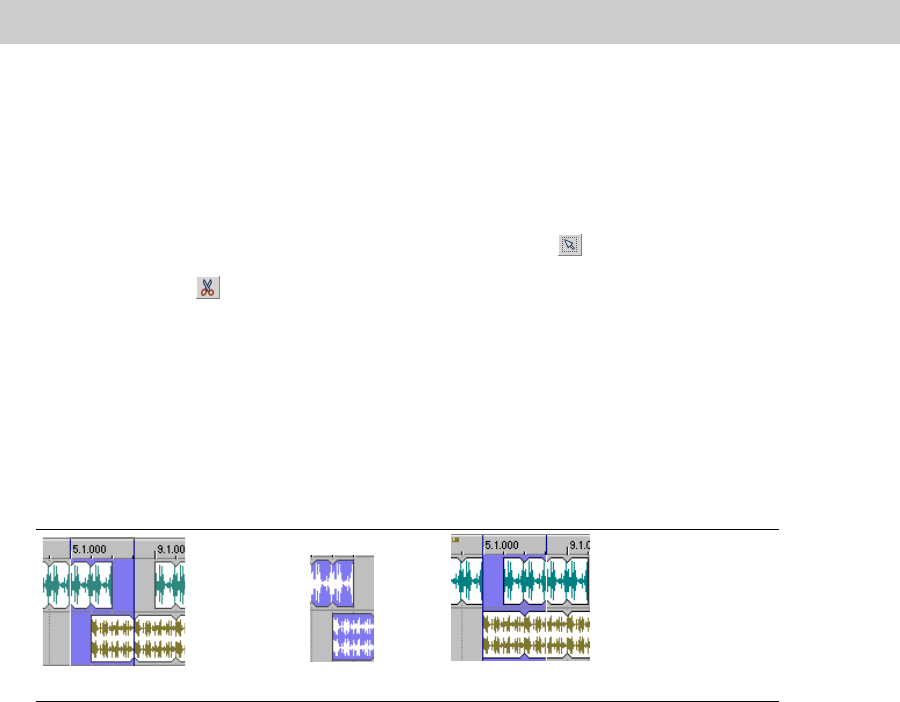
EDITING EVENTS | 67
Changing fade types
You can change a crossfade to use one of many combinations of fast, slow, linear, smooth, and sharp fade curves.
1.
Right-click the overlapping area to display a shortcut menu.
2.
Choose Fade Out Type from the shortcut menu and choose a fade curve from the submenu to set the curve for the
first event’s fade out.
3.
Choose Fade In Type from the shortcut menu and choose a fade curve from the submenu to set the curve for the
first event’s fade in.
Ripple editing
ACID includes a ripple editing feature. This feature allows you to cut, delete, and paste events or portions of events within
a time selection and simultaneously adjust the position of all later events on a selected track. The existing events’ timeline
position adjusts by the total amount of the time selection that is being cut, deleted or pasted from the clipboard.
You may turn on ripple editing mode by choosing Ripple Edits from the Options menu or pressing Ctrl+L.
Cutting events in ripple editing mode
Cutting events or portions of events removes them and their time information from their respective tracks. This
information is placed on the clipboard, from which you may paste the information back into your project.
1.
From the Options menu, choose Ripple Edits to enter ripple editing mode.
2.
Click the event to be cut or make a time selection.
To cut multiple events, use the Ctrl key, the Shift key, or the Selection () tool to select the events. For more
information, see Selecting multiple events on page 44.
3.
Click the Cut button ( ) on the toolbar to cut the event(s) to the clipboard.
The cut events and their time information are removed from the selected track(s) and placed on the clipboard.
Existing events in the selected track(s) move forward to occupy the space created by the cut.
Cutting time selections in ripple editing mode
Events within the time selection are reproduced and placed on the clipboard. Also, the time information is placed on the
clipboard. Existing events occurring after the time selection move forward in the project by the length of the time
selection.
Note:
Ripple editing is only available when a time selection is present.
Events before cut Clipboard contents Events after cut
Existing events
adjust to occur
sooner in the project
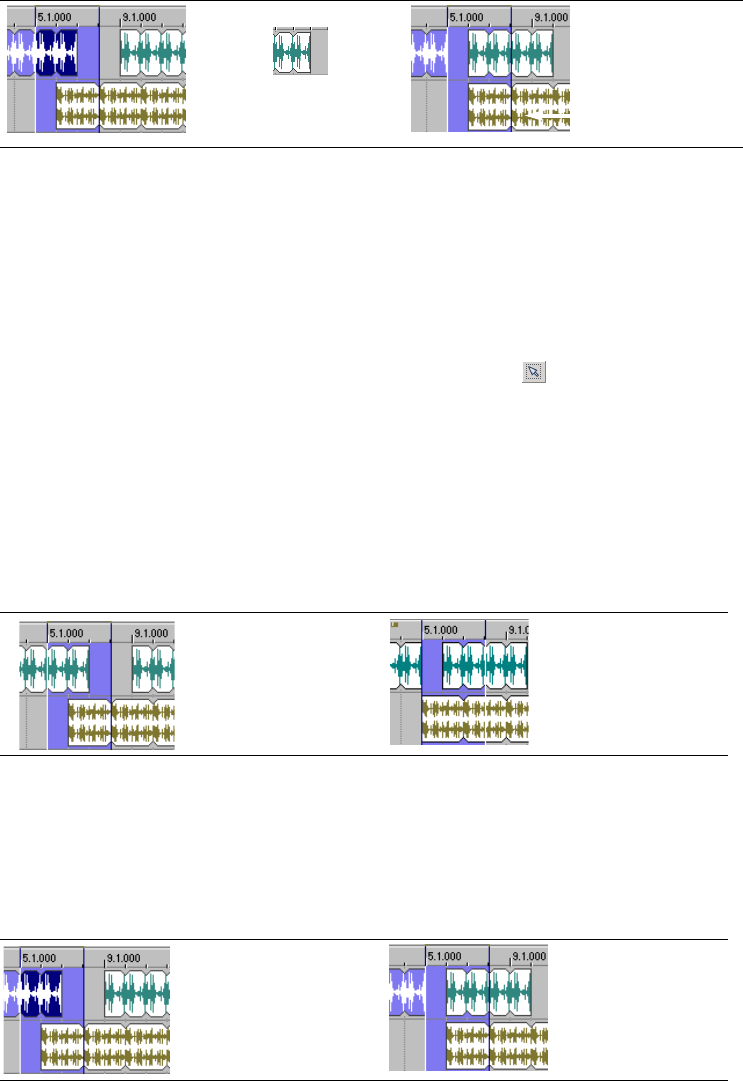
68 | Chapter 3
Cutting time and event selections in ripple editing mode
Events and portions of events within the time selection are reproduced and placed on the clipboard. Also, the time
information is placed on the clipboard. Existing events occurring later than the time selection move forward by the
length of the time selection. Only tracks containing selected events are affected by the ripple edit.
Deleting events in ripple editing mode
Deleting events or portions of events removes them and their time information from their respective tracks. However,
this information is not placed on the clipboard. Existing events move forward when you delete material from a selected
track.
1.
From the Options menu, choose Ripple Edits to enter ripple editing mode.
2.
Click the event to be deleted or make a time selection.
To cut multiple events, use the Ctrl key, the Shift key, or the Selection ( ) tool to select the events. For more
information, see Selecting multiple events on page 44.
3.
Press Delete to delete the event(s).
Deleting time selections in ripple editing mode
Events within the time selection and their time information are removed from the project. Existing events occurring after
the time selection move forward in the project by the length of the time selection. When information is deleted, it is not
placed on the clipboard.
Deleting time and event selections in ripple editing mode
Events within the time selection and their time information are removed from the project. Existing events occurring after
the time selection move forward in the project by the length of the time selection. When information is deleted, it is not
placed on the clipboard.
Events before cut Clipboard contents Events after cut
Events before delete Clipboard contents Events after delete
Events before delete Clipboard contents Events after delete
Existing events on the top
track adjust to occur
sooner in the project
Existing events
adjust to occur
sooner in the
project
Existing events on the top
track adjust to occur
sooner in the project
Deleted information is not
placed on the clipboard.
Deleted information is not
placed on the clipboard.
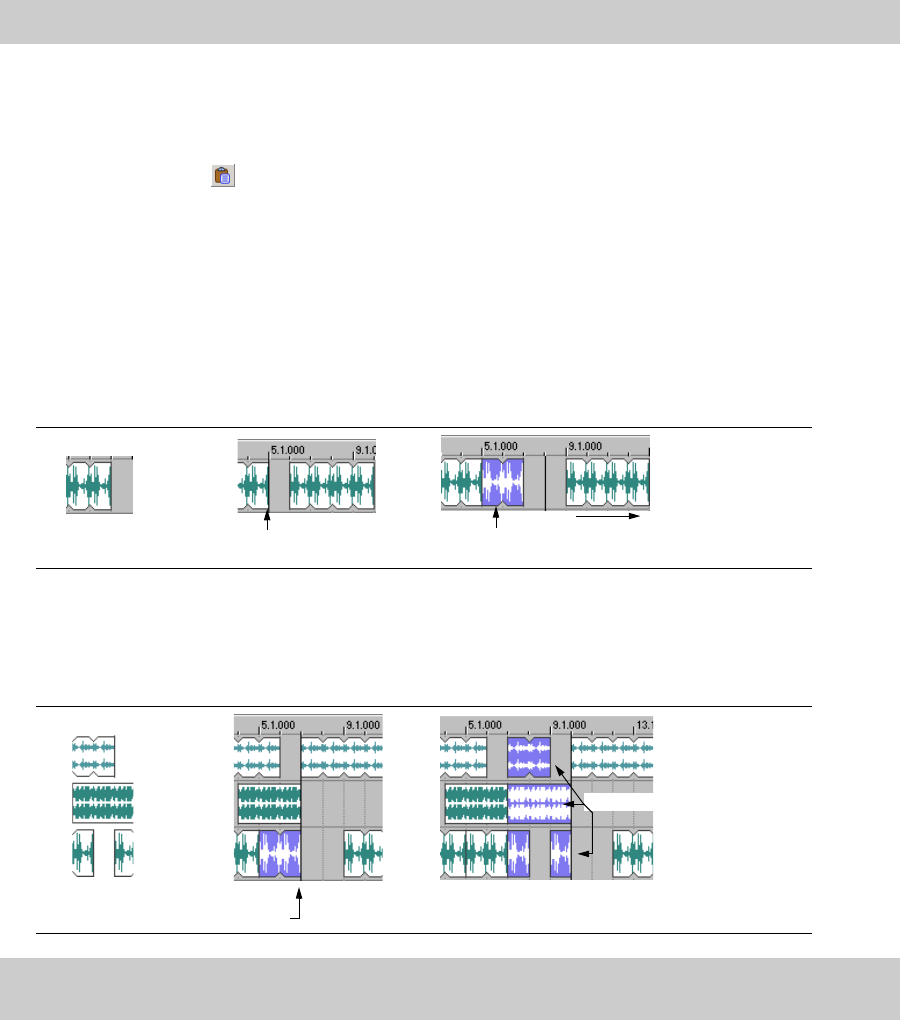
EDITING EVENTS | 69
Pasting events in ripple editing mode
Once information is copied to the clipboard, you may choose a variety of ways to paste the clipboard items into tracks. For
more information, see Pasting events on page 61. The following procedures explain pasting information in ripple editing
mode.
1.
From the Options menu, choose Ripple Edits to enter ripple editing mode.
2.
Move the cursor to the desired timeline location.
3.
Place the cursor within the track where you want to paste the event.
4.
Click the Paste button ( ) on the toolbar to paste the event into the track.
Clipboard information is pasted at the cursor’s position on the track. Existing events or portions of events after the cursor
adjust to occur later in the project. The amount of adjustment is based on the total length of the information being
pasted.
Pasting single track information in ripple editing mode
The information on the clipboard determines how many tracks are affected when you paste. If you have copied or cut
information from one track, only the selected track is affected by the pasted event and time information.
Pasting multitrack information in ripple editing mode
Multiple events can be pasted as easily as single events.
Slipping and sliding events
To help you picture what happens when you slip and slide events, think of an event as a window to a media file. The
window can display the entire media file or a small section. When the window displays only a portion of the media file,
you can move either the window or the underlying media to adjust the media played by an event:
•When you slip an event, your event maintains its place on the timeline, but the media file moves in the direction you
drag.
Note:
Events are always pasted into their own tracks at the cursor position.
Clipboard contents Events before paste Events after paste
Clipboard contents Events before paste Events after paste
Note:
Pasting in ripple editing mode ripples only the events on the tracks that receive the clipboard contents. If you want
to ripple all tracks at the paste position, use the Paste Insert command from the Edit menu.
Paste
position
Newly pasted
event
Existing event adjusts
to move later in the
project.
These events will
be pasted Paste
position
Existing events on the tracks adjust later in
the project
Newly pasted event
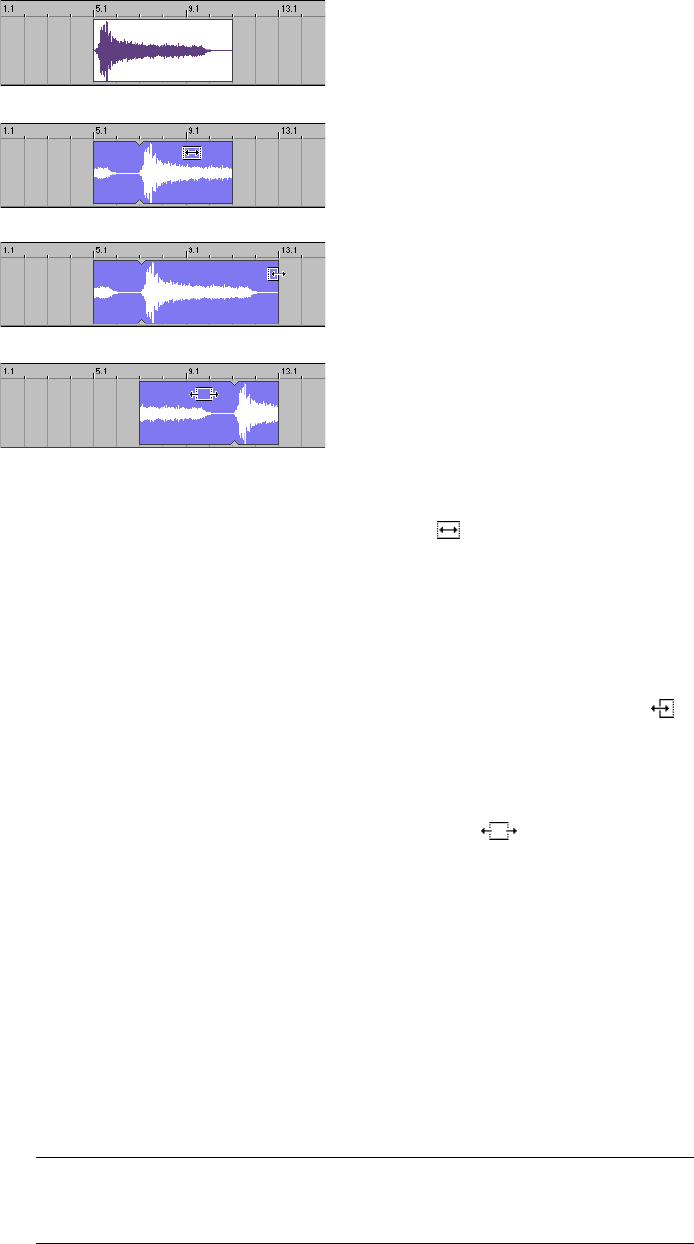
70 | Chapter 3
• When you slide an event, the media file maintains its place on the timeline, but the event moves in the direction you
drag.
Shifting the contents of (slipping) events
Hold Alt while dragging an event. The slip cursor appears ( ).
As you drag the event, the contents of the event shift, but the event does not move. You can use this technique when you
want to maintain an event’s length and position but want the to event play a different section of the source media file.
For creative ways to use event slipping, see Duplicating with offset on page 262.
Slip-trimming events
Hold Alt while dragging the right or left edge of an event. The slip-trim cursor appears ( ).
As you drag the event edge, the media moves with the event edge.
Sliding events
Hold Ctrl+Alt while dragging an event. The slide cursor appears ( ).
As you drag, the relative position of the media remains fixed on the track, and the event position changes. You can use
this technique when you want to maintain an event’s length but want the event to play a different section of the source
media file at a different point in your project.
Changing event properties
To access event properties, right-click the event and choose Properties from the shortcut menu.
These properties are saved in the project but are not saved into the file when you save changes to a clip in the Clip
Properties window. For more information, see Saving file properties on page 120.
The following table describes each of the settings in the Event Properties dialog.
Item Description
Start offset The Start offset for an event specifies a playback starting position that is
different than the beginning of the file. This is especially useful for loops; you
can change the feel of a loop by simply starting on beat two rather than beat
one.
Original loop event
Slipping the event two measures to the right
Slip-trimming the event two measures to the right
Sliding the event two measures to the right
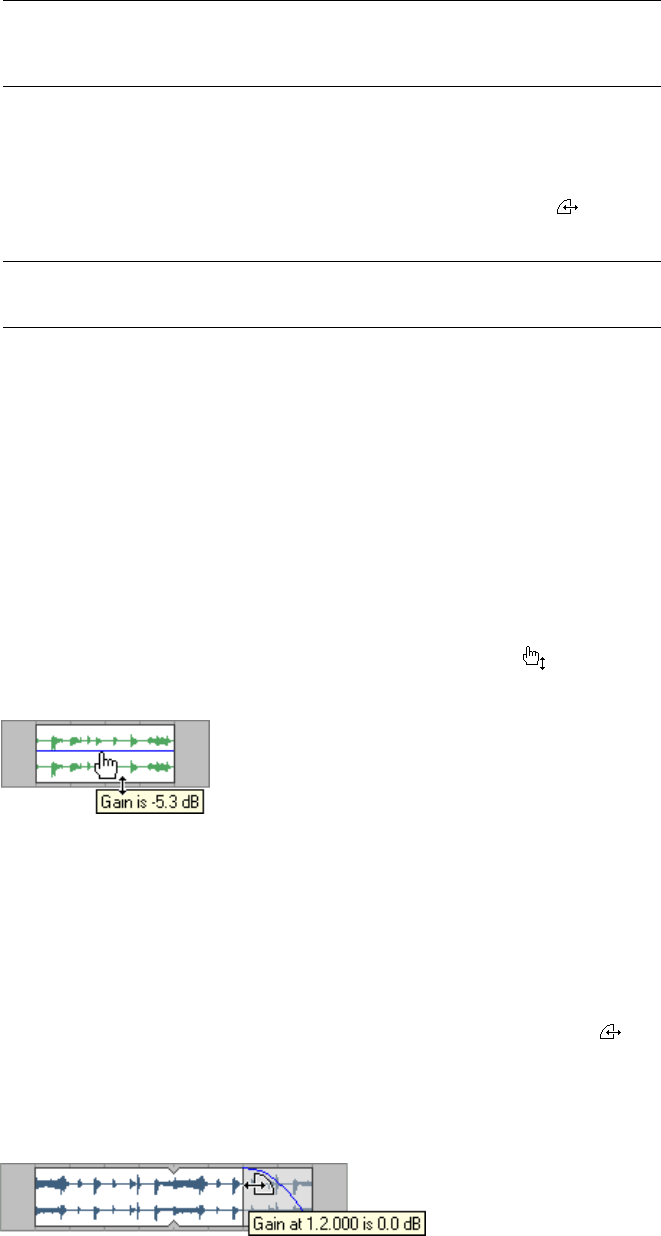
EDITING EVENTS | 71
Using event envelopes
You can use envelopes on individual events. Envelopes give you the ability to control each event’s fade-in, fade-out, and
overall volume. Envelopes are useful for transitional effects between events by subtly fading out one event’s volume
while another fades in.
These envelopes are different than track envelopes because they affect only the event whereas track envelopes can affect
multiple events on the track. For more information, see Using track automation envelopes on page 113.
The event’s volume level and fade curves are represented by a line on the event.
Setting an event’s volume envelope
You can control an event’s overall volume by setting an envelope at the desired decibel (dB) level.
1.
Place the mouse pointer at the top of the event. The envelope cursor ( ) appears.
2.
Drag the volume line to the desired level. As you drag the volume line, the event’s decibel level is displayed.
3.
Release the mouse to set the event’s dB level.
After you set the event volume level, you may change it later by dragging the envelope line.
Setting an event’s fade-in and -out envelope curve
You can control an event’s envelope fade-in and -out characteristics by adjusting the event’s envelope handles. These
handles allow you to control the length and dB level of fade-ins and fade-outs. Also, you can change the type of curve
that the event uses to control the volume’s fade characteristics.
1.
Place the mouse pointer on the upper corner of the event. The envelope cursor ( ) appears.
2.
Drag the envelope cursor and position the envelope curve. As you drag the cursor, the following information is
displayed:
• The event decibel level.
• The length (in measures.beats.ticks) of the fade-in or fade-out.
3.
Release the mouse to set the fade-in or fade-out characteristics.
Pitch shift The Pitch shift value specifies a pitch shift for the selected event. Event-based
pitch shift is calculated after the project key and any pitch shift assigned to a
track. For more information, see Changing tempo, time signature, and key on
page 95.
Quick fade edges to
prevent clicks
When you add an offset to an event so that it does not end on a loop point,
you can introduce an audible click at the edges of the event. Select the Quick
fade edges to prevent clicks check box, and a quick fade-in or fade-out is
performed on the event edges.
To adjust a quick fade, zoom into the event and hover over the upper-left or
upper-right corner of an event until the cursor is displayed as . Drag the
edge of the fade to adjust its duration. For more information, see Setting an
event’s fade-in and -out envelope curve on page 71.
Reverse Select the Reverse check box to reverse the event’s audio and peak data. An
arrow appears on the event in the timeline to indicate that it has been
reversed.
Item Description
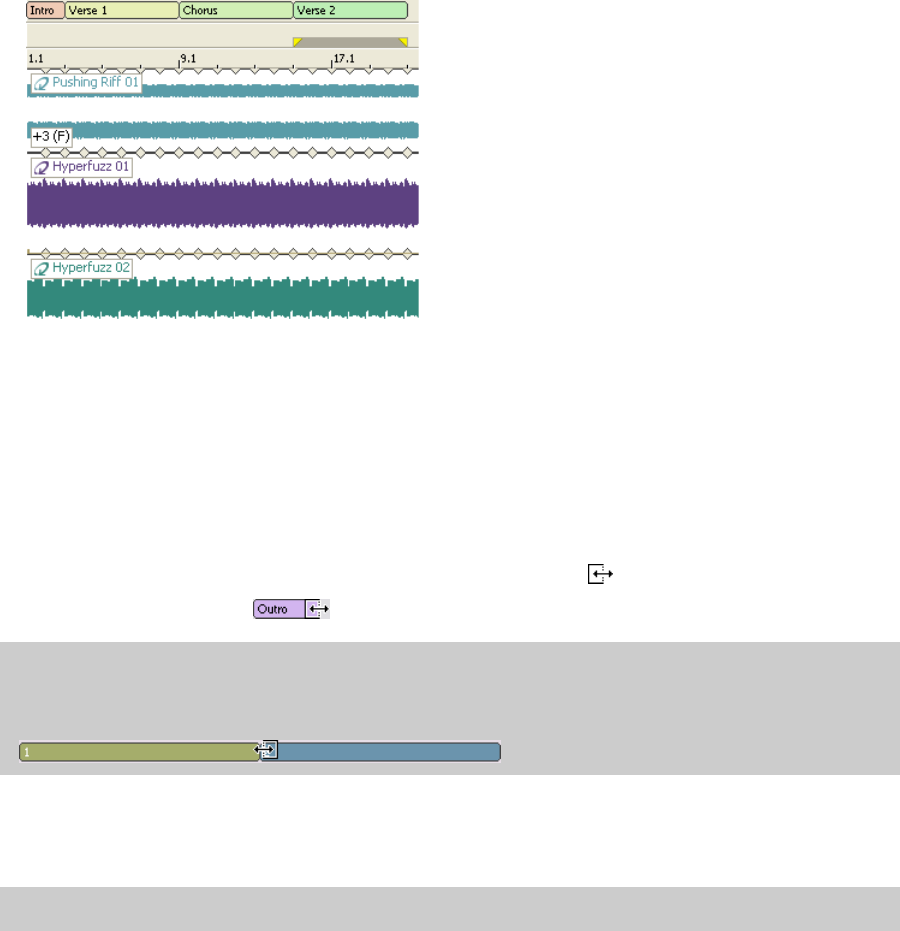
72 | Chapter 3
Changing the event’s fade curve type
You can set an event’s fade curves (fast, linear, slow, smooth, or sharp) that are used to raise or lower the volume over
time. Right-click the fade region, select Fade In Type or Fade Out Type from the shortcut menu, and choose the
appropriate fade curve from the submenu.
Using sections
With sections, you can create different arrangements using simple drag-and-drop operations.
Each section header above the timeline represents a segment of your project. When you drag a section header to a new
location of the timeline, all events, envelopes, regions, markers, and commands within the section follow.
Inserting a section
1.
Create a time selection that includes the portion of the timeline that you want to use as a section.
2.
From the Insert menu, choose Section (or press Shift+S). A section label is added above the marker bar.
3.
Type a name to identify the section and press Enter.
Adjusting a section's length
1.
Hover over the end of a section label. The mouse pointer is displayed as a .
2.
Drag the end of the section: to extend or shorten it.
Renaming a section
1.
Right-click the section label and choose Rename from the shortcut menu. The section label changes to an edit box.
2.
Type a new name in the edit box.
3.
Press Enter.
Tips:
• Hold Shift to override snapping.
• As you drag the edge between two adjacent sections, both will be adjusted simultaneously.
Tip:
Press F2 to rename the selected section.
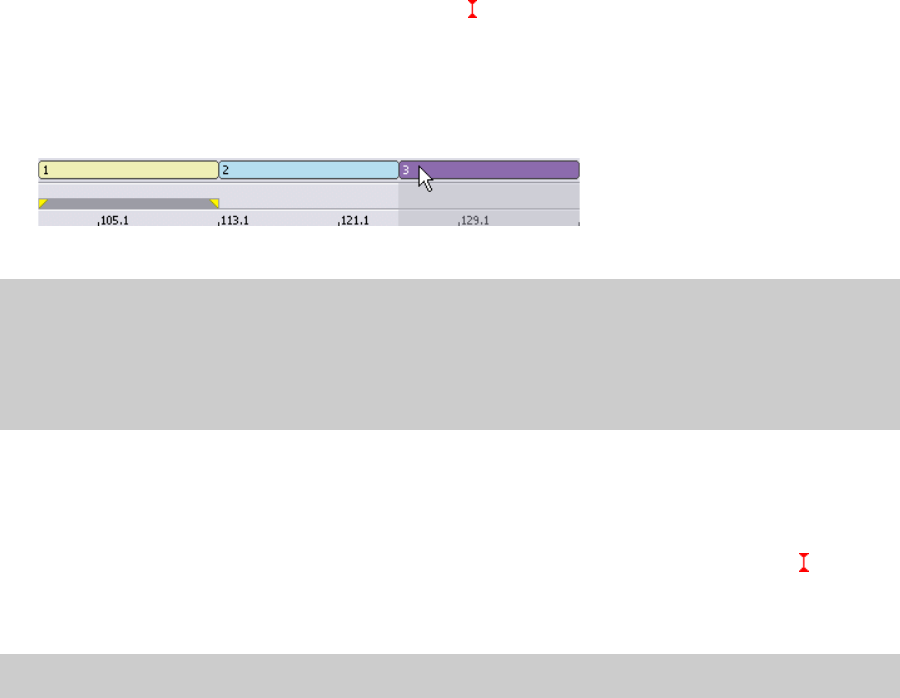
EDITING EVENTS | 73
Changing a section's color
1.
Right-click the section label and choose Color from the shortcut menu.
2.
Choose a color from the menu. The color of the section header is updated, but event colors do not change.
Moving (shuffling) sections
Shuffling sections allows you to move all events, envelopes, regions, commands, and markers within a section in a single
operation. For more information, see Ripple editing on page 67.
1.
Drag a section label to a new position on the timeline. A is displayed to indicate where the section will be
moved.
2.
When you drop the section, events are split at each end of the section, and all events within the section are moved to
the position where you dropped the section. Downstream events ripple to make room for (or fill the space of) the
section you dragged.
Copying a section
Copying sections lets you copy all events within a section in a single operation. For more information, see Ripple editing on
page 67.
1.
Hold Ctrl and drag a section header, or multiple section headers, to a new position on the timeline. A is
displayed to indicate where the section will be copied.
2.
When you drop the section, it is copied to the position where you dropped it.
Deleting a section
Deleting a section removes the section and all events are removed from the timeline.
Right-click a section label and choose Delete from the shortcut menu. Events are split at each end of the section, and all
events, envelope points, regions, commands, and markers within the section are deleted. Downstream events ripple to fill
the space of the section you deleted. For more information, see Splitting events on page 64.
Moving a section label
Hold Alt while dragging a section label to move the selected labels without affecting the contents of the timeline.
Hold Ctrl+Alt while dragging a section label to create copies of the selected labels without affecting the contents of the
timeline.
Removing a section label
Removing a section label removes the section label from the timeline without affecting the section's events.
Right-click a section label and choose Remove Label from the shortcut menu.
Notes:
• Hold Ctrl or Shift to select and shuffle multiple selections
• When shuffling envelope points, the shape of the envelope is copied to the new location and additional points are created
at each end of the section if necessary.
• The tempo, time signature, and key of the section will be preserved during shuffling, and tempo, time signature, and key
markers will be created if necessary.
Note:
Hold Ctrl or Shift to select and copy multiple selections.
74 | Chapter 3
Clearing all events from a section
Clearing events removes the events from a section while leaving the section label intact.
Right-click a section label and choose Clear Events from the shortcut menu. Events are split at each end of the section,
and all events within the section are deleted. For more information, see Splitting events on page 64.
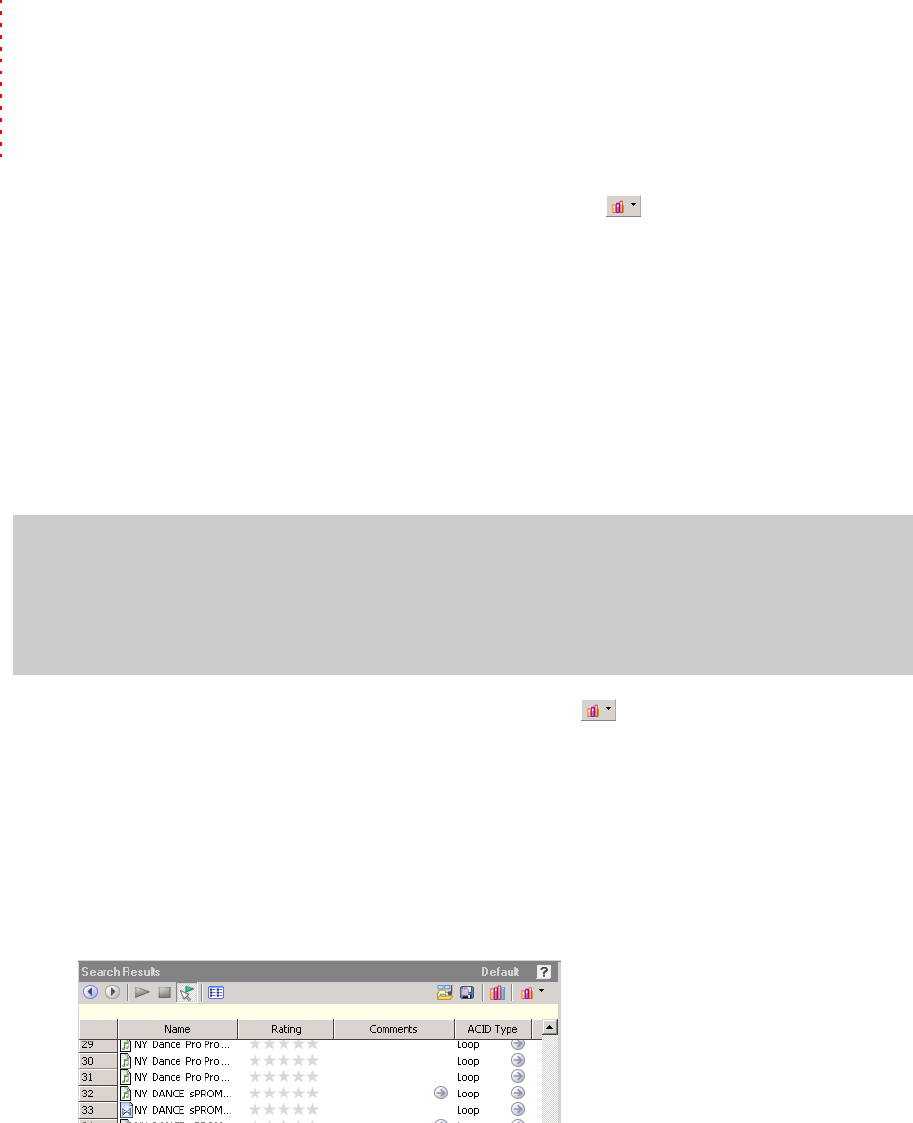
USING THE MEDIA MANAGER | 75
Chapter
4
Using the Media Manager
This chapter covers the management and tagging of your media files in ACID using the Media Manager feature.
Creating a new media library
You can create multiple media libraries as necessary to organize your media. Each media library is maintained by the
Media Manager software as a separate database that stores information about the media contained within it.
1.
From the Media Manager window, click the Media Library actions button ( ) and choose New Media Library
from the menu. The New Media Library dialog is displayed.
2.
In the Name box, type the name you want to use to identify the library.
3.
The Folder box displays the path to the folder where the library will be created. Click Browse to choose a different
location.
4.
Click the Create button to create the new library.
Opening a media library
The Media Manager window displays the contents of the current media library. You can open a different library at any
time.
1.
In the Media Manager window, click the Media Library Actions button ( ) and choose Open Media Library from
the menu. The Open Media Library dialog is displayed.
2.
Choose the folder where the library you want to open is stored:
• Choose a drive and folder from the Look in drop-down list.
—or—
• Use the bar on the left side of the window to browse to a folder.
3.
Select a library from the list.
4.
Click the Open button to open the selected library. The name of the current library is displayed in the upper-right
corner of the Search Results pane:
Adding media files to a library
Before you can search or organize your media files, you’ll need to add them to a media library.
Important:
When you open a media library, the Media Manager tool creates a transaction log file. This file is created in
the same folder as the .medialib file and uses the same base name as the .medialib file. For example, the transaction log file
for default.medialib would be default_log.ldf.
Do not delete these log files. Doing so will prevent you from opening the associated library. When the Media Manager tool
closes, it automatically removes the log file. If the application terminates inappropriately, close all running ACID windows,
restart ACID, and close the application to clear the log file.
76 | Chapter 4
When the Sony Sound Series Loops & Samples™ reference library is installed and set as the active reference library in the
Media Manager Options dialog, tags and custom properties from the reference library will be applied to media from
existing Sony Sound Series Loops & Samples or Loops for ACID collections when you add media to your library. For more
information on Media Manager options, see Setting Media Manager options on page 86.
1.
Click the Add Files to Media Library button ( ). The Add Files to Media Library dialog is displayed.
2.
Choose the folders that will be searched for media:
a.
If it isn’t displayed automatically, click the Add Folder button ( ) to display the Browse for Folder dialog.
b.
Select the folder you want to search.
c.
Click OK.
3.
Repeat step 2 for each folder you want to search.
4.
Select the Include subfolders check box if you want to search folders within the selected folders.
5.
Select the Audio, Video, Images, or MIDI check boxes to indicate the types of media you want to add. Clear a check
box to exclude that type of media file.
Files that contain audio and video streams will be added if either or both of the Audio or Video check boxes are
selected.
6.
Specify whether you want to search for new files or all files:
• Select the New files only radio button if you want to search only for new media files. Files that already exist in
the media library will be skipped.
—or—
• Select the All files radio button if you want to search for all media files in the specified folder. New media files
will be added, and files that already exist in the media library will be searched to determine whether their
properties have changed.
7.
Select the Add tags and custom properties from files check box if you want to add tags and custom columns saved
in the media files to your library. For more information about tagging media, please see Tagging media files on page 77.
For information about adding custom columns to the Search Results pane, see Adding custom columns on page 86.
8.
Select the Use file and folder names to apply tags automatically check box if you want to automatically tag files
based on the file path.
For example, when this check box is selected, a loop saved in the d:\loops\drums\hi-hats\ folder would have the
tags Drums and Hi-Hats applied when it is added to the library. Some synonyms (and variant spellings) will be
resolved automatically. If you need to modify the pattern-matching, you can edit the AutoTagPatterns.xml file, which
is created in your My Documents\Sony Media Libraries folder the first time the application starts.
9.
Click the Search button to start adding files to the library.
10.
Click the Close button when you’re finished.
A tag is automatically added to the tag tree when you search. The tag name will include the date and time of the
search, and all files that were added or updated in the library are marked with this tag.
Note:
The Sony Sound Series Loops & Samples reference library is not installed by default, but you can install it from the
ACID CD or download it from the Sony Media Software Web site (http://mediasoftware.sonypictures.com/reference). After
installing the library, go to the Media Manager Options dialog and choose the reference library from the Reference
library drop-down list.
Tip:
If the Save media-usage relationships in active media library check box is selected on the General tab of the ACID
Preferences dialog, you can add individual files to a library by previewing the files in the ACID Explorer window.
Tips:
If you want to change an item in the folder list, select it and click the Browse button () in the Folders column. If you
want to remove a folder from the list, select it and click the Remove Folder button ( ).
Note:
Changing the selection of the Add tags and custom properties from files and Use file and folder names to
apply tags automatically check boxes also changes the settings in the Media Manager Options dialog.

USING THE MEDIA MANAGER | 77
Removing media files from a library
You can remove a reference to a media file from a library without affecting the media file itself.
1.
Select files in the Search Results pane to choose the files you want to delete:
• To select a single file, click the file.
—or—
• To select multiple consecutive files, click the first file, hold the Shift key, and then click the last item.
—or—
• To select multiple files that are not consecutive, hold the Ctrl key and click each file.
2.
Right-click a selected file and choose Remove from Library from the shortcut menu (or press the Delete key on your
keyboard). A confirmation dialog is displayed.
3.
Click OK to remove the selected files from the library.
Tagging media files
Tagging helps you classify your media files. For example, if you wanted to keep track of loops played by a specific
instrument, you could create a tag with the name of the instrument and apply it to the appropriate loops. Similarly, you
could create tags for genres, moods, seasons, client names, locations, scenes, performer names, and so on.
When you create a new library, a default tag tree is displayed in the Tags pane. You can create your own tags to customize
the tags for your needs. Tags are the fastest way to search a media library, and they require very little disk space.
Tags are saved in your media library. If a media file exists in multiple libraries, tagging the media file in one library has no
effect on the other libraries unless you save the tags to the files and use the Add Files to Media Library dialog to update
tags and custom properties for all files.
Creating a tag
Adding tags creates new tags in the current library only.
1.
Click the Add Tag button ( ) to add a new tag to the tree.
If a tag is selected, the new tag will be added below the selected tag. If no tag is selected, the new tag will be added
to the bottom of the tag tree.
2.
Type a name for the tag.
3.
Press Enter.
4.
If you want to change the icon used to display the tag, right-click it and choose Edit from the shortcut menu to
display the Tag Editor dialog.
5.
If you want to change the tag’s location, drag it to a new location in the tag tree.
Applying a tag to a media file
You tag media by dragging a tag from the tag tree to a media file in the Search Results pane (or by dragging a media file
to a tag) when the Add Tag Mode button ( ) is selected.
1.
Select media files to tag in the Search Results pane:
• To select a single file, click the file.
—or—
• To select multiple consecutive files, click the first file, hold the Shift key, and then click the last item.
—or—
• To select multiple files that are not consecutive, hold the Ctrl key and click each file.
Tip:
If you want to see which tags are associated with a file as you’re adding or removing tags, drag the Tags column in
the Search Results pane to the left so you can see the Name and Tags columns at the same time.
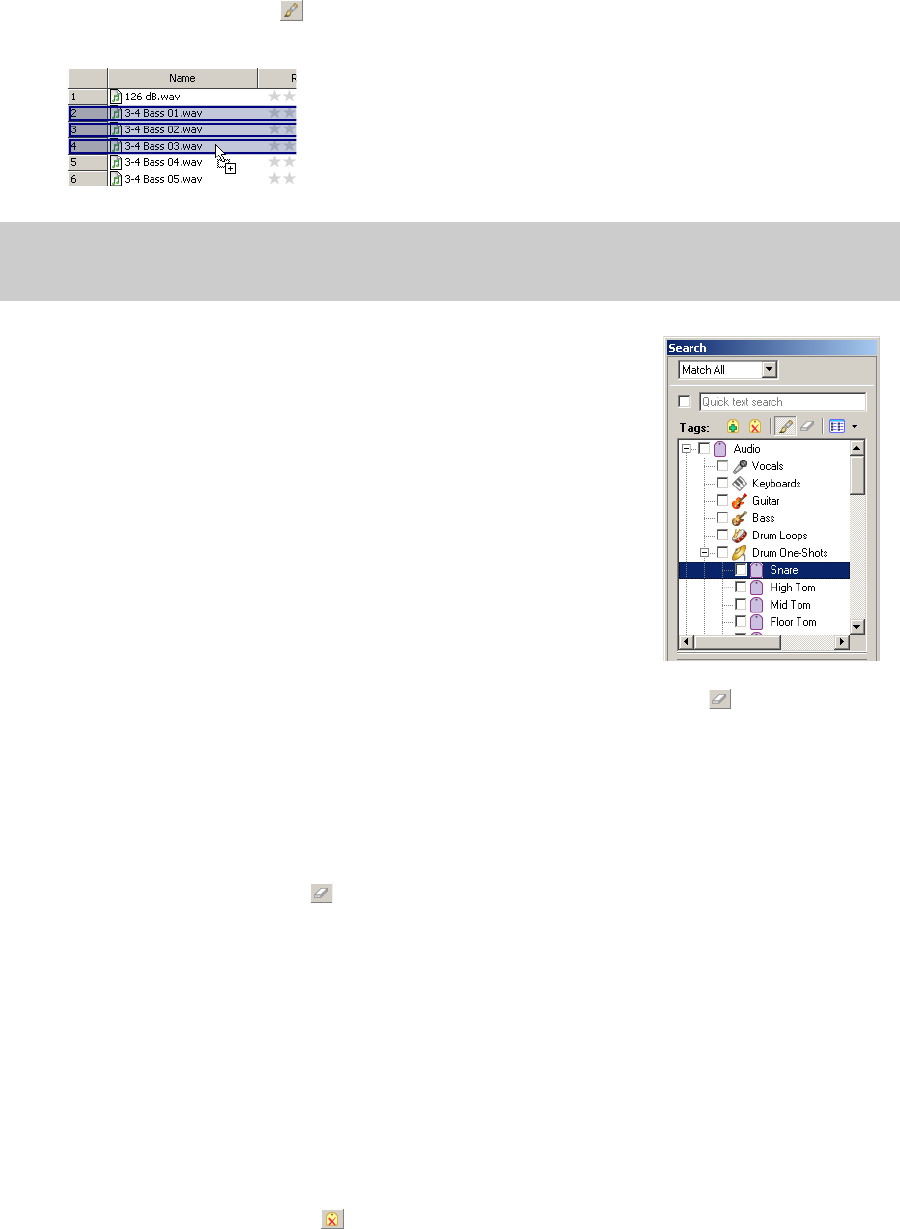
78 | Chapter 4
2.
Click the Add Tag Mode button ( ) in the Search pane.
3.
Drag a tag from the tag tree to the selected file(s).
When you add a subtag to a media file, the tag’s hierarchical position in the tag tree is
applied implicitly.
In this example, adding the “Snare” tag to a media file would mean that a search for
“Audio,” “Drum One-Shots,” or “Snare” would find your tagged media. If the user
rearranged the tag tree so that the “Snare” tag did not appear below the “Audio” and
“Drum One-Shots” tags, searching for “Audio” or “Drum One-Shots” would not find
your tagged media.
If you add all three tags to your media file, a search for “Audio,” “Drum One-Shots,” or
“Snare” would find your tagged media even if the tag tree had been rearranged,
though this behavior is not always desirable.
Removing a tag from a media file
You remove tags from media by dragging a tag from the tag list to a media file in the
Search Results pane (or by dragging a media file to a tag) when the Remove Tag Mode button ( ) is selected.
1.
Select media files in the Search Results pane:
• To select a single file, click the file.
—or—
• To select multiple consecutive files, click the first file, hold the Shift key, and then click the last item.
—or—
• To select multiple files that are not consecutive, hold the Ctrl key and click each file.
2.
Click the Remove Tag Mode button ( ) in the Search pane.
3.
Drag a tag from the tag tree to the selected file(s). The tag is removed from the file(s).
Deleting a tag from a library
Deleting the selected tag(s) affects the current library only.
1.
In the Search pane, select the tag(s) to be removed:
• To select a single tag, click the tag.
—or—
• To select multiple consecutive tags, click the first tag, hold the Shift key, and then click the last tag.
—or—
• To select multiple tags that are not consecutive, hold the Ctrl key and click each tag.
2.
Click the Delete Selected Tag button ( ) to delete the tag from the current library. A confirmation dialog is
displayed.
3.
Click OK to remove the selected tags from the library.
Tip:
You can also right-click a selection in the Search Results pane and choose Add Tag from the shortcut menu to add a
tag to all selected media. The Tag Chooser dialog will be displayed. Select the tag you want to add, and then click the OK
button.
USING THE MEDIA MANAGER | 79
Merging subtags
Merging tags combines a selected tag with its subtags and removes the subtags from your library permanently.
To merge a tag with its subtags, right-click the tag and choose Merge Subtags into Selected Tag from the shortcut menu.
All subtags are combined with the main tag, and the subtags are removed from the library. All media formerly associated
with the subtags is associated with the main tag.
Arranging tags in the tag tree
Tags are displayed in a tree view in the Media Manager window. You can organize tags hierarchically: click the Expand
button ( ) in the Search pane to expand a list, or click the Collapse button ( ) in the Search pane to hide an expanded
list.
You can drag, copy, and paste tags within the list to arrange them and create parent and child tags.
You can also display tags in a palette view by clicking the Change Tags View button ( ).
Editing tag names or images
1.
Double-click a tag (or right-click a tag and choose Edit from the shortcut menu) to display the Tag Editor dialog.
2.
In the Tag name box, type the name you want to display for the tag.
3.
Select a thumbnail image to choose the icon that will be displayed for the tag in the Search pane and in the Search
Results pane when the tag is added to a media file.
4.
Click the OK button to apply your changes and close the Tag Editor dialog.
Viewing or creating palettes
The palette view provides another way of working with tags that can be useful for more focused searching. You can use a
palette to concentrate on a portion of the current tag tree.
In the palette view, tags are displayed as a grid of buttons instead of the standard hierarchical tag tree.
1.
Click the Change Tags View button ( ) to toggle the display of the tag tree and palette view.
2.
Click the down arrow next to the button to choose a saved palette or create a new palette.
Creating a palette
1.
Click the down arrow next to the Change Tags View button ( ) and choose New Palette from the menu. The
New Palette dialog is displayed.
2.
In the Name box, type the name you want to use to identify the palette.
3.
In the Rows box, specify the number of rows of buttons you want to display in the palette.
4.
In the Columns box, specify the number of columns of buttons you want to display in the palette.
5.
Click OK to create the palette. The palette is displayed as a grid with empty buttons.
Assigning palette buttons
1.
Perform either of the following actions to display the Tag Chooser dialog:
• Click an empty palette button.
—or—
• Click an existing button and choose Choose Tag from the shortcut menu.
2.
Select the tag you want to assign to the button.
3.
Click the OK button.

80 | Chapter 4
Clearing a button
Right-click a palette button and choose Clear from the shortcut menu.
Deleting a saved palette
1.
Right-click a palette button and choose Delete Current Palette from the shortcut menu.
2.
Click the OK button when prompted to delete the palette from your library.
Saving tags and properties to media files
Saving tags and properties to files makes all your organization portable: if tags and custom properties are saved to files,
that information will be preserved in the files and can be added to the library by selecting the Add tags and custom
properties from files check box in the Add Files to Media Library dialog.
Saving tags and properties to files affects only the current media library and libraries that you create after saving the
information. If you have multiple libraries, you can add embedded tags and custom columns to existing libraries by
opening the desired library and rescanning your media folders with the Add tags and custom properties from files
check box selected in the Add Files to Media Library dialog. Embedded file properties are also updated when you preview
or add media to a project.
The following file formats can store this type of information internally:
•MP3
• Windows Media Format (WMA and WMV)
•WAV
•WAV64
•SFA
•PCA
• Scott Studios
For other file types, the Media Manager tool will save metadata to an .sfl file (using the same base name as your media
file).
Follow these steps to save tag and property information in your media file(s):
1.
In the Search Results pane, select media files for which you want to save tags and properties:
• To select a single file, click the file.
—or—
• To select multiple consecutive files, click the first file, hold the Shift key, and then click the last item.
—or—
• To select multiple files that are not consecutive, hold the Ctrl key and click each file.
2.
Click the Save Tags and Properties to File(s) button ( ) in the top right corner of the Search Results pane. Tags and
other information from the Search Results pane is saved for the selected file(s).
Backing up your media libraries
Media Manager software automatically saves your library as you make changes, so you don’t need to tell the application
explicitly to save your library as you're working.
However, you can create a backup of the current library as a restore point or as a template to create new libraries.
1.
Click the Media Library Actions button ( ) and choose Back Up Media Library from the menu. The Back Up
Media Library dialog is displayed.
2.
Choose a drive and folder from the Save in drop-down list, or use the browse window to locate the folder where you
want to save your backup.
3.
In the File name box, type the name you want to use to identify the library.
4.
Click the Save button.

USING THE MEDIA MANAGER | 81
To restore the backup at a later time, open the backup file.
Opening a Reference Library
A reference library contains information about media from an outside source or vendor.
You can also use a reference library to search media files that you aren’t part of your collection. For example, if you’re
unable to find the perfect loop for an ACID project in your own collection, you could use the Sony Sound Series Loops &
Samples reference library to search the entire Sony Sound Series Loops & Samples catalog and purchase a new loop
library.
You can use the Media Reference Library drop-down list in the Media Manager Options dialog to determine which
library is opened when you click the Switch to Media Reference Library button ( ).
1.
Click the Switch to Media Reference Library button ( ). The reference library specified in the Media Manager
Options dialog is opened. Media in a reference library is displayed in gray text to indicate that the files are not
available on your computer.
2.
Find the media you’re looking for with a standard or advanced search.
3.
Tag media from the reference library as needed. For more information on tagging, see Tagging media files on page 77.
4.
When you select a file in a reference library, the Product Information pane displays information about the selected
file and a link you can use to purchase the media.
Using the Sony Sound Series Loops & Samples reference library
If you have the Sony Sound Series Loops & Samples reference library loaded when you search your computer for media,
media from existing Sony Loops and Samples or Loops for ACID collections will inherit tags and custom properties from
the reference library.
The Sony Sound Series Loops & Samples reference library is not installed by default, but you can install it from the ACID
CD or download it from the Sony Media Software Web site
(http://mediasoftware.sonypictures.com/reference). After installing the library, go to the Media Manager Options dialog
(click the Media Library Actions button ( ) and choose Options from the menu) and choose the reference library
from the Reference library drop-down list.
Searching for media files
You can use the Media Manager tool to search the current media library for media files using keywords or tags.
Searching using a keyword
1.
Select the Quick text search check box in the Search pane and type a keyword (or keywords) in the edit box.
2.
Press Enter.
Tips:
You can use the Search Results Limit box in the Media Manager Options dialog to determine the maximum
number of media files you’d like to have returned in the results of your searches. Increasing the Search Results Limit
setting increases the amount of time required to search a library and can significantly decrease performance if set
excessively high.
When performing complex searches, consider creating temporary tags to classify the results. If you apply a tag to the files
found by a complex search, you can return to those files easily by searching on the tag. The Media Manager tool can search
for tags more quickly than it can perform keyword or advanced searches.
Tip:
You can separate search terms using quotation marks and other operators. If quotes or wildcard characters are not
applied, an * is automatically added before and after each search term.
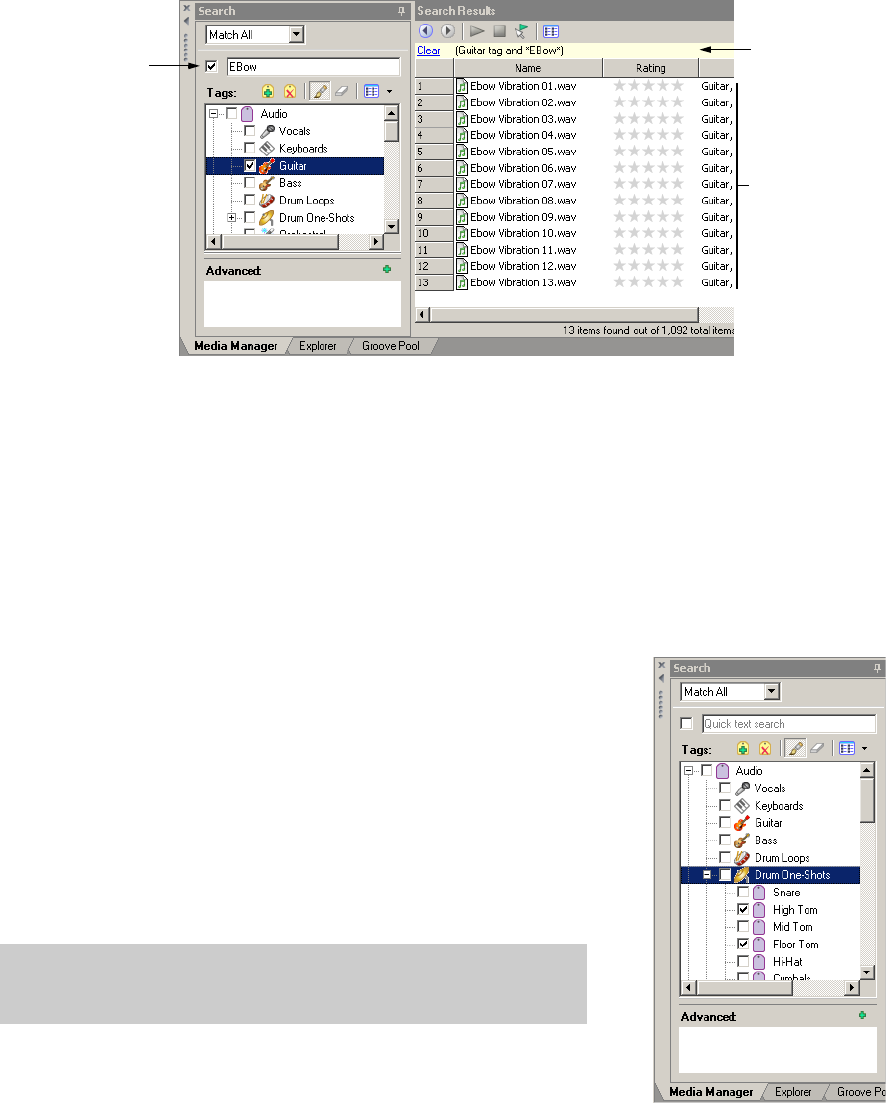
82 | Chapter 4
The Media Manager tool searches your media files and displays the results in the Search Results pane on the right
side of the window. Any file that contains your keywords in the file name or attributes is displayed (tags are not
searched as keywords).
Your search terms are displayed in the yellow bar below the Search Results toolbar.
3.
You can refine the search results using any of the following methods:
• Select tag check boxes.
• Use the Advanced search controls. For more information, see Using advanced search options on page 83.
•Choose Match Any from the Match Any/Match All drop-down list to display all media that matches any of your
keyword, tag, or advanced search criteria. Using this option in the search displayed in step 2, the Search Results
pane would display all files that contain the keyword “EBow” OR the “Guitar” tag.
•Choose Match All from the Match Any/Match All drop-down list to display only media that matches all of your
keyword, tag, and advanced search criteria. Using this option in the search displayed in step 2, the Search
Results pane would display all files that contain the keyword “EBow” AND the “Guitar” tag.
Searching using tags
In the Search pane, select the check box for each tag you want to find. The Media
Library searches your media files and displays the results in the Search Results pane
on the right side of the window.
Choose Match Any from the Match Any/Match All drop-down list if you want to
display all media that contains any keyword, tag, or advanced search criteria. In the
example to the right, the Search Results pane would display all files that contain the
tag “High Tom” OR the tag “Floor Tom.”
Choose Match All from the Match Any/Match All drop-down list if you want to
display only media that includes all keyword, tag, and advanced search criteria. In the
preceding example, the Search Results pane would display only files with tags “High
Tom” AND “Floor Tom.”
Sorting search results
Click a column heading to sort the results in ascending or descending order based
on that column.
Note:
If you have check boxes selected for parent and child tags, those tags
will be treated as an OR relationship regardless of whether Match Any or
Match All is selected.
Keyword
Search terms
Search results
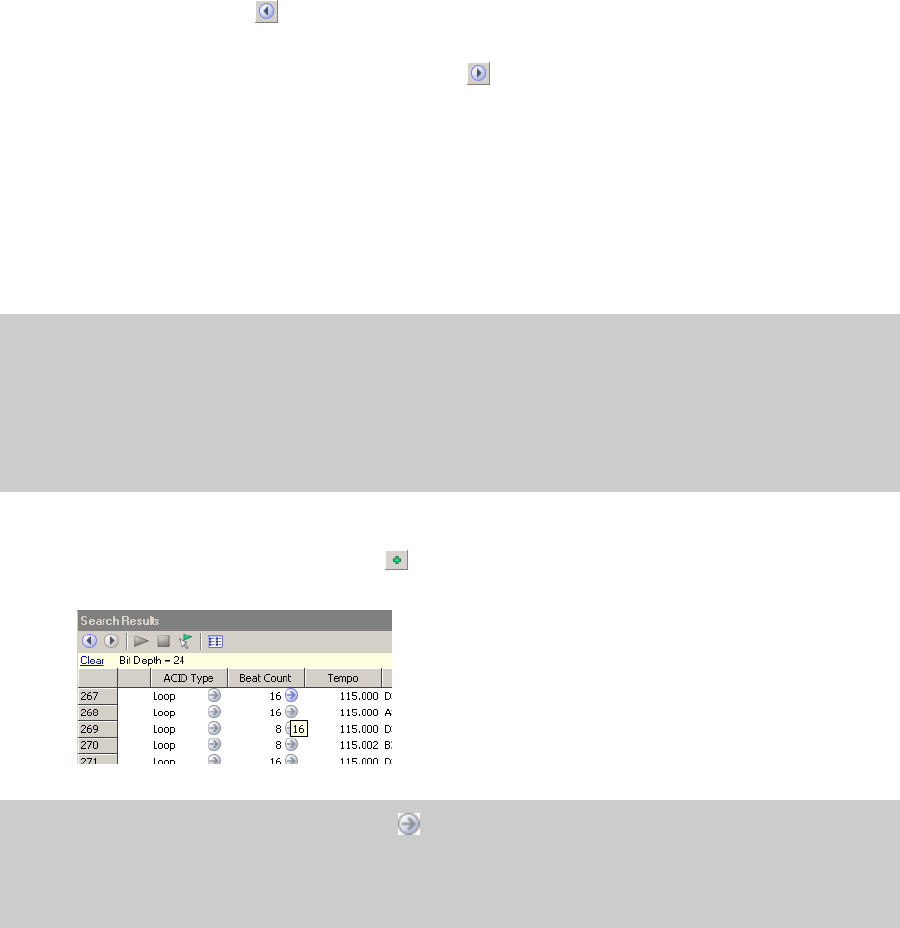
USING THE MEDIA MANAGER | 83
Viewing previous searches
Click the Previous Search button ( ) in the top left corner of the Search Results pane to navigate through your recent
searches and update the contents of the Search Results pane.
After viewing previous searches, click the Next Search button ( ) in the top left corner of the Search Results pane to
navigate back to your current search.
Using advanced search options
If your media library contains many files and you’re searching for a very specific media file, the Advanced section of the
Search pane can help you zero in on exactly the file you want.
If you want to perform an advanced search to refine the results of a previous search, start by creating a quick search or
tag-based search and then perform the following steps.
1.
Add your search criteria:
a.
Click the Add New Search Criteria button ( ) in the Search pane. The Search Criteria Chooser is displayed.
b.
Double-click an item in the Search Criteria Chooser or drag it to the Advanced section of the Search pane.
2.
Set parameters for each of your search criteria. If the item displays an edit box, type the parameter you want to
search for. If the item is displayed as a hyperlink, click the value to display a control you can use to set the value.
3.
Choose whether you want to display files that match any or all of your search criteria:
• Choose Match Any from the Match Any/Match All drop-down list if you want to display all media that matches
any of your keyword, tag, or advanced search criteria.
—or—
• Choose Match All from the Match Any/Match All drop-down list if you want to display only media that matches
all of your search criteria.
4.
Select the check boxes for the advanced search criteria you want to include in your search, or clear a check box to
exclude that item.
Tips:
You can use the Search Results Limit box in the Media Manager Options dialog to determine the maximum
number of media files you’d like to have returned in the results of your searches. Increasing the Search Results Limit
setting increases the amount of time required to search a library and can significantly decrease performance if set
excessively high.
When performing complex searches, consider creating temporary tags to classify the results. If you apply a tag to the files
found by a complex search, you can return to those files easily by searching on the tag. The Media Manager tool can search
for tags more quickly than it can perform keyword or advanced searches.
Tips:
If an item in the Search Results pane displays a button, you can click it to find related media. For example,
clicking the button in the following example adds an item to the Advanced section to help you find other media with a
beat count of 16.
You can also drag a column heading from the Search Results pane to the Advanced section of the Search pane.
84 | Chapter 4
Previewing media
You can use the transport controls in the Media Manager window to preview media files.
1.
Select files in the Search Results pane to choose the files you want to preview:
• To select a single file, click the file.
—or—
• To select multiple consecutive files, click the first file, hold the Shift key, and then click the last item.
—or—
• To select multiple files that are not consecutive, hold the Ctrl key and click each file.
2.
Start playback:
•If the Auto Preview button ( ) is selected, playback will begin automatically.
•If the Auto Preview button is not selected, click the Start Preview button ( ) to begin playback.
If you have multiple files selected, they will be played back sequentially. Each file’s icon will change to a play icon
() during playback.
3.
Click the Stop Preview button ( ) to stop the preview, or turn off the preview feature by deselecting the Auto
Preview button.
If the file is offline, you’ll be prompted to locate the file or choose a replacement.
Adding media to your project
After you’ve added media to your library, tagged it, and searched for specific files or related media, you’ve probably found
just the right piece of media for your current project.
You can add media to your project from the Search Results pane by performing any of the following actions:
• Dragging a file from the Search Results pane to the project timeline. The file is added wherever you drop it.
• Double-clicking a media file in the Search Results pane (if the Double-click in Search Results pane adds media to
project check box is selected in the Media Manager Options dialog). The file is added to the bottom of the track list.
• Right-clicking a media file in the Search Results pane and choose Add to Project from the shortcut menu. The file is
added to the bottom of the track list.
If the file is offline, you’ll be prompted to locate the file or choose a replacement. For more information, see Resolving
offline media files below.
Resolving offline media files
An offline media file is a file that is no longer available to the Media Manager. Media may be classified as offline if you
eject removable storage after adding a file to your library or change a file’s name or location.
1.
Add media to your project or preview media files. If any of the files are not accessible, the Resolve Offline Media
dialog is displayed with a listing of offline files and their status:
Tip:
To preview a media file in its associated media player, right-click the file and choose Open with Player from the
shortcut menu.
Tip:
You can also drag files from the Search Results pane to the Windows desktop, a folder, or to another application that
is an OLE (object linking and embedding) drop target.
Icon Status Description
Offline The file listed in the Offline File column cannot be found. The status will be Offline if you did
not search or browse for a replacement file.
Probable
Match
The file listed in the Offline File column will be replaced by the file listed in the Replacement
File column. A status of Probable Match indicates that the Media Manager tool found a
likely replacement file when you clicked Smart Search.
USING THE MEDIA MANAGER | 85
2.
Select the files you want to resolve:
• To select a single file, click the file.
—or—
• To select multiple consecutive files, click the first file, hold the Shift key, and then click the last item.
—or—
• To select multiple files that are not consecutive, hold the Ctrl key and click each file.
3.
Specify how you want to resolve the selected files:
•Click the Smart Search button to search quickly and allow the Media Manager tool to suggest the replacement
file.
•Click the Browse button to choose a specific replacement file.
•Click the Leave Offline button to leave the file offline. The file will not be added to your project.
•Click the Remove button to remove the file from the media library. The file will not be added to your project. The
original media file is not deleted.
4.
Repeat step 3 for each file in the list.
5.
Click the OK button to preview the files or add the files to your project and update the media library with the
replacement files.
Customizing the Media Manager window
Much of what you see in the Media Manager window can be customized to suit your preferences.
Automatically hiding the Search pane
Click the push pin button ( ) in the title bar of the Search pane if you want to save space in the Media Manager window
by automatically hiding the search pane:
• The push pin is displayed as a ( ) when the Search pane is anchored in the Media Manager window.
• The push pin is displayed as a ( ) when the Search pane is set to hide automatically.
When the Search pane is set to hide automatically, you can hover over the Search tab on the left edge of the Media
Manager window to show the pane. When you move your mouse away from the Search pane, it hides automatically.
Docking and undocking the Search pane
You can undock the Search pane from its location in the Media Manager window to float it over the ACID window, or you
can change the docking position of the pane within the Media Manager window. To undock and move the Search pane,
drag its title bar to the desired location.
Resizing columns
You can resize the columns in the Search Results pane by dragging the splitter between columns to the desired size. To
resize a column automatically, double-click a splitter.
Found The file listed in the Offline File column will be replaced by the file listed in the Replacement
File column. A status of Found indicates that you chose the file you want to use after
clicking the Browse button.
Icon Status Description
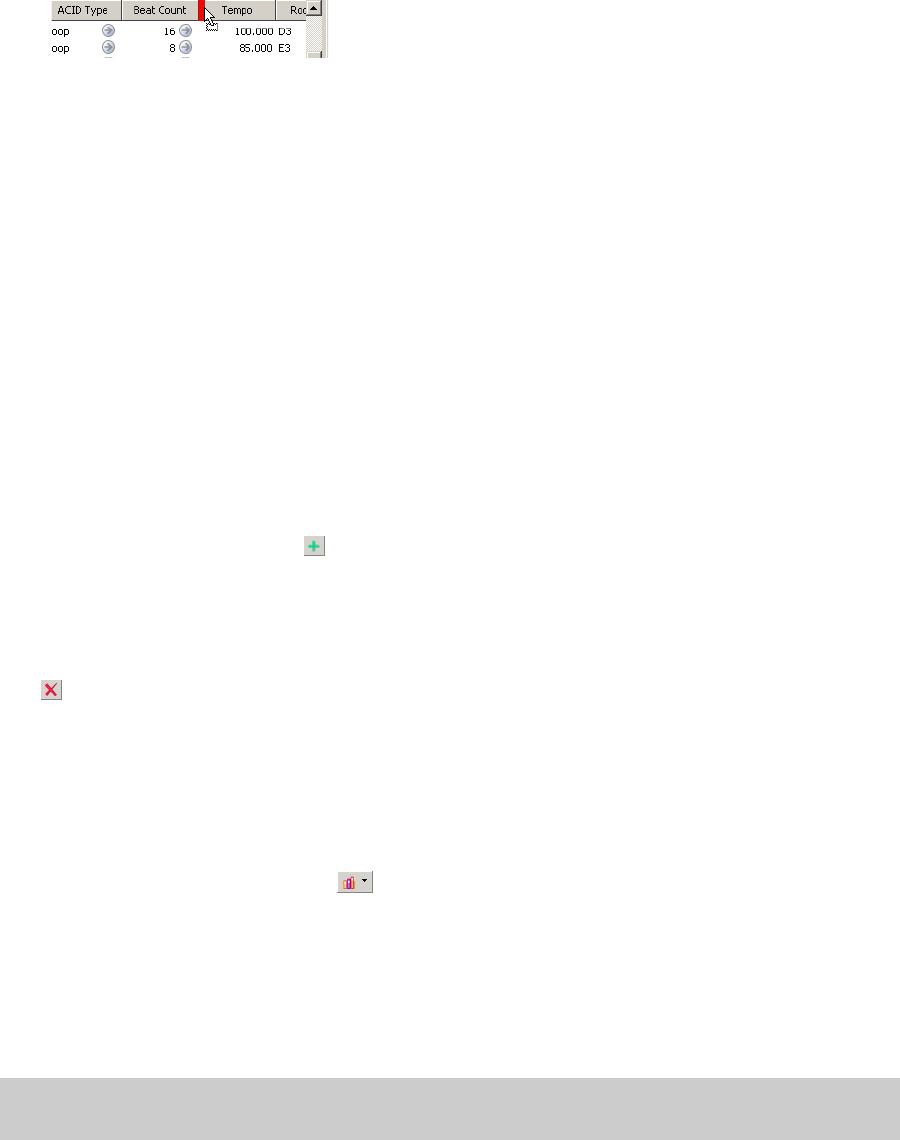
86 | Chapter 4
Moving columns
To move a column in the Search Results pane to a different location, drag the column header to the desired location. A
red indicator shows where the column will be dropped.
Showing or hiding columns
1.
Right-click the column headings and choose Column Chooser from the shortcut menu.
2.
Drag the columns you want to see from the Column Chooser dialog to the Search Results pane.
3.
To hide a column, right-click a column heading and choose Remove this Column from the shortcut menu.
Adding custom columns
You can add custom columns to the Search Results pane to store additional information about media files. When you add
custom columns, they are added to the current library only.
For example, if you wanted to keep track of which removable hard drive contained a media file, you could create a
custom Drive Number column to assign any numeric rating to a media file. You could then use the Advanced section of
the Search pane to search using the Drive Number value.
When adding media to a library, you can choose to add this information by selecting the Add tags and custom columns
from files check box in the Add Files to Media Library dialog.
1.
Right-click the column headings and choose Custom Columns from the shortcut menu.
2.
Click the Add New Column button ( ) to add a custom column. A new entry is added to the list.
3.
In the Name box, type the name you’d like to display as a column heading.
4.
Select the Type box and choose Text or Integer from the drop-down list to indicate whether you’ll store text or
numeric data in the column.
5.
If you want to remove a custom column, select an entry in the list and click the Delete Selected Columns button
(). The column and all data stored in the column is removed from the library.
6.
Click the OK button. The column is added to the media library, and the Search Results pane is scrolled to the right to
display your new column.
Setting Media Manager options
Use the Media Manager Options dialog to set options for working with the Media Manager tool.
1.
Click the Media Library Actions button ( ) and choose Options from the menu. The Media Manager Options
dialog is displayed.
2.
From the Reference library drop-down list, choose the library you want to load when you click the Switch to Media
Reference Library button in the upper left corner of the Search Results pane. For more information about using
reference libraries, see Opening a Reference Library on page 81.
3.
In the Search results limit box, type the maximum number of media files you’d like to have returned in the results of
your searches.
4.
Select the Double-click in Search Results pane adds media to project check box if you want to add files to the
current project by double-clicking a file in the Search Results pane.
Note:
Increasing the Search Results Limit setting increases the amount of time required to search a library and can
significantly decrease performance if set excessively high.

USING THE MEDIA MANAGER | 87
5.
Select the Shut down database service on exit check box if you want to stop the database service when you close
ACID.
6.
Set your options for adding media to a library:
a.
Select the Add tags and custom properties from files check box if you want to add tags and custom columns
saved in the media files to your library. For more information about tagging media, see Tagging media files on page
77. For information about adding custom columns to the Search Results pane, see Adding custom columns on page
86.
b.
Select the Use file and folder names to apply tags automatically check box if you want to automatically tag files
based on the file path.
For example, when this check box is selected, a loop saved in the d:\loops\drums\hi-hats\ folder would have the
tags Drums and Hi-Hats applied when it is added to the library. Some synonyms (and variant spellings) will be
resolved automatically. If you need to modify the pattern-matching, you can edit the AutoTagPatterns.xml file, which
is created in your My Documents\Sony Media Libraries folder the first time the application starts.
7.
Click the OK button to close the dialog.
Note:
Stopping the service can conserve system resources when you aren’t using any applications that use the
Media Manager tool. However, the application will take longer to start when the check box is selected.
88 | Chapter 4
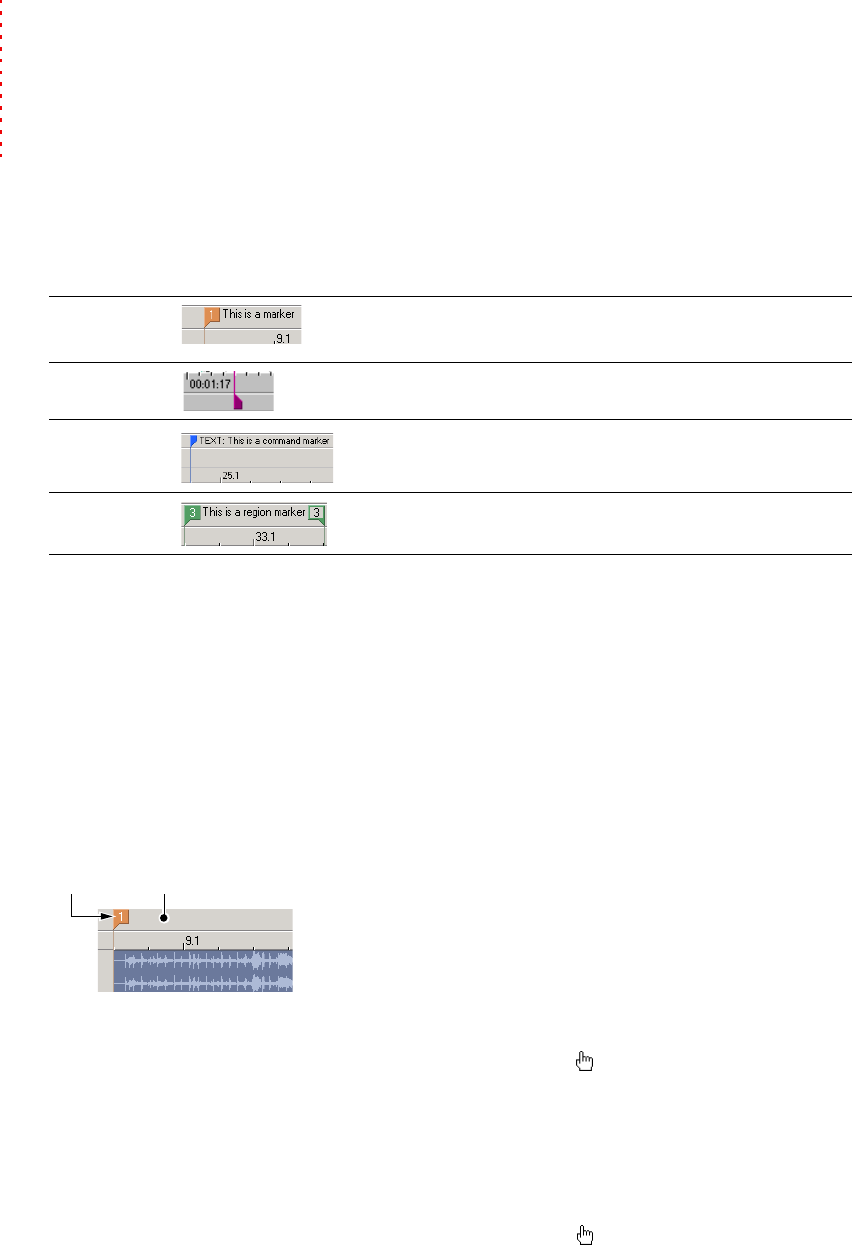
WORKING IN THE TRACK VIEW | 89
Chapter
5
Working in the Track View
This chapter introduces you to several ACID® features that increase your productivity, such as markers, regions, and
snapping options. You’ll also learn about the different ways to change a project’s tempo, key, and time signature. Finally,
you’ll learn several options for adjusting the project timeline.
Using project markers and regions
ACID markers and regions identify areas of your project and provide navigational cues for quickly finding those areas.
After you insert markers and regions, you may adjust their position along the project’s timeline and label them with
meaningful names for your reference.
Working with standard markers
Markers are tools that can make creating music easier by identifying specific points along the project’s timeline. They can
be named, moved, and serve as snap and navigational points for the cursor and events. When you place markers, they are
automatically numbered (up to 99) in the order that you place them.
Placing markers
Markers are placed at the cursor position. You may place a marker in one of the following ways:
•From the Insert menu, choose Marker.
• Right-click the marker bar, choose Markers/Regions from the shortcut menu, and choose Insert Marker from the
submenu.
• Press M. You may use this method to place a marker while the project is playing.
Moving markers
1.
Place the mouse pointer on the marker to be moved. The hand cursor ( ) appears.
2.
Drag the marker to the desired position.
Naming markers
You can name markers in your project. You may want to name markers based on parts of the project. For example, you
may want to identify choruses, refrains, bridges, or instrument solos as reference points along the timeline.
1.
Place the mouse pointer on the marker to be named. The hand cursor ( ) appears.
2.
Right-click the marker and choose Rename from the shortcut menu. A box appears next to the marker.
Marker type Description
Marker (standard) Markers identify specific reference points in your project. Points that you
may want to identify are introductions, bridges, refrains, choruses, or
whatever you choose.
Time marker Time markers are fixed to the time ruler and mark absolute time in your
project. They are very useful when scoring video.
Command marker Command markers indicate when an instruction or function occurs in a
streaming media file.
Regions Regions subdivide your project into time segments. Regions have in and out
points, which allow them to function as permanent time selections.
Marker Marker bar
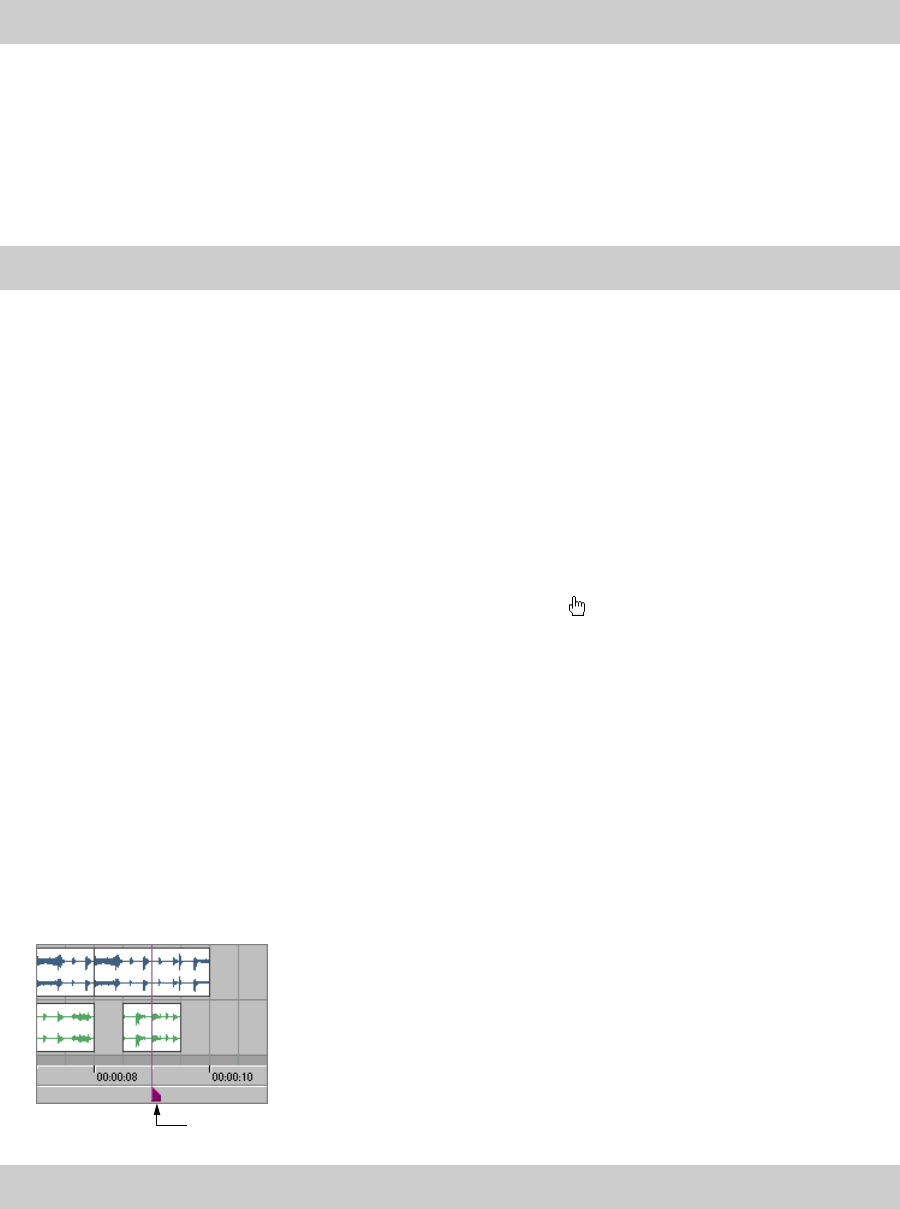
90 | Chapter 5
3.
Type a marker name in the box and press Enter to save the name.
Navigating to markers
While you are working on your project, you may have scrolled to a portion of the project where the cursor is not visible.
There are two ways to move the cursor directly to the selected marker:
• Right-click the marker and choose Go To from the shortcut menu.
• Click the marker once.
• Press the number key (not on the numeric keypad) corresponding to the marker number.
Adjusting tempo to match cursor to marker
Position the cursor, right-click the marker tab, and choose Adjust tempo to match cursor to marker from the shortcut
menu. The project tempo changes so that the cursor position matches the selected marker.
Deleting markers
You may remove markers from the project at any time. Because markers are automatically numbered (up to 99) when
they are placed, the remaining markers are not renumbered when one is deleted. Rather, the remaining markers retain
their numbers. However, if you add markers later, numbering begins to fill the sequence gap.
For example, if you have five markers in your project and delete markers three and four, the remaining markers are listed
as one, two and five. When you add markers again, the markers are numbered as three and four.
1.
Place the mouse pointer on the marker to be deleted. The hand cursor ( ) appears.
2.
Right-click the marker and choose Delete from the shortcut menu. The marker is removed from the project.
Working with time markers
Unlike standard markers, time markers are tied to absolute time within your project. They are added differently than
standard markers and appear on the time ruler at the bottom of the track view. Otherwise, time markers can be
manipulated just like other markers.
Placing time markers
Time markers are placed at the cursor position. You may place a time marker in one of the following ways:
•From the Insert menu, choose Time Marker.
• Press H. You may use this method to place a time marker while the project is playing back.
Tip:
You can use the same steps to rename a marker. Alternately, you can double-click the marker and enter a new name.
Tip:
You may also navigate from one marker to the next by pressing Ctrl+left/right arrow key.
Note:
Time markers are not numbered.
Time marker
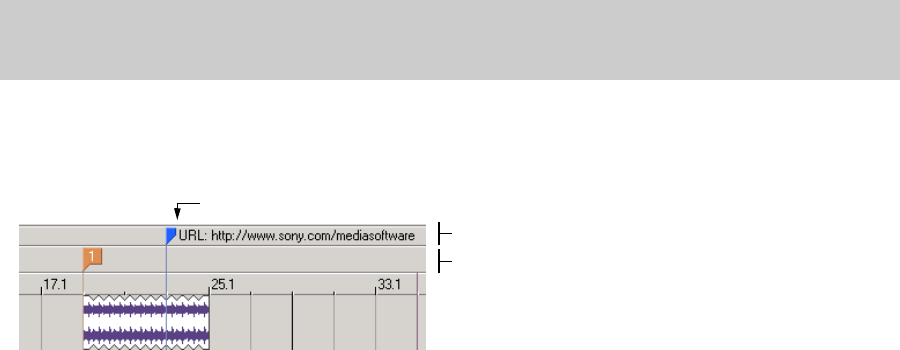
WORKING IN THE TRACK VIEW | 91
Adjusting tempo to match marker to cursor
Using this function with time markers is particularly useful when scoring video. For more information, see Scoring video on
page 207.
Position the cursor, right-click the marker tab, and choose Adjust tempo to match marker to cursor from the shortcut
menu. The project tempo changes so the time marker matches the cursor position.
You can also align the marker and cursor by holding Alt while dragging the marker. For example, hold Alt while dragging
a time marker to a location on the beat ruler. The project tempo adjusts so the time at the marker occurs on a specific
beat. For example, if you place a time marker at 10 seconds on the time ruler and hold Alt while dragging the marker to
5.1 on the beat ruler, the project’s tempo is adjusted so the first beat of measure five occurs at ten seconds.
Working with command markers
Command markers add interactivity to a multimedia presentation streamed over the Internet. As your media plays, any
number of other actions can be programmed to execute. These commands are a part of the Windows Media® and
RealMedia™ streaming formats. Most frequently, these actions add text or open a related Web site. The specific
commands available vary depending on the final format of your project.
Placing command markers
Command markers appear on the command ruler, which is above the marker bar.
1.
Position the cursor where you want to place the command marker.
2.
From the Insert menu, choose Command.
3.
Complete the Command Properties dialog:
•From the Template drop-down list, choose a custom template. For more information, see Saving command
properties as a custom template on page 91.
•From the Command drop-down list, choose the type of command. For more information, see Defining streaming
media commands on page 92.
• Enter parameters in the Parameter box to define the behavior of the command.
• Enter your own notes or comments in the Comment box.
• Specify the timing of the command in the Position box. Command markers are automatically set to the current
cursor position unless you change this value.
4.
Click OK. The new command marker appears on the command bar.
After you create a command marker, you can move the marker by dragging it to a new location.
Editing command marker properties
Double-click any command marker to open the Command Properties dialog and edit its contents. You can also right-click
a command marker and choose Edit from the shortcut menu.
Saving command properties as a custom template
If you plan to use a command more than once, you can save command properties as a template. You can then reuse the
command properties by selecting the template from the Te mplate drop-down list.
Note:
Streaming media files can be played back from a hard drive or CD-ROM, but in order to stream properly across the
Internet, the file must be on a streaming media server. Check with your internet service provider for details and availability
of this service.
Marker bar
Command ruler
URL command marker
92 | Chapter 5
1.
Create a command and complete the Command Properties dialog.
2.
Click in the Template box and enter a name for the template.
3.
Click the Save Template button ( ).
Defining streaming media commands
In a streaming media file, command markers can be used to display headlines, show captions, link to Web sites, or any
other function you define.
Several command types are included that you may add to a streaming media file. Some command types are exclusive to
either the Windows Media or the RealMedia file types.
Tip:
Your metadata command templates are saved in the cmdtemp.xml file in the ACID program folder. You can edit this
file directly to modify your templates.
Command Player Type Description
URL Windows Media
and RealMedia
Indicates when an instruction is sent to the user’s Internet browser to
change the content being displayed. With this command, you enter the
URL that displays at a specific time during the rendered project’s playback.
TEXT Windows Media Displays text in the captioning area of the Windows Media Player located
below the video display area. You enter the text that displays during
playback.
Note: To view captions during playback in Windows Media Player 9, choose
Captions and Subtitles from the Windows Media Player Play menu, and
then choose On if Available from the submenu.
WMClosedCaption Windows Media Displays the entered text in the captioning window defined by an HTML
layout file.
WMTextBodyText Windows Media Displays the entered text in the text window defined by an HTML layout
page.
WMTextHeadline Windows Media Displays the entered text in the headline window defined by an HTML
layout file.
Title RealMedia Displays the entered text on the player’s title bar.
Note: When rendering Windows Media files, title information is based on
the settings on the Summary tab of the ACID Project Properties dialog or
the Index/Summary tab of the Custom Template dialog. The summary
information from the Project Properties dialog will be used if information
has been specified in both places.
To view this information during playback, choose Now Playing Options
from the Windows Media Player View menu and select the items you want
to display.
Author RealMedia Displays the entered text (author’s name) when a user selects About this
Presentation from the RealPlayer shortcut menu or Properties from the
Windows Media shortcut menu.
Note: When rendering Windows Media files, author information is based
on the settings on the Summary tab of the ACID Project Properties dialog
or the Index/Summary tab of the Custom Template dialog. The summary
information from the Project Properties dialog will be used if information
has been specified in both places.
To view this information during playback, choose Now Playing Options
from the Windows Media Player View menu and select the items you want
to display.

WORKING IN THE TRACK VIEW | 93
Defining HotSpot commands
Hotspots are defined using the following parameter syntax:
HotSpotPlay MM:SS (LEFT, TOP, RIGHT, BOTTOM) “LABEL” FILENAME
HotSpotBrowse MM:SS (LEFT, TOP, RIGHT, BOTTOM) “LABEL” URL
HotSpotSeek MM:SS (LEFT, TOP, RIGHT, BOTTOM) “LABEL” MM:SS
The Parameter box for a typical HotSpotBrowse command for a hotspot rectangle that is 50 pixels wide by 20 pixels tall
and lasts for 10 seconds would look like this:
HotSpotBrowse 00:10 (0, 0, 50, 20) “Sony” http://www.sony.com/mediasoftware
All parameters are optional except the last. The hotspot defaults to the entire duration of the file and the entire video
frame if the duration and dimensions are not specified.
Adjusting tempo to match cursor to marker
Position the cursor, right-click the marker tab, and choose Adjust tempo to match cursor to marker from the shortcut
menu. The project tempo changes so that the cursor position matches the selected command marker.
Deleting command markers
To delete a command marker, right-click the marker and choose Delete from the shortcut menu.
Working with regions
Regions are useful tools that allow you to subdivide your project into time sections by designating in and out points
along the timeline. Regions can function as permanent time selections for playback and editing purposes. Like markers,
regions can serve as reference points and may be moved, named, and provide snap points for the cursor and events.
When you place regions, they are automatically numbered in the order that you place them.
Placing and moving regions
Regions are placed at the start and end points of a loop region (time selection). You may place a region in one of the
following ways:
•From the Insert menu, choose Region.
• Right-click the marker bar, choose Markers/Regions from the shortcut menu, and choose Insert Region from the
submenu.
•Press R.
Copyright RealMedia Displays the entered copyright information when a user selects About this
Presentation from the RealPlayer shortcut menu or Properties from the
Windows Media shortcut menu.
Note: When rendering Windows Media files, copyright information is
based on the settings on the Summary tab of the ACID Project Properties
dialog or the Index/Summary tab of the Custom Template dialog. The
summary information from the Project Properties dialog will be used if
information has been specified in both places.
To view this information during playback, choose Now Playing Options
from the Windows Media Player View menu and select the items you want
to display.
HotSpotPlay RealMedia Allows you to define an area in the RealPlayer video display that users can
click to jump to another RealMedia file.
HotSpotBrowse RealMedia Allows you to define an area in the RealPlayer video display that users can
click to jump to a Web page that you specify.
HotSpotSeek RealMedia Allows you to define an area in the RealPlayer video display that users can
click to jump to a point in the current RealMedia file.
Command Player Type Description
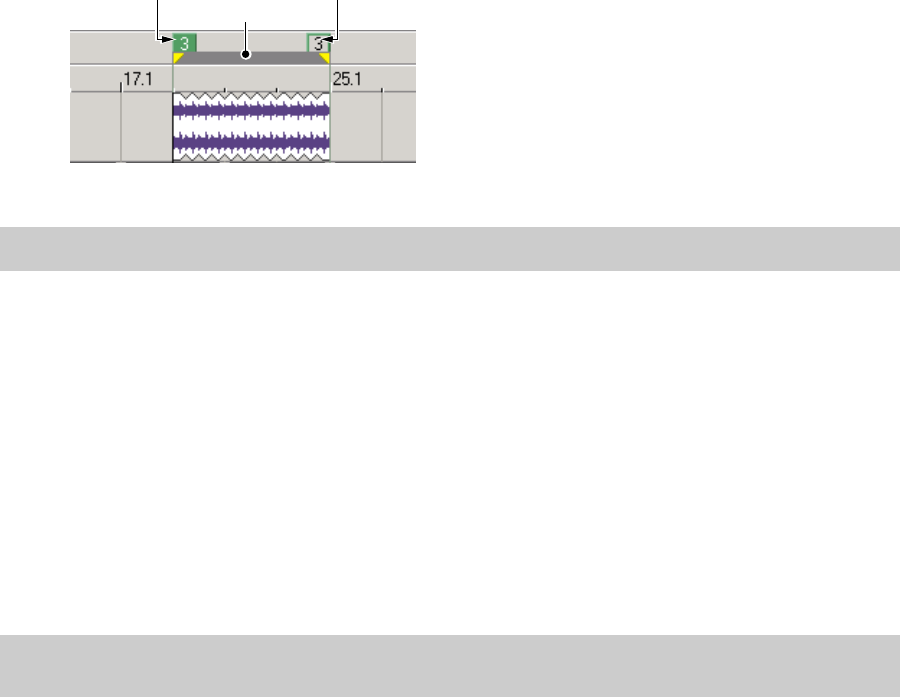
94 | Chapter 5
After you place a region, you may change its position by dragging the region tag to the desired position.
Naming regions
You can name the placed regions in your project. You may want to name regions based on parts of the project or to
define the amount of time that the regions encompass. For example, you may want to identify introductions, solos, or
special time-related features in your project as reference points.
1.
Right-click the region’s start tag and choose Rename from the shortcut menu. A box appears next to the tag.
2.
Type a region name and press Enter to save the name.
Navigating to regions
While you are working on your project, you may have scrolled to a portion of the project where the cursor is not visible.
You may click in the track view to move and view the cursor or you may use region tags to bring the cursor into view.
To move the cursor to the selected region tag, right-click the region tag and choose Go To from the shortcut menu.
Selecting regions
You may use the region’s start and end tags to make a time selection across all tracks in your project. The information
within the time selection can then be used for playback or editing.
To select a region, right-click a region tag and choose Select Region from the shortcut menu. The loop bar appears
between the region tags and the tracks are highlighted.
Deleting regions
You may remove regions from the project at any time. Because regions are automatically numbered when they are
placed, the existing regions are not renumbered when one is removed. Rather, the existing regions retain their numbers.
However, if you add regions later, numbering begins to fill the sequence gap that exists.
For example, if you have six regions in your project and delete regions four and five, the remaining regions are listed as
one, two, three and six. When you add regions again, the regions are numbered as four and five.
To remove a region from a project, right-click the region tag marker and choose Delete from the shortcut menu.
Using snapping
Snapping helps you to align events in your project with other items. Event edges are preset to snap to the project’s grid
lines as you drag an event along the track. If snapping is enabled and the Grid Only option is turned off, the event’s edges
automatically align to these designated snap points:
• Cursor position
•Grid lines
•Markers
• Regions start and end points
Tip:
You can move a region without changing its size by holding Alt while dragging either region tag.
Tip:
You may also navigate between regions in your project by pressing Ctrl+left/right arrow key or the number key (not
on the numeric keypad) corresponding to the region number.
Region start Loop region
Region end
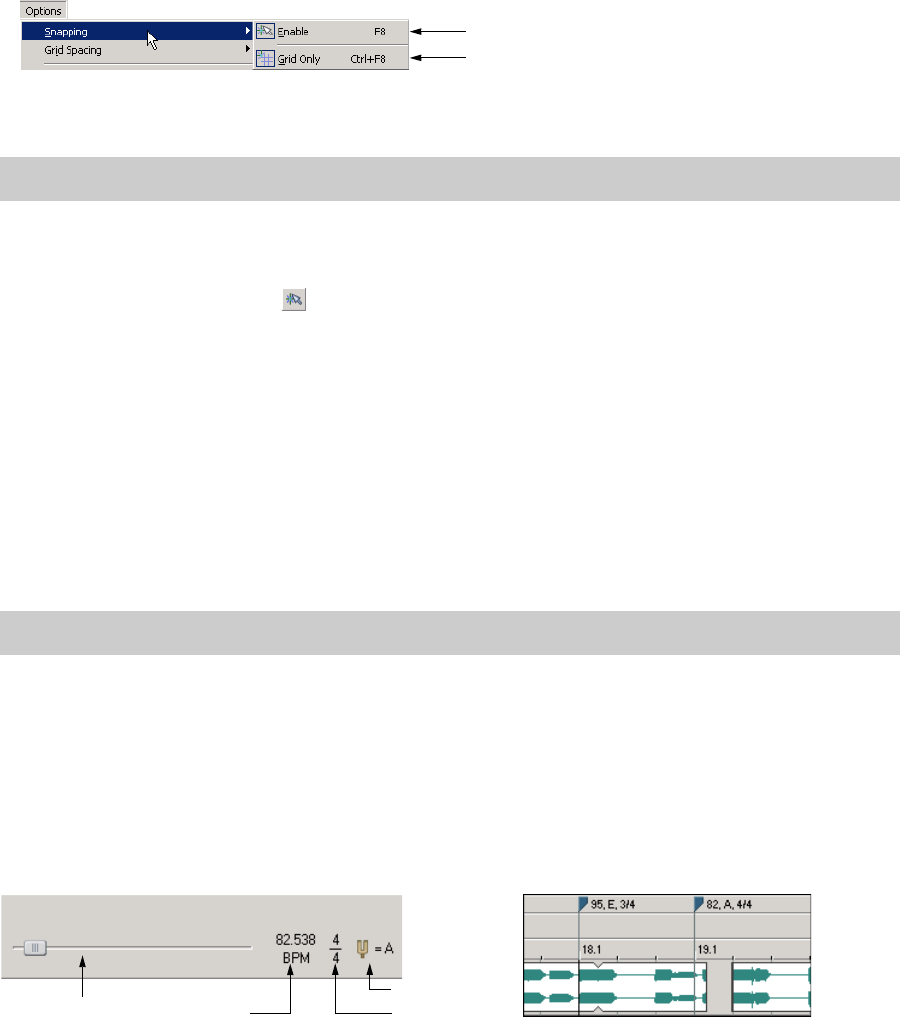
WORKING IN THE TRACK VIEW | 95
• Loop region (time selection) in and out points
You may turn on snapping for these elements in the project or limit snapping to grid lines.
Choosing snapping options
If the snap function is preventing you from placing an event precisely where you want it, you may turn snapping off.
Turning off snapping prevents events from automatically aligning to the cursor, grid lines, markers, regions, and time
selections.
The Options menu allows you to toggle snap functions. The button image next to the Enable command indicates when
snapping is turned on. The button image next to the Grid Only command indicates the type of snapping in use.
Turning snapping on and off
You may turn snapping on and off in one of the following ways:
•Click the Enable Snapping button ( ) on the Toolbar.
•From the Options menu, choose Snapping, and choose Enable from the submenu.
•Press F8.
Snapping to grid lines
With snapping turned on, you may choose to snap only to grid lines. From the Options menu, choose Snapping, and
choose Grid Only from the submenu. The button image next to the command indicates that it is active.
Snapping to all elements
With snapping turned on, you may choose to snap to all elements. From the Options menu, choose Snapping, and
choose Grid Only from the submenu. The button image next to the Grid Only command appears deselected when
snapping to all elements.
Changing tempo, time signature, and key
You can set a tempo, time signature, and key for your ACID project. You can also make adjustments during playback.
You can add specific tempo, time signature, and key changes within a project using tempo/key/time signature change
markers. These markers appear on the marker bar above the track view. When the cursor passes over one of these
markers, the master project tempo, key, and/or time signature changes in real time.
Tip:
You can temporarily suspend snapping while dragging by holding down the Shift key.
Tip:
Press Ctrl+F8 to toggle between grid only and all elements.
Select to turn all snapping on/off
Select to toggle between snapping
to grid lines only and snapping to all
elements.
Set the tempo, time signature, and key for the whole project...
Project Tempo slider Project Tempo
Project Key
Project Time
Signature
...or change these elements dynamically in
the timeline.
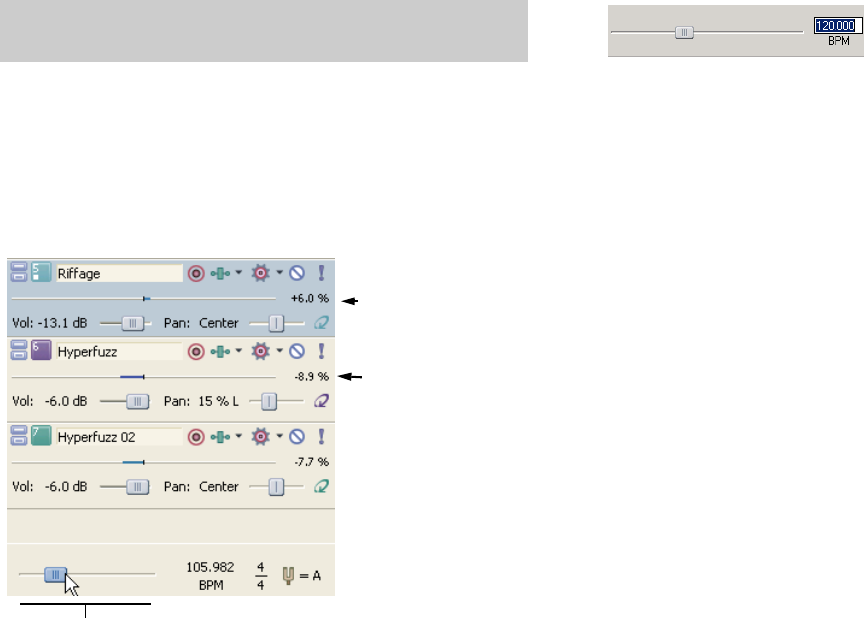
96 | Chapter 5
Changing project tempo
You can change the tempo of a project without affecting the project’s key.
Changing tempo using the Project Tempo slider
Drag the Project Tempo slider at the bottom of the track list. Dragging the slider to the left slows the tempo, while
dragging it to the right speeds the tempo.
As you drag the Project Tempo slider, a colored bar appears under each track’s name to represent the amount a track is
being stretched to match the project tempo. The mark in the center of the bar represents the original tempo of a file.
When the bar appears to the right of the mark, the project tempo is faster than the original file; when the bar appears to
the left of the mark, the project tempo is slower than the original file. The amount of change also displays as a percentage
at the right end of the bar.
Changing project tempo to match file tempo
Each track’s shortcut menu contains the option Use Original Tempo. The original tempo of the file used on the track
appears to the right of this option in the shortcut menu. To change the project’s tempo to match the original file tempo,
simply choose Use Original Tempo from the shortcut menu.
Changing project time signature
Click the Project Time Signature control and select a time signature from the menu to adjust a project’s time signature.
Select Other from the menu to enter a custom time signature.
Changing project key
Click the Project Key control and select a key from the menu to adjust a project’s key.
Tip:
Double-click the tempo value next to the Project Tempo slider
to enter an exact value. Press Enter when you are finished.
Project tempo is slower
than file tempo.
Project tempo is faster than
file tempo.
Project Tempo slider
As you drag the slider, a colored bar appears for each track.
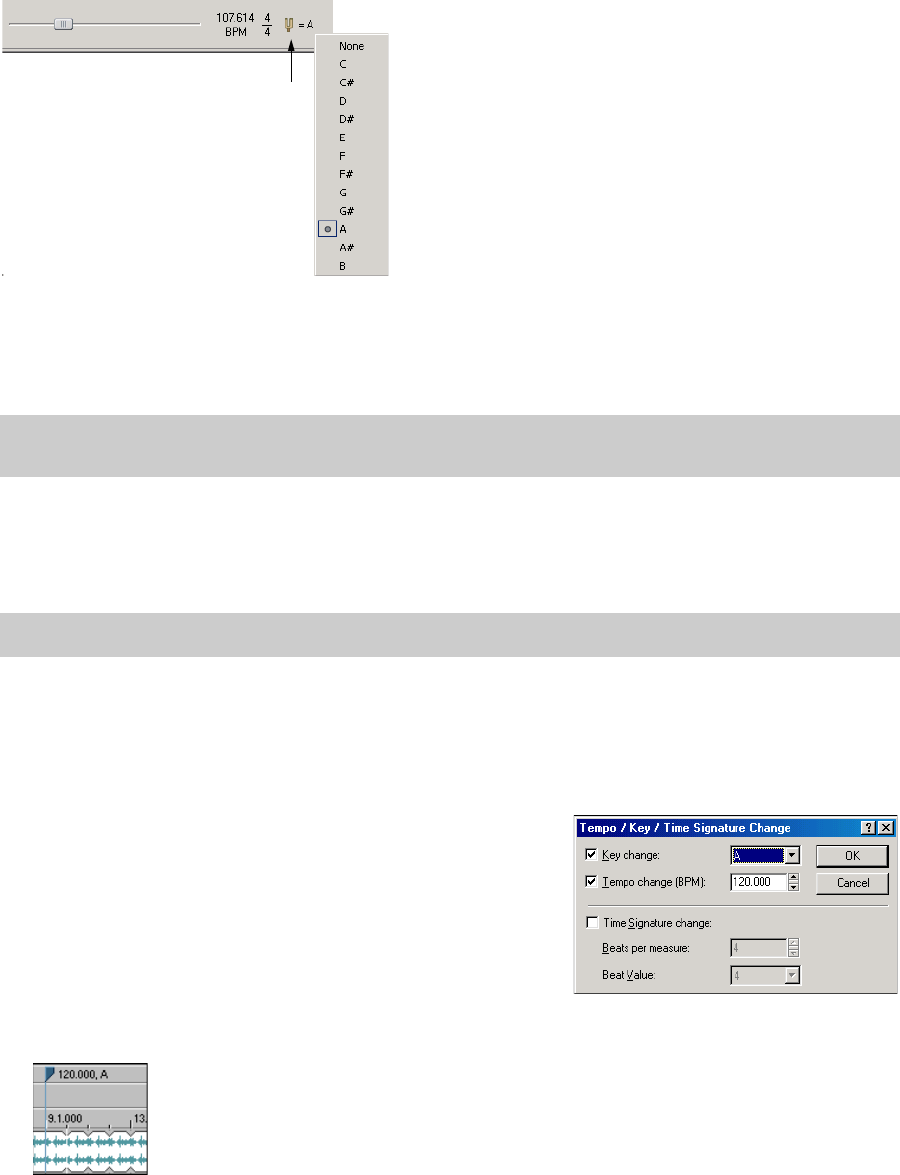
WORKING IN THE TRACK VIEW | 97
This feature makes it possible to use media that are in different keys in the same project: each loop that has a specified
root note is transposed to the key indicated by the Project Key control.
For example, if three loops have root notes of A, B, and C, and your Project Key control is set to D, the loops are pitch-
shifted by five, three, and two semitones, respectively.
Working with tempo/key/time signature change markers
Tempo/key/time signature change markers allow you to make changes to the tempo, key, and/or time signature at
specified points in your project.
Adding tempo/key/time signature change markers
1.
Position the cursor where you want the change to occur.
2.
From the Insert menu, choose Tempo/Key/Time Signature Change. The Tempo/Key/Time Signature Change dialog
appears.
3.
Select the check boxes for the types of changes you want to occur
at the cursor position.
•Key Change changes the key of all tracks until another
tempo/key/time signature change marker is encountered.
•Tempo Change changes the tempo of all tracks until another
tempo/key/time signature change marker is encountered.
•Time Signature Change changes the time signature of all
tracks until another tempo/key/time signature change
marker is encountered.
4.
Specify the desired change information and click OK
to close the
dialog. A marker appears in the marker bar at the cursor position that displays the change information.
Editing tempo/key/time signature change markers
There are several ways to edit the tempo/key/time signature change marker:
• Position the cursor on or after the marker and adjust the Project Tempo, Project Time Signature, or Project Key
controls. The marker’s text reflects the change.
Note:
If the root note for a track is set to Don’t Transpose in the Clip Properties window, the track does not pitch shift
with the rest of the project.
Note:
Time signature changes must occur on the first beat of a measure.
Project Key control
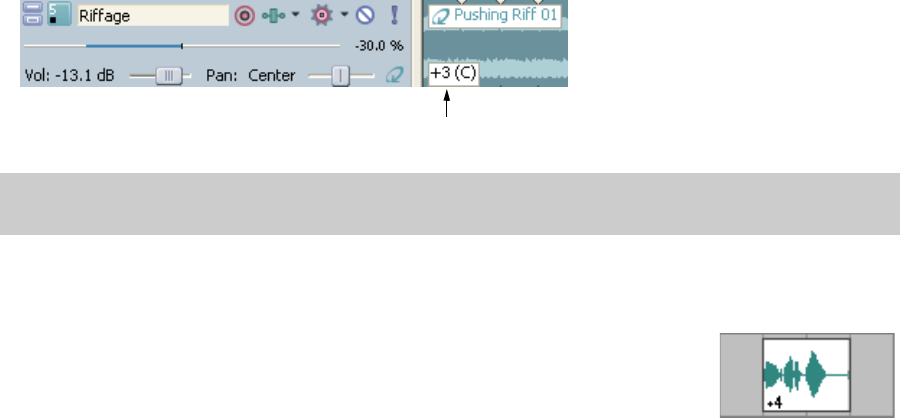
98 | Chapter 5
• Right-click the marker, choose Edit from the shortcut menu, and enter the appropriate change in the Tempo/Key/Time
Signature Change dialog.
• Double-click the marker and enter the appropriate change in the Tempo/Key/Time Signature Change dialog.
Adjusting tempo to match cursor to marker
Position the cursor, right-click the marker tab, and choose Adjust Tempo to Match Cursor to Marker from the shortcut
menu. The project tempo changes so that the cursor position matches the selected marker.
Deleting tempo/key/time signature change markers
To delete a marker, right-click the marker and choose Delete from the shortcut menu.
Changing a clip’s key
You can change the key of a clip on a track without affecting the project’s key. For creative ways to use track key changes,
see Detuning paired tracks on page 261.
1.
Right-click the track and choose Properties from the shortcut menu. The Track Properties window appears.
2.
Double-click the event you want to edit.
3.
On the General tab of the Clip Properties window, enter the number of semitones by which to adjust the key in the
Pitch Shift box or use the spinner control. Use the minus (-) key for negative values.
4.
Close the Track Properties window. The pitch shift displays in the event.
Changing an event’s key
You can change the key of an individual event without affecting the pitch of the track or project.
Right-click the event in the track view, choose Pitch Shift from the shortcut menu, and
choose Up Semitone or Down Semitone from the submenu. The pitch shifts one semitone
in the direction specified, and the amount of shift displays on the event itself.
You can also change an event’s key using keyboard shortcuts. For more information, see
Event editing commands on page 26.
Tip:
Another way to change the key of the track is to select the track in the track list and press + (plus) or - (minus) on the
numeric keypad.
Pitch shift display

WORKING IN THE TRACK VIEW | 99
Adjusting time
Two commands are provided for adjusting your project’s timeline: Insert Time and Fit to Time.
Inserting time
Use the Insert Time command to insert a specified amount of blank space into the project at the current cursor position.
This feature can be used to create space in the project for new events.
1.
Position the cursor where you want to insert time.
2.
From the Insert menu, choose Time. The Insert Time dialog appears.
3.
Enter the amount of time you want to insert and click
OK.
Fitting to time
The Fit to Time command allows you to adjust the project’s overall length to a specified amount of time.
1.
From the Edit menu, choose Fit to Time. The Fit to Time dialog appears with the current project length displayed in
the New length box.
2.
Enter the new project length in the New length box. The length is always entered in time format, regardless of the
format used on the time ruler.
3.
Click
OK. The dialog closes and the tempo is adjusted to alter the project’s length.
Note:
The Insert Time dialog uses the measures.beats.ticks format used by the beat ruler.
Note:
The maximum and minimum length is limited to reduce the possibility of creating audible artifacts through the
compression/expansion process.
100 | Chapter 5
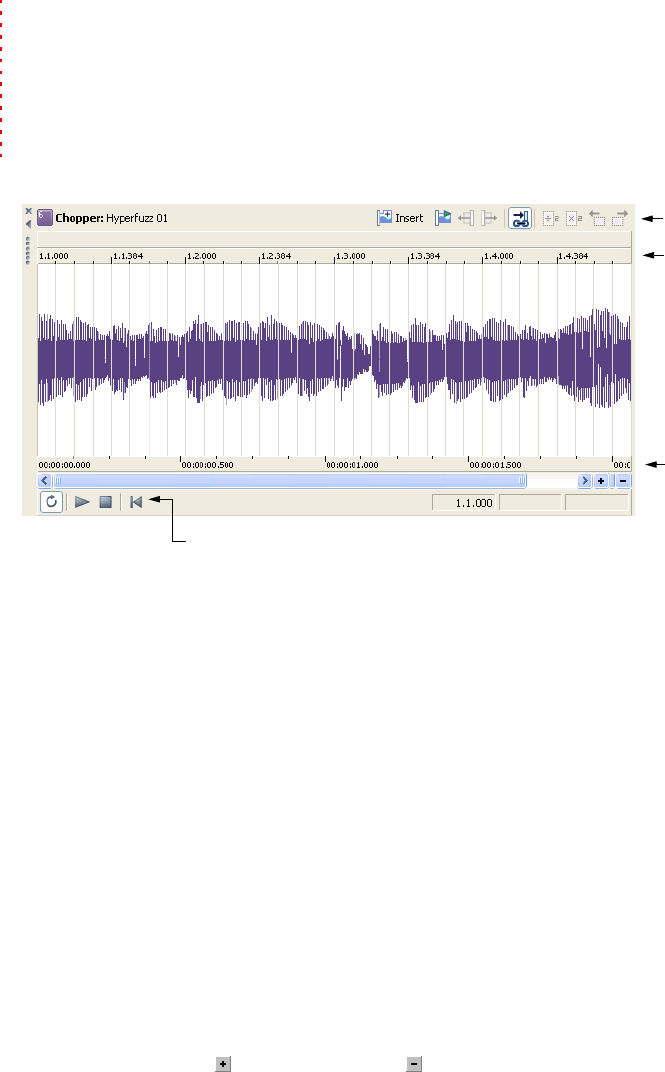
USING THE CHOPPER | 101
Chapter
6
Using the Chopper
The Chopper™ feature in ACID® allows you to quickly create slice-and-dice effects. For creative ways to use the Chopper, see
Slicing and dicing in the Chopper on page 266.
Working in the Chopper window
Selecting an event loads its clip in the Chopper.
Viewing the Chopper
To display the Chopper, choose Chopper from the View menu or press Alt+2.
Changing the Chopper grid
The Chopper’s grid uses the same increments available on the track view. To change the grid display, right-click the
waveform area of the Chopper, choose Grid Spacing from the shortcut menu, and choose the desired display from the
submenu.
Changing Chopper snapping options
The snapping behavior of the track view and Chopper are linked. To enable snapping in both components, choose
Snapping from the Options menu and choose Enable from the submenu, or press F8.
When snapping is turned on, you can choose between snapping only to the grid or snapping to all elements. For more
information, see Using snapping on page 94.
Magnifying the Chopper
There are three ways of adjusting the magnification of the Chopper.
•Click the Zoom In Time ( ) and Zoom Out Time ( ) buttons located in the lower-right corner of the window.
• Click within the Chopper and use the mouse wheel.
• Quickly magnify a selection by right-clicking and choosing Zoom to Loop Region from the shortcut menu.
Previewing in the Chopper
The Chopper contains a dedicated transport bar that can be used to preview selections prior to inserting them into the
project.
Toolbar
Beat ruler
Transport bar
Time ruler
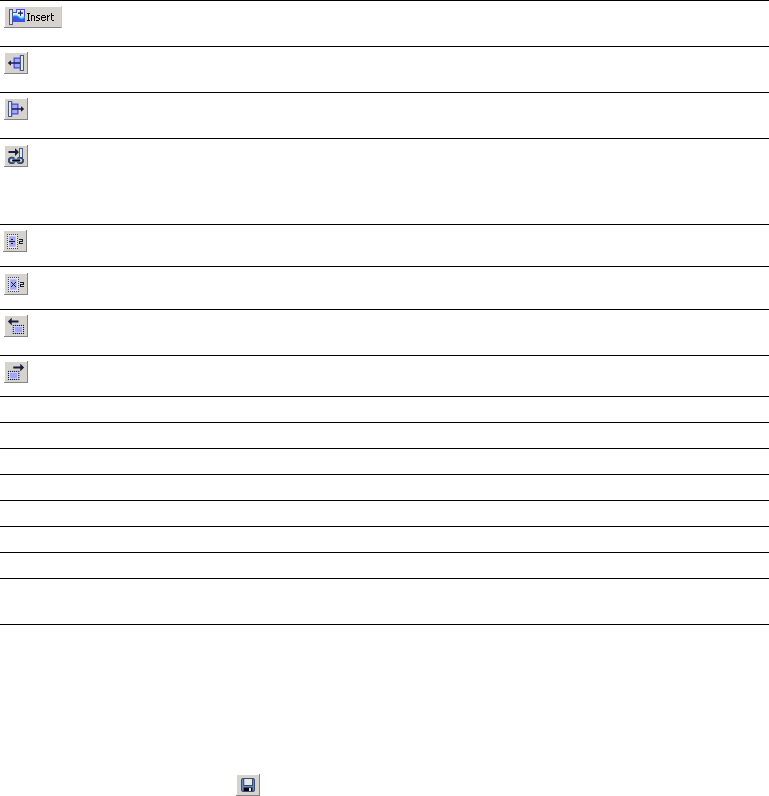
102 | Chapter 6
Using Chopper toolbar and keyboard commands
In addition to the transport bar, the Chopper contains a toolbar that is designed to make creating selections quick and
easy. The following table briefly describes the toolbar buttons and the associated keyboard commands.
Inserting markers and regions in the Chopper
When working with events in the Chopper, you can drop markers and create regions just like in the track view. For more
information, see Using project markers and regions on page 89.
These markers and regions are saved with the project when it is saved. They can also be saved back to the original media
file by clicking the Save File button ( ) in the Track Properties window. For more information, see Saving file properties
on page 120.
Creating selections in the Chopper
After you place a file in the Chopper, you can use the toolbar, transport bar, and mouse (or their keyboard equivalents) to
create and preview selections within the file. When have made the selection you want, you can insert the selection into
the track view.
Placing files in the Chopper
To place a file in the Chopper, do any of the following:
• Select a track in the track list.
• Select an event.
Button Keyboard Function
/ (front slash) or A Inserts the Chopper selection in the track view at the current cursor
position.
Ctrl + , (comma) Shifts the track view’s cursor position to the left by the length of the
increment arrow.
Ctrl + . (period) Shifts the track view’s cursor position to the right by the length of the
increment arrow.
NLinks the length of the increment arrow with the length of the
selection. When toggled on, the length of the increment remains equal
to the length of the selection. When toggled off, you can configure the
increment independently of the Chopper selection.
; (semicolon) Halves the length of the Chopper selection.
‘’ (apostrophe) Doubles the length of the Chopper selection.
< or , (comma) Shifts the Chopper selection to the left by the length of the selection.
> or . (period) Shifts the Chopper selection to the right by the length of the selection.
Ctrl + Shift + , (comma) Shifts the selection left by the increment length.
Ctrl + Shift + . (period) Shifts the selection right by the increment length.
Ctrl + ; (semicolon) Doubles the length of the increment arrow.
Ctrl + ‘’ (apostrophe) Halves the length of the increment arrow.
RInserts a region.
MInserts a marker.
IMarks the start point of a loop region.
OMarks the end point of a loop region. Once the endpoint is established,
the loop region becomes highlighted.
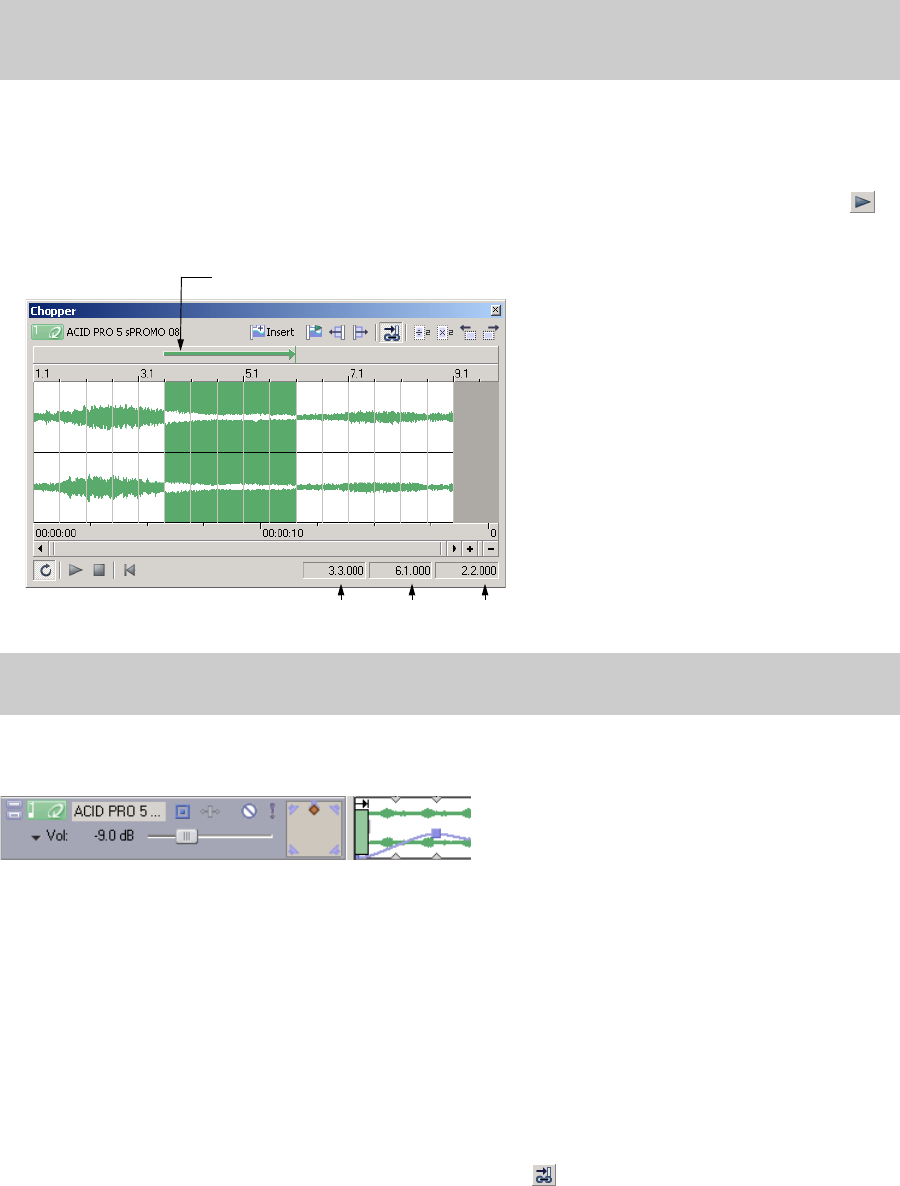
USING THE CHOPPER | 103
• Right-click an event and choose Select in Chopper from the shortcut menu.
Creating selections
To create a selection, drag the mouse, or hold Shift while pressing the arrow keys. A shaded region appears in the
Chopper to indicate the current selection, and its start point, end point, and length display at the bottom-right corner of
the window in measures.beats.ticks format. You can preview the selection at any time by clicking the Play button ( )
on the Chopper’s transport bar or pressing Space.
As you make a selection in the Chopper, a colored block appears in the track view. This block indicates where the selection
will be placed on the track view when you insert it from the Chopper.
Creating selections of a specific musical length
You may want to create a selection with a length corresponding to a musical value. You can easily do this in the software
using the Chopper’s selection shortcut menu.
1.
Create a selection or place the cursor in the Chopper. For more information, see Creating selections on page 103.
2.
Right-click and choose the desired musical length from the shortcut menu. A selection is created equal to the
specified musical length.
Inserting increments
In addition to creating selections, the Chopper feature allows you to configure the sections of silence between selections
painted on a track. When you click the Link Arrow to Selection button ( ), the increment arrow length is incremented
with the selection length. This forces the increment and selection lengths to remain equal, thereby allowing you to insert
selections seamlessly, end-to-end, in the project.
Note:
If you choose Select in Chopper on an event that contains only a portion of a file, the entire contents of the file are
placed in the Chopper. The part of the waveform selected, however, matches the contents of the selected event. This allows
you to see the event in the context of the entire media file.
Note:
In addition, an increment arrow appears on the track view above the selected block. For more information, see
Inserting increments on page 103.
Increment arrow
Start End Length
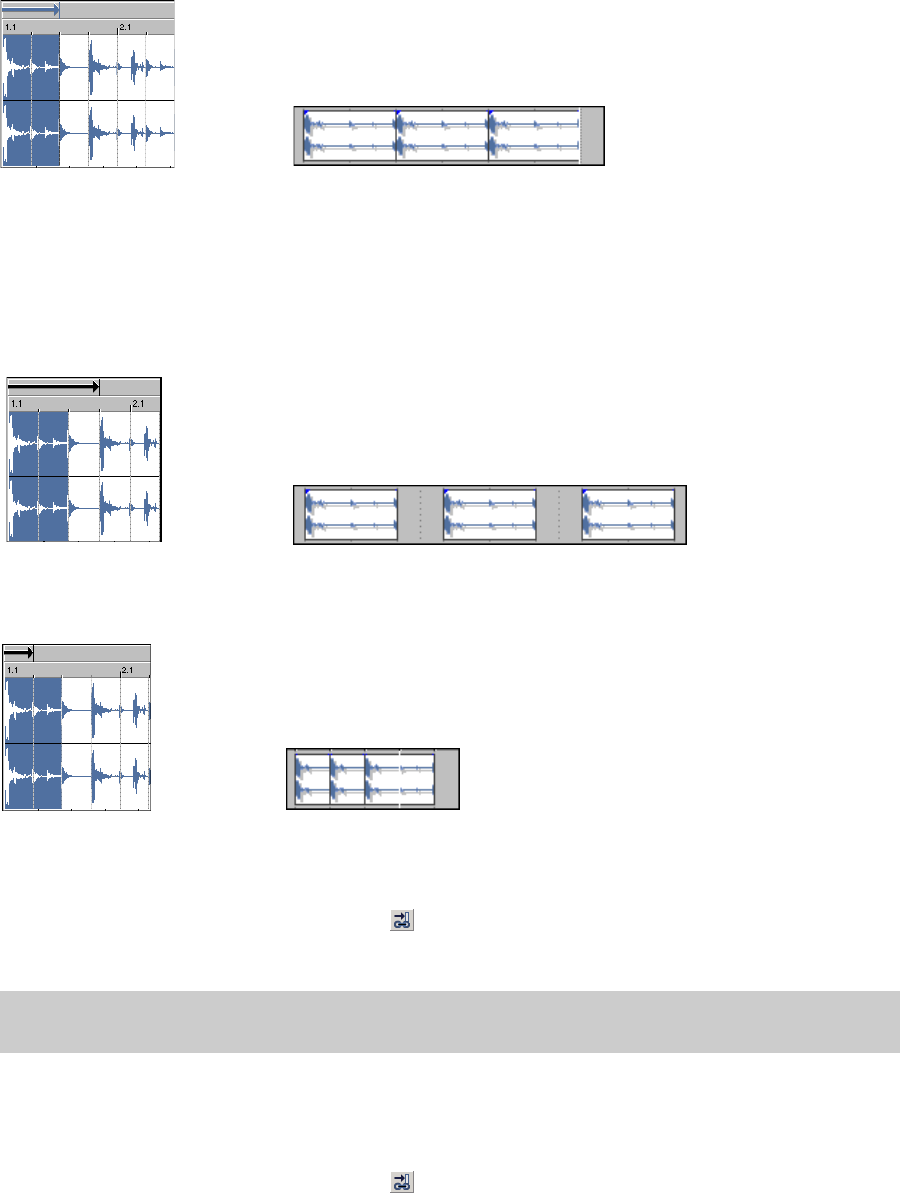
104 | Chapter 6
When the Link Arrow to Selection button is toggled off, the increment arrow is displayed in black and you are able to
establish a increment length that is independent of the selection length. The increment arrow can be set by dragging
either end of the arrow or by using the increment shortcut menu.
When the increment length is greater than the length of the selection, an appropriate amount of silence is inserted
following the selection when you insert it in the track view. This affects the track’s insert position and allows you to paint
selections separated by the specified increment.
When the increment length is less than the length of the selection, the selections are overlapped as you insert them in
the track view.
Creating increments
1.
Verify that the Link Arrow to Selection button ( ) is toggled off and the increment arrow is displayed in black.
2.
Drag the point of the arrow to configure an increment of the desired length.
Creating increments of a specific musical length
The increment shortcut menu, like the selection shortcut menu, allows you to create increments that correspond to the
specified musical length.
1.
Verify that the Link Arrow to Selection button ( ) is toggled off and the increment arrow is displayed in black.
2.
Right-click the increment arrow and choose the desired musical value from the shortcut menu. The increment
length is automatically configured to the selected value in both the Chopper and the track view.
Tip:
While dragging the increment arrow, the Chopper’s middle status value temporarily displays the length of the
increment.
Chopper selection inserted end-to-end three times
Selection and increment length linked
Increment greater than selection Selection inserted with specified increment three times
Increment less than selection Selection overlaps when inserted three times
USING THE CHOPPER | 105
Creating increments of a custom musical length
1.
Verify that the Link Arrow to Selection button ( ) is toggled off and the increment arrow is displayed in black.
2.
Right-click the increment arrow and choose Custom from the shortcut menu. The Custom Length dialog appears.
3.
Choose the desired increment format from the drop-down menu.
4.
Enter an appropriate value in the adjacent box and click OK. The increment length is automatically configured to the
selected value in both the Chopper and the track view.
Inserting selections in the track view
You can add selections from the Chopper to your project in several ways.
Using the Insert Selection button
After you create the desired selection and increment, you can insert the selection in the project at the track view’s cursor
position by clicking the Insert Selection button ( ). After the Chopper inserts the audio, the cursor moves to the
end of the increment.
• If the increment length is equal to the selection length, selections are painted end-to-end.
• If the increment length is greater than the selection length, an appropriate amount of silence is painted prior to the
next insert position.
• If the increment length is less than the selection length, selections overlap.
Using copy and paste
You can right-click the selection in the Chopper and choose Copy from the shortcut menu to copy the current selection
to the clipboard. You can then use the Paste command to insert the selection in the track view. After the event is pasted,
the cursor advances to the end of the pasted event.
Dragging selections
You can drag a Chopper selection from the Chopper to the track view. Release the mouse at the location where you want
to insert the selection.
Moving the insert position in the track view
Click the Move Track View Cursor Left button ( ) and the Move Track View Cursor Right button ( ) to move the
current insert position in the track view left/right by the increment length.
Saving Chopper selections as new files
You can quickly create a new loop by making a selection in the Chopper and saving the selection as a new file. The file is
added to your project as a new track.
1.
Make a selection in the Chopper.
2.
Right-click the selection and choose Chop to New Track or Chop to New Clip from the shortcut menu. The Chop to
New dialog appears.
3.
In the File name box, enter a name for the new file.
Note:
It is possible to set an increment value that results in the increment arrow extending beyond the scope of the
Chopper. If this occurs, an accurate depiction of the increment still appears in the track view.
Note:
When you paste a selection from the Chopper to the track view, the increment setting is ignored.
Tip:
You can also drag a selection from the Chopper to the track list.

106 | Chapter 6
4.
From the Save as type box, choose a file format for the new file.
5.
From the Template drop-down list, choose a template for rendering the file, or click Custom to create custom
rendering settings. For more information, see Creating custom rendering settings on page 56.
6.
Click Save.
If you chopped to a new clip, a new clip is added to the current track. For more information, see Using clips with tracks
on page 107.
If you chopped to a new track, the file is added as a new track in the project. For more information, see Using
assignable effects on page 142.
Using the Chopper with one-shots
Selections of loops and Beatmapped files transfer flawlessly between the Chopper and the track view because the beats
are clearly identified. However, one-shot files present more of a problem. You can use the following method to create
accurate single-hit selections in one-shot files.
1.
Verify that the snapping options are active. If snapping is not active, choose Snapping from the Options menu and
choose Enable from the submenu, or press F8.
2.
Verify that the Link Arrow to Selection button ( ) is selected.
3.
Create a selection of the desired musical length in the Chopper. For more information, see Creating selections of a
specific musical length on page 103.
4.
From the Options menu, choose Snapping, and choose Enable from the submenu, or press F8 to toggle all
snapping options off.
5.
Click the Link Arrow to Selection button ( ) to toggle the linking option off. You can now adjust the selection
without changing the increment.
6.
Drag the middle of the increment arrow to reposition selection length in the Chopper.
7.
Use the mouse and/or keyboard to fine-tune the selection. The increment arrow does not change.
8.
Insert the desired selection data in the track view. For more information, see Inserting selections in the track view on
page 105.
9.
Repeat steps six through eight to insert all desired selections in the track view.
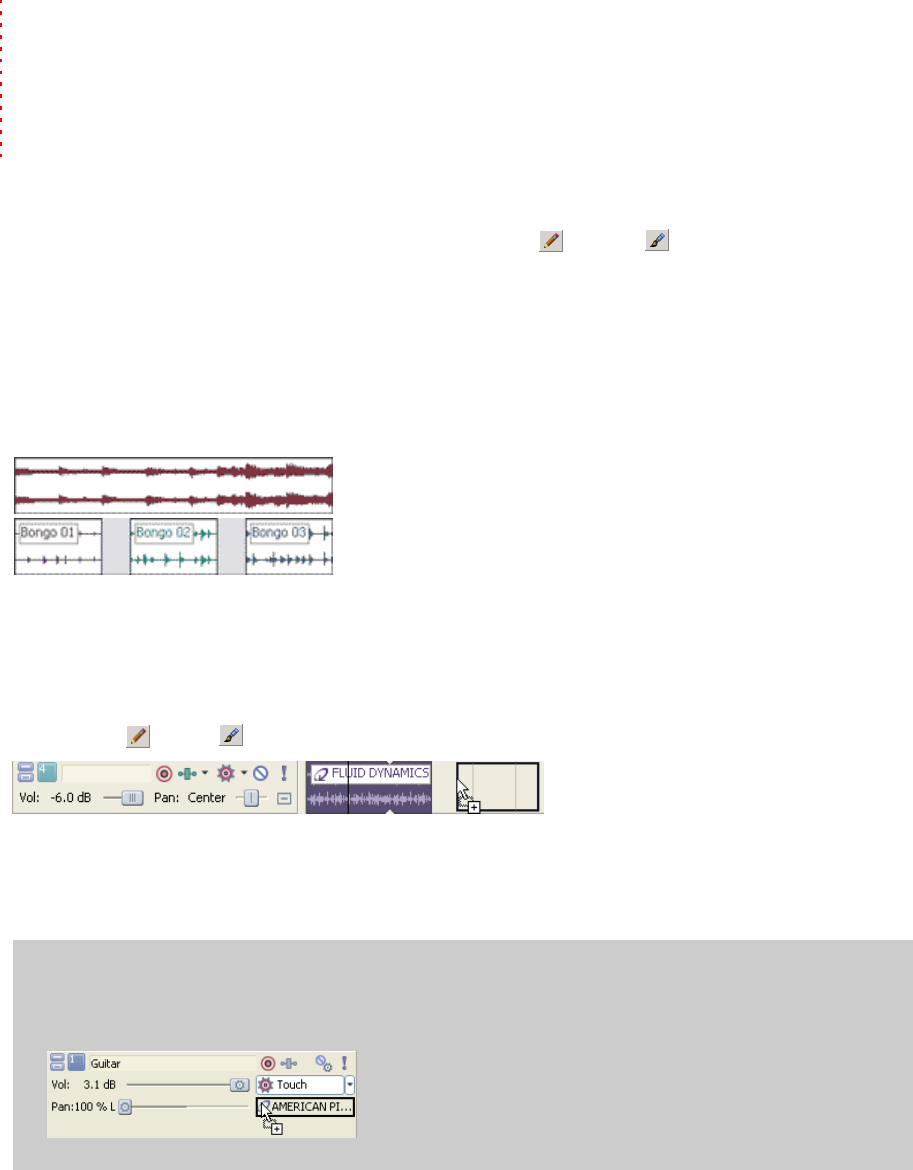
WORKING WITH TRACKS | 107
Chapter
7
Working with Tracks
This chapter covers advanced track features including using clips, track effect chains, track envelopes, groove mapping™,
and stereo panning modes. You’ll also learn more about track types, track properties, track folders, and rendering tracks
to new files.
Using clips with tracks
In previous versions of ACID®, each track in your project corresponded to a single media file. If you're comfortable with
the track-equals-media model, this version of ACID can behave in much the same way: when you add media to your
project, a new track is created for the media file. You can use the Draw and Paint tools to create events using the
track's media.
In this version of ACID, you can now add multiple media files — or clips — to one track. Think of clips as the palette you
can dip your paintbrush in when you paint on the timeline. For example, if you want to use one track for all the guitar
loops in your project, you can create a single guitar track and add each guitar loop as a separate clip. When a track has
multiple clips, the Draw and Paint tools create events using the active clip.
A single audio track can contain any combination of loops, one-shots, or Beatmapped clips. MIDI tracks can contain only
MIDI clips. For more information, see Understanding clip types on page 40.
Adding clips to tracks
Drag a file from the Windows Explorer, Explorer Window, or Media Manager window to an existing track in the timeline to
add a clip to the track and add an event where you drop the clip. The new clip is set as the active clip for creating events
with the Draw or Paint tool.
You can drag single-stream MIDI files to a track to add clips. When you drag multistream MIDI files to a track, tracks and
events are created.
You can also record into a track to create a new clip.
Setting the active clip and creating events
It is simple to set active clips and create events with ACID.
Tips:
• You can use the Chopper window to create new clips from the track’s existing media.
• If you want to add a clip to a track without creating an event, drag a file from the Windows Explorer, Explorer Window, or
Media Manager window and drop it on the Paint Clip Selector button.
• Hold Shift while clicking the Paint Clip Selector button to display the Open dialog, where you can add a new clip.
On a track with multiple clips, each event can point to a different media file. In this example, each
event represents one of the track's three clips.
The banner at the top of each event (i.e. Bongo 01, Bongo 02, and Bongo 03) displays the name of
the event's source clip.
On a track with a single clip, events are always created using the track's media.
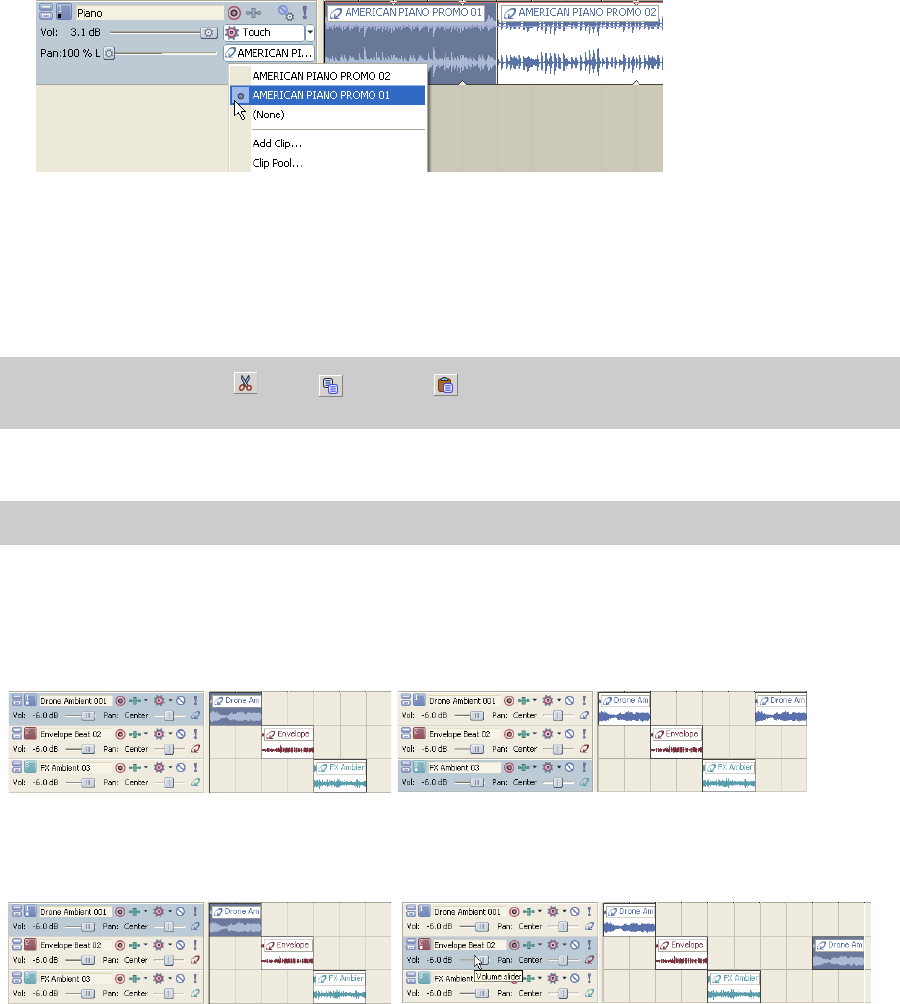
108 | CHAPTER 7
1.
Click the Paint Clip Selector button in the track header. A menu is displayed to list the track's current clips.
2.
Choose a clip from the menu. The selected clip is used for creating events with the Draw or Paint tool.
Copying clips and events across tracks
In previous versions of ACID, you could only copy and paste events within the same track. Now you can use clips to copy
events between tracks.
1.
Select the events you want to copy.
2.
Click to position the cursor where you want to paste the events.
3.
Click the track header of the track where you want to paste the contents of the clipboard.
4.
From the Edit menu, choose Paste. Events are added at the cursor position, and clips are added to the track for the
pasted events as needed.
Tip:
You can also use the Cut , Copy , and Paste buttons in the Clip Pool tab in the Track Properties window
to cut, copy, and paste clips across tracks.
Tip:
Hold Ctrl or Shift to select multiple events. You can select multiple events that use different clips.
. . . and paste it into track the same track, a new event is created on the
same track. No clips are created.
If you copy an event from track 1. ..
If you copy an event from track 1. . . ... and paste it into track 2, the event from track 1 is added to track 2, and a new
clip is created for the new event.
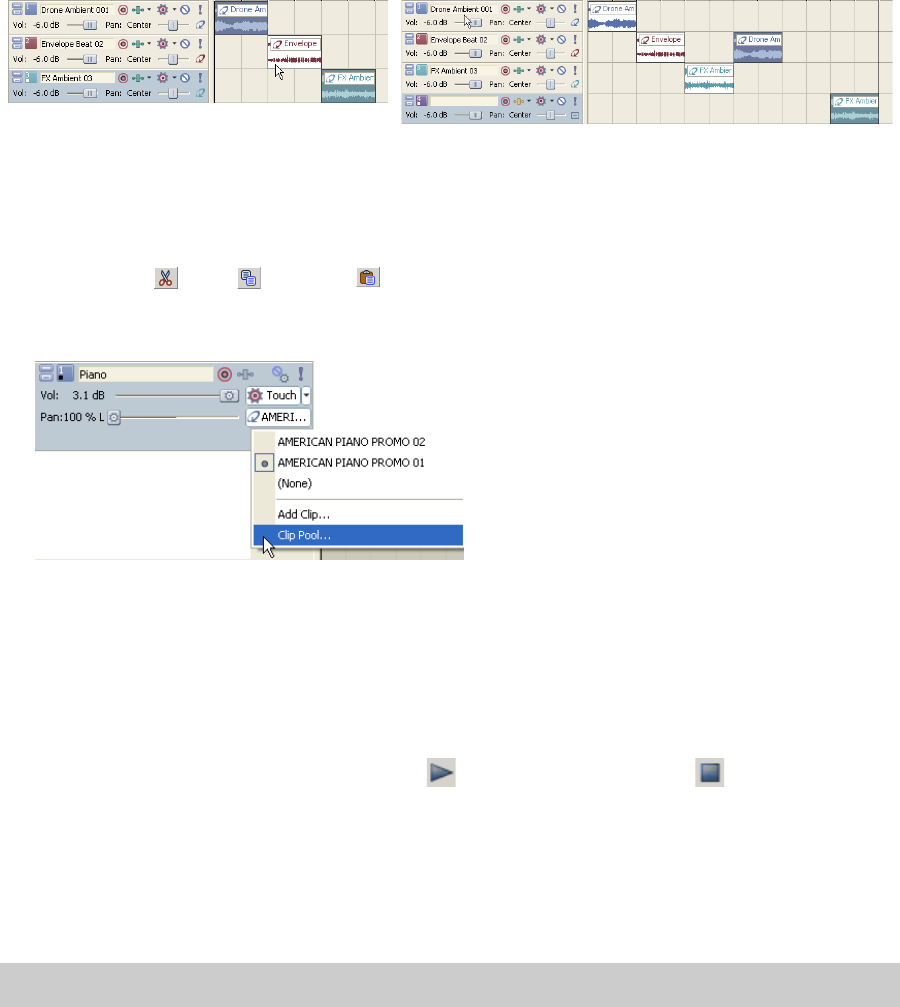
WORKING WITH TRACKS | 109
Copying clips across tracks without copying events
You can use the Cut , Copy , and Paste buttons on the audio Track Properties or MIDI Track Properties
window to cut, copy, and paste clips across tracks:
1.
Click the Paint Clip Selector button on the track header and select Clip Pool.
2.
In the Clip Pool, select the clip you want to cut or copy, and then click Cut or Copy.
3.
Click the Paint Clip Selector button in the track header where you want to paste clips, and then choose Clip Pool
from the menu.
4.
Click the Paste button in the Clip Pool.
Previewing clips
Select a clip in the clip list, and then click the Play button to play it. Click the Stop button to stop playback.
Changing an event’s clip
1.
Select the events you want to change.
2.
Right-click a selected event and choose Event Clip. The track's current clips are displayed in a submenu.
3.
Choose the clip you want to use from the submenu. All selected events are updated to use the new clip.
Pitch shifting audio clips
You can use the Clip Properties window to pitch-shift all events on the track associated with a specific clip. For more
information, see Adjusting pitch shift on page 116.
Using the Clip Pool
You can use the Clip Pool to organize each track's media. In the track header, click the Paint Clip Selector button and then
choose Clip Pool.
The clip list displays each track's clips, the number of times the clip is used on the track, and the path to the media file.
Tip:
Press C or Shift+C to change the selected event's clip by cycling forward or backward through the track's clips.
If you copy events from tracks 1 and 3. . . .. . and paste them into track 2, the event from track 1 is added to track 2, and a new
clip is created for the new event. A new track is created for the event from track 3.
110 | CHAPTER 7
Clear a clip's check box to remove it from the Paint Clip Selector menu without removing it from the track. To make the
clip available again, select the check box.
To set the active clip, click the space next to a clip's check box. The icon indicates which clip will be used for creating
events with the Draw or Paint tool.
Click the Remove Unused Clips button to remove all unused clips from the track.
Click the Open button to display the Open dialog, where you can browse to clips you want to add to the track.
Select a clip in the Clip Pool and click the Delete button. Only clips with a Use Count of 0 can be deleted.
You can use the Cut , Copy , and Paste buttons in the Clip Pool window to cut, copy, and paste clips across
tracks.
Selecting events that use a specified clip
Right-click an event and choose Select Events Using This Event's Clip from the shortcut menu to select all events on the
track that use the same clip as the selected event.
Right-click the timeline, choose Select Events Using Clip, and then choose a clip from the submenu to select all events
on the track that use the specified clip.
Using track effects
ACID allows you to use DirectX® and VST plug-ins at the track level. Track-level plug-ins process everything on the
selected track.
You can create plug-in chains, adjust the order of plug-ins on a chain, bypass plug-ins, remove plug-ins, and save
frequently used chains as presets.
Using track effects
The Sony Track EQ plug-in effect is assigned to all tracks by default; however, it does not use CPU power or affect the
sound until you adjust its settings. You can remove the EQ plug-in if desired. For more information, see Removing plug-ins
from chains on page 112.
In addition, you can use effect plug-ins in the Mixer window by applying effect chains to busses or soft synths, or by
creating assignable effect chains and routing tracks to them. For more information, see Using the Mixer on page 141.
Tip:
To remove the unused media from your project, choose Remove All Unused Clips from the Tools menu.
Tips:
• If the VST plug-in you want to use isn't displayed in the Plug-In Chooser, you can use the VST Effects tab in the Preferences
dialog to add the plug-in's folder and then click the Refresh button to scan for plug-ins. For more information, see Using
the VST Effects tab on page 234.
• If the DirectX plug-in you want to use isn't displayed in the Plug-In Chooser, hold Ctrl+Shift while restarting ACID and then
select the Delete all cached application data check box to reset your preferences and rescan for DirectX plug-ins.
Important:
Be aware that using non-in-place plug-ins (such as Time Stretch, Pitch-Shift without preserving duration,
and some Vibrato settings) will cause audio to play out of synchronization with the waveform display in the timeline and
with other tracks. If an effects chain includes non-in-place plug-ins, the effects chain icon will be displayed as a .
When using ACID as a ReWire device, any effects chain that includes non-in-place plug-ins will be automatically bypassed
to prevent synchronization problems with the ReWire mixer application. The effects chain icon will be displayed as a .
Apply the plug-ins within the ReWire mixer application.
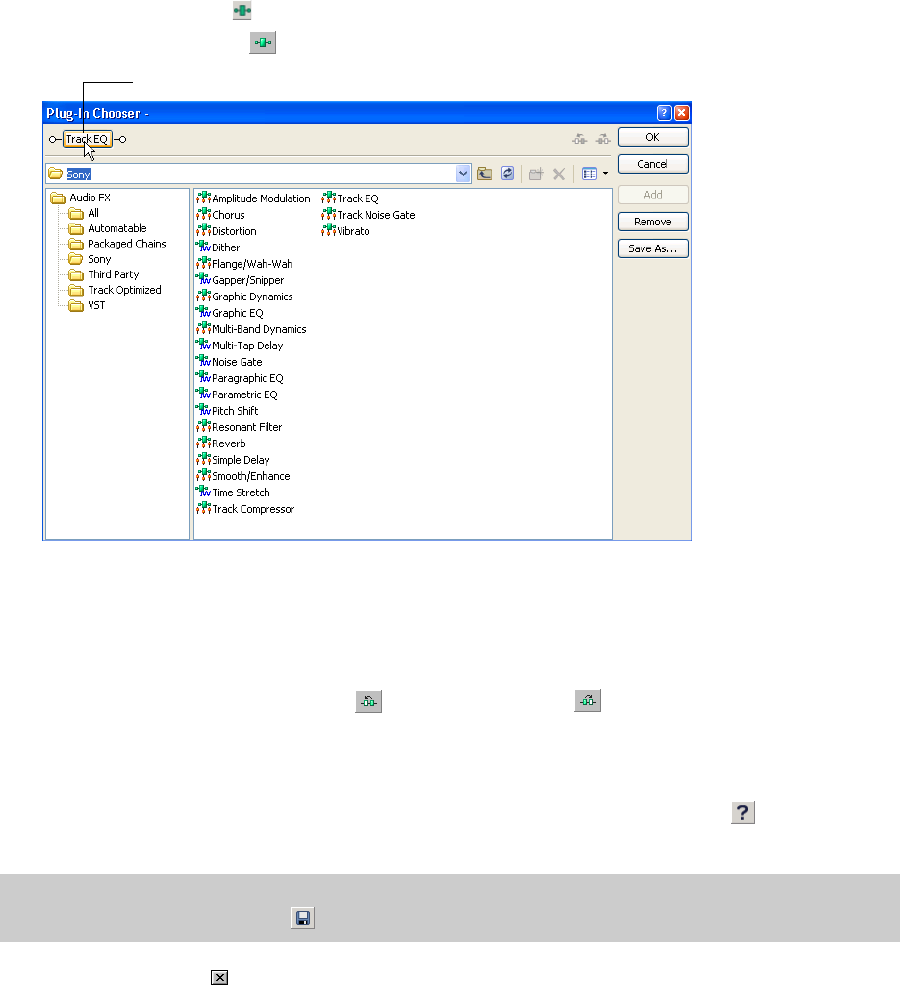
WORKING WITH TRACKS | 111
Creating or adding to track plug-in chains
A plug-in chain can contain one or more plug-ins. When you add multiple plug-ins, you may set the processing sequence
that the track’s events go through when the project is played back. Moreover, the plug-ins that you add to the chain may
be added more than once. For example, a plug-in chain could look something like this: Track EQ, Track Compressor, Track
EQ, and Track Noise Gate.
After you create a plug-in chain, the track’s events are processed by each plug-in in its respective order on the chain. The
events’ effects processing is cumulative, so in some cases, you may want to rearrange the order of plug-ins to achieve the
desired sound. For more information, see Arranging plug-in chain order on page 112.
1.
Click the Track FX button ( ). The Audio Plug-In window appears.
2.
Click the Edit Chain button ( ) to display the Plug-In Chooser dialog.
3.
Select the plug-ins that you want to add. There are three ways to add a plug-in to the chain:
• Double-click the plug-in.
• Drag the plug-in to the chain area.
• Select the plug-in and click the Add button.
4.
Rearrange the order of plug-ins as needed by dragging plug-ins to different locations in the chain or by selecting a
plug-in and clicking the Shift Plug-In Left ( ) and Shift Plug-In Right ( ) buttons.
5.
Click OK. The Plug-In Chooser dialog closes. The Audio Plug-In window displays the plug-in chain and the settings
for the plug-in last selected on the Plug-In Chooser dialog.
6.
Click a specific plug-in and adjust the effect’s parameters manually, or choose one of the presets from the Preset
drop-down list. For more information about effect parameters, click the Plug-In Help button ( ) in the Audio Plug-
In window.
7.
Click the Close button ( ) to close the Audio Plug-In window.
You can use a track effect chain as a default for all new tracks you create. For more information, see Setting default track
properties on page 227.
Tip:
You can save an effect’s parameters as a preset to be used in other projects. To save a preset, enter a name in the
Preset box and click the Save Preset ( ) button.
Chain area
112 | CHAPTER 7
Automating plug-in parameters
You can automate the parameters of certain plug-ins by adding envelopes to the track. For more information, see Adding
or removing track effect automation on page 130.
Arranging plug-in chain order
The plug-ins are cumulative during playback. For example, when the track’s signal passes through the EQ, it carries the
EQ’s settings as it passes through the compression plug-in, then the signal carries both those plug-in settings to the next
plug-in.
Because of this cumulative effect, you may need to arrange plug-ins in a certain order so that one plug-in’s processing
does not adversely affect the next plug-in on the chain. There is no right or wrong way to order plug-ins, although some
plug-ins work better when they follow another. However, the plug-in order in the chain is strictly based on your
preferences and desired output.
1.
Click the Track FX button ( ). The Audio Plug-In window appears.
2.
There are three ways to arrange plug-ins in your chain:
• Drag the plug-in to a new location in the chain.
• Right-click the plug-in and choose Move Left or Move Right from the shortcut menu.
• Click the plug-in and then click the Shift Plug-In Left ( ) and Shift Plug-In Right ( ) buttons.
3.
Click the Close button ( )
to close the Audio Plug-In window.
Bypassing plug-ins in a chain
You can bypass a plug-in without removing it from the chain by clearing the check box for the plug-in. Alternately, right-
click the plug-in and choose Bypass from the shortcut menu.
Bypassing effect automation
For plug-in chains that include effect automation using envelopes, you can bypass automation by clicking the Bypass FX
Automation button ( ) on the Audio Plug-In window. This does not remove any effect automation envelopes from the
track, but rather temporarily bypasses processing of the effect automation. You can toggle this button on and off to hear
the difference between the plug-in chain as a standard (non-automated) effect versus an automated effect.
Removing plug-ins from chains
1.
Click the Track FX button ( ). The Audio Plug-In window appears.
2.
Right-click the plug-in and choose Remove from the shortcut menu, or click the Remove Selected Plug-In button
().
3.
Click the Close button ( )
to close the Audio Plug-In window.
Saving plug-in chains as packages
You can save plug-in chains as packages so that you may use them again with other projects. If you use a combination of
plug-ins often, saving them as a package saves you time. Effect packages retain their chain order and individual plug-in
settings.
Tip:
To bypass (or re-enable) all plug-ins in a chain, right-click the Track FX button ( ) and choose Bypass All or Enable
All.
Tip:
To remove all plug-ins in a chain, right-click the Track FX button ( ) and choose Delete All.
WORKING WITH TRACKS | 113
You may save plug-in chains as packages from existing chains on tracks or when you are creating a plug-in chain. The
plug-in chains that you save as packages appear in the Plug-In Chooser dialog in the Packaged Chains folder. You can
apply an effect package to a track the same way you assign a plug-in to a track.
Once you have created custom presets for effects or effect chains, you can use the Preset Manager to back up, transfer, or
delete custom presets from any of the plug-ins you use in ACID. For more information, see Using the Preset Manager on
page 151.
1.
Click the Track FX button ( ). The Audio Plug-In window appears.
2.
Click the Edit Chain button ( ) to display the Plug-In Chooser dialog.
3.
Add and arrange plug-ins to create a plug-in chain and click OK.
4.
Click a specific plug-in and adjust the effect’s parameters manually, or choose one of the presets from the Preset
drop-down list. For more information about effect parameters, click the Plug-In Help button ( ) in the Audio Plug-
In window.
5.
Click the Save Chain Preset button ( ). The Save Plug-In Package dialog appears.
6.
Enter a name for the package.
7.
Click OK to save the plug-in chain as an effect package.
Removing or bypassing all effects on tracks
You can clear a track of all effects by right-clicking the Track FX button ( ) and choosing Delete All from the shortcut
menu.
You can bypass all of a track’s effects without removing them by right-clicking the Track FX button ( ) and choosing
Bypass All from the shortcut menu. To apply them again, right-click the Track FX button ( ) and choose Enable All from
the shortcut menu.
Using track automation envelopes
Track envelopes allow you to control volume, panning, assignable effect send levels, bus send levels, and effect
parameters (for effects that support automation) for a specific track. You can distinguish the various envelopes by their
color.
For more information, see Using Automation on page 127.
Choosing stereo pan types
When you pan a track using the pan slider or a pan envelope, you can choose among several pan types to determine how
the track is panned.
1.
Click the pan slider label and choose a pan type from the submenu:
•The Add Channels pan type is most useful for panning stereo source material. This pan type makes the stereo
image appear to move as a unit between the speakers. As the fader is moved from the center to a side, more and
more of the signal from the opposite side is folded into the side you are panning towards, until at the extreme,
both channels are fed at full intensity into a single channel. This pan type uses a linear panning curve.
•The Balance pan type is most useful for adjusting the relative signal levels of the right and left channels in stereo
source material. In this pan type, moving from the center to a side, the opposite side starts at a base dB level
(either 0 dB, -3 dB, or -6 dB) and decays to no signal level. The signal in the side you are panning towards starts at
the base dB level (either 0 dB, -3 dB, or -6 dB) and increases to 0 dB. When the stereo source is panned fully to
one side, that side plays at 0 dB while the other side provides no signal at all. This pan type uses a linear panning
curve.
Note:
If the track has no plug-in chain, clicking the Track FX button ( ) displays the Plug-In Chooser dialog.
Note:
When applying stereo pan types, a monaural track is interpreted as a stereo track with the same data in both
channels.
114 | CHAPTER 7
•The Constant Power pan type is most useful for panning mono source material. As you move the fader from
side to side, this pan type creates the illusion of the source moving around the listener from one side to the
other, in a semi-circle. This pan type uses the constant-power panning curve.
•The Film pan type allows you to pan between pairs of adjacent speakers using a constant power model. This
mode is optimized for theater-style speaker placement. In stereo projects, Film mode functions identically to
Constant Power. As you drag the pan point to the center speaker, the sound becomes diffused through the
front and rear speakers. When the track is panned fully to the center speaker, there is no output from the front
and rear speakers. Dragging the pan point to the center of the surround panner sends the signal to all speakers.
You can choose a pan type as a default for all new tracks you create. For more information, see Setting default track
properties on page 227.
Using the Beatmapper
When you add a file to a project that is longer than 30 seconds, the Beatmapper™ Wizard starts. This allows you to decide
whether or not to add tempo information to the file.
The Beatmapper identifies a file’s downbeats and measures, allowing the file to stretch/compress in conjunction with the
project’s tempo. A file added without the Beatmapper behaves as a one-shot, maintaining its original length regardless of
the project tempo.
1.
Add the file to your project. The Beatmapper Wizard starts if the file is longer than 30 seconds.
2.
Specify whether you want to use the Beatmapper Wizard:
• Select the Ye s radio button and click Next to detect measures and downbeats.
• Select the No radio button and click Finish to close the Beatmapper and add the file as a one-shot.
3.
Click the Play button ( ) to verify the downbeat marker’s position. If the marker is positioned on a downbeat, click
Next. Otherwise, drag the marker to the appropriate location and click Next. The Beatmapper draws the file’s
waveform and places a region to indicate the length of the first measure.
4.
Click the Play button ( ) to verify the measure’s length.
• Select the Metronome check box to preview the measure with the assistance of a metronome.
•Click the Halve Loop Region ( ) or Double Loop Region ( ) button to change the length of the selection.
If the Beatmapper misdetects the length of the measure, it may be off by either half or double the actual
amount.
• If the region is positioned correctly, click Next. Otherwise, drag the region markers to the appropriate locations
and click Next.
The waveform appears with measure lengths selected.
5.
Drag the Measure slider to scroll through the song and click the Play button ( ) to verify each measure’s length. If
the song’s tempo is consistent, the measures are placed correctly. If the tempo fluctuates, you can drag the end of
the measure selection to change the measure’s position.
Changing the measure length affects the entire song; if adjusting the last measure of the song causes the first
measure to be incorrect, the downbeat may not be positioned correctly, or the song’s tempo may not be consistent
enough for the Beatmapper.
6.
Click Next when the measure lengths are correct. The Beatmapper adds tempo information to your file and displays
some additional options.
7.
Specify your preferences for the following options:
• Select the Change project tempo to match Beatmapped track check box if you want to set your project tempo
to match the tempo calculated by the Beatmapper Wizard. Selecting the check box ensures that your
Beatmapped track plays at the original tempo.
Note:
You can change the file length that triggers the Beatmapper in the Audio tab of the Preferences dialog. For more
information, see Using the Audio tab on page 230.
Tip:
The Reset button sets the downbeat marker back to its detected position.

WORKING WITH TRACKS | 115
• Select the Preserve pitch of the Beatmapped track when tempo changes check box to maintain the track’s
original pitch regardless of the project’s tempo.
• Select the Save Beatmapper information with file check box if you want the file to open with the Beatmapper
settings each time you use the file.
8.
Click Finish to close the Beatmapper Wizard. The file is added to the project as a Beatmapped track.
9.
Draw the event in the track view.
Understanding stretching properties
All loops on the ACID installation disc (as well as all loop collection CD-ROMs) contain stretching properties. This means
that tempo and key information is stored in the loops, allowing the application to accurately perform its time stretching/
compressing and pitch-shifting functions on these loops when placed in a project.
Keep in mind that you do not need to designate stretching properties for loops that you create for ACID projects. The
application typically makes an accurate estimate regarding the loop file’s tempo. In addition, you can temporarily assign a
root note to the file to allow it to be transposed to the project’s key. However, when creating custom loops for use in
multiple projects, you should define stretching properties.
You can set the stretching properties for loops and Beatmapped clips. For more information, see Adjusting stretching
properties for loop or Beatmapped clips on page 116.
Configuring track properties
From the View menu, choose Track Properties to display the Track Properties window. The contents of the Track
Properties window reflect the currently selected audio or MIDI track.
If you want to edit media properties and stretching information, use the Clip Properties window.
Audio track properties
For audio tracks, the Track Properties window displays the Clip Pool. The Clip Pool is used to organize each track's media.
For more information, see Using the Clip Pool on page 109.
MIDI track properties
You can use the Output Settings tab to adjust MIDI controllers, voices, and drum maps. You can use the Input Filters tab
to set up MIDI message, velocity, or quantize filters. You can use the Clip Pool tab to organize each track's media and
enable looped or one-shot drawing for MIDI events. By right-clicking a clip in the Clip Pool, you may access the Clip
Properties window to use the Piano Roll Editor and List Editor tabs. The Piano Roll Editor and List Editor tabs allow you
to view and edit all MIDI data.
Configuring clip properties
1.
Double-click a track icon (such as ) to display the Track Properties window and the clips used on the track.
2.
Double-click a clip to open the Clip Properties window.
Tip:
You can place the entire event by using the Paint ( ) tool. With the Paint tool selected, press Ctrl while you click once
in the track to place the Beatmapped file.
Note:
This section addresses clip properties for non-MIDI clips. For information on MIDI clip properties, see Processing
and filtering MIDI events on page 173.
116 | CHAPTER 7
Once you modify the properties of a clip, the information is saved with your project, but does not alter the original media
file. If you want, you can save your changes to the media file as well. For more information, see Saving file properties on
page 120.
Managing a track’s clips
Each track in your ACID project can contain multiple, distinct media files, called clips. Use the Clip Pool tab in the Track
Properties window to add, remove, and preview clips. For more information, see Using clips with tracks on page 107.
Adjusting general clip properties
The General tab displays information about the file associated with a clip and allows you to change the ACID type, apply
pitch shifting to all events on the track that use the same clip, and adjust time-stretching for Beatmapped clips.
Changing clip type
Choose a setting from the ACID type drop-down list to change the way the clip is handled.
Adjusting time stretching (Beatmapped clips only)
If you want to preserve the clip’s pitch while you adjust the tempo, select the Preserve pitch when stretching check box.
When the check box is cleared, you can still adjust the tempo of the clip, but the pitch is also affected.
Adjusting pitch shift
Enter a value in the Pitch Shift (semitones) box (or use the spinner control) to adjust the pitch of all events that use the
clip.
Adjusting stretching properties for loop or Beatmapped clips
The Stretch tab allows you to specify how pitch-shifting and time stretching is handled for loop or Beatmapped clips.
After you have edited a file’s properties, click the Save File button ( ) to embed ACID information with the file.
If you cannot or do not wish to embed ACID information with the file, you can set the properties to suit your needs, and
they will be saved with the ACID project (but not with the file). This means, however, that you must set the properties for
every project where you use the loop. Configuring the stretching properties and clicking the Save File button ( )
allows you to “set and forget” the properties so the properties will be set for any project.
Note:
When you edit a clip in an external editor, changes to the sound file are reflected immediately after you save the
file. Changes to a media file's ACID properties are not updated in your ACID project until you click Reload on the Clip
Properties window.
Track Type Description
Loop When you select Loop, the clip is transposed to the key of the project and stretches to
fit the project tempo. Loops can be drawn across the track and will repeat end-to-end.
One-Shot When you select One-Shot, the clip is streamed from the hard disk rather than
storing it in RAM if it is longer than thirty seconds. One-shot files do not change
tempo with the rest of the loops and are not transposed to the project key.
The Stretch tab is not available when One-Shot is selected.
Beatmapped When you add a file that is longer than 30 seconds to a project, the Beatmapper
Wizard allows you to add tempo information to the file.
Tip:
To save to a different file, click the Save File As button ( ).
WORKING WITH TRACKS | 117
If you edit the file in another audio-editing program, ACID-specific data may be removed. If this occurs, simply set the
stretching properties again and click the Save File button ( ).
Stretching properties for loop files
The following table describes the settings on the Stretch tab for loop files.
Note:
The Stretch tab for Beatmapped clips is essentially the Beatmapper without the wizard.
Item Description
Root note Choose a note from the drop-down list to set the base note for loops that you want to
conform to the project key.
If you do not want a clip transposed to the project key (a clip that contains a drum sample,
for example) choose Don’t transpose.
Number of beats Choose a setting from the drop-down list to specify the length of the original file. Selecting a
value that does not match the actual file causes the loop to play at a different speed. For
example, specifying a length of 8 beats for a 4-beat loop causes the loop to play at half-
speed at any given tempo.
You can misinform the software regarding the beat length of a loop for creative ends. For
more information, see Playing double time/half time on page 263.
Stretching method Stretching properties determine how time compression and expansion is performed on
audio events. If you hear audio anomalies due to time compression, try editing the
stretching properties of the track.
Looping segments is the default stretching method, and it works well with most types of
material. The clip media is divided into sections that are crossfaded, and some sections may
be looped if necessary to achieve the necessary length.
Choose Nonlooping segments for sustaining material such as synthesizer pads and held
notes. The clip media is divided into sections that are crossfaded, but no sections are looped.
Choose Pitch shift segments to shift the pitch of the clip to adjust for increases or decreases
in tempo. Using this option, you can eliminate some of the problems that occur with
extreme tempo changes just create new sounds from existing loops. For example, if you
have slowed the project tempo down and hear echo artifacts, choosing Pitch shift segments
can eliminate these artifacts.
Choose Sliced segments for material such as drum loops where silence exists between
notes. Instead of crossfading the segments, silence is added between beats to reduce
warbling or other artifacts.
When you set the stretching method to Sliced segments, beat markers represent divisions in
the clip media where silence will be inserted to accomplish stretching. Stretch-only markers
are not used in this mode and are displayed in gray.
You can adjust stretching properties creatively. For more information, see Overriding
compress/expand on page 265.
Transient sensitivity Type a value in the box or use the spinner control to adjust the sensitivity for beat detection.
Higher settings increase sensitivity and lower settings decrease sensitivity.
When you set the control to 100, beat markers ( ), stretch markers ( or ), and beat
anchors ( ) are created for every transient.
As you decrease the setting, markers are created for only strong transients.
Increasing this setting can be advantageous when working with audio that has complex
rhythms. Lower settings are more suitable for synthesizer pads and other basic material.
Timing tightness Choose a setting from the drop-down list to specify the resolution for beat anchors ( ).
Stretch spacing Choose a setting from the drop-down list to specify how many stretch markers () will be
displayed along the bottom of the waveform display.
Audio that contains rapid notes—such as drum rolls—benefits from setting the divisions at
a smaller fraction of a beat. Slower-paced material, however, may actually suffer from high
resolution.
Redetect Beats Click to automatically detect the beats in the current file. Use this button to apply the ACID
beat-detection algorithm to existing media.
118 | CHAPTER 7
Stretch markers for loop clips
Stretch markers ( ) correspond to subdivisions of beats in the audio file. These markers tell ACID where to divide the
audio when performing time stretching to match tempo. Accurately detecting these beats is the key to making the time-
compression process sound good.
Each beat marker ( ) on the beat ruler corresponds to a combination beat/stretch marker ( ) on the timeline. If you want
to convert a combination beat/stretch marker to a stretch-only marker, double-click the marker (or right-click the marker
and choose Convert to Stretch Marker from the shortcut menu).
As a general rule, markers that are excessively close to each other may cause clicks in the audio. However, markers should
not be more than one second apart, or pitch and echo artifacts may result.
You can add, move, and delete stretch markers on the Stretch tab. If snapping is enabled, markers will snap to the current
grid spacing.
Moving markers
You can drag any marker to a new location. If you move a combination stretch/beat marker ( ), its associated beat marker
() will also be moved.
Adding markers
Double-click the marker bar at the bottom of the waveform display to create a new marker. It is advantageous to add new
markers if the software does not detect any quick subdivisions in beats.
The biggest cause of audio artifacts due to time compression is a lack of beat detection. Make sure that you add markers
anywhere the application fails to put one on a pronounced beat.
Deleting markers
You can remove a user-defined marker by right-clicking and choosing Delete from the shortcut menu (or by double-
clicking a disabled marker).
Reset stretching markers
Click the Reload button ( ) to reset the markers to their last-saved positions.
Beat anchors and markers for loop clips
Beat anchors ( ) correspond to musical beats on the ruler at the top of the waveform display. Beat markers ( )
correspond to points in time on the ruler at the bottom of the waveform display. Each beat marker corresponds to a
combination beat/stretch marker ( ) on the timeline. If you want to convert a combination beat/stretch marker to a
stretch-only marker, double-click the marker (or right-click the marker and choose Convert to Stretch Marker from the
shortcut menu).
Beat anchors and markers are used only when a groove is applied to a track.
Offsets between beat anchors and beat markers indicate that the beat represented by an anchor is actually played at the
marker position, which may occur before or after the beat. This mapping represents the difference required to remove an
existing groove from a media file and return the media to straight machine time so that grooves can be applied
accurately.
If you want to hear the results of editing beat anchors and markers, select the Play Quantized button ( ) at the bottom
of the Clip Properties window and use the Clip Properties transport controls to preview the loop. Playing the clip in Play
Quantized mode demonstrates how the clip sounds when the Quantize to Straight groove is applied.
Tip:
Use the Zoom In Time (Up) ( ) and Zoom Out Time (Down) ( ) buttons to change the magnification of the
waveform.
WORKING WITH TRACKS | 119
In most cases, you won’t need to edit beat anchors.
You can add, move, and delete beat anchors and markers on the Stretch tab.
Moving anchors
You can drag beat anchors and stretch markers to map the sample data in the waveform to a specific beat:
• Moving a beat marker ( ) changes the audio that will be played at a beat anchor location.
• Moving a beat anchor ( ) changes the beat on which the audio represented by a stretch marker will be played. Beat
anchors snap to the current grid spacing. Hold Shift while dragging to bypass snapping (press Shift after you click).
Adding anchors
Double-click the marker bar (above or above the beat ruler) to create a new anchor and marker.
Deleting anchors
You can remove a marker by right-clicking and choosing Delete from the shortcut menu (or by double-clicking it).
Reset beat anchors
Right-click the beat marker bar and choose Reset All from the shortcut menu to reset the markers to their last-saved
positions.
Stretching properties for Beatmapped tracks
The following table describes the settings on the Stretch tab for Beatmapped tracks.
Reloading files
Clicking the Reload button ( ) restores all settings from the media file. Any setting changes made on the Stretch
tab of the Clip Properties are discarded.
Clicking this button also updates the Clip Properties window when changes are made to the properties from an external
editor.
Tip:
Use the Zoom In Time ( ) and Zoom Out Time ( ) buttons to change the magnification of the waveform.
Important:
Grooves are not applied using the markers on the Stretch tab. Autodetected stretch markers are used to
establish a baseline for applying other grooves with the Groove Pool window and Groove tool. User-defined markers have
no effect on groove quantization.
Item Description
Root note Choose a note from the drop-down list to set the base note for tracks that you want to
conform to the project key.
If you do not want a track transposed to the project key, choose Don’t transpose.
Original tempo Displays the original tempo of the track as determined by the Beatmapper Wizard. Enter a
value in the box or use the spin control to adjust the tempo.
Downbeat offset Displays the location of the track's first downbeat as determined by the Beatmapper wizard.
Enter a value in the box or use the spin control to adjust the location.
Beatmapper Wizard Click the Beatmapper Wizard button to adjust a track's tempo information. For more
information, see Using the Beatmapper on page 114.
120 | CHAPTER 7
Replacing files
Clicking the Replace File button ( ) displays the Replace File dialog and allows you to replace the audio file on
the current clip with a new audio file. This feature only replaces the actual audio. All track timing, effects, and envelopes
remain.
Saving file properties
When you make changes in the Clip Properties window, the changes you have made are saved in the project file, but
does not alter the original media file. To save clip property changes in the media file, click the Save File button ( ).
You can also click the Save File As button ( ) to save the changes to a new file. The media is saved with the modified
track properties to a new file, and renames the track in the track list to reflect the change.
All the information in the Clip Properties window is saved to your file except for any pitch-shifting you have applied. Any
regions or markers you have created in the Chopper™ are also saved. For more information, see Inserting markers and
regions in the Chopper on page 102.
Adjusting clip properties for MIDI tracks
From the View menu, choose Clip Properties to display the Clip Properties window. The contents of the Clip Properties
window will change to display properties for the currently selected clip in the timeline.
You can use the Clip Properties window to edit MIDI data using the OPT list editor or piano roll.
For more information, see MIDI Track Envelopes and Keyframes on page 183.
For more information, see Editing duration on page 175.
Working with grooves
From the View menu, choose Groove Pool to toggle the display of the Groove Pool window. The top portion of the
Groove Pool window displays the available groove maps in your project. The bottom portion shows the selected groove
map so you can edit it.
A groove refers to the rhythmic pattern of a piece of music. Groove maps in ACID expand on the software’s ability to
match the rhythm and timing of files nondestructively and in real time:
• Breathe new life into your collection of loops and MIDI files by creatively applying grooves to change the rhythmic feel.
• Adjust the timing of a track to add or remove a human feel.
• Quantize and map multiple tracks or loops to a common groove.
• Extract the groove from an existing audio file.
• Create new grooves from scratch.
• Different grooves can be applied to an entire track or portions of a track so you can easily match loops with
incompatible feels and tighten/loosen grooves nondestructively.
Applying or removing grooves
From the View menu, choose Groove Pool to toggle the display of the Groove Pool window.
Tip:
You can also replace a file by dragging an audio file from the Explorer and dropping it on the track name of an
existing track.
Note:
The grooves listed in the Groove Pool are specific to your project. If you’ve deleted grooves and saved your project,
those grooves will be unavailable unless you import the grooves again. For more information, see Importing a groove on
page 123.
Note:
Grooves cannot be applied to tracks that contain Beatmapped clips.
WORKING WITH TRACKS | 121
With the Groove Pool and Groove tool ( ), you can use groove maps to adjust the timing of entire tracks or portions of
tracks.
Applying a groove to an entire track
1.
From the View menu, choose Groove Pool to display the Groove Pool window if it isn’t already visible.
2.
Drag a groove from the Groove Pool window to a track. You can drop the groove in the track list or on the timeline.
A groove event is displayed at the bottom of the track to indicate that a groove has been applied to the track.
To toggle the height of the groove strips, choose Show Full-Size Groove Strips from the View menu.
Setting a default groove for new tracks
If you have a groove that you’d like to use to set the overall feel of a project, you can set it as a default for your project.
1.
From the View menu, choose Groove Pool to display the Groove Pool window if it isn’t already visible.
2.
Choose a setting from the Default groove for new tracks drop-down list.
When you add a new loop, one-shot, or MIDI track to your project, the selected groove will be applied to the entire
track. Existing tracks are not affected.
Applying multiple groove events to a track
Groove events allow you to apply grooves to portions of tracks or apply different grooves to various portions of a track.
The groove is applied where the groove event overlaps the media event.
The edges of groove events are boundaries for grooves, and audio cannot be grooved beyond the event edges.
1.
Select the Groove tool ( ).
2.
Click the down arrow next to the Groove toolbar button and choose a groove from the menu (or double-click a
groove in the Groove Pool).
3.
Click and drag over a track to paint groove events in the same way you create other events on the timeline.
Groove events are displayed at the bottom of the track to indicate where a groove will be applied.
4.
Repeat steps 2 and 3 to paint groove events as needed.
Tips:
If you want to get really creative, try setting a clip’s stretching method to Pitch shift segments (on the Stretch tab of
the Clip Properties window). When a groove adjusts a beat so it plays early, the pitch will be raised. When a beat is played
late, its pitch will be lowered.
If a groove map does not seem to work correctly on a loop, the beats in the file may not be properly detected. Click the
Redetect Beats button on the Stretch tab of the Clip Properties window to apply the ACID beat-detection algorithm to the
loop.
Note:
Groove maps are applied nondestructively. If you want to change a media files's inherent groove, use the
Render to new track command to render a new, grooved media file.
Important:
Grooves cannot be applied to Beatmapped clips.
Tips:
• Drag a groove from the Groove Pool to an existing groove event to change the event's groove.
• Right-click and drag with the Groove tool ( ) to erase a groove event.
• Hold Ctrl and right-click a groove event with the Groove tool to erase the entire event.
• Hold Ctrl and click a groove event with the Groove Erase tool ( ) to erase the entire event.
122 | CHAPTER 7
To toggle the height of the groove strips, choose Show Full-Size Groove Strips from the View menu
Erasing groove events
1.
Select the Groove Erase tool ( ).
2.
Click and drag the Groove Erase tool to erase a groove, or hold Ctrl while clicking a groove event to erase the entire
event.
Removing unused grooves from your project
Click the Remove All Unused Grooves from Project button ( ) to remove any grooves that have not been used in your
project.
Removing a groove from your project
1.
Select a groove in the Groove Pool window.
2.
Click the Remove Selected Grooves from Project button ( ). The selected groove is removed from your project.
If the groove is in use, a confirmation will be displayed if the Confirm groove deletion when still in use check box is
selected on the General tab of the Preferences dialog.
Creating grooves
You can add grooves to your project by using an existing track, duplicating existing grooves, importing grooves, or by
creating an entirely new groove from scratch.
Using Groove Cloning to create a new groove using a track in your project
ACID can analyze a clip’s audio to extract its groove so you can apply its feel to other clips.
1.
Right-click a track header in the track list and choose Paint Clip from the shortcut menu.
2.
Choose Add to Groove Pool from the submenu.
Tips:
• Drag a groove from the Groove Pool to an existing groove event to change the event's groove.
• Drag a groove from the Groove Pool to a space between two groove events to create a new groove event to fill
the space between the events.
• Hold Ctrl while clicking the space between two groove events to create a new groove event to fill the space
between the events.
• Right-click and drag with the Groove tool to erase a groove event.
• Hold Ctrl and right-click a groove event with the Groove tool to erase the entire event.
• Hold Ctrl and click a groove event with the Groove Erase tool ( ) to erase the entire event.
• Zoom in to see groove markers in the groove events. The markers represent the amount and direction of offset
applied to beats.
Tips:
• Right-click and drag with the Groove tool ( ) to erase a groove event.
• Hold Ctrl and right-click a groove event with the Groove tool to erase the entire event.
• Hold Ctrl and click a groove event with the Groove Erase tool ( ) to erase the entire event.
• Zoom in to see groove markers in the groove events. The markers provide a visual cue to the mapped groove.
• You can also right-click a track header and choose Remove Groove from Track from the shortcut menu to
remove all groove events from a track.
Note:
Groove cloning can extract grooves from loop clips only.
WORKING WITH TRACKS | 123
A new groove will be added to the Groove Pool window using the name of the clip you selected in step 1.
Duplicating a groove
Existing grooves can serve as templates for creating your own grooves.
1.
Select the grooves you want to duplicate. Hold Ctrl or Shift to select multiple grooves.
2.
Click the Duplicate Selected Grooves button ( ). The duplicated grooves are added to the Groove Pool.
3.
To change the name of a duplicated groove, right-click a groove and choose Rename from the shortcut menu.
4.
You can then edit the duplicated grooves as needed.
Importing a groove
You can use the Import Grooves button to add grooves from .groove files or other media files to the Groove Pool of your
project.
1.
Click the Import Grooves button ( ) in the Groove Pool window. The Import Groove dialog is displayed.
2.
Select the .groove or media file you want to add. Information about the file is displayed at the bottom of the dialog.
3.
Click the Open button to add the new groove to the Groove Pool.
Exporting a groove
Grooves are stored with your ACID project. Exporting a groove allows you to save a groove in a file that you can use in
other projects or share with other ACID users.
1.
Select a groove in the Groove Pool window.
2.
Click the Export Selected Grooves button ( ). The Export Groove to File dialog is displayed.
3.
Choose a drive and folder from the Save in drop-down list, or use the browse window to locate the folder where you
want to save your groove.
4.
Type a name in the File name box, or select a file in the browse window to replace an existing groove.
5.
Click the Save button to save your groove.
Creating a new groove
1.
Click the New Groove button ( ). A new groove is added to the Groove Pool window.
2.
Type a name for your groove in the edit box, and then press Enter.
Use the Groove Editor at the bottom of the Groove Pool window to adjust the length and feel of your groove. For
more information about editing grooves, please see below.
Note:
Grooves that you create from existing clips will be available only in the project where they were created. If you want
to make a groove available to other projects, export it to a .groove file.
Tip:
You can also click the Add to Groove Pool button ( ) in the Clip Properties window to add a loop groove to
the Groove Pool.
Tip:
You can extract a groove quickly by dragging a file from the Explorer window or Media Manager window to the
Groove Pool.
Note:
By default, grooves will be saved in the folder specified in the Default groove folder box on the Folders tab of the
Preferences dialog.
Grooves in this folder will be available in the Groove Pool window when you create a new ACID project.
124 | CHAPTER 7
Editing grooves
You can use the bottom portion of the Groove Pool window to edit grooves.
Your edits are saved with your project. If you want to use the edited groove in other projects, you’ll need to export it as a
.groove file and import the edited groove in each project where you want to use it.
1.
From the View menu, choose Groove Pool to display the Groove Pool window.
2.
Select a groove in the top portion of the window.
The bottom half of the Groove Pool window displays your groove as a timeline with beat anchors and groove
markers to represent how beats will be adjusted.
You’ll notice that this view is similar to the Stretch tab in the Clip Properties window. Both windows contain beat
anchors ( ); however, the markers on these windows perform opposite functions: the beat markers ( ) on the
Stretch tab are used to remove an existing groove from a file, and the groove markers ( ) on the Groove Editor
window represent a new groove that can be applied with the Groove Pool window and Groove tool.
• In the Groove Editor window, a beat anchor ( ) represents the beat that will be adjusted, or the source of your
groove adjustment.
•A groove marker () represents the point in time when a beat will be played. This is the destination of your
groove adjustment. A groove marker can occur before or after the beat anchor. A line connects a groove marker
to its associated beat anchor.
3.
Use the Length spinner control to adjust the length of the groove. Decreasing the setting will remove beat anchors
and groove markers from the file; increasing the setting will add anchors and markers.
4.
Add or remove markers as needed:
• If you want to add a marker, press M or double-click the beat ruler. A beat anchor and groove marker are added
to the nearest division on the beat ruler.
• If you want to delete a marker, right-click it and choose Delete from the shortcut menu.
5.
Adjust beat anchors and groove markers as necessary. Adjusting anchors and markers during looped playback helps
you hear the results of your edits.
a.
Drag a beat anchor ( ) (or insert a new one) to indicate which beat you want to adjust.
If snapping is enabled, beat anchors snap to the current grid spacing. Hold Shift while dragging to bypass
snapping (press Shift after you click).
b.
Drag a groove marker ( ) to adjust when the beat will be played. Drag to the left if you want a beat to be played
early, or drag left if you want it to be played late.
You cannot drag groove markers past each other, but multiple markers can exist at the same point in time.
When the Allow snapping for Post-Groove Markers check box is selected on the General tab of the Preferences
dialog, groove markers will snap to the current grid spacing if snapping is enabled. Hold Shift while dragging to
bypass snapping.
c.
Double-click a beat anchor or groove marker to reset the marker to the beat anchor position.
Using folder tracks
You can use the folder track feature to help organize your track list and timeline by grouping tracks so they can be quickly
and easily minimized or expanded.
Tip:
If you want to audition your edits in real-time, apply the groove to an event and start looped playback before you
start editing the groove.
Tip:
Use a single beat anchor/groove marker to adjust all beats forward or back equally. This produces an effect
similar to slipping an event.
Tip:
Hover over a beat anchor or groove marker to display a ToolTip that explains the effect of groove marker
adjustments.
WORKING WITH TRACKS | 125
When the folder track is minimized, you can perform edit operations on clustered events in the group, but you cannot
create events with the Draw or Paint tools or perform edge-trimming. Expand the folder track to edit individual events.
Creating a folder track
From the Insert menu, choose Folder Track. A folder track is added below the currently selected track.
You can create nested folder tracks by dragging a folder track to an existing folder track.
Adding existing tracks to a folder track
To add an existing track to a folder track, drag the track to the folder track. When the folder track is expanded, you can
specify the location of the track by dragging it to the desired position. When the folder track is minimized, dragging the
track to the folder track header places the track at the top of the list within the folder track.
Removing tracks from a folder track
To remove a track from the folder track, expand the folder track and drag the track to another location in the track list.
Muting a folder track
To mute all tracks in a folder track, click the Mute button ( ) on the folder track’s header. To unmute the folder track,
click the Mute button again.
Soloing a folder track
To solo only the tracks in a folder track, click the Solo button ( ) on the folder track’s header. To unsolo the folder track,
click the Solo button again.
Editing events in a folder track
When the folder track is minimized, you can also perform edit operations on clustered events in the group. The following
edit operations will affect clustered events:
• Pitch-shifting events.
• Dragging events.
• Cutting, copying, pasting, and deleting events.
Click to select a clustered group of events, or hold Ctrl or Shift while clicking to select multiple clusters of events. Selected
events are displayed in a darker color than unselected events.
Events that overlap are treated as a single event when the folder track is minimized.
Mixing multiple tracks to a single track
You can mix a selected group of tracks or an entire project to a single-track stereo event. If your project includes any
muted tracks, however, those events are not mixed into the new track. The original tracks and their events are unaffected
when you mix to a single track.
Typically, you would use this feature when you are finished refining a few tracks and want to combine them to conserve
processing power. Also, when you mix multiple tracks to a single stereo track, any envelope or track effects that you
applied are rendered into the newly mixed-down track. You can also use this feature to downmix 5.1 surround projects to
stereo.
This option also allows you to destructively process any track effect plug-ins.
1.
Solo the tracks you want to mix. To mix down the whole project, skip to step two.
Tip:
You can also use folder tracks to maintain alternate mixes of a project. For example, create two distinct drum parts
and move the tracks to separate folder tracks. Mute one of the drum folder tracks to choose which beat is used when you
play or render your project.
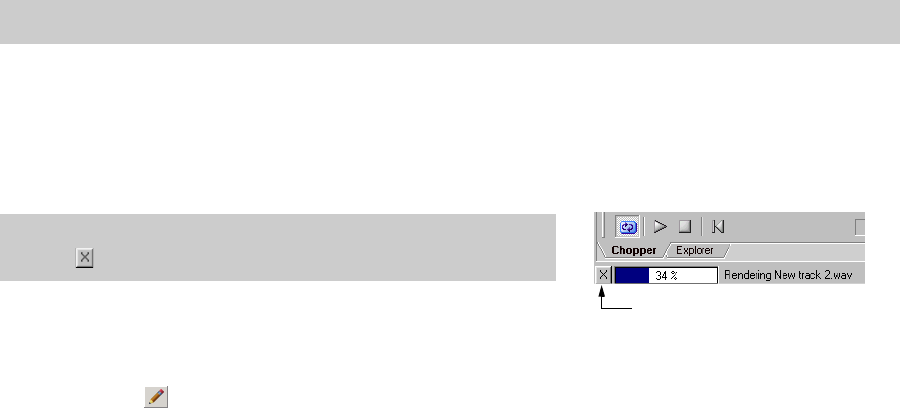
126 | CHAPTER 7
2.
From the Tools menu, choose Render to New Track or press Ctrl+M. The Render to New Track dialog appears.
3.
Complete the Render to New Track dialog:
•From the Save in drop-down list, choose the location where you want to save the new media file.
• Enter a name for the track in the File name box.
•From the Save as type drop-down list, choose a file format.
•From the Template drop-down list, choose an audio format from the template list, or click Custom to create
custom rendering settings.
• Select the Render loop region only check box if you want to render only the loop region to the new mixed
down track. Clear the check box to render the full length of the project.
4.
Click Save. The time selection or project is mixed down to a new track and a copy of the file is saved in the folder
specified.
As the tracks are being mixed down, a status bar appears in the lower-left corner of the ACID window.
After the new track is mixed down, it appears at the bottom of the track view. If you mixed down the entire project,
you may delete or mute the other tracks from the project, as they are all contained on the new track.
5.
Use the Draw ( ) tool to paint the waveform on the new track.
Exporting loops
From the File menu, choose Export Loops to create new loops using the original loop media files in your ACID project.
A new loop file is created for every tempo change in the project, which can result in multiple loop files being created from
a single loop media file.
1.
From the File menu, choose Export Loops. The Export Loops dialog appears.
2.
From the Save in drop-down list, choose the drive or folder to which the new files will be saved.
3.
From the Save as type drop-down list, choose the file format.
4.
From the Template drop-down list, choose an audio format, or click Custom to create custom rendering settings.
5.
Click Save. A progress dialog appears for each track as it is rendered to a file. Tempo information is included in the
file name of each loop file created (e.g., bass 120.000 BPM. wav).
Note:
If you want to downmix a 5.1 surround project, choose a stereo rendering format.
Tip:
You may cancel the rendering process by clicking the Cancel
button ( ) on the status bar.
Cancel button

USING AUTOMATION | 127
Chapter
8
Using Automation
Automation allows you to control audio and video levels, panning, and effect parameter automation over time. You can
create fades, apply stereo panning, and vary effect parameters throughout your project. Automation is represented on
the ACID® timeline as an envelope or set of keyframes. You can create automation by adding envelopes or keyframes to
your tracks (including bus tracks), or you can record automation parameters by adjusting controls in the ACID interface
(or on a control surface) during playback.
For more information, see Connecting a control surface on page 241.
Showing or hiding automation controls
The controls in the track list can function as trim controls or automation controls for track volume, panning, assignable
effects send, and bus send levels. Adjusting the trim control affects the level of the entire track.
To display trim controls in the track header, deselect the Automation Settings button .
Track automation
Track automation will always affect all events on the track. This means that any event envelopes will be calculated after
the track automation. For more information, see Using event envelopes on page 71.
Mute automation
Mute automation changes a track’s mute state throughout your project. Mute automation is either on or off with no fade
between. If you want to use fades, apply volume automation.
When you apply mute automation to a track, it’s possible to have a track that is muted and soloed simultaneously. The
mute state overrides the solo state:
•If a track’s Solo button is selected, the track is included in the solo group, but it will be muted whenever the
mute automation is set to mute the track.
•If the track’s Mute button is selected, the track is muted regardless of the mute automation settings.
Adding or removing mute automation
1.
Select a track.
2.
From the Insert menu, choose Audio Envelopes or Video Envelopes, or right-click in the track list and choose Insert/
Remove Envelope from the shortcut menu.
3.
From the submenu, choose Mute. A check mark is displayed next to the command, and an envelope is added to the
timeline.
4.
You can adjust the automation by editing the envelope in the timeline or by using the Mute button in the track
header when the Automation Settings button is selected.
Adjusting mute automation settings
1.
Select the Automation Settings button . The Mute button is displayed as .
2.
Click the Mute button to change the track's mute automation state at the cursor position.
The button behaves differently depending on the track automation recording mode:
• When the track automation mode is set to Off, the button mutes the entire track.
• When the track has a mute envelope and the track automation mode is set to Read, the button changes state to
reflect the envelope setting during playback but cannot be adjusted.
• When the track has a mute envelope and the track automation mode is set to Touch or Latch, the button edits
the envelope setting at the cursor position.
Tip:
Choose a fade type from the Audio default drop-down list on the Editing tab of the Preferences dialog to set the
default fade type that will be used when you add volume and panning envelopes. This setting is used only when you
create new envelopes—when you add a point to an existing envelope, the new point always uses the same fade type
as the preceding envelope point. Also, this setting is not used for event envelopes.
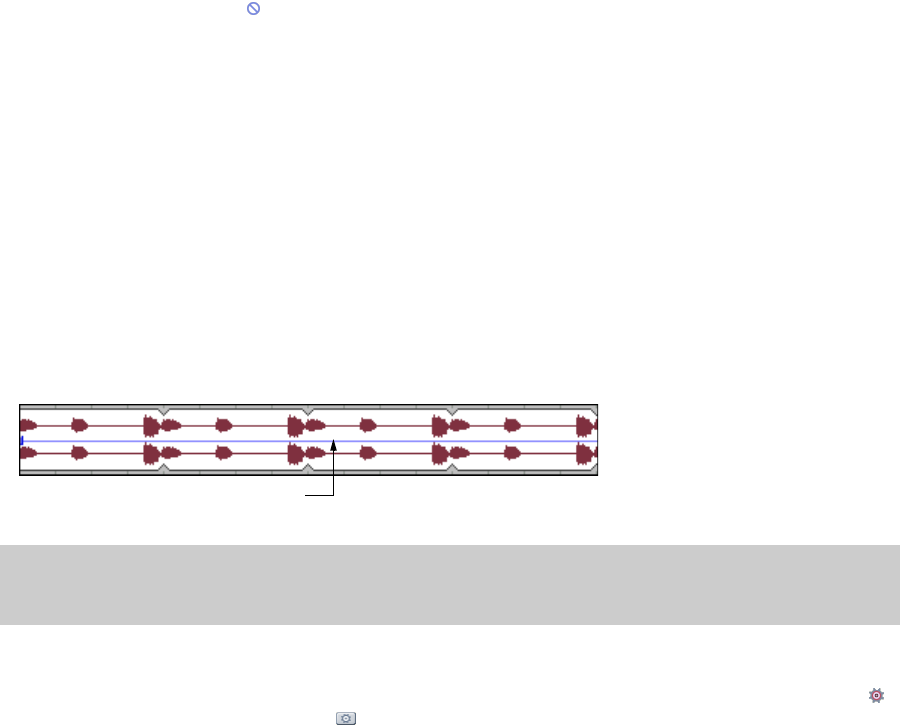
128 | Chapter 8
If you click the Mute button during playback, the behavior varies depending on the selected automation
recording mode. For more information, see Automating 5.1 surround projects on page 136.
Volume or pan automation
You can change a track’s volume or position in the stereo field throughout a project using automation envelopes.
Adding volume or pan envelopes
1.
Select the track to which you want to add the envelope. (You may select multiple tracks.)
2.
Add the envelope to the selected track(s) in one of following ways:
•From the Insert menu, choose Envelopes, and choose Volume or Pan from the submenu.
• Right-click the track header in the track list, choose Insert/Remove Envelope from the shortcut menu, and
choose Volume or Pan from the submenu.
• Press Shift+V (volume envelope) or Shift+P (pan envelope).
A blue line appears across the track(s) for a volume envelope, and a red line appears across the track(s) for a pan
envelope.
Adjusting volume or pan automation settings
1.
If you want to change volume or pan settings by recording automation, select the Automation Settings button .
The fader/slider handle is displayed as a in automation mode.
2.
Drag the Vol fader to control how loud a track is in the mix or drag the Pan slider to control the position of the track
in the stereo field.
The fader and the slider behave differently depending on the track automation recording mode:
• When the track automation mode is set to Off, the fader adjusts the volume of the entire track and the slider
pans the entire track. In this mode, the automation control acts as a second trim control.
• When the track has a volume envelope and the track automation mode is set to Read, the fader/slider will follow
the envelope during playback but cannot be adjusted.
• When the track automation mode is set to Touch or Latch, the fader/slider edits the envelope setting at the
cursor position. If the track does not have a volume/pan envelope, an envelope will be added when you adjust
the fader/slider.
If multiple tracks are selected, all selected tracks are adjusted.
If you adjust the fader/slider during playback, the behavior varies depending on the selected automation recording
mode. For more information, see Automating 5.1 surround projects on page 136.
Bus automation
You can use bus automation envelopes to vary the level of a track sent to a bus.
Adding bus envelopes
A bus envelope controls the level of a track sent to a particular bus. Before you can add a bus envelope, you must add
busses to the project. For more information, see Adding busses to the project on page 141.
1.
Select the track to which you want to add the bus envelope. (You may select multiple tracks.)
2.
Add the envelope to the selected track(s) in one of the following ways:
Note:
Because the default panning mode is additive, you can introduce clipping when panning a track to the left or right.
Choose an appropriate pan type and adjust the track volume accordingly. For more information, see Choosing stereo pan
types on page 113.
Envelope line
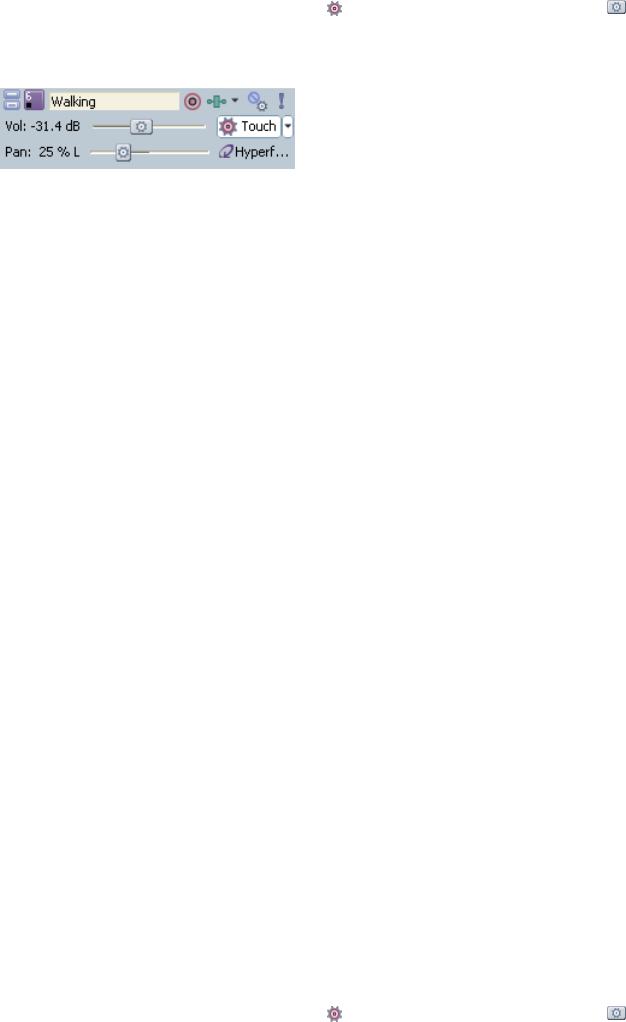
USING AUTOMATION | 129
•From the Insert menu, choose Envelopes, and choose the bus for which you want to add an envelope from the
submenu.
• Right-click the track header in the track list, choose Insert/Remove Envelope from the shortcut menu, and
choose the appropriate bus from the submenu.
A purple line representing the envelope appears across the track(s).
Adjusting bus automation levels
1.
Select the Automation Settings button . The fader handle is displayed as a in automation mode.
2.
Click the label on the multipurpose slider and choose a bus from the menu.
3.
Drag the fader to control the level of the track sent to each of the assignable FX chains that you have created.
Dragging the fader to the left cuts the volume; dragging to the right boosts the volume.
The fader behaves differently depending on the track automation recording mode:
• When the track automation mode is set to Off, the fader adjusts the send level of the entire track. In this mode,
the automation control acts as a second trim control.
• When the track has a bus envelope and the track automation mode is set to Read, the fader will follow the
envelope during playback but cannot be adjusted.
• When the track has a bus envelope and the track automation mode is set to Touch or Latch, the fader edits the
envelope setting at the cursor position. If the track does not have an envelope, one will be created when you
adjust the fader.
If multiple tracks are selected, all selected tracks are adjusted.
If you adjust the fader during playback, the behavior varies depending on the selected automation recording mode. For
more information, see Automating 5.1 surround projects on page 136.
Assignable effects automation
You can use assignable effects automation to vary the level of a track sent to an assignable effects chain.
Adding assignable effect envelopes
An assignable effect envelope controls the level of a track sent to a particular assignable effect chain. Before you can add
an assignable effect envelope, you must add an assignable effect chain to the project. For more information, see Adding
assignable effect controls on page 142.
1.
Select the track to which you want to add the assignable effect envelope. (You may select multiple tracks.)
2.
Add the envelope to the selected track(s) in one of following ways:
•From the Insert menu, choose Envelopes, and choose the assignable effect chain for which you want to add an
envelope from the submenu.
• Right-click the track header in the track list, choose Insert/Remove Envelope from the shortcut menu, and
choose the appropriate assignable effect chain from the submenu.
A green line representing the envelope appears across the track(s).
Adjusting assignable effects automation levels
1.
Select the Automation Settings button . The fader handle is displayed as a in automation mode.
2.
Click the label on the multipurpose slider and choose an assignable effects chain from the menu.
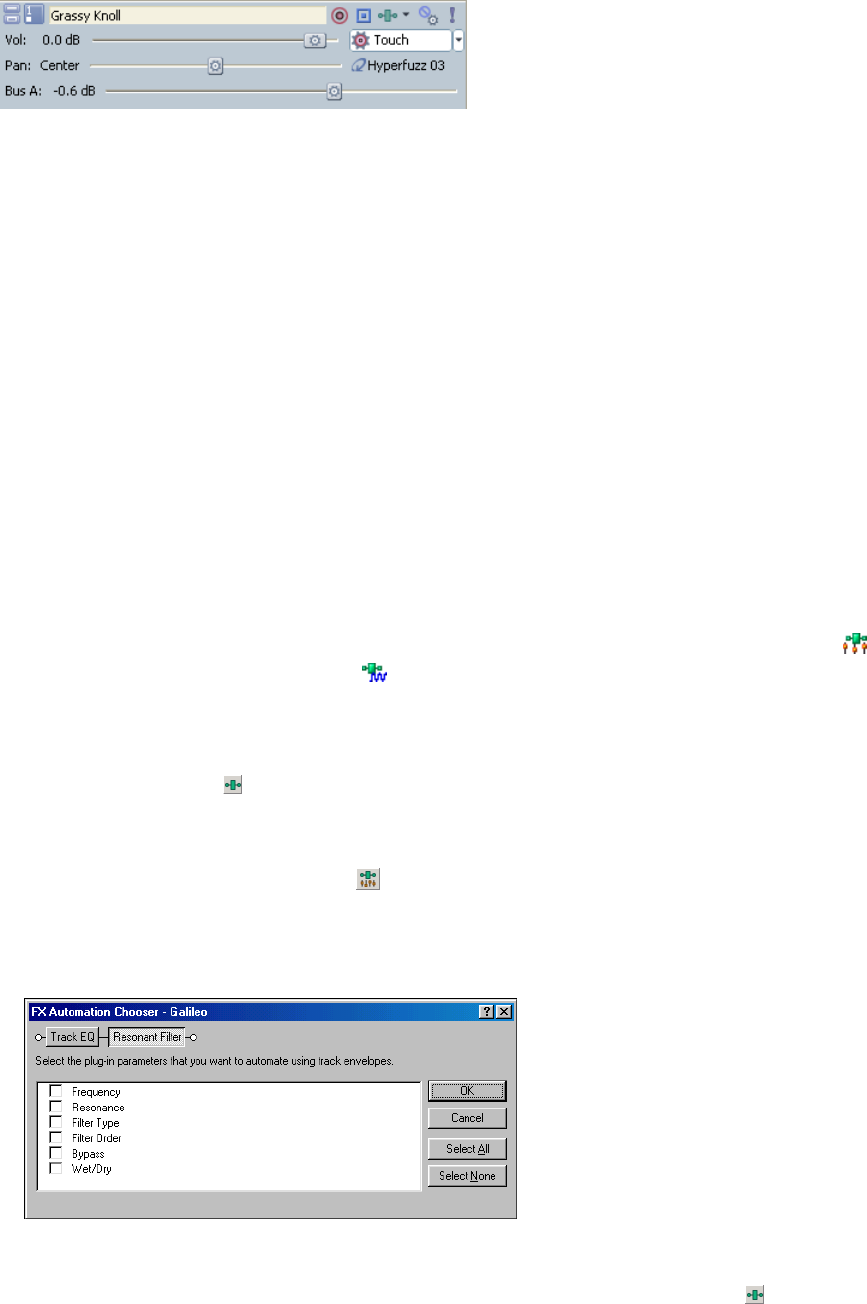
130 | Chapter 8
3.
Drag the FX fader to control the level of the track sent to each of the assignable FX chains that you have created.
The fader behaves differently depending on the track automation recording mode:
• When the track has an assignable effects envelope and the track automation mode is set to Off, the fader
adjusts the send level of the entire track. In this mode, the automation control acts as a second trim control.
• When the track has an assignable effects envelope and the track automation mode is set to Read, the fader will
follow the envelope during playback but cannot be adjusted.
• When the track has an assignable effects envelope and the track automation mode is set to Touch or Latch, the
fader edits the envelope setting at the cursor position. If the track does not have an envelope, one will be
created when you adjust the fader.
If multiple tracks are selected, all selected tracks are adjusted.
If you adjust the fader during playback, the behavior varies depending on the selected automation recording mode. For
more information, see Automating 5.1 surround projects on page 136.
Adding or removing track effect automation
If a plug-in supports automation, you can dynamically adjust effect parameters over time.
Adding effect automation envelopes
If a plug-in supports automation, you can use envelopes to adjust effect parameters over time. The appearance of the
plug-in in the Plug-In Chooser window indicates whether the plug-in supports automation. Plug-ins with this icon
support automation, while plug-ins with this icon do not. In addition, you can quickly locate plug-ins that support
automation in the Automatable subfolder.
For creative ways to use effect automation envelopes, see Creating wah-wah effects with automated Track EQ on page 264 and
Turning automated effects on and off on page 265.
1.
Click the Track FX button ( ) on a track to open the Audio Plug-In window.
If no track effects exist, clicking the Track FX button displays the Plug-In Chooser. Use the Plug-In Chooser to create
an effect chain including an automatable plug-in. For more information, see Creating or adding to track plug-in chains
on page 111.
2.
Click the Configure FX Automation button ( ) to display the FX Automation Chooser.
3.
Click a plug-in at the top of the FX Automation Chooser. A list of the effect’s automatable parameters appears.
4.
Select the check box for each parameter that you want to control with an envelope. You can use the Select All and
Select None buttons to quickly change your selections to all or none of the parameters.
5.
Click OK to close the FX Automation Chooser.
Envelopes display on the track for parameters that you selected in the FX Automation Chooser. To control which
effect parameter envelope displays on the track, click the arrow adjacent to the Track FX button ( ) and choose an
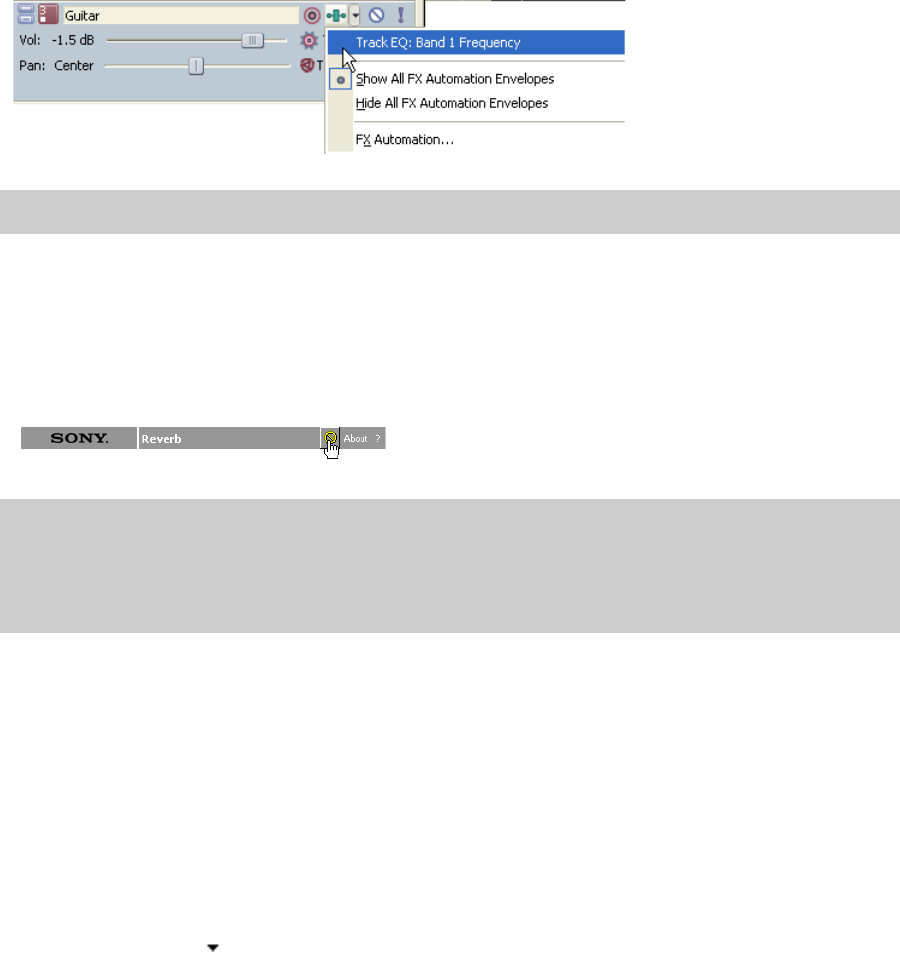
USING AUTOMATION | 131
envelope from the menu.
Adjusting effect automation settings
You can adjust automated effect parameters by editing the envelopes in the timeline or by recording automation with
the controls in the Audio Plug-In Window.
If you’ve enabled the Bypass parameter for a plug-in, you can click the Bypass button in the plug-in's banner to toggle
the Bypass envelope at the cursor position.
MIDI controller automation
You can use envelopes to adjust MIDI controllers throughout a project.
Adding or removing MIDI controller automation
1.
Right-click the track header, choose Insert/Remove Envelopes, and then choose Configure Controllers from the
menu. The MIDI Track Controllers Automation dialog is displayed.
2.
Select the check box for each controller you want to automate with an envelope.
If the controller you want to automate isn't displayed, select the Show all controllers check box at the bottom of the
dialog.
3.
Click the down arrow in the Envelope box and choose a command from the menu:
•Insert Envelope
• Show/Hide Envelope
• Reset All Envelope Points
• Delete Envelope
For more information, see You can use the Output Settings tab on the configure which controllers can be automated; add,
remove, or hide envelopes; set default values, and set each envelope's default fade curve. on page 176.
Adjusting MIDI controller automation settings
Track-level MIDI input filters—available on the Input Filters tab in the Track Properties window—allow you to control
exactly which MIDI messages you want to record or exclude.
For more information, see Setting up MIDI message input filters on page 179.
Tip:
Press E to toggle through the display of all effect parameter automation envelopes.
Note:
When you automate an effect’s frequency parameter, such as the frequency parameters in the track EQ effect,
you may notice that the frequency changes are more apparent when moving through the lower frequencies. This is
because frequency scales in track EQ and other plug-ins use a logarithmic scale, but effect automation uses linear
interpolation. To make the automated frequency changes sound more natural, change the fade curve types to change
the interpolation rates between envelope points. For high-to-low frequency sweeps, use a fast fade curve; for low-to-
high frequency sweeps, use a slow curve. For more information, see Changing envelope fade curves on page 134.
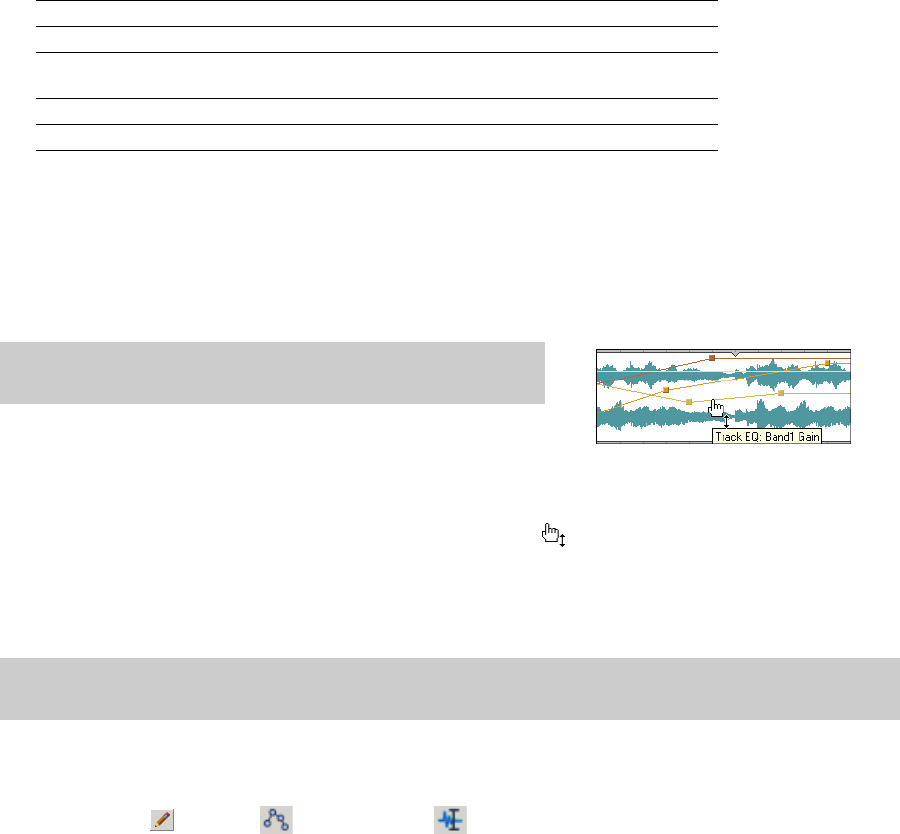
132 | Chapter 8
You can also use an external MIDI controller (or the keyboard/drum list between the track header and timeline) to record
MIDI into your ACID project.
For more information, see Using MIDI merge recording on page 166.
MIDI program change automation
You can use keyframes to change the track voice throughout your project.
For more information, see Adding a program change keyframe on page 184.
Working with track envelopes
Envelopes represent volume, audio panning, bus send levels, effect send levels, MIDI controllers, and effect parameter
automation settings in the timeline.
Adjusting envelopes
To adjust the overall level of an envelope, simply drag the envelope line up or down. A tooltip displays the amount of the
adjustment as you drag. You can adjust envelopes in real time.
You can also change the level of an envelope over time by adjusting individual envelope points that you place along the
envelope line.
Adding envelope points
After you have inserted an envelope, you can add envelope points to control the level of signal or amount of panning at
specific points in time.
1.
Place the mouse pointer on the envelope line. The envelope cursor ( ) appears.
2.
Add an envelope point in one of the following ways:
• Double-click the envelope.
• Right-click the envelope and choose Add Point from the shortcut menu.
Drawing envelope points
To create an envelope quickly, you can draw freehand envelope curves in the timeline.
1.
With the Draw , Envelope , or Time Selection tool active, hover over an envelope.
2.
Hold Shift, and then click and drag over the envelope. As you drag, a trail of envelope points is created.
3.
Release the mouse button when you're finished drawing.
If the Smooth and thin automation data after recording or drawing check box is selected on the External Control
Envelope type Description Color
Volume Controls track volume. Blue
Bus send volume Controls track level sent to bus. Lilac
Assignable effects send
volume
Controls track level sent to assignable effects control. Green
Pan Controls the position of a track in the stereo field (pan). Red
MIDI controller Adjusts MIDI controller values Various
Tip:
If you have multiple envelopes on a track, hover over an
envelope to display a tooltip indicating the name of the envelope.
Tip:
If you add too many points, you may delete a point by right-clicking it and choosing Delete from the shortcut menu.
You may also clear all envelope points by selecting Reset All from the shortcut menu.
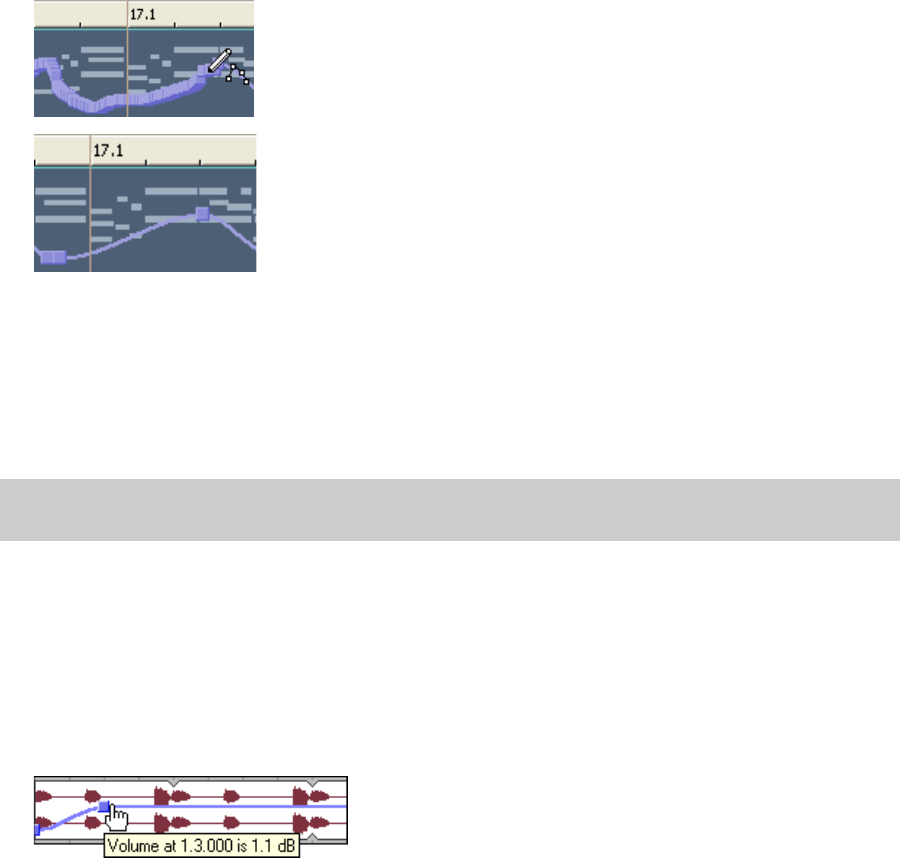
USING AUTOMATION | 133
and Automation tab of the Preferences dialog, the number envelope points will be reduced when you release the
mouse.
Thinning envelope points
Thinning envelope points decreases the number of points on an envelope while retaining the envelope’s overall settings.
Right-click an envelope and choose Thin All Points from the shortcut menu to thin the entire envelope.
To apply thinning to a section of the envelope, create a time selection, right-click the envelope, and then choose Thin
Selected Points from the shortcut menu.
Deleting envelope points
You can delete a point by right-clicking it and choosing Delete from the shortcut menu. If you want to delete all envelope
points, right-click a point and choose Reset All from the shortcut menu.
Adjusting individual envelope points
You can set the level of each envelope point by dragging it up or down. As you move an envelope point, a tooltip displays
both the point’s occurrence on the timeline and its level.
Other ways to set the level include:
• Right-click an envelope point and choose a setting from the shortcut menu.
• Choose Select All from the shortcut menu to raise or lower all points on the envelope.
• Right-click an envelope point and choose Set To from the shortcut menu. This displays a box in which you can specify a
setting.
You can adjust an envelope point’s location on the timeline by dragging it right or left. If snapping is enabled, the
envelope point snaps to time divisions as you drag. Hold Shift while dragging to override snapping (press Shift after you
click). For more information, see Using snapping on page 94.
Flipping envelopes
You can flip an envelope to invert the envelope around its center.
1.
Right-click an envelope. A shortcut menu appears.
Note:
Thinning is intended to reduce the number of envelope points created through automation recording and will
have little or no effect if you create envelopes by adding and editing points manually.
Unthinned envelope
Thinned envelope

134 | Chapter 8
2.
From the shortcut menu, choose Flip All Points.
Changing envelope fade curves
You may set the type of fade curve that occurs between envelope points: linear, fast, slow, smooth, sharp, or hold. To
change the fade curve, right-click an envelope between two envelope points and choose the appropriate fade curve
from the shortcut menu.
Locking envelope points to an event
From the Options menu, choose Lock Envelopes to Events if you want envelope points to move with an event when it is
moved along the timeline.
Using the Envelope tool
The Envelope tool ( ) is designed to manipulate multiple envelope points. Use the Envelope tool when you want to
edit envelope points but do not want to change other elements of the project. With the Envelope tool selected, events
cannot be moved or edited.
Selecting and moving envelope points
To select multiple envelope points using the Envelope tool, click the track that contains the envelope and drag your
cursor in the track view to select the points you want to move. Selected points display in an alternate color. Click any
selected point and drag it to the new position; all selected points will follow.
To deselect the points, click anywhere outside the selection.
Cutting, copying, and pasting envelope points
1.
Select the Envelope tool using one of the following methods:
•From the Edit menu, choose Editing Tool, and choose Envelope from the submenu.
•Click the Envelope Tool button ( ) on the toolbar.
2.
Click within a track to select it.
3.
Drag along the timeline to select envelope points.
4.
From the Edit menu, choose Cut or Copy.
5.
Position the cursor where you want to paste envelope points across a track.
6.
From the Edit menu, choose Paste.
Copying envelopes to another track
1.
Select the Envelope tool using one of the following methods:
•From the Edit menu, choose Editing Tool, and choose Envelope from the submenu.
•Click the Envelope Tool button ( ) on the toolbar.
2.
Click within a track to select it.
3.
From the Edit menu, choose Select All.
4.
From the Edit menu, choose Cut or Copy.
5.
Click within a track to select it.
6.
Click the Go to Start button ( ) if you want the envelope to appear exactly as it was in the original track, or click to
position the cursor where you want the envelope to start.
7.
From the Edit menu, choose Paste.
Tip:
If you want to flip only particular points on an envelope, select the points using the Envelope tool, right-click, and
choose Flip Selected Points from the shortcut menu. For more information on the Envelope tool, see Using the Envelope
tool on page 134.
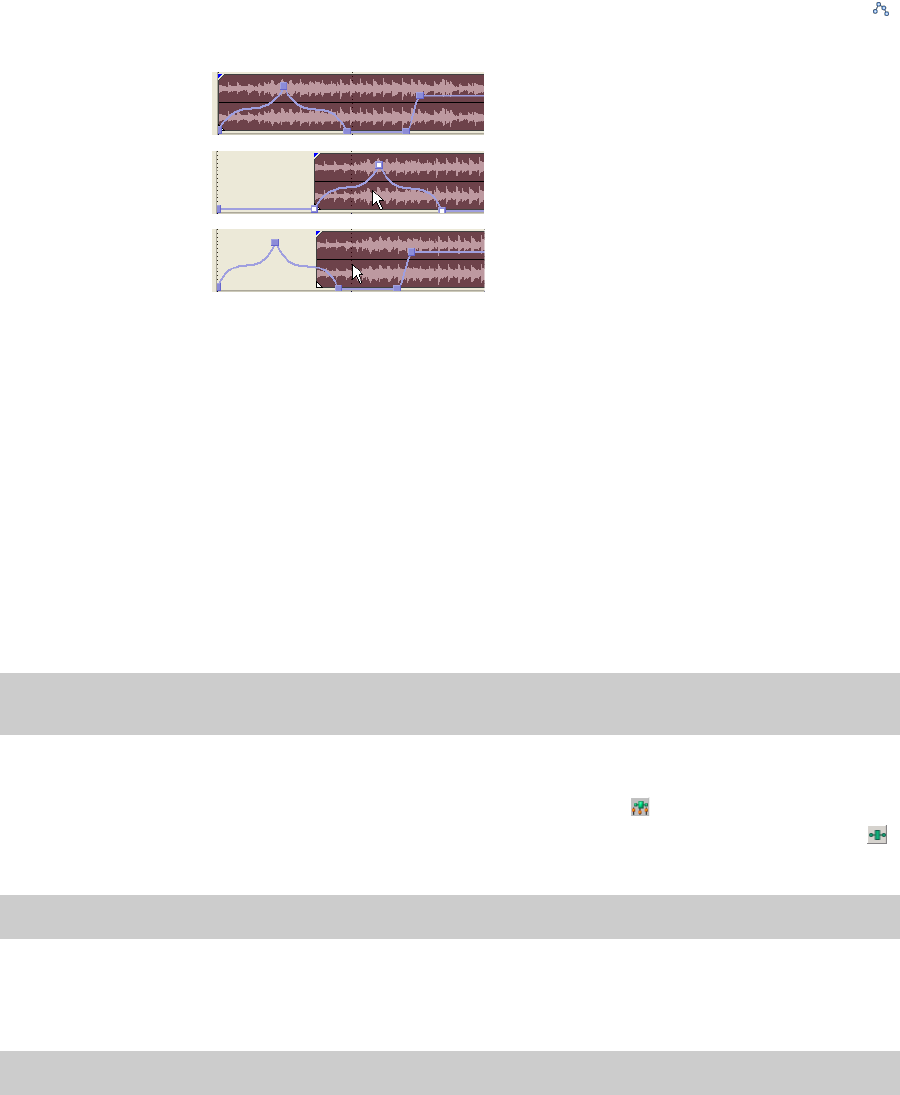
USING AUTOMATION | 135
Locking envelopes to events
Track envelopes extend for the length of a track and are independent of the events on the track. This means that the
envelope remains in place when you move the events in the track. However, track envelopes can be set to move with the
underlying events, thus preserving the timing of envelope points in relation to events.
To lock all of the envelopes in a project to the events in which they occur, click the Lock Envelopes to Events button ( )
or, from the Options menu, choose Lock Envelopes to Events. You can turn this feature off by clicking the button again.
Hiding track envelopes
After you have created your envelope and set your envelope points, you may hide the envelope. Hiding an envelope does
not affect the envelope point settings or track playback.
Hiding volume, pan, bus, or assignable effect envelopes
1.
Select the track(s) whose envelope(s) you want to hide.
2.
From the View menu, choose Show Envelopes. A submenu appears. A check mark next to an envelope type
indicates that it is visible in the track view.
3.
From the submenu, choose the type of envelope you want to hide. The specified envelope type no longer appears in
the track view for the selected track.
You can use the same steps to display the envelope again.
Hiding effect automation envelopes on a track
To hide effect parameter envelopes, click the arrow adjacent to the Track FX button ( ) and choose Hide All FX
Automation Envelopes from the menu. To display envelopes again, click the arrow adjacent to the Track FX button ( )
and choose Show All FX Automation Envelopes from the menu.
Removing track envelopes
You can remove envelopes from tracks quickly and easily.
Removing volume, pan, bus, or assignable effect envelopes
1.
Select the track(s) from which you want to remove the envelope(s).
Tip:
Select a track and press V to hide a volume envelope or P to hide a panning envelope. Press the key again to display
the envelope.
Tip:
Press E to toggle through the display of all effect parameter automation envelopes.
Note:
When you remove an envelope from a track and then add it again, you must recreate its envelope points.
The original event
Moving the event with
Lock Envelopes to Events
turned on
Moving the event with
Lock Envelopes to Events
turned off
136 | Chapter 8
2.
From the Insert menu, choose Envelopes. A submenu appears showing a check mark next to the envelopes being
used.
3.
From the submenu, choose the type of envelope you want to remove. The envelope type is removed from the
selected track(s).
Deleting MIDI controller envelopes
Click the down arrow next to the Insert/Hide Envelope button next to the controller's slider in the track header
and choose Delete Envelope.
If you want to show or hide an envelope without deleting its settings, click the Insert/Hide Envelope button .
You can also remove continuous controller envelopes on the Output Settings tab in the Track Properties dialog.
Removing effect automation envelopes
1.
Click the arrow adjacent to the Track FX button ( ) and choose FX Automation from the menu. The FX Automation
Chooser appears.
2.
Click the plug-in whose automation envelopes you want to remove. The parameters for the effect appear in the
dialog.
3.
Clear the check boxes for the envelopes to be removed.
4.
Click OK.
Automating 5.1 surround projects
In a 5.1 surround project, you can automate the center channel’s volume and surround panning using keyframes. For
more information, see Automating panning on page 217.
Automation recording modes
Automation recording allows you to edit envelope and keyframe settings by using the controls in the ACID interface.
When combined with a control surface, you can create fades and adjust control parameters with a level of control that
only a tangible control can provide.
For more information, see Connecting a control surface on page 241.
Automation recording is available for the following settings:
•Audio track envelopes (using the controls in the track header). For more information, see Working with track
envelopes on page 132.
•MIDI track envelopes (using the controls in the track header). For more information, see MIDI Track Envelopes and
Keyframes on page 183.
•Audio track effect parameters for automatable effects (using the controls in Audio Plug-In window). For more
information, see Adding effect automation envelopes on page 130.
• Bus, soft synth, and assignable effects output and panning levels (using the controls in the Mixer window or bus
track header).
• VSTi parameters (using the controls in the Soft Synth Properties window).
Tip:
Press Shift+V to remove a volume envelope or press Shift+P to remove a pan envelope.
Tip:
You can bypass effect automation without removing envelopes. For more information, see Bypassing effect
automation on page 112.
USING AUTOMATION | 137
•Surround panning keyframes. For more information, see Using the Surround Panner window on page 214.
Recording automation settings
1.
Add an envelope or automatable/keyframeable effect to a track.
For automatable audio track effects, you must add and effect automation envelope for each parameter you want to
automate.
2.
Select the Automation Settings button in the track header.
3.
Click the Automation Settings button and choose Automation Write (Touch) or Automation Write (Latch) from the
menu.
4.
Click to position the cursor in the timeline, and click the Play button to start playback.
5.
Adjust the control that corresponds to the envelope point or keyframe you want to adjust.
During playback, adjusting a control will create envelope points or keyframes at the cursor position. As long as you're
adjusting the control, new envelope points/keyframes will be created for each change of the play cursor's position.
6.
Click Stop to end playback and stop recording automation.
Editing sections of your recorded settings in Touch mode
In Touch recording mode, envelope points or keyframes are created only while a control is being adjusted. When you stop
adjusting the control, automation recording stops and the existing envelope points/keyframes are unaffected.
Use Touch mode for touching up sections of your recorded automation settings.
1.
Select the Automation Settings button in the track header.
2.
Click the Automation Settings button and choose Automation Write (Touch) from the menu. The icon in the
track header is displayed as a .
3.
Click to position the cursor in the timeline, and click the
Play
button to start playback.
4.
When you're ready to start editing, adjust the control that corresponds to the envelope point or keyframe you want
to adjust. Envelope points/keyframes are updated at the cursor position, and when you stop adjusting the control,
the original settings are preserved.
5.
Click
Stop
to end playback and stop recording automation.
Tips:
• If you want to record MIDI controller envelopes into a track using a hardware controller, you can use MIDI merge recording
to record the envelopes.
• If you want to thin envelope points after recording automation, you can select the Smooth and thin automation data
after recording or drawing check box on the External Control & Automation tab of the Preferences dialog or right-click
the envelope and choose Thin All Points or Thin Selected Points from the shortcut menu.
Automation Recording
Mode
Track Icon Description
Automation Write (Touch) Envelope points or keyframes are created only while a control is being
adjusted. When you stop adjusting the control, automation recording stops
and the existing envelope points/keyframes are unaffected.
Automation Write (Latch) Envelope points or keyframes are created when you change a control setting,
and recording continues until you stop playback. When you stop adjusting the
control, the control's current setting overwrites the existing envelope points/
keyframes.
138 | Chapter 8
Overwriting recorded settings in Latch mode
In Latch mode, envelope points or keyframes are created when you change a control setting, and recording continues
until you stop playback. When you stop adjusting the control, the control's current setting overwrites the existing
envelope points/keyframes.
Use Latch mode to overwrite automation settings with new values.
1.
Select the Automation Settings button in the track header.
2.
Click the Automation Settings button and choose Automation Write (Latch) from the menu. The icon in the
track header is displayed as a .
3.
Click to position the cursor in the timeline, and click the
Play
button to start playback.
4.
When you're ready to start editing, adjust the control that corresponds to the envelope point or keyframe you want
to adjust.
Envelope points/keyframes are updated at the cursor position until you stop playback.
5.
Click
Stop
to end playback and stop recording automation.
Editing individual envelope points or keyframes
Editing individual envelope points or keyframes gives you fine control over your recorded settings.
1.
Select the Automation Settings button on the track you want to edit.
2.
Click the Automation Settings button and choose Automation Write (Touch) or Automation Write (Latch) from
the menu.
3.
Select the parameter you want to edit:
• For a track envelope, select the envelope tool and click the envelope point you want to edit. You can right-
click a point and choose Properties from the shortcut menu to display an effect's property page.
• For a keyframe, double-click a keyframe to open its property page.
4.
Adjust the control that corresponds to the envelope point or keyframe you want to adjust. The selected envelope
point/keyframe is edited, and all others are unaffected.
For track envelopes, you can also edit the envelope directly in the timeline.
Setting the automation recording mode for a track
1.
Select the Automation Settings button in the track header.
2.
Click the Automation Settings button and choose a command from the menu to choose the automation mode.
Mode Track Icon Description
Off Automated parameters are ignored during playback.
When you switch to Off mode, the control setting from the cursor position is
used as a static setting, and the envelope/keyframe is dimmed to indicate that
it is unavailable.
Read The envelope/keyframe value is applied during playback, and the control
reflects the envelope/keyframe settings at the cursor position.
Adjustments to the control are not recorded.
Automation Write (Touch) The envelope/keyframe value is applied during playback, and the control
follows the envelope/keyframe settings during playback and when you
position the cursor.
Envelope points or keyframes are created only while a control is being
adjusted. When you stop adjusting the control, automation recording stops
and the existing envelope points/keyframes are unaffected.

USING AUTOMATION | 139
Automation Write (Latch) The envelope/keyframe value is applied during playback, and the control
follows the envelope/keyframe settings during playback and when you
position the cursor.
Envelope points or keyframes are created when you change a control setting,
and recording continues until you stop playback. When you stop adjusting the
control, the control's last setting overwrites the existing envelope points/
keyframes.
Mode Track Icon Description
140 | Chapter 8

USING THE MIXER | 141
Chapter
9
Using the Mixer
In the Mixer window, you’ll manage the project’s busses, assignable effects, and soft synth controls. In this chapter, you’ll
learn how to add each of these controls to the mixer and route individual tracks to them. You’ll also learn about working
with the mixer controls, including adjusting levels, muting, soloing, and adding effects. This chapter also describes how to
automate mixer controls by viewing them in the track view and adding envelopes.
Using busses
Think of busses as virtual pathways where signals from multiple tracks or effects can be mixed. You can add as many as 26
busses to the Mixer window, which provides you with a great deal of flexibility and mixing power.
Busses are the last stage of the ACID® signal flow and as such can be used to output audio signals to specific hardware. For
more information, see Routing busses to system hardware on page 141.
Adding busses to the project
Add a bus to a project by clicking the Insert Bus button ( ) in the Mixer window or by choosing Bus from the
Insert menu.
Adding multiple busses
1.
Display the Project Properties dialog using one of the following methods:
• Choose Properties from the File menu.
• Press Alt+Enter.
2.
Click the Audio tab.
3.
Enter a value in the Number of stereo busses box and click OK. The busses are added to the Mixer window.
Routing tracks to busses
If your project contains multiple busses, you can assign tracks to specific bus outputs. To assign a track to a bus, click the
Bus Assignment button ( ) on the track header and choose the desired bus from the menu.
Assigning tracks to busses allows you to apply settings to a series of tracks and to route tracks to a particular hardware
output.
Adjusting the bus send level
You can adjust the level of a track sent to a bus with the multipurpose slider in the track list.
Routing busses to system hardware
You can route individual busses to specific system hardware for output. This allows you to configure busses to route
output (projects or individual tracks) to sound cards, recording devices, mixing boards, etc.
By default, all busses are assigned to the Master bus. In this configuration, you can use busses for creating subgroups of
tracks. For example, you could route all your drum tracks to a bus so you can adjust their levels together without
changing their relative levels. However, you can also route busses to hardware outputs so you can use busses for sending
tracks to external effects processors or for mixing on an external mixer.
Note:
The Bus Assignment button only appears if you have more than one bus in the project.
Tip:
Bus sends are pre-volume by default. To change to post-volume, right-click the multipurpose slider label in the
track list, choose the appropriate bus from the menu, and choose Post Volume from the shortcut menu.
Note:
During startup, the application automatically identifies all hardware available for output on your computer and
listed these components as options on the Audio Device tab in the Preferences dialog. For more information, see Using
the Audio Device tab on page 230.
142 | Chapter 9
To route busses to hardware, you must first verify whether you are using a Windows Classic Wave Driver, a DirectSound
driver, or an ASIO driver as your audio device. Then you can choose the appropriate hardware device in the Mixer
window.
1.
From the Options menu, choose Preferences and click the Audio Device tab.
2.
From the Audio device type drop-down list, choose Windows Classic Wave Driver or an ASIO driver.
3.
Click OK to close the Preferences dialog.
4.
In the Mixer window, click the Playback Device Selector button ( ) on the bus you want to route.
5.
Choose a hardware device from the menu that appears.
Deleting busses
Just as you can add busses to a project at any time, you can also delete superfluous busses. When you delete a bus from a
project, tracks assigned to it are reassigned to the Master bus.
Deleting a bus
Right-click the bus in the mixer and choose Delete from the shortcut menu.
Deleting multiple busses
1.
Display the Project Properties dialog using one of the following methods:
•Choose Properties from the File menu.
• Press Alt+Enter.
2.
Click the Audio tab.
3.
Enter a value in the Number of stereo busses box and click OK. The busses are removed from the Mixer window.
Using assignable effects
You can use assignable effect controls to send various levels of multiple tracks to a single effect chain. Like busses, these
controls reside in the Mixer window and support plug-in chains. In addition, assignable effect outputs can be routed to
project busses. You can add up to 32 assignable effect controls to a project, and each control supports as many as 32
DirectX® or VST plug-ins on its chain.
For more information, see Adding depth with assignable effects on page 262..
Adding assignable effect controls
1.
From the Insert menu, choose Assignable FX or click the Insert Assignable FX button ( ) in the Mixer
window. The Plug-In Chooser dialog displays a list of the available plug-ins, and the assignable effect control is
added to the Mixer window.
2.
Add all desired plug-ins using one of the following methods:
• Double-click the desired plug-in.
Note:
If you have chosen Microsoft Sound Mapper in the Audio device type drop-down list on the Audio tab, you
cannot assign the bus to a different device.
Important:
Be aware that using non-in-place plug-ins (such as Time Stretch, Pitch-Shift without preserving duration,
and some Vibrato settings) will cause audio to play out of synchronization with the waveform display in the timeline and
with other tracks. If an effects chain includes non-in-place plug-ins, the effects chain icon will be displayed as a .
When using ACID as a ReWire device, any effects chain that includes non-in-place plug-ins will be automatically bypassed
to prevent synchronization problems with the ReWire mixer application. The effects chain icon will be displayed as a .
Apply the plug-ins within the ReWire mixer application.
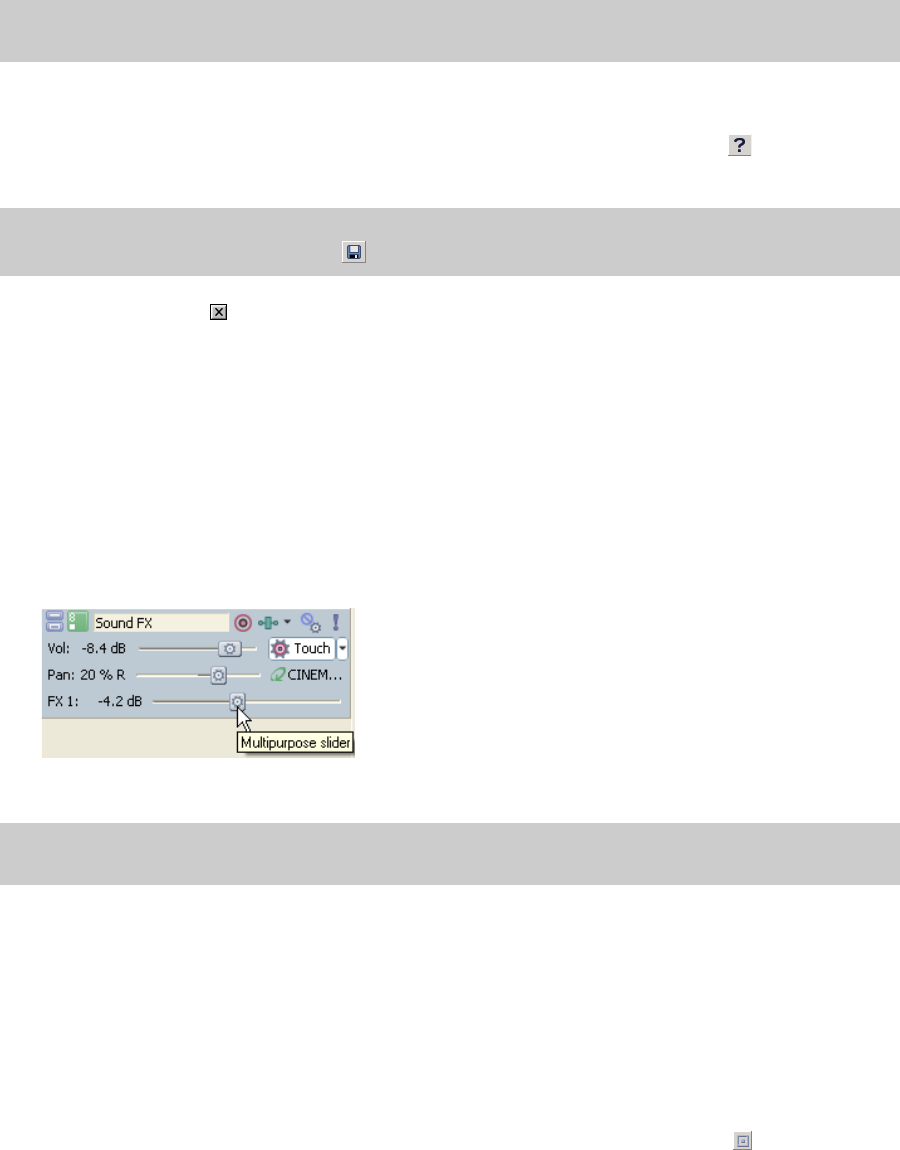
USING THE MIXER | 143
• Drag the desired plug-in to the chain area.
• Select the desired plug-in and click Add.
3.
Click OK. The Plug-In Chooser dialog closes. The Audio Plug-In window opens and displays the plug-in chain.
4.
Click a specific plug-in and adjust the effect’s parameters manually, or choose one of the presets from the Preset
drop-down list. For more information about effect parameters, click the Plug-In Help button ( ) in the Audio Plug-
In window.
5.
Click the Close button ( ) to close the Audio Plug-In window.
Working with assignable effects chains
After you add an assignable effect control, you can add plug-ins to the chain and modify them as needed. For more
information, see Adding effects to soft synth mixer controls on page 149.
Routing tracks to assignable effect controls
Routing tracks to an assignable effect control allows you to assign multiple tracks to a plug-in chain.
1.
Click the multipurpose slider label and choose the desired assignable effect control from the menu that appears. The
slider changes to reflect the name of the assignable effect control.
2.
Drag the fader to adjust the level of the track sent to the assignable effect chain.
If you set the Dry Out faders in your effect chain to -inf, you can adjust the wet/dry balance using the volume and
assignable effect settings on the multipurpose slider. The volume fader adjusts the dry signal and the assignable effect
fader controls the effect signals.
Routing assignable effect controls to busses
By default, assignable effect controls are routed to the Master bus for output. The bus then mixes the assignable effect
plug-ins with all tracks routed to the same bus and outputs the mixed signal to the appropriate output device. For more
information, see Routing busses to system hardware on page 141.
To route an assignable effect control to a different bus, click the Playback Device Selector button ( ) on the assignable
effect control and choose the desired bus from the drop-down list. The drop-down list displays all current busses in the
project. For more information, see Adding busses to the project on page 141.
Note:
If you have preset plug-in chains saved, double-click the Packaged Chains folder to view those presets. For
more information, see Saving plug-in chains as packages on page 151.
Tip:
You can save an effect’s parameters as a preset to be used in other projects. To save a preset, enter a name in the
Preset box and click the Save Preset button ( ).
Tip:
Assignable effect chains are post-volume by default. To change to pre-volume, click the multipurpose slider label in
the track list, choose the appropriate assignable effect chain from the menu, and choose Pre Volume from the submenu.
144 | Chapter 9
Deleting assignable effect controls
In the Mixer window, right-click the assignable effect control you want to delete and choose Delete from the shortcut
menu, or select the control and press Delete. The assignable effect control is removed from the Mixer window.
Using soft synth controls
You can add soft synth bus controls in the mixer to control the routing of your MIDI tracks to software synthesizers. Soft
synth controls allow you to control volume and voice mappings for your MIDI tracks and add effects to a software
synthesizer. In the same way you can route a MIDI keyboard to an outboard synthesizer module, you can route each MIDI
track to any soft synth control you have set up for your project.
There are three types of soft synth bus controls you can add: DLS (Downloadable Sounds), VSTi®, or ReWire™ devices.
A DLS or VSTi soft synth bus control is like a virtual synthesizer module where you can route tracks. In the same way you
can route a MIDI keyboard to an outboard synthesizer module, you can route each MIDI track to any soft synth you have
set up for your project or play a soft synth with an external MIDI controller.
A ReWire soft synth bus control connects a ReWire device application with ACID, which serves as a ReWire mixer
application. When ACID hosts a ReWire device application, playback is synchronized between the two programs, and the
panel application’s audio is output through the ACID mixer. With ReWire 2.0 panel applications, you can also route MIDI
tracks to ports (synths) in the ReWire device applications.
Use the soft synth bus control in the Mixer window to mute, solo, add effects to, and adjust the volume of each soft synth.
Adding soft synth controls to projects
If you have no external MIDI devices defined, a soft synth control is added with a default DLS voice set for you when you
add a MIDI track to your project. You can add more soft synth controls to a project as needed.
1.
Click the Insert Soft Synth button ( ) in the Mixer window. The Soft Synth Chooser dialog appears.
2.
To add a DLS or VSTi soft synth, click the Soft Synths tab and choose an available synth from the list. To add a ReWire
device application in ACID Pro, click the ReWire Devices tab and choose an installed device application from the list.
3.
Click OK.
Modifying soft synth control properties
Once you add a soft synth control to your project, you can use the Soft Synths Properties window to change the DLS,
VSTi, or ReWire 2.0 soft synth used by the control, or you can configure soft synths for external input from a MIDI
controller.
Soft synths that are routed to VST instruments or ReWire 2.0 panel applications inherit voicing information. Soft synths
that are routed to the DLS (DirectX) soft synth can be voiced using DLS or DLS-2 files.
Accessing the Soft Synth Properties window
You can display the Soft Synth Properties window by double-clicking the soft synth icon on a Mixer control ( ), or by
right-clicking the icon and choosing Soft Synth Properties from the shortcut menu.
Tip:
You can also use soft synth controls to play MIDI from an external device. For more information, see Playing MIDI
from external devices on page 197.
Note:
If you receive an error that a MIDI port is currently in use when you try to play back your project, check the MIDI
tab in the Preferences dialog and verify that your ReWire device applications are not trying to access the same MIDI
ports ACID is configured to use.
Note:
If the VST instrument you want to use does not appear in the list, click VSTi Preferences. For more
information, see Locating VST instruments on page 146. If the ReWire panel application you want to use does not
appear in the list, see Locating ReWire panel applications for use in ACID on page 153.
USING THE MIXER | 145
Changing the soft synth control routing
1.
Double-click the soft synth icon on a control ( ). The Soft Synth Properties window appears.
2.
Click the Edit Soft Synth button ( ). The Soft Synth Chooser dialog appears.
3.
Choose a soft synth type by:
• Routing the soft synth control to a DLS or VSTi soft synth by clicking the Soft Synths tab and choosing an
available soft synth from the list.
-OR-
• Routing the soft synth control to a ReWire device application; click the ReWire Devices tab and choose an
installed ReWire 2.0 device from the list.
4.
Click OK to return to the Soft Synth Properties window.
If you selected a VST instrument, the VSTi synth is displayed in the Soft Synth Properties window, and you can adjust
the controls as necessary. If you selected the DLS soft synth, you can click the Open DLS Voice Set button ( ) to
choose a DLS voice set.
If you selected a ReWire 2.0 device, the Soft Synth Properties window displays information about the synth’s MIDI
ports. Click the Open ReWire Device button ( ) to start the device (some applications cannot be started by a
ReWire mixer), or select the Lock MIDI Port Configuration button ( ) to lock MIDI ports so the software does not
lose port assignments due to dynamic changes from ReWire devices.
Changing voice mapping for DLS soft synth controls
You can choose a DLS set from anywhere on your system for output from a DLS soft synth control.
1.
Double-click the soft synth icon on a control ( ). The Soft Synth Properties window appears.
2.
Choose a DLS set from the Voice set drop-down list or click the Open DLS Voice Set button ( ) to browse to a DLS
set.
Changing patches for DLS soft synth controls
The DLS soft synth Available voices pane displays the patch names, numbers, and other parameters of the voices
included in the DLS set. You can choose a patch to play until the software receives a patch change from the MIDI file.
1.
Select a channel from the Channel drop-down list.
2.
Select a patch in the Available voices pane.
The Program button in the track header will display the selected patch for all tracks routed to the
channel you selected in step 1.
If the track does not contain program change keyframes, the selected patch is used to play the entire track.
If the track contains keyframes, the selected patch is assigned to the keyframe that occurs before the current cursor
position.
Adding patch changes to a MIDI file
You can add program change keyframes to tracks to change patches throughout the duration of your project. For more
information, see Adding a program change keyframe on page 184.
You can also create patch events in the list editor to change patches and banks within MIDI files. For more information, see
Creating events on page 195.
Note:
To set the current voice set as the default setting to be used whenever you add a DLS soft synth, click the Set as
default DLS Voice Set button ( ). If the default voice set is unavailable, the Windows GS sound set will be used.
Tip:
You can create patch change events in the list editor in order to change patches within MIDI files. For more
information, see Creating events on page 195.
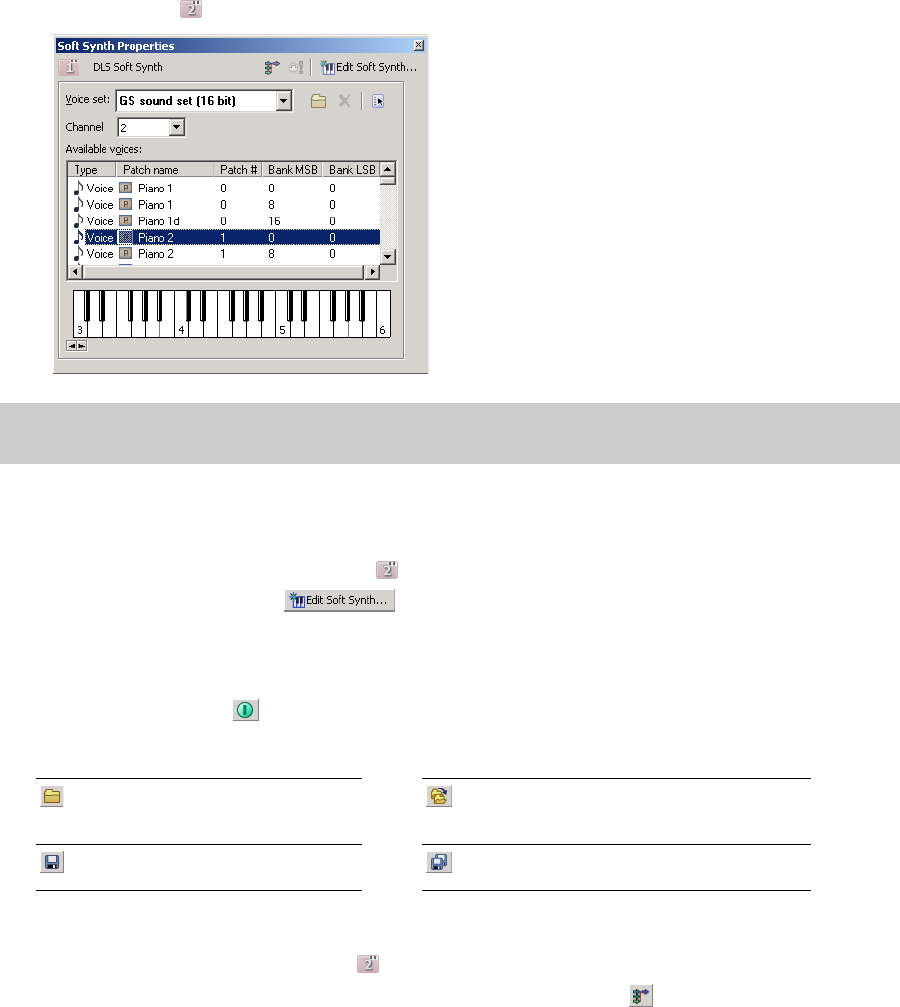
146 | Chapter 9
Previewing a DLS soft synth in the Soft Synth Properties window
When you’re using a DLS soft synth, a keyboard is displayed at the bottom of the Soft Synth Properties dialog so you can
play the synth with your mouse and audition patches. To display the Soft Synth Properties dialog, double-click the soft
synth icon on a control ( ).
Changing VST instruments for soft synth controls
You can choose a VST instrument from anywhere on your system for output from a soft synth control.
1.
Double-click the soft synth icon on a control ( ). The Soft Synth Properties window appears.
2.
Click the Edit Soft Synth button ( ). The Soft Synth Chooser dialog appears.
3.
Choose a VST instrument from the list and click OK.
If the VST instrument you want to use does not appear in the list, you may need to locate the files for use in the ACID
application. For more information, see Locating VST instruments on page 146.
4.
Select the Enable button ( ) to enable playback of the VST instrument.
5.
Modify the VST instrument settings as needed using the buttons in the Soft Synth Properties window:
Playing a soft synth with a MIDI device
1.
Double click a soft synth icon on a control ( ) in the Mixer window. The Soft Synth Properties window is displayed.
2.
In the Soft Synth Properties window, click the External MIDI Input Port button ( ) and choose a port from the
menu.
Locating VST instruments
A folder is designated where you can store VST instrument files. However, if you have VST instrument files elsewhere on
your system, you can direct the software to look for files in alternate locations.
1.
From the Options menu, choose Preferences. The Preferences dialog appears.
2.
Click the VST Instruments tab.
The Default VSTi search folder box shows the default location of VST instrument files for use in ACID. VST instrument
plug-ins located in this folder already appear in the Select VST instruments to be available as soft synths box at the
Note:
Audio driver latency can limit your ability to preview DLS voices in real time. Using low-latency drivers will produce
the best results.
Opens an effect preset. Choose an .fxp
file to replace the current instrument
preset.
Opens an effect bank. Choose an .fxb file to
replace the current effect bank.
Saves the current effect settings as a
new effect preset.
Saves the current effect settings as a new effect
bank.
USING THE MIXER | 147
bottom of the dialog.
If the VST instrument you want to use appears in this box, select its check box. If the VST instrument does not appear
in the box, continue with the following steps to locate the instruments for use in ACID.
3.
Click the Browse button next to the Alternate VSTi search folder 1 box. The Browse for Folder dialog appears.
4.
Browse to the location of your VST instrument files and click OK. The VST instrument plug-ins are located and
displayed in the Select VST instruments to be available as soft synths box at the bottom of the dialog.
5.
Repeat steps three and four for the Alternate VSTi search folder 2 box, if needed.
6.
In the Select VST instruments to be available as soft synths box, select the check boxes for the VST instruments you
want available in ACID.
7.
Click OK to close the Preferences dialog.
Configuring a soft synth for external input
Each soft synth bus control in the Mixer window can accept input from MIDI tracks and external MIDI devices. You can use
your favorite controller to play a DLS soft synth or VST instrument for recording or step recording.
1.
Double-click a soft synth icon on a control ( ) in the Mixer window. The Soft Synth Properties window is displayed.
2.
Click the External MIDI Input Port button ( ) and choose a port from the menu.
If the port you want to use isn’t displayed, choose External MIDI Device Preferences from the menu. The MIDI tab in
the Preferences dialog is displayed so you can select a port in the Make these devices available for MIDI input
section of the dialog.
3.
If you’re using a VSTi soft synth, select the Enable button ( ) on the Soft Synth Properties window to allow real-
time MIDI playback.
Soloing external MIDI inputs
Your external MIDI devices can be routed to multiple soft synth bus controls and MIDI thru devices. Soloing an external
input prevents your device from playing through other soft synths and MIDI thru devices.
1.
Double-click a soft synth icon on a control ( ) in the Mixer window. The Soft Synth Properties window is displayed.
2.
Click the Solo Listen to MIDI Input button ( ).
You can select the Solo Listen to MIDI Input button on additional soft synth bus controls to add them to the solo
group.
Deleting soft synth controls
Just as you can add soft synth controls to a project at any time, you can also delete superfluous soft synth controls. When
you delete a soft synth control from a project, tracks assigned to it are reassigned to the first soft synth control in the
Mixer window.
To delete a soft synth control, right-click the control in the mixer and choose Delete from the shortcut menu, or select the
control and press Delete.
Note:
Once you add a VSTi soft synth to a project, the VST
instrument stays locked until you close the application. When a
VST instrument is locked, you cannot clear its check box to make it
unavailable in ACID.
Note:
This step is necessary only if the Auto MIDI input routing check box on the MIDI tab of the Preferences dialog is not
selected.
Note:
This button is unavailable if the Auto MIDI input routing check box on the MIDI tab of the Preferences dialog is
selected, or if you have not selected an external MIDI input port.
148 | Chapter 9
Routing MIDI tracks to soft synth controls
If your project contains multiple soft synth controls, you can assign each MIDI track to a specific soft synth control. To
assign a track to a soft synth control, click the MIDI Output button ( ) on the track header and choose the desired soft
synth control from the menu. For more information, see Routing tracks to MIDI devices or soft synths on page 196.
Using mixer controls
Although busses, assignable effects, and soft synth controls are used to accomplish different tasks, they have many
features in common. You can adjust fader levels, mute or solo audio, and apply effects on all mixer controls. In addition,
you can select multiple mixer controls to apply changes to several controls simultaneously. You can also view mixer
controls in track view in order to automate them.
Working with mixer controls
You can adjust, solo, and mute mixer controls independently.
Adjusting faders
You can adjust mixer control levels during playback and preview the results in real-time. In addition, the stereo faders are
split into two channels. This allows you to adjust the levels of the left and right channels independently of one another.
For more information, see Adjusting split faders in the mixer on page 53.
Assignable effect controls contain two distinct faders, each of which is split into two channels. The left fader adjusts the
level of the input signal entering the control, while the right fader adjusts the output level.
Changing meter resolution
You may specify the meter resolution at which mixer controls display their signal levels. When a mixer control’s meter
resolution is changed, all meters in the Mixer window automatically change to reflect the new resolution setting. To
change the meter resolution, right-click the meter and choose the desired resolution from the shortcut menu.
Setting levels
When signals are routed through a mixer control, the signal levels may cause the meter to clip. If the meter clips, the level
is displayed in red at the top of the meter and the audio is distorted. You can lower the mixer control level and click the
red display to reset the meter. A better way to reduce clipping, however, is to adjust the volume of each track.
Muting mixer controls
Clicking the Mute button ( ) on a mixer control temporarily suspends playback of the control. When a mixer control is
muted, it appears grayed out and the word Muted appears at the bottom of the meter. Clicking the Mute button a
second time returns the mixer control to normal playback.
You can also press Z to mute a mixer control or group of controls.
Soloing mixer controls
Clicking the Solo button ( ) on a mixer control isolates playback by muting all other mixer controls. For example, when
you solo a bus, all remaining busses, assignable effects, and soft synths appear grayed out and the word Muted appears
at the bottom of their respective meters. Clicking the Solo button a second time returns all mixer controls to normal
playback.
Tip:
You can also reset the clip by right-clicking the meter and choosing Reset Clip from the shortcut menu.
Tip:
Press Ctrl and click the Mute button to mute only the selected mixer control (and restore any other muted controls). If
the selected mixer control is already muted, press Ctrl and click the Mute button to restore all controls.
USING THE MIXER | 149
You can also press X to solo a mixer control or group of controls.
Adding effects to soft synth mixer controls
You can add DirectX- or VST-compatible plug-ins, either individually or as a chain, to a mixer control. You can build plug-in
chains from any DirectX-compatible plug-ins installed on your system. You can add plug-ins (individually or as pieces of a
chain) to a mixer control at any time, and once you have added them, you can reorder them, remove them, and combine
them with additional plug-ins to achieve the desired effect.
Adding a plug-in to a mixer control results in the track signals assigned to that control being processed by the plug-in.
However, plug-ins assigned at the track level are processed before plug-ins added at the mixer level. For more information,
see Using clips with tracks on page 107.
Adding plug-in chains
1.
Click the FX button ( ) on the mixer control. The Plug-In Chooser dialog appears.
2.
Select the plug-ins that you want to add. The selected plug-ins appear in the chain area. There are three ways to add
a plug-in to the chain:
• Double-click the plug-in.
• Drag the plug-in to the chain area.
• Select the plug-in and click Add.
3.
Click OK to close the Plug-In Chooser dialog. The Audio Plug-In window opens and displays the plug-in chain.
4.
Click a specific plug-in and adjust the effect’s parameters manually, or choose one of the presets from the Preset
drop-down list. For more information about effect parameters, click the Plug-In Help button ( ) in the Audio Plug-
In window.
5.
Click the Close button ( )
to close the Audio Plug-In window.
Adding plug-ins to existing plug-in chains
1.
Click the FX button ( ) on the mixer control. The Audio Plug-In window appears.
2.
Click the Edit Chain button ( ). The Plug-In Chooser dialog appears.
3.
Add the desired plug-in(s) to the chain.
4.
Click OK to close the Plug-In Chooser dialog. The Audio Plug-In window opens and displays the plug-in chain.
Tip:
Press Ctrl and click the Solo button to solo only the selected mixer control (and restore any other soloed controls). If
the selected mixer control is already soloed, press Ctrl and click the Solo button to restore all controls.
Important:
Be aware that using non-in-place plug-ins (such as Time Stretch, Pitch-Shift without preserving duration,
and some Vibrato settings) will cause audio to play out of synchronization with the waveform display in the timeline and
with other tracks. If an effects chain includes non-in-place plug-ins, the effects chain icon will be displayed as a .
When using ACID as a ReWire device, any effects chain that includes non-in-place plug-ins will be automatically bypassed
to prevent synchronization problems with the ReWire mixer application. The effects chain icon will be displayed as a .
Apply the plug-ins within the ReWire mixer application.
Tip:
If you have saved any plug-in chain packages, double-click the Packaged Chains folder to view those packages.
For more information, see Saving plug-in chains as packages on page 151.
Tip:
You can save an effect’s parameters as a preset to be used in other projects. To save a preset, enter a name in the
Preset box and click the Save Preset button ( ).
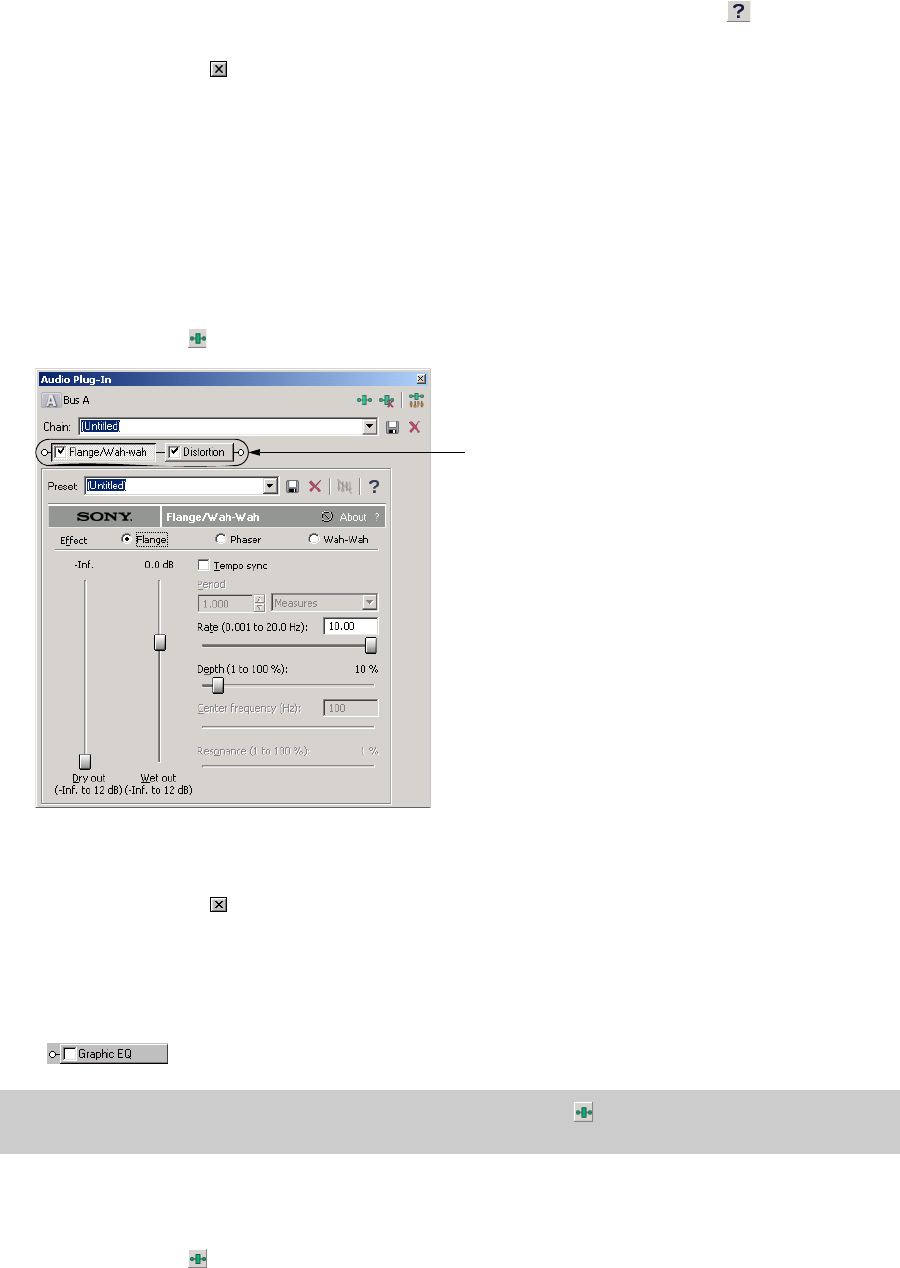
150 | Chapter 9
5.
Click a specific plug-in and adjust the effect’s parameters manually, or choose one of the presets from the Preset
drop-down list. For more information about effect parameters, click the Plug-In Help button ( ) in the Audio Plug-
In window.
6.
Click the Close button ( )
to close the Audio Plug-In window.
Arranging plug-ins on plug-in chains
The effect of plug-ins placed on a chain is cumulative. For example, when a signal passes through a plug-in, it carries
those settings through the next plug-in, and carries both settings through the next plug-in, and so on. Because of this
cumulative effect, you may need to rearrange the plug-ins on the chain so that one plug-in’s processing does not
adversely affect the next one in the chain.
There is no right or wrong way to order plug-ins, and the chain’s plug-in order is strictly based on your preferences and
desired output. However, certain plug-ins function better at specific points in the chain. For example, the dither plug-in
typically works best as the last plug-in on a chain.
1.
Click the FX button ( ) on the mixer control. The Audio Plug-In window appears.
2.
There are two ways to arrange plug-ins in your chain:
• Drag the plug-in to a new location in the chain.
• Right-click the plug-in and select Move Left or Move Right from the shortcut menu.
3.
Click the Close button ( ) to close the Audio Plug-In window.
Bypassing plug-ins on plug-in chains
You can bypass a plug-in without removing it from the chain by clearing the check box on the plug-in. Alternately, right-
click the plug-in and choose Bypass from the shortcut menu.
Removing plug-ins from chains
You can remove a plug-in from a chain at any time.
1.
Click the FX button ( ) on the mixer control. The Audio Plug-In window appears.
Tip:
To bypass (or re-enable) all plug-ins in a chain, right-click the FX button ( ) on the mixer control and choose
Bypass All or Enable All.
Plug-in chain
USING THE MIXER | 151
2.
Right-click the plug-in and choose Remove from the shortcut menu, or click the Remove Selected Plug-In button
().
3.
Click the Close button ( )
to close the Audio Plug-In window.
Removing or bypassing all effects on a mixer control
You can clear a mixer control of all effects by right-clicking the FX button ( ) and choosing Delete All from the shortcut
menu.
You can bypass the effects on a mixer control without removing them by right-clicking the FX button ( ) and choosing
Bypass All from the shortcut menu. To apply them again, right-click the FX button and choose Enable All from the
shortcut menu.
Saving plug-in chains as packages
You can save plug-in chains as packages so that you may re-use them in other projects. If you use a combination of plug-
ins often, saving them as a package saves you time. Effect packages retain their chain order and individual plug-in
settings.
You may save plug-in chains as packages from existing plug-in chains or in the Plug-In Chooser dialog during the actual
creation of the chain. The plug-in chains that you save as packages appear in the Plug-In Chooser dialog in the Packaged
Chains folder.
1.
Click the FX button ( ) on the mixer control. The Plug-In Chooser dialog appears if a plug-in chain does not already
exist.
To save an existing chain, click the FX button ( ) to open the Audio Plug-In window and skip to step four.
2.
Add and arrange plug-ins to create a plug-in chain and click OK.
3.
In the Audio Plug-In window, adjust the settings for each plug-in to achieve the effect you want. For more
information about effect parameters, click the Plug-In Help button ( ) in the Audio Plug-In window.
4.
Click the Save Chain Preset button ( ). The Save Plug-In Package dialog appears.
5.
Enter a name for the package.
6.
Click OK to save the plug-in chain as an effect package.
Organizing your plug-ins
You can create folders for organizing your plug-ins within the Plug-In Chooser dialog. You will notice that the Plug-In
Chooser dialog functions similarly to Windows Explorer. However, the Plug-In Chooser dialog only allows you to work
with plug-ins installed on your system.
Automating effect parameters
If a plug-in supports automation, you can add envelopes to a soft synth’s bus track to automatically adjust effect
parameters over time. For more information, see Using track automation envelopes on page 113.
Using the Preset Manager
Once you have created custom presets for effects or effect chains, you can use the Preset Manager to back up, transfer, or
delete custom presets from any of the plug-ins you use in ACID. The Preset Manager is a standalone application that you
can use to manage ACID, Sound Forge, and Vegas presets.
You can install the Preset Manager from the ACID installation disc. After you install the application, choose Contents and
Index from the Help menu in the Preset Manager for instructions on how to manage your presets.
Working with multiple mixer controls
When you select multiple busses, assignable effect controls, or soft synth controls in the mixer, you can simultaneously
perform functions on the controls. These functions include the following:
152 | Chapter 9
• Change bus or hardware routing
• Mute/solo bus or control
• Delete bus or control
• Change fader level
You can select multiple, nonadjacent controls by holding the Ctrl key while clicking each control’s name. You can select
multiple, adjacent controls by clicking the first control and holding the Shift key while clicking the last control in the
range.
Automating mixer controls in track view
You can automate bus, assignable effect, and soft synth controls in track view. You can view each of these controls on
tracks at the bottom of track view and to add envelopes to automate functions such as volume, pan, and assignable
effect chain input/output levels. You can also add envelopes to automate effect parameters for plug-ins that support
automation. For more information, see Track automation on page 127.
For creative ways to use bus automation, see Fading in and out of mixes on page 263.
Viewing bus tracks
From the View menu, choose Show Bus Tracks or press B. The bus tracks appear at the bottom of the track view. A bus
track appears for each mixer control in your project.
Adding track envelopes
Right-click the track header in the track list, choose Insert/Remove Envelope from the shortcut menu, and choose the
appropriate envelope type from the submenu.
You can identify which mixer controls have envelopes by looking at each control’s letter or number. An automated mixer
control has a small fader icon on its letter or number in the Mixer window.
Modifying track envelopes
You can modify a track envelope for a bus, assignable effect, or soft synth in the same way you do with any other track.
For more information, see Using track automation envelopes on page 113.
Working with ReWire
Using ReWire, you can stream audio between applications in real time, synchronize playback, and use either application’s
transport controls to control playback in the synchronized applications. The cursor position and loop region will be
shared in the synchronized applications.
ACID can be used as a ReWire mixer (host) or a ReWire device (client):
• When ACID is used as a ReWire mixer, a soft synth bus in the ACID mixer connects the ReWire device application with
the ACID audio engine. During playback, song position data is sent from the ACID window to the ReWire device
application, and the device will send its audio data back to the ACID soft synth bus control.
• When ACID is used as a ReWire device, the ReWire mixer sends song position data to the ACID project, and ACID sends
its audio to the ReWire mixer. ACID acts as a ReWire 1.0 device.
Note:
You cannot group the Preview fader in this manner with other mixer controls.
Bus with
automation
Bus without
automation
USING THE MIXER | 153
Using ACID as a ReWire mixer
ACID can act as a ReWire mixer application. After you enable a ReWire panel application to work within the software, you
can insert it as a soft synth control in the mixer, and the soft synth bus connects ACID and the ReWire device and carries
the data back and forth between them. The applications share timeline and cursor position data. ACID can mix or apply
effects to your panel application’s audio data output and then record the data.
Locating ReWire panel applications for use in ACID
If you have ReWire panel applications installed on your PC, you can select them for use as soft synth controls.
1.
From the Options menu, choose Preferences. The Preferences dialog appears.
2.
Click the ReWire Devices tab.
All installed ReWire panel applications appear in the Select ReWire Device to be available as soft synths box at the
bottom of the dialog. To choose the ReWire panel application you want to use, select its check box.
3.
Click the OK button.
Inserting a ReWire panel application as a soft synth
1.
Insert a ReWire panel application as a soft synth on the mixer just as you would a DLS or VSTi soft synth. For more
information, see Adding soft synth controls to projects on page 144.
2.
The soft synth bus control is added to the Mixer window using the default settings, and ACID attempts to start the
device. If the ReWire device application does not open, you can start it manually.
3.
Use the ReWire device application’s interface to open a project and adjust its settings.
Opening a ReWire device application
When you add a ReWire soft synth bus to your project, ACID attempts to start the device. There are several additional
ways to open a ReWire panel application for use with ACID:
• Double-click the soft synth control icon on the Mixer ( ).
• Right-click the soft synth control icon ( ) and choose Open ReWire Panel from the shortcut menu.
• Double-click the soft synth control icon ( ) on the Mixer to display the Soft Synth Properties window and then click
the Open ReWire Device Application button ( ). Click this button again to close the application when your editing
is finished.
• If ACID is unable to start your ReWire device application, you can start it manually.
Starting playback of the ACID project and synchronized ReWire devices
ReWire device and mixer applications communicate song position data back and forth with sample-level accuracy.
Position the cursor (or create a loop region) in the ACID timeline to indicate where you want playback to begin, and then
click Play ( ).
Note:
The ReWire panel application data will not be included in playback or rendering if the panel application is not
open.
Note:
Click the Lock MIDI Port Configuration button () to lock MIDI ports so port assignments are not lost due
to dynamic changes from ReWire panels.
Note:
For more information on working with your ReWire device application, please see the application’s
documentation.

154 | Chapter 9
Displaying the Soft Synth Properties window for a ReWire 2.0 Device
When you add a ReWire 2.0 synths master bus as a soft synth bus, you can double-click the soft synth control icon ( ) to
display the Soft Synth Properties window, where you can view the device’s MIDI ports, start or close the application, or
lock MIDI ports.
Click the Open ReWire Device Application button ( ) to start the device (some synths cannot be started by a ReWire
mixer application). When you’re finished editing in the ReWire device application, you can click this button again to close
the ReWire application.
Select the Lock MIDI Port Configuration button ( ) to lock MIDI ports so your ACID project does not lose port
assignments due to dynamic changes from ReWire devices.
Using ACID as a ReWire device
When ACID is used as a ReWire device, the output from your ACID mixer is output to a ReWire mixer application.
After you add the ACID synth to a ReWire mixer application, the mixer application sends song position data to the ACID
synth, which sends its audio back to the ReWire mixer.
Because ACID supports ReWire 1.0, MIDI data is not sent to the mixer (MIDI tracks are output as audio data through soft
synths).
Important notes:
• You must start your ReWire mixer application before starting ACID.
• When ACID is connected to a ReWire mixer application, the ACID project will automatically use the mixer application’s
bit depth and sample rate. Saving the ACID project in ReWire mode will not overwrite the project’s original bit depth
and sample rate.
• If a ReWire mixer application starts ACID, that ACID window will start in ReWire mode and cannot be switched from
ReWire mode. If a ReWire mixer connects to an existing ACID window, that window will run in ReWire mode, and you
can switch out of ReWire mode if necessary. If you exit that instance of the software and start ACID again, the new
instance will start in ReWire mode, and you can switch out of ReWire mode if necessary. You can switch out of ReWire
mode by choosing a new setting from the Audio device type drop-down list on the Audio tab of the Preferences
dialog.
•The ACID Tempo control below the track list is not available in ReWire Device mode. Tempo information is provided by
the ReWire mixer application.
• If a ReWire mixer application includes a tempo map, video and long one-shot tracks in your ACID project will lose
synchronization with looped material. Using ACID as a ReWire mixer (or in an ACID project without ReWire) will resolve
the issue.
• When using ACID as a ReWire device, any effects chain that includes non-in-place plug-ins will be automatically
bypassed to prevent synchronization problems with the ReWire mixer application. The effects chain icon will be
displayed as a . Apply the plug-ins within the ReWire mixer application.
• Before rendering from a ReWire mixer application, turn off the ACID metronome, or the metronome will be included in
the rendered output.
• If the mixer has a Render in Real-Time option, this mode may reduce the possibility of drop-outs from the ACID ReWire
device while rendering.
The ACID online help (from the Help menu, choose Contents and Index) provides setup information for several common
ReWire mixer applications. This information is intended to help you get up and running with ACID as a ReWire device. For
the most up-to-date information about using each ReWire mixer application, please refer to the manufacturer’s
documentation.
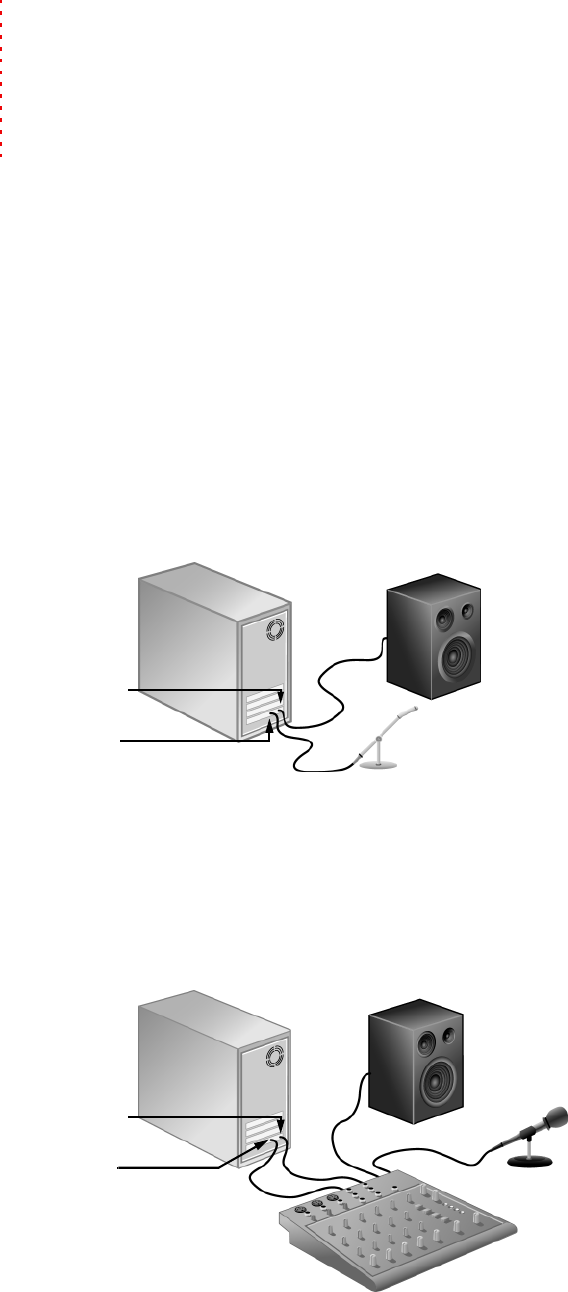
RECORDING AUDIO | 155
Chapter
10
Recording Audio
ACID® software can record audio into multiple mono or stereo audio tracks while simultaneously playing back existing
audio and video tracks. You are limited only by the performance of your computer system and audio hardware. Audio is
recorded to a media file on your computer and into an event on the timeline. You may record into an empty track, a time
selection, an event, or a combination of time and event selection. Audio output from your computer during recording is
not necessarily recorded with the new audio.
Recording does not alter any of the source media files in your project. Even when recording into an existing event, you are
not overwriting the data in that event. Instead, the data is recorded into a new take for that event and saved to a media
file on your hard drive.
For information about real-time MIDI recording, MIDI merge recording, and MIDI step recording, see Recording MIDI on
page 164.
Setting up your equipment
There are numerous ways to connect your equipment to your system. Refer to your equipment’s documentation for
specific setup instructions. The following are some possible general configurations.
Basic setup
This setup includes a simple microphone and speaker that are connected to the computer’s sound card. With a more
sophisticated microphone, you would typically want to use a preamplifier for input to the sound card.
Setup with mixer
This setup includes a mixer where the speaker and microphone connect. The mixer is then connected to the computer’s
sound card. Mixers usually have preamps built into them. This diagram does not show you an instrument or a physical
preamplifier, such as a rack-mounted component. The reason for this omission is because these types of setups vary
widely based on your mixer, instrument, and pre-amp type. Refer to your components’ documentation for specific setup
configurations.
Sound card out
Sound card in
Sound card out
Sound card in
Mixer out
Mixer in
Mixer
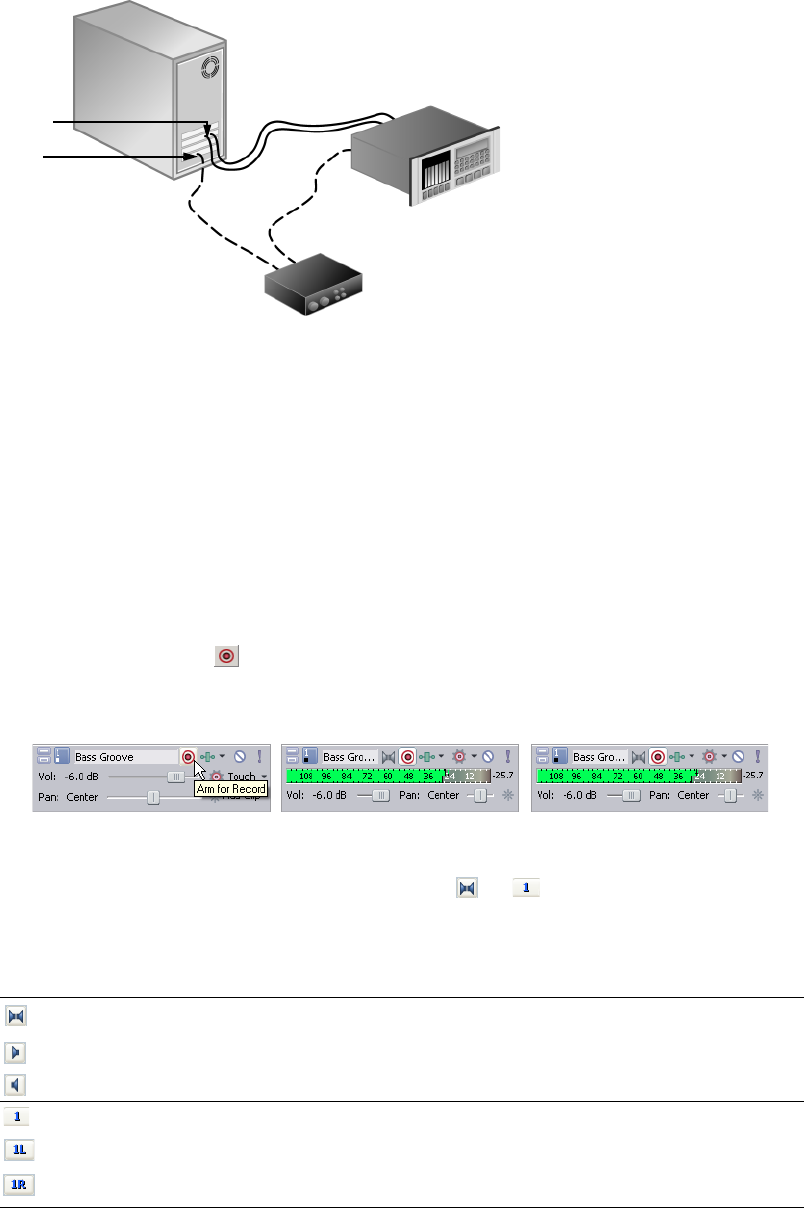
156 | CHAPTER 10
Setup with digital multitrack
This setup includes a digital multitrack recorder with an optional MIDI synchronization component. Usually you would
have a mixer, a microphone, etc. connected to these components. Your particular setup will vary depending on your
equipment. Refer to your components’ documentation for specific setup configurations.
Preparing to record
Before you record, you must arm the tracks into which you will record the new audio. You must also select the recording
settings for the tracks. You have the additional options of using a metronome or turning off playback during recording.
You may record into an empty track, a time selection, an event, or a combination of time and event selection. You can
also record multiple takes for an event so you can maintain multiple versions of an event that you may play back and edit.
Arming the track for recording
Whether recording into an existing track, an empty track, a selected event, or a time selection, you must prepare a track
for recording. You can arm multiple tracks prior to recording.
Click the Arm for Record button ( ) in the track list.
Once a track is armed, a record meter appears in the track list. Depending on your hardware, a record gain fader may also
appear.
In addition, one of two Record Device Selector buttons appears: ( ) or ( ). The button that appears is based on the
Audio device type selected in the Audio tab of the Preferences dialog. For more information, see Using the Audio Device
tab on page 230.
Button Description
Stereo
Mono left
Mono right
This button appears when Use Microsoft® Sound Mapper™ has been selected as the audio device type
on the Preferences Audio tab. The Sound Mapper allows you to choose how the signal will be
recorded: stereo or mono. Click this button to view a menu with Stereo, Left, or Right.
Stereo
Mono left
Mono right
This button appears when the Windows® Classic Wave Driver or an ASIO device has been selected as
the audio device type on the Preferences Audio Device tab. When you choose this option, you can
specify which device (e.g., sound card) you will record from on any given track prior to recording. Click
this button to view a menu with Stereo or Mono, and a submenu with all available devices for either
option.
Digital card
MIDI card
Digital out
Digital in
Sync. out
Sync. in
Digital
multitrack
MTC converter
The dashed line indicated an
option if you are synching ACID
software to tape via a MIDI
timecode.
Arm the track first. Track is ready for recording
using the Sound Mapper.
Track is ready for recording
from a specific device.
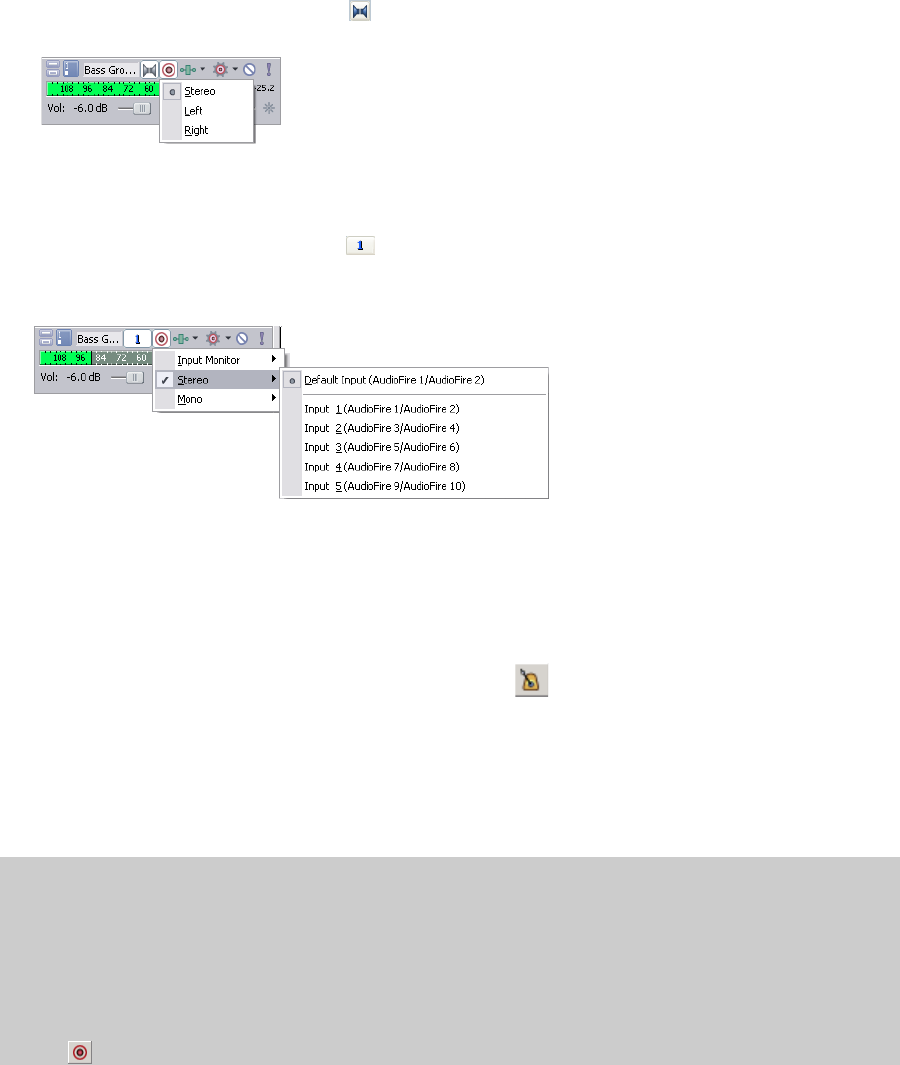
RECORDING AUDIO | 157
Selecting recording settings
After the track has been armed for recording, select whether the track records the signal in stereo, in mono from the left
channel, or in mono from the right channel. If you are using the Microsoft® Windows® Classic Wave Driver or an ASIO
device, you also must select the device from which the track will record.
Selecting recording settings for Sound Mapper
1.
Click the Record Device Selector button ( ). A menu appears.
2.
From the menu, choose the recording method (Stereo, Left, or Right).
Selecting recording settings for the Windows Classic Wave Driver or an ASIO device.
1.
Click the Record Device Selector button ( ). A menu appears.
2.
Choose either Stereo or Mono from the menu.
3.
From the submenu, choose the input device
Using the metronome
A built-in metronome marks time to help with the timing and tempo when recording a performance. The metronome’s
sound is not mixed in the final rendering of the project. Use the Preview fader in the Mixer window to control the
metronome volume.
To use the metronome, from the Options menu, choose Metronome .
Recording
You may record into an empty track, a time selection, an event, or a combination of time and event selection. The
recording is added to the timeline as new clip and is saved to a media file on your hard drive.
Recording into an empty track
1.
Select a track. Alternately, to record to a new track, choose Audio Track from the Insert menu.
Notes:
• Recorded files are in the folder specified on the Folders tab of the Preference dialog by default. If you want to
choose a project-specific folder, you can use the Recorded files folder box on the Audio tab of the Project
Properties dialog. For more information, see Using the Audio tab on page 230.
• You can use the ACID type for recorded audio drop-down list on the Audio tab of the Preferences dialog to
indicate whether you want to create Beatmapped clips of one-shots when recording audio.
•Use the Record action when nothing is armed drop-down list on the Audio tab of the Preferences dialog to
indicate whether you want to create an audio track, a MIDI track, or do nothing if you click the Record button
when no tracks are armed.
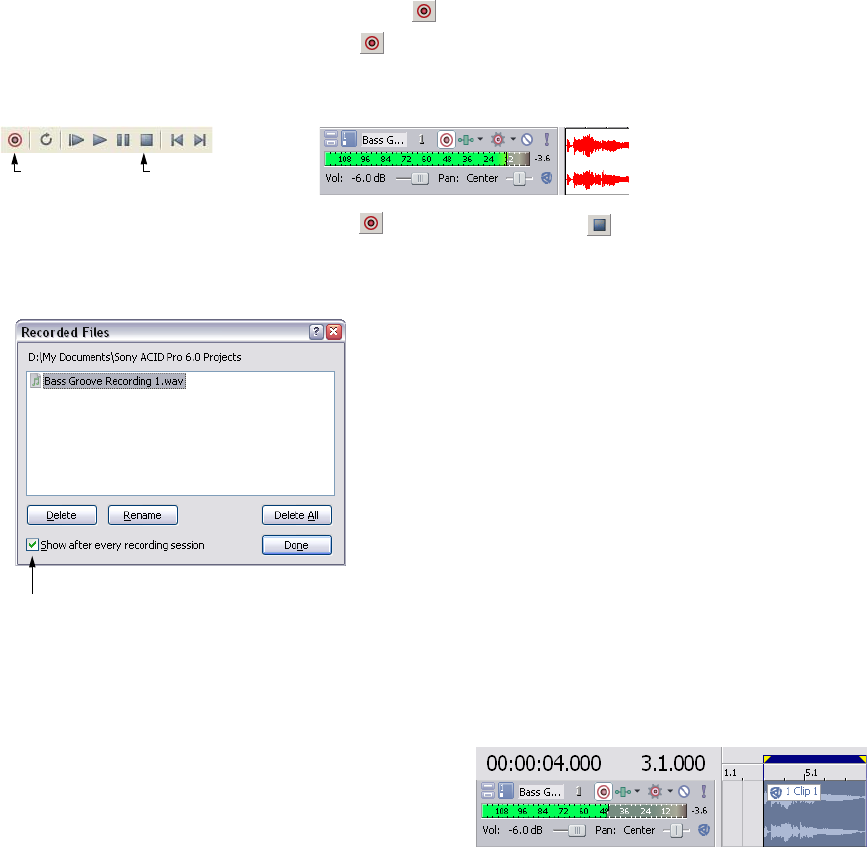
158 | CHAPTER 10
2.
Place the cursor on the timeline where you want to begin recording.
3.
Arm the track by clicking the Arm for Record button ( ) on the track.
4.
Start recording by clicking the Record button ( ) on the transport bar.
Depending on the recording selection, a waveform is created along the timeline as you record into the armed
track(s).
5.
Stop recording by clicking the Record button ( ) again or the Stop button ( ) on the transport bar.
6.
A small dialog opens displaying the name and location of the file or files that were just created. Click Done to return
to the main workspace.
Recording into a time selection
By making a time selection, you specify where along the timeline
to record. The time selection also determines how long the
software records. Any selected events that occur within the time
selection are split and the recorded data is placed into the time
selection.
The event’s waveform is displayed as it is recorded and
automatically stops recording when the cursor reaches the end of the time selection.
Recording into an event
By recording into an event, you automatically create a new clip containing the recorded material that is the same
duration as the selected event. The edges of the selected event serve as the punch-in and -out points that are used for
recording. Recording into an event allows you to establish a pre-roll before recording, which gives you time to prepare
before recording starts.
Because the entire recording is saved to the media file (not just the material between the edges of the take), you are not
limited to the recorded material contained in the length of the new clip. You can adjust the edges of the event or slip the
contents of the event if necessary. For more information, see Shifting the contents of (slipping) events on page 70.
The existing event that you record into is not affected or deleted. Instead, the event now contains two media files, each
listed as a separate clip in the track’s Clip Pool. For more information, see Using the Clip Pool on page 109.
1.
Place the cursor before the event to allow for pre-roll.
Recorded waveform
Start/stop
recording Stop recording
When a check mark appears in this box,
ACID software displays this dialog after
each recording session.
Delete—removes selected file
Rename—changes the name of a selected file
Delete All—removes all files in dialog
Done—returns to track view
Recorded waveform
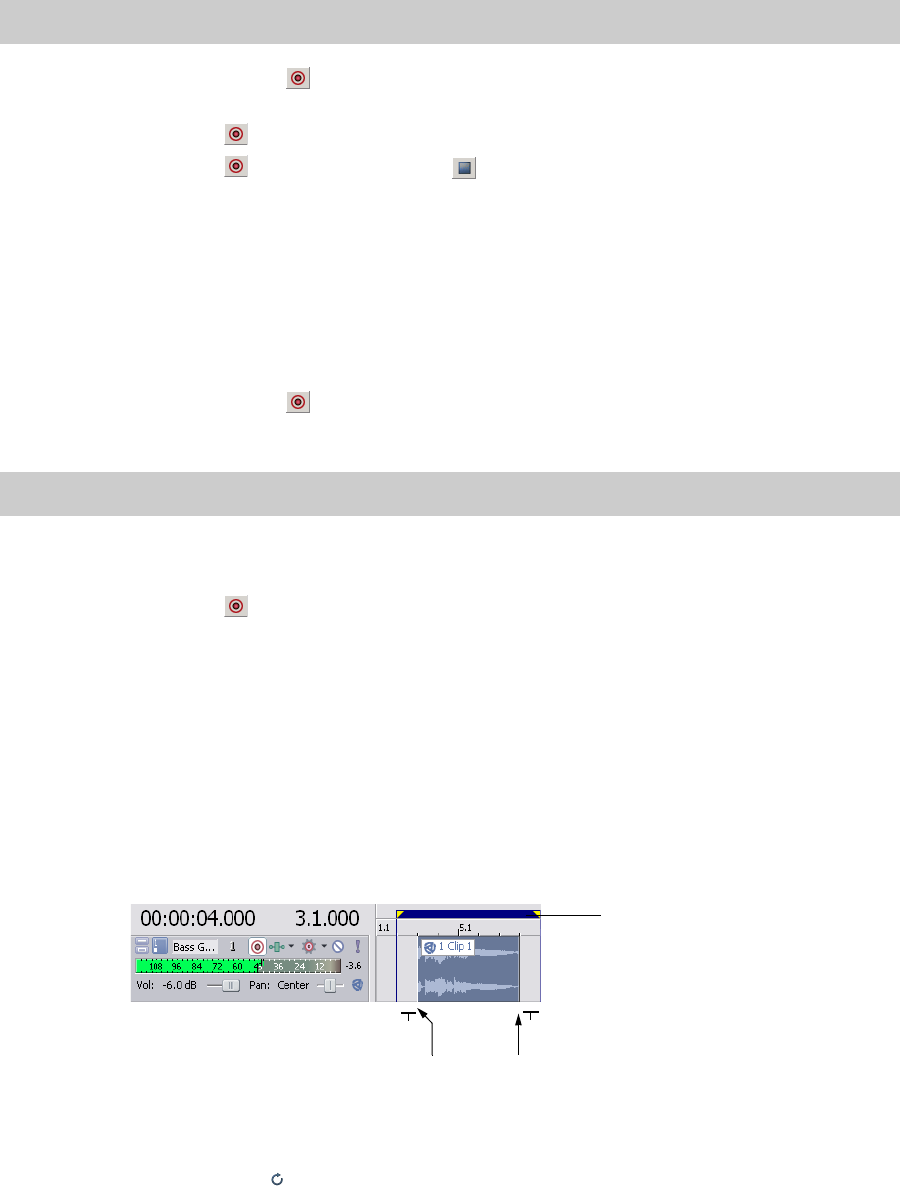
RECORDING AUDIO | 159
2.
Press Ctrl and click the event to select it.
3.
Click the Arm for Record button ( ) on the event’s track. When recording into multiple selected events, arm their
respective tracks at this time.
4.
Click the Record button ( ) on the transport bar to begin recording.
5.
Click the Record button ( ) again or the Stop button ( ) on the transport bar to stop recording.
Recording into an event with a time selection
Recording into a time selection allows for a pre- and post- roll during recording. The time selection is adjustable to
increase or decrease the pre- and post-roll duration. During recording, the selected event’s edges serve as the punch-in
and -out points. You can create multiple punch-in and -out points by selecting more events within the time selection.
You may need to split an existing event into three pieces so that you can select a smaller portion of the event to record
into. For more information, see Splitting events on page 64.
1.
Click the Arm for Record button ( ) on the desired track(s).
2.
Select the event to record into.
3.
On the marker bar, drag a time selection. You may adjust the time selection by dragging the selection bar’s starting
and ending points. Make the time selection start before the event for a pre-roll.
4.
Click the Record button ( ) on the transport bar to begin recording.
If input monitoring is turned on, the track’s original audio is played until the cursor reaches the selected event. When
the cursor plays through the selected event, you’ll hear your recording input, and the track’s original audio is played
again when the cursor moves past the selected event.
Using pre-roll
The previous technique allows you to define the playback region with a time selection and sets the punch-in and punch-
out points in the recording to the event boundaries. When you click the Record button, playback begins at the beginning
of the time selection. The event is then filled with the newly recorded material. The audio file that is recorded to your hard
disk is the full duration of the time selection. The event only contains a portion of the full recorded performance and can
therefore be trimmed (both shorter and longer) and repositioned within the event.
Working with multiple recorded clips
Clicking the Loop Playback button ( ) on the transport bar enables you to continually create clips during recording.
The last clip recorded is set as the track’s active clip. You can use clips as different versions of a recorded event that you
can quickly switch between to choose the best one.
Tip:
You can record into multiple events by pressing Ctrl and making selections.
Tip:
You may record into multiple events by pressing Ctrl and making your selections.
Time selection bar -
defines the recorded
audio file’s duration.
Post-roll
Pre-roll
Punch-outPunch-in
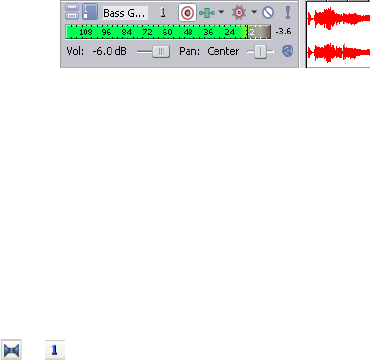
160 | CHAPTER 10
During recording with loop playback enabled, the time selection continually repeats and starts recording a new clip until
you stop recording. You can preview, select, rename, and delete clips in the Clip Pool pane of the Track Properties window
to manage the clips. For more information, see Using the Clip Pool on page 109.
The Clip Properties window will display region markers to represent the selected event’s clip in the waveform. For more
information, see Configuring clip properties on page 115.
Specifying where recordings are stored
Recorded files are saved in the folder specified on the Folders tab of the Preferences dialog is used by default.
If you want to choose a project-specific recorded files folder, you can use the Recorded files folder box on the Audio tab
of the Project Properties dialog.
Changing where recorded files are stored for new projects
1.
From the Options menu, choose Preferences.
2.
Click the Folders tab.
3.
Choose a setting from the Record drop-down list or click the Browse button to choose a folder.
4.
Click OK.
Changing where recorded files are stored for individual projects
1.
From the File menu, choose Properties. The Project Properties dialog appears.
2.
Click the Audio tab to display the project’s audio properties.
3.
Click the Browse button next to the Recorded files folder box.
4.
Browse for the location where you want to save recorded files.
5.
Click OK.
Monitoring audio levels
While you’re recording, a responsive meter is provided in the track header
to monitor the incoming signal level of the selected recording device. It is
important that you record with the highest signal possible without
clipping.
A reading of 0 dB is the maximum for a digital signal. Clipping occurs when the incoming signal is too high to be
represented as a digital value. The result is distortion in the recording. A clipped signal will be indicated by a red indicator
warning at the end of the meters.
Right-click the meters and choose a command from the shortcut menu to adjust the display of the meters.
Using record input monitoring
If you’re using a low-latency audio device and you want to hear your recording signal with real-time track effects, you can
turn on input monitoring.
To turn on input monitoring, click the Record Device Selector button ( or ) and choose Input Monitor from the
menu, and then choose Auto or On from the submenu. During recording, your signal will be played back with the current
track effects chain, but a dry (unprocessed) signal is recorded.
When Auto is selected, you will hear the input monitor signal when playback is stopped and during recording. If you’re
recording into selected events, you'll hear the input monitor signal only when the cursor passes over the selected events.

RECORDING AUDIO | 161
When On is selected, the behavior is similar to Auto mode, but you will always hear the input monitor during recording—
monitoring is not toggled on and off when recording in to a selected event.
Note:
Your ability to monitor effects in real time is dependent on your computer's performance. Effect automation
envelopes are bypassed during record monitoring.
162 | CHAPTER 10
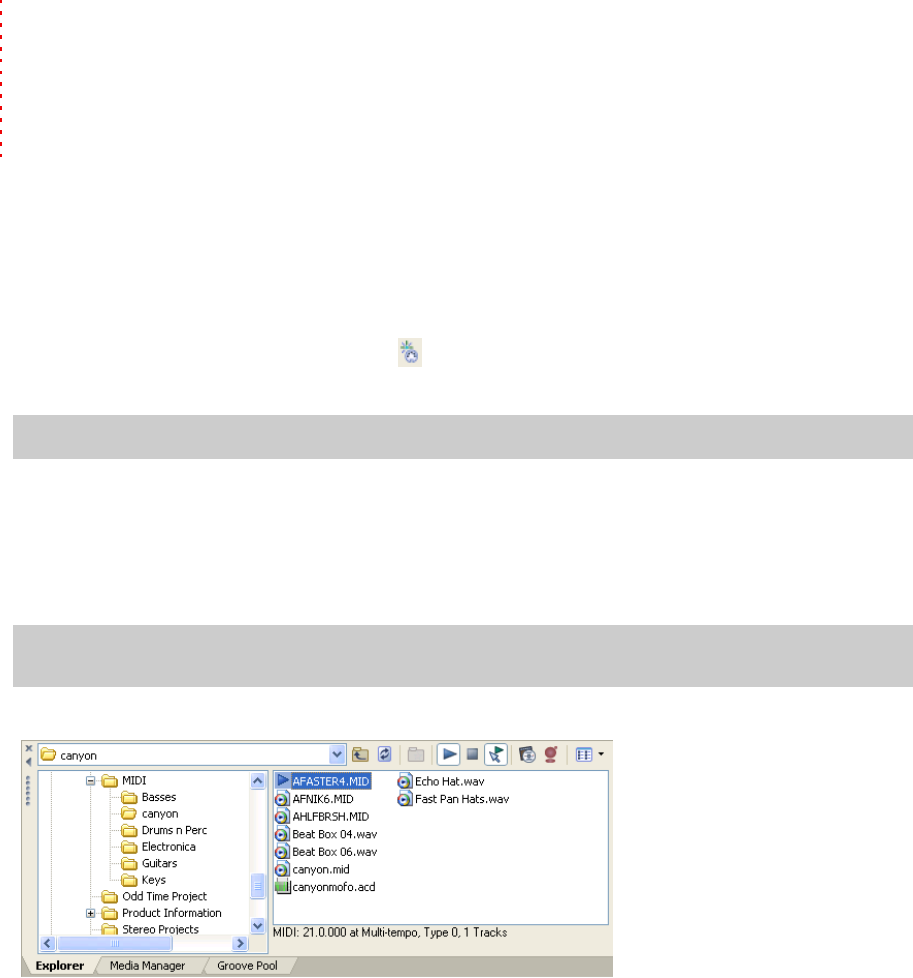
WORKING WITH MIDI | 163
Chapter
11
Working with MIDI
ACID® software allows you to record MIDI tracks and edit MIDI in your projects. The software provides two native OPT
plug-ins: the piano roll editor and the list editor. You can also render projects with MIDI tracks, play MIDI from an external
device, and synchronize to MIDI timecode (MTC).
Adding MIDI tracks and files
You can add MIDI files to your project or create new MIDI files from scratch. You can use MIDI tracks to record and play
back data from synthesizers and other MIDI-compliant equipment. MIDI tracks can use .mid, .smf, .wav, and .rmi files.
Adding MIDI tracks
To add a new, blank MIDI track to your project do one of the following:
•From the Insert menu, choose MIDI Track .
• Right-click in the timeline and choose Insert MIDI Track.
Adding MIDI files to a project
You can add MIDI files to your project just as you would add audio files. You can double-click a MIDI file to create new
tracks and events, or you can drag a MIDI file from the Explorer or Media Manager window to an existing track to add a
new clip.
When you right-click a MIDI file in the Explorer window, you can choose how you want to add it to your project:
1.
Add to Project — Adds the file to the current ACID project and adds tracks to the track list. No events are created.
• For Type 0 MIDI files, a separate track is created for each channel in the MIDI file, and all tracks are organized
within a folder track.
• For Type 1 MIDI files, a separate track is created for each track in the MIDI file, and all tracks are organized within
a folder track.
2.
Add to Project with Events — Adds the file to the current ACID project at the cursor position, adds tracks to the track
list, and creates events for the MIDI note data on each track. Envelopes are added to the tracks to represent MIDI
controller data.
• For Type 0 MIDI files, a separate track is created for each channel in the MIDI file, and all tracks are organized
within a folder track.
• For Type 1 MIDI files, a separate track is created for each track in the MIDI file, and all tracks are organized within
a folder track.
Tip:
You can also add a MIDI track by pressing Ctrl+Alt+Q.
Note:
When you select a MIDI file in the Explorer window, its length, tempo, type, and number of tracks are displayed
at the bottom of the window:
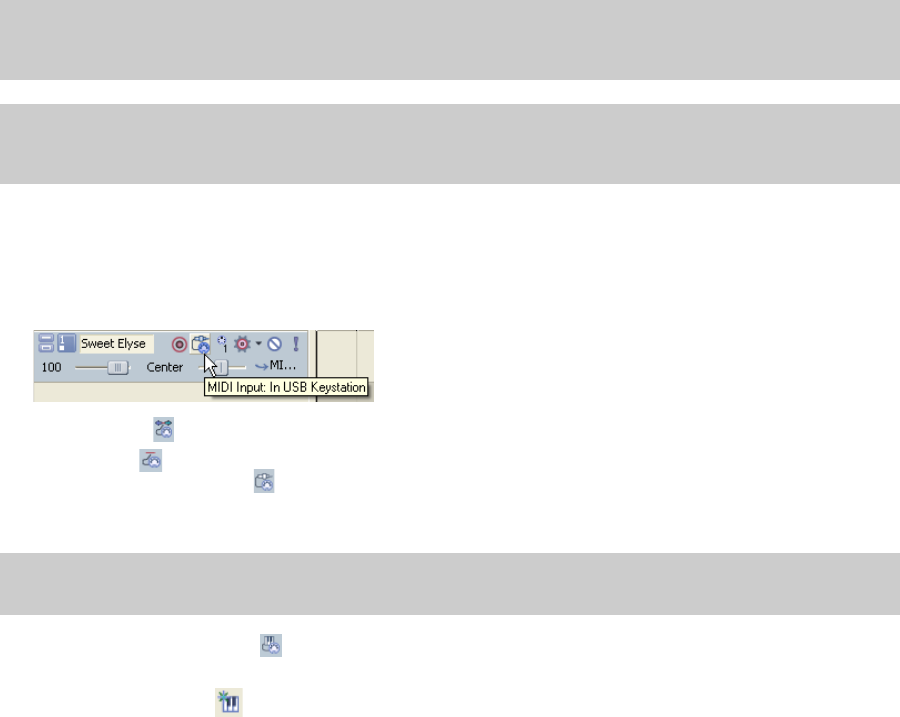
164 | Chapter 11
3.
Add to Project with Events Rippled — Adds the file to the current ACID project at the cursor position, adds tracks to
the track list, and creates events. Existing events are shifted downstream to make room for your MIDI file. Envelopes
are added to the tracks to represent MIDI controller data.
• For Type 0 MIDI files, a separate track is created for each channel in the MIDI file, and all tracks are organized
within a folder track.
• For Type 1 MIDI files, a separate track is created for each track in the MIDI file, and all tracks are organized within
a folder track.
4.
Open as New Project — Starts a new project, adds tracks to the track list, and creates events for the MIDI note data
on each track.
• For Type 0 MIDI files, a separate track is created for each channel in the MIDI file.
• For Type 1 MIDI files, a separate track is created for each track in the MIDI file.
Recording MIDI
You can use an external MIDI controller (or the keyboard/drum list between the track header and timeline) to record MIDI
into your ACID project.
You can record in real time during project playback by using step recording or MIDI merge recording to build MIDI tracks.
Track-level MIDI input filters allow you to control exactly which MIDI messages you want to record (or exclude).
Setting up a MIDI controller for recording into a track
1.
Select the MIDI track you want to record into, or press Ctrl+Alt+Q to add a new, blank MIDI track to your project.
2.
Choose a MIDI input port by clicking the MIDI Input button on the track header. Choose a command from the menu:
• Auto Input — Uses automatic input routing. The focus track will accept input from any MIDI device.
• Input Off — Turns off MIDI input to the track.
• Hardware Input Port List — Displays the devices that are selected in the Make these devices available for
MIDI input list on the MIDI tab of the Preferences dialog. Choose the specific device you want to use to send
MIDI to the track.
• Soft Synth Input Port List — Displays the available soft synths in your project. Choose the soft synth you
want to use to send MIDI to the track. For more information, see Using soft synth controls on page 144.
Choose Soft Synth from the Insert menu and select a soft synth for your project from the Soft Synth
Chooser dialog. You can also select Insert Soft Synth from the Mixer.
3.
Choose a MIDI input channel:
•Click the MIDI Input button on the track header.
Tip:
If you use the keyboard/drum list between the track header and timeline to input MIDI notes, note that the buttons
are velocity sensitive: clicking toward the right side of a button plays the note with a higher velocity setting than clicking
toward the left side. The keyboard/drum list is visible in inline MIDI editing mode.
Important:
Attempting to record MIDI controller data over an existing event will overwrite existing note data. If you
want to record controllers over an existing event, use MIDI merge recording. For more information, see Using MIDI merge
recording on page 166.
Note:
You must choose a specific input port to use MIDI input filters. For more information, see Configuring MIDI input
filters on page 179.
WORKING WITH MIDI | 165
• Choose MIDI Channel from the menu, and choose the MIDI channel you want to send data to the track, or
choose All if you want the track to listen to all channels.
4.
Click the MIDI Input button on the track header and choose Send MIDI Input Thru to MIDI Output from the menu if
you want to echo notes from the MIDI controller to the track's MIDI device or soft synth for monitoring.
5.
Click the MIDI Input button on the track header and choose MIDI Input Filters from the menu to open the Track
Properties window. Use the Input Filters tab to specify which MIDI messages you want to record (or exclude). For
more information, see Configuring MIDI input filters on page 179.
Recording MIDI in real time
You can record MIDI in real time while your project plays back.
1.
Connect a MIDI controller to your computer. If you don't have a MIDI controller, you can use the keyboard in the track
view (when in MIDI timeline editing mode) or the keyboard in the Soft Synth Properties window.
2.
Select the Arm for Record buttons on the tracks where you want to record. Arming a track enables it for
recording.
3.
Choose a MIDI input device and channel for each armed track. For more information, see Setting up a MIDI controller
for recording into a track on page 164.
4.
Set up any desired MIDI message, velocity, or quantize filters for your armed tracks. For more information, see
Configuring MIDI input filters on page 179.
5.
Position the cursor where you want to start recording.
6.
Click the Record button on the transport bar to start recording. MIDI messages from your controller are recorded
as you play them.
• Notes are added to an event in the timeline.
• MIDI controller adjustments (such as pitch wheel and modulation wheel movements) are recorded as track
envelopes. For more information, see MIDI controller automation on page 131.
MIDI controllers are recorded in latch mode: envelope points are created when you change a control setting,
and recording continues until you stop playback. When you stop adjusting the control, the control's current
setting overwrites the existing envelope points.
7.
To stop recording, click the Record button again or click the Stop button on the transport bar.
A new clip is created for the recorded MIDI data on each armed track. You can use the Clip Pool tab in the Track
Properties window to manage clips.
Using MIDI step recording
Click the MIDI Step Record button to open the MIDI Step Record dialog, where you can record by specifying the
interval between MIDI messages. Step recording allows you to record notes with very precise timing.
Tip:
If you want to select multiple input channels, hold Ctrl and select additional channels from the MIDI Channel
submenu.
Note:
Not all VSTi plug-ins can record using the keyboard in the Soft Synth Properties window.
Note:
Envelope points are not thinned when recording MIDI controllers from a hardware device.
Note:
You can also record into time selections, punch into MIDI events, or record multiple clips (when recording into
a selection with Loop Playback selected) in the same way you record audio.
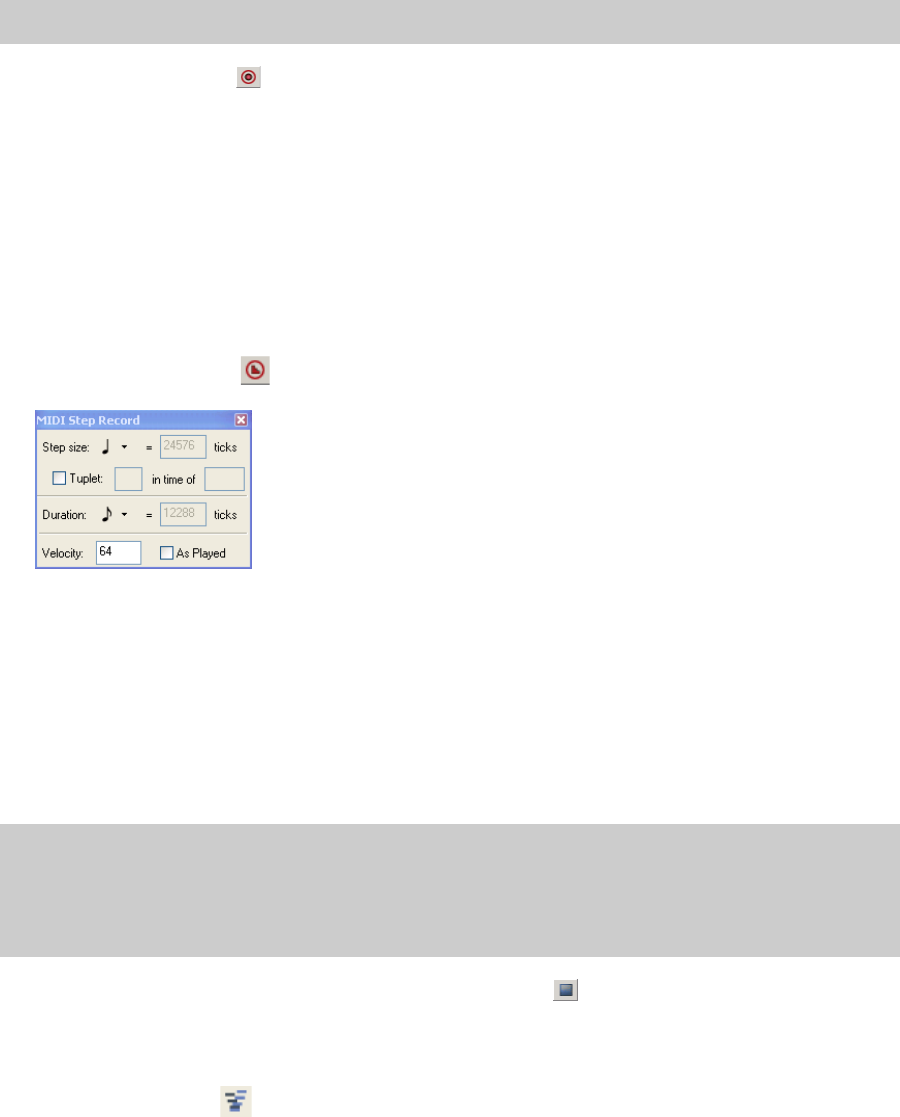
166 | Chapter 11
1.
Connect a MIDI controller to your computer. If you don't have a MIDI controller, you can use the keyboard in the
track view (when in MIDI timeline editing mode) or the keyboard in the Soft Synth Properties window.
2.
Select the Arm for Record buttons on the tracks where you want to record. Arming a track enables it for
recording. If you don't arm a track for recording, a new MIDI track will be created when you click the MIDI Step
Record button.
3.
Choose a MIDI input device and channel for each armed track. For more information, see Setting up a MIDI controller
for recording into a track on page 164. If you're recording using the keyboard in the track view or the Soft Synth
Properties window, choose Auto Input. Click the MIDI Input button on the track header and choose Send MIDI
Input Thru to MIDI Output from the menu if you want to echo notes from the MIDI controller to the track's MIDI
device or soft synth for monitoring.
4.
Set up any desired MIDI message, velocity, or quantize filters for your armed tracks. For more information, see
Configuring MIDI input filters on page 179.
5.
Position the cursor where you want to start recording.
6.
Click the MIDI Step Record button.
7.
Use the MIDI Step Record dialog to set options for recorded MIDI notes.
a.
Click the Step size button and choose interval between the beginnings of notes.
Select the Tuplet check box to set irregular intervals. For example, to set a triplet interval in 4/4 time, select the
Tuplet check box and choose 3 in time of 4.
b.
Click the Duration button and choose length of the note's sustain. When you choose a duration longer than the
step size, notes will overlap.
c.
To set the note-on velocity for recorded notes, type a value in the Velocity box. If you want to record note-on
velocity from your controller, select the As Played check box.
8.
MIDI messages from your controller are recorded as you play them, and notes are added to an event in the timeline.
9.
To stop recording, close the MIDI Step Record dialog or click the Stop button on the transport bar.
Using MIDI merge recording
Click the MIDI Merge Record button to build a MIDI part by recording repeatedly into a loop region. MIDI merge
data is recorded in real time, and you can add more notes each time recording passes through the loop region.
Note:
Not all VSTi plug-ins can record using the keyboard in the Soft Synth Properties window.
Notes:
• MIDI controller adjustments (such as pitch wheel and modulation wheel movements) are not recorded in step record
mode.
• If you press a key before releasing the current key, both notes will be recorded at the same timeline position. Release both
keys to advance to the next step.
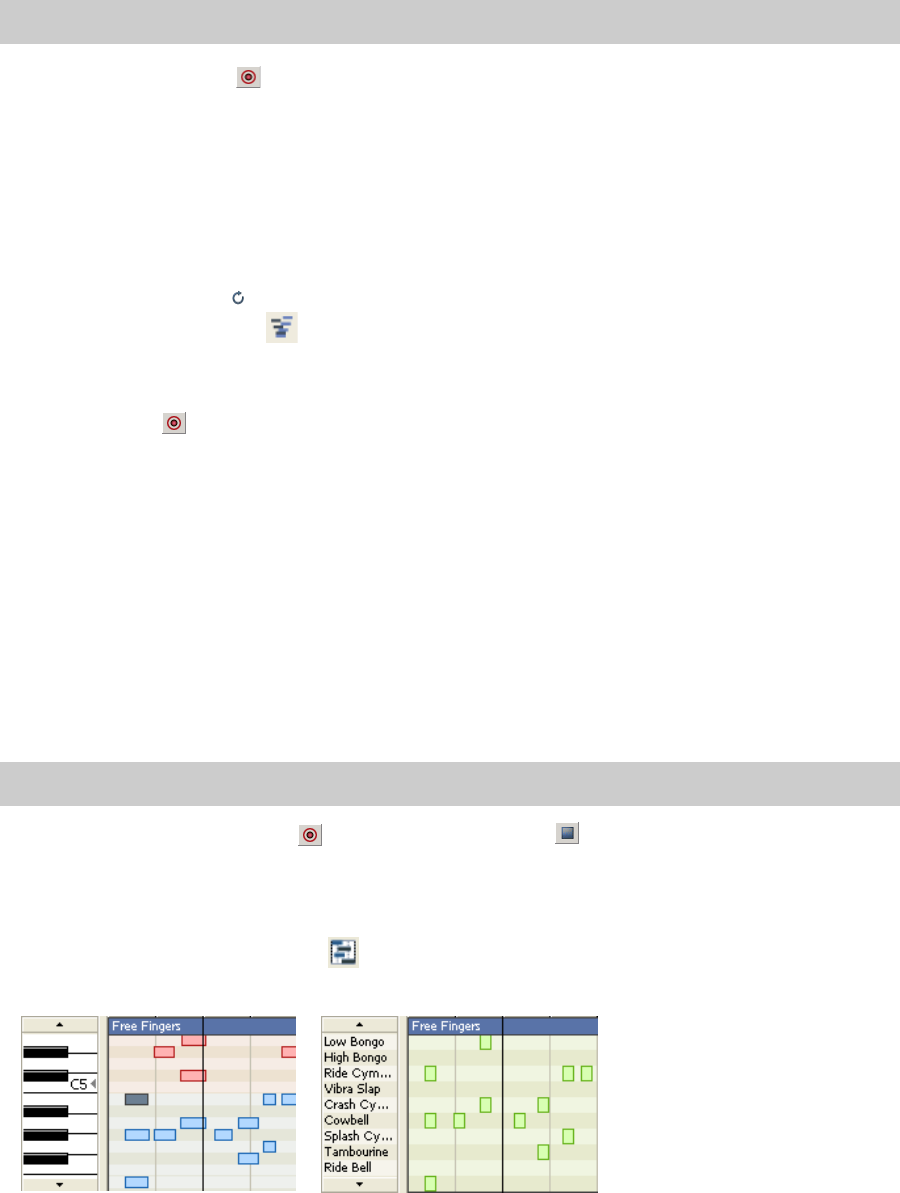
WORKING WITH MIDI | 167
1.
Connect a MIDI controller to your computer. If you don't have a MIDI controller, you can use the keyboard in the track
view (when in MIDI timeline editing mode) or the keyboard in the Soft Synth Properties window.
2.
Select the Arm for Record buttons on the tracks where you want to record. Arming a track enables it for
recording. If you don't arm a track for recording, a new MIDI track will be created when you click the MIDI Step
Record button.
3.
Choose a MIDI input device and channel for each armed track. For more information, see Setting up a MIDI controller
for recording into a track on page 164.
4.
Set up any desired MIDI message, velocity, or quantize filters for your armed tracks. For more information, see
Processing and filtering MIDI events on page 173.
5.
Click and drag in the marker bar or a blank area of the timeline to create a loop region.
6.
Select the Loop Playback button.
7.
Select the MIDI Merge Record button.
8.
Position the cursor at the start of the loop region. If you want to record with pre-roll, you can position the cursor
before the loop region.
9.
Click the Record button on the transport bar to start recording.
MIDI messages from your controller are recorded as you play them.
• Notes are added to an event in the timeline.
• MIDI controller adjustments (such as pitch wheel and modulation wheel movements) are recorded as track
envelopes. For more information, see MIDI controller automation on page 131. MIDI controllers are recorded in
touch timeout mode: envelope points are created or edited when you change a control setting. When you stop
adjusting the control, existing envelope points on the timeline are preserved.
MIDI controllers that are switches (such as a damper pedal) are always recorded in latched mode: envelope
points are created when you change a control setting, and recording continues until you stop playback. When
you stop adjusting the control, the control's current setting overwrites the existing envelope points.
When recording returns to the beginning of the loop region, existing MIDI controller envelopes are unaffected.
For example, you could record note data the first time recording passes through the loop region, record pitch-
bend controllers the second time, and modulation the third time.
10.
To stop recording, click the Record button again or click the Stop button on the transport bar.
Editing MIDI on the timeline
Click the Enable Inline MIDI Editing button to edit MIDI events directly on the timeline. In this mode, you can draw
and erase notes in a piano roll or drum grid view.
Note:
Not all VSTi plug-ins can record using the keyboard in the Soft Synth Properties window.
Note:
Envelope points are not thinned when recording MIDI controllers from a hardware device.
A piano roll allows you to edit MIDI notes for
most patches.
A drum grid allows you to edit MIDI notes for soft
synths that have drum maps defined.
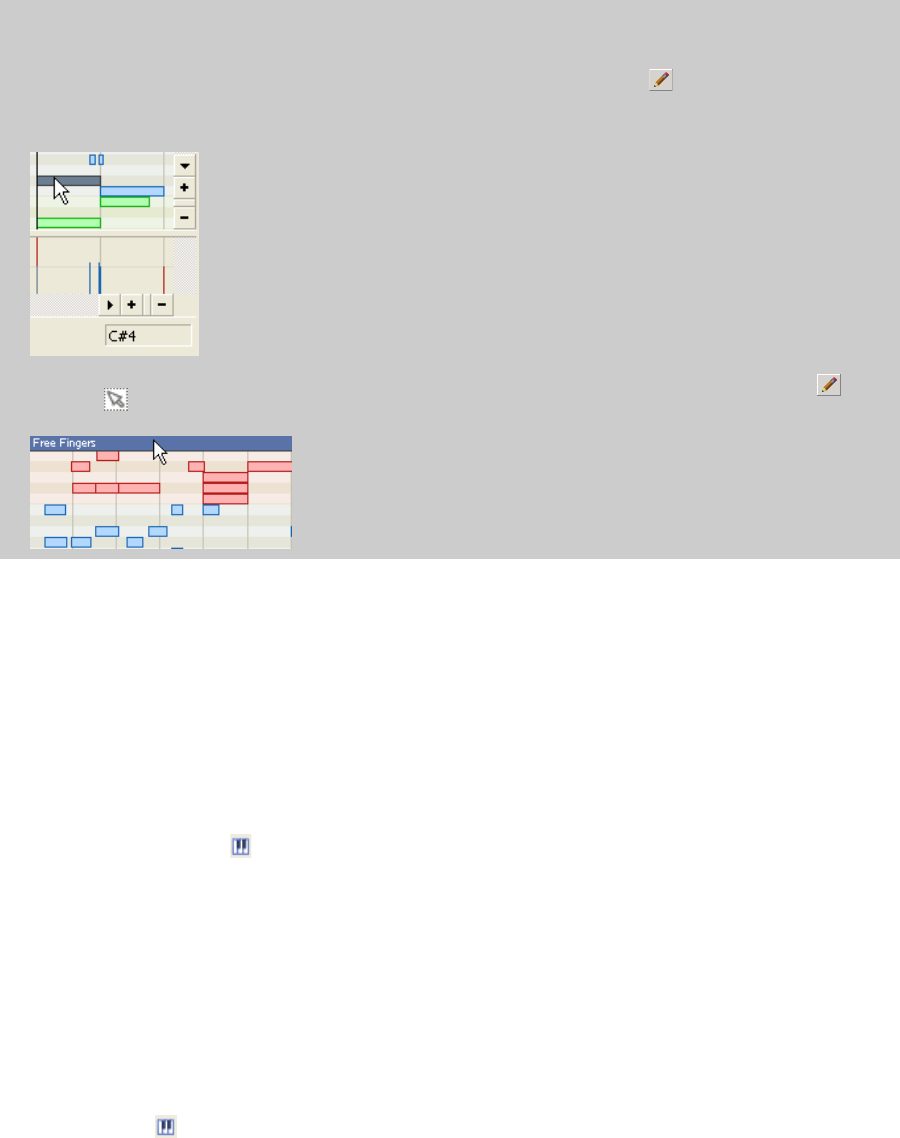
168 | Chapter 11
When you edit a MIDI event, all events that use the same clip will be updated. For more information, see Using clips with
tracks on page 107.
If you want to edit a single event, right-click the event and choose Copy to New Clip from the shortcut menu.
Choosing a drum map or kit for a track
MIDI tracks can display a piano roll or a drum grid. For more information, see Creating or editing drum maps on page 200.
Tracks that are routed to the DLS soft synth will display a drum grid only if a drum map exists for the current patch. You
cannot edit drum maps for GM2 drum kits.
Choosing a drum map or kit
1.
Click the Program button on the track header.
2.
Perform one of the following actions:
• If your track is routed to the DLS soft synth, choose Drum Kits from the menu. A submenu displays the available
drum kits.
• If your track is routed to a MIDI device or a VSTi soft synth, choose Drum Maps from the menu, and then choose
Select Drum Map from the submenu. The Output Settings page of the Track Properties dialog is displayed.
3.
Choose the drum map or kit you want to use.
Displaying the piano roll
If your track is routed to a MIDI device or VSTi soft synth, you can switch from a drum grid view to a piano roll view. Click
the Program button , choose Drum Maps, and then choose None.
Navigating the piano roll or drum grid
In inline MIDI editing mode, adjusting the height of the track will allow you to see more or less of the piano roll or drum
grid. After you set the height of the track, you can use the following methods to navigate.
Tips:
• Hold Ctrl+Shift while double-clicking a MIDI event to enter inline editing mode.
• While in inline editing mode, drag over a blank area of the timeline with the Draw tool to create a new clip and draw
an empty event.
• While in inline MIDI editing mode, you can hover over a note or velocity stem to view its value in the bottom-right corner of
the timeline:
• If you want to move a MIDI event while in timeline MIDI editing mode, drag the top of the event with the Draw or
Selection tool:
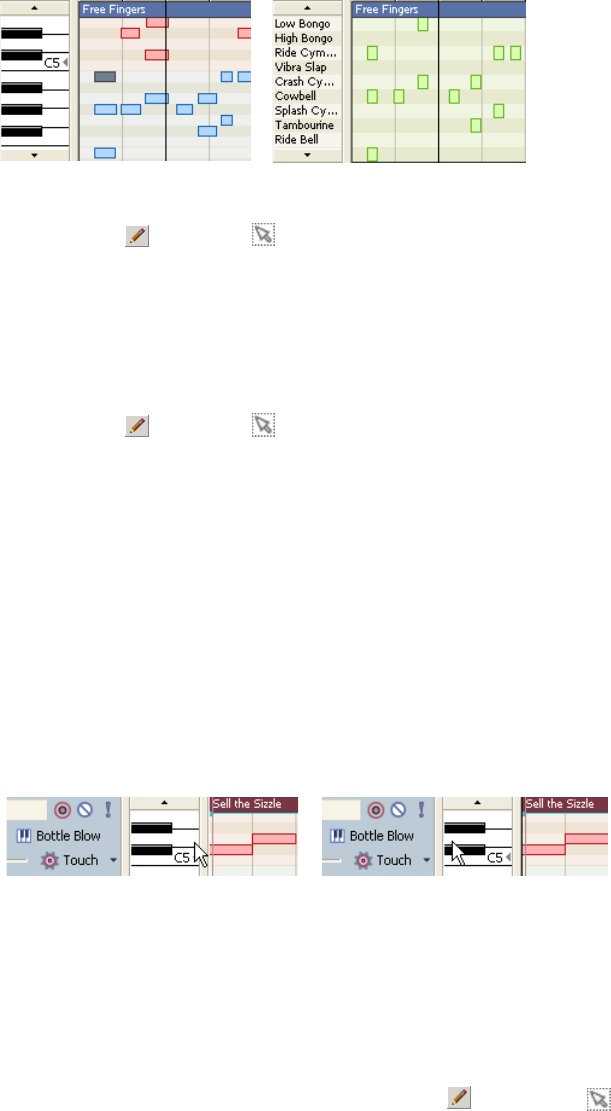
WORKING WITH MIDI | 169
Scroll vertically
Perform any of the following actions to scroll vertically within a track:
• Use the scroll buttons at the left edge of the track to scroll up or down:
•With the Draw or Selection tool, hover over the timeline and hold Ctrl while rolling the mouse wheel forward
or back.
• Hold Ctrl while dragging the keyboard/drum list up or down.
• Hover over the keyboard/drum list and roll the mouse wheel forward or back.
Zoom note height
Perform either of the following actions to zoom note height:
•With the Draw or Selection tool, hover over the timeline and hold Ctrl+Alt while rolling the mouse wheel
forward or back.
• Hover over the keyboard and hold Shift while rolling the mouse wheel forward or back.
Zoom note width
Note width is based on the horizontal zoom level of the timeline. Use the zoom controls in the lower-right corner of the
timeline (or hover over the timeline and roll the mouse wheel forward or back) to zoom in or out.
Audition notes with the keyboard/drum grid
You can use the keyboard/drum grid between the track header and timeline to audition the track's MIDI output or record
MIDI. When you click the keys, the note is played using the appropriate patch at the cursor position.
These buttons are velocity sensitive: clicking toward the right side of a button plays the note with a higher velocity
setting than clicking toward the left side.
Audio driver latency can limit your ability to preview DLS voices in real time. Using low-latency drivers will produce the
best results.
Selecting notes
You can select individual and groups of notes with the Draw and Selection tools.
Piano roll Drum grid
Clicking toward the right side of the keyboard (or
drum list) plays the note with a higher velocity.
Clicking toward the left side of the keyboard (or
drum list) plays the note with a lower velocity.
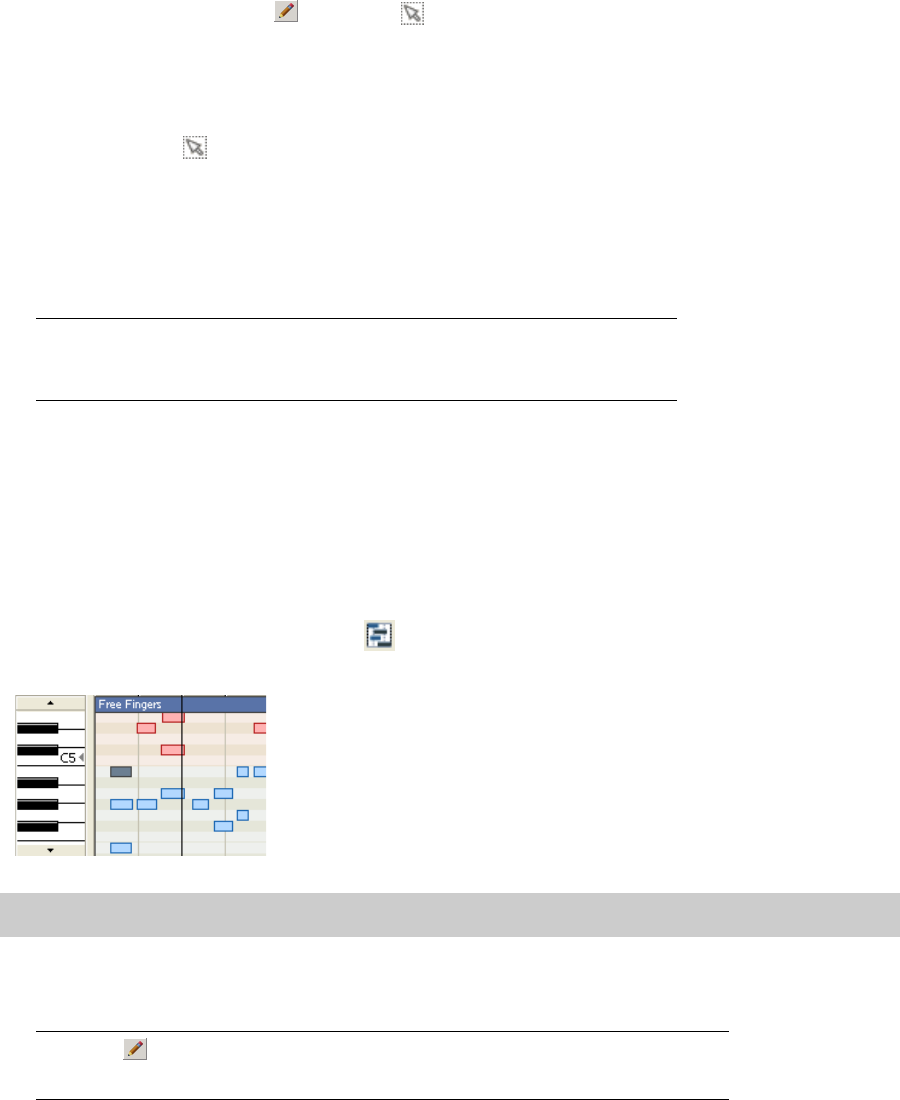
170 | Chapter 11
Selecting individual notes
Click individual notes with the Draw or Selection tool to select them. Hold Ctrl while clicking to add or remove
notes from the selection.
Selecting groups of notes
Drag with the Selection tool to draw selection boxes around the notes you want to include. The Selection tool can
draw three types of selection boxes:
To change the type of selection box you are using, right-click the mouse while holding down the left mouse button.
Clicking the right mouse button will toggle through the three types of selection boxes.
Adding or deleting notes
1.
Click the Enable Inline MIDI Editing button .
2.
Use the scroll buttons at the left edge of the track to navigate the piano roll/drum grid:
3.
Select an editing tool.
Free selection The default behavior of the tool. Click to select individual notes (hold Shift or Ctrl
to select multiple notes). Drag to draw a rectangular region that begins where
you start drawing and ends where you release the mouse button. All notes
inside the region will be selected. This method is good for selecting a group of
notes that are close together.
Vertical Can be used to easily select all notes that occur within a time range. The vertical
selection box automatically selects all of the notes between your first mouse
click and where you draw the selection box; even notes that are not visible at the
current magnification are selected.
Horizontal Can be used to easily select all notes on a single or multiple adjacent rows. The
horizontal selection box automatically selects all notes on a row that is touched
by the selection box; even notes that are not visible at the current magnification
are selected.
Tip:
Drag the bottom border of the track header to increase the height of the track.
Tool Icon Description
Draw Allows you to insert, edit, select, and move notes.
In drum-grid mode, the Draw and Paint tools both draw fixed-length note
events.
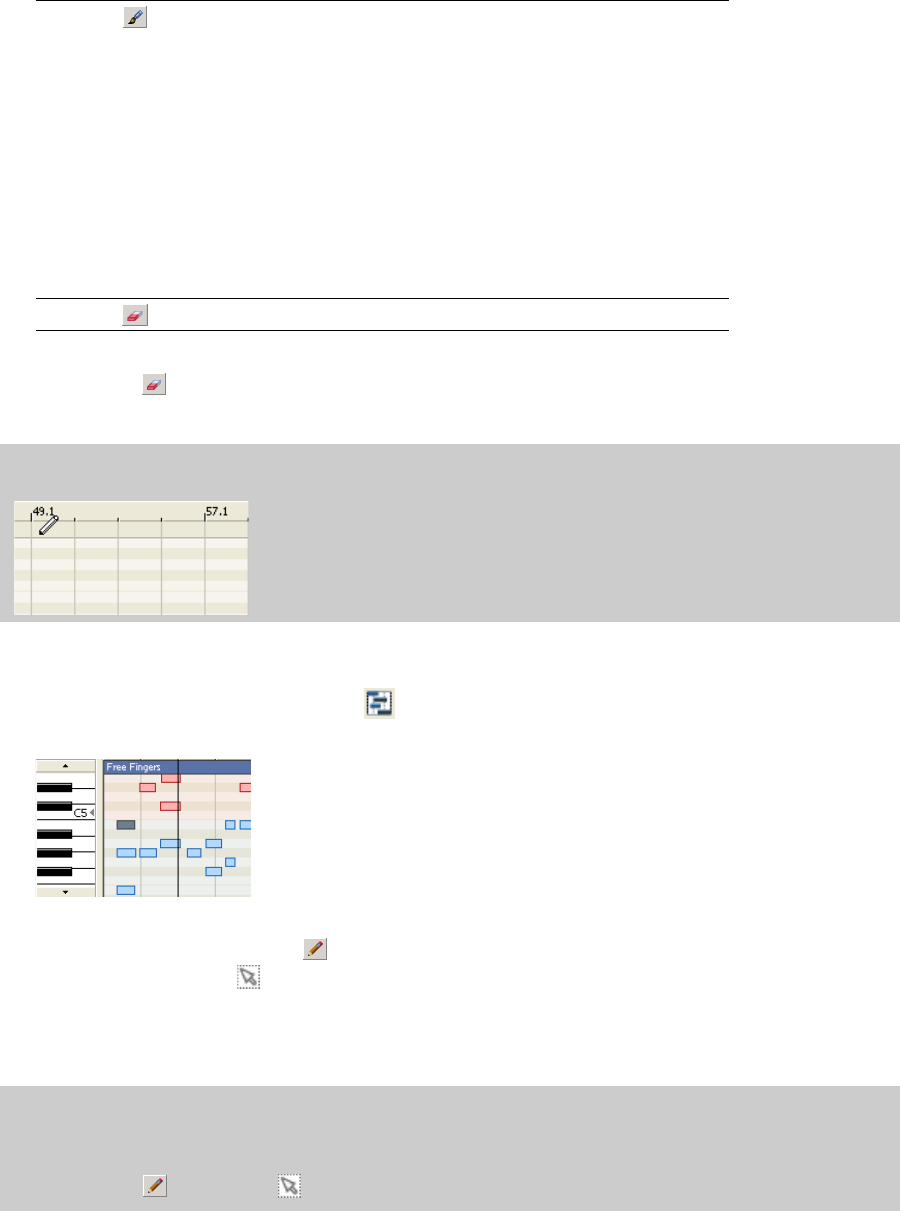
WORKING WITH MIDI | 171
4.
Inside an event, drag in the row for the pitch you want to create to create a new note, or click an existing note with
the Erase tool to remove it. If you draw or paint notes beyond the event edge, the event is automatically
extended. Hold Shift while dragging to override horizontal snapping (press Shift after you click).
Editing note positions
1.
Click the Enable Inline MIDI Editing button .
2.
Use the scroll buttons at the left edge of the track to navigate the piano roll/drum grid:
3.
Select the notes you want to edit by doing either of the following:
• Click a note with the Draw tool to select it. You can hold Ctrl while clicking to select multiple notes.
• Use the Selection tool to select multiple events by clicking and dragging to create a selection box around
the notes you want to edit.
4.
Drag notes left or right to change their position on the timeline, or drag up or down to assign a note to a different
pitch.
Paint Allows you to insert notes of a specific length.
The Paint tool is different from the Draw tool in that it can cross note row
boundaries. Use the Paint tool to add a random element to your ACID projects.
Note: In drum-grid mode, the Draw and Paint tools both draw fixed-length note
events.
Using the Paint tool:
• Click the down arrow next to the Paint tool button and choose a note length
from the menu.
• Click the Paint tool button to select the tool. The Paint tool is selected, and
notes will be painted using the selected note length.
Note: Right-click with the Paint tool to erase notes.
Erase Allows you to remove existing notes.
Tip:
In inline MIDI editing mode, drag in the top portion of the track to create a new event using the active clip.
Tips:
• Hold Shift while dragging to override horizontal snapping (press Shift after you click).
• Hold Alt while dragging to constrain to horizontal or vertical movement.
•With the Draw and Selection tools you can cut, copy, and paste MIDI notes.
Tool Icon Description
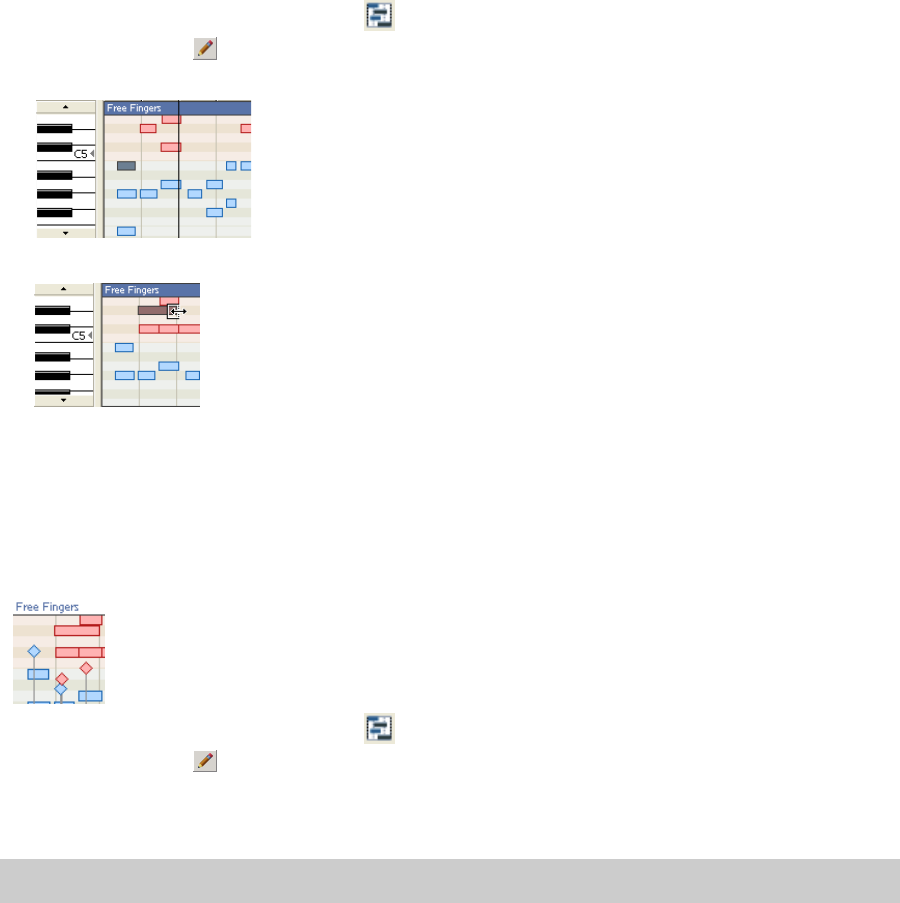
172 | Chapter 11
Editing note duration
1.
Click the Enable Inline MIDI Editing button .
2.
Select the Draw tool .
3.
Use the scroll buttons at the left edge of the track to navigate the piano roll/drum grid:
4.
Drag either edge of a note. The edge of the note moves, changing its duration:
Hold Shift while dragging to override horizontal snapping (press Shift after you click).
Editing note velocity
Note velocity is represented in the timeline by velocity stems. To show or hide velocity stems in inline MIDI editing mode,
choose Show Inline MIDI Editing from the View menu, and then choose Show Note-On Velocities or Show Note-Off
Velocities from the submenu.
1.
Click the Enable Inline MIDI Editing button .
2.
Select the Draw tool .
3.
If velocity stems aren't already displayed, choose Show Inline MIDI Editing from the View menu, and then choose
Show Note-On Velocities or Show Note-Off Velocities from the submenu.
Tips:
Press F while inline MIDI editing mode to toggle the display of velocity stems.
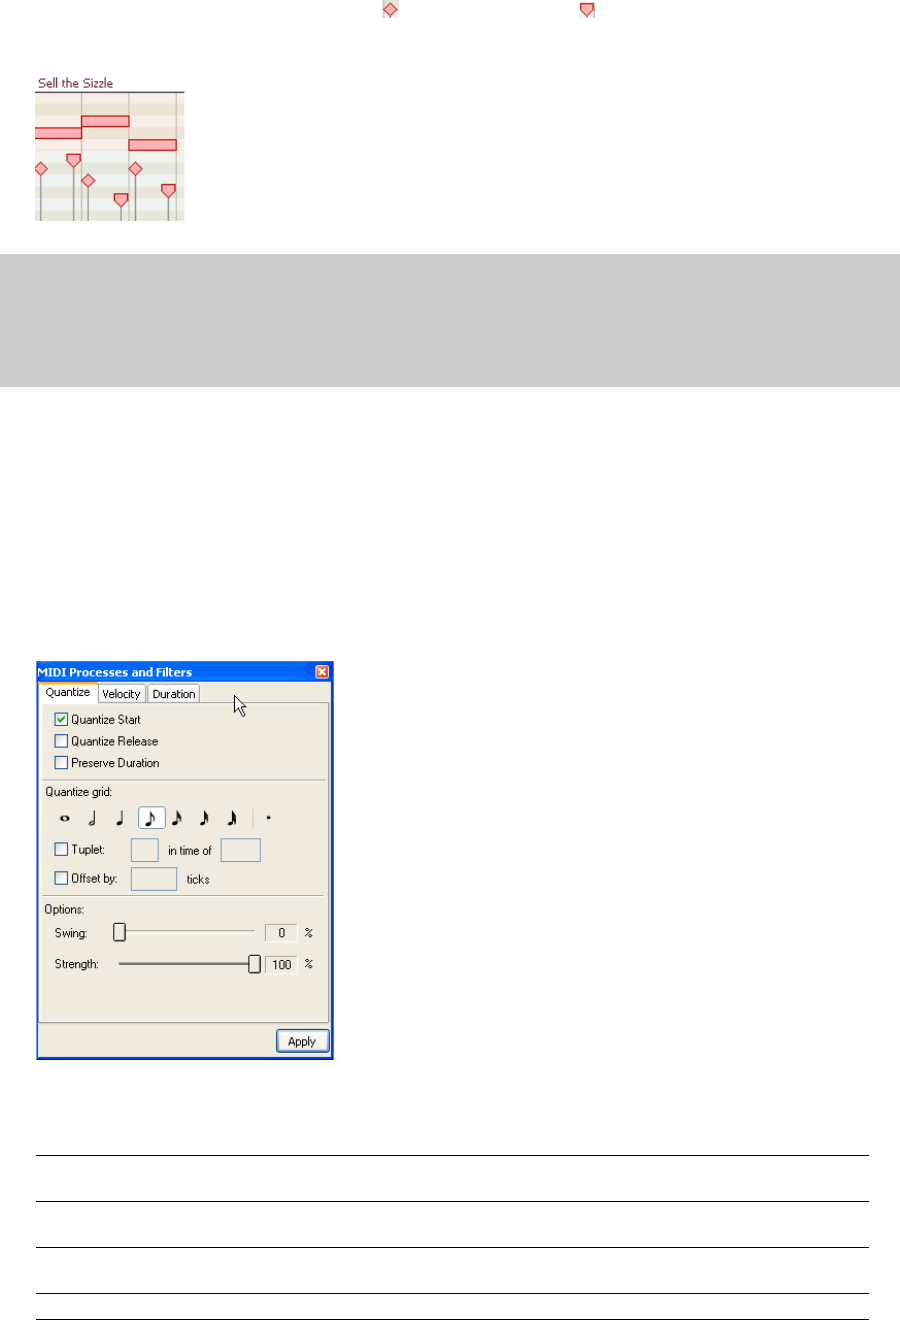
WORKING WITH MIDI | 173
4.
Drag the top of the stem (for note-on velocity or for note-off velocity ) up to increase the note's velocity, or
drag down to decrease velocity. If multiple notes are selected, the velocities of all selected notes are adjusted at the
same time.
Processing and filtering MIDI events
From the Edit menu, choose MIDI Processes and Filters to apply destructive editing to MIDI events on the timeline. You
can quantize data in events, edit velocity values, change the duration of an event, or transpose MIDI data.
Quantizing MIDI events
1.
From the Edit menu, choose MIDI Processes and Filters. The MIDI Processes and Filters dialog is displayed.
2.
Select the Quantize tab.
3.
Select your quantization options:
Tips:
• Double-click the top of a velocity stem to set the note's velocity to the default value (64).
• Right-click a note and choose Velocity from the shortcut menu. You can then choose a command from the submenu to set
the note-on velocity.
• If multiple notes are selected, you can edit the velocities of all selected notes simultaneously.
Item Description
Quantize start Select this check box to force the beginning (note-on messages) of MIDI events to a specified resolution
on the grid.
Quantize release Select this check box to force the end (note-off messages) of MIDI events to a specified resolution on the
grid.
Preserve duration If you select Quantize start or Quantize release, you can select this check box to maintain the lengths of
notes.
Quantize grid Click an icon to select the resolution of the quantize grid.
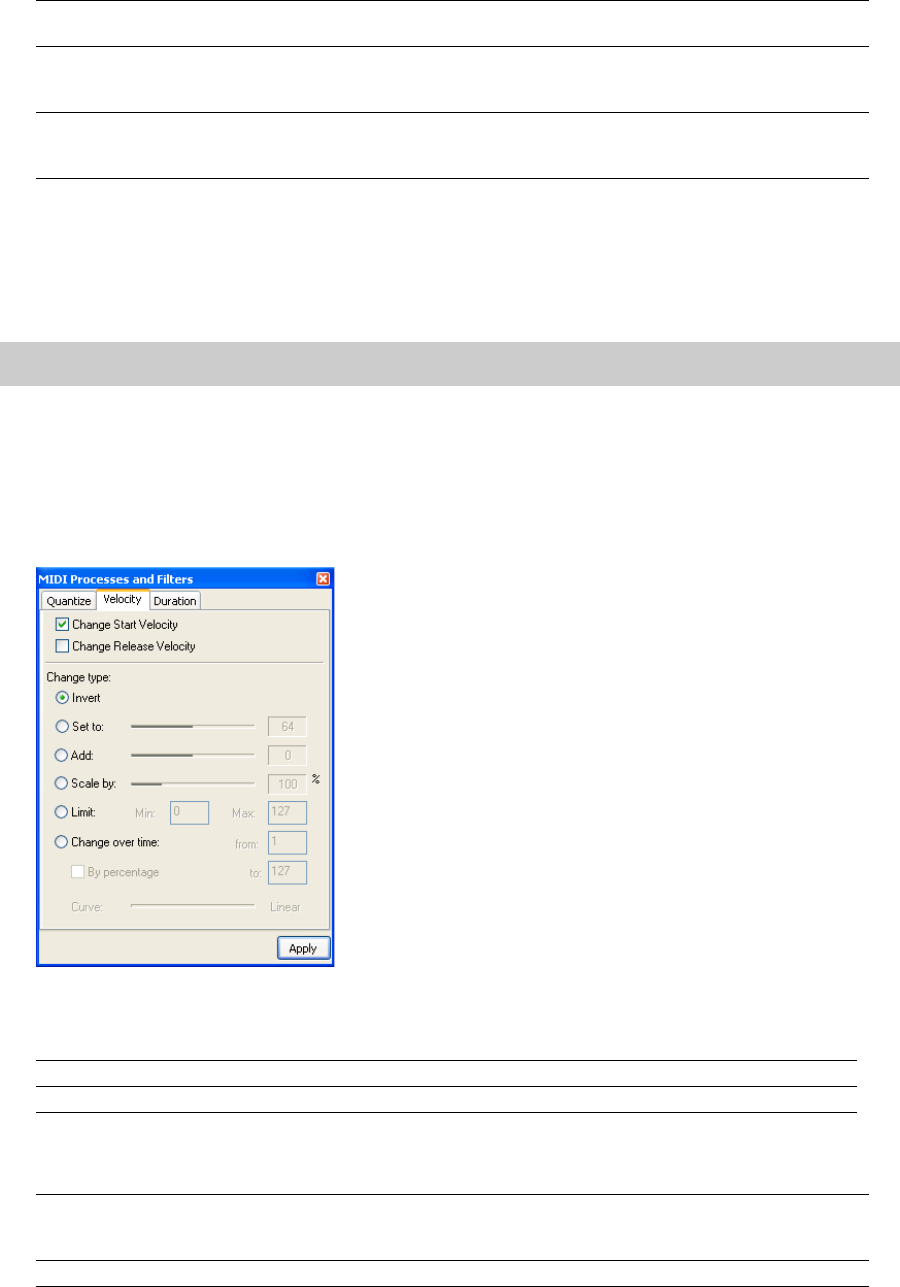
174 | Chapter 11
4.
Select the tracks or events you want to quantize:
• Select a track to quantize all events on the track. Hold Ctrl or Shift while clicking a track header to select multiple
tracks.
• If you want to quantize multiple events on multiple tracks, hold Ctrl or Shift while clicking the events to select
them, and then select the tracks.
• If a selected event has note events selected, only the selected notes will be quantized.
5.
Click the Apply button.
Editing velocity
1.
From the Edit menu, choose MIDI Processes and Filters. The MIDI Processes and Filters dialog is displayed.
2.
Select the Velocity tab.
3.
Select a check box to indicate whether you want to edit note-on or note-off velocities:
4.
Select a radio button to indicate how you want to change velocity:
Tuplet Select this check box to set irregular beat boundaries for the quantize grid. For example, to quantize to
triplet beat boundaries in 4/4 time, select the Tuplet check box and choose 3 in time of 4.
Offset by Select the check box and type a value in the box to offset the quantize grid by the specified number of
ticks. You can type negative values to shift the grid backward.
Swing Drag the slider to add a swing to the quantize grid. When you set this slider to 0, notes are quantized
directly to the grid. Increasing the setting shifts every other grid boundary forward: set to 300% to shift
every other grid boundary to the next grid division.
Strength Drag the slider to adjust how strictly you want to quantize. For example, to quantize directly to the grid,
set the slider to 100%. If you set the slider to 50%, a note that would be shifted 4 ticks is moved only 20
ticks.
Note:
Muted tracks will not be quantized.
Item Description
Change Start Velocity Select this check box to edit note-on velocities.
Change Release Velocity Select this check box to edit note-off velocities.
Item Description
Invert Select this radio button to invert selected note velocities. When you invert a velocity, it is subtracted from
127 (negative values are forced to positive) so a note with a velocity of 127 will be 0 after inversion, a
velocity of 10 will be 117, and so on.
Set to Select this radio button and drag the slider to change note velocities to a specific value.

WORKING WITH MIDI | 175
5.
Select the tracks or events you want to edit:
• Select a track to edit all events on the track. Hold Ctrl or Shift while clicking a track header to select multiple
tracks.
• If you want to edit multiple events on multiple tracks, hold Ctrl or Shift while clicking the events to select them,
and then select the tracks.
• If a selected event has note events selected, only the selected notes will be edited.
6.
Click the Apply button.
Editing duration
1.
From the Edit menu, choose MIDI Processes and Filters. The MIDI Processes and Filters dialog is displayed.
2.
Select the Duration tab.
3.
Select a radio button to indicate how you want to change a note duration:
Add Select this radio button and drag the slider to add (or subtract) a constant offset to selected note
velocities.
Scale by Select this radio button and drag the slider to multiply selected note velocities by a percentage. For
example, setting this slider to 50% would reduce all note-on or note-off velocities by half.
Limit Select this radio button and type values in the Min and Max boxes to restrict selected note velocities to
the specified range. For example, if you type 40 in the Min box and 90 in the Max box, velocities below 40
will be set to 40, velocities greater than 90 will be set to 90, and velocities between 40 and 90 will be
unaffected
Change over time Select this radio button and type values in the From and To boxes to change velocity values gradually
over time. The velocity for the first note in the selection is set to the From value, and the velocity for the
last note in the selection is set to the To value. Select the By percentage check box to change velocity
over time based on the current values. For example, to fade a selection in, select the By percentage check
box and type 1 in the From box and 100 in the To box. To fade a selection out, type 100 in the From box
and 1 in the To box. Drag the Curve slider to choose the fade curve that will be used to generate velocity
for notes between the first and last note.
Note:
Note-on velocities are bound between 1 and 127 while note-off velocities are bound between 0 and 127.
Note:
Muted tracks will not be edited.
Item Description
Change by Select this radio button, and then choose a setting from the drop-down list:
•Setting duration to — Allows you to set notes to a specific duration.
Click the down arrow next to the selected note size and choose the desired note duration from the
menu. Choose User size to type a duration in beats.ticks in the edit box: for example, type 2.000 for two
beats, or type 0.200 for 200 ticks.
•Adding to duration — Allows you to add a constant value to existing note durations.
Click the down arrow next to the selected note size and choose the amount you want to add to notes.
•Subtracting from duration — Allows you to subtract a constant value from existing note durations.
Click the down arrow next to the selected note size and choose the amount you want to subtract from
notes.
Scale by Select this radio button and drag the slider to multiply selected note durations by a percentage. For
example, setting this slider to 200% would double note durations.
Select the Change start times check box if you want to change the start times of notes while changing
duration.
For example, if you set the Scale by slider to 50% and select the Change start times check box, you can
compress notes so they play in double time. If you set the Scale by slider to 50% and clear the Change
start times check box, note durations will be shorter, but their positions on the timeline will not change.
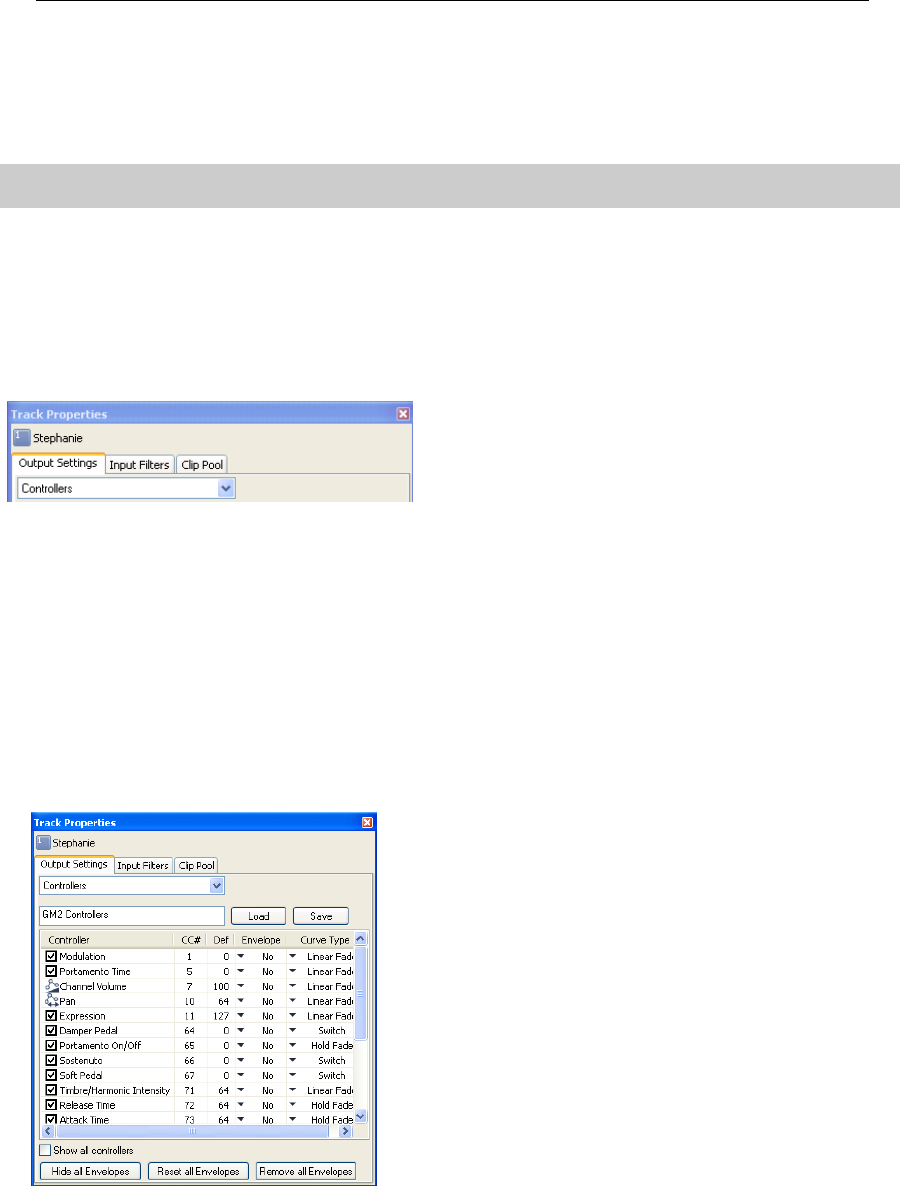
176 | Chapter 11
4.
Select the tracks or events you want to edit:
• Select a track to edit all events on the track. Hold Ctrl or Shift while clicking a track header to select multiple
tracks.
• If you want to edit multiple events on multiple tracks, hold Ctrl or Shift while clicking the events to select them,
and then select the tracks.
• If a selected event has note events selected, only the selected notes will be edited.
5.
Click the Apply button.
Editing MIDI track properties
From the View menu, choose Track Properties to display the Track Properties window. The contents of the Track
Properties window reflect the currently selected track.
For MIDI tracks, you can use the Output Settings tab to adjust MIDI controllers, voices, and drum maps. You can use the
Input Filters tab set up MIDI message, velocity, or quantize filters. You can use the Clip Pool tab to organize each track's
media and enable looped or one-shot drawing for MIDI events. For more information, see Audio track properties on page
115.
Configuring MIDI track output settings
You can use the Output Settings tab on the configure which controllers can be automated; add, remove, or hide
envelopes; set default values, and set each envelope's default fade curve.
Controller automation
1.
From the View menu, choose Track Properties. The Track Properties dialog is displayed.
Limit Select this radio button and choose Min and Max values to restrict note durations to the specified range.
For example, if you choose an eighth note as the Min setting and a half note as the Max setting, sixteenth
notes will be changed to eighth notes, and whole notes will be changed to half notes. Notes between the
Min and Max settings are unaffected.
Note:
Muted tracks will not be edited.
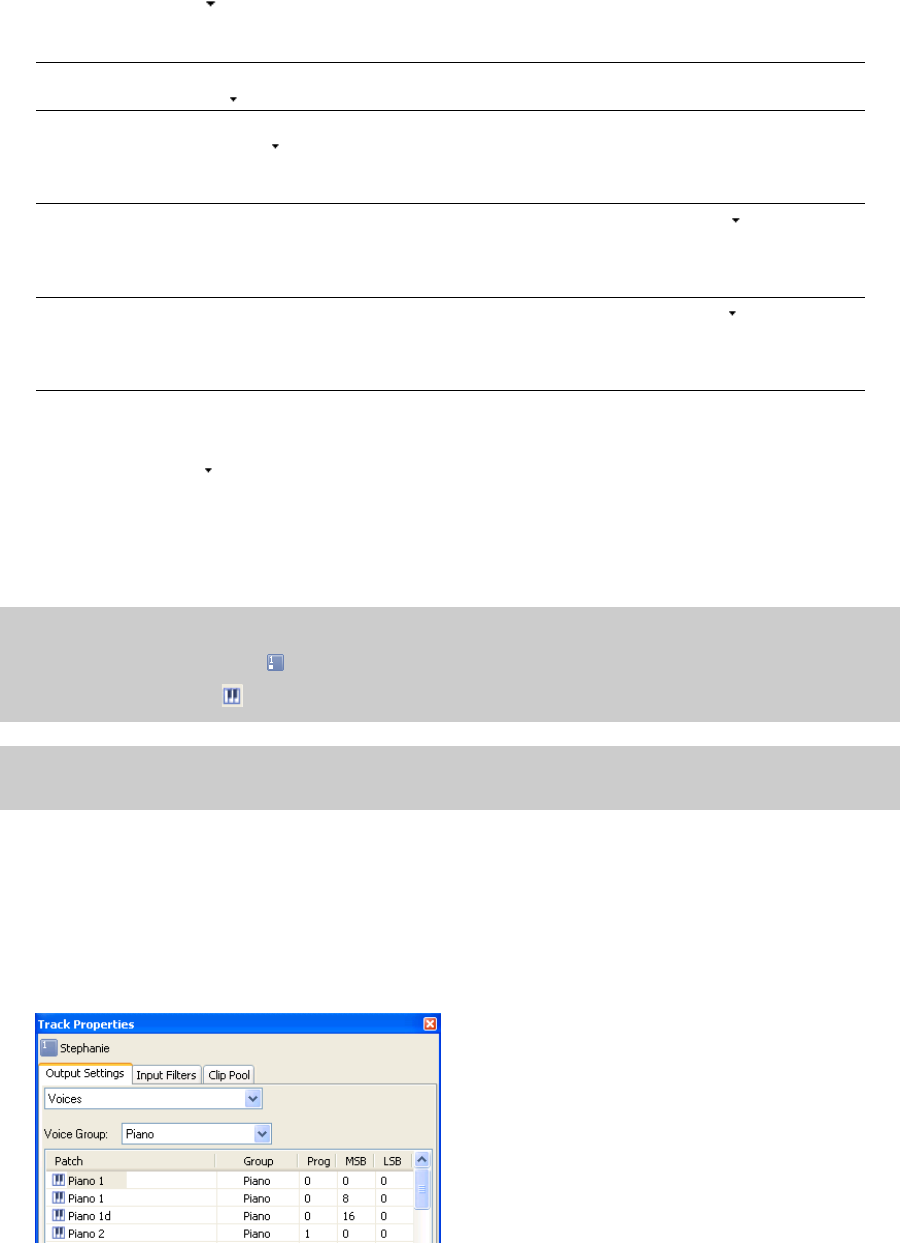
WORKING WITH MIDI | 177
2.
Select the check box for each controller you want to automate with an envelope. If the controller you want to
automate isn't displayed, select the Show all controllers check box at the bottom of the dialog.
3.
Click the down arrow in the Envelope box and choose a command from the menu:
4.
Double-click the Def box and type a new value to change the default setting for a controller. This value is used when
you reset envelope points.
5.
Click the down arrow in the Curve Type box to set the default fade curve for each controller's automation
envelope. The new curve type will be applied to all segments on the envelope. You can right-click a segment and
choose a new fade curve to override the default curve type.
6.
Click the Save button if you want to save the current settings as a mapping file, or click Load to browse to a mapping
file that will replace the current settings.
Setting the track voice
You can set the voice used to play the entire track, or you can add keyframes to add program changes.
1.
Right-click the track header, choose Insert/Remove Envelopes, and then choose Configure Controllers from the
menu. The Track Properties dialog is displayed.
2.
On the Output Settings tab, choose Voices from the drop down menu.
Command Description
Insert Envelope If the controller does not have an automation envelope, No is displayed. Click the down arrow
and choose Insert Envelope to add an automation envelope to the timeline.
Show/Hide Envelope If the controller has an automation envelope, Visible or Hidden is displayed. Click the down
arrow and choose Hide Envelope or Show Envelope to toggle its display.
Click the Hide all Envelopes button at the bottom of the dialog to hide all controller envelopes
on the track.
Reset all envelope points If the controller has an automation envelope, you can click the down arrow and choose
Reset all envelope points to restore all points to the default value
Click the Reset all envelope points button at the bottom of the dialog to set all points on all
controller envelopes on the track to the default value.
Delete Envelope If the controller has an automation envelope, you can click the down arrow and choose
Delete Envelope to remove the envelope all envelope points from the timeline.
Click the Remove all Envelopes button at the bottom of the dialog to delete all controller
envelopes on the track.
Note:
You can also select controllers by doing either of the following:
• Double-click the MIDI track icon to open Track Properties dialog. On the Output Setting tab, choose Controllers from
the drop-down menu.
• Click the Program button , choose Select Program Change.
Tip:
You can MIDI merge recording to record MIDI controller values from a MIDI device. For more information, see Using
MIDI merge recording on page 166.
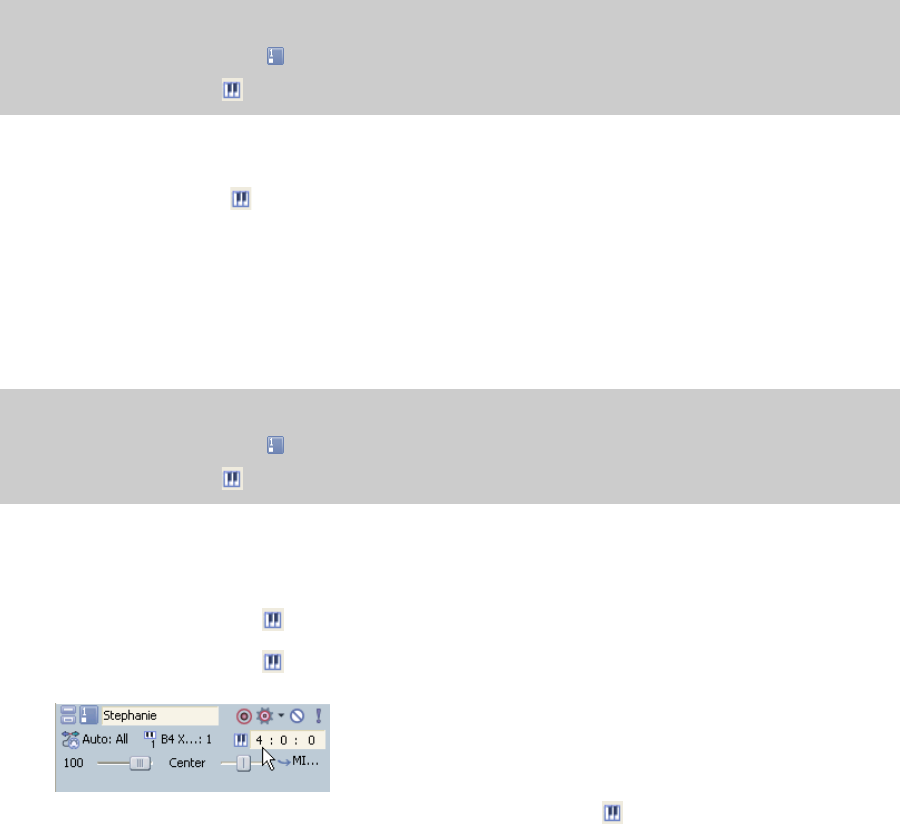
178 | Chapter 11
3.
Choose the voice you want to use.
Changing the track voice
1.
Click the Program button .
2.
Choose a program from the menu, or choose Select Program Change to display the Output Settings tab in the Track
Properties window, where you can select a patch.
If the track does not contain program change keyframes, the selected patch is used to play the entire track. If the
track contains keyframes, the selected patch is assigned to the keyframe that occurs before the current cursor
position.
Changing the patch for a hardware synth
If your track is routed to a hardware synth, there are several ways to change patches:
•Click the Program button and choose Synth Control of Patch if you want to change patches using the
synth's controls.
•Click the Program button and choose Use Program Change and Bank if you want to change patches by
specifying the program, MSB, and LSB values. Double-click the values in the track header to edit them:
• If you've created a patch map for your device, click the Program button and choose Use Device Patch Map
to return to the device's patch map. You can then choose a patch by clicking the Program button and choosing
a patch from the menu. (For more information about creating patch maps and assigning them to hardware
devices, click here.)
Selecting a drum map for a track
1.
Right-click the track header, choose Insert/Remove Envelopes, and then choose Configure Controllers from the
menu. The Track Properties dialog is displayed.
2.
Under the Output Settings tab, select Drum Map from the drop down menu.
Note:
You can also set the track voice by doing the following:
• Double-click the MIDI track icon to open Track Properties dialog. On the Output Setting tab, choose Voices from the
drop-down menu.
•Click the Program button , choose Select Program Change, and then choose Voices from the drop-down menu.
Note:
You can also select drum maps by doing either of the following:
• Double-click the MIDI track icon to open Track Properties dialog. On the Output Setting tab, choose Drum Map from
the drop-down menu.
•Click the Program button , choose Drum Maps and then Select Drum Map.
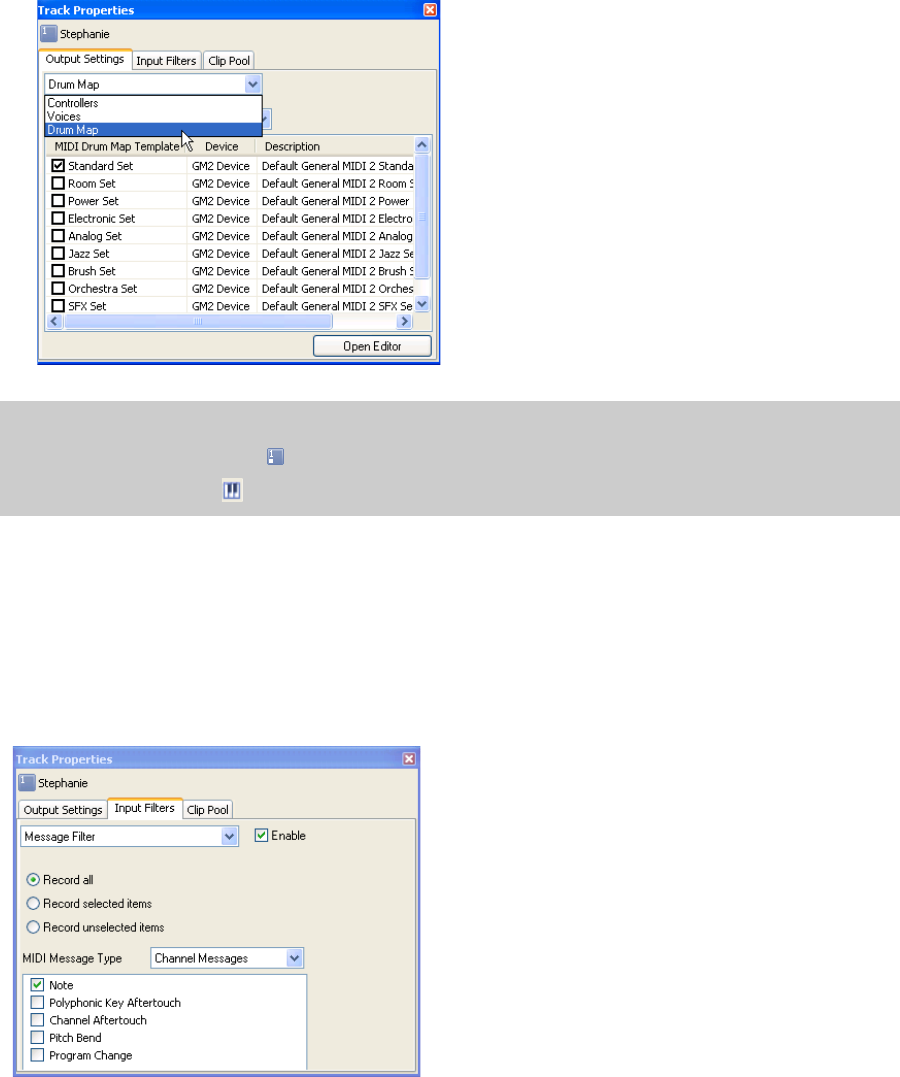
WORKING WITH MIDI | 179
3.
Choose the drum map you want to use.
Configuring MIDI input filters
You can use the Input Filters tab set up MIDI message, velocity, or quantize filters.
Setting up MIDI message input filters
Use the Input Filters tab to choose which notes or other MIDI messages you want to record or exclude from MIDI
recordings.
1.
Select the track where you want to apply the filter.
2.
From the View menu, choose Track Properties.
3.
In the Track Properties dialog, click the Input Filters tab.
4.
Choose Message Filter from the drop-down list at the top of the page.
5.
Select the Enable check box.
Note:
You can also select drum maps by doing any of the following:
• Double-click the MIDI track icon to open Track Properties dialog. On the Output Setting tab, choose Drum Map from
the drop-down menu.
• Click the Program button , choose Drum Maps, and then choose Select Drum Map.
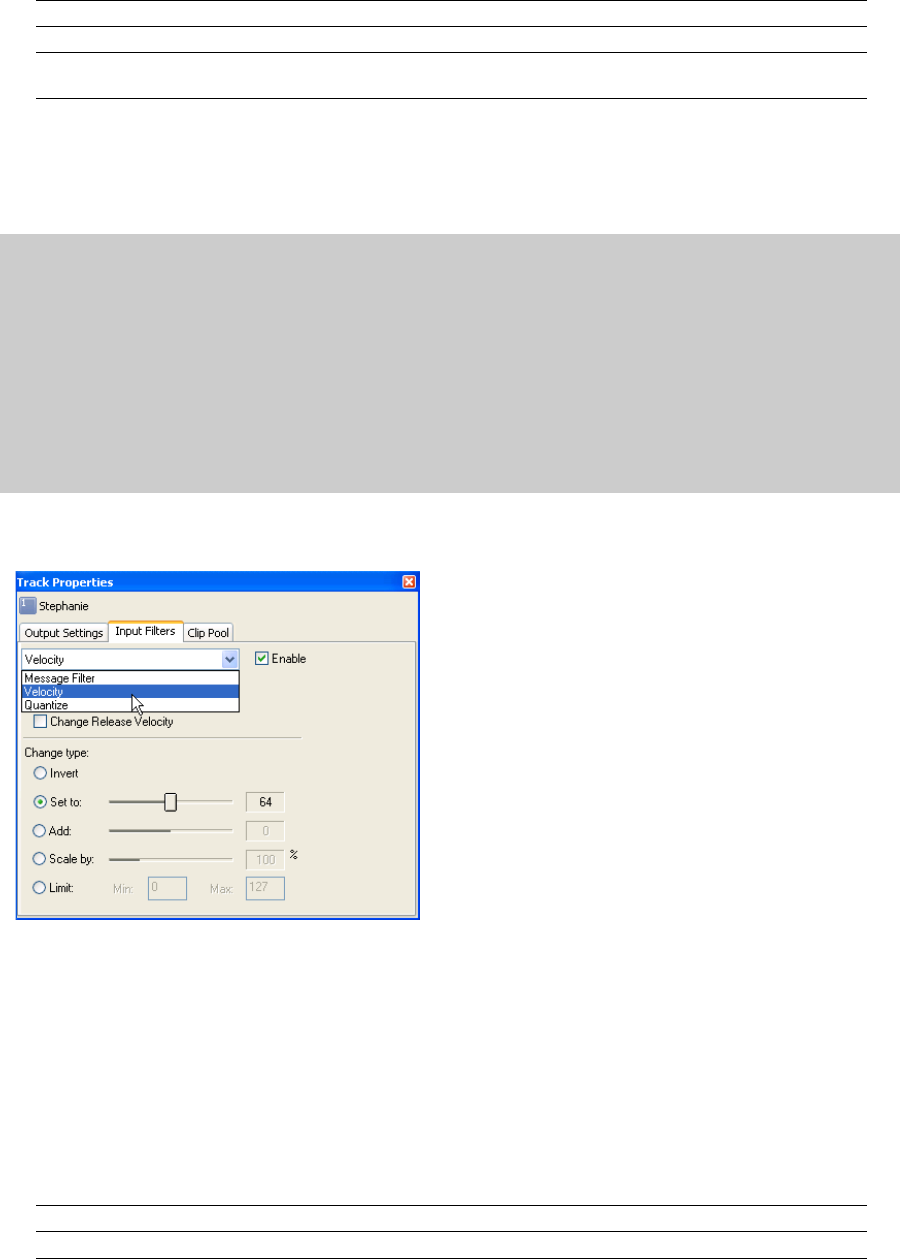
180 | Chapter 11
6.
Select your recording options.
7.
Choose a setting from the MIDI Message Type drop-down list. The box at the bottom of the page displays the
available MIDI messages.
8.
Select the check box for each MIDI message that you want to filter. When editing note messages, you can double-
click the Min and Max boxes to type the notes you want to filter.
Setting up MIDI velocity input filters
Use the Input Filters tab to modify or limit note-on and note-off velocity from a track's MIDI input device during
recording.
1.
Select the track where you want to apply the filter.
2.
In the Track Properties dialog, click the Input Filters tab.
3.
Choose Velocity from the drop-down list at the top of the page.
4.
Select the Enable check box.
5.
Select a check box to indicate whether you want to edit note-on or note-off velocities:
Item Description
Record all Select this radio button if you want to record all MIDI messages from the input port.
Record selected items Select this radio button if you want to choose which MIDI messages you want to record.
Record unselected items Select this radio button if you want to choose which MIDI messages you want to ignore when
recording.
Tips:
• If you're recording into two tracks, you can use note message filters to split your keyboard and create two separate parts.
For example, set track 1 to record only notes A1 to B4, and set track 2 to record only notes C5 to C9. If you assign track 1 to a
plucked string bass soft synth and track 2 to a grand piano synth, the low notes you play on your keyboard will be recorded
only on track 1 and will be voiced by the bass. The high notes you play will be recorded only on track 2 and will be voiced by
the piano.
• Filtering continuous controller messages allows you to control exactly which continuous controllers are recorded. For
example, if you wanted to make sure you didn't accidentally record modulation automation by bumping your keyboard's
modulation wheel, you could select the Record unselected items radio button, choose Continuous Controllers from the
MIDI Message Type drop-down list, and then select the Modulation check box.
• Excluding system exclusive messages during recording can improve performance during real-time recording and when
using MIDI thru.
Item Description
Change Start Velocity Select this check box to edit note-on velocities.
Change Release Velocity Select this check box to edit note-off velocities.
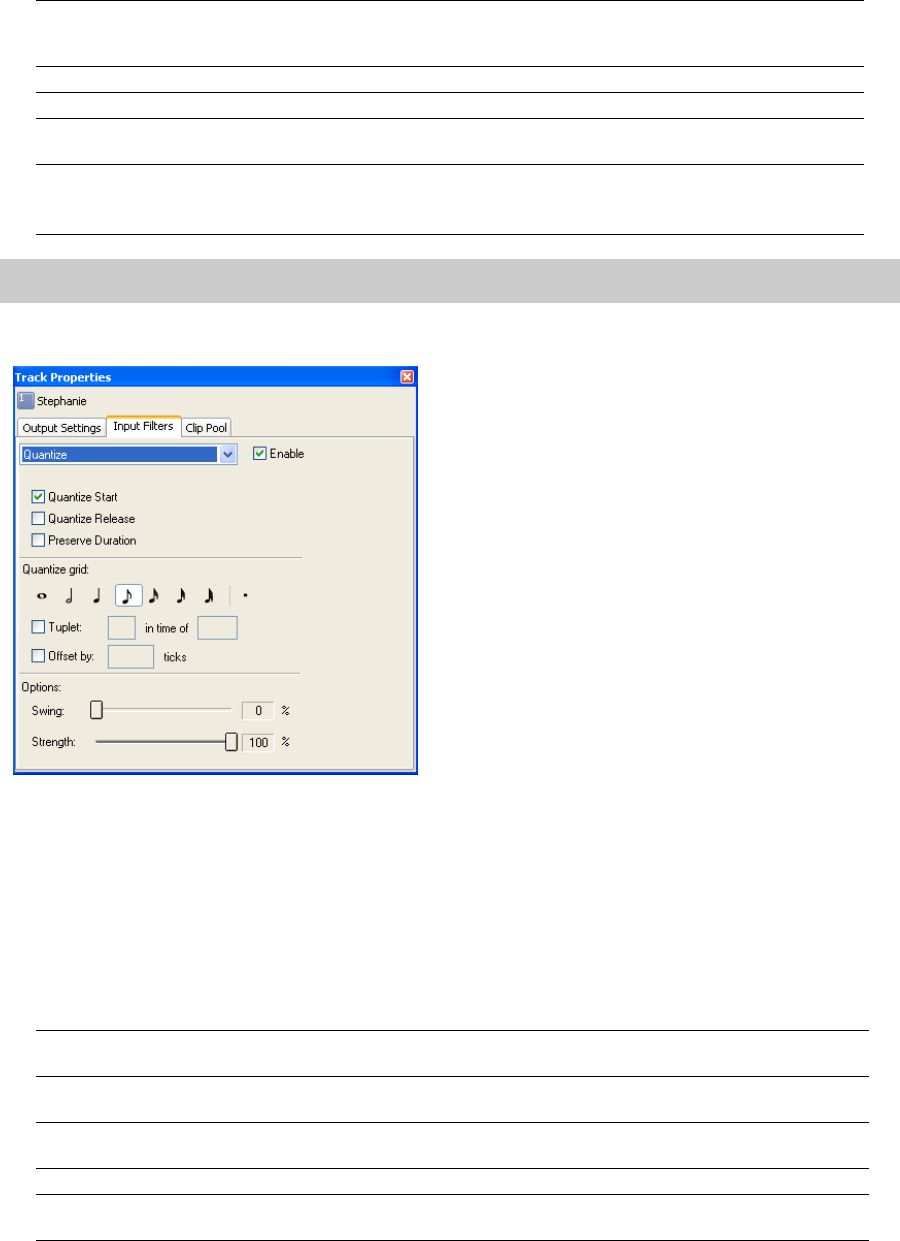
WORKING WITH MIDI | 181
6.
Select a radio button to indicate how you want to change velocity:.
Setting up MIDI quantize input filters
Use the Input Filters tab to force notes from a track's input port to align with musical beats during recording.
1.
Select the track where you want to apply the filter.
2.
In the Track Properties dialog, click the Input Filters tab.
3.
Choose Quantize from the drop-down list at the top of the page.
4.
Select the Enable check box.
5.
Select your quantization options:
Item Description
Invert Select this radio button to invert note velocities. When you invert a velocity, it is subtracted from 127 (negative
values are forced to positive), so a note with a velocity of 127 will be 0 after inversion, a velocity of 10 will be
117, and so on).
Set to Select this radio button and drag the slider to change note velocities to a specific value.
Add Select this radio button and drag the slider to add (or subtract) a constant offset to note velocities.
Scale by Select this radio button and drag the slider to multiply note velocities by a percentage. For example, setting
this slider to 50% would reduce all note-on or note-off velocities by half.
Limit Select this radio button and type values in the Min and Max boxes to restrict note velocities to the specified
range. For example, if you type 40 in the Min box and 90 in the Max box, velocities below 40 will be set to 40,
velocities greater than 90 will be set to 90, and velocities between 40 and 90 will be unaffected.
Note:
Note-on velocities are bound between 1 and 127, and note-off velocities are bound between 0 and 127.
Item Description
Quantize start Select this check box to force the beginning (note-on messages) of MIDI events to a specified resolution
on the grid.
Quantize release Select this check box to force the end (note-off messages) of MIDI events to a specified resolution on the
grid.
Preserve duration If you select Quantize start or Quantize release, you can select this check box to maintain the lengths of
notes.
Quantize grid Click an icon to select the resolution of the quantize grid.
Tuplet Select this check box to set irregular beat boundaries for the quantize grid. For example, to quantize to
triplet beat boundaries in 4/4 time, select the Tuplet check box and choose 3 in time of 4.
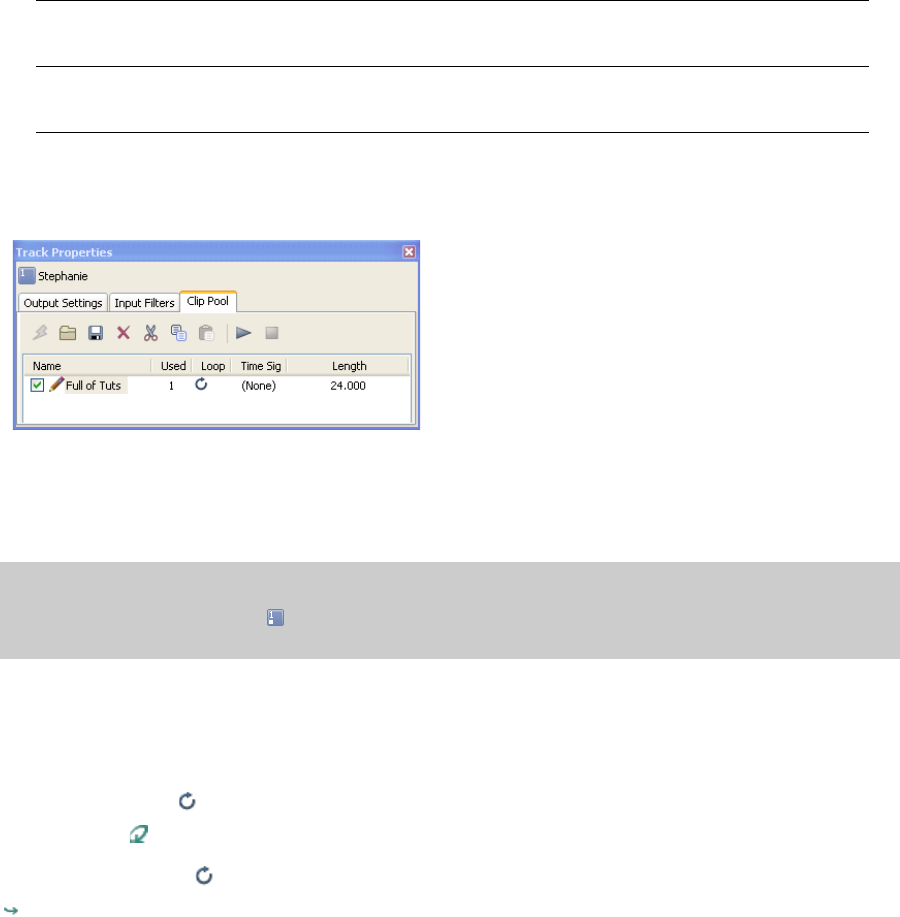
182 | Chapter 11
Using the clip pool
You can use the Clip Pool to organize each track’s media and enable looped or one-shot drawing for MID events.
1.
Select a track.
2.
From the View menu, choose Track Properties. The Track Properties dialog is displayed.
3.
Select the Clip Pool tab.
For more information, see Using the Clip Pool on page 109.
Toggling looped or one-shot painting for a MIDI clip
Select the Loop button on the Clip Pool if you want a MIDI clip to repeat when painted on the timeline. Loop clips are
displayed with a icon in the track list.
Deselect the Loop button if you want a MIDI clip to be treated as a one-shot. One-shot clips are displayed with a
icon.
Editing a MIDI clip's time signature
To change a MIDI clip's time signature, right-click a clip on the Clip Pool tab, choose Time Signature from the shortcut
menu, and then choose a time signature from the submenu.
The time signature you choose will be used to display the grid on the OPT piano roll editor and to display M.B.T
(measure.beat.tick) values on the OPT list editor.
For more information, see Using the piano roll editor on page 187.
For more information, see Using the list editor on page 191.
Offset by Select the check box and type a value in the box to offset the quantize grid by the specified number of
ticks. You can type negative values to shift the grid backward.
Swing Drag the slider to add a swing to the quantize grid. When you set this slider to 0, notes are quantized
directly to the grid. Increasing the setting shifts every other grid boundary forward: set to 300% to shift
every other grid boundary to the next grid division.
Strength Drag the slider to adjust how strictly you want to quantize. For example, to quantize directly to the grid,
set the slider to 100%. If you set the slider to 50%, a note that would be shifted 4 ticks is moved only 20
ticks.
Tips:
You can also access the clip pool by doing the following:
• Double-click the MIDI track icon to open Track Properties dialog. Click the Clip Pool tab from the drop-down menu.
•Click the Paint Clip Selector button and then choose Clip Pool.
WORKING WITH MIDI | 183
MIDI Track Envelopes and Keyframes
With MIDI track envelopes, you can adjust volume, panning, controller parameters, program changes, or Sysex
commands dynamically over the duration of a track.
You can automate VSTi parameters using envelopes on the soft synth bus track.
To record track automation using the controls in the track header, select the Automation Settings button . When the
button is not selected, the controls adjust static (trim) levels.
Adding a mute envelope
1.
Select a MIDI track.
2.
From the Insert menu, choose Envelopes, or right-click in the track list and choose Insert/Remove Envelope from
the shortcut menu.
3.
From the submenu, choose Mute. A check mark is displayed next to the command, and an envelope is added to the
timeline.
Mute automation is either on or off with no fade between the on and off states. If you want to use fades, apply
volume automation.
4.
If you want to change the track's mute state throughout the track, edit the envelope in the timeline. For more
information, see Adjusting envelopes on page 132.
5.
If you want to change the track's mute state by recording automation settings, select the Automation Settings
button in the track header.
6.
Click the Mute button in the track header to change the track's mute automation state at the cursor position.
The button behaves differently depending on the track automation recording mode:
• When the track automation mode is set to Off, the button mutes the entire track.
• When the track has a mute envelope and the track automation mode is set to Read, the button changes state to
reflect the envelope setting during playback but cannot be adjusted.
• When the track has a mute envelope and the track automation mode is set to Touch or Latch, the button edits
the envelope setting at the cursor position.
For more information, see Track automation on page 127.
Adding a MIDI controller envelope
1.
Select the track where you want to add or remove the envelope.
2.
Perform one of the following actions:
•Click the Insert/Hide Envelope button next to the controller's slider in the track header.
• From the Insert menu, choose Envelopes, and then choose a controller type.
Tips:
You can use the Display tab in the Preferences dialog to change the colors used to draw track envelopes. Using
custom envelope colors can help you avoid getting lost in a maze of envelopes when you're using track envelopes to
control MIDI controllers. For more information, see Using the Display tab on page 238.
Notes:
When you apply mute automation to a track, it's possible to have a track that is muted and soloed simultaneously
if you use the Mute and Solo buttons in the track header. The mute state overrides the solo state:
• If a track's Solo button is selected, the track is included in the solo group, but it will be muted whenever the mute
automation is set to mute the track.
• If the track's Mute button is selected, the track is muted regardless of the mute automation settings.
184 | Chapter 11
• Right-click the track header, choose Insert/Remove Envelope from the shortcut menu, and then choose a
controller type.
If the controller you want to adjust is not displayed in the menu, choose Configure Controllers from the menu.
You can use the Output Settings tab of the Track Properties window to configure which controllers are available
on the track.
3.
If you want to change the controller setting throughout the track, edit the envelope in the timeline. For more
information, see Adjusting envelopes on page 132.
4.
If you want to change controller settings by recording automation, click the Automation Settings button in
the track header. The slider handles are displayed as in automation mode.
5.
Drag a slider to edit automation settings at the cursor position.
The track header controls behave differently depending on the track's automation recording mode:
• When the track automation mode is set to Off, the controls adjust the level of the entire track. In this mode, the
automation envelope is bypassed, and the control does nothing.
• When the track has a controller envelope and the track automation mode is set to Read, the control will follow
the envelope during playback but cannot be adjusted.
• When the track automation mode is set to Touch or Latch, the control edits the envelope setting at the cursor
position. If the track does not have an envelope, an envelope will be added when you adjust the control.
If multiple tracks are selected, all selected tracks are adjusted.
For more information, see Recording automation settings on page 137.
Configuring MIDI track controller automation
You can use the Output Settings tab in the MIDI Track Properties dialog to configure which controllers can be automated;
add, remove, or hide envelopes; set default values; and set each envelope's default fade curve. For more information, see
Configuring MIDI track output settings on page 176.
Resetting a MIDI controller envelope’s points
Perform either of the following actions to reset an envelope's points to their default values:
• Click the down arrow next to the Insert/Hide Envelope button next to the controller's slider in the
track header and choose Reset All Envelope Points.
• Right-click the envelope and choose Reset All from the shortcut menu.
You can set the default value for each continuous controller on the Output Settings tab in the Track Properties dialog. For
more information, see Editing MIDI track properties on page 176.
Deleting a MIDI controller envelope
Click the down arrow next to the Insert/Hide Envelope button next to the controller's slider in the track header
and choose Delete Envelope.
Adding a program change keyframe
If you want to show or hide an envelope without deleting its settings, click the Insert/Hide Envelope button .
To add a program change keyframe:
1.
Click the Program button and choose Insert Program Change Keyframe. The program change keyframe row is
displayed at the bottom of the track.
Tip:
If you want to record MIDI controller envelopes into a track using a hardware controller, you can use MIDI merge
recording to record the envelopes. For more information, see Using MIDI merge recording on page 166.
WORKING WITH MIDI | 185
2.
Using the Draw or Envelope tool, double-click in the track's keyframe row to add a keyframe.
3.
To edit a keyframe, double-click it to display the Output Settings tab in the Track Properties window, and then select
the patch you want to assign to the keyframe.
Add a Sysex keyframe
1.
Right-click the track header, choose Insert/Remove Envelope, and then choose Insert Sysex from the submenu.
2.
Using the Draw or Envelope tool, double-click in the track's keyframe row to add a keyframe.
3.
To edit a keyframe, double-click it to display the System Exclusive Editor dialog.
Automating VSTi parameters
You can use the soft synth bus track to control parameter automation for VST instruments. For more information, see Using
soft synth controls on page 144.
Adding parameter automation envelopes
1.
Select the bus track header for a VSTi soft synth.
2.
From the Insert menu, choose Envelopes, and then choose Soft Synth Automation from the submenu. The Soft
Synth Parameter Automation dialog is displayed.
3.
Select the check box for each parameter you want to automate with an envelope.
4.
Click the down arrow in the Envelope box and choose a command from the menu:
Tip:
To hide the Sysex keyframe row without removing keyframes, right-click the track header, choose Insert/Remove
Envelope, and then choose Hide Sysex from the submenu. You can view the keyframe row again by right-clicking the
track header, choosing Insert/Remove Envelope, and then choosing Show Sysex.
Item Description
Insert Envelope If the parameter does not have an automation envelope, No is displayed.
Click the down arrow and choose Insert Envelope to add an automation envelope to the timeline.
Show/Hide
Envelope
If the parameter has an automation envelope, Visible or Hidden is displayed.
Click the down arrow and choose Hide Envelope or Show Envelope to toggle its display.
Click the Hide all Envelopes button at the bottom of the window to hide all envelopes on the bus track.
Reset All
Envelope Points If the parameter has an automation envelope, you can click the down arrow and choose Reset All
Envelope Points to restore all points to the default value.
Click the Reset all Envelopes button at the bottom of the window to set all points on all envelopes on the
bus track to the default value.
186 | Chapter 11
5.
Click the down arrow in the Curve Type box to set the default fade curve for each parameter's automation
envelope. The new curve type will be applied to all envelope segments. You can right-click a segment and choose a
new fade curve to override the default curve type.
Editing parameter automation envelopes
You can edit mute automation settings by adding an envelope to the bus track or by using the controls in the Soft Synth
Properties window. For more information, see Modifying soft synth control properties on page 144.
1.
Select the Automation Settings button .
2.
Click to position the cursor in the timeline where you want to edit a parameter.
3.
You can adjust automated parameters by editing the envelopes in the timeline or by recording automation with the
controls in the Soft Synth Properties window. For more information, see Adjusting envelopes on page 132.
The controls in the Soft Synth Properties window behave differently if the track has automation envelopes and when
you change the track automation recording mode:
• When the track automation mode is set to Off, the controls in the Soft Synth Properties window affect the entire
bus track (and all tracks routed to the soft synth).
• When the track has automation envelopes and the track automation mode is set to Read, the Soft Synth
Properties controls change state to reflect the envelope setting during playback but cannot be adjusted.
• When the track has automation envelopes and the track automation mode is set to Touch or Latch, the Soft
Synth Properties controls edit the envelope setting at the cursor position.
For more information, see Track automation on page 127.
Editing MIDI clip properties
From the View menu, choose Clip Properties (or Ctrl+Alt+3) to display the Clip Properties window. You can also get to
the Clip Properties window by double-clicking the track icon and selecting the Clip Pool tab in the Track Properties
window. Double-click one of the clips to open the Clip Properties dialog.
The contents of the Clip Properties window will change to display properties for the currently selected clip in the
timeline. You can use the Clip Properties window to edit MIDI data using the OPT list editor or piano roll.
For more information, see Using clips with tracks on page 107.
Editing a MIDI clip with OPT Piano Roll
The piano roll editor is an OPT plug-in that you can use to create and edit note events within the ACID Clip Properties
window for a MIDI track. For more information, see Using the piano roll editor on page 187.
Editing a MIDI clip with OPT Piano Roll
The List Editor tab is an OPT plug-in that you can use to perform detailed filtering and editing within the Clip Properties
window for a MIDI track. For more information, see Using the list editor on page 191.
Delete Envelope If the parameter has an automation envelope, you can click the down arrow and choose Delete
Envelope to remove the envelope and all envelope points from the timeline.
Click the Remove all Envelopes button at the bottom of the window to delete all parameter envelopes
on the bus track.
Tip:
When the Clip Properties window is undocked, you can double-click its title bar to toggle its size — especially
handy when you’re using the piano roll.
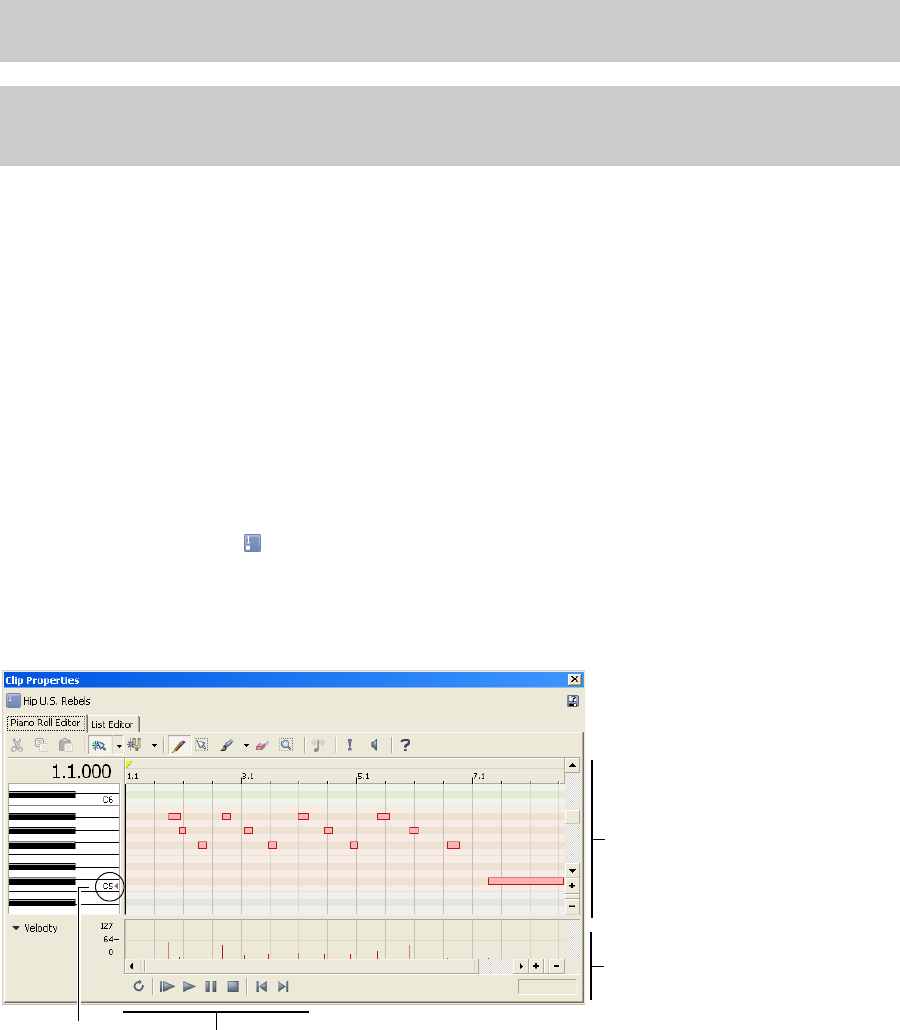
WORKING WITH MIDI | 187
Merging controller data from a MIDI clip
If you use MIDI clips that contain MIDI controller data, the controller data will not be displayed in the timeline by default.
Right-click the event on the timeline and choose Merge Envelope Data from the shortcut menu to represent MIDI
controllers as envelopes on the timeline.
Using the piano roll editor
The piano roll editor is an OPT plug-in that you can use to create and edit note events within the Clip Properties window
for a MIDI clip.
The top pane of the piano roll editor displays note information like a sequencer or a roll from a player piano. Each note is
represented by a rectangular note event of a certain length and pitch. The piano keys along the left side of the window
indicate the pitch of a note event. The beat ruler across the top of the window shows the length and location of a note
event.
The lower pane of the piano roll editor displays velocity information for each note event. A transport bar for previewing
MIDI appears at the bottom of the window.
Viewing the piano roll editor
1.
Double-click the MIDI icon ( ) on the track header to open the Track Properties window.
2.
Select the Clip Pool tab in the Track Properties dialog.
3.
Double-click one of the listed clips to open the Clip Properties dialog.
4.
Click the Piano Roll Editor tab. The piano roll editor appears.
Note:
The Merge Envelope Data command is not available in inline MIDI editing mode. For more information, see
Editing MIDI on the timeline on page 167.
Tip:
When Lock Envelopes to Events is selected from the Options menu, envelope points will move with an event as you
move it along the timeline. When Lock Envelopes to Events is not selected, you can move events and envelopes
independently.
Middle C Transport bar
Velocity
Pitch and length
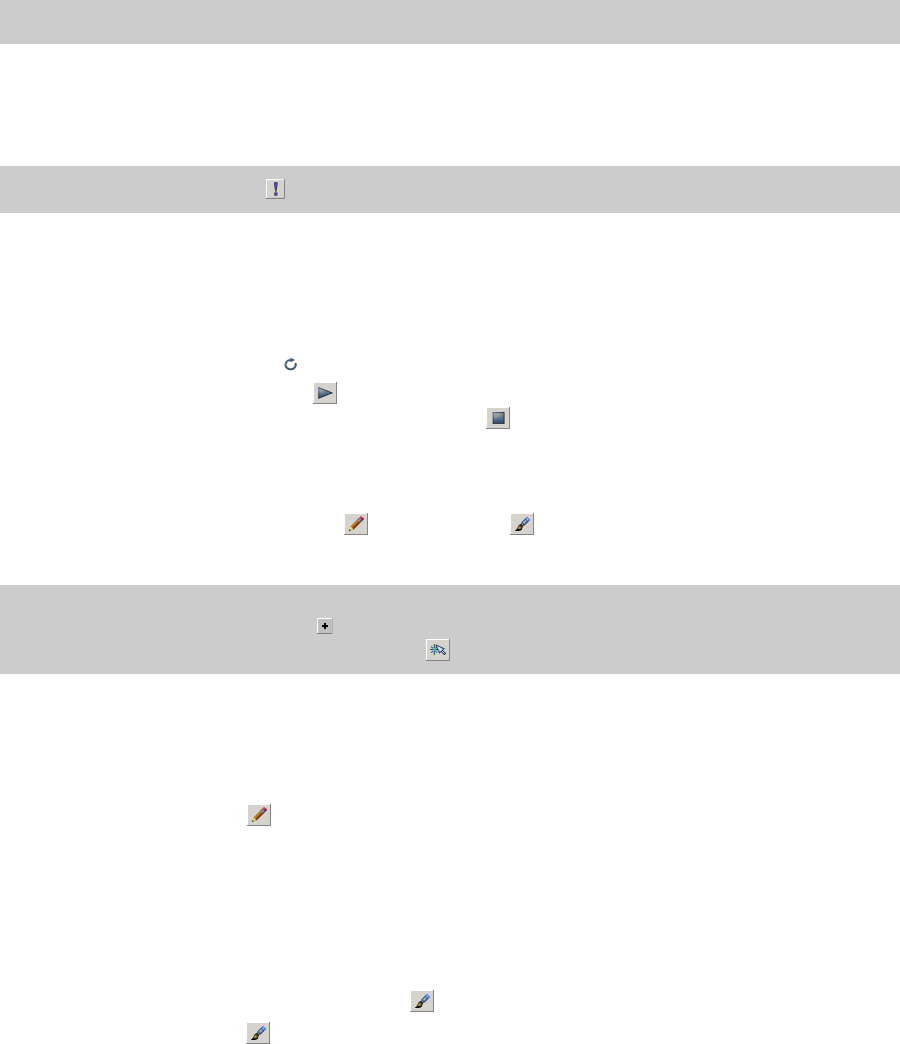
188 | Chapter 11
Previewing MIDI
You can preview the entire MIDI file, a loop selection, or single notes using the piano roll editor.
Previewing the MIDI file
Use the transport bar buttons at the bottom of the piano roll editor to play your MIDI.
Previewing a selection in looped playback
You can preview a selection in looped playback just as you would in the main ACID window.
1.
Drag the handles of the loop bar in the piano roll editor to create the desired loop region.
2.
Click the Loop Playback button ( ) to turn on looped playback.
3.
Click the transport bar’s Play button ( ) or press Space. The piano roll editor loops the playback of the selected
area. To stop playback, click the transport bar’s Stop button ( ) or press Space.
Adding note events
You can add note events using the Draw tool ( ) or the Paint tool ( ) in the same way you do in the main ACID
window.
Drawing note events
The Draw tool limits you to drawing one pitch at a time. In other words, you cannot drag up and down with the Draw tool
to draw note events across several pitches at once.
1.
Click the Draw Tool button ( ). The Draw tool is selected.
2.
Drag in the row for the pitch you wish to create. A new note event appears as you drag.
Painting note events
Unlike the Draw tool, the Paint tool allows you to create note events across multiple pitches with a single drag of the
mouse. The Paint tool also allows you to select the note length you want to paint.
1.
Click the arrow adjacent to the Paint Tool button ( ) and choose a note length to paint from the menu.
2.
Click the Paint Tool button ( ). The Paint tool is selected.
3.
Drag to create new note events. The new events appear as you drag.
Editing note events
You can change the length or pitch of a note event using the Draw tool. You can also cut, copy, and paste events in the
same way you do in the main ACID window.
Tip:
To control volume during playback in the piano roll editor, drag the Preview fader in the Mixer window.
Tip:
You can use the Solo button ( ) to solo a particular MIDI track during preview playback.
Tip:
As you drag to create new events, the event edge snaps to the divisions on the beat ruler. To snap to smaller
divisions, click the Zoom In Time button ( ) at the bottom of the window to zoom in more tightly. Or, to turn off
snapping altogether, click the Enable Snapping button ( ) to toggle it off.
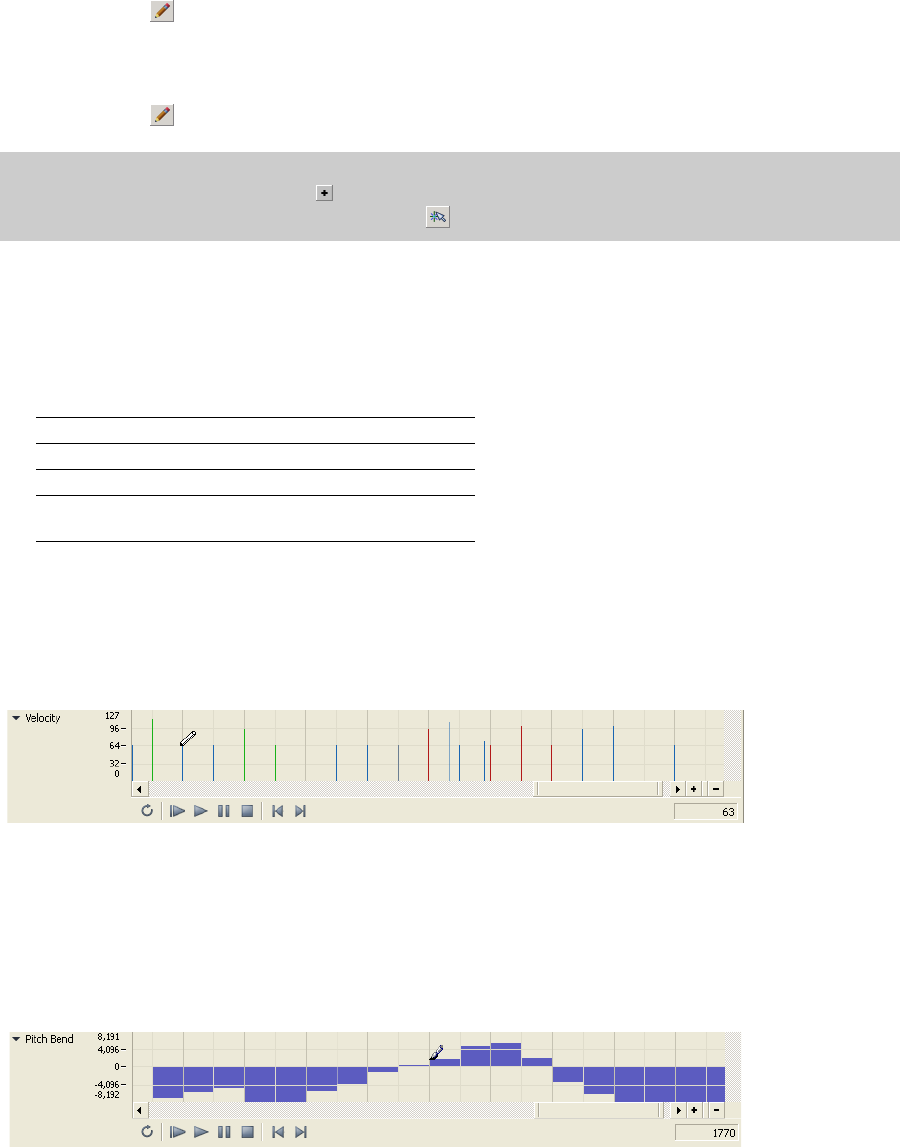
WORKING WITH MIDI | 189
Changing pitch
With the Draw tool ( ) selected, drag a note event to a new row.
Changing length
With the Draw tool ( ) selected, drag the edge of a note event to a new location.
Specifying a velocity value for notes
To enter a specific velocity value, right-click a note event in the piano roll, choose Velocity from the shortcut menu, and
choose the appropriate command from the submenu.
Changing velocity data
1.
In the lower-left corner of the Piano Roll Editor tab, click the drop-down arrow and choose Velocity from the menu.
2.
In the area at the bottom of the Piano Roll Editor tab, drag the top of a velocity bar up or down to change the velocity
value. You can also drag across multiple bars to change their values at the same time.
Setting pitch bend
1.
In the lower-left corner of the Piano Roll Editor tab, click the drop-down arrow and choose Pitch Bend from the
menu.
2.
In the area at the bottom of the Piano Roll Editor tab, drag to draw your pitch bend curve. To erase a curve, right-click
and drag.
Changing continuous controller information
1.
In the lower-left corner of the Piano Roll Editor tab, click the drop-down arrow, choose All Continuous Controllers
from the menu, and choose a controller from the submenu.
Tip:
As you drag the edge of a note event, the event edge snaps to the divisions on the beat ruler. To snap to smaller
divisions, click the Zoom In Time button ( ) at the bottom of the window to zoom in more tightly. Or, to turn off
snapping altogether, click the Enable Snapping button ( ) to toggle it off.
Command Description
Set to Maximum Sets the velocity to 127.
Set to Default Sets the velocity to 64.
Set to Minimum Sets the velocity to 0.
Set to... Allows you to enter a custom velocity
value.
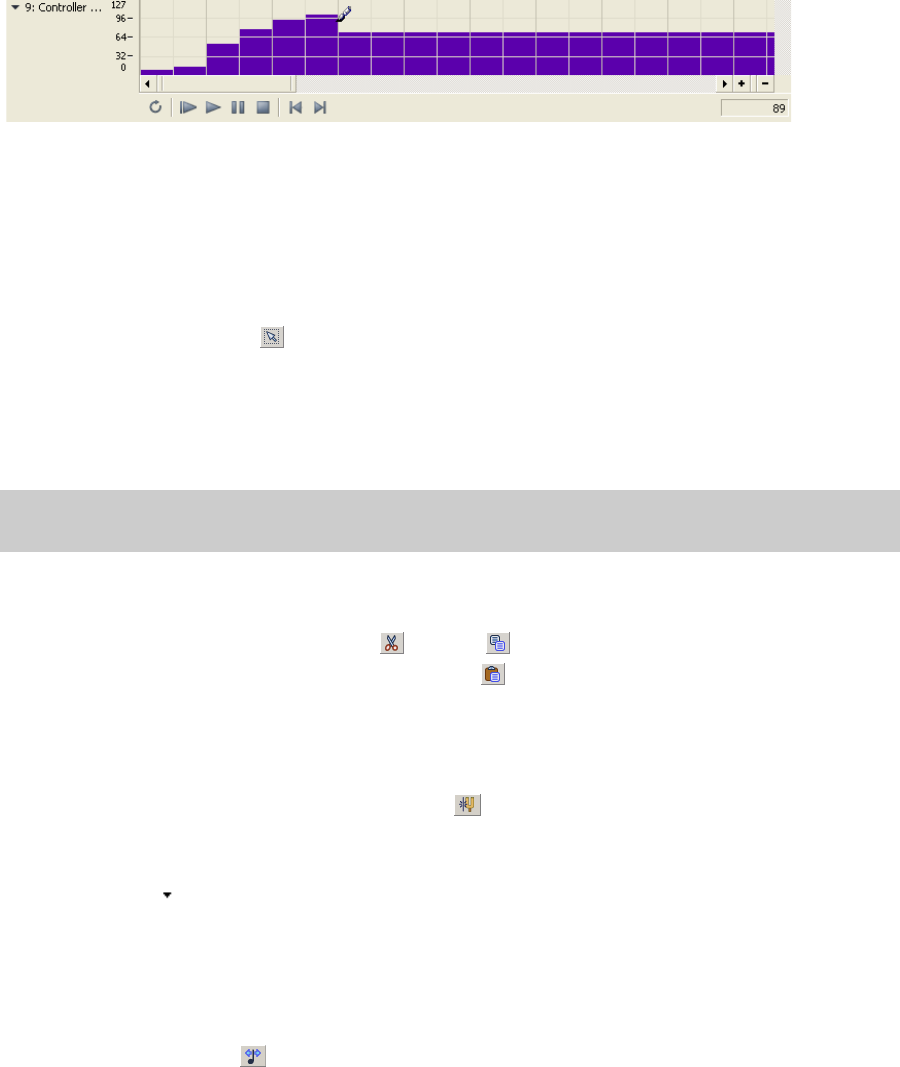
190 | Chapter 11
2.
In the area at the bottom of the Piano Roll Editor tab, drag to draw your controller information.
Selecting note events
With the Draw tool selected, you can select individual note events by clicking them. You can also use one of several
methods to select multiple events:
• With the Draw tool selected, press Ctrl or Shift while clicking note events. Pressing Shift allows you to select the first
and last note events of a range in order to select all notes in between, while pressing Ctrl allows you to select non-
contiguous note events.
•Click the Selection Tool button ( ) and drag across note events you wish to select.
• Press Ctrl+A to select all note events on a track.
Moving note events
After you select note events, you can drag them to new positions.
Using cut, copy, and paste
After you select note events, you can click the Cut ( ) or Copy ( ) buttons to cut or copy the events. You can then
position the cursor in a new location and click the Paste button ( ) to paste the events. Note events are always pasted
at the same pitch as the original note event.
Toggling note snapping
Click the Enable Snapping Notes to Specified Scale button ( ) to toggle snapping.
If the button is selected, you can only draw or drag notes within the selected scale. Hold Alt while drawing or dragging
notes to override snapping.
Click the down arrow next to the button to choose a root note and scale.
Quantizing note events
You can use the MIDI Quantize dialog to force notes to align with musical beats based on the parameters you specify.
1.
Select the notes you want to quantize. For more information, see Selecting note events on page 190.
2.
Click the Quantize button ( ). The MIDI Quantize dialog appears.
3.
From the Quantize resolution drop-down list, choose the beat to which you want the selected notes to be
quantized.
4.
Select the Start times check box to snap start times to the beat selected in the Quantize resolution drop-down list.
5.
Select the Note durations check box to snap note durations to the beat selected in the Quantize resolution drop-
down list.
6.
Click Apply.
Tip:
Press Alt while dragging note events to restrict your movement to vertical (change pitch) or horizontal (change
location in time).
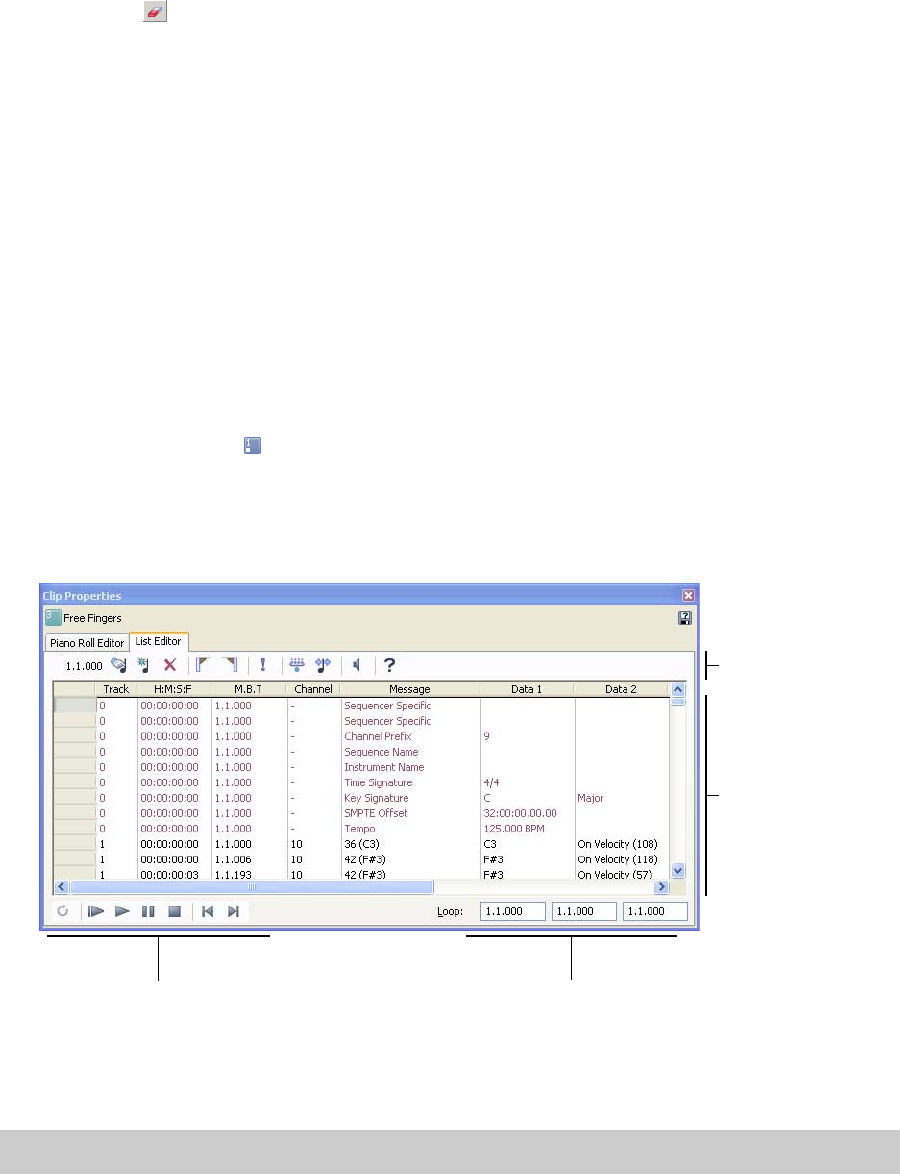
WORKING WITH MIDI | 191
Deleting note events
Use the Erase tool ( ) to erase events in the piano roll. Alternately, you can select events and press Delete. For more
information, see Selecting note events on page 190.
Undoing and redoing
You can easily undo and redo actions in the piano roll editor by using keyboard shortcuts. Press Ctrl+Z to undo an action,
and press Ctrl+Shift+Z to redo an action.
Using the list editor
The List Editor tab is an OPT plug-in that you can use to perform detailed filtering and editing within the Clip Properties
window for a MIDI clip.
Events within the MIDI file are displayed in a table. Each event occupies one row, and the rows are sorted in chronological
order. The columns in the List Editor tab display the contents of the events.
Viewing the list editor
1.
Double-click the MIDI icon ( ) on the track header to open the Track Properties window.
2.
Select the Clip Pool tab in the Track Properties dialog.
3.
Double-click one of the listed clips to open the Clip Properties dialog.
4.
Click the List Editor tab. The list editor appears.
Previewing MIDI
You can preview individual events or the MIDI file as a whole within the list editor.
Previewing single events
When monitoring is enabled, the list editor will play events when you select them.
Tip:
To control volume during playback in the list editor, drag the Preview fader in the Mixer window.
Transport bar Loop boxes
Toolbar
Events
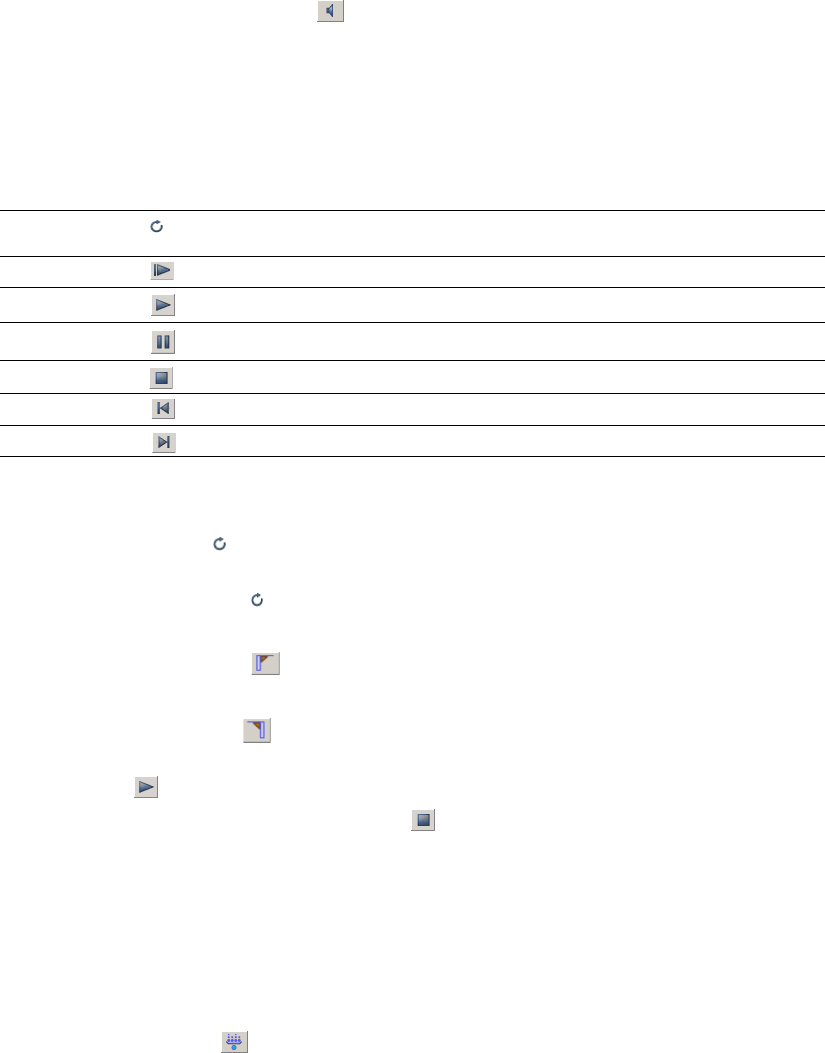
192 | Chapter 11
1.
In the list editor, click the Monitor button ( ) to turn on the event monitor.
2.
Click anywhere in an event row to play the event.
Playing MIDI files
In list editor, you may play your MIDI file by using the buttons on the transport bar:
Setting a loop region
When the Loop Playback button is selected, you can set a portion of the edit list to play repeatedly. The beginning,
end, and length of the loop region are displayed in the Loop boxes in the lower-right corner of the List Editor tab.
1.
Select the Loop Playback button .
2.
Select the first event you want to play.
3.
Click the Mark Loop Start button .
4.
Select the last event you want to play.
5.
Click the Mark Loop End button .
6.
Click the Play button to start playback. Select the event where you want to begin playback and click the transport
bar’s Play button ( ) or press Space. The piano roll editor begins playback and loops the marked selection.
7.
To stop playback, click the transport bar’s Stop button ( ) or press Space.
Filtering the list
A MIDI file can contain a dizzying number of individual events. You can speed the task of locating events in the list editor
by applying a filter. You can filter what the list editor displays either by track or by event type.
Filtering the list by event type
1.
Click the Event Filter button ( ). The MIDI Event Filter dialog appears.
Item Icon Description
Loop Playback Click to toggle looped playback mode. When the button is selected, only the events between
the mark in and mark out points will be played.
Play from Start Plays the entire MIDI file from the beginning, regardless of cursor position.
Play Plays from the current cursor position.
Pause Halts playback. The next time you click Play, playback will begin with the last event played.
Stop Halts playback. The next time you click Play, playback will begin with the first event in the list.
Go to Start Moves the cursor to the beginning of the list.
Go to End Moves the cursor to the end of the list.
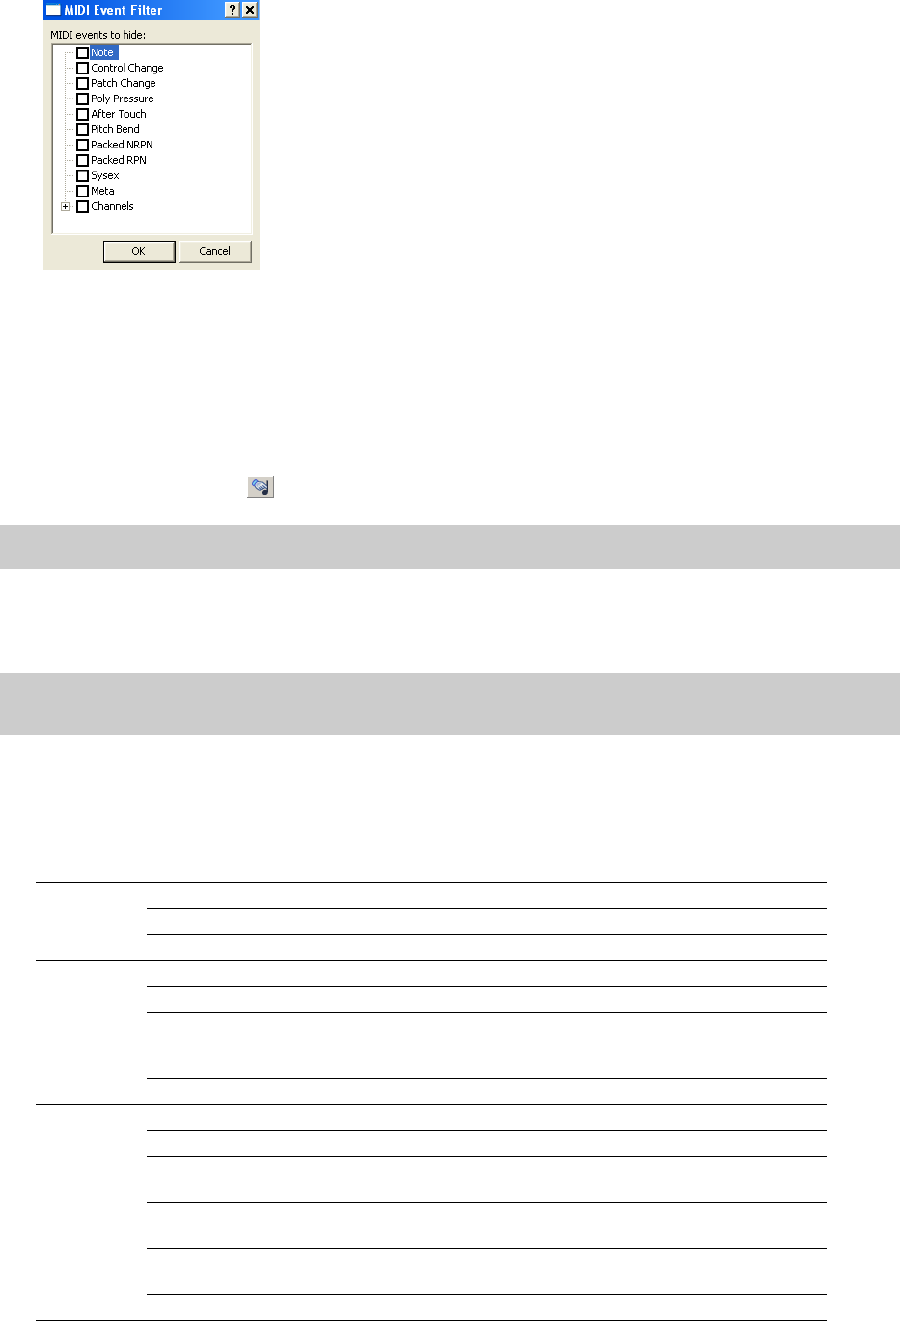
WORKING WITH MIDI | 193
2.
Select the check box for an event type to hide that type, or clear the check box to display that event type.
3.
Click OK. The list is filtered according to the criteria you selected.
Editing events
Once you have located a particular event, you can edit the parameters of the event as needed.
1.
Click in the event row you want to edit.
2.
Click the Edit Event button ( ). The Edit MIDI Event dialog appears.
3.
Edit the values in the dialog. For more information, see Event parameters on page 193.
4.
Click OK. The event updates to the new values.
Event parameters
The table below describes the editable event parameters for different event types.
Tip:
You can also double-click an event’s Message parameter to open the Edit Event dialog.
Tip:
You can edit individual parameters in columns other than Message by double-clicking the parameter and
entering a new value.
Event type Editable parameter Description
After Touch Start Time Time (in measures.beats.ticks) where you want the event to begin.
Channel MIDI channel (1-16) where you want to send the event.
Pressure Amount of vibrato (0-127) you want to apply to each voice on the channel.
Control
Change
Start Time Time (in measures.beats.ticks) where you want the event to begin.
Channel MIDI channel (1-16) where you want to send the event.
Controller Change
Number
Displays the number of the current controller change type. Choose a
controller change type from the drop-down list to the right of the Event
type drop-down.
Controller Change Value Controller value.
Note Start Time Time (in measures.beats.ticks) where you want the event to begin.
Channel MIDI channel (1-16) where you want to send the event.
Note Numeric value of the note you want to play. For more information, see MIDI
notes and frequencies on page 194.
On Velocity Speed of the note’s attack (0-127). Low values produce a soft attack; high
values produce a strong attack.
Off Velocity Speed of the note's release (0-127). Low values produce a soft release; high
values produce a staccato release.
Duration Length of the note’s sustain in measures.beats.ticks.
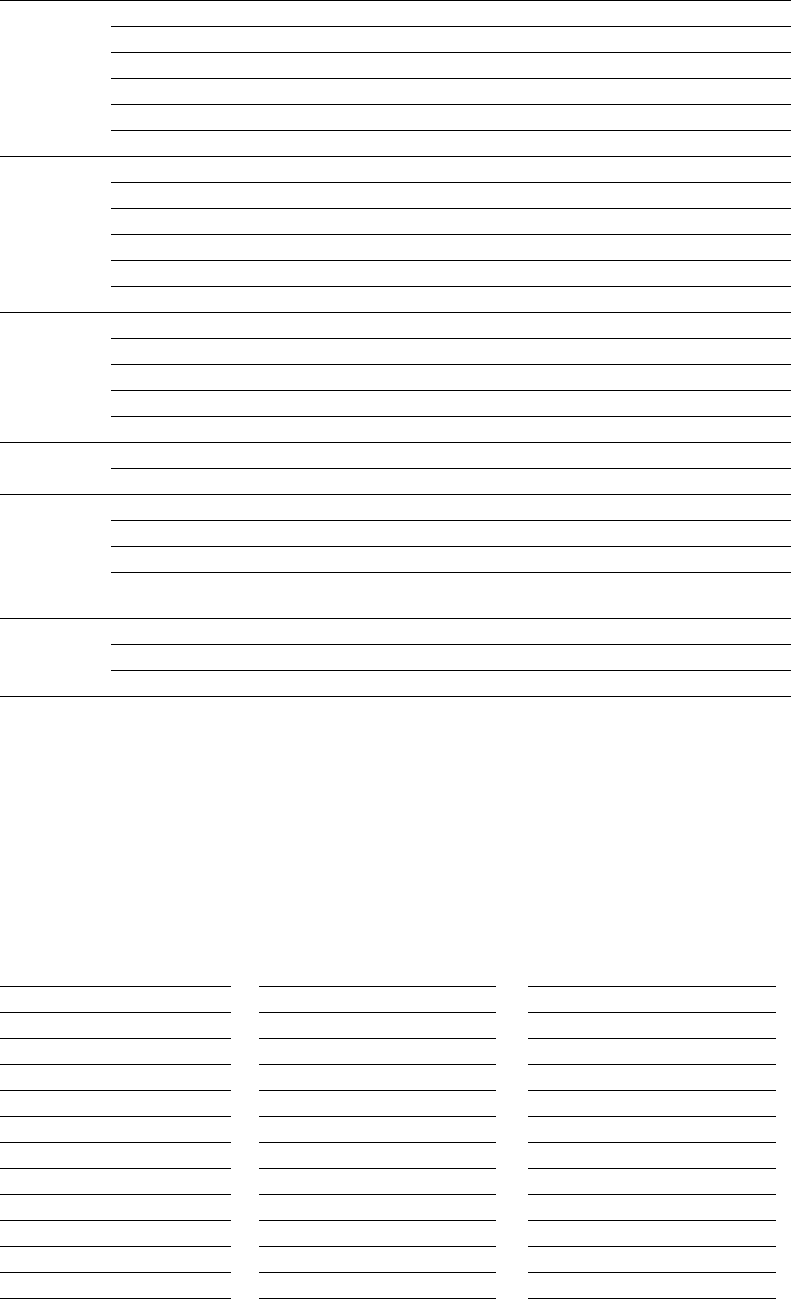
194 | Chapter 11
MIDI notes and frequencies
The following table shows the musical pitch and frequency associated with each MIDI note.
A5 is 440 Hz, and middle C is C5 at 261.63 Hz. These values can differ, often by one octave, from values used by other
manufacturers. The following frequencies are based on equal temperament tuning.
Packed NRPN* Start Time Time (in measures.beats.ticks) where you want the event to begin.
Channel MIDI channel (1-16) where you want to send the event.
NRP MSB Parameter’s most significant byte.
NRP LSB Parameter’s least significant byte.
Data MSB Value for the most significant byte.
Data LSB Value for the least significant byte.
Packed RPN** Start Time Time (in measures.beats.ticks) where you want the event to begin.
Channel MIDI channel (1-16) where you want to send the event.
NRP MSB Parameter’s most significant byte.
NRP LSB Parameter’s least significant byte.
Data MSB Value for the most significant byte.
Data LSB Value for the least significant byte.
Patch Start Time Time (in measures.beats.ticks) where you want the event to begin.
Channel MIDI channel (1-16) where you want to send the event.
Bank LSB Least significant byte value for the bank.
Bank MSB Most significant byte value for the bank.
Patch Number of the patch you want to play.
Pitch Bend Start Time Time (in measures.beats.ticks) where you want the event to begin.
Pitch +/- Number of cents by which you want to bend the pitch.
Poly Pressure Start Time Time (in measures.beats.ticks) where you want the event to begin.
Channel MIDI channel (1-16) where you want to send the event.
Note Note to which you want to apply pressure.
Pressure Pressure (0-127) you want to apply to the note. Most devices will apply
more vibrato to a note as the pressure increases.
Program
Change
Start Time Time (in measures.beats.ticks) where you want the event to begin.
Channel MIDI channel (1-16) where you want to send the event.
Patch Number of the new patch you want to play.
*Packed nonregistered parameter numbers (NRPN) are used to adjust settings such as vibrato and filtering, but are not
part of the General MIDI specification. Refer to your MIDI device’s documentation for more information about the
required parameters.
**Packed registered parameter numbers (RPN) are used to adjust common settings such as pitch wheel range.
Pitch MIDI Key Frequency Pitch MIDI Key Frequency Pitch MIDI Key Frequency
C0 08.176 G3 43 97.998 D7 86 1174.7
C#-0 18.662 G#3 44 103.82 D#7 87 1244.5
D0 29.177 A3 45 110.00 E7 88 1318.5
D#0 39.723 A#3 46 116.54 F7 89 1396.9
E0 410.301 B3 47 123.47 F#7 90 1480.0
F0 510.913 C4 48 130.81 G7 91 1568.0
F#0 611.562 C#4 49 138.59 G#7 92 1661.2
G0 712.250 D4 50 146.83 A7 93 1760.0
G#0 812.978 D#4 51 155.56 A#7 94 1864.7
A0 913.750 E4 52 164.81 B7 95 1975.5
A#0 10 14.568 F4 53 174.61 C8 96 2093.0
B0 11 15.434 F#4 54 184.99 C#8 97 2217.5
Event type Editable parameter Description
WORKING WITH MIDI | 195
Creating events
In addition to editing existing events, you can also create new events.
1.
Click the Insert Event button ( ). The Insert MIDI Event dialog appears.
2.
Choose an event type from the Event type drop-down list.
3.
Enter a start time in the Start time box.
4.
Enter values for the remaining event parameters.
5.
Click Insert. The new event is inserted at the designated start time.
Quantizing events
You can use the MIDI Quantize dialog to force events to align with musical beats based on the parameters you specify.
1.
To quantize only specific events, select the events you want to quantize in the list editor.
C1 12 16.352 G4 55 195.99 D8 98 2349.3
C#1 13 17.324 G#4 56 207.65 D#8 99 2489.0
D1 14 18.354 A4 57 220.00 E8 100 2637.0
D#1 15 19.445 A#4 58 233.08 F8 101 2793.8
E1 16 20.601 B4 59 246.94 F#8 102 2960.0
F1 17 21.826 C5 60 261.63 G8 103 3136.0
F#1 18 23.124 C#5 61 277.18 G#8 104 3322.4
G1 19 24.499 D5 62 293.66 A8 105 3520.0
G#1 20 25.956 D#5 63 311.13 A#8 106 3729.3
A1 21 27.500 E5 64 329.63 B8 107 3951.1
A#1 22 29.135 F5 65 349.23 C9 108 4186.0
B1 23 30.867 F#5 66 369.99 C#9 109 4434.9
C2 24 32.703 G5 67 391.99 D9 110 4698.6
C#2 25 34.648 G#5 68 415.31 D#9 111 4978.0
D2 26 36.708 A5 69 440.00 E9 112 5274.0
D#2 27 38.890 A#5 70 466.16 F9 113 5587.7
E2 28 41.203 B5 71 439.88 F#9 114 5919.9
F2 29 43.653 C6 72 523.25 G9 115 6271.9
F#2 30 46.249 C#6 73 554.37 G#9 116 6644.9
G2 31 48.999 D6 74 587.33 A9 117 7040.0
G#2 32 51.913 D#6 75 622.25 A#9 118 7458.6
A2 33 55.000 E6 76 659.26 B9 119 7902.1
A#2 34 58.270 F6 77 698.46 C10 120 8372.0
B2 35 61.735 F#6 78 739.99 C#10 121 8869.8
C3 36 65.406 G6 79 783.99 D10 122 9397.3
C#3 37 69.295 G#6 80 830.61 D#10 123 9956.1
D3 38 73.416 A6 81 880.00 E10 124 10548.1
D#3 39 77.781 A#6 82 932.32 F10 125 11175.3
E3 40 82.406 B6 83 987.77 F#10 126 11839.8
F3 41 87.307 C7 84 1046.5 G10 127 12543.9
F#3 42 92.499 C#7 85 1108.7
Tip:
Hold Shift or Ctrl while clicking event rows to select multiple events.
Pitch MIDI Key Frequency Pitch MIDI Key Frequency Pitch MIDI Key Frequency
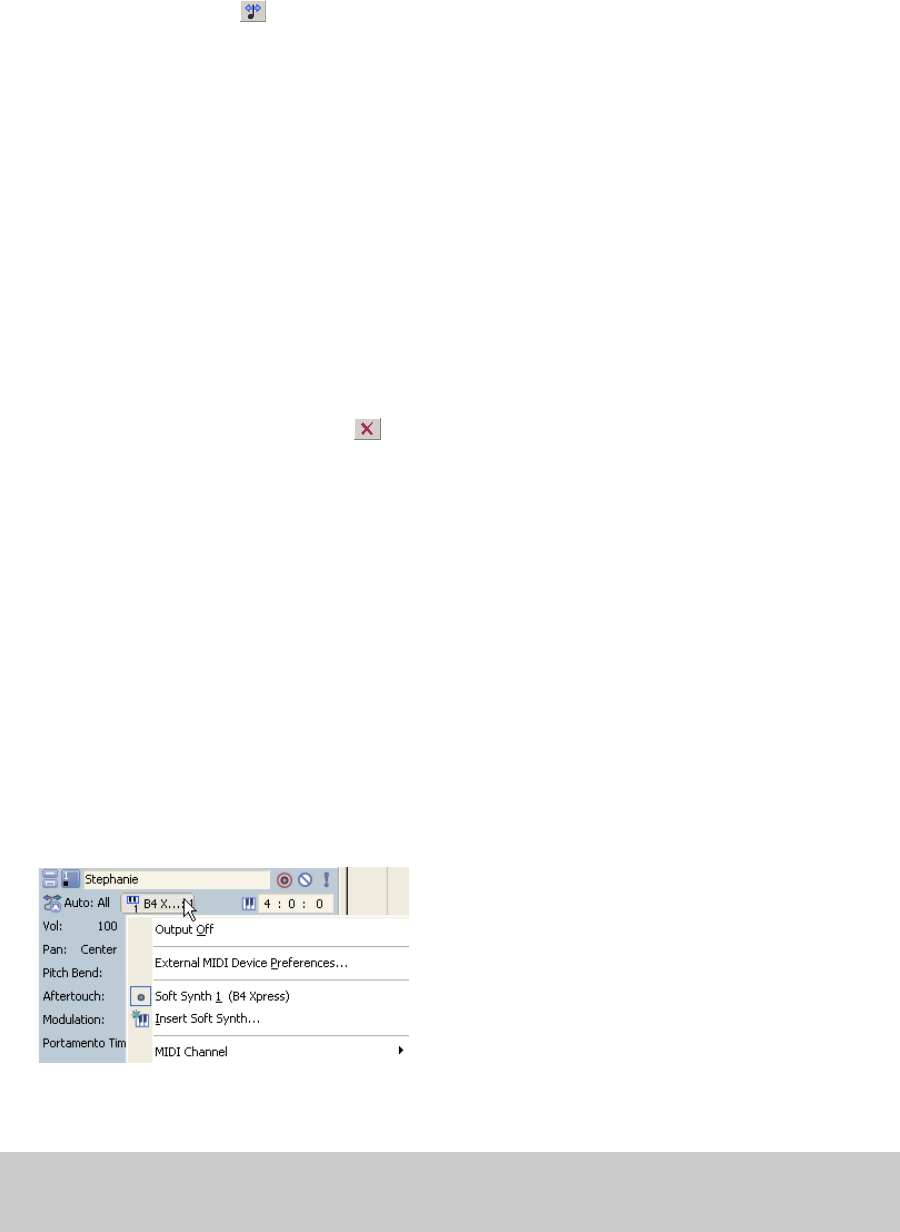
196 | Chapter 11
2.
Click the Quantize button ( ). The MIDI Quantize dialog appears.
3.
From the Quantize resolution drop-down list, choose the beat to which you want the selected events to be
quantized.
4.
Choose the appropriate options for quantizing:
• Select the Start times check box to snap event start times to the beat selected in the Quantize resolution drop-
down list.
• Select the Note durations check box to snap note durations to the beat selected in the Quantize resolution
drop-down list.
• Select the Notes only check box to quantize note events alone. When you select this check box, the list editor
does not quantize after touch, control change, meta, NRPN, RPN, pitch bend, poly pressure, and program
change events.
• Select the Apply to current selection only check box to quantize only the selected events. Clear the check box
to quantize all events within the list.
5.
Click Apply.
Deleting events
Click an event row and click the Delete button ( ).
Undoing and redoing
You can easily undo and redo actions in the list editor by using keyboard shortcuts. Press Ctrl+Z to undo an action, and
press Ctrl+ Shift+Z to redo an action.
Routing tracks to MIDI devices or soft synths
Each MIDI track can be played through any external MIDI port or any DLS, VSTi, or ReWire 2.0 soft synth bus control in the
Mixer window. For more information, see Using soft synth controls on page 144.
1.
Click the MIDI Output button. A list of all the available MIDI devices and software synthesizers is displayed.
• If the soft synth you want to use does not appear in the menu, choose Insert Soft Synth to add a soft synth bus
control to the project and route the track to the new synth. Click one of the following links for more information
about DLS sets, VST instruments, or ReWire device applications.
• If a MIDI device does not appear in the menu, choose External MIDI Device Preferences to open the MIDI tab of
the Preferences dialog and verify that the check box for the device is selected. If a device is selected for
generating MIDI timecode on the Sync Preferences tab, it will be unavailable as a playback device.
2.
Choose a device from the list to send the current track to that device. To route to a specific port in a ReWire 2.0
device, choose your ReWire device application from the list, and then choose a port from the submenu.
Note:
In order to render projects that contain MIDI tracks, MIDI tracks must be routed to DLS, VSTi, or ReWire 2.0 soft
synths. Tracks that are routed to external MIDI devices will not be included in the rendered file. For more information, see
Using the Sync tab on page 236.

WORKING WITH MIDI | 197
3.
To choose which MIDI channel will be used to send MIDI data, choose MIDI Channel, and then choose a channel
from the submenu.
Resetting MIDI ports
When a MIDI port is stuck playing a sustaining sound, a quick method to turn off MIDI ports is provided (much like the
panic button on MIDI hardware devices). From the Tools menu, choose Reset All MIDI Ports to send a global Note Off
command to all MIDI ports.
Rendering projects with MIDI tracks
To render projects that contain MIDI tracks, route the MIDI tracks to soft synths (DLS sets) rather than to external MIDI
devices; MIDI tracks that are routed to external MIDI devices are not included in the rendered file. For more information,
see Rendering projects on page 54.
Playing MIDI from external devices
You can receive MIDI input from an external device such as a MIDI keyboard. You can then use a soft synth control (with its
DLS set or VST instrument) or external MIDI device to output the sound from the external device.
Adding external devices as MIDI inputs
1.
Verify that the Enable Real-Time MIDI command is selected in the Options menu.
2.
From the Options menu, choose Preferences. The Preferences dialog appears.
3.
Click the MIDI tab.
4.
Select a device in the Make these devices available for MIDI input pane.
5.
To enable MIDI thru for the selected input, right-click the entry in the MIDI Thru column and choose a MIDI thru
device from the shortcut menu.
6.
Click OK.
Assigning MIDI inputs to soft synth controls
You can route MIDI input from an external device to any soft synth control in your project.
1.
In the Mixer window, double-click the soft synth icon on a control ( ). The Soft Synth Properties window appears.
2.
Click the External MIDI Input Port button ( ) and select the MIDI input device from the menu.
Tip:
If you want to select multiple input channels, hold Ctrl and select additional channels from the MIDI Channel
submenu.
Tip:
Press Ctrl+Alt+F7 to reset all MIDI ports.
Note:
The MIDI thru device must be selected in the Make these devices available for MIDI track playback pane in
order to appear in the menu. You can choose more than one MIDI device for MIDI thru output, if desired.
Note:
You can assign both individual tracks and external MIDI devices to a single soft synth.
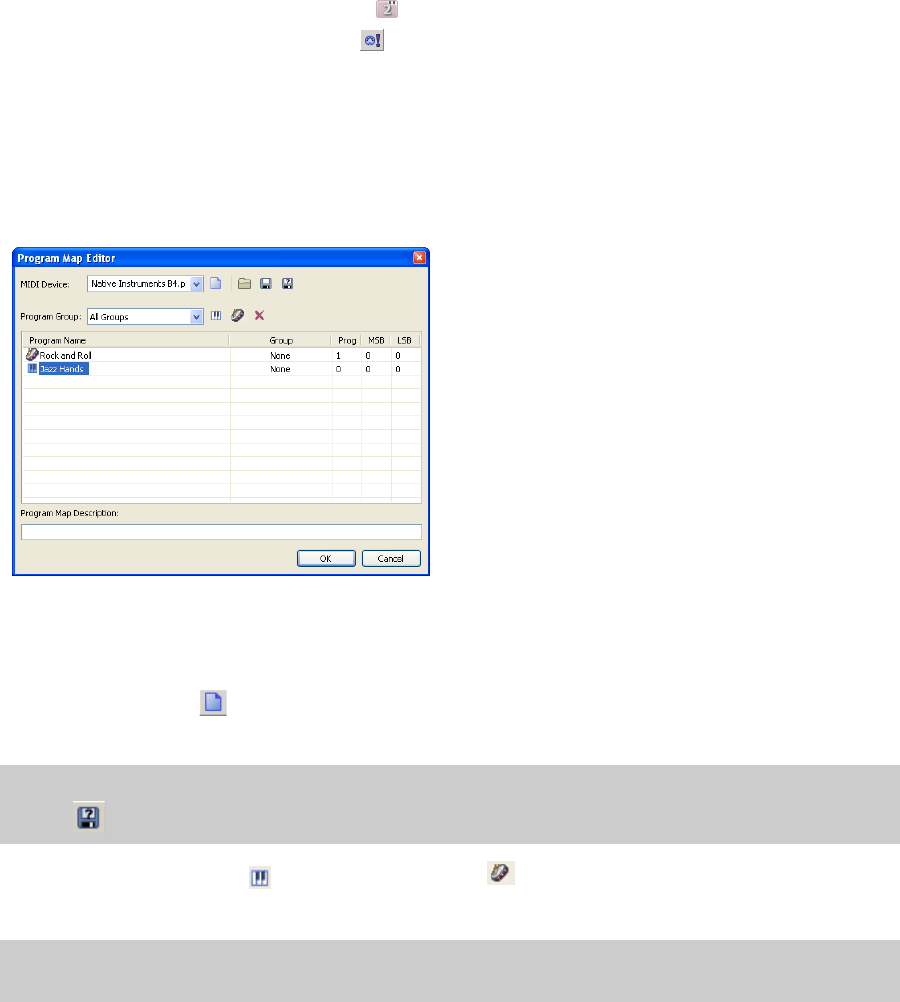
198 | Chapter 11
Soloing MIDI device inputs
External MIDI devices can be routed to multiple soft synths or MIDI thru devices. Soloing a MIDI device input prevents
your device from playing through other soft synths and MIDI thru devices, soloing the input through the selected soft
synth control. You can solo MIDI input on more than one soft synth control, if desired.
1.
Double-click the soft synth icon on a control ( ). The Soft Synth Properties window appears.
2.
Click the Solo Listen to MIDI Input button ( ).
Creating or editing program maps
From the Tools menu, choose Program Map Editor to display the Program Map Editor dialog.
You can use the Program Map Editor dialog to create or edit program maps for external MIDI devices. A program map
allows you to view program names in the track header and on the Output Settings tab of the Track Properties window
when a MIDI track is routed to a hardware synth.
Creating program maps
1.
From the Tools menu, choose Program Map Editor to display the Program Map Editor dialog.
2.
Click the New button to create a new program map. You'll be prompted to choose a file name and location
where you want to save the new map.
3.
Click the Add New Program or Add New Drum Program button to add a program to the table in the first
available slot.
4.
Type a description of the program in the Program box. You can double-click an existing name to edit it.
5.
If you want to assign the program to a group, right-click the Group box and choose a group from the shortcut menu.
If you want to create a new group, choose Add New Group and type a name in the box.
Tip:
If you want to create a program map based on an existing map, load a program map and then click the Save As
button to save a copy of the program map with a new name.
Note:
If a group is selected from the Voice Group drop-down list, the table lists only programs that belong to the
selected group. Any programs you add will automatically be associated with the selected group.
WORKING WITH MIDI | 199
6.
Double-click the Prog, MSB, and LSB values to edit them and type the values that correspond to the appropriate
program. Please refer to your device or its documentation to determine the correct values for each program.
7.
Click OK to close the dialog and save your changes.
Editing program maps
1.
From the Tools menu, choose Program Map Editor to display the Program Map Editor dialog.
2.
Load the program map you want to edit:
• Choose a setting from the MIDI Device drop-down list.
•Click the Load button and browse to the map you want to edit.
3.
To add programs to the map, click the Add New Program or Add New Drum Program button to add a
program to the table in the first available slot.
4.
To remove a program from the map, select a program and click the Delete button .
5.
To edit a program name, double-click the name and type a new value in the box.
6.
To change a program to a drum program , right-click the program name and choose Drum Kit from the
shortcut menu. To change a drum program to a program, right-click the program name and choose Drum Kit from
the shortcut menu to clear the check mark.
7.
If you want to assign the program to a group, right-click the Group box and choose a group from the shortcut menu.
If you want to create a new group, choose Add New Group and type a name in the box.
8.
Double-click the Prog, MSB, and LSB values to edit them and type the values that correspond to the appropriate
program. Please refer to your device or its documentation to determine the correct values for each program.
9.
Click OK to close the dialog and save your changes.
Assigning a patch map to a MIDI device
1.
From the Options menu, choose Preferences.
2.
Click the MIDI tab.
3.
In the Make these devices available for MIDI track playback section of the dialog, verify the check box is selected
for your MIDI device.
4.
Right-click the Device value for your MIDI device and choose Load Device Template from the shortcut menu.
Notes:
• Within ACID, MIDI values range from 0-127. If your device uses 1-128, subtract 1 when editing the program.
• Devices that use Sysex messages to change programs are limited to 128 programs.
Tip:
If you want to create a program map based on an existing map, load a program map and then click the Save As
button to save a copy of the program map with a new name.
Note:
If a group is selected from the Voice Group drop-down list, the table lists only programs that belong to the
selected group. Any programs you add will automatically be associated with the selected group.
Notes:
• Within ACID, MIDI values range from 0-127. If your device uses 1-128, subtract 1 when editing the program.
• Devices that use Sysex messages to change programs are limited to 128 programs.
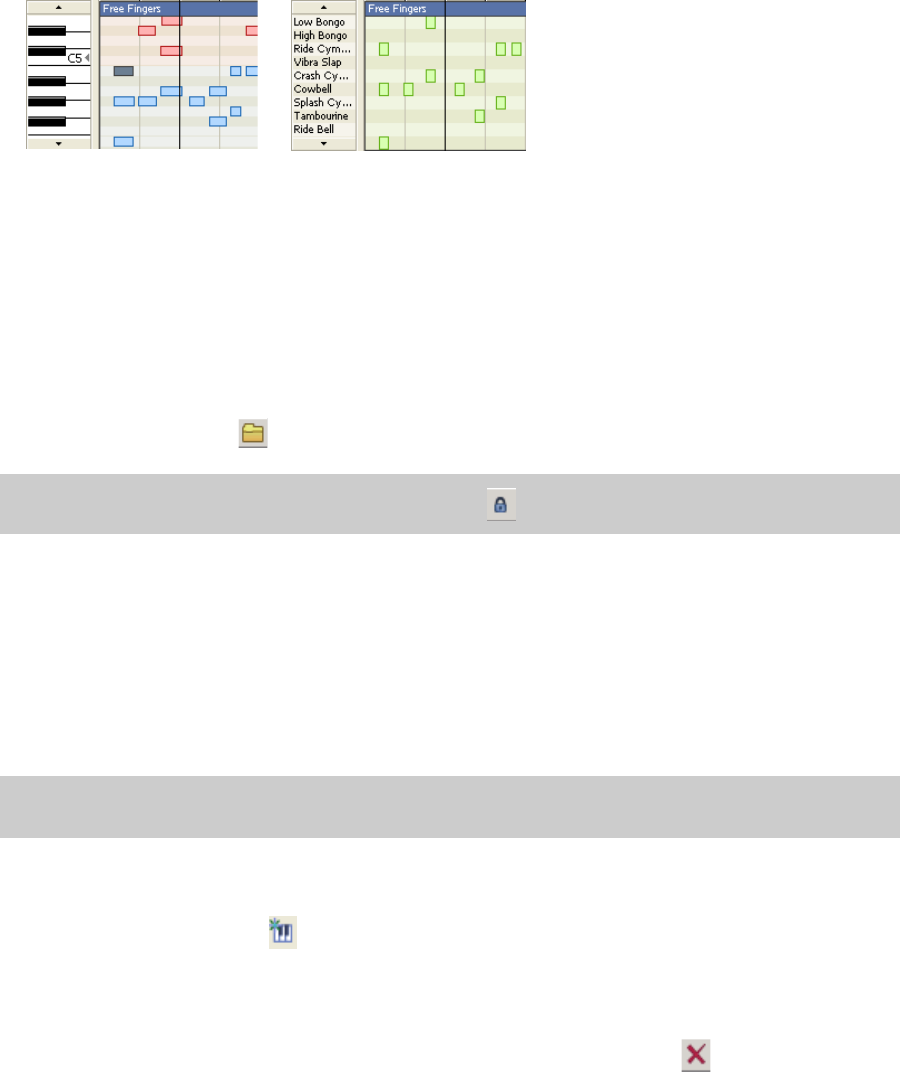
200 | Chapter 11
5.
Browse to the patch map you want to use and click Open. The selected patch map will be used for any track that is
routed to the MIDI device.
Creating or editing drum maps
From the Tools menu, choose Drum Map Editor to display the Drum Map Editor dialog.
You can use the Drum Map Editor dialog to create or edit drum maps. When a drum map is defined for a soft synth, you
can use the drum grid in the timeline to edit MIDI data.
For more information, see Editing MIDI on the timeline on page 167.
Editing a drum map
1.
From the Tools menu, choose Drum Map Editor to display the Drum Map Editor dialog.
2.
Choose the drum map you want to edit.
• Select a drum map in the MIDI Drum Map Template list.
—or—
•Click the Open button to browse to an XML drum mapping file.
3.
If you want to edit the name of the drum map, double-click the name in the MIDI Drum Map Template column and
type a new name in the box.
4.
If you want to associate the drum map with a MIDI device, double-click the Device box and type the name of a MIDI
device.
When you associate a drum map with a MIDI device, the drum maps will be displayed automatically on the Output
Settings tab of the Track Properties window when you choose Drum Map from the drop-down list at the top of the
page. For more information, see Editing duration on page 175.
5.
If you want to change the description of the map, edit the text in the Drum Map Description box.
6.
Add keys as needed:
a.
Click the Insert Key button to add a key to the drum map.
If a key is selected, the next available key will be inserted. For example, if you select C5 and click Insert Key, C#5
will be added if it does not exist in the current drum map. If C#5, D5, and D#5 already exist, E5 will be added.
b.
Double-click the name in the Instrument column and type the name of the instrument associated with the
selected key.
7.
Select a key in the table on the right side of the dialog and click the Delete Key button to remove it from the
drum map.
Tip:
Drum maps that belong to the GM2 kits are displayed with a and cannot be edited.
Note:
Be sure to type the device name identically in the Drum Map Editor and the Patch Map Editor. For more
information, see Creating or editing program maps on page 198.
A piano roll allows you to edit MIDI
notes for most patches.
A drum grid allows you to edit MIDI
notes for soft synths that have drum
maps defined.
WORKING WITH MIDI | 201
8.
If you want to copy key assignments from other drum maps, perform the following steps:
a.
In the MIDI Drum Map Template list, select the drum map that contains the keys you want to copy.
b.
Select the keys you want to copy. Hold Ctrl or Shift to select multiple keys.
c.
Click the Copy Selected Keys button .
d.
In the MIDI Drum Map Template list, select the drum map that you want to edit.
e.
Click the Paste Copied Keys into Map button .Select the keys you want to copy. Hold Ctrl or Shift to select
multiple keys.
If a key is selected, the next available key will be inserted. For example, if you select C5 and click Insert Key, C#5
will be added if it does not exist in the current drum map. If C#5, D5, and D#5 already exist, E5 will be added.
f.
Double-click the name in the Instrument column and type the name of the instrument associated with the
selected key.
9.
Click OK to close the dialog and save your changes.
Choosing a drum map for a track
Tracks that are routed to a VSTi soft synth or a MIDI device can display a piano roll or a drum grid.
Tracks that are routed to the DLS soft synth will display a drum grid only if a drum map exists for the current patch. You
cannot edit drum maps for GM2 drum kits.
Synchronizing using MIDI timecode
ACID can generate MIDI timecode (MTC) and MIDI clock as well as trigger from MIDI timecode. These features allow ACID
to be synchronized with other audio applications and external audio hardware.
Generating MIDI timecode
MIDI timecode is a standard timecode that most applications and some hardware devices use to synchronize themselves.
Stable MTC is generated at all available frame rates for other applications to chase.
1.
Specify a MIDI output device to which you will send timecode and a frame rate for the timecode. These options can
be found on the Sync tab of the Preferences dialog. For more information, see Using the Sync tab on page 236.
2.
From the Options menu, choose Timecode, and choose Generate MIDI Timecode from the submenu.
MTC begins generating wherever you click the Play button ( ).
Generating MTC with an offset
In some cases, you may want to start sending timecode with an offset (e.g., 01:00:00:00) to allow time for multiple devices
to synchronize. You can create an offset on the ACID time ruler to accomplish this. For more information, see Using the ruler
offset on page 223.
Viewing outgoing timecode
You can view outgoing timecode in the time display located directly above the track list. Right-click the time display and
choose MIDI Timecode Out from the shortcut menu to display outgoing MTC time.
Note:
The software cannot chase MTC or MIDI clock.
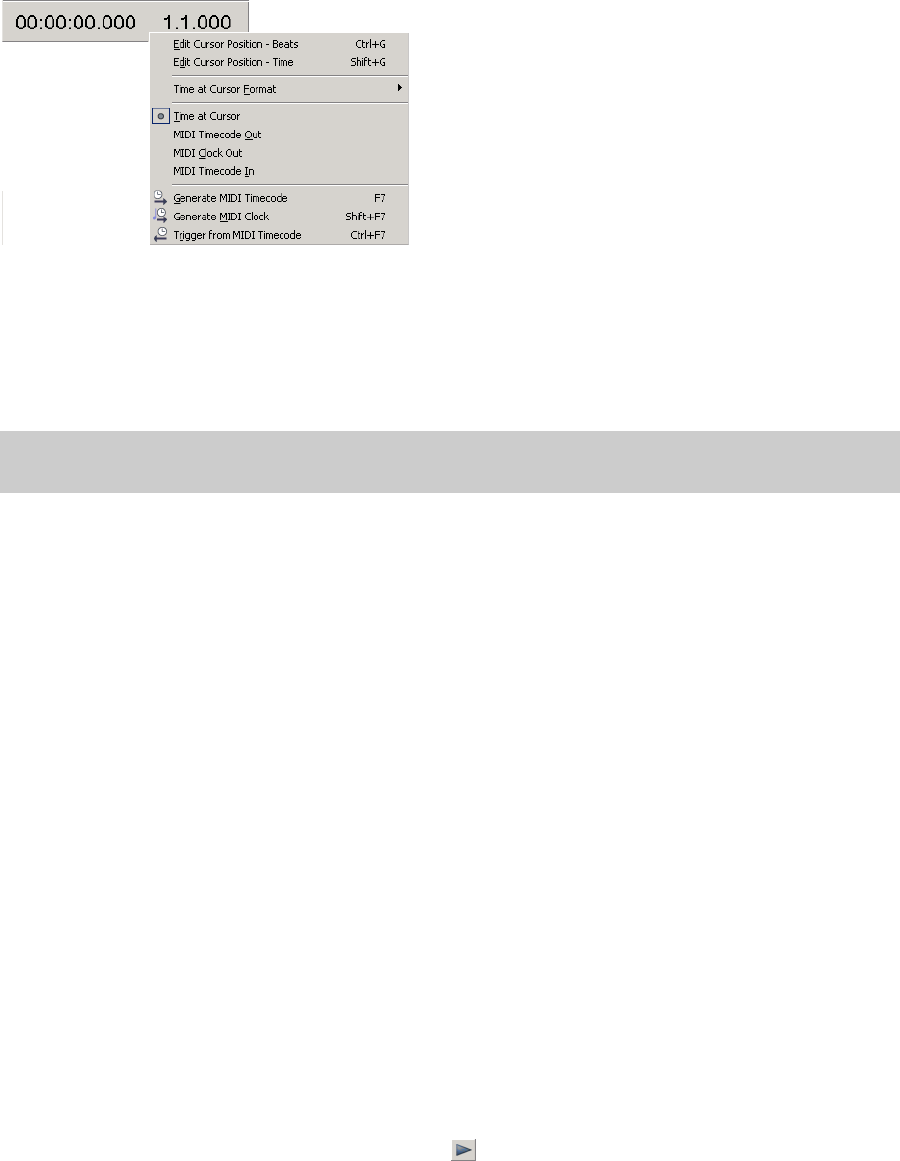
202 | Chapter 11
Triggering from MIDI timecode
You can trigger ACID playback using MTC. This means that the software initiates playback by receiving timecode from
another device.
1.
Connect a word clock signal between your computer and triggering device to lock synchronization.
2.
Configure your triggering device to send MTC to your computer.
3.
From the Options menu, choose Preferences and select the Sync tab to configure the application to receive MTC.
•From the Input device drop-down list, choose the port through which you receive MTC.
•From the Frame rate drop-down list, choose the frame rate that your trigger device uses to send MTC to ACID.
4.
From the Options menu, choose Timecode, and choose Trigger from MIDI Timecode from the submenu.
When an incoming MTC signal is received, playback begins from the position indicated by the timecode. If MTC is not
being received, you can play and edit normally.
Viewing incoming timecode
You can view the incoming timecode in the time display located directly above the track list. Right-click the time display
and choose MIDI Timecode In from the shortcut menu to show the incoming MTC time.
This display also shows status and error information. If Trigger from MIDI Timecode is enabled but no MTC is detected,
the display reads Waiting...; If the wrong frame rate of MTC is being detected, the display reads Wrong format.
Generating MIDI clock
MIDI clock differs from MTC in that it contains tempo as well as positional information. MIDI clock is essentially measured
in ticks from the beginning of the project. MIDI clock sends 24 ticks per quarter note.
The advantage of using MIDI clock is that tempo changes are sent to the chasing application and they will be preserved.
1.
Specify a MIDI output device to which you will send the clock. This option can be found on the Sync tab of the
Preferences dialog. For more information, see Using the Sync tab on page 236.
2.
From the Options menu, choose Timecode, and choose Generate MIDI Clock from the submenu.
MIDI clock is generated when you click the Play button ( ).
Viewing outgoing MIDI clock
You can view the outgoing clock in the time display located directly above the track list. Right-click the time display and
choose MIDI Clock Out from the shortcut menu to display the outgoing MIDI clock time.
Note:
If the MIDI trigger device can output MIDI timecode, a timecode converter is not necessary; you can connect the
trigger device directly to your computer.

WORKING WITH MIDI | 203
Exporting MIDI files
By using the Clip Pool tab, you can save the selected clip to a new folder or with a new file name. When you export a MIDI
file, the MIDI tracks in your project are saved to a standard MIDI file. Track names, track device names, and track voices are
saved in the exported file
Saving MIDI clips for export
You may now export multiple MIDI tracks and individual clips to standard MIDI files. To export files:
1.
Select Paint Clip Selector from the track header.
2.
Choose Clip Pool to open the Track Properties dialog box.
3.
Right-click on the clip you want to save and select Save As.
4.
Name the file and choose Save.
Exporting the project to a standard MIDI file
1.
From the File menu choose Export MIDI.
2.
From the Export Project as Standard MIDI File screen, choose a drive and folder from the Save in drop down list, or
use the browse window to locate the folder where you want to save your file.
3.
Type a name in the File name box, or select a file in the browse window to replace an existing file.
4.
Choose a setting from the MIDI file type drop-down list to indicate the type of file you want to save:
• Choose Standard MIDI File Type 1 to preserve tracks when exporting. This mode preserves the MIDI data in
your ACID project.
• Choose Standard MIDI File Type 0 to save your project as a single-track, multichannel MIDI file. For more
information, see Adding MIDI files to a project on page 163.
5.
Type a value in the Resolution box to set the resolution of file. The default is 960, but you can specify any value
between 24 and 960.
6.
Click the Save button.
Notes:
• Files are saved in the MIDI Export folder but they can be saved to any location.
• Files are saved as standard MIDI files (.mid).
• All MIDI clips are exported as MIDI file type 0. The MIDI File Type box is greyed out.
• File resolution is set at 960 pulses per quarter note. Resolution can be set between 24 and 960 pulses per quarter note. All
sequencers/players can read in any arbitrary resolution.
Note:
When you add a Type 0 MIDI file to your project, a separate track will be created for each channel in the file. If
you have tracks routed to separate soft synths or MIDI devices, they will be preserved as separate tracks only if their
MIDI outputs use different channels. For more information, see Routing tracks to MIDI devices or soft synths on page
196.
Important:
Not all MIDI devices can read arbitrary resolutions.
204 | Chapter 11
Configuring a Mackie Control Universal
The Mackie Control Universal is fully supported by ACID. An overlay is available from Mackie that you can use to label the
buttons and controls with their mapped functions in ACID.
For more information, see Using the Mackie Control Universal on page 246.
Configuring a Frontier TranzPort
Using a Frontier TranzPort, you can control ACID wirelessly.
For more information, see Using a Frontier TranzPort on page 256.
Configuring a generic MIDI controller
You can configure up to five generic MIDI control surfaces to work with the ACID interface.
For information about your specific device, please refer to the manufacturer's documentation.
For more information, see Configuring a generic MIDI controller on page 258.

WORKING WITH VIDEO | 205
Chapter
12
Working with Video
By adding a video track to your ACID® project, you can use the software as a scoring tool.
Video is always added to the top track in the track list. Depending on your horizontal zoom level, each frame displayed in
the video track may represent multiple frames from the source video. As you zoom in, marks display to represent each
frame, and you can zoom further to view individual frames.
Managing video
ACID makes it easy to add video to a project and work with the video track.
Adding or replacing video files
Use the Explorer window to find the file you want to use, and then add it to the project by double-clicking it or dragging
it into the track view. The video file is placed in the top track, and if the file has an audio stream, it is placed as a separate,
one-shot track in the track view.
If your project already contains a video track, you are prompted to replace the existing video if you open another video
file.
Removing the video track
Right-click anywhere in the video track and choose Remove Video from the shortcut menu.
Hiding and showing the video track
By default, video displays in the track view when you add it to a project. You can hide or show the video track at any time
by choosing Show Video Track from the View menu. A check mark next to the command indicates that the video track
displays.
Synchronizing audio and video
Editing the audio associated with a video file can cause it to become out of sync with the video. To resynchronize the
audio and video, right-click the audio file and choose Synchronize with Video from the shortcut menu.
Removing the video’s audio
Right-click the audio track in the track list and choose Delete Track from the shortcut menu. The audio track is removed,
but the video remains.
Changing frame numbering
Each frame is numbered in the video track. You can change the numbering format or turn off frame numbering
altogether.
1.
From the Options menu, choose Preferences. The Preferences dialog appears.
2.
Click the Video tab.
3.
Choose a setting from the Show source frame numbers on video thumbnails as drop-down list.
Editing video events
You have several video editing options to help you score your video.
Tip:
You can also add a still image (such as a BMP, JPEG, PSD, GIF, PNG, or TGA file) to the video track.
Note:
This does not work if you have changed the audio track to a loop.
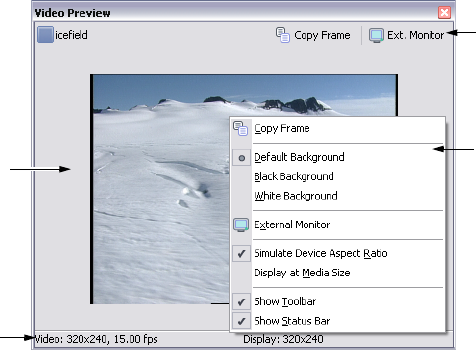
206 | Chapter 12
Moving video events
Drag the event to a new location along the video track.
Trimming video events
Drag either end of the video event. The video event stays in place, but the beginning or end of the video moves.
You cannot trim the beginning or end of the event past the event’s original end. You cannot trim an event earlier than its
starting point unless the event has been trimmed previously.
Slipping and sliding video events
To help you picture what happens when you slip and slide events, think of an event as a window to a media file. The
window can display the entire media file or a small section. When the window displays only a portion of the media file,
you can move either the window or the underlying media to adjust the media played by an event:
• When you slip an event, your event maintains its place on the timeline, but the media file moves in the direction you
drag.
• When you slide an event, the media file maintains its place on the timeline, but the event moves in the direction you
drag.
Shifting the contents of video events (slipping)
Hold Alt while dragging the video event to move the position of the video within the event. The event itself does not
move.
Slip-trimming video events
Hold Alt while dragging the beginning or end of a video event. The video moves with the event edge, and the opposite
edge of the event remains fixed.
Sliding video events
Hold Ctrl+Alt while dragging the video event to move the event while leaving the video in place. The relative position of
the video changes as when you slip an event.
Using the Video Preview window
The Video Preview window is used to view the video as it plays or to view the frame at the cursor position. To display the
Video Preview window, choose Video Preview from the View menu, or press Alt+4.
Shortcut menu
Toolbar buttons
Background
Status bar
WORKING WITH VIDEO | 207
Copying a frame to the clipboard
The Copy Frame toolbar button in the Video Preview window allows you to copy the current frame to the Windows®
clipboard.
Using toolbar buttons
The toolbar allows you to access two commonly used functions of the Video Preview window.
Using the shortcut menu
Right-click anywhere in the Video Preview window to display a shortcut menu with Video Preview window options.
Viewing the status bar
Right-click the Video Preview window and choose Show Status Bar from the shortcut menu to view the status bar. The
status bar shows the video’s frame size, frame rate, and display size.
Previewing on external monitors
You can use your system’s external monitor for previewing video playback. You must have an OHCI IEEE-1394 adapter
and a device to convert the DV signal to video, such as a DV camcorder, deck, or media converter.
To specify an external monitor, click the External Monitor button ( ) on the Video Preview window, or choose
Preferences from the Options menu and click the Video tab.
Other settings for the external monitor can also be found on the Video tab. For more information, see Using the Video tab
on page 234.
Scoring video
ACID has tools that allow you to adjust the tempo of a project to easily synchronize audio with specific video frames.
1.
Add your audio track(s) and video to your project.
2.
If the Video Preview window is not displayed, choose Video from the View menu.
3.
Click the Play button ( ) to begin playback.
4.
Press H each time you want to place a time marker at a frame you want to emphasize (where an explosion is heard,
for example).
Button Description
Copies the current frame to the
Windows clipboard.
Sends the preview to an external
monitor.
Item Description
Copy Frame Copies the current frame to the Windows clipboard.
Default Background Sets the background color of the Video Preview window to the default
color.
Black Background Sets the background color of the Video Preview window to black.
White Background Sets the background color of the Video Preview window to white.
External Monitor Sends the preview to an external monitor.
Display Square Pixels Compensates for any spatial distortions due to non-square pixel aspect
ratios.
Display at Media Size Displays video at the native resolution, clipping if necessary.
Show Toolbar Toggles the display of the Video Preview window toolbar.
Show Status Bar Toggles the display of the Video Preview window status bar.

208 | Chapter 12
5.
Click the Stop button ( ) to stop playback.
6.
Return to the leftmost time marker and fine tune its placement so it coincides exactly with the desired video frame.
7.
Place the cursor at the point to which you want to synchronize your time marker. For example, you might want the
frame that you marked in step six to coincide with a downbeat.
8.
Right-click the time marker and select Adjust Tempo to Match Marker to Cursor from the shortcut menu. The new
tempo appears in the track list.
9.
Press T to insert a tempo change marker. The adjusted tempo is detected and inserted into the tempo marker’s box.
The tempo change marker preserves synchronization between the time marker and location on the beat ruler as you
perform editing further down the timeline. For more information, see Adding tempo/key/time signature change
markers on page 97.
10.
Repeat steps six through nine to synchronize the rest of your video.
Tip:
Holding Alt while pressing the right or left arrow keys allows you to step the cursor through your video by
individual frames. You may need to drag your time marker to the cursor to get it on the desired frame.
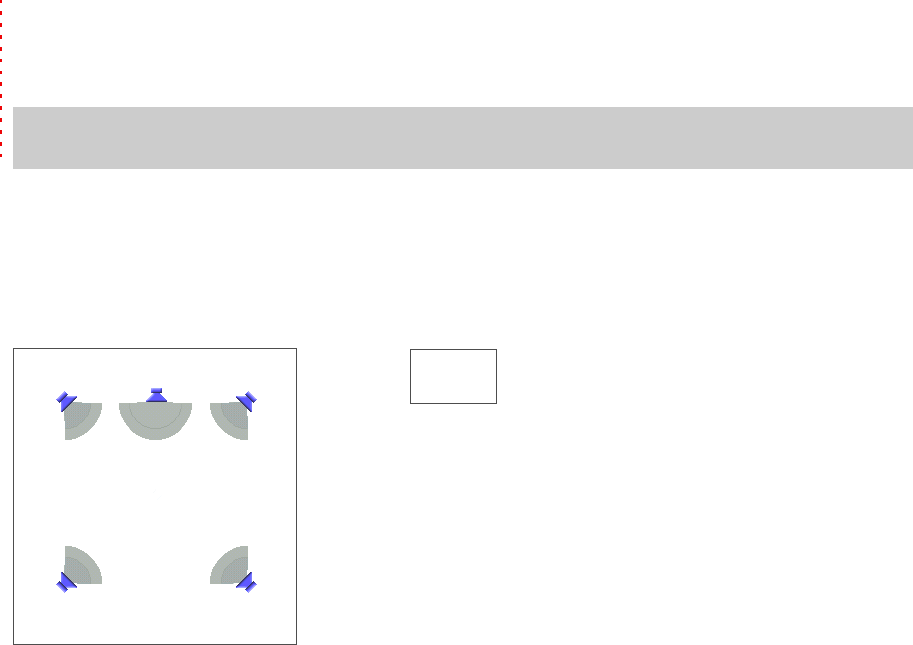
WORKING WITH 5.1 SURROUND | 209
Chapter
13
Working with 5.1 Surround
You can create 5.1-channel mixes to wrap a listener in your remixes or prepare audio for cinema, DVD-Video, DVD-Audio,
or DTS 5.1 Music projects.
What is 5.1 surround?
5.1 surround is a standard format consisting of three speakers across the front and two speakers in the rear. The “.1” is a
sixth channel called low-frequency effects (LFE) that enhances the bass levels in the mix.
The LFE channel is commonly used in motion pictures to enhance low audio frequencies for effects such as explosions or
crashes. Audio in this channel is commonly limited to a range from about 25 Hz to 120 Hz. Unlike the five primary
channels, the LFE channel adds no directional information. Depending on the speaker setup and audio levels, the sound
assigned to the LFE channel may be routed among the five main speakers or to an additional subwoofer.
Note:
ACID plays and mixes uncompressed 5.1-channel audio. Authoring software such as the Sony 5.1 Surround
Plug-In Pack is required to encode 5.1-channel audio for compressed delivery formats.
Left Center Right LFE
Right
Surround
Left
Surround
5.1 surround includes five main channels... ...and a sixth channel for low frequency effects.
210 | Chapter 13
Setting up surround hardware
Before you create surround projects, you should set up your system to provide 5.1 surround playback. To play a 5.1
surround project, you must have an appropriate speaker setup such as:
• Six powered speakers
• Six passive speakers with a six-channel amplifier
Your system must also have an appropriate sound card setup such as:
• 5.1-compatible sound card
• Sound card with three stereo outputs
• Three stereo sound cards
There are several ways to set up your system, depending on the sound card and speaker setup you are using.
Setting up surround projects
You can configure an ACID project to use 5.1 surround in the Project Properties dialog. You can also choose to apply a
low-pass filter for the LFE channel. Applying a low-pass filter approximates the bass-management system in a 5.1
decoder and ensures that you’re sending only low-frequency audio to the LFE channel.
1.
From the File menu, choose Properties.
2.
Click the Audio tab.
3.
From the Master bus mode drop-down list, choose 5.1 surround.
4.
To limit the audio sent to the LFE channel, do the following:
• Select the Enable low-pass filter on LFE check box and enter a value in the Cutoff frequency for low-pass filter
box. The low-pass filter isolates the audio sent to the LFE channel by limiting it to frequencies lower than the
value entered in the Cutoff frequency for low-pass filter box.
• Choose a setting from the Low-pass filter quality drop-down list to determine the sharpness of the filter’s
rolloff curve. Best produces the sharpest curve.
5.
Click OK.
The track list and Mixer window switch to 5.1 surround mode. The Master bus becomes the Surround Master bus, which
contains faders for each of the six surround channels. Surround panners appear on tracks and mixer controls. Tracks
routed to mixer controls (busses, assignable effects, or soft synths) do not have surround panners; panning for these
tracks takes place on the mixer control.
Six powered speakers Six passive speakers with a six-channel amplifier
5.1-
compatible
sound card
Connect powered speakers to your sound card’s
outputs as indicated by your sound card’s
documentation.
Connect your sound card’s front, rear, and center/
subwoofer outputs to the appropriate inputs on a
six-channel amplifier/home theater receiver. Connect front,
rear, center, and LFE speakers to the amplifier.
Sound card
with three
stereo
outputs
Connect powered speakers to your sound card’s
outputs where you have routed each of the pairs of
channels. The left channel of the Center/LFE pair is
the center channel; the right channel is the LFE
channel.
Connect your sound card’s outputs to the appropriate
inputs on a six-channel amplifier/home theater receiver.
Connect front, rear, center, and LFE speakers to the
amplifier.
Three stereo
sound cards
Connect powered speakers to your sound cards’
outputs where you have routed each of the pairs of
channels. The left channel of the Center/LFE pair is
the center channel; the right channel is the LFE
channel.
Connect your sound card’s outputs to the appropriate
inputs on a six-channel amplifier/home theater receiver.
Connect front, rear, center, and LFE speakers to the
amplifier.
Note:
Before rendering your surround project, check your surround authoring application’s documentation to determine
its required audio format. Some encoders require a specific cutoff frequency and rolloff, while other encoders require that
no filter be applied before encoding.
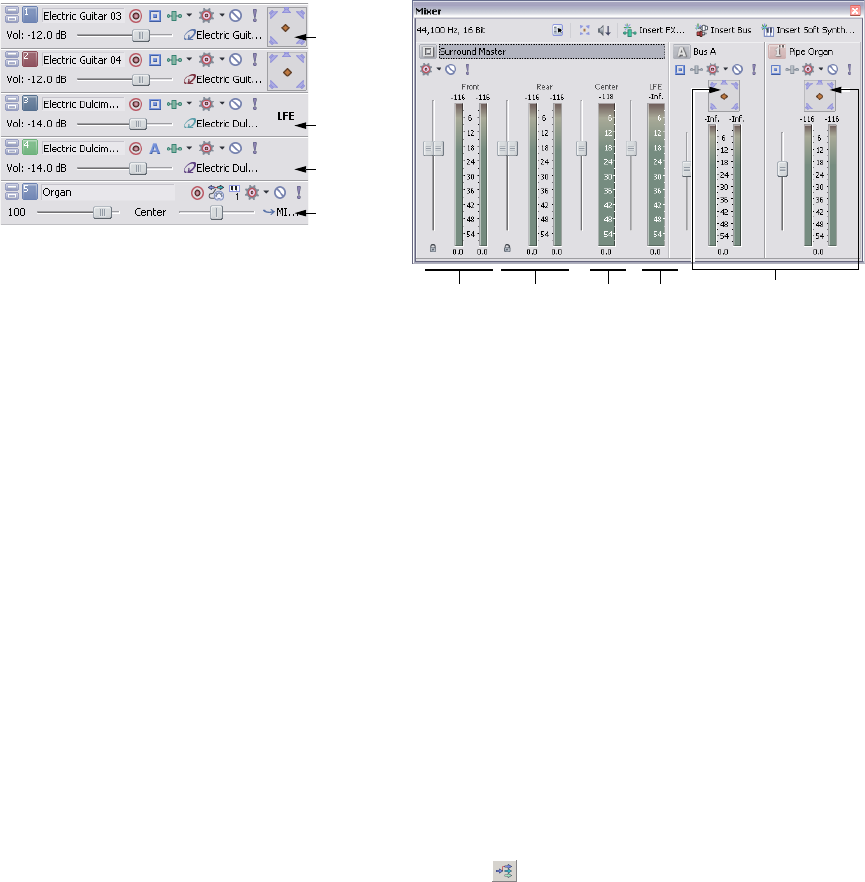
WORKING WITH 5.1 SURROUND | 211
Routing to hardware in the mixer
You must route the surround audio to the correct output in the mixer.
1.
From the Options menu, choose Preferences.
2.
Click the Audio tab.
3.
From the Audio device type drop-down list, choose an audio device type other than Microsoft Sound Mapper
(such as Windows Classic Wave Driver).
4.
Choose the playback devices for the six surround channels:
•From the Default Stereo and Front playback device drop-down list, choose the appropriate device for the
front left and right surround channels.
•From the Default Rear playback device drop-down list, choose the appropriate device for the rear left and right
surround channels.
•From the Default Center and LFE playback device drop-down list, choose the appropriate device for the center
and LFE surround channels.
5.
Click OK.
Overriding the default device routing
By setting up the device routing in the Audio tab of the Preferences dialog, you have set the defaults for surround
routing. However, you can override the default device routing at any time using the Surround Master bus in the Mixer
window.
1.
In the Mixer window, click the Audio Device Selector button ( ) on the Surround Master control. A menu of
surround channels (Front L/R, Rear L/R, and Center/LFE) appears.
2.
In the submenu, match a surround pair with the appropriate output.
3.
Repeat steps one and two to match each surround pair to the appropriate output.
Assigning audio to the LFE channel
Once the project is in 5.1 surround mode, you must decide whether a track will provide the “5” (surround panning) or the
“1” (LFE channel) in 5.1 surround. Initially, all tracks in a surround project are set to provide surround panning, but you can
assign a track to the LFE channel instead.
You can assign an individual track to the LFE channel or you can route the track to a mixer control (bus, soft synth, or
assignable effect chain) and assign the mixer control to the LFE channel.
To assign audio to the LFE channel, right-click the surround panner on the track header or mixer control and choose LFE
Only from the shortcut menu. The track or mixer control is assigned to the LFE channel.
Track list in 5.1 surround mode Mixer in 5.1 surround mode
Surround
panner
Surround
panners
Front L/R Rear L/R Center LFE
Track routed
to LFE
Track routed
to Bus
MIDI track
routed to
soft synth
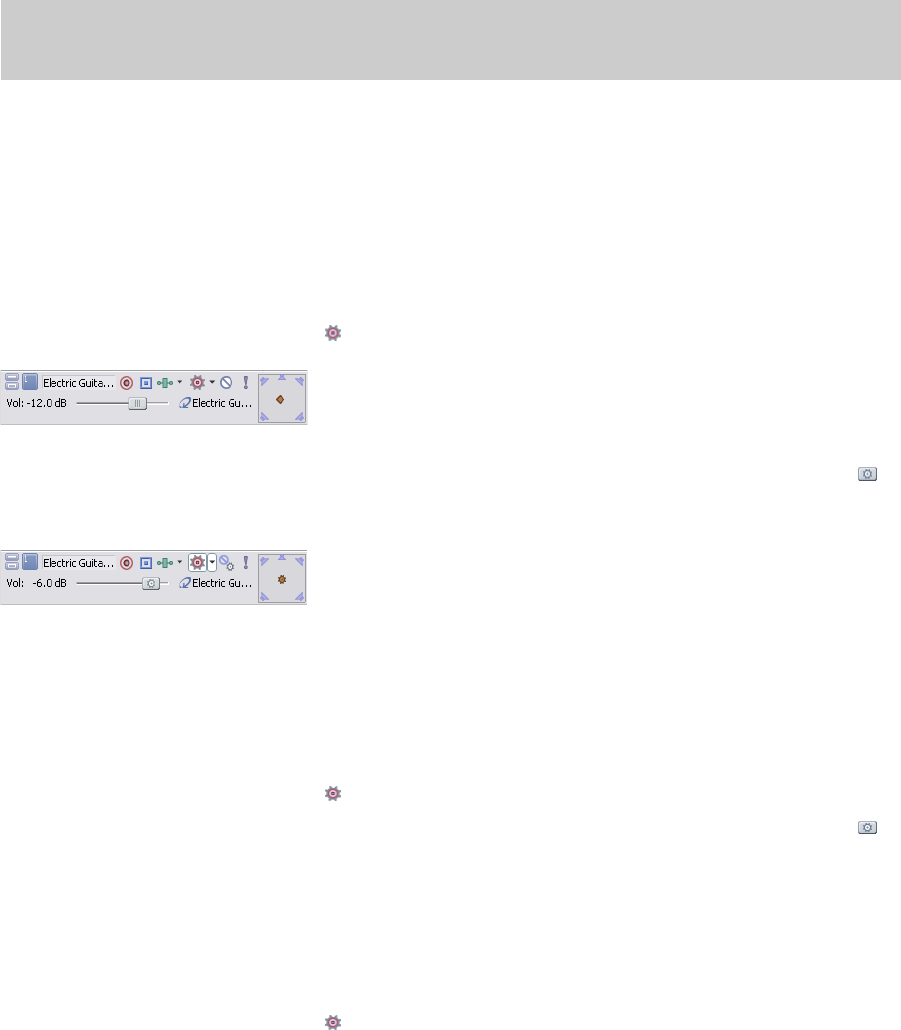
212 | Chapter 13
To change a track or mixer control back to surround panning, right-click the LFE indicator and choose Surround Pan
from the shortcut menu.
Adjusting volume
Adjusting track volume for 5.1 surround projects behaves almost identically to stereo projects. The controls in the track
headers and Mixer window can function as trim controls that adjust the overall volume of the track, bus, or assignable
effects chain, or they can adjust volume automation settings. For more information, see Track automation on page 127.
Adjusting track volume
You can adjust track volume using the Vol fader in the track header the same way you do in stereo projects.
Deselect the Automation Settings button ( ) if you want to adjust trim levels.
Select the Automation Settings button if you want to adjust volume automation. The fader handle is displayed as a in
automation mode.
Adjusting assignable effects send or bus send levels
You can adjust send levels for busses or assignable effects chains using the multipurpose fader in the track header. Click
the fader label and choose an assignable effects chain or bus from the menu. The fader in the track header can function
as a trim control that adjusts the overall send level of the track, or it can adjust send level automation settings.
Deselect the Automation Settings button ( ) if you want to adjust trim levels.
Select the Automation Settings button if you want to adjust volume automation. The fader handle is displayed as a in
automation mode.
Adjusting channel levels
Use the Surround Master bus control in the Mixer window to adjust the individual levels of the 5.1 channels. The faders in
the track bus control can function as trim controls that adjust the overall level of each channel, or you can automate the
master volume of the Surround Master bus (individual channel levels cannot be automated).
Deselect the Automation Settings button ( ) in the bus control or bus track if you want to adjust trim levels.
Note:
Before rendering your surround project, check your surround authoring application’s documentation to
determine its required audio format with respect to the LFE channel. For more information, see Setting up surround
projects on page 210.
Track header in trim mode
Track header in automation mode
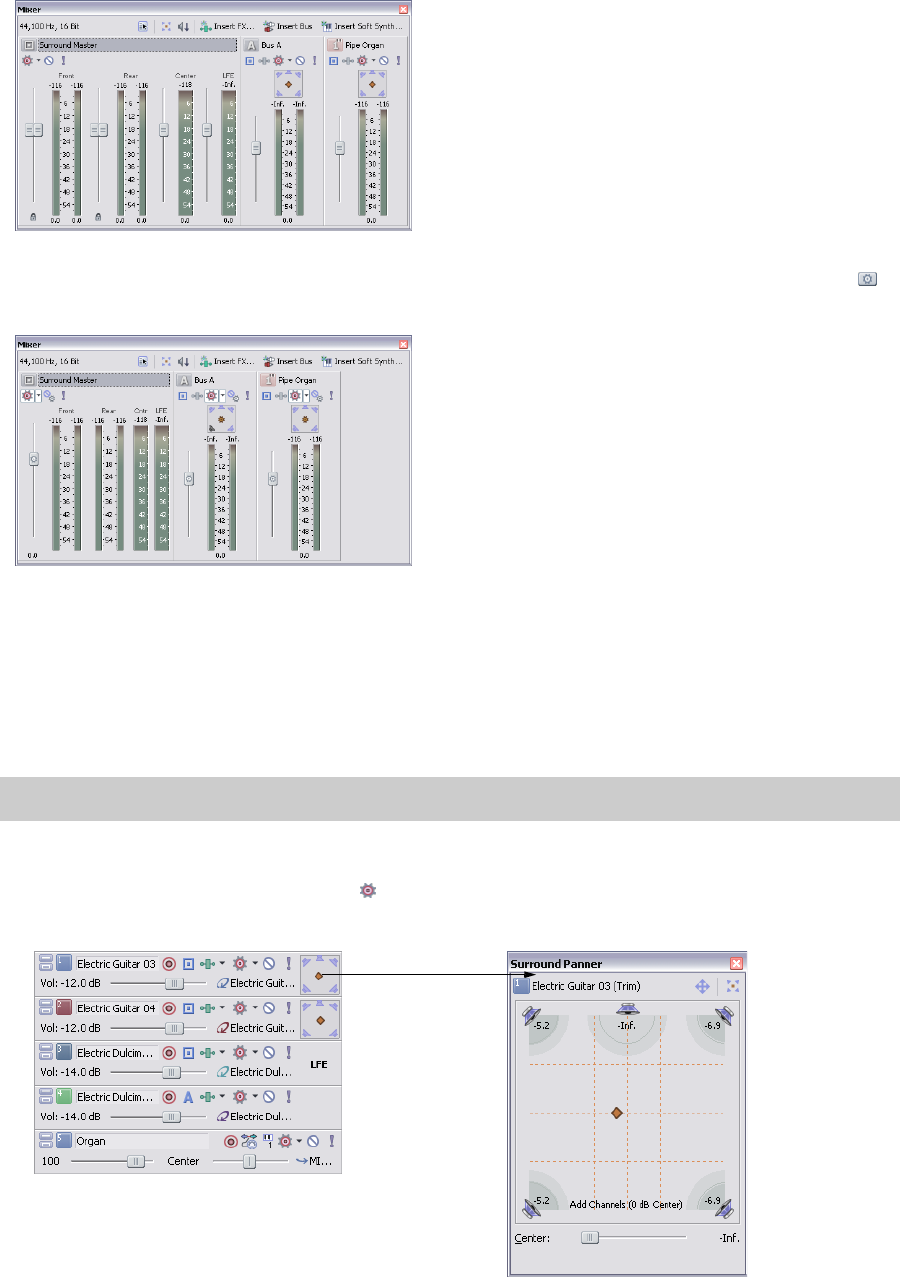
WORKING WITH 5.1 SURROUND | 213
Select the Automation Settings button if you want to adjust volume automation. The fader handle is displayed as a in
automation mode.
Panning audio
You can pan audio in a 5.1 surround project in two ways:
• Pan tracks individually using the Surround Panner window.
• Route tracks to mixer controls (busses, assignable effect chains, or soft synths) and pan the mixer controls using the
Surround Panner window.
Panning tracks
1.
Deselect the Automation Settings button ( ) on the track you want to pan.
2.
Double-click the surround panner on the track you wish to pan. The Surround Panner window appears.
3.
Adjust the panning settings. For more information, see Using the Surround Panner window on page 214.
Note:
You cannot pan audio on tracks or busses that are routed to hardware outputs in a 5.1 surround project.
Mixer controls header in trim mode
Mixer controls header in automation mode
Double-click to display
the Surround Panner
window
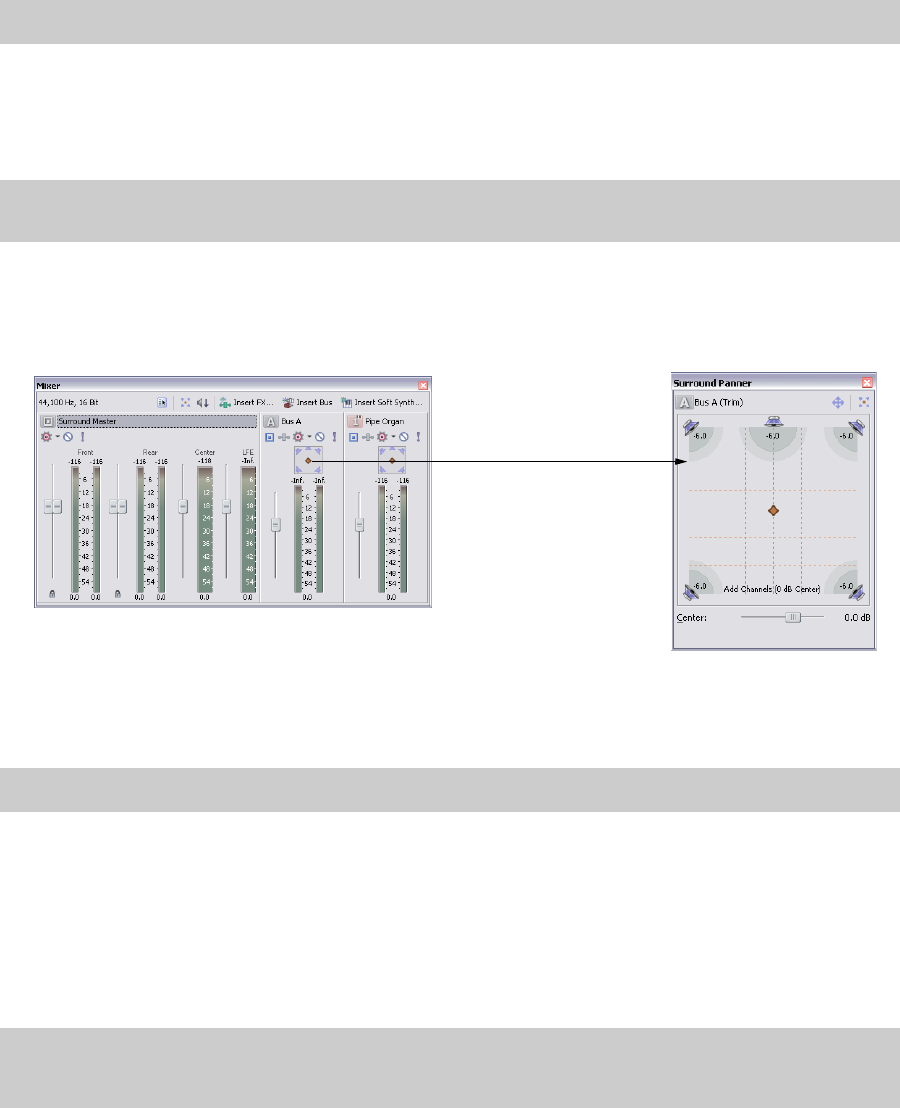
214 | Chapter 13
4.
Close the Surround Panner window.
Panning mixer controls
You may choose to route tracks to busses or other mixer controls (such as soft synths or assignable effect chains) and pan
them as a group rather than panning each track individually.
1.
Add a mixer control to the project. For more information, see Using the Mixer on page 141.
2.
Route tracks to the mixer control. For more information, see Routing tracks to busses on page 141.
3.
Double-click the surround panner on the mixer control to display the Surround Panner window.
4.
Adjust the panning settings. For more information, see Using the Surround Panner window on page 214.
5.
Close the Surround Panner window.
Using the Surround Panner window
Whether you’re adjusting track panning or mixer control panning, you use the same controls in the Surround Panner
window.
View the Surround Panner window by double-clicking a surround panner on a track header or mixer control. Once the
Surround Panner window is open, you can dock it in the ACID workspace. For more information, see Docking and floating
ACID windows on page 221.
Tip:
You can also use the surround panner in the track header to pan your track.
Note:
When you route a track to a bus or soft synth control, stereo (two-channel) output is sent to the mixer control
and the mixer control sends 5.1 (six-channel) output to the Surround Master bus.
Tip:
You can also use the surround panner on the mixer control to pan your track.
Tip:
You can also choose Surround Panner from the View menu to display the Surround Panner window. Once the
Surround Panner window is displayed, double-click the surround panner for a track or mixer control to view its pan
settings.
Double-click to display
the Surround Panner
window
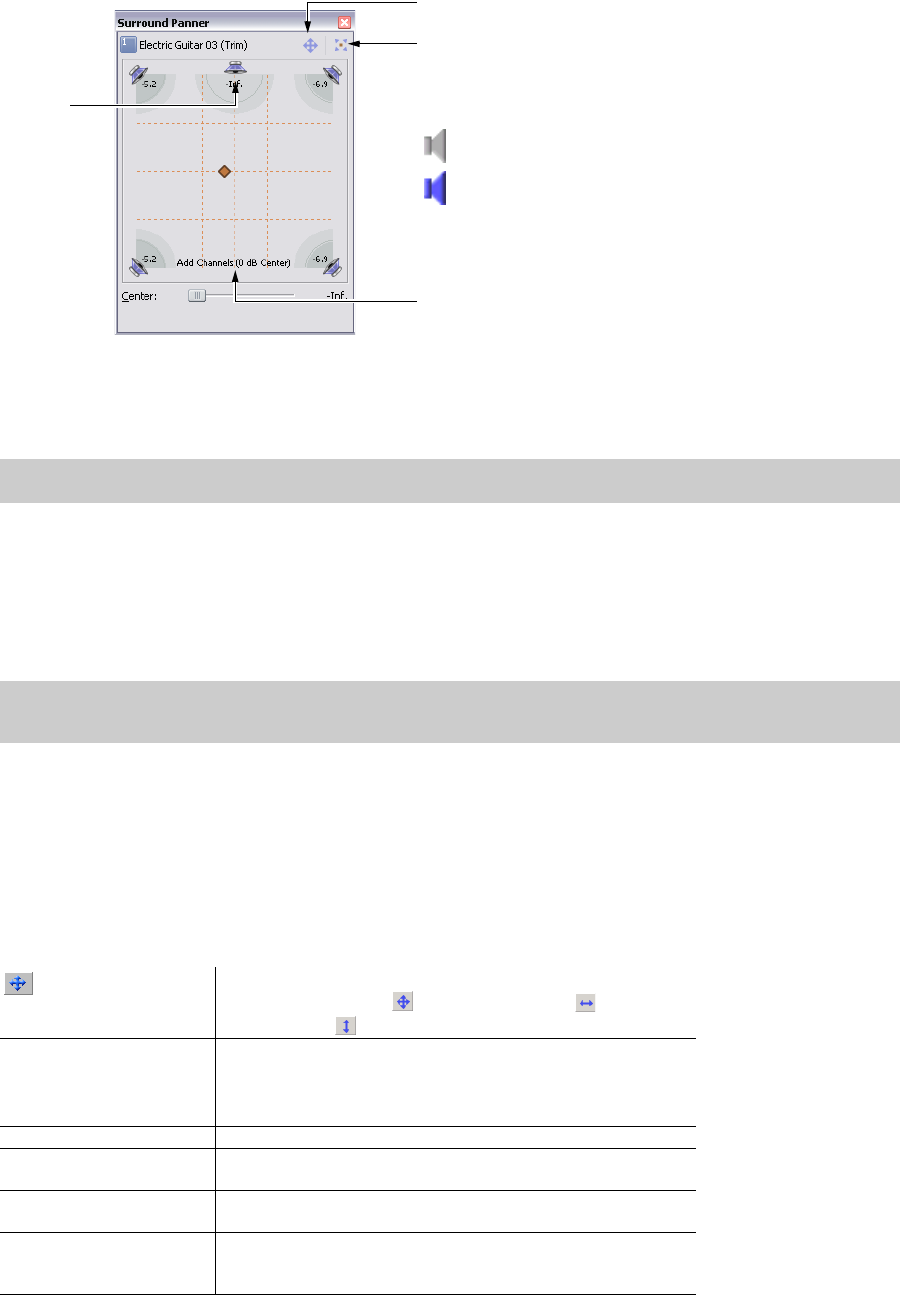
WORKING WITH 5.1 SURROUND | 215
1.
Click the speaker icons to mute or include channels.
Muting a channel ensures that no audio bleeds through a channel. For example, you might want to mute all but the
center channel when you’re panning dialogue to the center channel.
2.
Drag the pan point to position the sound within the sound field. For more information, see Moving the pan point on
page 215.
3.
Click the center speaker icon to include the center channel and drag the Center fader to apply a gain to the center
channel.
Applying a gain to the center channel may make dialogue more present in the mix.
4.
Drag the Smoothness slider to adjust the smoothness of the interpolation path between panning keyframes. The
smoothness setting appears only when you are automating panning using keyframes. For more information, see
Adjusting the Smoothness slider on page 219.
Moving the pan point
You have a variety of methods to help you position the pan point in the Surround Panner window.
Tip:
Ctrl + click a speaker icon to solo the channel.
Note:
When automating panning using keyframes, you cannot automate the gain applied using the Center fader.
For more information, see Automating panning on page 217.
Method Description
Click to toggle through three options for constraining pan point motion
as you drag: Move Freely ( ), Move Left/Right Only ( ), and Move
Front/Back Only ( ).
Double-click Double-clicking the pan point resets it to the center front of the
surround panner.
Double-clicking in the Surround Panner window moves the pan point
to the double-click location.
Ctrl+drag Makes fine adjustments.
Shift+drag Constrains motion to vertical, horizontal, or diagonal motion at 45
degree increments.
Alt+drag Constrains motion to a constant radius from the center of the surround
panner.
Shift+Alt+drag Constrains motion to the maximally inscribed circle (a constant radius
at the greatest possible distance from the center of the surround
panner).
Pan point
Pan type indicator
= Muted channel
= Active (included) channel
Assign track/bus to LFE channel
Toggle options for constraining pan
point movement
216 | Chapter 13
Choosing pan types
When you pan a track or mixer control, you can choose among several pan types to determine how the audio is panned.
The current pan type appears at the bottom of the Surround Panner window.
Right-click the Surround Panner window and choose a pan type from the shortcut menu.
•The Add Channels pan type makes the audio appear to move as a unit among the surround channels. As you
move the pan point toward a channel (speaker icon), more and more of the signal from the other channels are
folded into the channel you are panning towards, until at the extreme, all channels are fed at full intensity into a
single channel. This pan type uses a linear panning curve.
•The Balance pan type is most useful for adjusting the relative signal levels of the channels. In this pan type, as
you move the pan point from the center to a channel, the signal in the channel you are panning towards starts
at the base dB level (either 0 dB, -3 dB, or -6 dB) and increases to 0 dB. The signal in the channel you are panning
away from starts at a base dB level (either 0 dB, -3 dB, or -6 dB) and decays to no signal level. For example, when
you pan fully to the right, only the right channel is audible. This pan type uses a linear panning curve.
•The Constant Power pan type maintains a constant volume as you move the pan point from channel to
channel. This pan type, which uses the constant-power panning curve, is most useful for panning monaural
source media.
•The Film mode allows you to pan between pairs of adjacent speakers in 5.1 surround projects using a constant
power model. This mode is optimized for theater-style speaker placement. In stereo projects, Film mode
functions identically to Constant Power.
As you drag the pan point to the center speaker, the sound becomes diffused through the front and rear
speakers. When the track is panned fully to the center speaker, there is no output from the front and rear
speakers.
Dragging the pan point to the center of the surround panner sends the signal to all speakers.
Using the grid to monitor panning
The grid in the Surround Panner window helps you to visualize how your panning will sound. The grid's spacing changes
to match the current pan type.
The vertical lines represent the points where the left-to-right signal ratio is 6 dB, 0 dB, and -6 dB respectively: at the far-
left line, the left channel is 6.0 dB louder than the right channel.
The horizontal lines represent the points where the front-to-rear signal ratio is 6 dB, 0 dB, and -6 dB respectively. As you
adjust the Center fader, the lines move forward or backward to compensate for the center-channel gain.
Arrow keys Moves front/back/left/right.
Ctrl+Arrow keys Makes fine adjustments.
Page Up/Page Down Moves front/back.
Shift+Page Up/Page Down Moves left/right.
Numeric keypad 1-9 Jumps to a corner, edge, or center of the surround panner.
Ctrl+Numeric keypad 1,3,7, 9 Jumps to a location on the maximally inscribed circle (a constant radius
at the greatest possible distance from the center of the surround
panner).
Mouse wheel Moves front/back.
Shift+mouse wheel Moves left/right.
Ctrl+mouse wheel Makes fine front/back adjustments.
Ctrl+Shift+mouse wheel Makes fine left/right adjustments.
Note:
If you're panning fully to a single speaker in Film mode, you may notice that some signal is mixed to the
opposite speaker. This is because the ideal placement for surround speakers does not match the representation in the
surround panner. For example, panning to the front-left speaker produces a low-level signal in the rear-left speaker.
This is because your front-left speaker should be positioned 30° left of center and the speaker in the surround panner is
located 45° left of center. To produce a true 45° left-of-center pan, the signal is panned between the front- and rear-left
speaker.
Note:
The grid assumes that you're using a correctly set-up surround system (matched speakers and ideal positioning).
Variations in your monitoring system will cause inconsistencies between the graph and perceived output.
Method Description
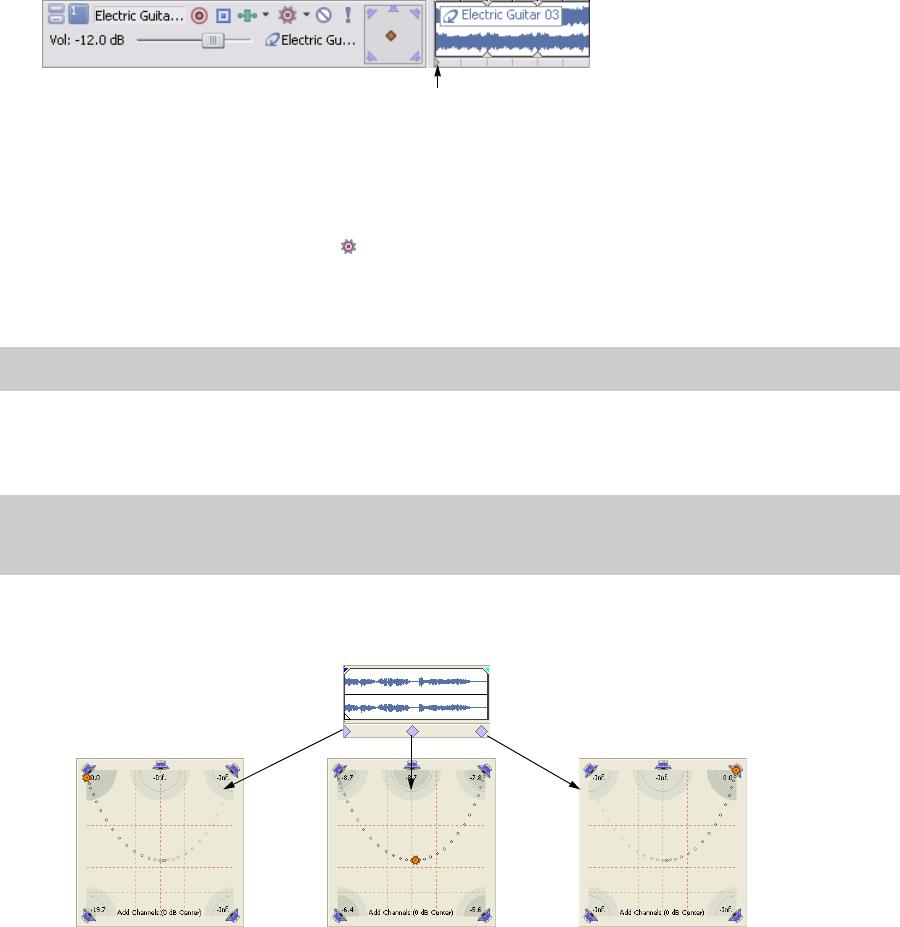
WORKING WITH 5.1 SURROUND | 217
Automating panning
You can automate panning on a track or mixer control by adding keyframes. Keyframes are similar to envelope points in
that they mark specific locations in the track where settings change. However, unlike envelope points, keyframes appears
just below the track to which they apply.
To add panning keyframes to a mixer control, you must first view the mixer control in track view. From the View menu,
choose Show Bus Tracks to view the bus track at the bottom of the track view. For more information, see Viewing bus tracks
on page 152.
Turning on panning keyframes
Before adding individual keyframes, you must first turn on the panning keyframes for the track or bus track.
1.
Select the track or bus track for which you want to automate panning.
2.
From the Insert menu, choose Envelopes, and choose Surround Pan Keyframes from the submenu.
An additional row appears below the track with a single keyframe positioned at the beginning of the project. This
single keyframe represents the current panning settings for the track.
Adding panning keyframes
With panning keyframes turned on, you can add keyframes at any location along the track or bus track.
1.
Position the cursor where you want to begin panning the track.
2.
Select the Automation Settings button ( ) on the track you want to pan.
3.
Double-click the surround panner to display the Surround Panner window.
4.
Adjust the panning settings. For more information, see Using the Surround Panner window on page 214.
5.
Close the Surround Panner window.
A keyframe with the pan settings you created appears below the track at the cursor position.
As you add keyframes to a track or bus track, the Surround Panner window shows the path of the panning keyframes.
The Smoothness slider controls the smoothness of the interpolation path between the keyframes. For more
information, see Adjusting the Smoothness slider on page 219.
Note:
You cannot automate muting/including channels.
Tip:
You can also add keyframes by double-clicking the keyframe row or by right-clicking the row and choosing Add
Keyframe from the shortcut menu. Once you’ve added the keyframe, double-click it to adjust panning settings in the
Surround Panner window.
Keyframe

218 | Chapter 13
Working with keyframes
After you add keyframes, you can work with them in much the same way as envelope points. For more information, see
Using track automation envelopes on page 113.
Moving keyframes
Drag a keyframe to a new position below its track.
Duplicating keyframes
Hold Ctrl and drag a keyframe to a new position below its track.
Editing keyframes
1.
Double-click a keyframe to open the Surround Panner window.
2.
Adjust the panning settings as desired and close the window.
Changing keyframe interpolation curves
To control how the pan is interpolated between keyframes, right-click a keyframe and choose an interpolation curve type
from the shortcut menu. Keyframe interpolation curves control how the pan occurs over time.
Keyframe Interpolation curve Description
Hold No interpolation takes place. The keyframe's settings are maintained until the next
keyframe.
Linear Panning is interpolated in a linear path.
Fast Panning is interpolated in a fast logarithmic path.
Slow Panning is interpolated in a slow logarithmic path.
Smooth Panning is interpolated along a smooth, natural curve.
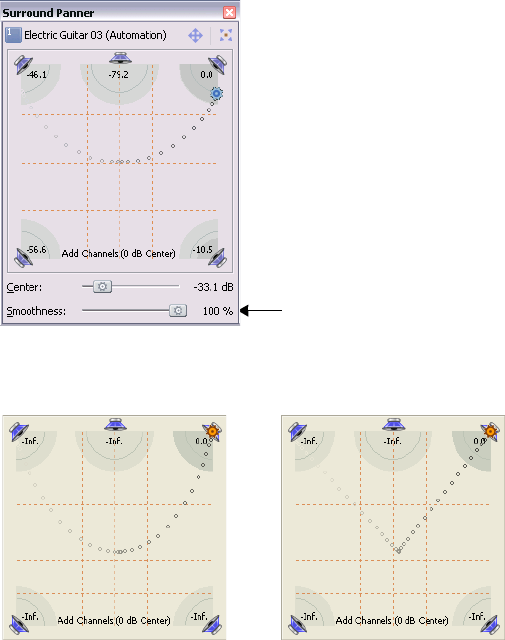
WORKING WITH 5.1 SURROUND | 219
Adjusting the Smoothness slider
The Smoothness slider controls the perceived motion of sound within the sound field among three or more keyframes.
When you drag the Smoothness slider to 0, the changes are interpolated between keyframes along a linear path. As you
increase the smoothness value, the path between keyframes grows more curved and smooth.
1.
Double-click a keyframe. The Surround Panner window appears.
2.
Drag the Smoothness slider to adjust the smoothness of the spatial interpolation path leading up to this keyframe.
Locking keyframes to events
If you want keyframes to move with an event when it is moved along the timeline, choose Lock Envelopes to Events
from the Options menu.
Hiding keyframes
1.
Select the track for which you want to hide keyframes.
2.
From the View menu, choose Show Envelopes, and choose Surround Pan Keyframes from the submenu.
Deleting keyframes
Right-click a keyframe and choose Delete from the shortcut menu.
Smoothness slider
Three keyframes with
smoothness=100...
...and the same three keyframes
with smoothness=0.
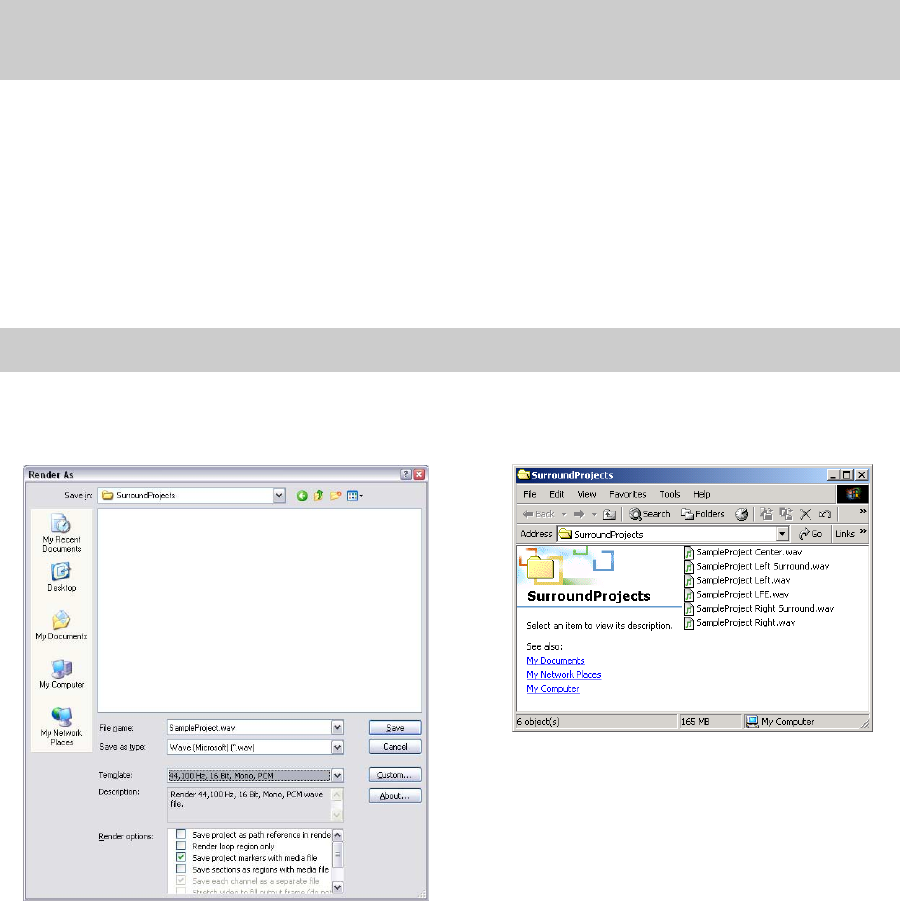
220 | Chapter 13
Rendering surround projects
5.1 surround projects are rendered to produce six monaural files (WAV or AIFF). You can then use an authoring
application to create the final cinema, DVD-Audio, DVD-Video, or DTS 5.1 Music project from the rendered files.
With the addition of the Sony 5.1 Surround Plug-In Pack, you can render AC-3 files and burn the resulting files to DVD.
1.
From the File menu, choose Render As. The Render As dialog appears.
2.
From the Save in drop-down list, choose the drive and folder where the file will be saved.
3.
Enter a new name for the project in the File name box.
4.
From the Save as type drop-down list, choose the desired file format (AIFF or WAV). If you have the Sony AC-3
Encoder, you can choose AC-3 from the list as well.
5.
If necessary, click Custom to customize the rendering settings. For more information, see Creating custom rendering
settings on page 56.
6.
Click Save.
Burning AC-3 files to DVD
With the addition of the AC-3 DVD Burner included in the Sony 5.1 Surround Plug-In Pack, you can burn AC-3 files to a
DVD.
1.
From the Tools menu, choose Start AC-3 DVD Burner. The AC-3 DVD Burner application starts.
2.
Follow the instructions for burning a DVD in the AC-3 DVD Burner online help. To access online help, click Help in
the AC-3 DVD Burner screen.
Note:
Before rendering your surround project, check your surround authoring application’s documentation to determine
its required audio format with respect to the LFE channel. For more information, see Setting up surround projects on page
210.
Note:
You are limited to creating monaural files when rendering a surround project.
Rendering the surround project SampleProject.wav... ...results in six WAV files.
APPENDIX A | 221
Appendix
A
Customizing ACID Software
You can customize the software to suit your project needs and working preferences. You may change these settings at
any time. If you use the same settings for all of your projects, you may set the ACID® application to use your settings as
defaults.
In this chapter, you will find information about functions that allow you to customize and set the application’s
preferences.
Working with ACID windows
The software has various windows that allow you to perform specific tasks related to your project or manage your media.
These windows can float on the workspace or be docked in the window docking area. All these windows may be viewed
or hidden via the View menu or their respective shortcut keys.
Docking and floating ACID windows
The window docking area allows you to keep frequently used windows available but out of the way while you are
working with a project. You can dock windows either in a single stack spanning the width of the screen or divide the
window docking area into sections (e.g., right, middle, and left) and create several stacks. You can also create floating
docks by dragging several windows to the same area on your screen.
Windows that are not currently visible in a stack display a tab that you can click to display it. You can also expand, restore,
or close a window using the buttons in the window’s upper-left corner. Windows are displayed in fixed positions in the
lower portion of the window.
Window Shortcut keys Description
Explorer Alt+1 Allows you to view and access your media files without leaving the work
area. You may also preview media files and place them in your project
from this window.
Chopper™ Alt+2 Allows you to select portions of a media file that can be placed into tracks
as events.
Mixer Alt+3 Allows you to work with busses, assignable effect chains, and soft synth
controls.
Video Preview Alt+4 Displays a project’s video output at the current cursor position in the
timeline.
Media Manager Alt+5 Displays the Media Manager™, which you can use to search for, manage,
and tag your media files.
Track Properties Alt+6 Allows you to view and edit track attributes. For MIDI tracks, allows you to
edit MIDI using the piano roll editor, list editor or other OPT plug-ins.
Surround
Panner
Alt+7 Allows you to control panning in a 5.1 surround project.
Soft Synth
Properties
Alt+8 Allows you to change the attributes of soft synth controls in the Mixer
window.
Audio Plug-In Alt+5 Allows you to view and edit settings for assignable, bus, soft synth, and
track effect chains.
Plug-In
Manager
Ctrl+Alt+1 Allows you to view and choose effects plug-ins to be added to a track,
bus, or assignable effects chain.
Groove Pool Ctrl+Alt+2 Allows you to view and edit grooves in your project.
Clip Properties Ctrl+Alt+3 For audio (non-MIDI) clips: allows you to change clip types (loop, one-
shot, and Beatmapped), and adjust time stretching, pitch, root notes,
tempo, and downbeat.
For MIDI clips: allows you to edit data using the OPT list editor or piano
roll.
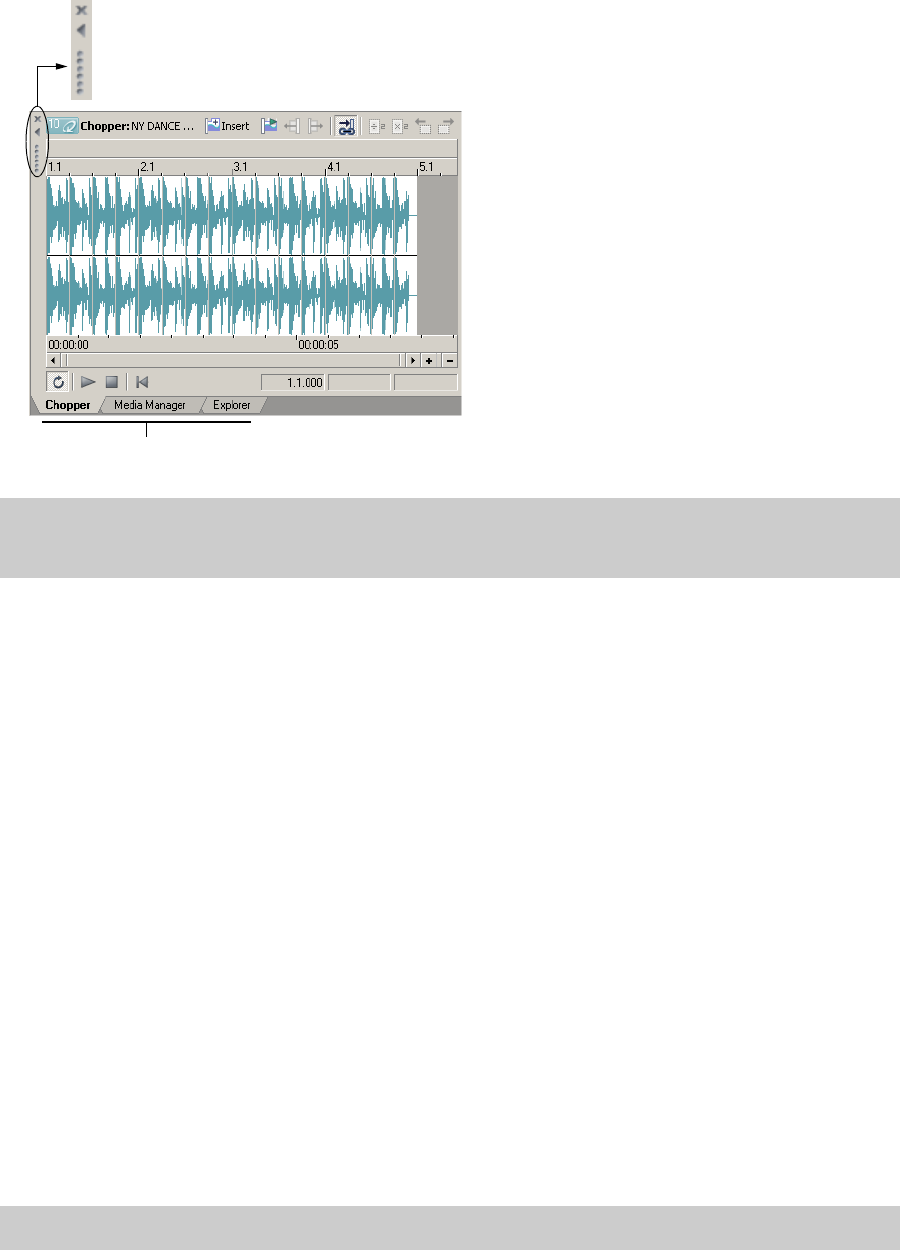
222 | APPENDIX A
Docking windows
1.
If the window is floating on the workspace, grab the window by its title bar and drag it to the window docking area
anywhere below the track list or track view. As you drag the window, the window’s outline appears.
2.
Position the window’s outline in the docking area where you want it and release the mouse.
Floating windows
You may float a window so that it does not appear in the docking area.
1.
Grab the window by its handle (the border along the left side) and drag the window to the workspace. As you drag
the window, the window’s outline appears.
2.
Position the window anywhere in the workspace and release the mouse. You can move the floating window by
dragging it to a new position or docking it again.
If desired, you can create a floating dock with multiple windows by repeating steps 1 and 2.
Preventing windows from docking
Press Ctrl while dragging a window to prevent it from docking in the workspace.
Resizing the window docking area
You can resize the track list, track view and docking area sections of the ACID workspace by dragging the dividers
between them.
Note:
When the last window in the docking area is closed or removed, the docking area minimizes automatically. When
the docking area is minimized, dragging a dockable window over the bottom of the ACID window causes the docking area
to open again.
Tip:
You can quickly hide or show the window docking area by pressing F11.
Tabs
Close window
Expand/restore window
Drag handle
APPENDIX A | 223
Changing the time ruler format
You may specify a time format for the ACID time ruler to display. The ruler, located below the track view, displays real time
in several formats. You may change the ruler format in one of the following ways:
•From the View menu, choose Time Ruler, and choose the desired format from the submenu.
• Right-click the time ruler and choose the desired format from the shortcut menu. In addition to right-clicking the time
ruler in the track view, you can use this technique on the time rulers in the Chopper and Track Properties windows.
The following table describes the available time formats.
Using the ruler offset
The ruler offset allows you to change the project ruler to start at a specific time. Typically, this feature is used in
conjunction with SMPTE and MIDI projects when their timelines are the main reference. Basically, the ruler offset allows
you to set the ACID time ruler based on another project’s timeline for reference purposes, i.e., the SMPTE or MIDI
timelines.
When you enter a new value along the timeline, the ruler’s time units are adjusted at the cursor position and at the start
of the timeline. For example, if the cursor is positioned at the 2:00 minute mark and you enter 15:00 minutes, the start of
the project will begin at 13:00 minutes. The ruler offset feature works the same for all time formats.
1.
Position the cursor anywhere along the timeline.
2.
Right-click the time ruler to display a shortcut menu.
3.
From the shortcut menu, choose Set Time at Cursor. A box opens at the cursor position.
4.
Enter a time value.
5.
Press Enter to set the cursor position’s time value. The value that you enter at the cursor position affects all time
values that precede and follow it.
Using the project grid
The project grid appears on the track view and is mainly used to align the events in your project. The grid divides your
project into equal units based on the setting that you choose. The grid setting can be based on the project type or how
you prefer to work.
Time format Description
Samples Displays the time ruler in samples.
Time Displays the time ruler in hours:minutes:seconds.milliseconds.
Seconds Displays the time ruler in seconds.
Time & Frames Displays the time ruler in hours:minutes:seconds.frames with a frame rate equal to that of your
video.
Absolute Frames Displays the time ruler in total frames from the beginning of the project.
Feet & Frames 16 mm Displays the time ruler in feet+frames at a rate of 40 frames per foot.
Feet & Frames 35 mm Displays the time ruler in feet+frames at a rate of 16 frames per foot.
SMPTE Film Sync
(24 fps)
Displays the time ruler in hours:minutes:seconds:frames with a frame rate of 24 frames per
second for synchronizing with film.
SMPTE EBU (25 fps) Displays the time ruler in hours:minutes:seconds:frames with a frame rate of 25 frames per
second for European Broadcasting Union.
SMPTE Non-Drop
(29.97 fps)
Displays the time ruler in hours:minutes:seconds:frames with a frame rate of 29.97 frames per
second.
SMPTE Drop
(29.97 fps)
Displays the time ruler in hours:minutes:seconds;frames with a frame rate of 29.97 frames per
second using dropped frame numbers.
SMPTE 30 (30 fps) Displays the time ruler in hours:minutes:seconds:frames with a frame rate of 30 frames per
second.
Audio CD Time Displays the time ruler in tt+mm:ss:ff (track number +/- minutes:seconds:frames) with a frame
rate of 75 fps.
224 | APPENDIX A
It is important to remember that in some cases the grid lines and the ruler divisions do not match. This is because they are
two independent functions. However, you may set the grid to align to the ruler, which is the default setting.
The grid can use the following formats:
Setting the grid type
You may change the grid type at any time and apply it to your project. There are two ways to set the grid type for your
project.
•From the Options menu, choose Grid Spacing, and choose the type of grid you want from the submenu.
• Right-click the marker bar, choose Grid Spacing from the shortcut menu, and choose the type of grid that you want
from the submenu.
Using the toolbar
The toolbar is set to display below the menu bar. However, you may hide and customize the toolbar to suit your
preferences. The settings that you apply to the toolbar remain set until you change them again.
Hiding and displaying the toolbar
If you prefer to use shortcut keys when working with your project, you may hide the toolbar to create more workspace.
Choose Toolbar from the View menu to hide it. The check mark next to the command is removed and the toolbar
disappears. The toolbar remains hidden until you choose Toolbar from the View menu to display it again.
Reordering toolbar buttons
You can change the toolbar’s button order to suit your preferences. You may either reorder the buttons directly on the
workspace or via the Customize Toolbar dialog.
Reordering buttons on the ACID workspace
1.
Hold Shift and drag the button that you want to move to the new location on the toolbar. A hand icon ( ) within
an outline of the button indicates that you are moving the button.
2.
Release the mouse to drop the button in its new location.
Reordering buttons in the Customize Toolbar dialog
The Customize Toolbar dialog allows you to control the order and functionality available on the Toolbar. You may return
the toolbar to its default settings by clicking the Reset button.
1.
From the Options menu, choose Customize Toolbar. The Customize Toolbar dialog appears.
Ruler Marks 16th Notes
Measures 16th Note Triplets
Half Notes 32 Notes
Quarter Notes 32nd Note Triplets
Quarter Note Triplets 64th Notes
8th Notes 64th Note Triplets
8th Note Triplets
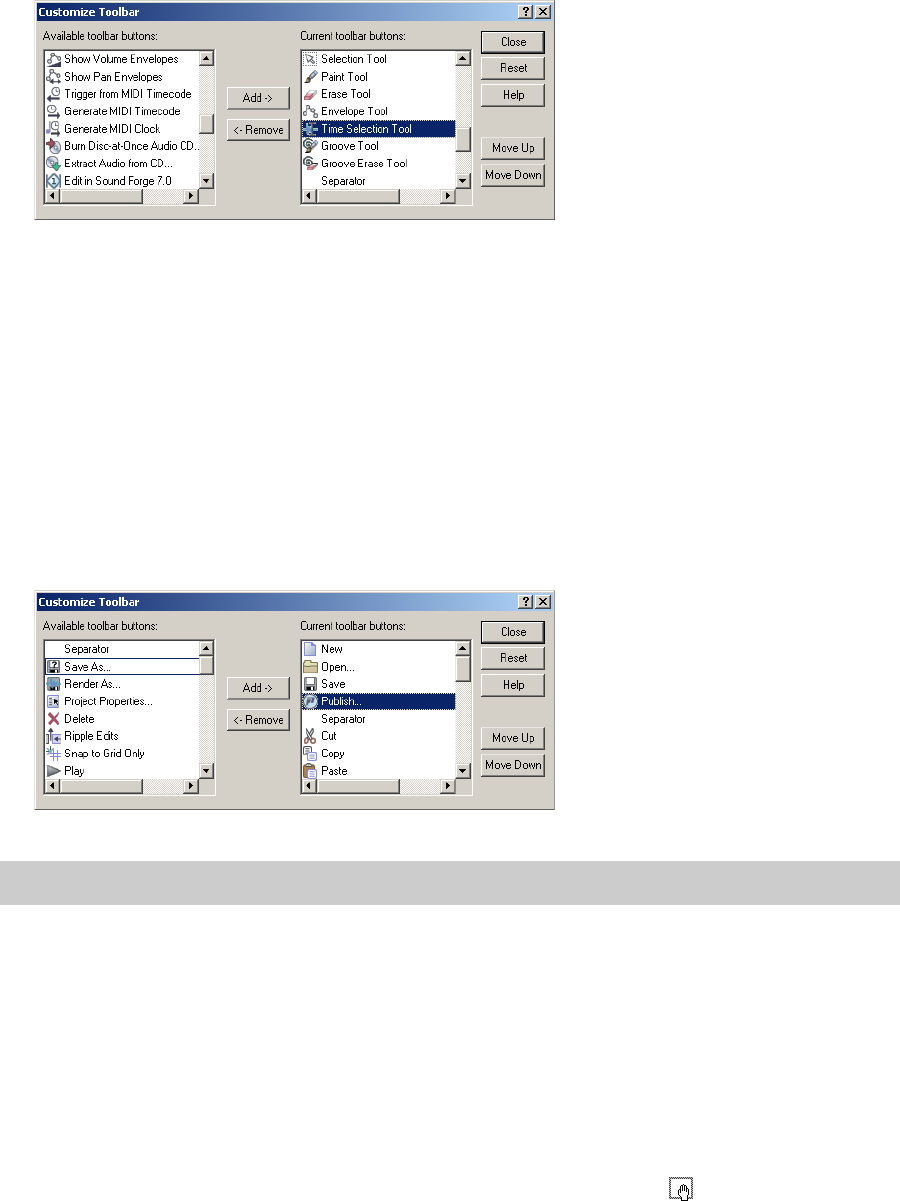
APPENDIX A | 225
2.
On the Current toolbar buttons pane, select the button that you want to move and click Move Up or Move Down.
3.
Click Close to save the toolbar changes and close the dialog.
Adding buttons to the toolbar
A series of buttons are included that you may add to the toolbar. These buttons are listed in the Customize Toolbar dialog.
You may also add separators on the toolbar to organize the buttons to suit your preferences.
You may return the toolbar to its default settings by clicking the Reset button on the dialog.
1.
From the Options menu, choose Customize Toolbar. The Customize Toolbar dialog appears.
2.
On the Available toolbar buttons pane, use the scroll bars to locate the button that you want to add and select it.
3.
On the Current toolbar buttons pane, select the button that you want the newly added button to proceed in order.
For example, if you want to add the Save As button and want it to precede the Publish button, select the Publish
button in the Current toolbar buttons pane.
4.
Click Add. The new button is added above the selected button on the Current toolbar buttons pane.
5.
Click Close to save the toolbar settings and close the dialog.
Removing buttons from the toolbar
You may remove buttons and separators from the toolbar. If you have added buttons to the toolbar, removing unused or
unwanted buttons allows you to maximize the toolbar’s space. You may remove toolbar buttons either directly on the
workspace or via the Customize Toolbar dialog.
Removing buttons on the ACID workspace
1.
Hold Shift and drag the button that you want to remove off the toolbar. A hand icon ( ) within an outline of the
button indicates that you are removing the button.
2.
Release the mouse to remove the button.
Tip:
You may also double-click a button in the Available toolbar buttons pane to add it to the toolbar.
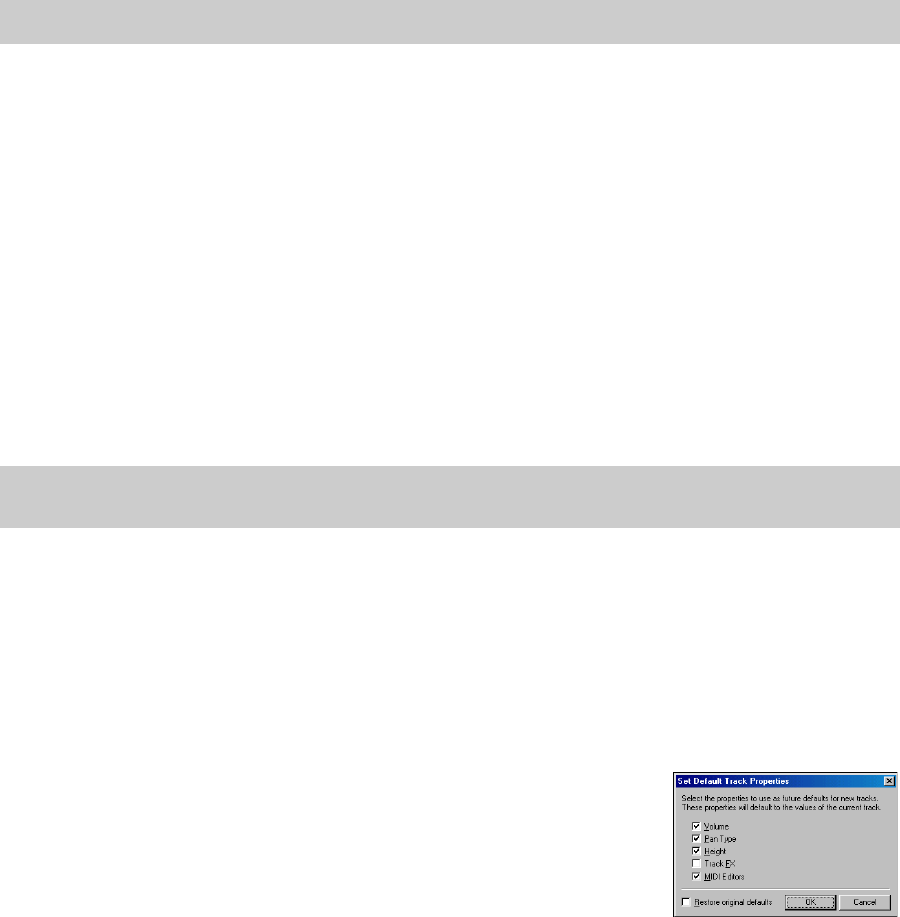
226 | APPENDIX A
Removing buttons in the Customize Toolbar dialog
You may return the toolbar to its default settings by clicking the Reset button on this dialog.
1.
From the Options menu, choose Customize Toolbar. The Customize Toolbar dialog appears.
2.
On the Current toolbar buttons pane, select the button that you want to remove.
3.
Click Remove. The button is removed from the Current toolbar buttons pane and will not appear on the toolbar.
4.
Click Close to save the toolbar settings and exit the dialog.
Using the time display
The time display above the track list reflects the cursor’s position on the timeline.
Changing cursor position
You can edit the cursor position using time as it is displayed on either the beat ruler or time ruler:
• To set the cursor’s position based on the beat ruler, right-click the time display and choose Edit Cursor Position - Beats
from the shortcut menu.
• To set the cursor’s position based on the time ruler, right-click the time display and choose Edit Cursor Position - Time
from the shortcut menu.
Once you make your selection from the shortcut menu, a box appears for the appropriate time display. Enter the cursor’s
new position and press Enter.
Changing the time display
The time display window always reflects the format of the time ruler. You may change the ruler settings for the time ruler
via the time display window.
1.
Right-click the time display window to display a shortcut menu.
2.
Choose Time at Cursor Format to display a submenu.
3.
Choose the desired time format.
Both the time window and time ruler display the chosen time format.
Monitoring MIDI timecode
You can use the time display to monitor incoming or outgoing MIDI timecode. MIDI can
be monitored in the following ways:
• Display MIDI timecode generated from external sources.
• Display MIDI timecode and MIDI clock information that is generated.
The time display settings work in conjunction with your project’s properties and MIDI setup options.
1.
Right-click the time display window to display a shortcut menu.
2.
From the shortcut menu, choose the type of MIDI monitoring to be displayed. Once you have made your selection,
the time display window displays both the MIDI code being input or output and a status message.
Tip:
You may also double-click a button to remove it.
Tip:
You can also edit the cursor position directly by double-clicking the desired time display value and entering the new
cursor position.

APPENDIX A | 227
Setting default track properties
Each new track has certain default properties, including height, volume, pan type, and track effects. You can modify these
track properties and then use the modified track as a standard for all new tracks you create.
1.
Modify a track’s volume (pg. 48), pan type (pg. 113), height (pg. 46), and track effects (pg. 107).
2.
Right-click the track header and choose Set Default Track Properties from the shortcut menu.
3.
Select the check boxes for properties you wish to set. Clear the check boxes for the properties you wish to leave as
they are.
4.
Click OK.
Setting ACID preferences
From the Options menu, choose Preferences to display the Preferences dialog.
Tip:
Select the Restore original defaults check box to return to the original track properties.

228 | APPENDIX A
Using the General tab
Item Description
Automatically open last project on
startup
Select this check box if you want to reopen the project that was open the last time the
software was closed. When you clear this check box, the software starts with a blank
project.
Show logo splash screen on
startup
Select this box if you want the ACID logo splash screen to display upon startup.
Use Net Notify to stay informed
about Sony products
When you select this check box, information is periodically displayed from Sony at
startup. Clear the check box to bypass the Net Notify dialog.
Draw contents of events Select this check box if you want waveforms to be drawn in events. Clearing the check
box can improve performance on some systems.
Create undos for FX parameter
changes
Select this check box if you want Undos to be created when you change a plug-in
parameter.
Confirm media file deletion when
still in use
When you select this check box, a message box appears asking if you want to delete a
media file that is currently in use by the project.
Close media files when ACID is not
the active application
When you select this check box, you can edit files in external editors while the files are
contained in events in ACID.
Close audio and MIDI ports when
ACID is not the active application
Select this check box if you want to close ACID audio and MIDI ports when you switch to
another application.
Clear the check box if you want to leave ports open. For example, if you have a MIDI
keyboard routed to an ACID soft synth, clearing the check box allows you to continue to
hear the soft synth while you work with a sequencer.
Enable multimedia keyboard
support
When you select this check box, you can use a multimedia keyboard to control playback
of a project.
Automatically render large Wave
files as Wave64
The WAV format is limited by a maximum file size of ~2GB. When you select this check
box, you can render larger files as Sony Wave64 files.
Prompt for region and marker
names if not playing
When you select this check box, a box appears so you can name markers and regions as
you place them.
Create project file backups on save
(.acd-bak)
When you select this check box, a backup of project files is made when you open them.
Backup files are stored in the same folder as your project and use the same file name
with the extension .acd.bak. You can use backup project files to revert to a project’s
previous state.
Preserve pitch for new
Beatmapped tracks when tempo
changes
Select the check box if you want to maintain the pitch of Beatmapped tracks when the
project tempo changes.
Automatically start the
Beatmapper Wizard for long files
Select the check box if you want to start the Beatmapper Wizard when you add a file
that is longer than 30 seconds to your project.
Use slower updates to prevent
playback clicks during editing
Select this check box if you want to update the ACID audio engine more slowly.
Selecting this option can prevent unwanted artifacts during timeline editing.
Enable autosave Select this check box to create a temporary project file that can aid in crash recovery.
Your project information is autosaved every five minutes without overwriting your
project file.
Use ASPI for CD burning and
extracting
Select this check box if you want to use ASPI (Advanced SCSI Programming Interface)
when burning and extracting CDs. ASPI enables host adapters and device drivers to
share a single SCSI hardware interface.
Use SPTI for CD burning Select this check box if you want to use SPTI (SCSI Pass-Through Interface) to
communicate with your CD burning drive.
Autoname extracted CD tracks Select this check box if you want file names to be automatically assigned to tracks that
you extract from CDs.
File names include the CD's ID number and track number.
Keep bypassed FX running (to
avoid pause on bypass/enable)
Select this check box if you want effects to remain open so you can bypass/enable
effects with no pause for A/B testing. When the check box is cleared, effects are fully
bypassed, conserving processing power.
Confirm groove deletion when still
in use
When this check box is selected, a message box will appear asking if you want to delete
a groove that is currently in use by the project.
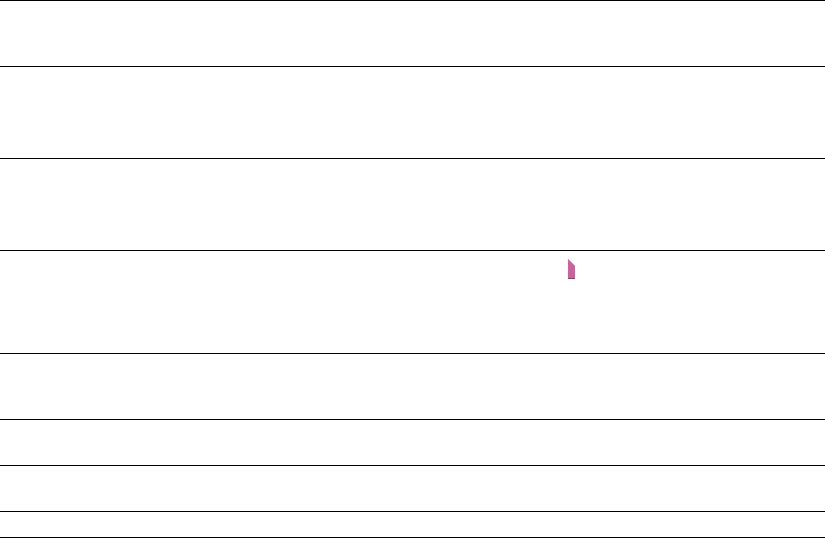
APPENDIX A | 229
Enable Windows XP Theme
support
When this check box is selected, the ACID window will inherit the appearance of the
current theme when using Windows® XP. When the check box is cleared, user interface
elements will maintain the classic Windows operating system appearance.
Save media-usage relationships in
active media library
When this check box is selected, the Media Manager™ will save information about
media usage so you can perform searches for media relationships.
You can search for projects that use a media file, projects where a media file was
previewed, media that was rendered with a media file, and so on.
Enable Media Manager (requires
ACID restart)
When this check box is selected, the Media Manager will start when you start ACID.
Clear the check box to turn off the Media Manager and prevent it from starting with the
application. If you're not using the Media Manager, you may want to turn it off to
conserve processing power or memory.
Allow snapping for post-groove
markers When this check box is selected, groove markers in the Groove Editor will snap to the
current grid spacing if snapping is enabled. Hold Shift while dragging to bypass
snapping (press Shift after you click).
Clear the check box if you do not want groove markers to snap to the grid.
Check .acd file type association at
startup
When this check box is selected, ACID automatically checks whether .acd, acd-bak, and
.acd-zip are associated with ACID and prompts you to restore the file association if
necessary.
Do not query Gracenote for CD
information
When this check box is selected, ACID will not attempt to obtain disc information from
Gracenote MusicID when you insert an audio CD.
Recently used project list Select the check box and enter a number in the box if you want to list your most
recently used projects at the bottom of the File menu.
Default All Restores all general preferences to the default settings.
Item Description
230 | APPENDIX A
Using the Audio tab
Using the Audio Device tab
Item Description
Open files as loops between
(seconds)
Enter a lower and upper limit to specify which files will be opened as loops if
stretching properties are not saved in the file.
Files that are shorter than the lower limit will be opened as one-shot tracks; files
longer than the upper limit will the Beatmapper Wizard. (pg. 114)
Quick fade edit edges of audio
events
When the check box is selected, ACID software will place a rapid fade on the edges
of audio events (10 ms by default) to soften potentially harsh transitions. When the
command is not selected, edges of new events are not faded (fades that were
applied before the check box is cleared are not removed).
Right-click an event and select or clear the Quick Fade Edges command to
override the default event fade behavior for individual events.
Note: Selecting or clearing the check box will not affect existing quick fades in
your project. To remove all quick fades from a project, enter 0 in the Quick fade
time box.
Quick fade time (ms) Enter a time (in milliseconds) to specify the duration of fades applied to the edges
of events.
Important: Changing this setting will affect all existing quick fades in your project.
Waveform display while recording Choose a setting from the drop-down list to specify whether you want to display
waveforms in the timeline while recording audio. (pg. 157) Turning off waveform
displays can improve performance.
ACID type for recorded audio Choose a setting from the drop-down list to specify the type of clip that will be
created when you record audio. (pg. 40)
Record action when nothing is
armed
Choose a setting from the drop-down list to specify what happens if you click the
Record button when no track is armed:
New Audio Track Creates a new audio track where you can record.
New MIDI Track Creates a new MIDI track where you can record.
Do Nothing The Record button is unavailable unless an audio or MIDI track is
armed for recording.
Include project name when
naming recorded media
Select this check box if you want to use the project name to identify recorded clips.
For example, if this check box is selected and you’re working with My Remix.acd,
recorded files will be named My Remix Track X Recording X.wav.
If this check box is not selected, recorded files will be named Track X Recording
X.wav.
Default All Click to restore the Audio tab to the default settings.
Item Description
Audio device type Choose a driver type from the drop-down list.
Microsoft Sound Mapper. The default setting. Allows the Sound Mapper to choose
an appropriate playback device.
Direct Sound Surround Mapper. Allows the Surround Mapper to choose
appropriate playback devices for the front, rear, and center/LFE channels in a 5.1
surround project. (pg. 210)
Windows Classic Wave Driver. Allows you to choose a specific audio device using a
classic wave driver. For stereo projects, choose a device from the Default Stereo
and Front playback device drop-down list. For 5.1-surround projects, choose
devices from the Default Stereo and Front playback device, Default Rear playback
device, and Default Center and LFE playback device drop-down lists.
APPENDIX A | 231
Audio device type (continued) ASIO. Allows you to choose a specific audio device using a low-latency ASIO driver.
For stereo projects, choose a device from the Default Stereo and Front playback
device from the drop-down list. For 5.1-surround projects, choose devices from
the Default Stereo and Front playback device, Default Rear playback device, and
Default Center and LFE playback device drop-down lists.
ReWire Device Driver. Allows you to use ACID software as ReWire device (pg. 154)in
a ReWire mixer application. If a ReWire mixer application starts ACID software, that
ACID window will start in ReWire mode and cannot be switched from ReWire
mode. If a ReWire mixer connects to an existing ACID window, that window will
run in ReWire mode, and you can switch out of ReWire mode if necessary. If you
exit that instance of the software and start ACID software again, the new instance
will start ReWire mode, and you can switch out of ReWire mode if necessary by
choosing a different audio device type.
Default Stereo and Front playback
device
Choose the device that you want to use for playing stereo sound data. In a 5.1
surround project, this device plays the right and left channels.
Selecting a device such as the Microsoft Sound Mapper allows Windows to select
an appropriate device to use for the current sound data.
Note: If you have selected Microsoft Sound Mapper, you cannot assign busses to
different devices.
Default Rear playback device Choose the device that you want to use for playing the rear channels (right
surround and left surround) in a 5.1 surround project.
Default Center and LFE playback
device
Choose the device that you want to use for playing the center and LFE channels in
a 5.1 surround project.
Playback buffering (seconds) The Playback buffering (seconds) slider specifies the total amount of buffering
that is used during playback. The larger the number, the more buffering that
occurs during playback. This value should be as low as possible without gapping.
To set it, start at 25 and play a typical song. Move some of the track faders. If the
playback gaps at all, try increasing this slider in small increments until the gapping
stops. As you increase this slider, the RAM meter at the bottom of the ACID
window will indicate more RAM usage.
If you simply cannot get playback to be free of gapping, you need to either
decrease the number of tracks you are trying to play simultaneously, install more
RAM in your computer so you can increase buffering, buy a faster access hard
drive, or minimize the number of audio plug-ins you are trying to use
simultaneously.
Enable track buffering Select this check box and drag the Track buffering slider if you want to adjust the
amount of audio that is prerendered ahead of the cursor position.
When the check box is selected, a separate processing thread is used to render
audio from tracks. On multiprocessor or multicore computers, a thread will be
created for each logical processor.
When the check box is cleared, a single processing thread is used to render audio
from tracks and busses.
Default audio recording device Choose the device that you want to use for recording sound data.
Selecting the Microsoft Sound Mapper allows the operating system to select an
appropriate device to use for the current sound data.
Automatically detect and offset for
hardware recording latency
Select the check box to automatically compensate for offset between the time you
initiate recording and when your sound card starts recording.
Advanced Click this button to open the Advanced Audio Configuration dialog
Default All Click to restore the Audio tab to the default settings.
232 | APPENDIX A
Setting Advanced audio preferences from the Audio Device tab
Using the MIDI tab
Item Description
Audio devices This list displays all of the audio devices that are installed in your computer.
Selecting a device allows you to set the options for that device.
Interpolate position When you select this check box, the software attempts to compensate for
inaccurate devices by interpolating the playback or recording position. If you
notice that your playback cursor is offset from what you are hearing, select this
option for the playback device.
Position bias If the position of playback or record does not match what you hear after you
enable Interpolate position, you can attempt to compensate using the Position
bias slider. Moving this slider offsets the position forward or backward to
compensate for the inaccuracies of the device.
Do not pre-roll buffers before
starting playback
When you select this check box, buffers are not created prior to starting playback.
Some devices do not behave properly if you clear this check box. If your audio
stutters when you start playback, try selecting this option.
Audio buffers Drag the slider to set the number of audio buffers that will be used. Adjusting this
setting can decrease gapping or help you synchronize the input and output for
record input monitoring.
Buffer size (samples) Choose a setting from the drop-down list to indicate the buffer size you want to
use.
Priority Choose a setting from the drop-down list to set the priority that is assigned to your
audio buffers. Increasing the buffers’ priority can help you attain smoother
playback, but it can also adversely affect other processes.
Item Description
Make these devices available for
MIDI track playback
In the Hardware Port column, select the MIDI devices that you want to be available
for track playback (pg. 196) and generating MIDI clock (pg. 202).
In the MIDI Thru From column, right-click an entry and choose a MIDI device from
which the device selected in the Hardware Port column will accept incoming MIDI.
To load a program map for a hardware synth, right-click the Device box for your
MIDI device and choose Load Device Template from the shortcut menu.
The selected program map will be used for any track that is routed (pg. 196) to the
MIDI device. The device name will be displayed on the MIDI Output button on the
track header, and the programs from the device map will be available when you
click the Program button in the track header.
To assign an input device to a MIDI output port, right-click the Device box, choose
Input from the shortcut menu, and then choose an input device from the
submenu. For example, by assigning an input device, you can choose which
controller you want to use to play a MIDI device.
When you assign an input device to a MIDI output port, the device name is
displayed in the Device column in the appropriate row in the Make these devices
available for MIDI input list.
If you want an output device to receive MIDI thru data from an input device, right-
click the MIDI Thru From column and choose a device from the shortcut menu.
When you choose a MIDI Thru From device, the device name is displayed in the
Device column in the MIDI Thru To column in the Make these devices available for
MIDI input list.
Make these devices available for
MIDI input
Select the check box for each MIDI device that you want to be available for
recording MIDI (pg. 164) and controlling soft synths (pg. 197).
To assign an output port to an input device, right-click the Device box, choose
Output from the shortcut menu, and then choose an output device from the
submenu.
If you want a MIDI input device to echo its MIDI data to an output device, right-
click the MIDI Thru To column and choose a device from the shortcut menu. You
can select multiple devices to send MIDI thru data.

APPENDIX A | 233
Auto MIDI input routing Select the check box if you want to automatically route MIDI input devices to the
soft synth that was viewed last in the Soft Synth Properties window.
The Solo Listen to MIDI Input button in the Soft Synth Properties window is
unavailable when this check box is selected.
Default All Restores all MIDI preferences to the default settings.
Item Description

234 | APPENDIX A
Using the VST Effects tab
Using the VST Instruments tab
Using the ReWire Devices tab
Using the Video tab
Using the Editing tab
Item Description
Default VST search folder Displays the location where the software looks for VST effects.
Alternate VST search folder X Click Browse to choose an alternate location where VST effects can be found.
Select VST effects to be available as
audio plug-ins
Select the VST effects that you want available for use as ACID audio plug-ins. Only
the VST effects located in the default or alternate search folders appear in this box.
Item Description
Default VSTi® search folder Displays the location where the software looks for VST instrument files.
Alternate VSTi search folder X Click Browse to choose an alternate location where VST instrument files can be
found.
Select VST instruments to be
available as soft synths
Select the VST plug-ins that you want available for use as ACID soft synths. Only
the VST instruments located in the default or alternate search folders appear in
this box.
After you add a VSTi soft synth to a project, the VST instrument stays locked until
you close the software. When a VST instrument is locked, the lock icon for that VSTi
displays as locked, and you cannot clear the VSTi’s check box to make it
unavailable in the software.
Item Description
Select ReWire™ devices to be
available as soft synths
Select the ReWire client(s) that you want available for use as ACID soft synths.
Item Description
Device Choose a DV output device from the drop-down list. This is the interface to which
your video device is connected.
Details Displays information about the device selected in the External monitor device
drop-down list.
If project format is invalid for DV
output, conform to the following
If your source media does not conform to DV standards, choose a setting from the
drop-down list.The video is adjusted to display properly on your external monitor.
Sync offset (frames) If your audio is not synchronized with your external monitor, you can configure an
offset for your hardware. Drag the slider to synchronize audio and video.
This setting affects synchronization for previewing on an external monitor. Audio
and video synchronization in your ACID project is unaffected.
Record engage delay (frames) Drag the slider to specify the number of frames it takes your camcorder or deck to
switch from Record Pause to Record mode. If you're missing frames from the
beginning of your file after printing to tape, increase the setting. If you see
duplicated frames at the beginning of your video, decrease the setting.
Default All Restores all video preferences to the default settings.
Item Description
Project tempo range Use the up and down arrows or enter a value in the boxes to specify the minimum
and maximum tempo available in the ACID project. Changing this option affects
the resolution of the Project Tempo slider.

APPENDIX A | 235
Editing Application X Enter the name of each editor you want to display in the track list shortcut menu.
Right-click a track in the track list and choose Edit in [editor name] to edit the
media file associated with a track.
You can specify any editing tool you want to use; however, this feature was
designed for use with destructive audio/MIDI editors.
Browse Click Browse and select the .exe file for each editor you want to have available in
the track list shortcut menu.
Name Enter the name that you want to use to identify each editor. The name is displayed
in the track list shortcut menu and the Tools menu.
Clear Removes the specified editor from the Editing tab.
Check for latest versions of Sony
editors
When you select this check box, the software automatically searches for the latest
available Sony editors on your computer. If one is located, it appears as an
available editor in the Editing Application X box.
Default All Restores all editing preferences to the default settings.
Item Description

236 | APPENDIX A
Using the Sync tab
Setting sync preferences
Setting advanced sync preferences
Generate MIDI Timecode settings
Output device Choose a MIDI device from the drop-down list. MIDI timecode is sent to this
device. The MTC slave should also be set to this device. This device will not be
available for MIDI playback.
Frame rate Choose a frame rate from the drop-down list. This frame rate is used to generate
the MIDI timecode. The MTC slave must be set to the same frame rate.
Generate MIDI Clock settings
Output device Choose a MIDI device from the drop-down list. MIDI clock is sent to this device.
The MIDI clock slave should also be set to this device.
Trigger from MIDI Timecode settings
Input device Choose a MIDI device from the drop-down list. MIDI timecode is received from this
device. The MTC master should also be set to this device.
Frame rate Choose a frame rate from the drop-down list. This value specifies the frame rate at
which the MTC master sends timecode to ACID.
Advanced Click to open the Advanced Sync Preferences dialog.
Default All Restores all sync preferences to the default settings.
MTC Input
Free-wheel for timecode loss Select this check box if you want to continue to play if timecode is lost.
Enabling this option can compensate for infrequent losses in timecode. If you
frequently lose timecode, you should perform troubleshooting to determine the
cause of the problem.
Free-wheel slack time Use the up and down arrows or enter a value in the box to specify the amount of
time that timecode can be lost before the free-wheel playback time starts. A
longer time is more tolerant of breaks in the incoming timecode.
Free-wheel playback time Use the up and down arrows or enter a value in the box to specify the amount of
time that playback continues after the free-wheel slack time has been exceeded.
Synchronization delay time Use the up and down arrows or enter a value in the box to specify the amount of
time it takes for the software to synchronize itself to incoming timecode.
On slower computers, this time should be set to approximately two seconds. On
faster computers, it may be set lower.
Setting this value too low can sometimes result in audible pitch shifting at the
start of playback.
Offset adjust If ACID is consistently behind or ahead of your MTC generator, enter a value in the
box to adjust a synchronization offset with quarter-frame accuracy.
If the software is behind, set this value to a negative number. A setting of - 4 is a
common offset.
If the software is ahead, set this value to a positive number. A setting of +4 is a
common offset, although it is rare that the application will sync ahead.
MTC Output
Full-frame message generation Select a radio button to determine when full-frame timecode messages are sent
while Generate MIDI Timecode is active. Full-frame messages are used by some
external synchronizable audio devices to seek to a proper location prior to actually
starting synchronization. Tape-based recorders especially benefit from seeking to
full-frame messages because of the time it takes to move the transport to the
proper location. However, full-frame messages are ignored by some devices, and
may actually cause unexpected behavior in other devices.
Refer to your hardware documentation to find out if your hardware supports full-
frame messages.
MIDI Clock Output

APPENDIX A | 237
Send Start instead of Continue
when beginning playback
Select this check box if you want a Start command rather than a Continue
command to be sent when Generate MIDI Clock is activated.
When the check box is cleared, a Continue command is sent, as this type of
command allows the chasing device to start from a specific time. However, some
older sequencers that support MIDI Clock chase do not support the Continue
command and must start playback from the beginning every time.
Song Position Pointer generation Select a radio button to determine when Song Position Pointer messages are sent
while Generate MIDI Clock is active.
Song Position Pointer messages are used by MIDI applications and devices to seek
to a proper location prior to starting synchronization.
MTC Input
238 | APPENDIX A
Using the Display tab
Using the Other tab
Using the Folders tab
Item Description
Track colors Use these controls to change the default colors used to display tracks in your
project.
Select a track from the Track drop-down list, and then click the color swatch to
display a color picker.
You can choose any color using the RGBA or HSLA controls, or click the eyedropper
to sample a color from your screen.
When you click OK or Apply, all tracks that used the selected color are updated.
Envelope colors To customize an envelope’s color, select an envelope from the Envelope type drop-
down list. Click the color button to the right to display the Envelope Color dialog
and choose a custom color.
Icon color saturation Drag the slider to adjust the color intensity of icons in the ACID window. Drag to
the left to decrease the color saturation, or drag to the right to increase it.
Icon color tint Drag the slider to adjust the amount of tinting that is applied to the icons in the
ACID window. Drag the slider to the right to add an average of the title bar colors
to the icons. Drag to the left to decrease the amount of tinting applied.
Item Description
Enable multiple-selection preview
in Explorer window
Select this check box if you want to preview multiple selected files in the Explorer.
Enter values in the Number of times to repeat each Loop, Seconds of each
One-Shot to play, and Number of Beatmapped measures to play boxes to
specify how different file types are previewed.
Item Description
Default project folder This box displays the path to the folder that will be used for creating new projects.
Click the Browse button to choose a different folder.
Default groove folder This box displays the path to the folder where default grooves for new ACID
projects are saved. Click the Browse button to choose a different folder.
This folder is also used as the default location for saving exported grooves from the
Groove Pool window.
Use a single default folder for
project media saves
Select this radio button if you want to save all project media in a single folder.
Use separate defaults for each type
of project media save
Select this radio button if you want to choose where to save each type of project
media.
The following boxes display the location where each type of media file will be
saved.
Record This box displays the path to the folder that will be used when
you record new audio or MIDI tracks. Click the Browse button to
choose a different folder.
The folder you specify here is used by default for new projects,
but if you want to choose a project-specific recorded files folder,
you can use the Recorded files folder box on the Audio tab of the
Project Properties dialog.
Render to new This box displays the path to the folder that will be used when
you render to a new track. Click the Browse button to choose a
different folder.
Chop to new This box displays the path to the folder that will be used when
you create new tracks with the Chopper window. Click the
Browse button to choose a different folder.
APPENDIX A | 239
Using the External Control & Automation tab
Use the External Control & Automation tab to set up and customize control surfaces. From the Options menu, choose
Preferences to display the Preferences dialog. Click the External Control & Automation tab. For more information, see
Configuring a Mackie Control Universal on page 204.
New MIDI This box displays the path to the folder that will be used when
you export MIDI. Click the Browse button to choose a different
folder.
MIDI files are not created when you record MIDI or create new
MIDI clips. MIDI data for clips is stored within the ACID project.
Extract from CD This box displays the path to the folder that will be used for
tracks that you extract from audio CDs. Click the Browse button
to choose a different folder.
Render project This box displays the path to the folder that will be used when
you render your project. Click the Browse button to choose a
different folder.
Temporary files folder Displays the folder where temporary files are stored. Click Browse to specify a
new folder.
When you add a media file to a project from a removable device, a copy of the
media file is stored in a temporary files folder. This keeps the media file available
for use even if the source of the media is no longer accessible.
Be aware that this folder is cleared when you close the software. However, the
temporary files are not cleared if the software closes inappropriately.
Free storage space in selected
folder
This value displays the amount of space available in the folder specified in the
Temporary files folder box.
Note:
From the Options menu, choose External Control to enable your selected control surfaces.
Preference Description
Smooth and thin automation
data after recording or drawing
When recording automation or drawing envelope curves, ACID software creates as
many envelope points or keyframes as possible to represent your control
movements.
Select this check box if you want to reduce the number of envelope points/
keyframes after recording or drawing is finished.
For more information, see Recording automation settings on page 137.
For more information, see Adding effect automation envelopes on page 130.
Set controls to default values
when automation is turned off
Select this check box if you want controls to return to their default values when set
the track's automation recording mode to Automation Off. Automated effect
parameters do not have default settings and will retain their last-set values when
you turn automation off.
When the check box is cleared, controls will retain their last-set values when you
turn automation off.
Available devices Choose a device from the drop-down list and click Add to choose the control
surfaces that will be available to ACID software. Adding a device loads its default
profile.
For information about configuring specific MIDI controllers, see Setting up a
Mackie Control Universal on page 242, Using a Frontier TranzPort on page
256, or Configuring a generic MIDI controller on page 258.
Active control devices Lists the control devices that you’ve added. Double-click a device name to
customize its behavior.
Default all Restores all control surface preferences to the default settings.
Note:
You can connect one Mackie Control Universal (with up to four Mackie Control Universal Extenders), one Frontier
TranzPort, and up to five generic MIDI controllers.

240 | APPENDIX A
Customizing keyboard shortcuts
From the Options menu, choose Customize Keyboard to customize the keyboard shortcuts available in the ACID
interface.
The Keyboard mapping box displays the currently assigned shortcut keys. Click a tab in the middle of the dialog to
choose which shortcuts you want to see.
Editing or creating new shortcuts
1.
Click a tab in the middle of the dialog to indicate the type of command you want to assign to a keyboard shortcut.
2.
Select a command in the list.
3.
Click the Shortcut keys box and press the key combination you want to assign to the selected command.
4.
Click the Add button to assign the key combination in the Shortcut keys box to the selected command.
Saving a keyboard mapping
Click the Save as button and type a name to save your current keyboard shortcuts to an .ini file in the C:\Documents and
Settings\[user name]\Local Settings\Application Data\Sony\ACID Pro\6.0 folder.
You can use this file as a backup or to share your keyboard shortcuts with other ACID users.
Deleting a keyboard mapping
Choose a mapping from the Keyboard mapping drop-down list and click the Delete button to remove the selected
keyboard mapping.
Importing a keyboard mapping
Copy an ACID 6.0 keyboard mapping .ini file to the C:\Documents and Settings\[user name]\Local Settings\Application
Data\Sony\ACID Pro\6.0 folder.
The next time you start ACID, the new keyboard mapping will be available from the Keyboard mapping drop-down list
in the Customize Keyboard dialog.
Resetting the default keyboard mapping
Choose [Default] from the Keyboard mapping drop-down list and click OK to restore the default configuration.
Tip:
You can type a word in the Show commands containing box to filter the list of commands to display only
commands that contain the word you typed.
Tip:
The Application Data folder is not visible unless the Show hidden files and folders radio button is selected on the
View tab of the Windows Folder Options control panel.
Tip:
You cannot delete the default ACID keyboard mapping.
Tip:
The Application Data folder is not visible unless the Show hidden files and folders radio button is selected on the
View tab of the Windows Folder Options control panel.
APPENDIX B | 241
Appendix
B
Using Control Surfaces with ACID
A control surface is a hardware device that uses knobs, faders, and buttons to control user interface elements that are
normally controlled with a mouse. Using a control surface lends a tactile feel to your editing sessions.
Unlike keyboard shortcuts—which determine the shortcut's behavior based on the portion of the ACID window that has
focus—a control surface's mapped functions work no matter what part of the application has focus.
Connecting a control surface
You can use one Mackie® Control Universal with up to four Mackie Control Universal Extenders, one Frontier TranzPort, or
up to five generic control surfaces with ACID software. Perform the following steps for each device.
1.
Connect the MIDI Out port on your MIDI interface to the MIDI In port on your control surface.
2.
Connect the MIDI In port on your MIDI interface to the MIDI Out port on your control surface. For more information,
see Configuring ACID to use your control surface on page 241.
3.
Configure ACID software to use your control surface.
Configuring ACID to use your control surface
Use the MIDI tab in the Preferences dialog to select the device to which your control surface is connected. For more
information, see Using the MIDI tab on page 232.
1.
From the Options menu, choose Preferences to display the Preferences dialog.
2.
Enable your MIDI input and output ports:
a.
Select the MIDI tab in the Preferences dialog.
b.
In the Make these devices available for MIDI track playback box, select the check box for the MIDI port that is
connected to your control surface's In port.
c.
In the Make these devices available for MIDI input box, select the check box for the MIDI port that is connected
to your control surface's Out port.
3.
Choose your control surface:
a.
Select the External Control & Automation tab in the Preferences dialog. For more information, see Using the
External Control & Automation tab on page 239.
b.
Choose a device from the Available devices drop-down list and click the Add button. Adding a device loads its
default profile. If you want to customize the behavior of the control surface, double-click its entry in the Active
control devices list.
4.
Click OK to apply your changes and close the Preferences dialog.
5.
From the Options menu, choose External Control to enable your selected control surfaces.
Note:
If you’re using a USB interface such as Frontier TranzPort, just plug in the USB cable. For information about your
specific device, please refer to the manufacturer's documentation.
Note:
MIDI ports that are in use by a Mackie Control Universal or Mackie Control Universal Extender display a icon to
indicate that they are not available for MIDI track input or playback.
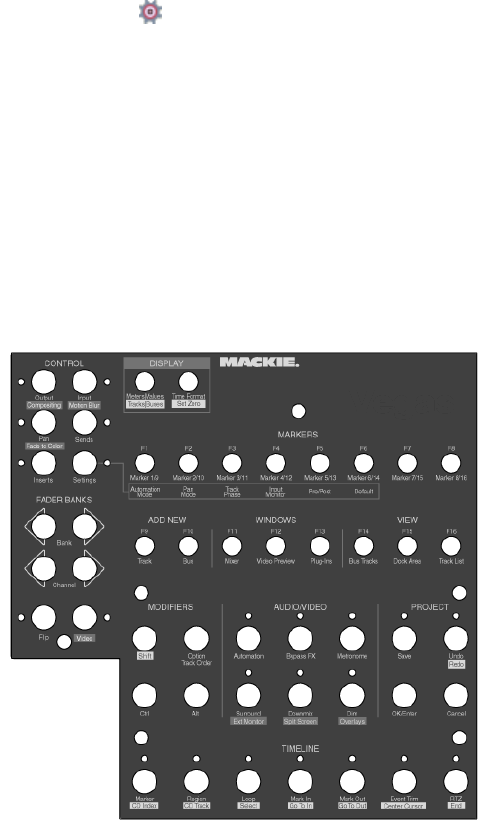
242 | APPENDIX B
Configuring or customizing your control surface
Use the External Control & Automation tab in the Preferences dialog to select the control surfaces you want to use and
adjust their configuration. For more information, see Using the External Control & Automation tab on page 239.
1.
From the Options menu, choose Preferences to display the Preferences dialog.
2.
Select the External Control & Automation tab.
3.
Choose a device from the Available devices drop-down list and click the Add button. The device is added to the
Active control devices list.
4.
Double-click the entry in the Active control devices list to display the configuration dialog.
For information about configuring specific MIDI controllers, see Setting up a Mackie Control Universal on page 242,
Using a Frontier TranzPort on page 256, or Configuring a generic MIDI controller on page 258.
Using your control surface
This section describes how to use your control surface in general terms.
For information about your specific device, please refer to the manufacturer's documentation.
1.
From the Options menu, choose External Control to enable your selected control surfaces.
2.
If necessary, press the Automation button on your control surface.
3.
Click the Automation Settings button for each track you want to edit with the control surface and choose
Automation Write (Touch) or Automation Write (Latch) to enable automation recording. For more information, see
Automation recording modes on page 136.
To enable automation recording for audio busses and soft synths, use audio bus tracks.
Use the functions on your control surface to edit your project.
Setting up a Mackie Control Universal
The Mackie Control is fully supported by ACID® software and lends a tactile element to your editing sessions. There are
many overlays available that you can use to label the Mackie Control buttons and controls with their mapped functions in
ACID. For more information about Mackie Control overlays, please check the Mackie Web site:
http://www.mackie.com/products/mcu/index.html
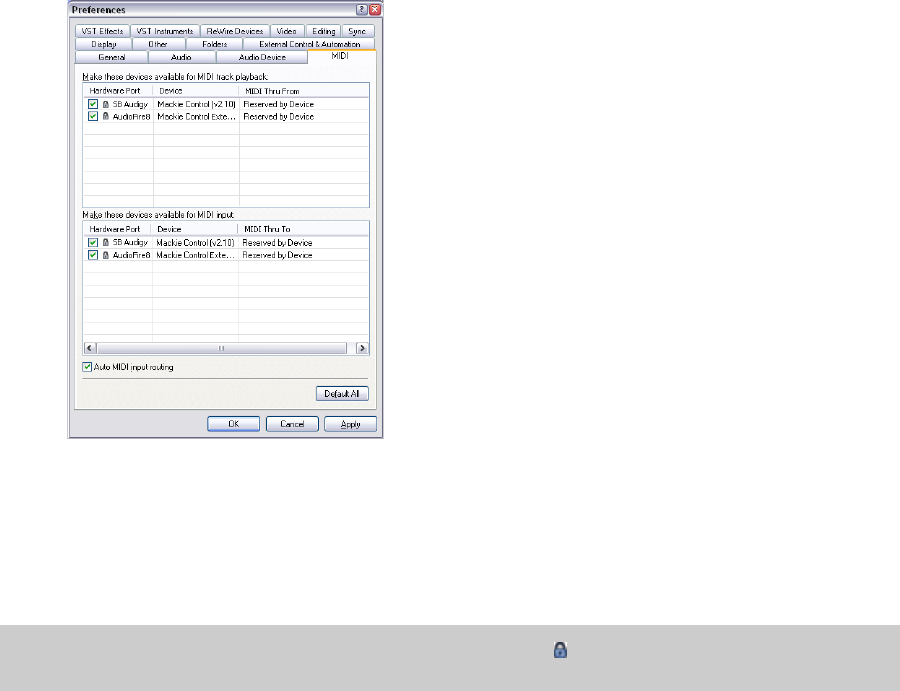
APPENDIX B | 243
The overlay identifies the default control mapping. You can also customize the buttons and controls on the Mackie
control. For more information, see Configuring or customizing control mappings on page 245. When you use the default
mapping, the Mackie Control is divided into several functional areas. All functionality described in this document refers to
the default control mapping.
Connecting the Mackie Control Universal
You can use one Mackie Control Universal (with up to four Mackie Control Extenders) with ACID. Perform the following
steps for each device.
If you’re using Mackie Control Extenders, you’ll need a multiport MIDI interface with MIDI In/Out ports for each device.
1.
Connect the MIDI Out port on your MIDI interface to the MIDI In port on your Mackie Control Universal.
2.
Connect the MIDI In port on your MIDI interface to the MIDI Out port on your Mackie Control Universal.
3.
Repeat Steps 1 and 2 for each Mackie Control Extender.
Configuring the software to use the Mackie Control Universal
1.
From the Options menu, choose Preferences to display the Preferences dialog.
2.
Enable your MIDI input and output ports:
a.
Select the MIDI tab in the Preferences dialog.
b.
In the Make these devices available for MIDI track playback box, select the check box for the MIDI port that is
connected to the Mackie Control Universal’s In port.
c.
In the Make these devices available for MIDI input box, select the check box for the MIDI port that is connected
to your Mackie Control Universal’s Out port.
d.
Repeat Steps 2b and 2c for each Mackie Control Extender.
e.
Click Apply.
3.
Choose your control surface:
a.
Select the External Control and Automation tab in the Preferences dialog.
b.
From the Available devices drop-down list, choose Mackie Control and click the Add button to load the default
profile.
4.
Click OK to apply your changes and close the Preferences dialog.
Note:
MIDI ports that are in use by a Mackie Control or Extender display a icon to indicate that they are not
available for MIDI track input or playback.
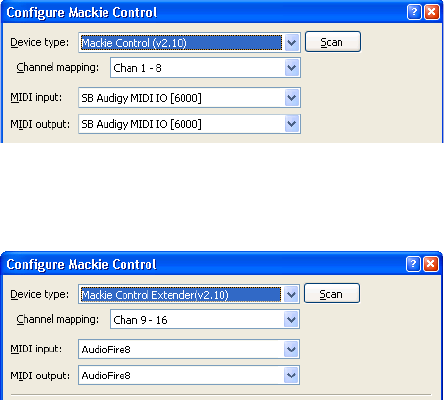
244 | APPENDIX B
5.
From the Options menu, choose External Control to enable the Mackie Control Universal.
Configuring channel mappings for Mackie Control Extenders
If you’re using Mackie Control Extenders, you’ll need to set up your channel mapping. Channel mapping tells the software
how the devices are arranged on your desktop.
For example, if your Mackie Control Universal is on the left of your Mackie Control Extender, you could configure the
Mackie Control to adjust channels 1 through 8 and use the Mackie Control Extender to adjust channels 9 through 16. If
you have a Mackie Control Universal positioned between two Mackie Control Extenders, you could adjust channels 1
through 8 on the left Extender, adjust channels 9 through 16 on the Mackie Control Universal, and adjust channels 17
through 24 on the right Extender.
1.
From the Options menu, choose Preferences to display the Preferences dialog.
2.
Select the External Control & Automation tab.
3.
Double-click your Mackie Control in the Active control devices list to display the Configure Mackie Control dialog.
The current channel mapping is displayed on each device's LCD.
4.
Choose the channels you want to control with the Mackie Control Universal:
a.
From the Device Type drop-down list, choose Mackie Control.
b.
From the Channel Mapping drop-down list, choose the channels you want to adjust with the Mackie Control
Universal.
5.
Choose the channels you want to control with the Mackie Control Extender:
a.
From the Device Type drop-down list, choose Mackie Control Extender.
b.
From the Channel Mapping drop-down list, choose the channels you want to adjust with the Mackie Control
Extender.
6.
Repeat Step 5 for each Mackie Control Extender.
7.
Click OK to apply your changes and close the Configure Mackie Control dialog.
8.
Click OK to apply your changes and close the Preferences dialog.
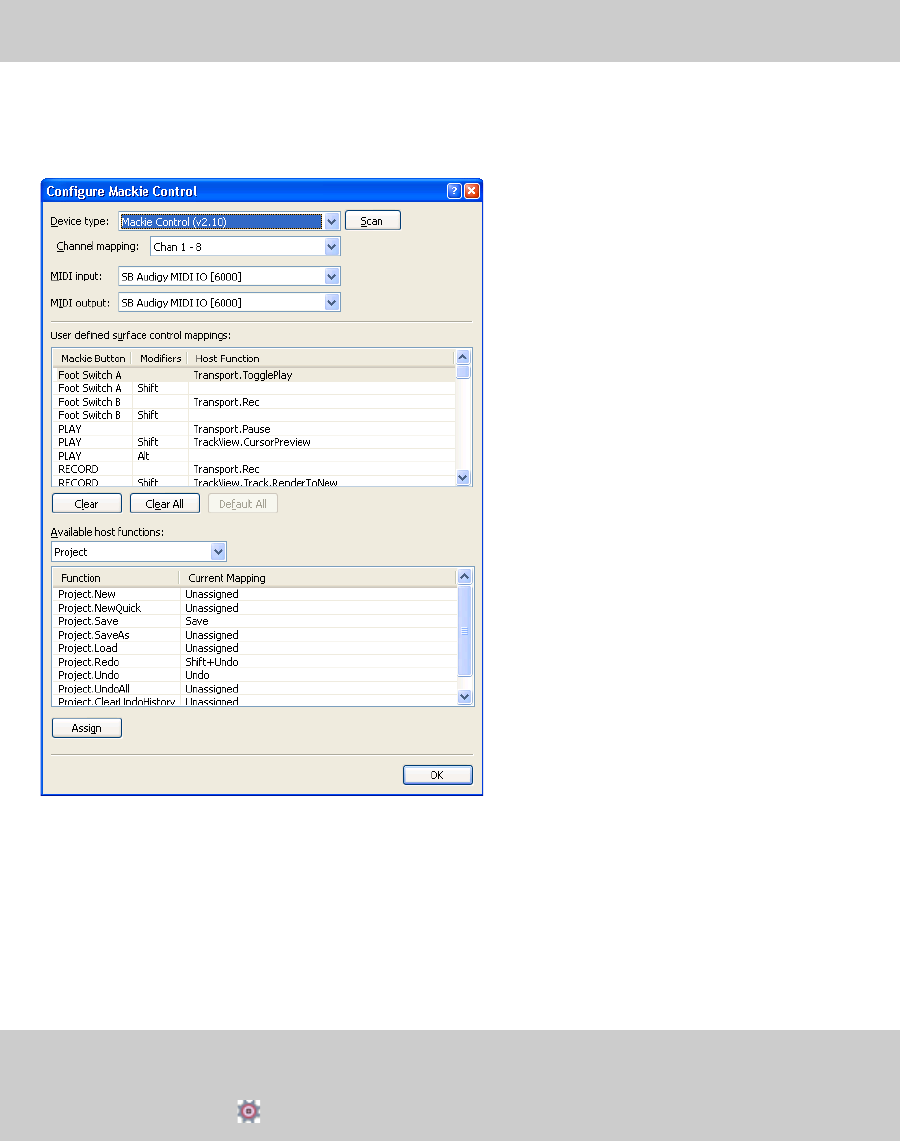
APPENDIX B | 245
Configuring or customizing control mappings
Use the External Control & Automation tab in the Preferences dialog to select the control surfaces you want to use and
adjust their configuration.
1.
From the Options menu, choose Preferences to display the Preferences dialog.
2.
Select the External Control & Automation tab.
3.
Double-click your Mackie Control in the Active control devices list to display the Configure Mackie Control dialog.
4.
To add or change a function do the following:
a.
Select an item in the User defined surface control mappings list.
b.
Select an item in the Available host functions list.
c.
Click the Assign button.
5.
To remove a function, select an item in the User defined surface control mappings list and click the Clear button.
6.
To remove all functions, click the Clear All button.
7.
To replace all custom functions with the default settings, click the Default All button.
Reminder:
When you customize your control mappings, button functions may not match the labels on the overlay. You
can click the Default All button in the Configure Mackie Control dialog to restore the default settings.
Important:
The Mackie Control Universal can control either trim or automation settings. In order to control automation
settings, the Automation button in the Audio/Video section must be selected, and the track or bus you want to edit must
be set to Automation Write (Touch) or Automation Write (Latch). Hold the F1 button while turning the V-Pot (or use the
Automation Settings button ) to change the automation recording mode for each track and bus track.
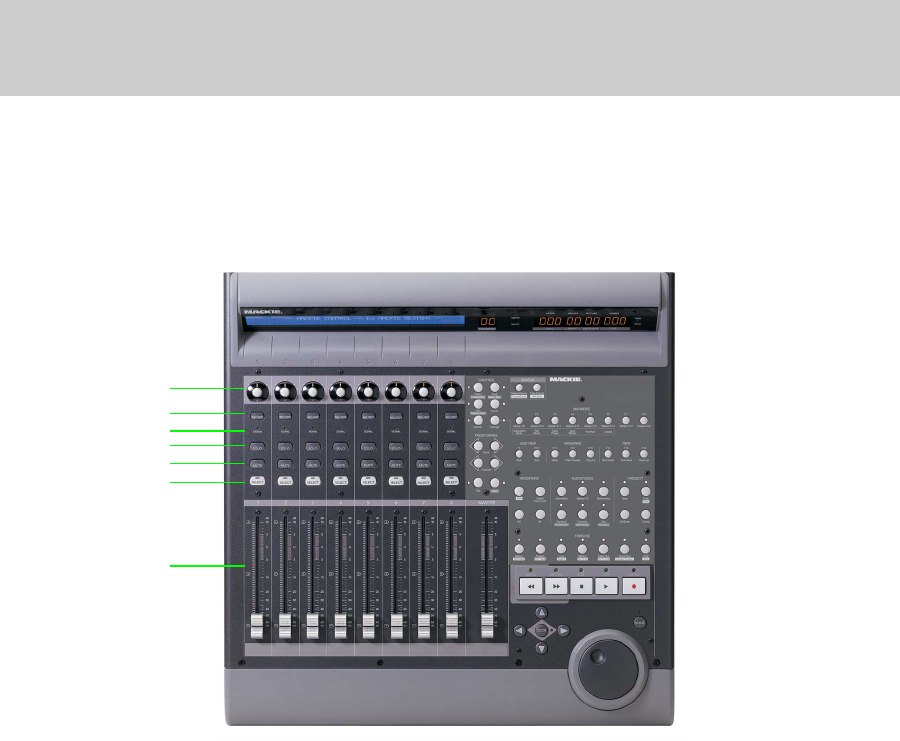
246 | APPENDIX B
Using the Mackie Control Universal
The following sections describe the default control mapping for the Mackie Control Universal when used with ACID.
Channel section
The channel section includes V-Pots (knobs), buttons, and faders that you can use to edit your tracks and busses.
If you’re using Mackie Control Extender units, you can control eight additional channels with each Extender. For more
information, see Configuring channel mappings for Mackie Control Extenders on page 244.
The Mackie Control Universal can control either trim or automation settings. In order to control automation settings,
the Automation button in the Audio/Video section must be selected, and the track or bus you want to edit must be set
to Automation Write (Touch) or Automation Write (Latch). Hold the F1 button while turning the V-Pot (or use the
Automation Settings button) to change the automation recording mode for each track and bus track.
Item Description
1V-Pot Adjusts values for panning, volume (when Flip button is selected), and effect parameter values.
•Audio track volume: Adjusts track volume when the Pan or Sends button is selected and the Flip button is
selected.
•Audio track panning: Adjusts audio track panning when the Pan button is selected.
•Bus send levels: Adjusts bus send levels when the Sends button is selected.
•Effect parameters: Adjusts effect parameters when the Inserts button is selected.
The V-Pot is velocity sensitive, so rotating quickly changes values quickly, and you can press the button to
choose a selection.
When the Pan or Sends button is selected, press the V-Pot to edit the track or bus effects chain.
2Rec/Ready
Button
Arms audio tracks for recording.
3Signal LED Indicates whether an audio track or bus is outputting a signal.
4Solo Button Press to solo a track or remove it from the solo group.
5Mute Button Press to mute or unmute a track.
6Select
Button
Press to select a track.
1
2
3
4
5
6
7
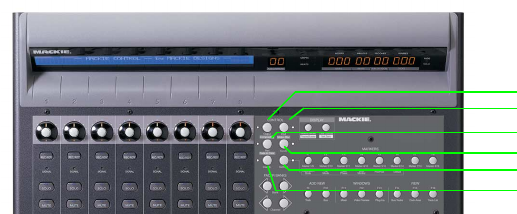
APPENDIX B | 247
Footswitches (not shown)
The Mackie Control has two switched inputs (labeled User Switch A and User Switch B) that you can use to connect
footswitches.
By default, footswitch A toggles playback, and footswitch B starts and stops recording.
You can customize the footswitches in the Configure Mackie Control dialog. Double-click Mackie Control in the Active
control devices list on the External Control & Automation tab of the Preferences dialog to display the Configure Mackie
Control dialog. For more information, see Configuring or customizing control mappings on page 245.
Control buttons
The buttons in the Control section determine the operation of the V-Pots and faders in the channel section of your Mackie
Control. In every mode, the fader adjusts track volume, and the V-Pot adjusts the selected control mode. You can press
the Flip button to reverse the V-Pot and fader function.
7Fader Adjusts the track or bus level (unless the Flip button is selected).
When the Automation button is selected, the fader adjusts the automation envelope if the track is in
Automation Write (Touch) or Automation Write (Latch) mode.
The fader can also adjust settings for the following items when you select other buttons in the Channel section.
•Audio track panning: Adjusts audio track panning when the Pan and Flip buttons are selected.
•Bus send levels: Adjusts bus send levels when the Sends and Flip buttons are selected.
The fader is touch sensitive, so if you're recording automation parameters, recording will begin when you touch
the fader and stop when you release it. The current setting is displayed in the Mackie Control display.
Item Description
1Output Press the Output button to set the output device for each track or bus. Turn the V-Pot in the channel section to
choose an output device and press the V-Pot to select it.
2Input Press to set the recording input device for each track. Turn the V-Pot in the channel section to choose an input
device and press the V-Pot to select it.
3Pan Press to adjust track panning using the V-Pot in the channel section.
In 5.1 surround projects, pressing the Pan button toggles left-to-right panning, front-to-rear panning, and
center-channel level adjustment using the V-Pot.
4Sends Press to adjust bus and assignable effects send levels. Press the Sends button to scroll through the available
busses and assignable effects chains, and then turn the V-Pot to adjust the send level.
Item Description
1
2
3
4
5
6
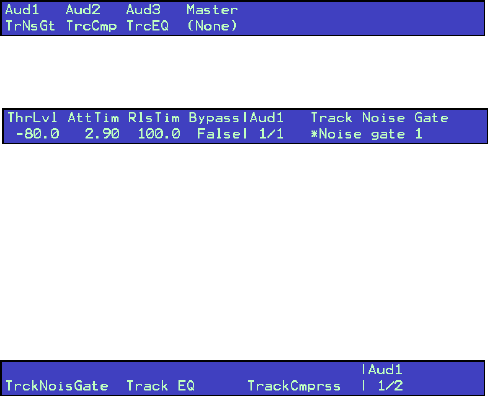
248 | APPENDIX B
5Inserts Press to adjust effects settings.
Press the button once to display PL in the Mackie Control Assignment display. The Mackie Control LCD displays
the effects that are assigned to each track or bus. The following example shows a three-track project:
Turn the V-Pot to scroll through the effects, and press the V-Pot to edit the current effect. In editing mode, PE is
displayed in the Assignment display. The following example shows the settings for the Noise Gate plug-in on
track one:
PE mode uses the following controls:
•V-Pots 1-4: Turn to edit the effect's parameters. For “switch” parameters such as Bypass, press the V-Pot to
change the setting.
•V-Pot 5: Turn to scroll through an effect's property pages.
•V-Pot 6: Turn to choose from a plug-in's available presets. Press the V-Pot to choose a preset.
•V-Pot 7: Turn to edit the current effect for a different channel.
•V-Pot 8: Turn to choose other effects for the current channel.
Press the Inserts button again to view effects chains. PS is displayed in the Assignment display. The following
example shows the effects chain on track one:
PS mode uses the following controls:
•V-Pots 1, 3, and 5: Turn to choose other effects for the current channel. Press to edit the selected effect and
enter PE mode.
•V-Pots 2, 4, and 6: After choosing an effect with V-Pot 1, 3, or 5, press V-Pot 2, 4, or 6 to add it to the channel.
•V-Pot 7: If a channel has multiple pages of effects in the chain, turn to display additional effects. In the
previous example, Aud 1 1/2 means that track one has two pages of effects.
•V-Pot 8: Turn to choose effects chains for other channels.
When <No Insert> is displayed above a V-Pot, you can turn the V-Pot to view effects that you can add to the
chain. New effects are displayed with a *. Press the next V-Pot (to the right) to add the effect.
6Settings Press to adjust track or bus settings using the F1 through F6 buttons.
•F1: Hold the button and turn the V-Pot to change the automation recording mode for each track and bus
track.
•F2: Hold the button and turn the V-Pot to change the current panning mode.
•F3: Not used.
•F4: Hold the button and turn the V-Pot to change record input monitoring settings when you're using an ASIO
audio device.
•F5: When the Pan button is selected, press the Settings button and then hold F5 while pressing the V-Pot to
change the bus or assignable effects output fader to Pre FX or Post FX.
When the Sends button is selected, press the Settings button and hold F5 while pressing the V-Pot to change
a track's bus or assignable effects send level to Pre Volume or Post Volume. Press the Sends button to scroll
through the available bus and effects sends.
•F6: Press the Settings button and hold F6 while pressing the V-Pot on a channel to return the channel's
settings to the track defaults.
Item Description
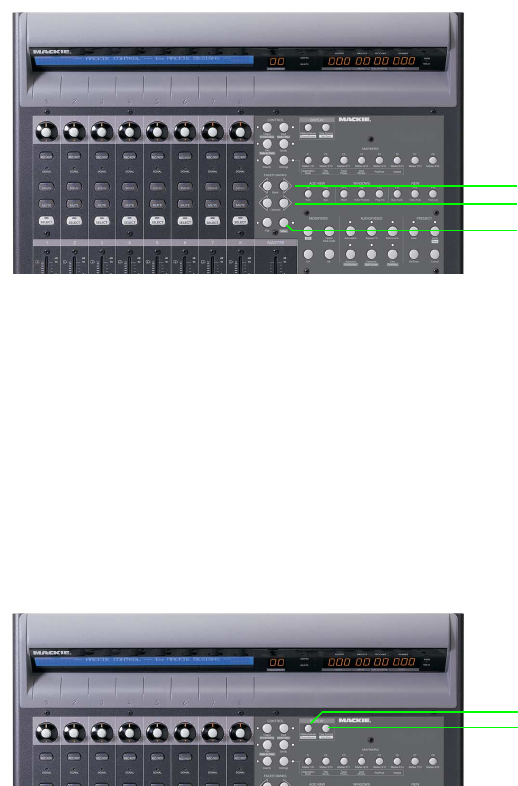
APPENDIX B | 249
Fader Banks buttons
The Fader Banks buttons control the behavior of the channel section controls.
Display buttons
The Display buttons control the behavior of the channel section controls.
Item Description
1Bank Press the left or right arrow button to scroll the channels 8 units at a time.
For example, if tracks 1-8 are currently displayed, pressing the right arrow will change to tracks 9-16.
2Channel Press the left or right arrow button to scroll the channels 1 unit at a time.
For example, if tracks 1-8 are currently displayed, pressing the right arrow will change to tracks 2-9.
Hold the Option button while pressing either Channel button to change track order. For example, if track two is
selected and you press Option+ < Channel, track two becomes track one. Conversely, if track one is selected and
you press Option + Channel >, track one becomes track two.
3Flip Press to exchange the behavior of the fader and V-Pot when allowed.
Item Description
1Meters/
Values
When you're working with audio tracks or busses, press to display meters or numeric values. Even in Meters
mode, numeric values are displayed when you edit a value.
Hold the Shift button in the Modifiers section while pressing the Meters/Values button to toggle control of
tracks, busses, or tracks and busses.
• Press once to show audio and MIDI tracks.
• Press again to show audio tracks.
• Press again to show MIDI tracks.
• Press again to show busses.
• Press again to show all tracks and busses.
2Time Fmt
Zero
Press and hold to display the current time format. Turn V-Pot 8 while holding the button to change the format.
1
2
3
1
2
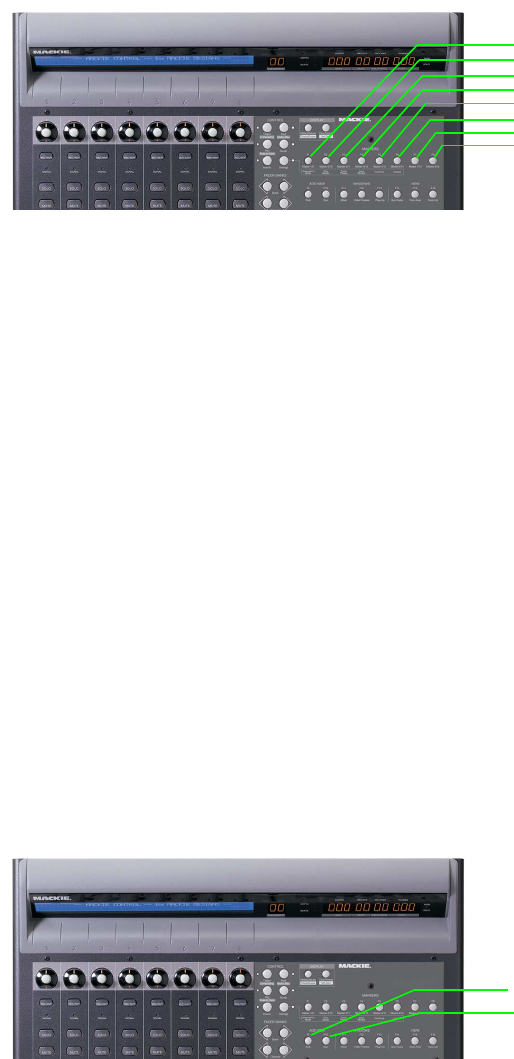
250 | APPENDIX B
Markers buttons
The Markers buttons control additional track and channel settings.
Add New buttons
The Add New buttons add busses or tracks to your project.
Item Description
1Marker 1/9
Automation
Mode
Press to place the cursor at marker 1, or hold Shift and press to place the cursor at marker 9.
When the Settings button is selected, hold the button and turn the V-Pot to change the automation recording
mode for each track and bus track.
2Marker 2/10
Pan Mode
Press to place the cursor at marker 2, or hold Shift and press to place the cursor at marker 10.
When the Settings button is selected, hold the button and turn the V-Pot to change the current panning mode.
3Marker 3 Press to place the cursor at marker 3.
4Marker 4
Input
Monitor
Press to place the cursor at marker 4.
When the Settings button is selected, hold the button and turn the V-Pot to change record input monitoring
settings when you're using an ASIO audio device.
5Marker 5
Pre/Post
Press to place the cursor at marker 5.
When the Pan button is selected, press the Settings button and then hold F5 while pressing the V-Pot to change
the bus or assignable effects output fader to Pre FX or Post FX.
When the Sends button is selected, press the Settings button and hold F5 while pressing the V-Pot to change a
track's bus or assignable effects send level to Pre Volume or Post Volume. Press the Sends button to scroll
through the available bus and effects sends.
6Marker 6
Default
Press to place the cursor at marker 6.
Press the Settings button and hold F6 while pressing the V-Pot on a channel to return the channel's settings to
the track defaults.
7Marker 7 Press to place the cursor at marker 7.
8Marker 8 Press to place the cursor at marker 8.
Item Description
1Track Press to add a new audio track.
2Bus Press to add an audio bus to your project.
1
2
3
4
5
6
7
8
1
2
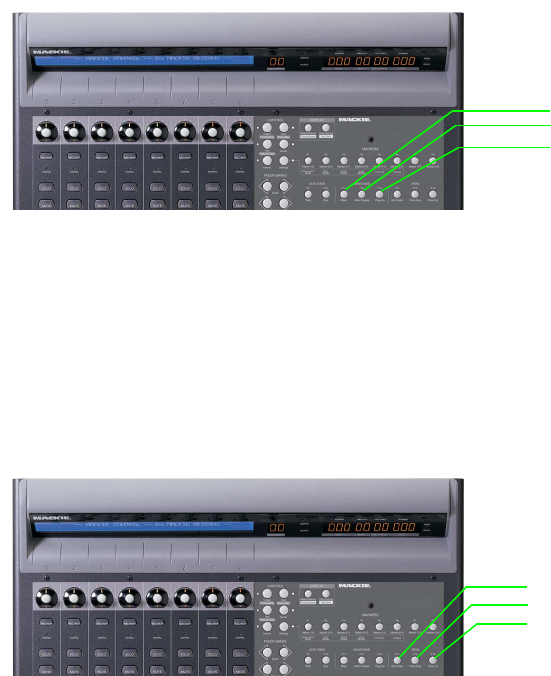
APPENDIX B | 251
Windows buttons
The Windows buttons control the display of various ACID windows.
View buttons
The View buttons control the display of various sections of the ACID window.
Item Description
1Mixer Press to show the Mixer window. If the window is not docked, pressing the button shows/hides the window.
2Video
Preview
Press to show the Video Preview window. If the window is not docked, pressing the button shows/hides the
window.
3Plug-Ins Press to show the Plug-In Manager window. If the window is not docked, pressing the button shows/hides the
window.
Item Description
1Bus Tracks Press to show or hide audio bus tracks in the ACID timeline.
When the Video button is selected, press to show or hide the video bus track.
2Dock Area Press to show or hide the Window Docking Area at the bottom of the ACID window.
3Track List Press to show or hide the track list in the timeline.
1
2
3
1
2
3
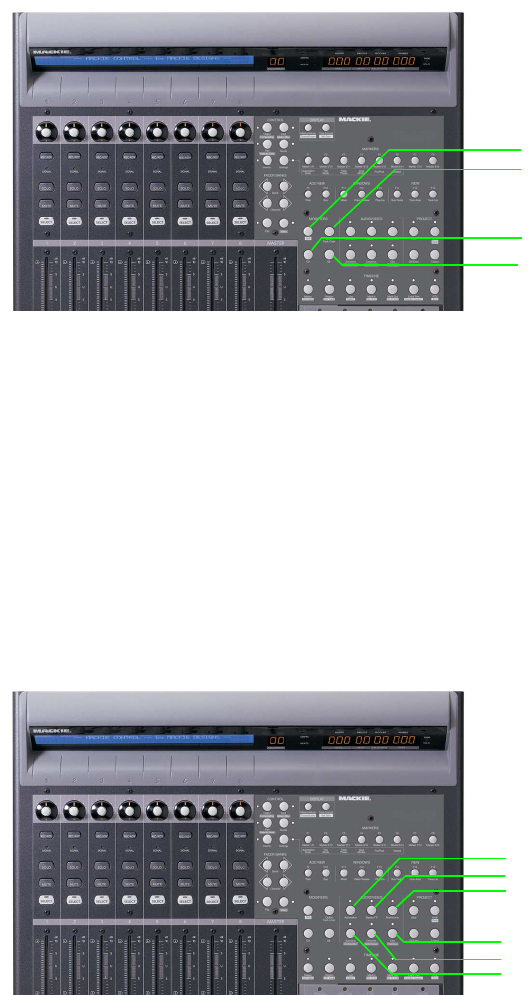
252 | APPENDIX B
Modifiers buttons
The Modifiers buttons extend the functionality of other buttons on the Mackie Control.
Audio/Video buttons
The Audio/Video buttons control various audio and video settings for your project.
Item Description
1Shift Hold the Shift button while pressing a button labeled with inverse text to perform the shift function.
For example, hold Shift while pressing the Undo/Redo button to reverse an undo action.
2Option/Track
Order
Hold the Option/Track Order button while pressing a button in the Settings, Add New, or Windows group for
alternative functions.
Hold the Option/Track Order button while pressing a the Channel < or Channel > button to change track order.
Hold the Option/Track Order button while pressing F1 to F16 to perform custom functions you can define.
For more information, see Configuring or customizing control mappings on page 245.
3Ctrl Hold the Ctrl button while using a control for alternative functions.
4Alt Hold the Alt button while using a control for alternative functions.
Item Description
1Automation Press to place the controls on the Mackie Control in automation mode. The controls in the channel section of the
Mackie Control will affect the automation parameters on the track or bus if Automation Write (Touch) or
Automation Write (Latch) mode is selected.
When the button is not selected, the buttons control trim (static) values.
2Bypass FX Press to bypass/enable all audio effects.
3Metronome Press to turn the metronome on or off.
4Surround Press to toggle the project properties between stereo and 5.1 surround mode.
5Downmix Press to toggle the state of the Downmix Output button in the Mixer window.
6Dim Press to toggle the state of the Dim Output button in the Mixer window.
1
2
3
4
1
2
3
4
5
6
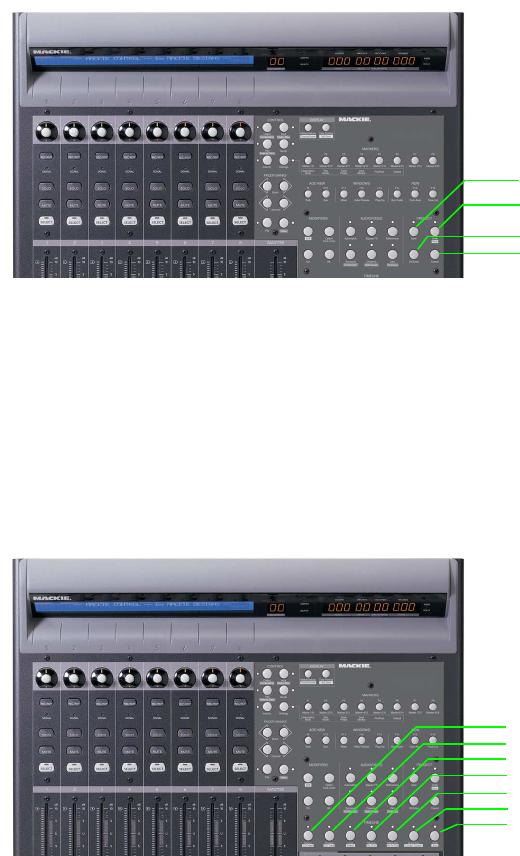
APPENDIX B | 253
Project buttons
The Project buttons perform various project-level commands.
Timeline buttons
The Timeline buttons perform various commands for the project timeline.
Item Description
1Save Press to save your project.
2Undo/Redo Press to reverse edit operations.
Hold Shift while pressing the button to reverse an undo operation.
3OK Not used.
4Cancel Not used.
Item Description
1Marker Press to place a marker at the cursor position.
Hold the Ctrl button while pressing the button to remove a marker.
2Region Press to convert the current selection to a region.
Hold the Ctrl button while pressing the button to remove a region.
3Loop/
Select
Press to toggle looped playback mode.
Hold the Shift button while pressing the Loop/Select button to create a time selection from the loop region.
4Mark In/
Go to In
Press to set the beginning of the loop region at the cursor position.
Hold the Shift button while pressing the Mark In/Go to In button to move the cursor to the beginning of the
loop region.
5Mark Out/
Go to Out
Press to set the end of the loop region at the cursor position.
Hold the Shift button while pressing the Mark Out/Go to Out button to move the cursor to the end of the loop
region.
6Event Trim/
Center
Cursor
Hold the Shift button while pressing the Event Trim/Center Cursor button to center the cursor in the timeline
view.
1
2
3
4
1
2
3
4
5
6
7
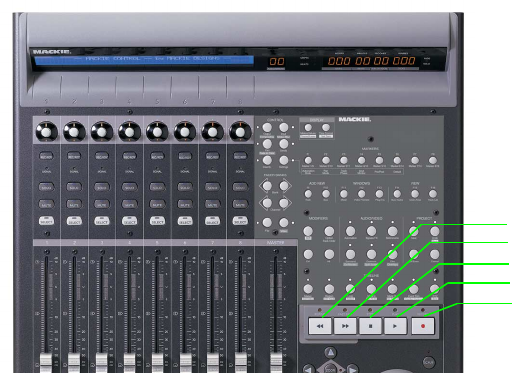
254 | APPENDIX B
Transport buttons
The Transport buttons allow you to navigate the timeline and preview your project.
7RTZ/
End
Press to move the cursor to the beginning of the project.
Hold the Shift button while pressing the RTZ/End button to move the cursor to the end of the project.
Item Description
1Rewind Press and hold to move backward through the timeline at 20x speed.
2Fast Forward Press and hold to move forward through the timeline at 20x speed.
3Stop Press to stop playback and return the cursor to its position before playback started.
4Play Press to start playback. Press again to stop playback and leave the cursor at its current position.
5Record Press to start recording. Press again to stop recording and leave the cursor at its current position.
Hold the Shift button while pressing the Record button to render the current selection to a new track.
Item Description
1
2
3
4
5
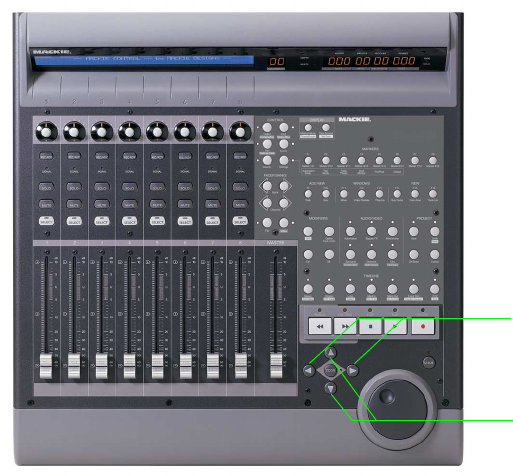
APPENDIX B | 255
Arrow buttons
The arrow buttons allow you to navigate the timeline and preview your project.
Item Description
1Left/Right • Press the left or right arrow button to move left or right 1/32 note.
•Hold Ctrl while pressing the left or right arrow button to go to the beginning or end of the project.
•Hold Alt while pressing the left or right arrow button to go to the beginning of the next or previous measure.
2Up/Down • Press to zoom in or out.
1
2
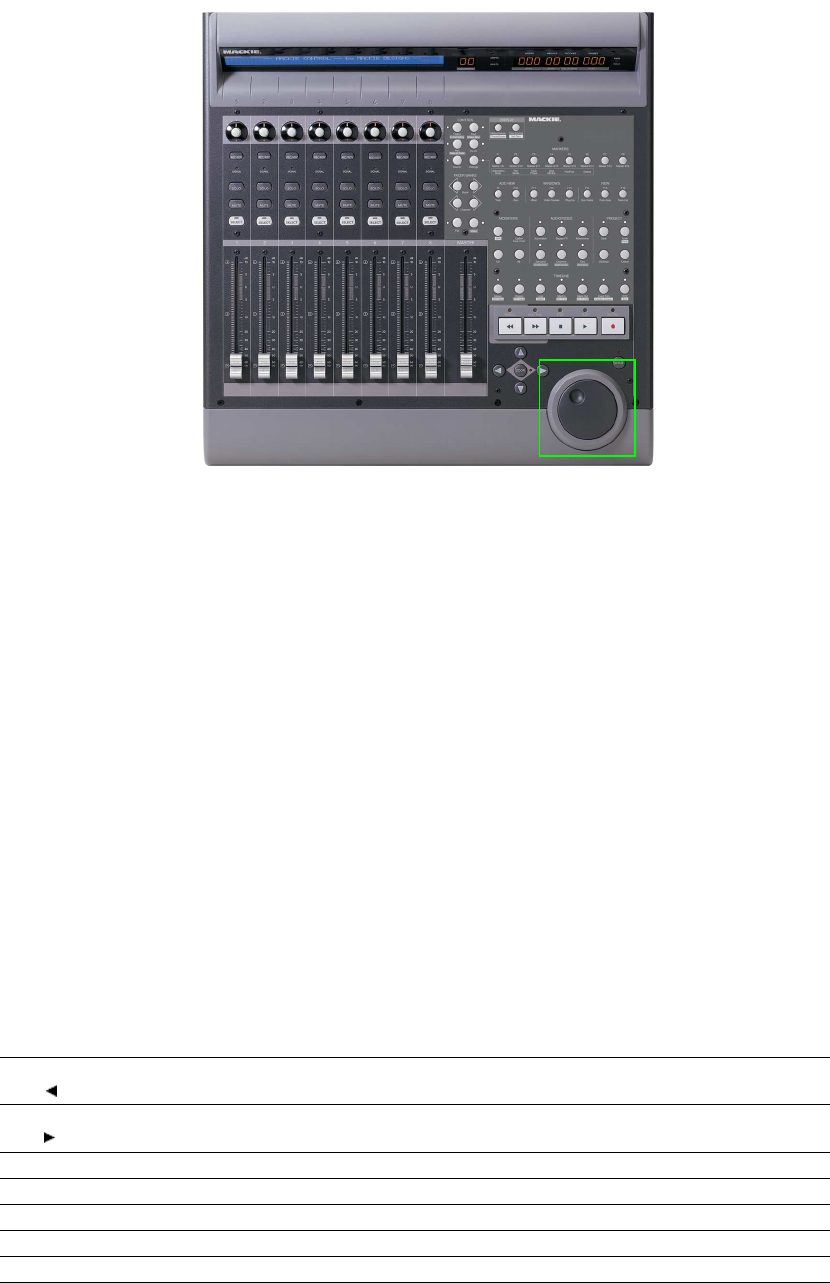
256 | APPENDIX B
Jog dial
The jog dial allows you to navigate the timeline and trim events.
Navigating the timeline
When playback is paused and the Scrub button is not selected, the jog dial performs the following functions:
• Turn the dial clockwise or counterclockwise to navigate the timeline by 1/32 note.
•Hold Alt and turn the dial to go to the beginning of the next or previous measure.
Scrubbing the timeline
During playback, turning the jog dial increases or decreases the playback rate.
When playback is paused and the Scrub button is selected, turning the jog dial scrubs the timeline.
Using a Frontier TranzPort
Using a Frontier TranzPort, you can control ACID wirelessly.
For more information, see Connecting a control surface on page 241.
Viewing the control mappings
The map for the TranzPort assigns the controls as follows.
Control Function Shift Function
Track Focus to previous track or
mixer control.
Insert audio track.
Track Focus to next track or mixer
control.
Insert MIDI track.
Rec Arm track for record.
Mute Mute track
Solo Solo track.
Undo Undo. Redo.
In Set loop start.
APPENDIX B | 257
Adjusting track or bus volume
1.
Press Track or Track to select the track or mixer control you want to adjust.
2.
Press Shift+Loop until the TranzPort displays volume.
3.
Hold Shift while rotating the jog wheel to adjust the volume of the selected track or mixer control.
Adjusting track or bus panning
1.
Press Track or Track to select the track or mixer control you want to adjust.
2.
Press Shift+Loop until the TranzPort displays panning.
3.
Hold Shift while rotating the jog wheel to adjust panning for the selected track or mixer control.
Editing a track's input device
1.
Press Track or Track to select the track you want to adjust.
2.
Press Shift+Loop until the TranzPort displays the track's input device.
3.
Hold Shift while rotating the jog wheel to scroll through the available inputs. When you change the input device, an
asterisk is displayed before the device name on the TranzPort.
Out Set loop end.
Punch Toggle metronome. Toggle MIDI merge recording when displaying volume or panning for a MIDI
track.
• Press Track or Track to select a MIDI track.
• Press Shift + Loop until volume or panning information is displayed on the
TranzPort.
• Hold Shift and press Punch.
For more information, see Using MIDI merge recording on page 166.
Loop Toggle looped playback. Toggle jog wheel control of volume, panning, input, or output device for tracks
or Mixer controls.
• Press Track or Track to select the track you want to adjust.
• Press Shift + Loop until the item you want to edit is displayed on the
TranzPort.
• Hold Shift while rotating the jog wheel to adjust the selected control.
Shift Toggle alternate functions.
Markers
Prev
Move to previous marker.
Markers
Add
Insert marker at cursor.
Markers
Next
Move to next cursor.
Jog Wheel Scroll cursor. Adjust volume or pan for current track.
Rewind. Go to start.
Fast forward. Go to end.
Stop playback or recording.
Play/pause.
Punch in or start recording.
Note:
Not all mixer controls allow panning adjustment.
Control Function Shift Function

258 | APPENDIX B
4.
Press Shift+Punch to set the input device.
Editing a track or mixer control's output device
1.
Press Track or Track to select the track or mixer control you want to adjust.
2.
Press Shift+Loop until the TranzPort displays the track's output device.
3.
Hold Shift while rotating the jog wheel to scroll through the available output devices. When you change the output
device, an asterisk is displayed before the device name on the TranzPort.
4.
Press Shift+Punch to set the output device.
Configuring a generic MIDI controller
You can configure up to five generic MIDI control surfaces to work with the ACID interface.
For information about your specific device, please refer to the manufacturer's documentation.
Customizing your control mappings
1.
From the Options menu, choose Preferences to display the Preferences dialog.
2.
Select the External Control & Automation tab.
3.
Double-click the Generic Control entry in the Active control devices list to display the Configure Generic Control
dialog.
4.
To add or change a function do the following:
a.
Choose a setting from the View function group drop-down list.
b.
Select the Learn check box.
c.
Select an command in the Host Command list and activate the control on your control surface.
d.
You can click the Edit button to fine-tune the MIDI message settings.
5.
Repeat step 4 for each command you want to make available on your control surface.
6.
To remove a function, select an item in the Host Command list and click the Reset button.
7.
To remove all functions, click the Reset All button.
8.
Click the Save As button to save your updated configuration file.
Notes:
• If you have a MIDI controller that includes buttons and knobs or faders, you can use the device as an external control
device and as a MIDI input device for recording MIDI — for example, you can use the buttons, knobs, and sliders on the
device for external control, and still use the keyboard, pitch wheel, and modulation wheel for recording MIDI. For more
information, see Recording MIDI on page 164.
MIDI messages that are mapped to external control functions are filtered when you record MIDI. If a note message is
assigned to a control surface function, both the note-on and note-off messages will be filtered.
• Effects parameters cannot be adjusted with a generic controller.
Important:
A generic control surface can control either trim or automation settings. In order to control automation
settings, you must assign a button to place the control surface in automation mode, and the Automation Settings
button on the track or bus you want to edit must be set to Automation Write (Touch) or Automation Write
(Latch).

APPENDIX B | 259
Loading a control mapping file
1.
From the Options menu, choose Preferences to display the Preferences dialog.
2.
Select the External Control & Automation tab in the Preferences dialog.
3.
Double-click the Generic Control entry in the Active control devices list to display the Configure Generic Control
dialog.
4.
Click the Open button and browse to the mapping file you want to use.
5.
Click OK to apply your changes and return to the Preferences dialog.
6.
Click OK to close the Preferences dialog.
Example of how you can set up MIDI keyboard as a generic control surface
If you have a MIDI device that has knobs, faders, and buttons, you can use assign those controls to adjust the tracks in
your project.
For this example, let's set up a MIDI keyboard with 8 knobs to adjust track volume.
1.
From the Options menu, choose Preferences to display the Preferences dialog.
2.
Select the MIDI tab, and verify that the port where your controller is connected is selected in the Make these devices
available for MIDI input list.
3.
Select the External Control & Automation tab.
4.
From the Available devices drop-down list, choose Generic Control, and then click the Add button. The Generic
Control is added to the Active control devices list.
5.
Double-click the Generic Control entry in the Active control devices list to display the Configure Generic Control
dialog.
6.
Verify that the port where your controller is connected is selected from the MIDI input drop-down list at the bottom
of the dialog.
7.
Because the MIDI keyboard in our example has 8 knobs, type 8 in the Number of channels box.
8.
Now, let's assign buttons to shift the channel banks up and down so you can control all the tracks in your project.
For example, when you start using the controller, the knobs will adjust tracks 1-8. When you shift the banks down,
you can control tracks 9-16, and so on.
a.
From the View function group drop-down list, choose Channels.
b.
Select the Learn check box.
c.
Select Channel Bank Down from the Host Command list.
d.
Press the button or key you want to use to switch to the next group of 8 tracks.
e.
Select Channel Bank Up from the Host Command list.
f.
Press the button or key you want to use to switch to the previous group of 8 tracks.
9.
Choose Audio Channels from the View function group drop-down list.
10.
Program each knob:
a.
Verify that the Learn check box is still selected.
b.
Select Channel 1 Fader from the Host Command list.
c.
Turn knob 1 on your MIDI keyboard. You'll notice that the Channel, MIDI Message, and MIDI Data columns are
updated.
Notes:
• You can use this same process to assign a controller to any configurable parameter. To adjust track volume, we're selecting
Channel x Fader in the Host Command list in step 10 below. However, if you wanted to adjust panning, you could choose
Channel x Pan, or if you wanted to adjust the bus send level, you could choose Channel x Send.
• Effect parameters cannot be controlled with a generic controller.

260 | APPENDIX B
d.
Repeat steps 10a and 10b to program knobs 2 through 8 on your keyboard.
11.
Now, let's assign a button to toggle the controller in and out of automation mode so we can use the knobs to adjust
the track's volume (trim) or record volume automation:
a.
From the View function group drop-down list, choose Assign.
b.
Select Toggle Automation Mode from the Host Command list.
c.
Verify that the Learn check box is still selected, and then press the button or key you want to use to switch your
control surface in and out of automation mode.
You'll notice that the Channel, MIDI Message, and MIDI Data columns are updated.
12.
Click OK to close the Configure Generic Control dialog, and then click OK to close the Preferences dialog.
13.
From the Options menu, choose External Control to enable your controller.
You're ready to start using your controller.
• Turn each knob on your controller and notice that turning knob 1 adjusts the volume (trim) of track 1, turning
knob 2 adjusts the volume of track 2, and so on.
• Press the button that you assigned to scroll the channel bank down in step 8.
Turn each knob on your controller and notice that turning knob 1 now adjusts the volume (trim) of track 9,
turning knob 2 adjusts the volume of track 10, and so on.
• Press the button that you assigned to scroll the channel bank up in step 8 so you can control tracks 1-8 again.
• Press the button that you assigned to toggle automation mode in step 11.
Select the Automation Settings button on each track to enable automation recording.
Start playback, and turn each knob on your controller, and notice that turning knob 1 records volume
automation on track 1, turning knob 2 records automation on track 2, and so on. For more information, see
Automation recording modes on page 136.
• Press the automation mode toggle button once more, and you can use the knobs to adjust track trim levels
again.

APPENDIX C | 261
Appendix
C
ACID Tips and Tricks
The following sections contain some time-saving tips and creative suggestions for building ACID® projects.
Adding long media files quickly
You can paint an entire CD track or MIDI file on an ACID track with a single click.
1.
Add a long file such as a CD track or MIDI file to your ACID project. For more information, see Adding media to the
project on page 37.
2.
Click the Paint Tool button ( ). The Paint tool is selected.
3.
Press Ctrl and click in the track. The entire file is painted onto the track at the position you clicked.
Playing with duplicate tracks
You can duplicate a track in your ACID project and then use the new track to create some interesting effects.
Detuning paired tracks
Detuning a paired track is a quick and easy way to thicken an audio track without adding the additional processing of
effects. This trick works extremely well with synths, pads, strings and ambient sounds, but you can also experiment with it
to add body to drums, basses, and horns.
1.
Right-click a track and choose Duplicate Track from the shortcut menu. A copy of the track is added to the track list.
The new track is the currently selected track.
2.
Use the + (plus) and - (minus) keys on your numeric keypad to change the pitch of the duplicated track.
Octave intervals (e.g., +12, -12, -24) typically sound best when working with pitched audio; however, experimenting
with other, less ordinary intervals may produce surprising results. When working with non-pitched audio, intervals
do not matter, thereby allowing you to freely experiment with radical pitch shifting.
This technique typically works best when tuning the duplicate track to a lower octave than the original track, but you
can also experiment with raising the pitch of the duplicate track.
Panning in conjunction with detuning
Few things are as uninteresting as a series of tracks panned down the middle of a stereo image. Particularly after
detuning a paired track, you should experiment with spatially positioning the tracks using the panning control (on the
multipurpose slider) or a pan envelope. Panning each track to a specific channel produces a nice, wide aural effect. If you
are looking for something a little more dynamic, position the original track anywhere in the stereo image and use a pan
envelope to sweep the duplicate track from the left channel to the right channel of the mix. For more information, see
Using track automation envelopes on page 113.
Note:
In a Beatmapped track, the file is painted starting from the location you identified as the downbeat. If the file
contains pick-up notes, drag the left edge of the event to reveal audio before the downbeat.
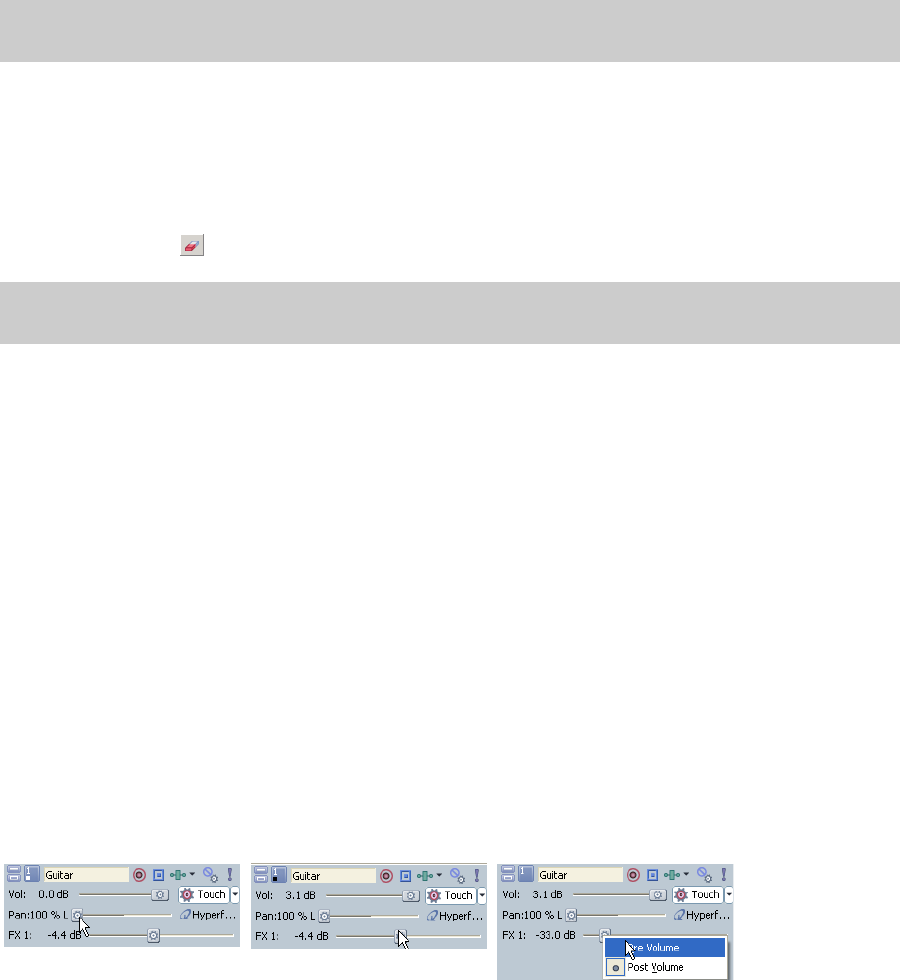
262 | APPENDIX C
Duplicating with offset
Another way to add interesting dynamics to a project is to duplicate tracks and add an offset to one of the pair. This trick
works well with most instrument loops and allows you to create different levels of effect. For example:
• Configuring a slight offset between duplicate tracks creates a natural chorus effect.
• Configuring small offsets creates various reverb effects.
• Configuring larger offsets creates interesting echoes.
1.
Right-click a track and choose Duplicate Track from the shortcut menu. A copy of the track is added to the track list.
2.
Hold Alt while dragging the waveform of the duplicate track. Notice that the waveform moves within the event,
which retains its size and position on the timeline.
3.
Experiment with different offsets between the duplicate tracks.
Creating ping-pong pan effects
You can use a pair of tracks to ping-pong audio from one speaker to another.
1.
Right-click a track and choose Duplicate Track from the shortcut menu. A copy of the track is added to the track list.
2.
Use the multipurpose slider to pan the original track 100% right and the duplicate track 100% left.
3.
Use the Erase tool ( ) to erase every other beat, alternating between the original and duplicate track.
Adding depth with assignable effects
You can add depth to your mix by panning a dry signal (no effects) to one side and a wet signal (with effects such as
chorus or reverb) to the other. You can pan the dry and wet signals by adding an assignable effects chain to your project.
1.
Add an assignable effects chain containing an effect such as chorus or reverb to your project. For more information,
see Adding assignable effect controls on page 142.
2.
Press B to view bus tracks. For more information, see Automating mixer controls in track view on page 152.
3.
Right-click the bus track for the assignable effect control, choose Insert/Remove Envelope from the shortcut menu,
and choose Pan from the submenu. A pan envelope appears on the bus track.
4.
Drag the envelope down to 100% right.
5.
Use the multipurpose slider (on the track to which you want to apply the effect) to make three changes:
• Pan the track 100% left.
• Set the assignable effect send to approximately the same volume as the track.
• Set the assignable effect send to Pre Volume.
Preview the effect. The dry signal is panned to the left, and the wet signal (with the chorus or reverb effect) is panned
to the right.
Tip:
As with most tricks, this method can be combined with pan and volume envelopes to produce an unlimited range of
effects.
Tip:
You can also use a pan envelope on a single track to create the same effect. For more information, see Using track
envelopes on page 122.
Pan the track hard left... ...match the assignable effect
send level to the track volume...
...and set the assignable effect send to
Pre Volume

APPENDIX C | 263
Playing double time/half time
You can also produce interesting effects by misinforming ACID regarding the number of beats in a file. Configuring a file
with half its actual number of beats results in double-time playback. This is an easy way to add speed metal drum tracks
to your project. This technique is also useful for adding a kick drum on every beat to producing a heavy dance
foundation. Conversely, configuring a file with twice its actual number of beats results in half-time playback.
1.
Right-click the desired track in the track list and choose Clip Properties from the shortcut menu. The Clip Properties
window appears.
2.
Click the Stretch tab.
3.
Change the value in the Number of beats box.
Constructing the wall of sound
As mentioned previously, it is sometimes preferable to color and thicken mixes without resorting to effects and other
digital processing. Working without the benefit of multitrack recording, music producer Phil Spector colored his songs by
having several instruments play slightly different parts. For example, he might have an acoustic bass, an electric bass, and
a piano play slight variations on the same basic riffs. These variations, along with the different timbre of the actual
instruments, produced a dense sonic mass that became known as The Wall of Sound.
• To add this aural density to your projects, experiment with using two, three, or even four tracks of similar
instrumentation.
• Alter the pitch of specific tracks to help them cut through the mix. For more information, see Changing a clip’s key
on page 98.
• Further differentiate specific tracks using pan and volume envelopes to color the project and simulate live
performance. For more information, see Using track automation envelopes on page 113.
• Make the effects even more pronounced by setting a start offset within specific individual events. For more
information, see Changing event properties on page 70.
Adding through subtraction
You can create dynamics by removing sections of events. You can erase sections of events from a project by using the
Erase ( ) tool.
To demonstrate using subtractive arranging, add three or four similar drum loops to a project. Use the Erase tool to delete
specific sections of each event. For example, erase all snares from one track, all basses from another, high hats from the
third, and so on. This results in a tighter, more realistic drum sound for your project.
Experiment with taking this technique a step further and randomly remove sections from each track. When doing this,
remember to keep at least one of the drum tracks playing at all times, unless you want the drums to completely drop out
of the mix. Randomly removing sections of events adds realism to your projects by approximating how a drummer plays
with slight variations throughout a song.
Tweaking the dynamics
You can use several techniques to adjust the dynamics of your mix.
Fading in and out of mixes
With bus tracks, you can use a volume envelope to fade in and out of the entire project.
1.
Press B to view bus tracks. For more information, see Automating mixer controls in track view on page 152.
2.
Select the Master bus track and press Shift+V to add a volume envelope.
3.
Add and adjust envelope points to fade into and out of the project. For more information, see Choosing stereo pan
types on page 113.
264 | APPENDIX C
Adding build ups
If you are attempting to build projects that escape the perceived limitations of computer-generated loop-based music,
you should concentrate on reproducing the subtle (and not so subtle) dynamics associated with live instrumentation.
One of the simplest, but most effective examples of this is the build up. When musicians play live, there is a tendency to
increase dynamics as a song enters a chorus or refrain. Think of how a drummer uses accents, drum rolls, and fills that
steadily increase in volume to enter a song or indicate an approaching change from verse to chorus or chorus to bridge.
This effect is easily reproduced by adding a volume envelope to the track. Add points at the various drum beats and
adjust them so that the volume steadily increases. For more information, see Adding volume or pan envelopes on page 128.
Creating wah-wah effects with automated Track EQ
You can use the automatable Track EQ effect to create a custom wah-wah effect on a track. The example below provides
sample values to use in the Track EQ plug-in, but you can adjust the settings to suit your taste.
1.
Click the Track FX button ( ) on the track to which you want to add the effect. The Audio Plug-In window appears.
2.
Adjust the settings for band 1 as follows:
• Frequency: 20,000
• Gain: -14.9
• Rolloff: 24
3.
Adjust the settings for band two as follows:
•Gain: 15
• Bandwidth: 0.9
4.
Click the FX Automation button ( ). The FX Automation Chooser dialog appears.
5.
Select the Band2 Frequency check box and click OK. An effect automation envelope appears on the track.
6.
Add points to the envelope so that the Band2 Frequency parameter oscillates between about 100 Hz and 3000 Hz.
For more information, see Choosing stereo pan types on page 113.
Making automated changes more stark
ACID envelopes allow you to change settings for a variety of features over time. While you may often use envelopes to
transition smoothly from one setting to another, you can also create interesting effects by making stark changes between
settings.
Abruptly changing volume or pan
By holding its setting until the next envelope point, the hold fade curve allows you to use volume and pan envelopes to
make abrupt changes. For more information, see Changing envelope fade curves on page 134.
1.
Select a track and press Shift+V (volume) or Shift+P (pan) to add an envelope.
2.
Click the Envelope Tool button ( ) to select the envelope tool.
3.
Right-click the first point on the envelope and choose Hold from the shortcut menu.
4.
Add several more points by double-clicking the envelope. Note that each new point also has the hold fade curve.
5.
Set each point to a different level. For more information, see Adjusting individual envelope points on page 133.
You can repeat the pattern by copying and pasting the envelope points repeatedly. For more information, see Cutting,
copying, and pasting envelope points on page 134.
Tip:
You can also use this technique on a bus track. For more information, see Automating mixer controls in track view on
page 152.

APPENDIX C | 265
Turning automated effects on and off
You can use effect automation envelopes to change effect settings over time, but you can create a simple, dramatic effect
by simply automating whether the effect is processed (on) or bypassed (off).
1.
Add an automatable effect to a track and adjust the effect’s parameters to your liking. For more information, see Using
track effects on page 110.
2.
In the Audio Plug-In window, click the FX Automation button ( ) to display the FX Automation Chooser.
3.
Click the automatable plug-in at the top of the FX Automation Chooser. A list of the effect's automatable parameters
appears.
4.
Select the Bypass check box and click OK. An envelope for the Bypass parameter of the effect appears on the track.
5.
Add multiple points to the envelope. For more information, see Adding envelope points on page 132.
6.
Adjust the envelope points to alternate between bypassing the effect (Bypass=True) and processing the effect
(Bypass=False). For more information, see Adjusting individual envelope points on page 133.
Preview the effect. The track alternates cleanly between processing the effect and bypassing the effect. You can
repeat the pattern by copying and pasting the envelope points repeatedly. For more information, see Cutting, copying,
and pasting envelope points on page 134.
Making automated frequency changes more natural
When you automate an effect’s frequency parameters, such as the frequency parameters in the track EQ effect, you may
notice that the frequency changes are more apparent moving through the lower frequencies than the higher
frequencies. Without getting too technical, frequency scales in track EQ and other plug-ins use a logarithmic scale instead
of a linear scale. Since effect automation uses linear interpolation, an effect’s automated frequency parameter will sound
as if it sweeps through the lower frequencies faster than the high frequencies. You can visualize this if you watch the plug-
in settings in the Audio Plug-In window during automated effect playback.
To make automated frequency changes sound more natural, use envelope fade curves to change the rate at which
interpolation happens between two envelope points. For a high-to-low frequency sweep, use a fast fade curve between
points, and for a low-to-high frequency sweep, use a slow curve. Although the fast and slow curves are not logarithmic
curves, they are similar enough to make the frequency transitions sound more even. For more information, see Changing
envelope fade curves on page 134.
Overriding compress/expand
One of the most powerful features of the software is its ability to compress or expand a loop while maintaining the loop’s
original pitch. However, you can override this feature in order to produce specific effects in your projects.
1.
Right-click an event and choose Clip Properties from the shortcut menu.
2.
Click the Stretch tab.
3.
From the Stretching method drop-down list, choose Pitch shift segments. The clip’s pitch will change in relation to
the tempo of the project.
While this may seem like just a way of producing old-school effects, it actually has practical applications as well. For
example, specifying Pitch shift segments can actually improve the fidelity of drum loops recorded at a tempo near the
project tempo. In addition, overriding the compress/expand feature allows you to create great bass grooves by slowing
drum loops.
266 | APPENDIX C
Slicing and dicing in the Chopper
You can use the Chopper™ to add creative slice-and-dice effects to your ACID project.
Chopping new loops for alternate time signatures
The Chopper makes it easy to clone a new loop from a song or sample. This feature can be particularly handy when you
want to create a loop for a different time signature. In this example, you’ll create a 3/4 pattern from a 4/4 loop.
1.
Set the project time signature to 3/4. For more information, see Changing project time signature on page 96.
2.
Place a 4/4 loop file in the Chopper. For more information, see Placing files in the Chopper on page 102.
3.
Select a three-beat section of audio to be used for the new loop. Use the Chopper’s transport bar to preview the new
loop.
4.
Right-click the selection and choose Chop to New Track from the shortcut menu. Alternately, press Ctrl+M. The
Chop to New Track dialog appears.
5.
Complete the information in the Chop to New Track dialog and click Save.
The selection is saved and the file is added as a 3/4 loop to a new track in the project. For more information, see Saving
Chopper selections as new files on page 105.
Chopping multiple files into a new loop
Want to combine short segments of several loops into a new loop? You can use the Chopper to chop segments from
several files into new loops and then combine the new loops into a single loop.
1.
Place a file in the Chopper. For more information, see Placing files in the Chopper on page 102.
2.
Select audio in the Chopper and press Ctrl+M to chop the audio to a new loop.
3.
Repeat steps one and two for as many loop segments as you want.
4.
Draw events on the new tracks to create a new melodic or rhythmic pattern.
5.
Select the new tracks and from the Tools menu, choose Render to New Track to render the tracks to a single track.
The Render to New Track dialog appears.
6.
Complete the information in the Render to New Track dialog and click Save. For more information, see Mixing multiple
tracks to a single track on page 125.
The new composite loop is saved and adds it to your project as a new track.
Creating drum-roll build ups
1.
Place a file in the Chopper. For more information, see Placing files in the Chopper on page 102.
2.
Create a one-measure selection. For more information, see Creating selections of a specific musical length on page 103.
3.
Click the Insert Selection button ( ) once. The selection is pasted to the track view.
4.
Click the Halve Selection button ( ). This decreases the selected portion of the waveform by half.
5.
Click Insert Selection button ( ) twice.
6.
Click the Halve Selection button ( ).
7.
Continue to double the number of inserts after each halving of the selection until you achieve the desired drum roll
effect.
Tip:
You can also drag a selection from the Chopper to the track list.
APPENDIX C | 267
Creating drum fills
1.
Place a file in the Chopper.
2.
Create an eighth-note (or other length) selection of a drum track in the Chopper.
3.
Click the Insert Selection button ( ).
4.
Use the Shift Selection Left ( ) and Shift Selection Right ( ) buttons to move the selection randomly through
the drum track, clicking the Insert Selection button ( ) to insert drum hits.
Creating one-track remixes
1.
Place a Beatmapped track in the Chopper. For more information, see Using the Beatmapper on page 114.
2.
Create a selection in the Chopper.
3.
Click the Insert Selection button ( ) twice.
4.
Use the Shift Selection Right button ( ) to move through the track, clicking the Insert Selection button ( )
as desired to insert events.
Creating pseudo-granular synthesis
1.
Create a sixty-fourth note (or shorter) selection in the Chopper.
2.
Click the Insert Selection button ( ).
3.
Use the Shift Selection Left ( ) and Shift Selection Right ( ) buttons to move the selection randomly through
the track, clicking the Insert Selection button ( ) to insert events.
Building instrument solos
The previous section described an extended technique to create challenging rhythmic variations in your projects. You
can use a slightly different version of the slice-and-dice technique to build instrument solos for your projects. To
demonstrate this, let’s start with an event containing a simple bass riff.
1.
Slice and dice the file in the Chopper to create new riffs and add them to the project. For more information, see Using
the Chopper on page 101.
2.
Use the pitch shifting to transpose some of the new events. For more information, see Changing an event’s key on page
98.
3.
Apply volume envelopes to simulate the varying attacks associated with live soloing. For more information, see
Adding volume or pan envelopes on page 128.
4.
Use tempo/key/time signature change markers to create passages with tempos that deviate from the project tempo.
For more information, see Working with tempo/key/time signature change markers on page 97.
Building scales
Though it is well outside the intended scope of the application, you can build unique scales from audio loops. To do this,
you must first isolate a note and determine what pitch it is. You can easily do this using the Spectrum Analysis tool in
Sound Forge®. Once you isolate and identify the note, choose Save As from the File menu in Sound Forge to save the note
as a new WAV file with a unique name. Finally, add the file to the ACID project and use pitch shifting to create all
remaining notes in the scale.
268 | APPENDIX C

APPENDIX D | 269
Appendix
D
Glossary
The glossary contains terms and their definitions that you may come across in the manual. This glossary not only includes
terms associated with ACID® software, but also includes relevant industry terms.
.acd-zip An ACID project file that contains all information regarding the project including track
layout, envelope settings, and effects parameters. In addition, all audio files used in the
project are embedded into the project file.
Activation Code This number is based on the Computer ID number of the computer on which the software
is installed. Each computer has a unique number, similar to a license plate. When you
register your copy of the software, Sony generates an activation code for you based on
the Computer ID number. Once you enter the activation code, the ACID application will
not time out. Since the activation number is based on the Computer ID, it is important
that you have the software installed on the computer where you will be using it.
Adaptive Delta Pulse
Code Modulation
(ADPCM)
A method of compressing audio data. Although the theory for compression using ADPCM
is standard, there are many different algorithms employed. For example, Microsoft's
ADPCM algorithm is not compatible with the International Multimedia Association’s (IMA)
approved ADPCM.
Advanced Streaming
Format (ASF)
See Windows Media® Format.
Aliasing A type of distortion that occurs when digitally recording high frequencies with a low
sample rate. For example, in a motion picture, when a car's wheels appear to slowly spin
backward while the car is quickly moving forward, you are seeing the effects of aliasing.
Similarly, when you try to record a frequency greater than one half of the sampling rate
(the Nyquist Frequency), instead of hearing a high pitch, you may hear a low-frequency
rumble.
To prevent aliasing, an anti-aliasing filter is used to remove high-frequencies before
recording. Once the sound has been recorded, aliasing distortion is impossible to remove
without also removing other frequencies from the sound. This same anti-aliasing filter
must be applied when resampling to a lower sample rate.
ASIO ASIO™ (Audio Stream In/Out) is a low-latency driver model developed by Steinberg Media
Technologies AG.
ASX File ASF Stream Redirector file. See Redirector File.
Attack The attack of a sound is the initial portion of the sound. Percussive sounds (drums, piano,
guitar plucks) are said to have a fast attack. This means that the sound reaches its
maximum amplitude in a very short time. Sounds that slowly swell up in volume (soft
strings and wind sounds) are said to have a slow attack.
Attenuation A decrease in the level of a signal.
Audio Compression
Manager (ACM)
The Audio Compression Manager from Microsoft® is a standard interface for audio
compression and signal processing for Microsoft Windows. The ACM can be used by
Windows programs to compress and decompress WAV files.
Audio Interchange File
Format (AIFF)
An audio file format developed by Apple®.
Audio Proxy File (.sfap0) See Proxy File.
Bandwidth When discussing audio equalization, each frequency band has a width associated with it
that determines the range of frequencies that are affected by the EQ. An EQ band with a
wide bandwidth affects a wider range of frequencies than one with a narrow bandwidth.
When discussing network connections, refers to the rate of signals transmitted; the
amount of data that can be transmitted in a fixed amount of time (stated in bits/second): a
56 Kbps network connection is capable of receiving 56,000 bits of data per second.
Beatmapped track A file that has tempo information added to it as a result of going through the
Beatmapper® Wizard.

270 | APPENDIX D
Beats Per Minute (BPM) The tempo of a piece of music can be written as a number of beats in one minute. If the
tempo is 60 BPM, a single beat occurs once every second.
Bit The most elementary unit in digital systems. Its value can only be 1 or 0, corresponding to
a voltage in an electronic circuit. Bits are used to represent values in the binary numbering
system. As an example, the 8-bit binary number 10011010 represents the unsigned value
of 154 in the decimal system. In digital sampling, a binary number is used to store
individual sound levels, called samples.
Bit Depth The number of bits used to represent a single sample. For example, 8- or 16-bit are
common sample sizes. While 8-bit samples take up less memory (and hard disk space),
they are inherently noisier than 16-bit samples.
Buffer Memory used as an intermediate repository in which data is temporarily held while
waiting to be transferred between two locations. A buffer ensures an uninterrupted flow
of data between computers. Media players may need to rebuffer when there is network
congestion.
Bus A virtual pathway where signals from tracks and effects are mixed. A bus's output can be a
physical audio device in the computer from which the signal is heard.
Byte Refers to a set of 8 bits. An 8-bit sample requires one byte of memory to store, while a 16-
bit sample takes two bytes of memory to store.
Clipboard The clipboard is the location where data cut or copied from ACID is stored. You can then
paste the data back into the software at a different location.
Clipping Occurs when the amplitude of a sound is above the maximum allowed recording level. In
digital systems, clipping is seen as a clamping of the data to a maximum value, such as
32,767 in 16-bit data. Clipping causes sound to distort.
Codec Coder/decoder: refers to any technology for compressing and decompressing data. The
term codec can refer to software, hardware, or a combination of both technologies.
Compression Ratio
(audio)
A compression ratio controls the ratio of input to output levels above a specific threshold.
This ratio determines how much a signal has to rise above the threshold for every 1 dB of
increase in the output. For example, with a ratio of 3:1, the input level must increase by
three decibels to produce a one-decibel output-level increase:
Threshold = -10 dB
Compression Ratio = 3:1
Input = -7 dB
Output = -9 dB
Because the input is 3 dB louder than the threshold and the compression ratio is 3:1, the
resulting signal is 1 dB louder than the threshold.
Compression Ratio
(file size)
The ratio of the size of the original noncompressed file to the compressed contents. For
example, a 3:1 compression ratio means that the compressed file is one-third the size of
the original.
Computer ID Each computer has a unique number, similar to a license plate. Sony creates an activation
number based on that number. Since the activation number is based on the Computer ID,
it is important that you have the ACID application installed on the computer where you
will be using it. The Computer ID is automatically detected and provided to you when you
complete the installation process.
The Computer ID is used for registration purposes only. It doesn't give Sony access to any
personal information and can't be used for any purpose other than for generating a
unique activation number for you to use the software.
Crossfade Mixing two pieces of audio by fading one out as the other fades in.
DC Offset DC offset occurs when hardware, such as a sound card, adds DC current to a recorded
audio signal. This current results in a recorded wave that is not centered around the zero
baseline. Glitches and other unexpected results can occur when sound effects are applied
to files that contain DC offsets.

APPENDIX D | 271
Decibel (dB) A unit used to represent a ratio between two numbers using a logarithmic scale. For
example, when comparing the numbers 14 and 7, you could say 14 is two times greater
than the number 7; or you could say 14 is 6 dB greater than the number 7. Where did we
pull that 6 dB from? Engineers use the equation dB = 20 x log (V1/V2) when comparing
two instantaneous values. Decibels are commonly used when dealing with sound
because the ear perceives loudness in a logarithmic scale.
In ACID, most measurements are given in decibels. For example, if you want to double the
amplitude of a sound, you apply a 6 dB gain. A sample value of 32,767 (maximum positive
sample value for 16-bit sound) can be referred to as having a value of 0 dB. Likewise, a
sample value of 16,384 can be referred to having a value of -6 dB.
Device Driver A program that enables Windows to connect different hardware and software. For
example, a sound card device driver is used by Windows software to control sound card
recording and playback.
Digital Rights
Management (DRM)
A system for delivering songs, videos, and other media over the Internet in a file format
that protects copyrighted material. Current proposals include some form of certificates
that validate copyright ownership and restrict unauthorized redistribution.
Digital Signal Processing
(DSP)
A general term describing anything that alters digital data. Signal processors have existed
for a very long time (tone controls, distortion boxes, wah-wah pedals) in the analog
(electrical) domain. Digital Signal Processors alter the data after it has been digitized by
using a combination of programming and mathematical techniques. DSP techniques are
used to perform many effects such as equalization and reverb simulation.
Since most DSP is performed with simple arithmetic operations (additions and
multiplications), both your computer's processor and specialized DSP chips can be used
to perform any DSP operation. The difference is that DSP chips are optimized specifically
for mathematical functions while your computer's microprocessor is not. This results in a
difference in processing speed.
DirectX A set of Application Program Interfaces designed by Microsoft for multimedia
development. A DirectX® plug-in, such as the Sony Noise Reduction™ DirectX Plug-In,
uses the DirectX Media Streaming Services (DMSS) API. Because DMSS is a standard API, a
DirectX plug-in can be used in any application that supports DMSS.
Downbeat This term is used in the Beatmapper to refer to the first beat of the first measure.
Downloadable Sound
(DLS)
A DLS file stores a custom sound set that you can load into your soft synth, giving you
another set of voices for MIDI playback.
Drag and Drop A quick way to perform certain operations using the mouse. To drag and drop, you click
and hold an item, drag it (hold the left mouse button down and move the mouse) and
drop it (let go of the mouse button) at another position on the screen.
Dynamic Range The difference between the maximum and minimum signal levels. It can refer to a musical
performance (high-volume vs. low-volume signals) or to electrical equipment (peak level
before distortion vs. noise floor). For example, orchestral music has a wide dynamic range,
while thrash metal has a very small (always loud) range.
Envelopes Envelopes allow you to automate the change of a certain parameter over time. In the case
of volume, you can create a fade out (which requires a change over time) by adding an
envelope and creating a point in the line to indicate where the fade starts. Then you pull
the end point of the envelope down to -inf.
Equalization (EQ) Equalizing a sound file is a process by which certain frequency bands are raised or
lowered in level. EQ has various uses. The most common use for ACID users is to simply
adjust the subjective timbral qualities of a sound.
Event An instance of a media file on a track. An event may play an entire media file or a portion
of the file.
File Format A file format specifies the way in which data is stored. In Windows, the most common
audio file format is the Microsoft WAV format.
Frame Rate Audio uses frame rates only for the purposes of synching to video or other audio. To
synchronize with audio, a rate of 30 fps (frames per second) is typically used. To
synchronize with video, 29.97 fps drop is usually used.

272 | APPENDIX D
Frequency Spectrum The frequency spectrum of a signal refers to its range of frequencies. In audio, the
frequency range is basically 20 Hz to 20,000 Hz. The frequency spectrum sometimes refers
to the distribution of these frequencies. For example, bass-heavy sounds have a large
frequency content in the low end (20 Hz-200 Hz) of the spectrum.
Groove A groove refers to the rhythmic pattern of a piece of music. By deviating from a machine-
quantized beat, individual beats may be played early or late to change the feel of the
music. Applying a groove can simulate the timing patterns of human musicians, lending a
human feel to MIDI-generated music or quantizing several distinct pieces of music to a
common timing.
Hertz (Hz) The unit of measurement for frequency or cycles per second (CPS).
In-place plug-in An in-place plug-in processes audio data so that the output length always matches the
input length. A non-in-place plug-in's output length need not match a given input length
at any time: for example, Time Stretch, Gapper/Snipper, Pitch-Shift (without preserving
duration), and some Vibrato settings can create an output that is longer or shorter than
the input.
Plug-ins that generate tails when there is no more input but otherwise operate in-place
(such as reverb and delay) are considered in-place plug-ins.
Insert Increment Sections of silence between selections that you can create using the Chopper and insert
into the track view.
Insertion Point The insertion point (also referred to as the cursor position) is analogous to the cursor in a
word processor. It is where markers or commands may be inserted depending on the
operation. The insertion point appears as a vertical flashing black line and can be moved
by clicking the left mouse button anywhere in the track view.
Loop Loops are small audio clips that are designed to create a repeating beat or pattern. Loops
are usually one to four measures long and are stored completely in RAM for playback.
Marker A marker is an anchored, accessible reference point in a file.
MIDI Channel An informational pathway over which MIDI data can travel.
Media Control Interface
(MCI)
A standard way for Windows programs to communicate with multimedia devices such as
sound cards and CD players. If a device has an MCI device driver, it can easily be controlled
by most multimedia Windows software.
Media File Files that may be placed within the ACID project. After a media file is placed into the
project, it is referred to as an event.
MIDI Clock A MIDI device-specific timing reference. MIDI Clock is not absolute time like MIDI
timecode (MTC); instead it is a tempo-dependent number of ticks per quarter note. MIDI
clock is convenient for synchronizing devices that need to perform tempo changes mid-
song. MIDI clock out is supported, but MIDI clock in is not.
MIDI Port A MIDI port is the physical MIDI connection on a piece of MIDI hardware. This port can be
a MIDI in, out or through. Your computer must have a MIDI-capable card to output MIDI
timecode to an external device or to receive MIDI timecode from an external device.
MIDI Timecode (MTC) MTC is an addendum to the MIDI 1.0 specification and provides a way to specify absolute
time for synchronizing MIDI-capable applications. MTC is essentially a MIDI representation
of SMPTE timecode.
Multiple-Bit-Rate
Encoding
Multiple-bit-rate encoding (also known as Intelligent Streaming for the Windows Media
platform and SureStream™ for the RealMedia™ G2 platform) allows you to create a single
file that contains streams for several bit rates. A multiple-bit-rate file can accommodate
users with different Internet connection speeds, or these files can automatically change to
a different bit rate to compensate for network congestion without interrupting playback.
To take advantage of multiple-bit-rate encoding, you must publish your media files to a
Windows Media server or a RealServerG2.
Musical Instrument
Device Interface (MIDI)
A standard language of control messages that provides for communication between any
MIDI-compliant devices. Anything from synthesizers to lights to factory equipment can be
controlled via MIDI.

APPENDIX D | 273
Normalize Refers to raising the volume so that the highest level sample in the file reaches a user
defined level. Use normalization to make sure you are using all of the dynamic range
available to you.
Nyquist Frequency The Nyquist Frequency (or Nyquist Rate) is one half of the sample rate and represents the
highest frequency that can be recorded using the sample rate without aliasing. For
example, the Nyquist Frequency of 44,100 Hz is 22,050 Hz. Any frequencies higher than
22,050 Hz produce aliasing distortion in the sample if no anti-aliasing filter is used while
recording.
Offline Media A media file that cannot be located on the computer. If you choose to leave the media
offline, you can continue to edit events on the track; the events point to the original
location of the source media file.
One-Shot One-shots are chunks of audio that are not designed to loop, and they are streamed from
the hard disk rather than stored in RAM if they are longer than three seconds. Things such
as cymbal crashes and sound bites could be considered one-shots.
Unlike loops, one-shots do not change pitch or tempo with the rest of a project.
OPT Plug-In A plug-in that uses the Open Plug-in Technology (OPT) standard from Yamaha. OPT plug-
ins provide tools for working with MIDI such as edit views, effect processors and filters,
arpeggiators, and real-time panel automation.
Pan To place a mono or stereo sound source perceptually between two or more speakers.
Peak Data File The file created when a media file is opened for the first time. This file stores the
information regarding the graphic display of the waveform so that opening a file is almost
instantaneous. This file is stored in the directory where the audio file resides and has a .sfk
extension. If this file is not in the same directory as the audio file or is deleted, it is
recalculated the next time you open the file.
Proxy File Working with certain types of media files with particular audio compression schemes can
be inefficient and slow. To compensate for this, audio proxy files are created for these
formats to dramatically increase speed and performance.
The file is saved as a proprietary .sfap0 file, with the same name as the original media file
and the same characteristics as the original audio stream. The conversion happens
automatically and does not result in a loss of quality or synchronization. You can safely
delete audio proxy files at any time since these files are recreated as needed.
Pulse Code Modulation
(PCM)
PCM is the most common representation of uncompressed audio signals. This method of
coding yields the highest fidelity possible when using digital storage. PCM is the standard
format for WAV and AIFF files.
Quantization The correction of rhythms to align with selected note lengths or beats in a MIDI sequence.
Real-Time Streaming
Protocol (RTSP)
A proposed standard for controlling broadcast of streaming media. RTSP was submitted
by a body of companies including RealNetworks and Netscape®.
Redirector File A metafile that provides information to a media player about streaming media files. To
start a streaming media presentation, a Web page includes a link to a redirector file.
Linking to a redirector file allows a file to stream; if you link to the media file, it downloads
before playback.
Windows Media redirector files use the .asx or .wax extension; RealMedia redirector files
use the .ram, .rpm, or .smi extension.
Region A region is a section of time used to subdivide your project into segments.
Rendering The process in which the project is saved to a specific file format like WMA or MP3.
Resample The act of recalculating samples in a sound file at a different rate than the file was
originally recorded. If a sample is resampled at a lower rate, sample points are removed
from the sound file, decreasing its size, but also decreasing its available frequency range.
Resampling to a higher sample rate, extra sample points are interpolated in the sound file.
This increases the size of the sound file, but does not increase the quality. When down-
sampling, one must be aware of aliasing.

274 | APPENDIX D
Sample The word sample is used in many different (and often confusing) ways when talking about
digital sound. Here are some of the different meanings:
A discrete point in time which a sound signal is divided into when digitizing. For example,
an audio CD-ROM contains 44,100 samples per second. Each sample is really only a
number that contains the amplitude value of a waveform measured over time.
A sound that has been recorded in a digital format; used by musicians who make short
recordings of musical instruments to be used for composition and performance of music
or sound effects. These recordings are called samples. In this manual, we try to use sound
file instead of sample whenever referring to a digital recording.
The act of recording sound digitally, i.e., to sample an instrument means to digitize and
store it.
Sample Rate The sample rate (also referred to as the sampling rate or sampling frequency) is the
number of samples per second used to store a sound. High sample rates, such as
44,100 Hz provide higher fidelity than lower sample rates, such as 11,025 Hz. However,
more storage space is required when using higher sample rates.
Sample Size See Bit Depth.
Sample Value The sample value (also referred to as sample amplitude) is the number stored by a single
sample. In 16-bit audio, these values range from -32768 to 32767. In 8-bit audio, they
range from -128 to 127. The maximum allowed sample value is often referred to as 100%
or 0 dB.
Secure Digital Music
Initiative (SDMI)
The Secure Digital Music Initiative (SDMI) is a consortium of recording industry and
technology companies organized to develop standards for the secure distribution of
digital music. The SDMI specification was created to answer consumer demand for
convenient accessibility to quality digital music, enable copyright protection for artists'
work, and enable technology and music companies to build successful businesses.
Shortcut Menu A context-sensitive menu that appears when you right-click certain areas of the screen.
The functions available in the shortcut menu depend on the object being right-clicked as
well as the state of the program. As with any menu, you can choose an item from the
shortcut menu to perform an operation. Shortcut menus are used frequently for quick
access to many commands.
Signal-to-Noise Ratio The signal-to-noise ratio (SNR) is a measurement of the difference between a recorded
signal and noise levels. A high SNR is always the goal.
The maximum signal-to-noise ratio of digital audio is determined by the number of bits
per sample. In 16-bit audio, the signal to noise ratio is 96 dB, while in 8-bit audio the ratio
is 48 dB. However, in practice this SNR is never achieved, especially when using low-end
electronics.
Society of Motion
Picture and Television
Engineers (SMPTE)
SMPTE timecode is used to synchronize time between devices. The timecode is formatted
as hours:minutes:second:frames, where frames are fractions of a second based on the
frame rate. Frame rates for SMPTE timecode are 24, 25, 29.97 and 30 frames per second.
Soft Synth A soft synth is a software-based synthesizer. Downloadable Sounds (DLS) and Virtual
Studio Technology Instruments (VSTi) are two types of soft synths.
You add a soft synth control in the Mixer window for each software synthesizer you want
to use in a project.
Streaming A method of data transfer in which a file is played while it is downloading. Streaming
technologies allow Internet users to receive data as a steady, continuous stream after a
brief buffering period. Without streaming, users must download files completely before
playback.
Tempo Tempo is the rhythmic rate of a musical composition, usually specified in beats per minute
(BPM).
Threshold A threshold determines the level at which the signal processor begins acting on the
signal. During normalization, levels above this threshold are attenuated (cut).
Time Format The format by which the time ruler and selection times are displayed. These can include:
time, seconds, frames, and all standard SMPTE frame rates.

APPENDIX D | 275
Track A discrete timeline for audio data. Audio events sit on tracks and determine when a sound
starts and stops. Multiple audio tracks are played together to give you a composite sound
that you hear through your speakers.
Track List The track list contains the master controls for each track. From here you can adjust the
mix, select playback devices, and reorder tracks.
Track View The majority of the track view is made up of the space where you draw events on each
track.
μ-Law μ-Law (mu-Law) is a companded compression algorithm for voice signals defined by the
Geneva Recommendations (G.711). The G.711 recommendation defines μ-Law as a
method of encoding 16-bit PCM signals into a non-linear 8-bit format. The algorithm is
commonly used in European and Asian telecommunications. μ-Law is very similar to A-
Law, however, each uses a slightly different coder and decoder.
Undo/Redo These commands allow you to change a project back to a previous state or reapply
changes after you have undone them.
Virtual MIDI Router
(VMR)
A software-only router for MIDI data between programs. The VMR is used to receive MIDI
timecode and send MIDI clock. No MIDI hardware or cables are required for a VMR, so
routing can only be performed between programs running on the same PC.
VST Instrument (VSTi) A Virtual Studio Technology instrument (VSTi®) is software synthesizer plug-in technology
for outputting MIDI developed by Steinberg Media Technologies AG.
WAV A digital audio file format developed by Microsoft and IBM®. One minute of
uncompressed audio requires 10 MB of storage.
Waveform A waveform is the visual representation of wave-like phenomena, such as sound or light.
For example, when the amplitude of sound pressure is graphed over time, pressure
variations usually form a smooth waveform.
Waveform Display Each event shows a graph of the sound data waveform. The vertical axis corresponds to
the amplitude of the wave. For 16-bit sounds, the amplitude range is -32,768 to +32,767.
For 8-bit sounds, the range is -128 to +127. The horizontal axis corresponds to time, with
the leftmost point being the start of the waveform. In memory, the horizontal axis
corresponds to the number of samples from the start of the sound file.
Windows Media® Format A Microsoft® file format that can handle audio and video presentations and other data
such as scripts, URL flips, images and HTML tags. Advanced Streaming Format files can be
saved with .asf, .wma, or .wmv extensions.
276 | APPENDIX D

Index | i
Index
Numerics
5.1 Surround Plug-In Pack, 209, 220
5.1 Surround, See Surround
A
AC-3 Encoder, 209, 220
Add channels panning model, 113, 216
Adding
Assignable effects, 142
Busses, 141
Events, 41
Media to projects, 37
MIDI tracks, 163
Soft synth controls, 144
Video, 205
Adding notes, 170
Adjusting section length, 72
Adjusting the mix, 48
Anchors
Adding, 119
Deleting, 119
Moving, 119
Reset beat anchors, 119
Arming tracks to record, 156
Assignable effects, 142–144, 148–152
Adding, 142
Adjusting levels sent from tracks, 113–136
Assigning tracks to, 143
Automation, 129
Deleting, 144
Routing to busses, 143
Saving effect packages, 151
Volume envelope, 132
Assigning patchmaps, 199
Audio Clip Properties window, 115
Audio device preferences tab, 230
Audio effects
Automation, 130
Audio Plug-In window, 23, 110–113
Audio preferences tab, 230
Audio properties tab, 35
Audio signal flow, 31–32
Automatic crossfades, 66
Changing fade types, 67
Creating, 66
Automating
Effects, 113–136
Mixer controls, 152
Surround panning, 217–219
Automating VSTi parameters, 185
Automation
Adding envelope points, 132
Adding volume or pan envelopes, 128
Adjusting volume or pan settings, 128
Assignable effects automation, 129
Bus automation, 128
Drawing envelope points, 132
Editing envelopes, 132
Generic control surfaces, 259
Latch mode, 137
MIDI controller, 131
MIDI program change, 132
Modes, 136
Mute automation, 127
Recording, 137
Showing or hiding controls, 127
Thinning envelope points, 133
Touch mode, 137
Track automation, 127
Track effect automation, 130
Volume or pan, 128
B
Balance panning model, 113, 216
Beat ruler, 21
Beatmapped tracks, 41
Stretching properties, 116, 119
Beatmapper wizard, 114
Bit depth, 35
Burning CDs, 57
Bus automation, 128–129
Adding bus envelopes, 128
Adjusting bus automation levels, 129
Bus tracks, 152
Busses, 141–142, 148–152
Adding, 141
Adjusting levels sent from tracks, 113–136, 141
Assigning tracks to, 19, 141
Automating parameters, 128–129
Automation, 128
Bus send volume envelopes, 132
Deleting, 142
Panning, 214
Routing assignable effects to, 143
Routing to hardware, 141
Using effects, 149
Using the control, 148
ii | Index
C
CD
Extracting media, 38
Writing media, 57
Changing a section’s color, 73
Changing an event’s clip, 109
Changing the track color, 47
Choosing a drum map for a track, 201
Chopper, 23, 101–106
Grid, 101
Inserting increments, 103
Inserting selections from, 105
Keyboard shortcuts, 102
Markers and regions, 102
Saving selections as new files, 105
Selecting audio, 102
Snapping options, 101
Tips and tricks, 266
Using with one-shots, 106
Window, 101
Clearing all events from a section, 74
Clip properties
Adjusting for MIDI tracks, 120
Changing clip types, 116
Clip Properties window, 115, 186
Clipping, 53
Clips
Adding to tracks, 107
Changing pitch, 98
Clip Pool, 109
Copying across tracks, 108
Copying across tracks without copying events, 109
Loops, 40
One-shots, 41
Paint Clip Selector button, 20
Previewing, 109
Setting the active clip and creating events, 107
Typ e s , 40
Cloning loops, 105, 266
Command markers, 91
Configuring input filters, 179
Connecting a control surface, 241
Connecting a Mackie Control Universal, 242
Constant power panning model, 114, 216
Control surface setup, 239
Control surfaces, 241
Frontier TranzPort, 256
Generic MIDI controller, 258
Mackie Control Universal, 242
Controller envelopes, 183
Copying
Events, 61
Tracks, 47
Copying sections, 73
Creating drum maps, 200
Creating patch maps, 198
Cursor, 43–46, 226
Cutting
Events, 63
In ripple mode, 67
Tracks, 47
D
Deleting
Assignable effects, 144
Audio from a video, 205
Busses, 142
Envelope points, 133
Events, 43, 63
In ripple mode, 68
Soft synth controls, 147
Tracks, 47
Video, 205
Deleting notes, 170
Deleting sections, 73
Detuning tracks, 261
Digital multitrack setup, 156
Display preferences, 238
DLS sets
Changing patches, 145
Routing tracks to, 148, 196
Using, 145
Docking windows, 222
Downloading media from the Web, 40
Drawing events, 41
Drum grid, 168
Drum map, 168
Drum maps, 200
Duplicating tracks, 47
DVD burning, 220
E
Editing clip properties, 115
Editing drum maps, 200
Editing MIDI, 167
Editing MIDI events, 43
Editing patch maps, 199
Editing preferences tab, 234
Index | iii
Effects
Assignable, 149
Automating, 113–136
Bus, 149
Managing effects, 151
Preset Manager, 151
Project, 149
Saving plug-in packages, 112, 151
Saving presets, 111, 149
Soft synth, 149
Tra c k , 110–113
Envelopes, 132–135
Adding points, 132
Adjusting, 132
Changing fade curves, 134
Color preferences, 238
Deleting points, 133
Drawing points, 132
Envelope tool, 134
Event, 71
Flipping, 133
Mixer controls, 152
Thinning points, 133
Tra c k , 113–136
Track envelopes, 132–135
Volume (track), 132
Equipment setup for recording, 155–156
Basic, 155
Mixer, 155
With digital multitrack, 156
With MIDI option, 156
Erasing events, 43, 263
Event takes
Recording audio as new, 157
Events
Automatic crossfades, 66
Changing a clip, 109
Changing length, 43
Changing pitch, 98
Copying, 61
Copying across tracks, 108
Cutting, 63, 67
Deleting, 63, 68
Editing in ripple mode, 67
Envelopes, 71
Erasing, 43
Fading edges for offsets, 71
Fading in and out, 71
Inserting at the play cursor, 42
Joining, 66
MIDI editing, 43
Moving, 43
Painting, 41
Pasting, 61, 69
Pitch shifting, 71
Properties, 70
Recording into, 158
Reversing, 63
Sections, 72
Selecting, 44–46
Shifting the contents of, 70
Sliding, 70
Slipping, 70
Slip-trimming, 70
Snapping, 94
Splitting, 64
Start offset, 70
Trimming, 63
Volu me, 71
Explorer window, 36–38
Exporting loops, 126
Exporting MIDI, 203
External Control & Automation Preferences, 239
External devices
Playing MIDI from, 197
Routing busses to, 141
Routing MIDI tracks to, 196
Routing video to, 207
External effects
Mixing, 141
External monitor, 207
Extracting media from CD, 38
F
Faders, Mixer, 52, 148
Fading edges of events, 71
Fading in/out
Events, 71
Mixer controls, 152
Tracks, 113–136
Film panning model, 216
Filtering MIDI, 173
Filtering MIDI events
In the list editor, 192
Fitting to time, 99
Flipping envelopes, 133
Floating windows, 222
Folder tracks, 41, 124
Adding tracks, 125
Creating, 125
Editing events, 125
Muting, 125
Removing tracks, 125
Soloing, 125
Frame numbering, 205
Frontier TranzPort, 241
Adjusting panning, 257
Adjusting volume, 257
Editing input device, 257
iv | Index
Editing output device, 258
Viewing control maps, 256
G
General preferences tab, 228
Generic control surface setup, 204, 256, 258
Generic controller, 241
Generic MIDI controller
Custom control maps, 258
Loading control maps, 259
Setting up a generic control surface, 259
Getting media from the Web, 40
Glossary, 269
Go to, 44
Gracenote
Obtaining or editing CD information, 39
Grid, 223
Groove Pool window, 24
H
Hardware
Playing MIDI from, 197
Routing busses to, 141
Routing MIDI tracks to, 196
Routing surround to, 211
Routing video to, 207
Setting up for surround, 210
Help, 15
Hiding/showing
Bus tracks, 152
Toolbar, 224
Track envelopes, 135
Video tracks, 205
Windows, 221
I
Icons
Color intensity preferences, 238
Tinting preferences, 238
Increments
Creating, 104
Creating a custom musical length, 105
Creating a specific musical length, 104
Inline MIDI editing, 167
Input filters, 179
Inserting sections, 72
Inserting time, 99
Installation, 15
J
Joining events, 66
K
Key changes
Clips, 98
Event, 71, 98
Marker, 97
Project, 96
Keyboard shortcuts
Chopper window, 102
General, 24
Keyframes, 217–219
L
LFE channel, 209, 211
List editor, 191
Creating MIDI events, 195
Deleting MIDI events, 196
Editing MIDI events, 193
Filtering MIDI events, 192
MIDI event parameters, 193
MIDI notes and frequencies, 194
Previewing MIDI events, 191
Quantizing note events, 195
Undoing and redoing, 196
Locking events
To track envelopes, 135
Looped playback, 50
Loops
Clips, 40
Creating in the Chopper, 105
Exporting from projects, 126
Stretching properties, 116, 117
M
Mackie Control Universal, 204, 241
Add new buttons, 250
Arrow buttons, 255
Audio/video buttons, 252
Channel section, 246
Control buttons, 247
Display buttons, 249
Fader banks, 249
Footswitches, 247
Jog dial, 256
Markers, 250
Modifiers, 252
Project buttons, 253
Timeline, 253
Transport buttons, 254
View buttons, 251
Window buttons, 251
Main window, 17
Index | v
Markers, 89–93
Adding, 118
Beat anchors and markers for loop clips, 118
Command markers, 91
Deleting, 118
In the Chopper, 102
Marker bar, 21
Moving, 118
Reset stretching markers, 118
Stretch markers for loop clips, 118
Tempo/key/time signature markers, 97
Time markers, 90
Media files
Adding from Media Manager, 84
Adding to projects, 37
Downloading from the Web, 40
Exporting loops from projects, 126
Extracting from CD, 38
Previewing in Chopper, 101
Previewing in Explorer, 36
Reloading, 119
Replacing, 120
Resolving offline, 84
Saving track properties to, 120
Searching, 81
Tagging, 77
Media libraries
Tagging files, 77
Media library
Adding media files, 75
Backing up, 80
Creating new, 75
Opening, 75
Removing media files, 77
Media Manager, 38, 75
Adding custom columns, 86
Adding media from, 84
Automatically hiding Search pane, 85
Customizing view, 85
Moving columns, 86
Moving the Search pane, 85
Options, 86
Resizing columns, 85
Resolving offline media, 84
Searching for media files, 81
Showing/hiding columns, 86
Media Manager window, 23
Merging controller data from MIDI clips, 187
Meter resolution, 148
Metronome, 157
MIDI, 163, 198, 202
Adding notes, 170
Adding patch changes to a file, 145
Adding tracks, 163
Assigning patch maps, 199
Automating VSTi parameters, 185
Choosing a drum map for a track, 201
Configuring a soft synth for external output, 147
Configuring input filters, 179
Controller automation, 131
Controller envelopes, 183
Creating patch maps, 198
Deleting controller envelopes, 136
Deleting notes, 170
DLS sets, 196
Drum maps, 168, 200
Editing drum maps, 200
Editing events, 43
Editing patch maps, 199
Exporting files, 203
Filtering events, 173
Inline editing, 167
Input button, 19
List editor, 191
MIDI merge recording, 166
Notes and frequencies, 194
Output button, 19
Panic button, 197
Patch maps, 198
Piano roll editor, 187
Playback devices, 196
Playing a soft synth with a MIDI device, 146
Playing from external devices, 197
Preferences, 232
Processing events, 173
Program button, 19
Program change automation, 132
Program change keyframe, 184
Quantizing, 190, 195
Recording, 164
Rendering, 197
Resetting ports, 197
Routing to hardware, 196
Selecting notes, 169
Signal flow, 33–34
Soloing external MIDI inputs, 147
Step recording, 165
Sysex keyframes, 185
Timecode synchronization, 201, 202
Track envelopes and keyframes, 183
Track Properties, 176
Track properties, 176
Tracks, 41
MIDI Clip Properties window, 186
MIDI control surface setup, 204, 256, 258
MIDI merge recording, 166
MIDI merging controller data, 187
MIDI track envelopes and keyframes, 183
MIDI tracks
Adjusting clip properties for, 120
Device selection, 19
Mixer setup (external), 155
Mixer window, 51–53, 141–152
vi | Index
Automating controls, 152
Routing surround through, 211
Working with mixer controls, 148
Working with multiple controls, 151
Mixing to a single track, 125
Monitor for video editing, 207
Moving
Events, 43
Tracks, 46
Moving a section label, 73
Moving sections, 73
Multichannel MIDI files, 163
Multipurpose slider, 20, 48
Multistream MIDI files, 163
Mute automation, 127
Muting
Mixer controls, 148
Tracks, 19, 48
N
Note durations, 173
Note velocity, 173
O
Offsetting tracks, 262
One-shots
Clips, 41
Selecting in the Chopper, 106
Online help, 15
Opening
Media files, 37
Projects, 36
Other preferences tab, 238
Overview of ACID, 16
P
Packages, Saving, 112, 151
Paint Clip Selector, 20
Painting events, 41, 42
Palettes, 79
Assigning buttons, 79
Clearing buttons, 80
Creating, 79
Panic button, 197
Panning
Automation, 128
Pan types, 113, 216
Surround, 213
Tracks, 20, 48, 113–136
Panning, audio
Envelope, 132
Pasting
Events, 61
In ripple mode, 69
Tracks, 47
Patch maps, 198
Piano roll editor, 170, 187
Adding note events, 188
Continuous controller information, 189
Deleting note events, 191
Editing note events, 188
Previewing MIDI, 188
Quantizing note events, 190
Selecting note events, 190
Snap to scale, 190
Undoing and redoing, 191
Pitch shifting
Clips, 98
Events, 71, 98
Projects, 96
Playing projects, 50
Bypassing audio effects during playback, 51
Playing from the cursor position, 50
Playing the entire project, 50
Using playback options, 50
Using the transport bar, 50
Plug-In Manager window, 24
Plug-Ins, See Effects
Post-roll, 159
Preferences
Audio, 230
Audio device, 230
Display, 238
Editing, 234
Envelope colors, 238
External Control & Automation tab, 239
General, 228
MIDI, 232
Other, 238
Sync, 236
Track colors, 238
VST effects, 234
VST Instruments, 234
Pre-roll, 159
Preset Manager, 151
Presets
Managing, 151
Saving, 149
Previewing clips, 109
Previewing media
Adjusting preview volume, 52
Index | vii
Chopper window, 101
Explorer window, 36
Processing MIDI, 173
Program change keyframes, 184
Projects
Adding media, 37
Key, 96
Opening, 36
Playing, 50
Properties, 35
Publishing to the Internet, 56
Rendering, 54
Saving, 54
Starting, 35
Tempo, 96
Time signature, 96
Properties
Clip, 115, 186
Event, 70
MIDI track, 176
MIDI track, 174-180, 176
Project, 35
Tra c k , 115
Proxy file, 273
Publishing projects, 56
Creating personal accounts, 57
Uploading, 57
Punch-in, 159
Q
Quantize MIDI, 173
Quantizing MIDI
In the list editor, 195
In the piano roll editor, 190
R
Recording, 155
Arming tracks, 156
Into a time selection, 158
Into an event, 158
Into an event with time selection, 159
MIDI tracks, 164
Selecting track input devices, 157
Specifying storage folder, 160
Starting and stopping, 157
Stereo, left, right channel options, 157
Redo, 49
Series of edits, 50
Reference library, 81
Sony Sound Series Loops and Samples, 81
Regions, 93–94
In the Chopper, 102
Reloading
Media files, 119
Removing
Audio from a video, 205
Video tracks, 205
Removing a section label, 73
Renaming
Mixer controls, 52
Tracks, 47
Renaming sections, 72
Rendering
MIDI projects, 197
Projects, 54
Supported formats, 55
Surround projects, 220
To new tracks, 125
Using custom settings, 56
Reordering tracks, 46
Replacing
Media files, 120
Resetting MIDI ports, 197
Resizing
Tracks, 46
Windows, 222
Reversing events, 63
ReWire, 152
ACID as a device, 154
ACID as a mixer, 153
ReWire panel applications
Inserting as soft synth, 153
Locating for use in ACID, 153
Opening, 153
Ripping tracks from CD, 38
Ripple editing, 67
Cutting events, 67
Deleting events, 68
Pasting events, 69
Ruler offset, 223
S
Sample rate, 35
Saving
Plug-in packages, 112, 151
Presets, 149
Projects, 54
Track properties to media files, 120
Scoring video, 207
Search pane
Autohiding, 85
Automatically hiding, 85
Searching for media files
By keyword, 81
viii | Index
Media Manager, 81
Using tags, 82
Sections
Adjusting length, 72
Adjusting the length, 72
Arranging a project, 72
Changing color, 73
Clearing all events, 74
Copying, 73
Deleting, 73
Inserting, 72
Moving (shuffling), 73
Moving a label, 73
Removing a label, 73
Renaming, 72
Trimming, 72
Selecting events, 44–46
Selecting notes, 169
Setting the active clip and creating events, 107
Setting up a control surface, 241
Setting up a Mackie Control Universal, 242
Shortcut keys, 24
Signal flow
Audio, 31–32
MIDI, 33–34
Sliding
Events, 70
Video events, 206
Slipping
Events, 70
Video events, 206
Slip-trimming
Events, 70
Video events, 206
Snapping, 94
In the Chopper window, 101
To scale, 190
Soft synth controls, 144–152
Adding, 144
Assigning tracks to, 148
Deleting, 147
Modifying properties, 144
Routing to DLS sets, 145
Routing to VST instruments, 146
Soft Synth Properties window, 23
Soft synths
Deleting, 147
Routing MIDI tracks to, 148
Soloing
Mixer controls, 148
Tracks, 19, 49
Splitting events, 64
At the cursor position, 64
Multiple events, 65
One event, 65
Within a time selection, 66
Start offset, 70
Streaming media commands, 91
Stretching properties, 115, 119
Subtags, 79
Summary properties tab, 35
Surround, 209–220
Automating panning, 217–219
Hardware setup, 210
Keyframes, 217–219
LFE channel, 209, 211
Panning, 213
Rendering, 220
Surround Panner window, 23, 214
Sync preferences tab, 236
Synchronizing audio and video, 205
Sysex keyframes, 185
System requirements, 15
T
Tagging media files, 77
Tag s
Applying to media file, 77
Arranging in the tag tree, 79
Creating, 77
Creating palettes, 79
Deleting from library, 78
Editing names or images, 79
Removing from library, 78
Removing from media file, 78
Saving to media files, 80
Subtags, 79
Viewing palettes, 79
Tak e s
Recording audio as new, 157
Tempo changes
Marker, 97
Project, 96
Temporary files, 37, 239
Time
Fitting projects to time, 99
Inserting into projects, 99
Time display, 226
Time markers, 90
Time ruler, 21, 223
Time selection
Recording into, 158
Index | ix
Splitting, 65
Time signature changes
Marker, 97
Project, 96
Timecode synchronization, 201, 202
Tips and tricks, 261–267
Toggle automation mode, 259
Toolbar, 17, 224–226
Track automation, 127–130
Track automation envelopes, 132
Track envelopes, 132–135
Colors, 132
Deleting points, 133
Locking to events, 135
Removing, 135
Typ e s , 132
Track filters for MIDI, 179
Track list, 18
Track Properties window, 23, 115, 120, 176
Track view, 20
Tra c k s
Adding clips to, 107
Adjusting bus send levels, 141
Adjusting general clip properties, 116
Adjusting mix, 48
Adjusting several simultaneously, 49
Assigning to busses, 19, 141
Assigning to effect chains, 143
Assigning to soft synth controls, 148
Automating parameters, 127–130
Beatmapped, 41
Changing clip types, 116
Changing color, 47
Color preferences, 238
Copying clips and events across, 108
Copying trips without copying events, 109
Copying, cutting, pasting, 47
Default properties, 227
Deleting, 47
Device selection, 19
Duplicating, 47
Effects, 110–113
Envelopes, 113–136
Folder, 41, 124
Managing clips, 116
MIDI, 41
Muting, 19, 48
Panning, 20, 48, 113–136, 213
Pitch shifting audio clips, 109
Previewing clips, 109
Properties, 115, 120, 227
Renaming, 47
Reordering, 46
Resizing, 46
Selecting events that use a specified clip, 110
Soloing, 19, 49
Stretching properties, 115, 119
Using clips with, 107
Using the Clip Pool, 109
Volu me, 20, 48
Working with, 46
Transport bar, 21
Transposing
Beatmapped tracks to the project key, 119
Keys within a project, 97
Loop tracks to the project key, 117
Project keys, 96
Trimming events, 63
Trimming sections, 72
U
Understanding clip types, 40
Undo, 49
All edits, 49
Series of edits, 49
Undo history, 50
Using clips with tracks, 107
Using the Clip Pool, 109
Using the Mackie Control Universal, 246
V
Video, 205–208
Adding, 205
Editing events, 205
Frame numbering, 205
Hiding/showing, 205
Removing, 205
Removing associated audio, 205
Scoring, 207
Synchronizing with audio, 205
Video Preview window, 23
Video window, 206
Voices
Patch changes for DLS sets, 145
VST instruments, 146
Volume
Automation, 128
Event, 71
Project, 51, 148
Tra c k , 20, 48
Track envelopes, 132
VST effects
Preferences, 234
VST Instruments
Preferences, 234
x | Index
VST instruments
Loading banks and presets, 146
Locating for use in ACID, 146
Routing MIDI tracks to, 148
Using, 146
W
Wall of sound, 263
What’sThis? help, 16
Window docking area, 22
Windows
Audio Plug-In, 110–113
Audio plug-in, 23
Chopper, 23, 101
Docking/floating, 221
Explorer, 22, 36–38
Groove Pool, 24
Hiding/showing, 221
Main, 17
Media Manager, 23
Mixer, 23, 51–53, 141–152
Plug-In Manager, 24
Soft Synth Properties, 23
Surround Panner, 23, 214
Track Properties, 23, 115, 120
Video Preview, 23
Working with tracks, 46
Writing to CD, 57
Understanding track-at-once and disc-at-once, 57
Z
Zoom controls
Chopper window, 101
Main window, 22