Nordic ID PL3000H RFID Device User Manual Nordic ID PL3000 v2 9 HF us indd
Nordic ID Oy RFID Device Nordic ID PL3000 v2 9 HF us indd
UserManual.wiki
>
Nordic ID
>
PL3000H User Manual
User Manual
Navigation menu
Upload a User Manual
Namespaces
Wiki Guide
HTML
PDF
Info
Views
User Manual
Discussion / Help
Navigation
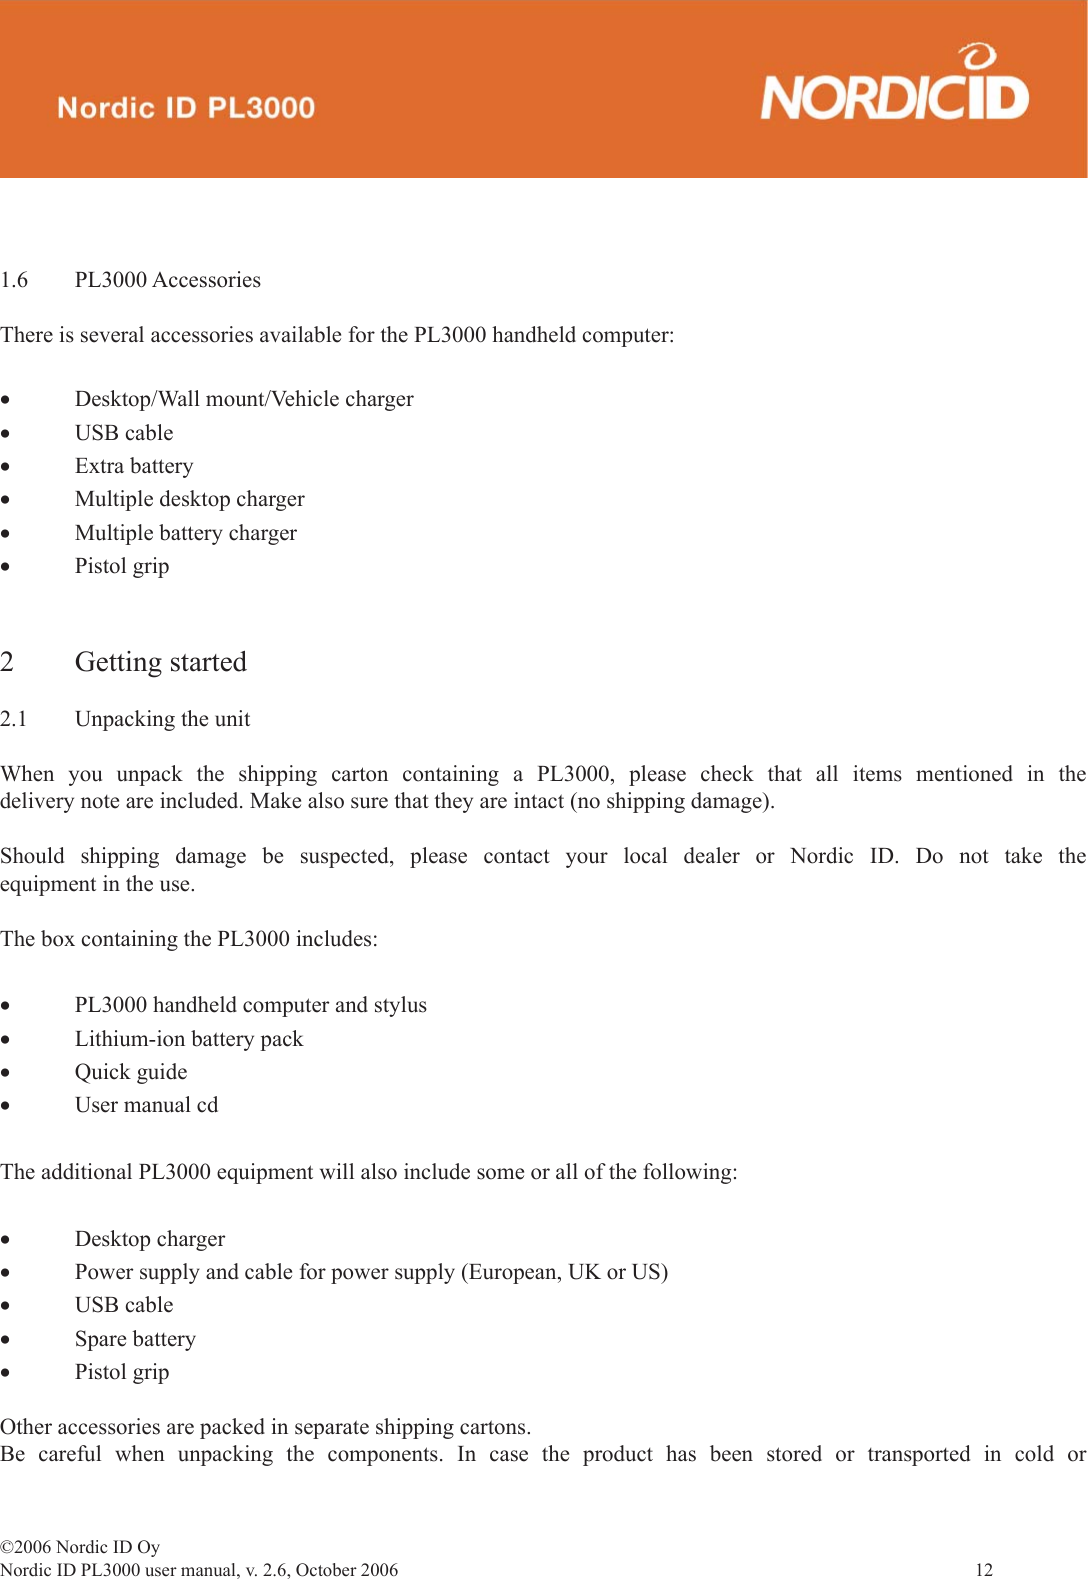
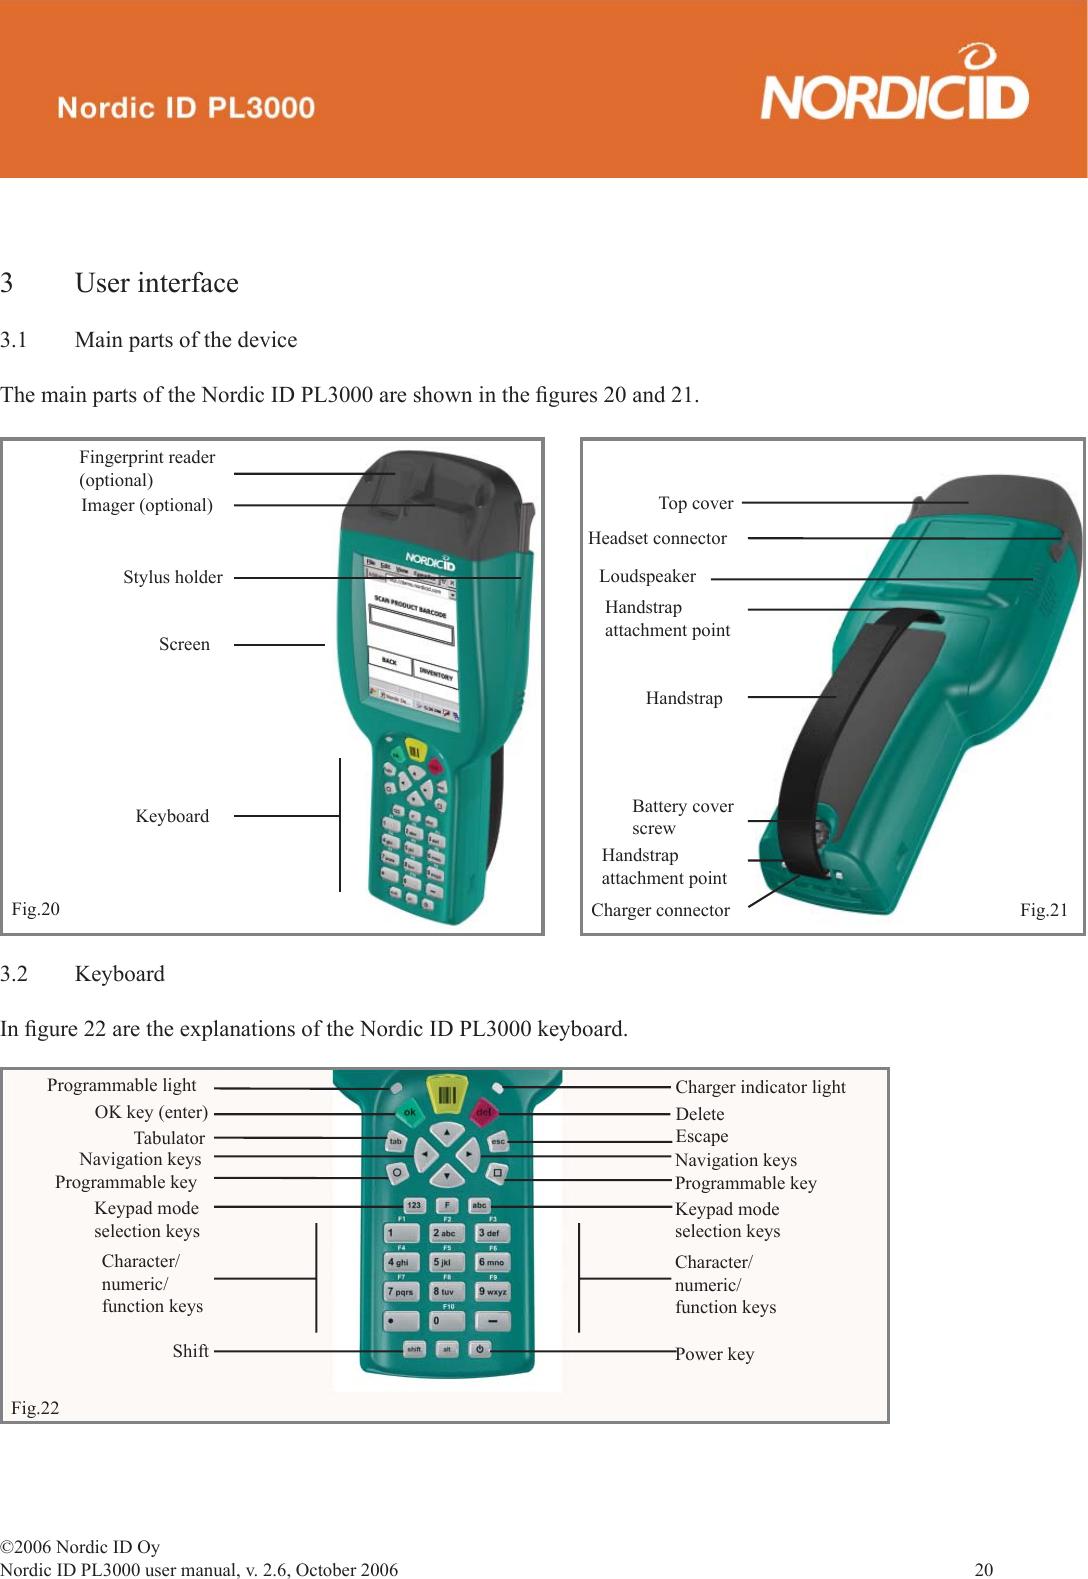
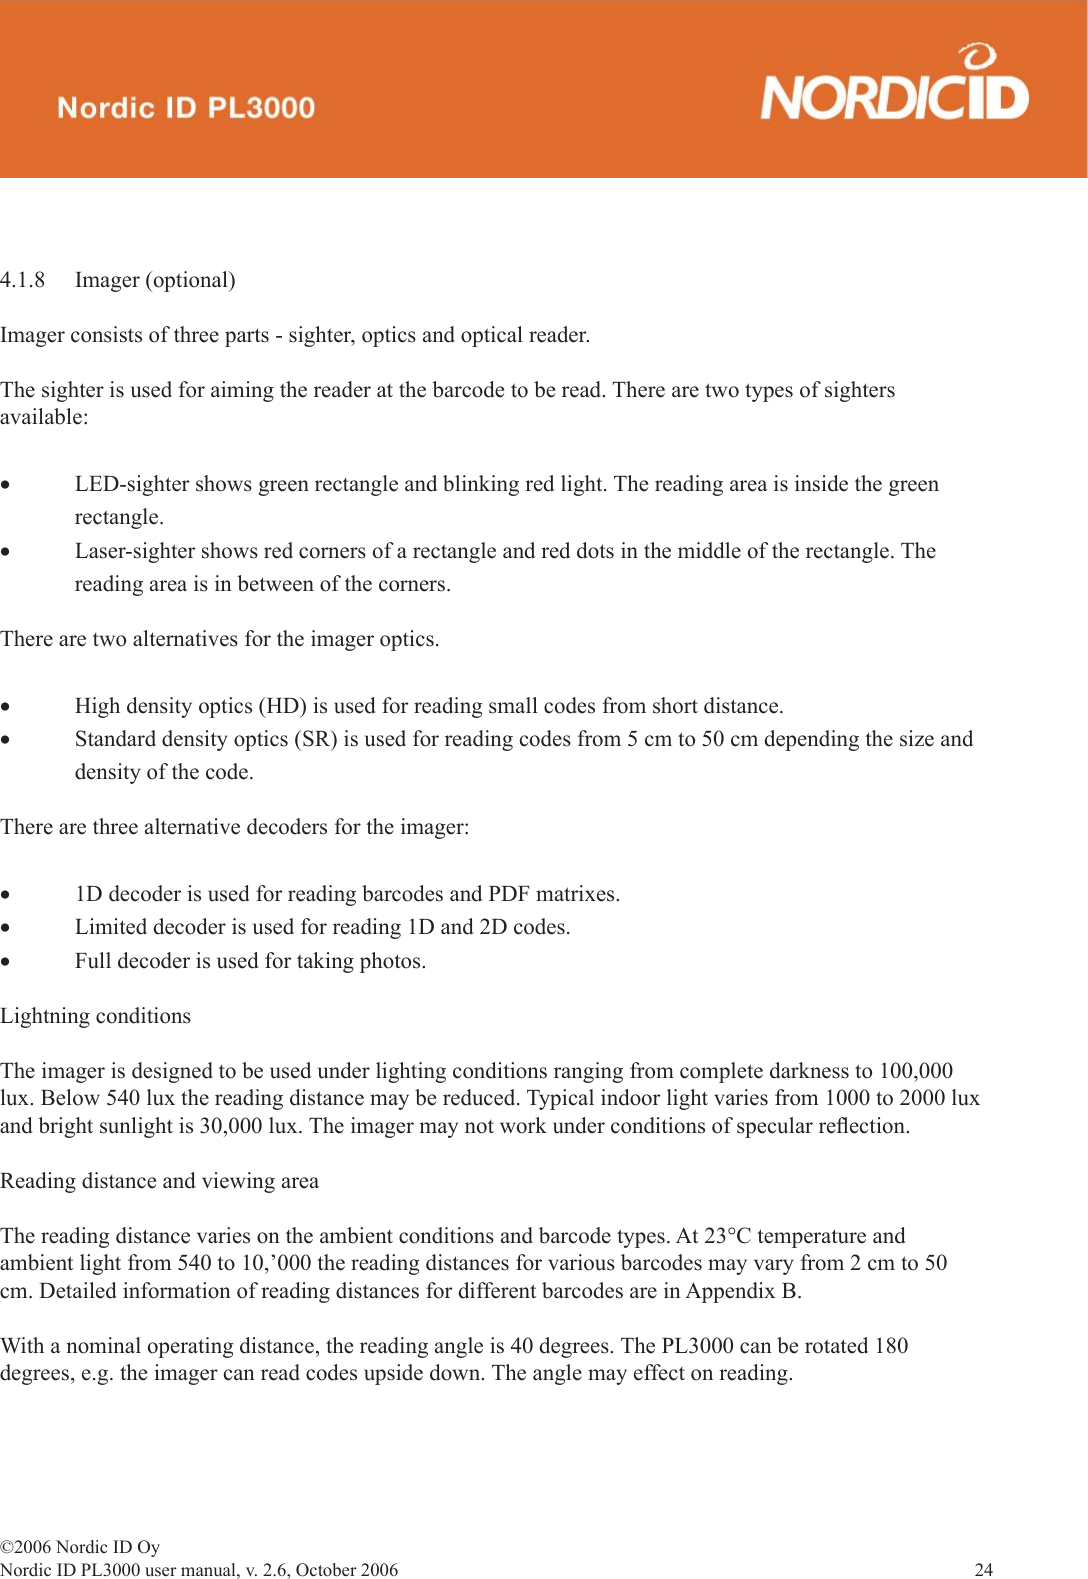

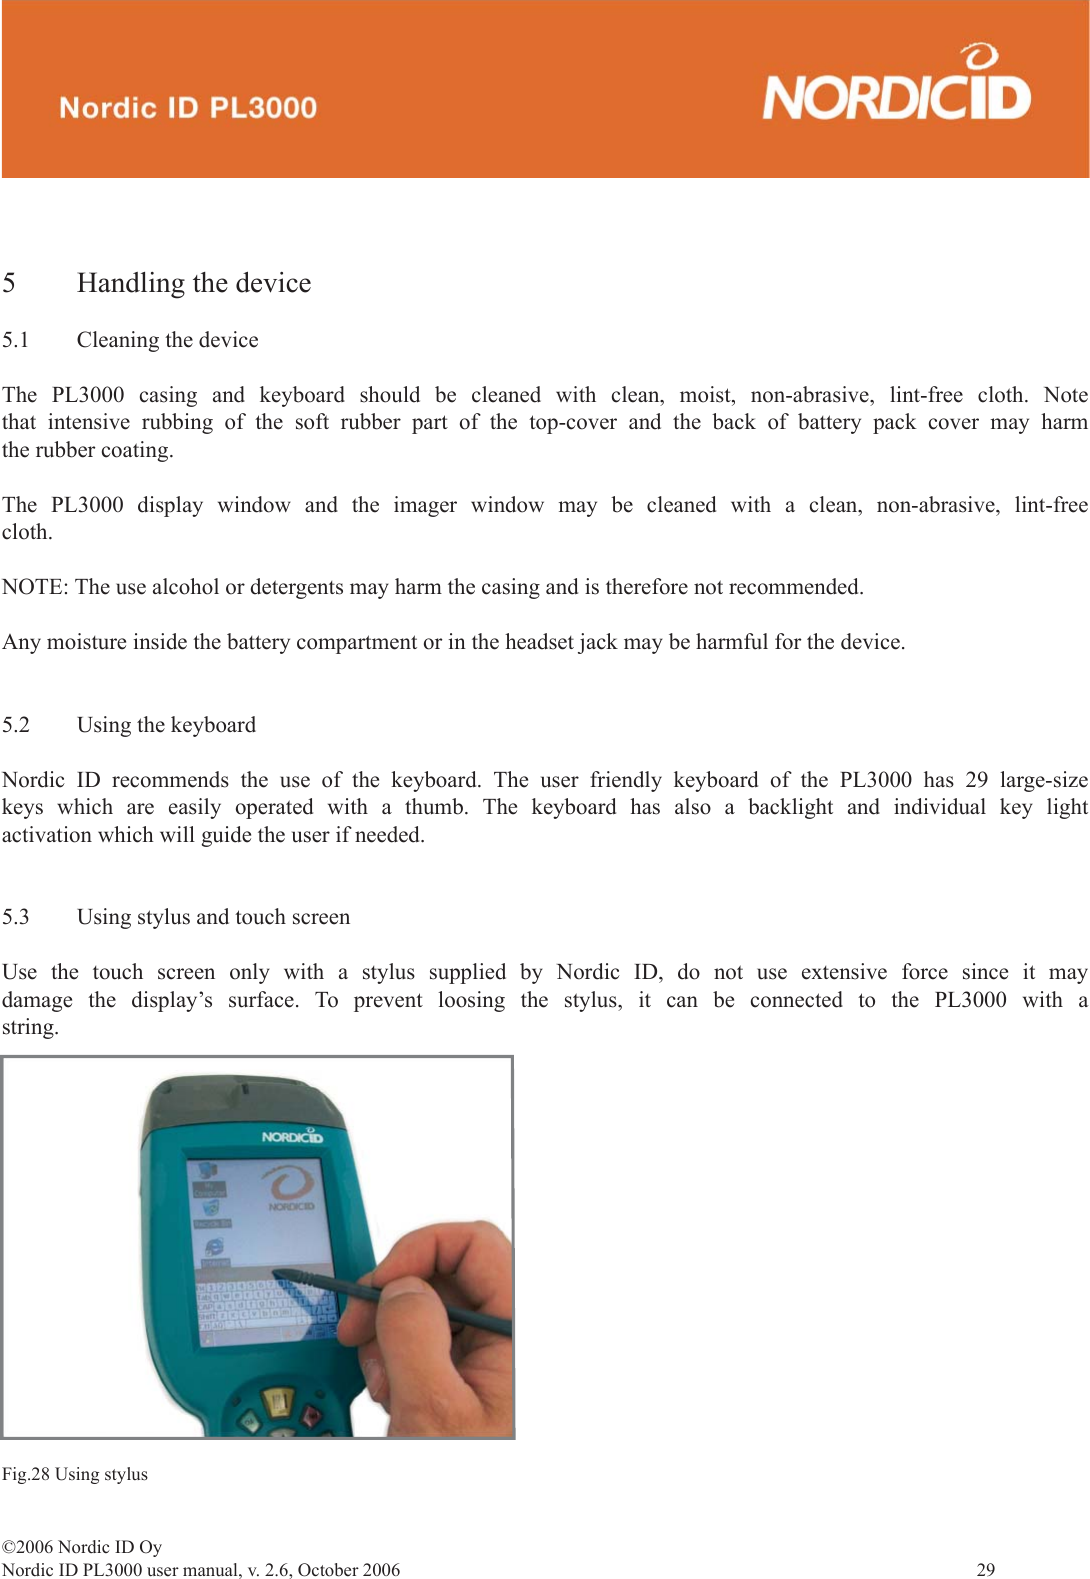

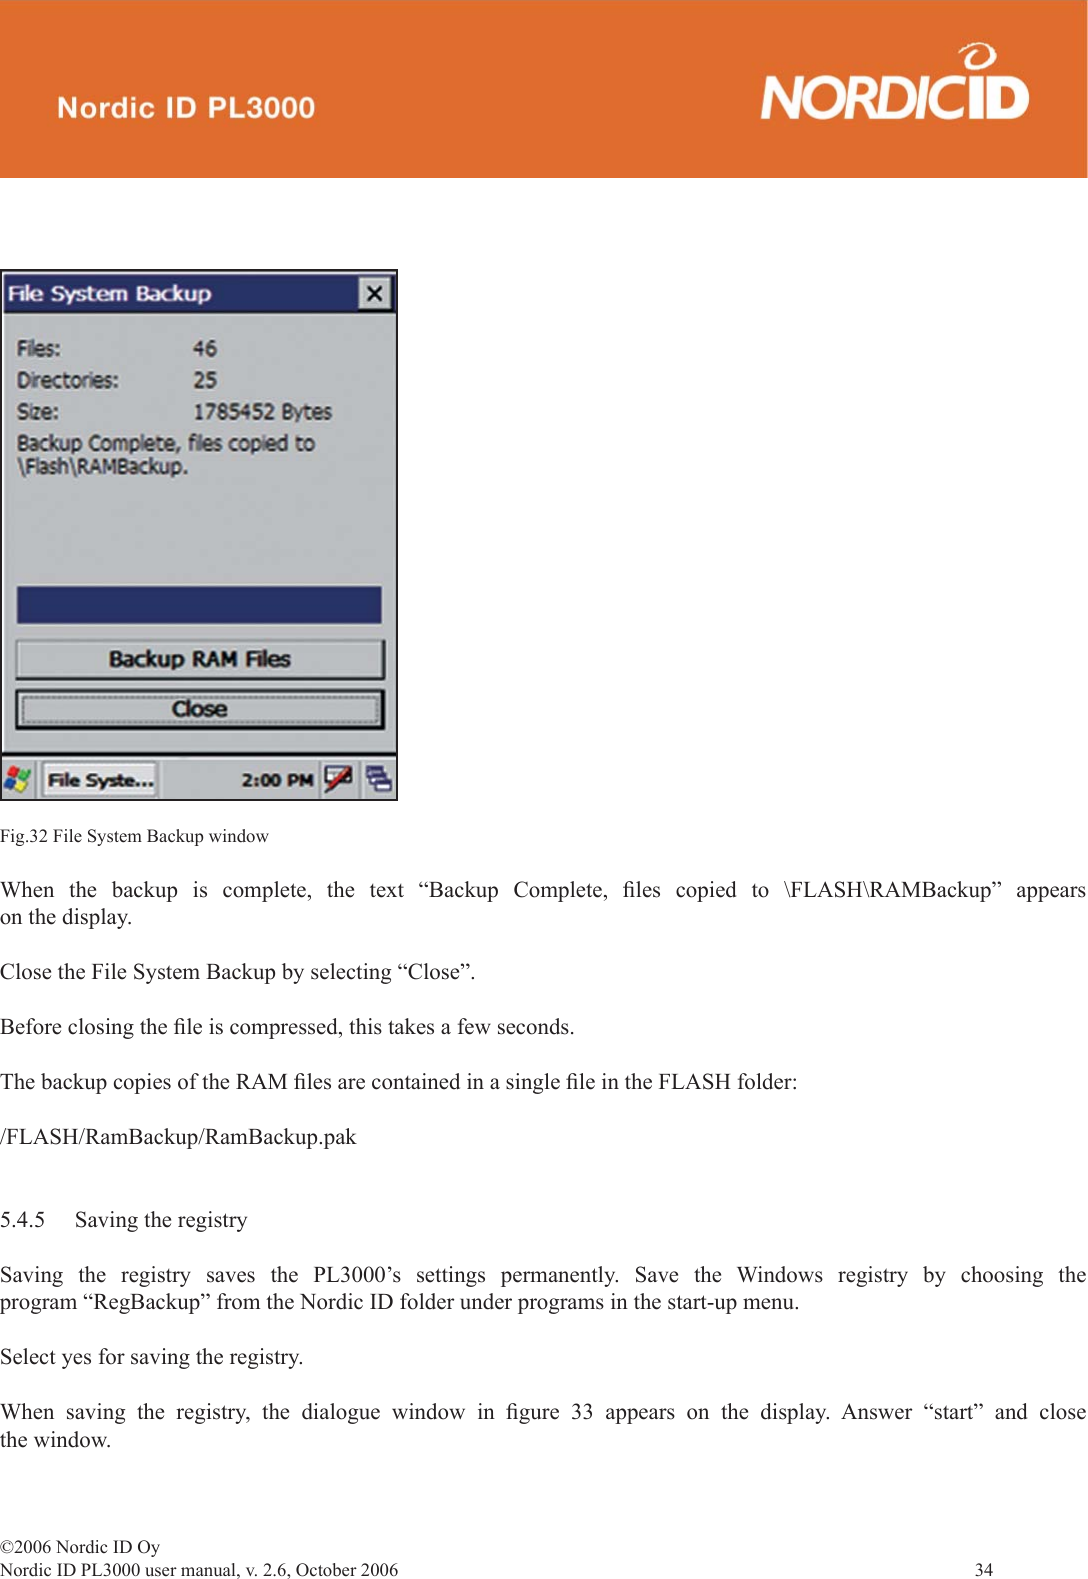


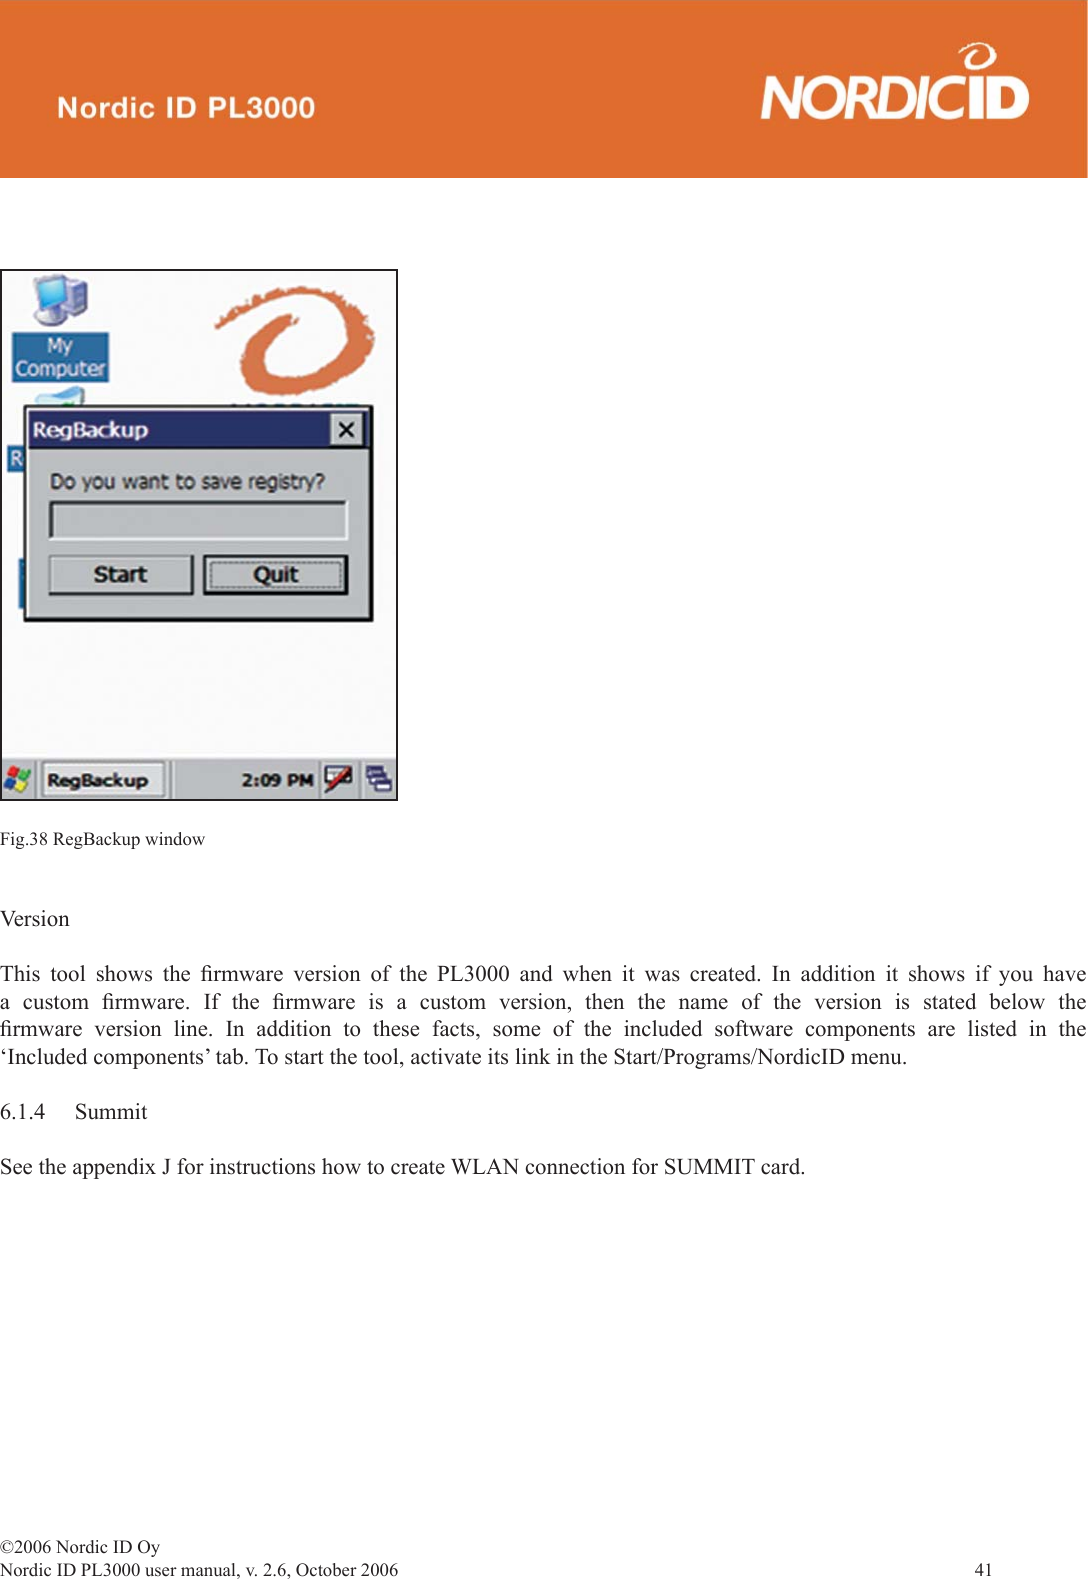
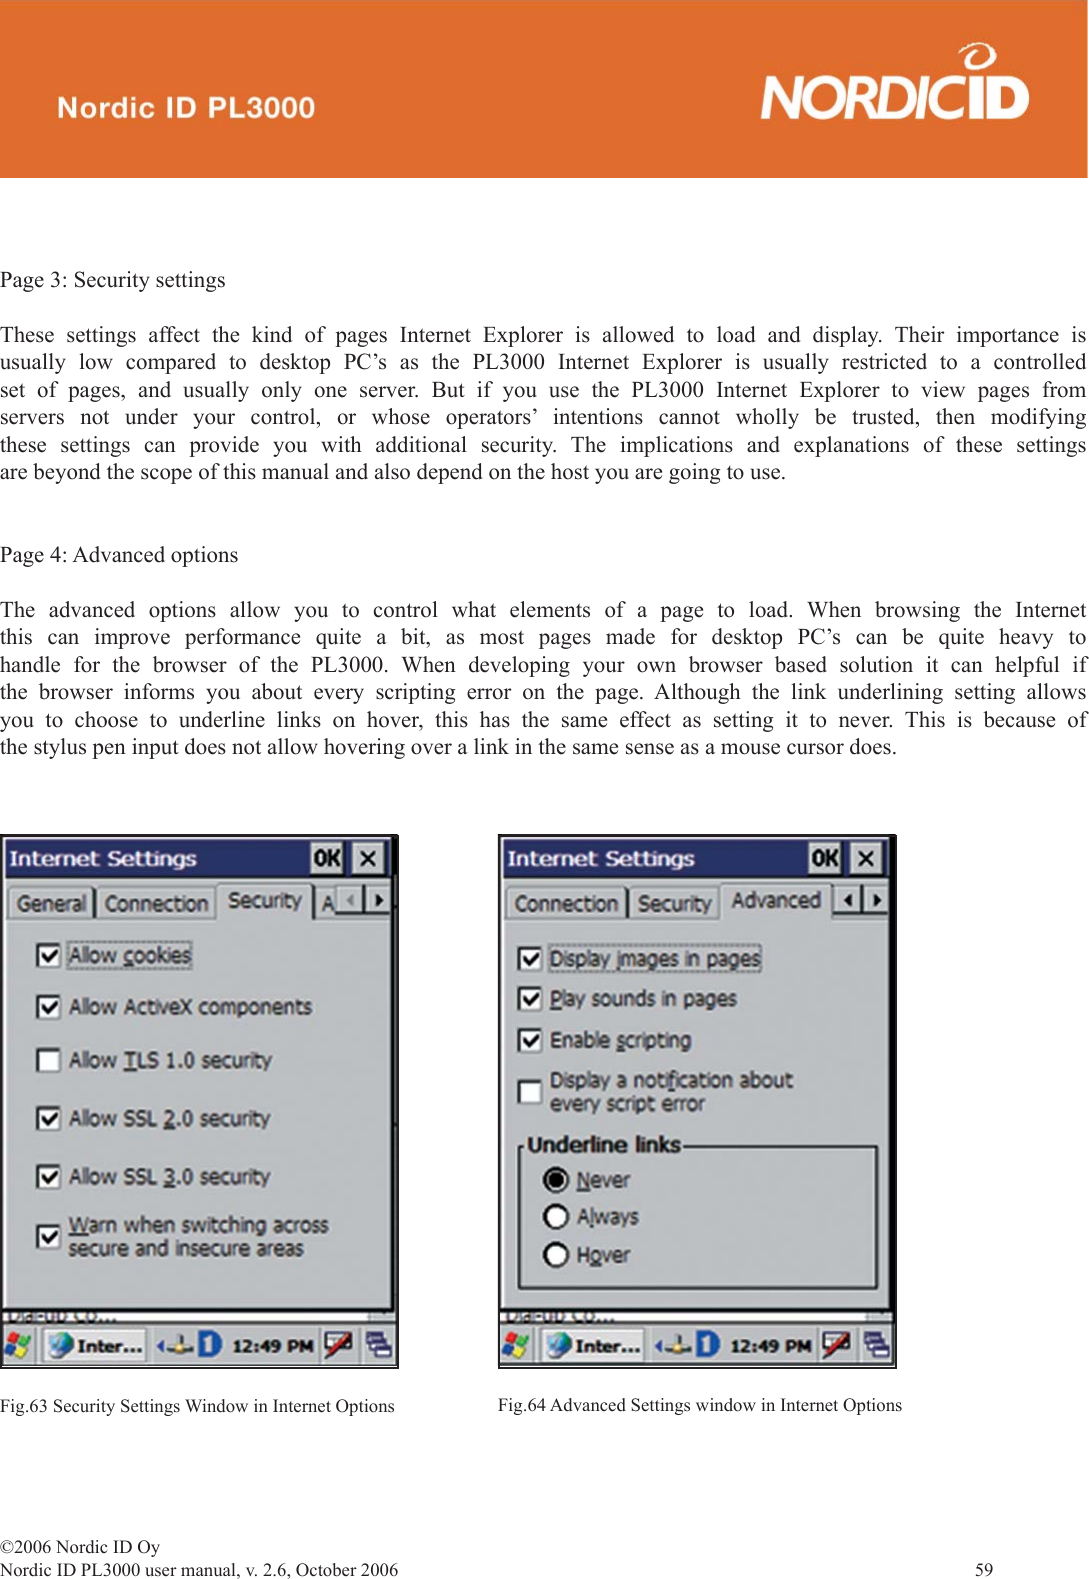
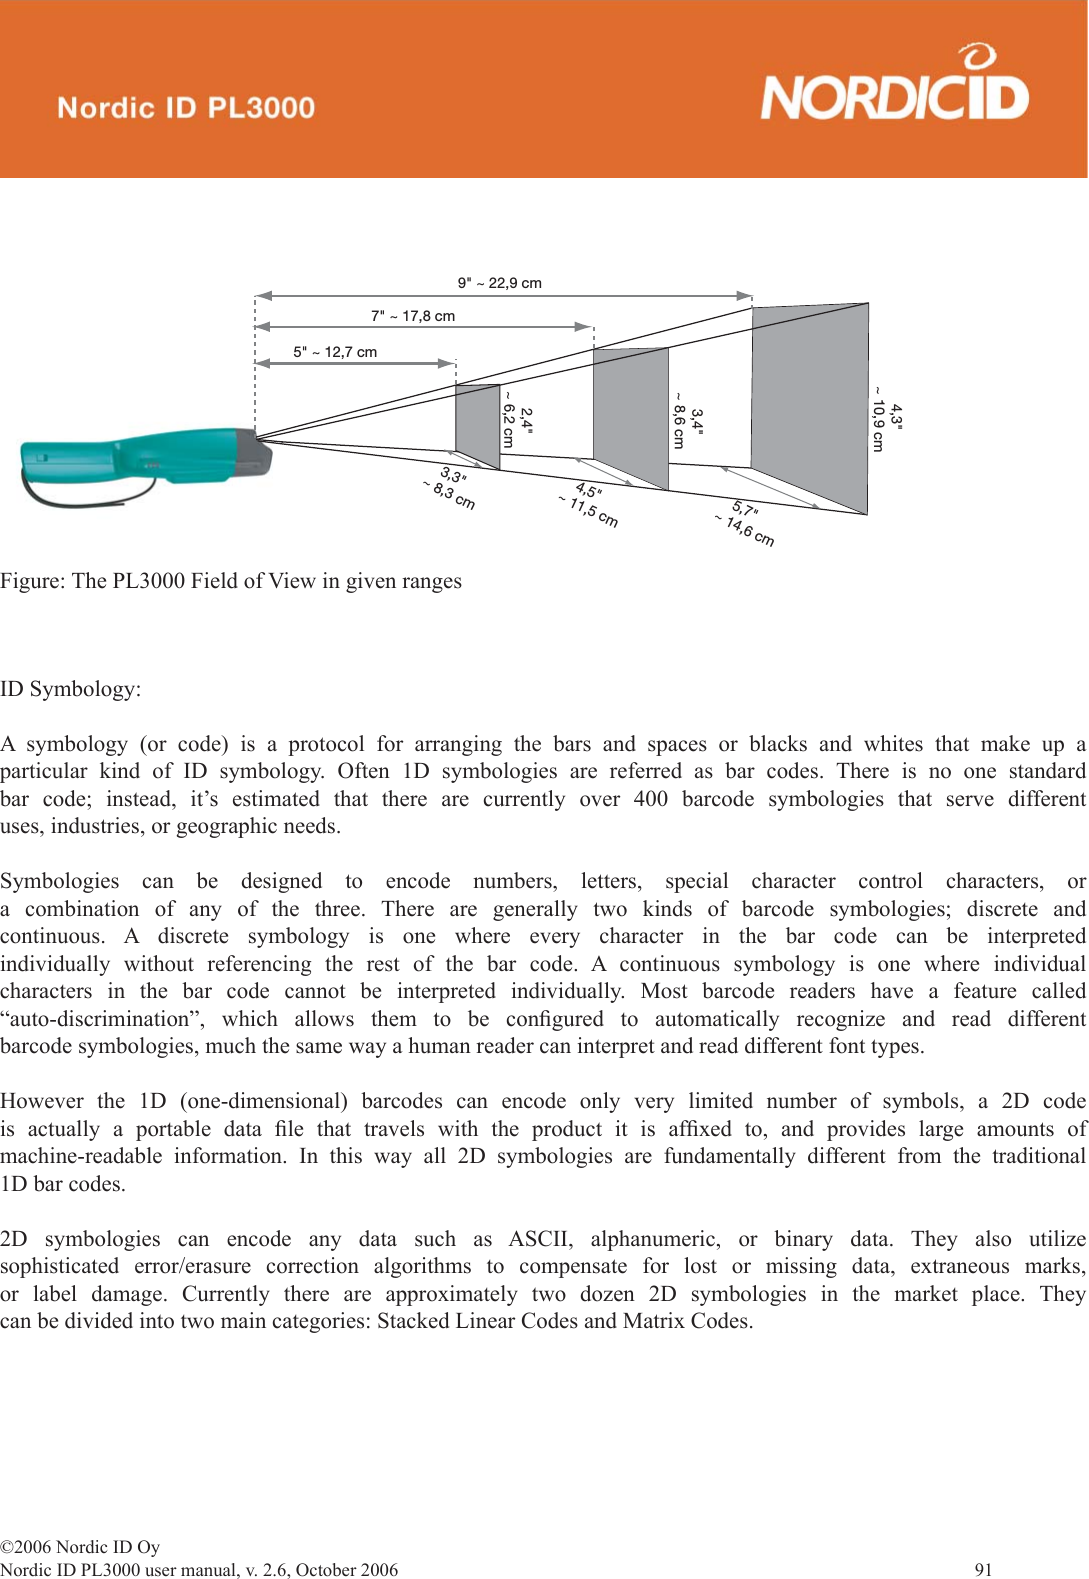
![©2006 Nordic ID OyNordic ID PL3000 user manual, v. 2.6, October 2006 37 Special characters can be chosen by selecting the SHIFT key. Scandic letters and other special characters can be used by selecting the [áü] key. You can close the virtual keyboard by opening the keyboard menu from the control bar and by selecting “Hide input panel”.Fig.35 Virtual keyboard](https://usermanual.wiki/Nordic-ID/PL3000H/User-Guide-779056-Page-37.png)
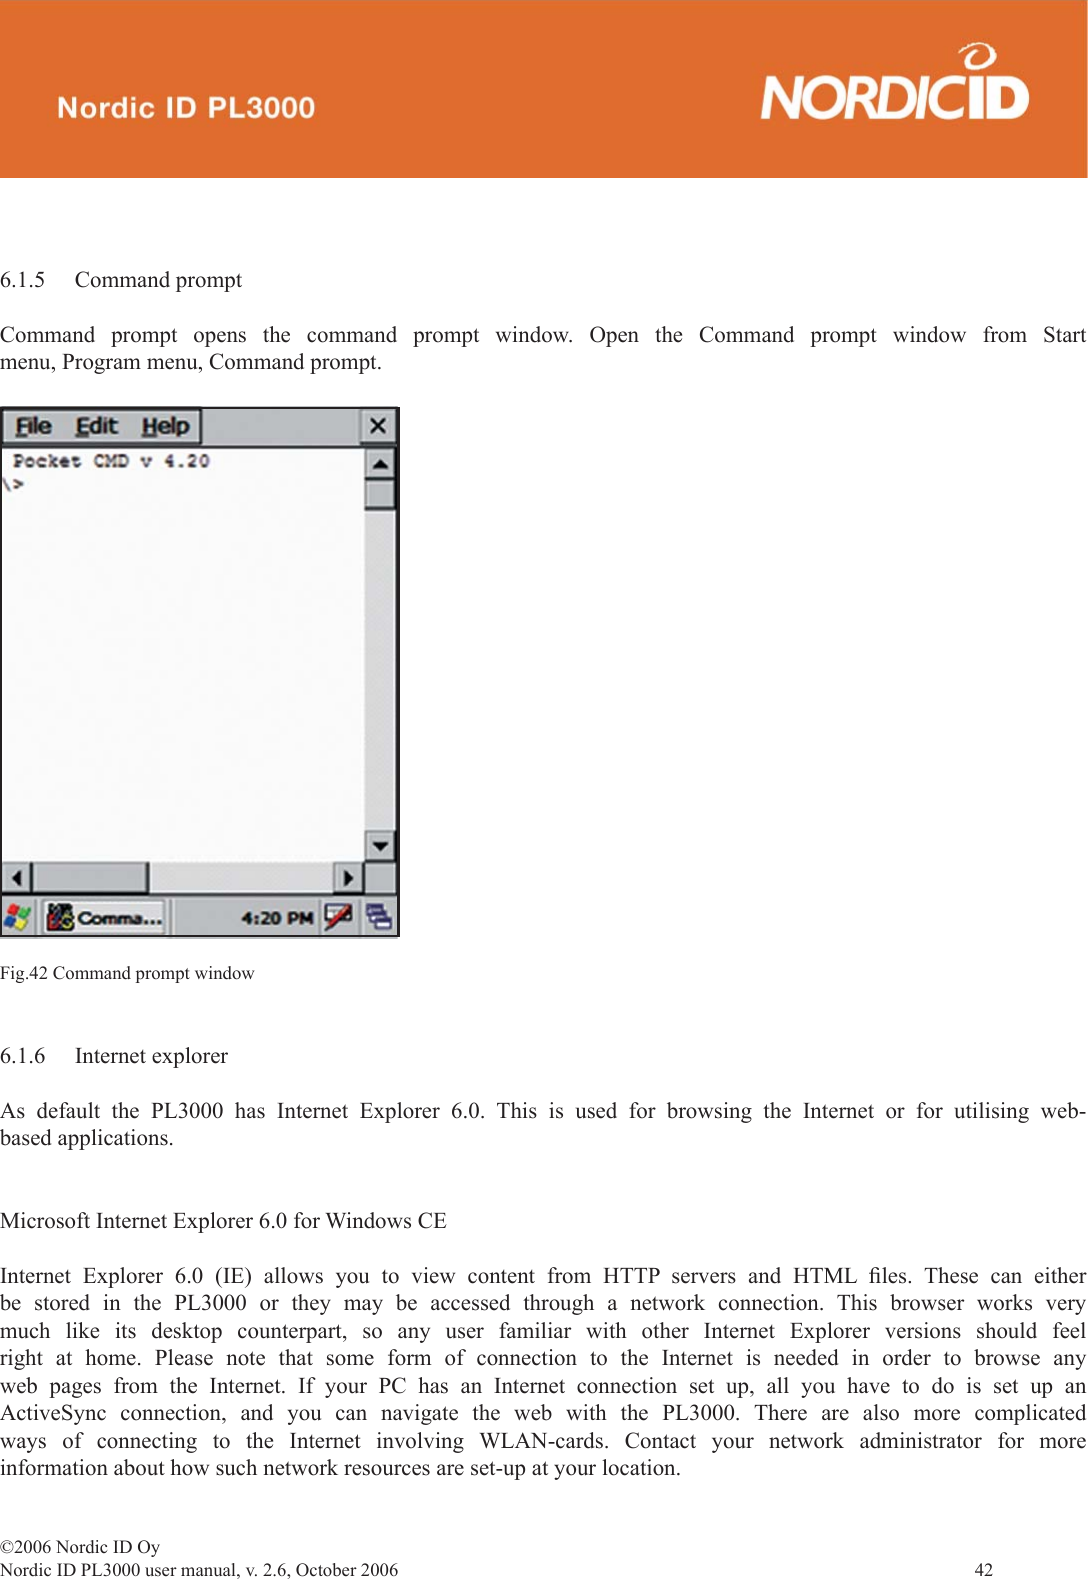
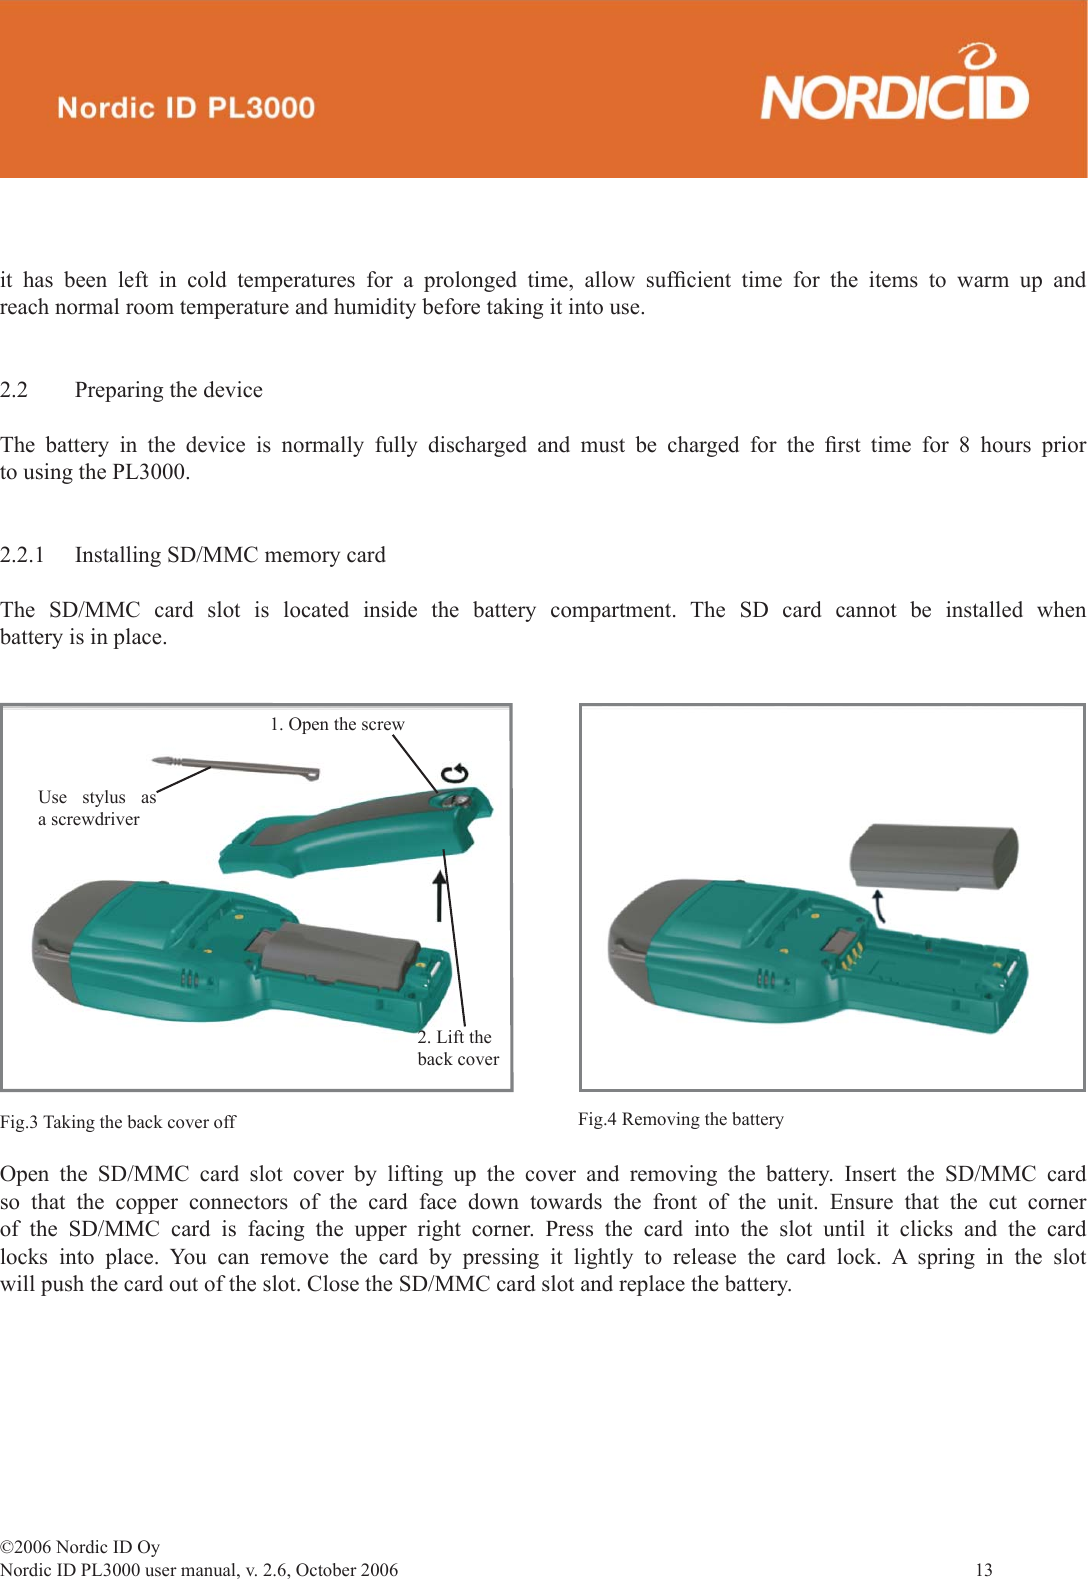
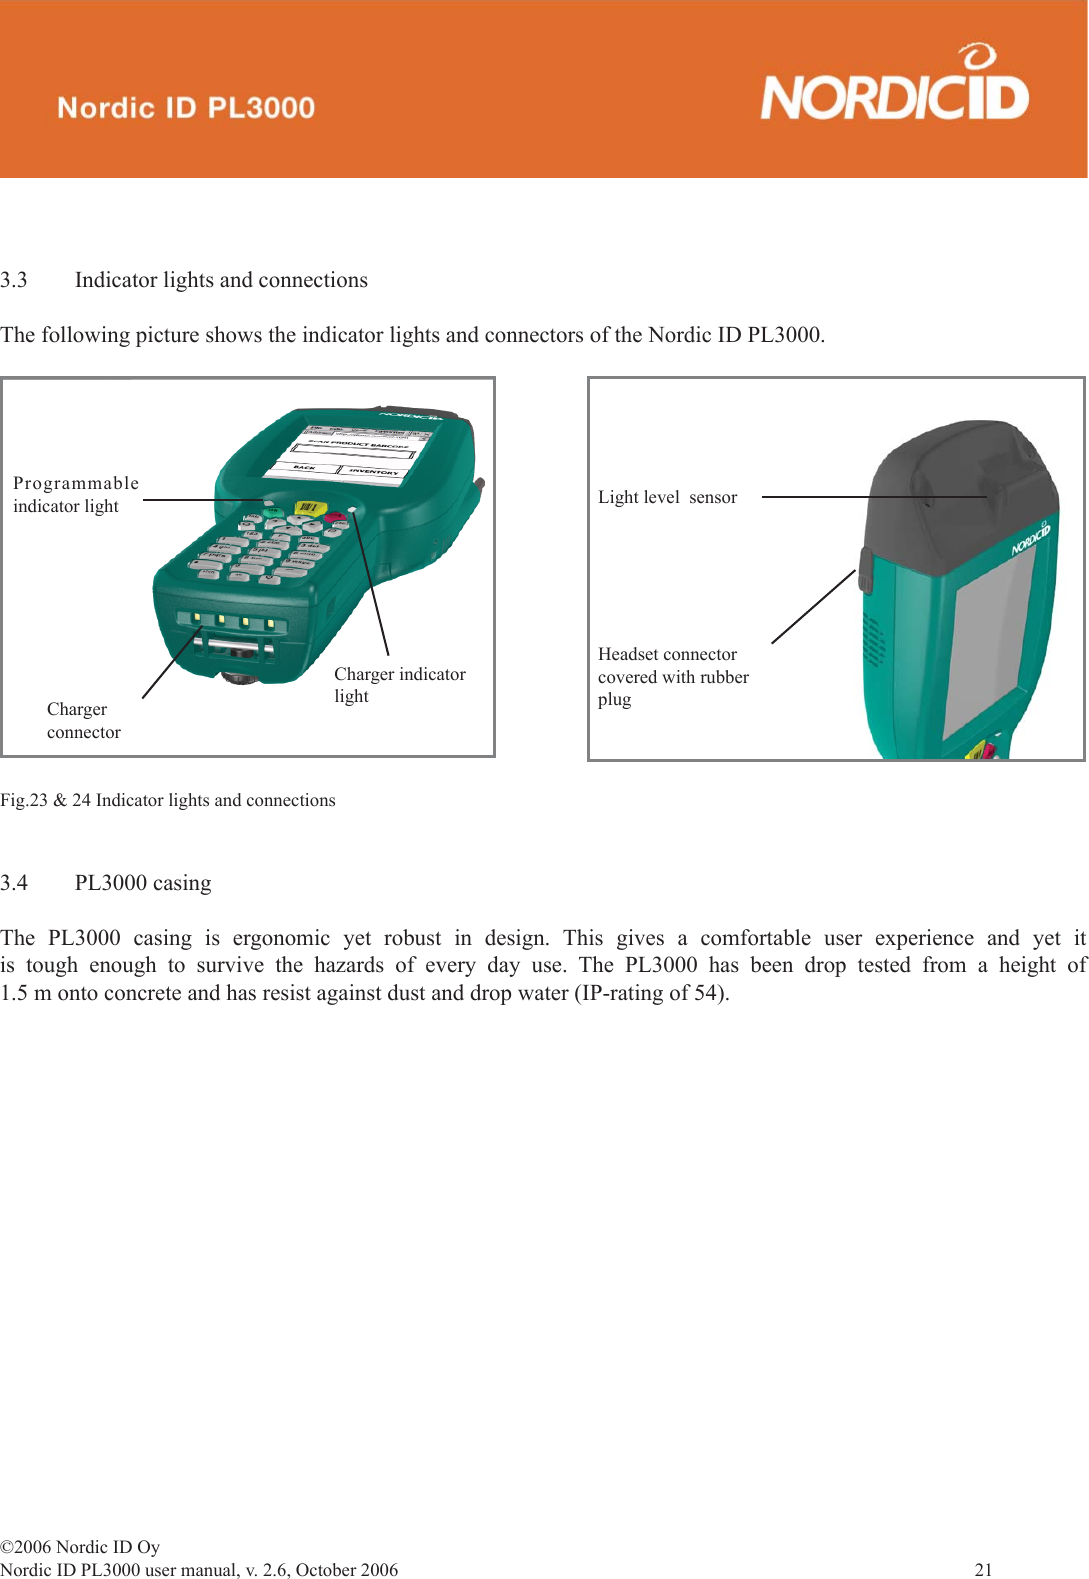
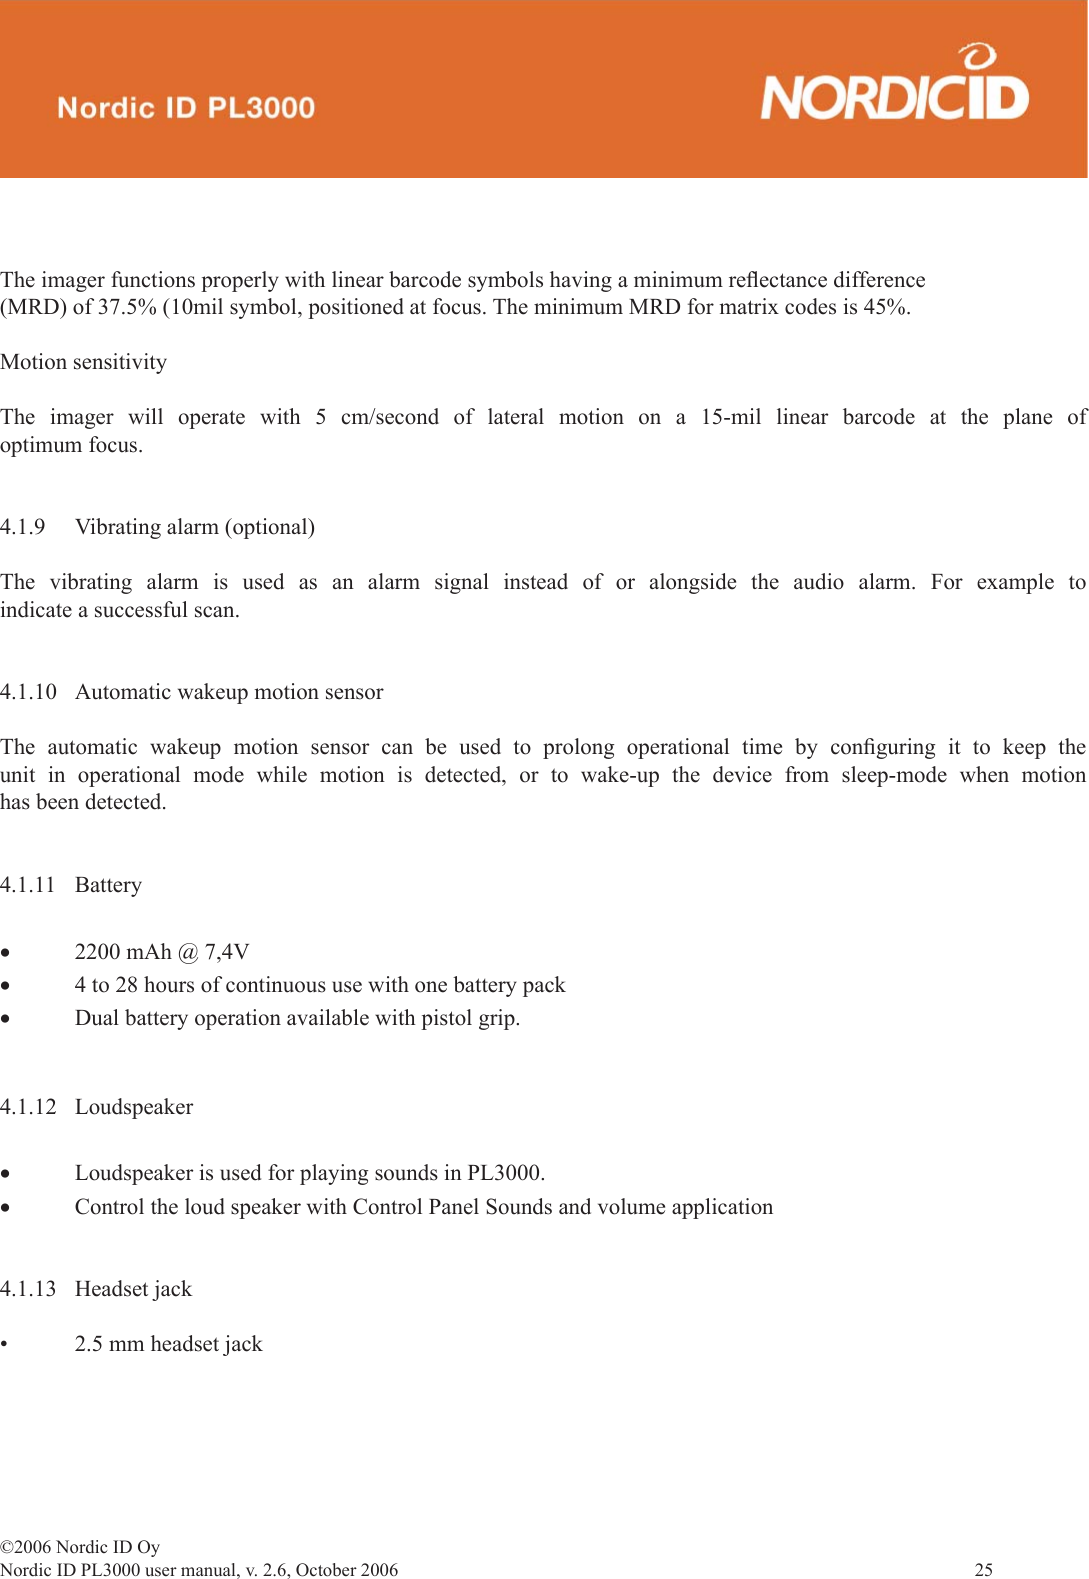
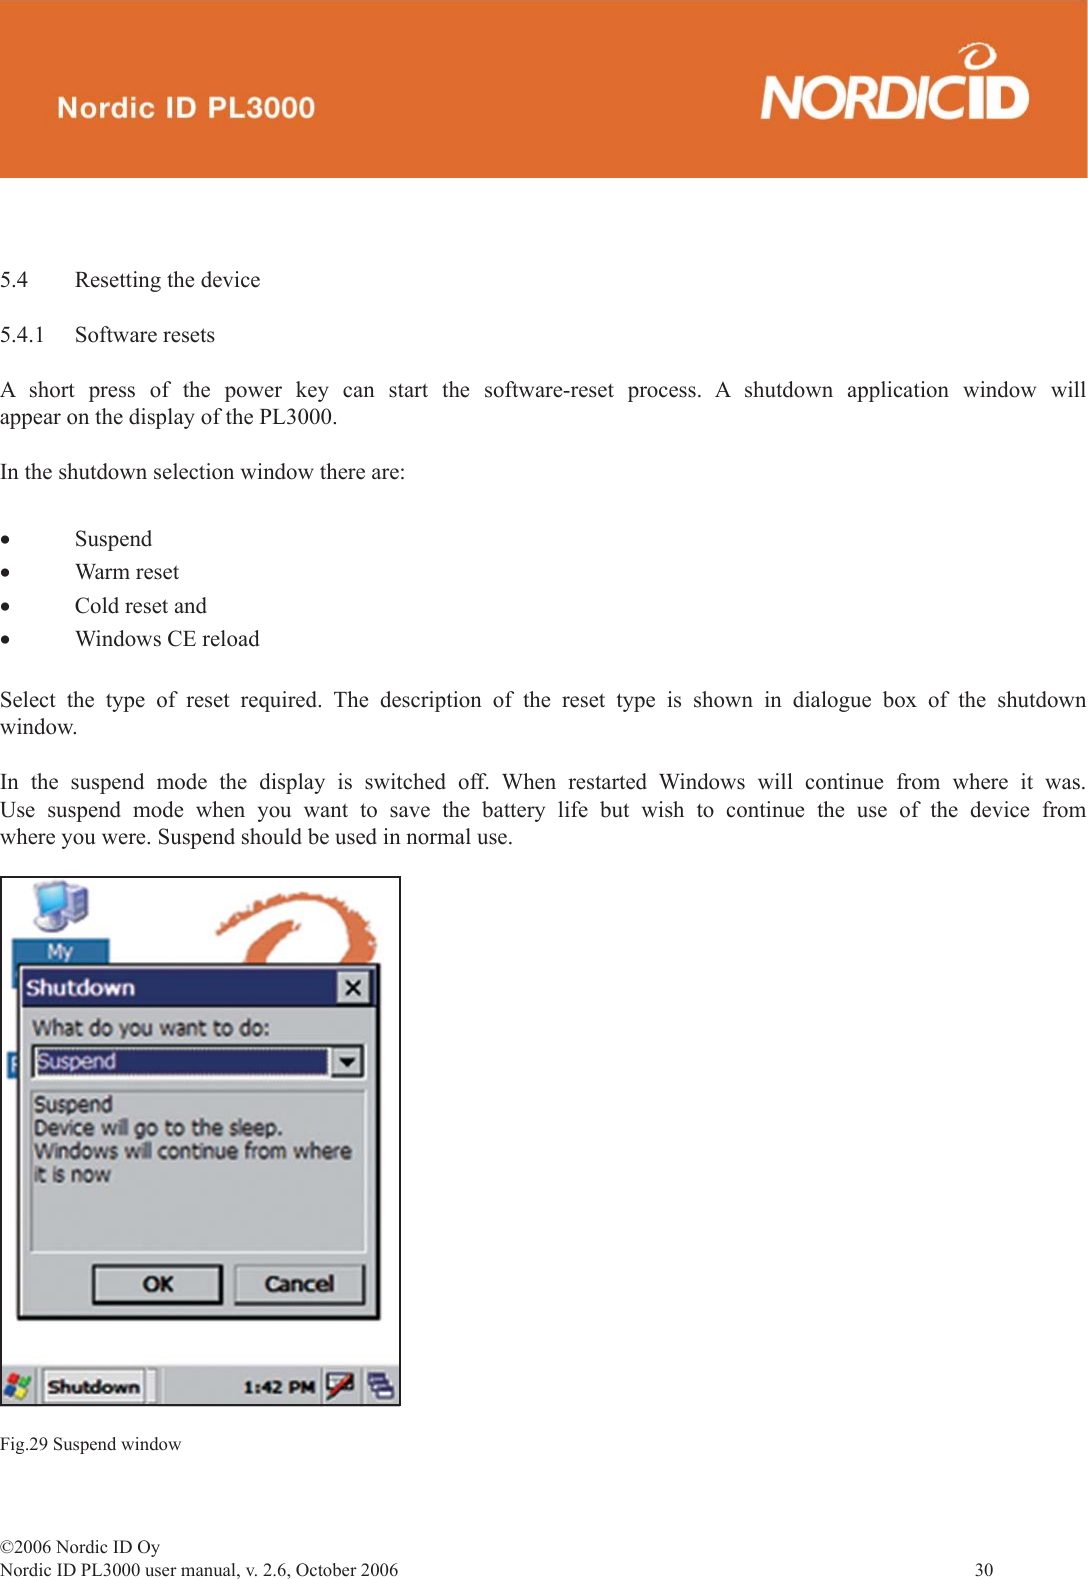
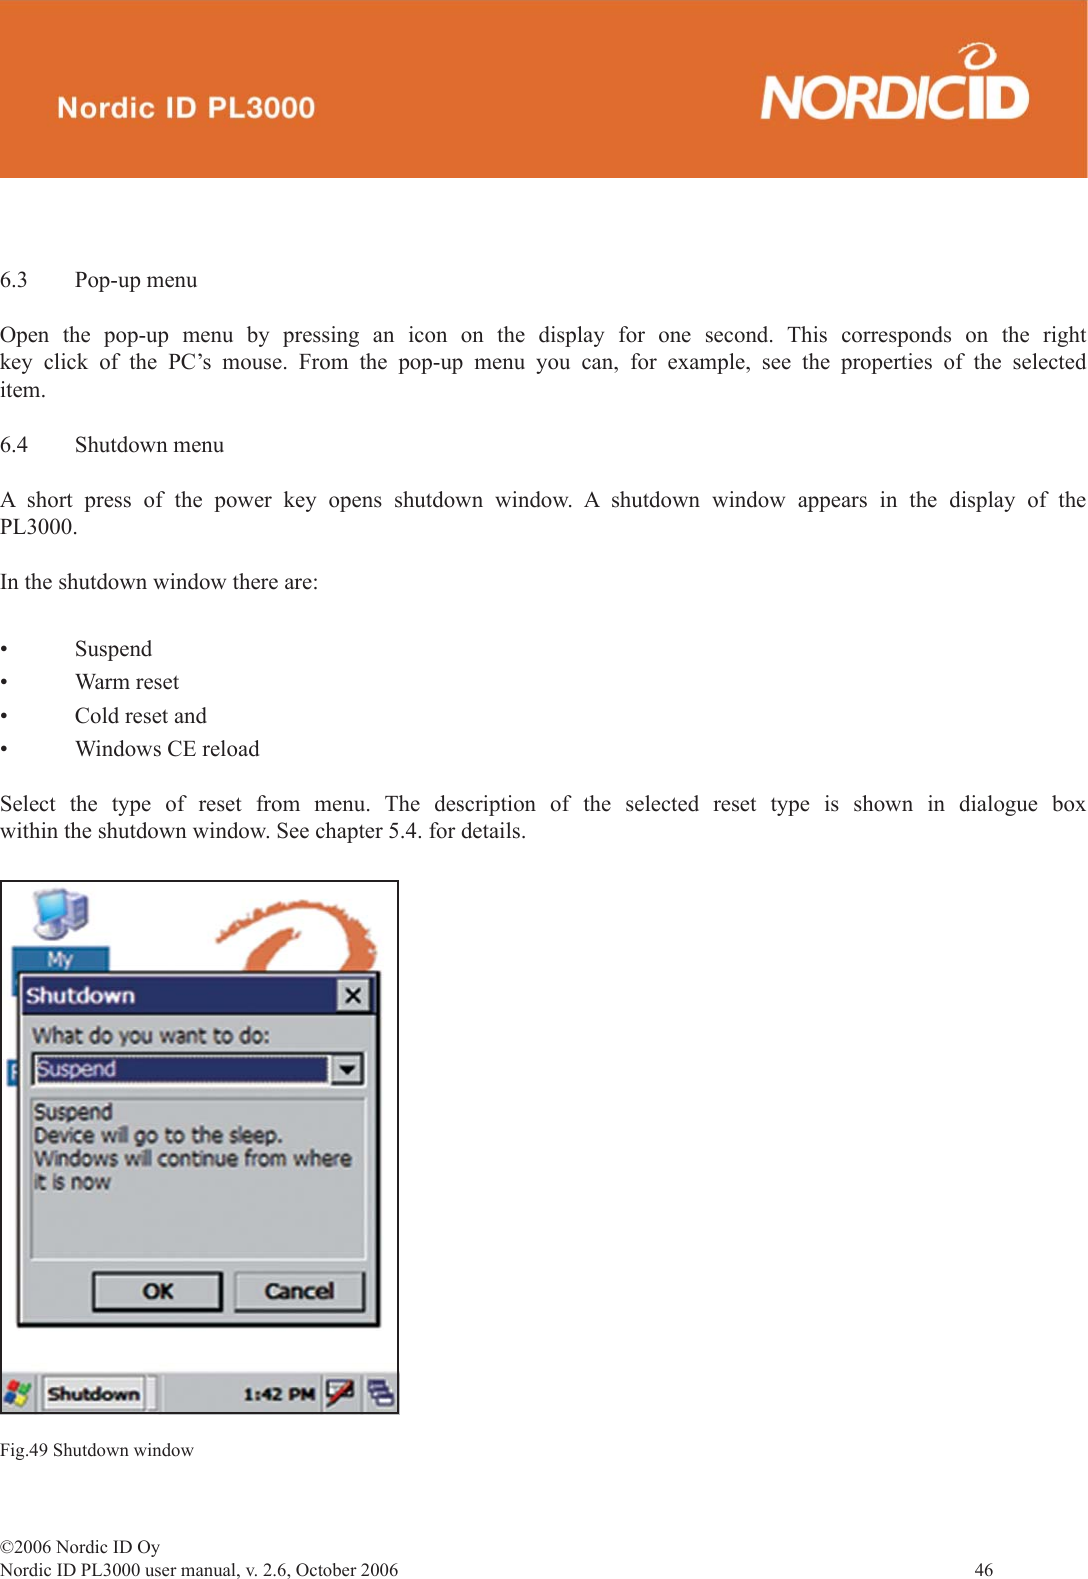
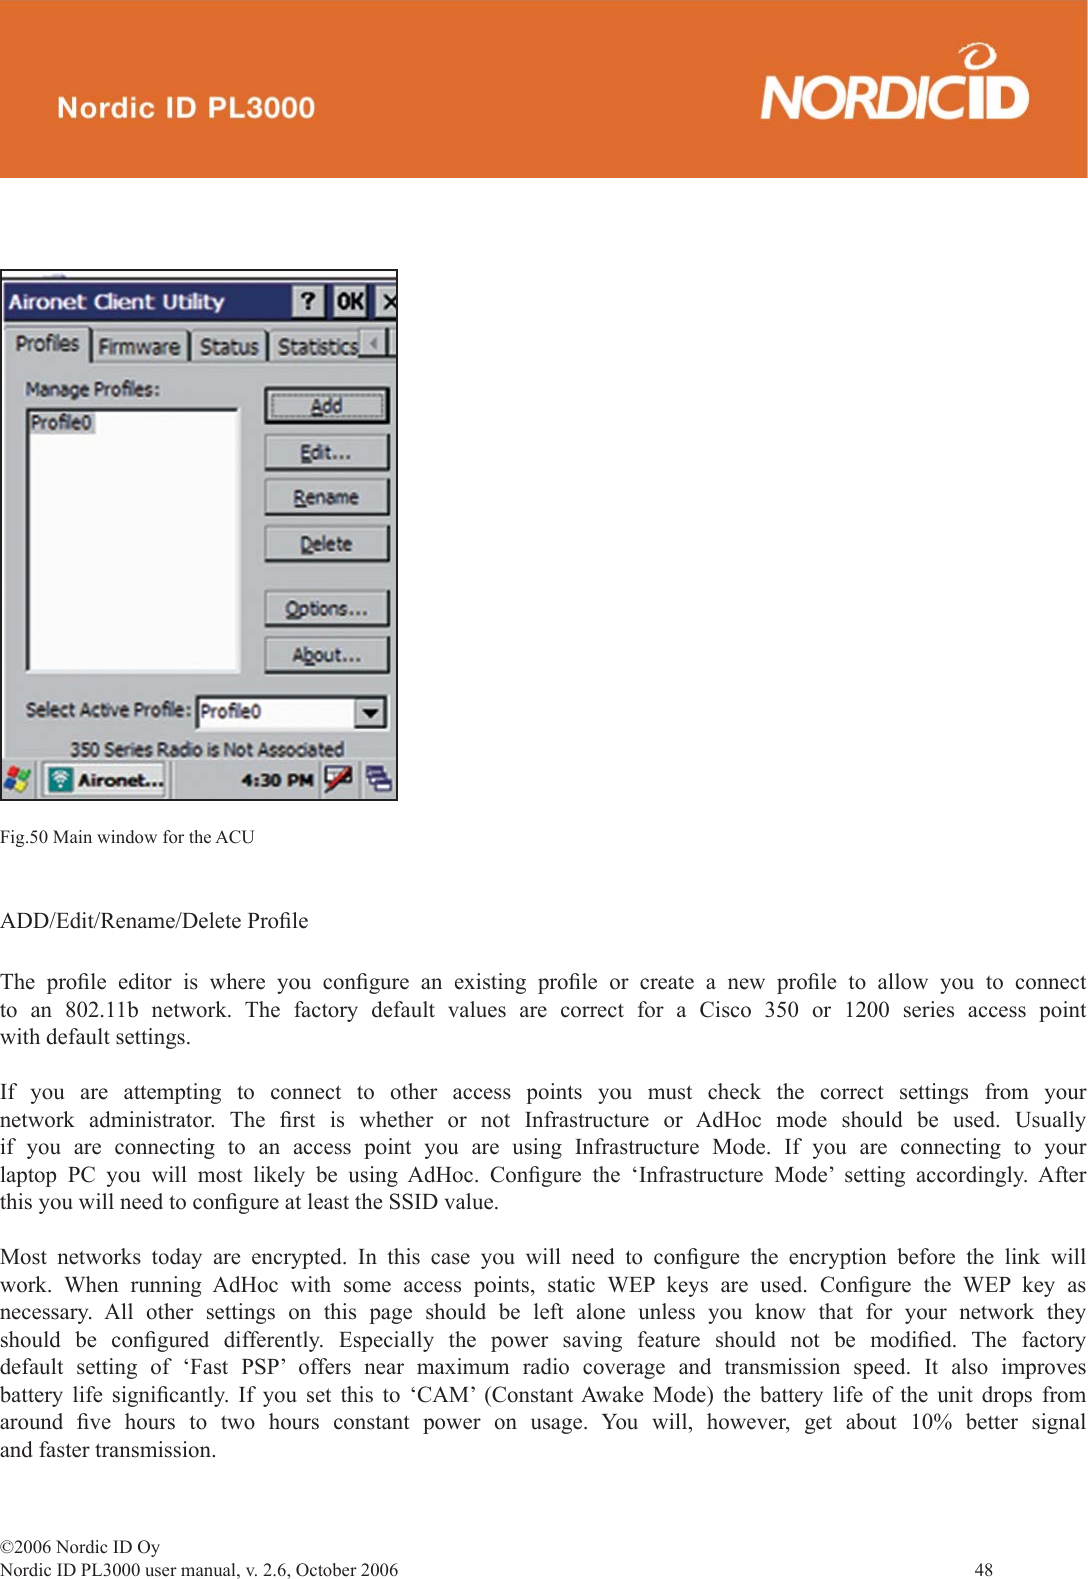
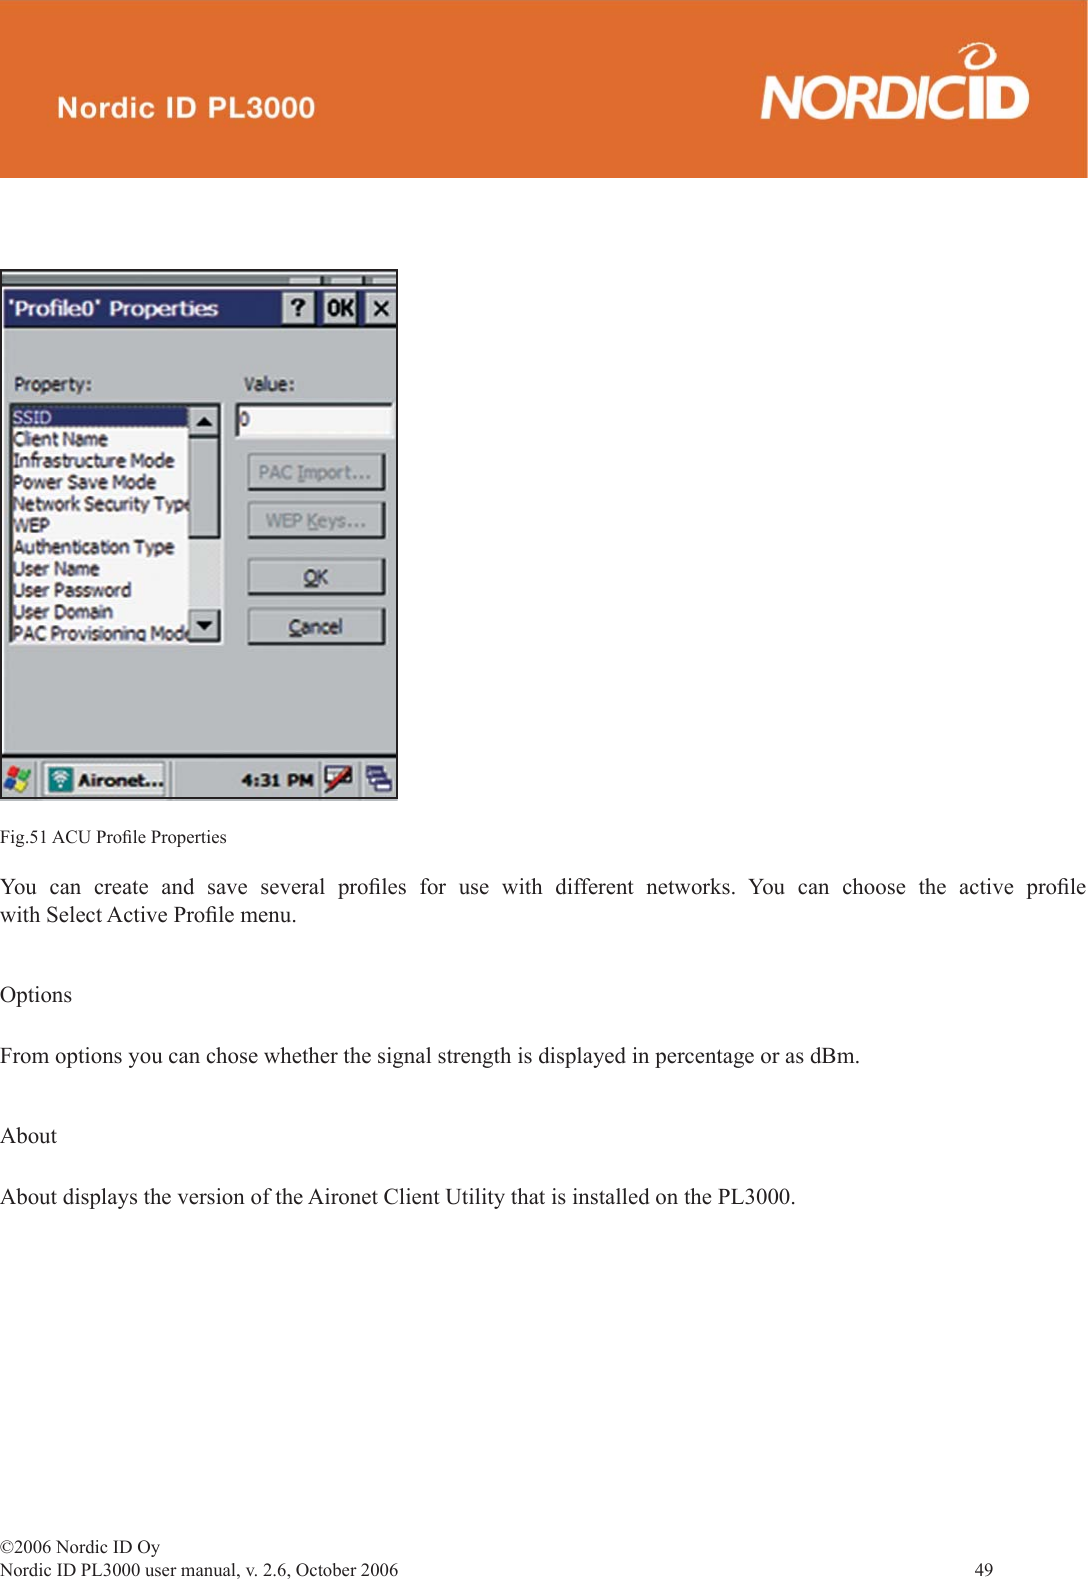
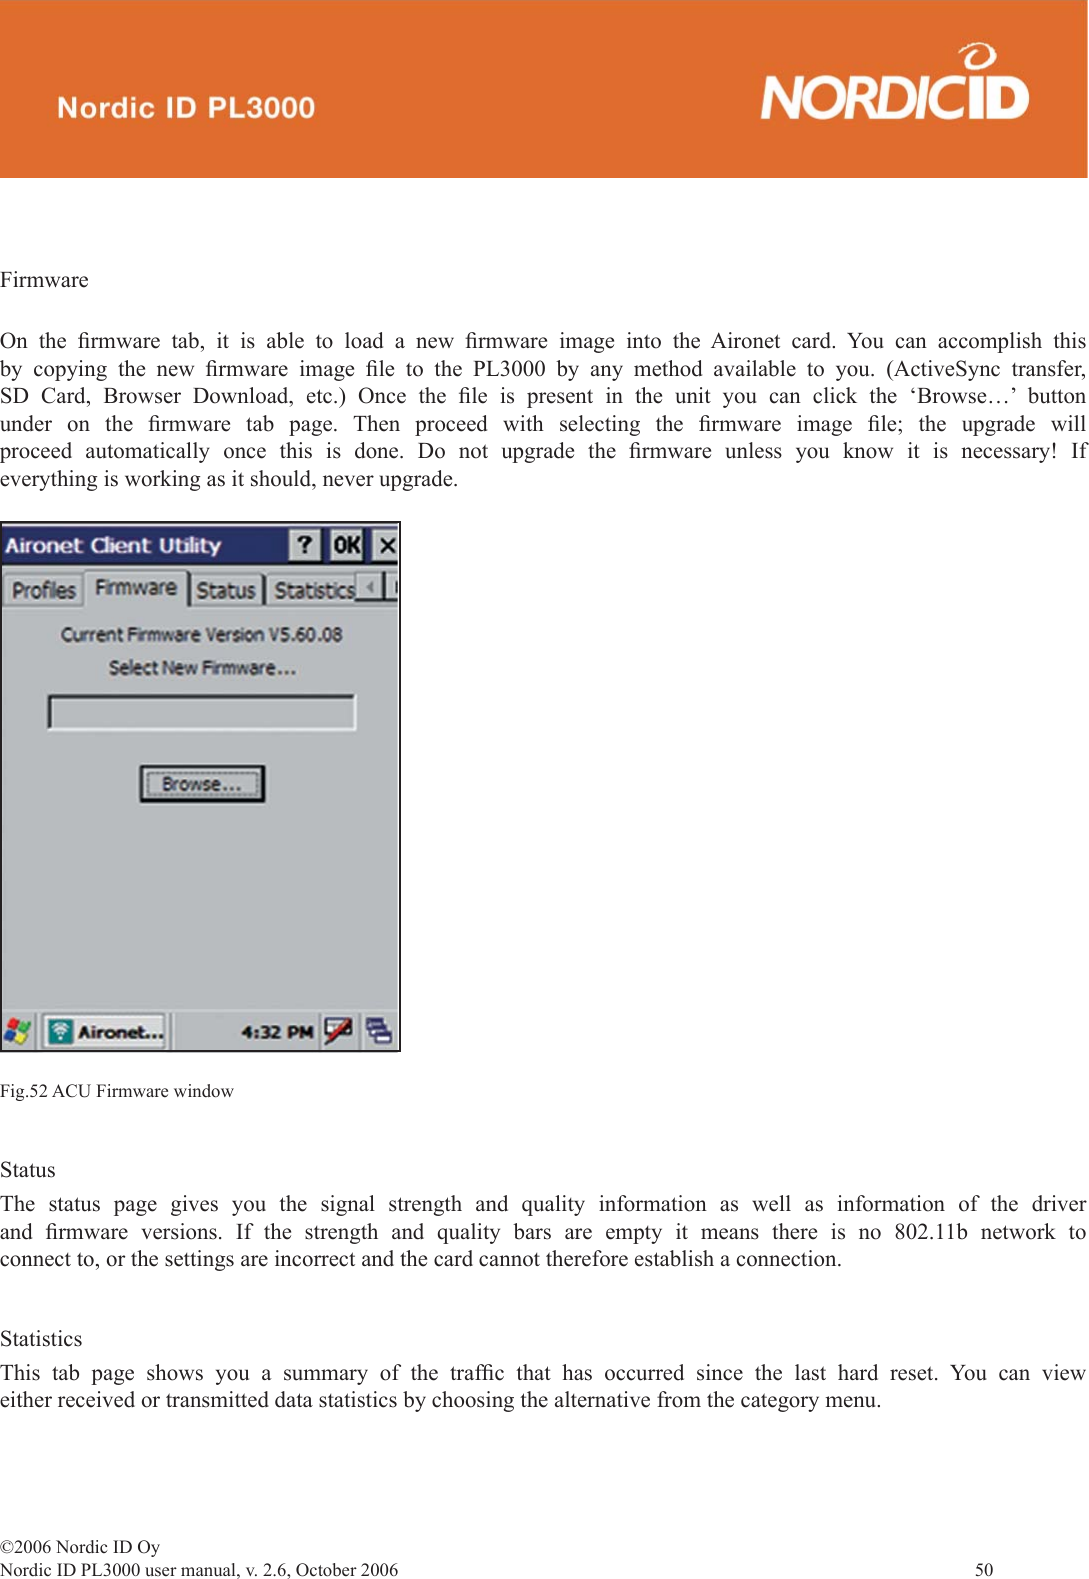
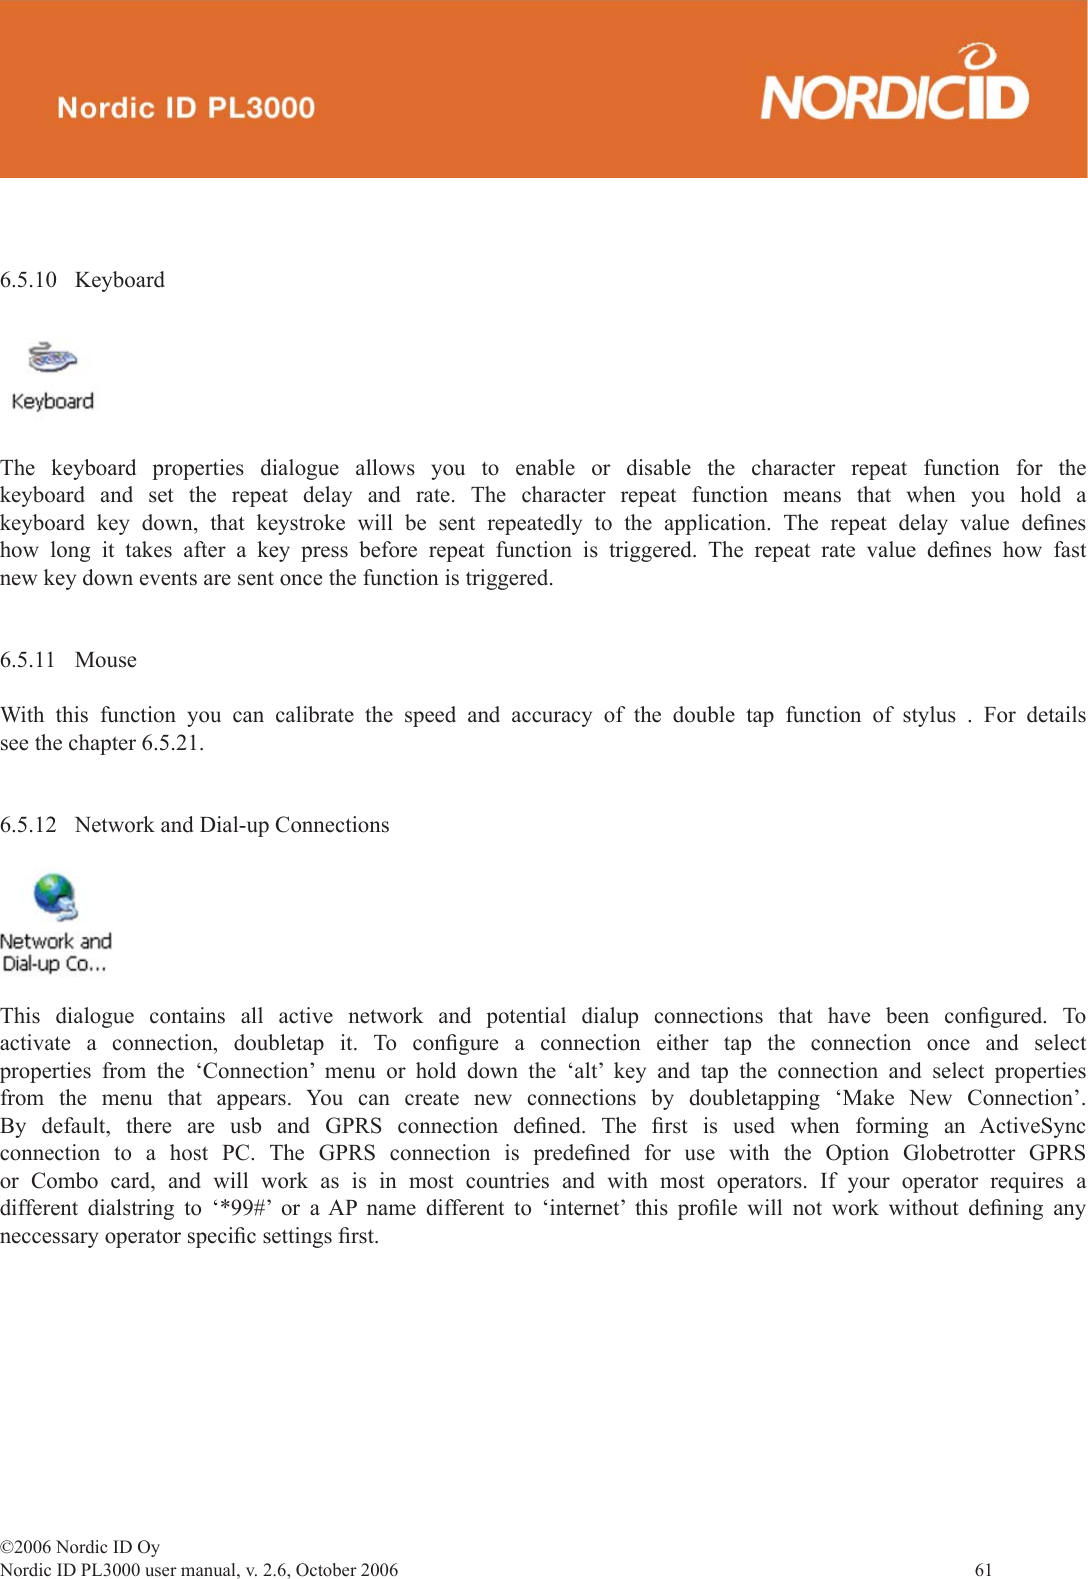
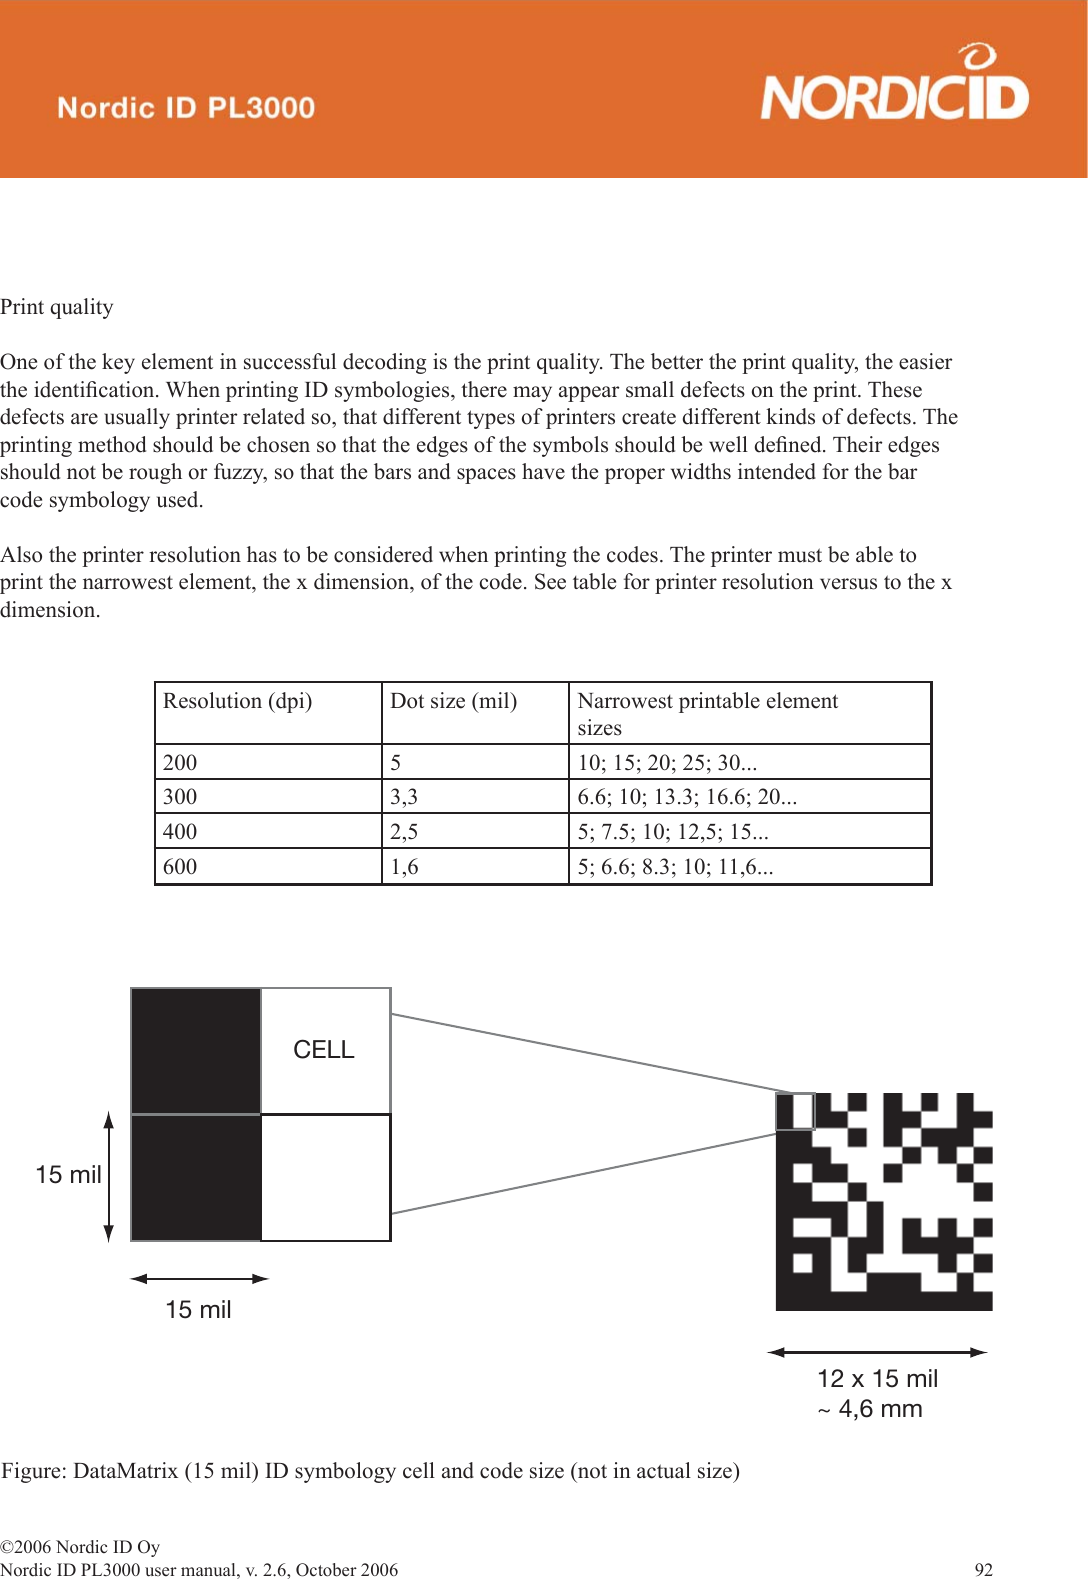
![©2006 Nordic ID OyNordic ID PL3000 user manual, v. 2.6, October 2006 45 6.1.9 Windows ExplorerWith the Windows Explorer you can browse fi les and folders stored in the PL3000 and perform actions with fi les and folders.Document icon opens File, Edit, View, Go and Favourite menus. Button icon opens quick buttons for fi le and folder actions.6.2 The task barThe task bar is located to the bottom of the display. You can hide or display the task bar from start menu -> settings task bar -> start menu.When the task bar is hidden you can open it by tapping the bottom of display with the stylus.The hidden task bar can be opened also with the keyboard:Fig.48 The Task bar• Close all the windows, • Press esc for removing all selections• Press tab for selecting taskbar• Press “OK” for opening the task barTask bar itemsStartup icon. Single click opens the Windows start menu.Alphabetic icon. The [A] icon shows when the capital letters mode is selected.Time Icon. Double click opens the calendar and clock of the PL3000. See the chapter “Setting on the time and date” for instructions.Virtual Keyboard Icon. Single click opens the virtual keyboard menu. See the chapter on “the virtual keyboard” for instructions.Desktop Icon. Single click brings desktop on the display.](https://usermanual.wiki/Nordic-ID/PL3000H/User-Guide-779056-Page-45.png)


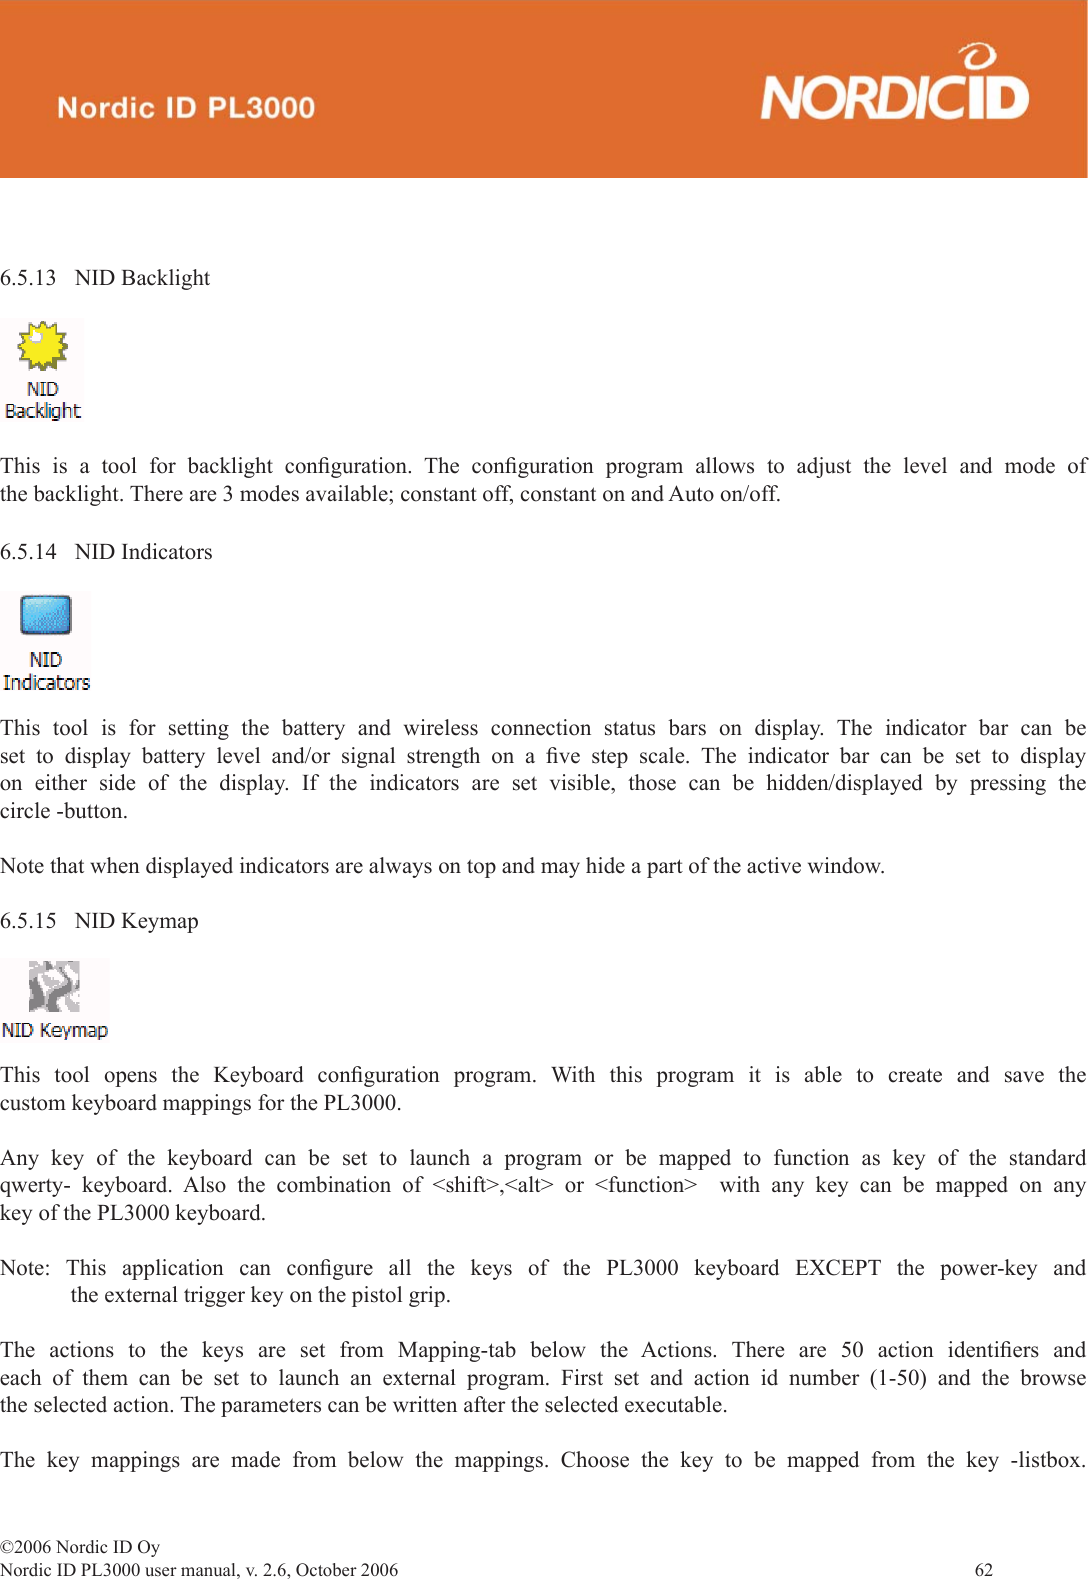

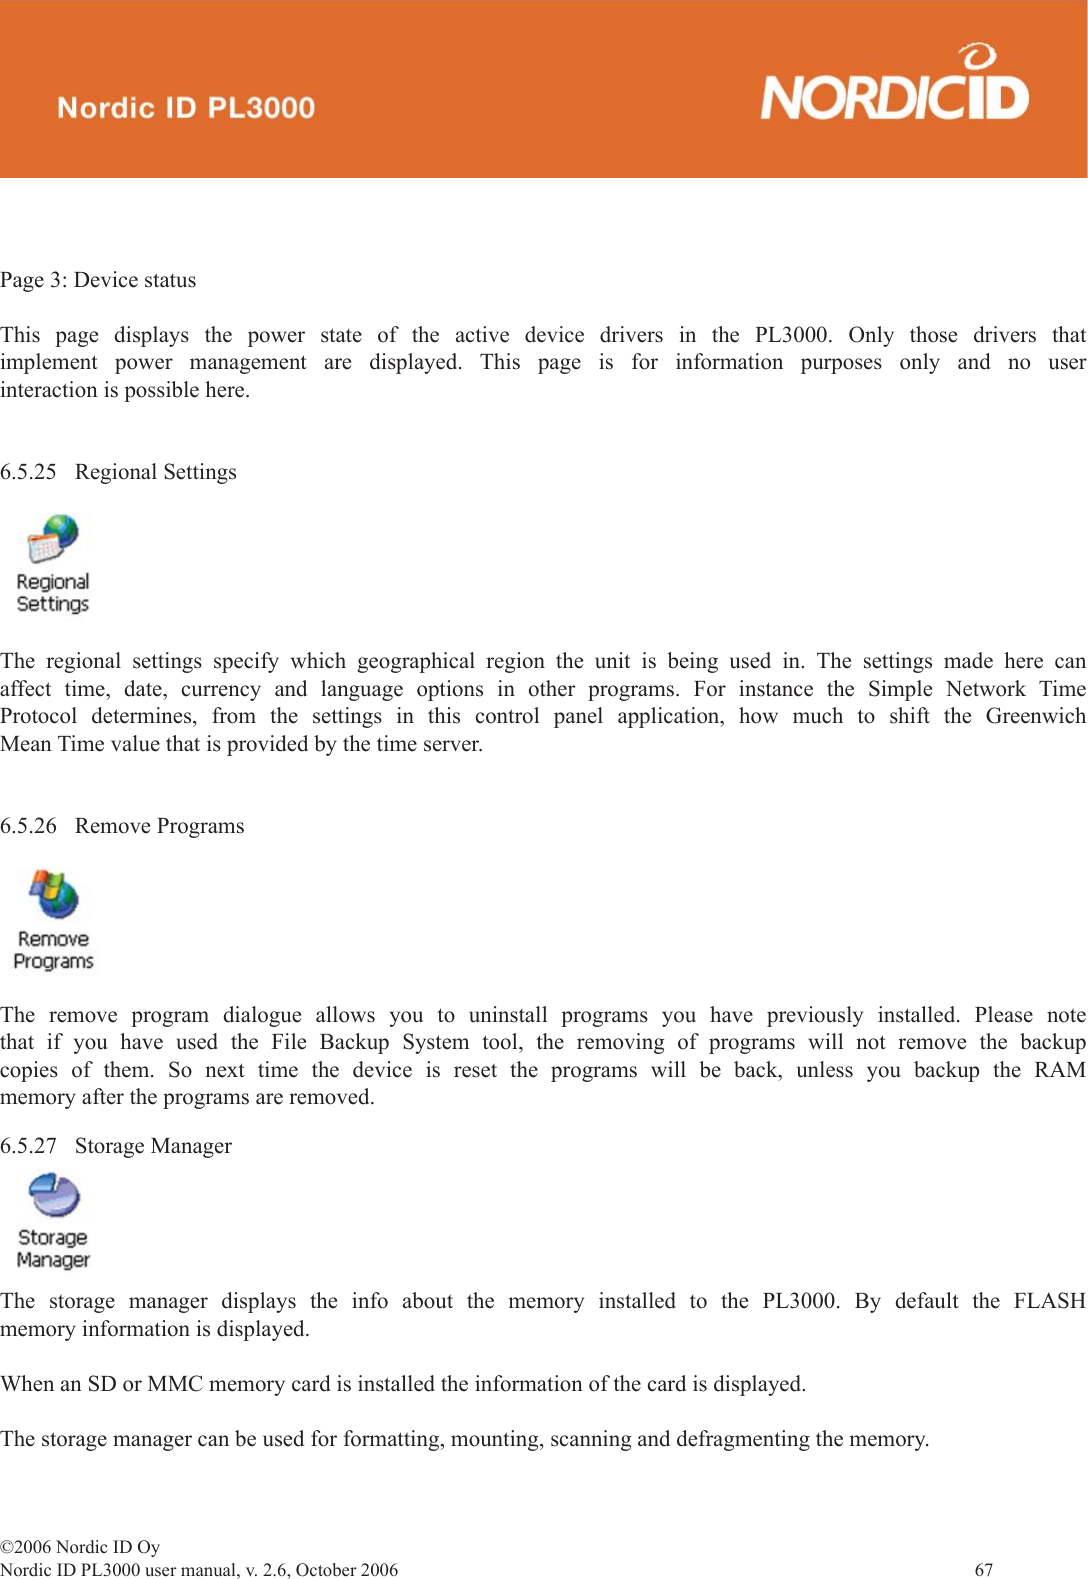


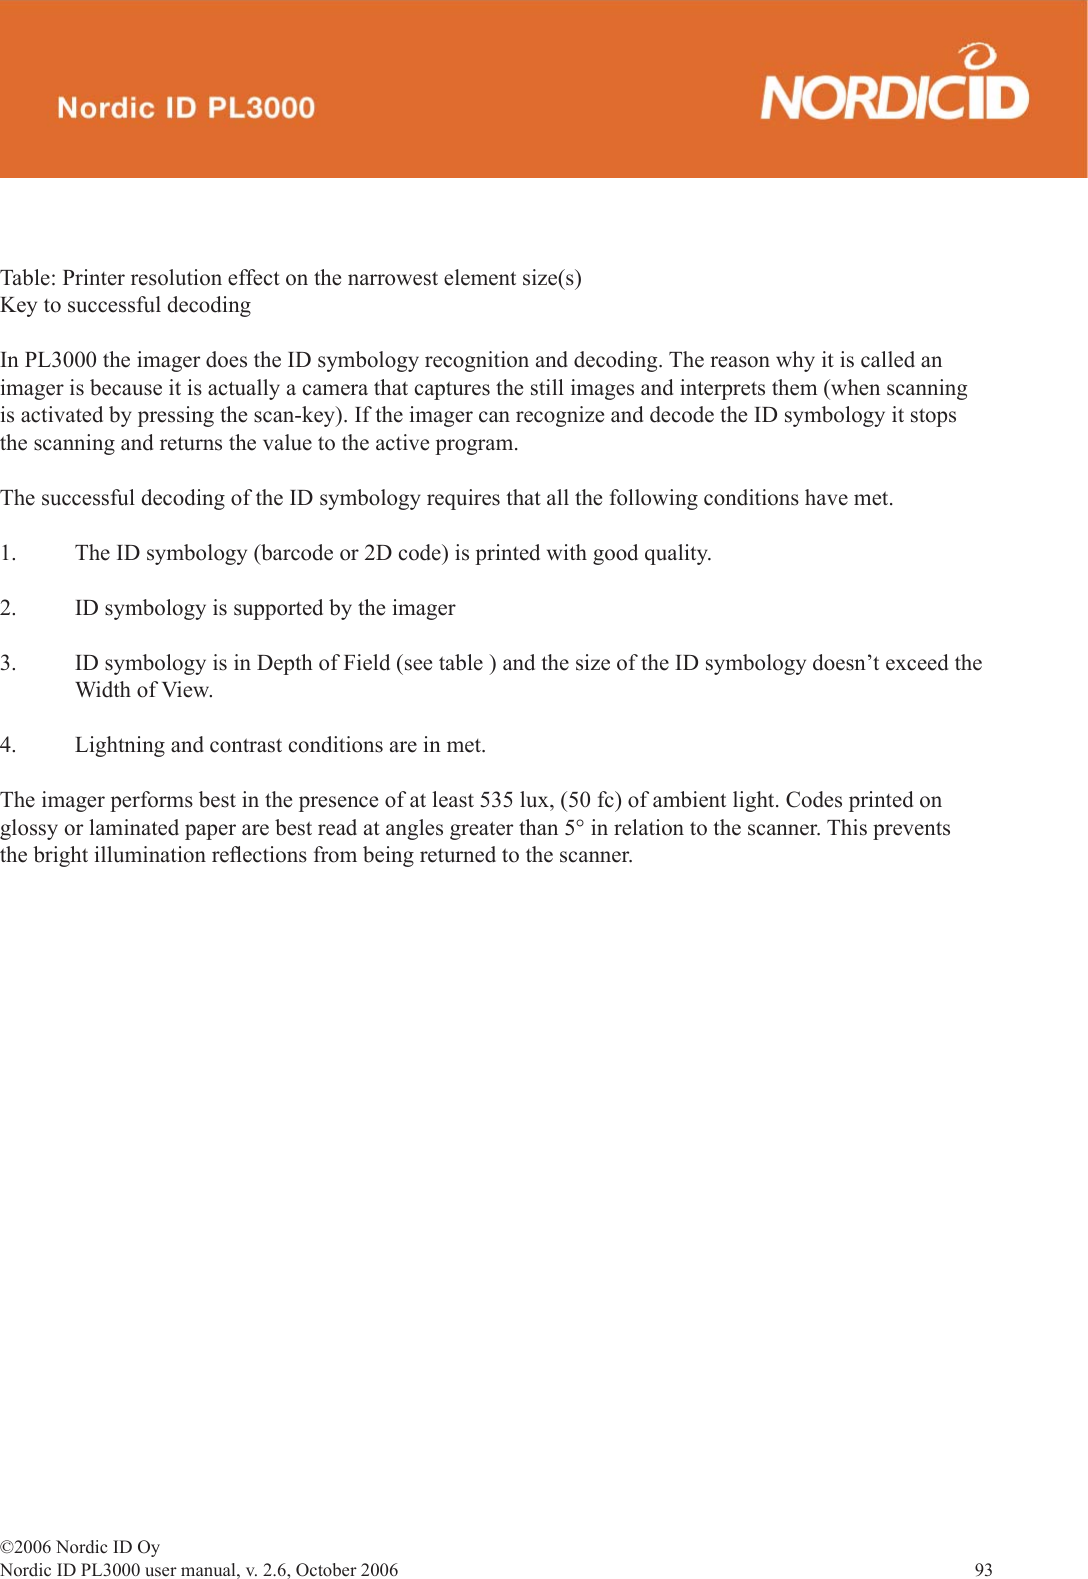


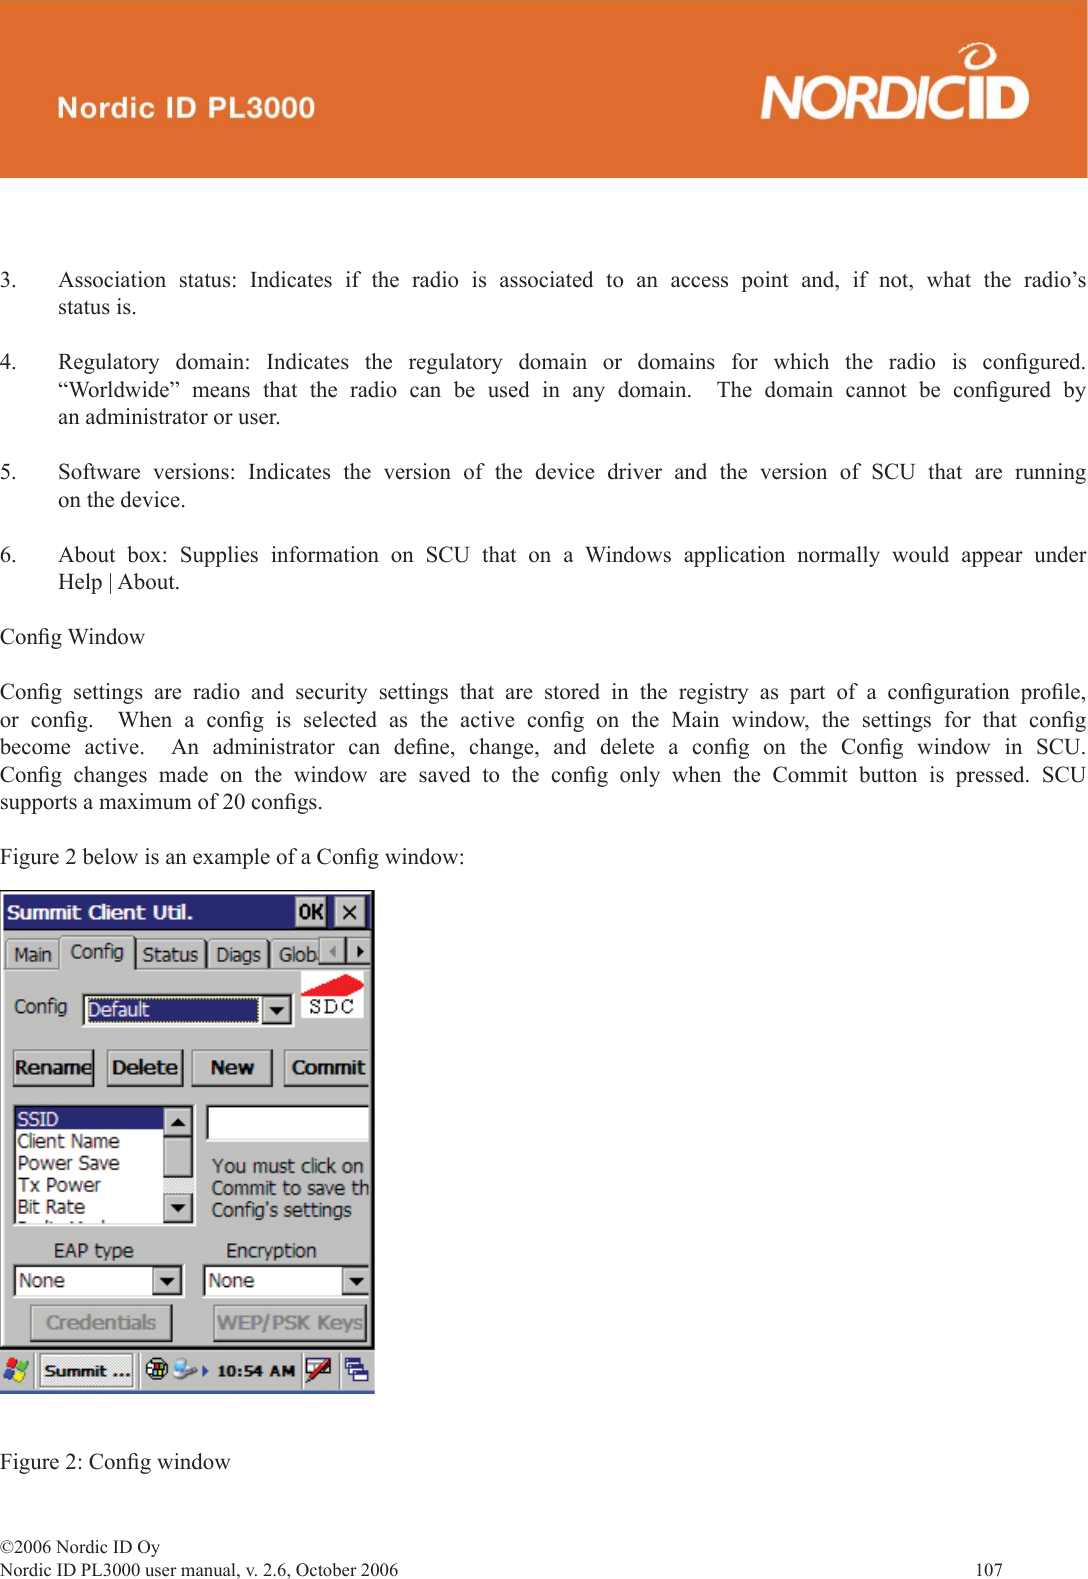
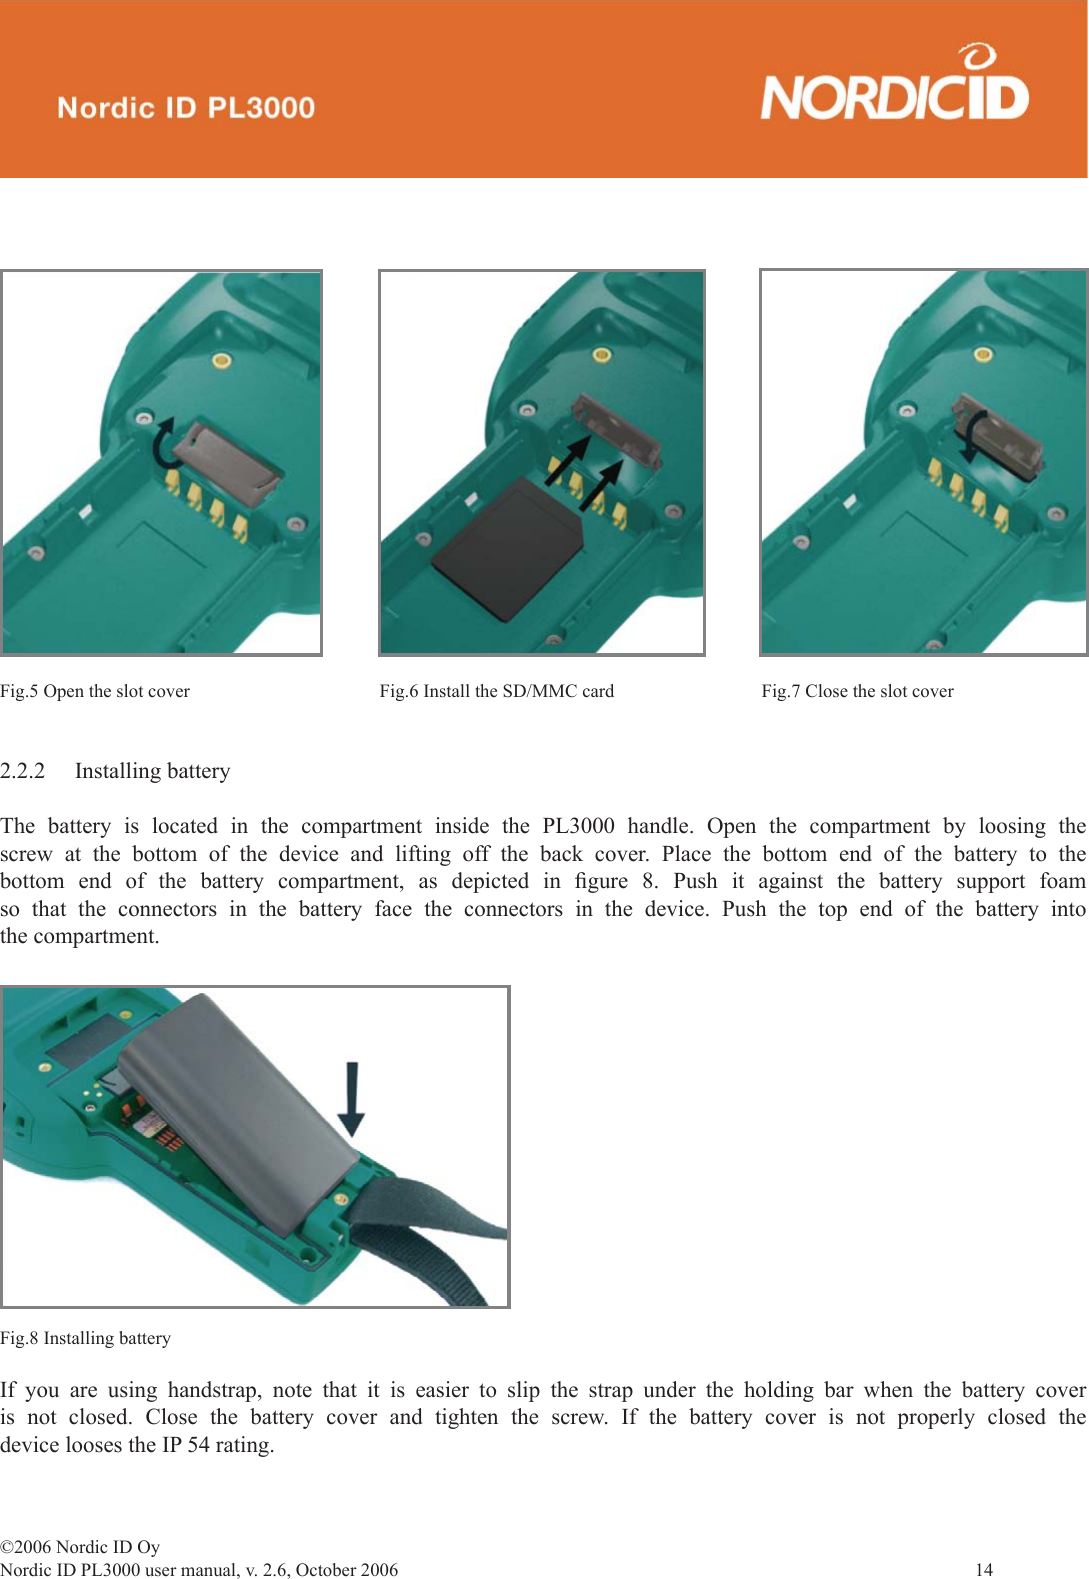
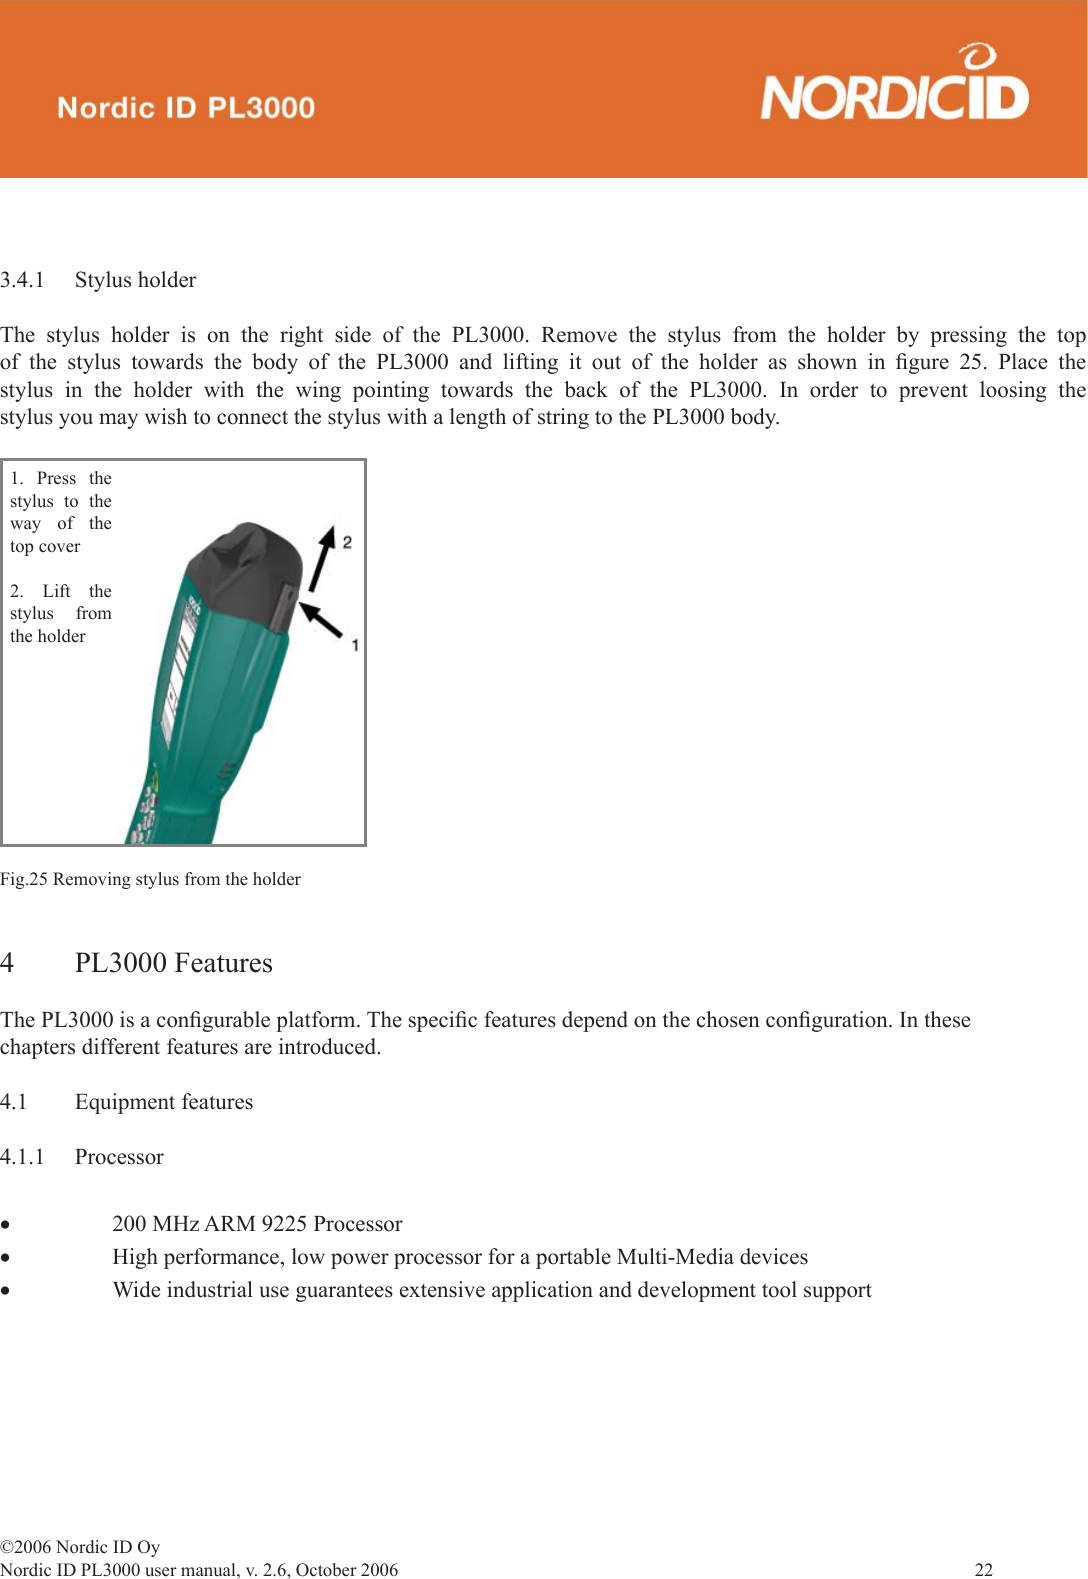
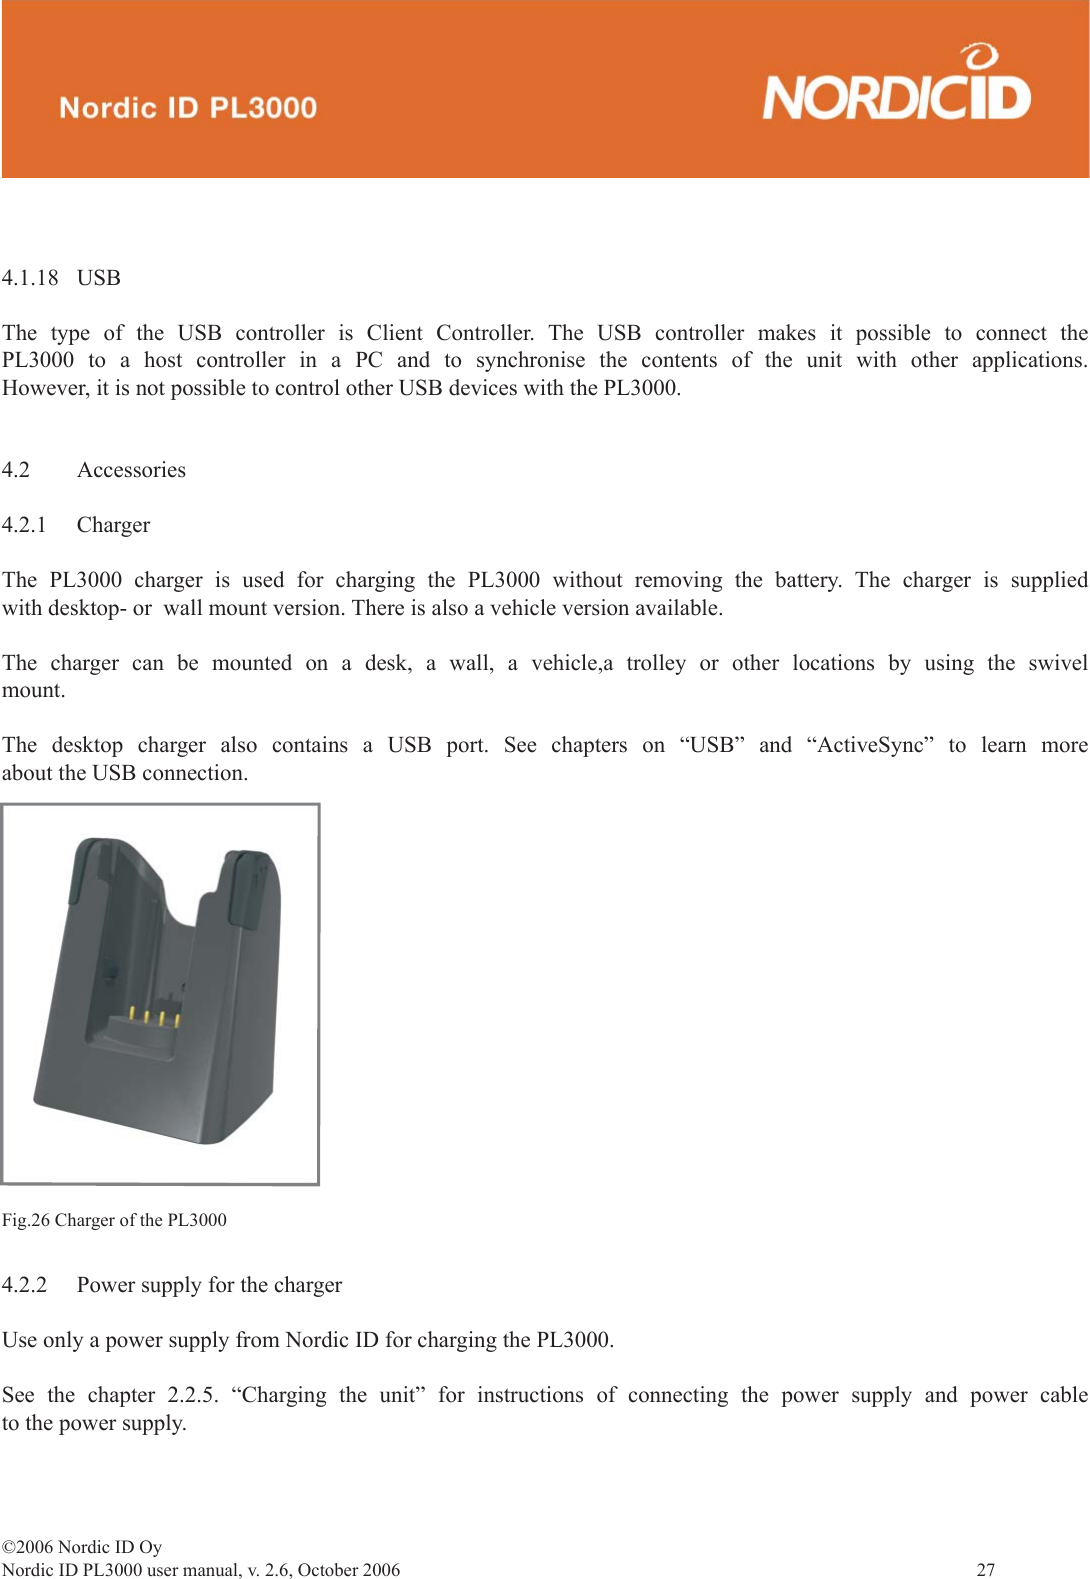
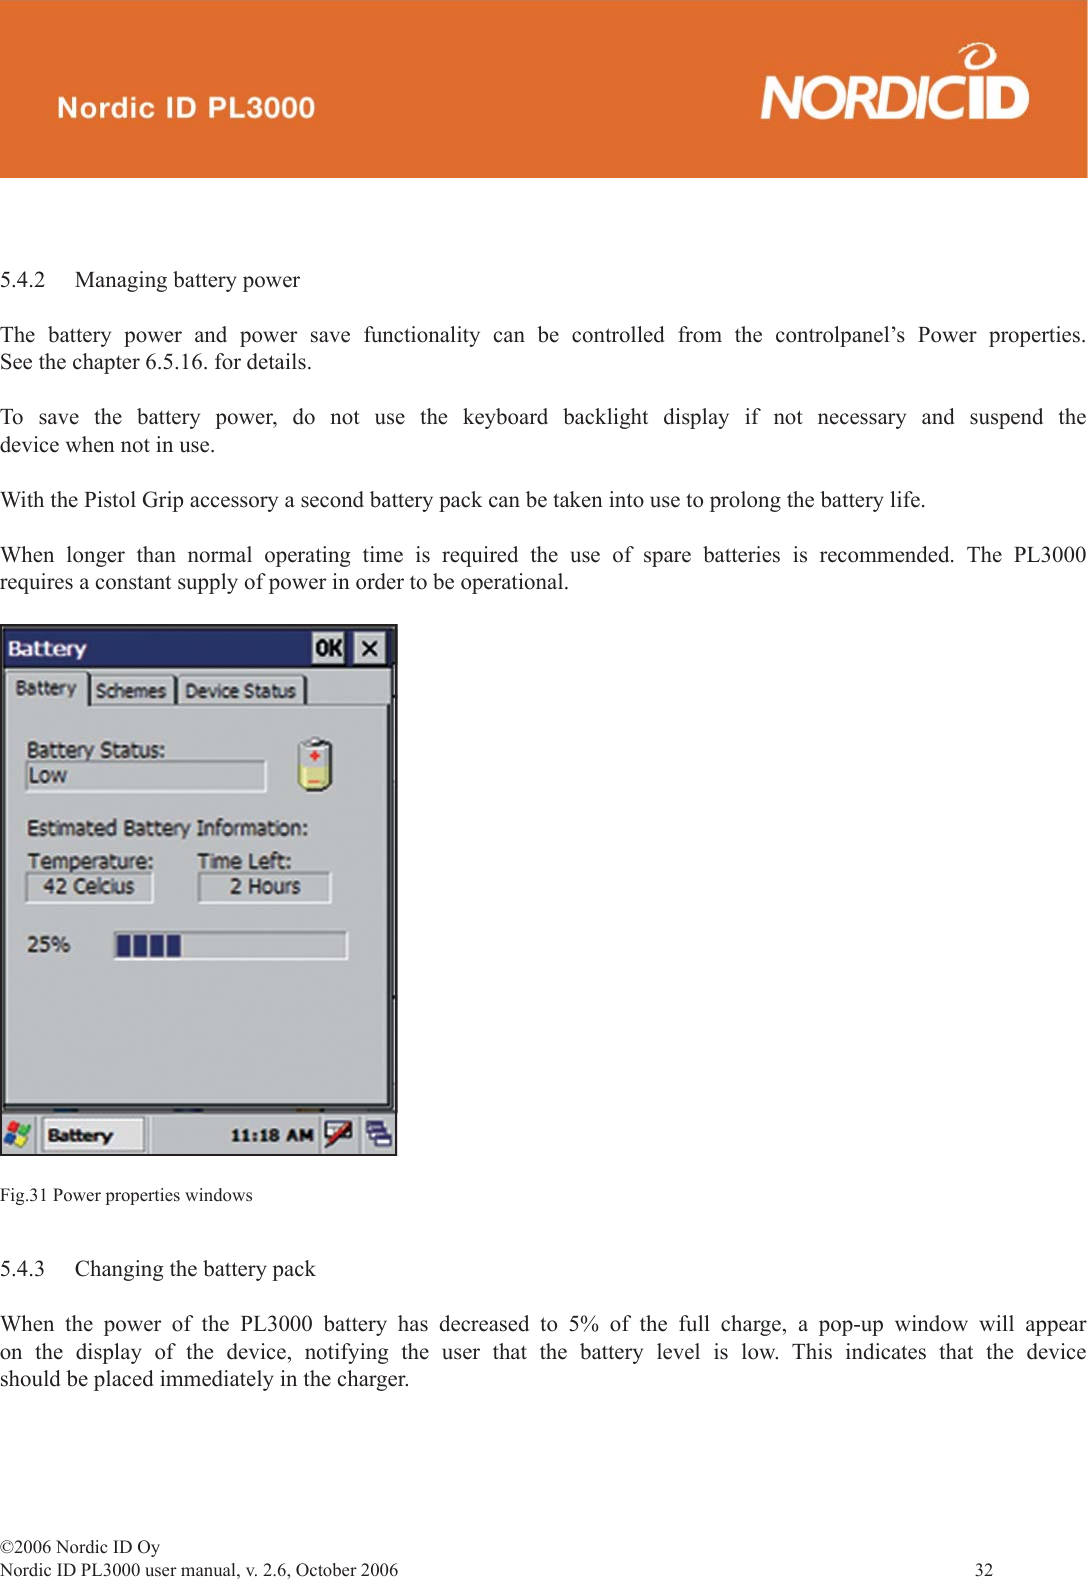
![©2006 Nordic ID OyNordic ID PL3000 user manual, v. 2.6, October 2006 109 ThirdPartyConfi gIf the confi g named “ThirdPartyConfi g” is selected as the active confi g, then SCU works in tandem with WZC for confi guration of all radio and security settings for the radio module. WZC must be used to defi ne the following radio and security settings: SSID, Auth Type, EAP Type, and Encryption. The following SCU confi g settings can be defi ned for the ThirdPartyConfi g confi g: Client Name, Power Save, Tx Power, Bit Rate, and Radio Mode. Those SCU confi g settings, all SCU global settings, and the WZC settings are applied to the radio when ThirdPartyConfi g is selected as the active confi g and a power cycle is performed.Status WindowThe Status window provides status information on the radio. Status items include IP address and MAC address for the client radio, IP address and MAC address for the AP, signal strength, channel, transmit power, and data rate. A sample Status window is shown in Figure 4 below: Figure 4: Status windowHere are the highlights:- Client info: Name of active confi g, client name, client IP address, and client MAC address- AP info: AP name, AP IP address, and AP MAC address- Signal strength, shown both graphically and numerically- Other connection info: Channel, transmit power[4], and bit rateOne status item, the radio association state, is shown on both the Status window and the Main window.](https://usermanual.wiki/Nordic-ID/PL3000H/User-Guide-779056-Page-109.png)
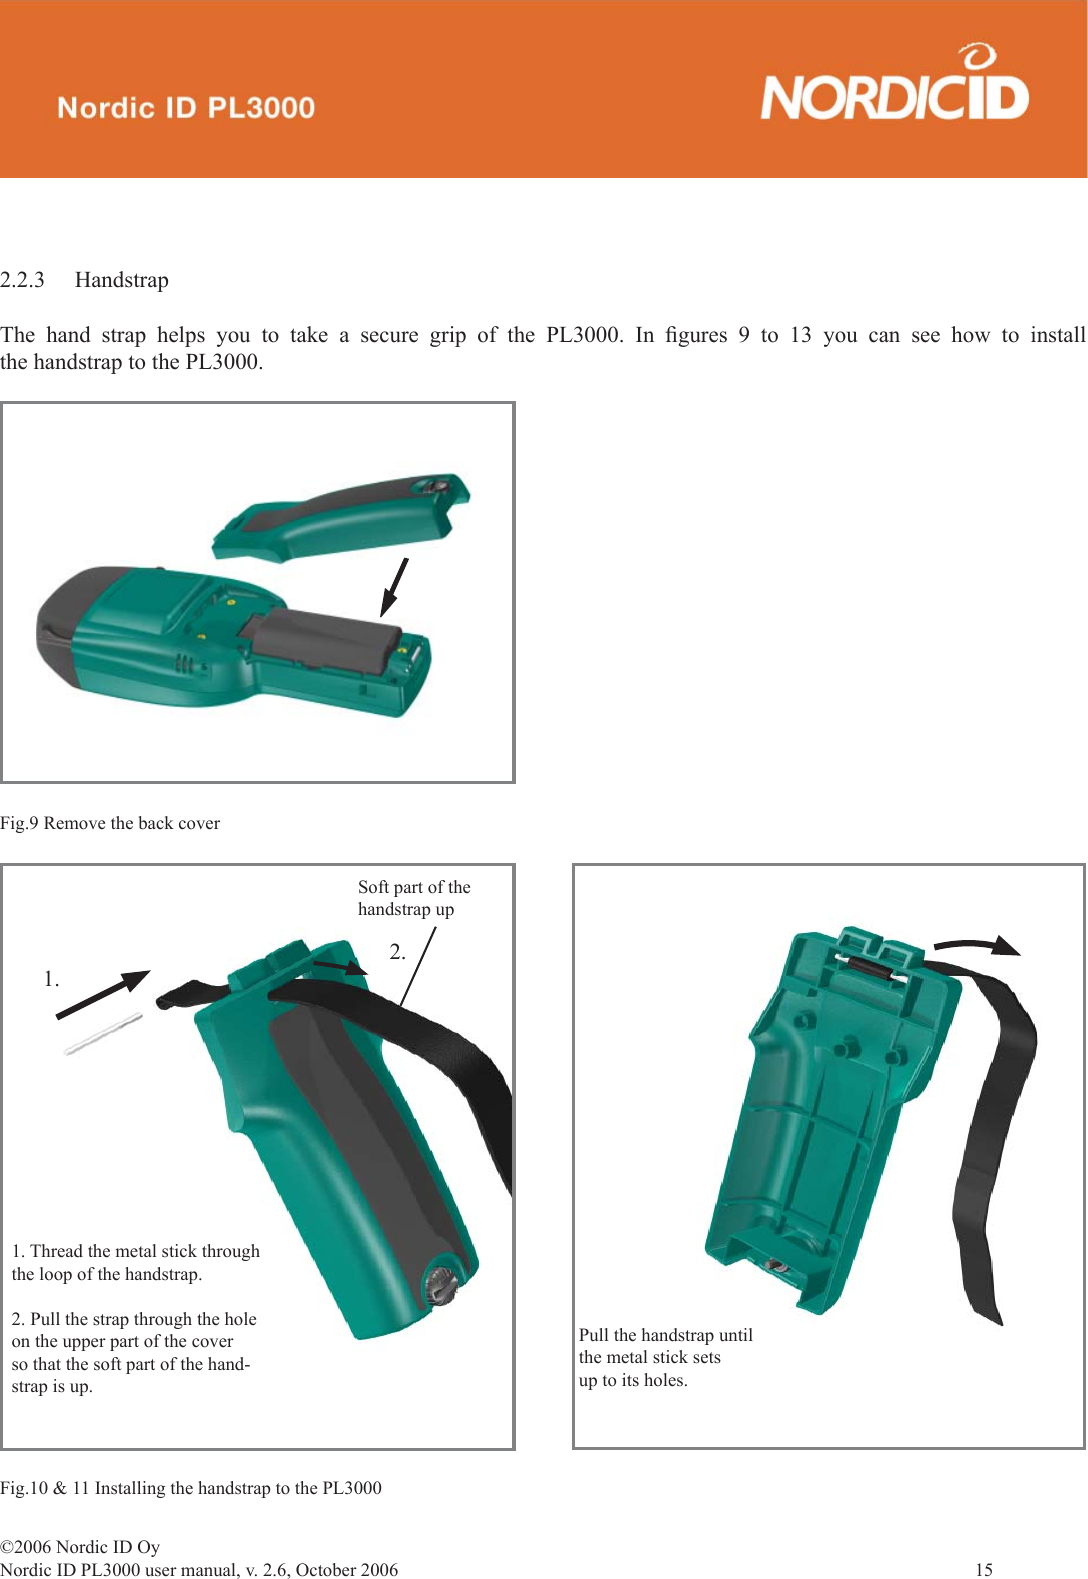
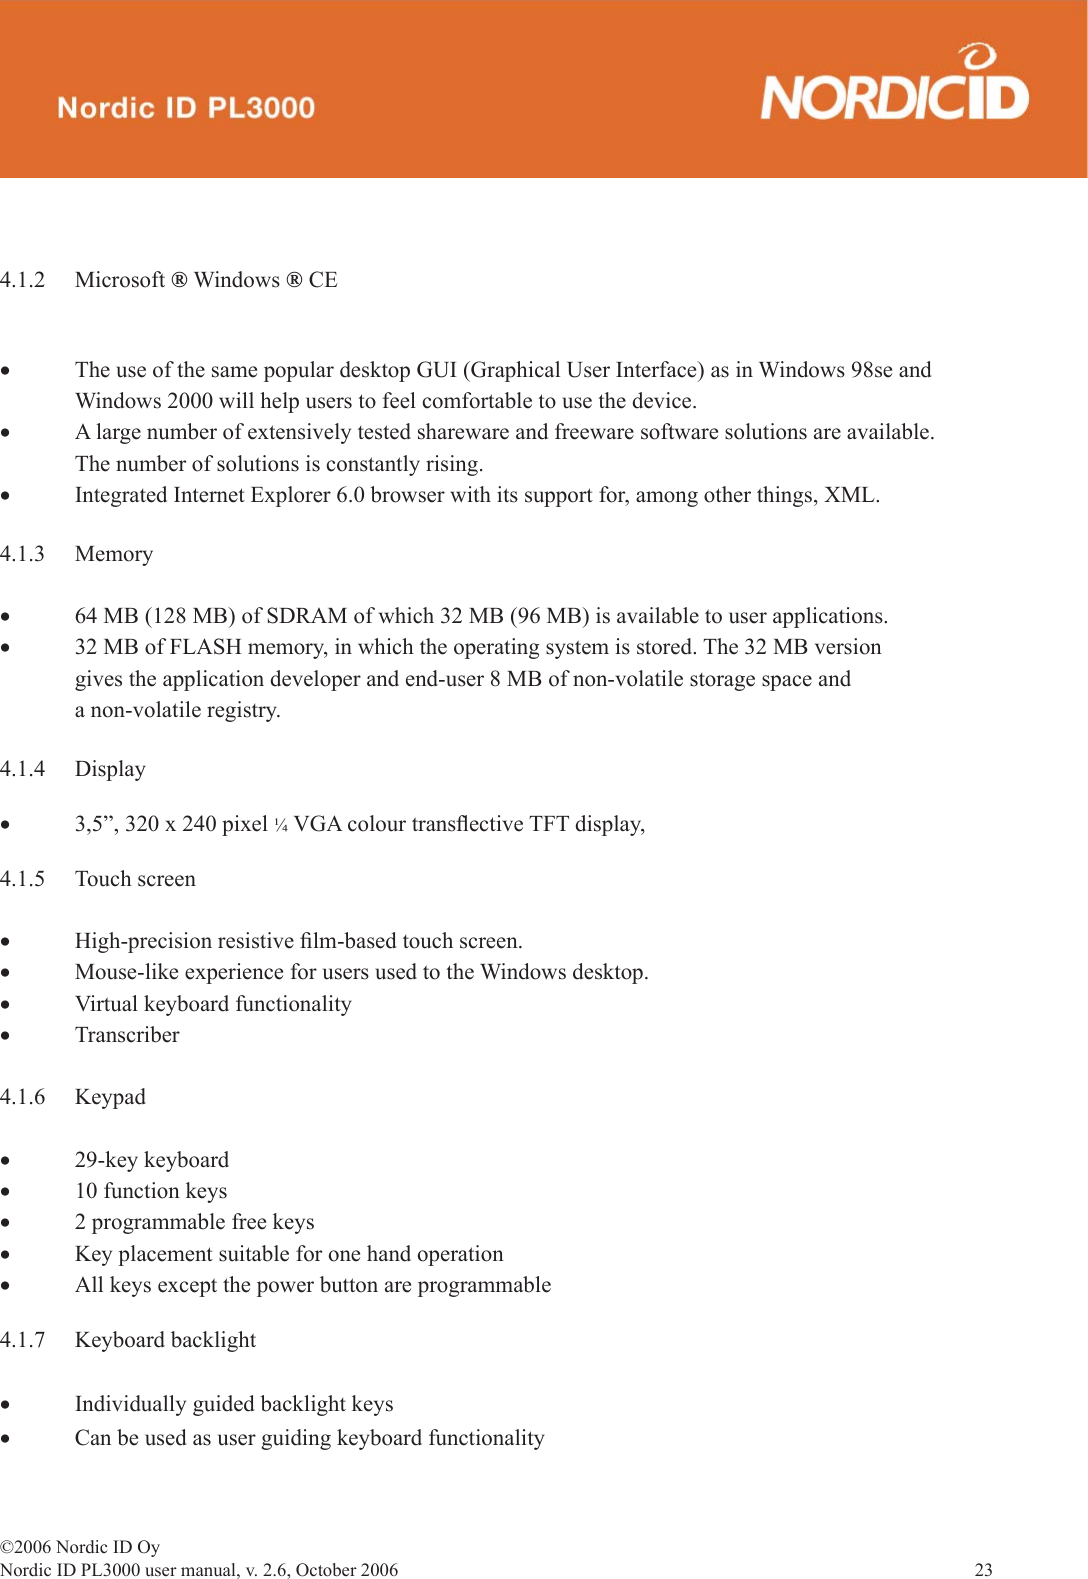
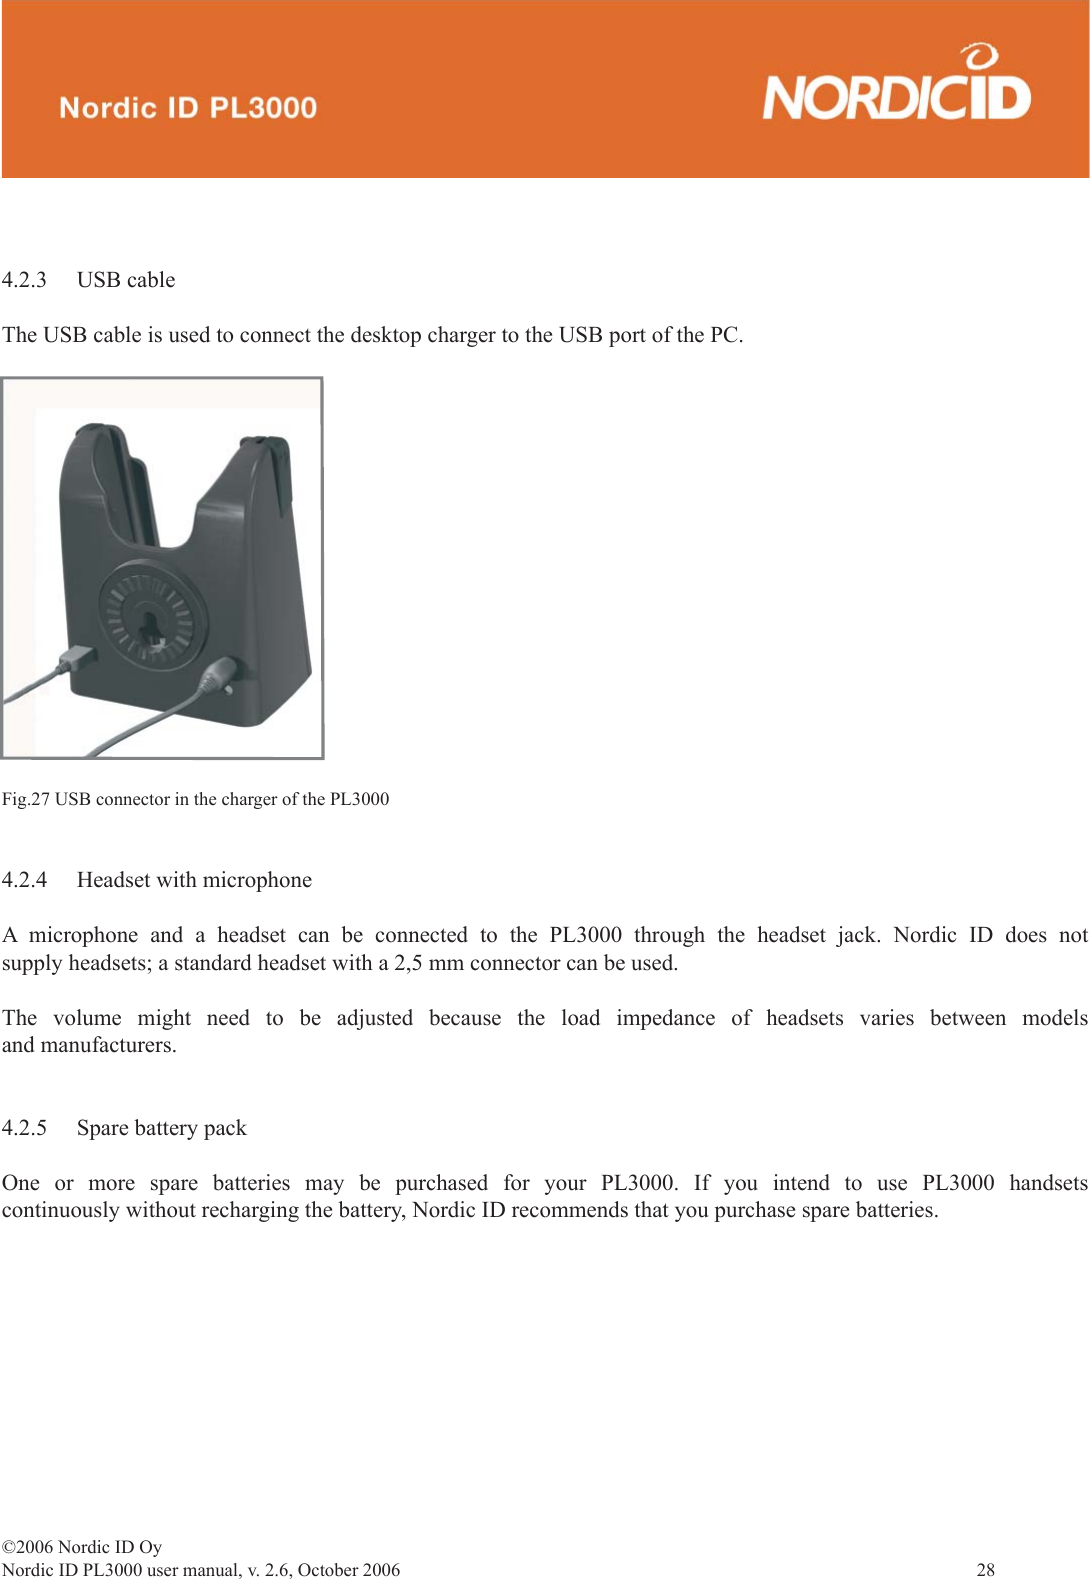
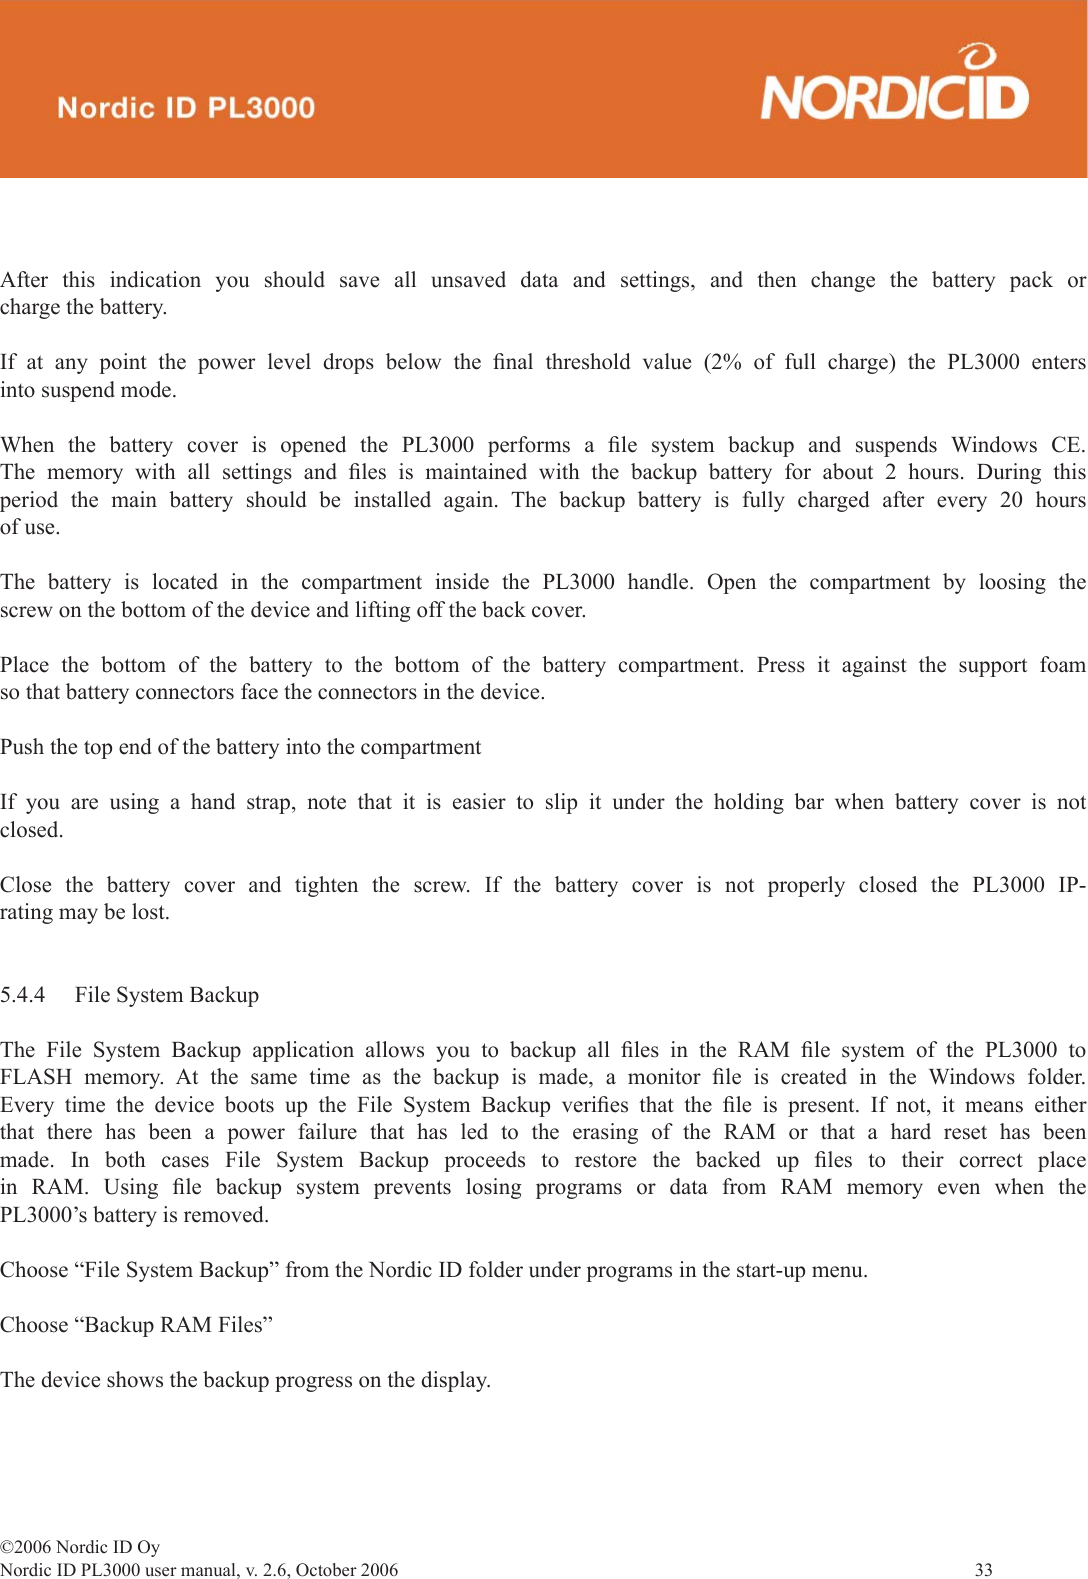
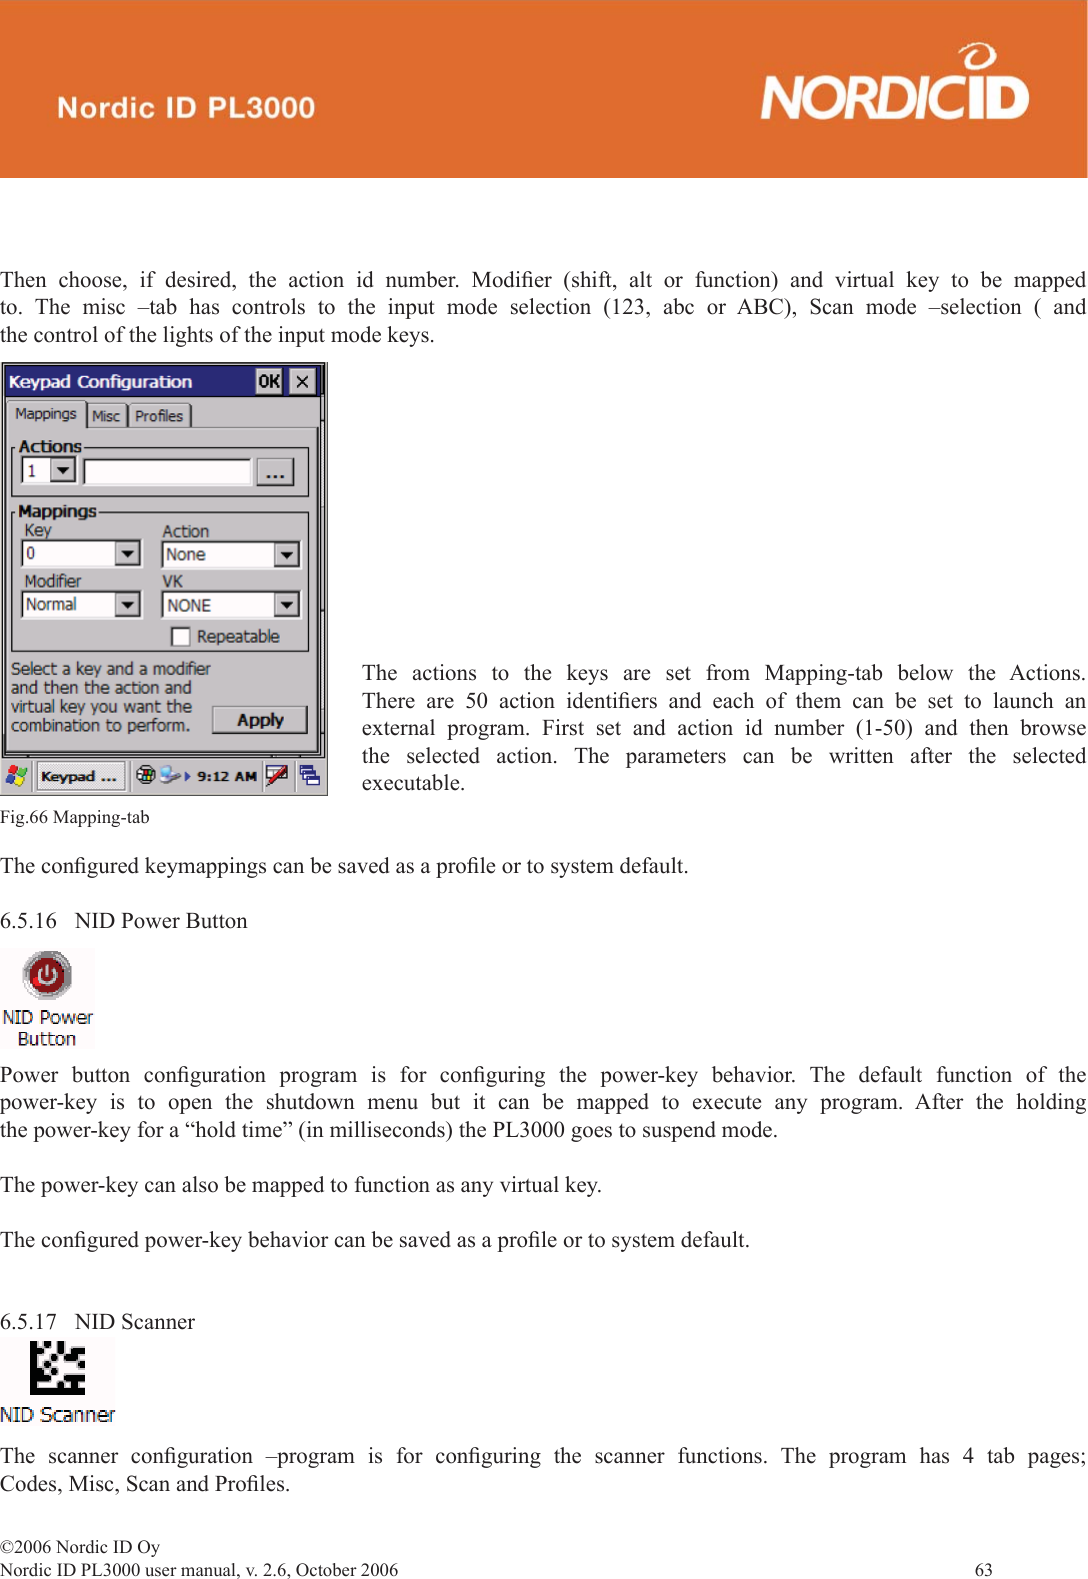
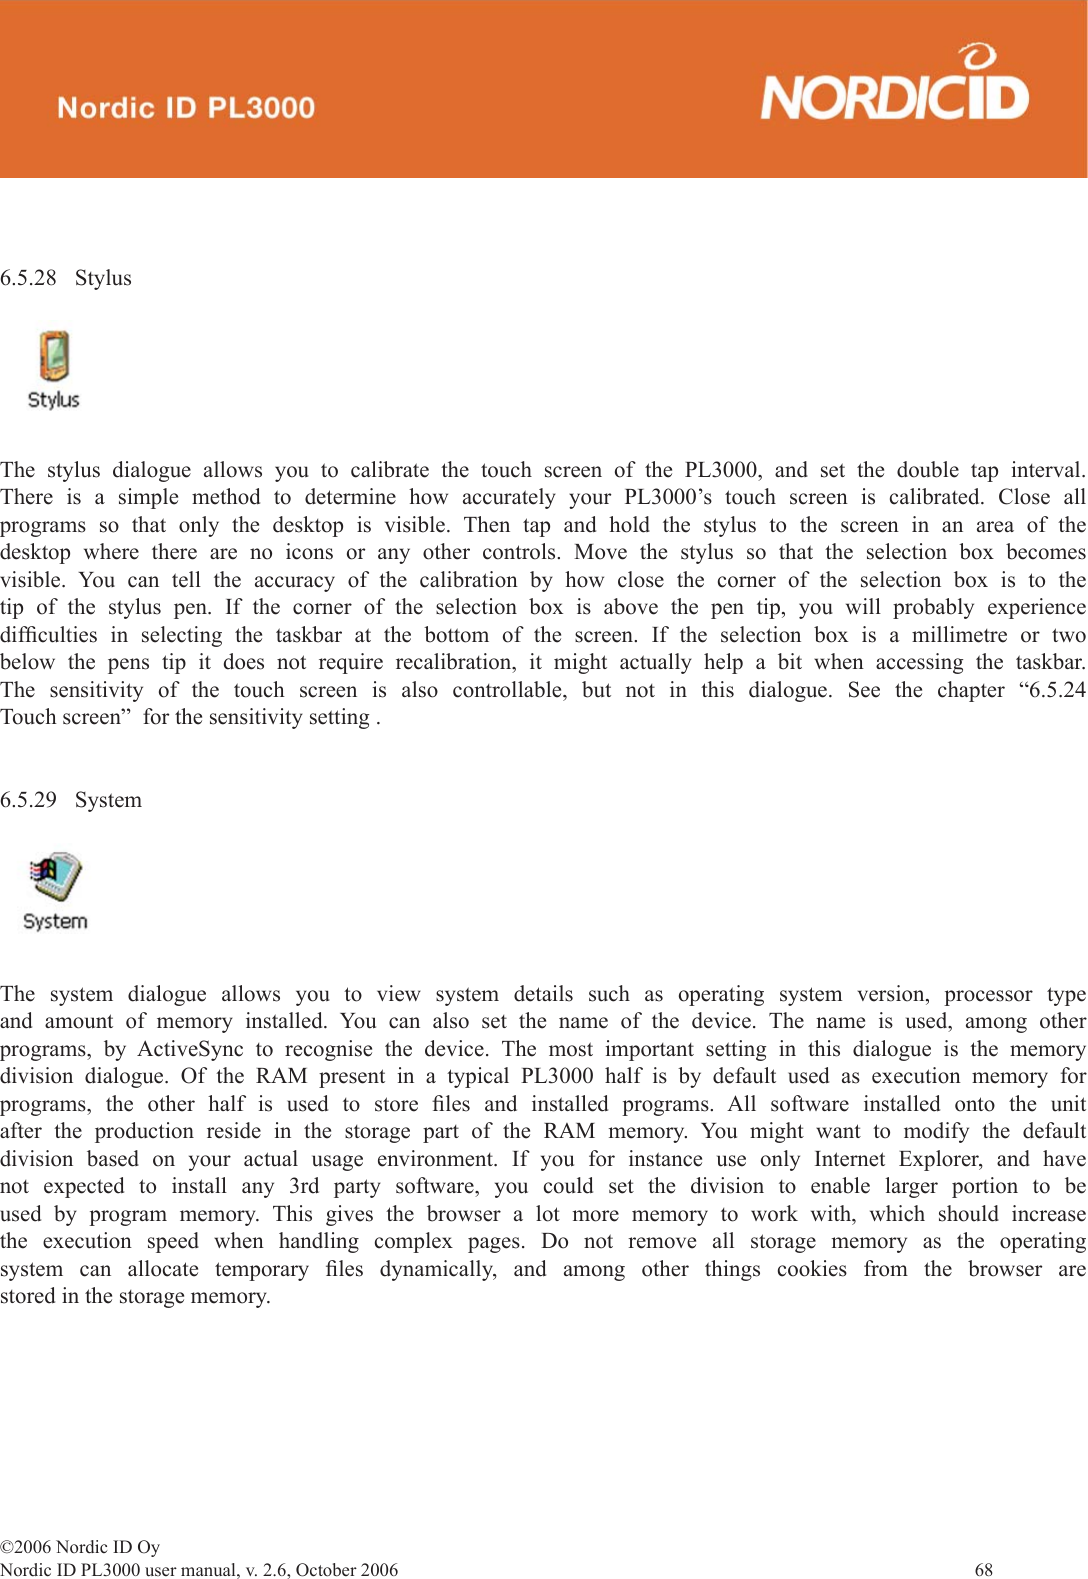
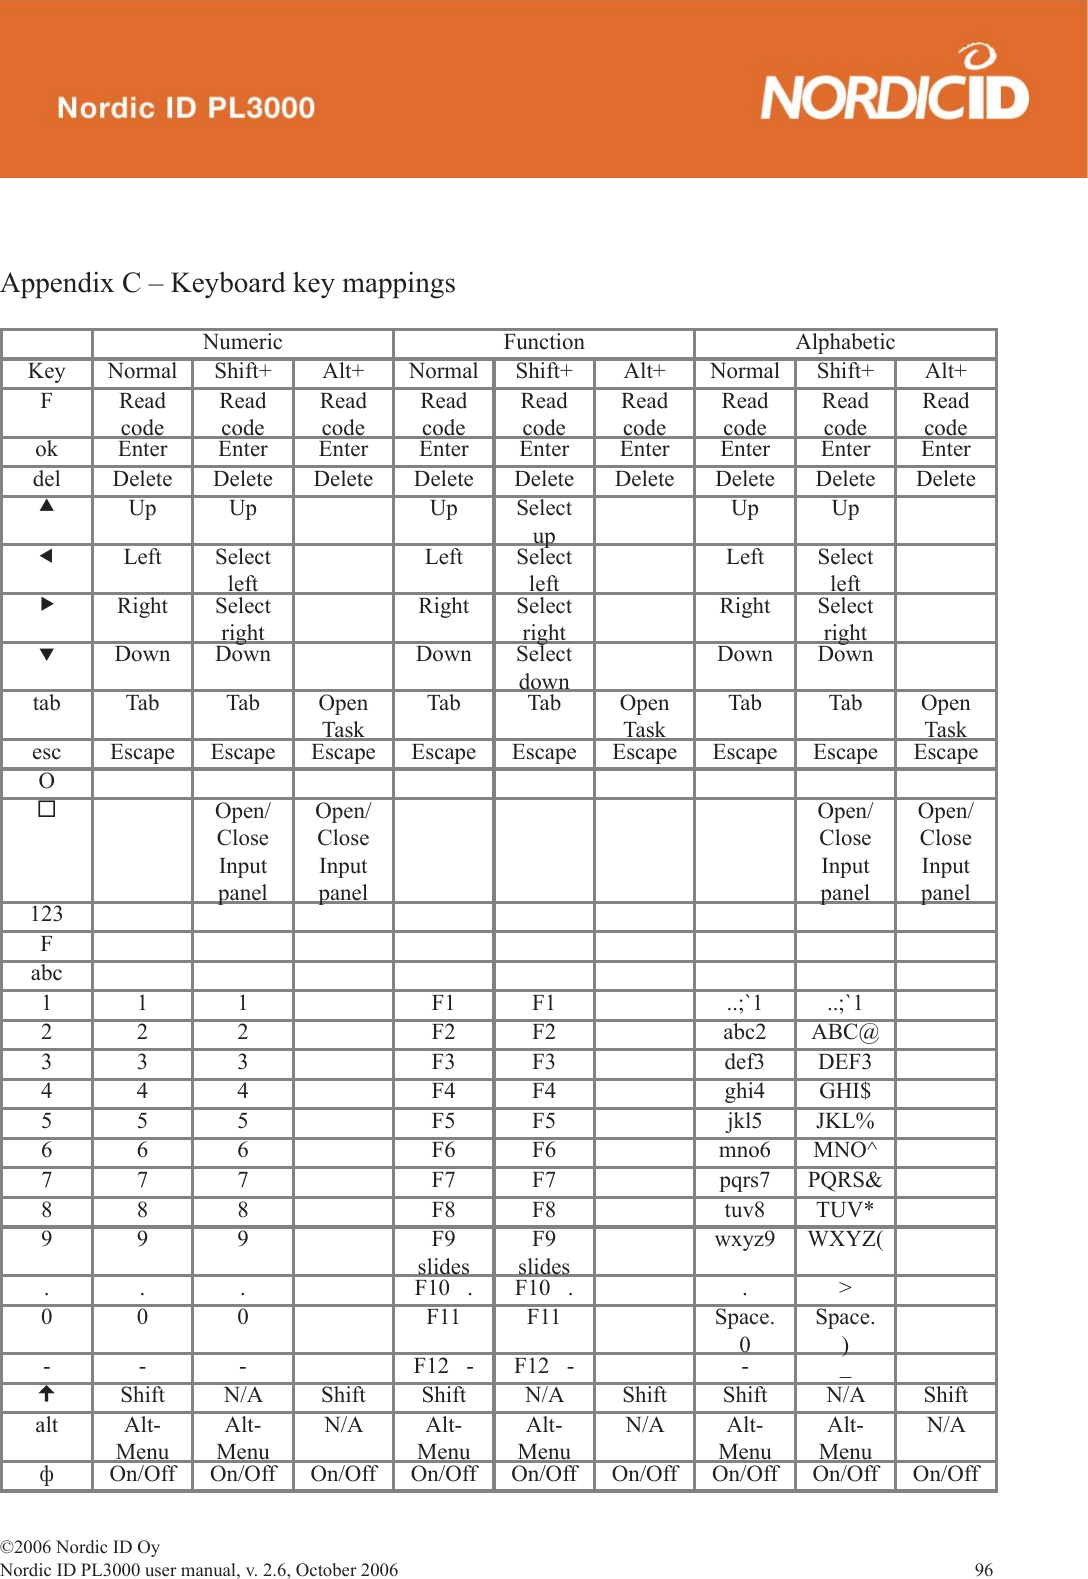
![©2006 Nordic ID OyNordic ID PL3000 user manual, v. 2.6, October 2006 110 Potential values are: Down (not recognized), Not Associated, Associated, or [EAP type] Authenticated. Diags WindowA sample Diags, or troubleshooting, window is shown in Figure 5 below: Figure 5: Diags window Here are the functions available on the Diags window:- (Re)connect: Disable and enable the radio, apply or reapply the current confi g, and attempt to associate and authenticate to the wireless LAN, logging all activity in the output area at the bottom.- Release/Renew: Obtain a new IP address through DHCP release/renew, and log all activity in the output area at the bottom.- Start Ping: Start a continuous ping to the address in the edit box next to it. Once the button is clicked, its name and function will change to Stop Ping. Leaving the Diags window also will stop the ping, as will pressing any other button on the screen.](https://usermanual.wiki/Nordic-ID/PL3000H/User-Guide-779056-Page-110.png)