ORION ELECTRIC M2F9A TV interface Device User Manual Manual 1
ORION ELECTRIC CO., LTD. TV interface Device Manual 1
UserManual.wiki
>
ORION ELECTRIC
>
M2F9A User Manual
>
Manual 1
Contents
1.
Manual 1
2.
Manual 2
Manual 1
Navigation menu
Upload a User Manual
Namespaces
Wiki Guide
HTML
PDF
Info
Views
User Manual
Discussion / Help
Navigation

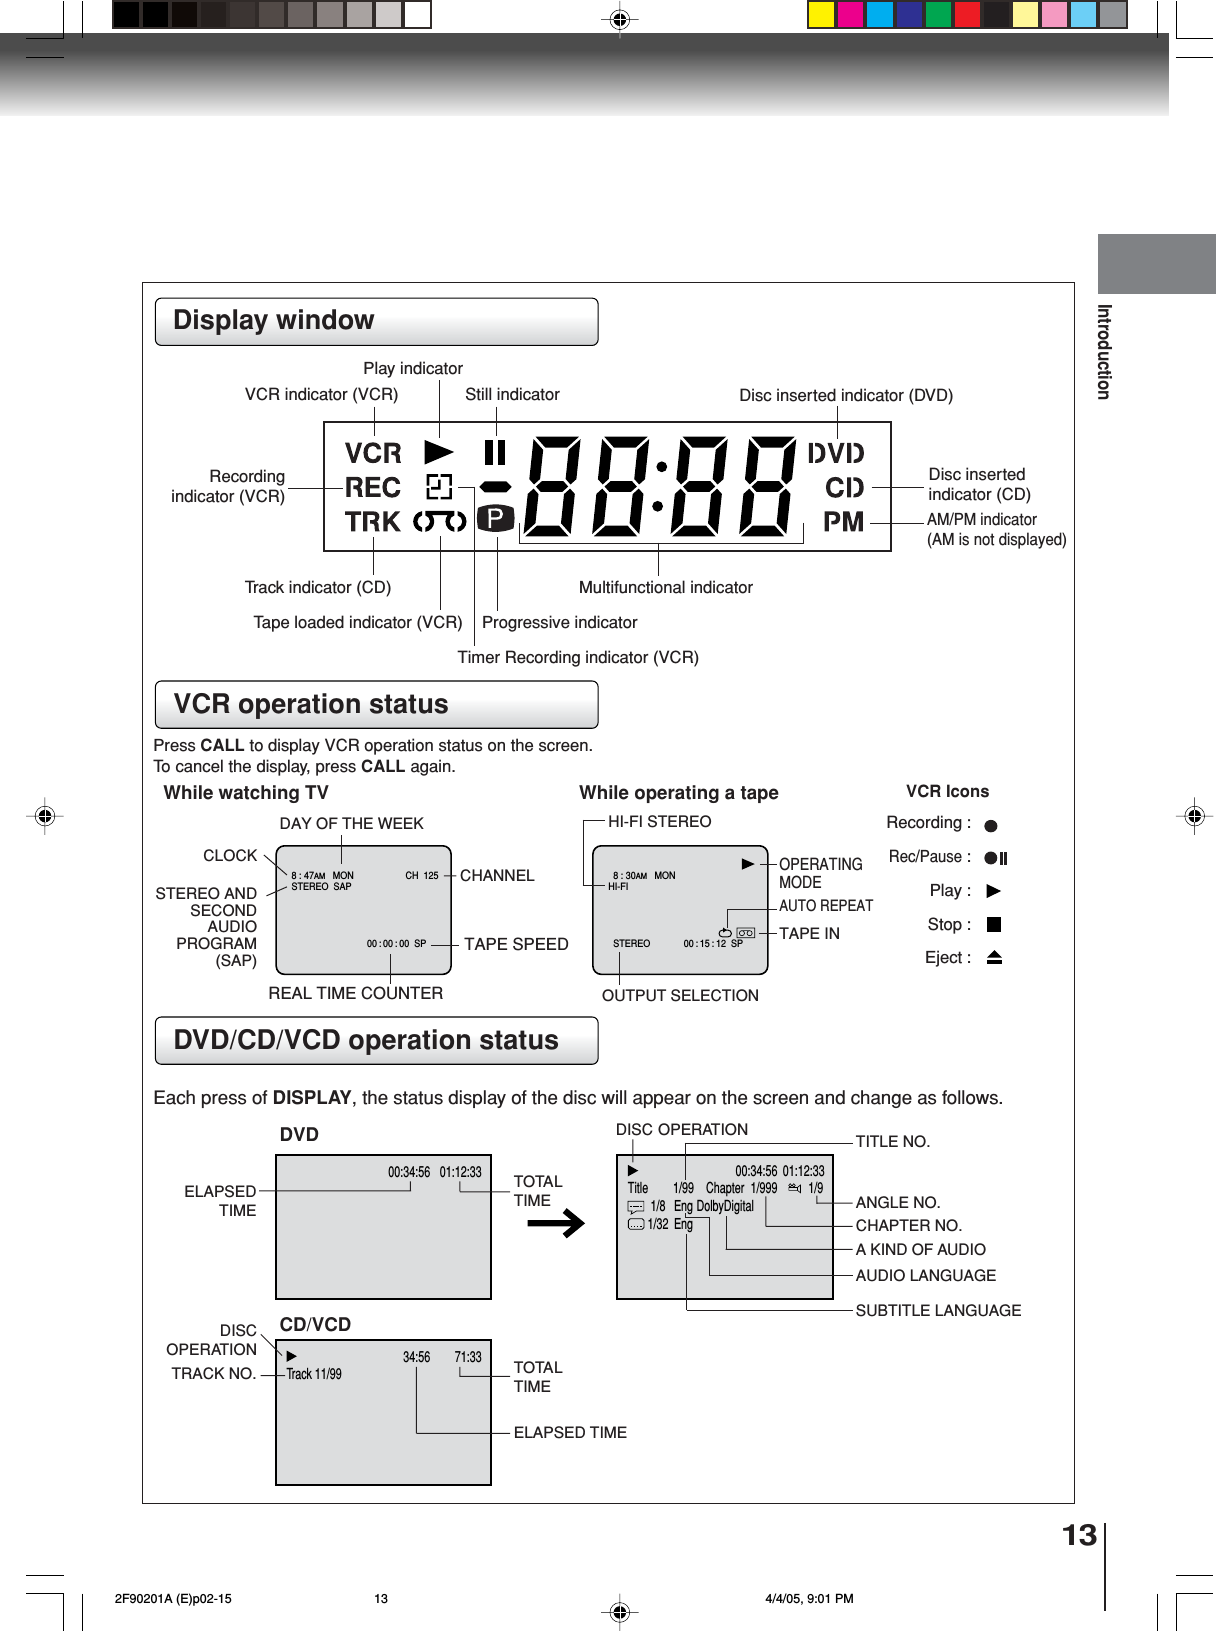
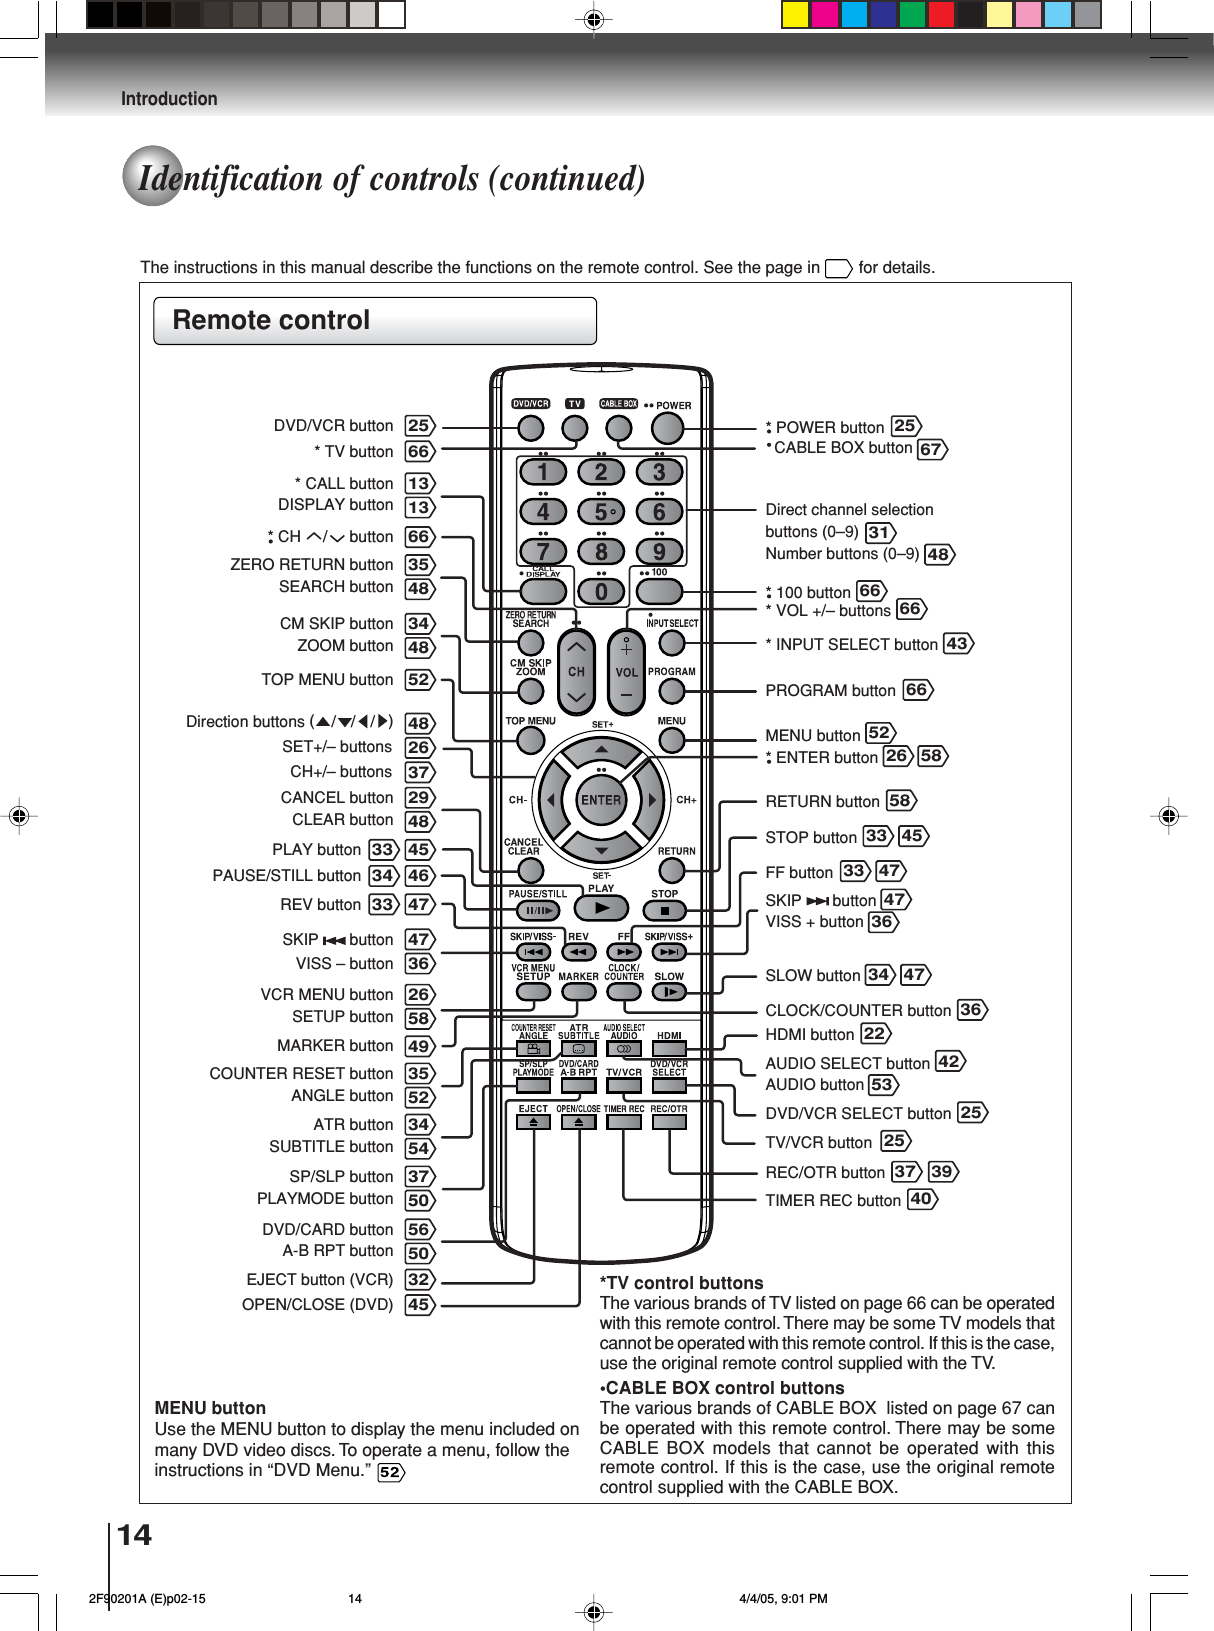
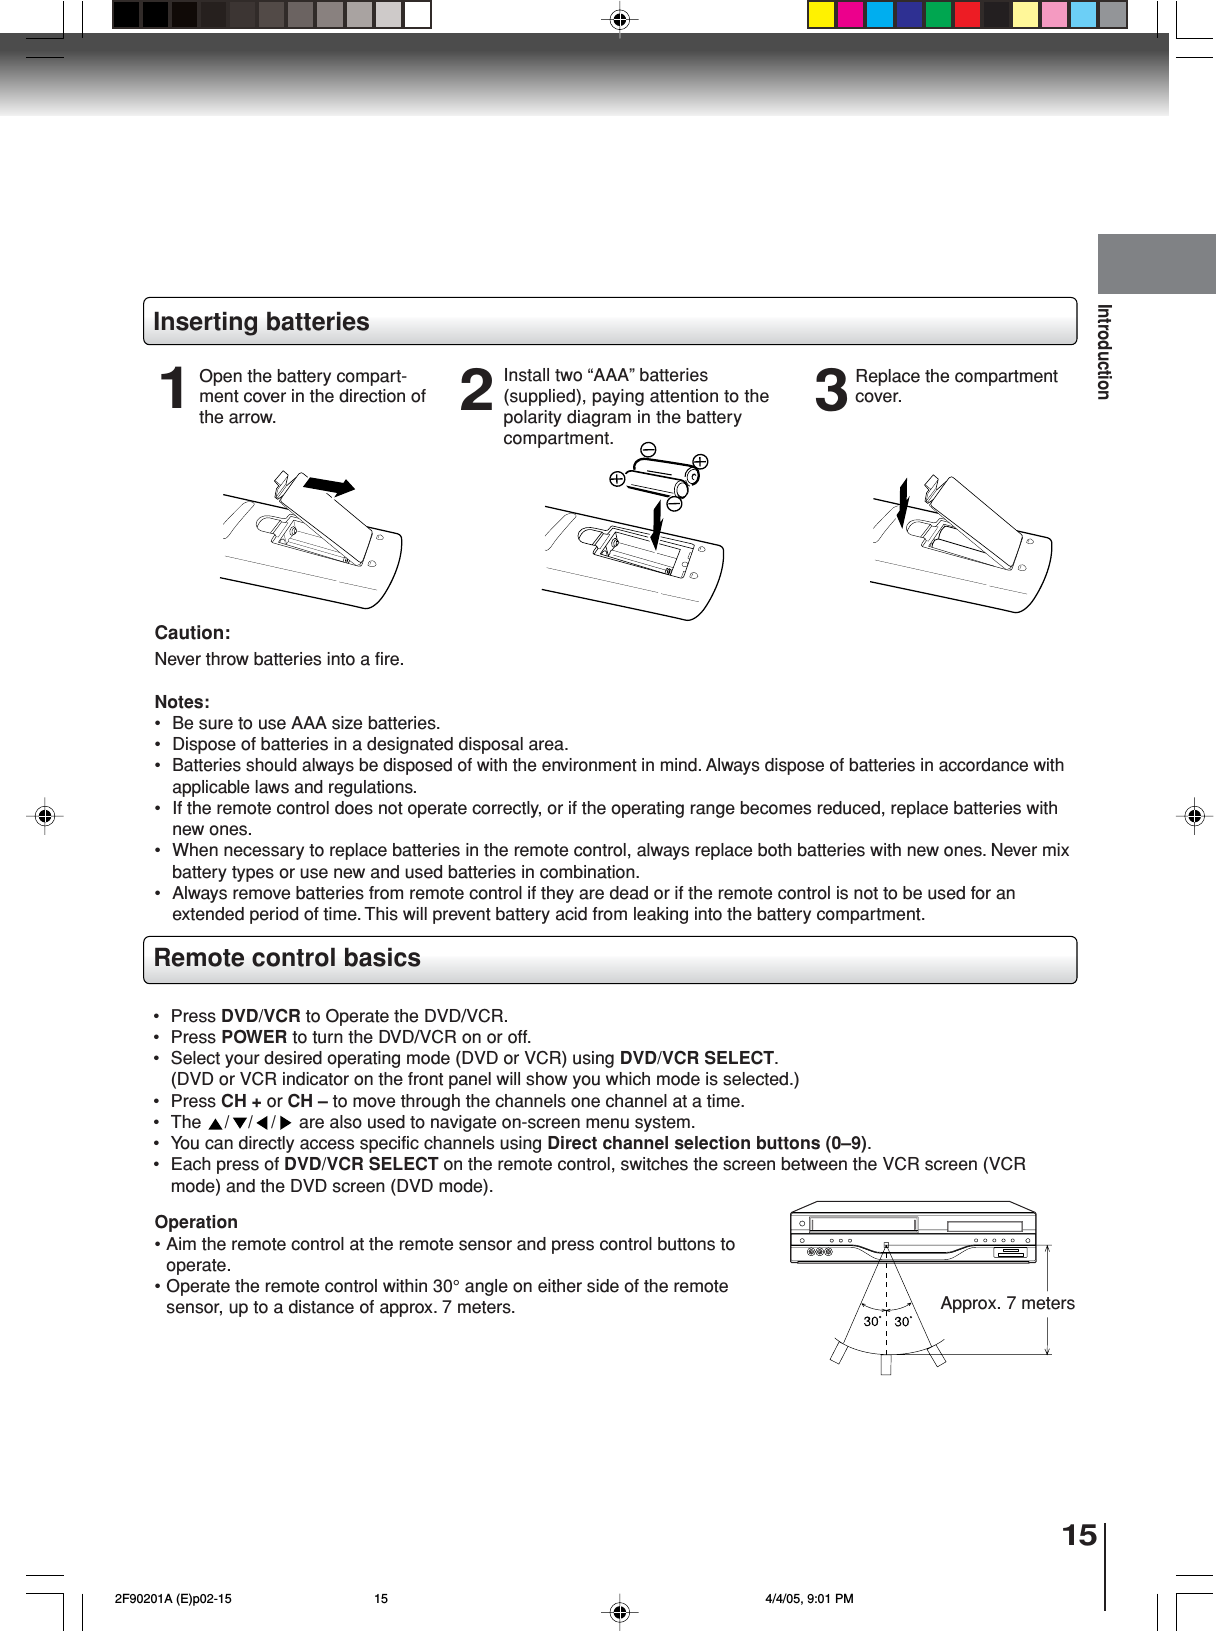
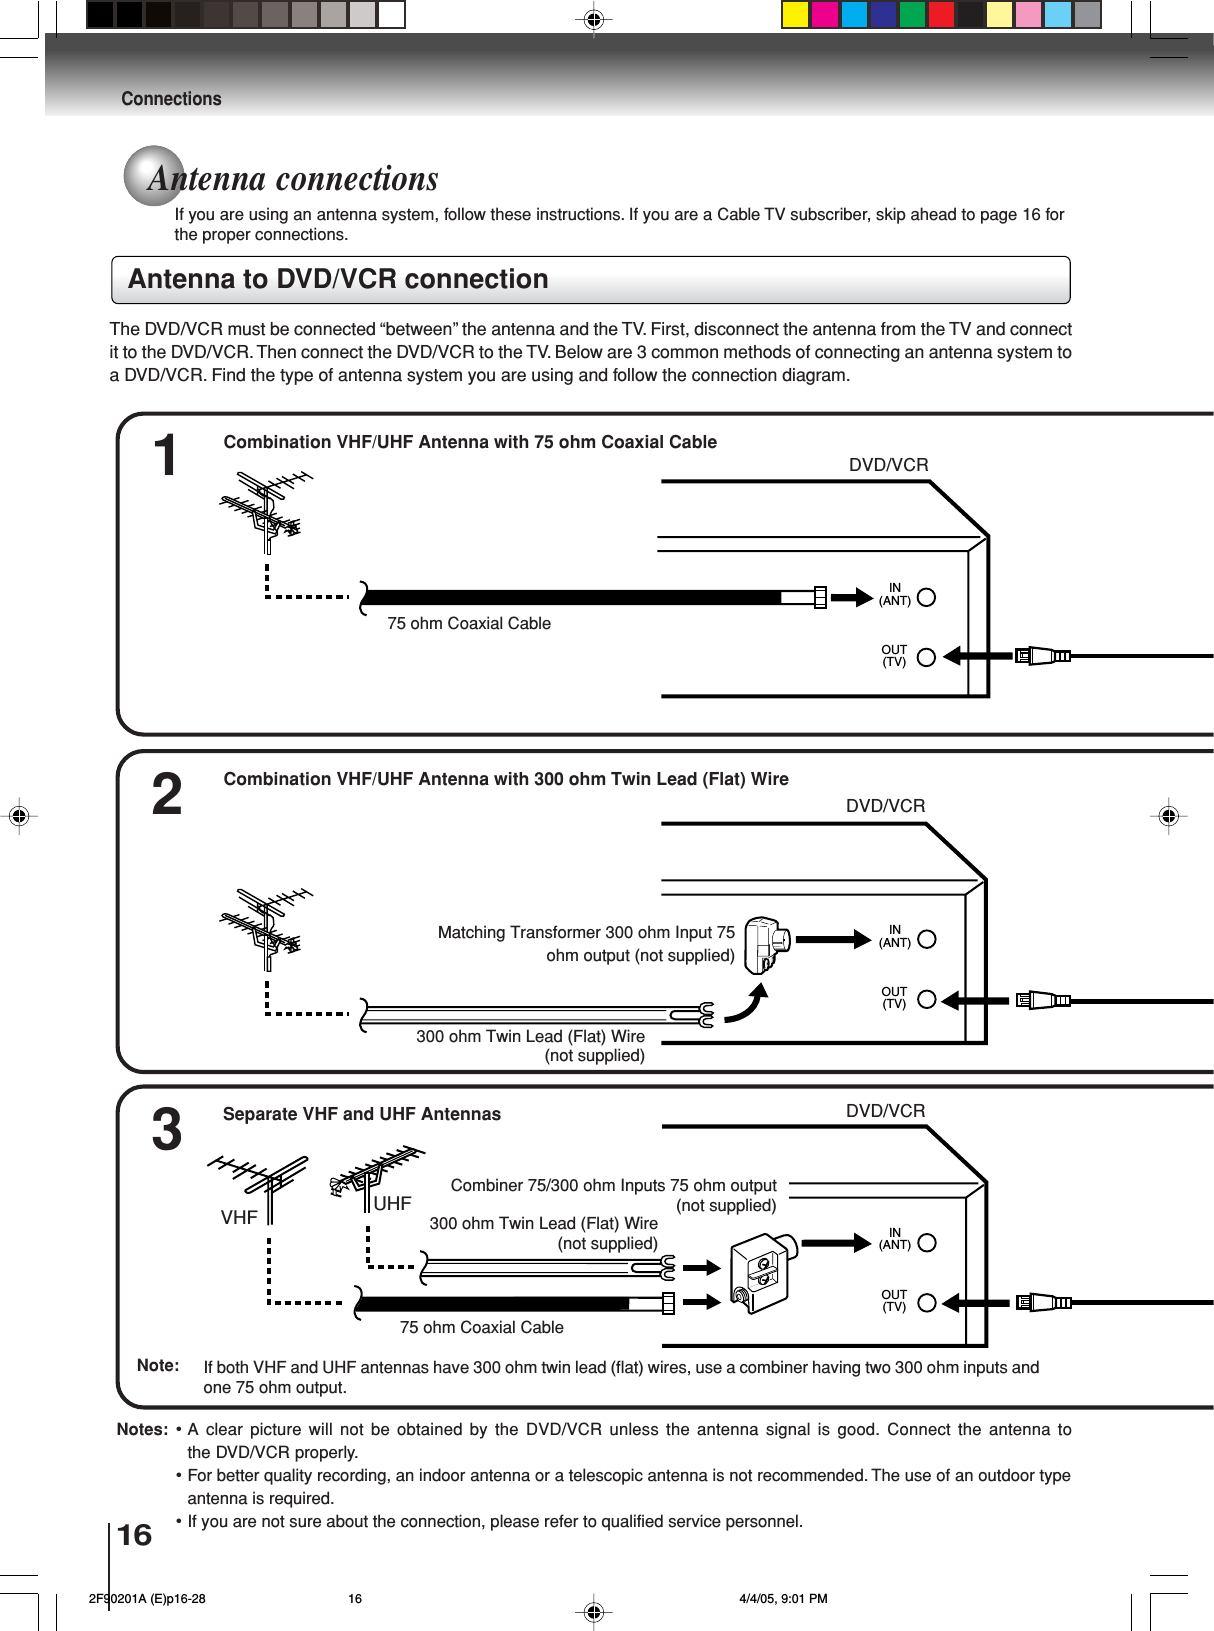
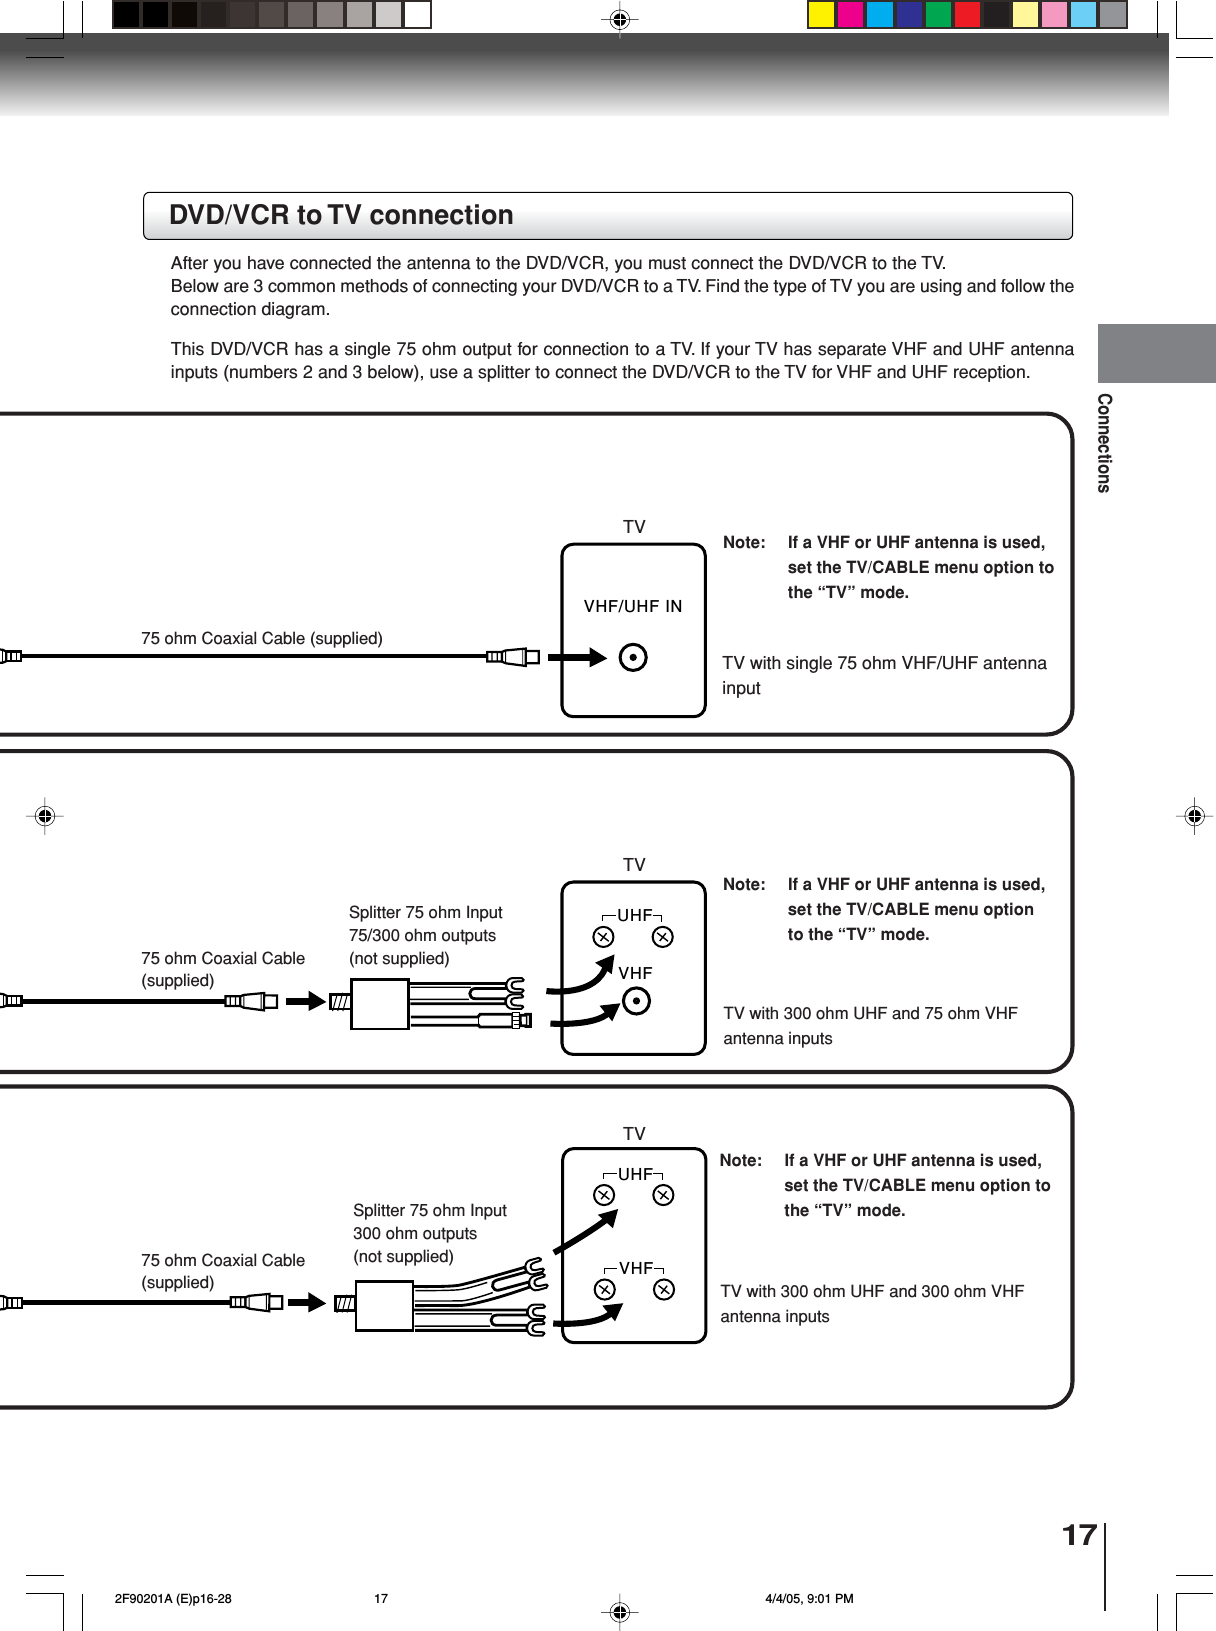
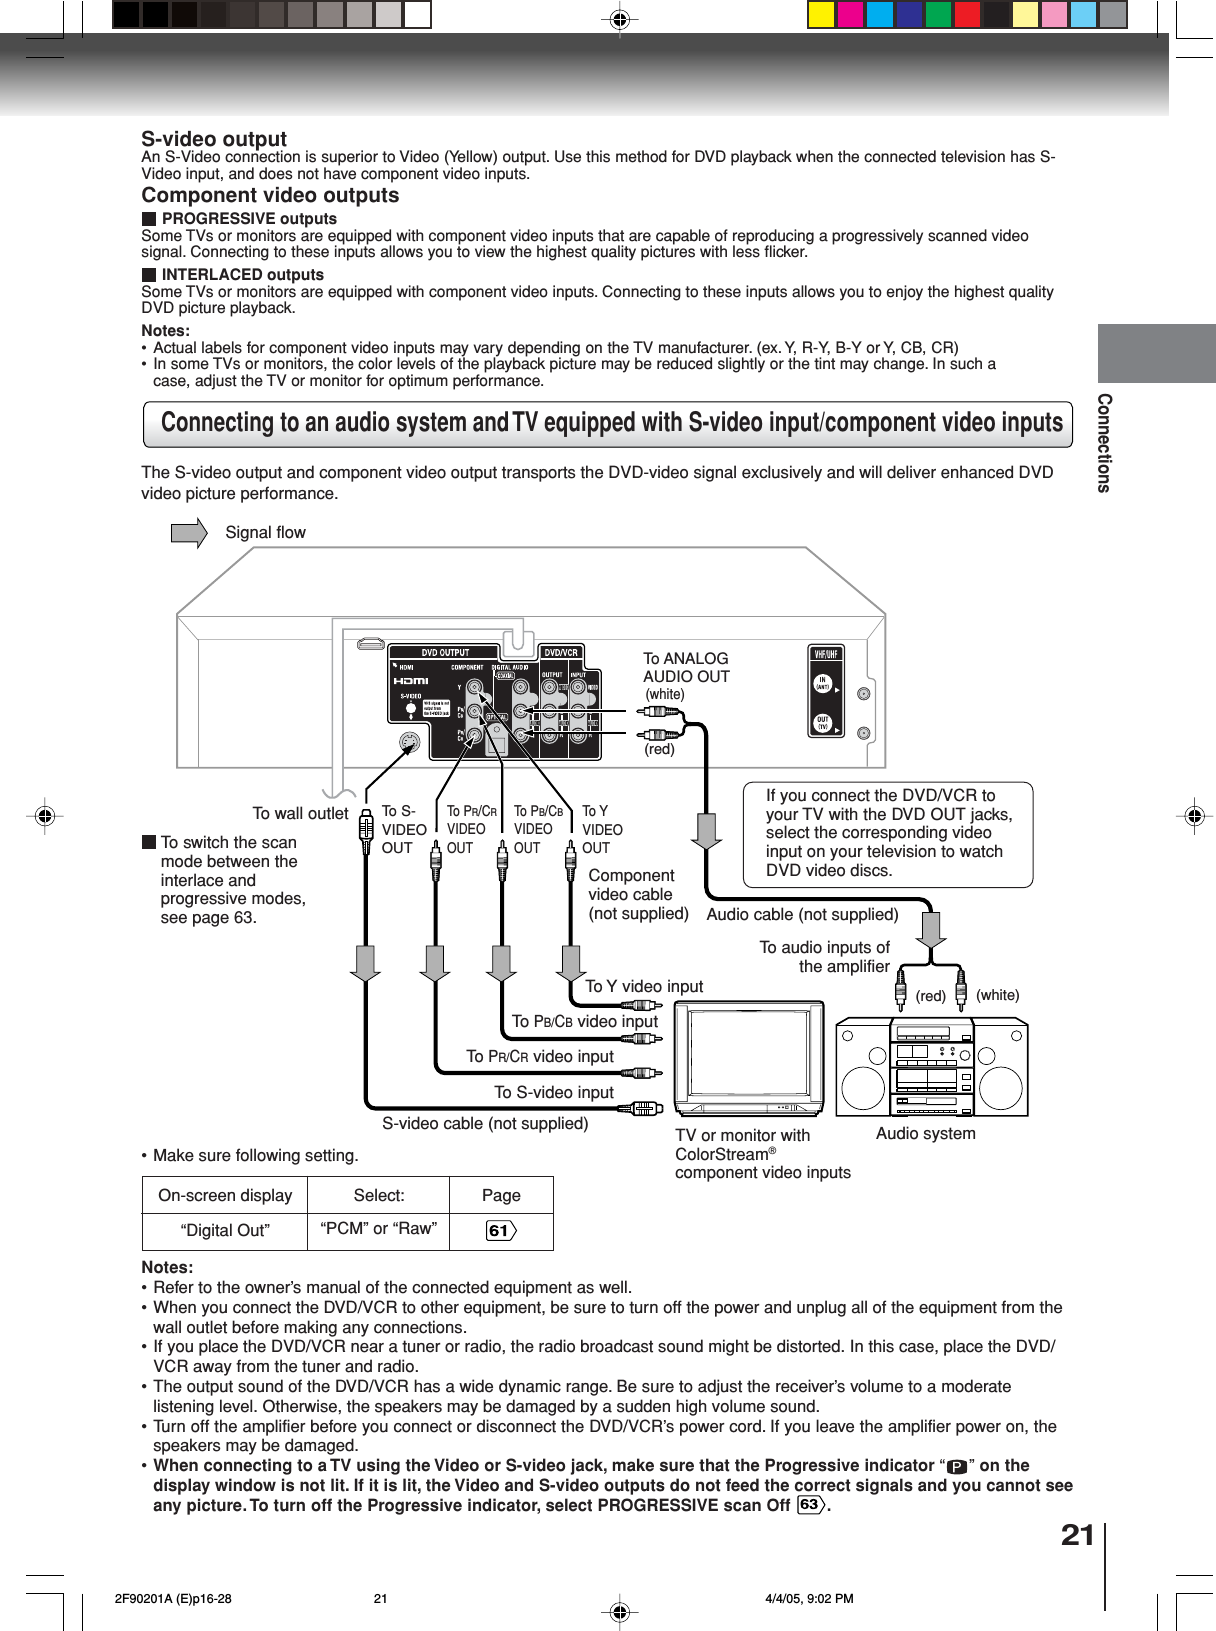
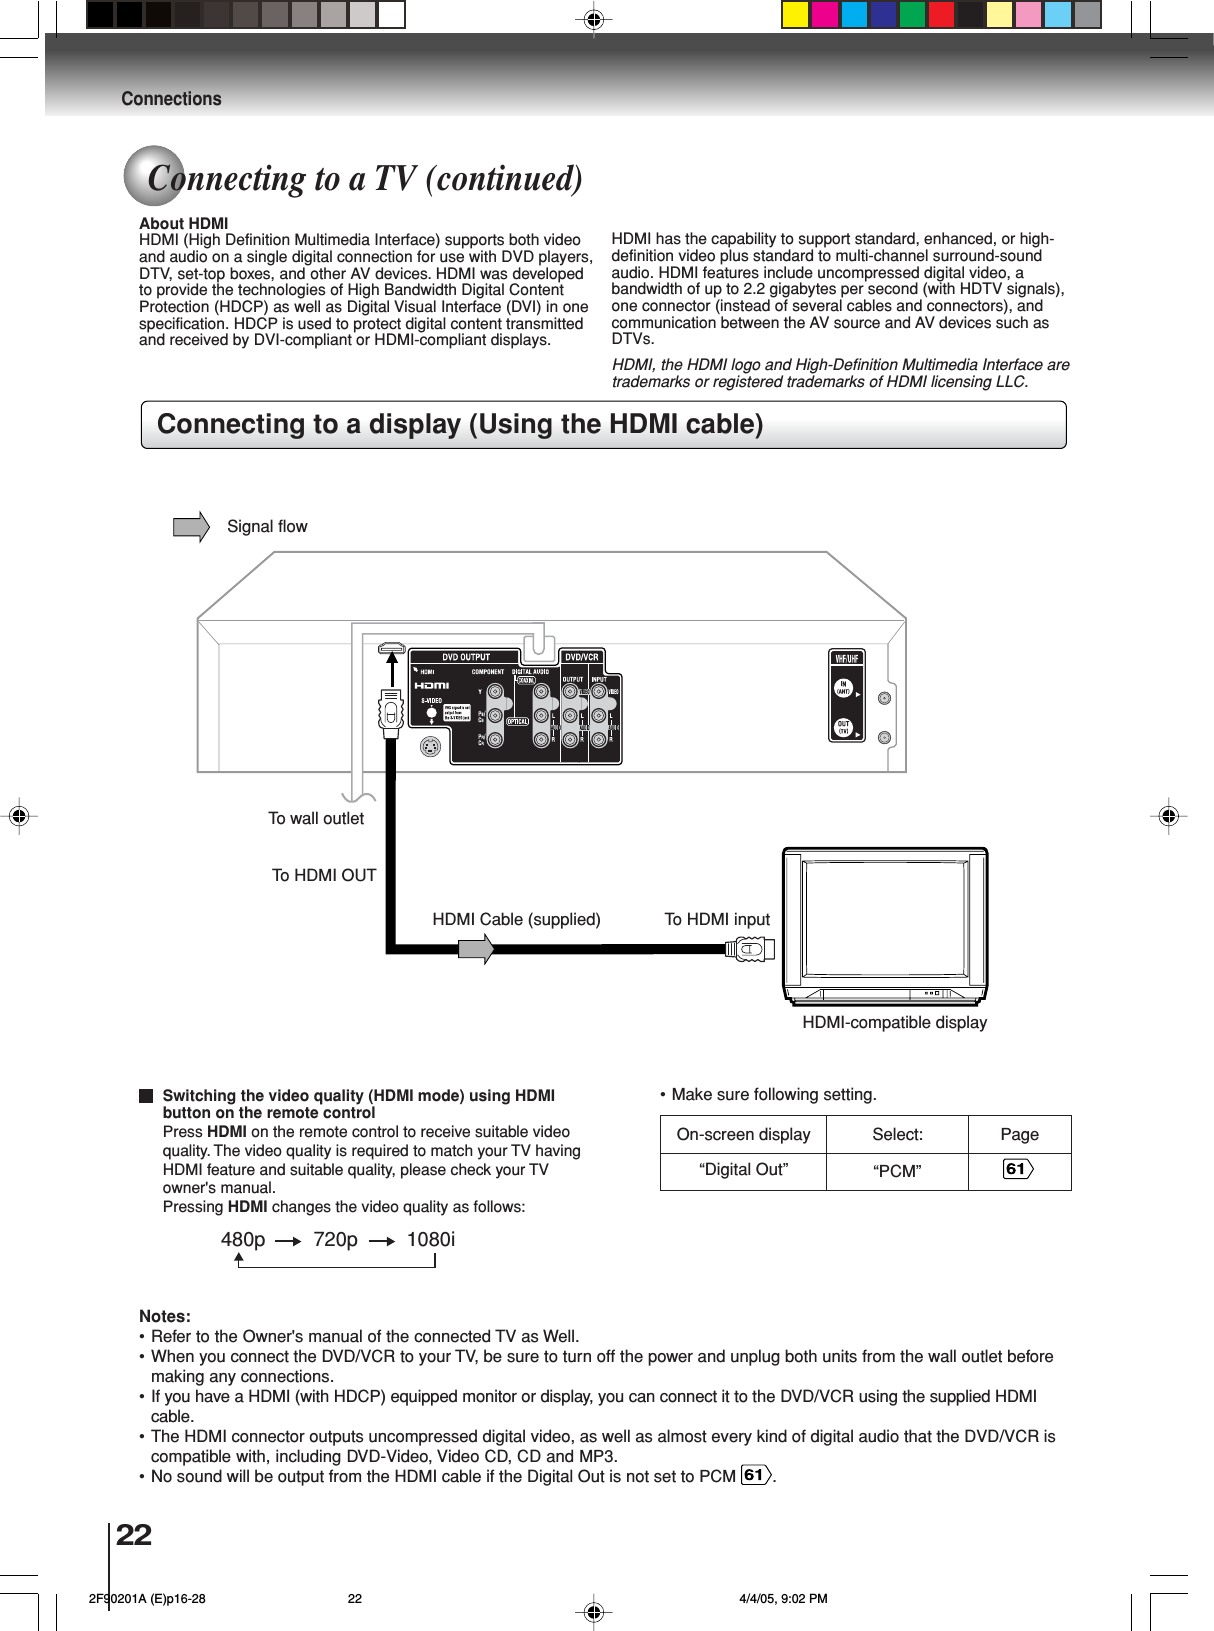
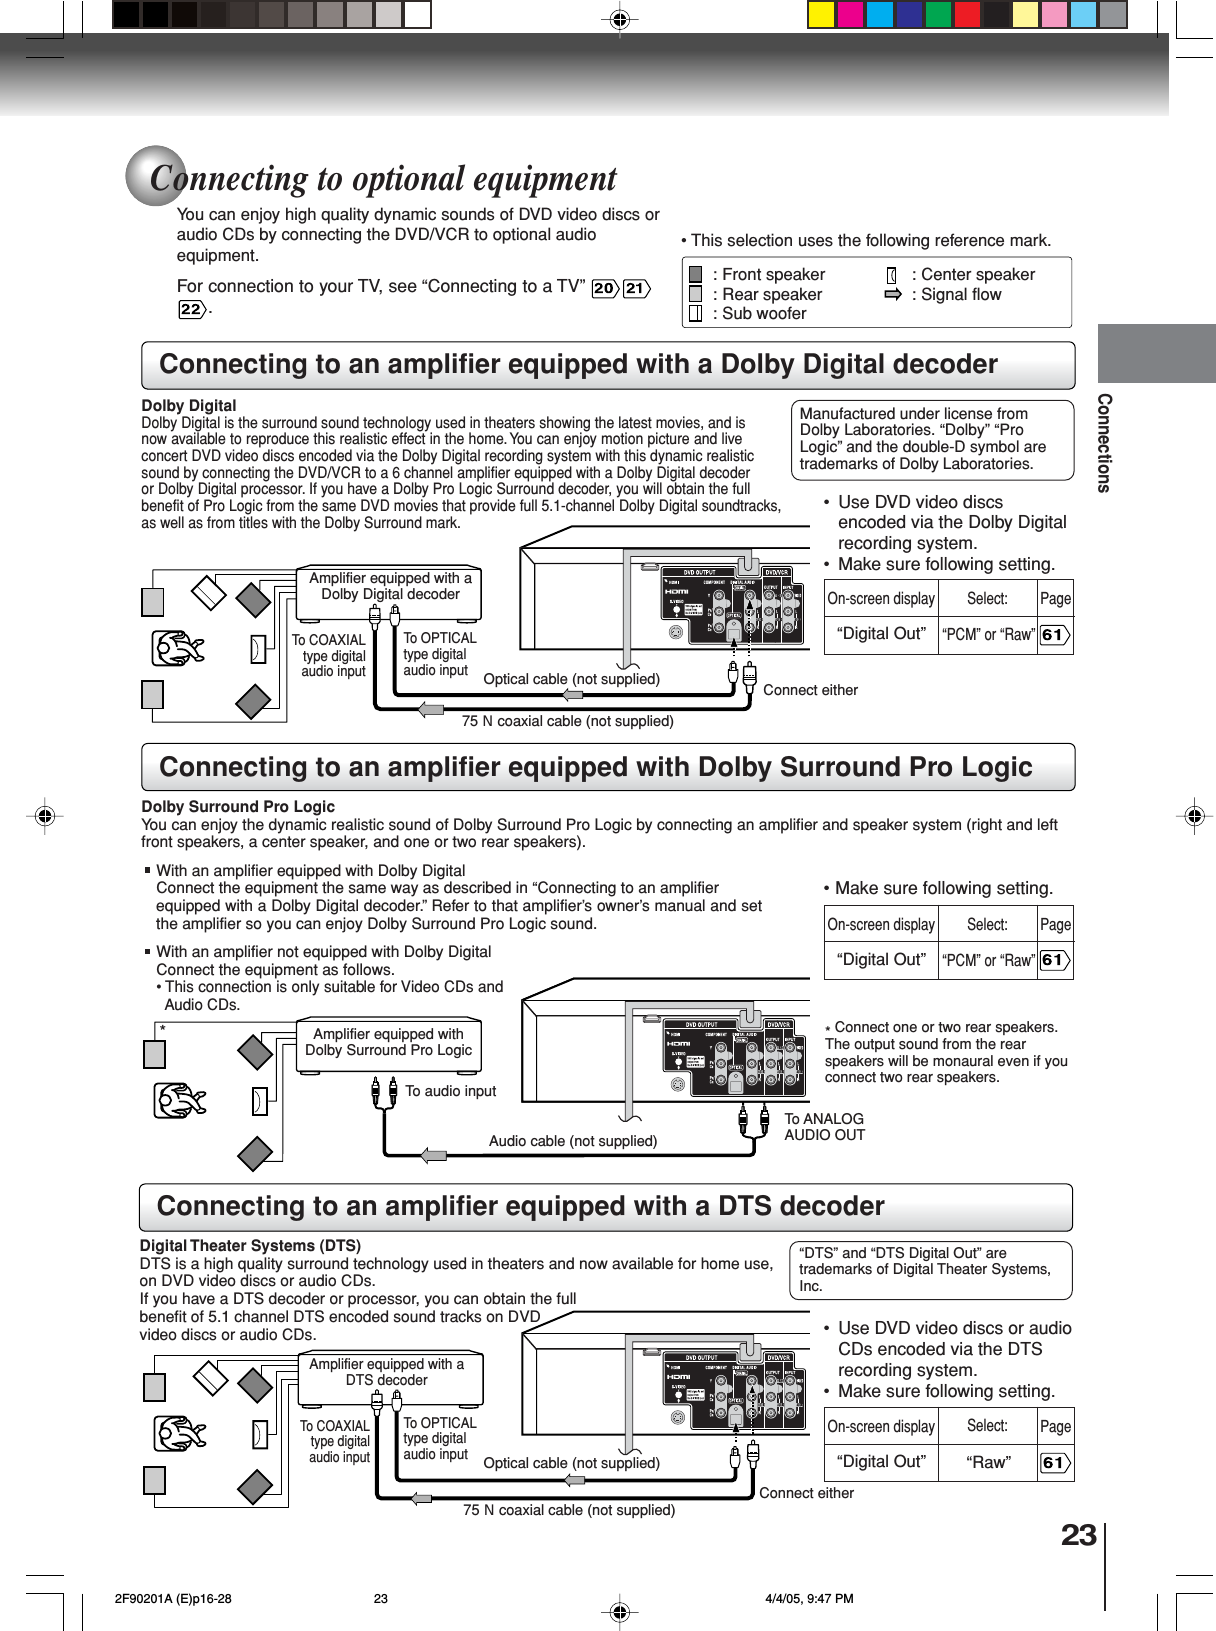
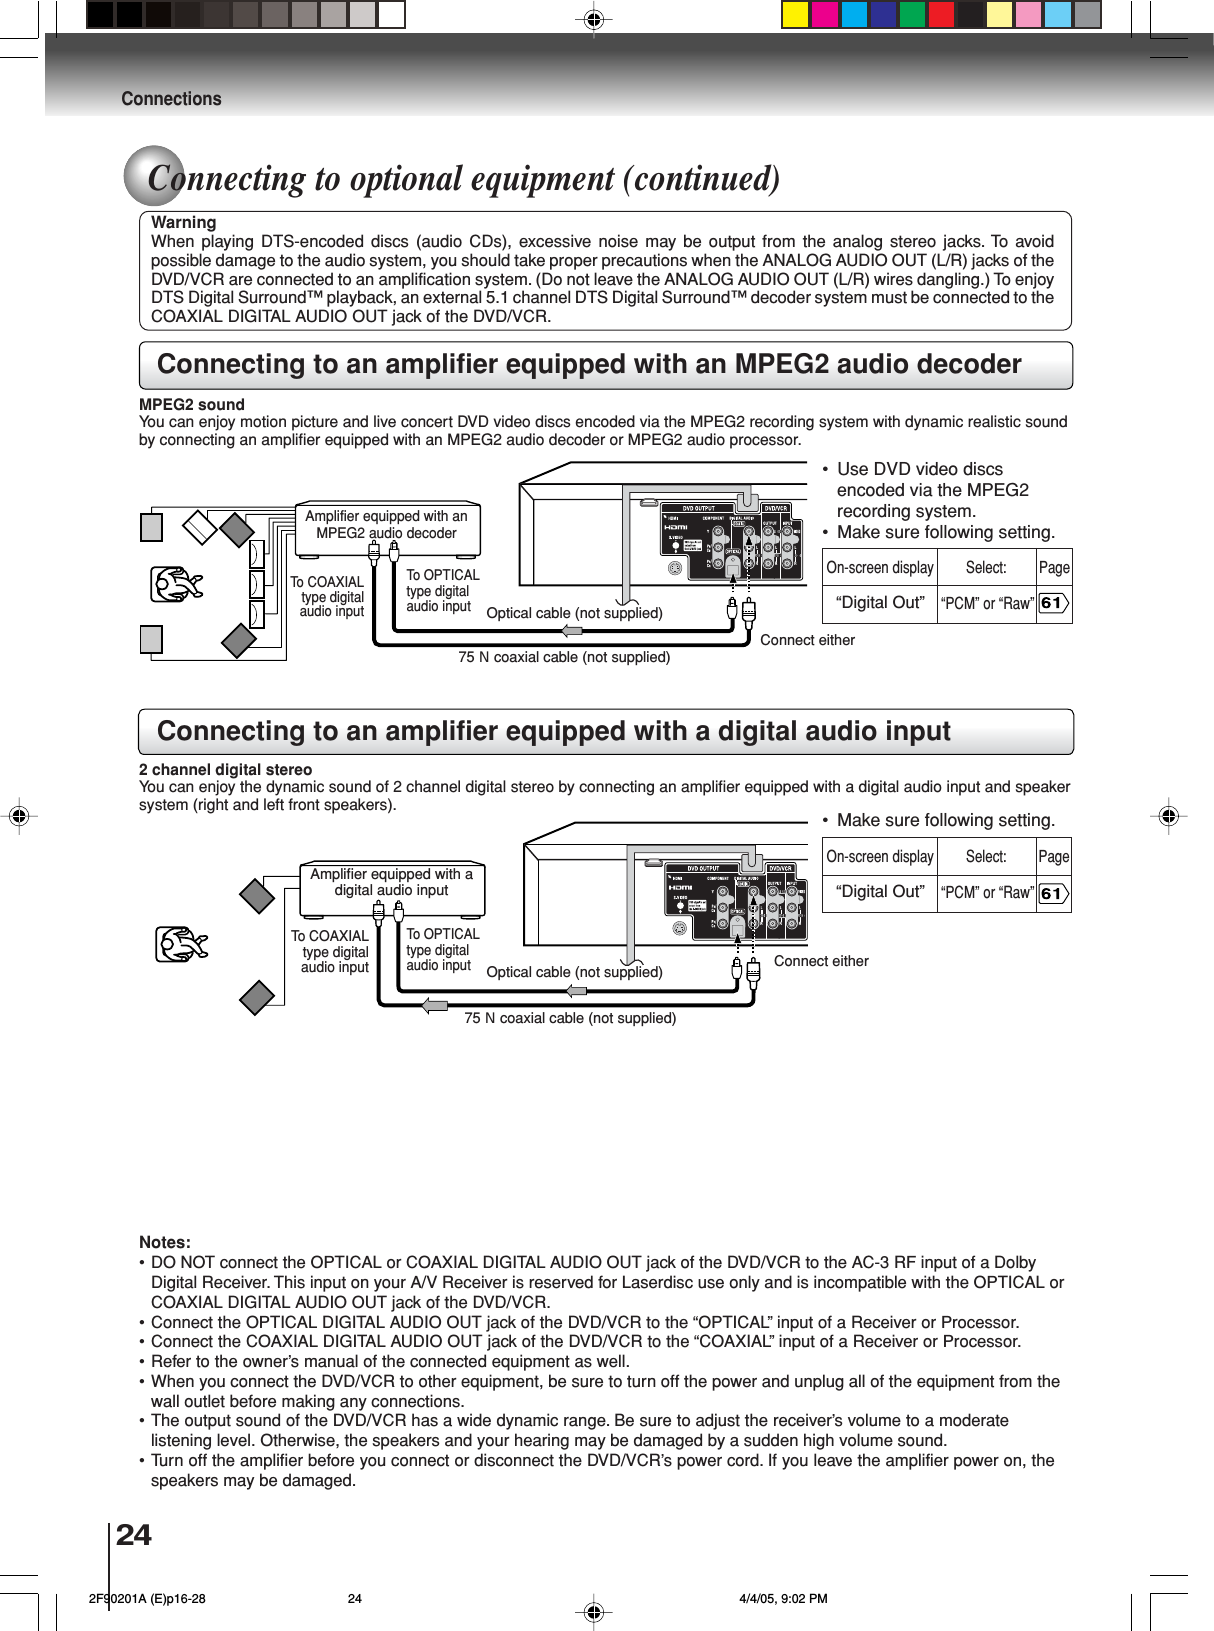
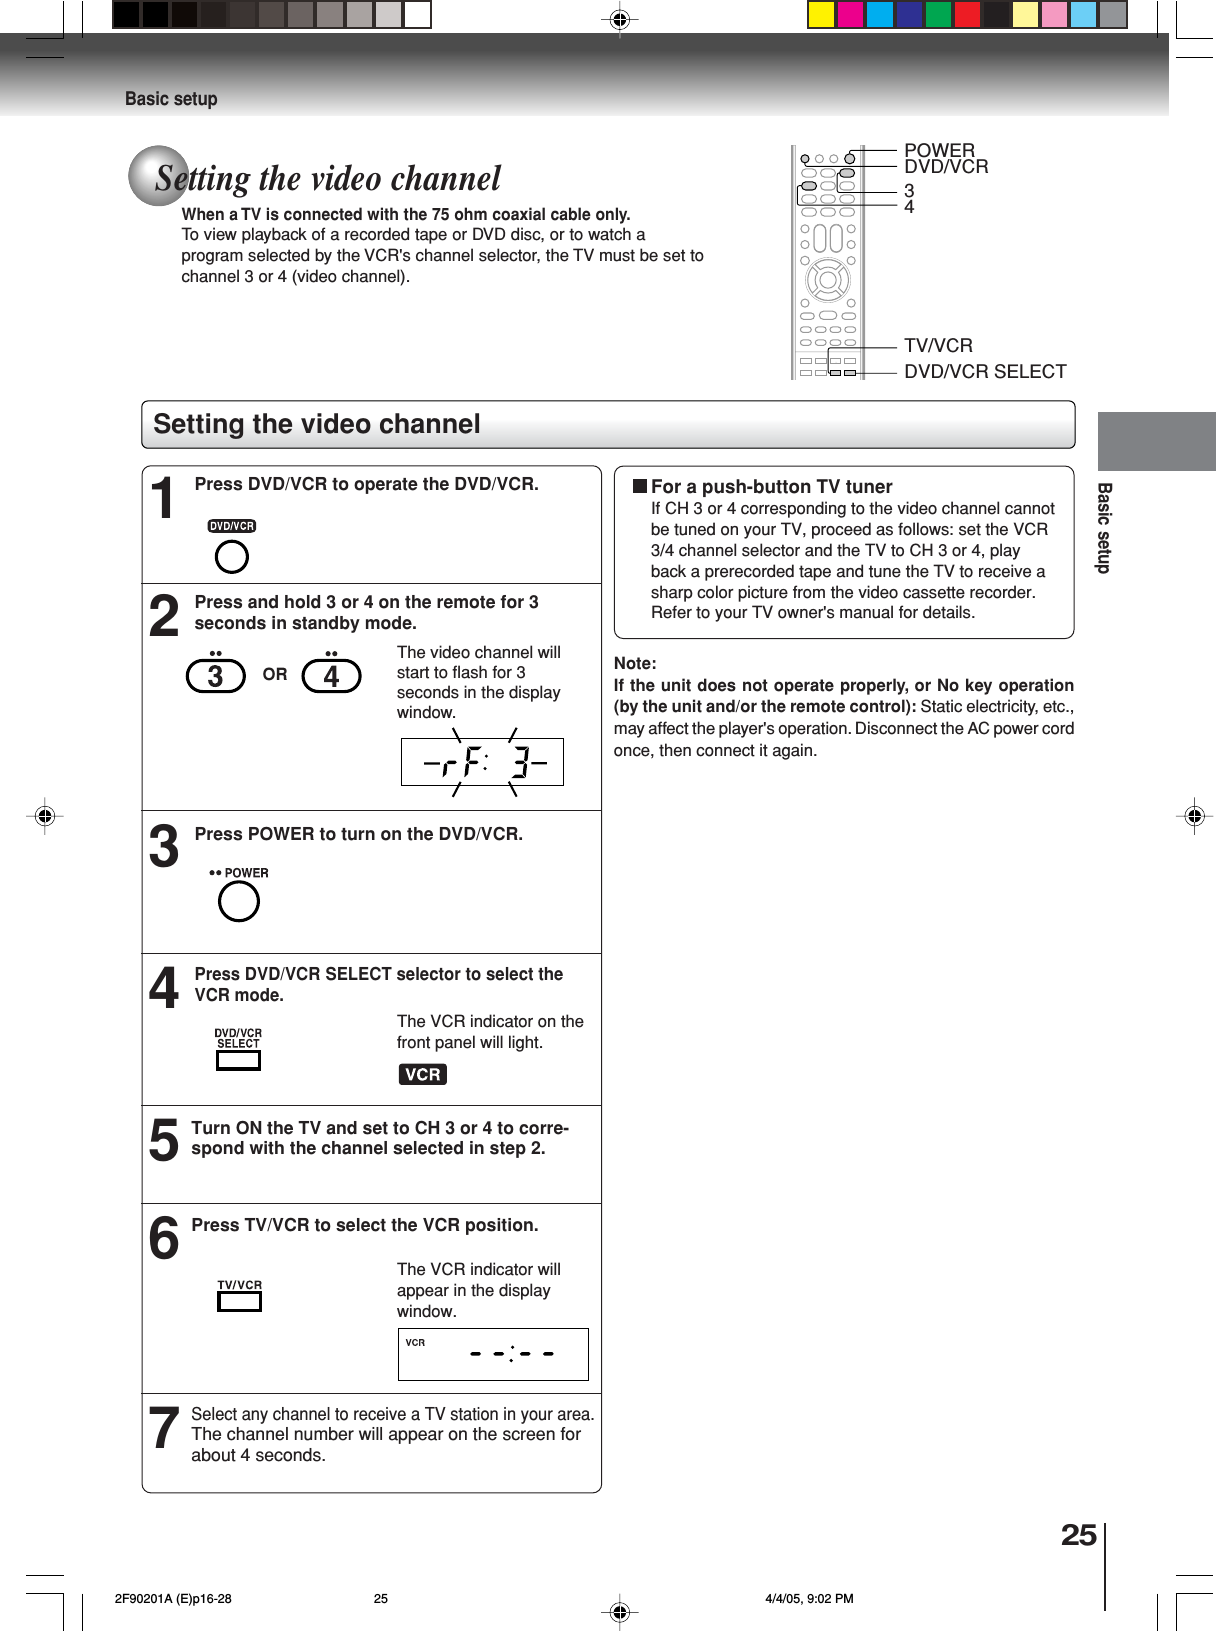
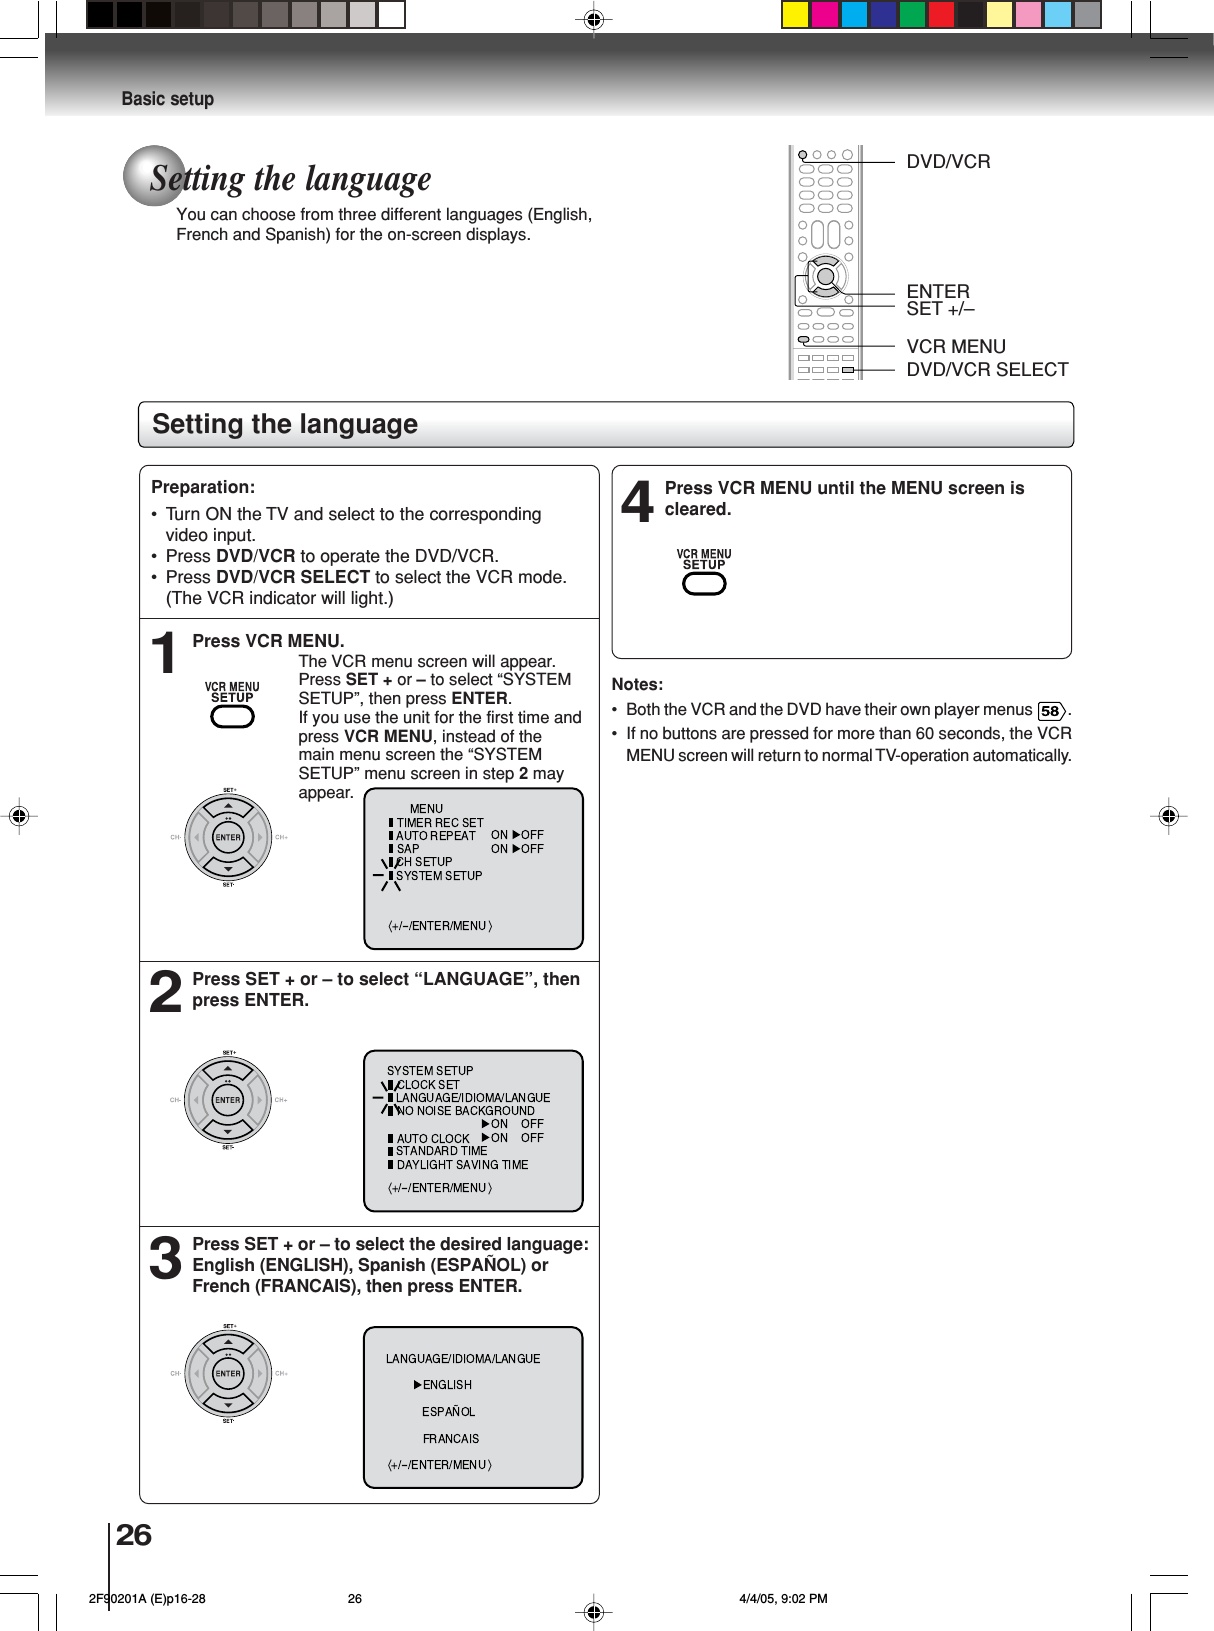
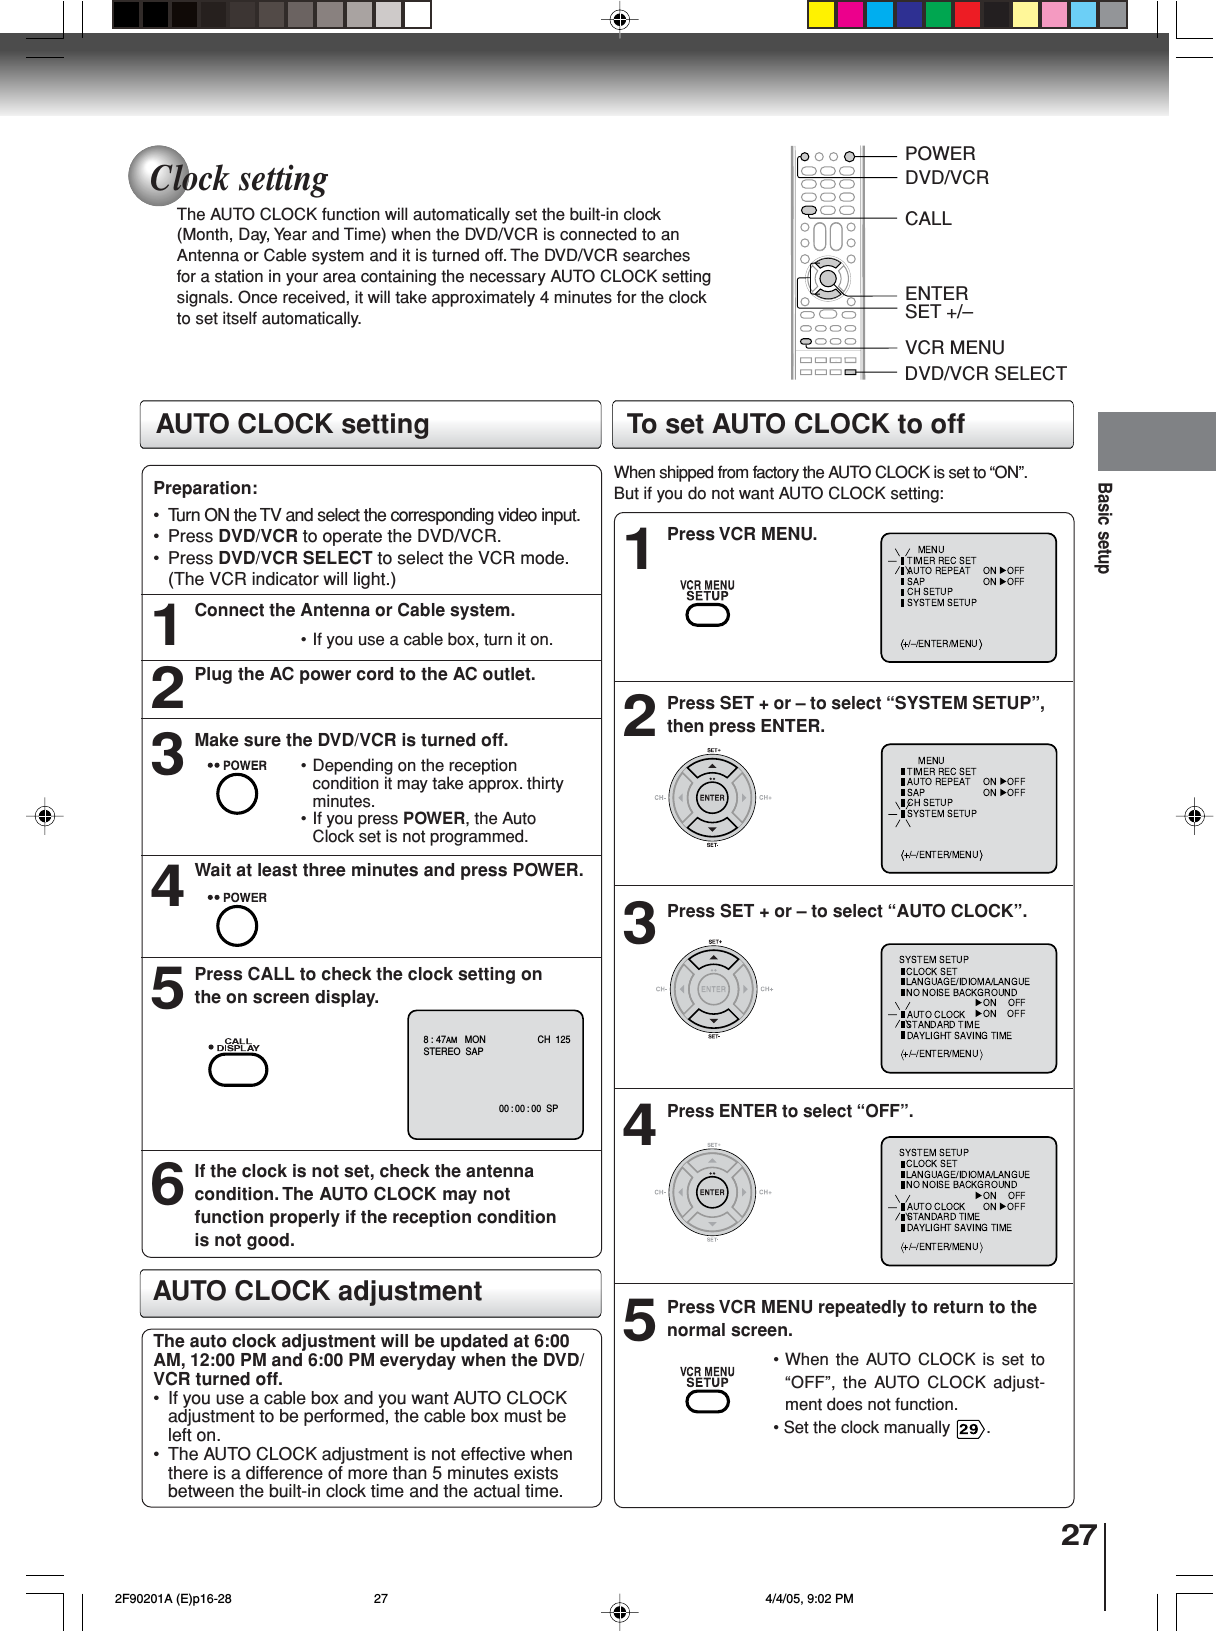
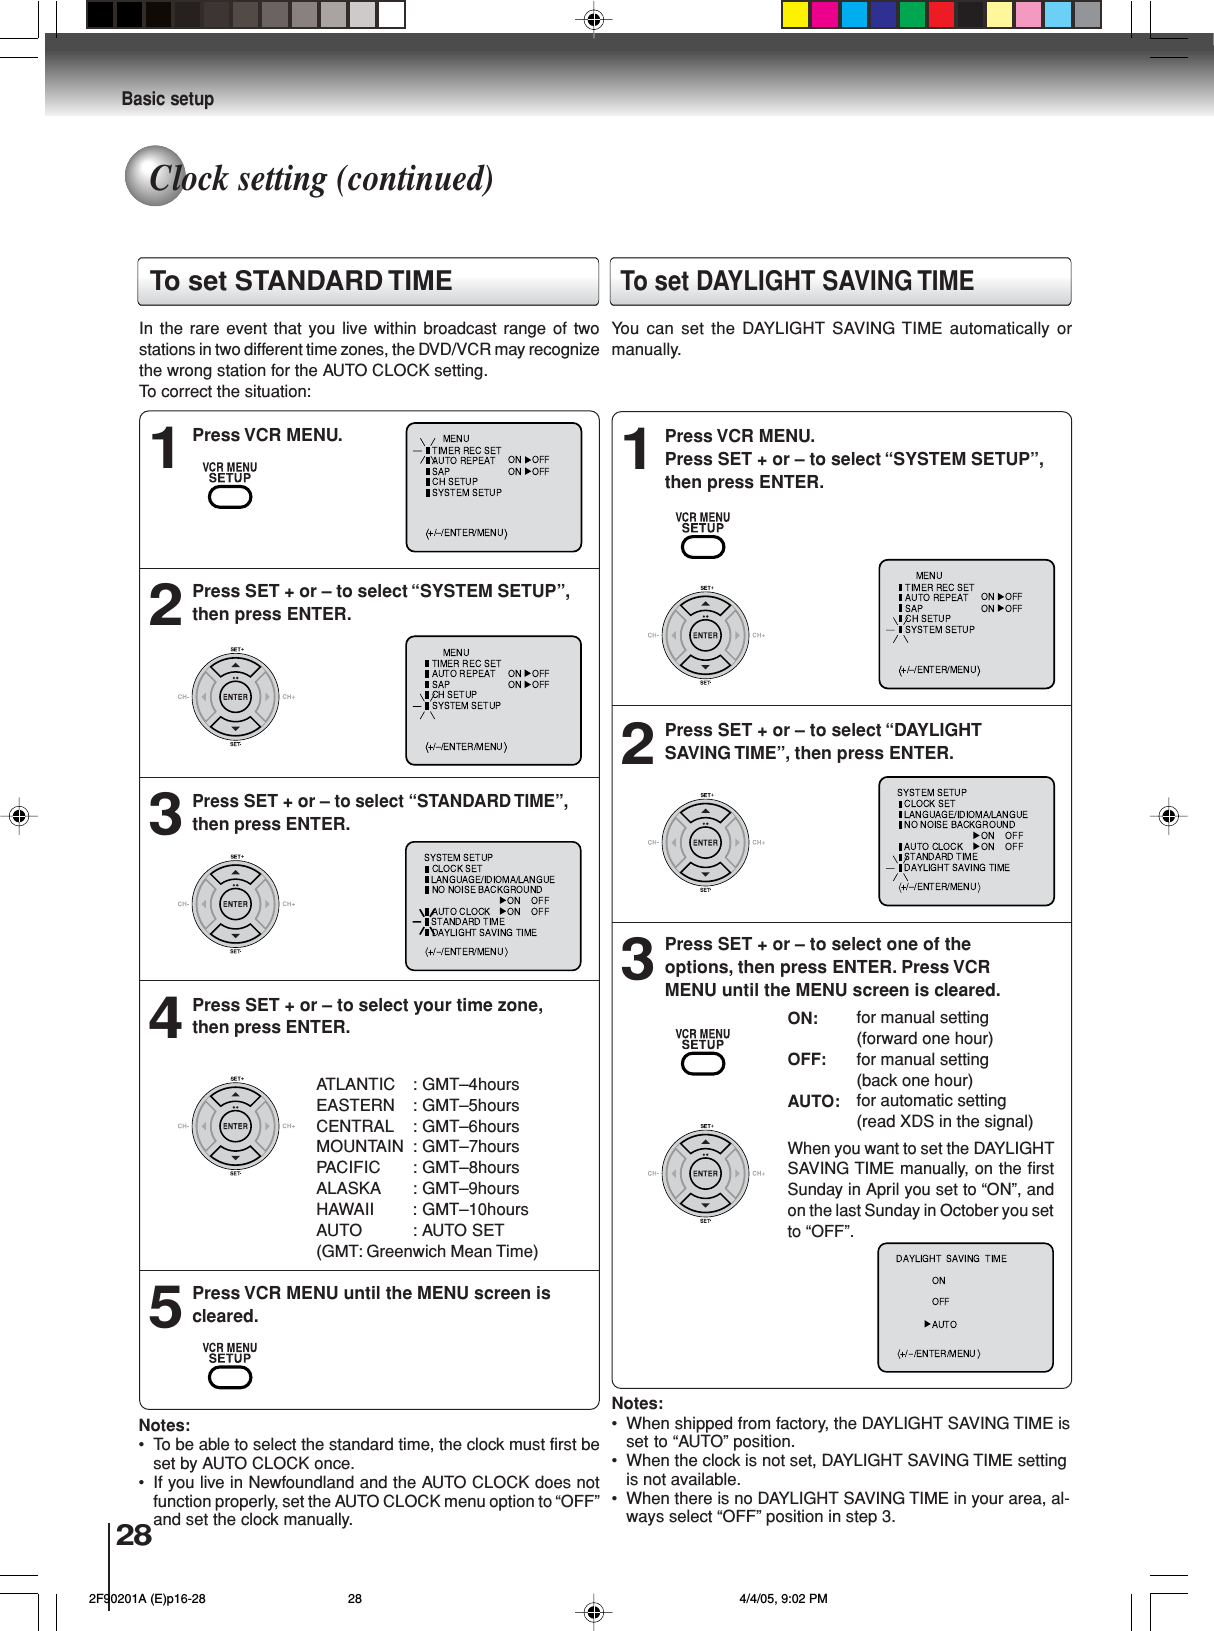
![12IntroductionFront panel Rear panelON/STANDBY buttonAUDIO (L/R)/VIDEO IN(LINE IN 2) jacksEJECTbuttonCassette loading slotDisc trayDisplay windowREC buttonCHANNEL / buttonsOPEN/CLOSE buttonSTOP buttonPLAY buttonFF buttonREV buttonVCR/DVD mode selectorbuttonRemote sensorVCR indicatorDVD indicatorDVD S-VIDEO OUT jackDVD AUDIO (L/R)OUT jacksDVD COAXIAL DIGITAL AUDIO OUT jackDVD COMPONENTOUT jacksANT OUT jackANT IN jackAUDIO (L/R)/VIDEOIN (LINE IN1) jacksDVD/VCR common AUDIO(L/R)/VIDEO OUT jacksAC power cord5Media card slotSD memory cardMMC (MultiMediaCard)xD-Picture CardMemory Stick (PRO)Media card slot[CompactFlash memorycard]HDMI OUT jackDVD OPTICAL DIGITALAUDIO OUT jacksIdentification of controlsSee the page in for details.When connecting the optical digital cable, remove the cap and fit the connector into the jack firmly.When not using the jack, keep the cap inserted to protect it from dust intrusion. 2F90201A (E)p02-15 4/4/05, 9:01 PM12](https://usermanual.wiki/ORION-ELECTRIC/M2F9A.Manual-1/User-Guide-535369-Page-12.png)