ProcessingPoint UATTENDBIOW uAttend BN4000 & uAttend BN2500 User Manual 1
ProcessingPoint, Inc. uAttend BN4000 & uAttend BN2500 Users Manual 1
Contents
- 1. Users Manual 1
- 2. Users Manual 2
Users Manual 1
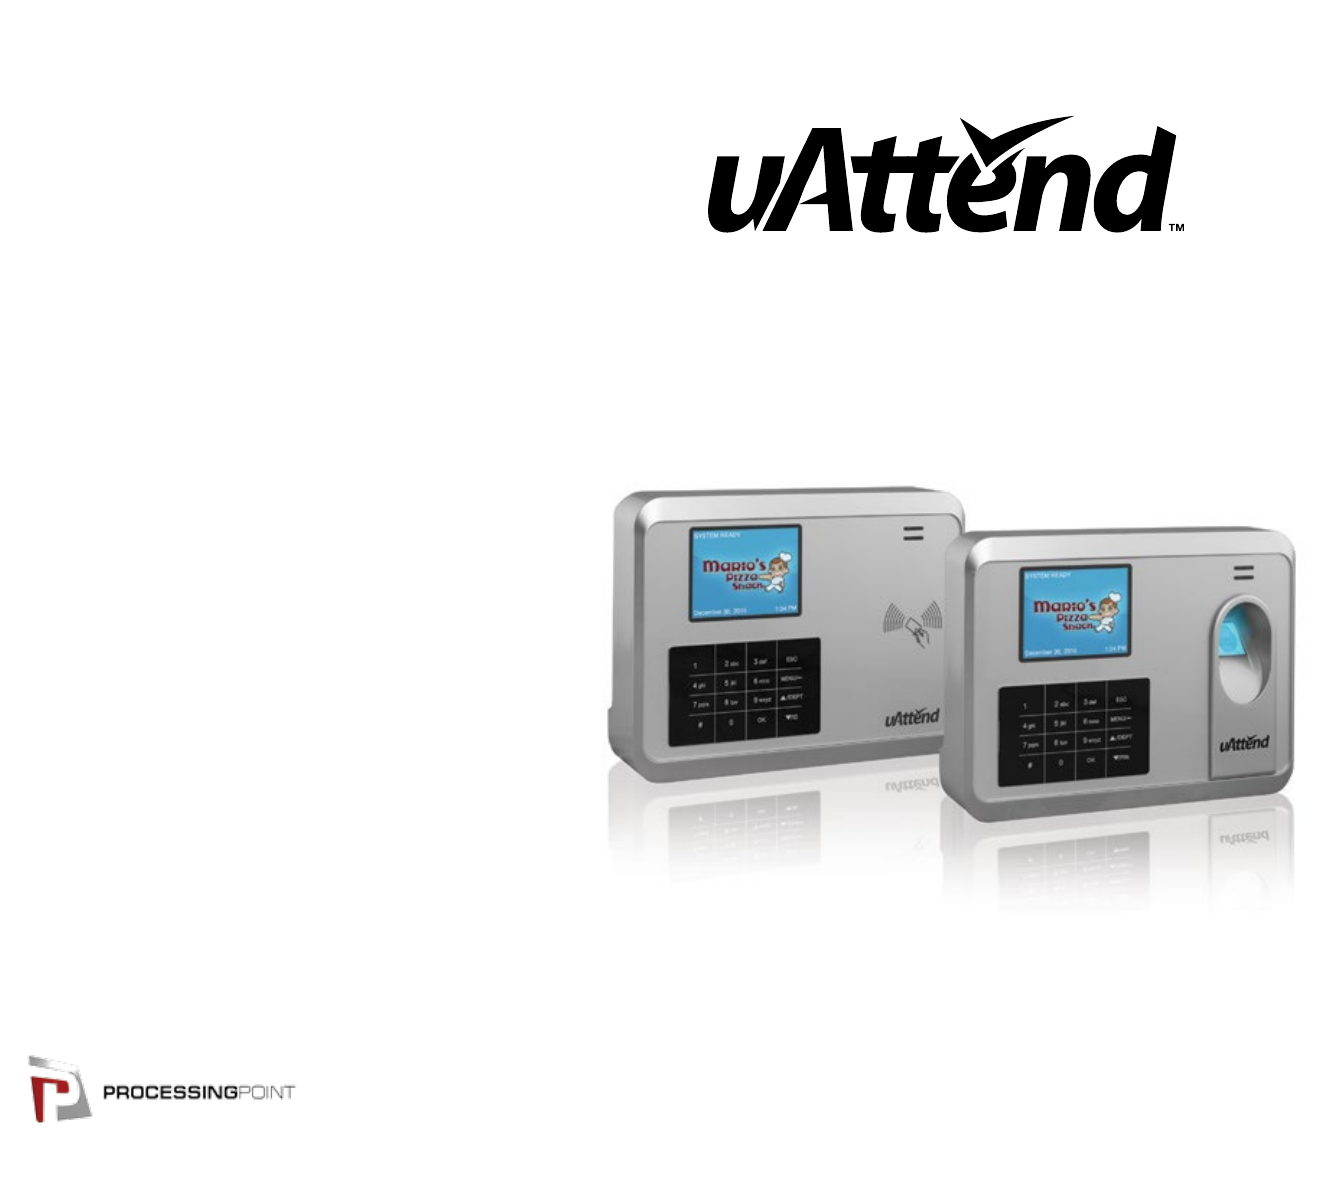
PROFESSIONAL SERIES
PRODUCT GUIDE
2796 Loker Ave., Suite 111, Carlsbad, CA 92010
CB1000 • CB2000 • BN1500 • BN2500
uATTEND DEVICE LIMITED
WARRANTY
users.
33

TABLE OF CONTENTS
1.0 INTRODUCTION 2
2.0 SETTING UP YOUR uATTEND ACCOUNT 2
3.0 SETTING UP AND USING THE CB1000 6
4.0 SETTING UP AND USING THE CB2000 10
5.0 SETTING UP AND USING THE BN1500 15
6.0 SETTING UP AND USING THE BN2500 22
7.0 TROUBLESHOOTING 30
8.0 TEMPLATE ASSIGNMENT SHEET 32
32
8.0 TEMPLATE ASSIGNMENT
SHEET
MAKE COPIES OF THIS PAGE FOR ADDITIONAL EMPLOYEES, IF NEEDED.
EMPLOYEE
NAME
FINGERPRINT ID

1.0 INTRODUCTION
1. Create your uAttend account, using the steps provided in Section 2.1.
2. Add departments, using the steps provided in Section 2.2.
3. Add employees, using the steps provided in Section 2.2.
4. Set up your timeclock, using the steps provided in one of the following
sections:
2.0 SETTING UP YOUR
uATTEND ACCOUNT
2.1 Creating an Account
1. Open your web browser and visit:
or 1-800-518-8925.
2. Enter the Dealer ID.
312
ERROR MESSAGE NOTES
SERVER CONNECTION
ERROR
THIS MESSAGE DISPLAYS IF
THE TIMECLOCK IS UNABLE TO
COMMUNICATE WITH THE SERVER DUE
TO A FIREWALL, CONTENT FILTER,
OR ANY OTHER KIND OF NETWORK
BLOCK.
DNS ERROR THIS MESSAGE DISPLAYS IF THE
TIMECLOCK DOES NOT HAVE A
VALID DNS SERVER IP ADDRESS TO
CONTACT, OR THE DNS SERVER IT
IS CONTACTING CANNOT PROPERLY
RESOLVE THE HOST NAME FOR THE
SERVER.
DHCP ERROR THIS MESSAGE DISPLAYS IF THE
TIMECLOCK DOES NOT RECEIVE
PROPER IP ADDRESS INFORMATION
PROVIDED TO IT FROM THE DHCP
SERVER.
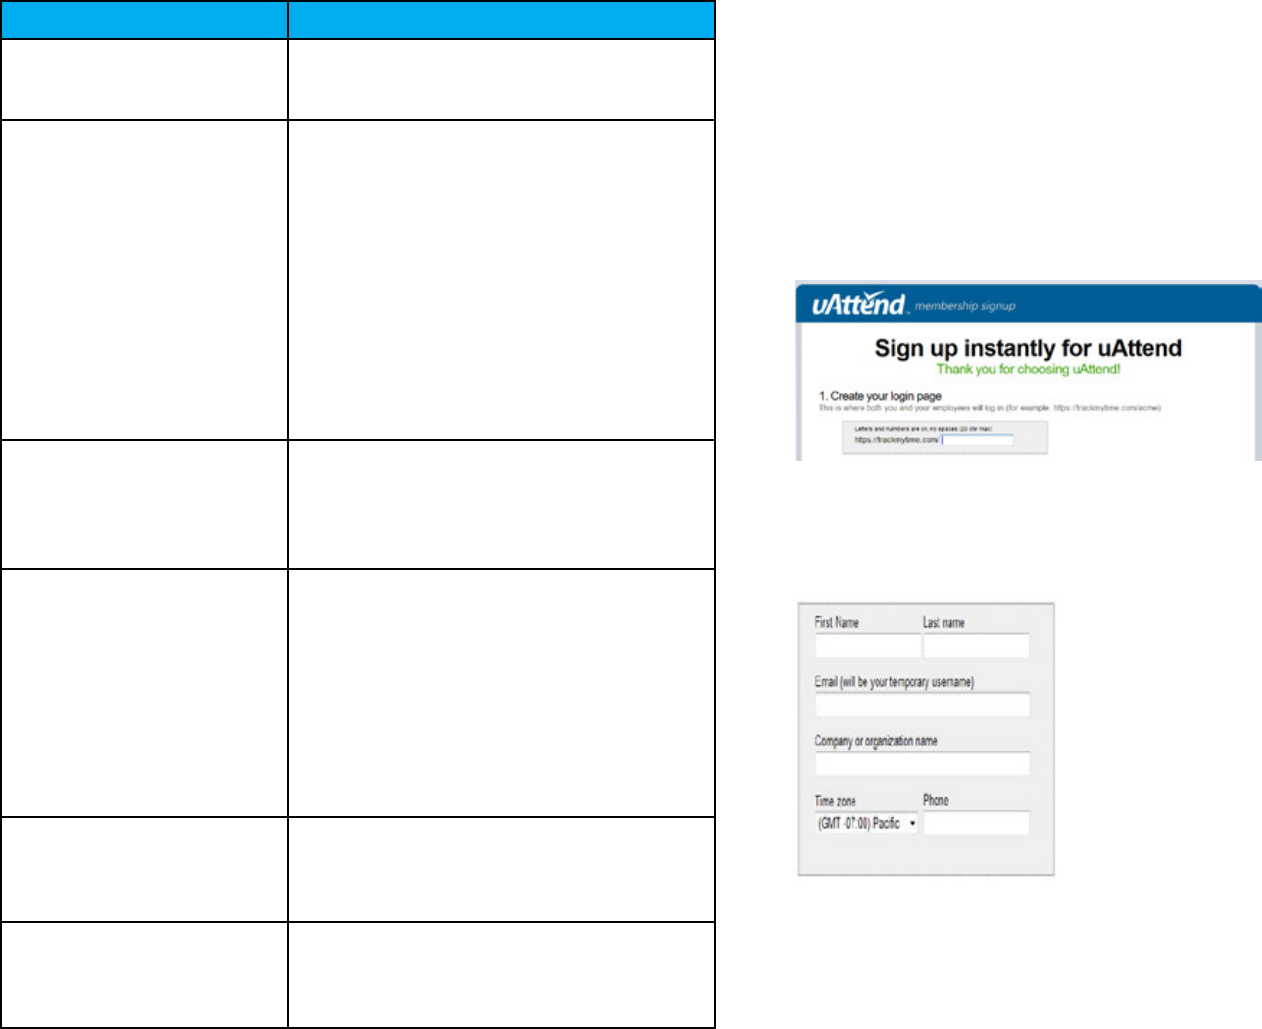
3. Click Get Pricing.
4. Click the Sign Up button for the plan that you select.
Create Your Login Page—
Enter Clock Administrator—
later.
Sign Up—
Create my account.
330
7.0 TROUBLESHOOTING
ERROR MESSAGE NOTES
DEVICE ID ERROR THIS MESSAGE DISPLAYS WHEN THE
TIMECLOCK HAS NOT BEEN LINKED TO
A uATTEND ACCOUNT.
NET NOT FOUND THIS MESSAGE DISPLAYS IF THE
TIMECLOCK IS NOT CURRENTLY
PLUGGED INTO ANY NETWORKING
DEVICE, OR THE NETWORKING DEVICE
IT IS PLUGGED INTO IS TURNED OFF
OR IS NOT FUNCTIONING CORRECTLY.
CHECK TO MAKE SURE THAT:
• Your network allows DHCP
CONNECTIONS.
• tHe network is not beHinD
A FIREWALL THAT BLOCKS
COMMUNICATION ON PORT 80.
SORRY, DEALER ID NOT
FOUND
TRACKMYTIME.COM WILL REPORT
THIS ERROR IF THE DEALER ID
YOU ENTERED IS NOT VALID.
PLEASE CONTACT YOUR DEALER
REPRESENTATIVE FOR ASSISTANCE.
UNSUCCESSFUL LOGIN WHEN YOU ATTEMPT TO LOG IN TO
TRACKMYTIME.COM, THE LOGIN FORM
REFRESHES. THIS INDICATES THAT THE
USERNAME/PASSWORD COMBINATION
THAT YOU ENTERED WAS NOT
CORRECT.
IF YOU HAVE FORGOTTEN YOUR
USERNAME AND/OR PASSWORD, CLICK
ON THE EMAIL USERNAME/PASSWORD
LINK AT THE TOP OF THE PAGE.
SORRY, USER NOT FOUND THIS MESSAGE DISPLAYS IF A USER
ATTEMPTS TO PUNCH IN, BUT THEIR
FINGERPRINT ID HAS NOT BEEN
ASSIGNED TO THEIR USER PROFILE.
SORRY, USER NOT
VERIFIED
THIS MESSAGE DISPLAYS IF A USER
ATTEMPTS TO PUNCH IN, BUT THEIR
FINGERPRINT TEMPLATE HAS NOT
BEEN REGISTERED.
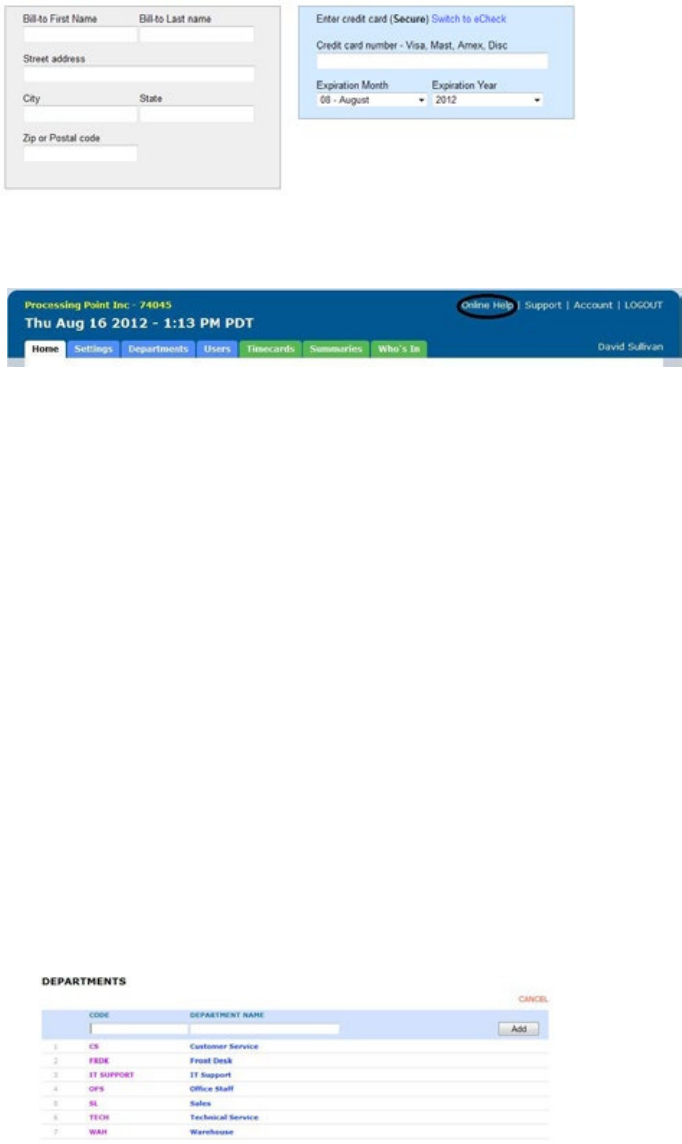
2.2 Adding Departments and Employees
Account
2.2.1 Adding Departments
1. Click the Departments tab on the main menu.
2. Click Add Department.
3. In the Code field, enter a code for the department.
4. In the Department Name field, enter a name for the department.
5. Click Add.
294
The Device Management
Update Time—
Device ID—
Upload Logo—
Date Format—
Reverify Time—
Sounds—
Time Format—
The Communications
Set IP—
DHCP—
Network Settings—
Delete WIFI Settings—
View WIFI Settings—
Communicating Interface—
The System Management
Reset—
Help—
MAC Address—
Update Firmware—
Firmware Version—
6. Click the department’s name to continue adding department settings.
Online Help
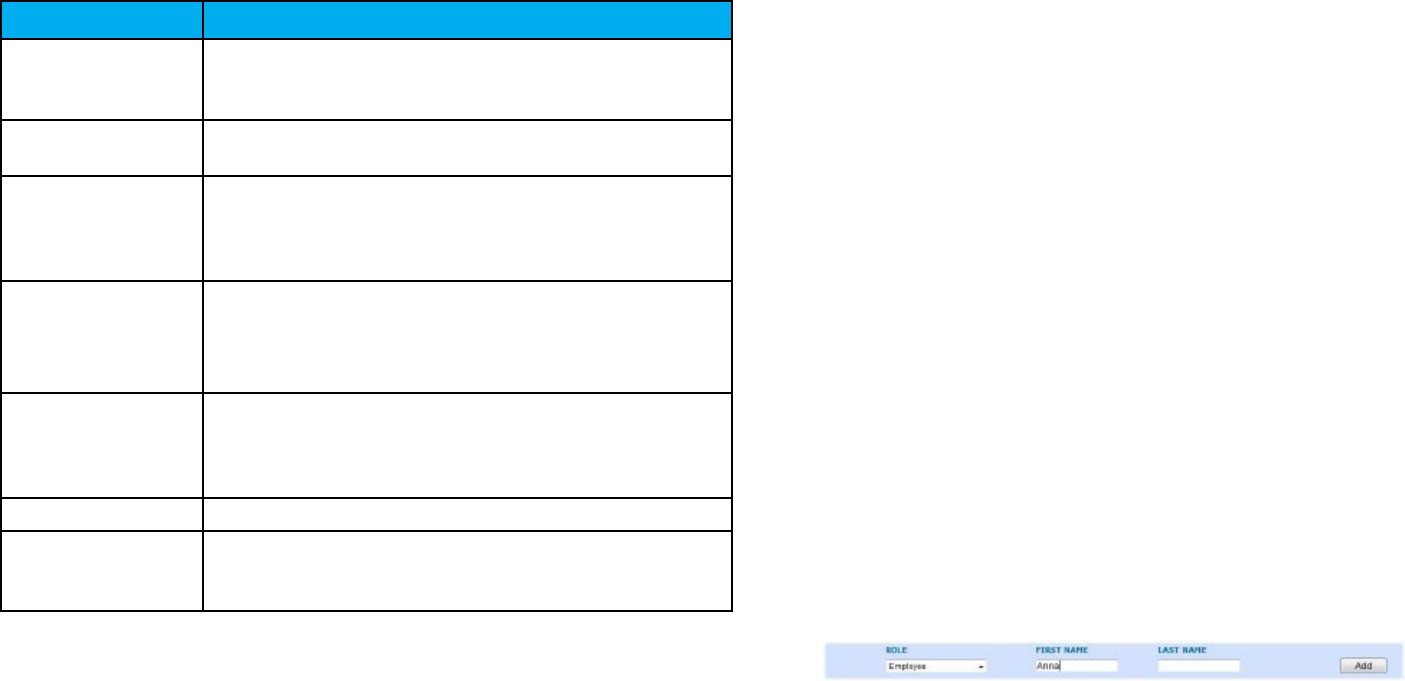
2.2.2 Adding Employees
1. Click the Users tab on the main menu.
2. Click Add User.
3. From the Role drop-down menu, select the role that you wish to
assign to the user.
Employee—
Supervisor—
Administrator—
NOTE:
4. In the First Name field, enter the user’s first name.
5. In the Last Name field, enter the user’s last name.
6. Click Add.
7. Click the new user’s name to continue adding user settings.
NOTE: PIN Number
Badge Number
528
6.4.1 Using the BN2500 Keypad
6.4.2 Using the BN2500 Menus
The User Management menu
Add User—
Delete User—
Change Mgr Password—
View User ID—
Download Templates—
KEY FUNCTION
1-0 FUNCTION AS THE NUMBERS THEY REPRESENT.
USE THE KEYPAD TO ENTER A PIN BY PRESSING
THE CORRECT FOUR DIGITS, THEN PRESSING OK.
ESC USED TO EXIT FROM A MENU OR CANCEL A
FUNCTION.
MENU USED TO ENTER MENU MODE. REQUIRES A
MANAGER PASSWORD. DEFAULT PASSWORD IS
53178. DEFAULT PASSWORD CAN BE CHANGED
BY A MANAGER.
UP ARROW/DEPT PRESSING THE UP ARROW/DEPT KEY
IN STANDBY MODE WILL ENABLE THE
DEPARTMENT TRANSFER FUNCTION. IN ALL
OTHER MODES, THIS KEY IS USED TO SCROLL UP.
DOWN ARROW/
ID
PRESSING THE DOWN ARROW/ID KEY IN
STANDBY MODE WILL ALLOW A USER TO ENTER
THEIR PIN. IN ALL OTHER MODES, THIS KEY IS
USED TO SCROLL DOWN.
OK USED TO ACCEPT KEY ENTRIES.
# USED TO SWITCH BETWEEN ALPHA AND
NUMERIC DURING WIFI PASSWORD ENTRY AND
IS OTHERWISE USED AS A TOGGLE BUTTON.
3.0 SETTING UP AND USING
THE CB1000
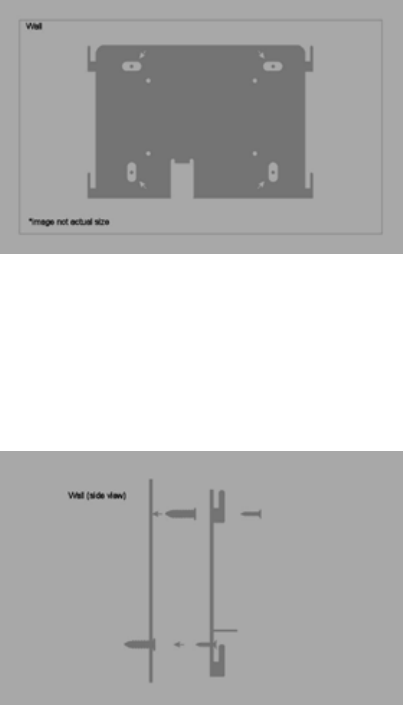
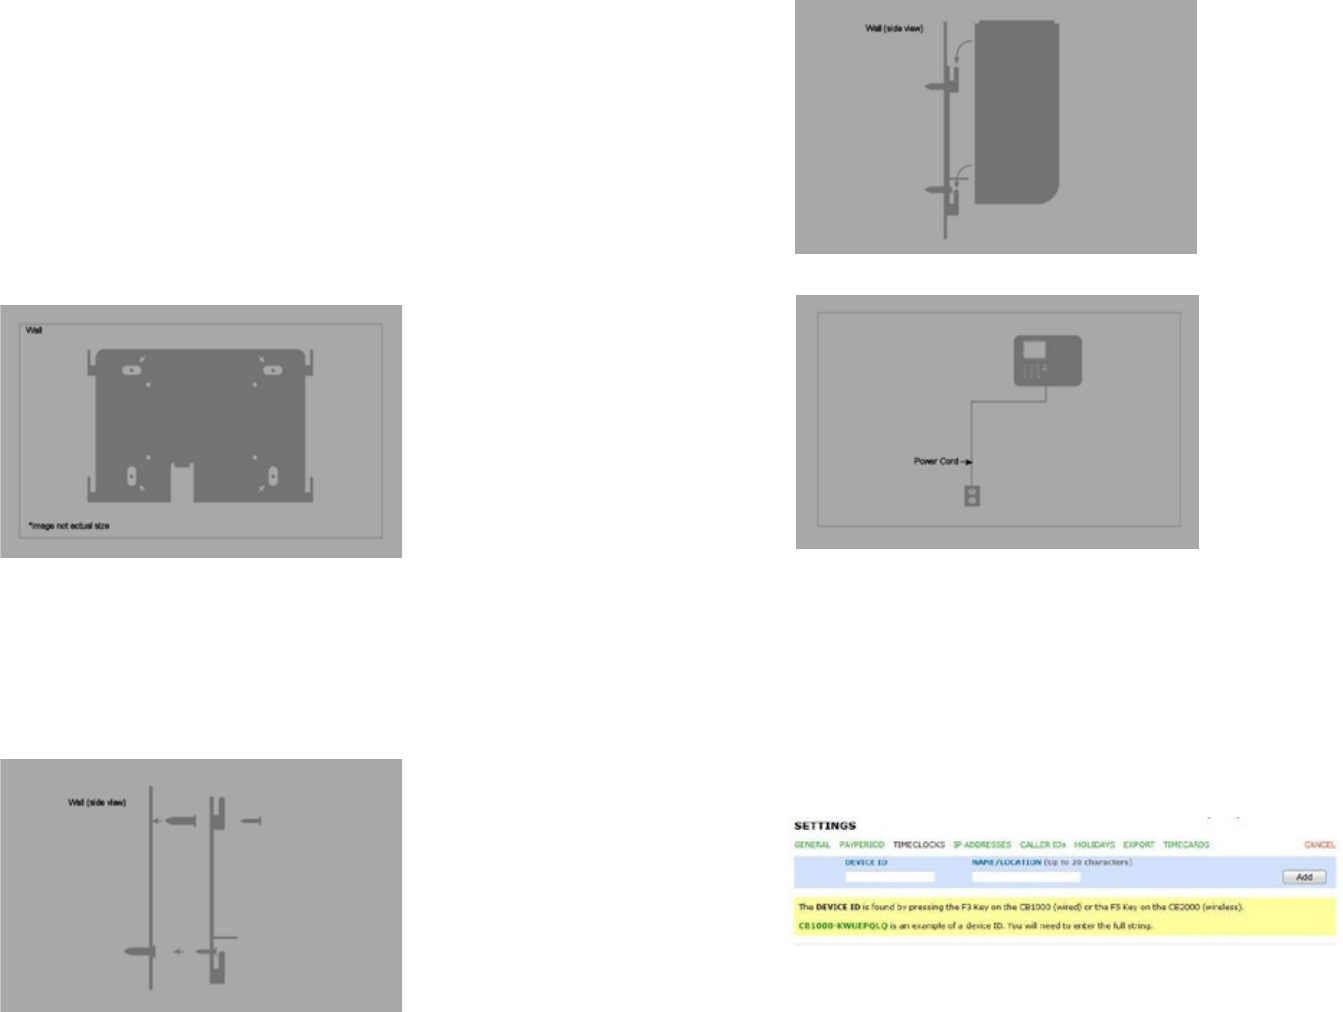
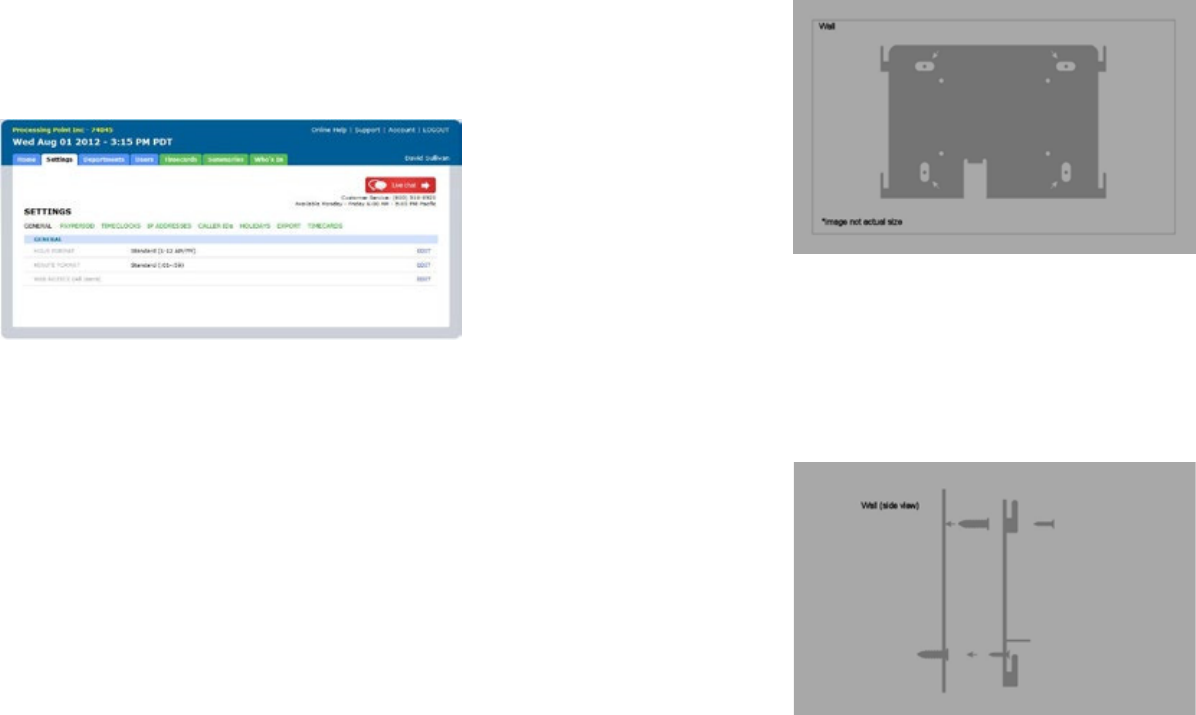
3.1 Mounting Your CB1000
1. Find a location near a power outlet and a router, switch, or Ethernet
jack where you would like to mount the timeclock.
2. Place the metal back plate against the wall, as shown below, and
mark the four screw holes against the wall.
3. Insert the wall studs into the center of the wall marks in all four
locations.
4. Place the metal back plate against the wall, with prongs facing away
from the wall and pointing upward, and screw the back plate to the
wall in all four locations.
276
6.3.1 Transferring Fingerprint Templates to Other Timeclocks
1. Click the Users tab on the main menu.
2. Click Manage Fingerprint Templates.
3. Check all of the fingerprint templates that you wish to transfer to an
additional timeclock.
4. Use the drop-down menu to select the timeclock(s) to which you
wish to transfer the templates.
5. Click Submit.
1. Press the Menu key.
2. Enter the default password (53178) if it has not been changed, then
press OK.
3. Press OK.
4. Scroll to select Download Templates, using the down arrow key.
5. Press OK.
6. Wait for the templates to download to the timeclock.
7. At the Success screen, press OK.
6.4 Overview of the BN2500
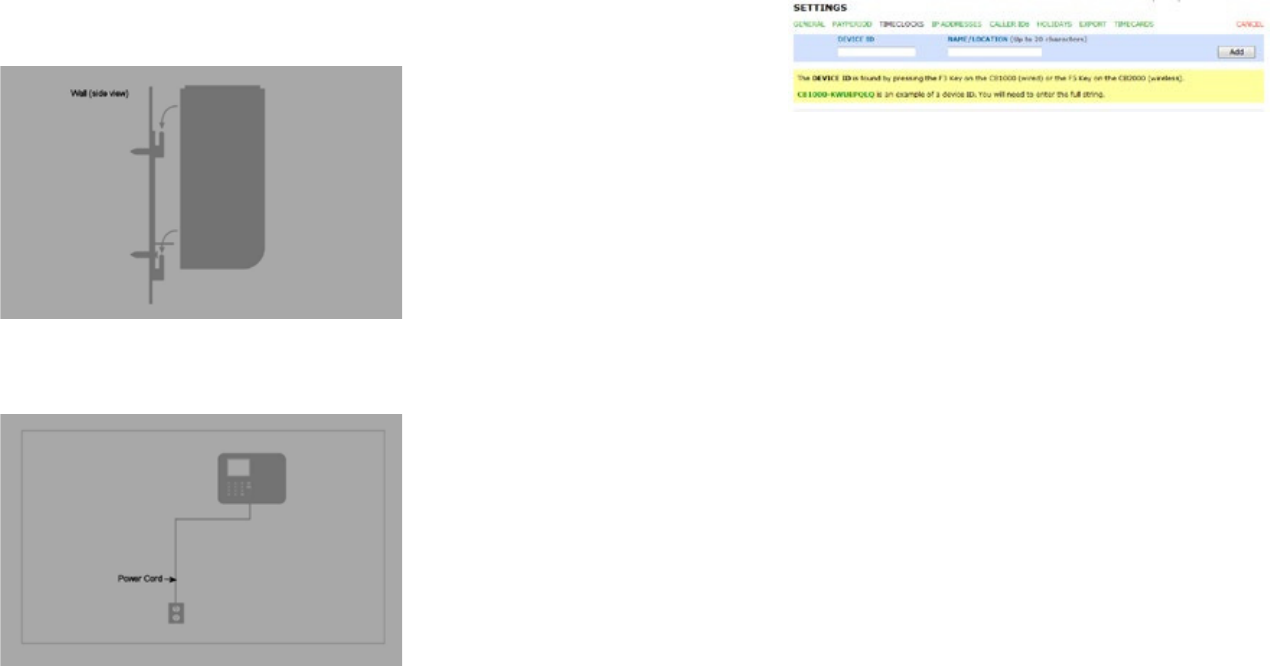
5. Affix the timeclock to the metal back plate by lining up the four slots
in the back of the timeclock to the four metal prongs on the back plate.
Push down lightly to make sure the timeclock is securely fastened to
the back plate and wall.
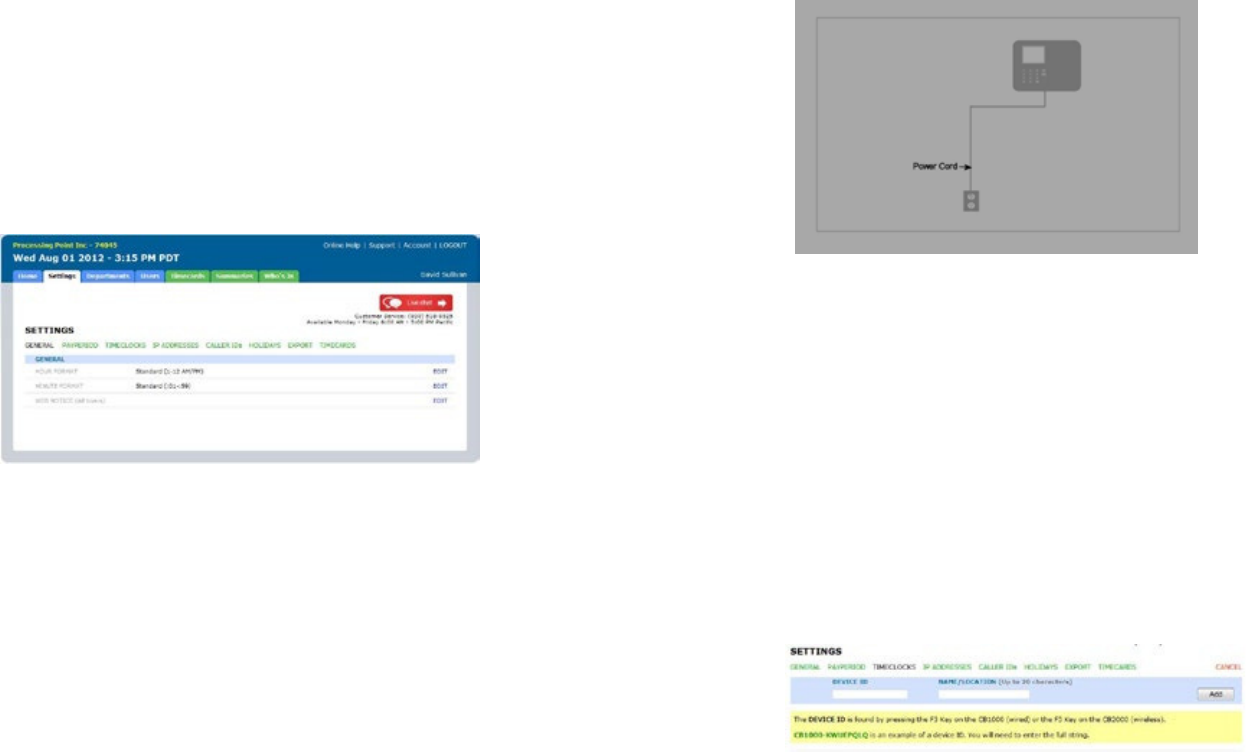
6. Attach the AC120V power cord to the back of the timeclock.
3.2 Linking the CB1000 to Your uAttend Account
1. Attach an Ethernet cable between the timeclock and your router,
then plug the timeclock into a power outlet.
2. Log in to your uAttend account, if you are not already logged in.
3. Click the Settings tab.
4. Click the Timeclocks link.
5. Click Add Timeclock.
6. In the Device ID field, enter the Device ID assigned to the CB1000.
726
6. The designated employee should press their finger firmly on the
sensor until you hear a beeping sound. The employee should then
remove their finger from the sensor. This process will be repeated two
more times with the same finger.
NOTE:
7. Repeat the previous steps for each employee who will be using the
timeclock.
1. Click the Settings tab on the main menu.
2. Click the Timeclocks link.
3. Click the Assign Templates link that appears next to the name of
the timeclock that you used to register the fingerprint templates.
4. Assign each fingerprint template to the appropriate employee,
using the Template Assignment Sheet in this guide as a reference.
IMPORTANT:

7. In the Name/Location field, enter the name for the timeclock.
8. Click Add.
9. IMPORTANT: Restart the timeclock.
3.3 Overview of the CB1000
3.3.1 Using the CB1000 Keypad
3.3.2 Using the CB1000 Menus
KEY FUNCTION
1-0 FUNCTION AS THE NUMBERS THEY REPRESENT.
USE THE KEYPAD TO ENTER A PIN BY PRESSING
THE CORRECT FOUR DIGITS, THEN PRESSING OK.
ESC USED TO EXIT FROM A MENU OR CANCEL A
FUNCTION.
MENU USED TO ENTER MENU MODE. REQUIRES A
MANAGER PASSWORD. DEFAULT PASSWORD IS
53178. DEFAULT PASSWORD CAN BE CHANGED
BY A MANAGER.
UP ARROW/
DEPT
PRESSING THE UP ARROW/DEPT KEY IN
STANDBY MODE WILL ENABLE THE DEPARTMENT
TRANSFER FUNCTION. IN ALL OTHER MODES,
THIS KEY IS USED TO SCROLL UP.
DOWN ARROW/
ID
PRESSING THE DOWN ARROW/ID KEY IN
STANDBY MODE WILL ALLOW A USER TO ENTER
THEIR PIN. IN ALL OTHER MODES, THIS KEY IS
USED TO SCROLL DOWN.
OK USED TO ACCEPT KEY ENTRIES.
# USED AS A TOGGLE BUTTON.
258
5. At the Success screen, press OK.
6.2.2 Connecting via LAN Cable
1. Press 2 to connect via LAN.
2. The timeclock will display the message “DHCP Configuring.”
3. After successfully connecting to your network, the timeclock will
display the “System Ready” message in the upper-left corner of the
main screen.
6.3 Registering Fingerprint Templates
1. Press the Menu key.
2. Enter the default password (53178) if it has not been changed, then
press OK.
3. From the timeclock menu, select the first option, User Management.
4. Select Add User.
5. Enter an ID code for the fingerprint template and press OK.
924
The Device Management
Update Time—
Device ID—
Upload Logo—
CB1000.
Date Format—
CB1000.
Reverify Time—
Sounds—
Time Format—
The Communications
IP Address—
address.
Subnet Mask—
DefGateway—
DHCP—
DNS IP Addr—
The System Management
Reset—
Help—
MAC Address—
Update Firmware—
Firmware Version—
5. In the Device ID field, enter the Device ID assigned to the BN2500.
6. In the Name/Location field, enter the name for the timeclock.
7. Click Add.
6.2.1 Connecting via WIFI Router
1. Press 1 to initialize the WIFI module.
2. Press OK.
3. Using the down arrow key, scroll to your preferred network and press OK.
4. Enter the password and press OK.

2310
4.0 SETTING UP AND USING
THE CB2000
4.1 Mounting Your CB2000
1. Find a location near a power outlet and a router, switch, or Ethernet
jack where you would like to mount the timeclock.
2. Place the metal back plate against the wall, as shown below, and
mark the four screw holes against the wall.
3. Insert the wall studs into the center of the wall marks in all four
locations.
4. Place the metal back plate against the wall, with prongs facing away
from the wall and pointing upward, and screw the back plate to the
wall in all four locations.
5. Affix the timeclock to the metal back plate by lining up the four slots
in the back of the timeclock to the four metal prongs on the back plate.
Push down lightly to make sure the timeclock is securely fastened to
the back plate and wall.
6. Attach the AC120V power cord to the back of the timeclock.
6.2 Linking the BN2500 to Your uAttend Account
1. Log in to your uAttend account, if you are not already logged in.
2. Click the Settings tab.
3. Click the Timeclocks link.
4. Click Add Timeclock.
1122
5. Affix the timeclock to the metal back plate by lining up the four slots
in the back of the timeclock to the four metal prongs on the back plate.
Push down lightly to make sure the timeclock is securely fastened to
the back plate and wall.
6. Attach the AC120V power cord to the back of the timeclock.
4.2 Linking the CB2000 to Your uAttend Account
1. Log in to your uAttend account, if you are not already logged in.
2. Click the Settings tab.
3. Click the Timeclocks link.
4. Click Add Timeclock.
5. In the Device ID field, enter the Device ID assigned to the CB2000.
6.0 SETTING UP AND USING
THE BN2500
6.1 Mounting Your BN2500
1. Find a location near a power outlet and a router, switch, or Ethernet
jack where you would like to mount the timeclock.
2. Place the metal back plate against the wall, as shown below, and
mark the four screw holes against the wall.
3. Insert the wall studs into the center of the wall marks in all four
locations.
4. Place the metal back plate against the wall, with prongs facing away
from the wall and pointing upward, and screw the back plate to the
wall in all four locations.
2112
6. In the Name/Location field, enter the name for the timeclock.
7. Click Add.
4.2.1 Connecting via WIFI Router
1. Press 1 to initialize the WIFI module.
2. Press OK.
3. Using the down arrow key, scroll to your preferred network and press OK.
4. Enter the password and press OK.
5. At the Success screen, press OK.
The Device Management
Update Time—
Device ID—
Upload Logo—
Date Format—
Reverify Time—
Sounds—
Time Format—
The Communications
IP Address—
Subnet Mask—
DefGateway—
DHCP—
DNS IP Addr—
The System Management
Reset—
Help—
MAC Address—
Update Firmware—
Firmware Version—
1320
4.2.2 Connecting via LAN Cable
1. Press 2 to connect via LAN.
2. The timeclock will display the message “DHCP Configuring.”
3. After successfully connecting to your network, the timeclock will display
the “System Ready” message in the upper-left corner of the main screen.
4.3 Overview of the CB2000
4.3.1 Using the CB2000 Keypad
KEY FUNCTION
1-0 FUNCTION AS THE NUMBERS THEY REPRESENT.
USE THE KEYPAD TO ENTER A PIN BY PRESSING
THE CORRECT FOUR DIGITS, THEN PRESSING OK.
ESC USED TO EXIT FROM A MENU OR CANCEL A
FUNCTION.
MENU USED TO ENTER MENU MODE. REQUIRES A
MANAGER PASSWORD. DEFAULT PASSWORD IS
53178. DEFAULT PASSWORD CAN BE CHANGED
BY A MANAGER.
UP ARROW/DEPT PRESSING THE UP ARROW/DEPT KEY
IN STANDBY MODE WILL ENABLE THE
DEPARTMENT TRANSFER FUNCTION. IN ALL
OTHER MODES, THIS KEY IS USED TO SCROLL UP.
DOWN ARROW/
ID
PRESSING THE DOWN ARROW/ID KEY IN
STANDBY MODE WILL ALLOW A USER TO ENTER
THEIR PIN. IN ALL OTHER MODES, THIS KEY IS
USED TO SCROLL DOWN.
OK USED TO ACCEPT KEY ENTRIES.
# USED TO SWITCH BETWEEN ALPHA AND
NUMERIC DURING WIFI PASSWORD ENTRY AND
IS OTHERWISE USED AS A TOGGLE BUTTON.
5.4.1 Using the BN1500 Keypad
5.4.2 Using the BN1500 Menus
The User Management
Add User—
Delete User—
Change Mgr Password—
View User ID—
Download Templates—
KEY FUNCTION
1-0 FUNCTION AS THE NUMBERS THEY REPRESENT.
USE THE KEYPAD TO ENTER A PIN BY PRESSING
THE CORRECT FOUR DIGITS, THEN PRESSING OK.
ESC USED TO EXIT FROM A MENU OR CANCEL A
FUNCTION.
MENU USED TO ENTER MENU MODE. REQUIRES A
MANAGER PASSWORD. DEFAULT PASSWORD IS
53178. DEFAULT PASSWORD CAN BE CHANGED
BY A MANAGER.
UP ARROW/DEPT PRESSING THE UP ARROW/DEPT KEY
IN STANDBY MODE WILL ENABLE THE
DEPARTMENT TRANSFER FUNCTION. IN ALL
OTHER MODES, THIS KEY IS USED TO SCROLL UP.
DOWN ARROW/
ID
PRESSING THE DOWN ARROW/ID KEY IN
STANDBY MODE WILL ALLOW A USER TO ENTER
THEIR PIN. IN ALL OTHER MODES, THIS KEY IS
USED TO SCROLL DOWN.
OK USED TO ACCEPT KEY ENTRIES.
# USED AS A TOGGLE BUTTON.
1914
4.3.2 Using the CB2000 Menus
The Device Management
Update Time—
Device ID—
Upload Logo—
CB2000.
Date Format—
Reverify Time—
Sounds—
Time Format—
Change Mgr Password—
The Communications
Set IP—
DHCP—
Network Settings—
Delete WIFI Settings—
View WIFI Settings—
Communicating Interface—
The System Management
Reset—
Help—
MAC Address—
Update Firmware—
Firmware Version—
5.3.1 Transferring Fingerprint Templates to Other Timeclocks
1. Click the Users tab on the main menu.
2. Click Manage Fingerprint Templates.
3. Check all of the fingerprint templates that you wish to transfer to an
additional timeclock.
4. Use the drop-down menu to select the timeclock(s) to which you wish
to transfer the templates.
5. Click Submit.
1. Press the Menu key.
2. Enter the default password (53178) if it has not been changed, then
press OK.
3. Press OK.
4. Scroll to select Download Templates, using the down arrow key.
5. Press OK.
6. Wait for the templates to download to the timeclock.
7. At the Success screen, press OK.
5.4 Overview of the BN1500
1518
5.0 SETTING UP AND USING
THE BN1500
5.1 Mounting Your BN1500
1. Find a location near a power outlet and a router, switch, or Ethernet
jack where you would like to mount the timeclock.
2. Place the metal back plate against the wall, as shown below, and
mark the four screw holes against the wall.
3. Insert the wall studs into the center of the wall marks in all four
locations.
4. Place the metal back plate against the wall, with prongs facing away
from the wall and pointing upward, and screw the back plate to the
wall in all four locations.
6. The designated employee should press their finger firmly on the
sensor until you hear a beeping sound. The employee should then
remove their finger from the sensor. This process will be repeated two
more times with the same finger.
NOTE:
7. Repeat the previous steps for each employee who will be using the
timeclock.
1. Click the Settings tab on the main menu.
2. Click the Timeclocks link.
3. Click the Assign Templates link that appears next to the name of
the timeclock that you used to register the fingerprint templates.
4. Assign each fingerprint template to the appropriate employee,
using the Template Assignment Sheet in this guide as a reference.
IMPORTANT:
1716
5. Affix the timeclock to the metal back plate by lining up the four slots
in the back of the timeclock to the four metal prongs on the back plate.
Push down lightly to make sure the timeclock is securely fastened to
the back plate and wall.
6. Attach the AC120V power cord to the back of the timeclock.
5.2 Linking the BN1500 to Your uAttend Account
1. Attach an Ethernet cable between the timeclock and your router,
then plug the timeclock into a power outlet.
2. Log in to your uAttend account, if you are not already logged in.
3. Click the Settings tab.
4. Click the Timeclocks link.
5. Click Add Timeclock.
6. In the Device ID field, enter the Device ID assigned to the BN1500.
7. In the Name/Location field, enter the name for the timeclock.
8. Click Add.
9. IMPORTANT: Restart the timeclock.
5.3 Registering Fingerprint Templates
1. Press the Menu key.
2. Enter the default password (53178) if it has not been changed, then
press OK.
3. From the timeclock menu, select the first option, User Management.
4. Select Add User.
5. Enter an ID code for the fingerprint template and press OK.
1716
FCC Statement
This device complies with Part 15 of the FCC Rules. Operation is subject to the following
two conditions: (1) This device may not cause harmful interference, and (2) this device
must accept any interference received, including interference that may cause undesired
operation. Any Changes or modifications not expressly approved by party responsible for
compliance coulk void the user’s authority to operate the equipment.
Radiation Exposure Statement
This equipment complies with FCC radiation exposure limits set forth for an uncontrolled
environment. This equipment should be installed and operated with minimum distance
20cm between the radiator & your body.
This transmitter must not be co-located or operating in conjunction with any other antenna
or transmitter.