ACCO V10472 Nobo Kapture USB Receiver User Manual Manual
ACCO Brands, Inc. Nobo Kapture USB Receiver Manual
UserManual.wiki
>
ACCO
>
V10472 User Manual
Manual
Navigation menu
Upload a User Manual
Namespaces
Wiki Guide
HTML
PDF
Info
Views
User Manual
Discussion / Help
Navigation

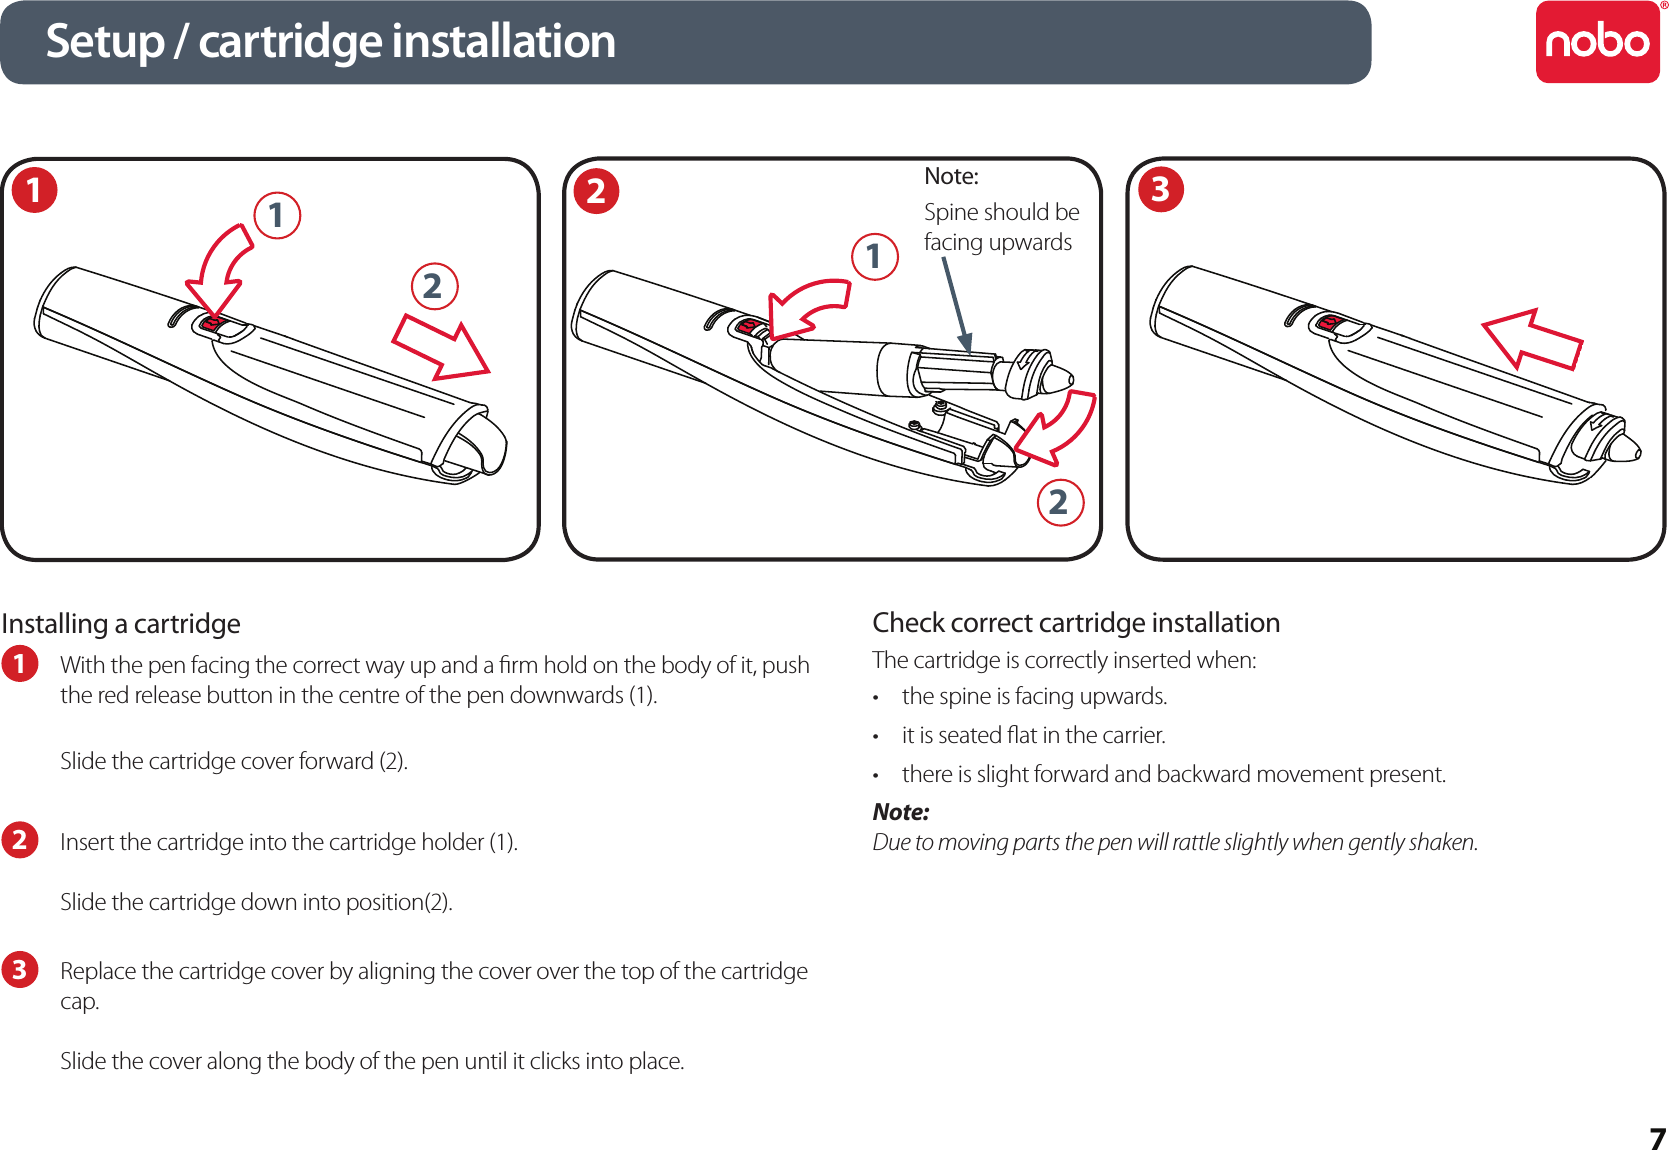
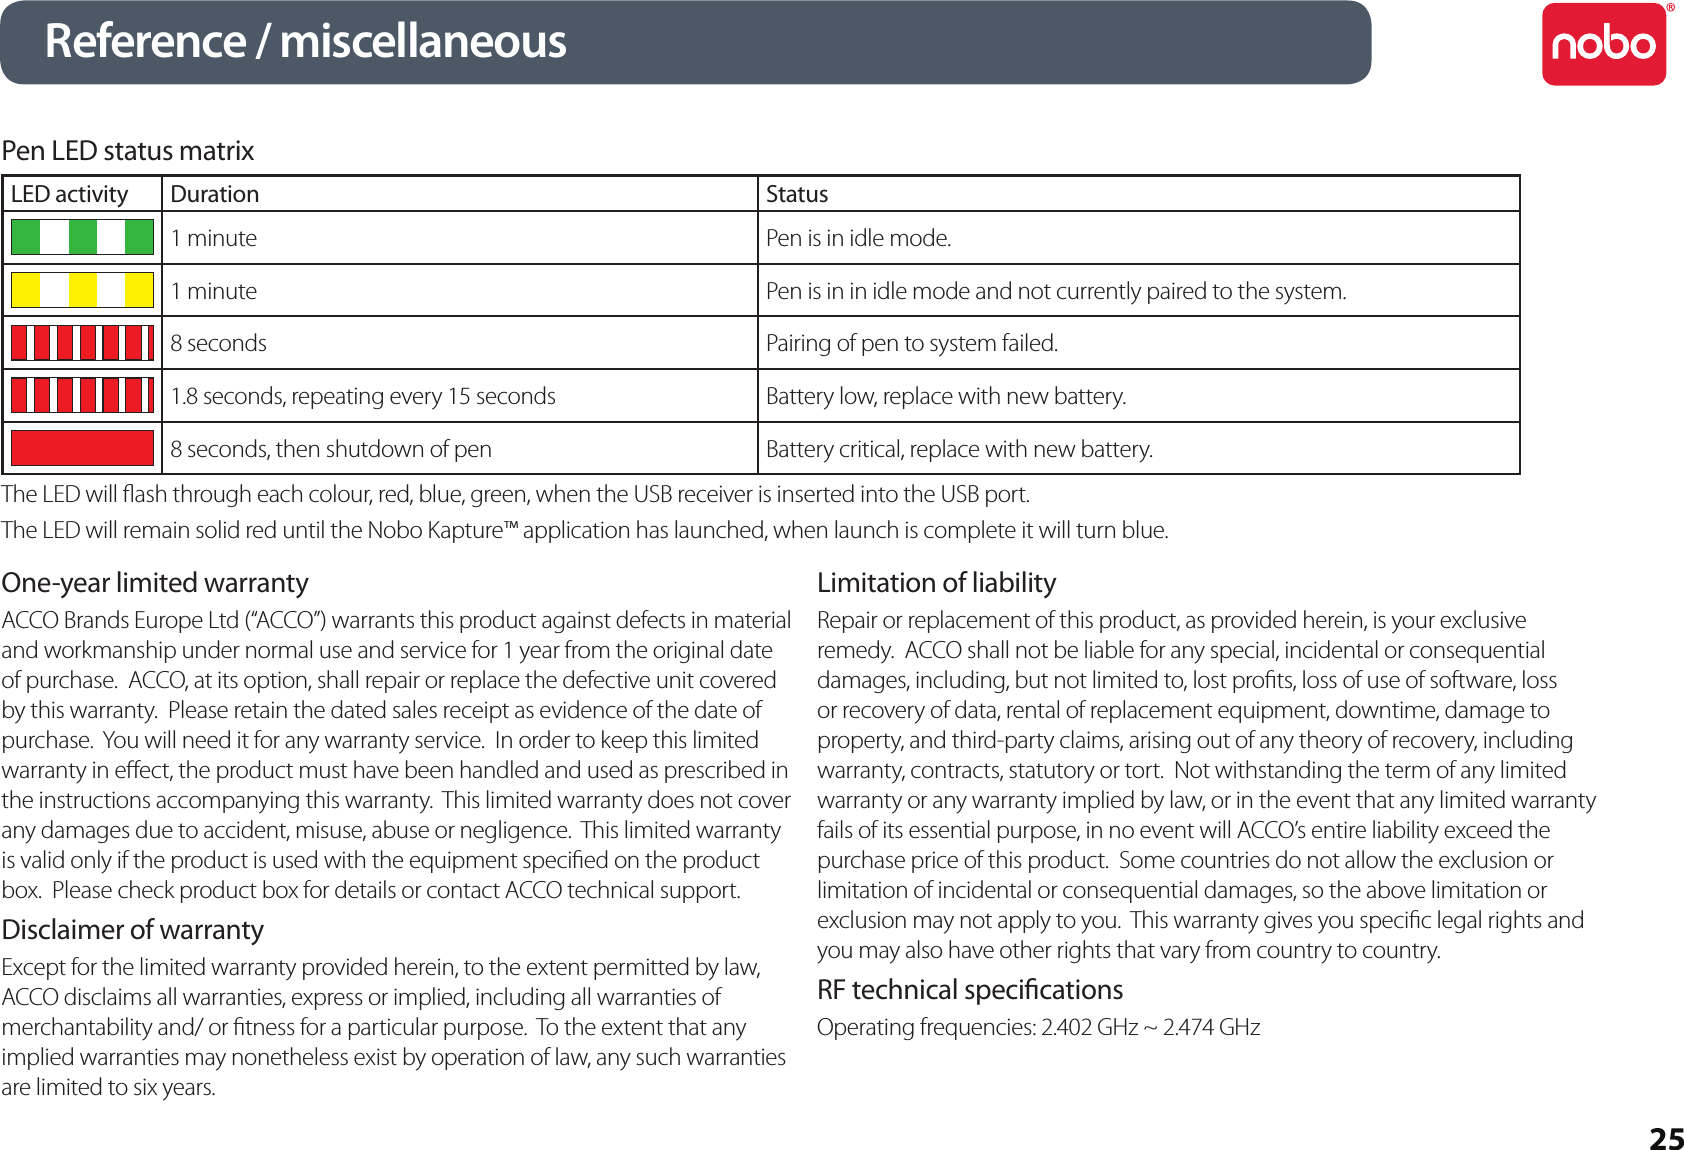
![6Inserting or replacing the battery1 Turn the pen upside down.With a rm hold on the body of the pen push the red release button at the base of the pen downwards (1). Slide the battery cover away from the body of the pen (2).If replacing the battery remove the old battery.2 Insert the new battery, observing correct polarity (positive [+] end rst).Replace the battery cover by inserting the tab into the slot (1) and sliding the cover down until it clicks into place (2).Switch on the digital marker pen by placing the nib (with or without the cap) on a surface. The pen will switch on and be ready to use within 3 seconds. The pen will automatically switch o after a period of inactivity.Battery Do’sUse only alkaline batteries of AAA (LR03) type.•Remove the battery from the pen and store in a cool, dry, clean place if it will not •be used for a long period of time.Dispose of the battery taking note of any local regulations.•Battery Don’tsDo not attempt to recharge the battery.•Do not short-circuit the battery. A short-circuit may cause severe damage to the •battery.Do not drop, hit or otherwise abuse the battery as this may result in the exposure •of cell contents, which are corrosive.Do not expose the battery to moisture or rain.•Keep the battery away from re or other sources of extreme heat. Do not •incinerate. Exposure of the battery to extreme heat may result in an explosion.1Setup / battery installation21 x AAA battery2112](https://usermanual.wiki/ACCO/V10472/User-Guide-1205773-Page-6.png)