AISOLUTION KDC100 Barcode Reader User Manual KDC100 User Manual English
AISOLUTION CO., LTD. Barcode Reader KDC100 User Manual English
User Manual
KDC100
USERMANUAL
Rev0.9
오류
!
스타일이
정의되어
있지
않습니다
.
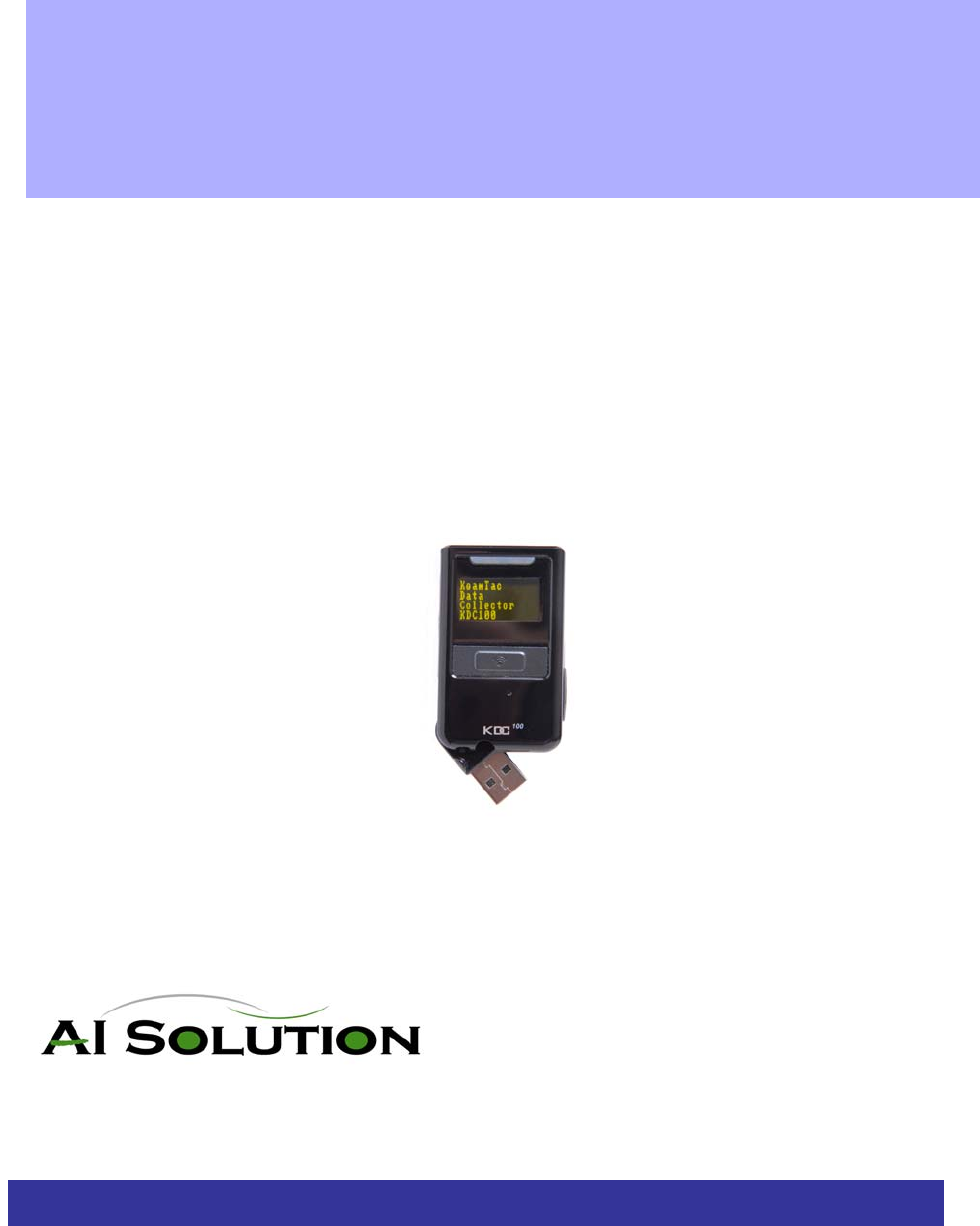
KDC100 Introduction
The AISOLUTION data collector KDC100 is a compact, light and powerful reader with a rechargeable battery,
OLED display, large memory and connections to PC, PDA and cellphone using serial and USB cable.
KDC100 is well suited for a variety of portable applications. It can be used as an accessory to a PDA or
cellphone as well as an independent data collector.
The key features of KDC100 are
• Bright OLED display
• Built in swing-out USB connector
• Rechargeable Li-Poly battery with separate installation space for easy replacement
• Top of the line laser scan engine
• Auto uploading scanned data to the host device upon connecting either USB or serial port
• Large data memory
The KDC100 also provides seamless integration of barcode capability into your application by providing a user
friendly software development kit.
Installation and Operation
Installation
Prior to installing the included software on your PC, verify that your system meets the minimum system
requirements.
1. Microsoft Windows operating system: 2000 or XP
2. Free space on hard drive of 512 MB.
3. Accessible USB port for connecting the KDC100 to your computer
4. 256M byte memory or larger.
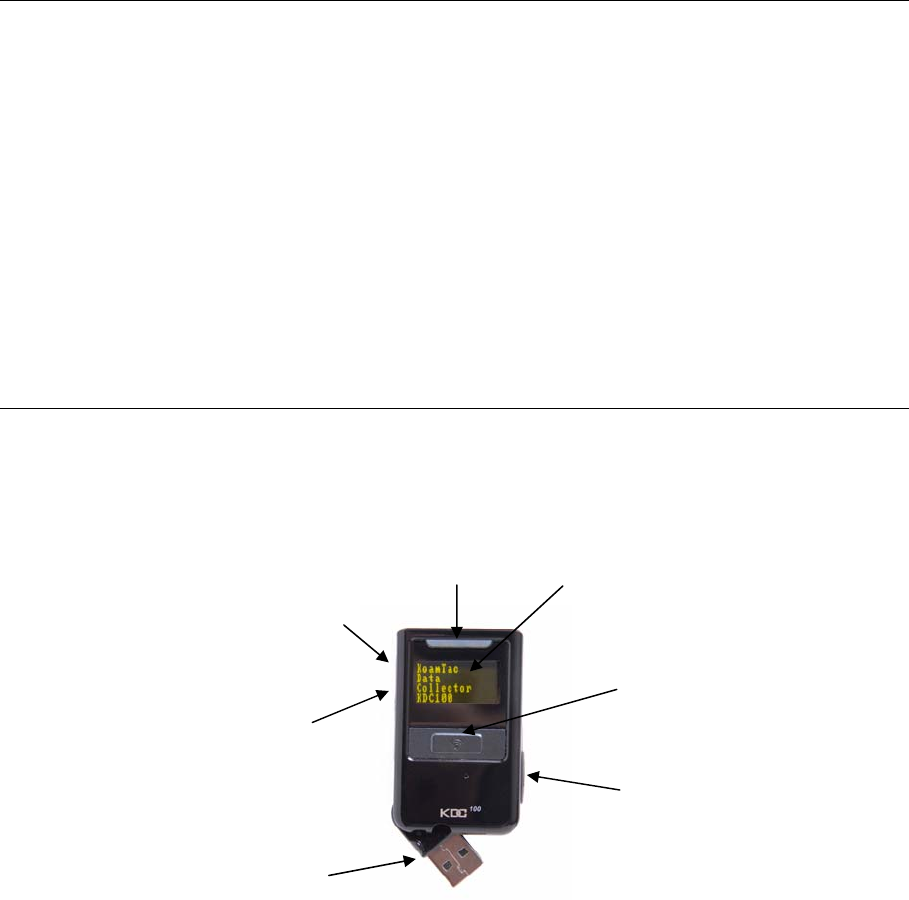
Locationofbuttons
OLED Display
USB & Serial
port
Scan Button
Upper Menu
Button
Lower Menu
Button
Swin
g
-out USB
LED

오류
!
스타일이
정의되어
있지
않습니다
.
BasicOperation
Readingbarcodes
Point the KDC100 to the barcode and press the trigger key.
A High beeper tone will be heard upon a successful scan.
The front panel LED will illuminate in green.
The scanned barcode will be displayed, along with barcode type and time stamp.
When the barcode cannot be read, try the following:
z Check that the width of barcode label does not exceed the width of the light beam.
z Change the angle between the barcode and KDC100.
z Change the distance between the barcode and KDC100.
z Check option settings.
UploadbarcodedatatoPC.
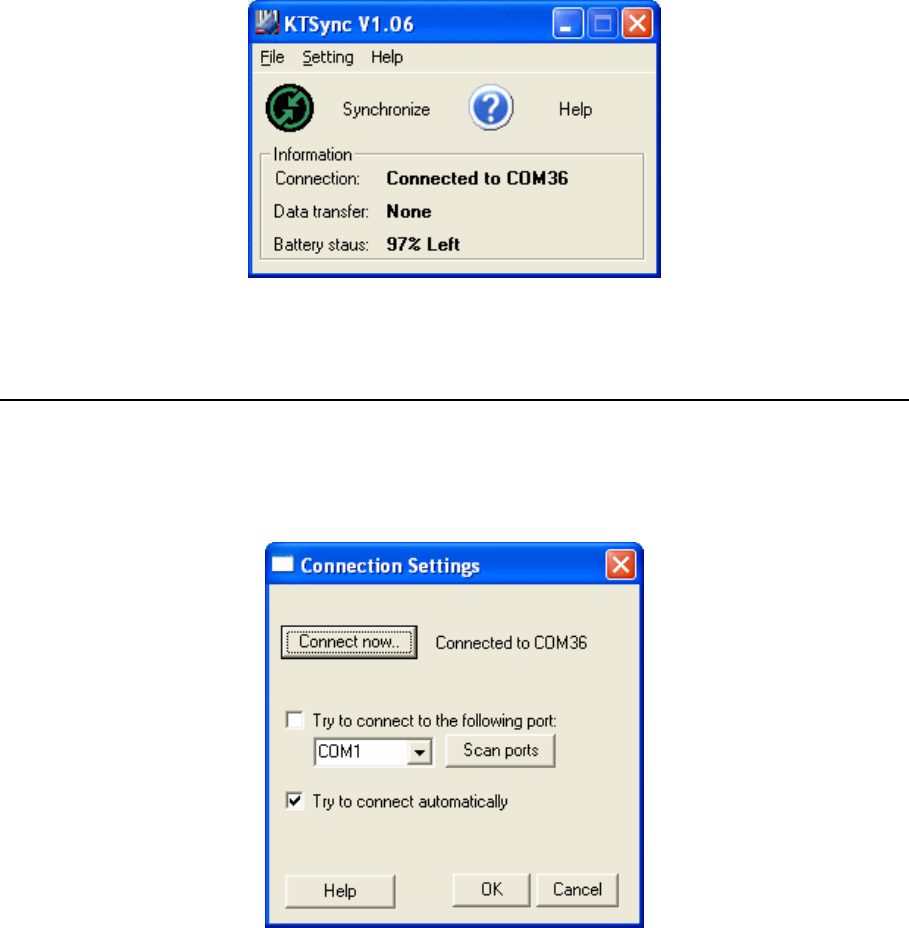
Use the included Synchronization program to upload barcode data from KDC100 to your PC.
Start KTSync program
Configure Synchronization options
Execute Sync. Operation
KDC100Menus
The user can access menu selection mode by pushing both buttons on the right side of the KDC100
simultaneously. The table below summarizes the KDC 100 menus.
0123456789012
Code39
20061231:235959

Level 1 Level 2 Note
View Data Delete Review and delete stored data
EAN13 Enable/Disable Symbology
EAN8 Enable/Disable Symbology
UPCA Enable/Disable Symbology
UPCE Enable/Disable Symbology
CODE39 Enable/Disable Symbology
ITF14 Enable/Disable Symbology
CODE128 Enable/Disable Symbology
I2of5 Enable/Disable Symbology
CODABAR Enable/Disable Symbology
EAN128 Enable/Disable Symbology
CODE93 Enable/Disable Symbology
CODE35 Enable/Disable Symbology
BooklandEAN Enable/Disable Symbology
EAN13withAddon Enable/Disable Symbology
EAN8withAddon Enable/Disable Symbology
UPCAwithAddon Enable/Disable Symbology
Set Barcodes
UPCEwithAddon Enable/Disable Symbology
CodaBar_NoStartStopChars
ReverseDirection
UPCE_as_UPCA
EAN8_as_EAN13
UPCE_as_EAN13
ReturnCheckDigit
VerifyCheckDigit
UPCA_as_EAN13
I2of5_VerifyCheckDigit
Code39_VerifyCheckDigit
I2of5_ReturnCheckDigit
Code39_ReturnCheckDigit
UPCE_ReturnCheckDigit
UPCA_ReturnCheckDigit
Barcode Options
EAN8_ReturnCheckDigit

오류
!
스타일이
정의되어
있지
않습니다
.
EAN13_ReturnCheckDigit
Scan Angle Narrow/Wide
Filter Normal/High
Time Out 100..10000msec
Minimum Barcode Length 2..36
Scan Options
Security Level 1..4
Memory Status # of stored barcode, amount of remaining
memory
Sleep Timeout 1sec..10sec
Date & Time YYYY:MM:DD, HH:MM:SS
Battery % left
System
Version FW version. Serial Number
LEDStatus
LED Color Status
Green z Successful Reading
z USB is connected and battery is fully charged
Yellow z Low battery
Red z No reading
z Empty battery
Synchronization
KTSync has two major functions – Synchronization and Keyboard Emulation. AISOLUTION Synchronization
provides data upload functions to any Windows XP application. Keyboard Emulator enters scanned data directly
into any XP application programs as if it was manually typed on the keyboard. KTSync also provides the
following additional functions:
z Prefixes, suffixes add function which further eliminates the need for manual data entry
z Symbology and Scan Option selector
z Barcode Wedging.
You will see the following screen when launching KTSync application.
ConnectionSettings
The user can manually configure the connection with the PC by using the ”Connection Settings” option. Please
check the “Try to connect automatically” option if you desire to set up the connection between your KDC100
and Windows XP automatically.
오류
!
스타일이
정의되어
있지
않습니다
.
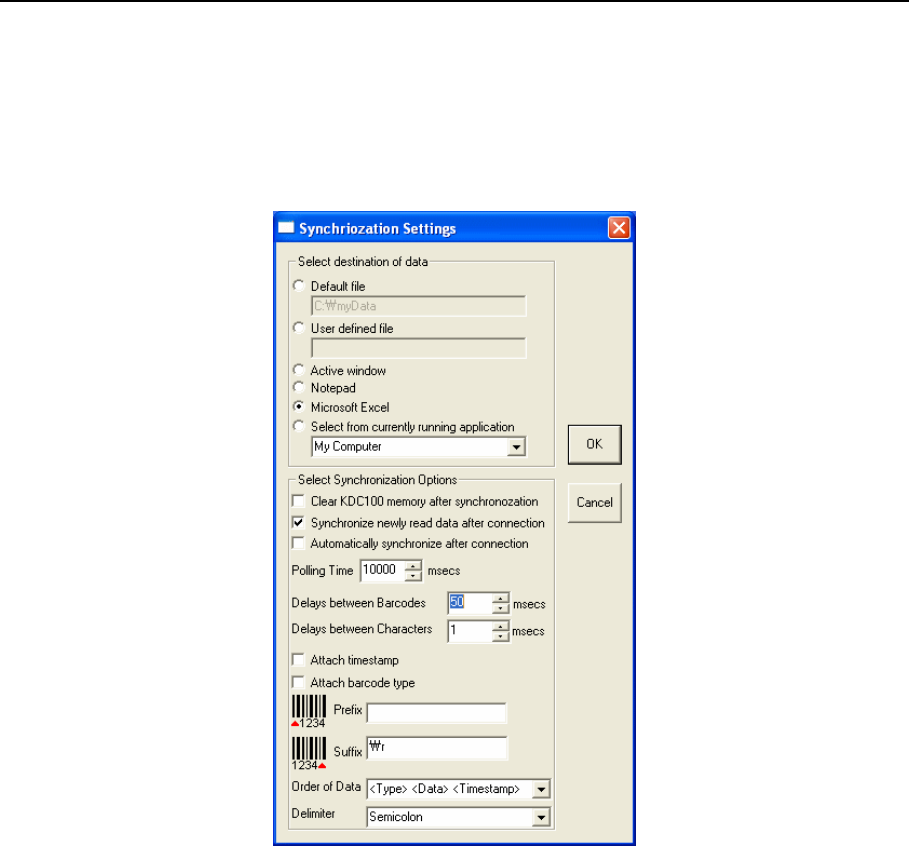
Synchronization
The AISOLUTION KDC100 provides several synchronization options with hosts such as PC, PDA and
Cellphone. The standard package includes the software for Windows XP synchronization. If you need cellphone
or PDA integration, please contact your local representative. The user can configure various Synchronization
and Keyboard Emulation function in the “Synchronization Settings” option.
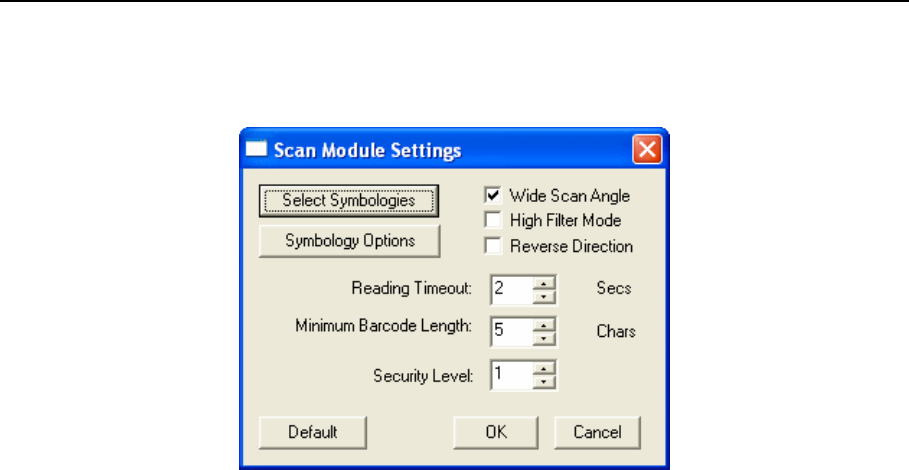
BarcodeSelection
The user can configure barcode options in the Scan Module Settings menu.
CAUTION: Changes or modifications not expressly approved by the manufacturer
responsible for compliance could void the user’s authority to operate the equipment
WAR NING
This device complies with part 15 of the FCC Rules. Operation is subject to the
following two conditions: (1) This device may not cause harmful interference, and (2)
this device must accept any interference received, including interference that may cause
undesired operation.
INFORMATION TO USER:
This equipment has been tested and found to comply with the limit of a Class B digital
device, pursuant to Part 15 of the FCC Rules. These limits are designed to provide
reasonable protection against harmful interference in a residential installation. This
equipment generates, uses and can radiate radio frequency energy and, if not installed
and used in accordance with the instructions, may cause harmful interference to radio
communications. However, there is no guarantee that interference will not occur in a
particular installation; if this equipment does cause harmful interference to radio or
television reception, which can be determined by turning the equipment off and on, the
user is encouraged to try to correct the interference by one or more of the following
measures:
1. Reorient / Relocate the receiving antenna.
2. Increase the separation between the equipment and receiver.
3. Connect the equipment into an outlet on a circuit difference from that to which
the receiver is connected.
4. Consult the dealer or an experienced radio/TV technician for help