AISOLUTION KDC250 Barcode Scanner(Bluetooth) User Manual
AISOLUTION CO., LTD. Barcode Scanner(Bluetooth) Users Manual
Users Manual

UserManualKDC250
March,2011
REVISION
2.85(6).L
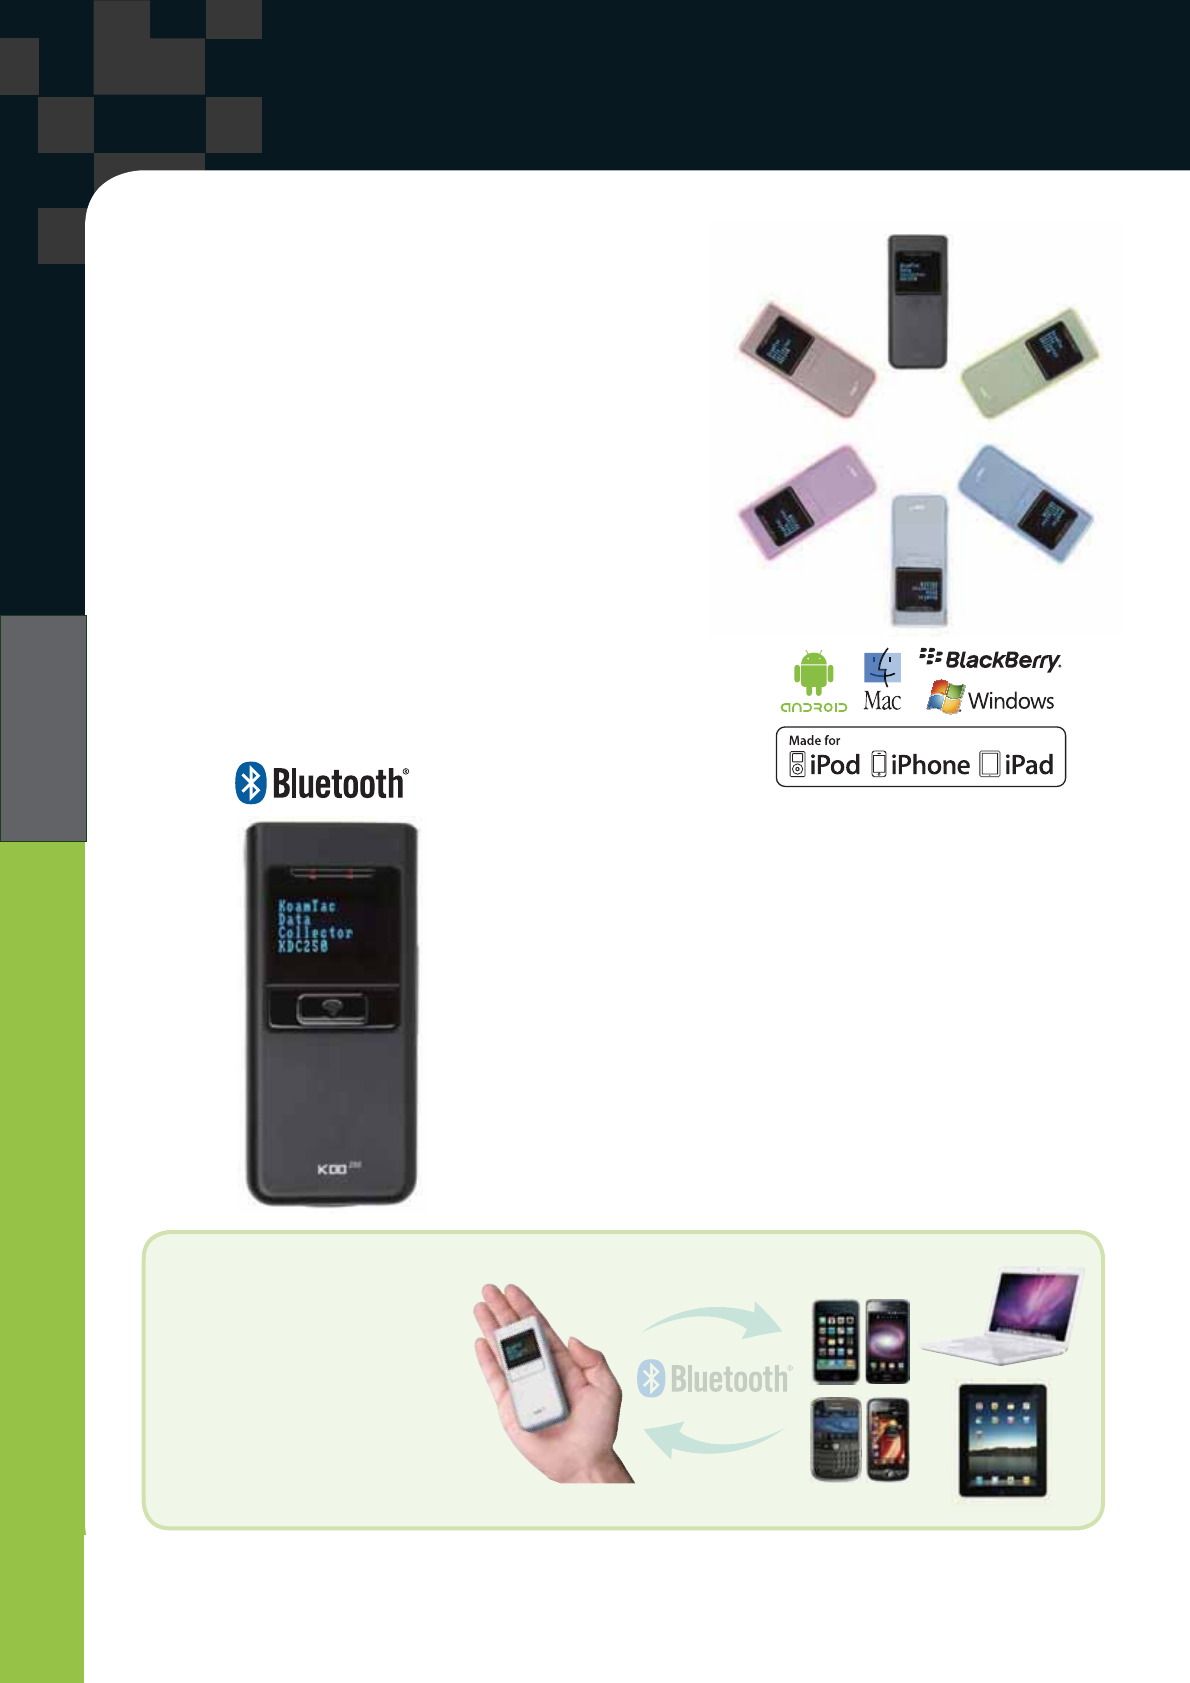
A New Wave in Auto ID
A New Wave in Auto-ID
T
h
e
KD
C
2
50
e
n
ab
l
es
d
iv
e
r
se
m
ob
il
e
A
uto
-I
de
n
t
ifi
cat
i
o
n
a
pplications for collectin
g
and storin
g
barcode data
.
A
b
ui
l
t in
d
isp
l
ay e
l
iminates
bl
in
d
erroneous
d
ata co
ll
ections
a
nd enables interactive data collection processes.
An eas
y
-to-replace rechar
g
eable batter
y
that can rechar
g
e
f
rom any USB port allows more than 15,000,000 barcode
scans. With 4MB of on-board memory that stores over
1
00,000 product records, memor
y
shorta
g
es are also no
l
onger a pro
bl
em.
All KD
C
®
pro
d
ucts come wit
h
FREE KTSync
®
so
f
tware
(
includes
k
e
y
board wed
g
in
g
, application
g
eneration, DB look up and
i
nventor
y
mana
g
ement features) and FREE SDK (includes
technical support
f
rom our top engineers and development
staff
).
ADVANCED FEATURES
q
48 Channel GPS Receiver
q
Class
2
Bluetooth
®
wi
th
HID
/S
PP
/
MF
i
(
250i model onl
y
) Profile
s
q
B
rig
h
t 1
”
OLED Disp
l
ay
q
R
echar
g
eable Li-Ion Batter
y
q
S
tores 100
,
000+ Pro
d
uct Recor
ds
q
K
TS
y
nc
®
with Ke
y
board Wed
g
in
g
, Application
Generation, DB Look up and Inventory
Management features.
GPS
© 2011 KoamTac
,
Inc. KDC250-110101
116 Villa
g
e Boulevard, Suite 200, Princeton, NJ 08540, USA
Te
l +1-
609
-7
3
4-4
335
F
a
x +1-
609
-22
8
-4
3
7
3
E-m
a
il inf
o@
k
oa
m
tac
.
co
m
www.k
oa
m
tac
.
com
q
T
rans
p
ortat
i
o
n
q
L
og
i
st
i
cs
q
H
ealthcare Services
q
F
ield Service
s
q
D
i
st
ri
but
i
o
n
&
R
eta
i
l
q
P
roperty
M
anagement
KDC250 Laser Barcode Data Collector
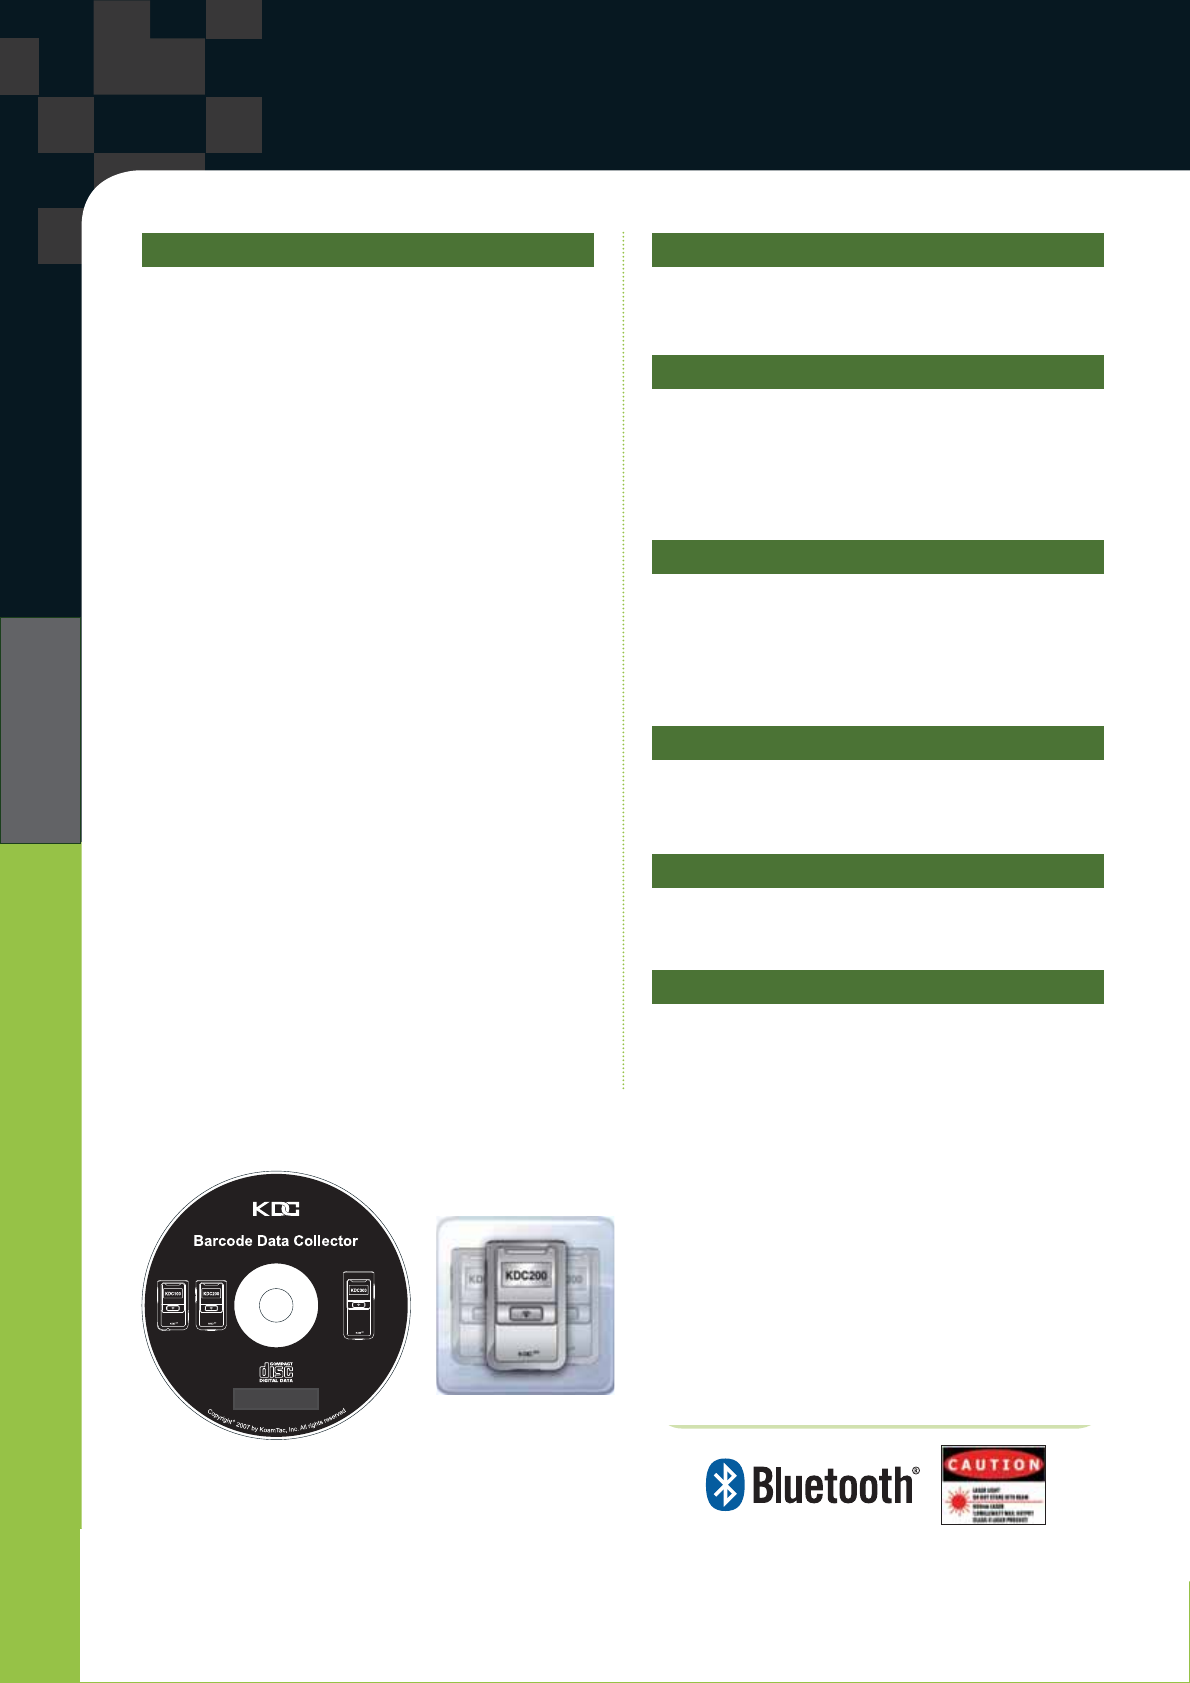
A New Wave in Auto ID
KDC250 Specifications
Hardware Specifications
Physical Characteristics
Size
: 1.45”x 3.26”x 0.82” (37mmx83mmx21mm)
Weight
: 2.0 oz. (57 grams)
Electrical Characteristics
Battery
: Lithium-Ion (3.7V DC, 650mAh)
Charging
: Via USB connector
Typical Operating Current
: 170mA
@
3.3V
Scanning Performance
Scan Rate
: 100 scans/sec
GPS
PT9250 48 channel GPS Receiver
User Environment
Drop Spec
: 4 feet (1.22m) with Rubber Case
Operating
(%`(%
Storage
(%`(%
Humidity
`PQPEQPFGPUKPI
Interfaces
Bluetooth
®
V2.1+EDR, Class 2, HID/SPP/MFi(i model only)
USB to Serial (Ultra mini USB port)
Functionality
Memory Flash ROM
: 256KB Program, 4MB User Data
Memory RAM
: 64KB
Microprocessor
: ARM7, 32 bits
Real-time Clock
: Quartz RTC for timestamp
Symbologies
EAN, UPC, Code 39, Code 93, Code 128, Codabar,
Interleaved 2 of 5, GS1-128, Code 3 of 5
Wedging & Synchronization
q
Store to a file or transfer to the application
q
Keyboard wedge function
q
Add-on prefixes and suffixes
q
Barcode option selection
Application Generation
q
SDK for PC, Pad and Smartphone application
q
Application generation tool
q
Database lookup feature
q
Inventory management feature
Regulatory Conformance
Laser Safety - IEC Class I, CDRH Class II
EMC - CE, FCC, MIC, TELEC
Models
KDC250 – USB &
Bluetooth
®
HID/SPP
KDC250i – USB &
Bluetooth
®
HID/SPP/MFi
Package Contents
1 Data Collector with rechargeable battery
1 USB cable, 1 Lanyard, 1 Software CD,
1 Protective Boot, optional Finger Trigger Glove
For more information, contact us at:
KoamTac, Inc.
116 Village Boulevard, Suite 200 Princeton,
NJ 08540, USA
Tel +1-609-734-4335
Fax +1-609-228-4373
E-mail info
@
koamtac.com
www.koamtac.com
© 2011 KoamTac, Inc. KDC250-110101
116 Village Boulevard, Suite 200, Princeton, NJ 08540, USA
Tel +1-609-734-4335 Fax +1-609-228-4373 E-mail info@koamtac.com
www.koamtac.com
Bluetooth Spec
Operating Freq : 2 402 MHz ~ 2 480 MHz
Freq Channel : 79 (CH space : 1 MHz )
Modulation method : GFSK, PSK(EDR)
Oscillation method : PLL
KDC250 User Manual
2
TABLEOFCONTENTS
1.1 KDC Package ...................................................................................................................................... 10
1.2 KDC Characteristics ............................................................................................................................ 11
2.1 KoamTac Installation Wizard ............................................................................................................... 13
Windows XP .......................................................................................................................................... 13
Vista and Windows 7 ............................................................................................................................. 18
Windows Mobile 5.0+ ............................................................................................................................ 21
Android .................................................................................................................................................. 23
Blackberry .............................................................................................................................................. 23
iPad/iPhone/iPod touch ......................................................................................................................... 23
2.2 Manual Installation ............................................................................................................................... 24
Windows XP, Vista, and 7 ..................................................................................................................... 24
Windows Mobile 5.0+ ............................................................................................................................ 24
3.1 Getting Started ..................................................................................................................................... 25
Attach Neck Strap to KDC ..................................................................................................................... 25
Charge KDC Battery .............................................................................................................................. 25
Configure KDC ...................................................................................................................................... 26
3.2 Basics .................................................................................................................................................. 27
Reading Barcodes ................................................................................................................................. 27
Synchronizing Barcode Data to PC ....................................................................................................... 27
3.3 KDC Menus ......................................................................................................................................... 28
KDC Mode Menu ................................................................................................................................... 33
View Data Menu .................................................................................................................................... 33
Set Barcodes Menu ............................................................................................................................... 33
Code Options Menu ............................................................................................................................... 33
Scan Options Menu ............................................................................................................................... 33
Data Process Menu ............................................................................................................................... 34
BT Config Menu - KDC200 / KDC250 / KDC300 .................................................................................. 38
BT Service - KDC200 / KDC250 / KDC300 ........................................................................................... 38
GPS Config - KDC250 ........................................................................................................................... 39
System Menu ......................................................................................................................................... 39
3.4 LED Status ........................................................................................................................................... 40
3.5 Empty Battery ...................................................................................................................................... 40
3.6 Buffer Full ............................................................................................................................................ 40
3.7 Reset Feature ...................................................................................................................................... 41
3.8 Replace Battery ................................................................................................................................... 42
LISTING OF FIGURES ................................................................................................................................ 6
LISTING OF TABLES ................................................................................................................................. 7
1. INTRODUCTION .................................................................................................................................... 9
2. INSTALLATION ................................................................................................................................... 13
3. OPERATING THE KDC ........................................................................................................................ 25
KDC250 User Manual
3
4.1 ConnectDevice
...................................................................................................................................... 43
4.2 Auto Connect ....................................................................................................................................... 43
4.3 Auto Power On
..................................................................................................................................... 43
4.4 Auto Power Off
..................................................................................................................................... 44
4.5 Beep Warning
....................................................................................................................................... 44
4.6 PWR OFF Time
.................................................................................................................................... 44
4.7 PowerOFF Msg
.................................................................................................................................... 44
4.8 MAC Address
....................................................................................................................................... 44
4.9 FW Version
........................................................................................................................................... 45
4.10 Wakeup Nulls
..................................................................................................................................... 45
4.11 Autolock Time
..................................................................................................................................... 45
4.12 BT Toggle
........................................................................................................................................... 45
4.13 Power
................................................................................................................................................. 46
4.14 Pairing
................................................................................................................................................ 46
4.15 Discovering
......................................................................................................................................... 46
4.16 Connect To ........................................................................................................................................ 47
4.17 HID Sync ............................................................................................................................................ 47
5.1 Barcode and GPS data format
............................................................................................................... 48
5.2 GPS Menu ........................................................................................................................................... 48
5.3 GPS Hot Key ....................................................................................................................................... 49
6.1 KTSync Menu ...................................................................................................................................... 50
6.2 File Menu ............................................................................................................................................. 53
Connect to KDC ..................................................................................................................................... 53
Synchronize ........................................................................................................................................... 53
Bluetooth................................................................................................................................................ 54
6.3 Synchronization Settings ..................................................................................................................... 55
Destination of Data ................................................................................................................................ 55
Synchronization Methods ...................................................................................................................... 56
Current KDC Wedge Method................................................................................................................. 57
Synchronization Options ........................................................................................................................ 58
Application Options ................................................................................................................................ 58
6.4 Barcode & KDC Settings ..................................................................................................................... 59
Select Symbologies and Symbology Options........................................................................................ 60
Data Editing Option ............................................................................................................................... 60
6.5 Others Settings .................................................................................................................................... 61
6.6 Mobile pKTSync ................................................................................................................................... 62
6.7 Android aKTSync ................................................................................................................................. 63
KDC and Android Pairing ...................................................................................................................... 63
Launch KTSync ..................................................................................................................................... 63
6.8 iPad/iPhone/iPod touch KTSync .......................................................................................................... 65
KDC200i/300i and iPhone/iPad/iPod touch connection instructions ..................................................... 65
Pair and connect KDC200i/300i and iOS4.0+ in HID mode .................................................................. 65
How to disconnect and reconnect HID mode using Up and Down Button keys. .................................. 66
KDC200i/300i connection using iPhone mode ...................................................................................... 66
4. BLUETOOTH - KDC200/250/300 ......................................................................................................... 43
5. GPS - KDC250 ...................................................................................................................................... 48
6. SYNCHRONIZATION ............................................................................................................................ 50
KDC250 User Manual
4
How to connect and reconnect iPhone mode using UP keys. .............................................................. 67
6.9 Blackberry bKTSync ............................................................................................................................ 68
6.10 KTSync for Mac OS X........................................................................................................................ 70
7.1 Application Generation ........................................................................................................................ 74
Generate Application ............................................................................................................................. 74
Data Filter Settings ................................................................................................................................ 75
Application Download and Execution .................................................................................................... 77
7.2 Predefined Applications ....................................................................................................................... 78
Master/Slave .......................................................................................................................................... 78
Pick/Bin .................................................................................................................................................. 80
DB Lookup Application .......................................................................................................................... 82
Inventory Application ............................................................................................................................. 84
A.1 Symbologies ........................................................................................................................................ 88
A.2 Code Options ...................................................................................................................................... 90
Reverse Direction .................................................................................................................................. 90
Symbology Conversion .......................................................................................................................... 90
Verification of Optional “Check Digit” .................................................................................................... 91
Transmission of “Check Digit” ............................................................................................................... 91
Resolution of Inconsistencies ................................................................................................................ 92
A.3 Miscellaneous Barcode Information .................................................................................................... 93
Height of a Linear Barcode .................................................................................................................... 93
Check Characters .................................................................................................................................. 93
Prevent Interleave 2 of 5 Partial Reading .............................................................................................. 93
Equation to Determining Potential Number of Stored Barcodes ........................................................... 94
Data Buffer Full ...................................................................................................................................... 94
B.1 Symbology ........................................................................................................................................... 95
B.2 Host Interface ...................................................................................................................................... 96
B.3 Battery ................................................................................................................................................. 96
B.4 Memory ............................................................................................................................................... 96
B.5 Programming ....................................................................................................................................... 97
C.1 Set Symbologies ................................................................................................................................. 98
C.2 Barcode Options ............................................................................................................................... 101
C.3 Delete Last Scanned Barcode .......................................................................................................... 103
C.4 Scan Options ..................................................................................................................................... 104
C.5 Scan Timeout .................................................................................................................................... 105
C.6 Minimum Barcode Length ................................................................................................................. 106
C.7 Security Level .................................................................................................................................... 109
C.8 Data Process - Wedge/Store ............................................................................................................ 110
7. APPLICATION GENERATION ............................................................................................................. 73
8. TROUBLESHOOTING .......................................................................................................................... 85
9. WARRANTY .......................................................................................................................................... 86
10. CONTACT INFORMATION ................................................................................................................. 87
APPENDIX A - BARCODE & SCAN OPTIONS ....................................................................................... 88
APPENDIX B – FAQ ................................................................................................................................. 95
APPENDIX C - SPECIAL BARCODES .................................................................................................... 98
KDC250 User Manual
5
C.9 Data Process - Data Format - Handshake ........................................................................................ 111
C.10 Data Process - Termination Character & Duplicate Check ............................................................. 112
C.11 Bluetooth ......................................................................................................................................... 113
C.12 Bluetooth Auto Power On Time ...................................................................................................... 115
C.13 Bluetooth PWR Off Time ................................................................................................................. 116
C.14 Autolock Time ................................................................................................................................. 119
C.15 System ............................................................................................................................................ 120
C.16 Sleep Timeout ................................................................................................................................. 122
C.17 Function .......................................................................................................................................... 123
C.18 Number ........................................................................................................................................... 124
C.19 Lower Case Alphabet ...................................................................................................................... 125
C.20 Upper Case Alphabet ...................................................................................................................... 128
C.21 Control Character ............................................................................................................................ 131
C.22 Symbol Character ........................................................................................................................... 132
C.23 Data Process ................................................................................................................................... 136
C.24 GPS ................................................................................................................................................. 137
C.25 Auto Power Off Timeout .................................................................................................................. 138
INDEX ...................................................................................................................................................... 139
KDC250 User Manual
6
LISTINGOFFIGURES
Figure 1 – KDC Package _______________________________________________________________ 10
Figure 2 - Characteristics of KDC100 _____________________________________________________ 11
Figure 3 - Characteristics of KDC200 / KDC300 _____________________________________________ 12
Figure 4 - Location of Scroll Buttons ______________________________________________________ 26
Figure 5 - KDC Display ________________________________________________________________ 27
Figure 6 - Reset Function for KDC200 / KDC300 ____________________________________________ 41
Figure 7 - Reset Function of KDC100 _____________________________________________________ 41
Figure 8 - KTSync® Synchronizer Menu ___________________________________________________ 50
Figure 9 – File Menu __________________________________________________________________ 51
Figure 10 – Setting Menu ______________________________________________________________ 51
Figure 11 – Application Menu ___________________________________________________________ 52
Figure 12 – About Menu _______________________________________________________________ 52
Figure 13 - COM Port Selection for KDC ___________________________________________________ 53
Figure 14 - Bluetooth Device Registry _____________________________________________________ 54
Figure 15 - KTSync® Synchronization Settings ______________________________________________ 55
Figure 16 - Barcode & KDC Settings, Symbologies, Data Editing and Scan Options _________________ 59
Figure 17 - KTSync® Confirmation Settings _________________________________________________ 61
Figure 18 – Mobile pKTSync ____________________________________________________________ 62
Figure 19 – Android aKTSync ___________________________________________________________ 64
Figure 20 – iPad/iPhone/iPod touch KTSync ________________________________________________ 67
Figure 21 – Blackberry bKTSync _________________________________________________________ 69
Figure 22 – Application Menu ___________________________________________________________ 73
Figure 23 – Application Warning Window __________________________________________________ 73
Figure 24 – Application Generation Menu __________________________________________________ 74
Figure 25 – Data Filter Settings __________________________________________________________ 75
Figure 26 – Master/Slave Application Settings ______________________________________________ 78
Figure 27 – Master/Slave Application Flow Chart ____________________________________________ 79
Figure 28 – Pick/BIN Application Menu ___________________________________________________ 80
Figure 29 – Pick/BIN Application Flow Chart _______________________________________________ 81
Figure 30 – DB Lookup Application Menu __________________________________________________ 83
Figure 31 – Inventory Application Menu ___________________________________________________ 84
KDC250 User Manual
7
LISTINGOFTABLES
Table 1 - Features of KDC _______________________________________________________________ 9
Table 2 – Approximate Time to Charge KDC Battery _________________________________________ 25
Table 3 - KDC Menu Options ____________________________________________________________ 32
Table 4 - Explanation of LEDs ___________________________________________________________ 40
Table 5 - Troubleshooting Techniques ____________________________________________________ 85
Table 6 - Symbologies Supported by KDC _________________________________________________ 88
Table 7 - Add-on for EAN-13 Symbology ___________________________________________________ 89
Table 8 - Add-on for EAN-8 Symbology ____________________________________________________ 89
Table 9 - Symbology Conversion _________________________________________________________ 90
Table 10 - Verification of Optional "Check Digit" _____________________________________________ 91
Table 11 - Transmission of "Check Digit" __________________________________________________ 91
Table 12 - Resolution of Inconsistencies ___________________________________________________ 92
Table 13 - Symbologies Supported by KDC ________________________________________________ 95G

KDC250 User Manual
8
COPYRIGHT, LICENSE, and WARNING PAGE
Copyright
2011 by KoamTac, Inc. All rights reserved.
No part of this publication may be reproduced or used in any form, or by any electrical or mechanical
means, without permission in writing from KoamTac, Inc. The material in this manual is subject to change
without notices. KoamTac reserves the right to make changes to any product to improve reliability,
function, or design. KoamTac doesn’t assume any product liability arising out of, or in connection with,
the application or use of any product, circuit, or application described herein. Follow all warnings and
instructions marked on manual and units. Use only the power source specified in this manual or marked
on the units.
May be covered under one or more pending and/or US Patents, including US Pat. No. 7,769,917 B1
KDC®is a registered trademark and property of KoamTac, Inc.
KoamTac®is a registered trademark and property of KoamTac, Inc.
KTSync®is a registered trademark and property of KoamTac, Inc.
TO PREVENT FIRE OR SHOCK HAZARD, DO NOT EXPOSE THIS UNIT TO ANY TYPE OF MOISTURE. DO
NOT LOOK DIRECTLY INTO LASER OR POINT THE LASER INTO ANOTHER PERSON’S EYES. EXPOSURE
TO THE BEAM MAY CAUSE EYE DAMAGE.
CAUTION:
Changes or modifications not expressly approved by the manufacturer responsible for compliance could
void the user’s authority to operate the equipment.
WARNING:
This device complies with part 15 of the FCC Rules. Operation is subject to the following two conditions:
(1) This device may not cause harmful interference, and (2) this device must accept any interference
received, including interference that may cause undesired operation.
INFORMATION TO USER:
This equipment has been tested and found to comply with the limit of a Class B digital device, pursuant
to Part 15 of the FCC Rules. These limits are designed to provide reasonable protection against harmful
interference in a residential installation. This equipment generates uses and can radiate radio frequency
energy and, if not installed and used in accordance with the instructions, may cause harmful interference
to radio communications. However, there is no guarantee that interference will not occur in a particular
installation; if this equipment does cause harmful interference to radio or television reception, which can
be determined by turning the equipment off and on, the user, is encouraged to try to correct the
interference by one or more of the following measures:
1. Reorient / Relocate the receiving antenna.
2. Increase the separation between the equipment and receiver.
3. Connect the equipment into an outlet on a circuit difference from
that to which the receiver is connected.
4. Consult the dealer or an experienced radio/TV technician for help.
WARNING: RISK OF EXPLOSION IF BATTERY IS REPLACED BY AN INCORRECT TYPE.
DISPOSE USED BATTERIES ACCORDING TO THE INSTRUCTIONS.

KDC250 User Manual
9
1. INTRODUCTION
Congratulations on purchasing KoamTac’s revolutionary barcode scanner and data collector.
Lightweight and compact, with a user-friendly design and superior functionality, KoamTac’s KDC works
in a variety of portable applications. Use it independently or as an accessory to your PC, PDA, or
smartphone. To find out more about KoamTac, Inc. and our family of products, visit us at
www.koamtac.com.
Table 1 - Features of KDC
FEATURES KDC100 KDC200 KDC250 KDC300
USB CONNECTIONS 21 1 1
RECHARGEABLE BATTERY YES YES YES YES
SCAN ENGINE Laser Laser Laser
Imager
AUTOMATIC DATA UPLOAD YES YES YES YES
STORES 10,000+ BARCODES YES YES YES YES
KTSYNC® SOFTWARE YES YES YES YES
SDK FOR DEVELOPERS YES YES YES YES
SUPPORTS MICROSOFT©
WINDOWS XP, VISTA, 7 &
G
MOBILE 5.0+
YES YES YES YES
ANDROID, BLACKBERRY, IOS NO YES YES YES
BLUETOOTH NO YES YES YES
GPS NO NO YES NO
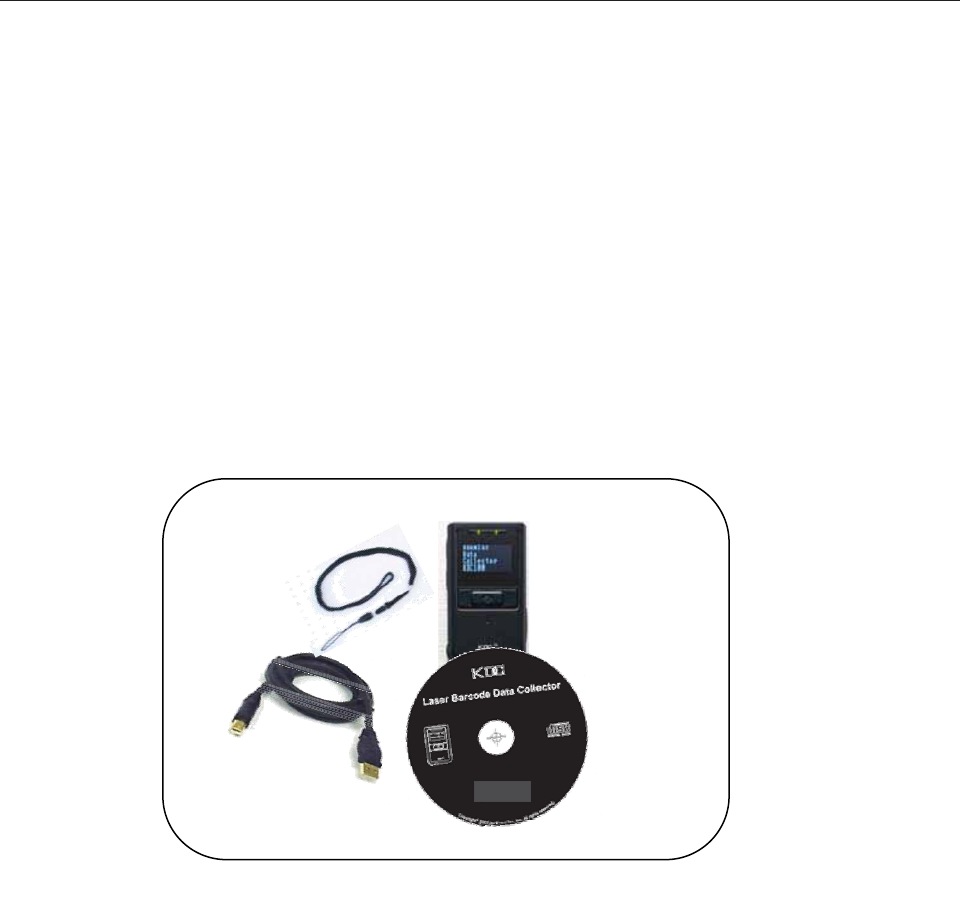
KDC250 User Manual
10
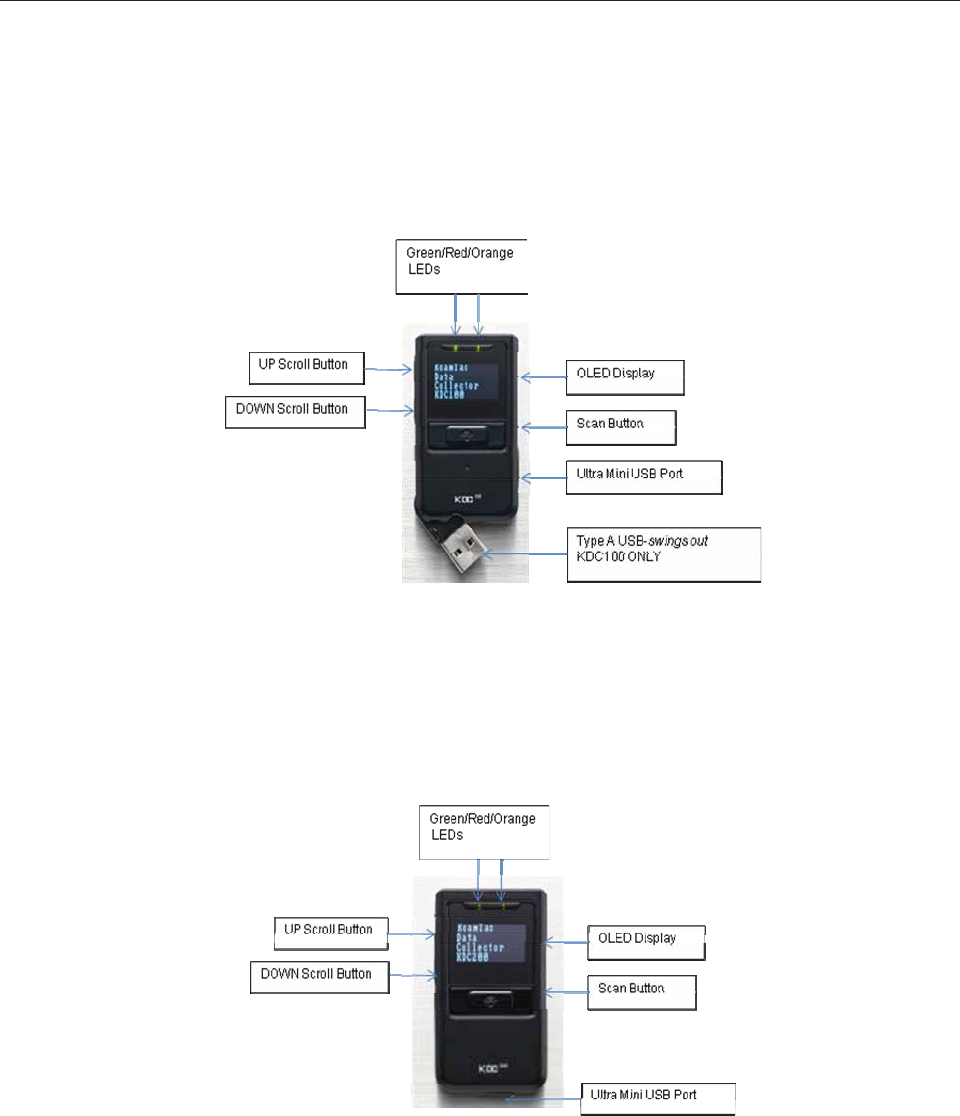
1.1 KDC Package
The standard KDC package contains:
1. One KDC Barcode Data Collector
2. One USB Cable
3. One Neck Strap
4. KoamTac Installation CD with
z KTSync©for Microsoft Windows XP, Vista, 7 and Mobile 5.0+
z KDC Device Driver
z User Manual
5. One Protective Rubber Case
NOTE: Depending on your region or distributor, package contents may vary.
Figure 1 – KDC Package
KDC250 User Manual
11
1.2 KDC Characteristics
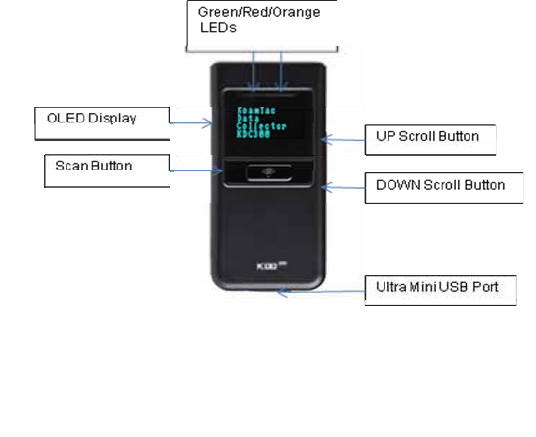
Before you use your KDC, please become familiar with its physical characteristics. Refer to Figure 2 and
Figure 3 below which indicate placement of scan and scroll buttons, OLED display, LEDs, and ports on
your KDC. All KDC models are similar except for the KDC100 which includes an additional USB
connector.
KDC100 Barcode Reader and Data Collector
KDC200 / KDC250 / KDC300
Barcode Reader and Data Collector
KDC200
Figure 2 - Characteristics of KDC100
KDC250 User Manual
12
KDC250/300
Figure 3 - Characteristics of KDC200 / KDC250 / KDC300
KDC250 User Manual
13
2. INSTALLATION
2.1 KoamTac Installation Wizard
Windows XP
WARNING: DO NOT CONNECT KDC TO USB PORT PRIOR TO INSTALLATION
1. Insert KoamTac Installation CD into your computer’s CD drive.
2. Click Start icon then My Computer icon. A listing of devices on your computer will be displayed
including the disk drive containing the KoamTac Installation CD.
3. Click on the KoamTac Installation CD icon then click on the Setup directory. Click on the
PC_Setup.exe file which executes the KTSync Setup Wizard.
NOTES
x If KTSync Setup Wizard locates an older version of KTSync on your computer, you will be
prompted to remove the older program before installing the new version. Select Remove
KTSync then click Finish. When removal is complete, click Close. Go to Step 2 to run KTSync
Setup Wizard.
x If you have any problems, please refer to the Manual Installation section.
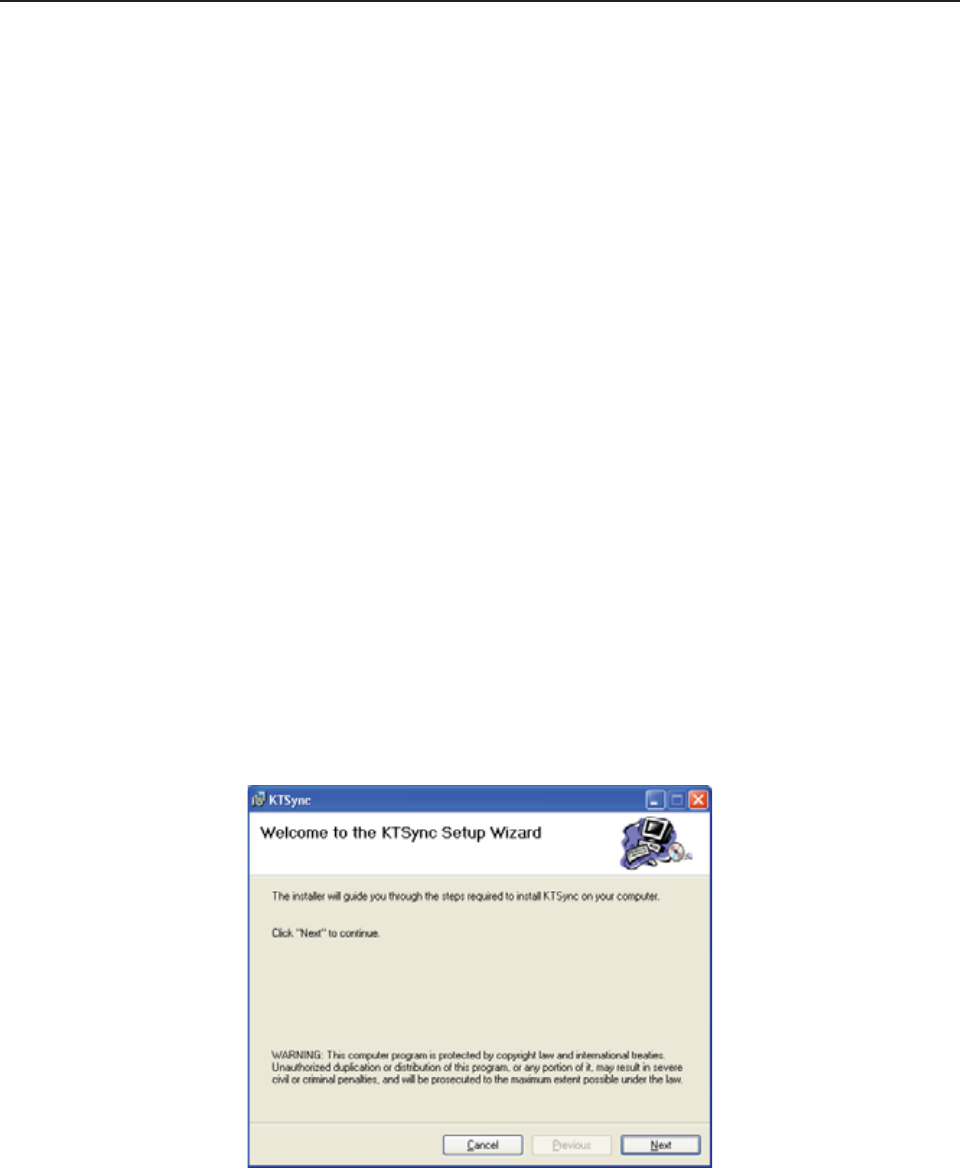
KTSync Setup Wizard
Below are the screen images you will see during the installation of KTSync.
zClick Next icon in KTSync Setup Wizard window
KDC250 User Manual
14
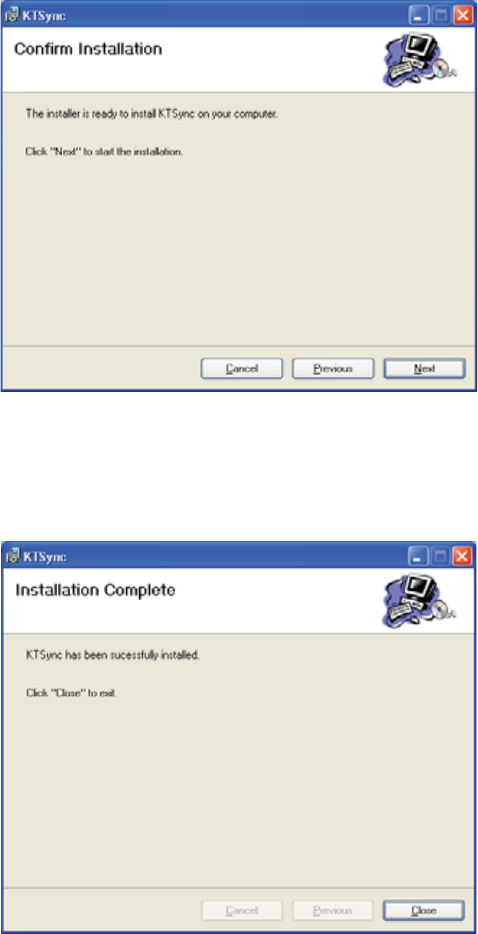
zClick Next icon in KTSync Confirm Installation window
x Within a few minutes, installation of KTSync will be complete. Click Close icon and wait for the
Device Driver Installation Wizard to load.
KDC250 User Manual
15
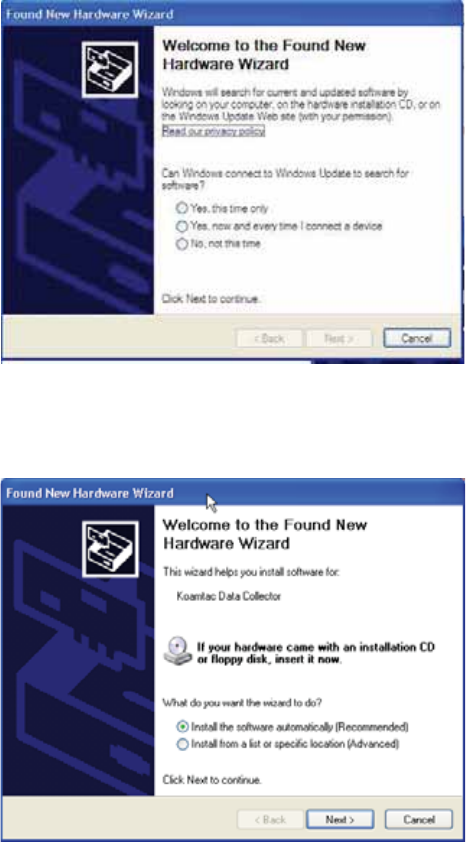
Device Driver Installation Wizard
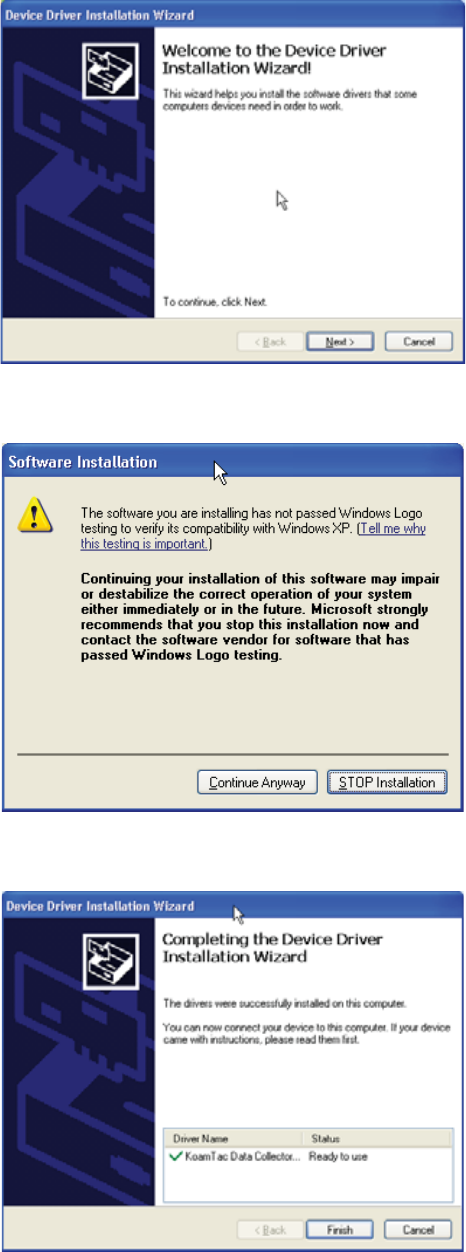
Below are the screen images you will see during the installation of the KDC Device Driver.
zClick Next icon in Device Driver Installation Wizard window
zClick Continue Anyway icon in Software Installation Logo testing window
zClick Finish icon in Device Driver Installation Wizard window
KDC250 User Manual
16
Connect KDC to Computer
Using the USB cable included with the KDC, follow the directions below.
zConnect the cable’s ultra mini USB connector to the KDC.
zConnect the cable’s Type A USB connector to your PC.
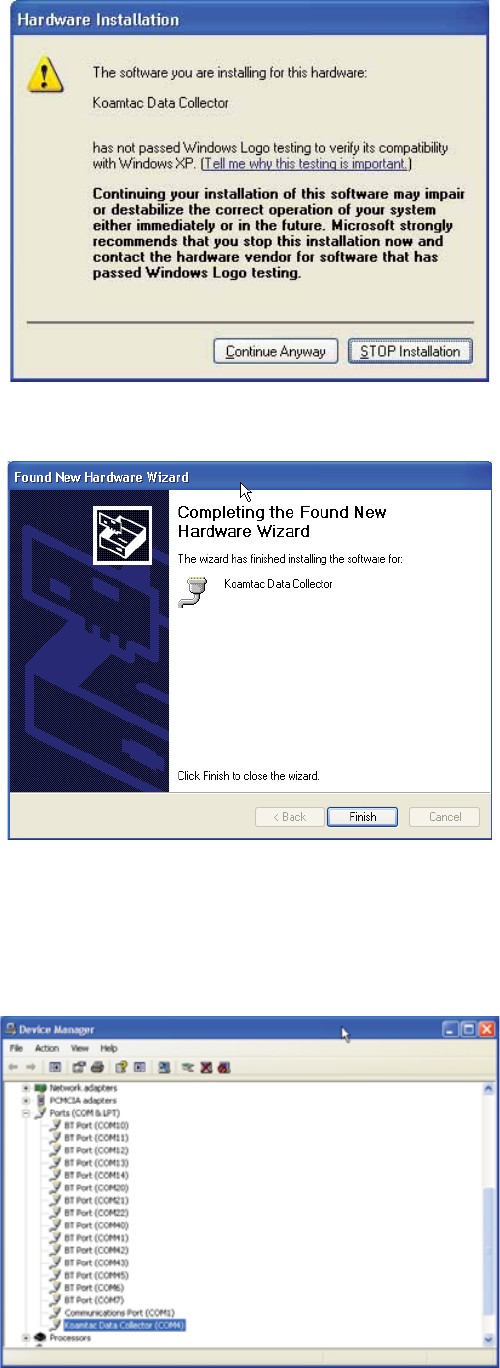
zWait until your computer beeps and/or displays the message Found New Hardware.
Found New Hardware Wizard
zSelect “No, not this time” option in Found New Hardware Wizard and click Next if your PC pops
up the following Found New Hardware Wizard.
zSelect “Install the software automatically (Recommended)” option in Found New Hardware
Wizard and click Next if your PC pops up the following Found New Hardware Wizard.
KDC250 User Manual
17
zClick Continue Anyway icon in Software Installation Logo testing window
zClick Finish icon in Found New Hardware Wizard window
Verify COM Port Address
zUser can verify installed COM Port in Device Manager

KDC250 User Manual
18
Vista and Windows 7
WARNING: DO NOT CONNECT KDC TO USB PORT PRIOR TO INSTALLATION
1. Insert KoamTac Installation CD into your computer’s CD drive.
2. Click Start icon then My Computer icon. A listing of devices on your computer will be displayed
including the disk drive containing the KoamTac Installation CD.
3. Click on the KoamTac Installation CD icon then click on the Setup directory. Click on the
PC_Setup.exe file which executes the KTSync Setup Wizard.
NOTES
x If KTSync Setup Wizard locates an older version of KTSync on your computer, you will be
prompted to remove the older program before installing the new version. Select Remove
KTSync then click Finish. When removal is complete, click Close. Go to Step 2 to run KTSync
Setup Wizard.
x If you have any problems, please refer to the Manual Installation section.
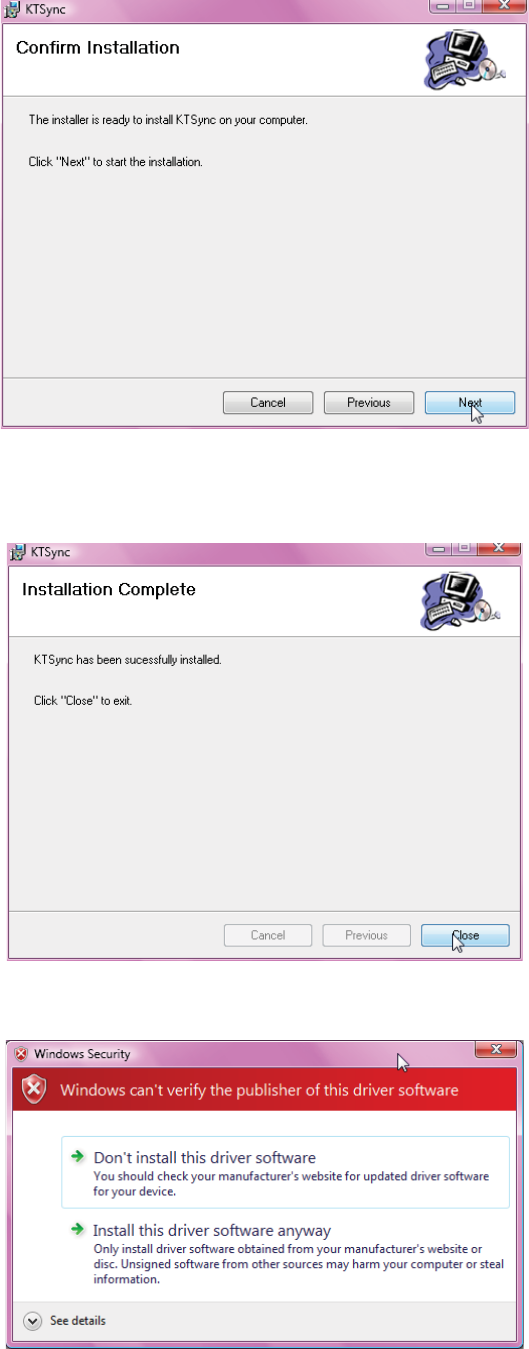
KTSync Setup Wizard
Below are the screen images you will see during the installation of KTSync.
zClick Next icon in KTSync Setup Wizard window
KDC250 User Manual
19
zClick Next icon in KTSync Confirm Installation window
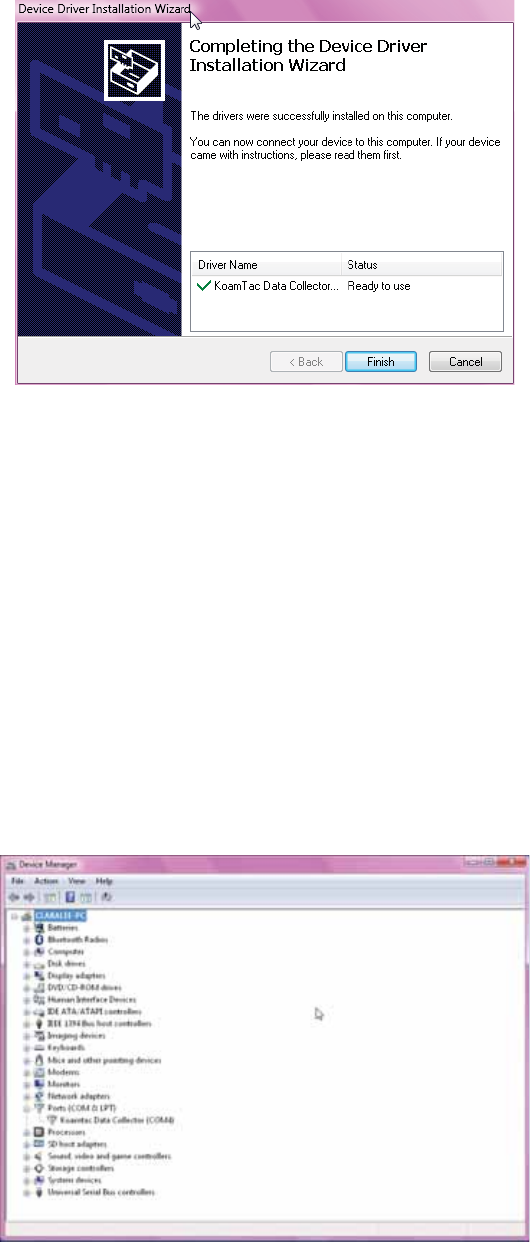
zClick Close icon in KTSync Installation Complete window and wait for Device Driver Installation
Wizard
zClick Install this driver software anyway in Windows Security window
KDC250 User Manual
20
zClick Finish icon in Device Driver Installation Wizard window
Connect KDC to Computer
Using the USB cable included with the KDC, follow the directions below.
zConnect ultra mini USB connector to the KDC.
zConnect Type A USB connector to your PC.
zWait until your computer beeps and/or displays the message Found New Hardware.
Verify COM Port Address
zUser can verify installed COM Port in Device Manager
KDC250 User Manual
21
Windows Mobile 5.0+
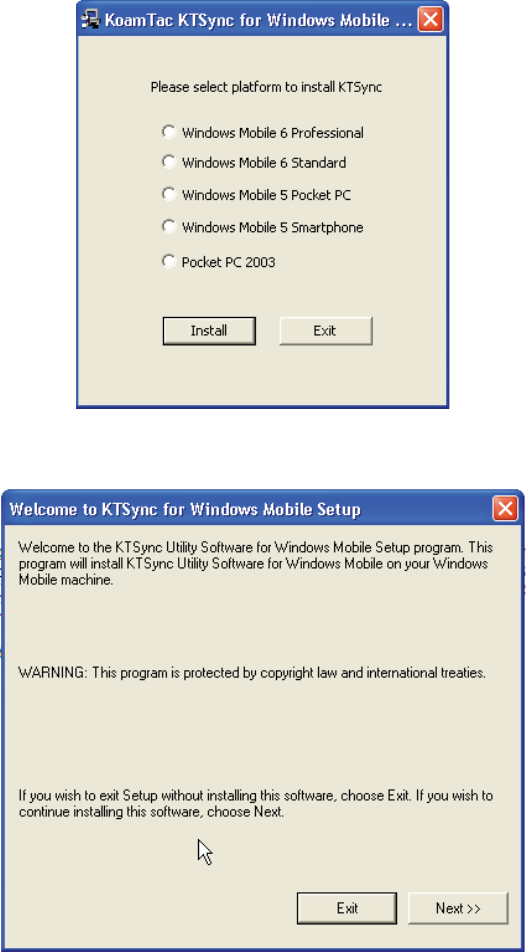
WARNING: PLEASE CONNECT PDA TO PC PRIOR TO INSTALLATION
1. PC_Setup.exe creates Mobile_Setup.exe file under C:\Program Files\KoamTac\KTSync\Windows.Mobile
directory
2. Execute Mobile_Setup.exe
z Select Windows Mobile version to install.
z Click Next icon.

KDC250 User Manual
22
zClick OK icon in Pending Application Install window
zFollow the instructions on PDA screen
COM port Assignment
zUser should assign a COM port for KDC before using pKTSync.
zUser should pair KDC with PDA using PDA Bluetooth manager and assign a COM port for
Bluetooth communication
zPlease refer to the PDA manual for the details of COM port assignment method
KDC250 User Manual
23
Android
z Download and install aKTSync from the Android Market.
http://www.androidzoom.com/android_applications/productivity/ktsync_luxv.html
Blackberry
z Download and install bKTSync from the Blackberry App World.
http://appworld.blackberry.com/webstore/content/16861?lang=en
iPad/iPhone/iPod touch
z Download and install iKTSync from the Apple App Store.
http://itunes.apple.com/us/app/ktsync/id372916602?mt=8

KDC250 User Manual
24
2.2 Manual Installation
The KDC is equipped with one ultra mini USB port which is used to upload barcode data and to charge
the KDC battery. Prior to using the KDC, KTSync software and KDC device driver must be installed on
your computer. Using the USB cable included with the KDC, follow the directions below.
NOTE: If you have the KDC100, it has two ports, Ultra Mini and standard Type A which swings
out. See Figure 2 for more details.
Windows XP, Vista, and 7
1. Insert the KoamTac Installation CD into your computer’s disk drive.
2. Create a directory called KoamTac on your computer.
3. Copy XP.Vista.7 directory from KoamTac CD to KoamTac directory. The XP.Vista.7 directory
contains KTSync® programs for Microsoft® Windows XP, Vista, Windows 7 and user
manuals.
4. Connect KDC cable to ultra mini USB connector on the KDC.
5. Connect KDC cable to Type A USB connector on your computer. Wait until your computer
beeps and/or displays the message New Hardware Found. You will be prompted to search
for a device driver for KDC.
6. Browse then select KTReader.inf file from the KoamTac directory created in Step 2. Follow
screen prompts to continue with the device driver installation.
NOTE: KTReader.inf is the device driver for 32bit Microsoft® Windows XP, Vista, and
Windows 7. If you have a 64bit computer, use KTReader.inf file from XP.Vista.64bit folder
in the KoamTac directory.
Windows Mobile 5.0+
Please connect your Windows Mobile PDA to your computer before software installation.
zCreate a directory and name it KoamTac on the PDA.
zCopy Mobile5.0_6.0 directory from KoamTac CD to PDA KoamTac directory.
zMobile5.0_6.0 contains KTSync® programs for Microsoft® Windows Pocket PC 2003, Mobile
5.0, Mobile 6.0 Standard, and Mobile6.0 Professional. It also includes KDC User Manual.
KDC250 User Manual
25
3. OPERATING THE KDC
3.1 Getting Started
Attach Neck Strap to KDC
To prevent possible damage to the KDC, we strongly recommend wearing it around your neck by the
included neck strap. Also, please don’t swing KDC by the neck strap because contact with another
object may cause it to malfunction or become damaged.
To attach the neck strap:
1. Fit the thin end of neck strap through the pillar of the KDC.
2. Loop the thick end of strap through the thin loop
3. Pull the strap tight to secure
Charge KDC Battery
Prior to using the KDC, you must charge its battery. To charge the battery, follow these directions.
1. Connect the KDC cable to the ultra mini USB connector on the KDC.
2. Connect the KDC cable to Type A USB connector on your computer.
3. Your KDC battery will begin charging. Within a few minutes, two small LEDs on the front panel will
illuminate orange. When the battery is fully charged, the LEDs will illuminate green.
KDC100 KDC200 KDC250/300
2 Hours 2 Hours 4 Hours
Table 2 – Approximate Time to Charge KDC Battery
KDC250 User Manual
26
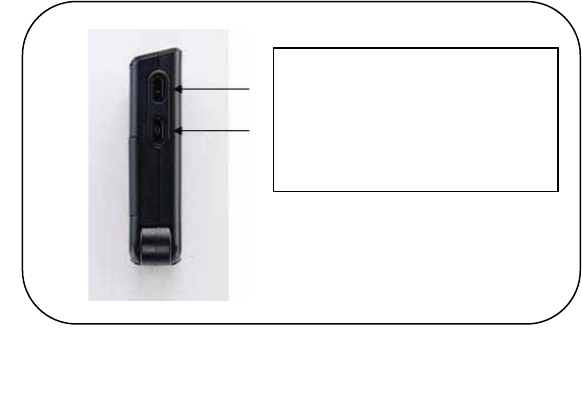
Press UP and DOWN Scroll Buttons
simultaneously to access the KDC
menu.
Configure KDC
The KDC is designed to meet the data collection requirements of many different industries in a variety of
dynamic situations. To perform well in these diverse environments, the KDC is designed to be
configured easily and quickly. But, to perform at its maximum level, the KDC must be configured
properly. Until you are familiar with configuring the KDC, it is recommended that you DO NOT modify the
KDC settings. The KDC can be configured in three different methods which are explained in Section 3.3
– KDC Menus, Chapter 4 –Synchronization, and Appendix C – Special Barcodes.
CONFIGURATION METHODS FOR THE KDC
zKDC Menu
zKTSync® Software
zSpecial Barcodes
Figure 4 - Location of Scroll Buttons
KDC250 User Manual
27
3.2 Basics
Reading Barcodes
Reading a barcode is simple. Point the KDC at a barcode and press the scan button. Be sure to point
the scan engine at the barcode, not at your face, and make sure to position the light beam on the
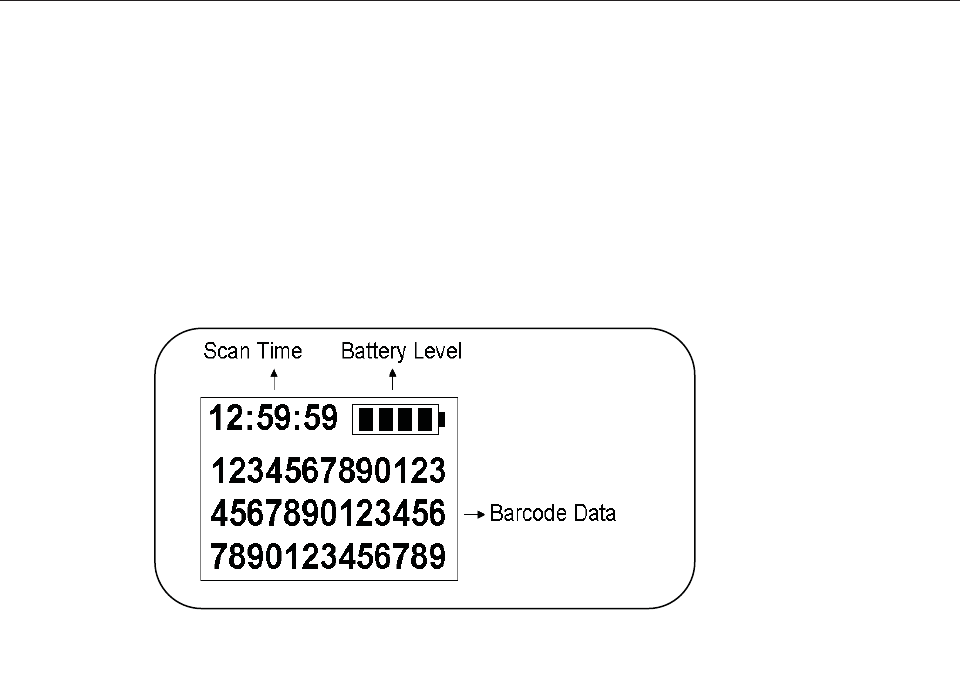
barcode. If the barcode is scanned successfully, you will hear one beep and the LEDs will illuminate in
green. The scanned barcode data will be displayed along with the scan time and battery level.
Depending on the configuration of your KDC, other information may also be displayed.
If the scan was unsuccessful, you will hear two beeps, the LEDs will illuminate in red, and the message
Failed reading… will display. If you have problems scanning a barcode, try the following suggestions
while pointing the KDC at the barcode and depressing the scan button.
z
Modify the angle of the KDC in relation to the barcode, making the angle bigger or smaller as needed.
z
Modify the distance between the barcode and the KDC, moving closer or further away as needed.
z
Check option settings defined in the KDC menu section and change options as needed.
z
Check that the barcode’s width does not exceed the light beam’s width and vice versa.
Synchronizing Barcode Data to PC
Use the KTSync´program to synchronize barcode data from the KDC to your PC. Please refer to
Chapter 4 for details.
Figure 5 - KDC Display

KDC250 User Manual
28
3.3 KDC Menus
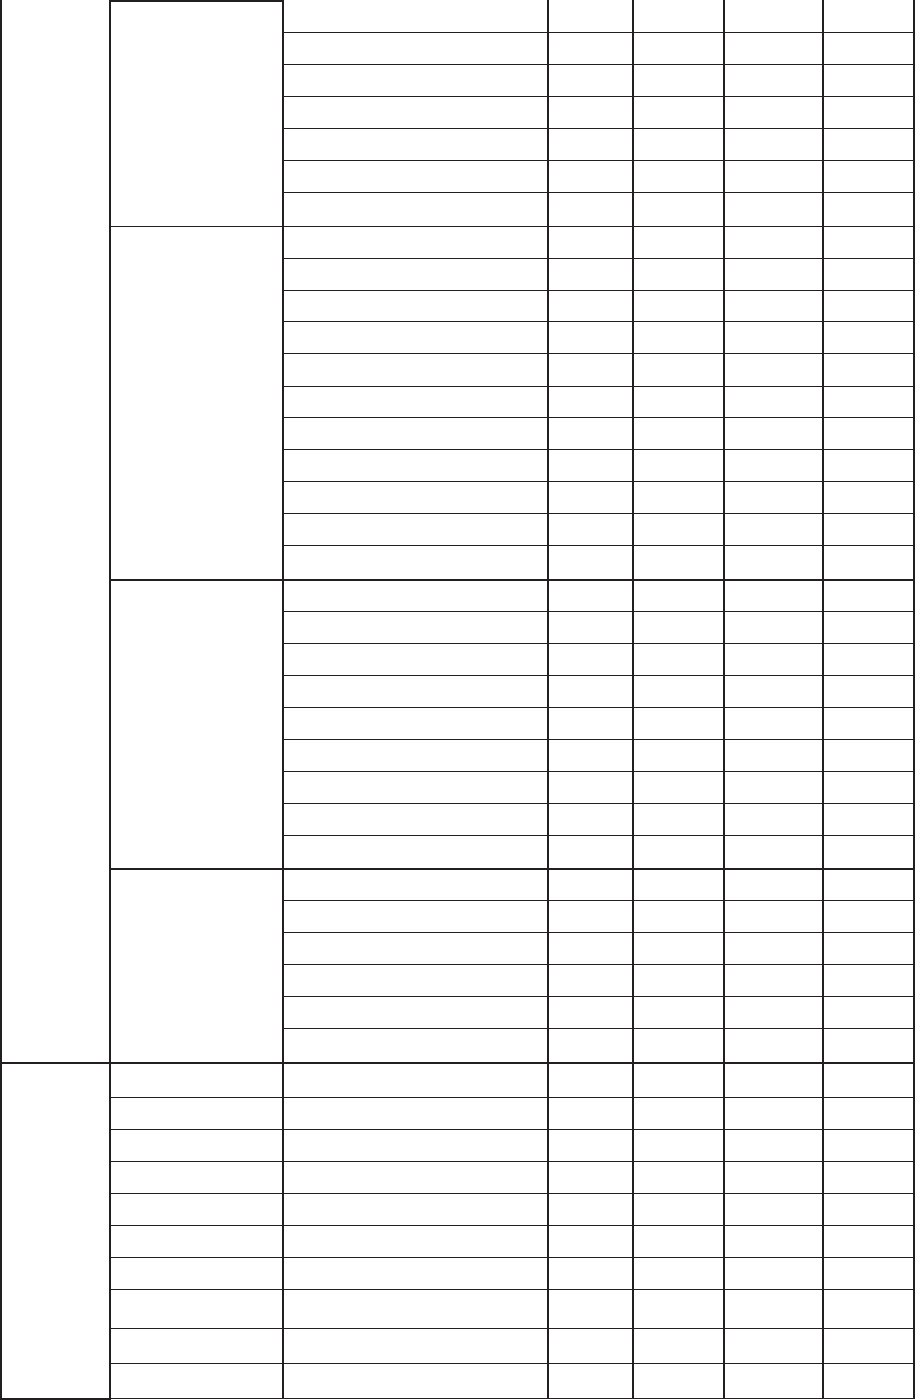
Top Menu Sub Menu Options
Default
KDC100 KDC200(i) KDC250(Gi) KDC300(i)
KDC Mode
Normal Default Default Default Default
Application
Custom
Application
Custom
Application
Custom
Application
Custom
Application
View Data View/Delete
View/Delete
Data
View/Delete
Data
View/Delete
Data
View/Delete
Data
Set
Barcodes
(100/200/250)
EAN13 Enabled/Disabled Enable Enable Enable N/A
EAN8 Enabled/Disabled Enable Enable Enable N/A
UPCA Enabled/Disabled Enable Enable Enable N/A
UPCE Enabled/Disabled Enable Enable Enable N/A
CODE39 Enabled/Disabled Enable Enable Enable N/A
ITF14 Enabled/Disabled Enable Enable Enable N/A
CODE128 Enabled/Disabled Enable Enable Enable N/A
I2of5 Enabled/Disabled Enable Enable Enable N/A
CODABAR Enabled/Disabled Enable Enable Enable N/A
GS1-128 Enabled/Disabled Enable Enable Enable N/A
CODE93 Enabled/Disabled Enable Enable Enable N/A
CODE35 Enabled/Disabled Enable Enable Enable N/A
BooklandEAN Enabled/Disabled Disable Disable Disable N/A
EAN13withAddon Enabled/Disabled Disable Disable Disable N/A
EAN8withAddon Enabled/Disabled Disable Disable Disable N/A
UPCAwithAddon Enabled/Disabled Disable Disable Disable N/A
UPCEwithAddon Enabled/Disabled Disable Disable Disable N/A
Set
Barcodes
(300)
1D Symbology
Codabar N/A N/A N/A Enable
Code 11 N/A N/A N/A Enable
Code 32 N/A N/A N/A Enable
Code 39 N/A N/A N/A Enable
Code 93 N/A N/A N/A Enable
Code 128 N/A N/A N/A Enable
EAN-8 N/A N/A N/A Enable
EAN-13 N/A N/A N/A Enable
GS1 Composit N/A N/A N/A Enable
I2of5 N/A N/A N/A Enable
Matrix 2of5 N/A N/A N/A Enable
MSI N/A N/A N/A Enable
Plessey N/A N/A N/A Enable
PosiCode N/A N/A N/A Enable
GS1 Omni N/A N/A N/A Enable
GS1 Limited N/A N/A N/A Enable
GS1 Expanded N/A N/A N/A Enable
S2of5 Ind N/A N/A N/A Enable
KDC250 User Manual
29
S2of5 IATA N/A N/A N/A Enable
TCL39 N/A N/A N/A Enable
Telepen N/A N/A N/A Enable
Trioptic N/A N/A N/A Enable
UPCA N/A N/A N/A Enable
UPCE0 N/A N/A N/A Enable
UPCE1 N/A N/A N/A Enable
2D Symbology
AztecCode N/A N/A N/A Enable
AztecRunes N/A N/A N/A Enable
CodablockF N/A N/A N/A Enable
Code16K N/A N/A N/A Enable
Code49 N/A N/A N/A Enable
DataMatrix N/A N/A N/A Enable
MaxiCode N/A N/A N/A Enable
MicroPDF N/A N/A N/A Enable
PDF417 N/A N/A N/A Enable
QRCode N/A N/A N/A Enable
HanXin Code N/A N/A N/A Enable
Postal Codes
Postnet N/A N/A N/A Enable
PlanetCode N/A N/A N/A Enable
UK Post N/A N/A N/A Enable
Canada Post N/A N/A N/A Enable
Kix Post N/A N/A N/A Enable
Australia Post N/A N/A N/A Enable
Japan Post N/A N/A N/A Enable
China Post N/A N/A N/A Enable
Korea Post N/A N/A N/A Enable
OCR
OCR Off N/A N/A N/A Enable
OCR A N/A N/A N/A Disable
OCR B N/A N/A N/A Disable
OCR USC N/A N/A N/A Disable
OCR MICR N/A N/A N/A Disable
OCR SEMI N/A N/A N/A Disable
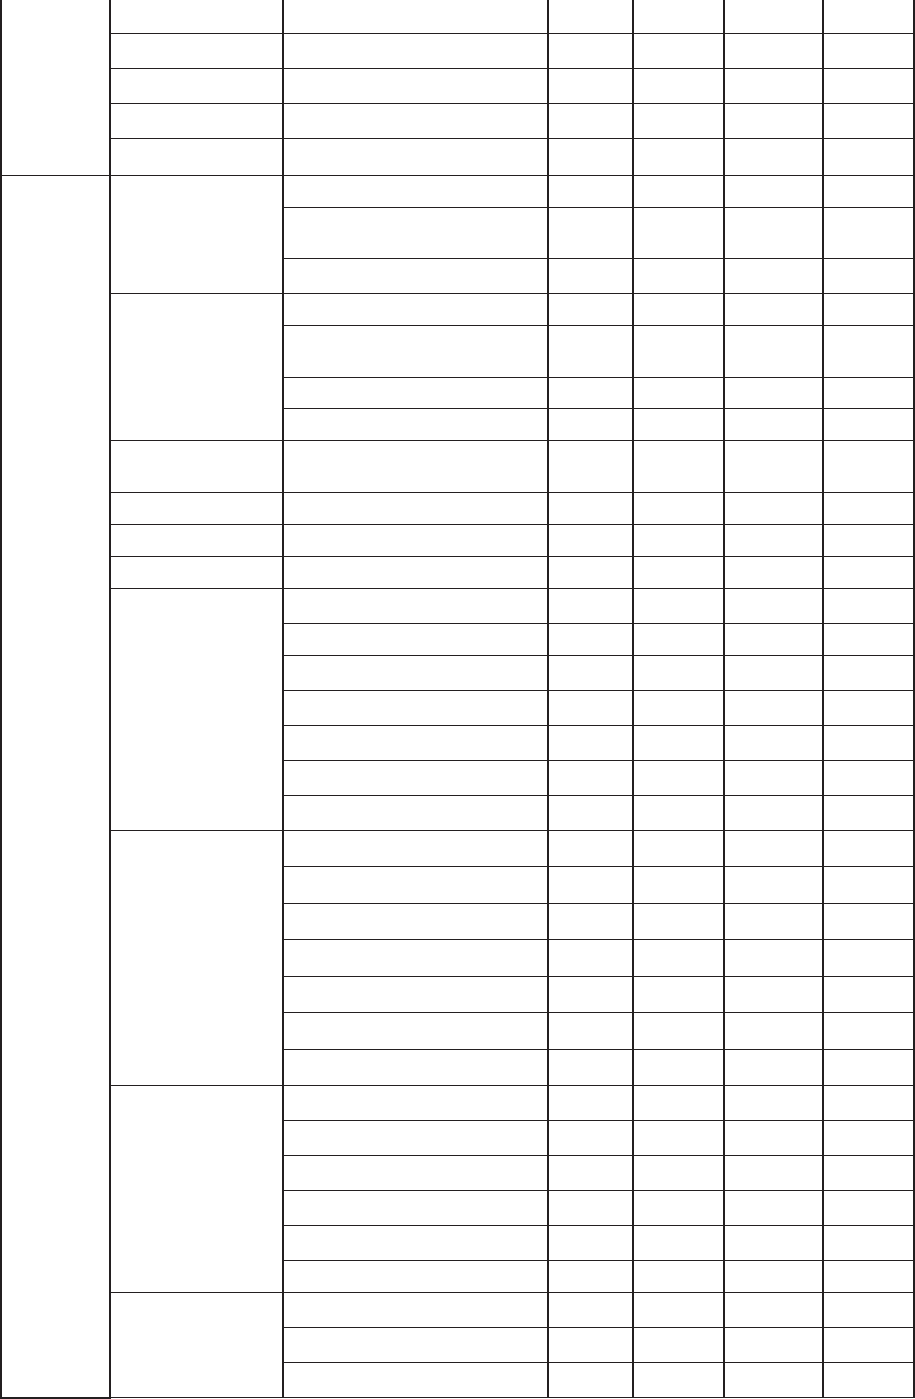
Barcode
Options
(100/200/250)
CodaBar_NoStartStopChars Enabled/Disabled Disable Disable Disable N/A
UPCE_as_UPCA Enabled/Disabled Disable Disable Disable N/A
EAN8_as_EAN13 Enabled/Disabled Disable Disable Disable N/A
UPCE_as_EAN13 Enabled/Disabled Disable Disable Disable N/A
ReturnCheckDigit Enabled/Disabled Disable Disable Disable N/A
VerifyCheckDigit Enabled/Disabled Disable Disable Disable N/A
UPCA_as_EAN13 Enabled/Disabled Disable Disable Disable N/A
I2of5_VerifyCheckDigit Enabled/Disabled Disable Disable Disable N/A
Code39_VerifyCheckDigit Enabled/Disabled Disable Disable Disable N/A
I2of5_ReturnCheckDigit Enabled/Disabled Disable Disable Disable N/A
KDC250 User Manual
30
Code39_ReturnCheckDigit Enabled/Disabled Disable Disable Disable N/A
UPCE_ReturnCheckDigit Enabled/Disabled Enabled Enabled Enabled N/A
UPCA_ReturnCheckDigit Enabled/Disabled Enabled Enabled Enabled N/A
EAN8_ReturnCheckDigit Enabled/Disabled Enabled Enabled Enabled N/A
EAN13_ReturnCheckDigit Enabled/Disabled Enabled Enabled Enabled N/A
Barcode
Options
(300)
Codabar
Tx StartStop(Enable/disable) N/A N/A N/A Disable
Check
Digit(DoNotVerify/VerfyDONotTX/VerifyDoTx) N/A N/A N/A DoNotVerify
Concatenate(Disable/Enable/Required) N/A N/A N/A Enable
Code39
Tx StartStop(Enable/disable) N/A N/A N/A Disable
Check
Digit(DoNotVerify/VerfyDONotTX/VerifyDoTx) N/A N/A N/A DoNotVerify
Append(Enable/Disable) N/A N/A N/A Disable
Full ASCII(Enable/Disable) N/A N/A N/A Disable
I2of5 Check
Digit(DoNotVerify/VerfyDONotTX/VerifyDoTx) N/A N/A N/A DoNotVerify
Code11 Check Digit(2 digits/1 digit) N/A N/A N/A 2 digits
Code128 Concatenate(Disable/Enable) N/A N/A N/A Disable
Telepen Output(Original/AIM) N/A N/A N/A AIM
UPCA
VerifyChkDgt(Enabled/Disabled) N/A N/A N/A Enable
NumberSys(Enabled/Disabled) N/A N/A N/A Enable
2DgtAddenda(Enabled/Disabled) N/A N/A N/A Disable
5DgtAddenda(Enabled/Disabled) N/A N/A N/A Disable
Req. Addenda(Enabled/Disabled) N/A N/A N/A Disable
Sep. Addenda(Enabled/Disabled) N/A N/A N/A Enable
Coupon Code(Enabled/Disabled) N/A N/A N/A Enable
UPCE
Expand(Enabled/Disabled) N/A N/A N/A Disable
Req. Addenda(Enabled/Disabled) N/A N/A N/A Disable
Sep. Addenda(Enabled/Disabled) N/A N/A N/A Enable
Check Digit(Enabled/Disabled) N/A N/A N/A Enable
NumberSys(Enabled/Disabled) N/A N/A N/A Enable
2DgtAddenda(Enabled/Disabled) N/A N/A N/A Disable
5DgtAddenda(Enabled/Disabled) N/A N/A N/A Disable
EAN-13
VerifyChkDgt(Enabled/Disabled) N/A N/A N/A Enable
2DgtAddenda(Enabled/Disabled) N/A N/A N/A Disable
5DgtAddenda(Enabled/Disabled) N/A N/A N/A Disable
Req. Addenda(Enabled/Disabled) N/A N/A N/A Disable
Sep. Addenda(Enabled/Disabled) N/A N/A N/A Enable
ISBN Trans.(Enabled/Disabled) N/A N/A N/A Disable
EAN-8
VerifyChkDgt(Enabled/Disabled) N/A N/A N/A Enable
2DgtAddenda(Enabled/Disabled) N/A N/A N/A Disable
5DgtAddenda(Enabled/Disabled) N/A N/A N/A Disable

KDC250 User Manual
31
Req. Addenda(Enabled/Disabled) N/A N/A N/A Disable
Sep. Addenda(Enabled/Disabled) N/A N/A N/A Enable
MSI Tx CheckChar(Enabled/Disabled) N/A N/A N/A Disable
PosiCode A and B/A&B LimitedA/A&B LimitedB N/A N/A N/A A&B
LimitedB
GS1
UPCEAN Ver.(Enabled/Disabled) N/A N/A N/A Disable
GS1 Emulation(No Emulate/GS1 128
Emul/GS1 Emulate) N/A N/A N/A No Emulate
PostNet Tx CheckChar(Enabled/Disabled) N/A N/A N/A Disable
PlanetCode Tx CheckChar(Enabled/Disabled) N/A N/A N/A Disable
Scan
Options
Scan Angle Narrow/Wide Wide Wide Wide N/A
Filter Normal/High Normal Normal Normal N/A
Time Out .5 seconds to 10 seconds 2 second(s) 2 second(s) 2 second(s) 2 second(s)
Min. Barcode Length 2 to 36 characters 4 chars 4 chars 4 chars N/A
Min. Barcode Length 2 to 48 characters N/A N/A N/A 4 chars
Security Level 1 to 4 level 2 level 2 level 2 level N/A
Auto Trigger Enabled/Disabled Disable Disable Disable Disable
Reread Delay Continuous, Short, Medium, Long, Extra
Long Medium Medium Medium Medium
Finger Trigger Enabled/Disabled Enabled Enabled Enabled N/A
Partial Display
Start Position 1 1 1 1
No. of Char(s) 0 chars 0 chars 0 chars 0 chars
Action Select Select Select Select
Data
Process
Wedge / Store
Wedge Only
Wedge & Store Always Default Default Default Default
Store Only
Save if Sent
Save if Not Sent
Data Format
Barcode only Default Default Default Default
Packet Data
Data Editor/Prefix Delete Delete Delete Delete Delete
Data Editor/Suffix Delete Delete Delete Delete Delete
Data Editor/AIM ID None/In Prefix/In Suffix None None None None
Data Editor/Partial Data
Start Position 1 1 1 1
No. of Char(s) 0 chars 0 chars 0 chars 0 chars
Action Select Select Select Select
Handshake Enable/Disable Disable Disable Disable Disable
Terminator None, CR, LF, CR+LF, Tab CR+LF CR+LF CR+LF CR+LF
Chk Duplicate Enabled/Disabled Disable Disable Disable Disable
BT Config
(200/250/300)
ConnectDevice
SPP N/A
Default
(200) Default (250) Default
(300)
HID N/A
iPhone N/A Default(200i) Default(250i) Default(300i)
Auto Connect Enabled/Disabled N/A Disable Disable Disable
Auto Power On Enabled/Disabled N/A Disable Disable Disable
Auto Power On/Power Off
Time Disable, 1sec to 10second(s) N/A Disable Disable Disable
Auto Power Off Enabled/Disabled N/A Enable N/A Enable

KDC250 User Manual
32
Auto Power Off/Beep
Warning Enabled/Disabled N/A Enable N/A Enable
Auto Power Off/Power Off
Time 1 to 30 minutes N/A 5 minute(s) N/A 5 minute(s)
PowerOff Msg Enabled/Disabled N/A Disable Disable Disable
MAC Address 12 Characters Bluetooth MAC Address N/A
BT FW Version v1.2.xrt Bluetooth Firmware Version N/A
Wakeup Nulls Enabled/Disabled N/A Disable Disable Disable
BT Toggle Enable/Disable N/A Disable Disable Disable
HID AutoLock Disabled/1m/2m/3m/4m/5m/10m/15m N/A 1min 1min 1min
HID Keyboard US/German N/A US US US
BT Service
(200/250/300)
Power Enabled/Disabled N/A Enable Enable Disable
Pairing Pairing neighboring Bluetooth devices N/A
Discovering Discovering neighboring Bluetooth devices N/A
Connecting to View Connect to Bluetooth device N/A
GPS Config
(250G)
GPS Power Enabled/Disabled N/A N/A Disabled N/A
Power Mode Normal/Power Save N/A N/A Normal N/A
Bypass Data Enabled/Disabled N/A N/A Disabled N/A
Acqurie Test N/A N/A N/A
Reset GPS N/A N/A N/A
System
Config
Memory Status
No. of Stored Barcodes
Free Memory Available
Reset Memory
Memory(Empties Data)
Application Memory
BT Registry(KDC100 Not use)
Auto Erase Enabled/Disabled Disabled Disabled Disabled Disabled
Sleep Timeout Disable, 1sec to 10minute(s) 5 second(s) 5 second(s) 5 second(s) 5 second(s)
Auto PowerOff
Bluetooth N/A N/A Disabled N/A
GPS Module N/A N/A Disabled N/A
PWR OFF Time N/A N/A
Disables,
5Min, 10Min,
20Min, 30Min,
1Hr, 2Hr
N/A
Date / Time YYYY:MM:DD & HH:MM:SS
Battery % of Battery Charge Available
Version Firmware Version & Serial No.
Button Lock Enabled/Disabled Disable Disable Disable Disable
Beep Sound Enabled/Disabled Enable Enable Enable Enable
Auto Exit Enabled/Disabled Enable Enable Enable Enable
Port Status Enabled/Disabled Enable Enable Enable Enable
Display Format
Time & Battery / Type & Time / Type &
Battery / Memory Status / GPS Data(KDC250
only)
Time &
Battery
Time &
Battery
Time &
Battery
Time &
Battery
Menu Barcode Enable/Disable N/A N/A N/A Disable
Scrolling Enabled/Disabled Enable Enable Enable Enable
Brightness 1 to 15 level (8 level) 8 level 8 level 8 level 8 level
Factory Default Restores Default Settings
Table 3 - KDC Menu Options
KDC250 User Manual
33
KDC Mode Menu
The KDC Mode Menu has two options – Normal and Application modes.
zNormal: This is the default mode which provides basic barcode scanning. In Normal mode
barcode data can be manipulated directly through the KDC or using KTSync® during the
synchronization process.
zApplication: This mode allows you to run the user application created by Application Generation
Tool described in Chapter 6.
View Data Menu
This menu option allows you to view and/or delete barcodes stored in the KDC.
Set Barcodes Menu
This menu lists all the barcode symbologies supported by your KDC and allows you to select the barcode
symbologies you will be scanning. For maximum scan performance, you should select only the
symbologies you are scanning. Please refer to Appendix A.1 – Symbologies for a detailed listing of
symbologies supported by your KDC.
Code Options Menu
Your KDC supports various Code Options including Transmission of Start and Stop Characters,
Symbology Conversion, Verification of Optional Check Character, and Transmission of Check Digit.
Please refer to Appendix A.2 Options for a detailed explanation of each option.
Scan Options Menu
zScan Angle: Allows you to configure the laser beam angle to the barcode. Wide is 54oand Narrow
is 27o. The default is Wide.
zFilter: Allows you to change the Filter mode from Normal to High for poor quality barcodes.
The default is Normal.
zTimeout: Allows you to set the length of time before the KDC will stop scanning a barcode from .5
second up to 10 seconds. The default is 2 seconds.
zMinimum Barcode Length: Allows you to set a barcode length from 2 characters to 36 characters. It
is strongly recommended that you maximize the minimum barcode length setting to prevent
possible errors. The default is 4 characters.
zSecurity Level: Allows you to ensure an accurate barcode reading by setting the number of times

KDC250 User Manual
34
the KDC will read a barcode. Security Level is set from 1 up to 4. The higher security level means
more reliable readings though some performance degradation is likely. For poor quality barcodes,
we recommend increasing the security level. The default is 2.
zAuto Trigger: Allows users to scan a barcode automatically once Auto Trigger is enabled and USB
cable is connected. User can adjust Reread delay from Continuous to Extra Long. Auto Trigger
mode always enables duplicate check option.
zPartial Display: Allows you to display partial data. User defines the start position and number of
characters to be displayed.
Data Process Menu
Wedge/Store - The KDC provides five modes of data transmission in keyboard wedging mode.
zWedge Only: Barcode data is NOT stored in memory but transmitted to the host.
zWedge & Store Only: Barcode data is stored in memory and transmitted to the host.
zStore Only: Barcode data is stored in memory but NOT transmitted to the host.
zSave if Sent: If data transmission is successful, barcode data is stored in memory.
zSave if Not Sent: If data transmission is NOT successful, barcode data is stored in memory.
Data Format - The KDC provides two data formats, Barcode Only and Packet Data.
zBarcode Only: KDC transmits scanned barcodes only. User may incorporate proper data
transmission error detection and correction mechanism in this mode.
KDC supports various termination
characters for barcode only format.
User can select <NONE>, <CR>, <LF>,
<CR+LF> or <TAB> as the termination character.
zPacket Data: KDC transmits packet data with checksum to minimize transmission errors.
KTSync® sets Data Format to Packet Data format upon execution.
User may change Data Format to Barcode only if user prefers to use Barcode only
mode but either KTSync program terminates abnormally or user disconnects KDC
without exiting KTSync program normally.
[Note] Barcode Index: KDC200i/300i add 4 bytes barcode index to support maintaining last
synchronized barcode information. This optional index would be added if data format is “Packet
Data” and
(1) 4 bytes index would be added before “@” when responding to “p” command
(2) 4 bytes index plus “@” character would be added after checksum byte if user scan a
barcode and wedging to the host
KDC250 User Manual
35
Data Editor - KDC provides various data editing options.
zPrefix - Allows you to add a prefix to scanned data which can then be stored in KDC or wedged
to the host. The Prefix format must be defined in the data format menu of KTSync. The
maximum length for a Prefix is 11 characters.
9NOTE: This Prefix option is different from the Prefix option in KTSync which appends the
prefix to data during synchronization.
9NOTE: User can also define prefix by scanning characters defined in Appendix C.18 ~ C.22
between following special barcodes
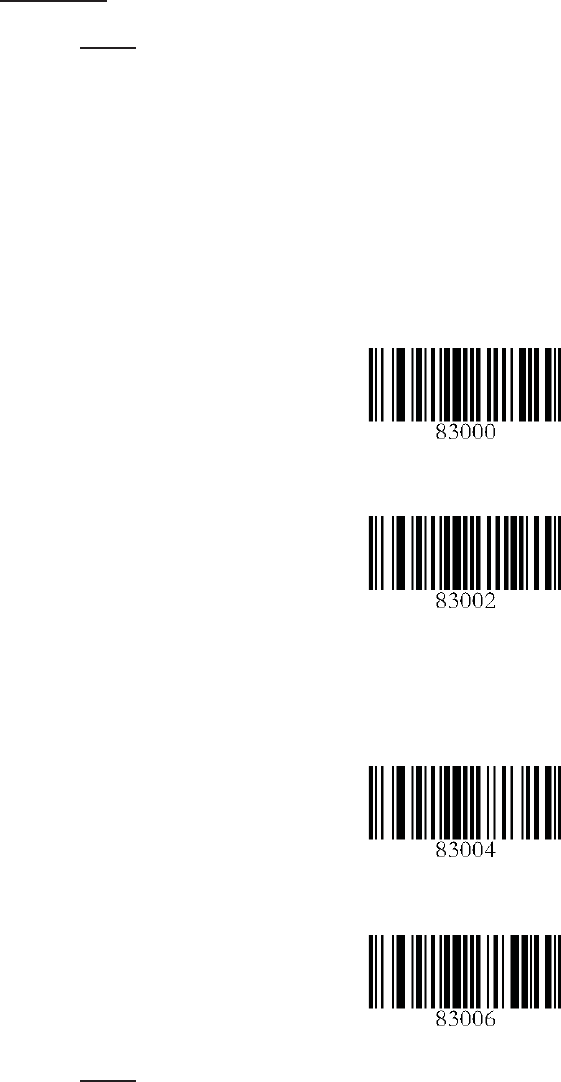
Prefix Enter Start
Prefix/Suffix Enter Finish
9NOTE: User can also delete or display current prefix by scanning following special
barcodes
Delete Prefix
Display Prefix
zSuffix - Allows you to add a suffix to scanned data which can then be stored in KDC or wedged
to the host. The Suffix must be defined in the data format menu of KTSync. The maximum
length for a Suffix is 11 characters.
9NOTE: This Suffix option is different from the Suffix option in KTSync which appends the
suffix to data during synchronization.
9NOTE: User can also define suffix by scanning characters defined in Appendix C.18 ~ C.22
between following special barcodes
KDC250 User Manual
36
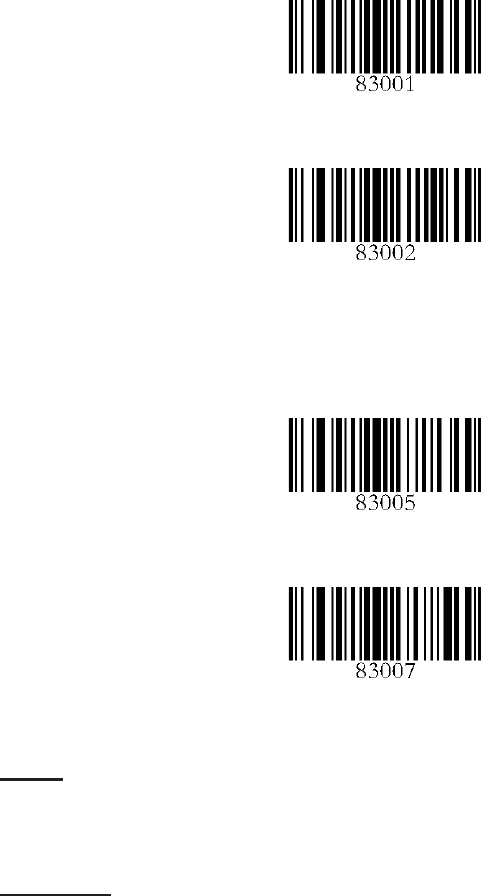
Suffix Enter Start
Prefix/Suffix Enter Finish
9NOTE: User can also delete or display current suffix by scanning following special
barcodes
Delete Suffix
Display Suffix
zAIM ID - Allows you to add AIM ID to scanned data which can then be stored in KDC or wedged
to the host. AIM ID must be defined in data format menu of KTSync. AIM ID is either added to
the end of Prefix or Suffix.
zPartial Data: Allows you to store and/or transfer partial data. User defines the start position and
number of characters to be stored and/or transferred.
9 Select the x characters from yposition
Set Partial Data Start Position to y, Partial Data Length to x, Partial Data Action to
Select
Partial Data Length 0 means Select all characters from y position.
9 Erase the x characters from yposition
Set Partial Data Start Position to y, Partial Data Length to x, Partial Data Action to
Erase
Partial Data Length 0 means Erase all characters from y position.

KDC250 User Manual
37
Handshake - KDC provides Handshake mode when Data Format is set to Packet Data.
zHandshake Mode will increase the reliability of barcode data transmission.
zThe default mode for Handshake is Disabled.
zData transmission speed is slower when Handshake Mode is Enabled.
Terminator – KDC supports various termination characters when the Data Format mode is set to Barcode
Only. This option allows you to select <NONE>, <CR>, <LF>, <CR+LF>, or <TAB> as the termination
character. The default terminator is <CR+LF>. Up/Down/Left/Right arrow terminator is also available for
HID mode.
Chk Duplicate – This option allows you to prevent collecting duplicated data.
KDC250 User Manual
38
BT Config Menu - KDC200 / KDC250 / KDC300
The KDC supports Bluetooth Ver2.1+EDR. Before utilizing the advantages of Bluetooth functionality with
the KDC, you should become familiar with Bluetooth connectivity and its impact on your host environment.
To configure your KDC for Bluetooth functionality, you must use the KDC Menus. To access the menus,
simultaneously press the UP and DOWN scroll buttons on the side of the KDC. Use the DOWN button to
scroll to Bluetooth then press the Scan button.
Below is a listing of the Bluetooth options and their settings. The default settings for these options have
been set to increase the usability of Bluetooth technology without compromising the KDC battery usage.
IMPORTANT: We strongly recommend NOT changing these settings until you have fully tested the
Bluetooth connection between the KDC and the host device.
For more detailed information regarding Bluetooth functionality with the KDC, please refer to Chapter 4.
zConnectDevice – Only applicable to KDC200i and KDC300i
zAuto Connect - Enabled or Disabled
zAuto Power On - Enabled or Disabled
o PWR On Time – Disabled, 1 to 10 seconds
zAuto Power Off - Enabled or Disabled (KDC250 should use option in system menu)
o Beep Warning - Enabled or Disabled
o PWR Off Time - 1 to 30 Minutes
zPowerOff Msg – Enabled or Disabled
zMAC Address – 12 characters Bluetooth MAC Address
zFW Version – Display Bluetooth Firmware Version
zWakeup Nulls – Enabled or Disabled
zAutolock Time – 0, 1, 2, 3, 4, 5, 10, 15 minutes
zBT Toggle – Enable or Disable HID soft keyboard or iPhone mode connection On/Off toggle.
zHID Keyboard – English or German
`
BT Service - KDC200 / KDC250 / KDC300
zPower
o Enable or Disable Bluetooth Power
zPairing Mode
o KDC enters pairing mode so that host Bluetooth device can search KDC.
o KDC exits pairing mode either by pressing the scan button or it fails to pair with Bluetooth host
device in 90sec.
zDiscovering
o Search neighborhood Bluetooth devices
zConnecting To
o Inquiry to registered Bluetooth devices
zHID Sync
o KDC transmits all stored data to the host over HID profile if HID Sync option is enabled
KDC250 User Manual
39
GPS Config - KDC250
zGPS Power
o Enable or Disable GPS Power
zPower Mode
o Normal or Power Save
zBypass Data
o Enabled or Disabled
zAcquire Test
o Acquiring time test of GPS signal
zReset GPS
o Reset GPS parameters
System Menu
zMemory Status: Checks the number of stored barcodes and memory usage.
zReset Memory: Resets KDC memory by erasing all stored barcodes, application and BT registry.
zAuto Erase: Erases all stored barcodes upon reaching buffer full condition if Enabled is selected
zSleep Timeout: Sets amount of time KDC waits, when not being used, before going to sleep.
zAuto Power Off (KDC250 only)
oBluetooth: Enabled/Disabled
oGPS: Enabled/Disabled
oPower Off Time:0(Never), 5, 10, 20, 30, 60, 120 seconds
zDate/Time: Sets the date and time of KDC which can also be set using KTSync®
zBattery: Shows current status of battery power level.
zVersion: Shows KDC firmware version and serial number.
zButton Lock: Locks or unlocks KDC scan and scroll buttons.
zBeep Sound: Enables or disables KDC beep sound.
zAuto Exit: Enables KDC to automatically exit KDC Menus.
zPort Status: Enables or disables KDC port messages.
zDisplay Format: Selection of display format - Time & Battery, Type & Time, Type & Battery, or
Memory Status
zMenu Barcode: Enables or disables Honeywell special barcodes
zScrolling : Enables or disables display scrolling for a barcode with more than 40 characters
zBrightness: Adjusts display brightness
zFactory Default: Resets KDC options to factory default settings.
KDC250 User Manual
40
3.4 LED Status
LED Color Status
Green zSuccessful Reading
zUSB is connected and battery is fully charged
Orange zLow battery
zUSB is connected and battery is charging
Red zNo reading
zEmpty battery
Table 4 - Explanation of LEDs
3.5 Empty Battery
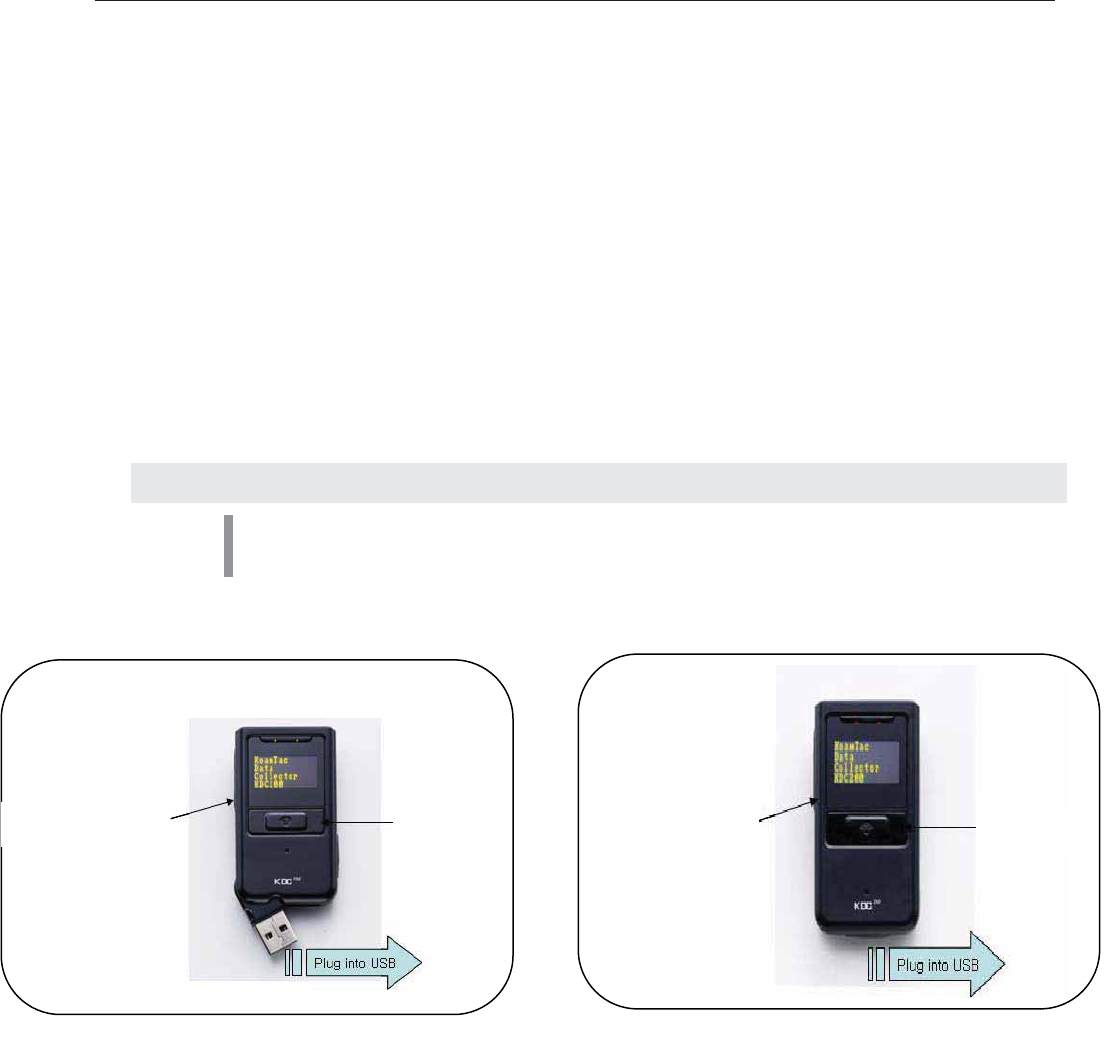
The KDC will display the message Empty Battery Connect USB when the battery is empty. Please
charge the KDC IMMEDIATELY to prevent data collecting interruption.
3.6 Buffer Full
The KDC will display the message Buffer Full when the size of collected data reaches 80KB or the
number of collected barcodes is 10,240. To prevent the loss of data, you should synchronize the data then
reset the memory when this message displays.
KDC250 User Manual
41
3.7 Reset Feature
The Reset feature lets you restart the KDC if necessary without losing any stored barcode data or option
settings. To reset the KDC, follow these steps.
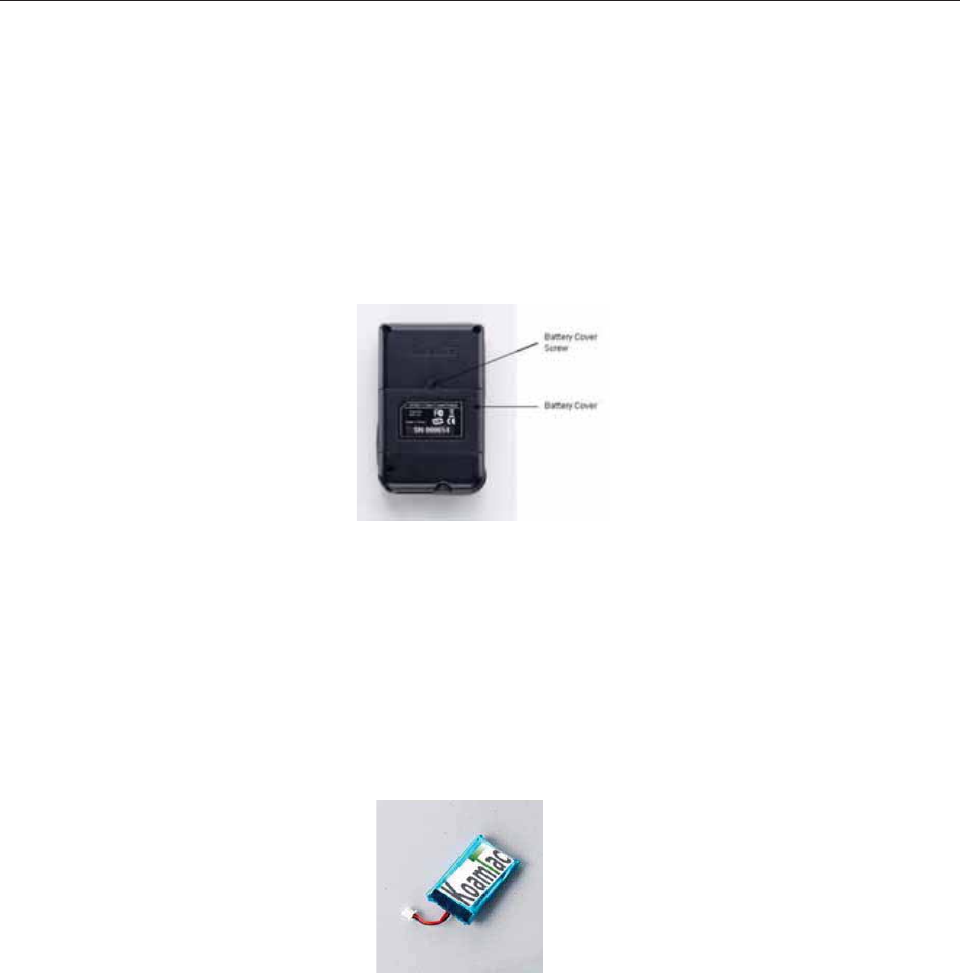
1. Connect the KDC to your PC.
zKDC100 - Connect to your PC directly using the swing out, Type A USB connector.
See Figure 7.
zKDC200 / KDC300 - Connect to your PC using the included cable, attaching the ultra mini
USB connector to your KDC and the standard, Type A connector to your PC’s USB port.
See Figure 6.
2. Press DOWN scroll button and SCAN button simultaneously for 5 seconds.
3. When the LEDs illuminate yellow, release the buttons.
4. The KDC initial screen, KoamTac Data Collector KDC displays when reset is complete.
Note:
The KDC stores collected data into flash memory and will not lose data or the KDC settings
during the reset process.
Figure 7 - Reset Function of KDC100 Figure 6 - Reset Function for KDC200 - KDC250 - KDC300
DOWN Scroll Button DOWN Scroll Button
Scan Button
Scan Button
KDC250 User Manual
42
3.8 Replace Battery
KDC200 comes with a rechargeable, Lithium-Polymer battery. The battery is recharged from any USB
port and can be recharged about 300 times before it needs to be replaced.
KoamTac recommends replacing the battery every six months as a declining battery will cause
noticeable performance degradation in KDC200. Replacement batteries can be purchased from a
KoamTac distributor. Batteries should be disposed of properly.
Step One - Place KDC200 face down on a firm surface. On the back, locate the small black screw in the
middle of KDC. This screw secures the battery cover.
Step Two - Press a small Phillips head screwdriver firmly into the screw while simultaneously turning
counterclockwise and loosen the screw. The battery cover will pop open. Remove the cover, keeping
the screw intact. Store cover with screw in a safe place for later.
Step Three - Gently lift the battery to locate a wire connector underneath the battery. The wire
connector is attached to the red and black wires on the battery. It is also attached to a connector on
KDC. Remove the battery using a flat head screwdriver to disengage the connectors, being careful not to
damage the connector on KDC.
Step Four – Use a small flat head screwdriver to reattach the new battery. Connect the white connector
attached to the red and black wires on the replacement battery to the connector on the KDC. Gently
press the battery down, fitting it inside the KDC. Replace the battery cover. With the Phillips head
screwdriver securely tighten the battery cover screw.
Step Five – The replacement battery must be charged before KDC can be used.

KDC250 User Manual
43
4. BLUETOOTH - KDC200/250/300
The KDC200/250/300 support HID (Human Interface Device) and SPP (Serial Port Profile).
KDC200i/250i/300i support HID, SPP and MFI (Made for iPhone). They are compatible with the following
Bluetooth stacks.
zBlueSoleil
zBroadcom (Widcomm)
zMicrosoft Windows XP, Vista, 7, and Mobile5.0+
zToshiba
Bluetooth Config
4.1 ConnectDevice
KDC supports both Serial Port Profile (SPP) and Human Interface Device Profile (HID). User can choose
SPP2.0, SPP2.1 or HID profile to communicate with the host device. Additional iPhone option is available for
KDC200i/300i models.
User can connect and disconnect Bluetooth connection with the host device by pressing Up and Down key if
BT Toggle option in BT Config menu is enabled. It normally takes 3 seconds to connect and 1 second to
disconnect.
This is a very useful feature for iPhone and iPad application. User can enable and disable iPhone and iPad
softkey instantly using this BT Toggle option.
Up key shows Bluetooth connection status and Downkey shows time if KDC is connected using SPP profile.
4.2 Auto Connect
This feature allows the KDC to connect automatically to the host device when the KDC is powered on.
IMPORTANT: Until the host device and KDC have been fully tested, it is strongly recommended that this
feature be set to Disable because a host device that does not support this feature can cause problems such
as power loss or upload delays.
[Note] KDC tries to connect automatically to the host 10 times during two minutes if Bluetooth power is ON,
Bluetooth is disconnected, Auto Connect is enabled and system Sleep Timeout is set to 5 seconds
4.3 Auto Power On
The Auto Power On option allows the KDC to automatically power on Bluetooth when the SCAN
button is depressed. The default setting is Disabled. NOTE: The host may have to open the COM port
before reconnecting with the KDC. Power on time determines the scan button pressing time to activate auto
power on feature.

KDC250 User Manual
44
4.4 Auto Power Off
The Auto Power Off option works in conjunction with the PWR Off Time option. This option allows the KDC
to power off Bluetooth automatically when the KDC is NOT CONNECTED to the host for the time duration
specified in the PWR Off Time option.
The default for this option is Enabled. It is strongly recommended to keep it enabled to maximize the
operation time of the KDC. If Auto Power Off is enabled, Bluetooth can be manually powered off before
specified time in PWR Off Time option.
4.5 Beep Warning
The KDC beeps to acknowledge the status of the Bluetooth connection as follows:
1. One high short beep when Bluetooth is connected.
2. One low short when Bluetooth is disconnected.
3. Five short beeps if:
z“Beep Warning is ENABLED”
z“Auto Power Off is DISABLED”
z“KDC200/200P/300 is DISCONNECTED from HOST”
z“Bluetooth power is ON”
4.6 PWR OFF Time
The PWR Off Time option works in conjunction with the Auto Power Off option. If Auto Power Off is
Enabled, the KDC powers off Bluetooth when the time duration specified in the PWR Off Time option is met
and the KDC is NOT CONNECTED to the host. The time settings for this option are from one (1) minute to
30 minutes. The default is five (5) minutes.
4.7 PowerOFF Msg
KDC can display “Bluetooth Disconnected” message if Power Off Message option is Enabled. “Bluetooth
Disconnected” message would be displayed if PowerOff Msg option is Enabled and KDC is disconnected
with other Bluetooth device.
4.8 MAC Address
User can verify KDC Bluetooth MAC Address.
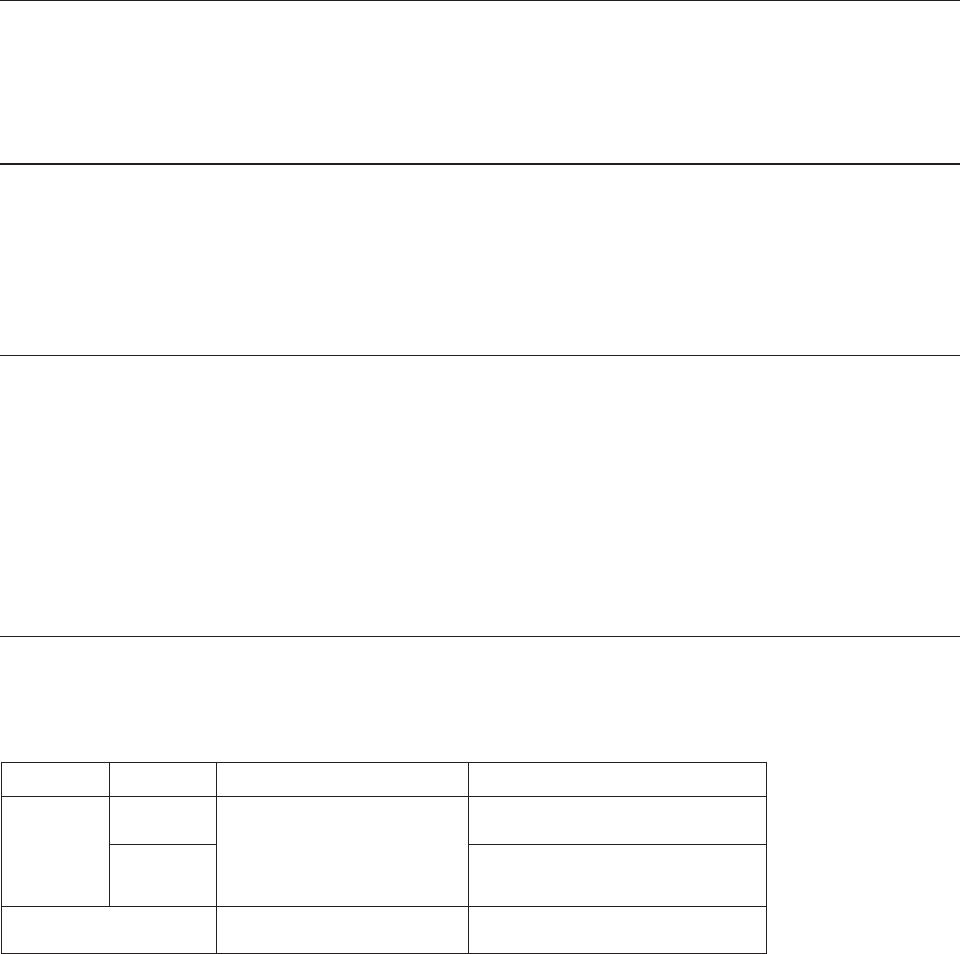
KDC250 User Manual
45
4.9 FW Version
User can verify KDC Bluetooth firmware version in BT FW menu.
4.10 Wakeup Nulls
The KDC sends three leading Null bytes to wake up connected Bluetooth device. This feature can be
disabled if connected Bluetooth device doesn’t require additional bytes to wake up.
4.11 Autolock Time
iPhone/iPad/iPod touch loses incoming Bluetooth data in sleep mode. Users can set KDC Autolock time to the
same Autolock time of your iPhone/iPad/iPod touch to use automatic wakeup feature in HID mode to prevent
data loss. There would be a one second delay of barcode transmission if Autolock time is set to more than one
minute and the barcode scan interval is larger than auto lock time. The autolock time would be set as 0, 1, 2, 3,
4, 5, 10, 15 minutes. 0 means iPhone/iPad/iPod touch never enters sleep mode.
4.12 BT Toggle
User can enable or disable HID soft keyboard or iPhone mode connection On/Off toggle using BT Toggle
option.
Setting Mode Up key Down key
Enabled
HID Reconnect to the last
connected device if the
Bluetooth is disconnected
Toggle Soft Keyboard
iPhone Disconnect the Bluetooth
connection
Disabled Display Bluetooth
connection status Display KDC date/time
[Note1] New soft keyboard toggle option using Down key inHIDmodeiseffectivefromBTFWversion
1.2.6orhigherandKDCFWversionis2.85(6).200(300).Iorhigher.PriortoBTFWversion1.2.5
orKDCFW2.85(6).200(300).HenablesthesoftkeyboardbypressingtheDownkeyand
disablesthesoftkeyboardbypressingtheUpkey.
[Note2]iPhone/iPad/iPodtouchlosesincomingBluetoothdatainsleepmode.Usersshouldwakeup
iPhone/iPad/iPodtouchbeforescanningabarcodeinHIDmode.
[Note3]KDCsupportsautoiPhone/iPad/iPodtouchwakeupfeatureinHIDmodefromBTFW1.2.6and
KDCFW2.85(6).200(300).Iversion.UsersshouldsetKDCAutolocktimetothesameAutolock
timeofyouriPhone/iPad/iPodtouchtouseautomaticwakeupfeatureinHIDmode.There
wouldbeaoneseconddelayofbarcodetransmissionifAutolocktimeissettomorethanone
minuteandthebarcodescanintervalislargerthanautolocktime.

KDC250 User Manual
46
Bluetooth Service
4.13 Power
The POWER option allows you to Enable or Disable the Bluetooth functionality of the KDC. To use Bluetooth,
this option must be set to Enable. However, like all devices enabled for Bluetooth, the KDC will search
constantly to connect with a Bluetooth host when set to enable. Constant searching uses battery power.
Unless you are using Bluetooth with your KDC, this option should be set to Disable.
IMPORTANT: To prevent unnecessary power problems, it is strongly recommended that the POWER option
be set to Disable if the KDC is idle for an extended period of time.
4.14 Pairing
Before you are able to use Bluetooth, the KDC must be paired with the host device. This paring
process only needs to be completed once with each host device. After pairing, the host device will
always recognize the KDC as a Bluetooth device unless the Bluetooth configuration is modified. If it is
modified, you may need to pair the devices again.
IMPORTANT: The host device must be configured for Bluetooth before it can be paired to the KDC.
[NOTE] KDC with Bluetooth Spec2.1+EDR doesn’t prompt Pin code entry menu
To pair the KDC with the host, follow these instructions.
1. Select Pairing from the Bluetooth menu. The message “Pairing started…” will displayed.
2. When prompted by the host device, enter the Security PIN “0000”.
3.
The
“Pairing success”
message will display when the Bluetooth connection is successfully
established. The connection must be established before the pairing timeout which is 60 seconds.
zIf “Pairing failed...” message displays, the Bluetooth connection with the host device failed. If the
message “Connected” displays, a Bluetooth connection was established.
zIt is possible for the message “Pairing failed...” to display on the KDC while the host device displays
“Connected” message. If this occurs, a Bluetooth connection is established.
4.15 Discovering
KDC200/250/300 start to search neighboring Bluetooth device if this Discovering menu is executed. It would
take about 30 seconds to finish search and lists available neighboring Bluetooth devices. Use may enter
corresponding Bluetooth MAC address in KTSync Bluetooth menu instead of searching neighborhood
Bluetooth devices.

KDC250 User Manual
47
4.16 Connect To
This option lets you easily connect KDC to Bluetooth devices either previously registered in KTSync under
the File Menu or discovered/connected from KDC Bluetooth Service menu
[Note] There could be an interoperability issue depending on corresponding device Bluetooth stack. Master
Bluetooth device may request to follow master Bluetooth device security procedure if KDC tries to connect
to the master Bluetooth device.
4.17 HID Sync
User can synchronize stored barcode data over HID using HID Sync option. KDC starts to transmit all stored
barcode data upon executing HID Sync option.

KDC250 User Manual
48
5. GPS - KDC250
The KDC250 supports the GPS feature. One can record the GPS coordinate with a barcode or use KDC250
as a Bluetooth GPS receiver.
5.1 Barcode and GPS data format
KDC250 adds the GPS coordinate after barcode data if GPS data is available. GPS data starts with “<G|P/S\”
and ends with “:”. For example, KDC250 would record barcode “1234567890” and GPS coordinate
“4354.45275,N;07925.81993,W” as “1234567890<G|P/S]4354.45275,N;07925.81993,W:” in the barcode data
field.
5.2 GPS Menu
KDC250 provides the following GPS menu.
GPS Power Menu
zUsers can enable or disable the GPS Power.
zThe GPS module consumes a lot of battery power and it is strongly recommended to turn off the
GPS if KDC250 is not used for a for a period of time.
zIt is also recommended to use GPS Auto Power Off option in the System menu. This option would
turn off the GPS power automatically if a barcode is not scanned for a period of time.
Power Mode Menu
zUsers can extend the battery life of the KDC250 in Power Save mode
zUsers should use normal mode if accurate GPS data is required
zKDC250 will last about 15 hours in normal non-bypass data mode and 18 hours in power save non-
bypass data mode
zKDC250 will last about 7 hours in normal bypass data mode and 8 hours in power save bypass
data mode
Bypass Menu
zThis option should be disabled if users want to record the GPS data with a scanned barcode data.
zKDC250 would bypass GPS data to the host if the bypass option is enabled
zKDC250 becomes Bluetooth GPS receiver if this bypass data option is selected

KDC250 User Manual
49
Acquire Test Menu
zGPS signal acquiring time test
Reset GPS Menu
zReset GPS settings
5.3 GPS Hot Key
KDC250 provides the following hot keys for convenient GPS operations.
GPS Power Enable
zUsers can turn on the GPS power by pressing the scan button if auto power off is enabled and GPS
power is disabled.
zUsers should keep pressing the scan button for more than 3 seconds to turn on the GPS power.
GPS Bypass mode Enable/Disable
zUsers can toggle GPS Bypass mode by pressing the scan button if GPS power is enabled.
zUsers should keep pressing the scan button for more than 3 seconds to toggle GPS bypass mode.
GPS Acquire test cancellation
zUsers can cancel GPS acquire test by pressing the scan button during the test
GPS Data amend cancellation
zUsers can cancel GPS data amend by pressing the scan button if GPS data is not available immediately.
zUsers should keep pressing the scan button for more than 3 seconds to cancel GPS data amend.

KDC250 User Manual
50
6. SYNCHRONIZATION
When barcode data is collected, it must be uploaded to your application. KTSync®, which is bundled with
the KDC, is software that allows barcode data to be uploaded to any PC, PDA, or smartphone running
Android 2.1+, Apple iOS3.1.3+, Blackberry. Mac and Windows XP/Vista/7/Mobile 5.0+. It has three
major functions. Windows XP/Vista/7 version supports all of the following features. Tablet, PDA and
Smartphone versions support only limited features of PC KTSync.
zSynchronization - Provides data upload functionality to your applications.
zKeyboard Emulator - Allows scanned data to upload directly into your application as if the data were
being entered manually on a keyboard.
zApplication Generation - Allows user to create custom applications or download predefined
applications such as Master-Slave, Pick/Bin, DB Lookup and Inventory.
Additional functions include:
Prefix and Suffix add-ons to eliminate manual data entry.
Symbology and Scan Option selections.
Barcode Wedging options.
6.1 KTSync Menu
KTSync® was installed on your PC during the initial installation process. Before data can be uploaded to
any host device, KTSync® must be launched on the host and configured to recognize the KDC. The
following screen displays when KTSync® is launched.
File Menu
zConnect: This option displays the Serial port (COM#) assigned to KDC. You can also use this
option to manually assign the Serial port. The Serial port assigned to KDC can be found under
Windows Device Manager. The port assignment is used by KTSync® for synchronizing data from
the KDC to the host.
zSynchronize: This option manually tells the KDC to synchronize data with the host. While data is
being synchronized, KTSync menu options are unavailable. NOTE: Please do not use your
Figure 8 - KTSync® Synchronizer Menu
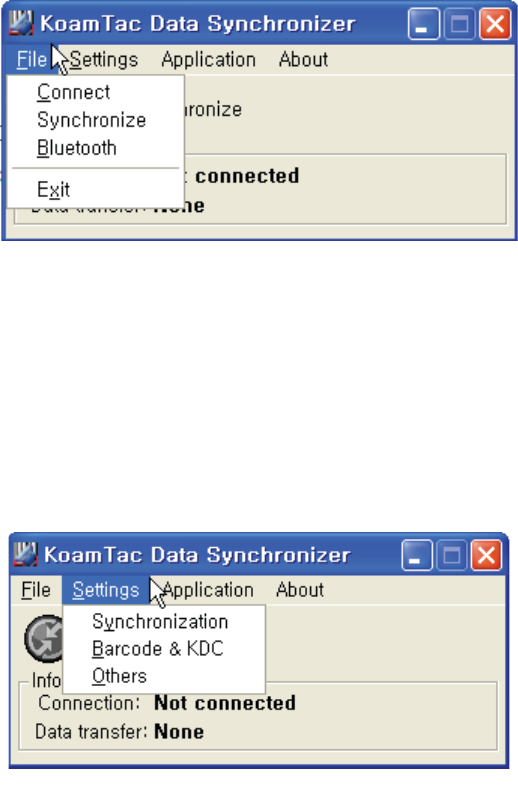
KDC250 User Manual
51
computer during data synchronization.
zBluetooth: This option is not available on KDC100. User can register MAC address to be directly
connected by KDC200/250/300.
zExit: This option ends the KTSync program. You must re-run KTSync before you can synchronize
data on the KDC.
Settings Menu
zSynchronization: Select Synchronize options.
zBarcode & KDC: Select Barcode and KDC options.
zOthers: Select Auto Connection and/or Synchronization Confirmation options.
Figure 10 – Setting Menu
Figure 9 – File Menu
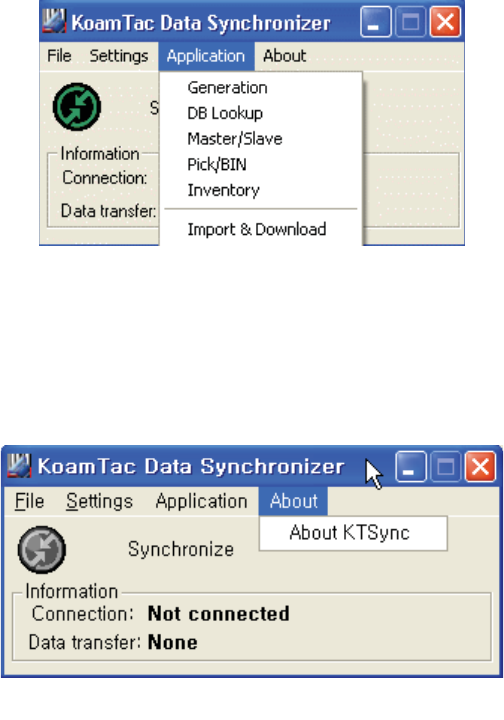
KDC250 User Manual
52
Application Menu
zGeneration: Create user application or download predefined application.
zDB Lookup: Allows users to download DB into KDC and display barcode description field
zMaster/Slave: User defines a master barcode for comparison with one or more slave barcodes
zPick/BIN: User defines Pick ID and the barcode symbology for comparison with a defined Bin
zInventory: Users can count inventories. Inventory description would be displayed if inventory DB is
downloaded into KDC.
About Menu -KTSync®- Version Information
Figure 12 – About Menu
Figure 11 – Application Menu
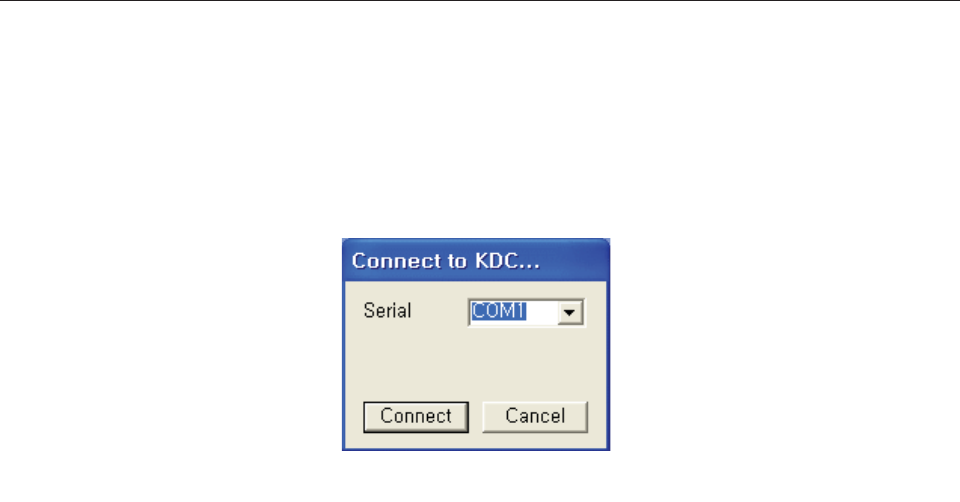
KDC250 User Manual
53
6.2 File Menu
Connect to KDC
The KDC connects to a COM port automatically when connected to your PC’s USB port. You can
manually assign the KDC COM port using KTSync® Connection submenu under File menu if
needed.
zThe COM port assignment is found in the Windows Device Manager.
zKTSync® will not connect to the KDC if it is in KDC Menus. You must EXIT from the KDC
Menus.
zIf KTSync® fails to connect automatically to the KDC, please follow these directions.
1. Exit KTSync®.
2. Check that you have connected the KDC to a USB port on your PC.
3. Make sure to use the cable provided with the KDC.
4. Check that the KDC is not in KDC Mode Menu.
5. Restart KTSync®.
NOTE: You can manually assign the COM port using KTSync® Connect option under the File
menu.
Synchronize
Under the File Menu, this option allows you to manually synchronize data on KDC with host. This option
is similar to clicking on the Synchronize button in the KoamTac Data Synchronizer box.
Figure 13 - COM Port Selection for KD
C
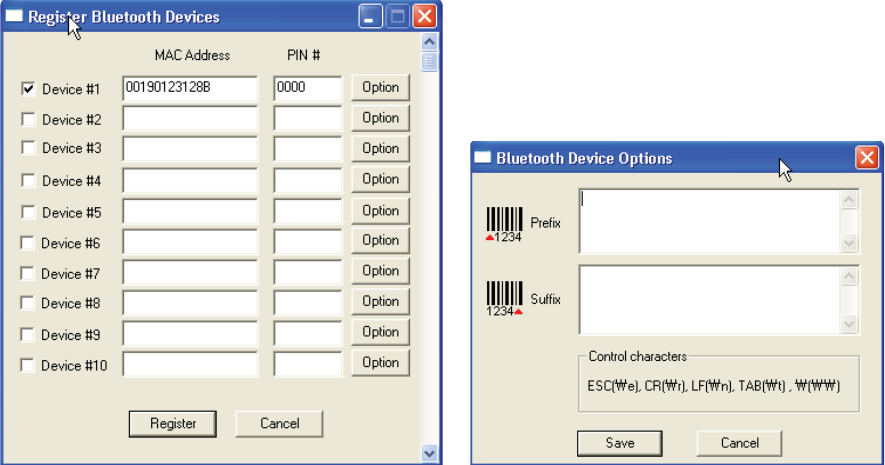
KDC250 User Manual
54
Bluetooth
This menu option allows you to register up to ten Bluetooth devices including their MAC address, PIN #, and
optional prefixes or suffixes. This option enables direct Bluetooth connection between KDC and other
Bluetooth devices such as Bluetooth printer. User should choose Bluetooth device to be connected in
“Connect to” menu in KDC Bluetooth Service menu.
Figure 14 - Bluetooth Device Registry
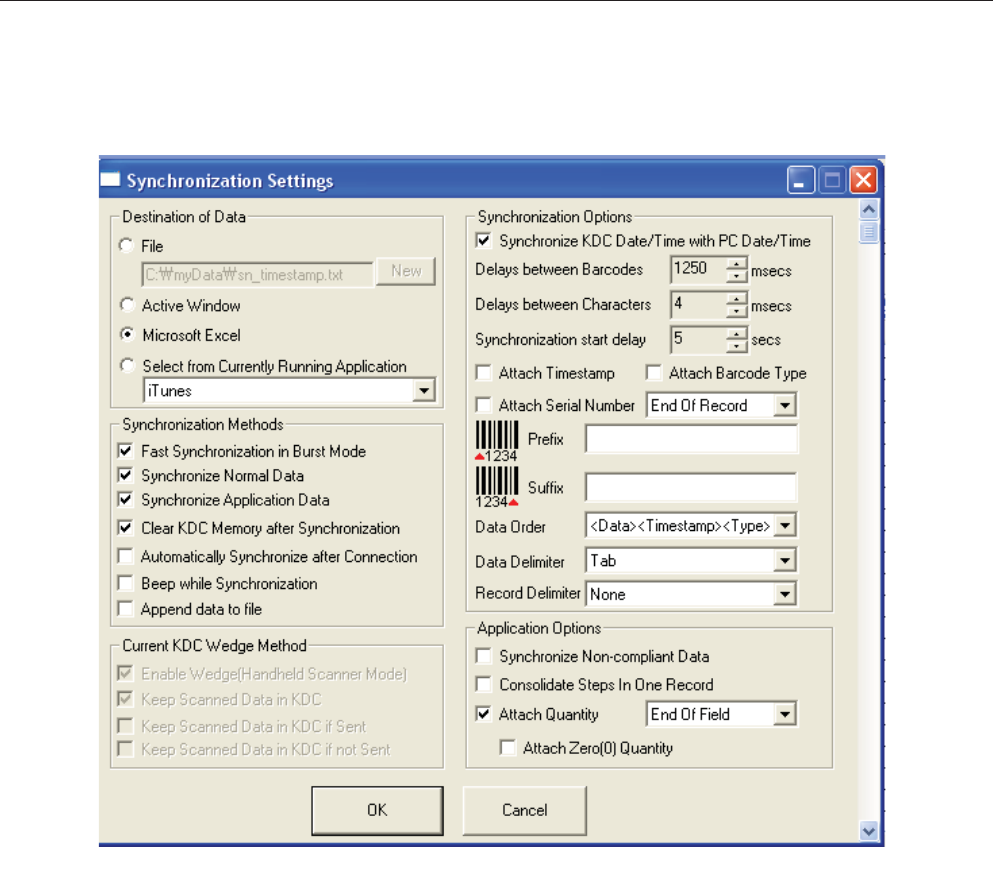
KDC250 User Manual
55
6.3 Synchronization Settings
KTSync®provides several synchronization options for synchronizing data from your KDC to host devices
such as your PC, PDA, or smartphone running Windows XP, Vista, Windows 7, or Mobile 5.0+.
Destination of Data
When barcode data is uploaded to the host device, you must assign a destination for the data.
Destination of Data options include:
zFile - This option means data will be saved in the assigned filename. You can select a different target
directory by clicking the New icon. C:\MyData\sn_timestamp.txt is the default directory. If this directory
is not created, you will be prompted to create it before data can be uploaded to a file.
zActive Window - This option means scanned barcode data is sent directly to the active program running
on your device as if the data was being entered directly from a keyboard.
zMicrosoft Excel - This option means barcode data is being imported directly into Microsoft’s Excel.
Various parameters can be set when uploading data to Excel.
Figure 15 - KTSync® Synchronization Settings

KDC250 User Manual
56
zSelect from Current Running Application – This option allows you to select a currently running
application for data synchronization.
Note:
xData synchronization begins immediately if Automatically After Connection is selected. If not
selected, data synchronization is started manually by the user.
x Users SHOULD NOT operate the PC during the synchronization process. It can interrupt the
process causing unreliable results.
Synchronization Methods
Fast Synchronization in Burst Mode
The KDC can synchronize data to a host device in Burst mode or Sequential mode. Burst mode provides
the fastest synchronization process but could result in error in a poor Bluetooth environment. Fast
synchronization in burst mode is only recommended with USB connection.
Synchronize Normal Data
The KDC will synchronize Normal Data only in KDC memory if Synchronize Normal Data option is
selected. If you want all data in KDC memory synchronized, you should select Synchronize Normal Data
and Synchronize Application Data.
Synchronize Application Data
The KDC will synchronize Application Data only in KDC memory if Synchronize Application Data option
is selected. If you want all data in KDC memory synchronized, you should select Synchronize Normal
Data and Synchronize Application Data.
Clear KDC Memory after Synchronization
The stored barcode data is cleared from the KDC memory after synchronization if this option is selected.
The KDC can store a total of 10,240 barcodes or 80KB(86 version)/180KB(85 version) of barcode data.
zIt is important to clear the KDC memory periodically to prevent Buffer Full message which will
prevent the KDC from storing additional data.
zStored barcode data can also be deleted using the Reset Memory feature on the KDC.
Automatically Synchronize after Connection
This option lets you automatically synchronize collected data to your computer immediately when the
KDC250 User Manual
57
KDC is connected to the host.
zIMPORTANT: Remember to configure all options properly before selecting this option.
zData synchronization can be done manually by clicking the synchronize icon if this option is not
selected.
Beep while Synchronization
You can enable or disable the beep tone during the synchronization process. A beep is sounded each
and every time barcode data is synchronized if this option is selected. The KDC beeps 5 times when the
synchronization process is complete.
Append data to File
KTSync would append data to the exiting file instead of creating a new file if user has specified file name
and Append data to File option is enabled.
Current KDC Wedge Method
The KDC can be configured in one of five Wedge/Store modes -
zWedge Only - Scanned data is transmitted to the host. The KDC does not store scanned data.
zWedge & Store - Scanned data is stored in the KDC and transmitted to the host.
zStore Only - Scanned data is stored in the KDC but NOT transmitted to the host.
zSave if Sent - Scanned data is stored in the KDC ONLY if transmission to the host is successful.
zSave if Not Sent - Scanned data is stored in the KDC ONLY if transmission to the host is
unsuccessful.
Enable Wedge (Handheld Scanner Mode) - This option will be checked if Wedge Only or
Wedge & Store option is selected.
Keep Scan Data in KDC - This option will be checked if Store Only or Wedge & Store option is
selected.
KDC250 User Manual
58
Synchronization Options
Synchronize KDC Time with PC Time when Connected
This option enables you to synchronize the KDC date and time with the host date and time.
Synchronization of date and time occurs after the data is uploaded to the host device.
Delays
You can set transmission delays between barcodes and characters during the synchronization process.
It is important to set proper delays to prevent errors during the transmission of collected barcodes. Some
Windows applications such as Excel require longer delay times.
Attachments
Timestamp, Barcode Type, and Serial Number can be attached to the scanned barcode by selecting these
options. The Serial Number of the KDC can be attached to the Start or End of Record.
Prefix and Suffix
zEnter the characters you want appended to the front (Prefix) or back (Suffix) of the barcode in the
Prefix and Suffix fields.
zThe character set is any combination of ASCII characters including alphanumeric, line feed (“\n”),
and carriage return (“\r”).
Order and Delimiter
zSelect Order of Data – Type, Data, and Timestamp
zSelect the Delimiter between Data – Tab, Space, Comma, and Semicolon
zSelect the Delimiter between Records – None, LF, CR, Tab, and <LF & CR>
Application Options
Synchronize Non-Compliant Data
The KDC will synchronize both compliant and non-compliant data (filtered data) if Synchronize Non-
Compliant Data option is Enabled.
Consolidate Steps in One Record
KTSync will consolidate the data collected in Step 1 with the data collected in Step 2 and/or Step 3. Data
will be consolidated into one record instead of individual data records for each step when Consolidate
Steps in One Record is Enabled. Non-complete records, i.e. three steps were defined but data was only
collected for two steps; would be discarded if this option is Enabled.
Attach Quantity
Quantity would be attached to the left or right of the data if this option is Enabled.
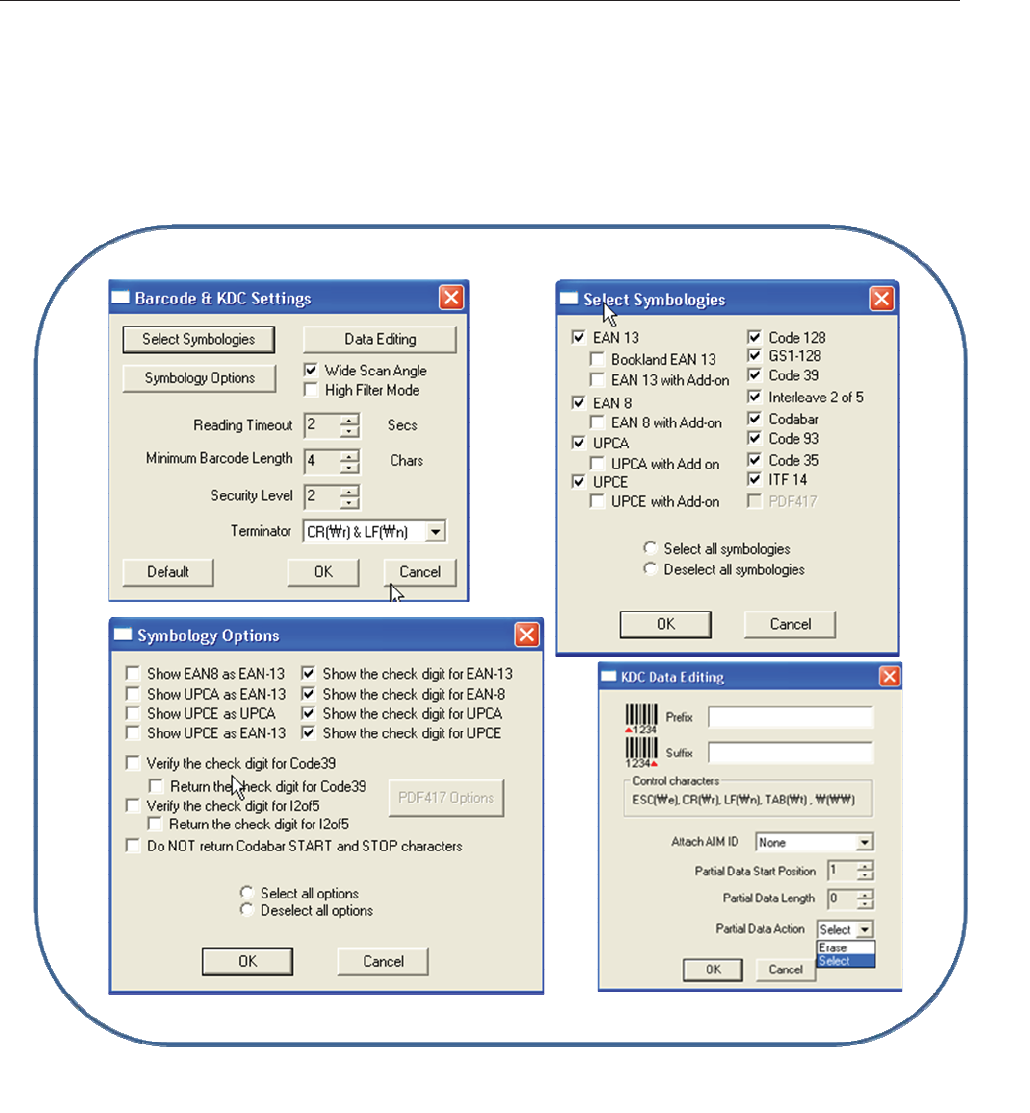
KDC250 User Manual
59
6.4 Barcode & KDC Settings
KTSync® allows you to configure the KDC Scan Options and Barcode Settings. The configuration options
for the KDC using KTSync® are similar to the Set Barcodes, Code Options, Data Editing and Scan
Options on the KDC Menu. Please refer to Appendix A for proper barcode settings for your application.
NOTE: You must configure barcode and scan options properly for optimal KDC performance.
Figure 16 - Barcode & KDC Settings, Symbologies, Data Editing and Scan Options

KDC250 User Manual
60
Select Symbologies and Symbology Options
The process for scanning and reading barcodes is delicate and complicated. Although your KDC is
equipped with a high performance scan engine, if configured incorrectly it may not perform at its peak
performance level. To ensure its high performance, the KDC comes configured to optimize its scan
engine technology. Unless you clearly understand the impact of your changes to the KDC settings,
please do not change factory default settings. Please refer to Appendix A for details. Pressing the Default
icon will reset all symbology related options to factory default settings.
Data Editing Option
Prefix - Allows you to add a prefix to scanned data which can then be stored in KDC or wedged to the
host. The Prefix format must be defined in the data format menu of KTSync. The maximum length for a
Prefix is 11 characters. NOTE: This Prefix option is different from the Prefix option in KTSync which
appends the prefix to data during synchronization.
Suffix - Allows you to add a suffix to scanned data which can then be stored in KDC or wedged to the
host. The Suffix must be defined in the data format menu of KTSync. The maximum length for a Suffix is
11 characters. NOTE: This Suffix option is different from the Suffix option in KTSync which appends the
suffix to data during synchronization.
AIM ID - Allows you to add AIM ID to scanned data which can then be stored in KDC or wedged to the
host. AIM ID must be defined in data format menu of KTSync. AIM ID is either added to the end of Prefix
or Suffix.
Partial Data: Allows you to display and store partial data. User defines the start position and number of
characters to be displayed and stored.
z Select the x characters from yposition
9 Set Partial Data Start Position to y, Partial Data Length to x, Partial Data Action to Select
9 Partial Data Length 0 means Select all characters from y position.
z Erase the x characters from yposition
9 Set Partial Data Start Position to y, Partial Data Length to x, Partial Data Action to Erase
9 Partial Data Length 0 means Erase all characters from y position.
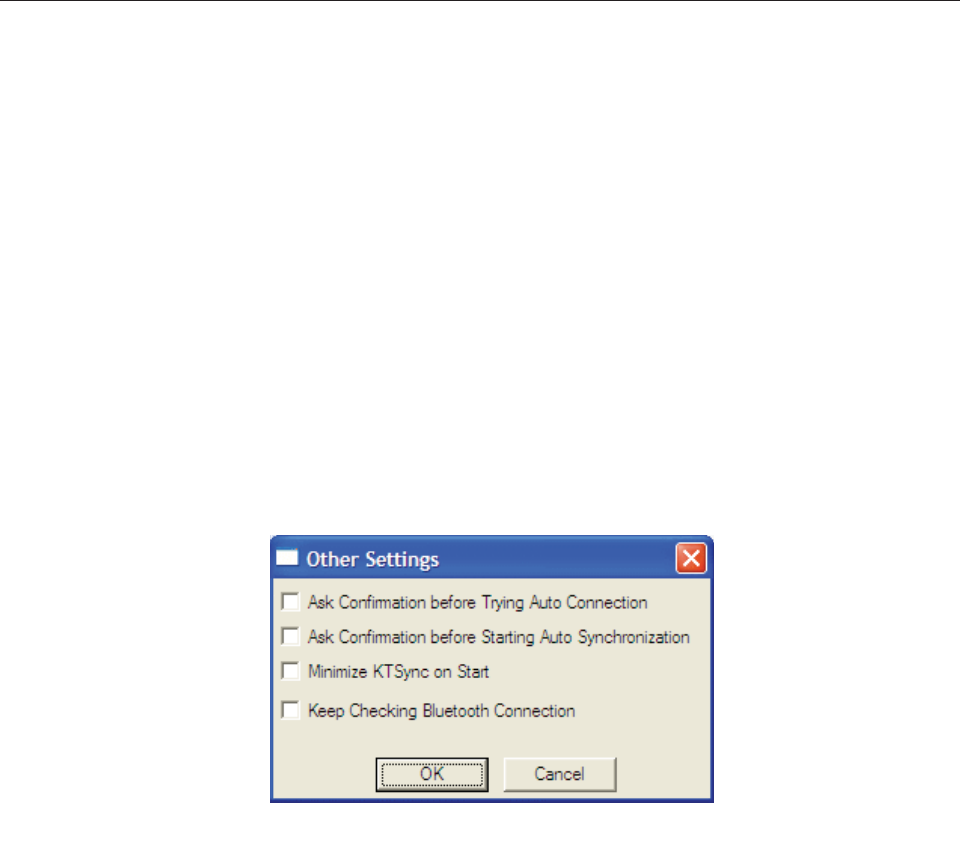
KDC250 User Manual
61
6.5 Others Settings
Other options under the Settings menu allows you to select four additional settings.
xAsk Confirmation before Trying Auto Connection prevents unintentional launch of KTSync.
xAsk Confirmation before Starting Auto Synchronization prevents unintentional synchronization
of data.
xMinimize KTSync on Start will minimize KTSync and send to the tray upon execution.
xKeep Checking Bluetooth Connection allows reconnection of KDC once Bluetooth signal is
detected. This feature is useful when moving from Bluetooth host device frequently. KTSync will
automatically reconnect Bluetooth connection when you enter an effective Bluetooth network
range. (Not Available on KDC100)
To select any of these settings, click on the box to the left of the setting. A check mark () will display
next to the setting to indicate that it is selected.
Figure 17 - KTSync® Confirmation Settings
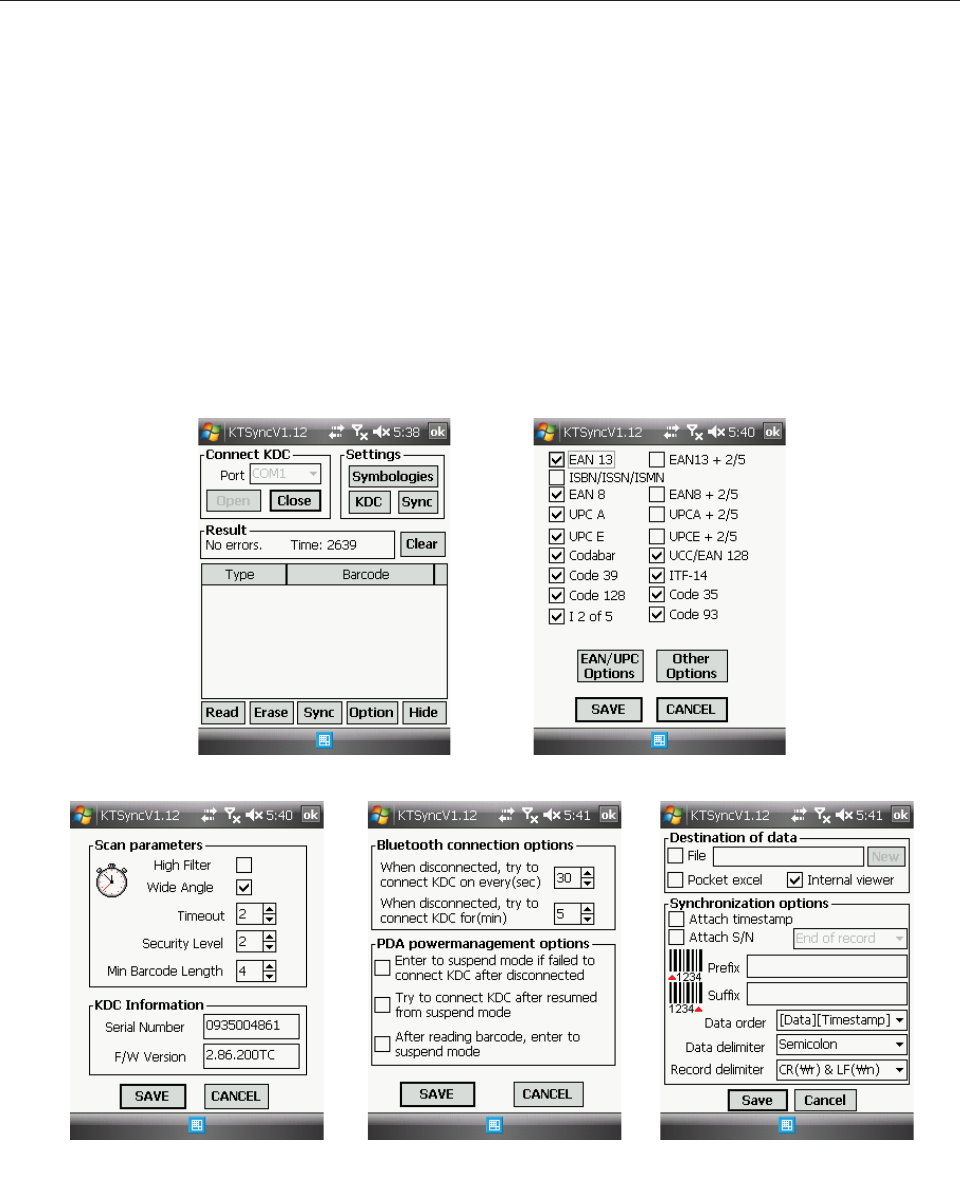
KDC250 User Manual
62
6.6 Mobile pKTSync
pKTSync provides limited functionality for Pocket PC 2003 and Mobile 5.0+ users.
1. Synchronization - Provides data upload functionality to your applications.
2. Keyboard Emulator - Allows scanned data to be uploaded directly into your application as if the data
were being entered manually on a keyboard.
For detailed explanations of these functions, please refer to earlier sections of this chapter.
WARNING: The user must assign the correct COM port to KDC prior to use pKTSync. Please refer
to your mobile device manual for details on Bluetooth pairing and COM port assignment methods.
Figure 18 – Mobile pKTSync

KDC250 User Manual
63
6.7 Android aKTSync
The aKTSync provides limited functionality of PC KTSync to Android users.
[NOTE 1] aKTSync only supports Android devices with 2.1+ OS version and that are compatible
with BluetoothChat application.
[NOTE 2] KDC with Bluetooth Spec2.1+EDR doesn’t prompt Pin code entry menu
KDC and Android Pairing
1. Pairing
zSelect “SPP” Bluetooth profile from KDC ConnectDevice submenu in BT Config menu.
zSearch KDC200/200i/300/300i from Android and pairing two devices.
zKDC200/200i/300/300i PIN code is “0000”
2. Connection
zClick “Connect” icon in aKTSync
zAndroid would list up paired Bluetooth devices and user should select the target KDC.
3. Synchronization - Provides data upload functionality to your applications.
4. Settings – User can change various Synchronization options in settings menu.
5. Wedging – User can wedge barcode data to any Android application. Press home key and launch the
target application.
Launch KTSync
1. Download and install aKTSync from the Android Market.
http://www.androidzoom.com/android_applications/productivity/ktsync_luxv.html
2. Change KDC Bluetooth “ConnectDevice” option to “SPP”
3. Execute Android Bluetooth device scan option and KDC Bluetooth pairing option
A. Execute KDC Bluetooth “Pairing” option
B. Launch “Settings” on the Android device
C. Select “Wireless and Networks”
D. Click on “Bluetooth Settings”
E. Click on “Scan devices”
F. The Android device will display the KDC model and 6 digits of the serial number.
4. Press the KDC list entry, enter “0000” PIN code and press “OK”
5. When paired, the Android device will display “Paired but not connected”.
6. Launch aKTSync program
A. Press menu key and select the “Connect” option on the top left
B. From the list of paired devices, choose the KDC to use
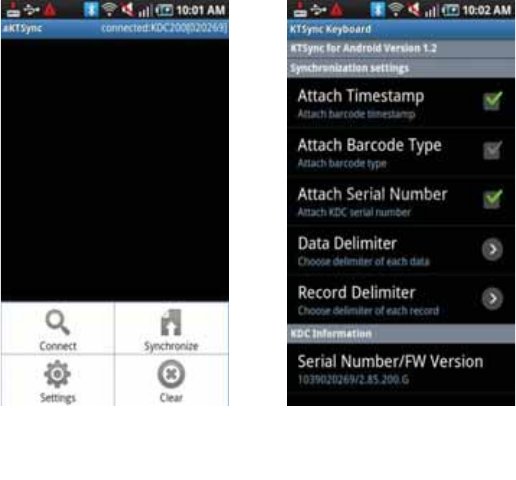
KDC250 User Manual
64
C. On the top menu bar of aKTSync, you will see “connecting” then “connected”.
D. On the KDC display, you will see “Pairing Succeeded!!!” then “Bluetooth Connected”
E. Select “Settings” option on the bottom left to change aKTSync settings
7. Keyboard Wedge
A. Launch “Settings” on the Android device
B. Select “Language and Keyboard (or Input method)”
C. Select “KTSync Keyboard”
D. Launch the application and touch the input box to give focus to it
E. Barcode would be wedged to the input box upon scanning a barcode
Figure 19 – Android aKTSync

KDC250 User Manual
65
6.8 iPad/iPhone/iPod touch KTSync
The KTSync for iPad/iPhone/iPod touch provides limited functionality of PC KTSync for iPad, iPhone and
iPod touch users.
KDC200i/300i and iPhone/iPad/iPod touch connection
instructions
.
1. The KDC200i/300i supports “SPP”, “HID” and “iPhone” Bluetooth profiles.
2. The iPhone/iPad/iPod touch should use either “HID” or “iPhone” Bluetooth profiles. “iPhone” is the
default profile.
3. Users can select the Bluetooth profile in the BT Config > Connect Device menu.
4. Download the KTSync program from the App Store.
5. Enable the iPhone/iPad/iPod touch Bluetooth power from the Setting > General > Bluetooth menu
Pair and connect KDC200i/300i and iOS4.0+ in HID mode
[Note 1] Users have to RESET the iPhone/iPad/iPod touch to change “HID to iPhone mode” or “vice
versa”.
[Note 2] KDC with Bluetooth Spec. 2.1+EDR stack doesn’t require 4 or 6 digits PIN digits entry
1. Go to the iPhone/iPad/iPod touch Bluetooth setting menu. Settings > General > Bluetooth
2. Change KDC connect device to HID from BT Config > ConnectDevice
3. Change KDC to pairing Mode
4. The iPhone/iPad/iPod touch will find a new device as “Keyboard”.
5. Click “Keyboard” device- the iPhone/iPad/iPod touch will ask for the PIN number. The iPAD will ask
for 6 digits and the iPhone/iPod touch will ask for 4 digits
6. As soon as the iPhone/iPad/iPod touch asks for the PIN number, KDC will display the PIN digits
selection menu. By default, it is 6 digits.
7. Press the scan button to select the 6 digit PIN code for the iPad. Press the side down button and
press the scan button to select the 4 digit PIN code for the iPhone/iPod touch.
8. The iPhone/iPad/iPod touch will display the PIN code that users should enter into the KDC.
9. By default the KDC displays pin codes 555555(5555). Users can change the PIN code by using the
side UP button to increase numbers, side DOWN button to decrease numbers, and the SCAN button
to confirm and move to next digit
KDC250 User Manual
66
10. Once the last PIN number is entered, press and hold the SCAN button for a few seconds. KDC will
display “HID connected” and the iPAD/iPhone/iPod touch will display “Connected” if paired
successfully
How to disconnect and reconnect HID mode using Up
and Down Button keys.
1. Users needs to select the option to use this feature in the BT Config > HID Control.
2. Press the DOWN button to disconnect the HID connection and bring a soft keyboard.
3. Press the UP button to connect HID
4. The BT toggle is a useful feature if users desire to use both the KDC and soft keyboard.
KDC200i/300i connection using iPhone mode
[NOTE 1] Users have to RESET the iPhone/iPad/iPod touch to change “HID to iPhone mode” or “vice
versa”.
[NOTE 2] KDC with Bluetooth Spec2.1+EDR doesn’t prompt Pin code entry menu.
1. Download and install iKTSync from the Apple App Store.
http://itunes.apple.com/us/app/ktsync/id372916602?mt=8
2. Press the two KDC side buttons together to enter menu mode
3. Scroll down to “Bluetooth” menu using KDC Down button
4. Press the front middle scan button
5. Scroll down to “Discovering” and press the front middle scan button
A. “Discovering Started …” message will be displayed on KDC screen
B. Discovering will take about 30 seconds.
6. Select discovered iPhone/iPod touch device name and press the front middle scan button
A. [Pin Code] User Default/Enter PinCode will be displayed
B. Press the front middle scan button to select the “Use Default” option
C. “Connencting to iPhone/iPod touch device name” will be displayed
D. iPhone/iPad/iPod touch will ask for the PIN number.
E. Please enter “0000” and hit “connect” icon
F. “iPhone Connected” message will be displayed
7. Launch KTSync and configure Settings
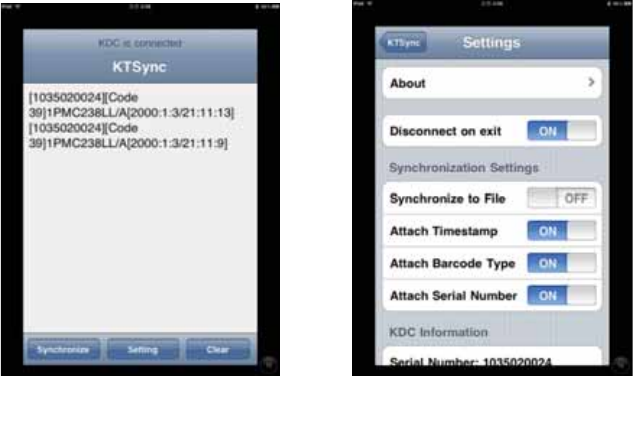
KDC250 User Manual
67
How to connect and reconnect iPhone mode using UP
keys.
1. Users needs to select the option to use this feature in the BT Config > iPhone Button
2. Press the UP button to connect or reconnect to the iPhone/iPad/iPod touch
Figure 20 – iPad/iPhone/iPod touch KTSync
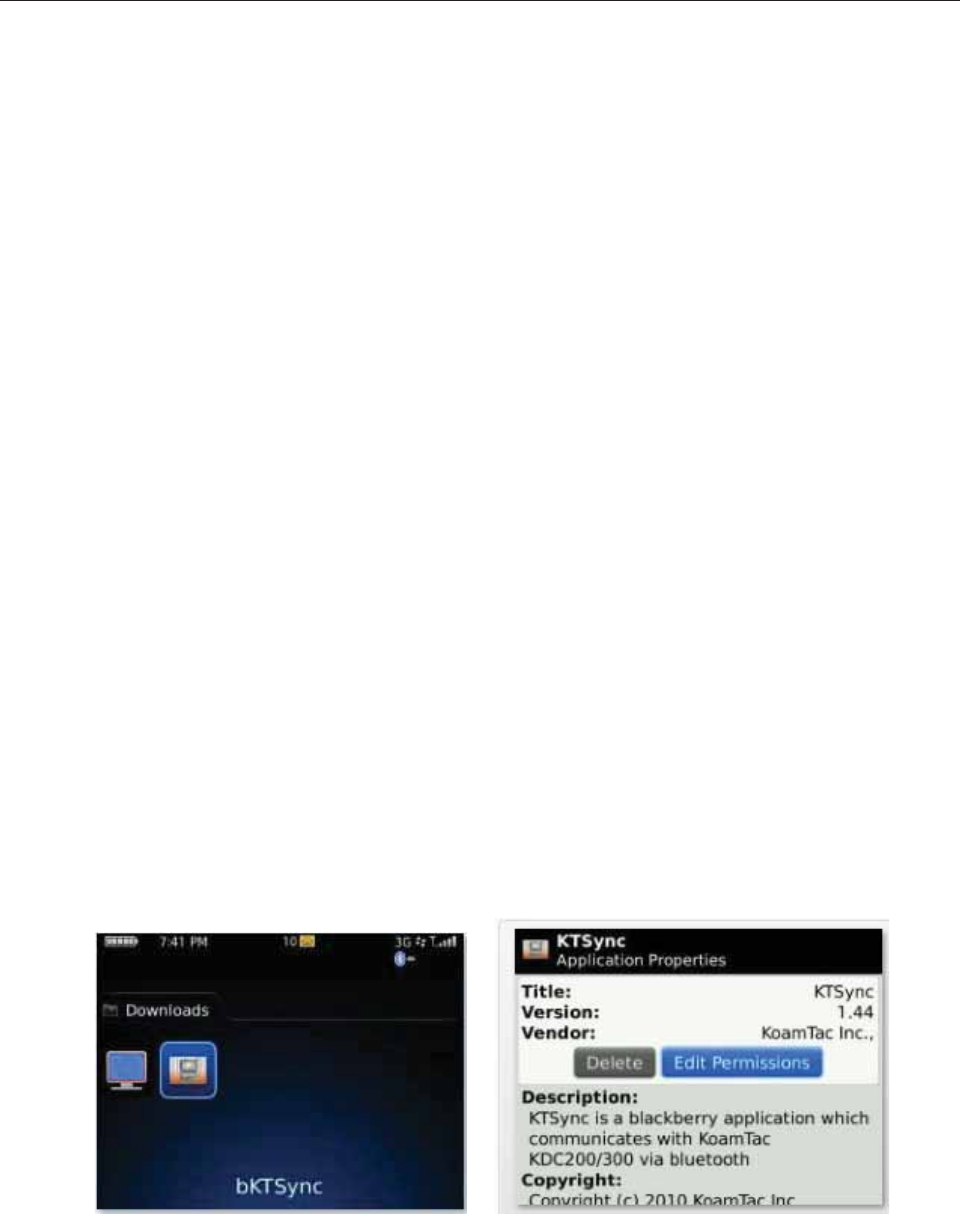
KDC250 User Manual
68
6.9 Blackberry bKTSync
The bKTSync provides limited functionality of PC KTSync for Blackberry users.
[NOTE] KDC with Bluetooth Spec2.1+EDR doesn’t prompt Pin code entry menu
1. Download and install bKTSync from the Blackberry App World.
http://appworld.blackberry.com/webstore/search/ktsync?lang=en
2. Go to Blackberry Options > Applications menu and Enable ˈInput Simulationˉ option
3. Change KDC Bluetooth profile in “ConnectDevice” option to “SPP”
4. Execute Blackberry Bluetooth manager and KDC Bluetooth pairing option
A. Execute KDC Bluetooth “Pairing” option
B. Launch the Blackberry Bluetooth manager and select “Search”. The KDC model and 6 digits of the
serial number would be displayed.
C. Highlight the KDC and press the Enter or Select Key
D. Enter “0000” PIN code and press the Enter or Select Key
E. The Blackberry will display “Pairing with KDC”…”complete.”
F. Close the Blackberry Bluetooth manager
5. Go to Downloads folder and execute KTSync
6. User can configure KDC options in KDC settings and Symbologies Settings menu
7. Go to KTSync Synchronization Settings and select Destination. To send collected barcode as an email
attachment, choose ˈEmail Attachmentˉ as destination, enter email address, subject and body message.
You can enter multiple email addresses using the semicolon(;) separator.
8. To scan barcodes into any application (like email, notes, worksheet or web browser), press the menu key
and select “Running in the background” option. bKTSync will maintain the connection and place the
scanned barcode data where ever the cursor is flashing.
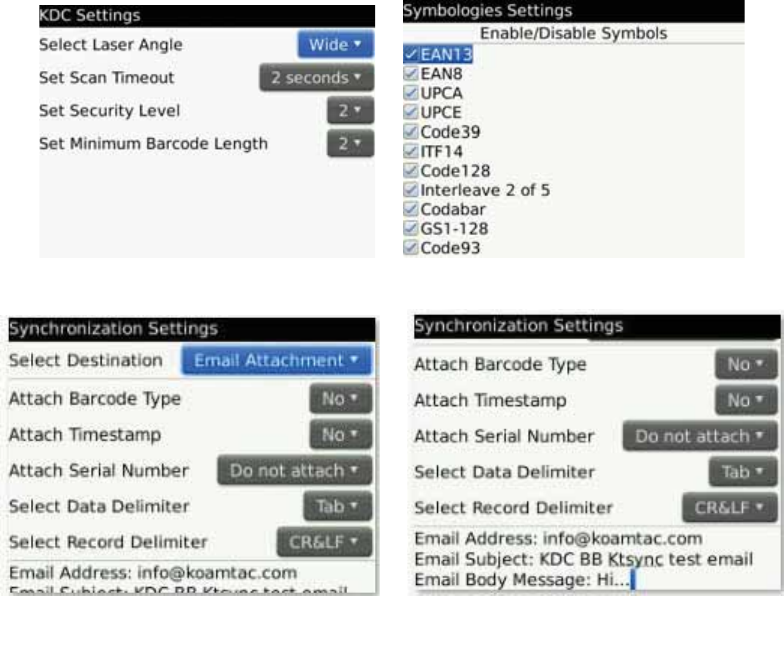
KDC250 User Manual
69
Figure 21 – Blackberry bKTSync
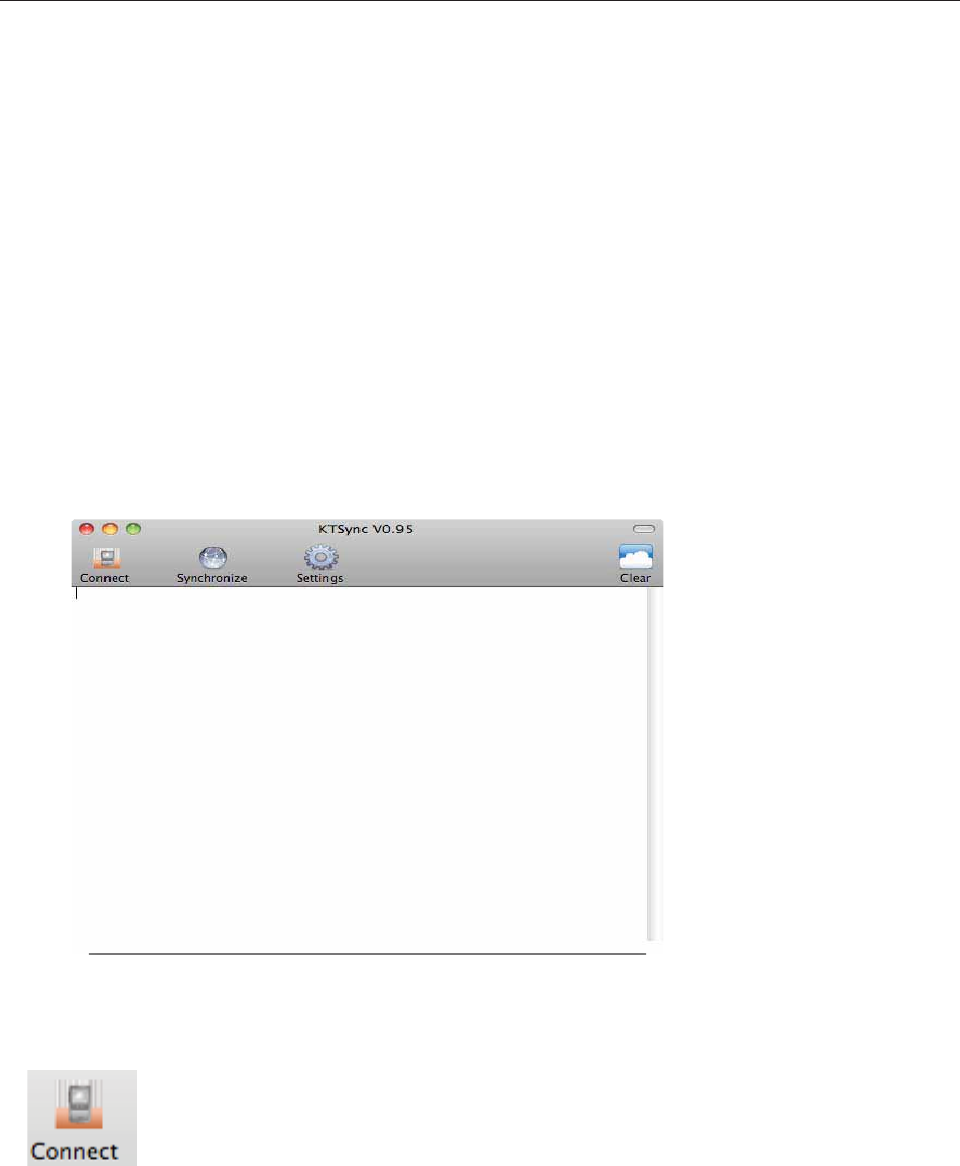
KDC250 User Manual
70
6.10 KTSync for Mac OS X
The KTSync Mac OS X version provides limited functionality of PC Windows KTSync for Mac OS X
users.
[NOTE 1] KTSync for Mac OS X version only supports Bluetooth SPP profile. User should pair
KDC with Mac before launching KTSync program.
[NOTE 2] Mac OS X version KTSync is built as a X86 binary application and works with the Intel
based Mac. It is verified on Mac PC running Mac OS X 10.6.5 only.
KTSync Mac OS X version supports following features.
z Keyboard wedge function to the active window or any registered user application
z Synchronize to a file, active window and user defined application.
z It allows adding serial number, timestamp and various data and record delimiters.
User will see the following initial KTSync screen once launching the program.
Connect Button
User can connect the Mac with paired KDC by clicking the Connect button. The following screen will be
displayed when this button is pressed and KTSync will start to connect to the selected KDC.
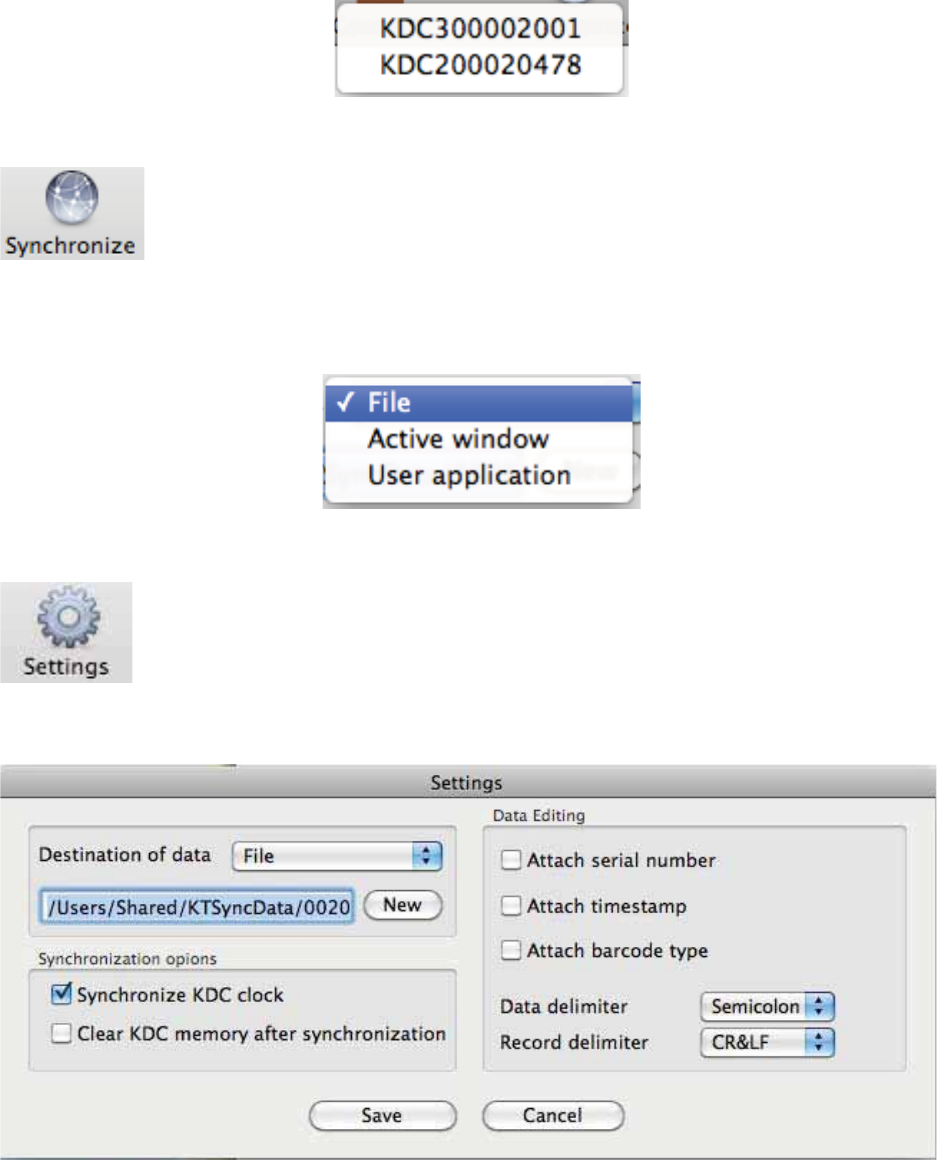
KDC250 User Manual
71
G
Gz¡GiG
User can start the synchronization process by pressing the Synchronize button. User can select the
destination of barcode data in the settings menu. There are 3 selectable destinations.
G
GzGiG
User can configure synchronization options by pressing the Settings button.
G
G
z Destination of data
¾ The KTSync program wedges or downloads barcode data to the one of following 3
destinations.
9 File: The KTSync makes file name based on current date and time and stores into a
default directory /Users/Shared/KTSyncData directory. User can define other

KDC250 User Manual
72
directory by clicking “New” button. The maximum file path length is a 128 characters.
9 Active window
The KTSync sends barcode data to current active window if Active window option is
selected.
9 User application: User can define the target .app application by pressing “New” button.. The
maximum application name path length is 128 characters.
z Synchronize KDC clock
KTSync will set KDC’s date and time with Mac PC date and time when KDC is connected to Mac if
this option is enabled.
z Clear KDC memory after synchronization
KTSync clears barcode date stored in KDC memory once synchronization has finished if this
option is enabled
z Attach serial number
The KTSync would add a KDC serial number to barcode data if this option is enabled.
z Attach time stamp
The KTSync would add timestamp to barcode data if this option is enabled.
z Attached barcode type
The KTSync would add barcode type to barcode data if this option is enabled.
z Data delimiter
This option is used to select a character to be added between barcode data, serial number,
timestamp and/or barcode type is attached to barcode data. User can select one of “None”, “Tab”,
“Space”, ‘Comma” and “Semicolon” as data delimiter.
z Record delimiter
This option is used to select a character to be added at the end of barcode record. User can select
one of “None”, “CR”, “LF”, TAB”, and “CR&LF” as record delimiter.
Clear Button
User may press this button to clear KTSync internal viewer.
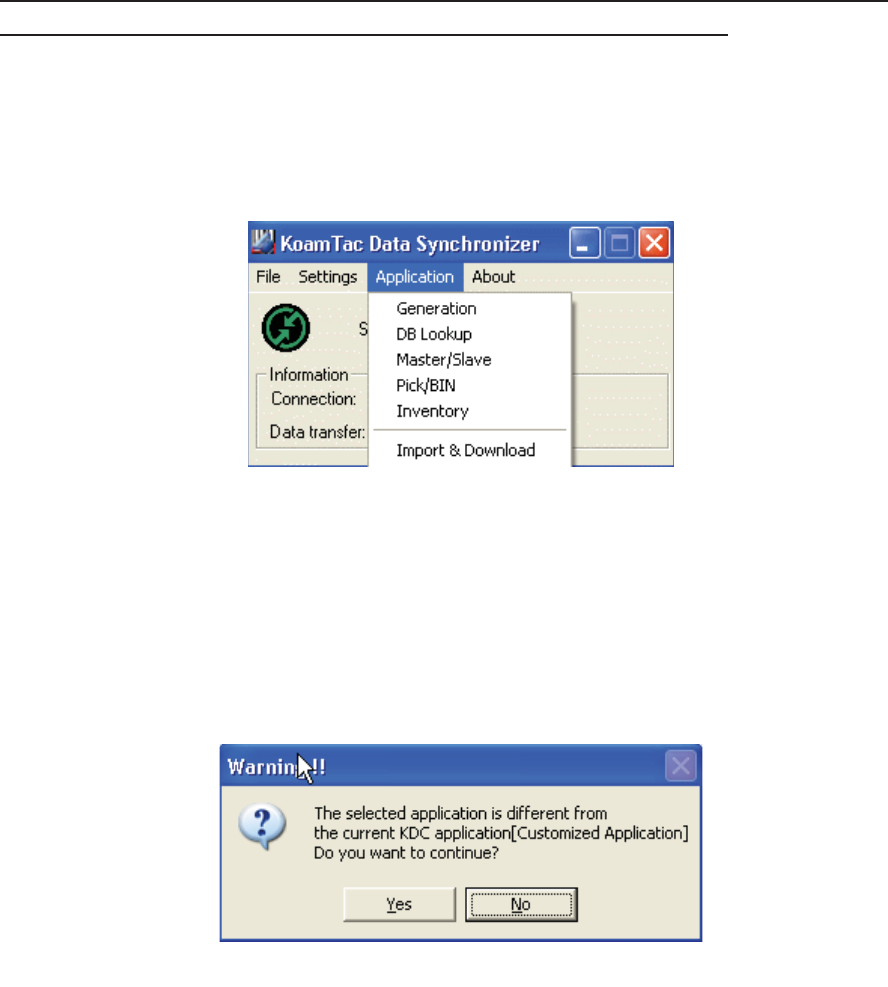
KDC250 User Manual
73
7. APPLICATION GENERATION
[NOTE] KDC FW2.85.200.x doesn’t supports the Application Generation feature. Users should
upgrade FW2.85.200.x to FW2.86.200.x to use Application Generation feature
When you select Application menu from the KTSync, you can choose from the following five Applications
– Generation, DB Lookup, Master/Slave, Pick/BIN, and Inventory. Users can also download saved
programs using Import & Download option.
When the Application tool is selected, the KDC will beep once to acknowledge a connection between the
KDC and the Application tool. KTSync would popup the following warning window if downloaded
application in KDC doesn’t match with KTSync application tool.
[Note] KDC would wedge barcode data to the host in application mode if “wedge and store always”
option in data process menu is selected and KDC firmware version is higher than 2.86.xxx.G.
Figure 22 – Application Menu
Figure 23 – Application Warning Window
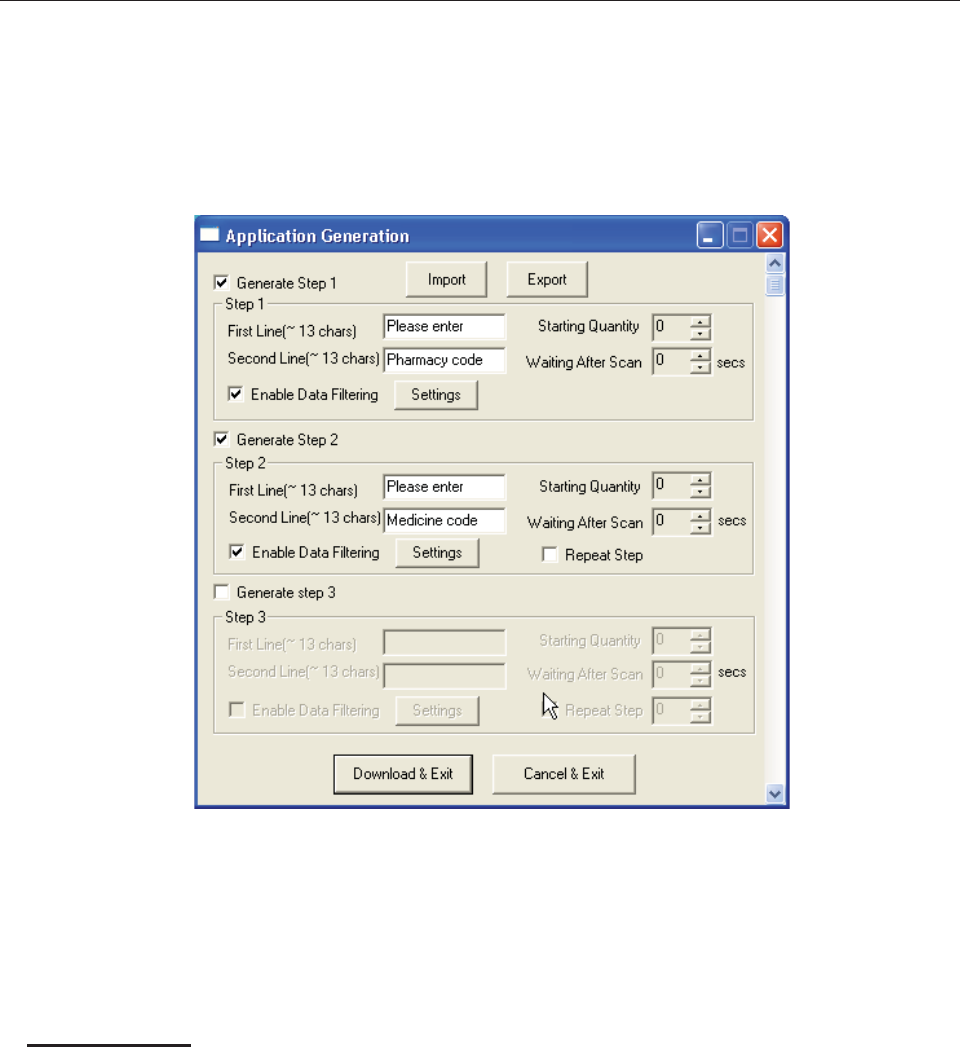
KDC250 User Manual
74
7.1 Application Generation
KDC Application Generation tool is a robust feature that allows you to create custom applications for
collecting and managing barcode data. To create a custom application, select the Generation submenu
from the Application menu in KTSync®.
Generate Application
Generate step 1 - To generate a custom application, click on the Generate Step 1 box which enables
you to define the user prompts and data collection settings for Step 1 of your custom application. Below
is a description of each field. These prompts are the same when selecting Generate step 2 and
Generate step 3. NOTE: Your custom application can include only Step 1.
zFirst line
Enter up to 13 characters which will display on the first line of the KDC
zSecond line
Enter up to 13 characters which will display on the second line of the KDC
Figure 24 – Application Generation Menu
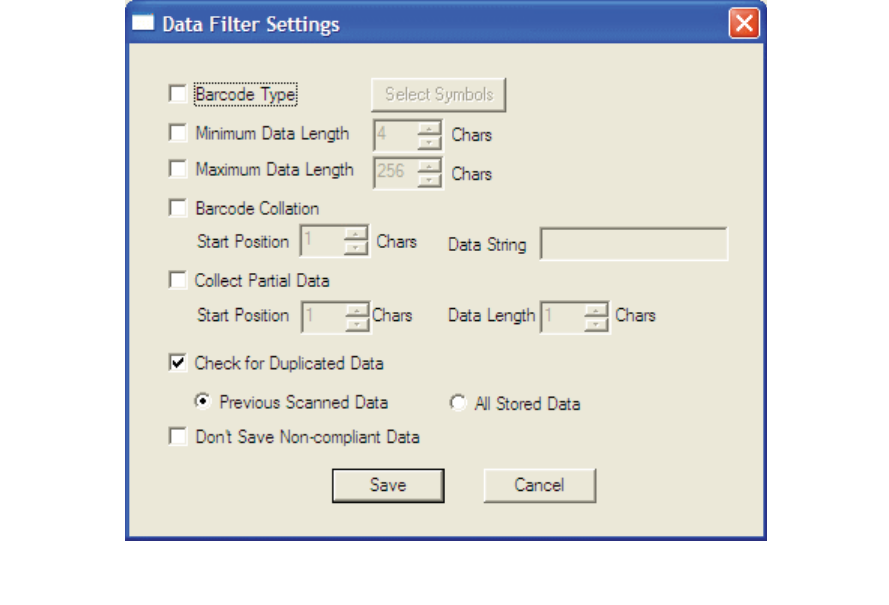
KDC250 User Manual
75
zStarting quantity
Enter a predefined start quantity for each scanned barcode. The start quantity can be defined from
1 to 128 and is modifiable using up or down side key.
zWaiting to scan
Enter the number of seconds the KDC pauses before the user prompts display. During this timeout
period, the user can modify the quantity. If this field is set to zero, the quantity field cannot be
adjusted. This field can be defined from “-1” to “30” seconds. “-1” second enables infinite waiting of
user quantity input.
zEnable data filter
Click on this box to enable the data filtering option. Data filtering allows you to predefine different
aspects of the barcode data you are collecting.
Data Filter Settings
When you select Enable data filtering, you must click on the Settings box to select the Data filter setting.
The option for the data filter settings are the same for Step1, Step 2, and Step 3.
Figure 25 – Data Filter Settings
KDC250 User Manual
76
zBarcode Type
This field allows you to select the type of barcodes the KDC will collect. When you click on the box,
Select Symbols is enabled. A listing of the symbologies supported by the KDC displays. To select
a barcode symbology, click on the box associated with the symbology.
zMinimum Data Length
This field allows you to define the minimum length of the scanned barcode. The length can be
between 2 and 36 characters. If a user scans a barcode whose length is less than the defined
length, the barcode data is not collected.
[Note] The default KDC minimum barcode length defined in scan option is 4. Therefore, users
should change KDC minimum barcode length to 2 or 3 to define minimum data length to 2 or 3.
zMaximum Data Length
This field allows you to define the maximum length of a scanned barcode. The defined length can
be between 2 and 256 characters. If a user scans a barcode whose length is greater than the
defined length, the barcode data is not collected.
[Note] The default KDC minimum barcode length defined in scan option is 4. Therefore, users
should change KDC minimum barcode length to 2 or 3 to define maximum data length to 2 or 3.
zBarcode Collation
This option enables you to define a data string that the KDC will use to compare scanned barcodes.
o Starting Position – This is the start position of the scanned barcode data to be compared
with the defined data string.
o Data String – This is the defined value to be compared with scanned barcode data. This
value can be up to 32 characters
zCollect Partial Data
This option allows you to define partial barcode data to be collected when a barcode is scanned.
Only the partial data will be stored in the KDC.
o Start position – This is the starting position that the KDC will use when collecting scanned
barcode data.
oData Length – This is the length of partial data to be stored by the KDC
zCheck for Duplicated Data
This option allows you to prevent collecting duplicated data.
o Previous Scanned Data – This option allows you to compare the scanned barcode with the
previously scanned barcode and treat it as non-compliant data if you scanned the same
barcode twice.

KDC250 User Manual
77
oAll Stored Data – This option allows you to compare the scanned barcode with stored
barcode data and treat it as non-compliant data if the same barcode already scanned and
stored.
zDon’t Save Non-Compliant Data
This field tells the KDC how to manage non-compliant data based on the defined data filtering
fields. If this field is enabled, non-compliant data is NOT stored in the KDC. If this option is not
enabled, non-compliant data is stored.
Generate step 2
To include another step in your data collection process, click the box, Generate step 2. This step has
the same options as Step 1. In this step, you have the option of repeating step 2 by clicking the box,
Repeat Step. NOTE: This field is disabled when your application has three steps.
Generate step 3
To include a third step, click the box, Generate step 3. This step has the same options as step 1 and 2.
However, in this step you have the option to repeat steps 2 or 3.
Application Download and Execution
Prior to running your application, it must be downloaded to KDC.
zClick “Download” icon from Application Generation Window.
zChange KDC from Normal mode to Application mode.
- Press two side buttons simultaneously to enter menu mode
- Select KDC mode and enter scan button
- Change to Application mode
- Save and exit from menu mode
zKDC will run in normal mode if you don’t change to Application mode after downloading the
application.
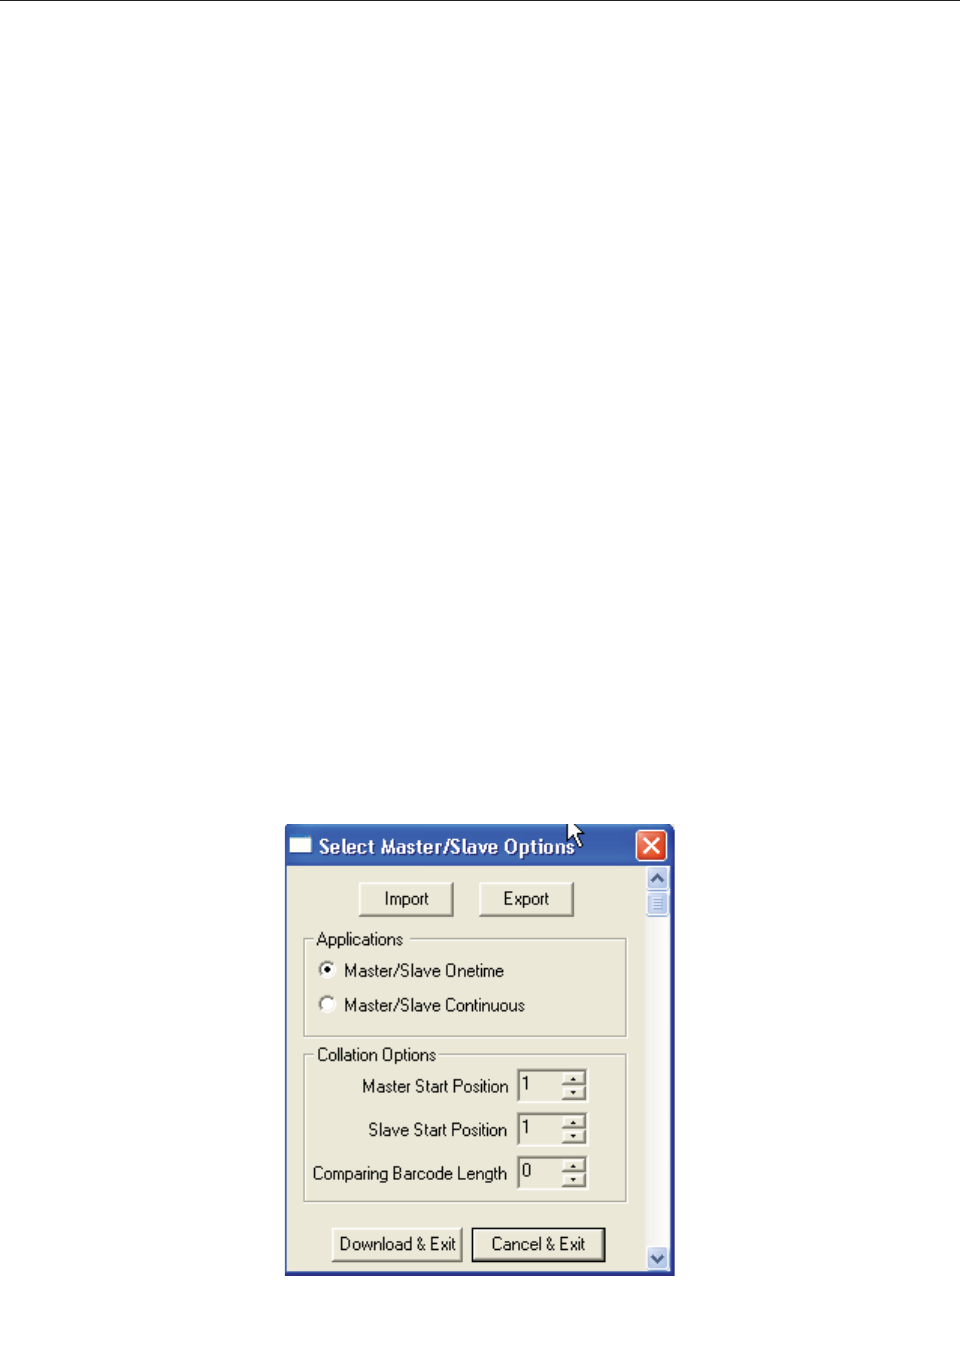
KDC250 User Manual
78
7.2 Predefined Applications
KTSync provides four Predefined Applications – Master/Slave, Pick/Bin, DB Lookup and Inventory.
Master/Slave
Master/Slave predefined application allows you to define a master barcode for comparison with one or
more slave barcodes. The predefined application can be run once or continuously and within either setting,
you can define a substring for comparison of master and slave barcodes.
zMaster/Slave Onetime
Define one master barcode and compare it with one slave barcode.
zMaster/Slave Continuous
Define one master barcode and compare it with multiple slave barcodes.
zCollation Options
Works in either Onetime or Continuous Mode to compare a substring within the master and slave
barcodes.
9 Master start position - Select the numeric position of start substring character in Pick
barcode, 1 to 255
9 Slave start position - Select the numeric position of start substring character in Pick
barcode, 1 to 255
9 Comparing Barcode Length - Number of characters to be compared, 0 to 255. 0 means all
characters.
Figure 26 – Master/Slave Application Settings
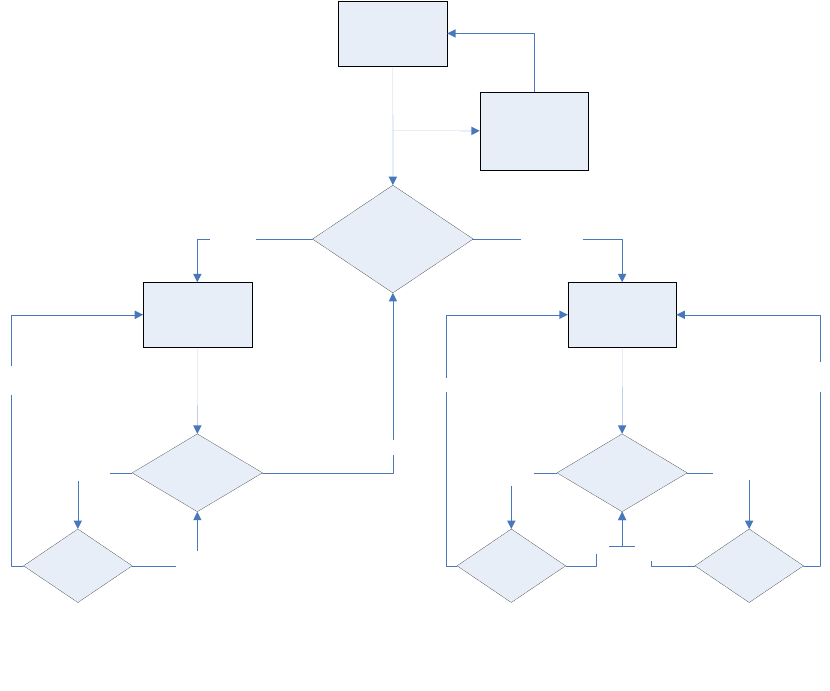
KDC250 User Manual
79
Figure 27 – Master/Slave Application Flow Chart
Collation :
Define substring to
be compared.
Default is entire
barcode
Scan Maste
r
Barcode
Scan Maste
r
Barcode
Onetime Continuous
Select MS Mode :
(Onetime,
Continuous)
Scan Check
Barcode
KDC Mode
Up or Down
Key?
Mismatched
Matched
Up
Key
Down
Key
Scan Chec
k
Barcode
Up or Down
Key?
Matched Mismatched
Up Key?
No
Yes
Down
Key
Up
Key
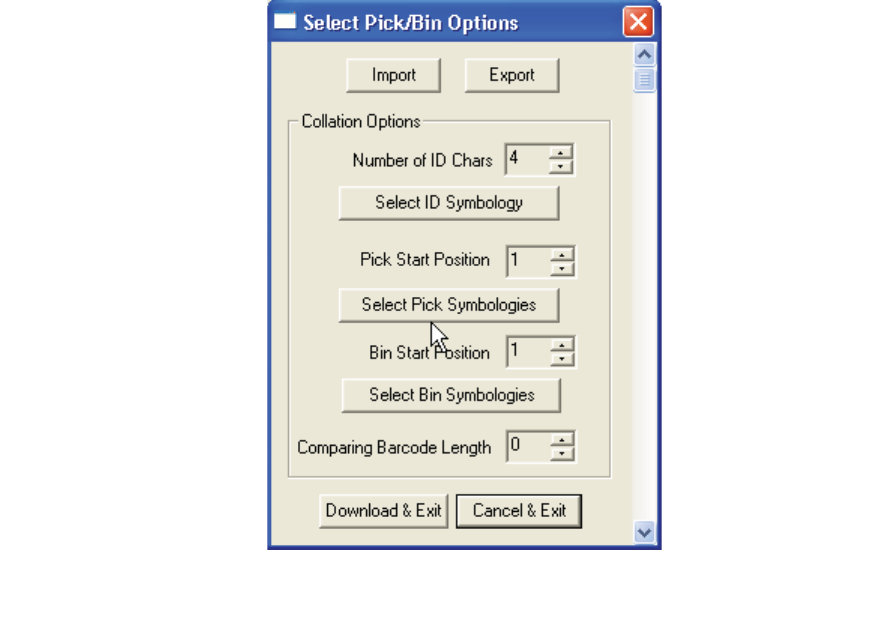
KDC250 User Manual
80
Pick/Bin
The Pick/Bin predefined application is a special version of the Master/Slave predefined application. The
Pick/Bin application allows you to define Pick ID and the barcode symbology for comparison with a
defined Bin.
zNumber of ID and Symbology
Define Pick ID characters from 1 to 32 and the barcode symbology.
zPick Start Position and Symbology
Select numeric position of start substring character in Pick barcode from 1 to 255 and the barcode
symbology.
zBin Start Position and Symbology
Select the numeric position of start substring character in Bin barcode from 1 to 255 and the
barcode symbology.
zComparing Barcode Length
Select the number of characters to be compared from 0 to 255. 0 means all characters.
Figure 28 – Pick/BIN Application Menu
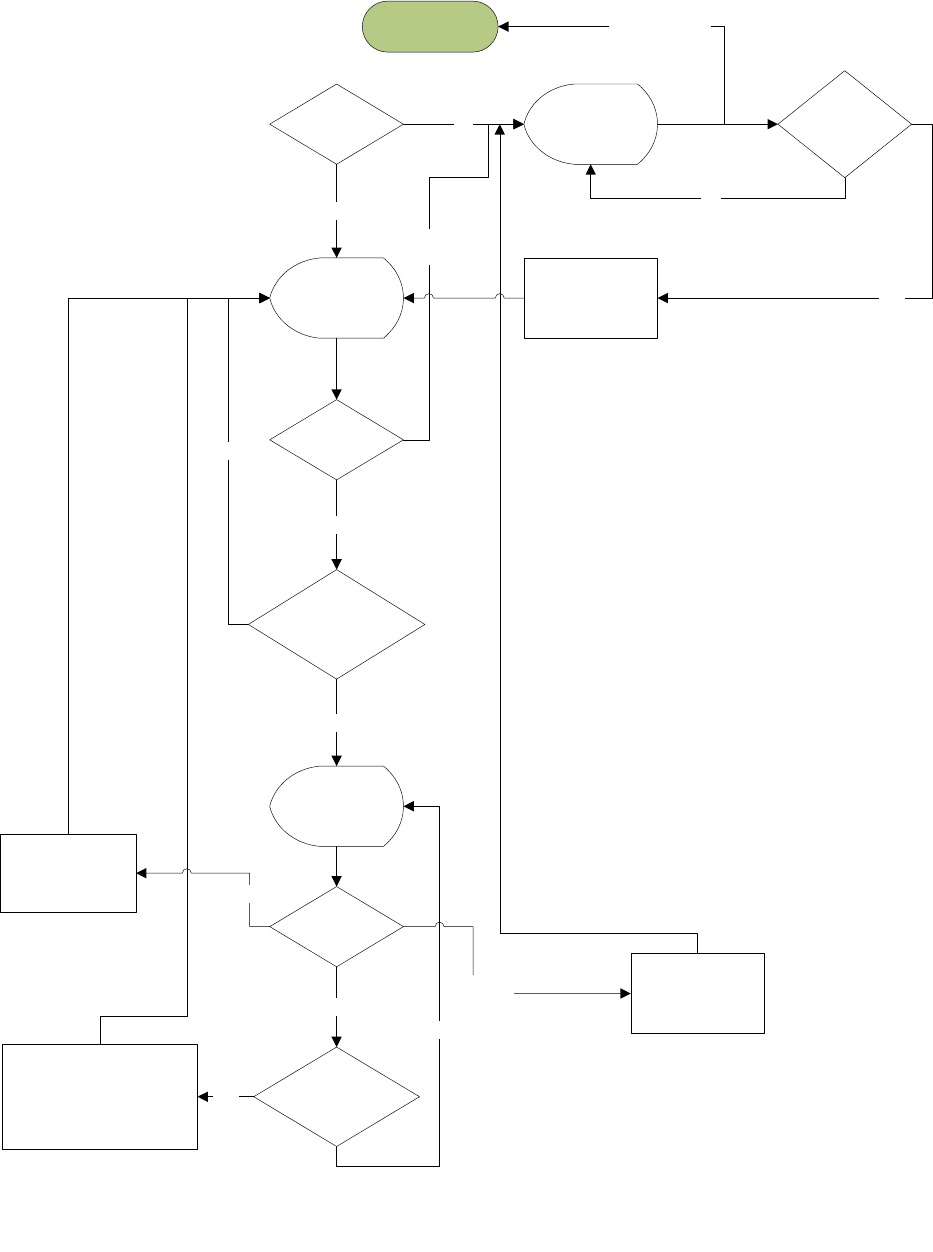
KDC250 User Manual
81
User ID
Defined Scan User ID Valid User ID
Store User ID
Please
scan Pick data
User Input
Valid Barcode
Please scan
Bin data
User Input
Barcode
Match?
No
Yes
Yes
No
Up
Side Key
Scan button
Yes
No
Up
Side Key
Scan button
Yes
No
Ignore Scanned
Pick Label
Timeout
Ignore Scanned
Pick Label
Store
User ID,
KDC Serial Number,
Timestamp,
Pick Barcode
Exit to KDC Menu <Up>+<Down>
Figure 29 – Pick/BIN Application Flow Chart
KDC250 User Manual
82
DB Lookup Application
The DB Lookup application allows you to download a database to the KDC which can then be utilized for
advanced AUTO-ID applications like displaying additional data after scanning a barcode. For example,
using our DB Lookup application, you could download a product database including information such as
description, price, and stock quantity. With the advanced data functionality built-in to the KDC, you could
easily display product price, description, and stock level after the product’s barcode is scanned.
Functionality of DB Lookup Application
x The database size cannot exceed 800 records.
x The maximum record size is 128 bytes.
x Each record can have up to 4 fields including the barcode which is the primary key.
x The maximum field size is 39 characters.
x Quantities can be entered by pressing the UP or DOWN scroll buttons after DB fields displayed.
x Quantity can be 1 to 128.
x User can create a database using Microsoft Excel.
o Excel file must be saved as .txt.
o Records should be separated by CR/LF
o Fields should be separated by TAB.
o Database should end with CR/LF.
o Last 4 bytes of database should be CR/LF/CR/LF.
DB Lookup Fields and Settings
zDownload DB to KDC - Downloads user created database to KDC.
zStarting Quantity - Enter predefined start quantity for each scanned barcode. The start quantity
can be defined from 1 to 128 and is modifiable using up or down scroll buttons.
zBarcode Field - Select the position of barcode field in database from 1 to 4.
zStored Barcode Start Position - Select the numeric position of start substring character of
barcode in database from 1 to 39.
zScanned Barcode Start Position - Select the numeric position of start substring character of
scanned barcode from 1 to 39.
zComparing Barcode Length - Number of characters to be compared from 0 to 255 where 0 is all
characters.
zDisplay on KDC - Define database fields to be displayed on KDC. KDC can display one to three
fields. KDC will display one field in two or three lines if same field is specified in line entering option.
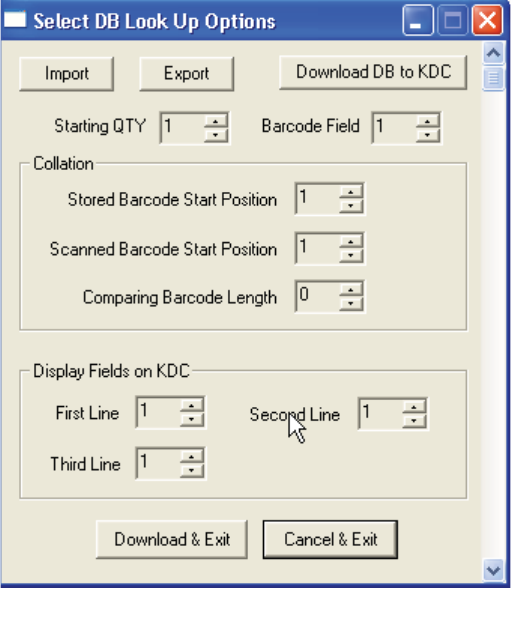
KDC250 User Manual
83
Figure 30 – DB Lookup Application Menu
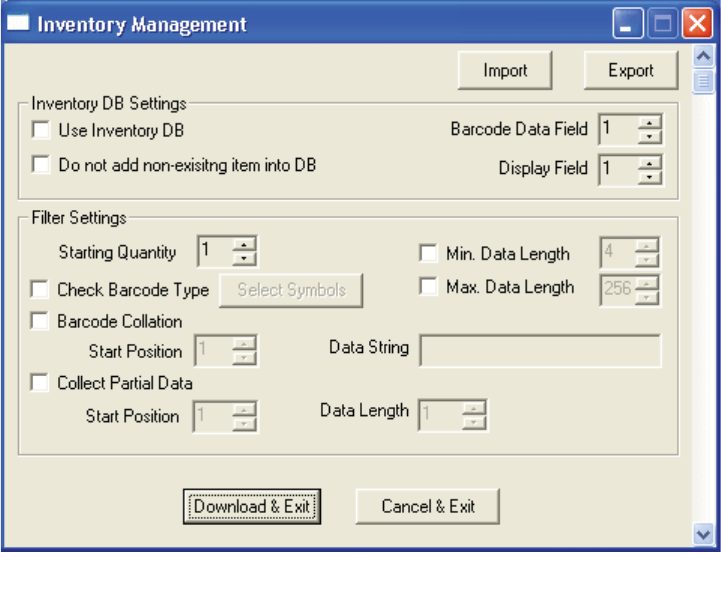
KDC250 User Manual
84
Inventory Application
The Inventory application allows you to count inventories by scanning inventory barcodes. This application
will increase inventory item count if the same item is scanned. Users can also download an inventory
database to the KDC. KDC will display inventory description after scanning a barcode if inventory DB is
downloaded.
Functionality of Inventory Application
x The inventory cannot exceed 800 items.
x The maximum record size is 128 bytes.
x Each record can have up to 4 fields including the barcode which is the primary key.
x The maximum field size is 39 characters.
x Quantities between 1 to 32786 can be entered by pressing the UP or DOWN scroll buttons after
inventory is scanned.
x Starting Quantity can be 1 to 128.
x Min/Max. Data Length is between 2 to 256 (KDC100/200) or 4 to 256 (KDC300)
x Barcode Collation Start Position is between 1 to 256
x The length of Collation Data String is between 1 to 30
x Collect Partial Data Start Position is between 1 to 256
x Collect Partial Data Length is between 1 to 256
x Users can create an inventory database using Microsoft Excel.
o Excel file must be saved as .txt.
o Click User Inventory DB option to display inventory description
o Click Do not add non-existing item into DB if one do not wish to add new items into inventory DB
o The number of Barcode Data Field is between 1 to 4
o The position of Display Filed is between 1 to 4
Figure 31 – Inventory Application Menu

KDC250 User Manual
85
8. Troubleshooting
PROBLEM CAUSE SOLUTION
KDC not working Dead battery zCharge battery by connecting KDC to your PC using the
included cable
Hardware failure z Contact distributor for technical support
KDC not charging
Bad battery zReplace battery – Contact Local Distributor
Poor USB port z USB port doesn’t supply proper current to KDC - Charge KDC
using a different USB port on your PC
Failed reading
Damaged barcode zScan a different barcode
Out of scan range zMove the scanner closer to barcode
z Move scanner farther from the barcode
Incorrect angle z Change the angle of scanner to barcode
Symbology
not supported
z Contact KoamTac - www.koamtac.com for possibility of
custom symbology support
Scan options z Check scan option settings
Dirty scan window z Clean scan window
Damaged scan window z Replace scan window
KDC reads
wrong barcode
Dirty scan window zClean scan window
Damaged scan window z Replace scan window
Poor quality barcode
zSelect only necessary barcodes
zIncrease minimum barcode length
z Increase security level
Can’t communicate
with PC, PDA,
or smartphone
USB cable is not
connected properly zCheck cable connection between KDC and host device
Software is not
working properly z Reload the software
COM configuration z Check COM port configurations
LED blinks yellow Low battery power zCharge the battery by connecting KDC to PC.
zKDC will lose collected data if the battery is empty.
Buffer Full Message Full Memory zClear the Memory using Synchronization program
Empty Battery
Message Empty battery zConnect USB immediately.
zSynchronize the collected data and charge KDC
Abnormal KTSync
Operation on DELL
PC
Quickset Utility zDisable Quickset Utility before using KTSync.
zDell Quickset utility interrupts normal KTSync operation
WSED Utility
zDisable WSED Wireless enable/disable utility
zdelete the folder C:\Program Files\WSED,
which contains a file WSED.exe, with the same icon as
in the taskbar
zDelete the registry entry KEY_LOCAL_MACHINE
\SOFTWARE\Microsoft\Windows\CurrentVersion\Run\WSED
Table 5 - Troubleshooting Techniques
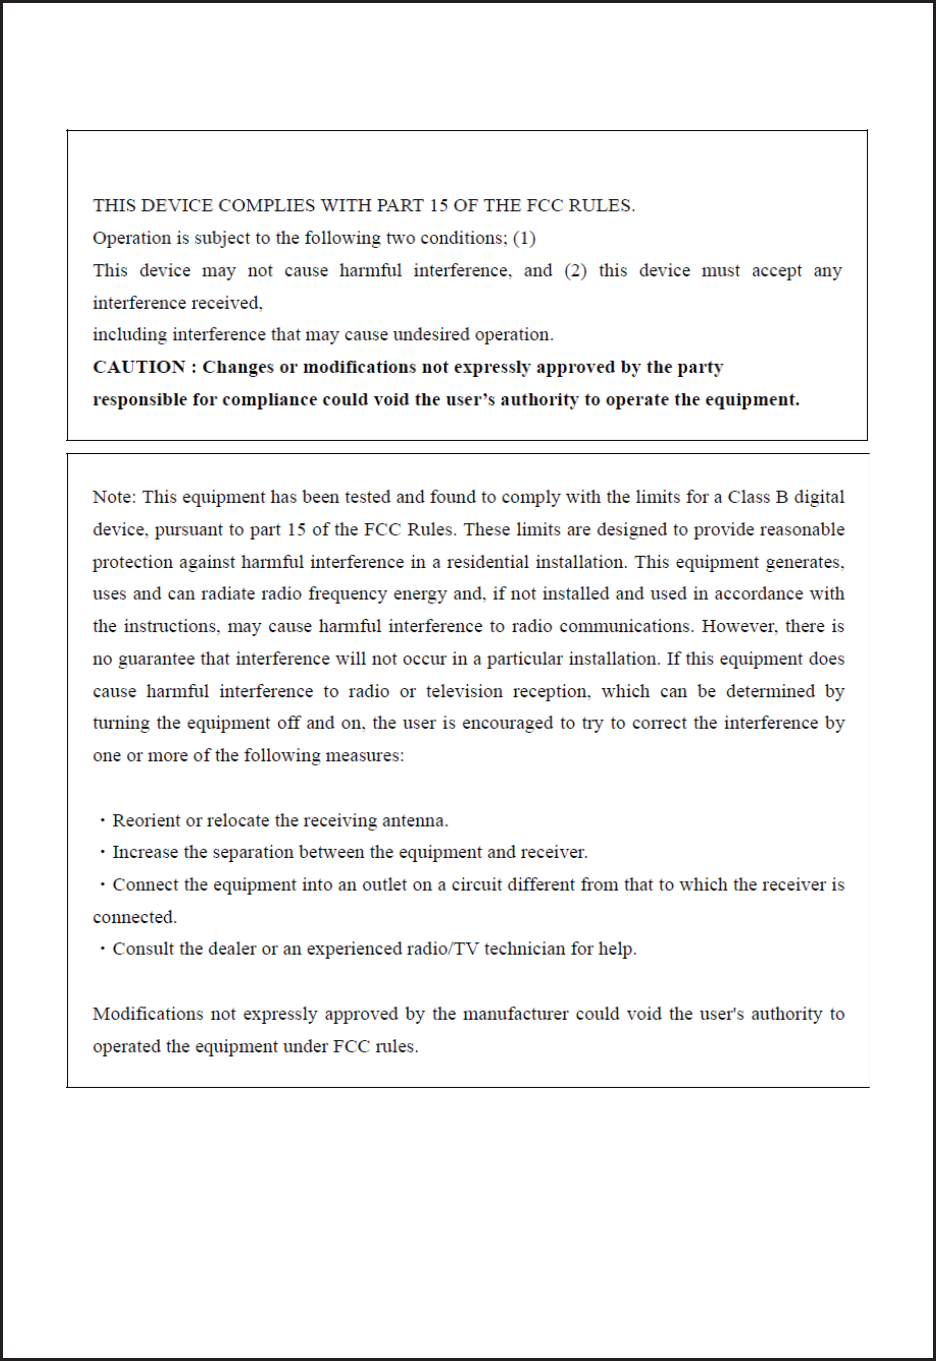
WSP-i450 Rev. 1.0
http://www.woosim.com 30
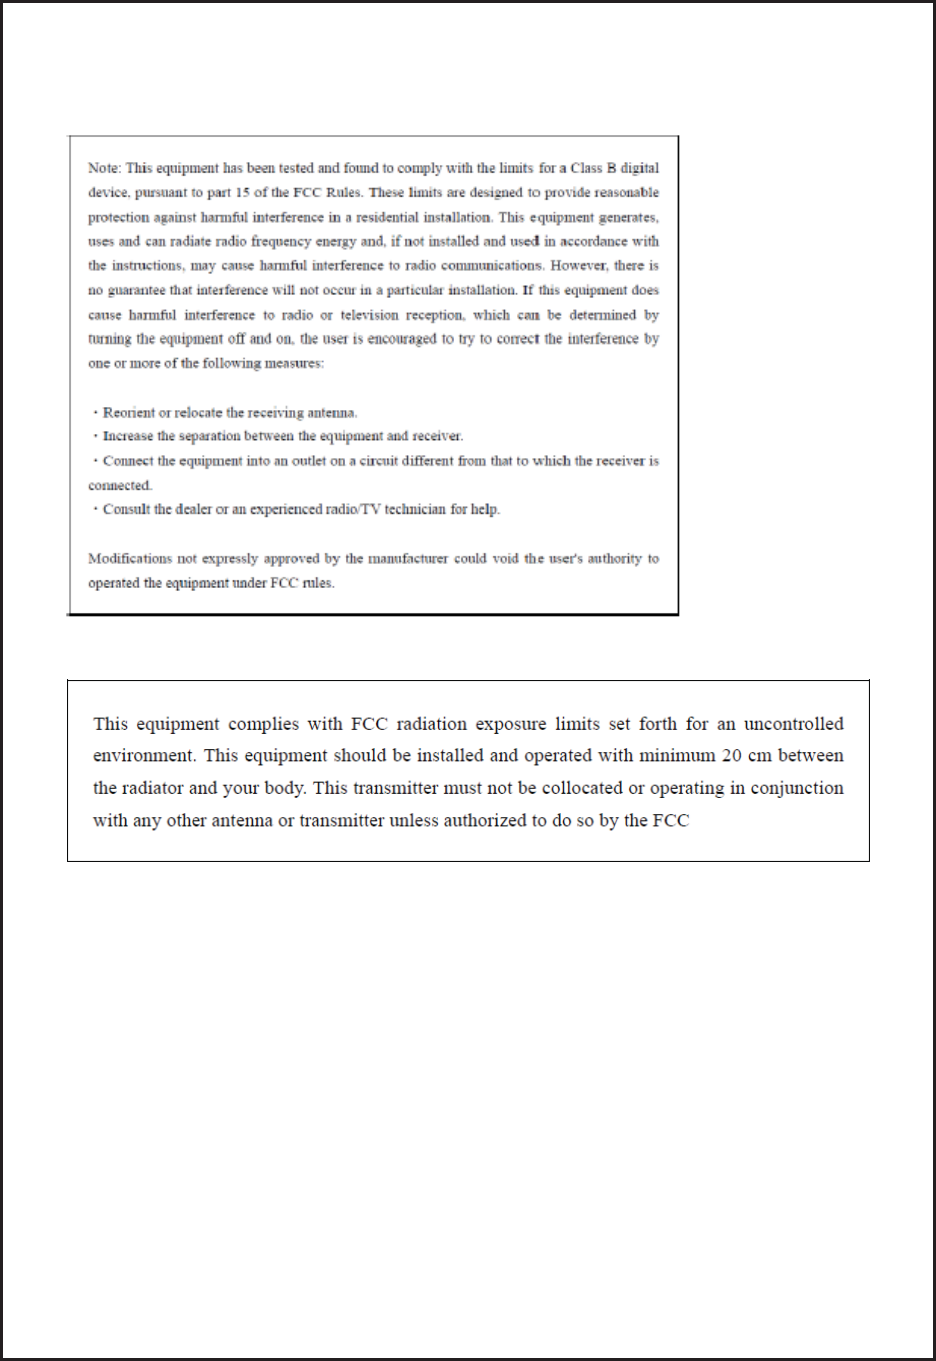
WSP-i450 Rev. 1.0
http://www.woosim.com 31

KDC250 User Manual
88
APPENDIX A - Barcode & Scan Options
The process for scanning and reading barcodes is delicate and complicated. Although your KDC is
equipped with a high performance scan engine, if configured incorrectly it may not perform at its peak
performance level. To ensure its high performance, the KDC comes configured to optimize its scan
engine technology. Unless you clearly understand the impact of your changes to the KDC settings,
please do not change factory default settings.
A.1 Symbologies
KoamTac’s KDC products support most major barcode symbologies including 1D, 2D, Postal, and OCR-
Fonts. Below is a list of the barcode symbologies supported by the KDC with respect to each models
particular area of support. To ensure superior scan performance, remember to select only the required
symbologies.
KDC100 KDC200 KDC300
1D
Barcodes
EAN13, EAN8, UPCA,
UPCE, Bookland EAN,
EAN13 with Addon, EAN8
with Add-on,
UPCA with Add-on,
UPCE with Add-on,
Interleave 2 of 5, ITF14,
Code128, Codabar, GS1-
128, Code39, Code93, &
Code35
EAN13, EAN8, UPCA,
UPCE, Bookland EAN
EAN13 with Add-on, EAN8
with Add-on,
UPCA with Add-on,
UPCE with Add-on,
Interleave 2 of 5, ITF14,
Code128, Codabar, GS1-
128, Code39, Code93, &
Code35
Codabar, Code11, Code32,
Code39, Code128, EAN8,
EAN13, GS1-128, I2of5,
MSI, Plessey, PosiCode,
GS1 DATABAR OMNI,
GS1 Limited, GS1
Expanded, S2of5IA,
S2of5ID,
TLC39, Telepen, Trioptic,
UPCA, & UPCE
2D
Barcodes N/A N/A
AztecCode, AztecRunes,
CodablockF,Code 16K,
Code49, DataMatrix,
MaxiCode, MicroPDF,
PDF417, & QRCode and
HanXin Code
Postal
Barcodes N/A N/A
AusPost, CanadaPost,
ChinaPost, JapanPost,
KoreaPost, KixPost,
Planet Code, Postnet (US),
& UKPost
OCR
Fonts N/A N/A
OCR-A, OCR-B,
OCRUSCurrency,
OCRMICRE13B, &
OCRSEMIFONT
Table 6 - Symbologies Supported by KDC
Bookland EAN vs. EAN-13
Bookland EAN which includes ISBN, ISSN, and ISMN, is supported by the KDC. This group of symbologies is
essentially an EAN-13 barcode with fixed prefixes; 977 for ISSN, 978 for ISBN, and 979 for ISMN. If EAN-13

KDC250 User Manual
89
and Bookland EAN are both enabled, Bookland EAN takes precedence. Bookland EAN does not have any
options. The Bookland EAN barcode does not contain any groupings – that is, there are no hyphens or
separators. Thus, the ISBN 957-630-239-0 is transmitted as 9576302390.
Add-on Symbologies
By default, the 2 or 5 digit add-on symbols with a UPCE, UPCA, EAN-8, and EAN-13 barcode is neither
decoded nor transmitted. Transmission for these specific symbologies is enabled by setting the appropriate
withAddon options. There are 4 withAddon options, one for each symbology:
UPCEwithAddon
UPCAwithAddon
EAN8withAddon
EAN13withAddon
The decoding of add-on symbols is typified by the following table, which explains the process for EAN-13
symbols.
Mode Behavior Value of flags
EAN13 EAN13withAddon
Auto-discrimination If add-on symbol is present, then it is also
decoded; otherwise only the EAN-13 symbol
is decoded.
true true
With add-on Only EAN-13 barcodes with 2 or 5 add-on
symbol are decoded.
false true
Without add-on The add-on symbol is ignored. true false
Table 7 - Add-on for EAN-13 Symbology
The add-on symbol is appended to the EAN-13 barcode. The process is similar for UPCE, UPCA, and
EAN-8 barcodes. Note that all the UPCE, UPCA, EAN-8, and EAN-13 formatting and conversion options
are in effect. The following table should help explain the effect of various options for EAN-8 barcode
12345670 + 12.
Barcode EAN8_as_EAN13 EAN8_ReturnCheckDigit EAN13_ReturnCheckDigit
1234567012
False
True
N/A
123456712 False
00000123456712
True N/A
false
000001234567012 true
Table 8 - Add-on for EAN-8 Symbology
The add-on symbol neither contains check digit nor a terminating guard band. Every effort has been made
to reduce the decoding error; however, it is likely to decode a partial scan of a 5-digit add-on symbol as a 2-
digit add-on symbol. It is strongly recommended that the minimum security level is set at 2 while decoding
add-on symbols. Since the decoder takes a conservative view on the add-on symbols, it is likely that the
add-on symbol will be missed in the auto-discrimination mode. Auto-discrimination mode should then be
avoided.

KDC250 User Manual
90
A.2 Code Options
The KDC supports the following barcode options:
zTransmission of start and stop characters
zReverse direction
zSymbology conversion
zVerification of optional check character
zTransmission of check digit
Transmission of Start and Stop Characters
For Codabar symbols you can choose not to transmit the start and stop symbols, the NOTIS Editing. By
default, they are transmitted. Setting the field CodaBar_NoStartStopChars to true disables the
transmission.
Reverse Direction
This option may be selected if direction oriented symbologies are selected such as Code35.
Symbology Conversion
By default the EAN-8, UPCE, and UPCA symbols are transmitted in their native format. It is possible to
show them in a different format. You can choose to display UPCE symbols as either UPC-A or EAN-13
symbols, EAN-8 symbols as EAN-13 symbols, or UPC-A symbols as EAN-13 symbols. The following
table shows the effect of setting various options.
Option EAN-8 UPC-A UPC-E All
others
EAN8_as_EAN13 Converted to
EAN-13 No effect No effect
No
effect
UPCA_as_EAN13 No effect Converted to
EAN-13 No effect
UPCE_as_EAN13 No effect No effect Converted to
EAN-13
UPCE_as_UPCA No effect No effect Converted to
UPC-A
Table 9 - Symbology Conversion
KDC250 User Manual
91
Verification of Optional “Check Digit”
Code39 and Interleave 2 of 5 have an optional check digit, which, by default, is not verified. Their
verification can be enabled by selecting the option VerifyCheckDigit to true or you can enable the
verification for individual symbologies. If the check digit verification fails then the barcode is not
transmitted.
Option Selected Verify Code39 check
digit
Verify I2of5 check digit
VerifyCheckDigit Yes Yes
Code39_VerifyCheckDigit Yes No effect
I2of5_VerifyCheckDigit No effect Yes
Table 10 - Verification of Optional "Check Digit"
Transmission of “Check Digit”
By default, the check digit – optional or mandatory – is not transmitted. Its transmission can be enabled
for all symbologies by enabling ReturnCheckDigit option.
Option Selected
Is the check digit returned?
EAN-
13
EAN-
8
UPC-
A
UPC-
E
Code39 I2of5
ReturnCheckDigit Yes Yes Yes Yes Yes Yes
EAN13_ReturnCheckDigit Yes No effect No effect No effect No effect No effect
EAN8_ReturnCheckDigit No effect
Yes No effect No effect No effect No effect
UPCA_ReturnCheckDigit No effect No effect Yes No effect No effect No effect
UPCE_ReturnCheckDigit No effect No effect No effect Yes No effect No effect
Code39_ReturnCheckDigit No effect No effect No effect No effect Yes No effect
I2of5_ReturnCheckDigit No effect No effect No effect No effect No effect Yes
Table 11 - Transmission of "Check Digit"

KDC250 User Manual
92
Resolution of Inconsistencies
Three types of inconsistencies could arise in the assignment of symbology options. The decoder has pre-
defined strategies to resolve these inconsistencies: If UPCE_as_EAN13 is true, then UPCE_as_UPCA
is ignored.
If symbology conversion is selected but the target symbology is not enabled, then the decoder still
outputs the symbol in the target symbology. For example, suppose UPC-E is enabled and
UPCE_as_EAN13 is true but EAN-13 is disabled. All UPC-E symbols will be shown as EAN-13 and
EAN-13 options (if specified) will be applied. For the two symbologies that have optional check digits,
Code39 and Interleave 2 of 5, the decoder will always transmit the check digit if the verification is
disabled.
Verify Check
Digit
Return Check
Digit Description
Disabled Enabled or
Disabled Check digit is not verified but is transmitted
Enabled Disabled Check digit is verified but is not transmitted
Enabled Enabled Check digit is verified and is transmitted
Table 12 - Resolution of Inconsistencies

KDC250 User Manual
93
A.3 Miscellaneous Barcode Information
Height of a Linear Barcode
Industry standards suggest a height of either 6.5mm or 15% of the symbol length, whichever is greater.
Symbols of less than recommended heights may cause recognition problems.
Check Characters
Yes, we recommend the use of check-characters in barcodes. Operating without check-characters is not
safe and will lead to errors that are costly to correct. Using check-characters positively affects data
integrity especially when character density is at the limits and/or image quality is not at its best.
Prevent Interleave 2 of 5 Partial Reading
A partial scan of an Interleave 2 of 5 symbol may decode and cause incorrect data to be read. To
prevent partial scans on long symbols, you should include bearer bars. These are bars that run along the
top and bottom edges of the barcode in the scanning direction. If a partial scan of the barcode occurs,
the scanning beam will hit the bearer bar and will not decode. The bearer bar must touch the top and
bottom of all the bars and must be at least 3 times as wide.
Another solution for the short scanning problem is to fix all Interleave 2 of 5 symbols to a set number of
digits. Zeros can be used to pad the data to the set number of digits. The application program would then
be set to only accept scans of the correct number of digits.
Finally, a check digit may be used. The Interleave 2 of 5 symbology has an optional check character
which uses a weighted Modulo 10 scheme. The check character is the last character in the symbol and
should be checked by the decoder and then transmitted with the data. Since Interleave 2 of 5 must
always have an even number of digits, the leftmost character may need to be a zero when the check
character is added. The standard check digit is calculated by assigning alternating 3,1,3,1… weights to
respective data digits. These weights are then multiplied by their respective data digits and the products
are summed. The check digit is the digit needed to be added to the sum to make it an even multiple of
10. An example would be if the sum of the products was 37, then the check digit would be 3.

KDC250 User Manual
94
Equation to Determining Potential Number of Stored
Barcodes
The number of barcodes that can be stored in the KDC memory depends on the size of the barcodes.
Example: If only UPCA barcodes are scanned and the check digit is not transmitted, then each barcode
takes up 11 (barcode data) + 2 (added bytes) + 2 (length and type) + 4 (time stamp) = 19 bytes. The
maximum number of UPCA barcodes that can be saved is 81,920/19 =4,311.
If different length barcodes are mixed, then you cannot compute the maximum number of barcodes that can
be stored.
Data Buffer Full
When the data buffer is full, the KDC displays a message, Buffer Full, ignoring any command to scan
barcodes. You must reset the data buffer to continue data collection.
KDC250 User Manual
95
Appendix B – FAQ
B.1 Symbology
Q: What barcode symbologies are supported by the KDC200?
A: The KDC200 supports most major 1D barcode symbologies. Below is a list of the1D symbologies
supported by the KDC200.
KDC300
2D Barcodes
AztecCode, AztecRunes, Codablock, Code16K,
Code49, DataMatrix, MaxiCode,
MicroPDF, PDF417, and QRCode
1D Barcodes
Codabar, Code11, Code32, Code39, Code128,
EAN8, EAN13, GS1-128, I2of5, MSI, Plessey,
PosiCode, GS1 DATABAR OMNI, GS1 Limited,
GS1 Expanded, S2of5IA, S2of5ID, TLC39,
Telepen, Trioptic, UPCA, and UPCE
Postal Barcodes
AusPost, CanadaPost, ChinaPost,
JapanPost, KoreaPost, KixPost, Planet Code,
Postnet (US), and UKPost
OCR Fonts
OCR-A, OCR-B, OCRUSCurrency,
OCRMICRE13B, and OCRSEMIFONT
KDC100 / KDC 200*
1D Barcodes
EAN13
EAN8
UPCA
UPCE
Bookland EAN
EAN13 with Add-on
EAN8 with Add-on
UPCA with Add-on
UPCE with Add-on
Interleave 2 of 5
ITF14
Code128
Codabar
GS1-128
Code39
Code93
Code35
Table 13 - Symbologies Supported by KDC

KDC250 User Manual
96
B.2 Host Interface
Q: What interface ports are supported by the KDC200?
A: The KDC200 has one ultra mini USB port which supports serial and USB-Serial. It also supports
Bluetooth profiles.
Q: What Bluetooth protocol stacks are supported by KDC200?
A: The KD200 has Bluetooth HID and SPP profiles. KDC200i/300i also support "Made for iPhone"
Bluetooth profile.
B.3 Battery
Q: How long will the KDC200 battery last before it needs to be replaced?
A: The battery on the KDC200 can be charged at least 300 times before it needs to be replaced.
Q: How long does it take to charge the KDC200?
A: It takes about 2 hours to fully charge the KDC200 from an empty battery status to a fully charged
status.
Q: How many barcodes can a fully charged KDC200 scan?
A: The KDC200 can scan more than 10,000 barcodes when fully charged. Using Bluetooth, it can
scan more than 7,500 barcodes. KDC200i would scan less barcodes than KDC200.
Q: How long will the KDC200 battery lasts in the sleep mode?
A: KDC200 last several days with Bluetooth connection. KDC200i last less than KDC200.
Q: Can I replace the KDC200 battery?
A: Yes. The KDC200 has a separate compartment for the battery which can be opened easily with a
screw driver. Contact your distributor for a replacement battery.
B.4 Memory
Q: How many barcodes can be stored in the KDC200?
A: KDC200 have basic 180KB data memory and optional 4MB extended memory. 180KB can store
more than 10,000 UPC barcodes and 4MB can store more than 100,000 product database. FW86
version uses 100KB for database area and user data memory is 80KB.
Q: Can I download stored barcodes or wedge barcodes to my application?
A: Yes. KTSync® is keyboard wedging, application generation, DB look up and inventory program
bundled with the KDC100/200/300 which supports host devices running on Android®,
iPhone/iPad/iPod touch, Blackberry®, Windows® XP/Vista/7/Mobile5.0+.
Q: Does the KDC200 support Android®,iPhone/iPad/iPod touch®,Blackberry®, Mac® and
Windows®devices?
A: KTSync® supports Android®, iPhone/iPad/iPod touch, Blackberry®, Mac® and Windows® devices
currently.

KDC200 User Manual
97
B.5 Programming
Q: Can the KDC200 be programmed by a KoamTac partner?
A: Yes. KoamTac’s Application Generation tool provides an enhanced programming environment for
developing custom applications for the KDC.
1. KDC supports, at most, three step data collection processes including the ability to perform
various data functionality features.
2. KDC’s database lookup function provides enhanced data processes enabling the KDC to
display database results with or without scanned barcode data.
3. KDC can display a message from Host enabling two way communications and a messaging
application.
Q: Does KoamTac provide customization services for the KDC200?
A: Yes. Custom applications or projects can be developed by KoamTac engineers. This service is
provided for an additional fee to KoamTac. For more information regarding this service, please
contact KoamTac.
Q: Can a partner develop a PC or Smartphone application for the KDC200?
A: A software development kit for``````````` Windows® XP/Vista/7/Mobile5.0+, Android is available on
KoamTac support page. Android®, iPhone/iPad/iPod touch, Blackberry®, Mac® SDK are available
through KoamTac authorized distributors.
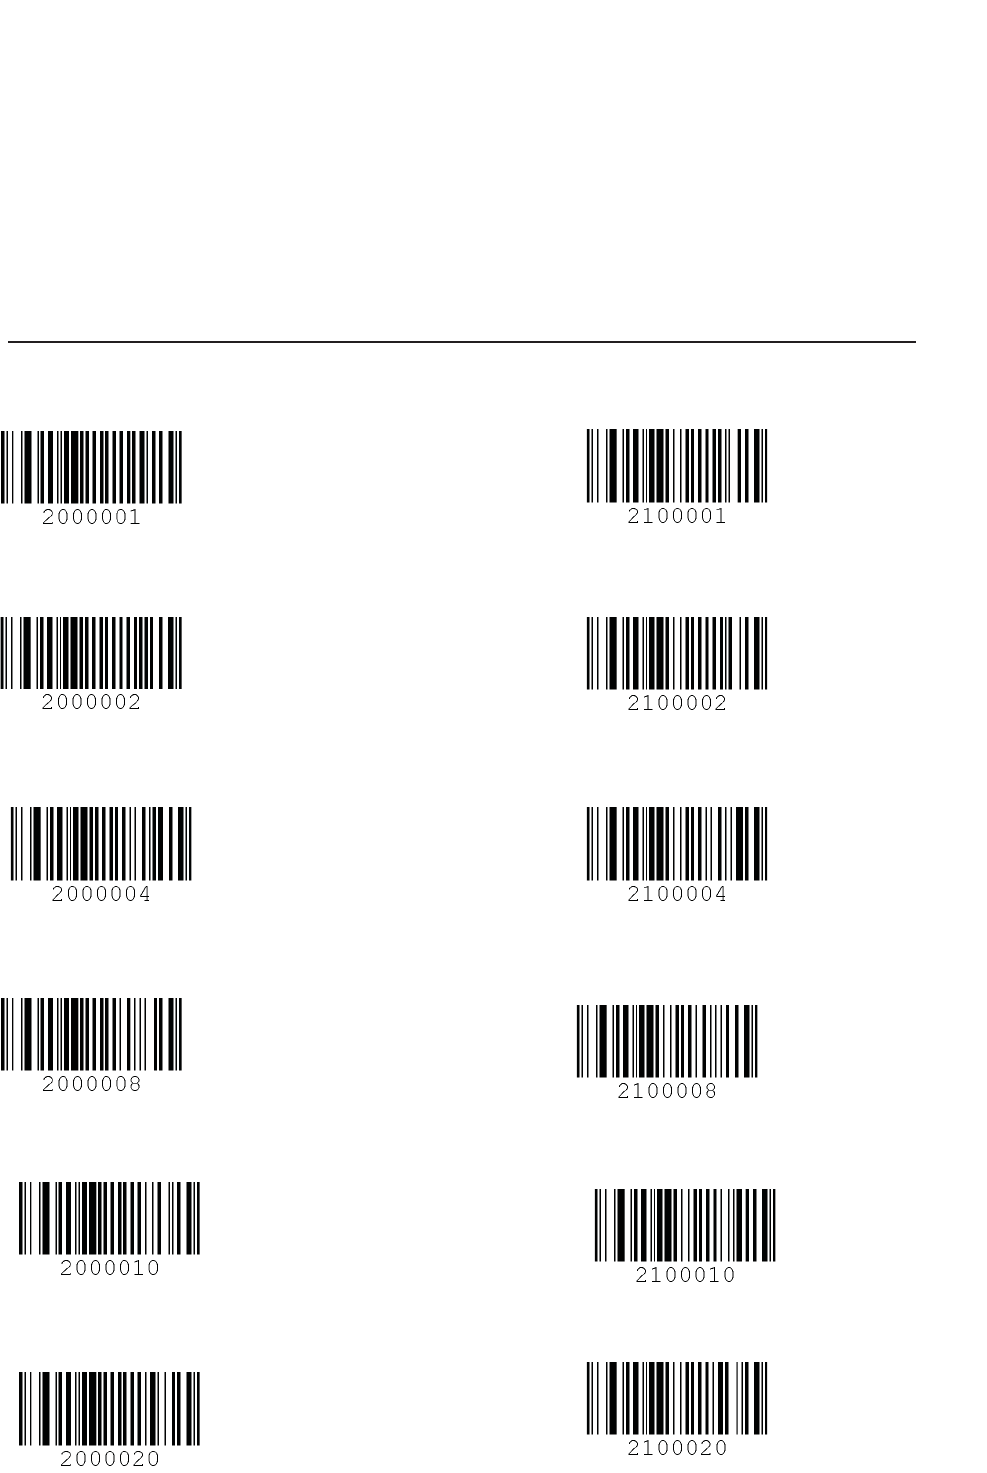
KDC200 User Manual
98
APPENDIX C - SPECIAL BARCODES
C.1 Set Symbologies
Enable EAN-13 Disable EAN-13
Enable EAN-8 Disable EAN-8
Enable UPCA Disable UPCA
Enable UPCE Disable UPCE
Enable Code39 Disable Code39
Enable ITF-14 Disable ITF-14
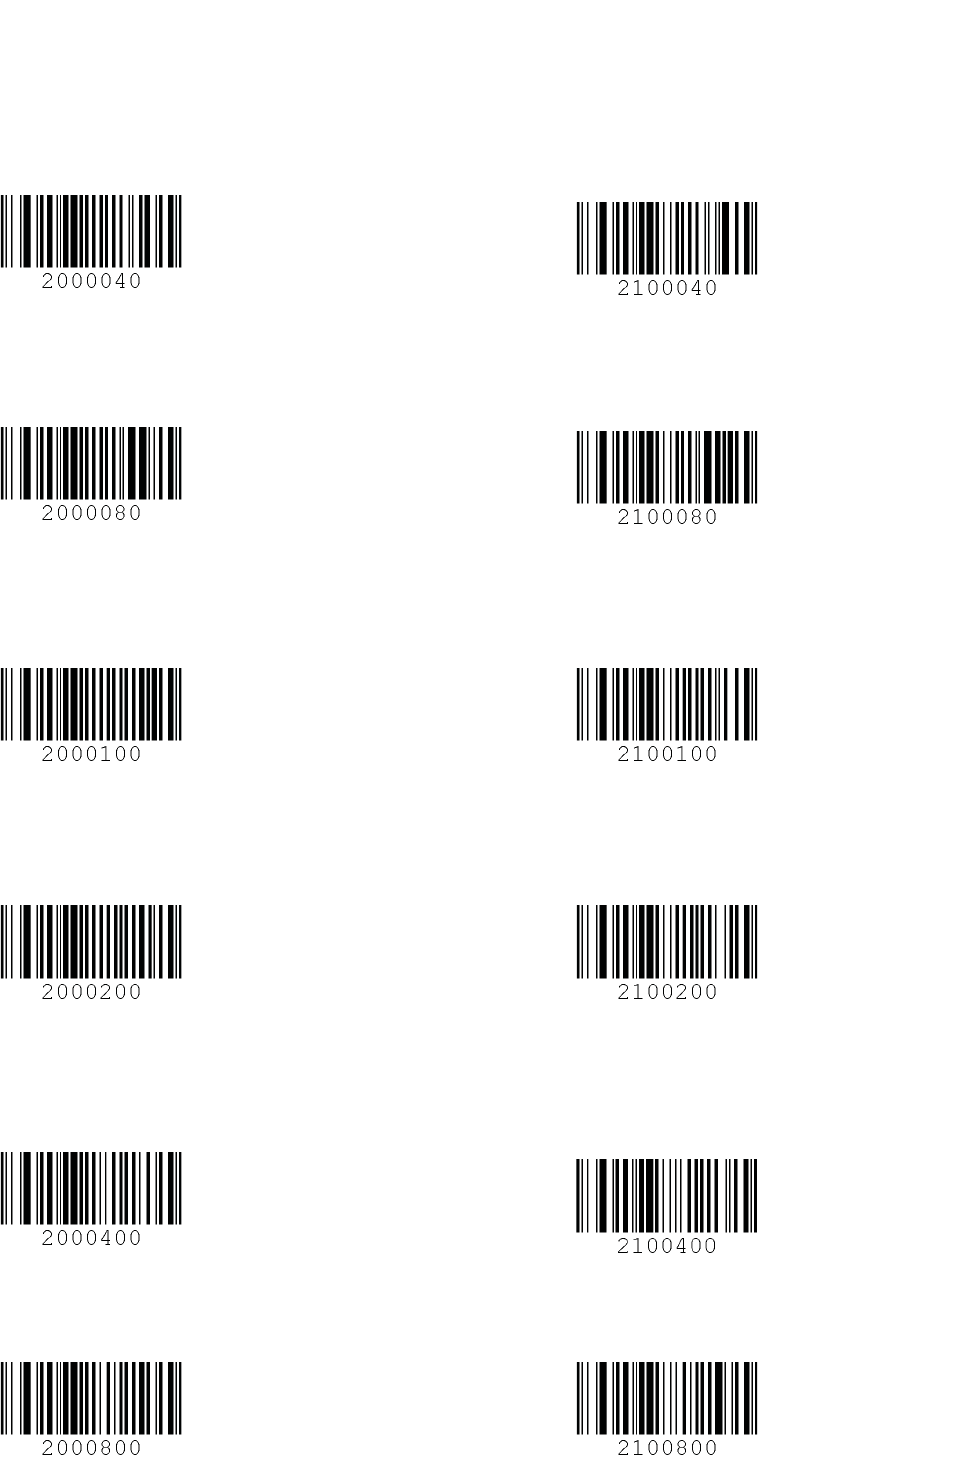
KDC200 User Manual
99
Enable Code128 Disable Code128
Enable Interleave 2 of 5 Disable Interleave 2 of 5
Enable Codabar Disable Codabar
Enable GS1-128 Disable GS1-128
Enable Code93 Disable Code93
Enable Code35 Disable Code35
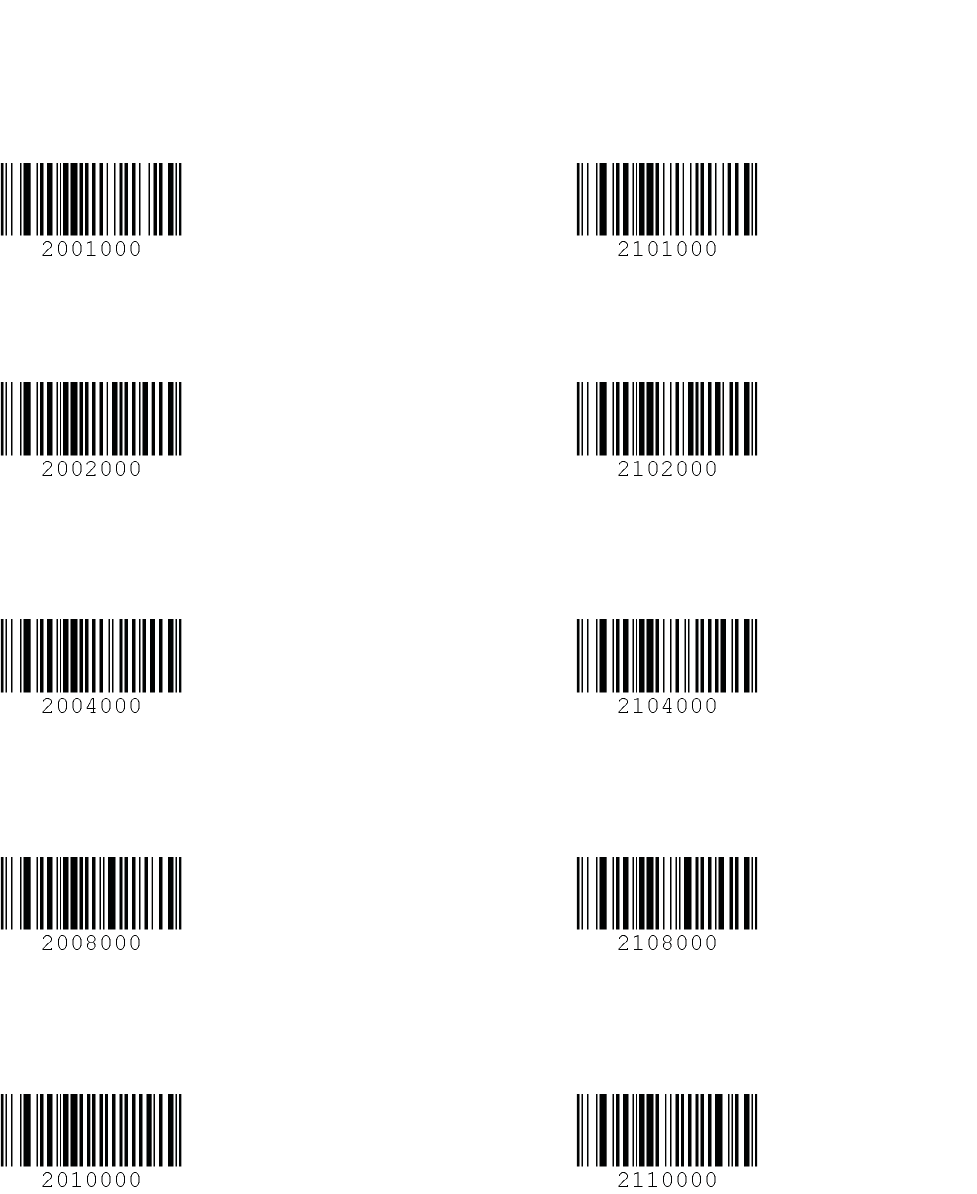
KDC200 User Manual
100
Enable Bookland EAN Disable Bookland EAN
Enable EAN-13 Supplements Disable EAN-13 Supplements
Enable EAN-8 Supplements Disable EAN-8 Supplements
Enable UPCA Supplements Disable UPCA Supplements
Enable UPCE Supplements Disable UPCE Supplements
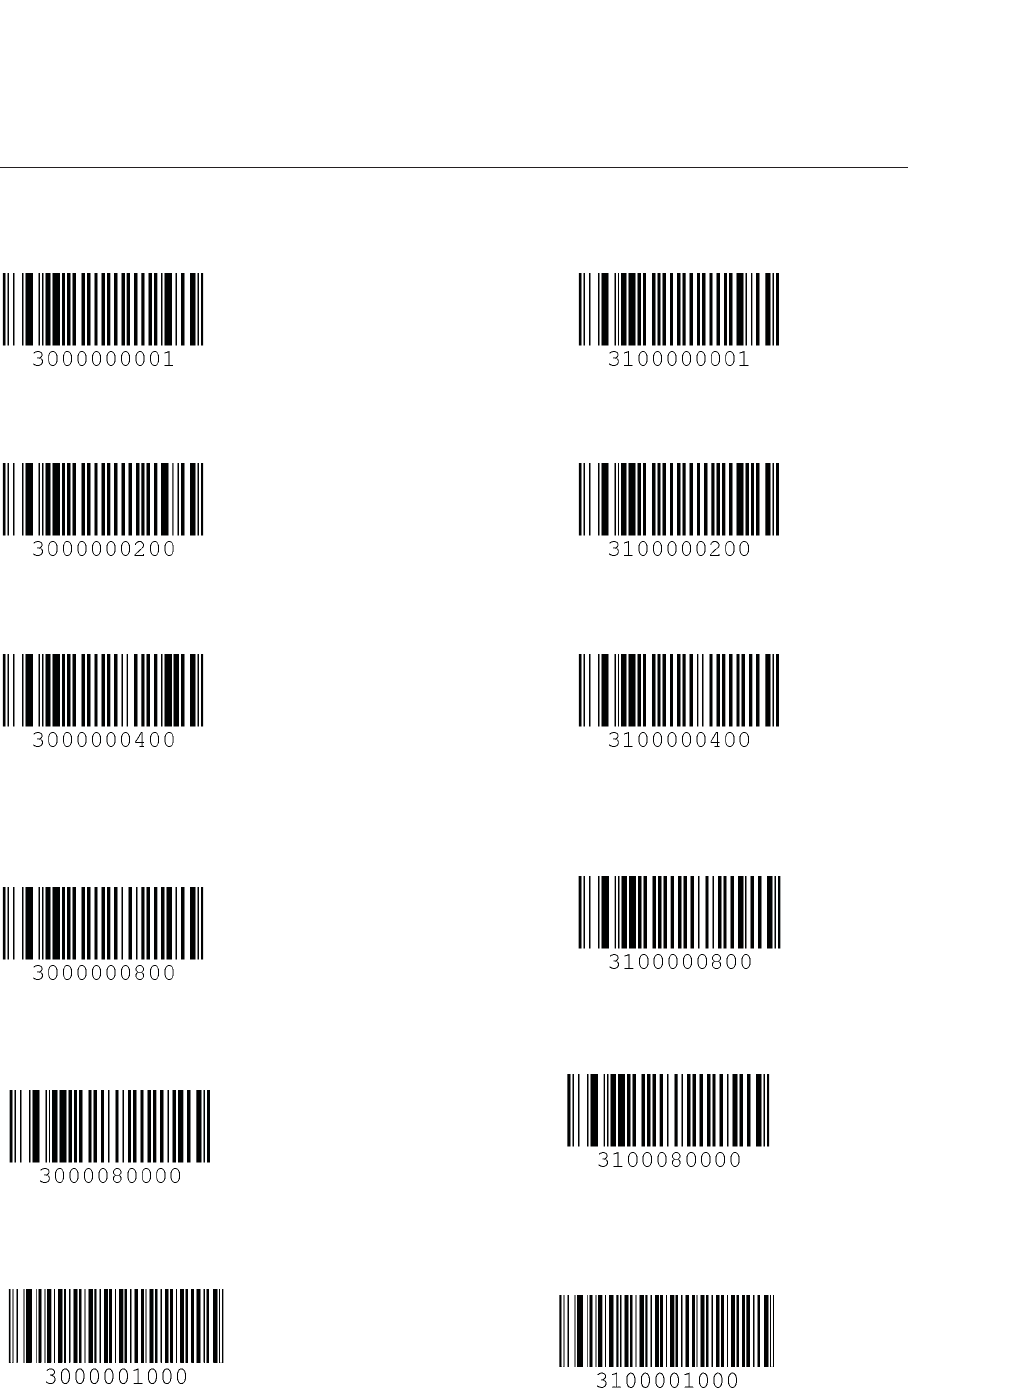
KDC200 User Manual
101
C.2 Barcode Options
Codabar - do NOT transmit start/stop Codabar - transmit start/stop
Convert UPCE to UPCA Do NOT convert UPCE to UPCA
Convert EAN8 to EAN13 Do NOT convert EAN8 to EAN13
Convert UPCE to EAN13 Do NOT convert UPCE to EAN13
Convert UPCA to EAN13 Do NOT Convert UPCA to EAN13
ReturnCheckDigit Do NOT ReturnCheckDigit
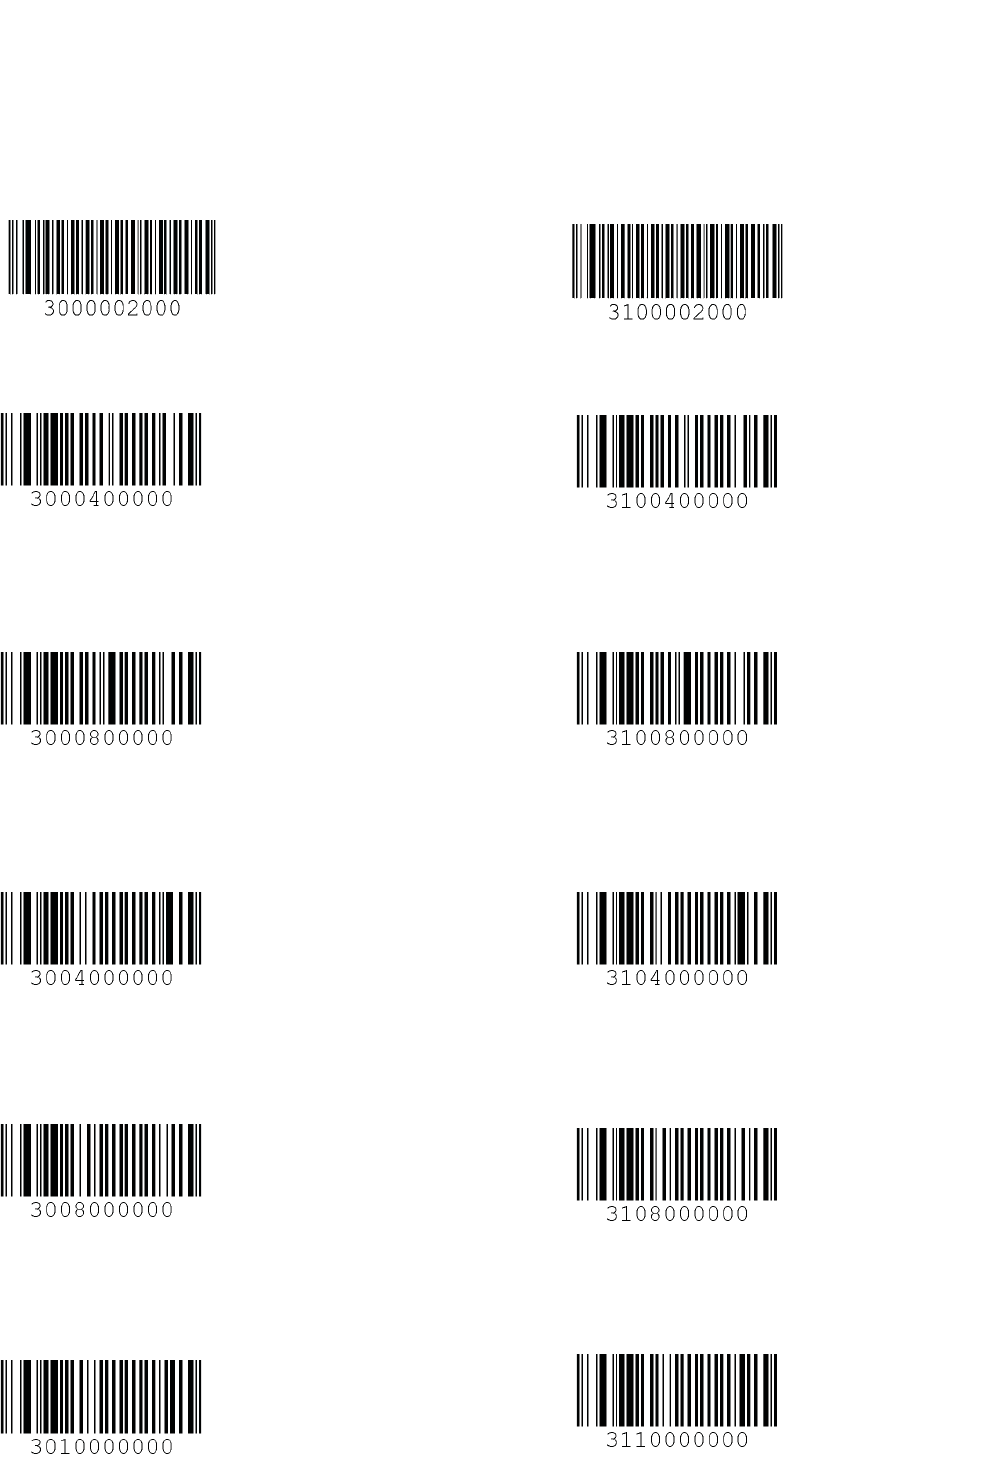
KDC200 User Manual
102
VerifyCheckDigit Do NOT VerifyCheckDigit
Verify check digit for I2of5 Do NOT verify check digit for I2of5
Verify check digit for Code39 Do NOT verify check digit for Code39
Return check digit for I2of5 Do NOT return check digit for I2of5
Return check digit for Code39 Do NOT return check digit for Code39
Return check digit for UPCE Do NOT return check digit for UPCE
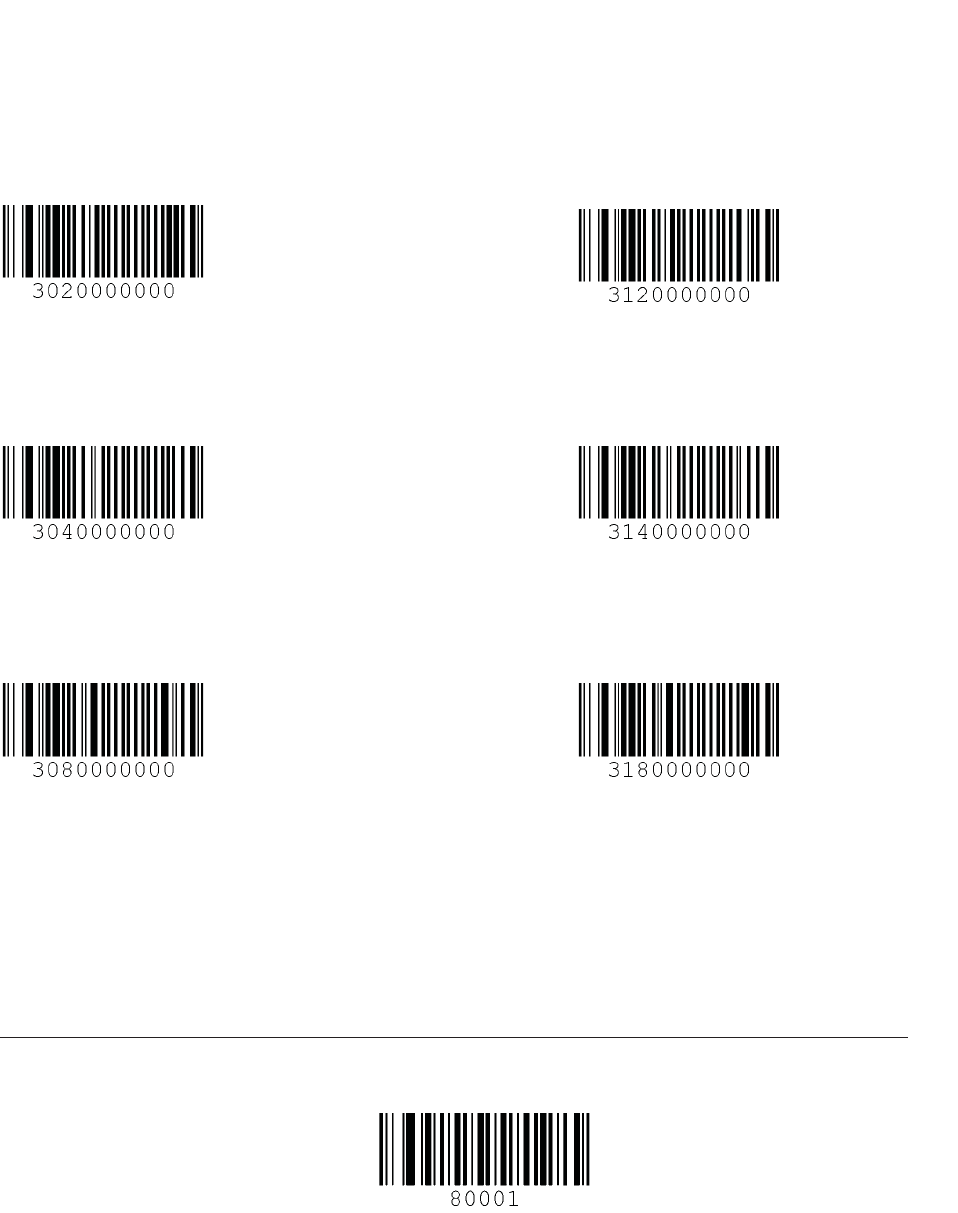
KDC200 User Manual
103
Return check digit for UPCA Do NOT return check digit for UPCA
Return check digit for EAN8 Do NOT return check digit for EAN8
Return check digit for EAN13 Do NOT return check digit for EAN13
C.3 Delete Last Scanned Barcode
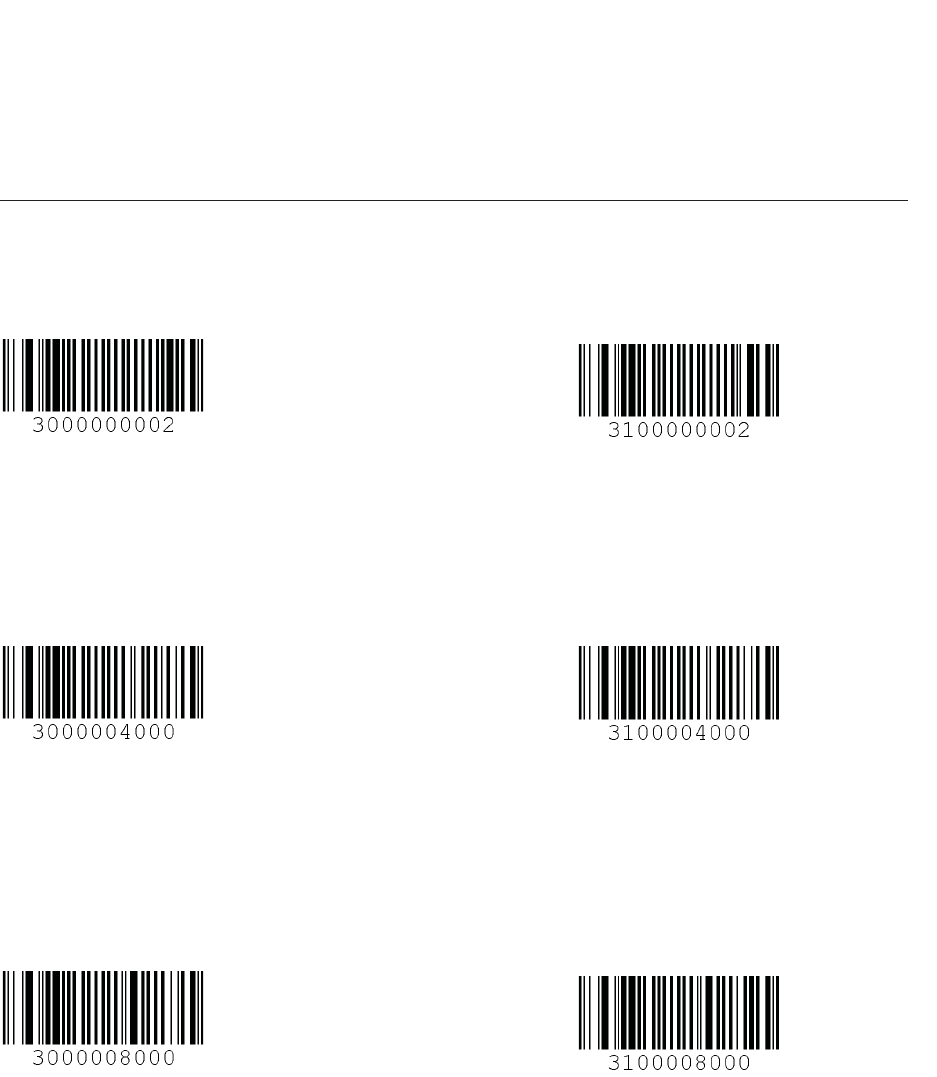
KDC200 User Manual
104
C.4 Scan Options
Reversed Scan Normal Scan
Wide scan angle Narrow scan angle
High filter mode Normal filter mode
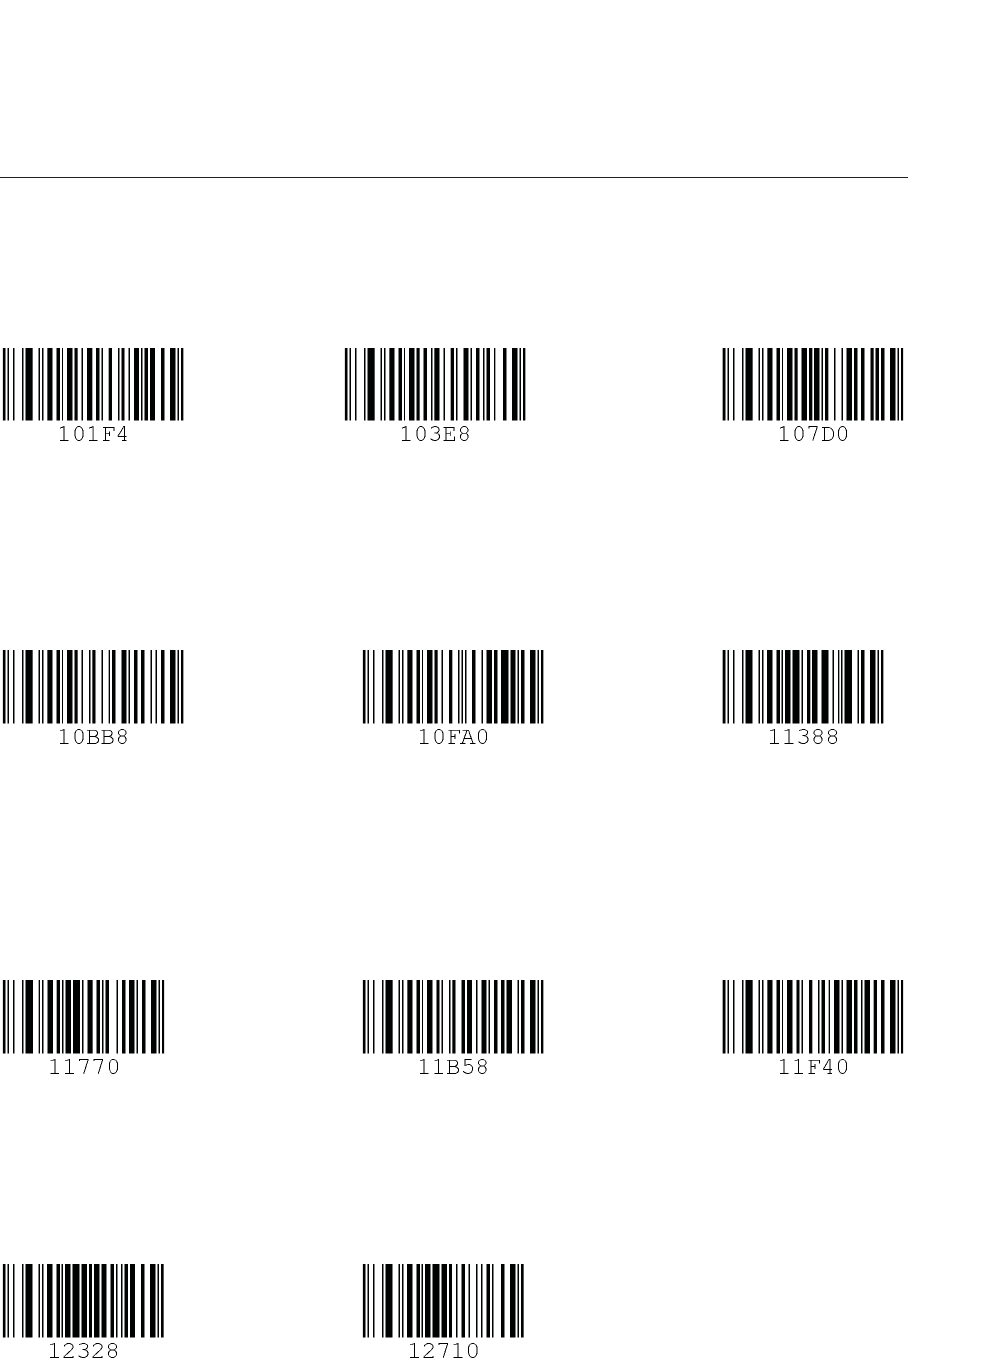
KDC200 User Manual
105
C.5 Scan Timeout
Timeout = 500msec Timeout = 1sec Timeout = 2sec
Timeout = 3sec Timeout = 4sec Timeout = 5sec
Timeout = 6sec Timeout = 7sec Timeout = 8sec
Timeout = 9sec Timeout = 10sec
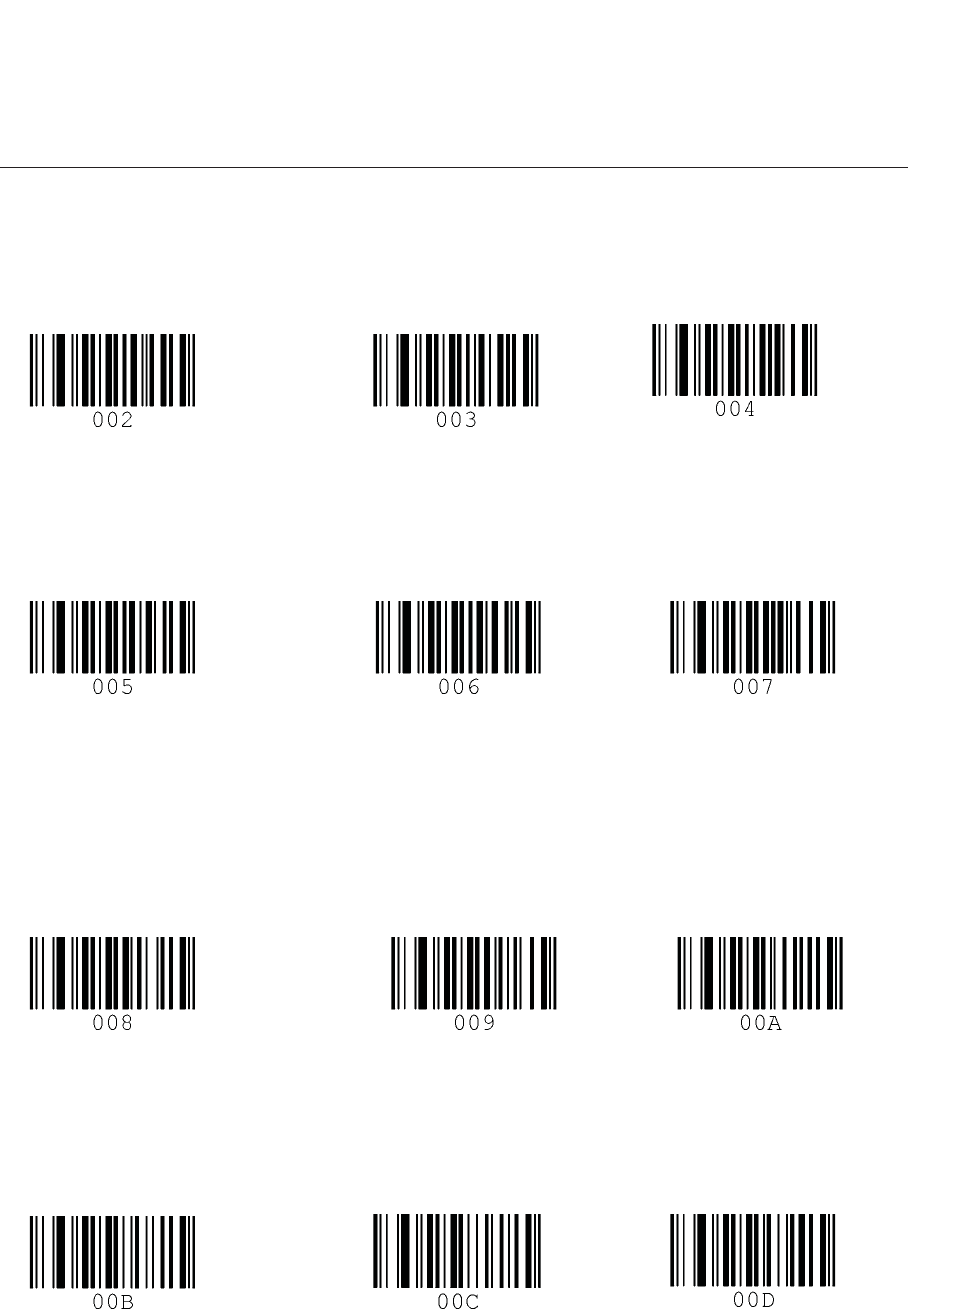
KDC200 User Manual
106
C.6 Minimum Barcode Length
Minimum Length = 2 Minimum Length = 3 Minimum Length = 4
Minimum Length = 5 Minimum Length = 6 Minimum Length = 7
Minimum Length = 8 Minimum Length = 9 Minimum Length = 10
Minimum Length = 11 Minimum Length = 12 Minimum Length = 13
KDC200 User Manual
107
Minimum Length = 14 Minimum Length = 15 Minimum Length = 16
Minimum Length = 17 Minimum Length = 18 Minimum Length = 19
Minimum Length = 20 Minimum Length = 21 Minimum Length = 22
Minimum Length = 23 Minimum Length = 24 Minimum Length = 25
Minimum Length = 26 Minimum Length = 27 Minimum Length = 28
KDC200 User Manual
108
Minimum Length = 29 Minimum Length = 30 Minimum Length = 31
Minimum Length = 32 Minimum Length = 33 Minimum Length = 34
Minimum Length = 35 Minimum Length = 36
KDC200 User Manual
109
C.7 Security Level
G
zGGdGXG
G
G
G
zGGdGYG
G
zGGdGZG
G
zGGdG[G
G
KDC200 User Manual
110
C.8 Data Process - Wedge/Store
Wedge Only
Wedge & Store
Store Only
Wedge & Store if Sent
h
Wedge & Store if Not Sent
KDC200 User Manual
111
C.9 Data Process - Data Format - Handshake
Data format - Barcode only
Data format - Packet data
Enable Handshake
Disable Handshake
Enable CheckDuplicate
Disable CheckDuplicate
KDC200 User Manual
112
C.10 Data Process - Termination Character &
Duplicate Check
None
CR
LF
CR+LF
Tab
Check Duplicate Enabled Check Duplicate Disabled
KDC200 User Manual
113
C.11 Bluetooth
Enable Bluetooth Power Disable Bluetooth Power
Enter Pairing Mode
Enable Auto Connect Disable Auto Connect
Enable Auto Power Off Disable Auto Power Off
Enable Auto Power On Disable Auto Power On
Enable Beep Warning Disable Beep Warning
KDC200 User Manual
114
Enable PowerOff Msg Disable PowerOff Msg
BT MAC Address BT FW Version
Enable Wakeup Nulls Disable Wakeup Nulls
Enable Scrolling Disable Scrolling
Discovering Connecting To
Discovering Enable Discovering Disable
ConnectToLast Disconnect
KDC200 User Manual
115
C.12 Bluetooth Auto Power On Time
Auto Power On Time Disabled Auto Power On Time 1sec
Auto Power On Time 2sec Auto Power On Time 3sec
Auto Power On Time 4sec Auto Power On Time 5sec
Auto Power On Time 6sec Auto Power On Time 7sec
Auto Power On Time 8sec Auto Power On Time 9sec
Auto Power On Time 10sec
KDC200 User Manual
116
C.13 Bluetooth PWR Off Time
1min 2min
3min 4min
5min 6min
7min 8min
9min 10min

KDC200 User Manual
117
11min 12min
13min 14min
15min 16min
17min 18min
19min 20min
KDC200 User Manual
118
21min 22min
23min 24min
25min 26min
27min 28min
29min 30min
KDC200 User Manual
119
C.14 Autolock Time
0 min (Never) 1 min
2 min 3 min
4 min 5 min
10 min 15 min
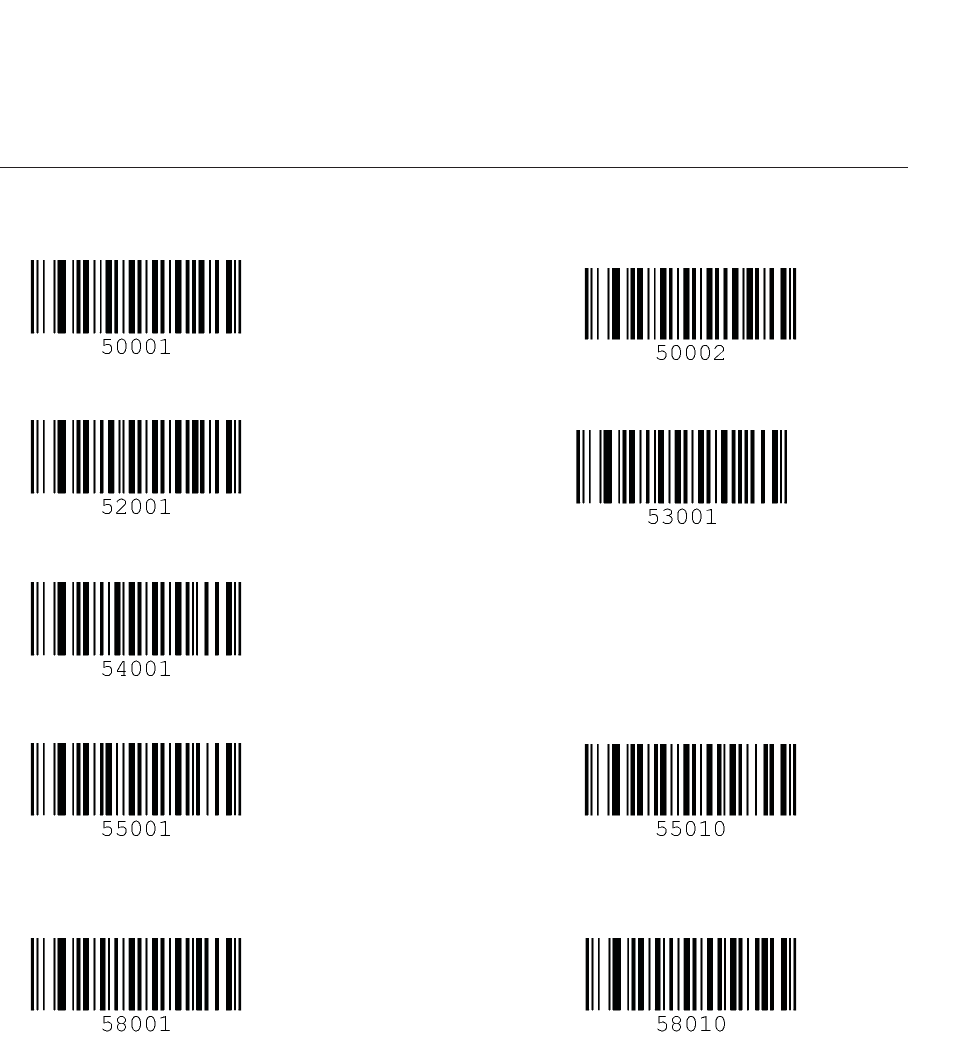
KDC200 User Manual
120
C.15 System
G
tGzGGGGGGyGtG
GGGG G
GG
G
kV{GGGGGGGiG
GGGG G
GG
G
}G
G
G
G
iGsGGGGGGiG|G
GGGGGG GG
G
G
G
lGhGtGlGGGGGkGhGtG
lG
GGGG G
GG
G
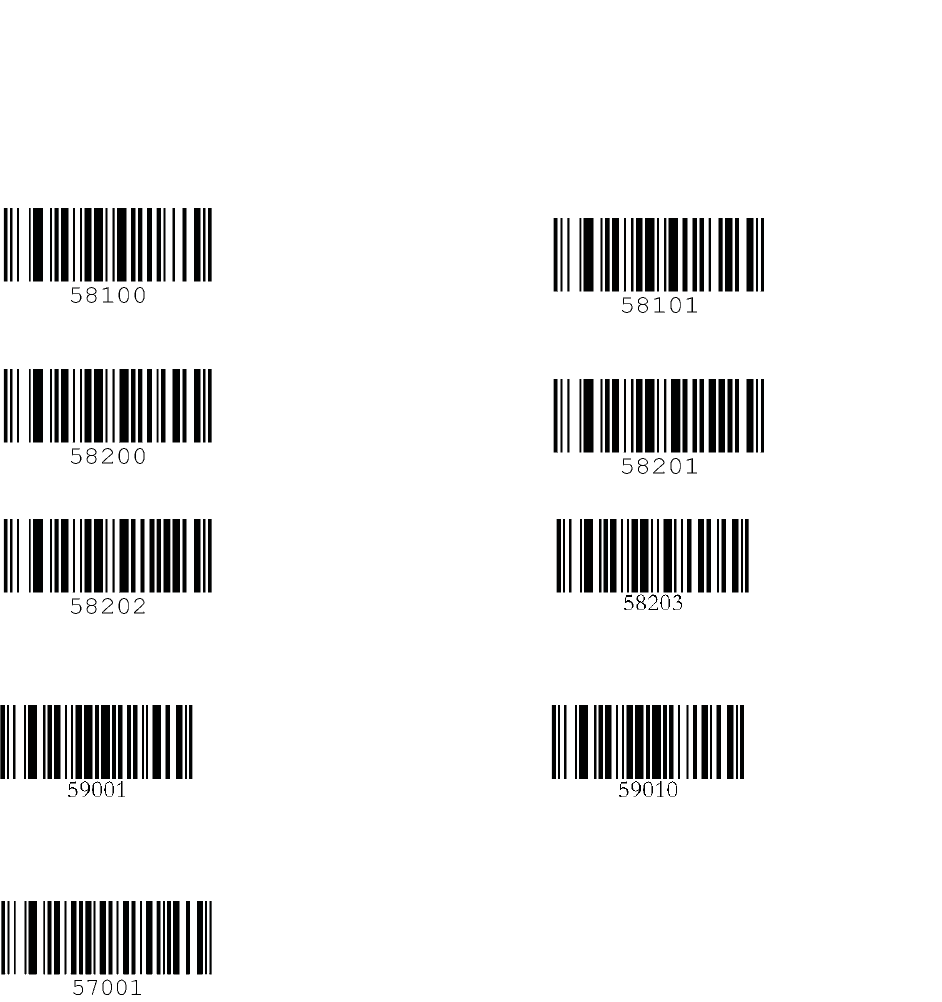
KDC200 User Manual
121
G
lGwGzGGGGGkGwGzG
GGGG GG
G
G
{GMGiGGGGGGG{GMG{G
GGGG G
GG
G
{GMGiGGGGGGtGzG
GGGGGGGGG GG
G
lGzGGGGGGkGzG
GGGGG G
G
mGkG
G
G
G
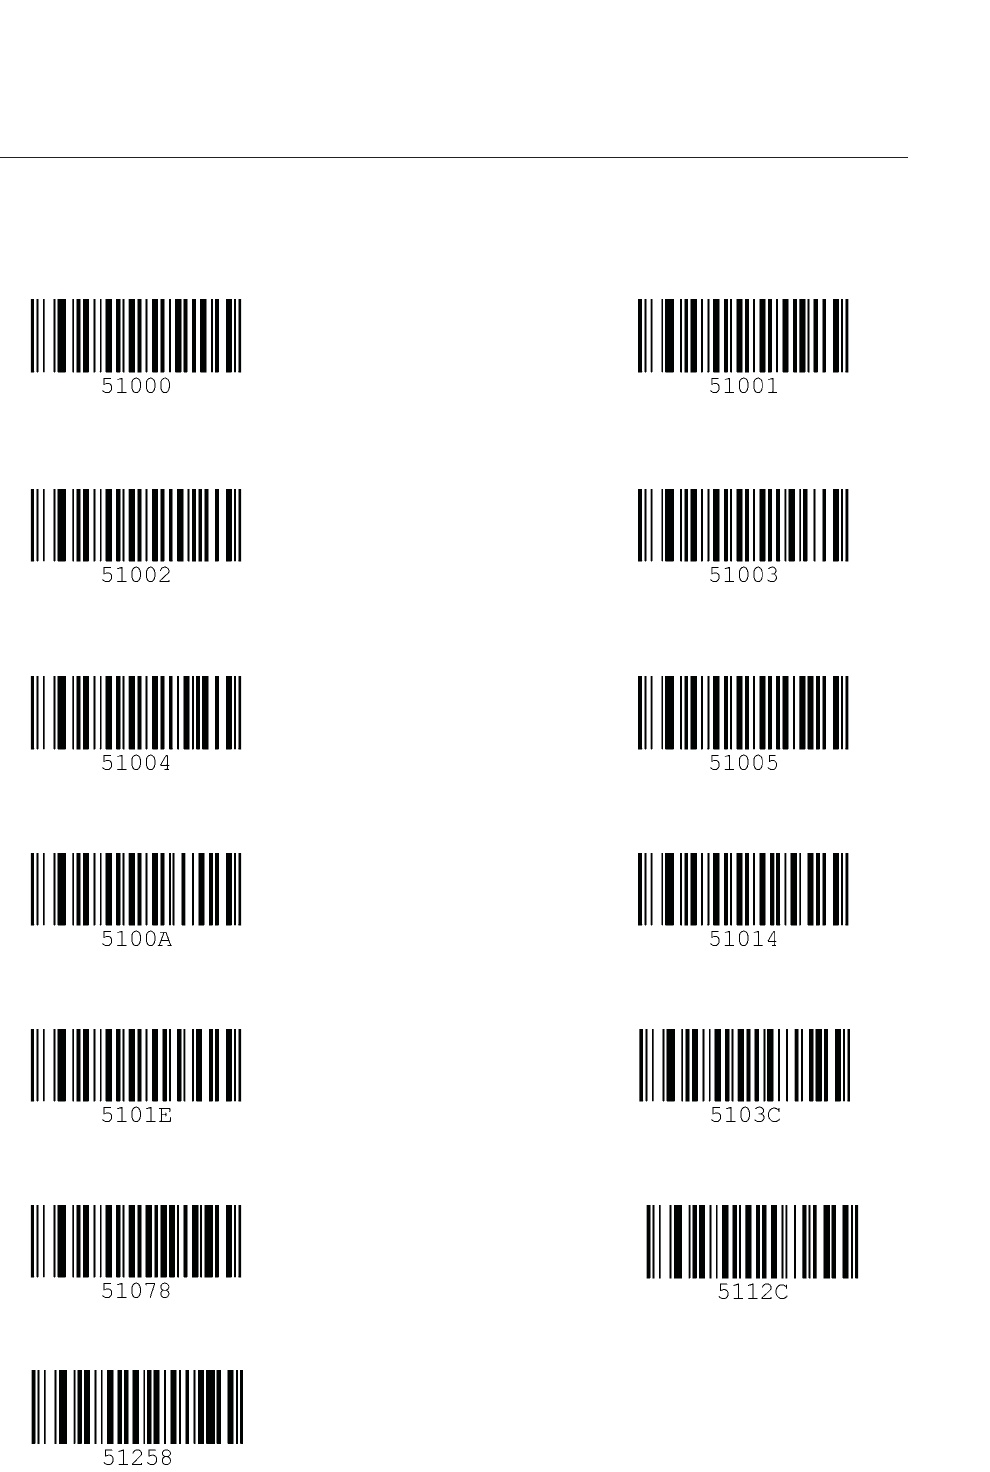
KDC200 User Manual
122
C.16 Sleep Timeout
Disable 1sec
2sec 3sec
4sec 5sec
10sec 20sec
30sec 1min
2min 5min
10min
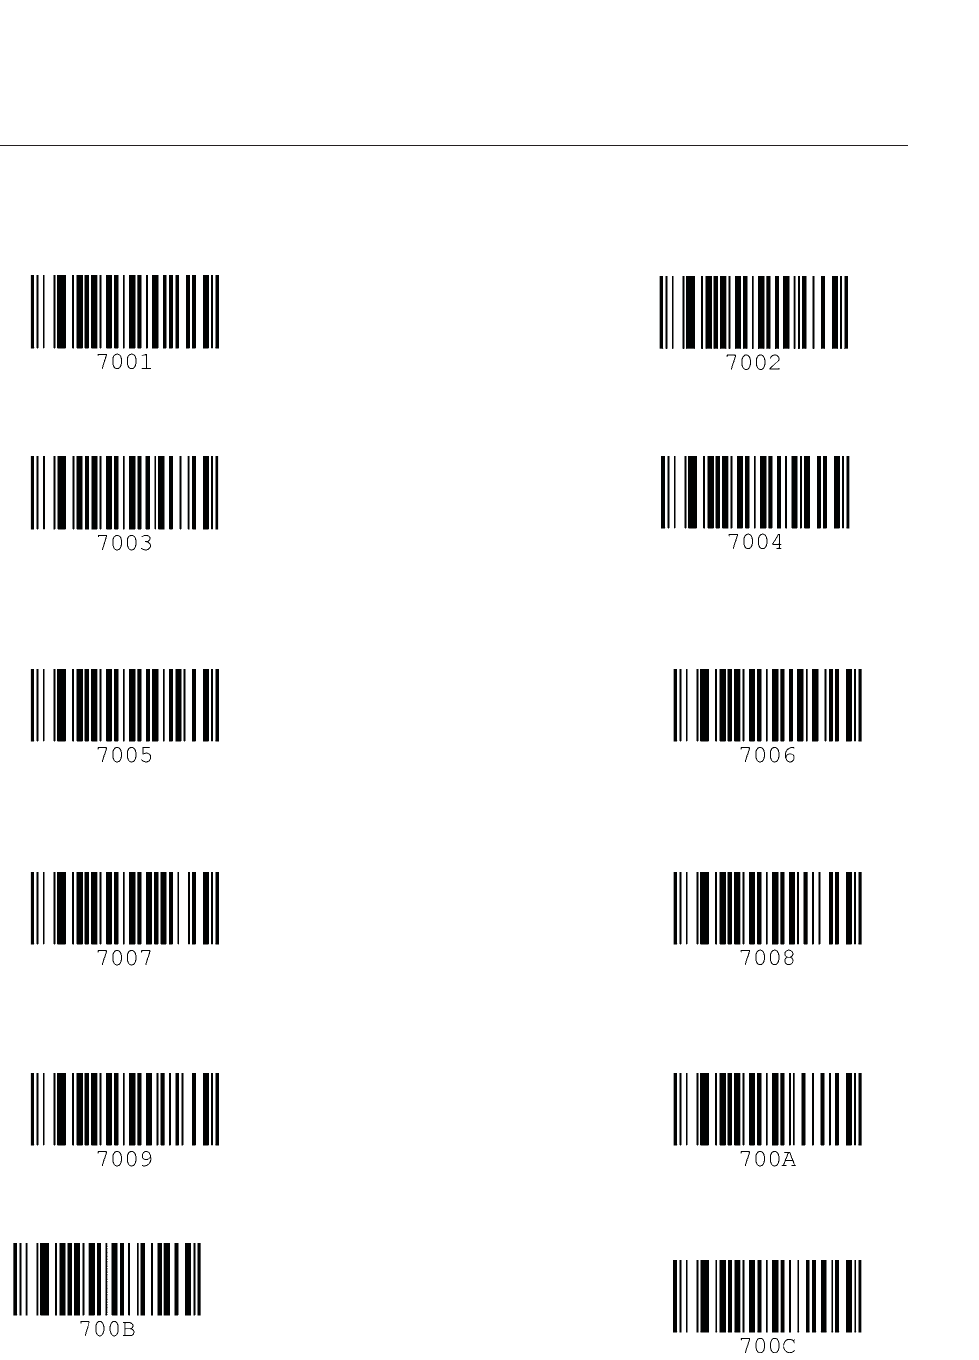
KDC200 User Manual
123
C.17 Function
F1 F2
F3 F4
G
F5 F6
F7 F8
GGGG
F9 F10
F11 F12
KDC200 User Manual
124
C.18 Number
0 1
2 3
4 5
6 7
8 9
KDC200 User Manual
125
C.19 Lower Case Alphabet
a b
c d
e f
g h
i j
KDC200 User Manual
126
k l
m n
o p
q r
KDC200 User Manual
127
s t
u v
w x
y z
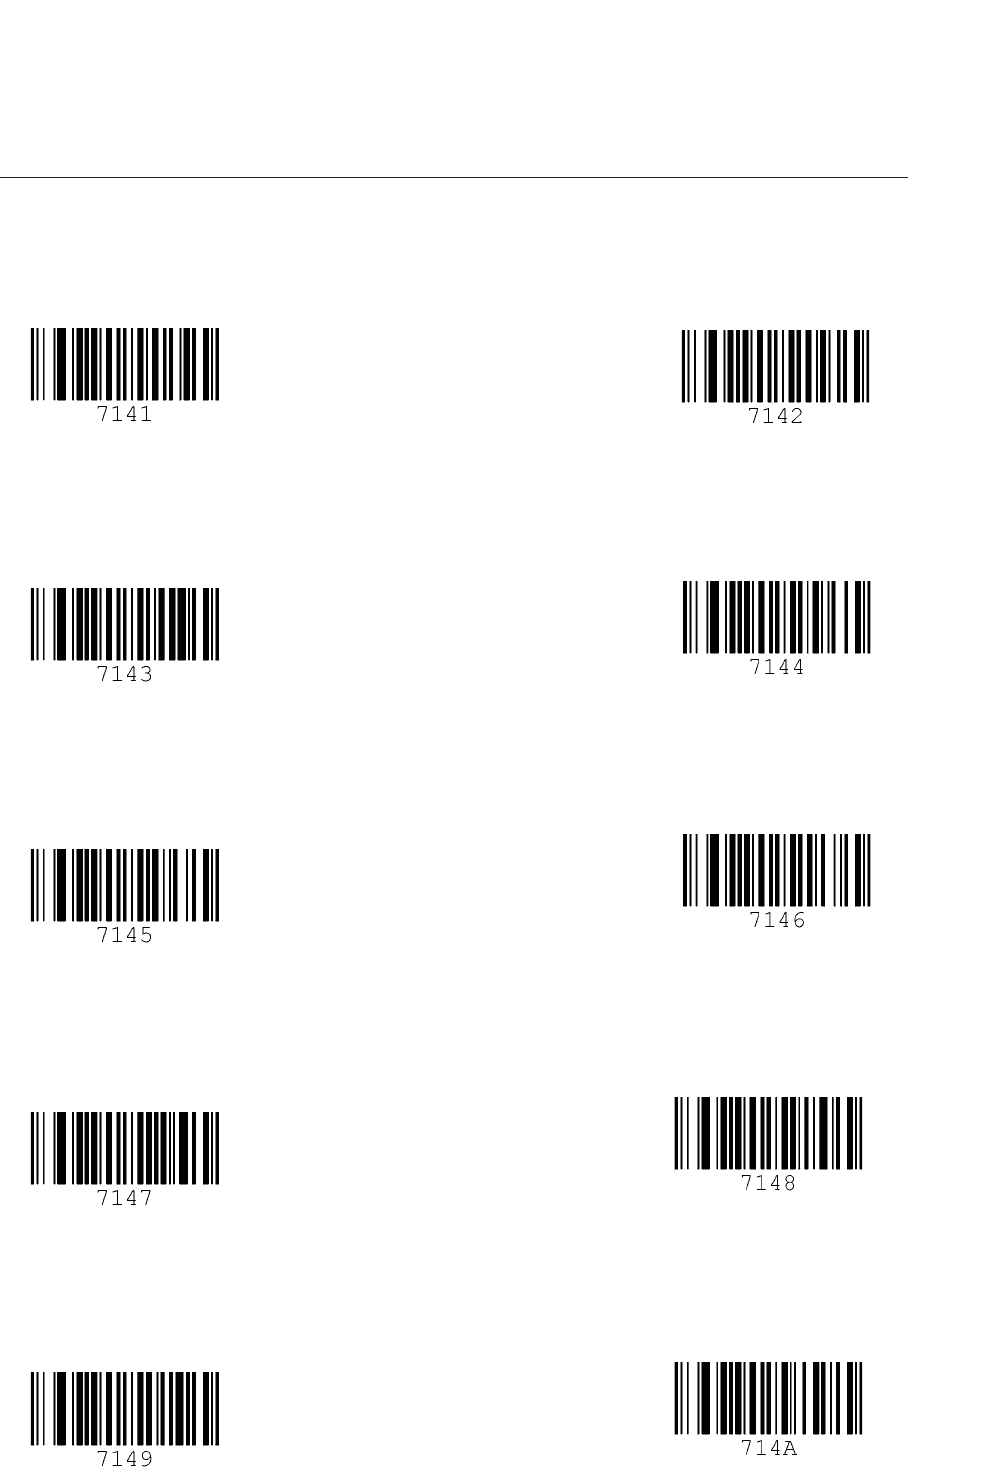
KDC200 User Manual
128
C.20 Upper Case Alphabet
A B
C D
E F
G H
I J
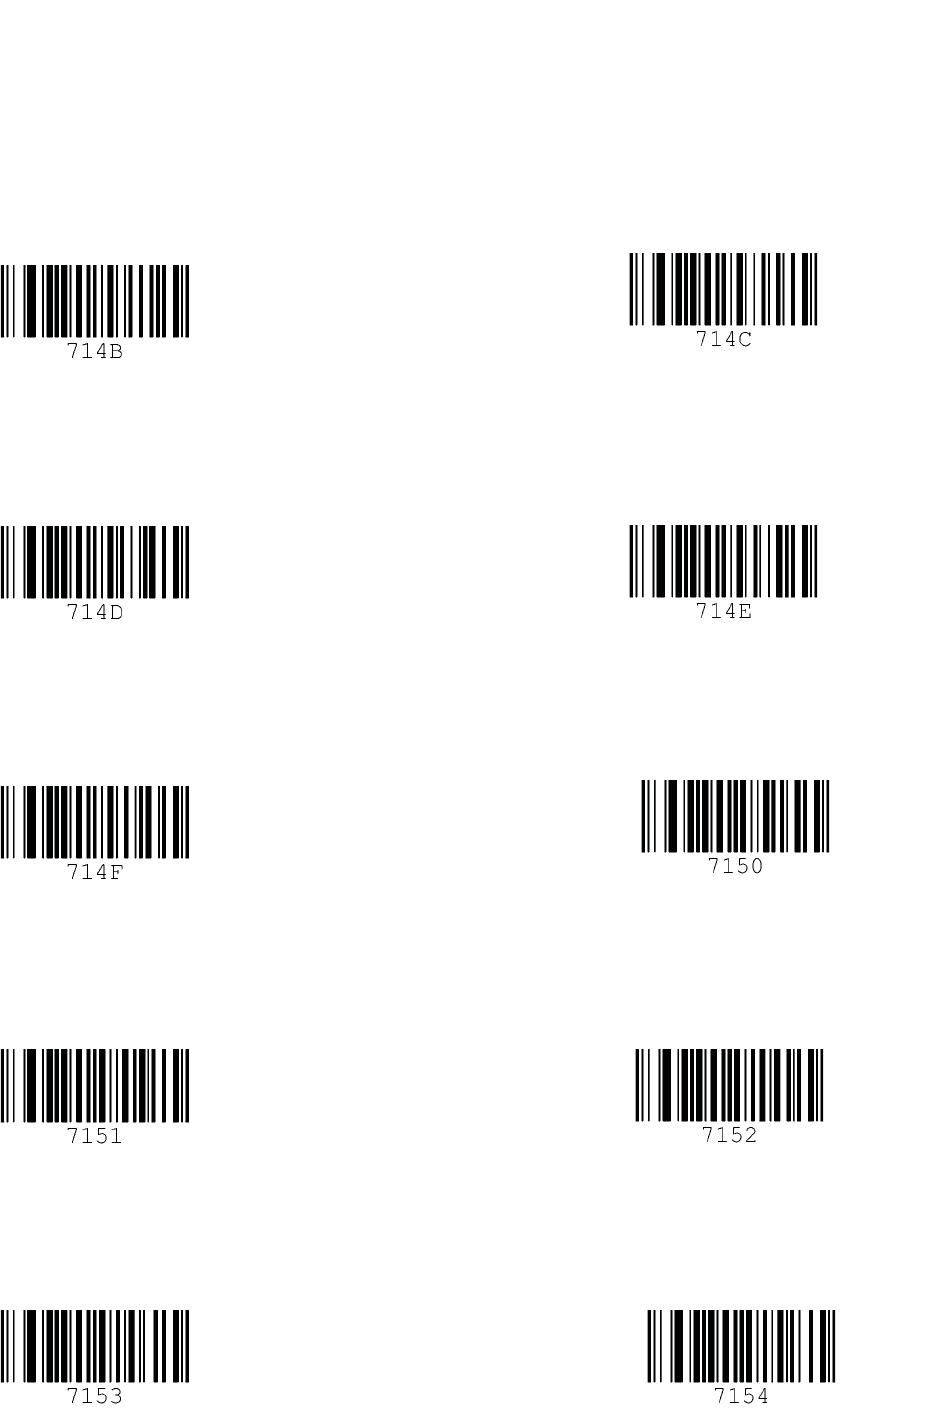
KDC200 User Manual
129
K L
M N
O P
Q R
S T
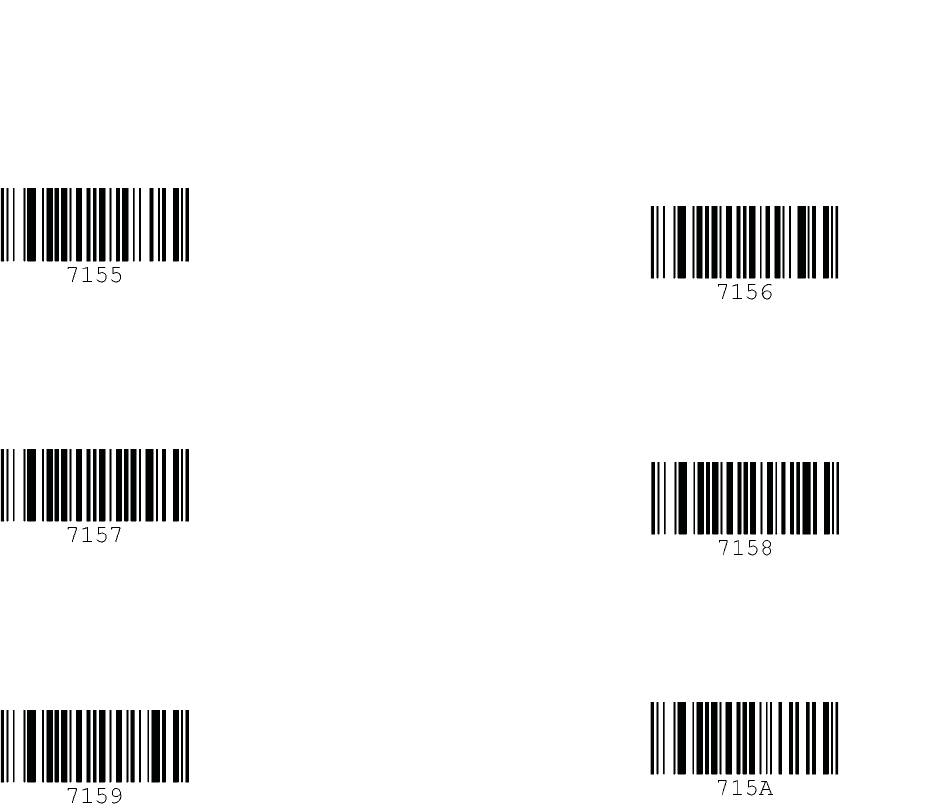
KDC200 User Manual
130
U V
W X
Y Z
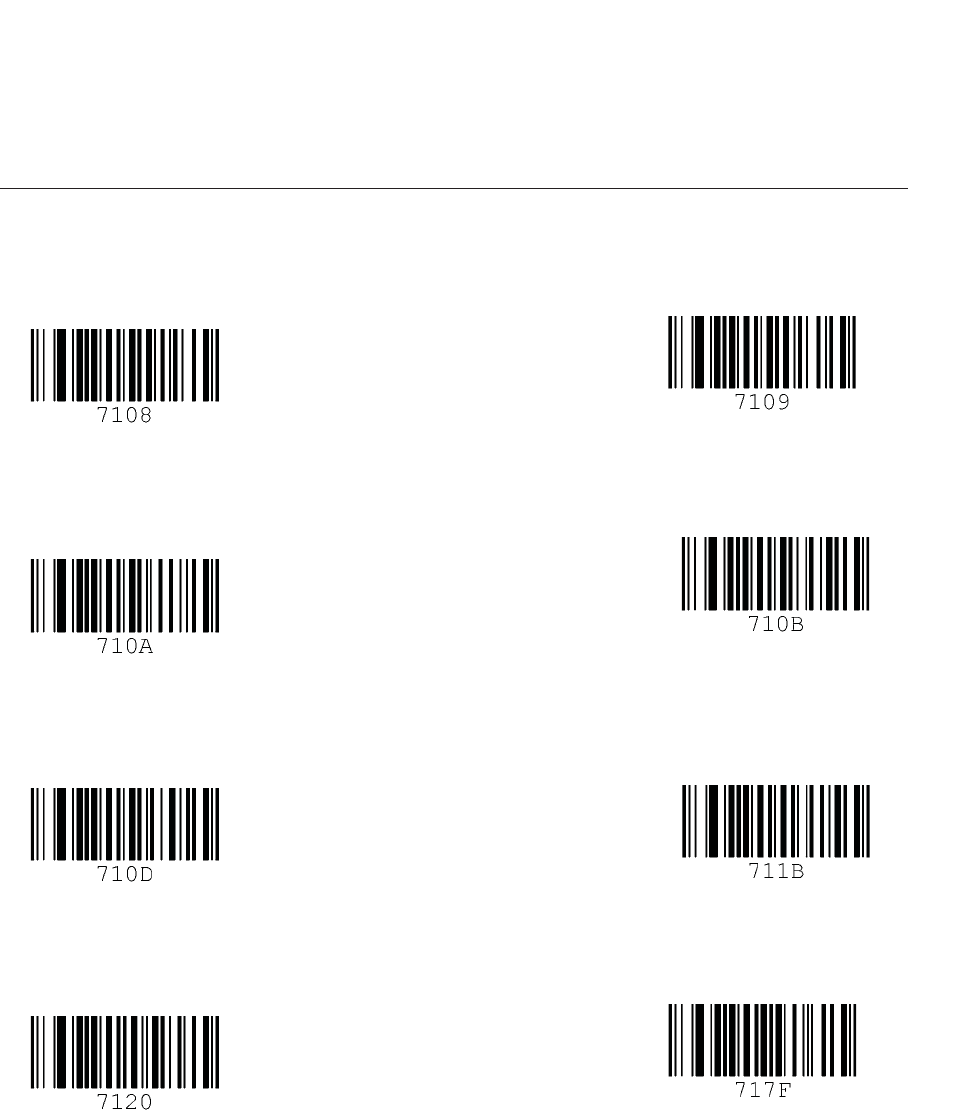
KDC200 User Manual
131
C.21 Control Character
BS TAB
LF VT
CR ESC
Space DEL
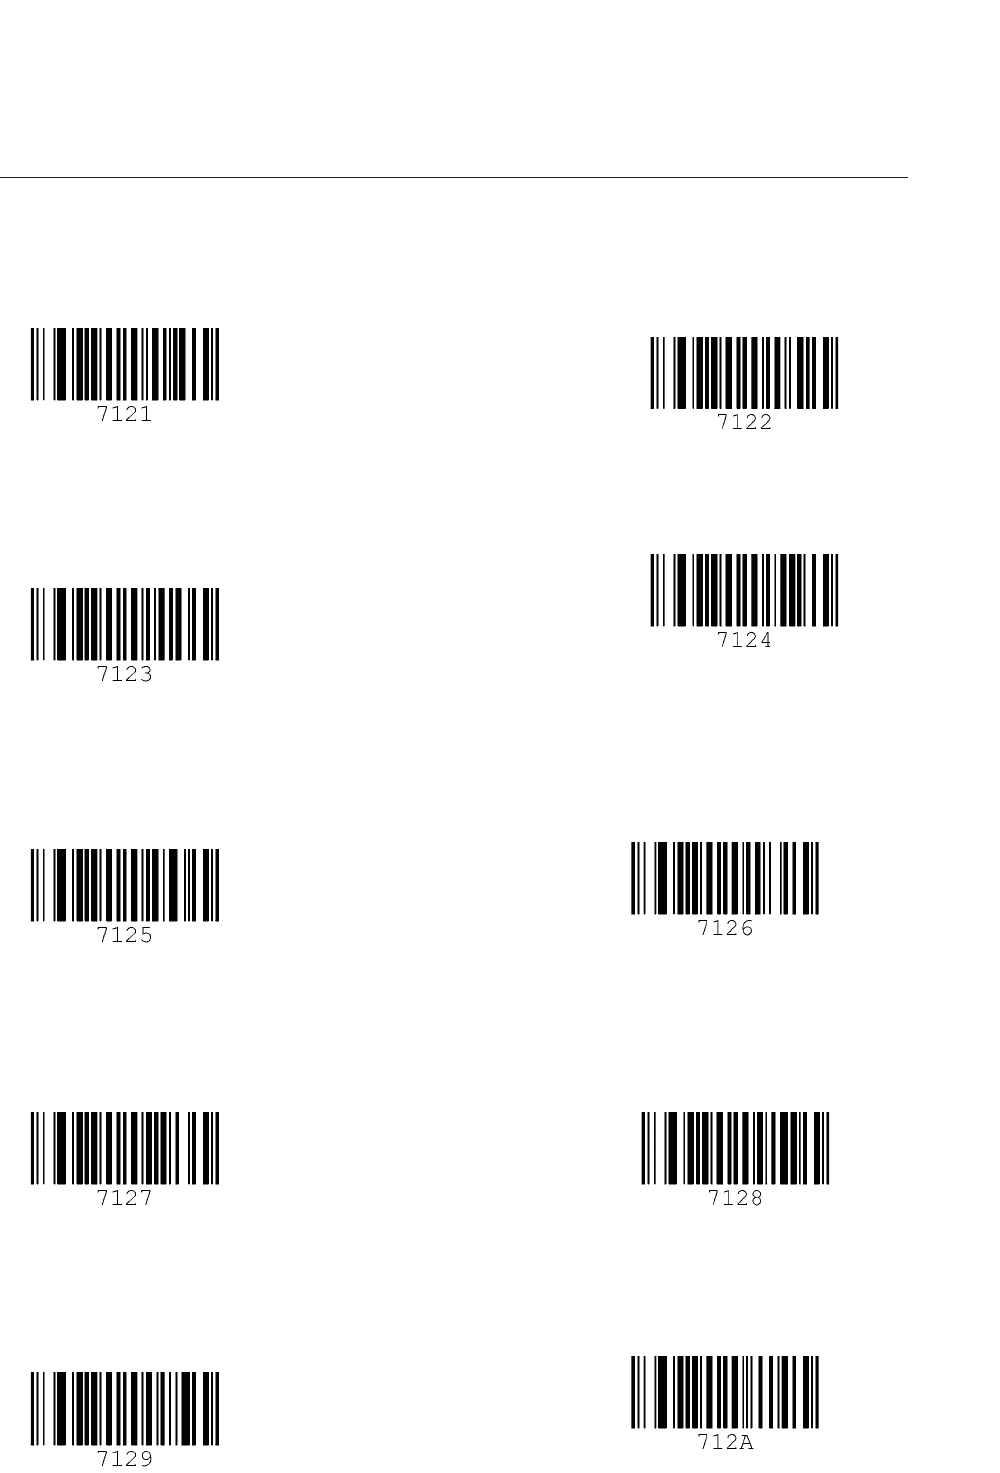
KDC200 User Manual
132
C.22 Symbol Character
! “
# $
% &
‘ (
) *
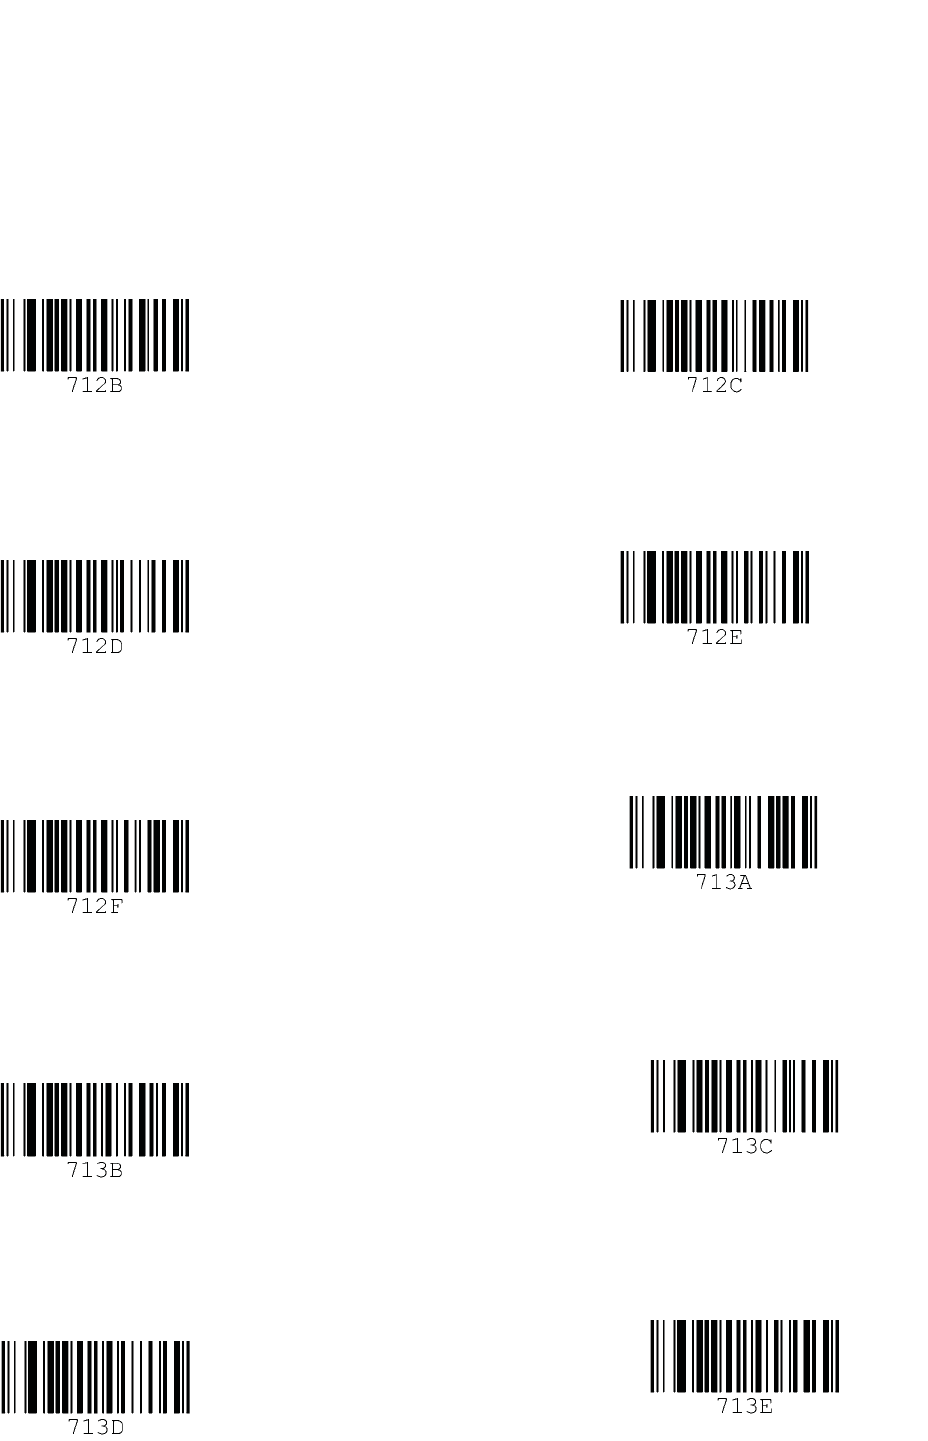
KDC200 User Manual
133
+ ,
- .
/ :
; <
= >
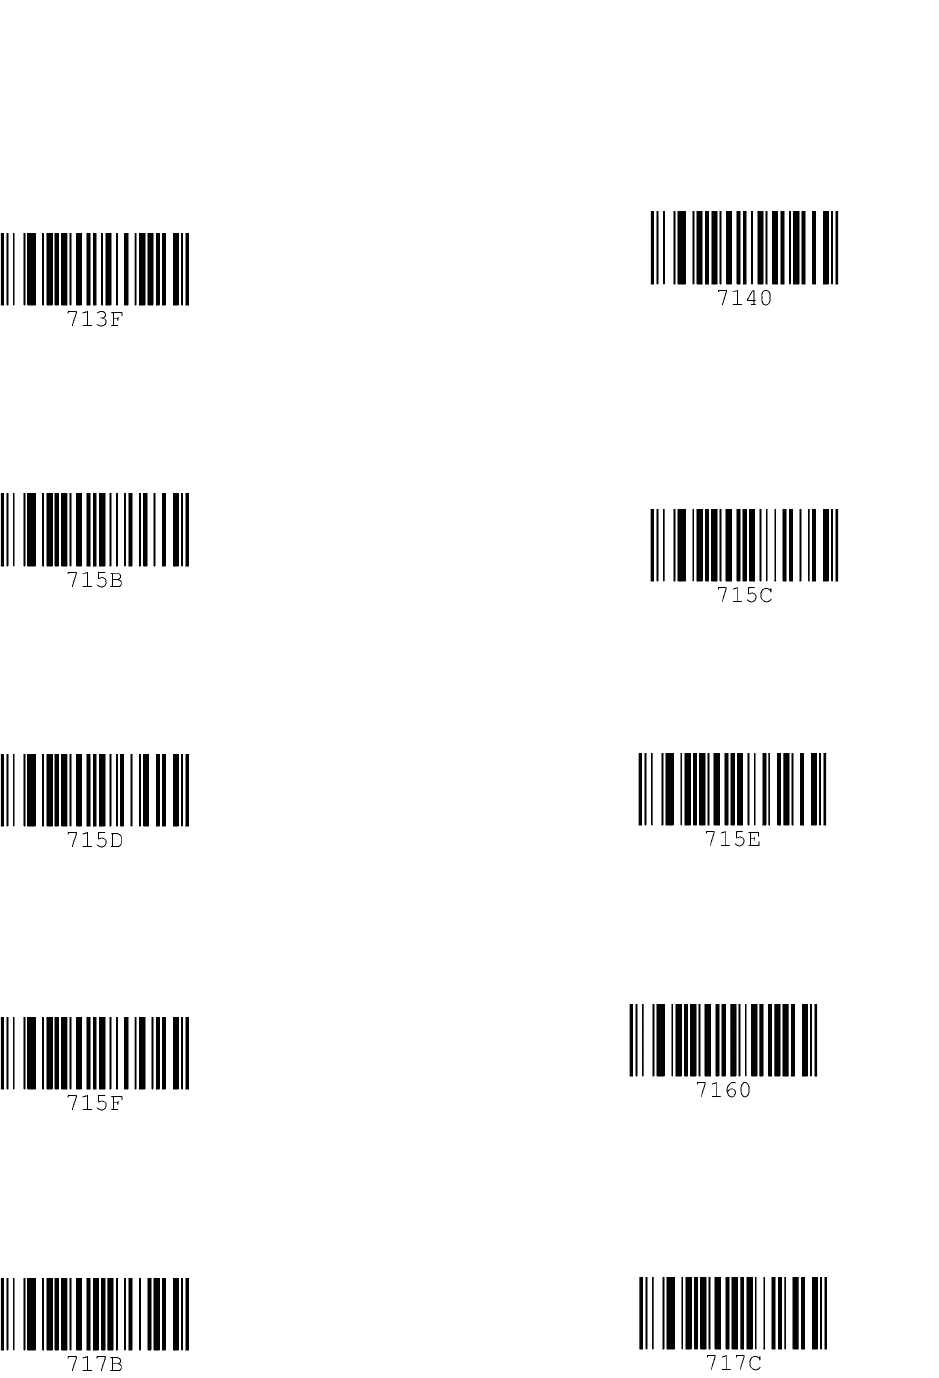
KDC200 User Manual
134
? @
[ \
] ^
_ `
|
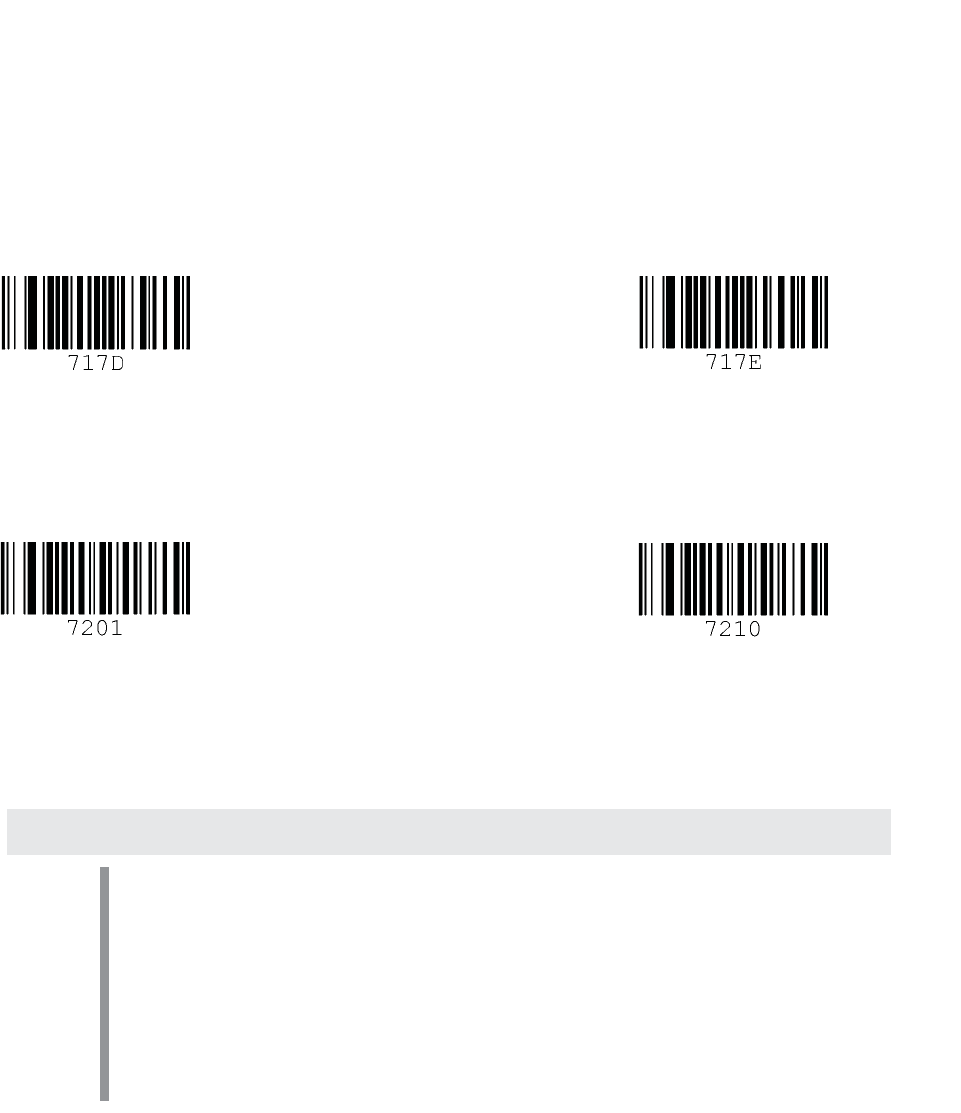
KDC200 User Manual
135
} ~
Start-String Stop-String
Note:
xYou can compose a string up to 16 characters.
xA string would be composed by scanning the “Start-String”,
number/alphabet/special characters, and “Stop-String” special barcodes.
xThe KDC will abort string composition if you do not scan
“Stop-String” in one minute after scanning “Start-String” and
number/alphabet/special characters.
KDC200 User Manual
136
C.23 Data Process
Prefix Enter Start Suffix Enter Start
Prefix/Suffix Enter Finish Prefix/Suffix Enter Cancel
Delete Prefix Delete Suffix
Display Prefix Display Suffix
KDC200 User Manual
137
C.24 GPS
GPS Power Enabled GPS Power Disabled
GPS Bypass Data Enabled GPS Bypass Data Disabled
Reset GPS Module GPS Acquire Test
GPS PowerSaveMode(Normal) GPS PowerSaveMode(PowerSaving)
GPS Auto Power Off Enabled GPS Auto Power Off Disabled
KDC200 User Manual
138
C.25 Auto Power Off Timeout
0 min(Disabled) 5 min
10 min 20 min
30 min 60 min
120 min DisplayFormat = GPS Data

KDC200 User Manual
139
INDEX
Angle .................................... 33
Auto.................................... 113
barcode scanner .................... 9
Battery ............ 25,39,120,121
Beep ....................... 39, 57, 113
Bluetooth ............................ 113
Button................................... 39
Clear .............................. 56, 85
Connect .............................. 113
data collectorSee barcode scanner
Date ..................................... 39
Delay .................................... 58
Delimiter ............................... 58
EAN128 .......................... 88, 95
EAN13 .... 88, 89, 90, 91, 92, 95
EAN8............ 88, 89, 90, 91, 95
mGk ................ 121
File ........................... 50, 53, 55
Filter ..................................... 33
Format .................................. 34
Full................................. 40, 85
Handshake ..................... 35, 37
High ................................ 33, 34
I2of5 ......................................91
ITF14 .............................. 88, 95
KoamTac9,41,85,86,87,95,97
KTSync´27,34,39,50,52,53,55,
59
LED ..................... 27, 40, 41, 85
Level ..................................... 33
Memory ..................... 39, 85, 96
Menu33, 34, 48, 49, 50, 51, 52, 53
Minimum ............................... 33
Narrow .................................. 33
Normal .................................. 33
Option33, 50, 58, 60, 88, 90, 91
Order .................................... 58
Pairing ................................ 113
PDA ................................ 55, 85
Power ................................. 113
Prefix .............................. 50, 58
Process .................................34
Reset .................................... 39
Resolution .............................92
Scan ....... 33, 50, 57, 59, 85, 88
Security ................................ 33
Serial .................................... 86
Sleep .................................... 39
Special Barcodes ................. 26
Status ............................. 39, 40
Store ............ 34, 35, 36, 57, 60
Suffix .................................... 58
Symbology ............... 50, 90, 95
Synchronization27,50,51,55,56,
57,58,60,62,63,73,85
Terminator ............................ 37
Time ......................... 33, 39, 58
Transmission .................. 90, 91
UPCA 88, 89, 90, 91, 92, 94, 95
UPCE ..... 88, 89, 90, 91, 92, 95
USB .................... 40, 41, 53, 85
Version ................................. 39
View ..................................... 33
Website ............... See Koamtac
Wedge ............................ 34, 57
Wide ..................................... 33