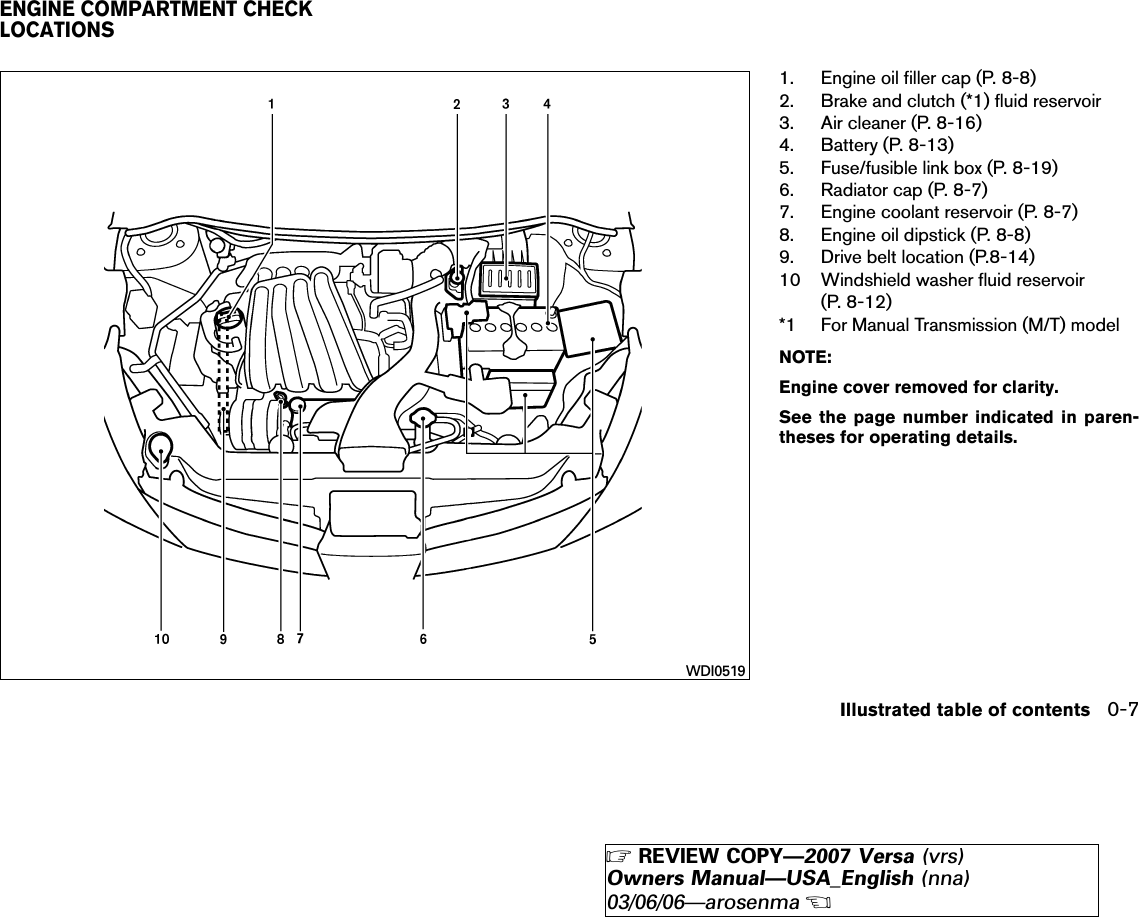
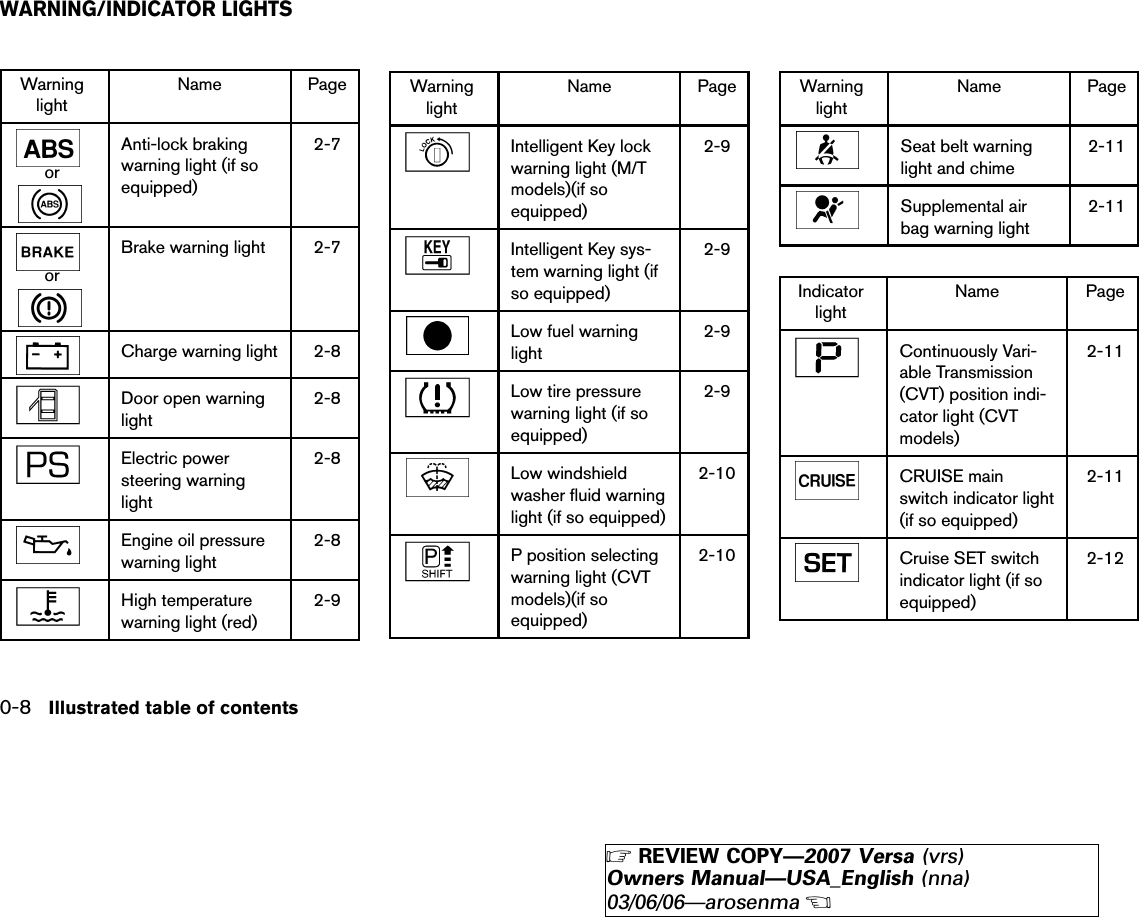
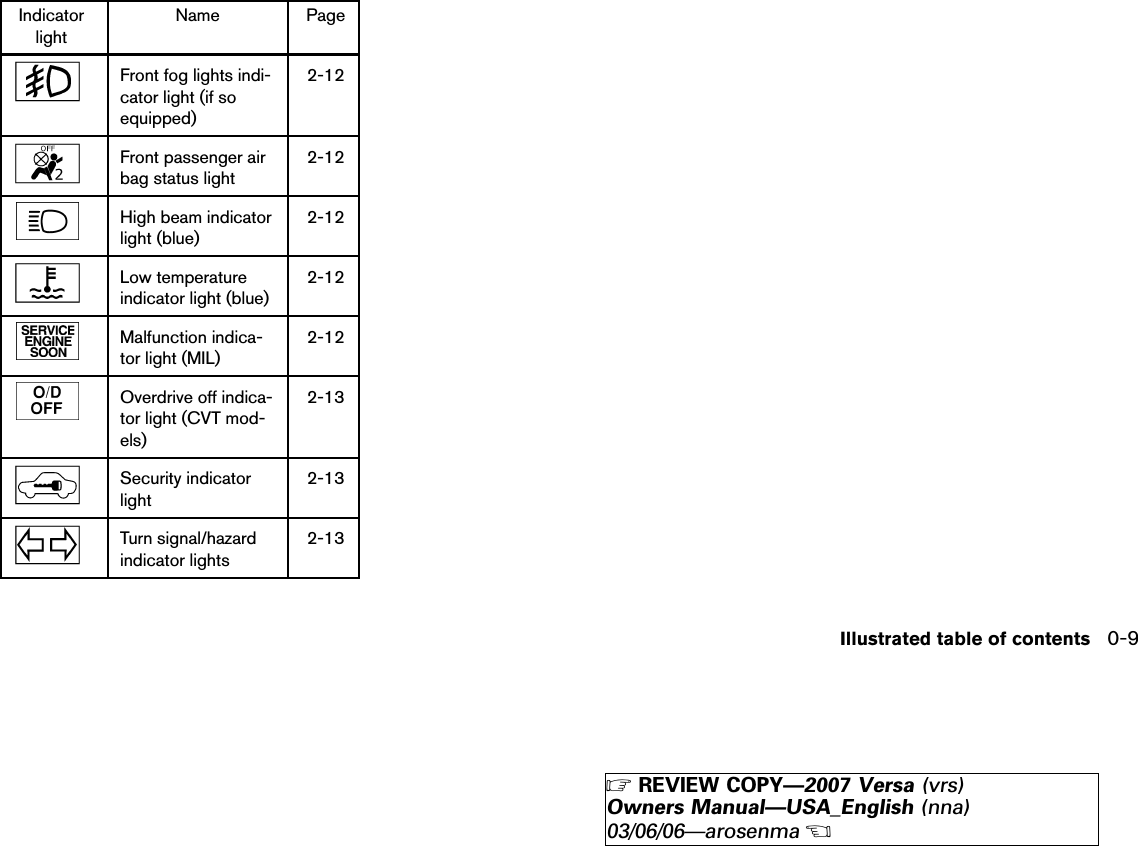
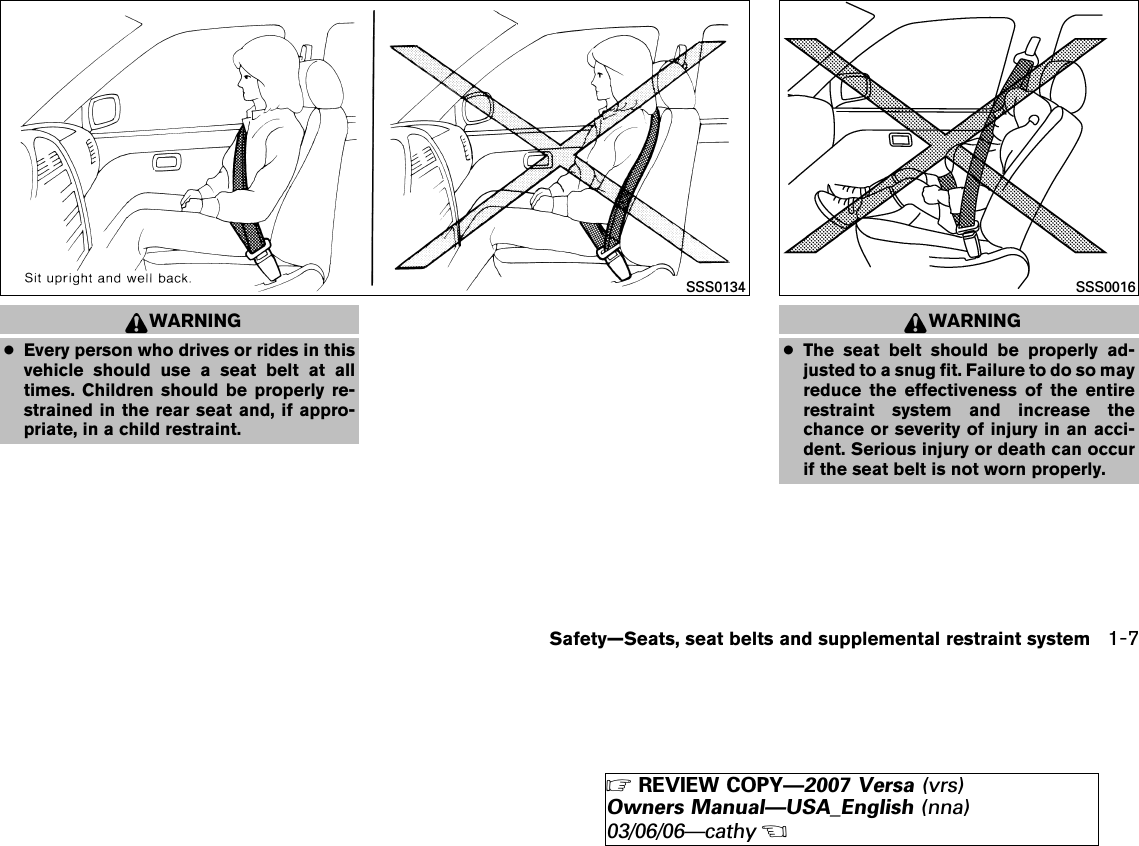
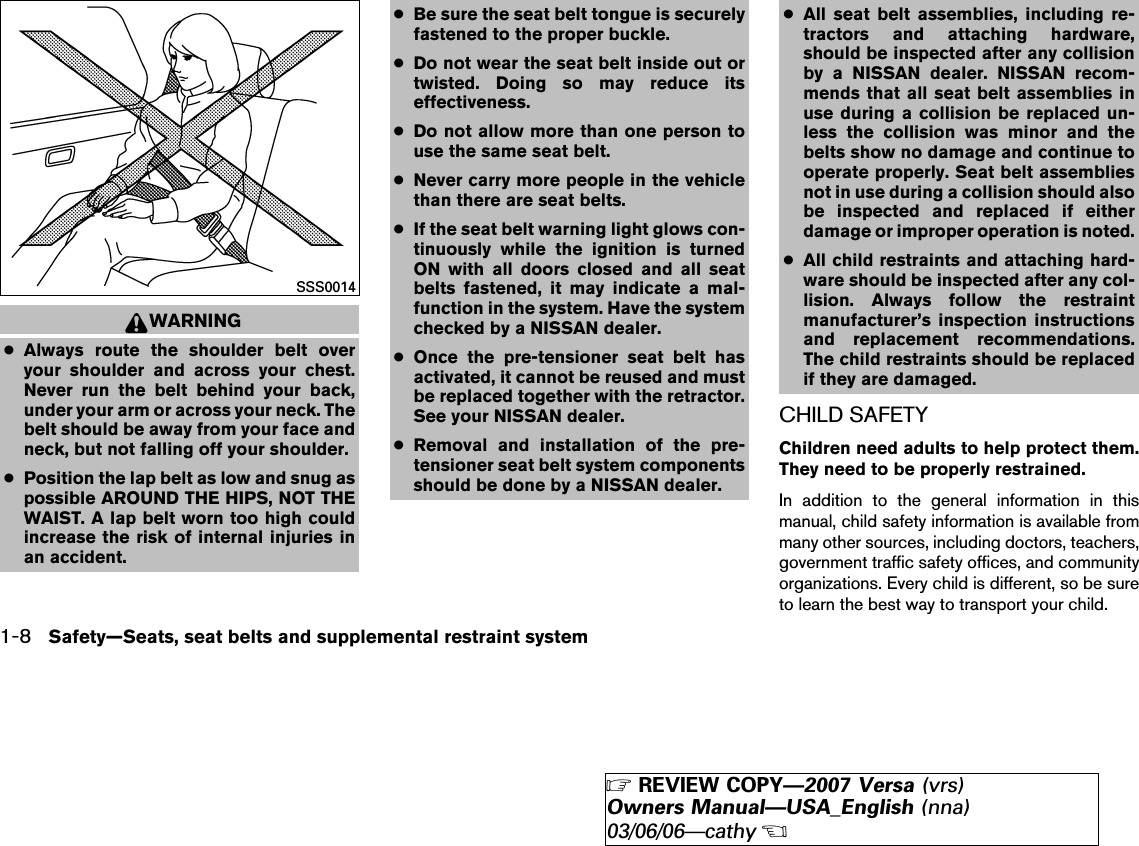
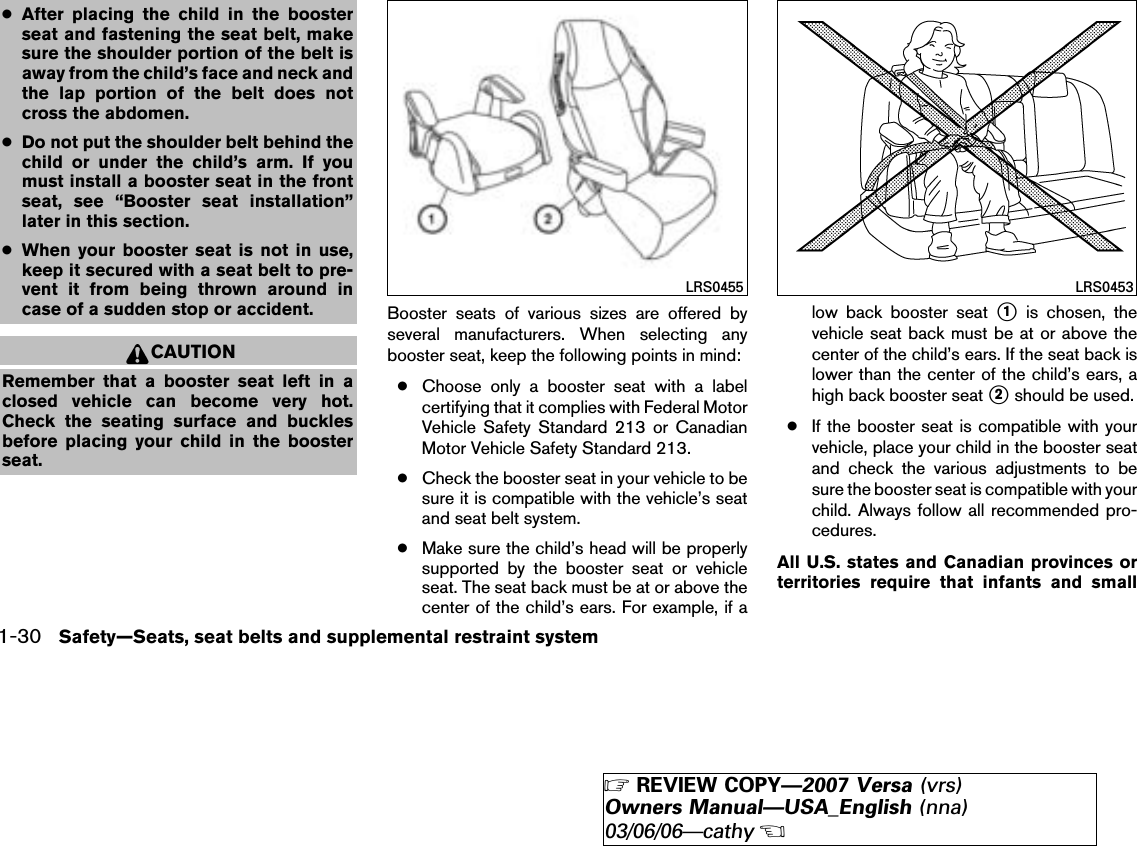
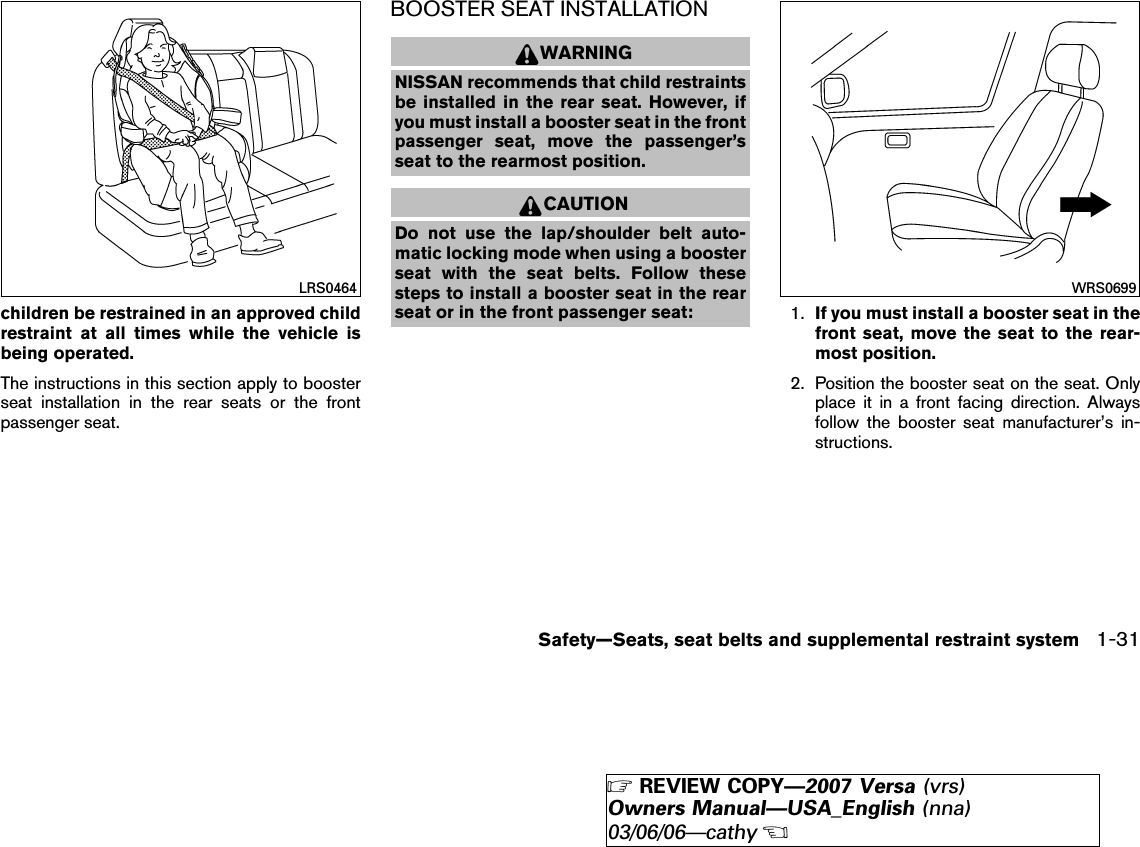
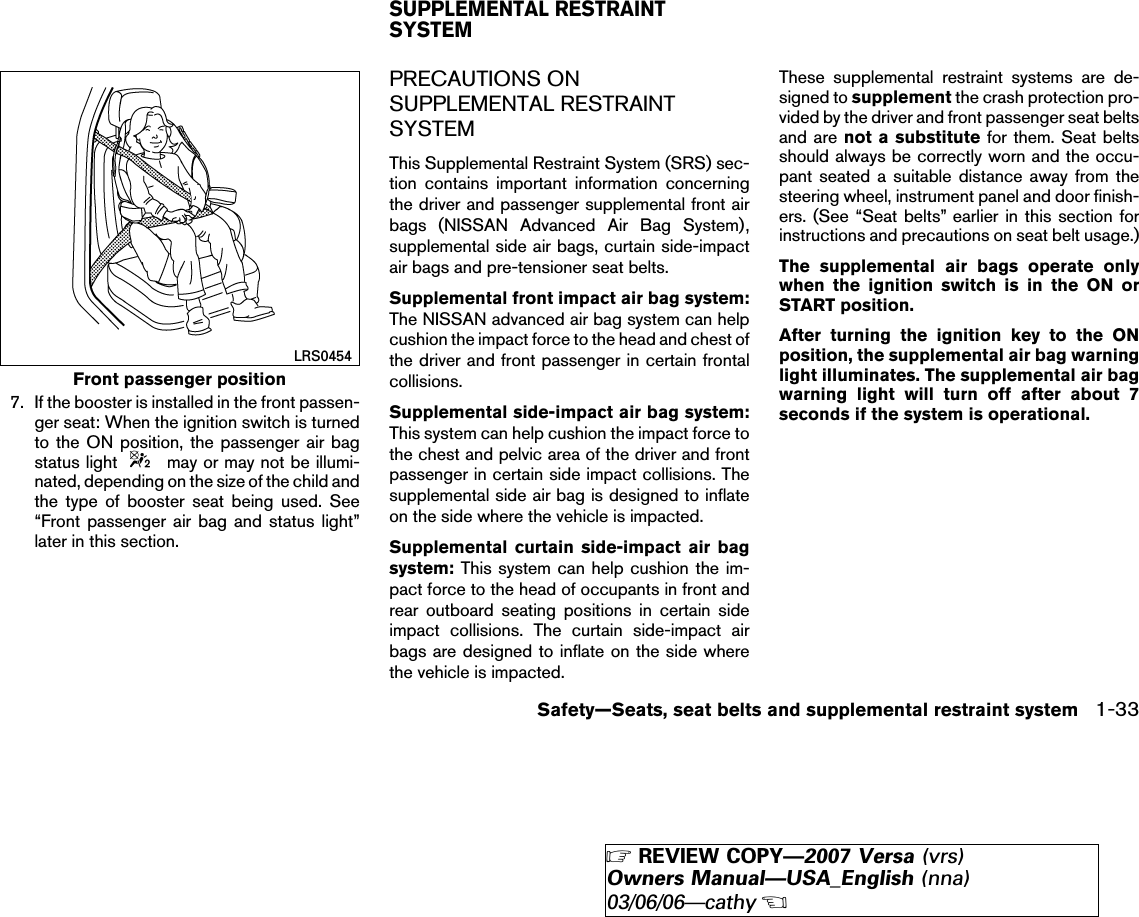
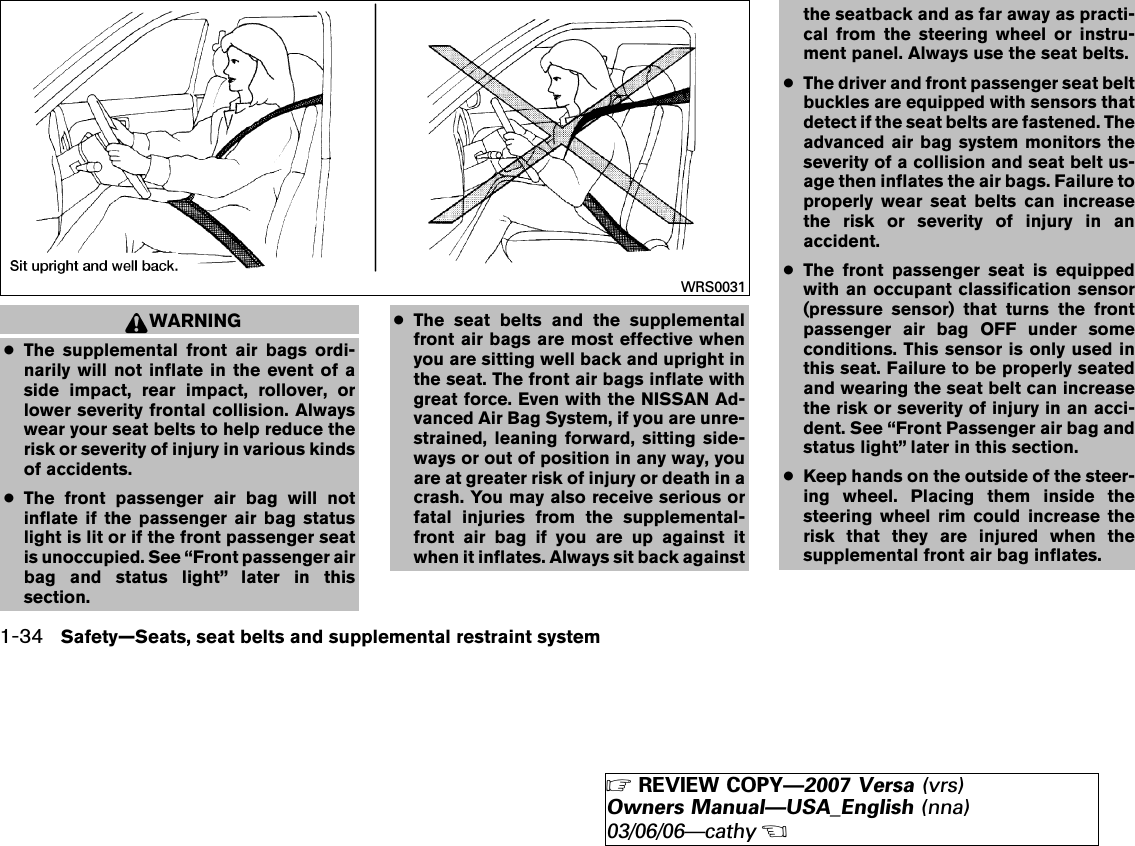
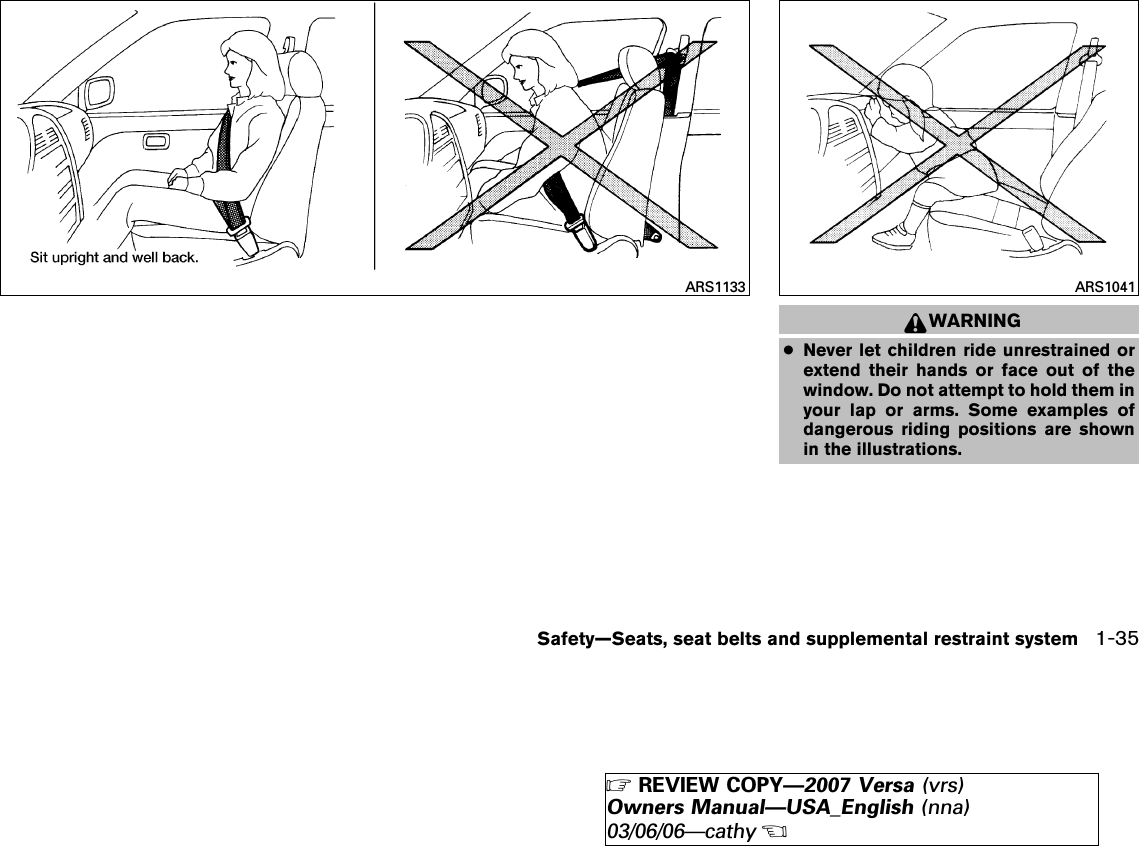
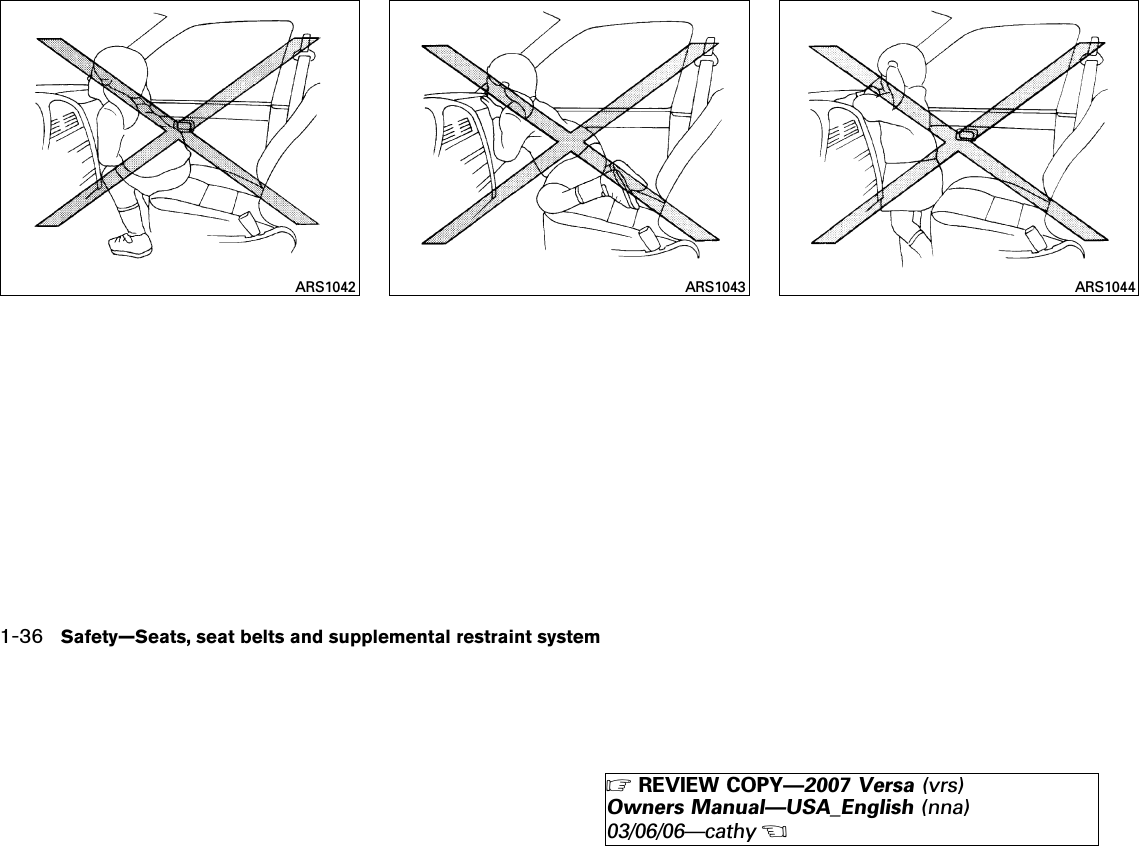
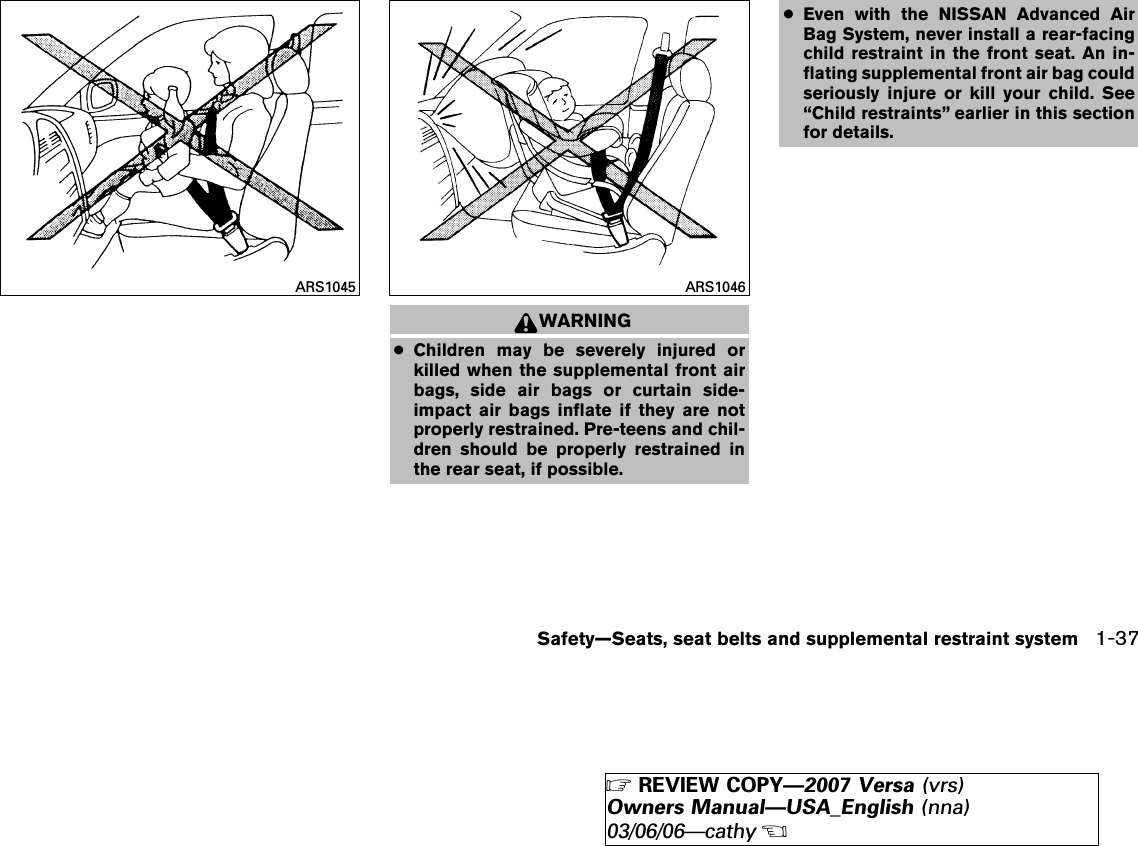
ALPS ALPINE WB1U733 Transmitter Assy-Lock System Remote Control User Manual Part1
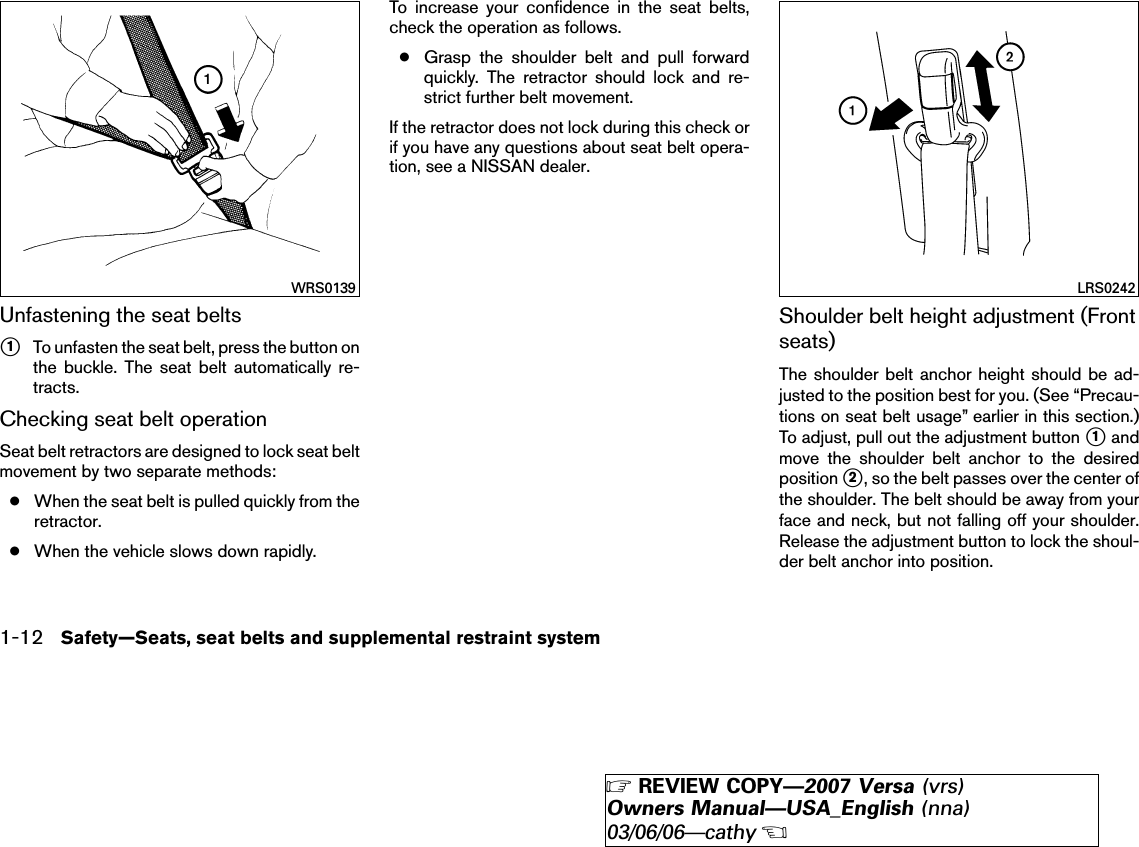
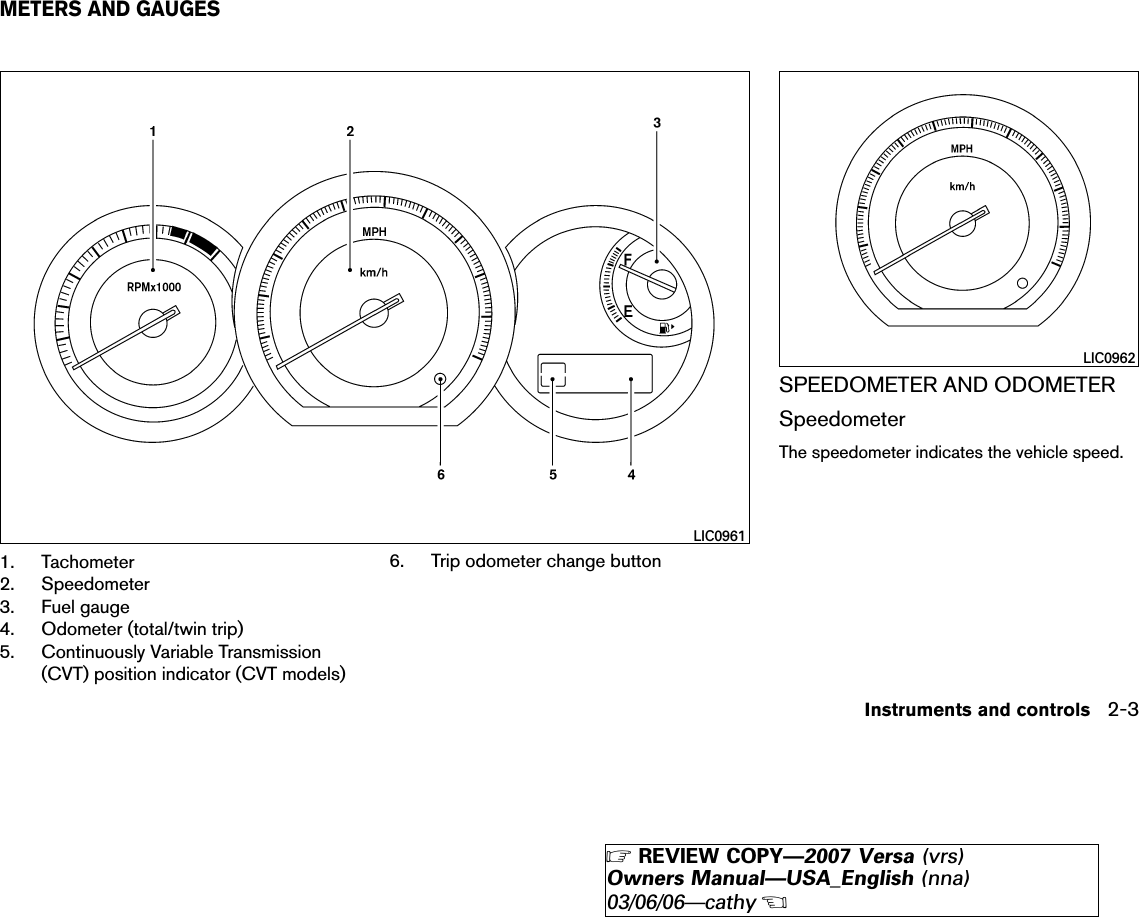
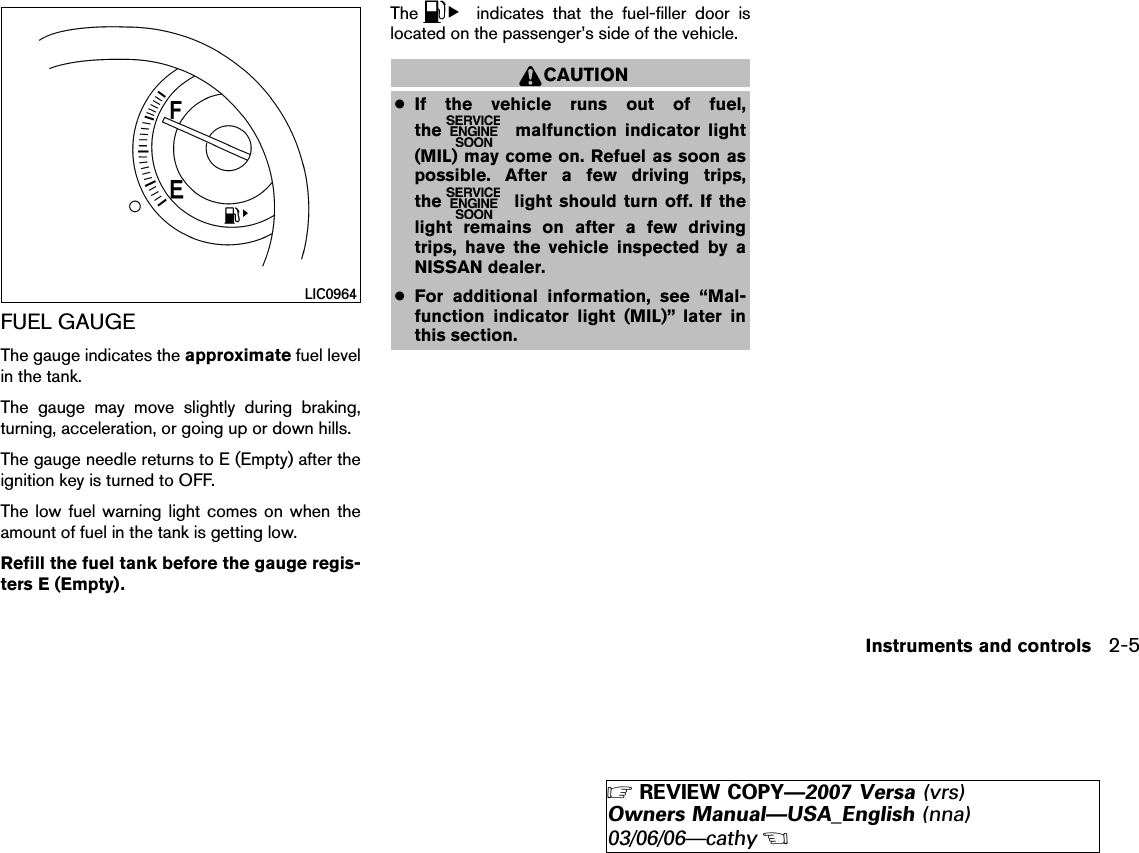
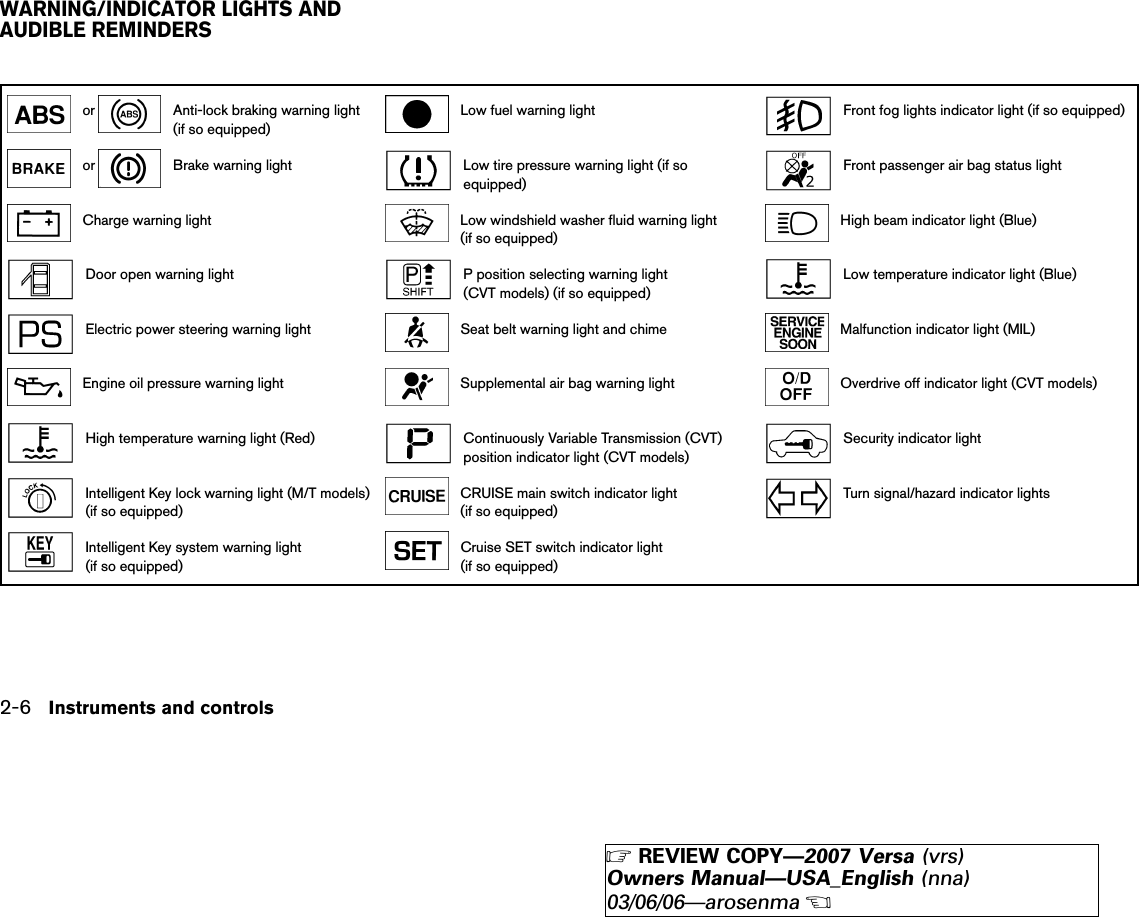
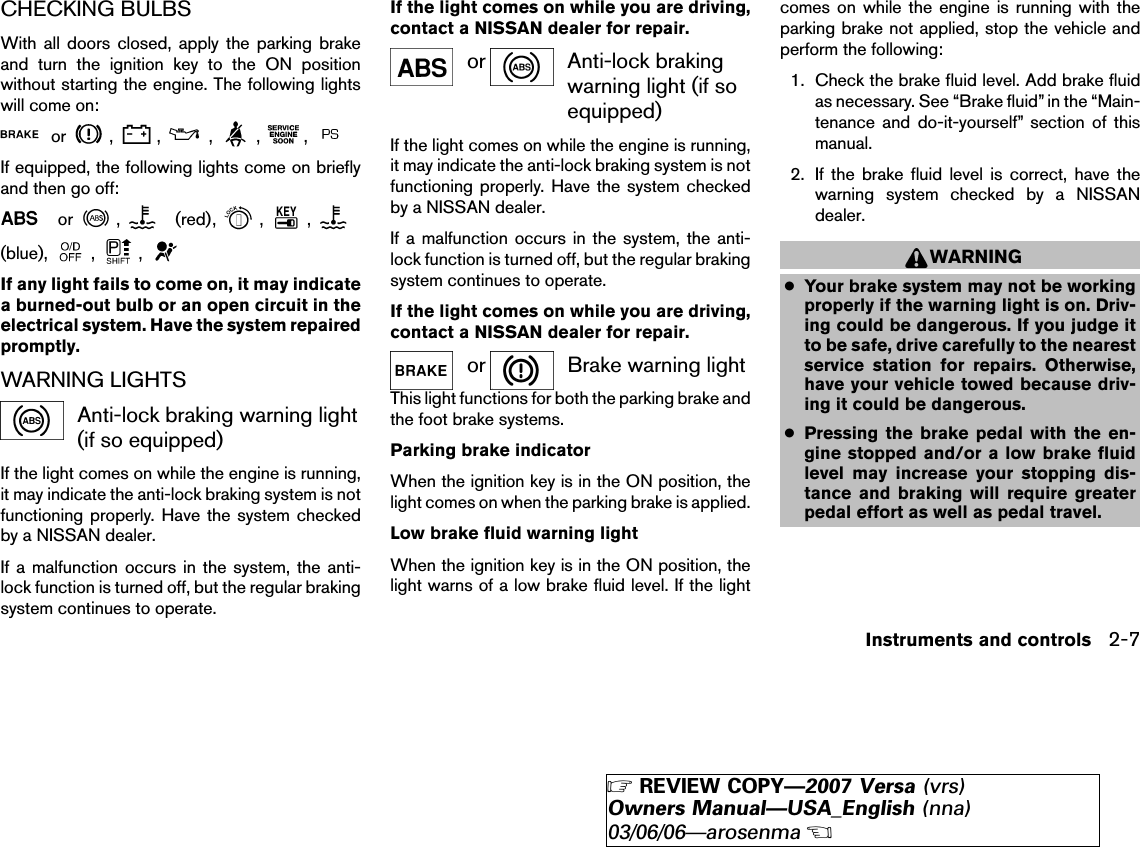
Alps Electric Co., Ltd. Transmitter Assy-Lock System Remote Control Users Manual Part1
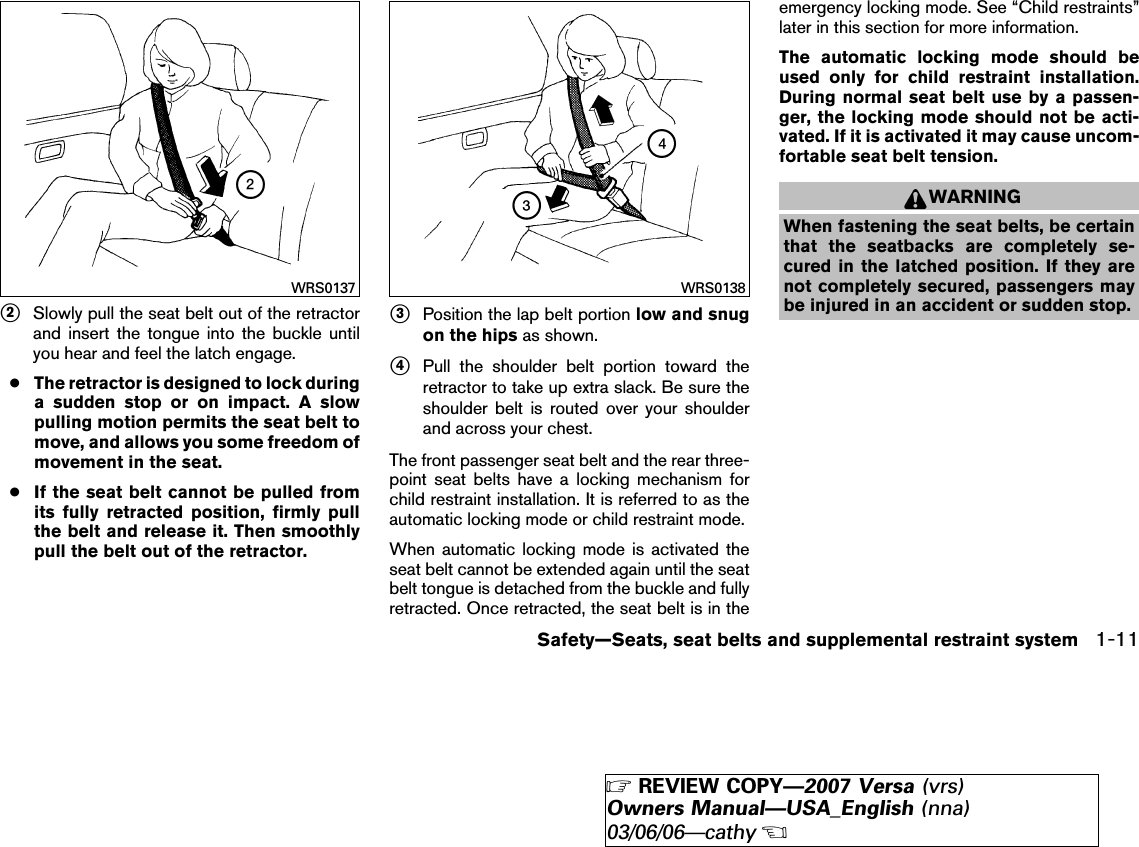
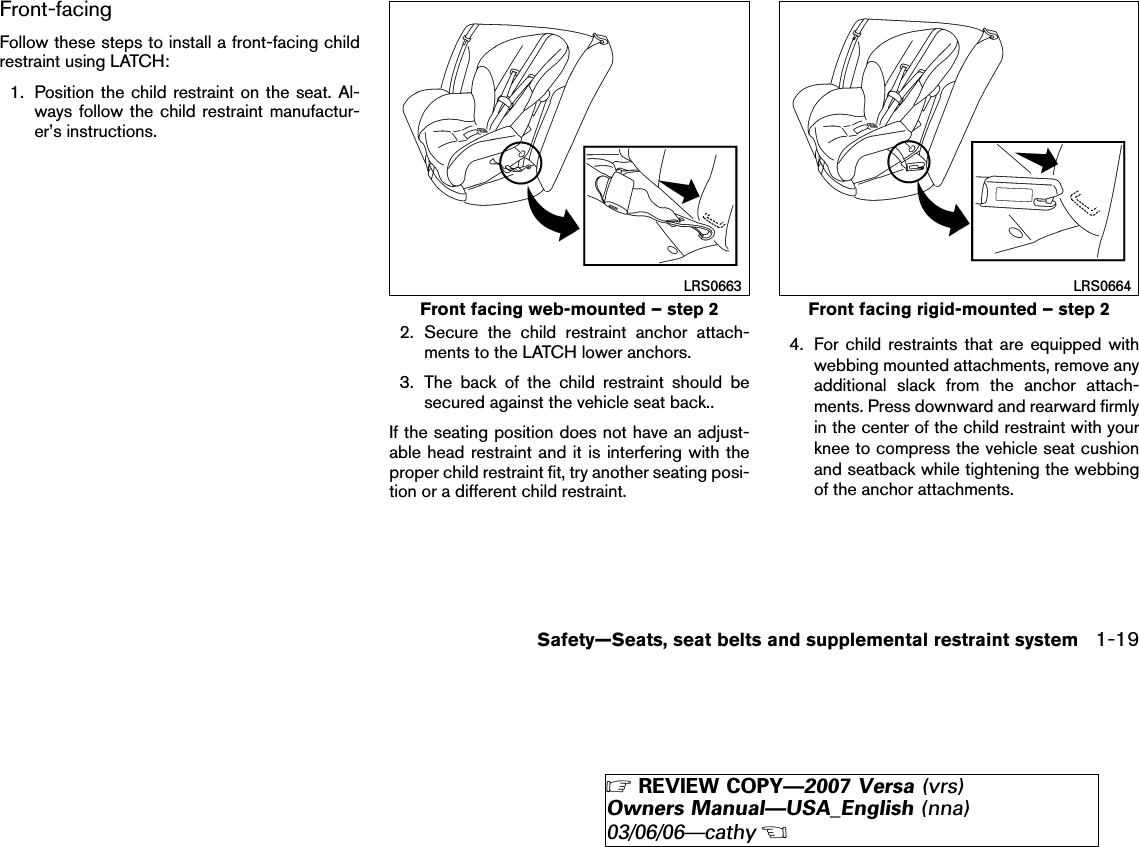
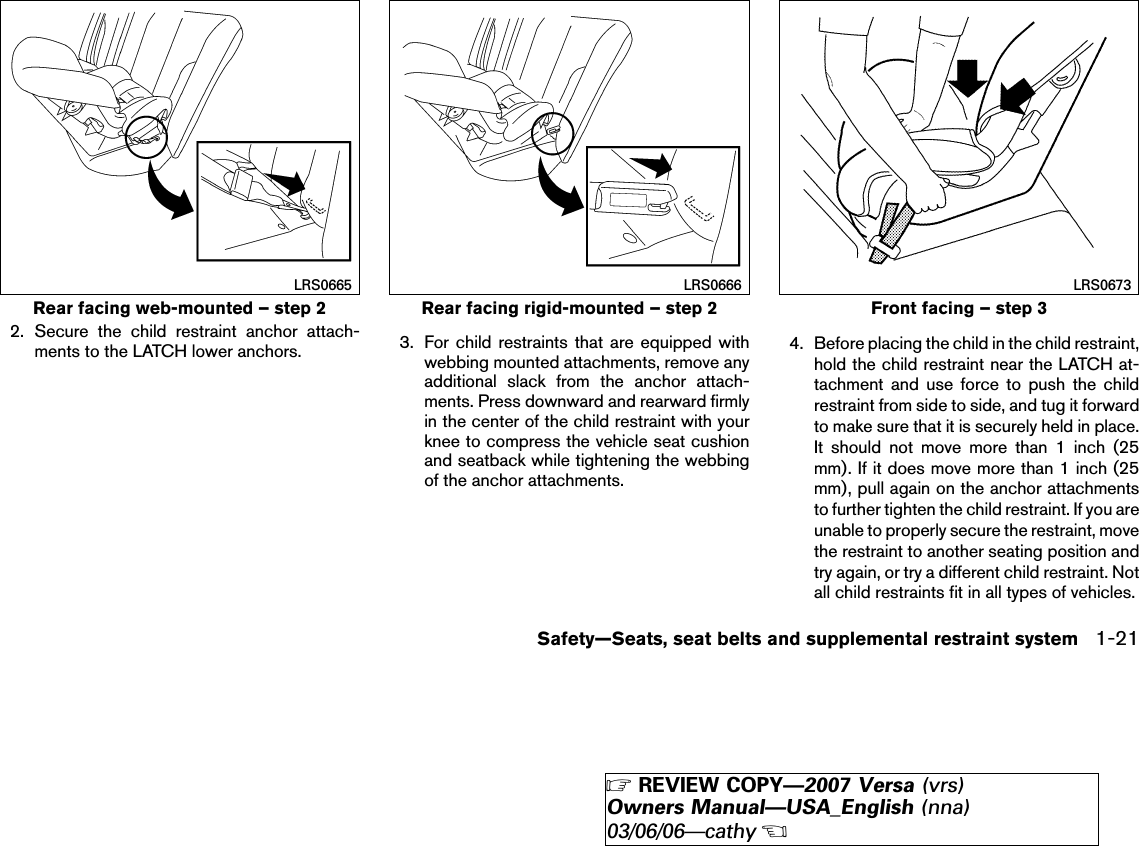
Contents
- 1. Users Manual Cover
- 2. Users Manual Part1
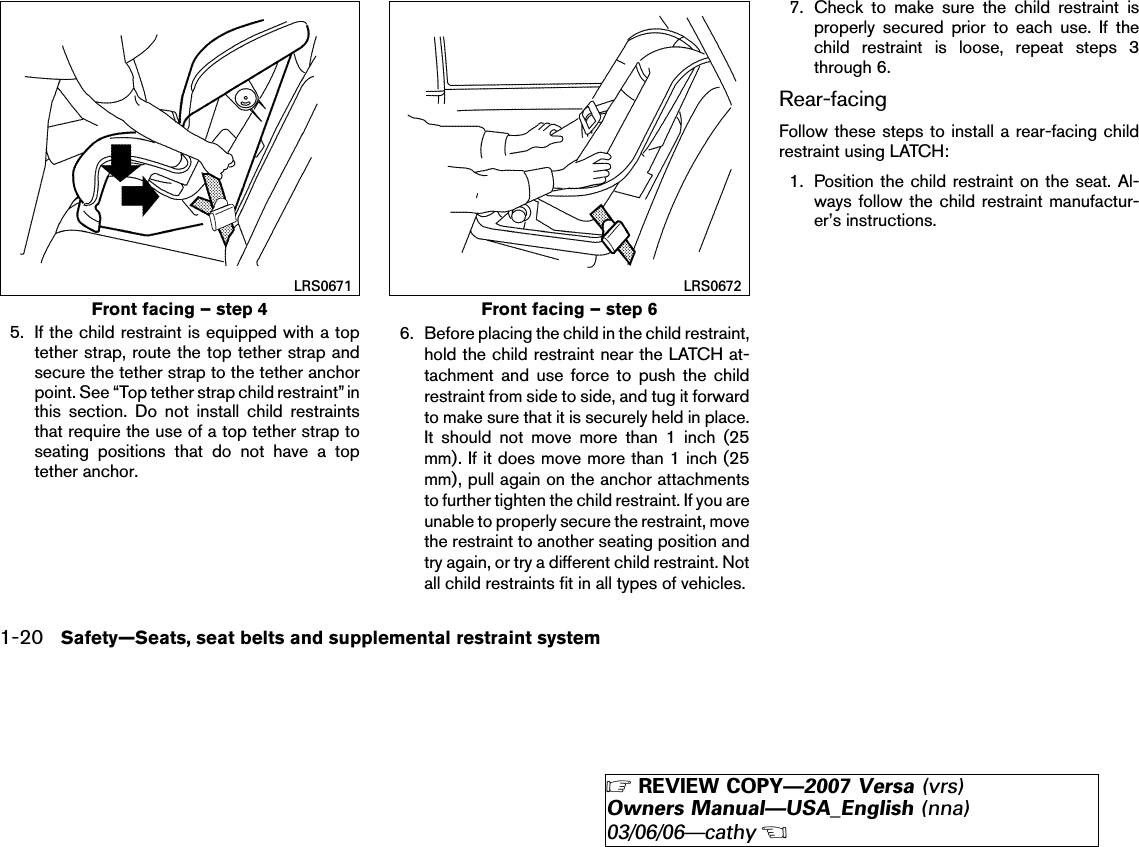
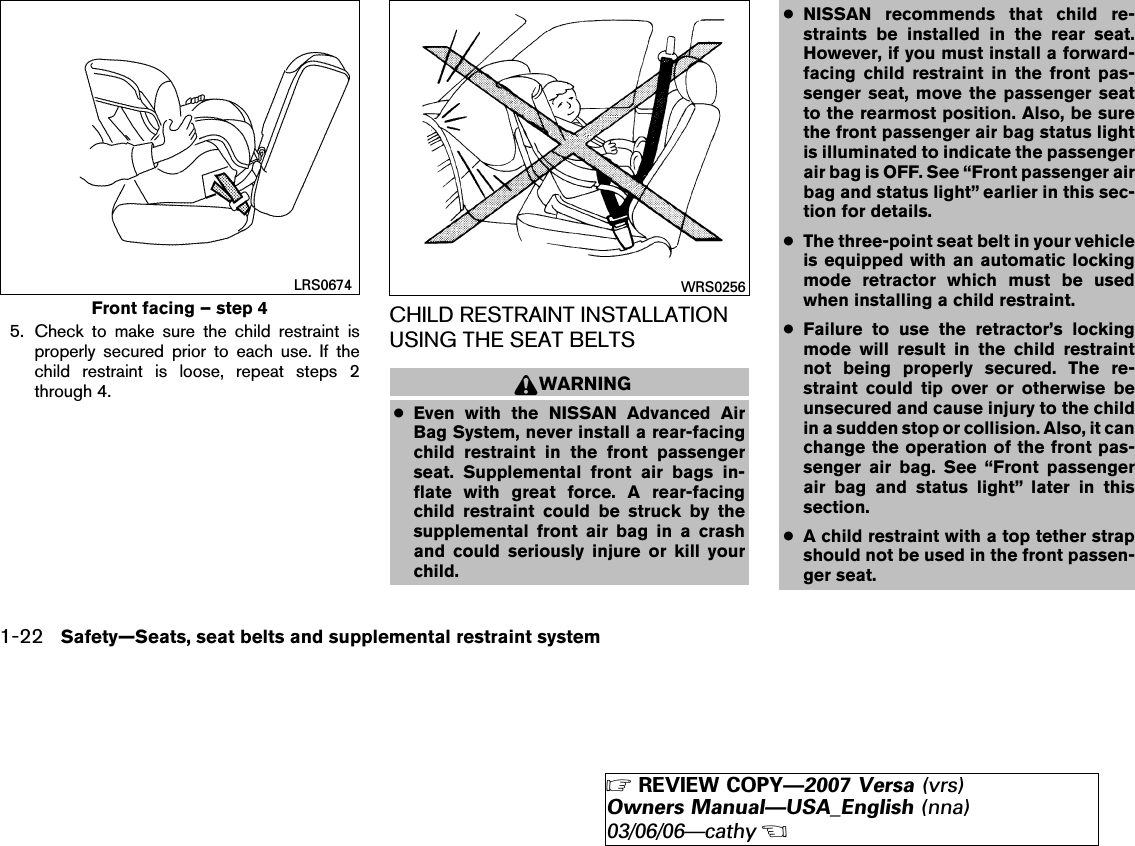
- 3. Users Manual Part2
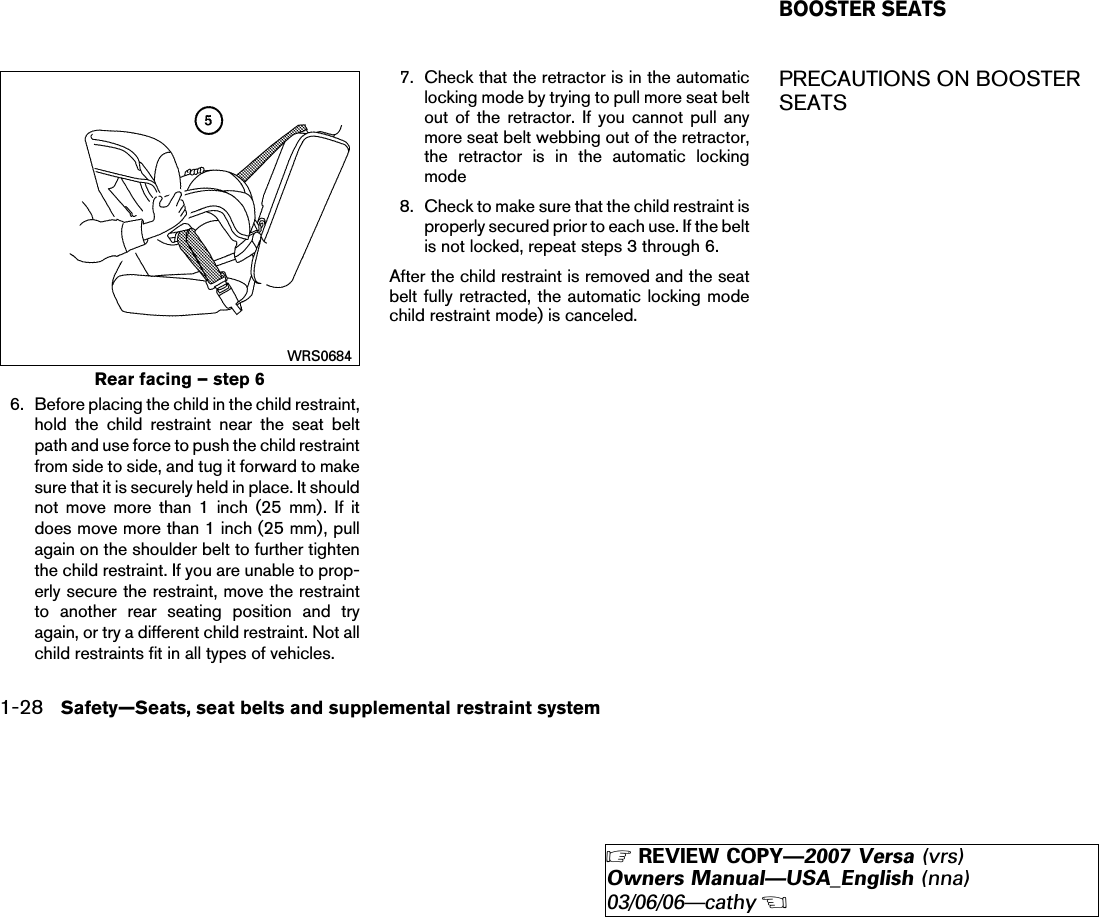
- 4. Users Manual Part3
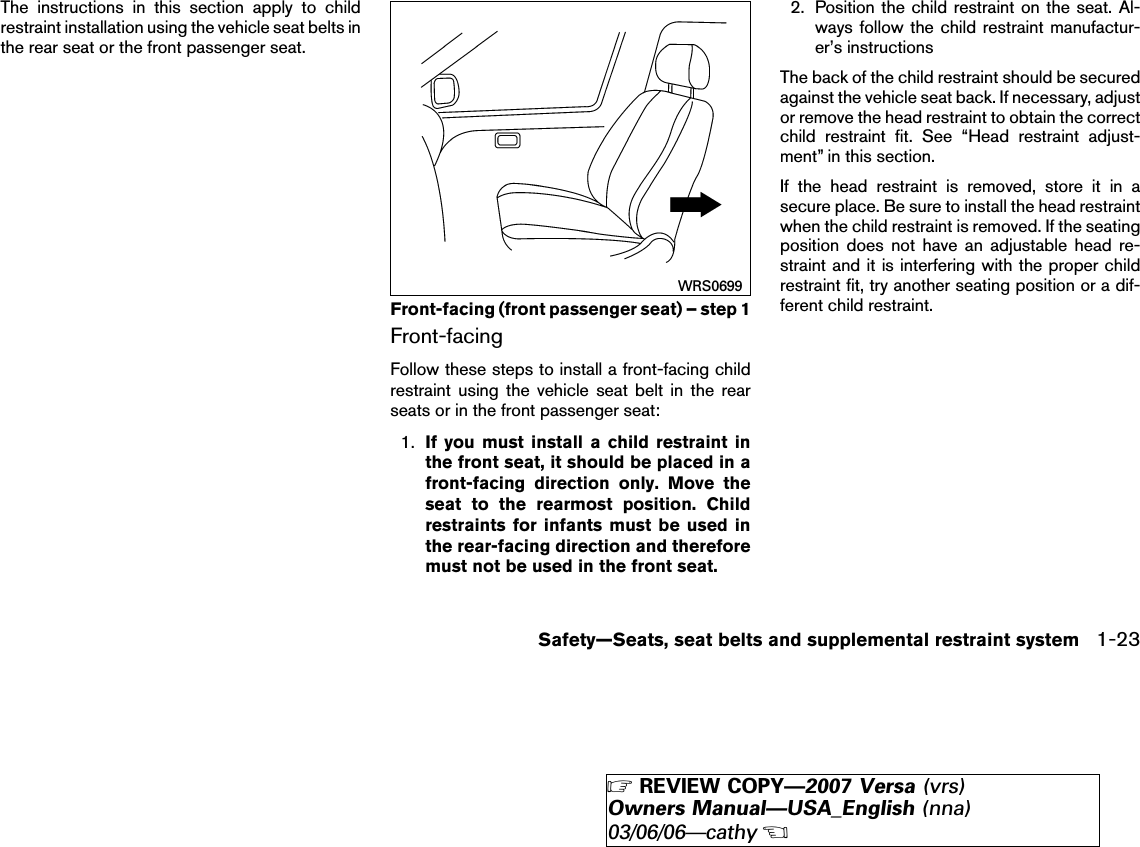
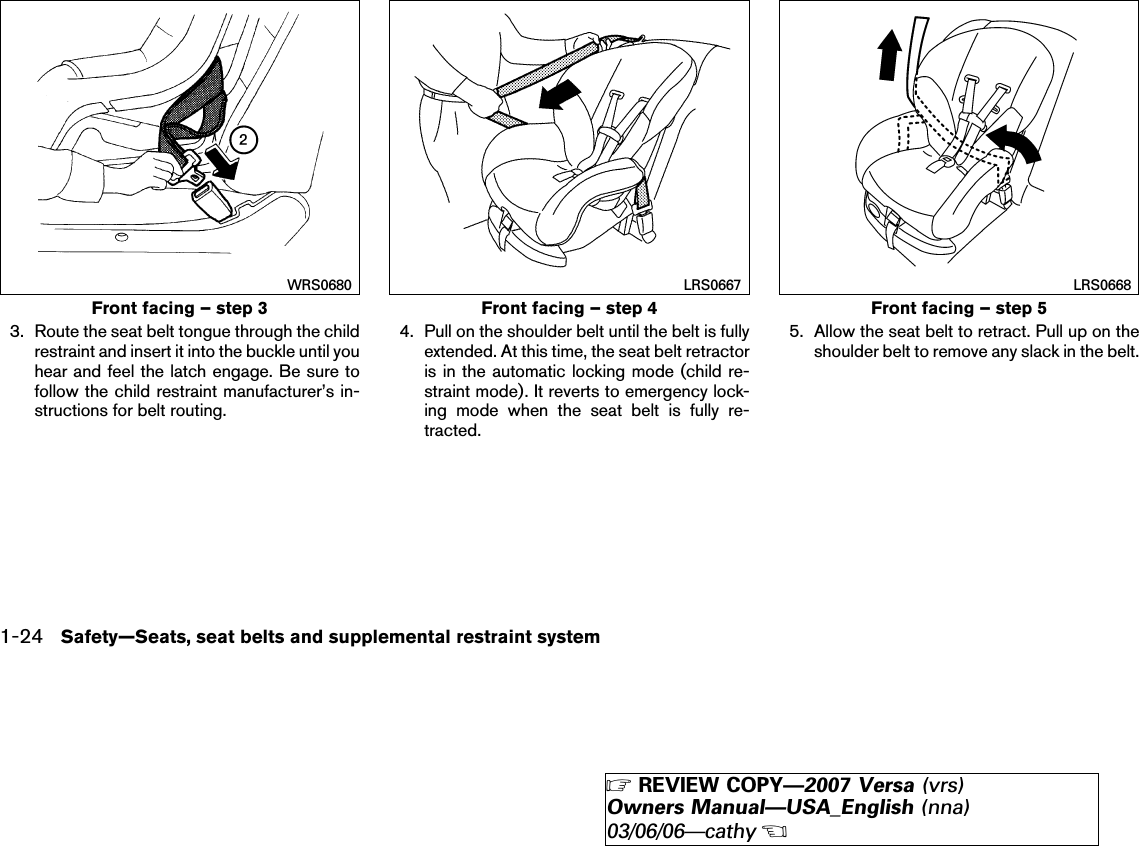
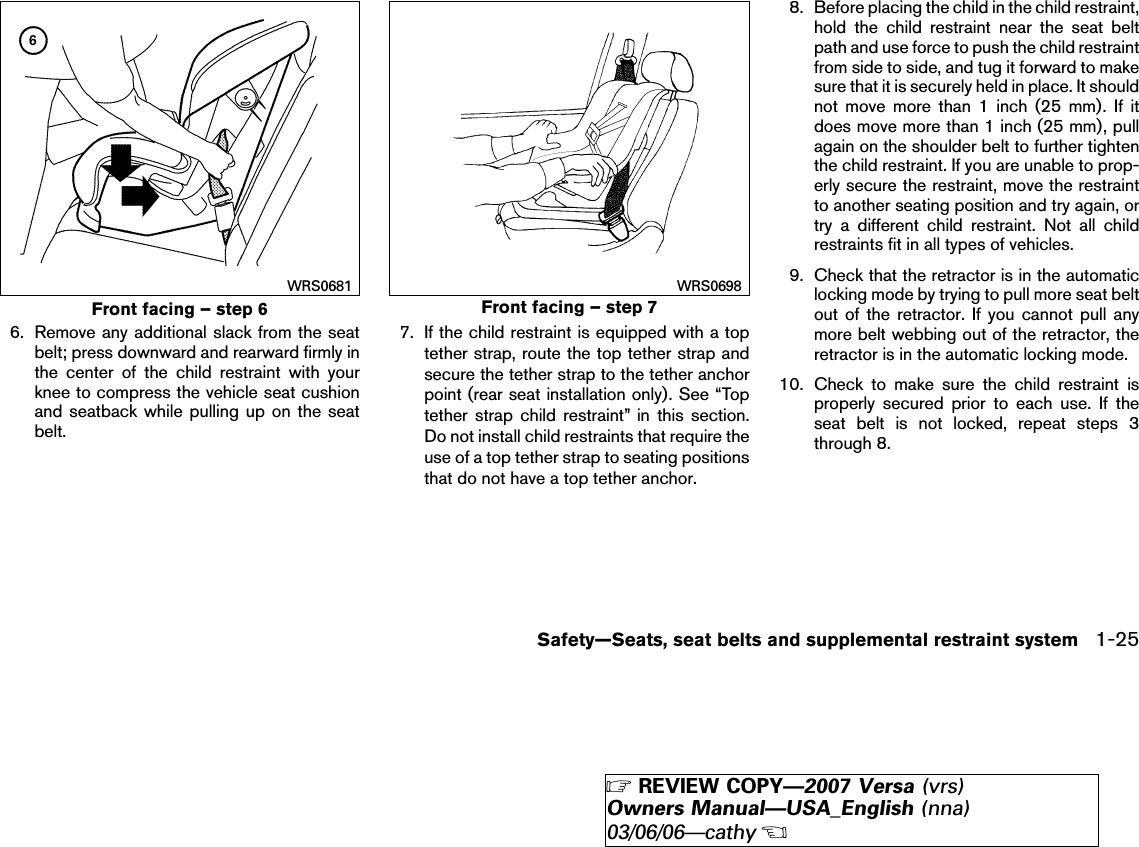
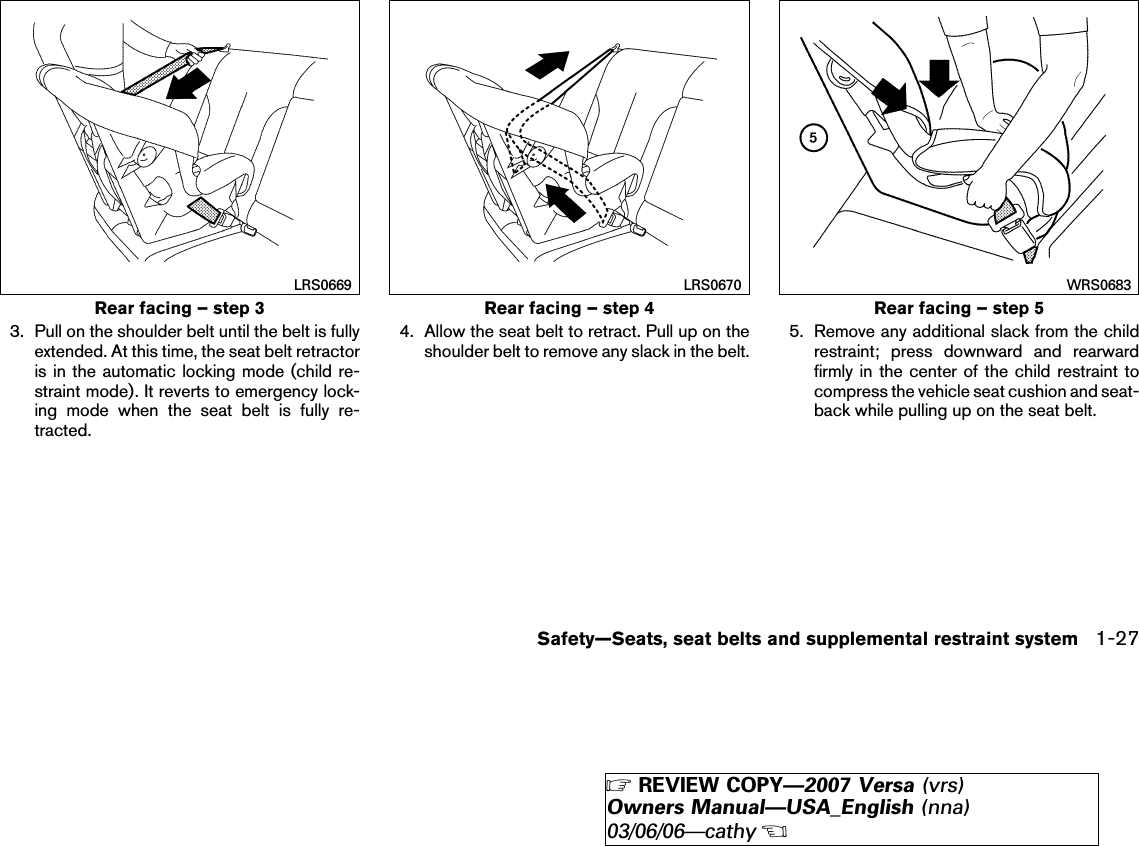
Users Manual Part1