AMT SATNOVA Digital Satellite Receiver User Manual manual pt 1
AMT Co., Ltd. Digital Satellite Receiver manual pt 1
UserManual.wiki
>
AMT
>
SATNOVA User Manual
>
manual pt 1
Contents
1.
manual pt 1
2.
manual pt 2
3.
manual pt 3
manual pt 1
Navigation menu
Upload a User Manual
Namespaces
Wiki Guide
HTML
PDF
Info
Views
User Manual
Discussion / Help
Navigation
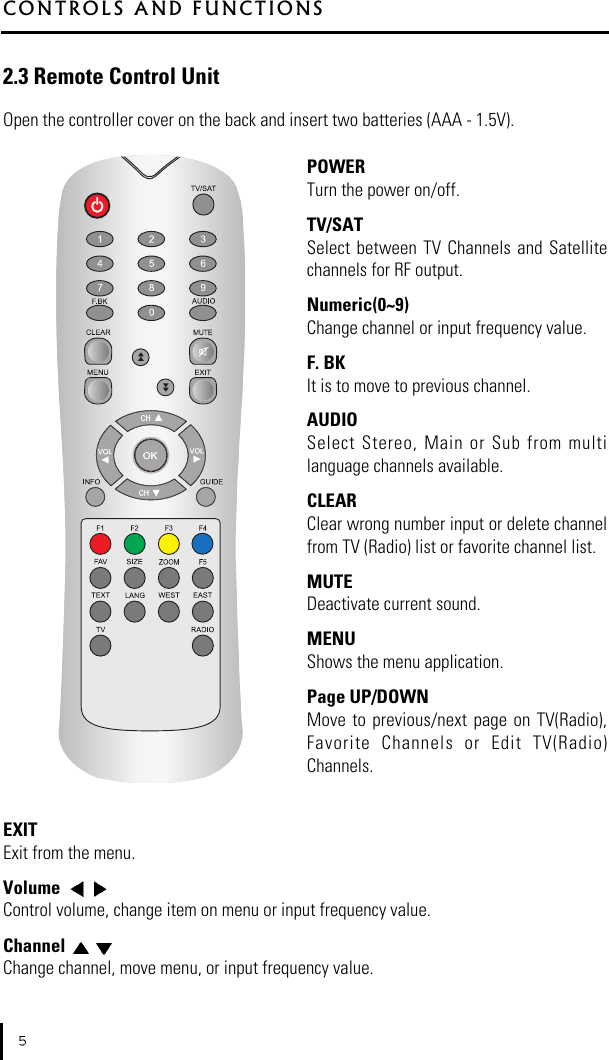
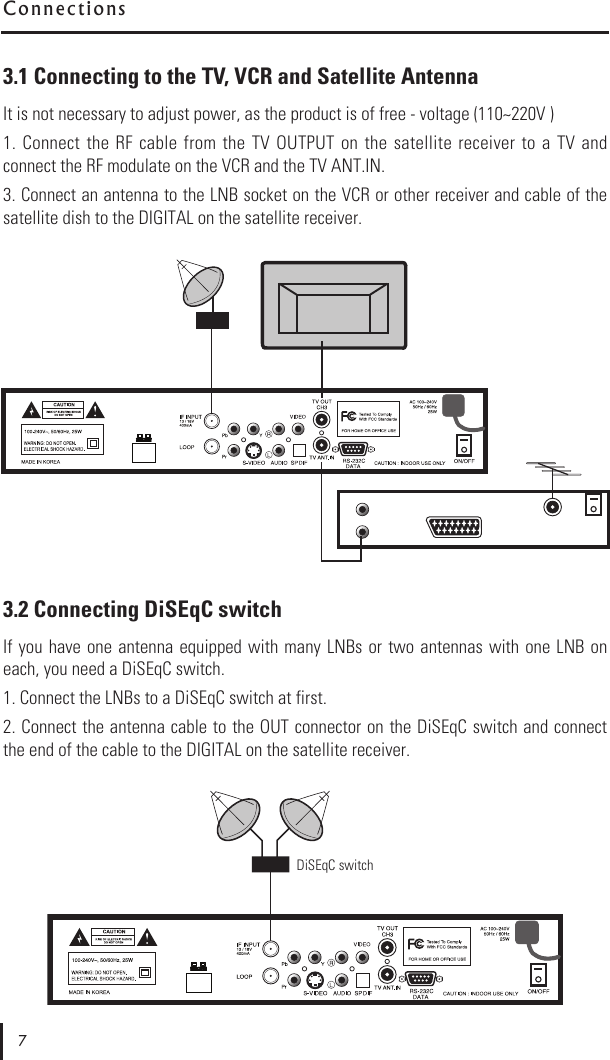
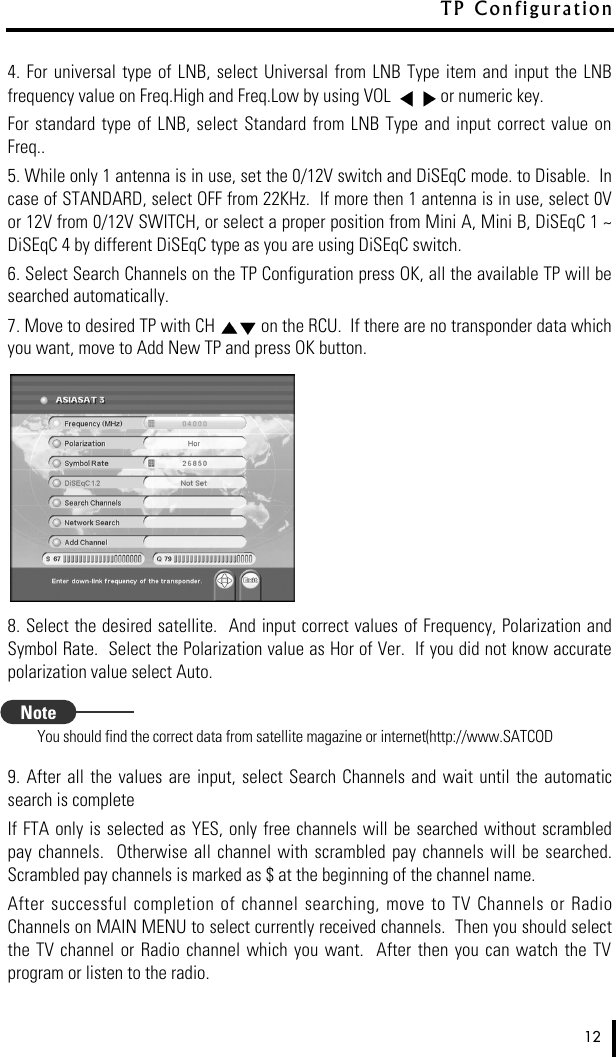
![OKSelect menu or value on menu item.INFOShows the information of current channel. Click the INFO button twice, EPG mode willbe displayed. When pressed in channel list channels will be sorted in alphabetical orderA-Z.GUIDEShows EPG[Electronic Program Guide]FAVAdd TV or Radio channel to the favorite list on Edit TV(Radio) Channels, or watch favoritechannel from your favorite list.SIZESelect between standard 4:3 and wide 16:9 screen sizes. ZOOM2 times zoom in mode. First press, show target area box. Second press, show zoomedscreen. Zoom area can be moved with arrow keys. Exit zoom in mode with "EXIT" remotekey.TEXTChange to Teletext mode. LANGSelect the audio language from 2 or more audio language channels available. EAST/WESTThe function of EAST/WEST button is to move the Position Actuatorwestward/eastward.TVChange to TV mode from radio channel. RADIOIt is for fast change to radio mode from TV channel. .R e m o t e C o n t r o l U n i t](https://usermanual.wiki/AMT/SATNOVA.manual-pt-1/User-Guide-655165-Page-9.png)