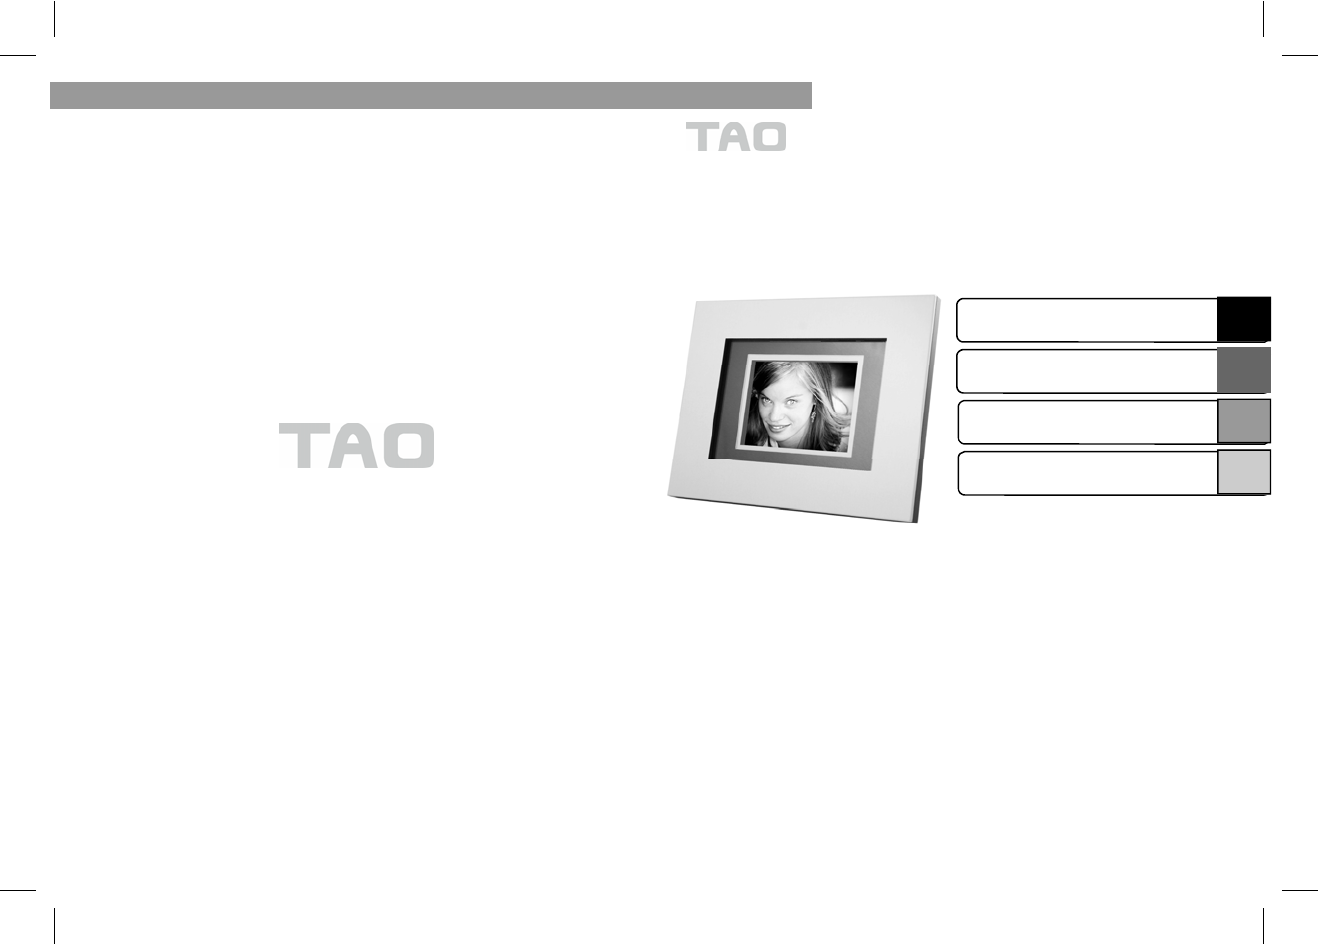
APEX DISPLAY AGAM00090RC Dgital photo frame User Manual TAO 5x7 Manual ver 1 0 7 24 2008
APEX DISPLAY CO., LTD. Dgital photo frame TAO 5x7 Manual ver 1 0 7 24 2008
User manual
© 2008 TAO ELECTRONICS, INC.
ENGLISH
digital photo
Frame
5x7 INCH DIGITAL PHOTO FRAME
Digital Frame User Guide
Please Read This First
This guide explains how to prepare the Digital Photo Frame and
use its basic features
The Components
Preparation
Menus and Settings
Loading Photos (PC)
FOR USE WITH MODELS SKU#
89350~89369
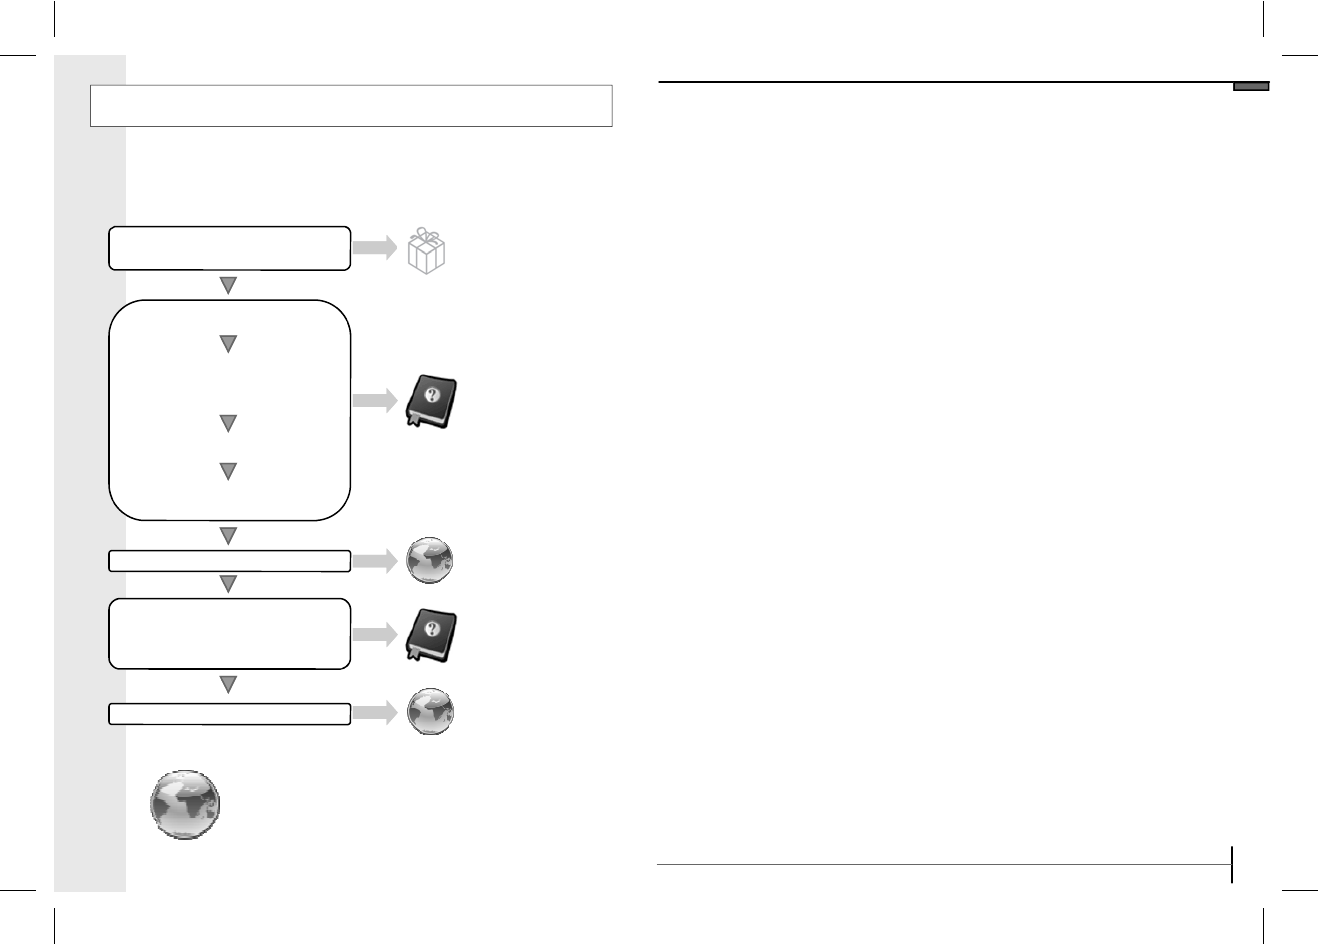
Flowchart and Reference Guides
The following guides and support are available. Refer to
them as necessary according to the flowchart below
For information on included
items and items sold separately
The Components Guide
Preparations
Basic hardware preparation, func-
tions and settings..
Menus and Settings
Loading Photos/Files
Frequently Asked Questions
Handling precautions, refer-
ences to various slideshow and
media functions
Troubleshooting
Packaging Exterior
Basic Manual
TAO Website
Basic Manual
TAO Website
www.taoelectronics.com
www.taoelectronics.com
29
Index
A
Alarm ON/OFF 10
Aspect Ratio 16
Auto On/OFF 11, 12
B
Buttons 3
C
Calendar Settings 8
Clock/Calendar 14
Compatible Files 4
Components 4
Contact 27
Custom Frames 21
D
Date 8
Deleting Photos 23
Display Setting 16
L
Loading Photos 26-27
M
Mac 27
Main Menu 6
Memory Cards 20
Music Menu 19
Music Repeat 15
O
Off 6
On 6
Other Products 28
P
PC Software 26
Photo Screen 18
Power 6
Preparation 7-9
R
Remote Control 22
Rotate 23
S
Safety 26
Slideshow Speed 13
Support 27
T
Tech Support 27
Thumbnail View 18
Time 9
Transition Speed 13
U
USB Flash Drive 20
V
Volume Settings 17
W
Windows 26
©2008 TAO Electronics, Inc.
Other Products
28
digital photo
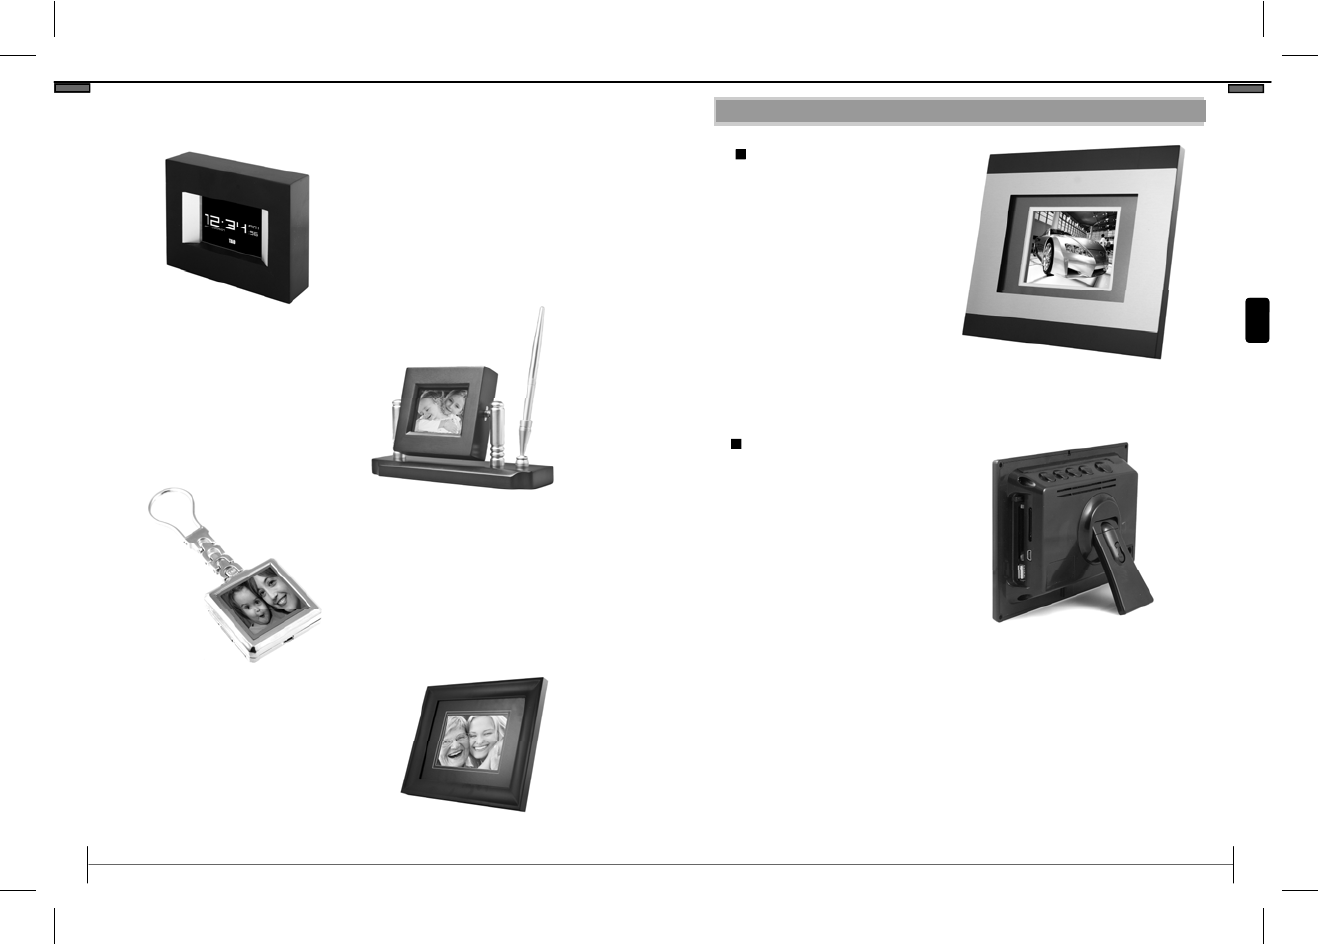
Clock
Digital Photo Frame & Clock Viewer
128 MB Internal Memory—1000 photos
3.5” Display
2 different models
digital photo
Desktop Penholder
Digital Photo Frame & Clock Viewer
128 MB Internal Memory—1000 photos
3.5” Display
2 different models
digital photo
Keychain
Digital Photo Keychain
Holds 100 photos
1.5” Display OLED
Rechargable Lithium Battery
4 different models
digital photo
Frame
Digital Photo Frame (8x10 style)
256MB Internal Memory
8” Display
10 different models
www.taoelectronics.com
3
The Components Guide
Front View
A. Display Screen
Back View
1. Tool Button
2. Next Button
3. Play/Pause
4. Previous Button
5. On/Off Button
6. A/C Adapter Slot
7. USB Flash Drive Slot
8. PC connection Slot
The Components Guide
1 2 3 4
5
6
7
A
8
9

©2008 TAO Electronics, Inc.
Overview & Specifications
Features
4
•
Load and display rich color photos in RGB
JPEG/JPG format up to 12 megapixel resolution.
•
Play your favorite songs as background music to
your photo slideshows.
•
Display and rotate photos as full screen stills,
automated slide shows, or as a dynamic split-
screen slide show.
•
Rotate and adjust the frame stand to show land-
scape and portrait style photos.
•
Display the time and calendar as an overlay to
your favorite photos.
Specifications
Display screen: 5.6" TFT LCD - 320 x 234
Internal memory: 128 MB
Photos: 56 ~ 100
Memory cards: CFI, CFII, SD, MMC, MS
Audio: yes ( speaker )
Formats: JPEG, Motion JPEG, MP3.
Frame: Replaceable for any standard 5x7 frame
PC interface: USB Host/Slave (2.0, 1.1)
Remote control: yes (RF, radio frequency)
Software: not required
Weight: 2 lb
Dimension:10" x 8" x 2.5" ( varies on the design)
Includes: AC adaptor, remote, USB cable, user's manual
Warranty: 1 year Domestic RMA
www.taoelectronics.com
27
Contact
Contact
Contact
Technical Support
US & Canada
Email: support@taoelectronics.com
Toll-Free: (888) 920-0829
Web: www.taoelectronics.com
Customer Service
US & Canada
Email: support@taoelectronics.com
Toll-Free: (888) 920-0829
Web: www.taoelectronics.com
International Support and Customer Service
Email: support@taoelectronics.com
Web: www.taoelectronics.com
Manufactured and distributed by:
TAO Electronics, Inc.
1215 Chrysler Drive
Menlo Park, CA 94025
Phone: (650) 326-5000
Fax: (650) 326-5828
©2008 TAO Electronics, Inc.
Safety Precautions
26
IMPORTANT INFORMATION REQUIRED BY THE FCC
This device complies with Part 15 of the FCC Rules. Operation is subject to the
following two conditions: (1) this device may not cause harmful interference; and
(2) this device must accept any interference received, including interference that
may cause undesirable operation.
NOTE: This equipment has been tested and found to comply with the limits for a
Class B digital device, pursuant to Part 15 of the FCC Rules. These limits are
designed to provide reasonable protection against harmful interference in a
residential installation. This equipment generates, uses, and can radiate radio
frequency energy and, if not installed and used in accordance with the instruc-
tions, may cause harmful interference to radio elevation reception, which can be
determined by turning the equipment off and on. The user is encouraged to try
to correct the interference by one or more of the following measures:
· Reorient or relocate the receiving antenna.
· Increase the separation between the equipment and receiver.
· Connect the equipment into an outlet on a circuit different from that to which the
receiver is connected.
· Consult the dealer or an experienced radio/TV technician for help.
WARNING-- To reduce the risk of fire, electrical shock, or serious personal injury:
· Keep the product and all its parts and accessories out of the reach of small children.
· Do not expose product to water or other liquids.
· Do not leave the unit unattended while it is in use. Always unplug the AC Power Adapter from the
electrical outlet when the unit is not in use.
· Do not place this product in a built-in installation such as a bookcase or rack unless proper ventila-
tion is provided or unless advised in the manufacturer’s instructions.
· Only operate this product from the type of power source indicated on the marking label. If you are
not sure of the type of power supply to your home, consult your product dealer or local power
company.
· Do not open the case; there are no user-serviceable parts inside. Opening the case will void your
warranty.
· Do not use attachments not recommended or sold by the product manufacturer.
· Never operate this product if it is not working properly, has been dropped, damaged, or exposed to
water or other liquids. Do not attempt to examine or repair this product yourself; take the product
to an electronics repair shop of your choice for inspection and repair.
CAUTION-- To reduce the risk of personal injury or product/property damage:
· Do not expose the product to extreme temperature changes, moisture/high humidity, or dust/dirt.
· Slots and openings in the cabinet are provided for ventilation and to ensure reliable operation of the
product and to protect it from overheating; do not block or cover these openings by placing the
product on a bed, sofa, rug, or other similar surface.
· Do not clean product with thinner, alcohol, or benzene.
· Do not leave the unit exposed to direct sunlight.
· Do not drop the product or subject it to strong shocks.
· Do not use this product outdoors; it is intended for indoor use only.
· The screen becomes warm during normal operation; this is not a malfunction.
· To clean, use a soft, non-abrasive cloth such as the camera lens cloth to clean the LCD screen.
· If you use an LCD Cleaning Kit, do not apply the cleaning liquid directly to the LCD screen. Apply
cleaning liquid to the cleaning cloth first, and then clean the screen.
!!
www.taoelectronics.com
5
Getting Started
Clock and Setup Menu Overview
•
Remove the protective film covering the LCD screen by
lifting the pull tab.
•
Plug the included AC Power Adapter into the frame,
and then into a standard110-220 volt AC electrical out-
let.
•
Power on the Digital Photo Frame by pressing the
power button on the remote control or the frame.
•
If there are photos stored in the internal memory or on
an inserted memory card, a the Thumbnail Screen will
appear.
Preparation
The digital LCD panel has a viewing angle of approximately
25 degrees in either direction. You can achieve a better
viewing angle by adjusting the frame stand height.
•
Extend the frame stand to a position for greatest stabil-
ity.
•
Extend or retract the strand by pushing the tab on the
stand, and adjusting the length.
•
Release the tab to lock the frame into position.
Adjusting the Viewing Angle
*Any changes or modifications are not expressly approved by the manufacturer could
void the user's authority to operate the equipment.
©2008 TAO Electronics, Inc.
Turning the Power On/Off
Turning the Digital Photo Frame On
1. Press the On/Off button.
Turning the Digital Photo Frame Off
Main Menu
6
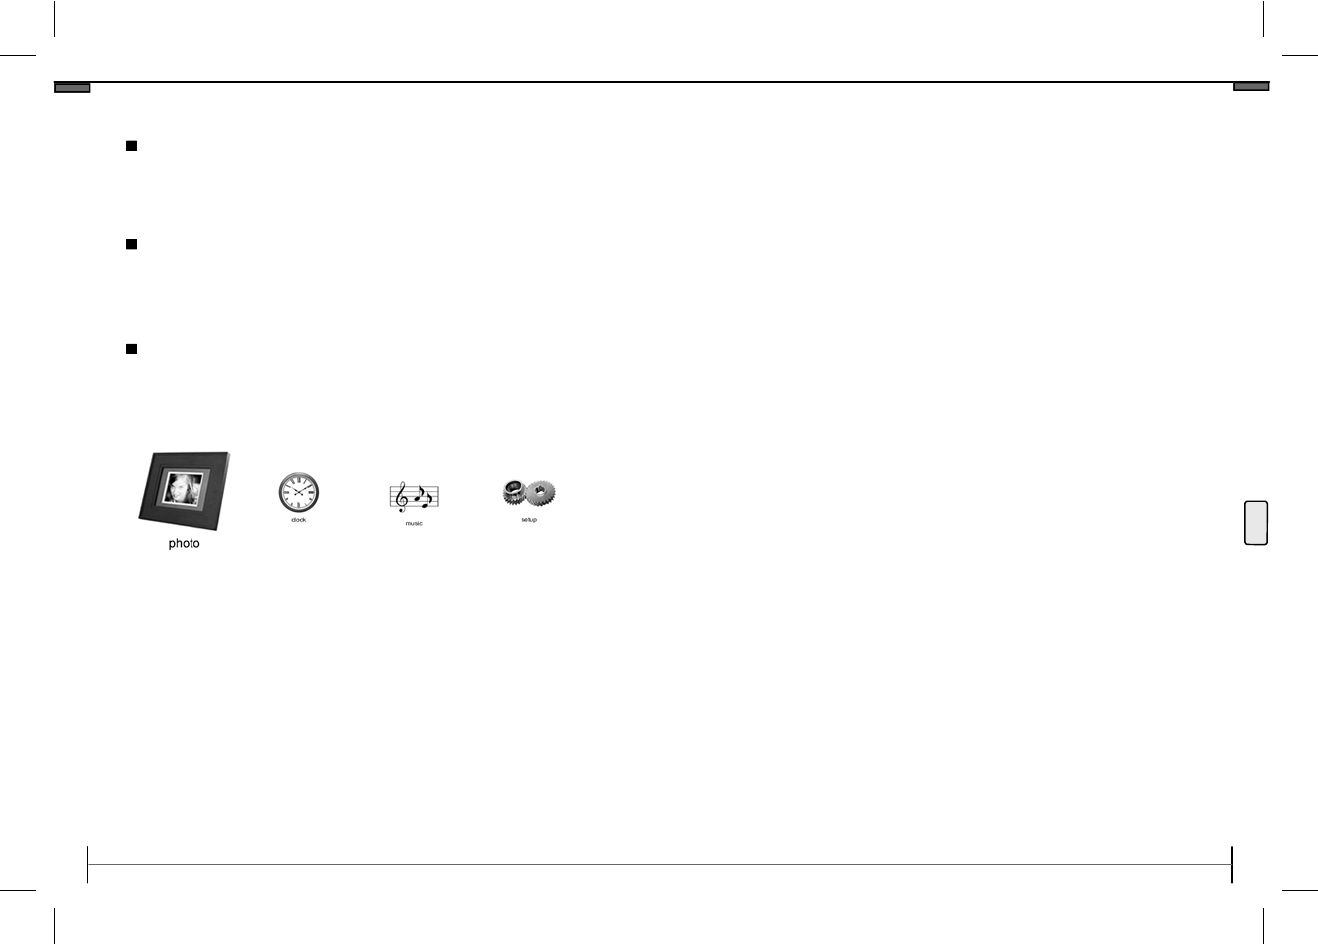
1. Press the Tool button on the back of your frame to
enter the Main Menu.
2. Press the Next or Previous button to cycle through
modes.
Photo: Displays Digital Photos as stills, slideshow, or
split-screen slideshow.
Clock: Date and Time settings
Music: Access and play MP3 music files.
Setup: General Settings and Preferences.
1. Connect the AC adapter to a power source.
2. Press the On/Off button (back of the frame).
www.taoelectronics.com
25
Loading Photos (Mac)
Loading Photos (Mac)
1. Connect the frame to your Mac via USB cable with
frame turned off.
2. Turn the Digital Photo Frame on.
3. The Digital Photo Frame will appear as a mounted
removable drive on the desktop. This may take a
minute to update the current file structure.
4. Drag and drop, or copy and paste your photos into
the frame’s internal memory.
5. Once you have loaded your desired photos, discon
nect the frame from your Mac, and turn the frame
off, and on again.
You can also search for photos via iPhoto, and drag the
desired images directly into the frame.
If you run into any issues while loading photos onto your
frame, please visit the support section of
www.taoelectronics.com for a list of frequently asked
questions and troubleshooting tips.
©2008 TAO Electronics, Inc.
1. Connect the frame to your computer via USB cable
with frame turned off.
2. Turn the Digital Photo Frame on.
3. From your desktop click “START”, followed by “MY
COMPUTER”. The Digital Photo Frame’s memory
will appear as a removable drive.
4. Drag and drop, or copy and paste your photos into
the frame’s internal memory.
5. Once you have loaded your desired photos, discon
nect the frame from your PC, and turn the frame
off, and on again.
You can also search for photos by clicking the “START”
button on the bottom left hand corner of your screen,
followed by the “Search” option to the right.
If you run into any issues while loading photos onto your
frame, please visit the support section of
www.taoelectronics.com for a list of frequently asked
questions and troubleshooting tips.
24
Loading Photos (PC)
www.taoelectronics.com
7
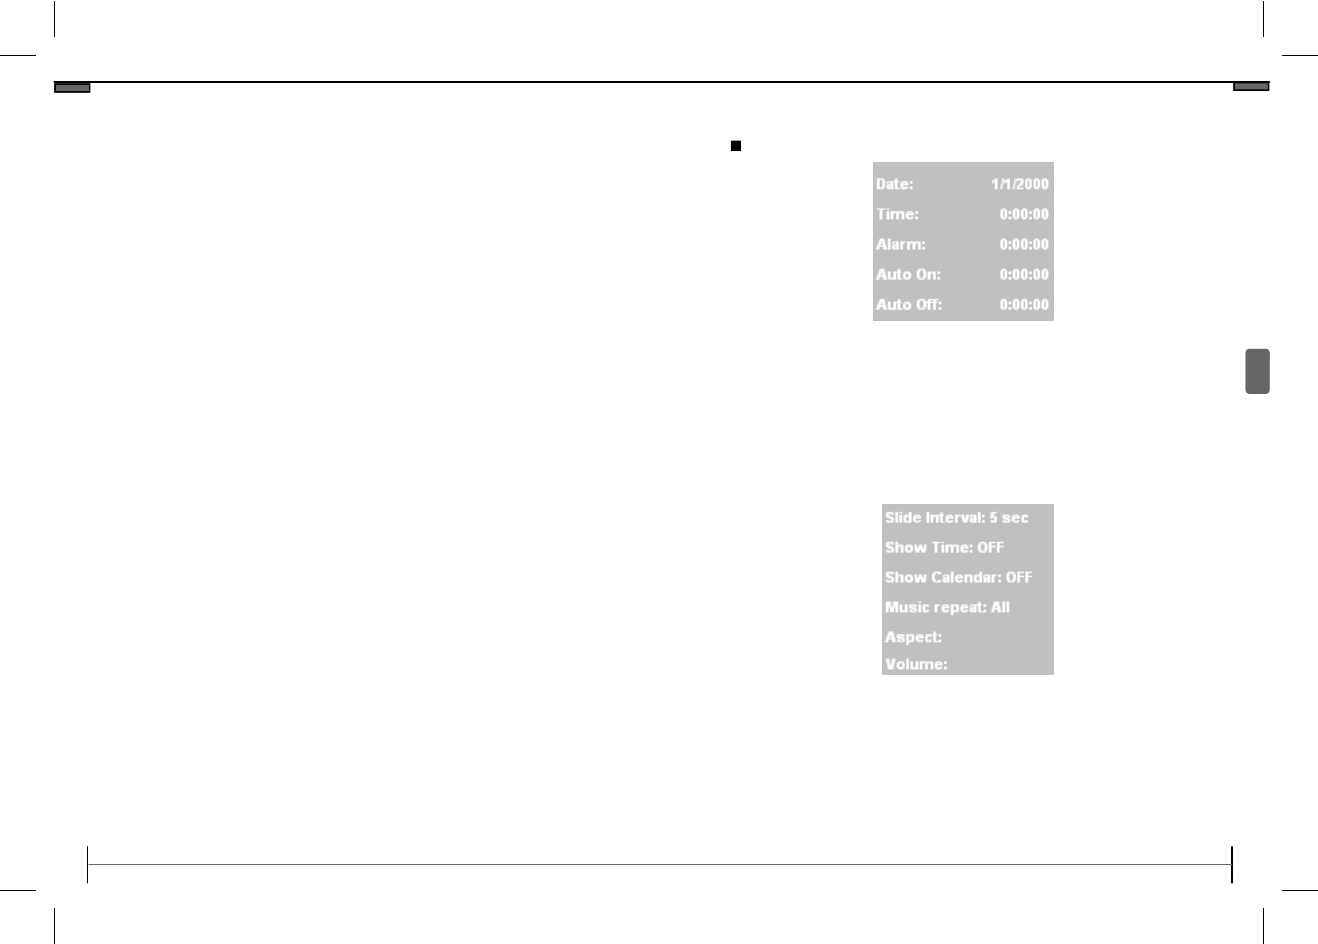
First Time Settings
Clock and Setup Menu Overview.
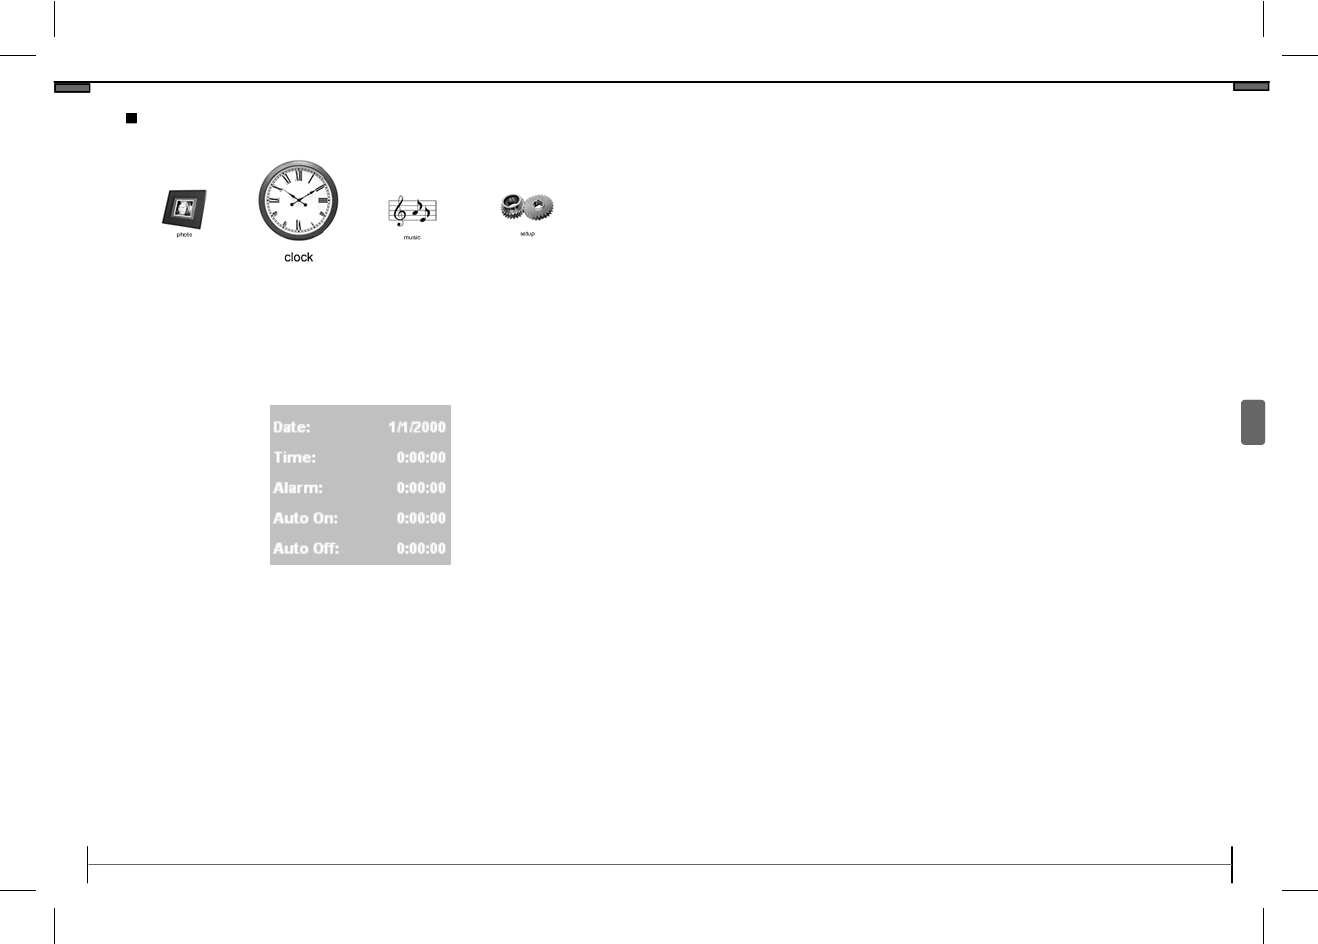
▪ Press the Previous and Next buttons to select the clock icon.
▪ Press the Play button to select.
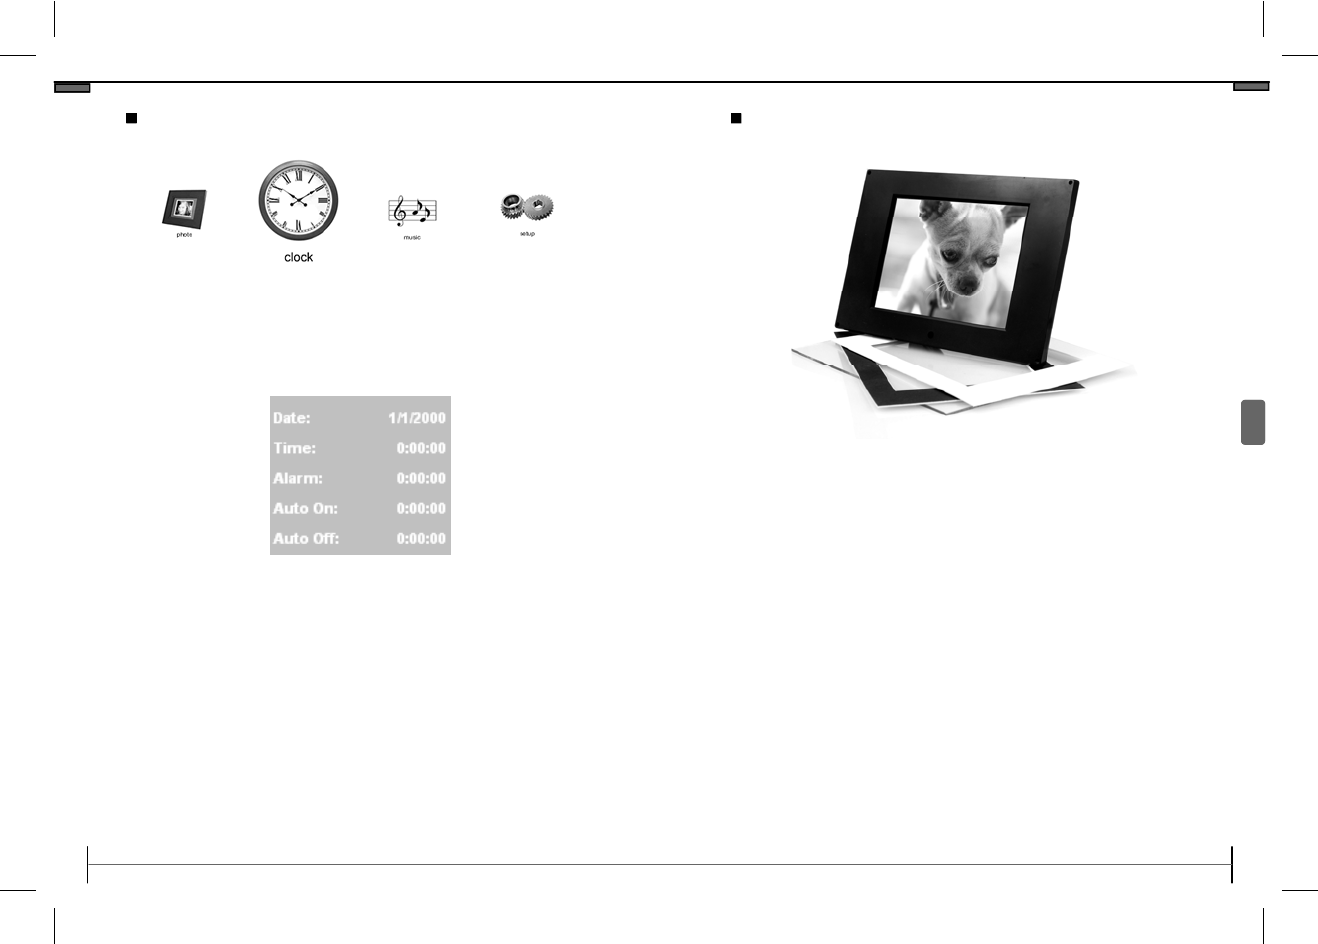
(1) Adjusts the date.
(2) Adjusts the time.
(3) Adjusts the alarm time.
(4) A
djusts the auto-on time.
(5) Adjusts the auto-off time.
Preparation
(6) Selects the slide show speed.
(7) Toggles the time display in photo mode.
(8) Toggles the calendar display in photo mode.
(9) Selects the music repeat settings.
(10) Toggles the aspect ratio for photo mode.
(11) Adjusts the volume.
©2008 TAO Electronics, Inc.
8
Setting the Date
1. Press the Tool Button to enter the Main Menu.
2. Use the Previous and Next buttons to select “Clock
3. Press the Play button to select.
1. Press the Play button to select “DATE”.
2. Press the Previous and Next buttons to cycle
through the year, and press the Play button to
confirm. This will highlight the month.
3. Press the Previous and Next buttons to cycle
through the months, and press the Play button to
confirm. This will highlight the day.
4. Press the Previous and Next buttons to cycle
through the days, and press the Play button to
confirm.
www.taoelectronics.com
23
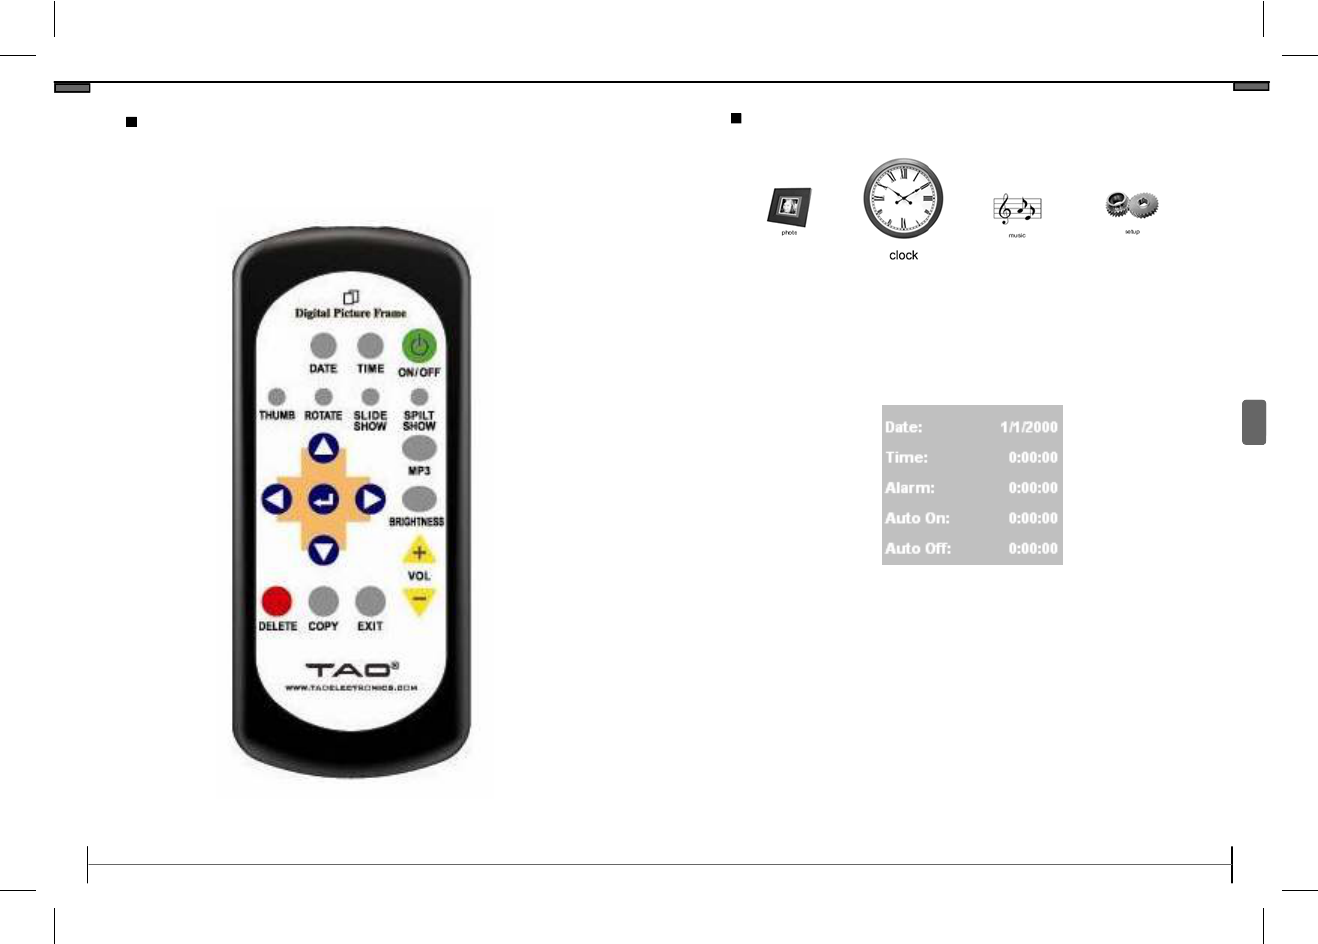
1) Date: Takes you to menu to set the date
2) Time: Takes you to menu to set the time
3) On/Off: Turns the frame on or off.
4) Thumb: Toggles the thumbnail screen.
5) Rotate: Rotates your pictures
6) Slide Show: Toggles the slideshow on or off.
7) Split Show: Takes you to 4 pictures in one screen slideshow
8) Up: Moves the selection up.
9) Left: Moves the selection to the left.
10) Right: Moves the selection to the right.
11) Down: Moves the selection down.
12) Enter: Press to confirm selection, or start/stop music or slide-
shows. This button also allows you to cycle through slideshow play
modes.
13) MP3: Takes your to your MP3 files on the internal or external
memory
14) Brightness: Controls the brightness of the screen
15) Delete: Deletes the current selection.
16) Copy: Copies photo / video / music files from external memory
to internal memory
17) Exit: Returns to the previous screen.
18) Vol – Button: Lowers volume.
19) Vol + Button: Raises volume.
Menus and Settings
©2008 TAO Electronics, Inc.
22
Remote Control
The TAO Digital Photo frame also comes with a radio
frequency (RF) remote control with the following features:
www.taoelectronics.com
9
Menus and Settings
Setting the Time
1. Press the Tool Button to enter the Main Menu.
2. Use the Previous and Next buttons to select “Clock
3. Press the Play button to select.
1. Press the Next button to highlight “TIME”, and
press the Play button to select.
2. Press the Previous and Next buttons to cycle
through the hours, and press the Play button to
confirm. This will highlight the minutes.
3. Press the Previous and Next buttons to cycle
through the minutes, and press the Play button to
confirm. This will highlight the seconds.
4. Press the Previous and Next buttons to cycle
through the seconds, and press the Play button to
confirm.
©2008 TAO Electronics, Inc.
10
Setting the Alarm
1. Press the Tool Button to enter the Main Menu.
2. Use the Previous and Next buttons to select “Clock
3. Press the Play button to select.
1. Press the Next button to highlight “Alarm”, and
press the Play button to select.
2. Press the Previous and Next buttons to cycle
through the hours, and press the Play button to
confirm. This will highlight the minutes.
3. Press the Previous and Next buttons to cycle
through the minutes, and press the Play button to
confirm. This will highlight the seconds.
4. Press the Previous and Next buttons to cycle
through the seconds, and press the Play button to
confirm.
www.taoelectronics.com
21
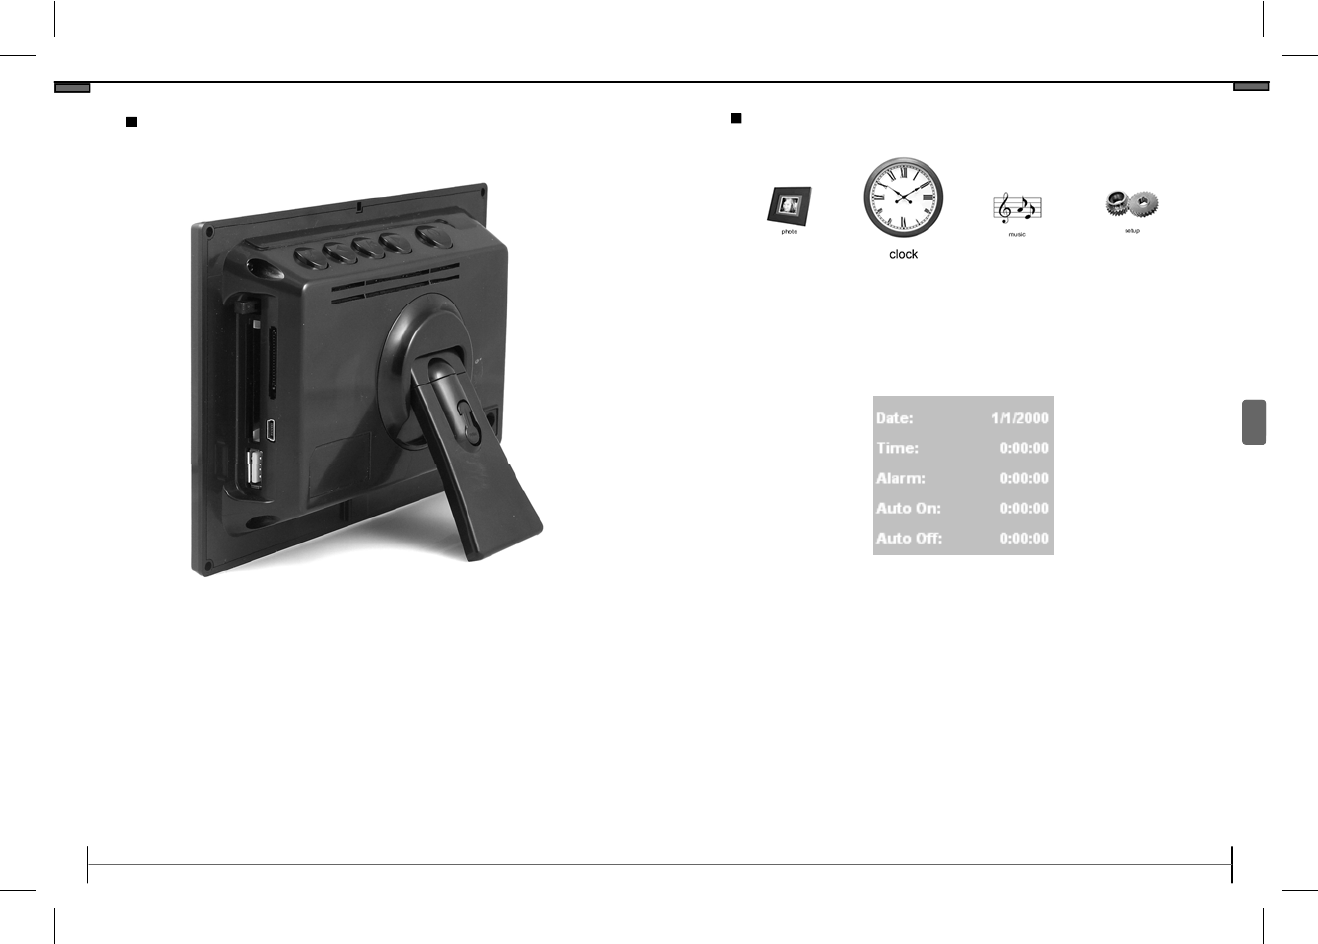
Customizable Frame
TAO Digital Photo Frames were designed and created
with the end user in mind. The LCD unit of the digital
photo frame is removable from it’s exterior molding,
allowing for countless possibilities of customization.
•
Designed to be used with a variety of standard
5x7” style frames. Simply loosen the tabs on the
back of your frame, remove the unit - and insert it
into a 5x7” with sufficient depth.
•
Change and rearrange paper matting to add a
different artistic touch.
•
TAO also offers professional laser engraving and
silk screening of logos, names, and messages for
your digital photo frames. Contact
sales@taoelectronics.com for more information..
Menus and Settings
©2008 TAO Electronics, Inc.
Memory Cards and USB Flash Drives
With your TAO Digital Photo Frame, you are able to display
photos directly from your memory card or USB Flash.
The memory card slots are located on the side of your digi-
tal photo frame, and are labeled for your convenience.
Simply insert the memory card or USB flash drive, and enter
the Photo mode to view your photos.
20
www.taoelectronics.com
11
Menus and Settings
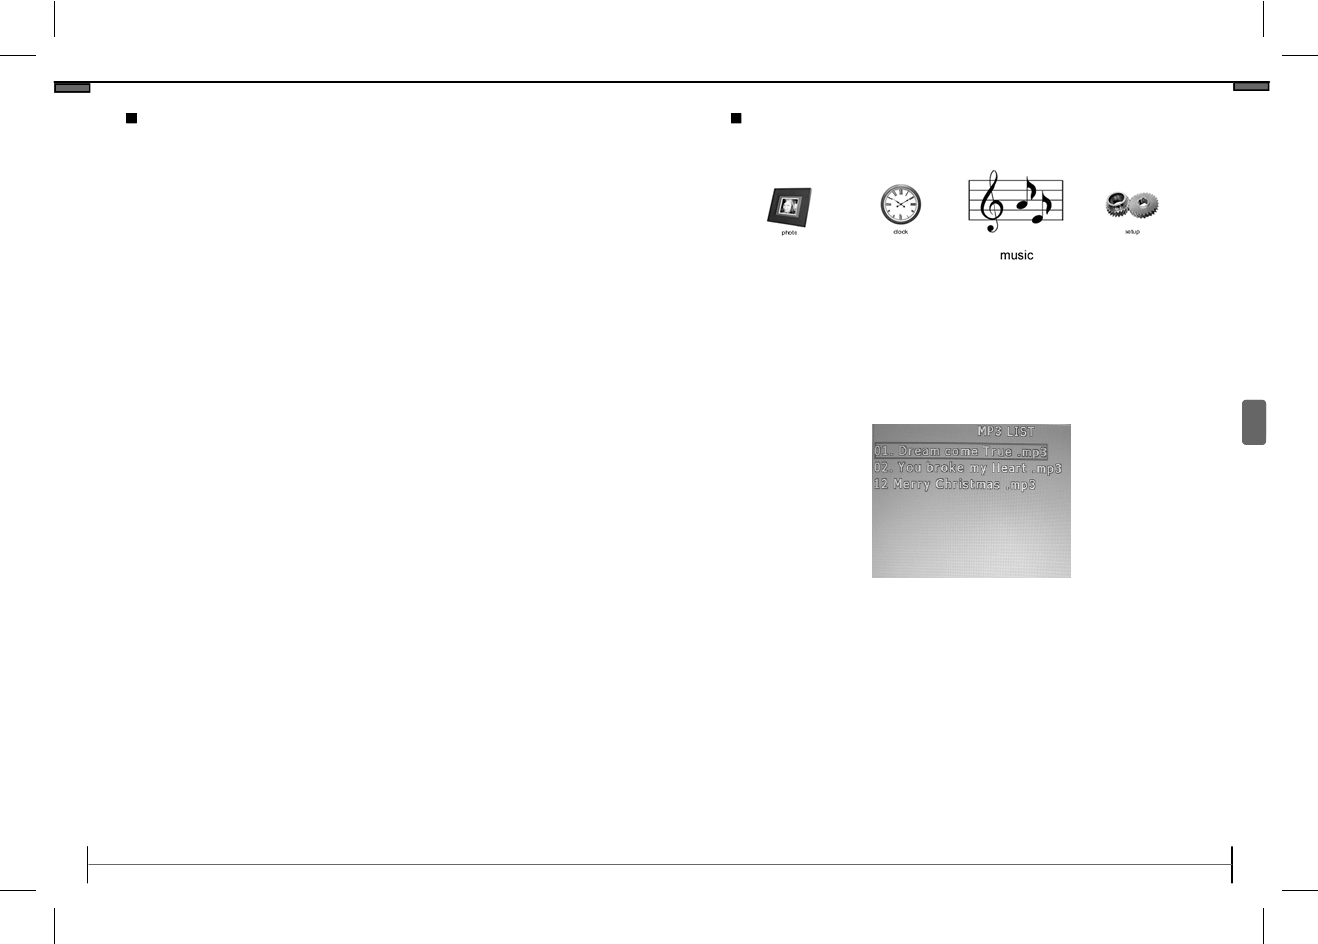
Setting the Auto On and Off Time
1. Press the Tool Button to enter the Main Menu.
2. Use the Previous and Next buttons to select “Setup
Alarm.”
3. Press the Play button to select.
Note: The Auto-On Feature is used in conjunction with
the Auto-Off Feature, and is designed to turn the frame
off for a period of time each day. The main power
switch must be turned ON for this feature to work.
When the Auto On Time is turned on, the frame will
automatically turn on at the specified time.
1. Press the Next button to highlight “Auto on”, and
press the Play button to select.
2. Press the Previous and Next buttons to cycle
through the hours, and press the Play button to
confirm. This will highlight the minutes.
©2008 TAO Electronics, Inc.
12
Cont. Setting the Auto On and Off Time
3. Press the Previous and Next buttons to cycle through the
minutes, and press the Play button to confirm. This will
highlight the seconds.
4. Press the Previous and Next buttons to cycle through the
seconds, and press the Play button to confirm.
5. Press the Previous and Next buttons to toggle between
having the Auto On feature ON or OFF, and press the
Play button to confirm.
6. Press the Next button to select “Auto off.”
When the Auto Off Time is turned on, the frame will automati-
cally turn Off at the specified time.
1. Press the Next button to highlight “Auto off”, and press the
Play button to select.
2. Press the Previous and Next buttons to cycle through the
hours, and press the Play button to confirm. This will
highlight the minutes.
3. Press the Previous and Next buttons to cycle through the
minutes, and press the Play button to confirm. This will
highlight the seconds.
4. Press the Previous and Next buttons to cycle through the
seconds, and press the Play button to confirm.
5. Press the Previous and Next buttons to toggle between
having the Auto On feature ON or OFF, and press the
Play button to confirm.
www.taoelectronics.com
19
Menus and Settings
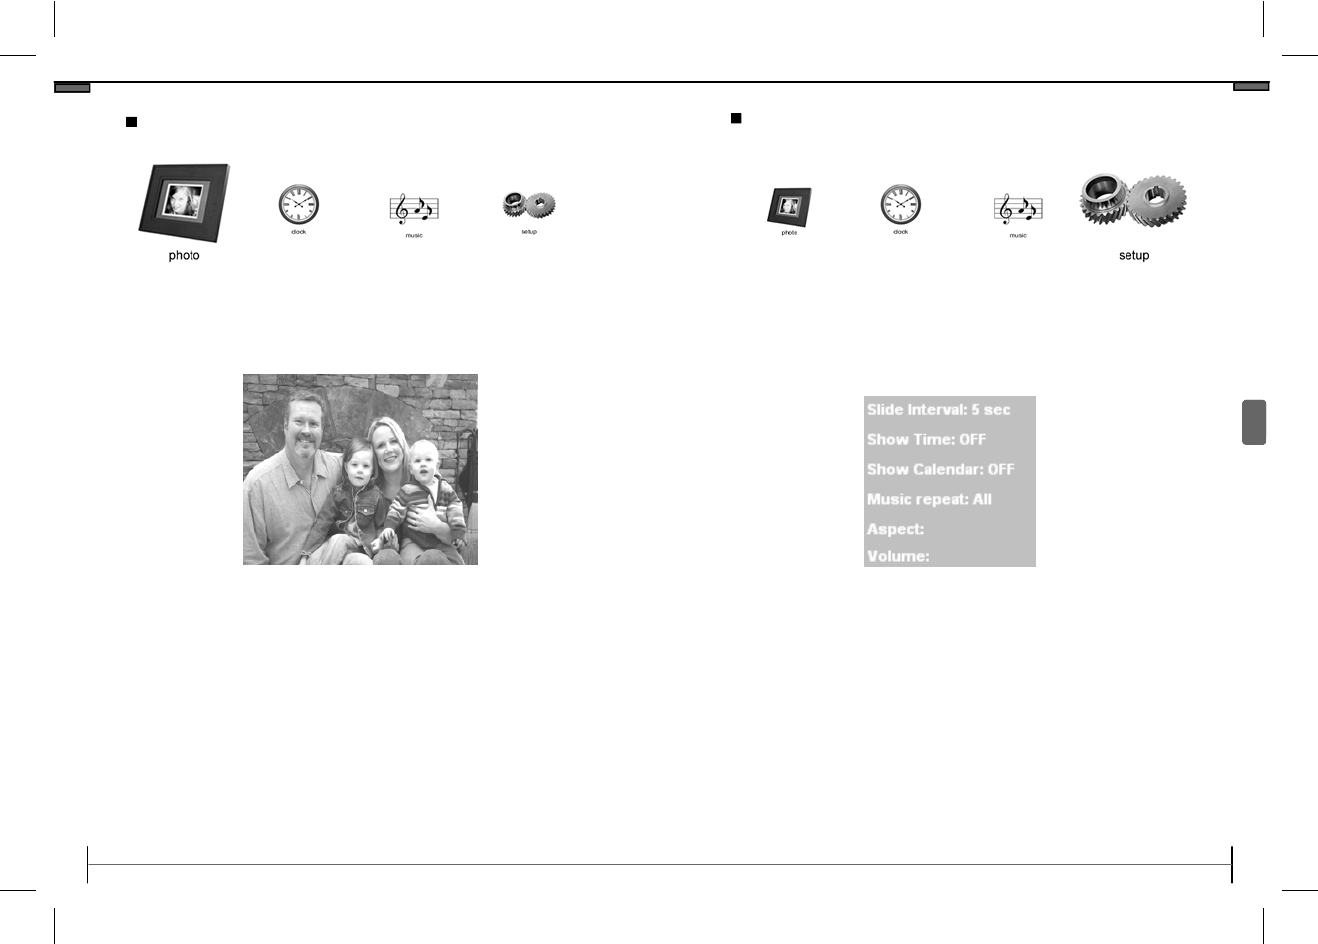
Music Menu
1. Press the Tool Button to enter the Main Menu.
2. Use the Previous and Next buttons to select “Music .”
3. Press the Play button to select.
1. Press the Next and Previous buttons to cycle
through songs.
2. Press the Play button to play the selected song.
Volume and Music Repeat settings can be changed in
the Setup Menu. (pg. 13, 15)
©2008 TAO Electronics, Inc.
18
Photo Mode
This mode displays a grid of photos in clusters of 9.
You can toggle through different view modes by
pressing the Play Button, and the current view mode
will appear on the upper-right corner of the screen.
FullSize: View a single photo, and press next/
previous to cycle images.
SlideShow: View photos as a slide show.
SplitShow: View photos in a split-screen slide
show.
1. Press the Tool Button to enter the Main Menu.
2. Use the Previous and Next buttons to select “Photo.”
3. Press the Play button to select.
www.taoelectronics.com
13
Menus and Settings
Setting the Slide Show Transition Speed
1. Press the Tool Button to enter the Main Menu.
2. Use the Previous and Next buttons to select “Setup .”
3. Press the Play button to select.
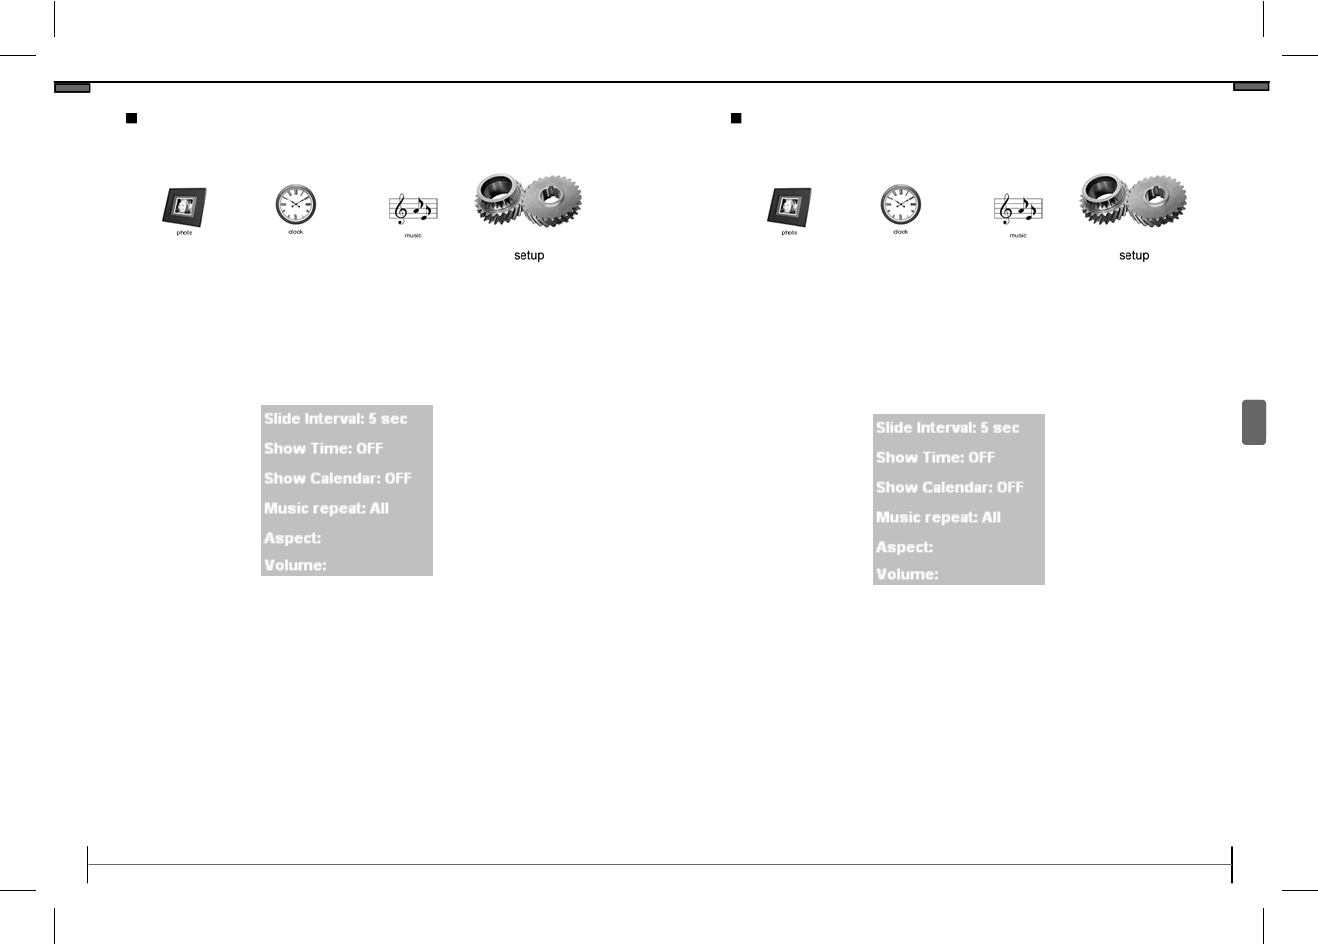
1. Press the Play button to select “Slide Interval”.
2. Press the Previous and Next buttons to toggle
between the different time seetings and press the
Play button to confirm.
•
5 sec 5 seconds between photos.
•
10 sec 10 seconds between photos.
•
30 sec 30 seconds between photos.
•
60 sec 60 seconds between photos.
©2008 TAO Electronics, Inc.
14
Toggling Clock and Calendar Overlay
1. Press the Tool Button to enter the Main Menu.
2. Use the Previous and Next buttons to select “Setup .”
3. Press the Play button to select.
When the Show Time or Show Calendar modes are
turned ON, the clock or calendar overlays will appear
during photo mode. Turn these modes off to display
photos only.
1. Press the Play button to select “Show Time”.
2. Press the Previous and Next buttons to toggle
between ON or OFF and press the Play button to
confirm.
3. Repeat this process for “Show Calendar”.
www.taoelectronics.com
17
Menus and Settings
Adjusting the Volume
1. Press the Tool Button to enter the Main Menu.
2. Use the Previous and Next buttons to select “Setup .”
3. Press the Play button to select.
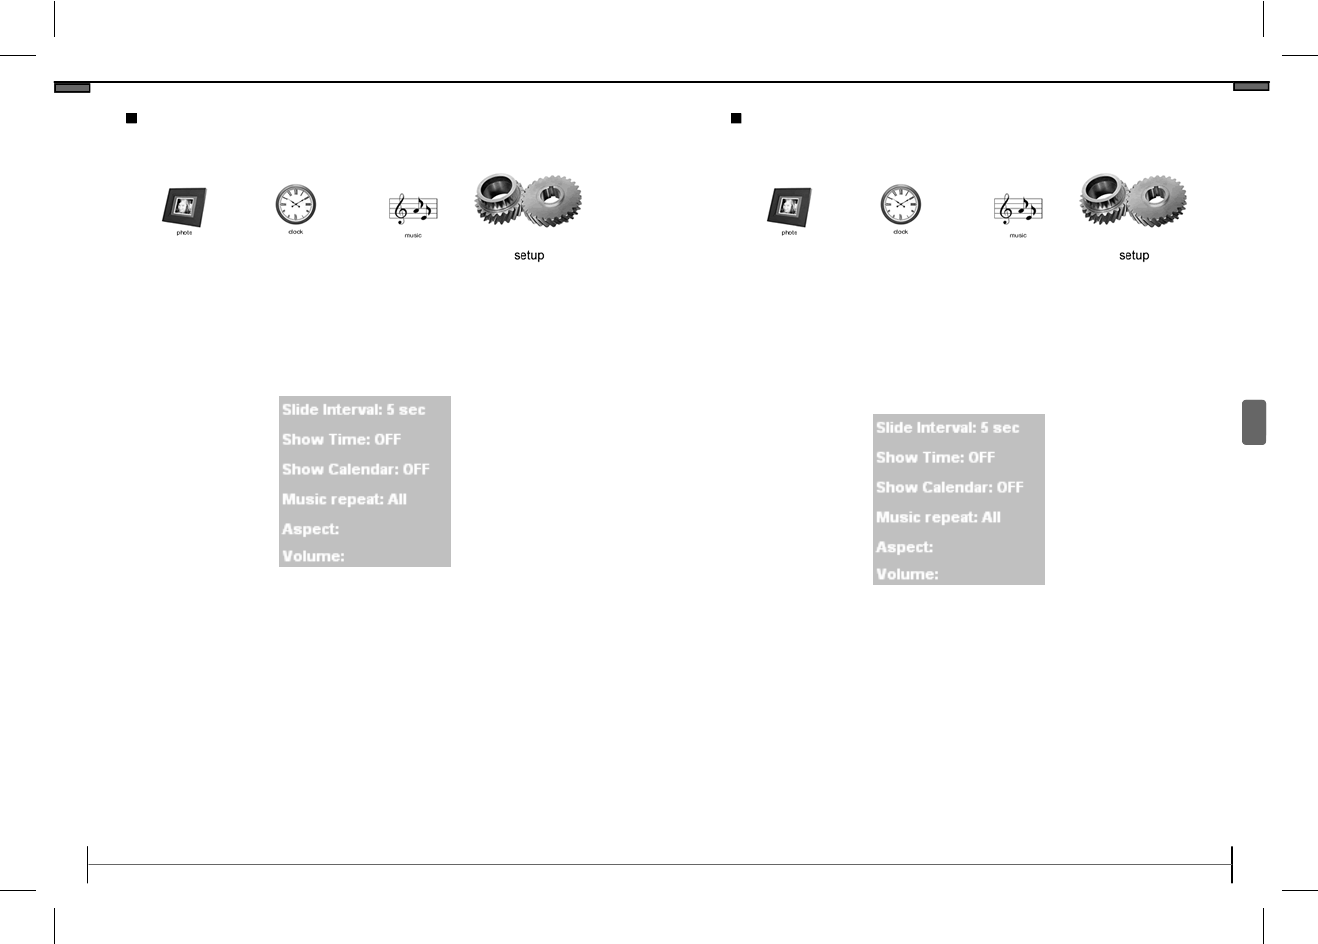
1 Press the Play button to select “Volume.”
2 Press the Previous and Next buttons to toggle
between the numbers and press the Play button
to confirm.
Volume numbers are on a 0-9 scale, with 0 as a muted
state, and 9 as the loudest.
©2008 TAO Electronics, Inc.
16
Selecting Aspect Ratio
1. Press the Tool Button to enter the Main Menu.
2. Use the Previous and Next buttons to select “Setup .”
3. Press the Play button to select.
1 Press the Play button to select “Aspect
2 Press the Previous and Next buttons to toggle
between the Aspect modes and press the Play
button to confirm.
Available view modes:
4:3 (default)
16:9
www.taoelectronics.com
15
Menus and Settings
Music Repeat
1. Press the Tool Button to enter the Main Menu.
2. Use the Previous and Next buttons to select “Setup .”
3. Press the Play button to select.
1 Press the Play button to select “Music Repeat.”
2 Press the Previous and Next buttons to toggle
between the Music Repeat modes and press the
Play button to confirm.
None: Music will end once the current song is over
One: The current song will play repeatedly.
All: Songs will play in alphabetical order, and
repeat once the last song has finished.