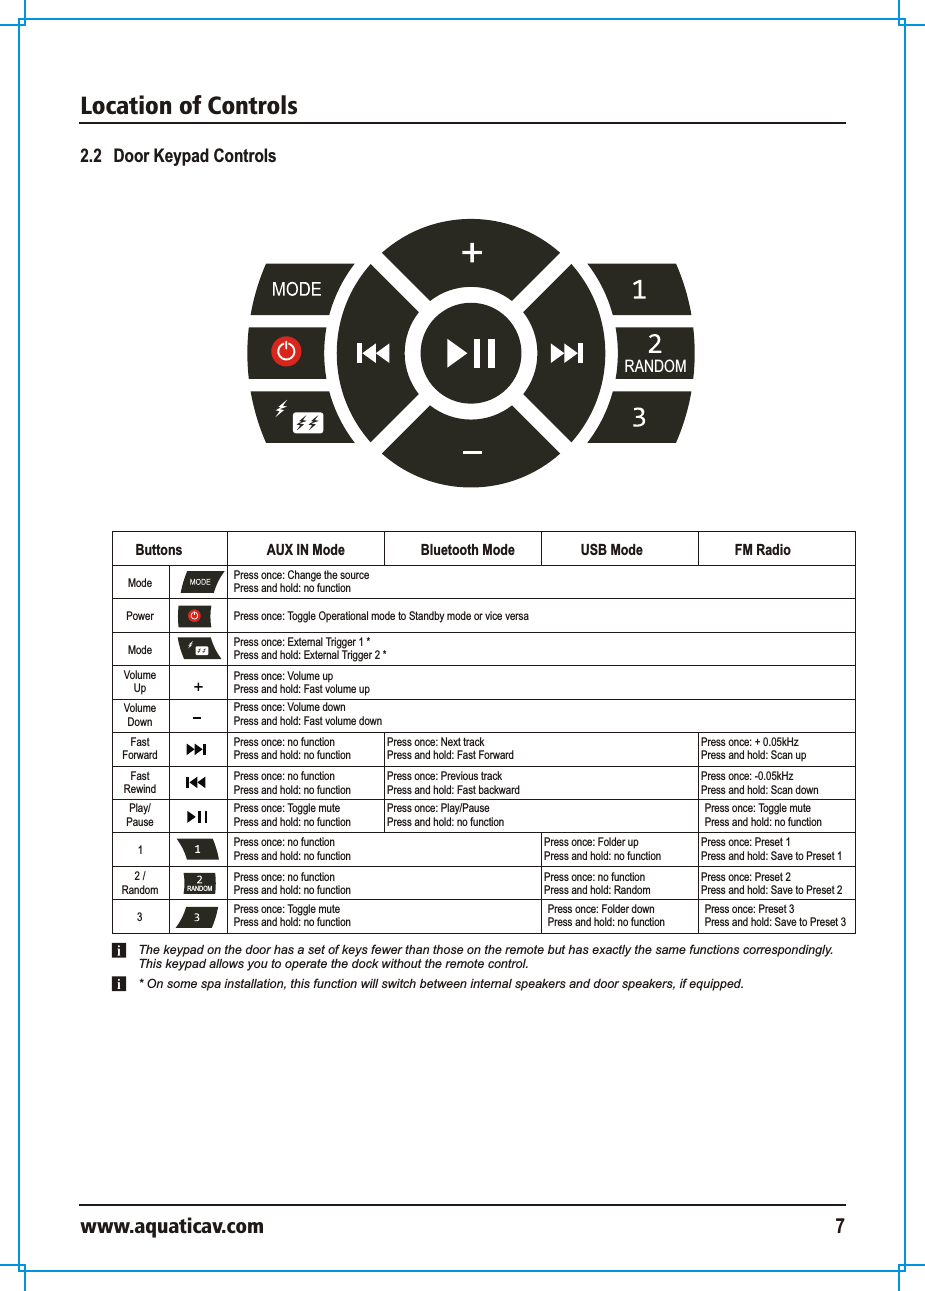
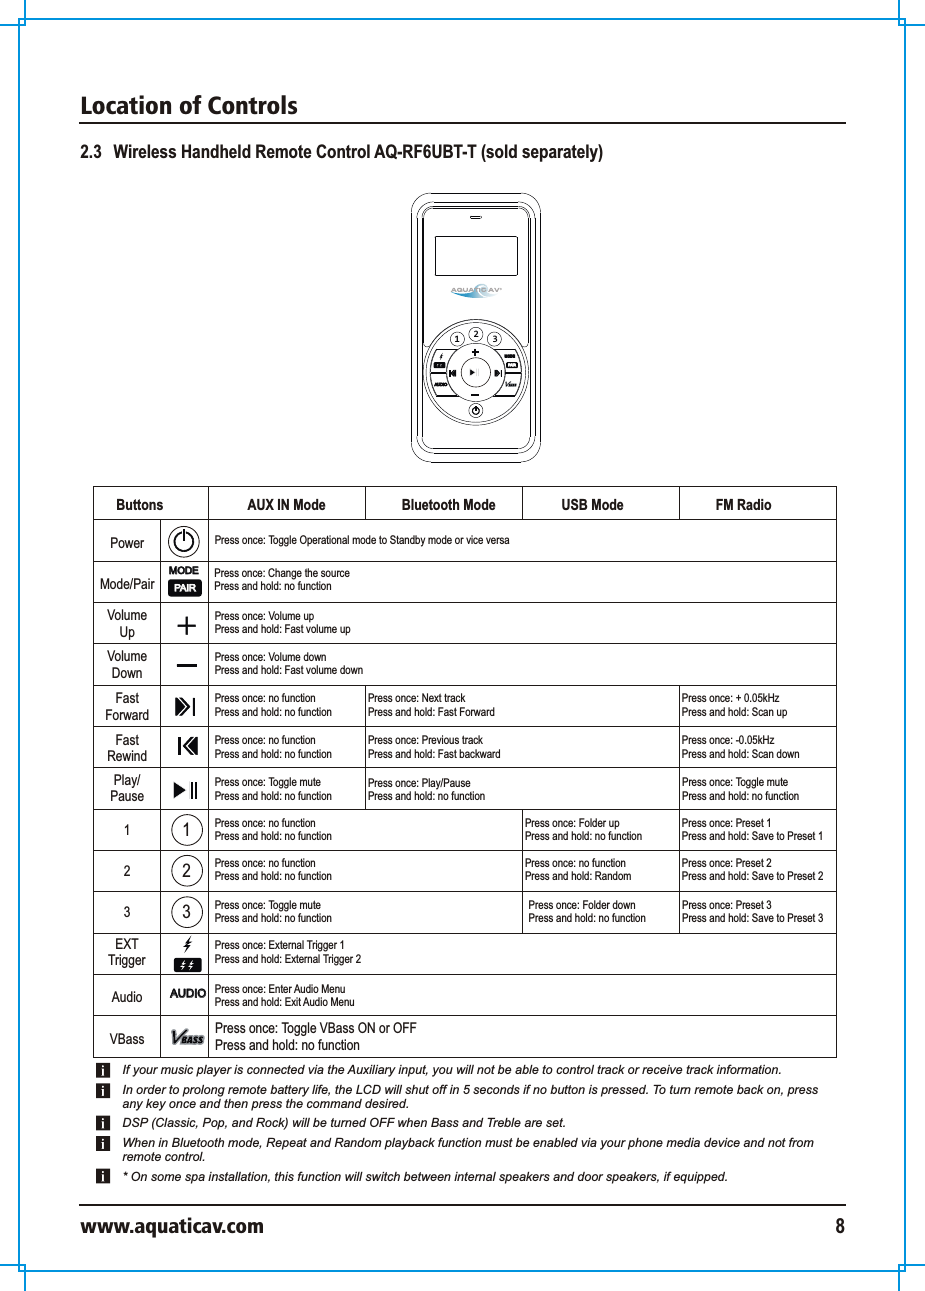
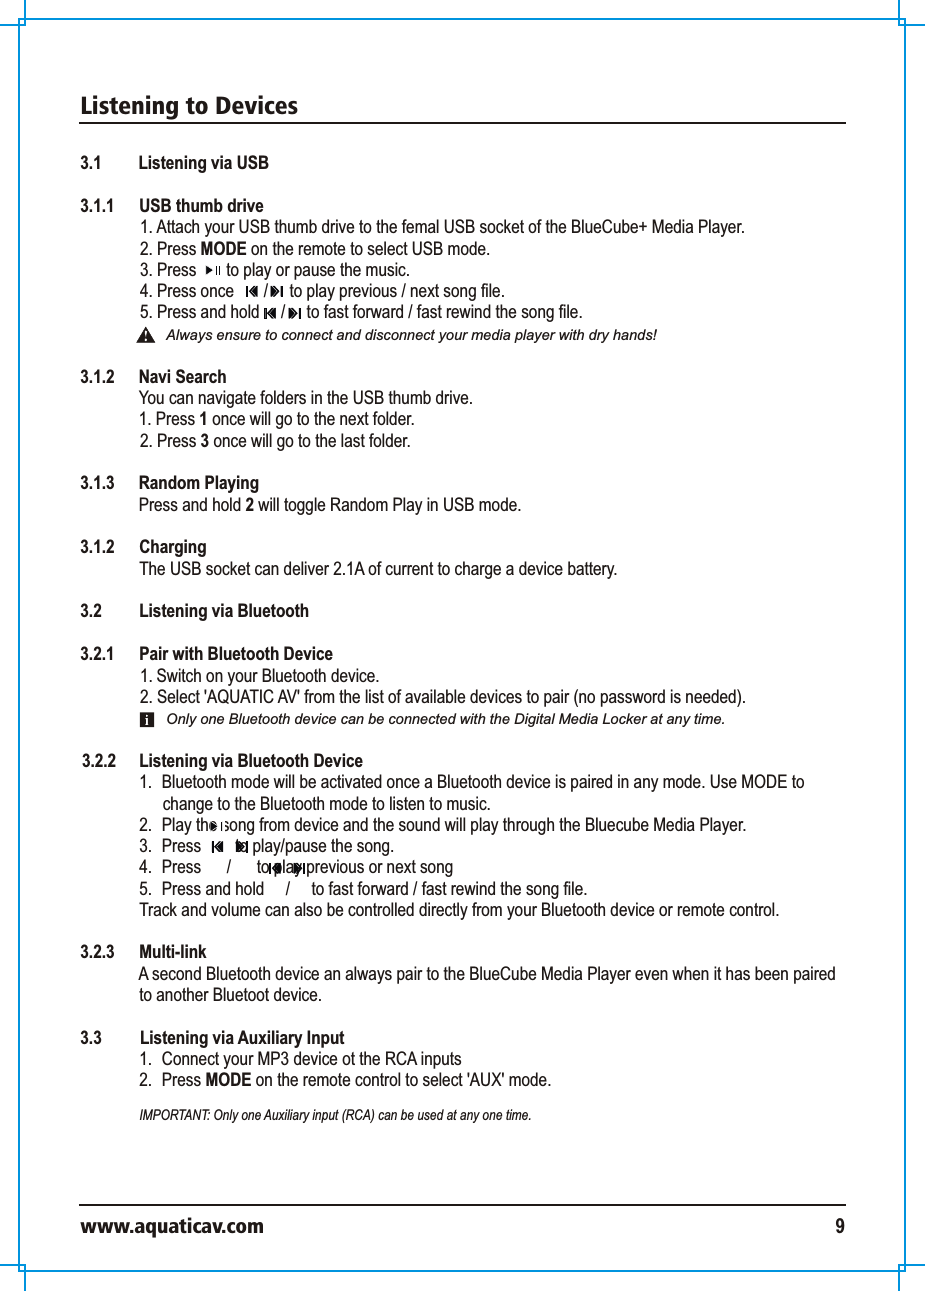
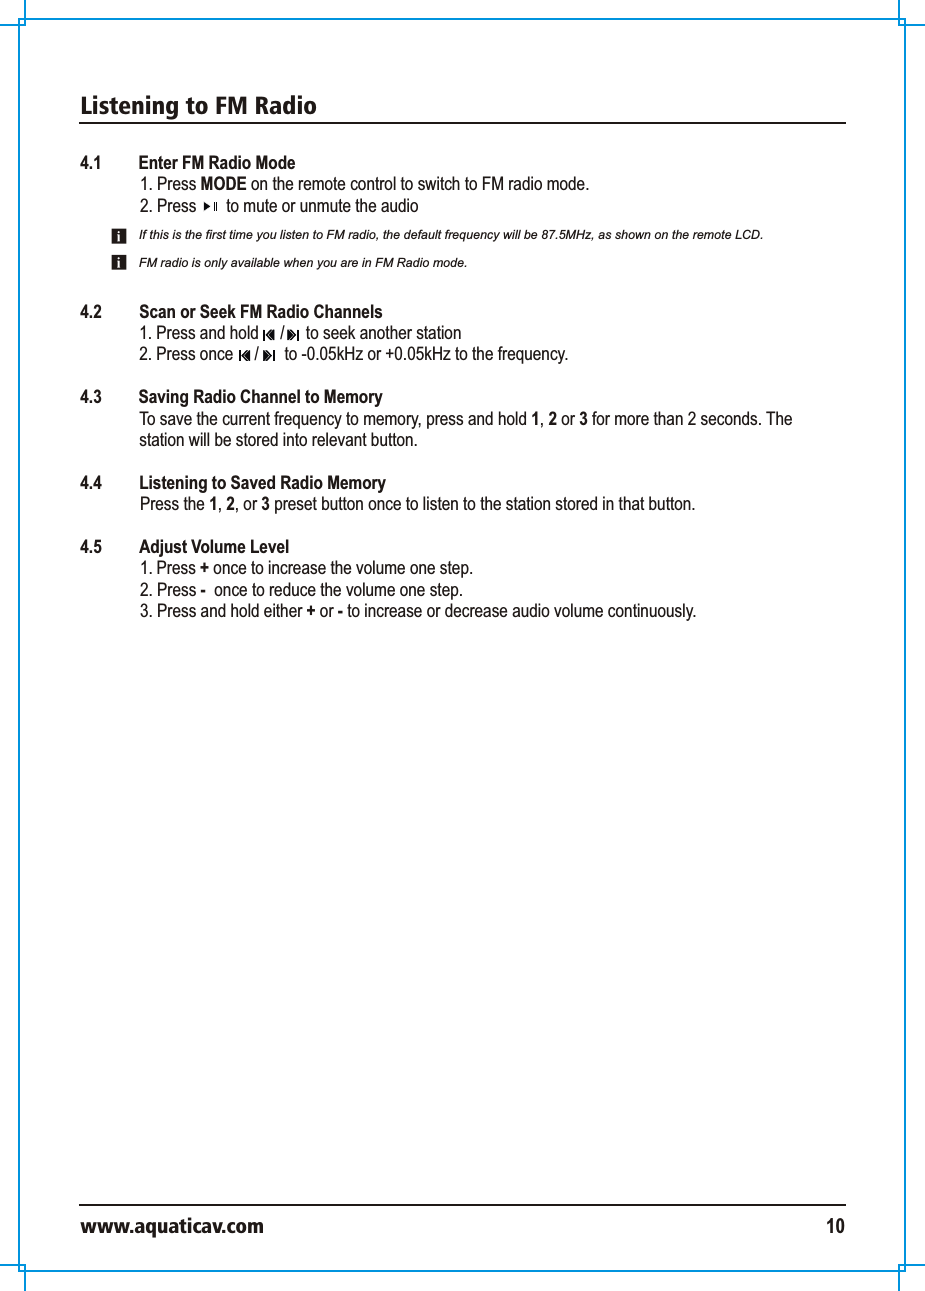
AQUATIC AV AQRFDM6D Multimedia Locker User Manual IB DM 6UBT V0 1 20161206
AQUATIC AV Multimedia Locker IB DM 6UBT V0 1 20161206
UserManual.wiki
>
AQUATIC AV
>
AQRFDM6D User Manual
>
15_AQ-DM-6UBT UserMan
Contents
1.
15_AQ-DM-6UBT UserMan
2.
15_AQ-DM-6BT UserMan
15_AQ-DM-6UBT UserMan
Navigation menu
Upload a User Manual
Namespaces
Wiki Guide
HTML
PDF
Info
Views
User Manual
Discussion / Help
Navigation
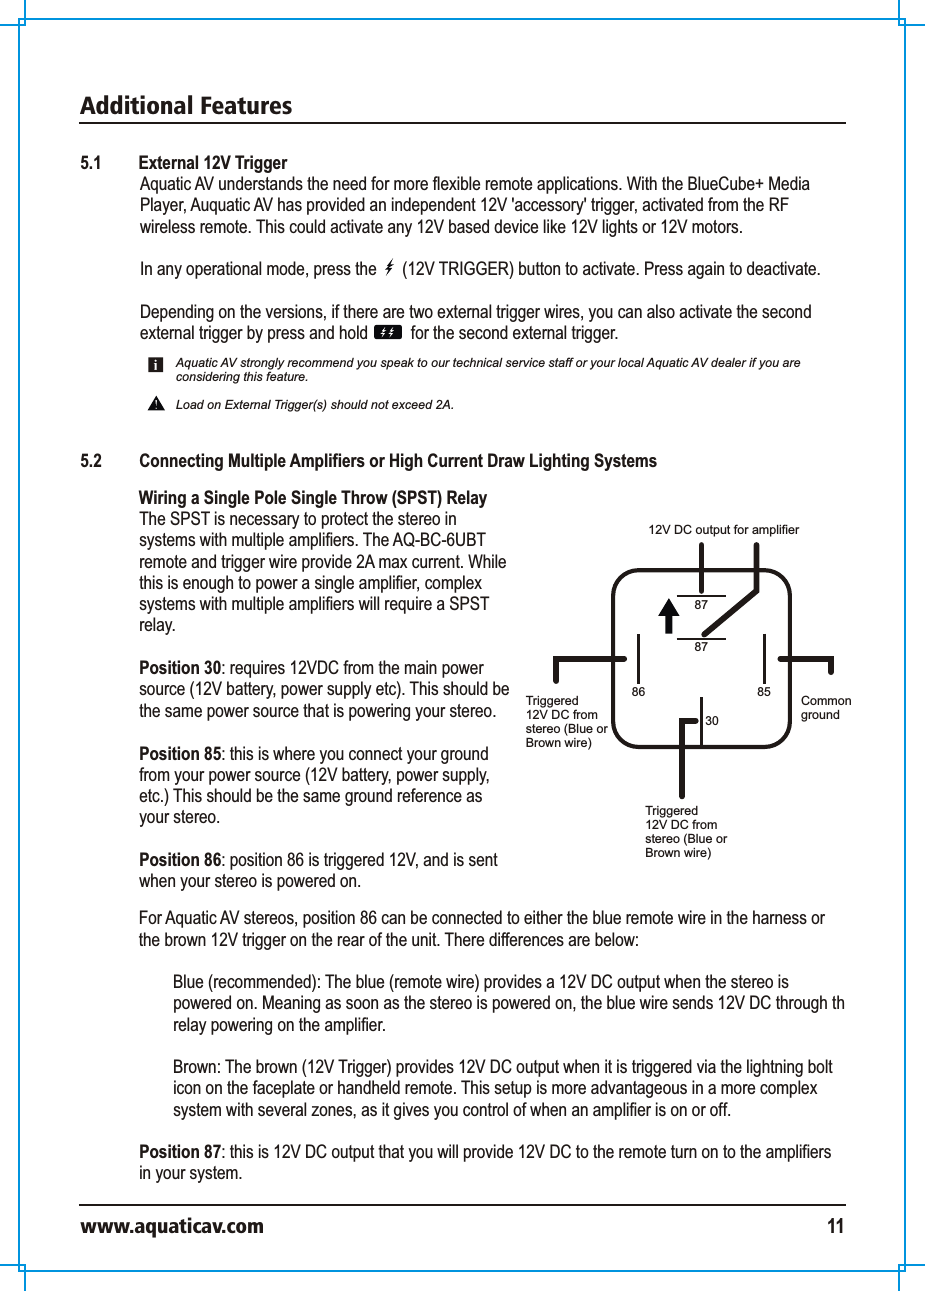
![Warranty Informationwww.aquaticav.com 14Aquatic AV offers a limited warranty of our products on the following terms: Length of Warranty2 years on audio systems, electronics, speakers, and accessories (receipt required). CoverageThis warranty covers only the original purchaser of a Aquatic AV product purchased from an authorized Aquatic AV dealer in the United States. In order to receive service, the purchaser must provide Aquatic AV with a copy of the receipt stating the customer name, dealer name, product pruchased and date of purchase. Defective productsProducts found to be defective during the warranty period will be repaired or replaced (with a product deemed to be equivalent) at Aquatic AV's discretion. What is not coveredDamage caused by accident, abuse, improper operation, theft. Any cost or expernse related to the removal or reinstallation of the product. Service performed by another other than an authorized Aquatic AV service center. Any product with the serial number or tamper labels defaced, altered or removed. Subsequent damage to other components. Any product not purchased from an authorized Aquatic AV dealer. Limit on implied warrantiesAny implied warranties including warranties of fitness for use and merchantability are limited in duration to the period of the express warranty set forth above. Some states do not allow limitation on the length of an implied warranty, so this limitation may not apply. No person is authorized to assume for Aquatic AV any other liability in connection with the sale of the product. How to obtain serviceYou must obtain a return material authorization number (RMA) to return any product to Aquatic AV. You are responsible for shipping charges of returned products to Aquatic AV. Please record the model and serial number[s] of your equipment in the spaced provided below as your permanent record and will assist us with your factory warranty coverage. These numbers can be found on the rear of the BlueCube Media Player. Model number[s]: Serial number[s]:](https://usermanual.wiki/AQUATIC-AV/AQRFDM6D.15-AQ-DM-6UBT-UserMan/User-Guide-3267390-Page-14.png)