ARRIS Global RNG210N Set-top Box with Moca Model:RNG210N User Manual Manual
Pace Micro Technology plc Set-top Box with Moca Model:RNG210N Manual
UserManual.wiki
>
ARRIS Global
>
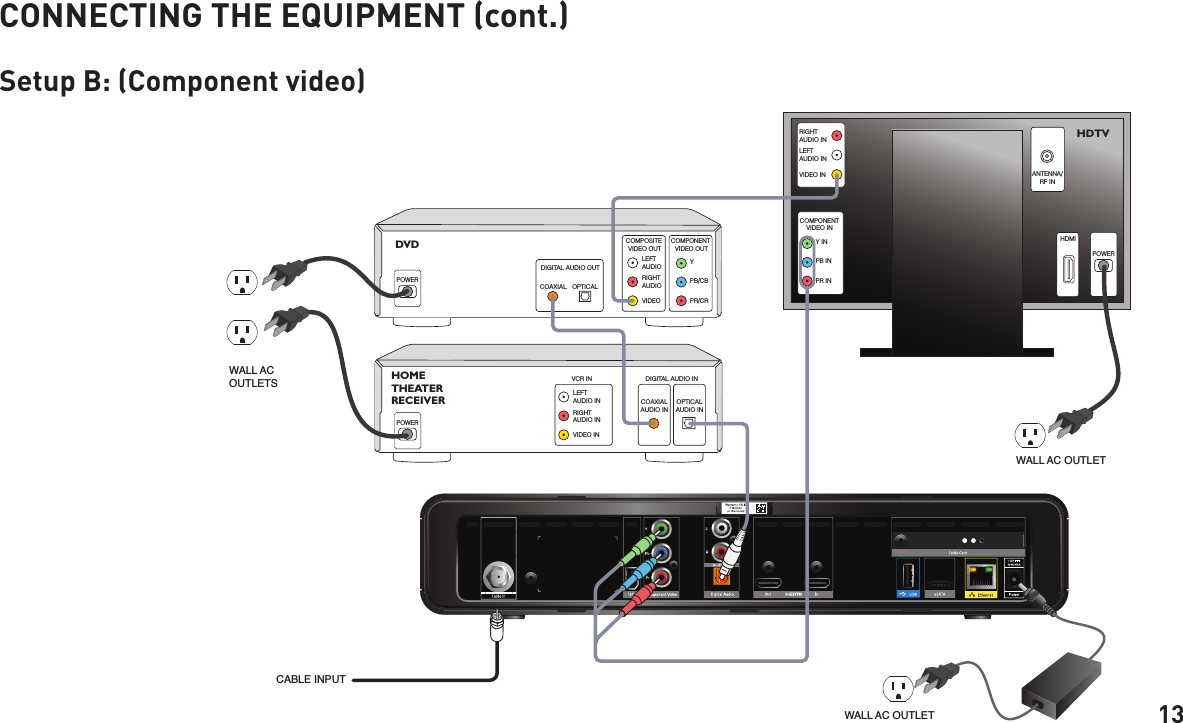
RNG210N User Manual
Manual
Navigation menu
Upload a User Manual
Namespaces
Wiki Guide
HTML
PDF
Info
Views
User Manual
Discussion / Help
Navigation