ARRIS 2W2701HGV 802.11 BG Access Point User Manual Gateway 2701HGV IG
Pace Americas 802.11 BG Access Point Gateway 2701HGV IG
UserManual.wiki
>
ARRIS
>
2W2701HGV User Manual
>
Install Guide
Contents
1.
Install Guide
2.
User Guide
Install Guide
Navigation menu
Upload a User Manual
Namespaces
Wiki Guide
HTML
PDF
Info
Views
User Manual
Discussion / Help
Navigation
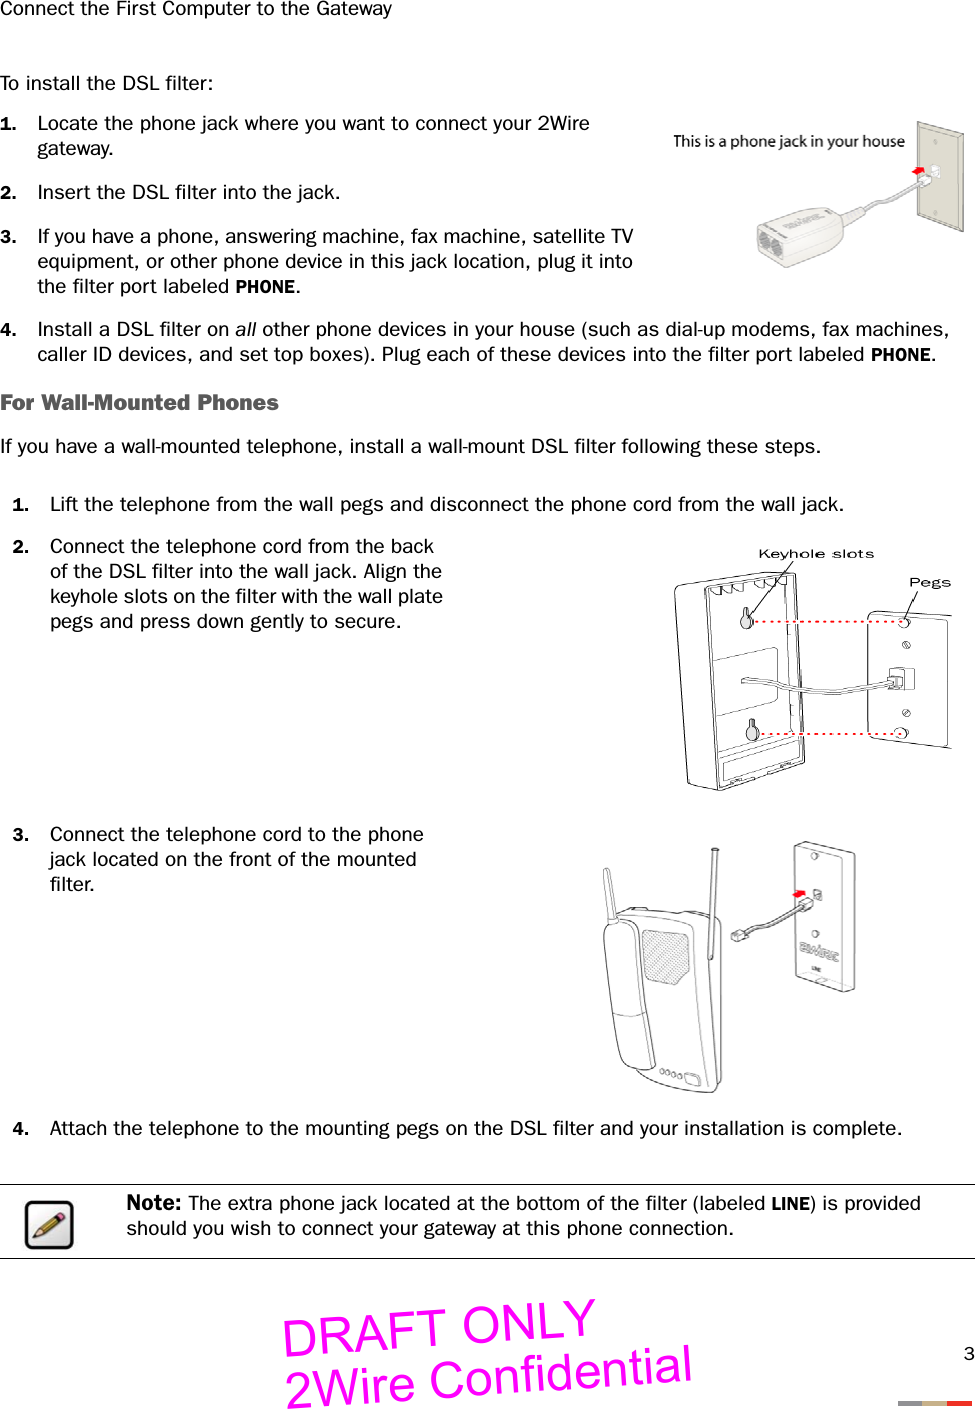
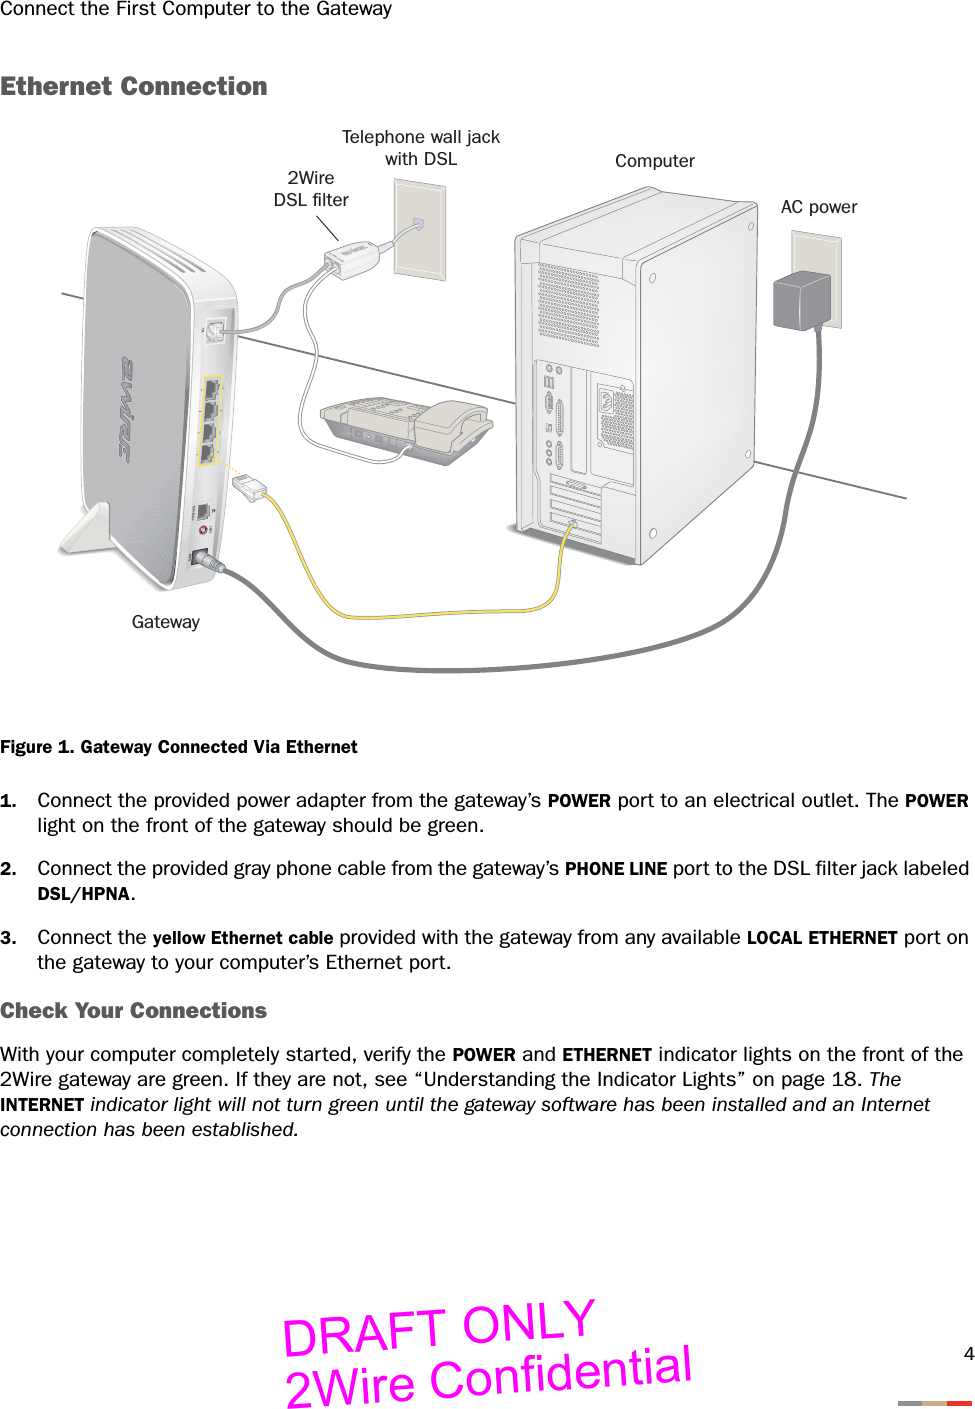
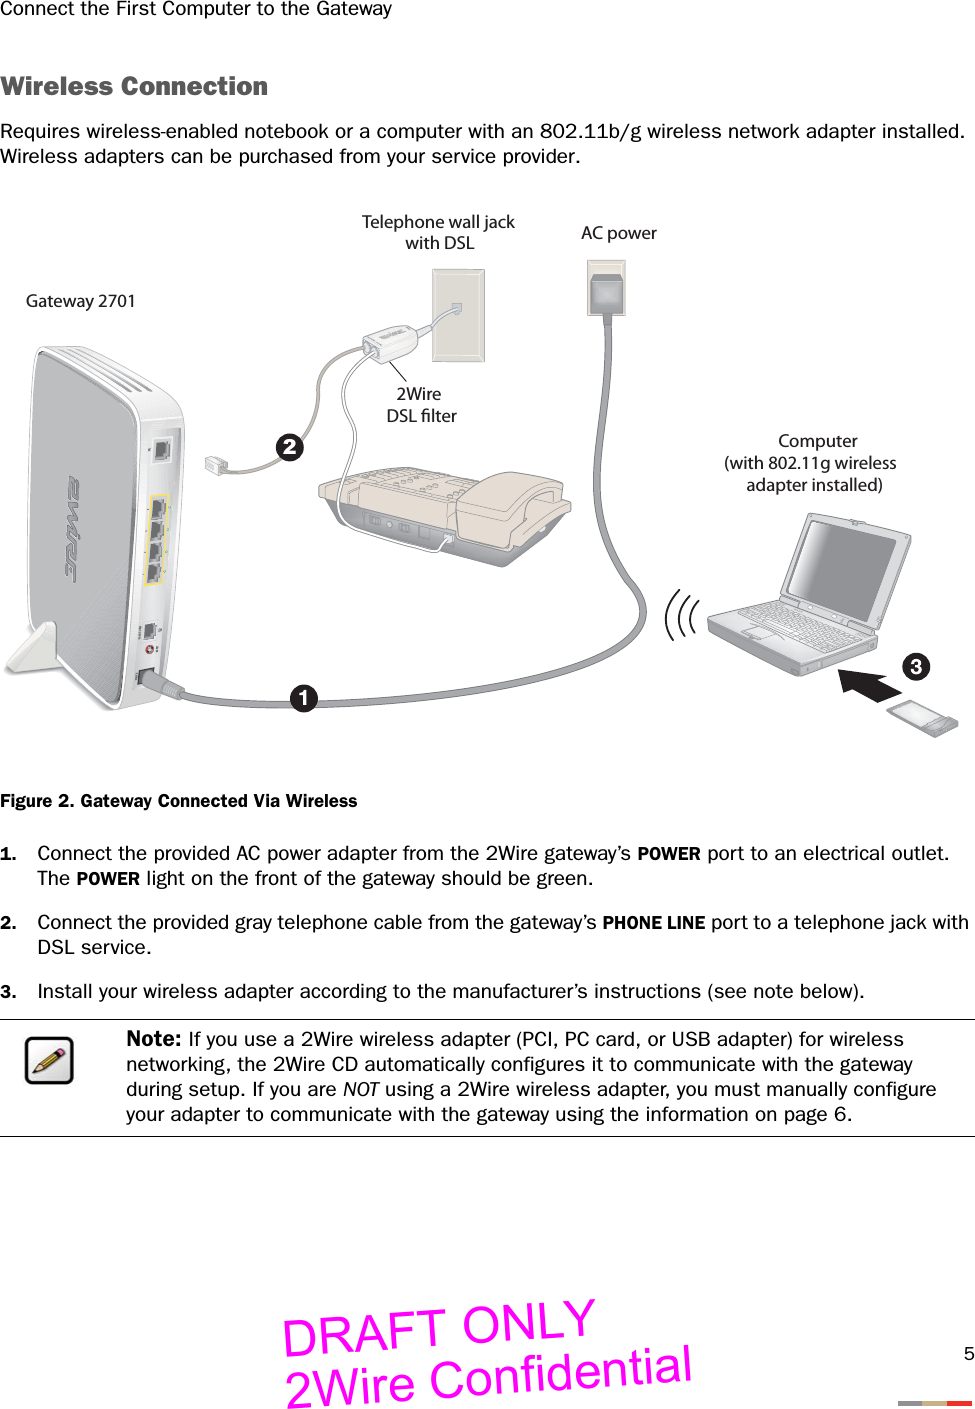
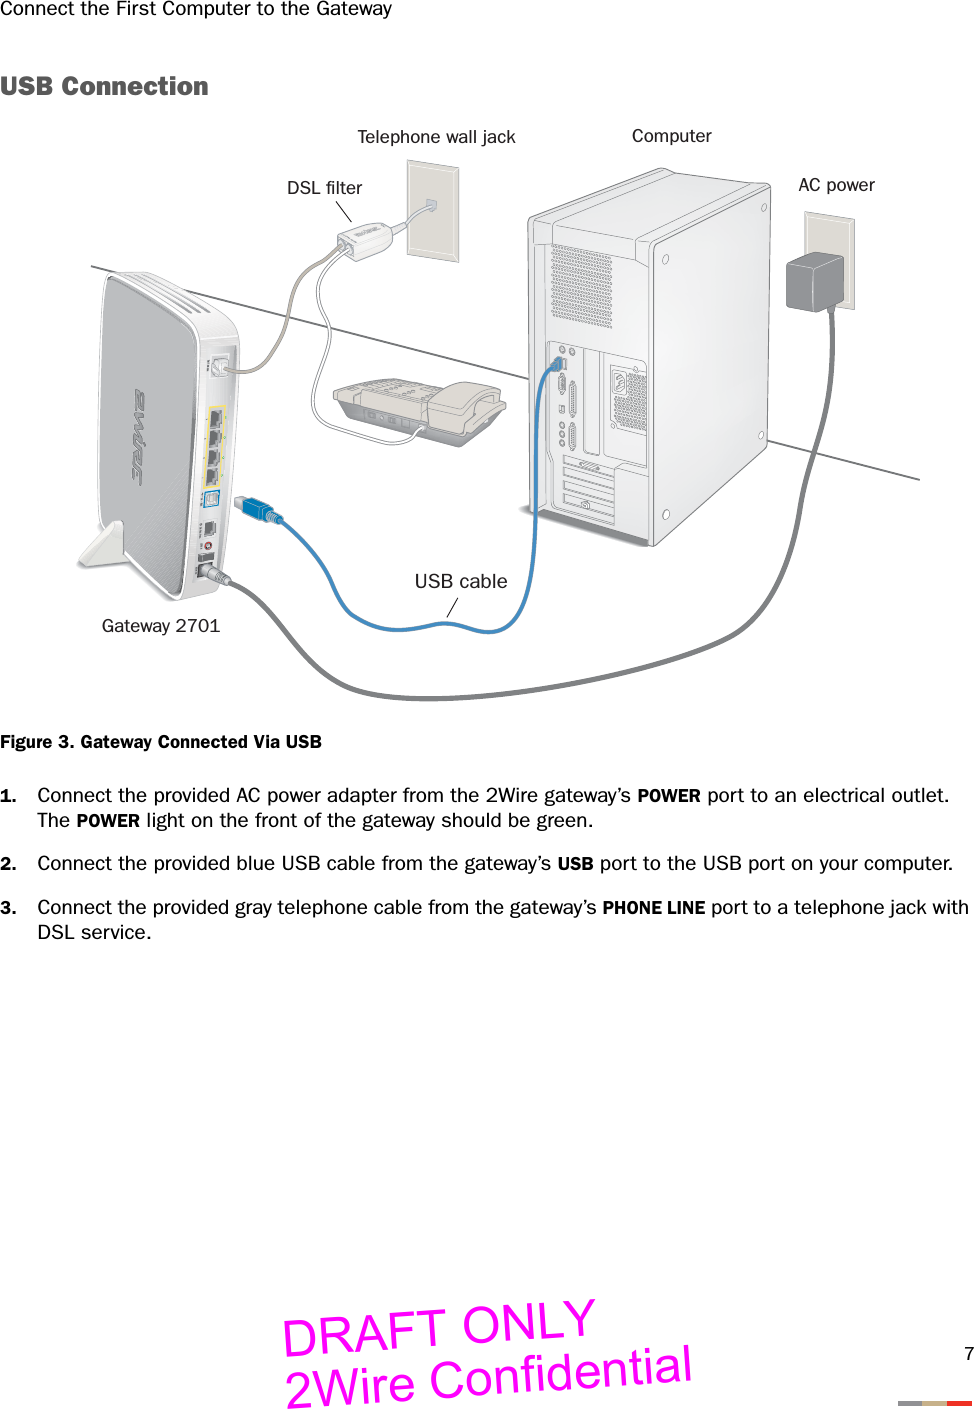
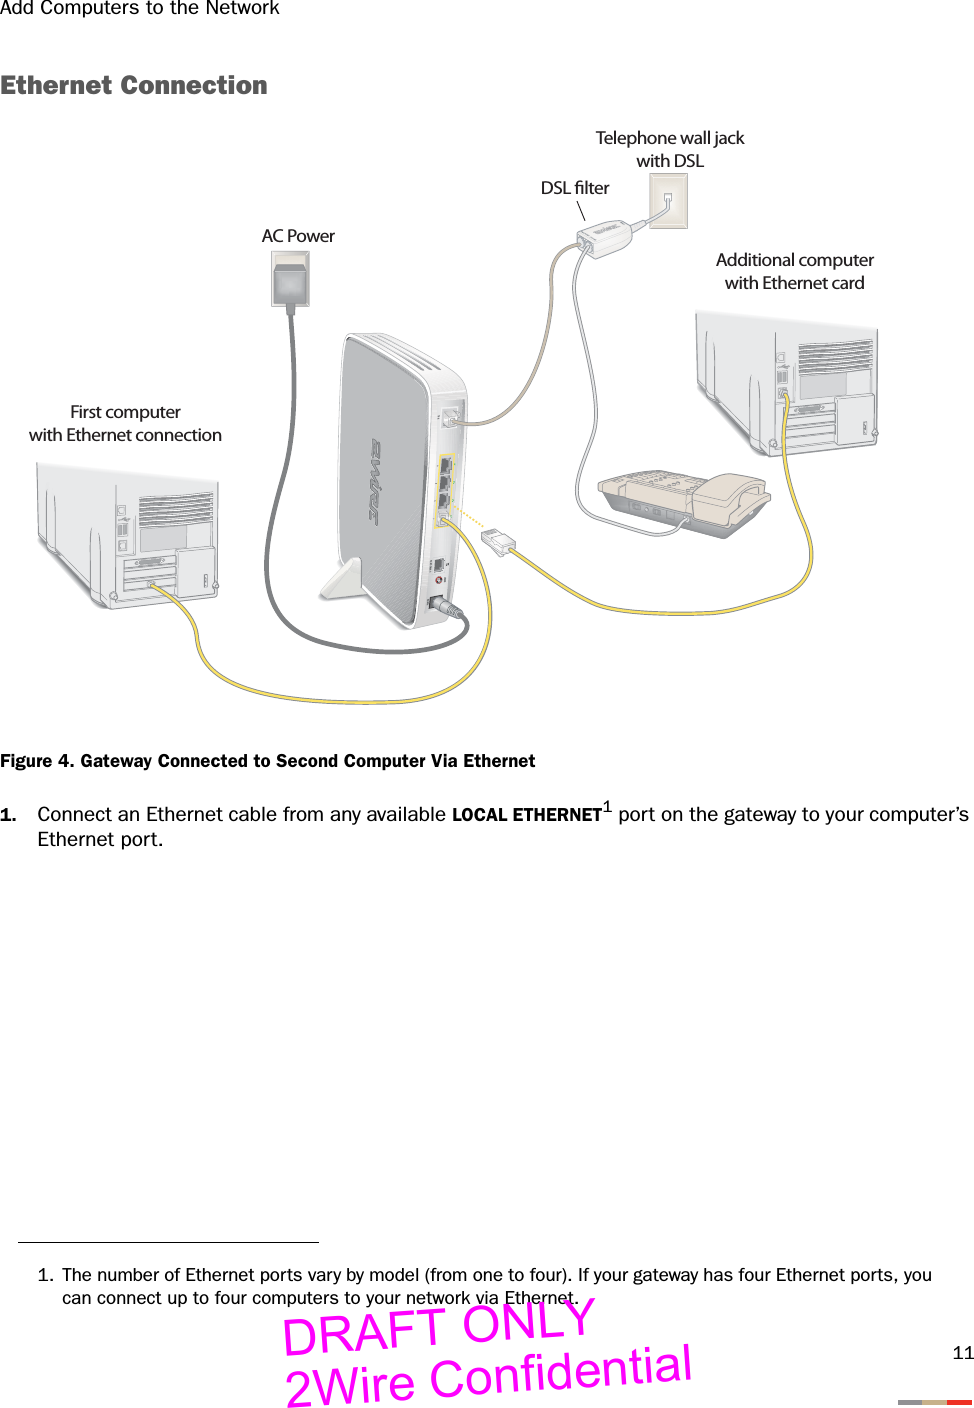
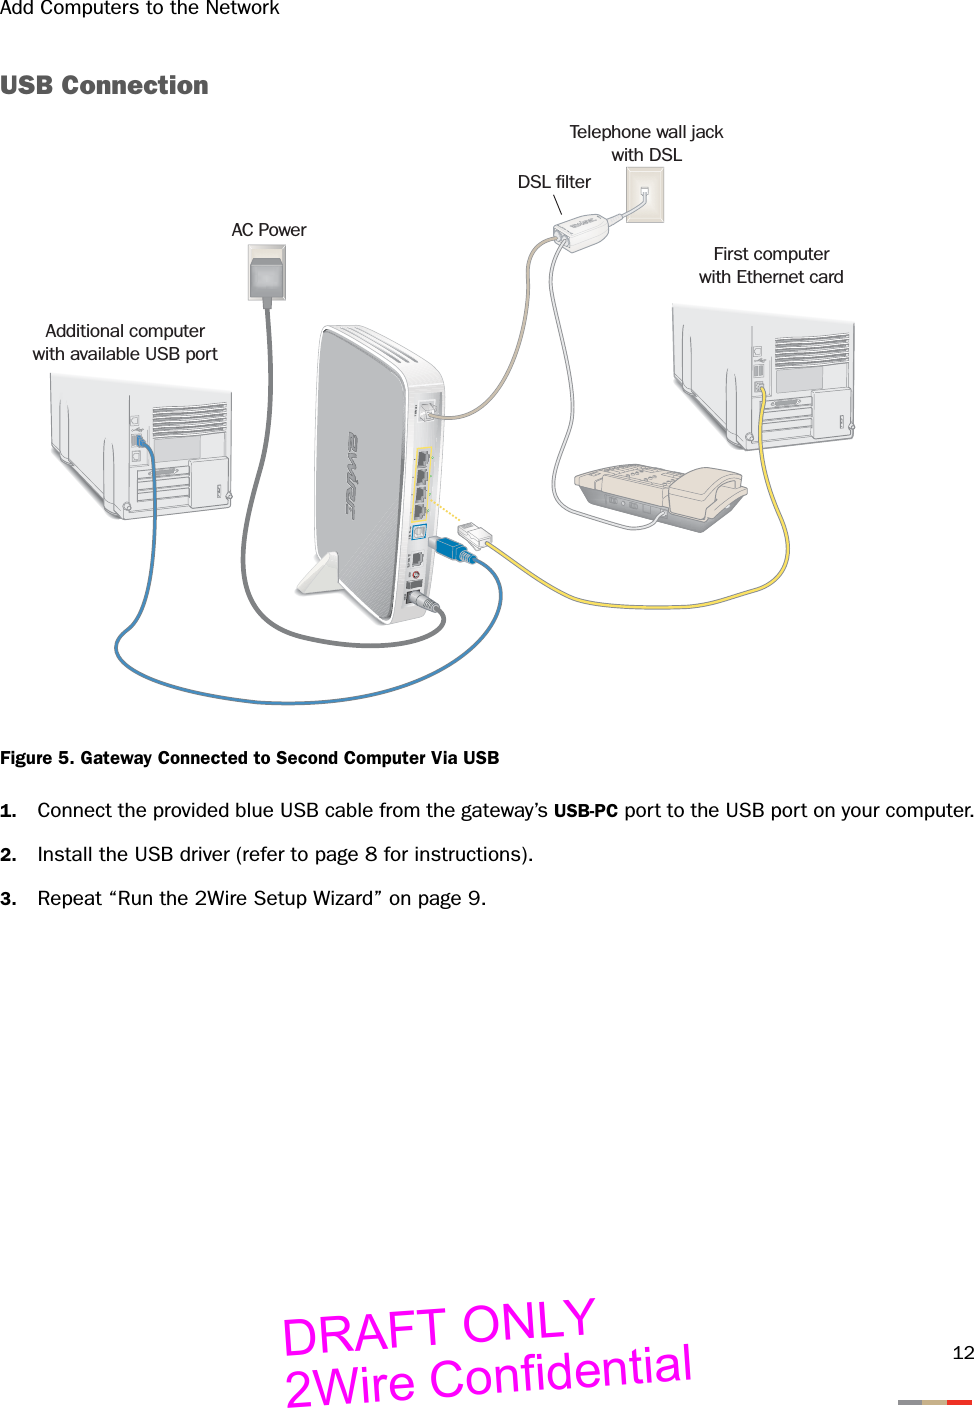
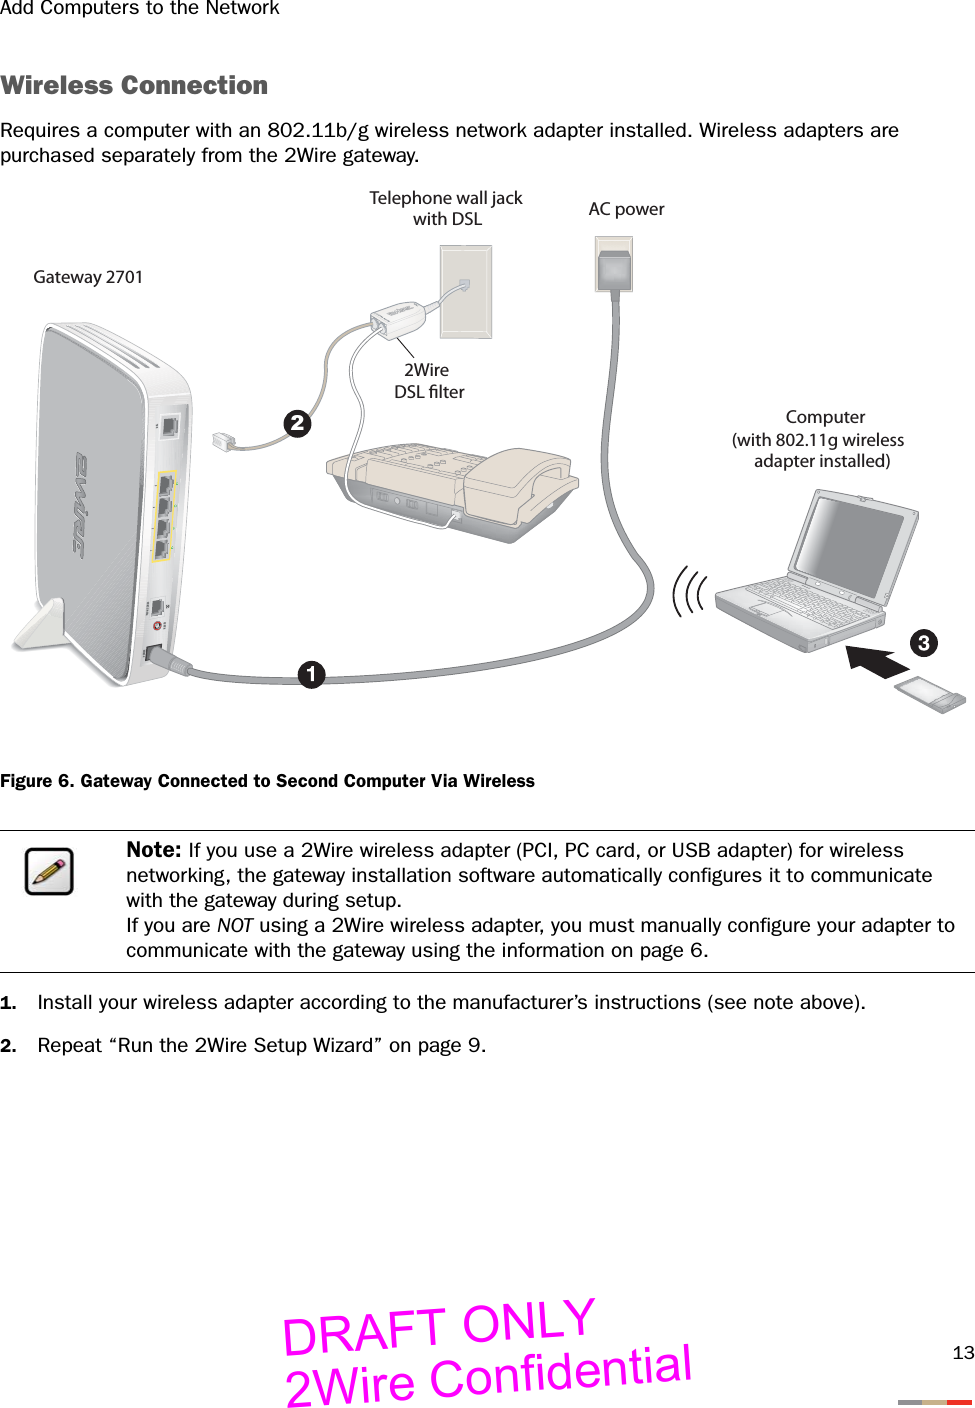
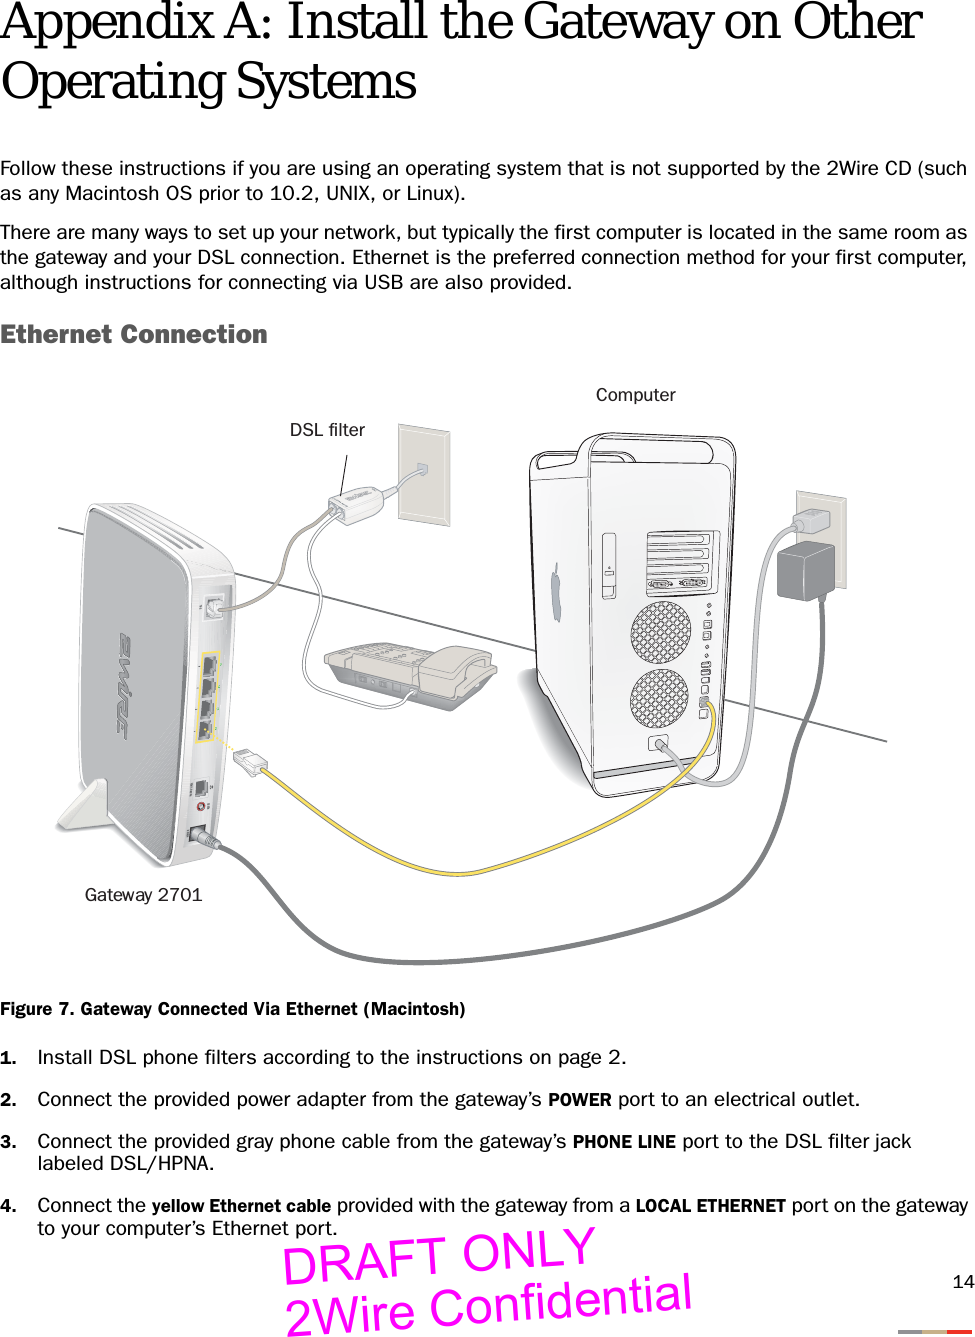
![Connect the First Computer to the Gateway6Non-2Wire Wireless Adapter ConfigurationLocating the Serial Number and Wireless Encryption KeyThe serial number of your 2Wire gateway is used as the network name (SSID). Beneath the serial number is a ten-digit number which is used as the encryption key. These are located on the bottom of your gateway (shown in vertical orientation). You will need this information to configure your wireless adapter. Configuring the Adapter1. Install and configure your wireless adapter according to the manufacturer’s instructions.2. Use the network adapter configuration software or Windows network connection wizard to set the network name (SSID) and encryption key (WEP).a. The network name is the word “2WIRE” (in all capital letters), followed by the last three digits of the gateway serial number (for example, 2WIRE110).b. The encryption key is a 64-bit hex value, located beneath the bar code on the bottom of the 2Wire gateway. In the example, it is 4119627022.c. For Mac OS X users, you may need to enter the “$” character at the beginning of the encryption key (for example, $4119627022).POWERDSLINTERNETPHONE 12701HGVPHONE 2ETHERNETWIRELESS2701HGVSN: 1455111001102Wire® Gatewaywww.2Wire.comComplies with Part 68, FCC RulesFCC Reg: 66KRDL01BTW2701REN=0.1FLX[4119627022 ]Assembly Number 4200-000428-000Tested To Comply With FCC StandardsFCC ID: PGR2W2701This device complies with part 15 of the FCC Rules. Operation is subject to the following two conditions: (1) This device may not cause harmful interference, and (2) this device must accept any interference received, including interference that may cause undesired operation.Concentrador Inalambrico para Red (ADSL)Marca: 2WireModelo: RG2701HGV-00Made in MalaysiaPatent No. Des. 437,2895,1V 3ARG2701HGV-00USB-PCDRAFT ONLY2Wire Confidential](https://usermanual.wiki/ARRIS/2W2701HGV.Install-Guide/User-Guide-787272-Page-9.png)