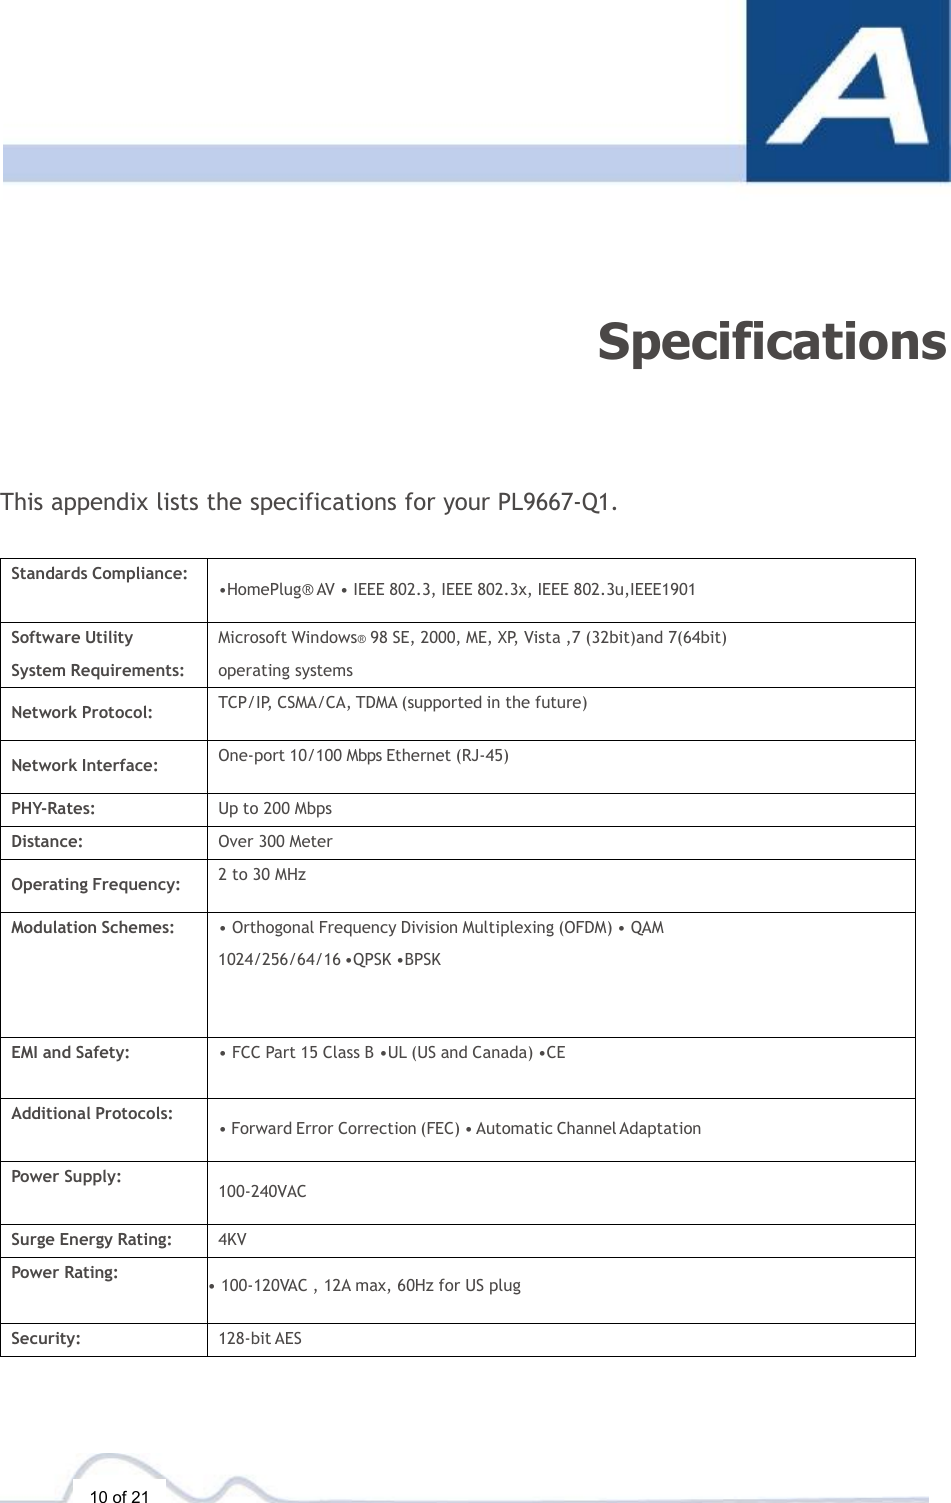
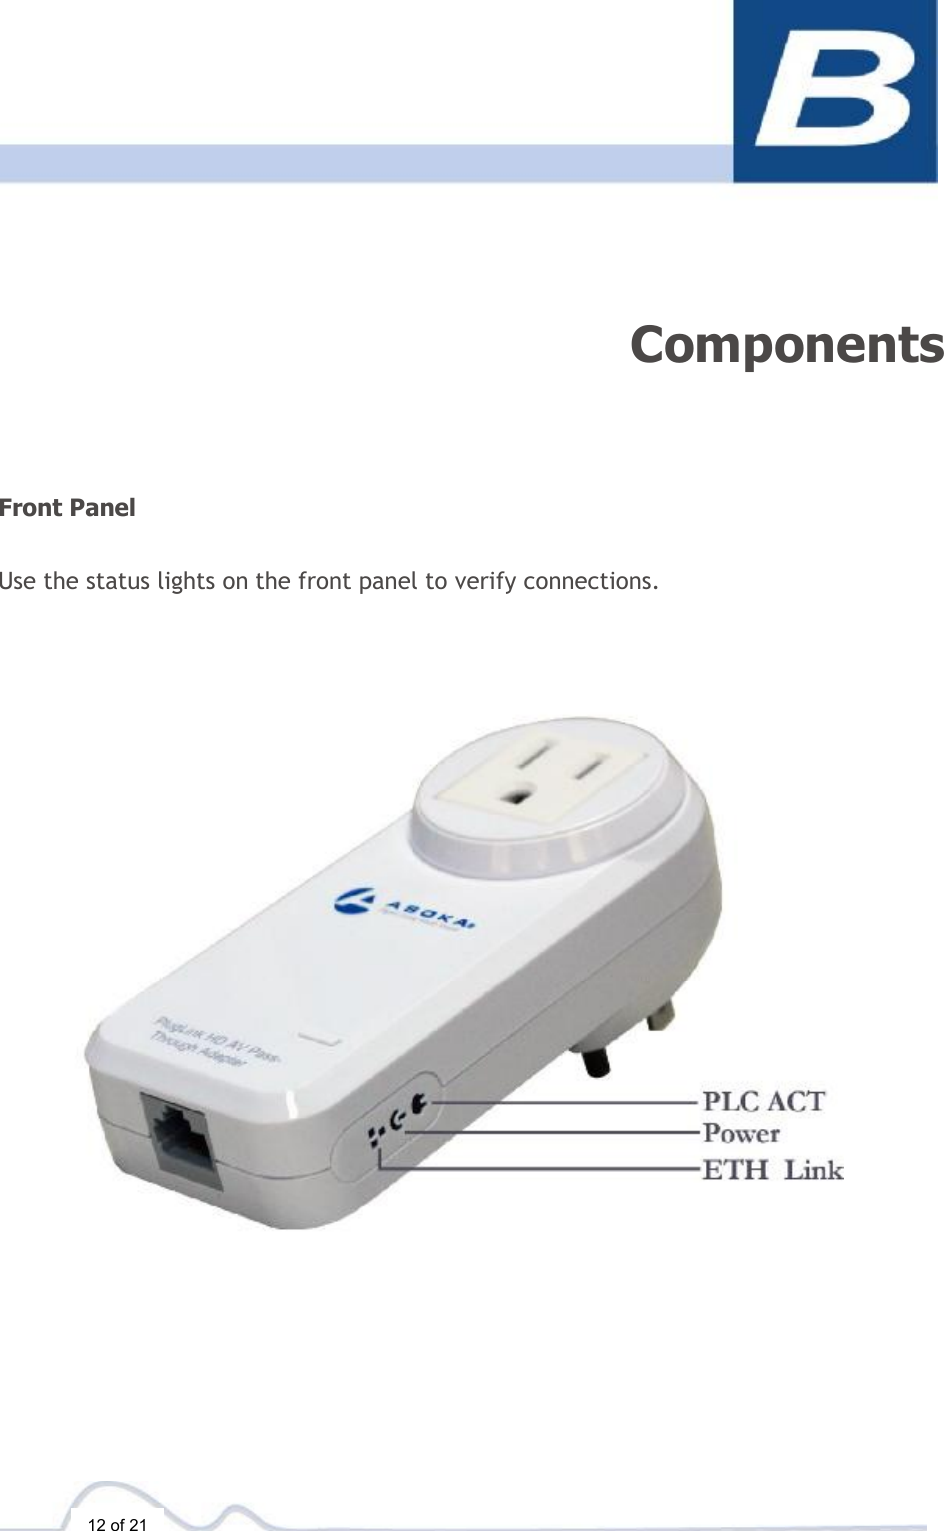
ASOKA USA PL9667-Q1 PlugLink HD AV Pass-Through Adapter User Manual PL9667 Q1 20140304
ASOKA USA Corporation PlugLink HD AV Pass-Through Adapter PL9667 Q1 20140304
UserManual.wiki
>
ASOKA USA
>
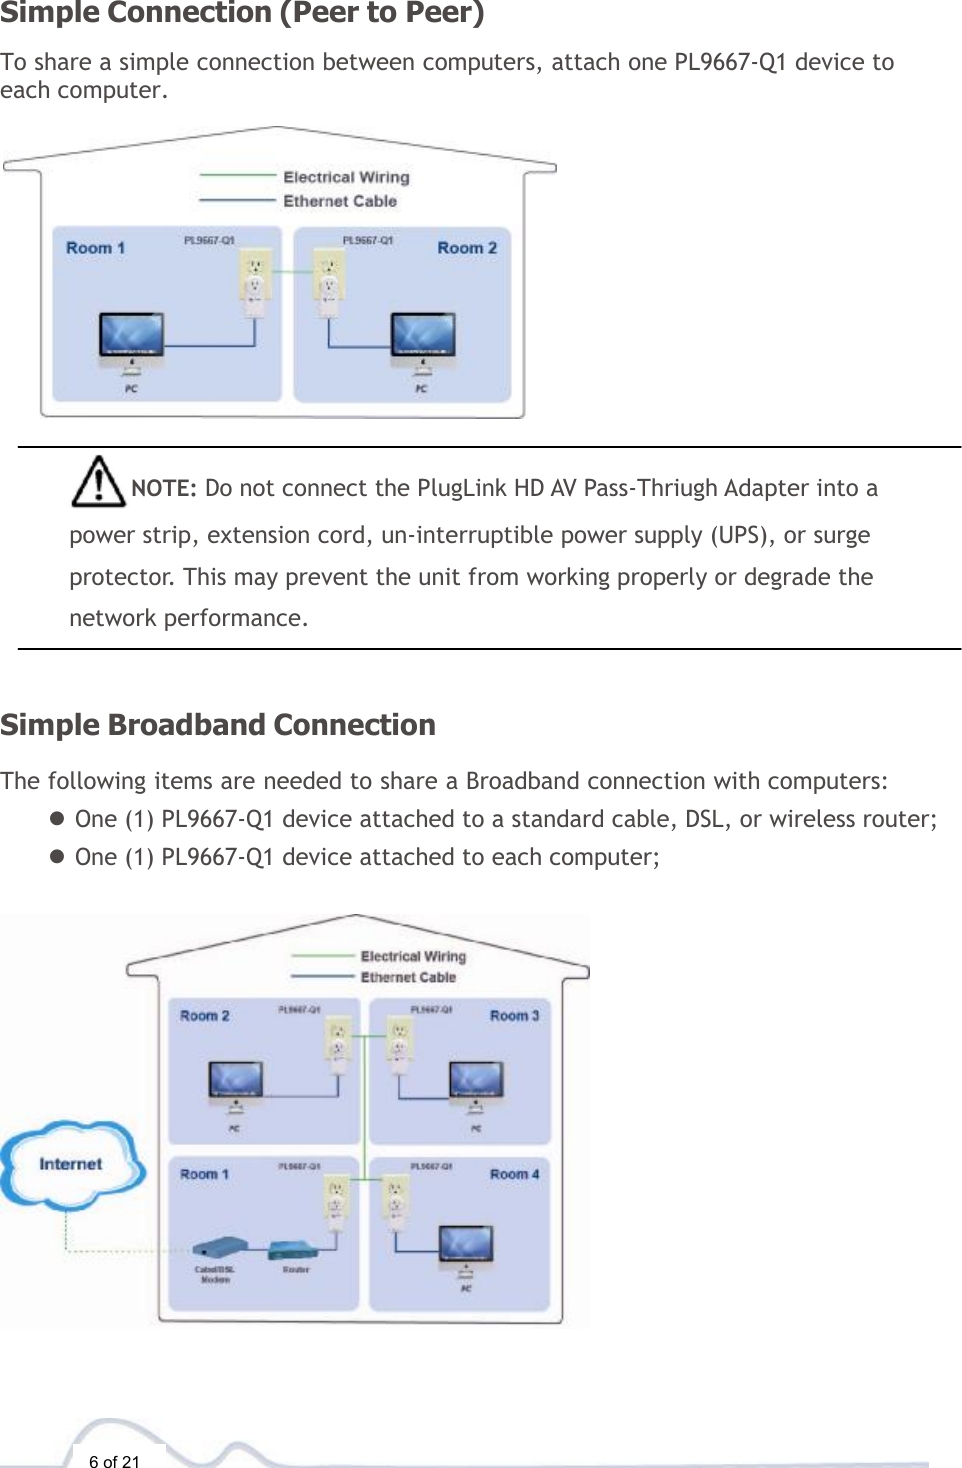
PL9667 Q1 User Manual
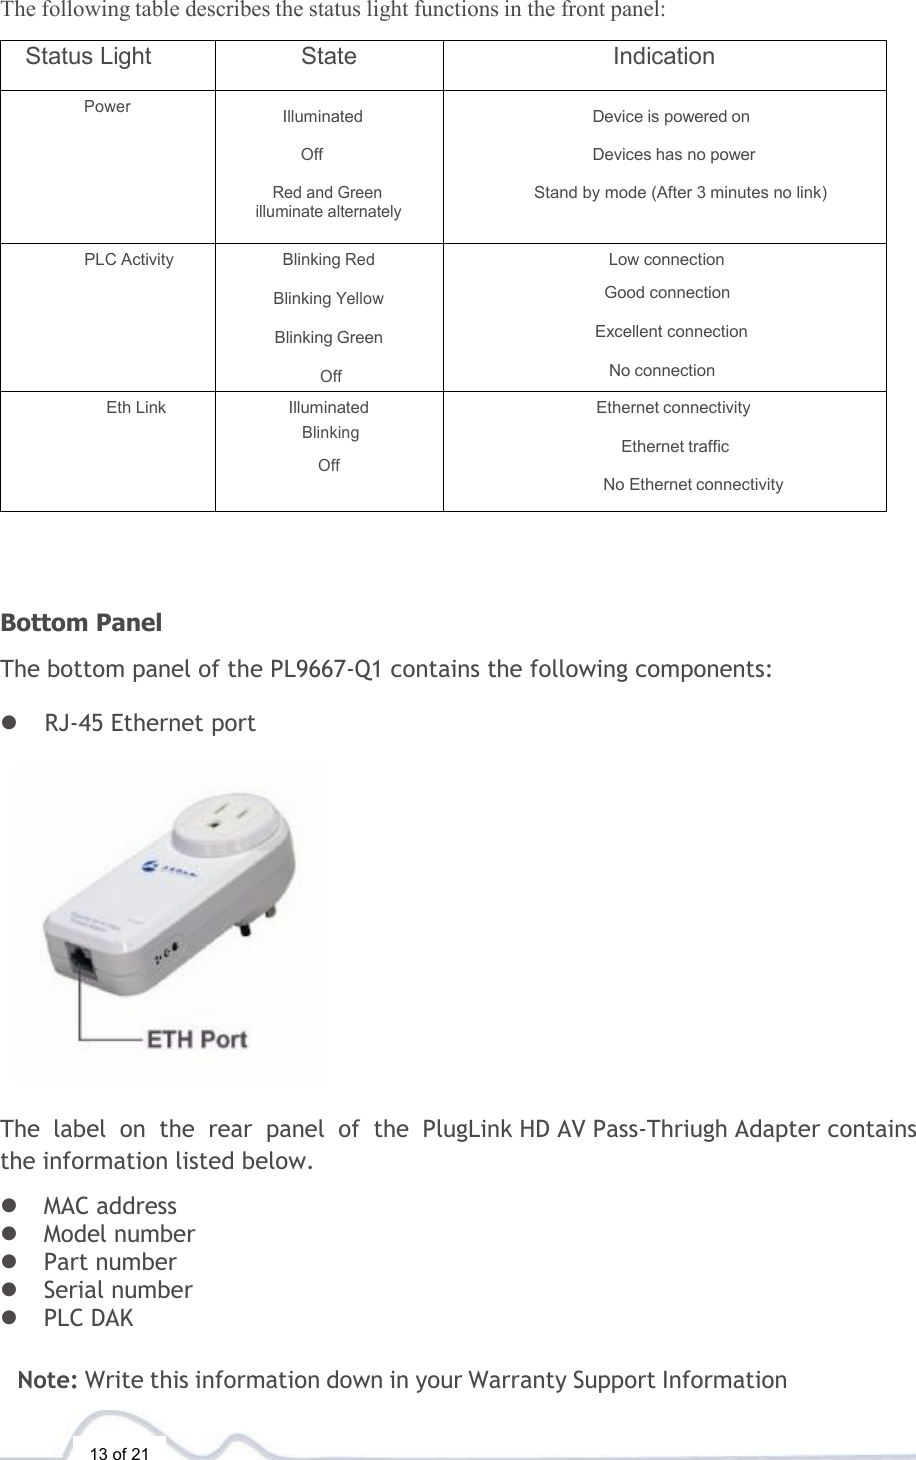
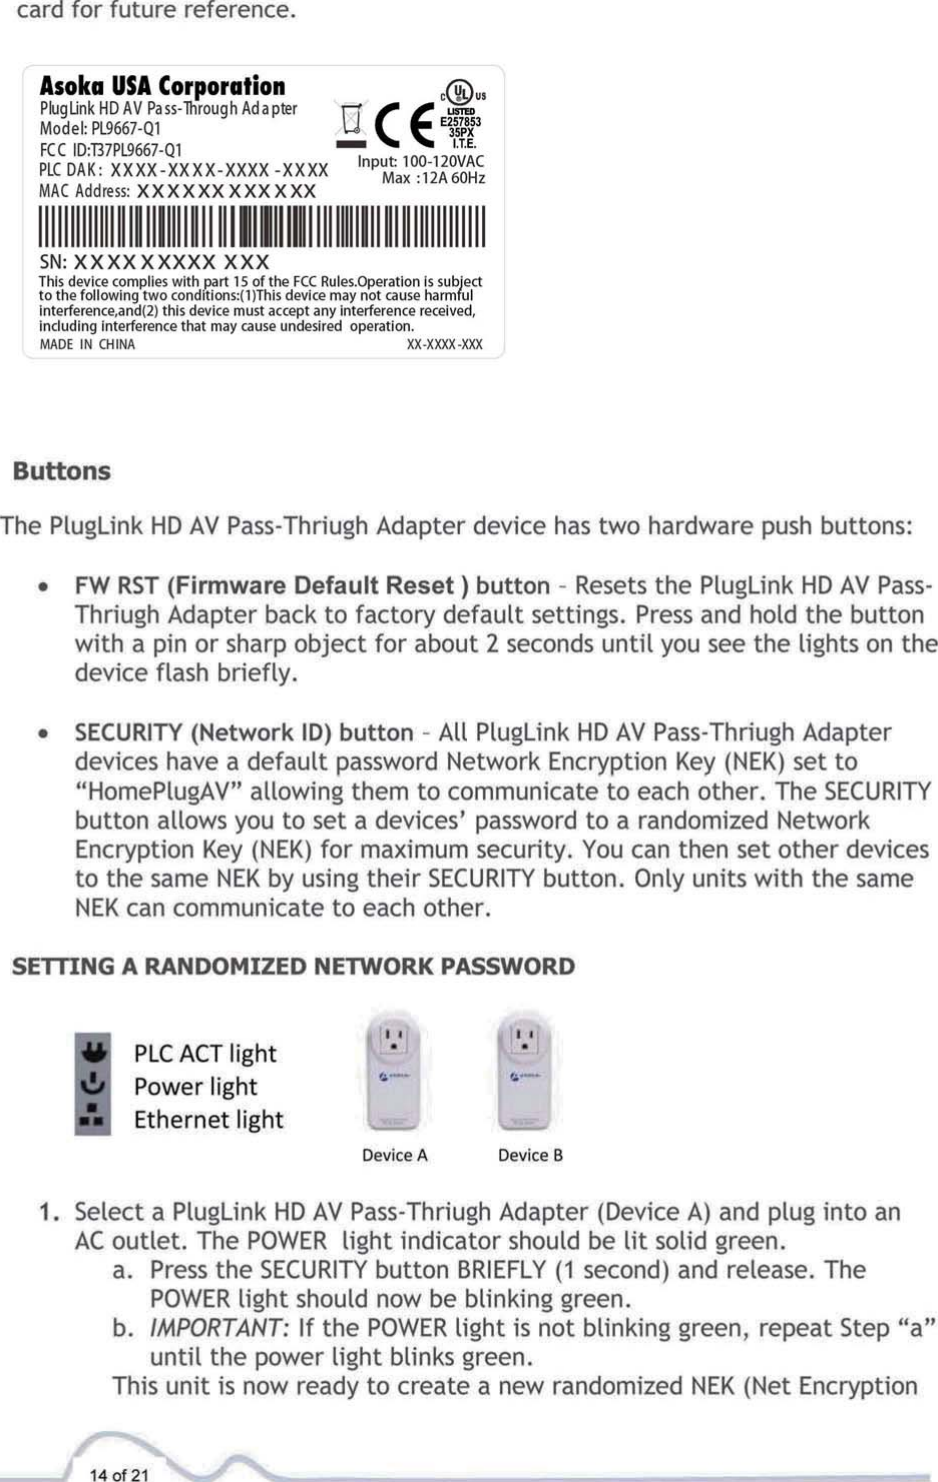
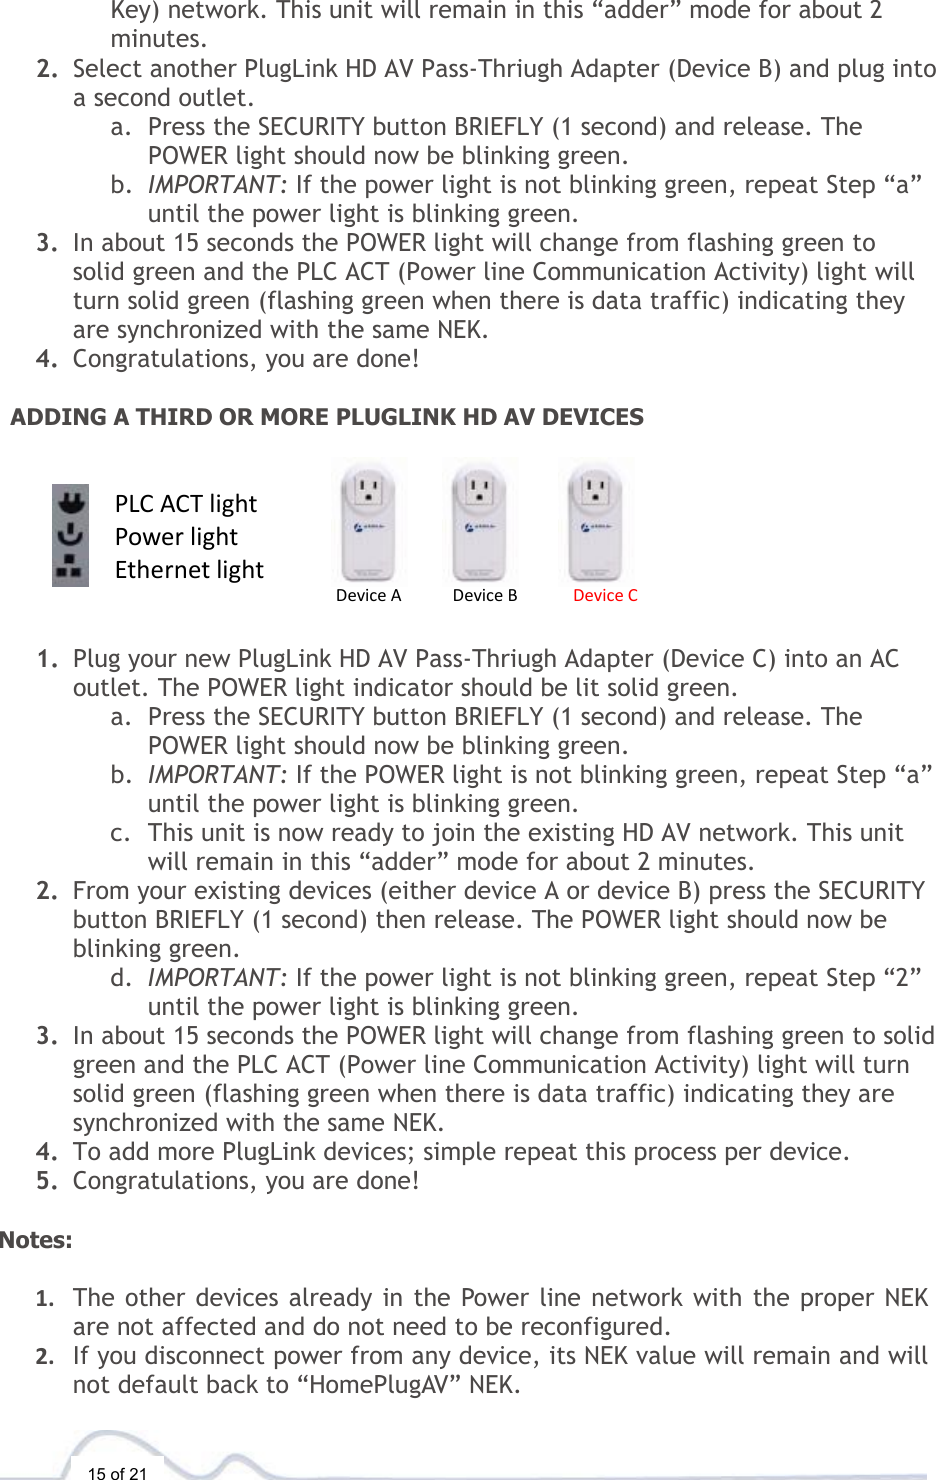
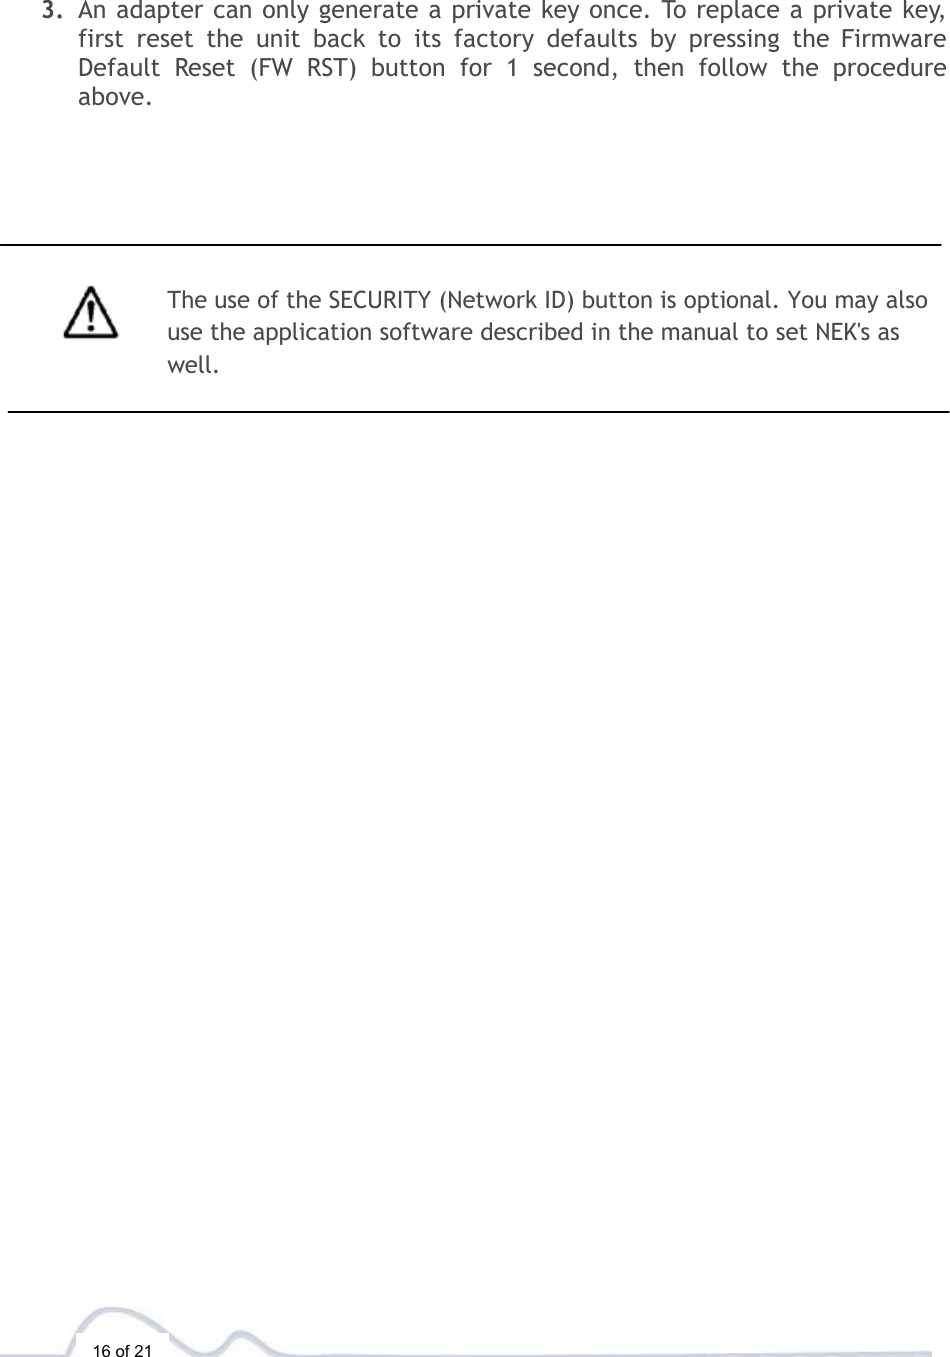
PL9667-Q1-User Manual
Navigation menu
Upload a User Manual
Namespaces
Wiki Guide
HTML
PDF
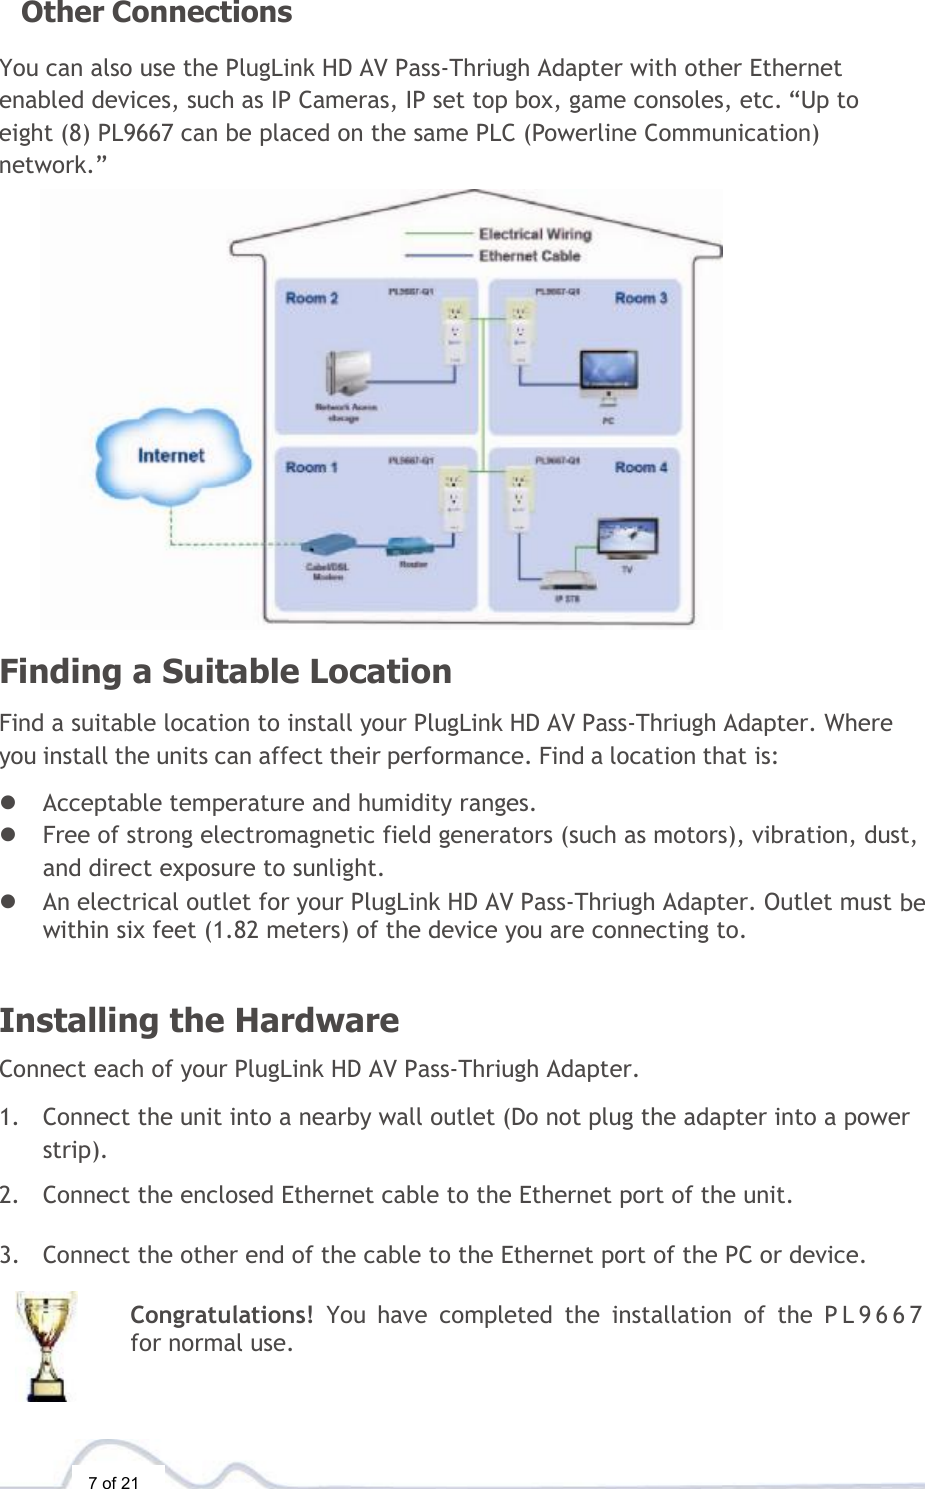
Info
Views
User Manual
Discussion / Help
Navigation