ASSALOY Global Solutions Norway AS PCBA9002 RF Module User Manual AA logo white eps
ASSA ABLOY Hospitality AS RF Module AA logo white eps
UserManual.wiki
>
ASSALOY Global Solutions Norway AS
>
PCBA9002 User Manual
user manual
Navigation menu
Upload a User Manual
Namespaces
Wiki Guide
HTML
PDF
Info
Views
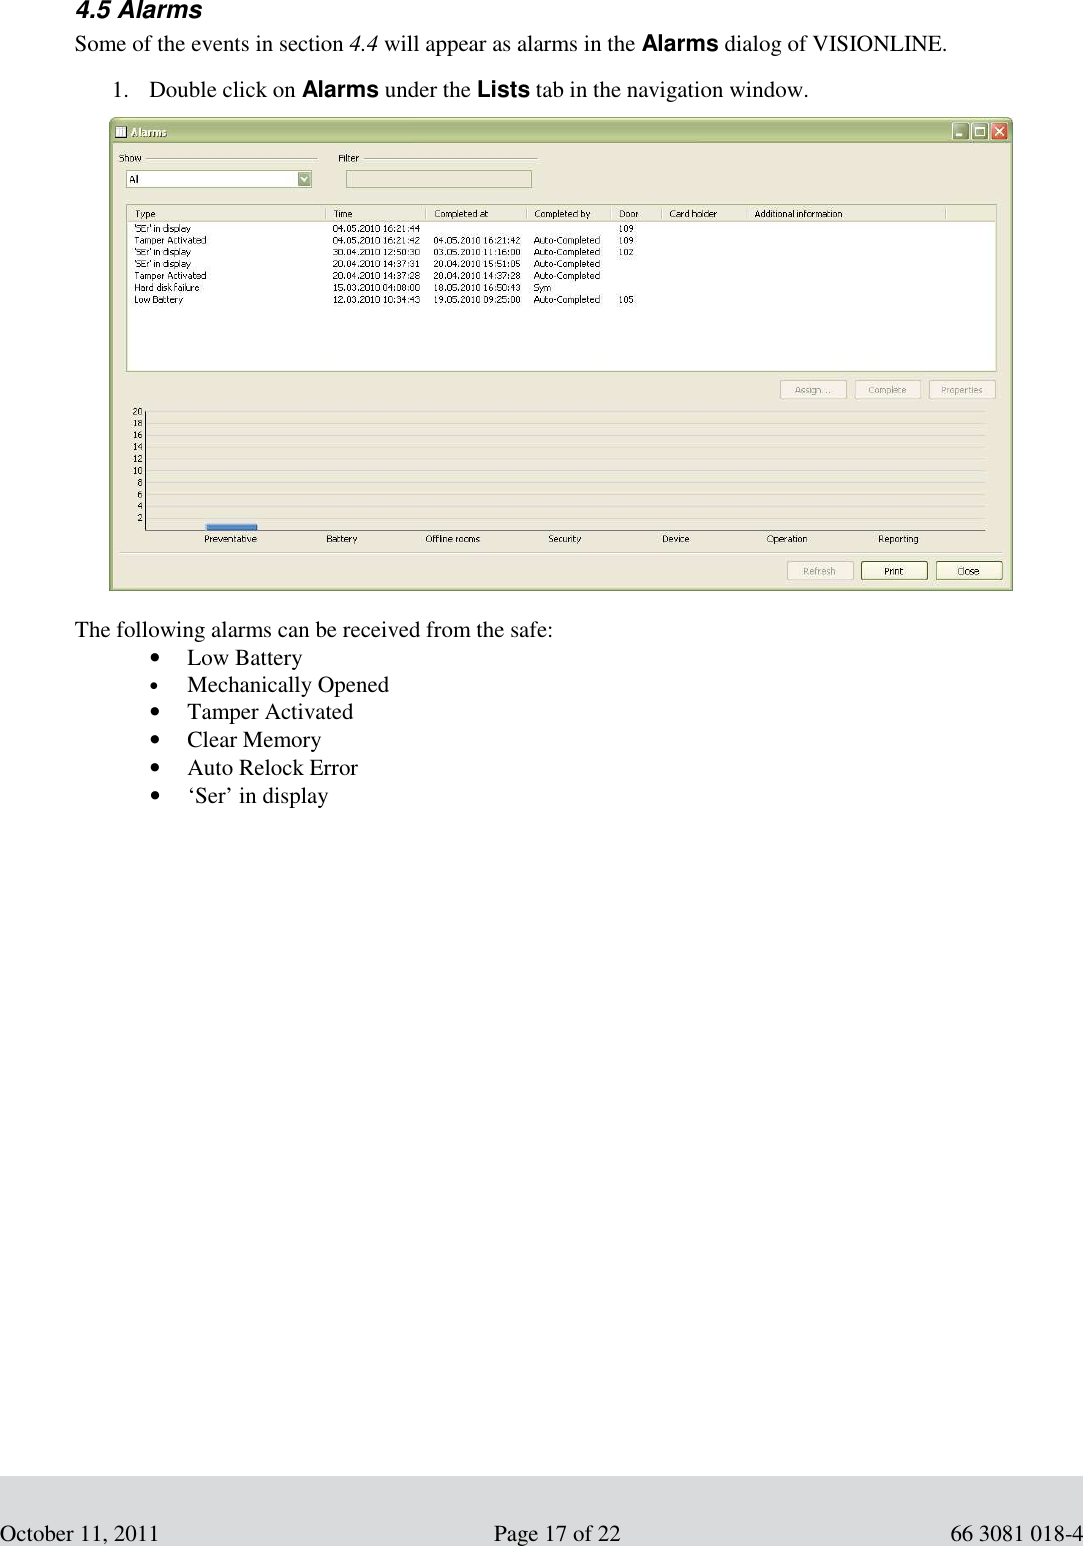
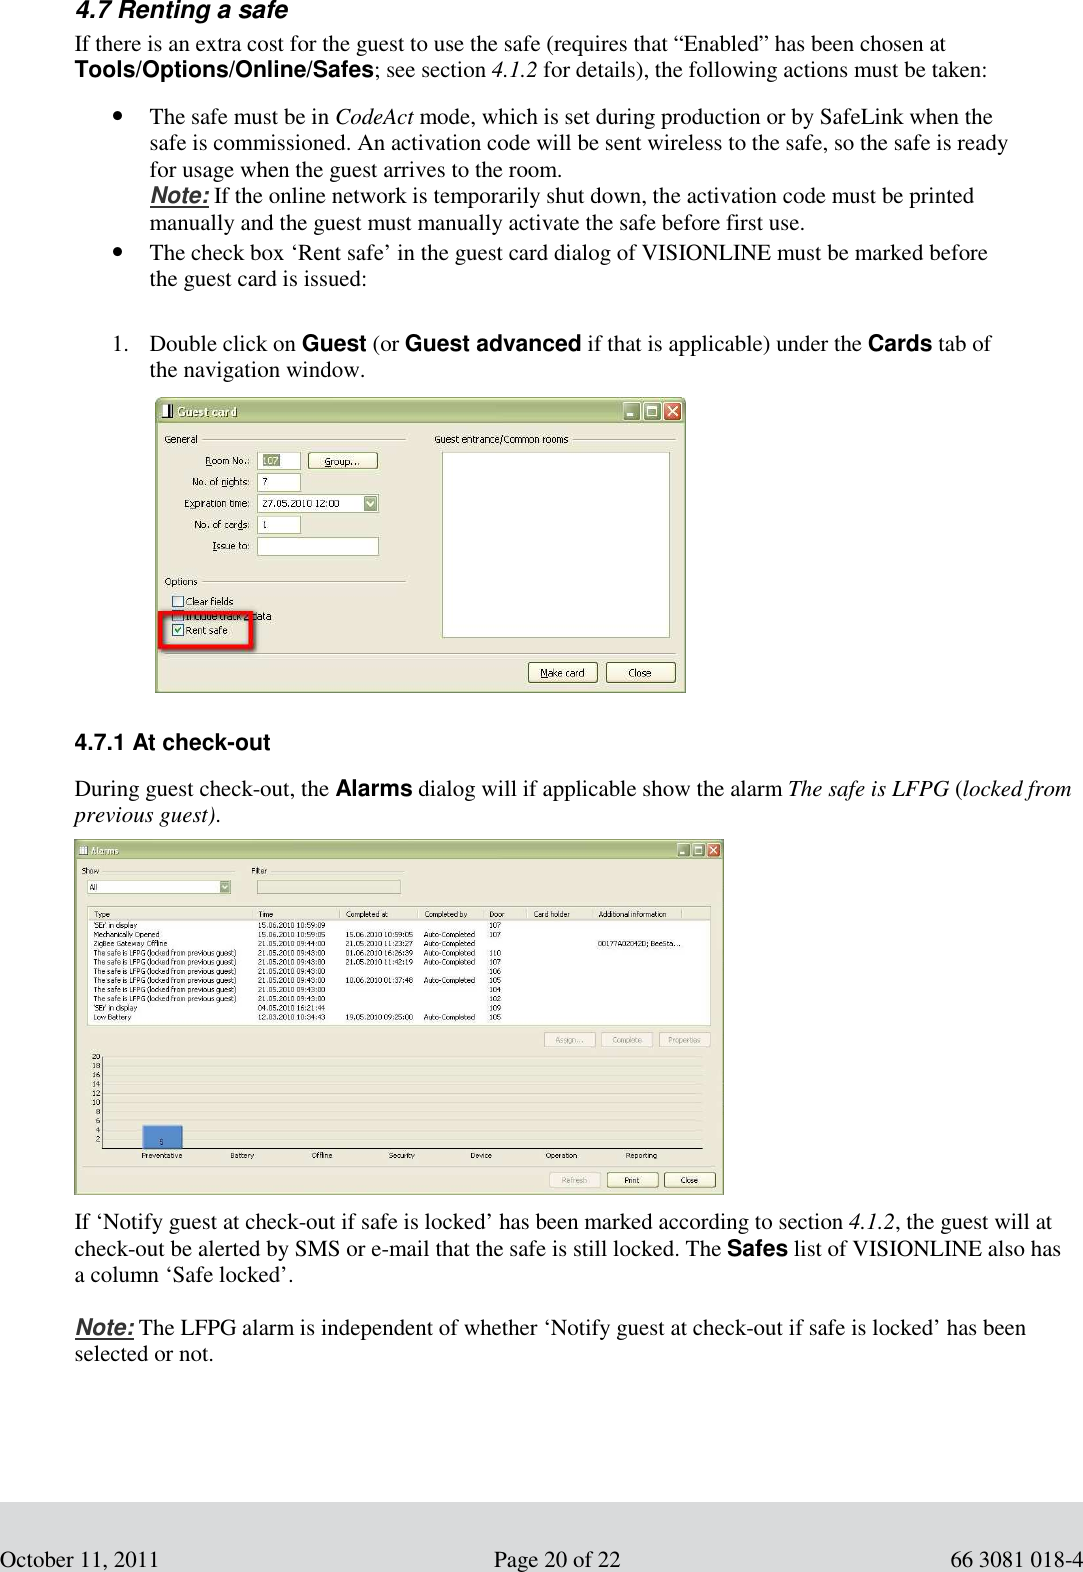
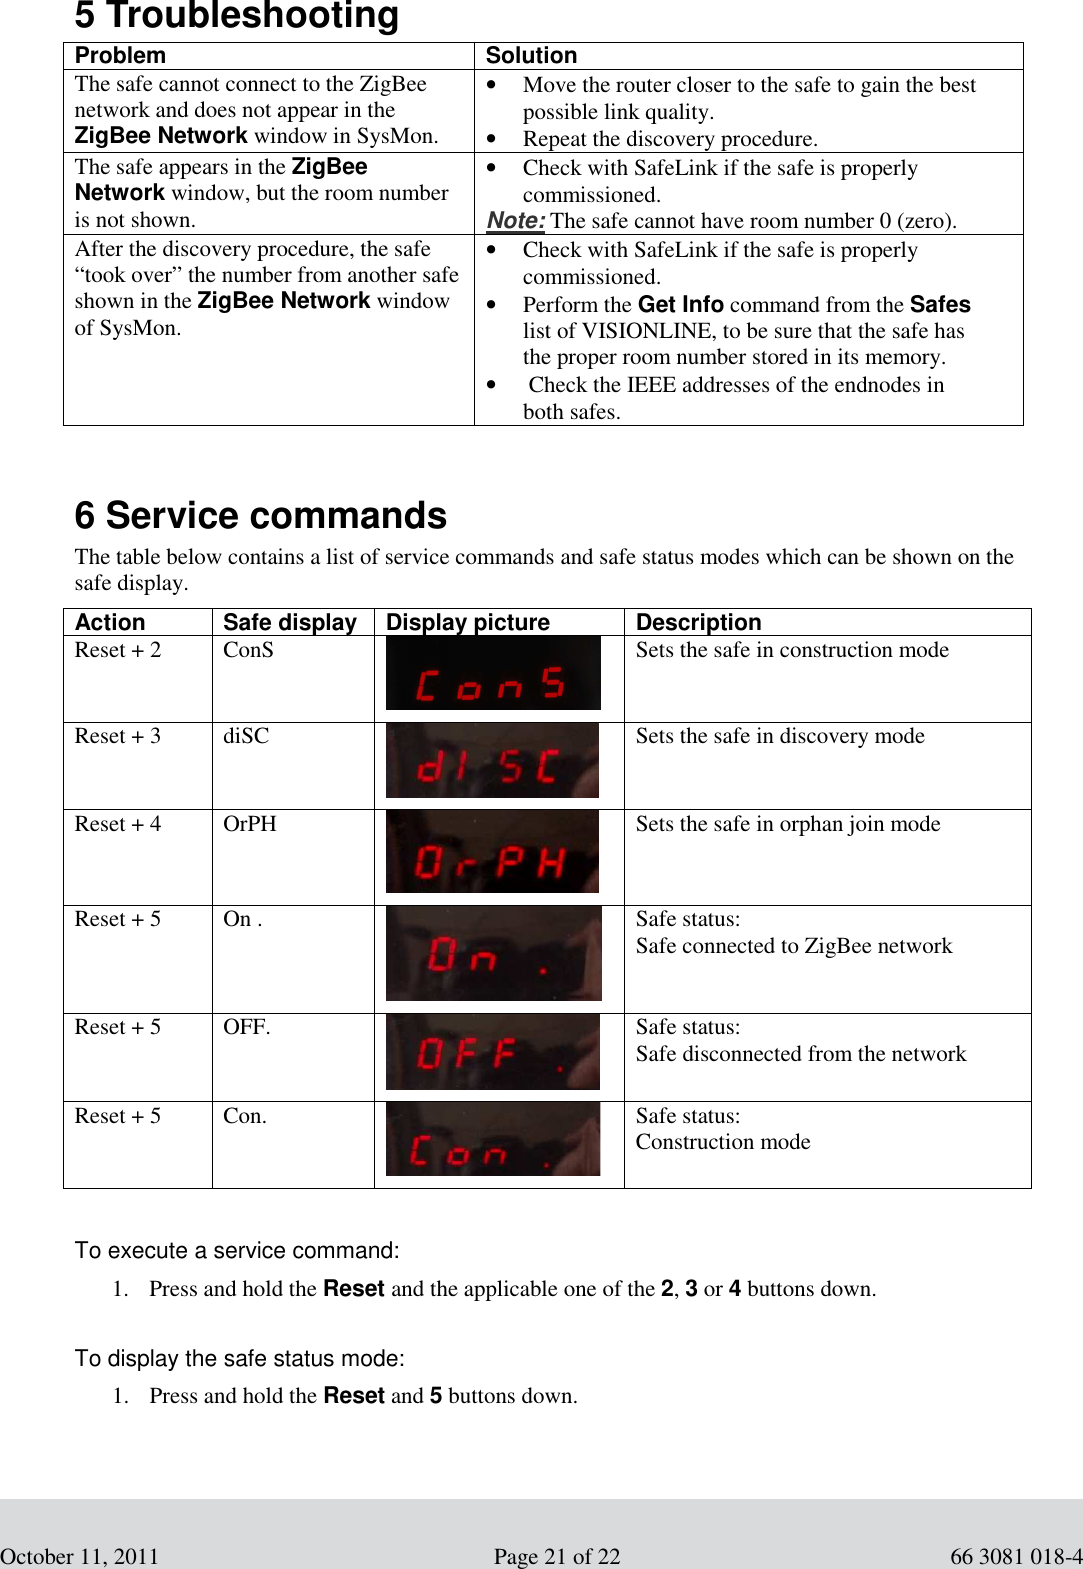
User Manual
Discussion / Help
Navigation