ASUSTeK Computer 1520 3G GPS PDA PHONE User Manual USERS MANUAL 2
ASUSTeK Computer Inc 3G GPS PDA PHONE USERS MANUAL 2
UserManual.wiki
>
ASUSTeK Computer
>
1520 User Manual
>
USERS MANUAL 2
Contents
1.
USERS MANUAL 1
2.
USERS MANUAL 2
3.
users manual 1
4.
users manual 2
USERS MANUAL 2
Navigation menu
Upload a User Manual
Namespaces
Wiki Guide
HTML
PDF
Info
Views
User Manual
Discussion / Help
Navigation


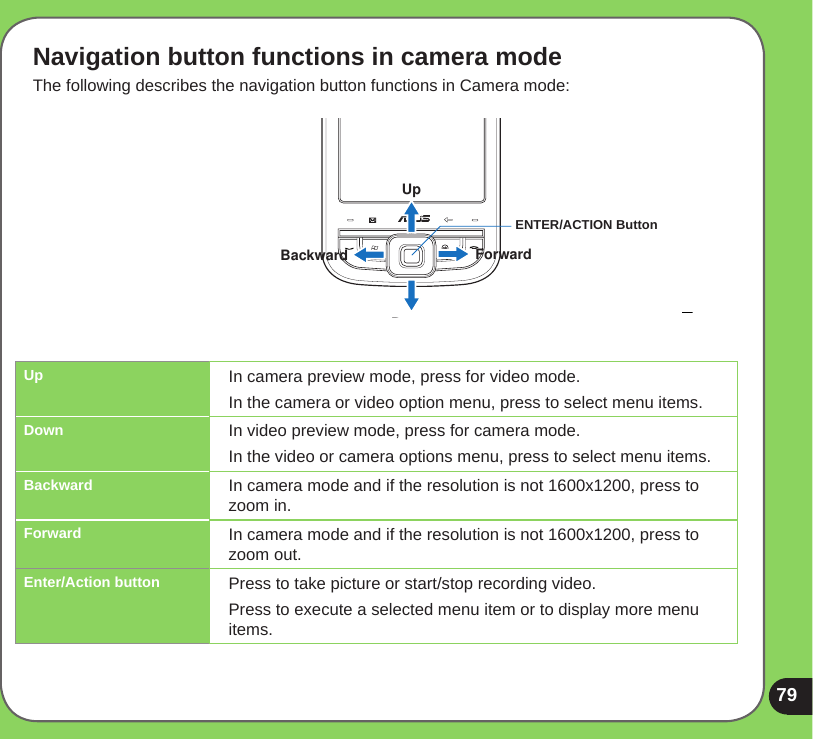
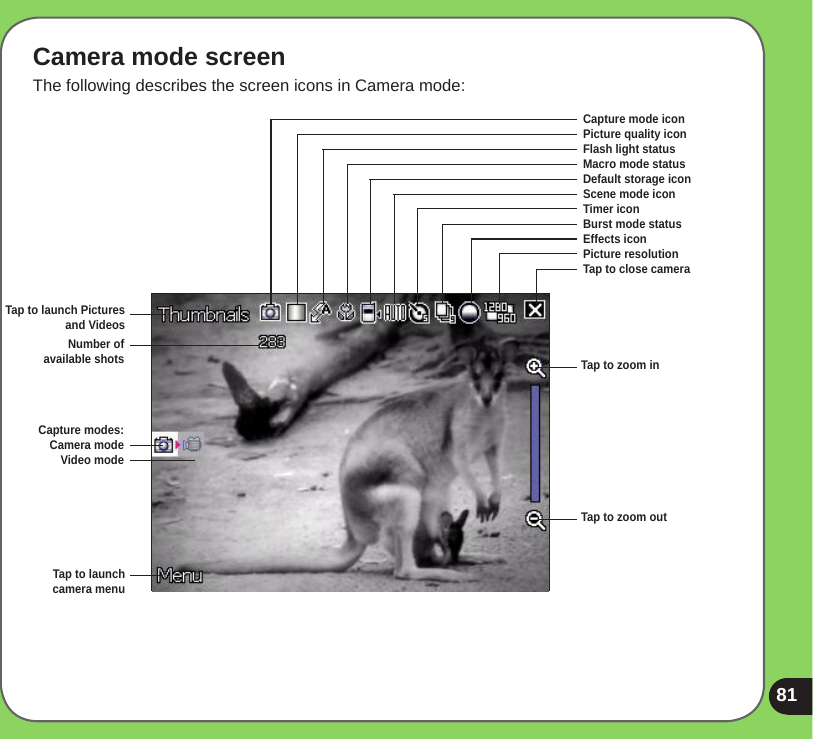
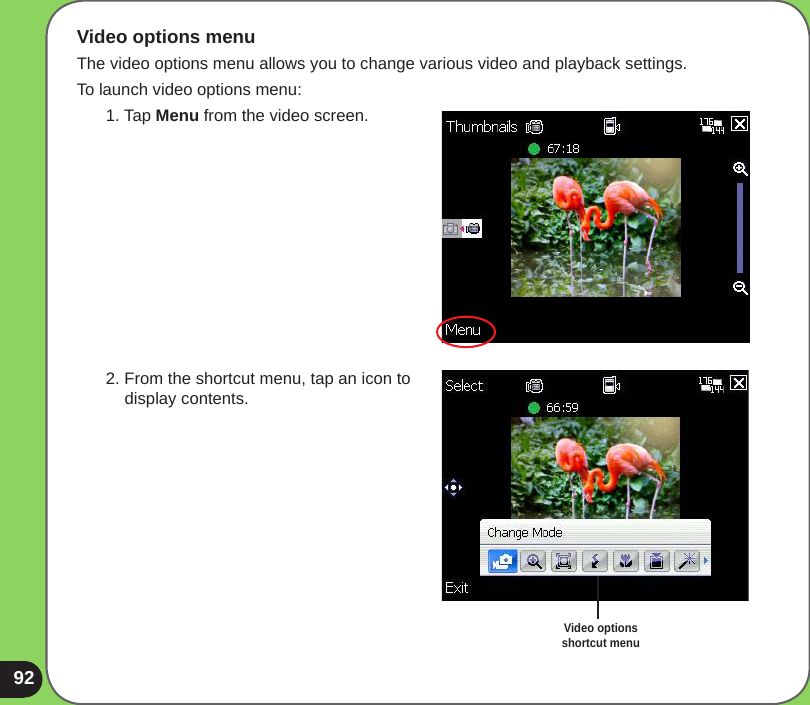
![82Camera mode icons• Capture mode icon [ / ] - indicates the current capture mode. • Picture quality icon [ / / ]- indicates the picture quality used.• Flash light status icon [ / / ] - indicates the camera ash status.• Macro mode icon [ ] - this icon appears when the camera is in macro mode.• Default storage icon [ / ] - indicates default storage for captured images.• Scene mode icon [ / / ] - indicates the scene mode used.• Timer icon [ / ] - when the camera timer is enabled (5 seconds or 10 seconds), the corresponding timer icon appears. When you press the shutter button or the navigation button to take a picture, the count down begins and picture is taken after the time set.• Burst mode icon [ / ] - indicates the number of frames in burst mode.• Effects icon [ / / ] - indicates the effect used. • Picture resolution [ / / / / / ] - shows the resolution used. When set to 1600x1200 resolution, the zoom in/zoom out function is disabled.• Exit icon [ ] - tap to exit camera.• Zoom In [ ] - tap to zoom in view of subject on screen.• Zoom Out [ ] - tap to zoom out view of subject on screen.• Thumbnails [ ]- tap to launch Pictures and Videos application and preview your images in thumbnails.• Menu [ ] - tap to launch camera menu options.](https://usermanual.wiki/ASUSTeK-Computer/1520.USERS-MANUAL-2/User-Guide-843976-Page-22.png)


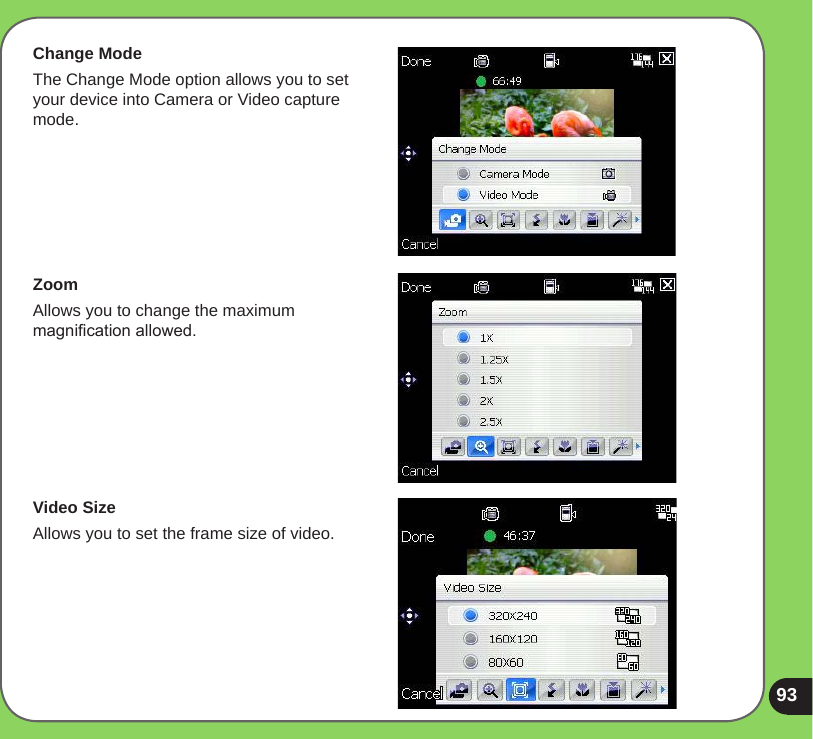
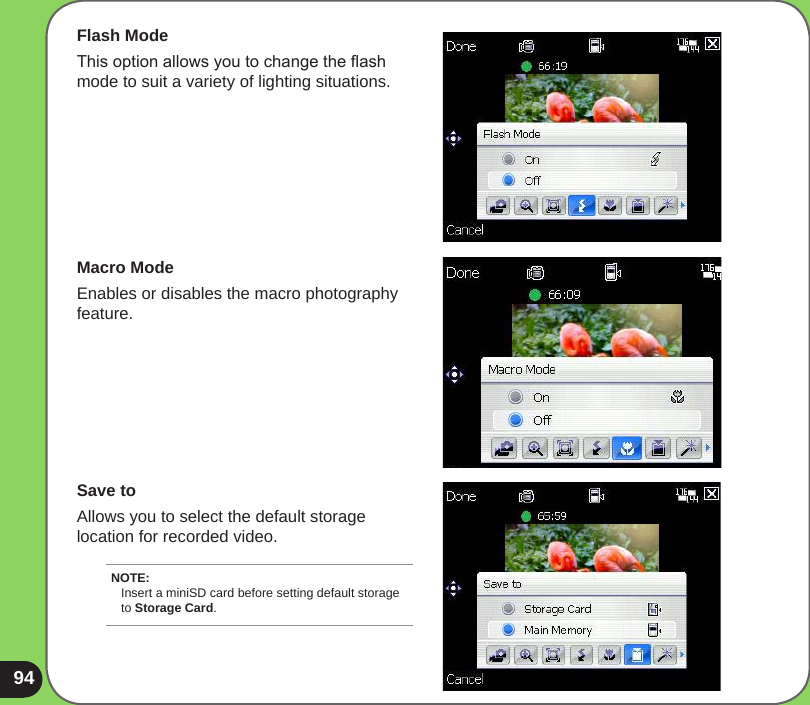
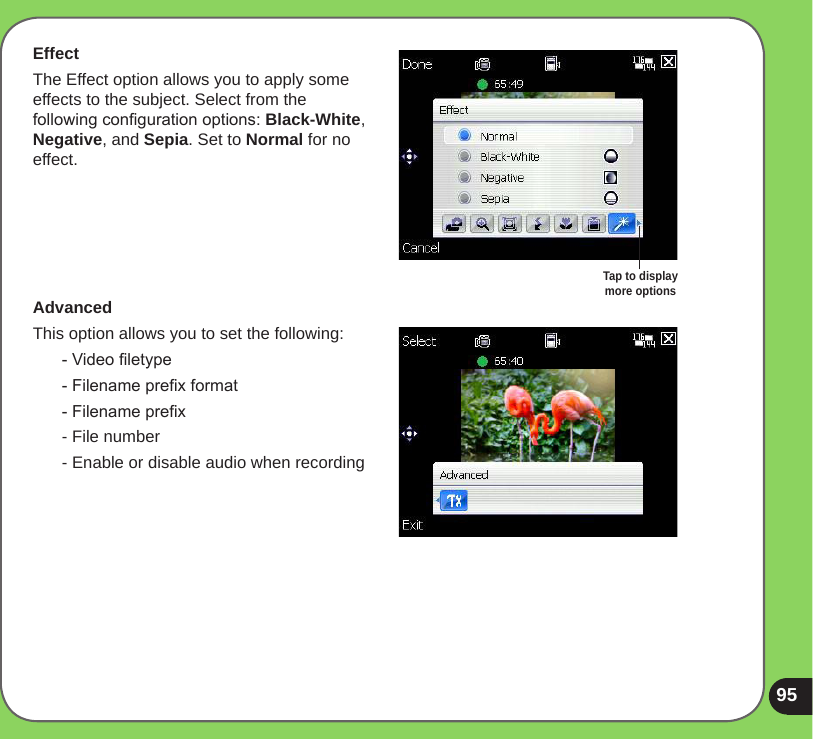
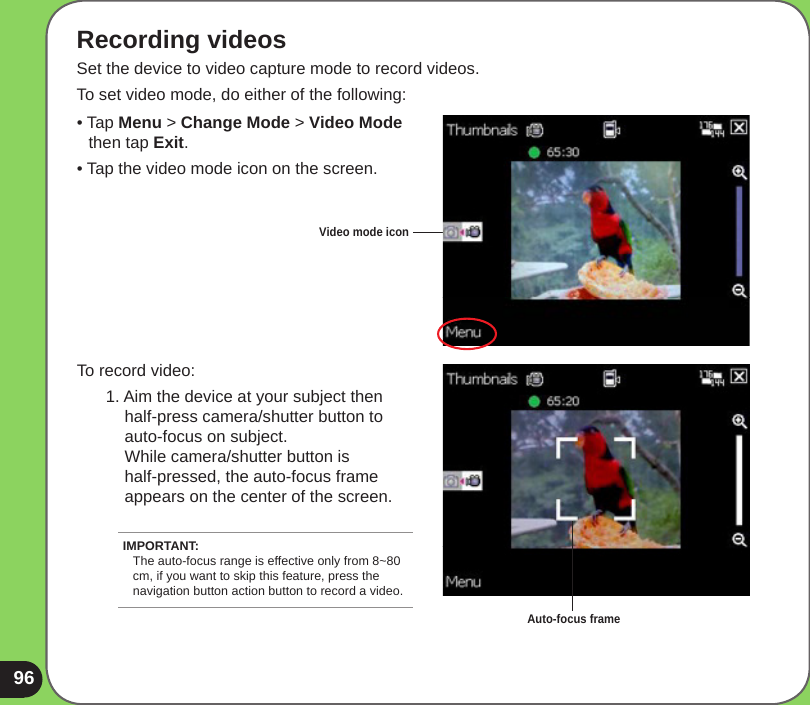
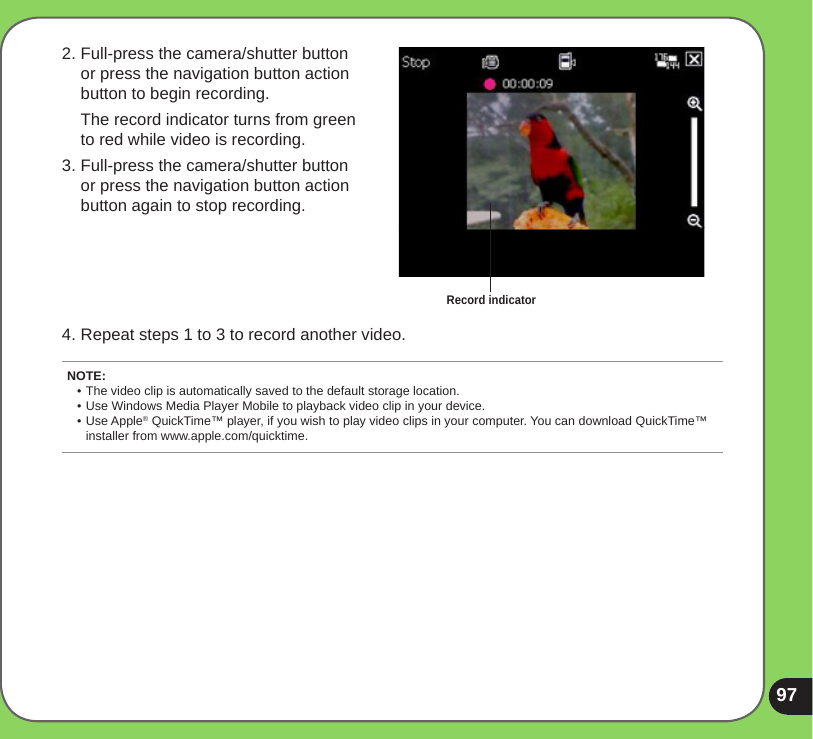
![91Video mode icons• Capture mode icon [ / ] - indicates the current capture mode. • Flash light status icon [ ] - this icon appears when the ash light is enabled.• Macro mode icon [ ] - this icon appears when the video is in macro mode.• Default storage icon [ / ] - indicates default storage for captured video clips.• Effects icon [ / / ] - indicates the effect used. • Video Size [ / / ] - shows the resolution used.• Exit icon [ ] - tap to close camera.• Zoom In [ ] - tap to zoom in view of subject on screen.• Zoom Out [ ] - tap to zoom out view of subject on screen.• Thumbnails [ ]- tap to launch Pictures and Videos application and play your video.• Menu [ ] - tap to launch video menu options.](https://usermanual.wiki/ASUSTeK-Computer/1520.USERS-MANUAL-2/User-Guide-843976-Page-31.png)