ASUSTeK Computer 8265NG Intel Dual Band Wireless-AC 8265 User Manual 1
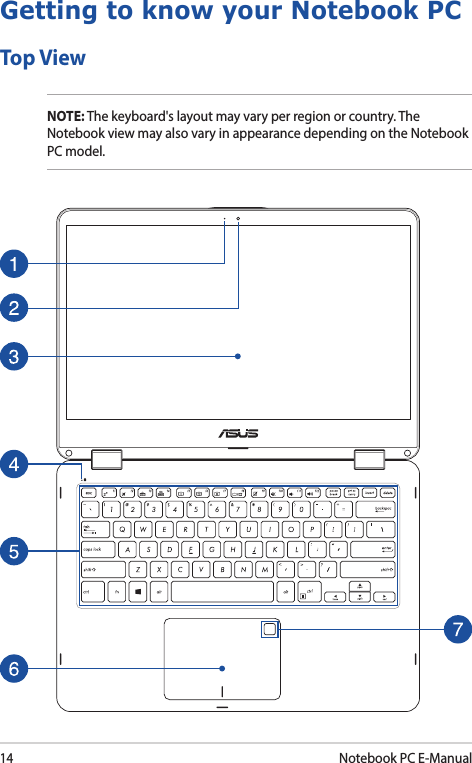
ASUSTeK Computer Inc Intel Dual Band Wireless-AC 8265 1
UserManual.wiki
>
ASUSTeK Computer
>
8265NG User Manual
>
User Manual 1
Contents
1.
(8265NGW) User Manual
2.
User Manual
3.
User Manual 1
4.
User Manual 2
5.
(8265NGW) UserMan
6.
(8265NGW) UserMan_20170914_Part 1
7.
(8265NGW) UserMan_20170914_Part 2
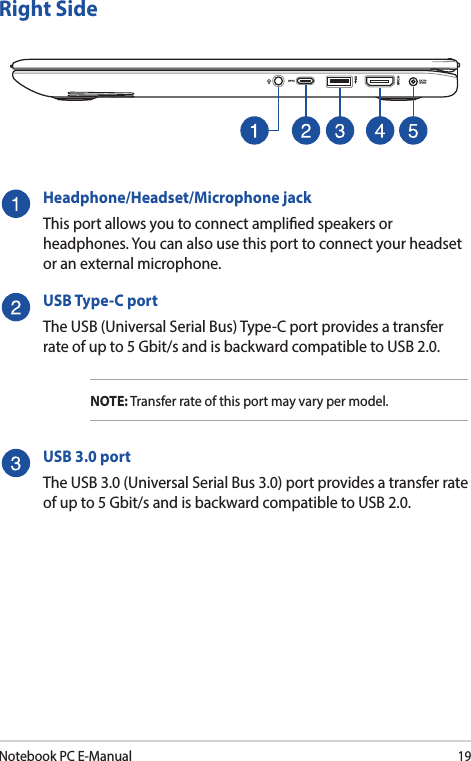
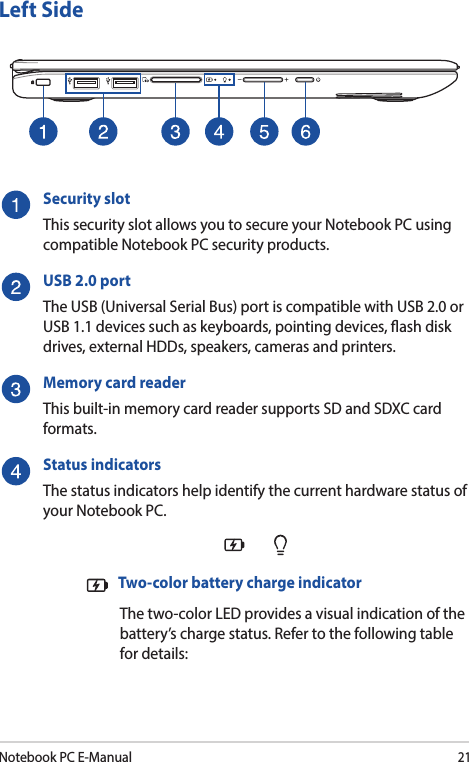
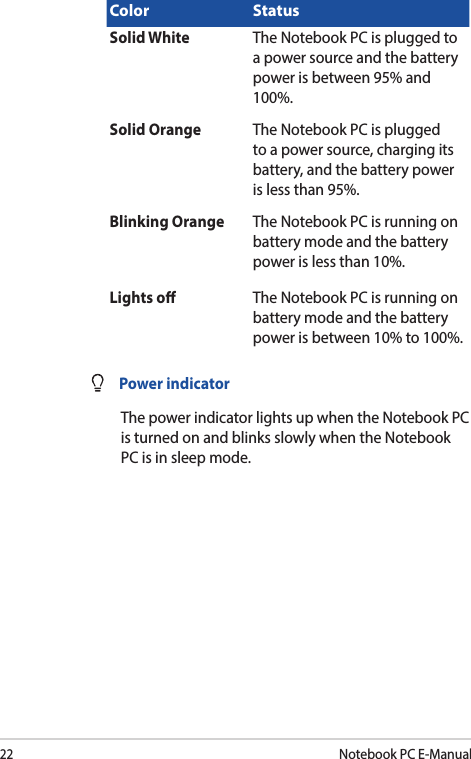
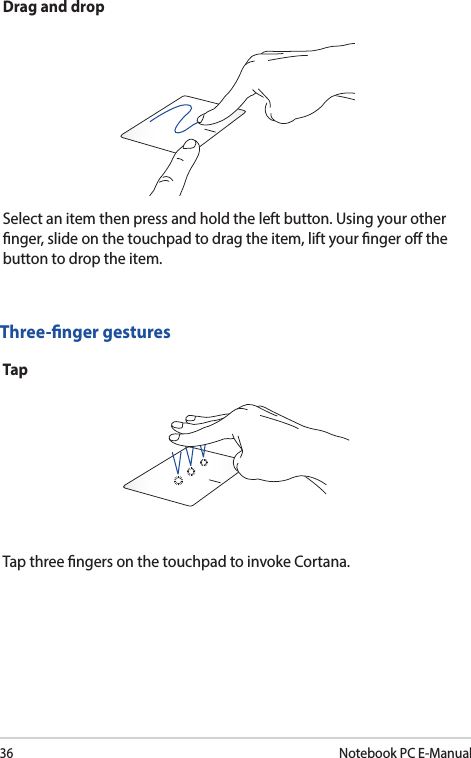
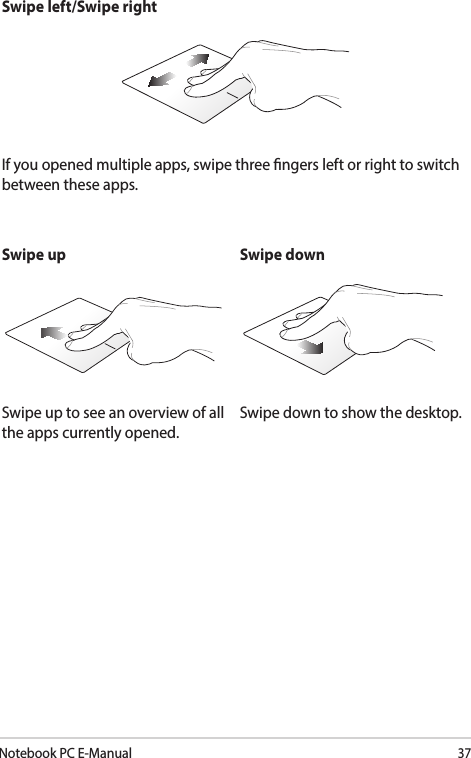
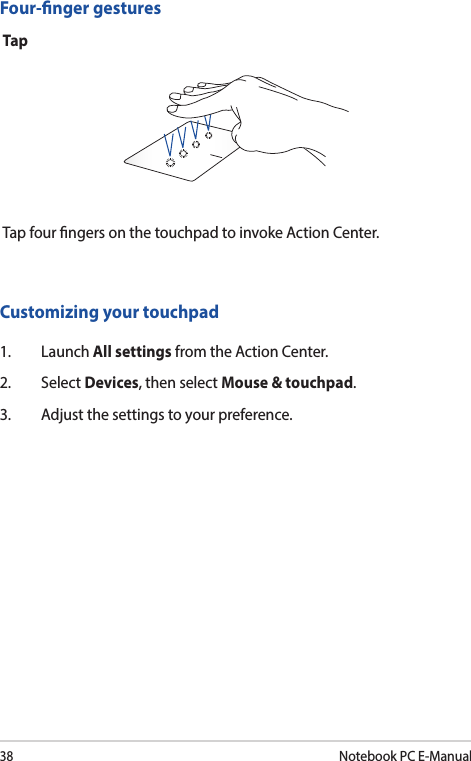
User Manual 1
Navigation menu
Upload a User Manual
Namespaces
Wiki Guide
HTML
PDF
Info
Views
User Manual
Discussion / Help
Navigation