ASUSTeK Computer EPC9GE703 Eee PC User Manual EeePC900HD XP
ASUSTeK Computer Inc Eee PC EeePC900HD XP
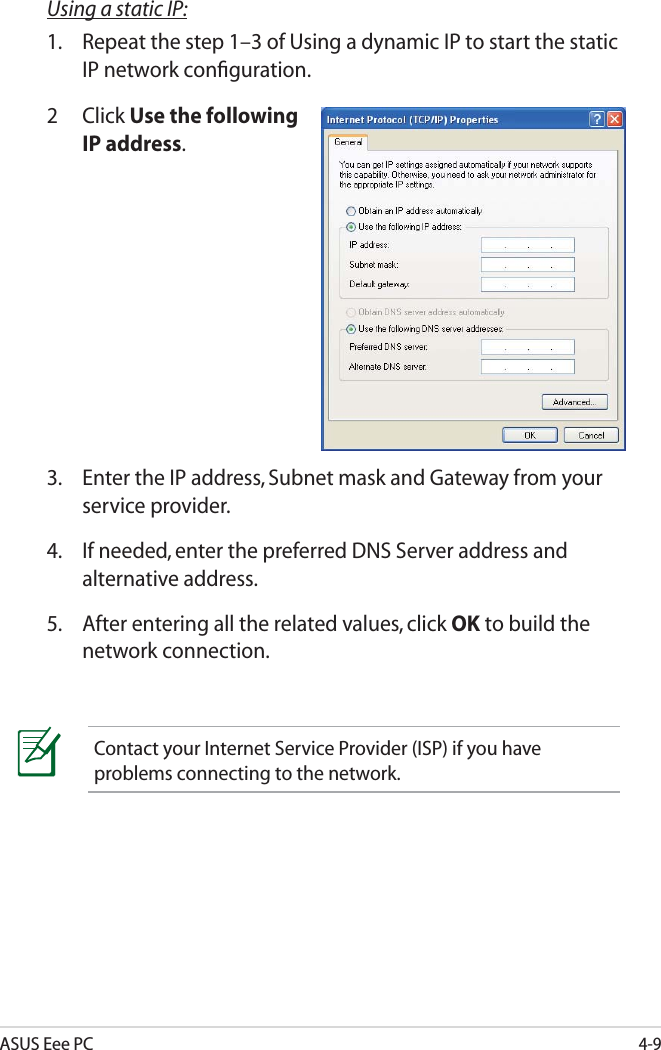
UserManual.wiki
>
ASUSTeK Computer
>
EPC9GE703 User Manual
Users Manual
Navigation menu
Upload a User Manual
Namespaces
Wiki Guide
HTML
PDF
Info
Views
User Manual
Discussion / Help
Navigation

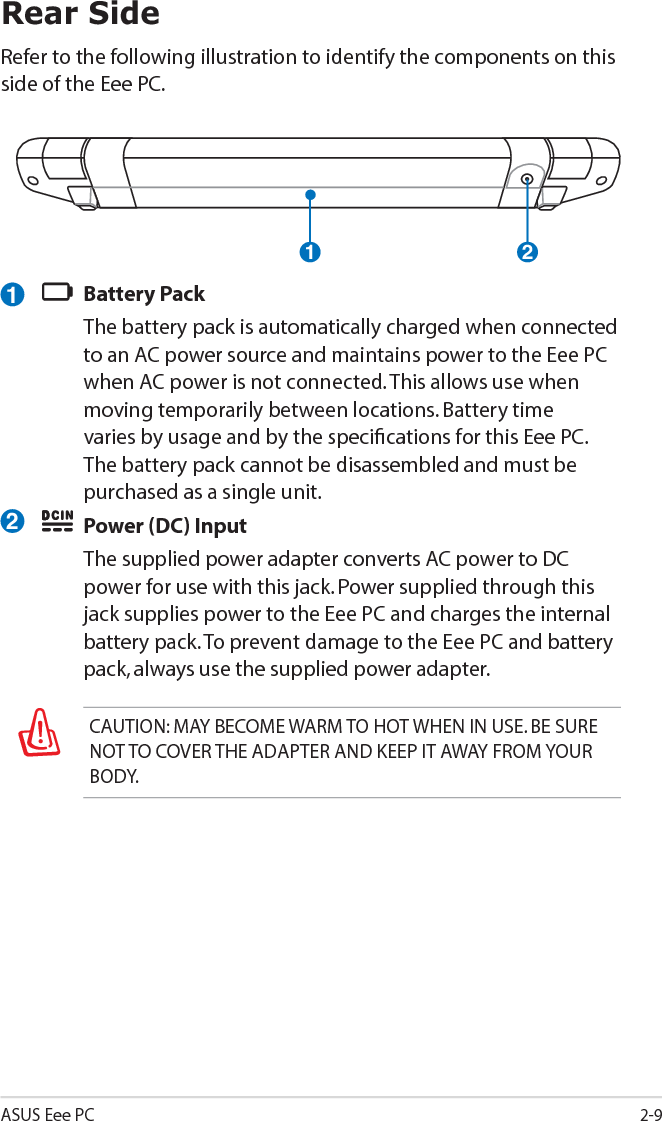


![A-4AppendixDeclaration of Conformity(R&TTE directive 1999/5/EC)The following items were completed and are considered relevant and sufficient:• Essential requirements as in [Article 3]• Protection requirements for health and safety as in [Article 3.1a]• Testing for electric safety according to [EN 60950]• Protection requirements for electromagnetic compatibility in [Article 3.1b]• Testing for electromagnetic compatibility in [EN 301 489-1] & [EN 301]• Testing according to [489-17]• Effective use of the radio spectrum as in [Article 3.2]• Radio test suites according to [EN 300 328-2]CE Mark WarningThis is a Class B product, in a domestic environment, this product may cause radio interference, in which case the user may be required to take adequate measures.IC Radiation Exposure Statement for CanadaThis equipment complies with IC radiation exposure limits set forth for an uncontrolled environment. To maintain compliance with IC RF exposure compliance requirements, please avoid direct contact to the transmitting antenna during transmitting. End users must follow the specific operating instructions for satisfying RF exposure compliance.Operation is subject to the following two conditions: • This device may not cause interference and • This device must accept any interference, including interference that may cause undesired operation of the device.Max. SAR Measurement (1g)802.11b SAR Value: 0.039 W/kg802.11g SAR Value: 0.097 W/kg](https://usermanual.wiki/ASUSTeK-Computer/EPC9GE703/User-Guide-987773-Page-80.png)