ASUSTeK Computer EPC9GE780 Eee PC User Manual Manual 10
ASUSTeK Computer Inc Eee PC Manual 10
UserManual.wiki
>
ASUSTeK Computer
>
EPC9GE780 User Manual
>
Manual 10
Contents
1.
Manual 1
2.
Manual 2
3.
Manual 3
4.
Manual 4
5.
Manual 5
6.
Manual 6
7.
Manual 7
8.
Manual 8
9.
Manual 9
10.
Manual 10
11.
Manual 11
12.
Manual 12
Manual 10
Navigation menu
Upload a User Manual
Namespaces
Wiki Guide
HTML
PDF
Info
Views
User Manual
Discussion / Help
Navigation

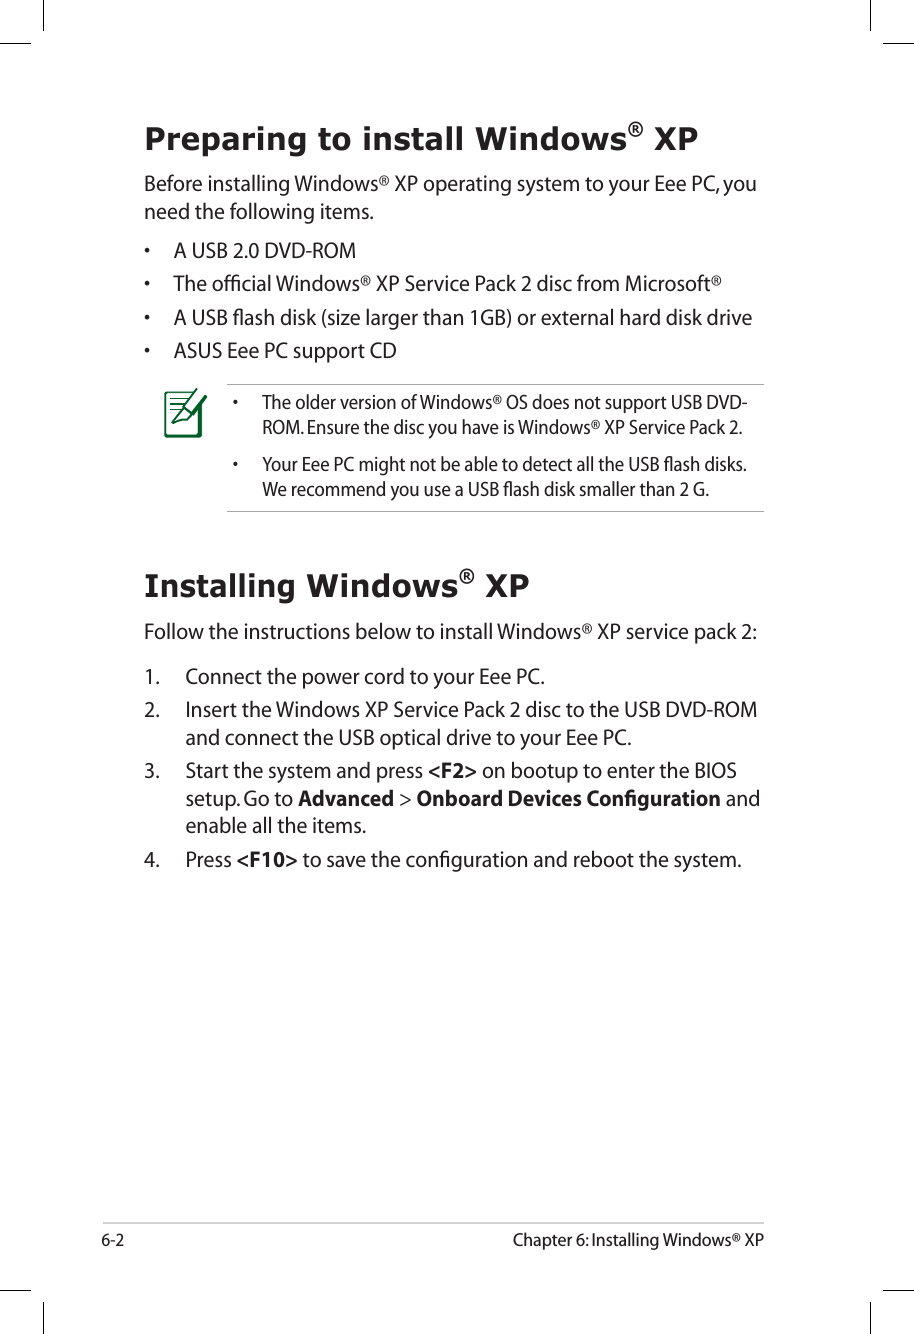
![ASUS Eee PC6-3Please select boot device:↑ and ↓ to move selectionENTER to select boot deviceHDD:SM-SILICONMOTION SM223ACUSB:Slimtype DVD6. After the Windows® XP installation screen appears. Delete any existing partitions.You will lose all your data after deleting all existing disk partitions. Ensure to back up your important data before installing Windows® XP to your Eee PC.7. Press <Enter> and select Format the partition using the NTFS file system to start the Windows® XP OS setup.8. Follow the on-screen instructions to complete the installation process.9. After the Windows® XP OS installation is completed. Restart the system and press <F2> on bootup to enter the BIOS setup. Go to Advanced and set OS Installation back to [Finished].10. Press <F10> to save the configuration and reboot the system.11. After entering Windows, insert the Support CD to the USB DVD/CD-ROM and click InstAll - Drivers Installation Wizard to install all drivers.5. Press <ESC> on bootup and the Please select boot device screen appears. Select USB:XXXXXX (may be labled as the ODD brand name) to boot from the optical drive.](https://usermanual.wiki/ASUSTeK-Computer/EPC9GE780.Manual-10/User-Guide-919360-Page-8.png)