ASUSTeK Computer EPC9GE780 Eee PC User Manual Manual 10
ASUSTeK Computer Inc Eee PC Manual 10
Contents
Manual 10
5-4
Chapter 5: System Recovery
Using USB Flash Disk
You need another PC and a USB flash disk (larger than 1GB) for Eee
PC system recovery.
You will lose all your data on the USB flash disk. Back up
important data before using the USB disk as a recovery disk.
To use your USB flash disk to perform system recovery:
1. Connect your USB flash disk (size larger than 1GB) to another
PC/NB (bundled with Windows XP or later version) and insert
the Support CD to that PC/NB at the same time.
Your Eee PC might not be able to detect all the USB flash disks.
We recommend you use a USB flash disk smaller than 2 G.
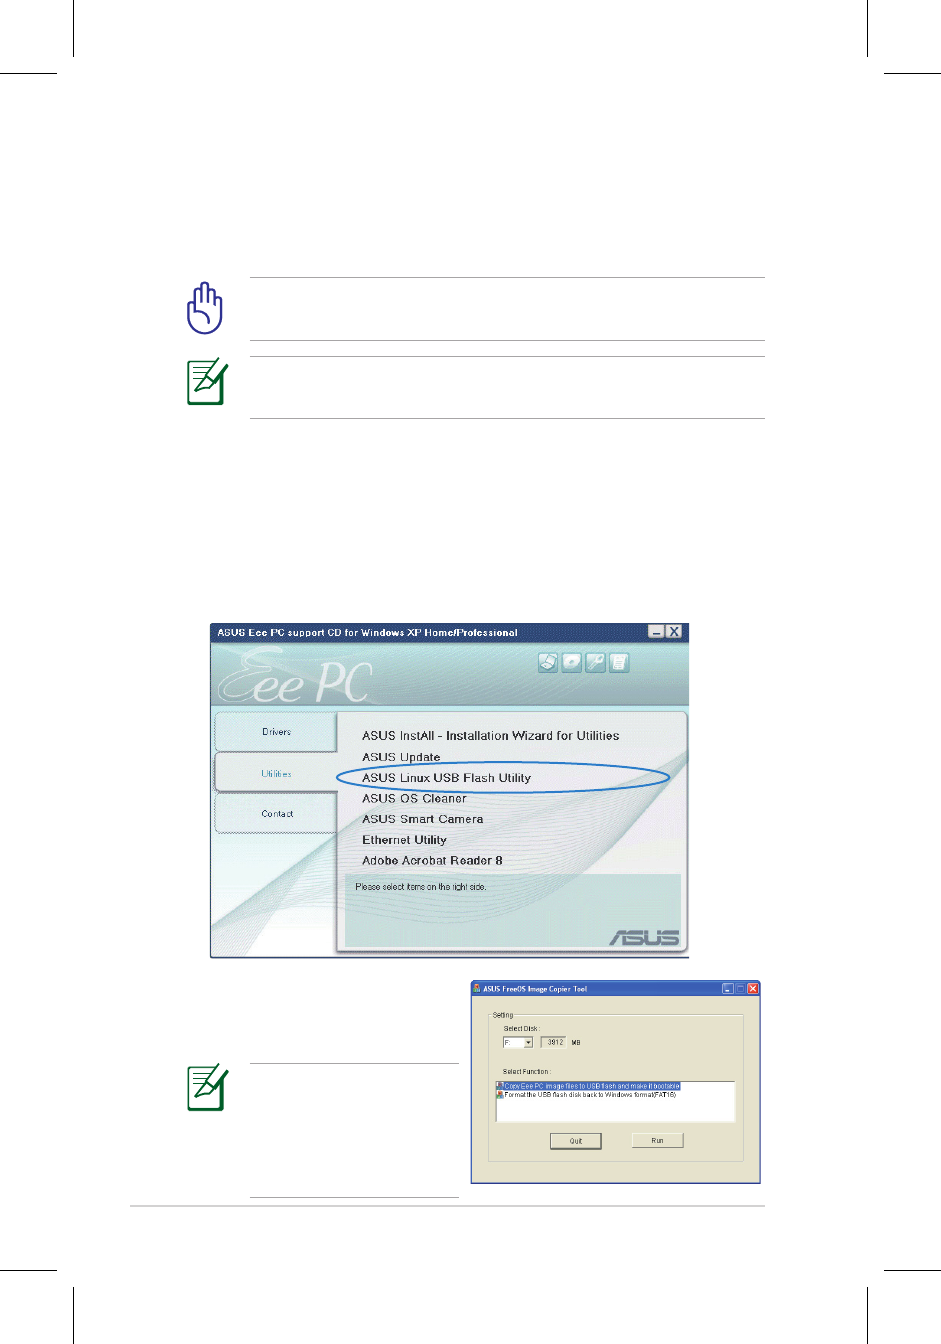
3. Select Copy Eee PC image
files to USB flash and make
it bootable.
Note that the disk for Eee
PC recovery is correct
if you have several USB
flash disks connected to
the PC.
2. Click Utilities on the left and select ASUS Linux USB Flash
Utility.

ASUS Eee PC
5-5
6. A dialog box appears. Follow the instructions to eject the USB
disk and replug it to your PC/NB. Click Retry to continue.
7. Click OK to complete the process.
4. Eject the Support CD, insert the Recovery DVD, and click Run.
5. Click Yes to continue. The system starts formatting your USB
flash disk.
5-6
Chapter 5: System Recovery
7. Connect the USB flash disk to your Eee PC.
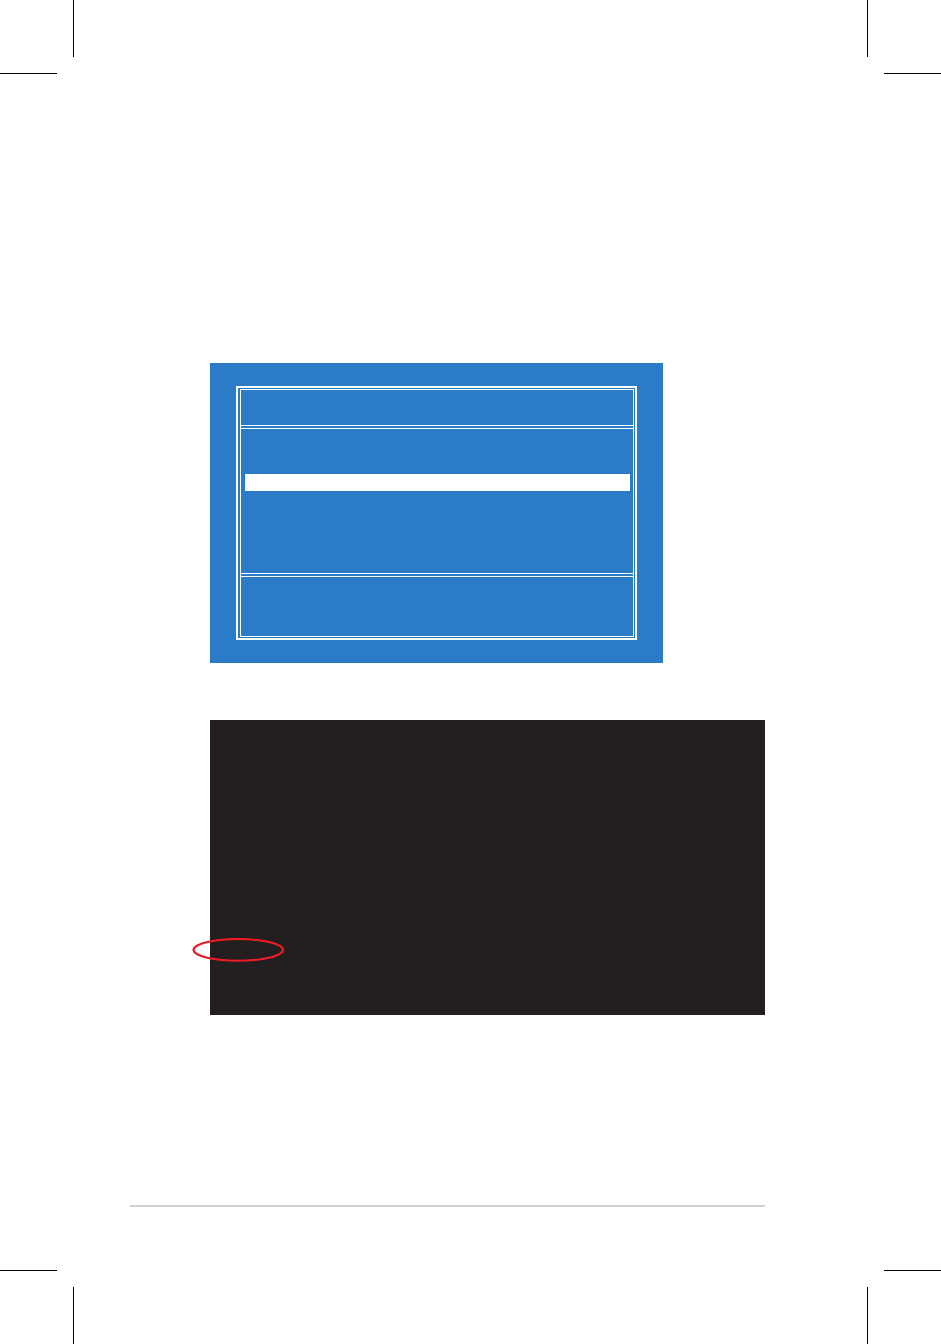
8. Restart the system and press <ESC> on bootup and the Please
select boot device screen appears. Select USB:XXXXXX (may be
labled as the USB flash brand name) to boot from the USB flash
disk drive.
Please select boot device:
↑ and ↓ to move selection
ENTER to select boot device
HDD:SM-ASUS_PHISON_OB SSD
HDD:SM-ASUS_PHISON SSD
USB:XXXXXXXX
9. Key in yes and press <Enter> to continue the system recovery.
ISOLINUX 3.11 2005-09-02 Copyright (C) 1994-2005 H. Peter Anvin
.
Press <Space> for Troubleshooting Menu...
Loading /boot/vmlinuz.......................
Loading /boot/initrd.gz..............................
Ready.
Uncompressing Linux... Ok, booting the kernel.
Waiting 5 Sec
Ready to image Eee PC using build 2008.03.05_21.08.
Enter "yes" to continue, anything else to reboot.
yes
10 When the recovery is completed, remove the USB flash disk and
press <Enter> to reboot the system.
ASUS Eee PC
5-7
Reformatting the USB flash disk
To use the USB disk on your Windows operating system normally,
follow the instructions below to reformat your USB disk.
1. Connect your USB flash disk to another PC/NB and insert the
Support CD to that PC/NB at the same time.
2. Click Utilities on the left and select ASUS Linux USB Flash
Utility.
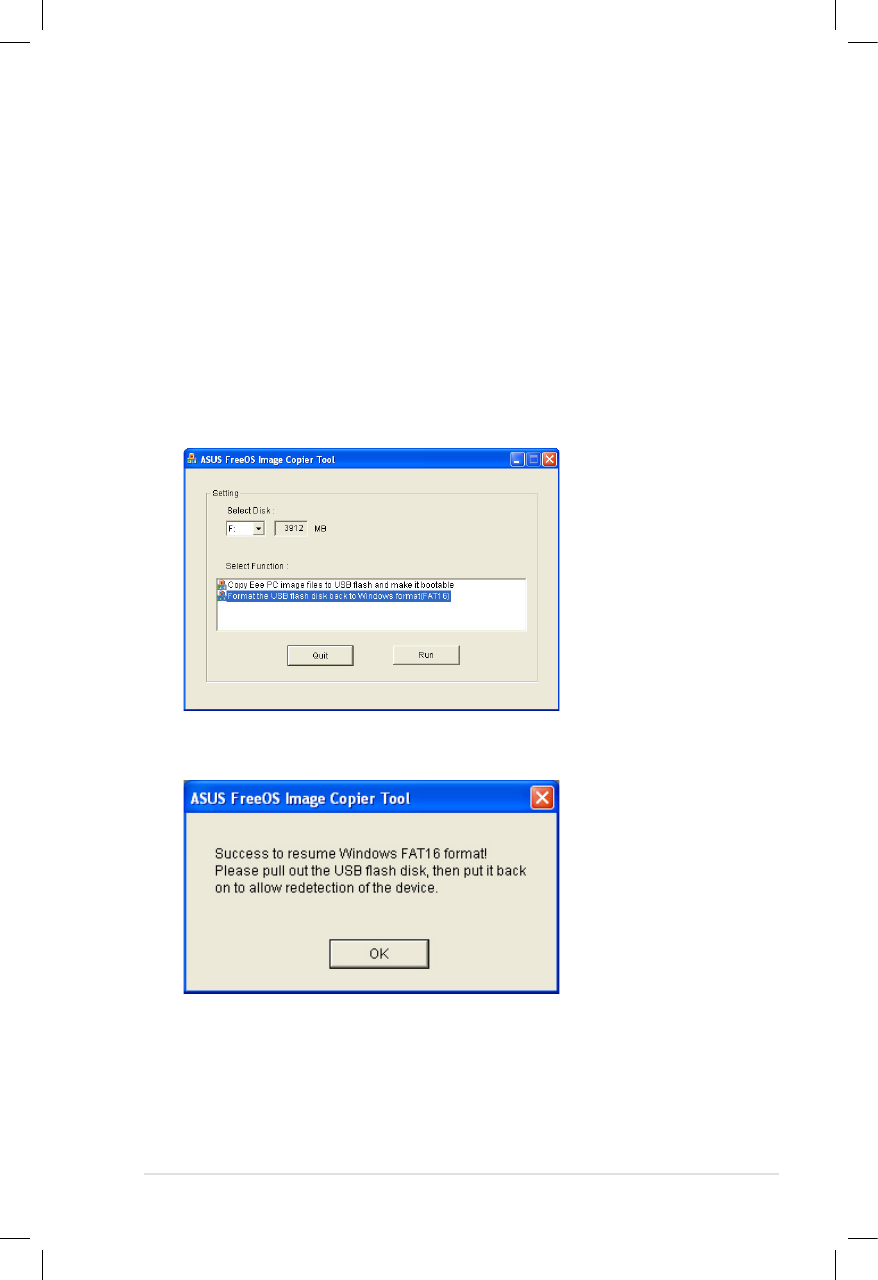
3. Select Format the USB flash disk back to Windows format
(FAT16) and click Run.
4. Click OK to complete the disk formatting.

5-8
Chapter 5: System Recovery

Preparing to Install Windows® XP
Installing Windows® XP
Support CD Information
6
Installing Windows® XP

6-2
Chapter 6: Installing Windows® XP
Preparing to install Windows
®
XP
Before installing Windows® XP operating system to your Eee PC, you
need the following items.
• A USB 2.0 DVD-ROM
• The official Windows® XP Service Pack 2 disc from Microsoft®
• A USB flash disk (size larger than 1GB) or external hard disk drive
• ASUS Eee PC support CD
• The older version of Windows® OS does not support USB DVD-
ROM. Ensure the disc you have is Windows® XP Service Pack 2.
• Your Eee PC might not be able to detect all the USB flash disks.
We recommend you use a USB flash disk smaller than 2 G.
Installing
Windows
®
XP
Follow the instructions below to install Windows® XP service pack 2:
1. Connect the power cord to your Eee PC.
2. Insert the Windows XP Service Pack 2 disc to the USB DVD-ROM
and connect the USB optical drive to your Eee PC.
3. Start the system and press <F2> on bootup to enter the BIOS
setup. Go to Advanced > Onboard Devices Configuration and
enable all the items.
4. Press <F10> to save the configuration and reboot the system.
ASUS Eee PC
6-3
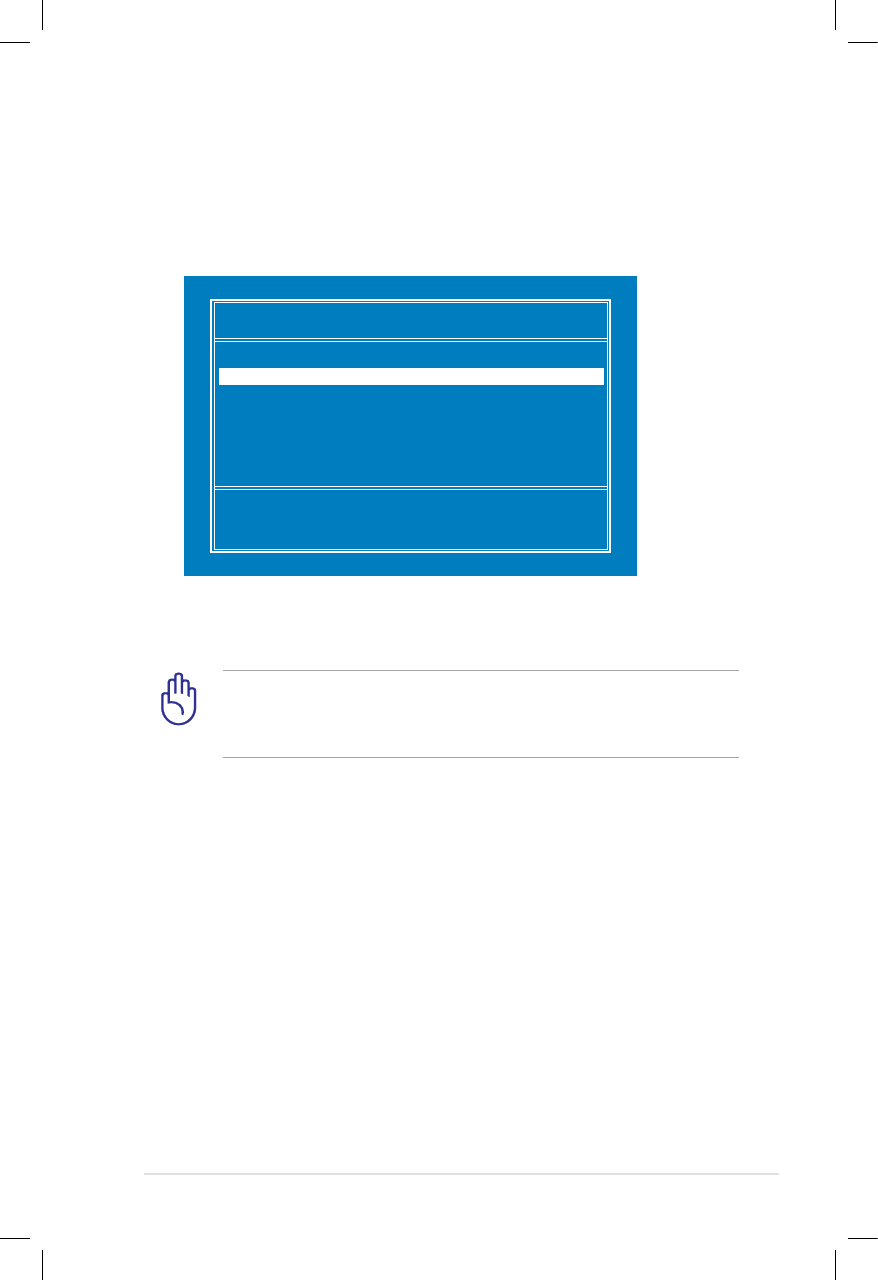
Please select boot device:
↑ and ↓ to move selection
ENTER to select boot device
HDD:SM-SILICONMOTION SM223AC
USB:Slimtype DVD
6. After the Windows® XP installation screen appears. Delete any
existing partitions.
You will lose all your data after deleting all existing disk
partitions. Ensure to back up your important data before
installing Windows® XP to your Eee PC.
7. Press <Enter> and select Format the partition using the NTFS
file system to start the Windows® XP OS setup.
8. Follow the on-screen instructions to complete the installation
process.
9. After the Windows® XP OS installation is completed. Restart the
system and press <F2> on bootup to enter the BIOS setup. Go
to Advanced and set OS Installation back to [Finished].
10. Press <F10> to save the configuration and reboot the system.
11. After entering Windows, insert the Support CD to the USB
DVD/CD-ROM and click InstAll - Drivers Installation Wizard to
install all drivers.
5. Press <ESC> on bootup and the Please select boot device
screen appears. Select USB:XXXXXX (may be labled as the ODD
brand name) to boot from the optical drive.
6-4
Chapter 6: Installing Windows® XP
Support CD information
The support CD that comes with the Eee PC package contains the
drivers, software applications, and utilities that you can install to
avail all the features.
If Autorun is NOT enabled in your computer, browse the
contents of the support CD to locate the file ASSETUP.EXE from
the BIN folder. Double-click the ASSETUP.EXE file to run the CD.
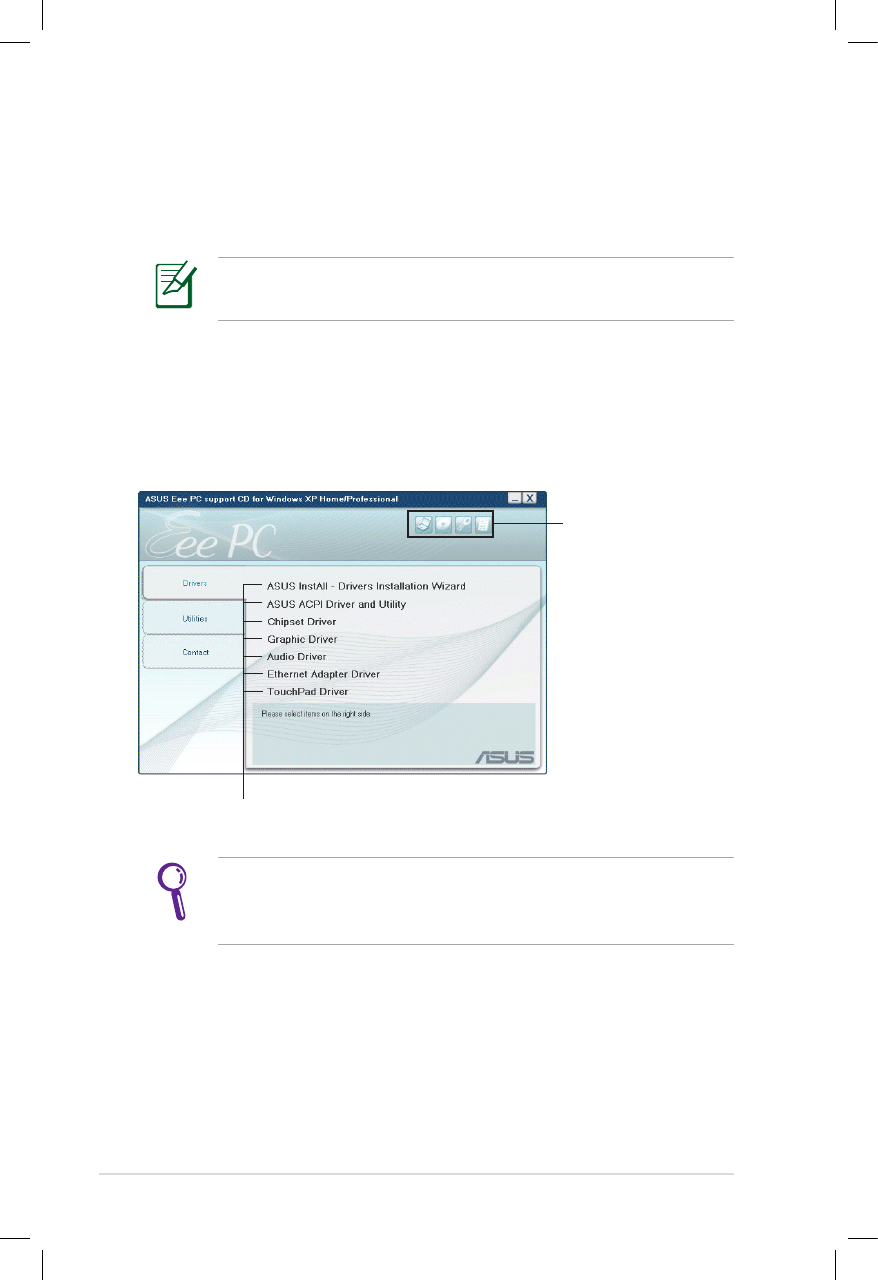
Click an item to install
Running the support CD
Insert the support CD in the external optical drive. The CD
automatically displays the Drivers menu if Autorun is enabled in
your computer.
Click an icon to
display support CD/
Eee PC information
All the following screens appear only in the Windows® XP SP2
environment.
ASUS Eee PC
6-5
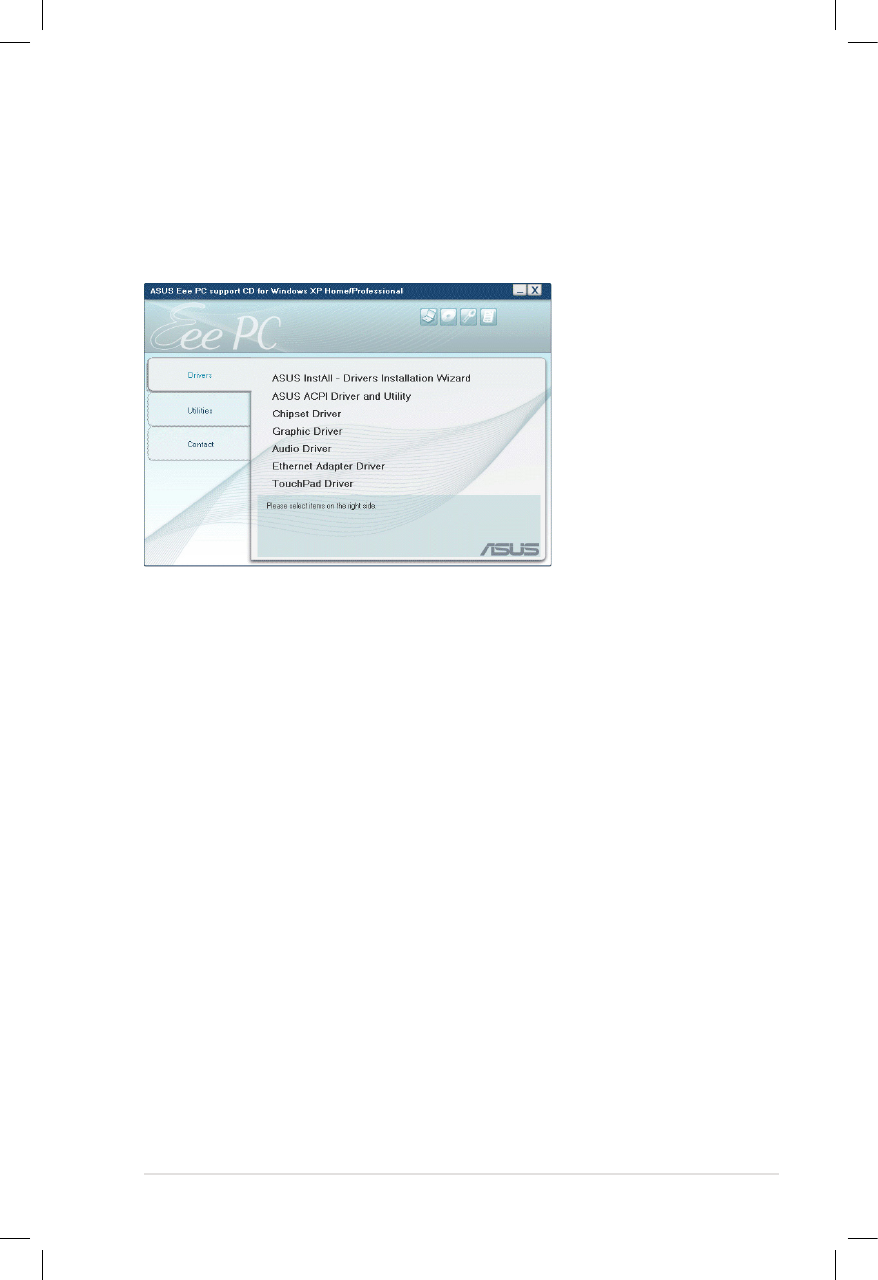
Drivers menu
The Drivers menu shows available device drivers when the system
detects installed devices. Install the necessary drivers to activate the
devices.
ASUS InstAll - Drivers Installation Wizard
Installs all the drivers.
ASUS ACPI Driver and Utility
Installs ASUS ACPI driver before all the drivers if you are not using
InstAll Wizard.
Chipset Driver
Installs the chipset driver.
Graphic Driver
Installs the Graphic driver.
Audio Driver
Installs the audio driver.
Ethernet Adapter Driver
Installs the Ethernet adapter driver.
TouchPad Driver
Installs the touchpad driver.
6-6
Chapter 6: Installing Windows® XP
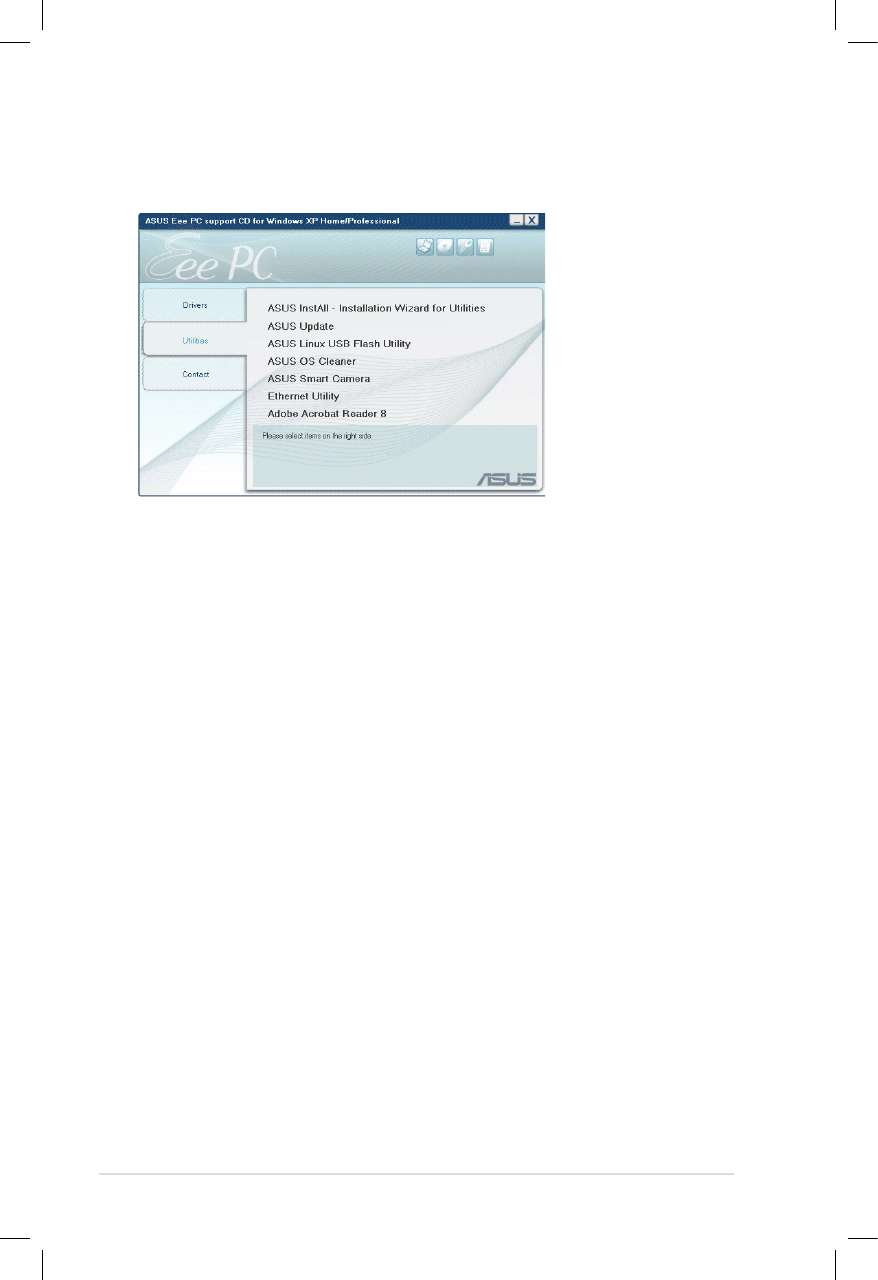
Utilities menu
The Utilities menu shows the applications that the Eee PC supports.
ASUS InstAll - Installation Wizard for Utilities
Installs all the utilities.
ASUS Update
The ASUS Update utility allows you to update the Eee PC BIOS in the
Windows® environment. This utility requires an Internet connection
either through a network or an Internet Service Provider (ISP).
ASUS Linux USB Flash Utility
Makes a USB bootable disk with Linux system image for Eee PC
system recovery.
ASUS OS Cleaner
Installs ASUS OS cleaner application.
ASUS Smart Camera
Installs ASUS Smart Camera.
Ethernet Utility
Installs the Ethernet utility.
ADOBE Acrobat Reader
Installs the Adobe® Acrobat® Reader that allows you to open, view,
and print documents in Portable Document Format (PDF).
ASUS Eee PC
6-7
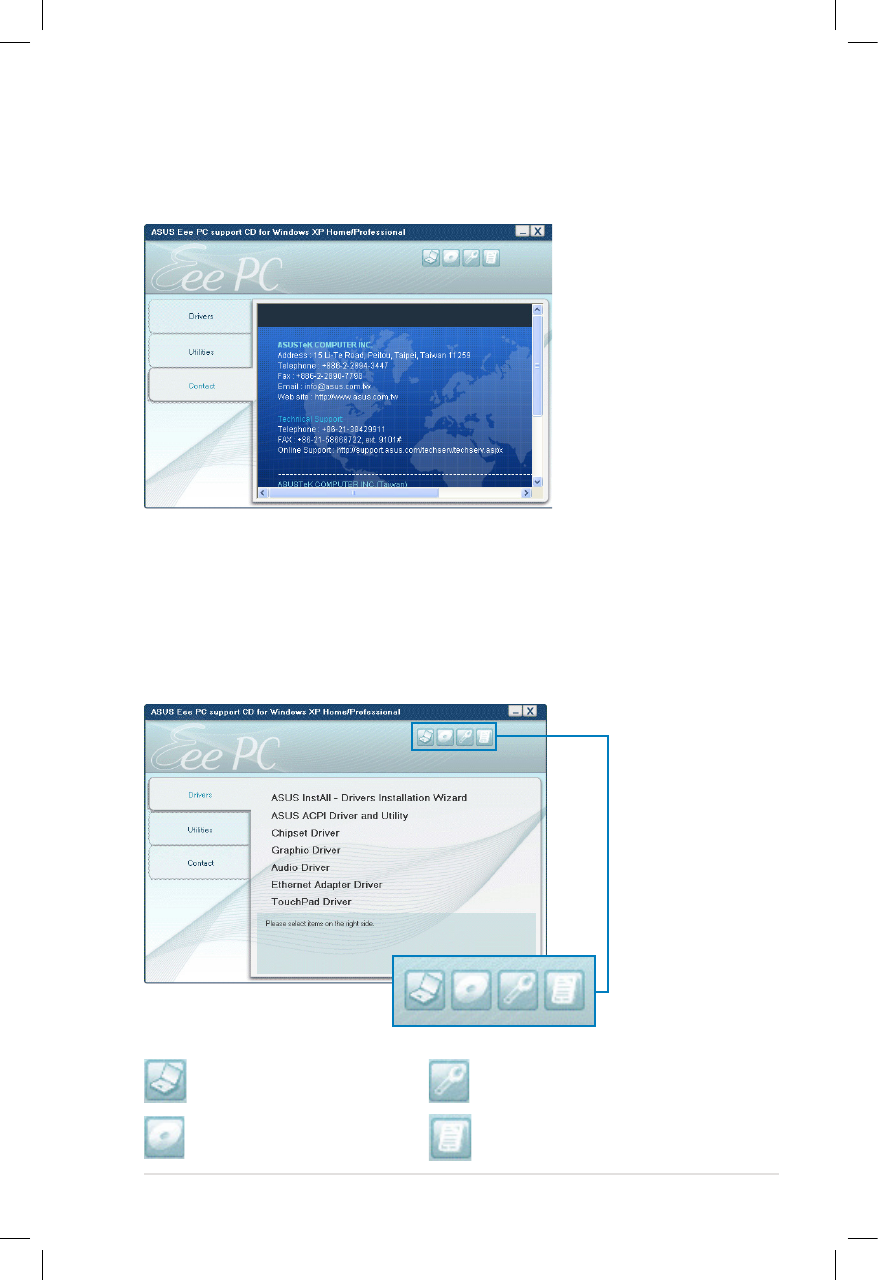
Contact
Click the Contact tab to display the ASUS contact information.
Other information
The icons on the top right corner of the screen provide additional
information on the Eee PC and the contents of the support CD. Click
an icon to display the specified information.
System information
CD content
Technical support
File list

6-8
Chapter 6: Installing Windows® XP

Trademark Statements
Qualified Vendor List
Declarations and Safety Statements
GNU General Public License
Copyright Information
Limitation of Liability
Service and Support
A
Appendix

A-2
Appendix
Trademark Statements
Google Talk service and its logos are trademarks of Google Inc..
GroupWise service and its logos are trademarks of Novell Inc..
MSN service and its logos are trademarks of Microsoft Corporation.
QQ service and its logos are trademarks of Tencent Inc..
Yahoo! service and its logos are trademarks of Yahoo! Inc..
All other services and logos are either trademarks or registered
trademarks of their respective owners.
ASUS Eee PC
A-3
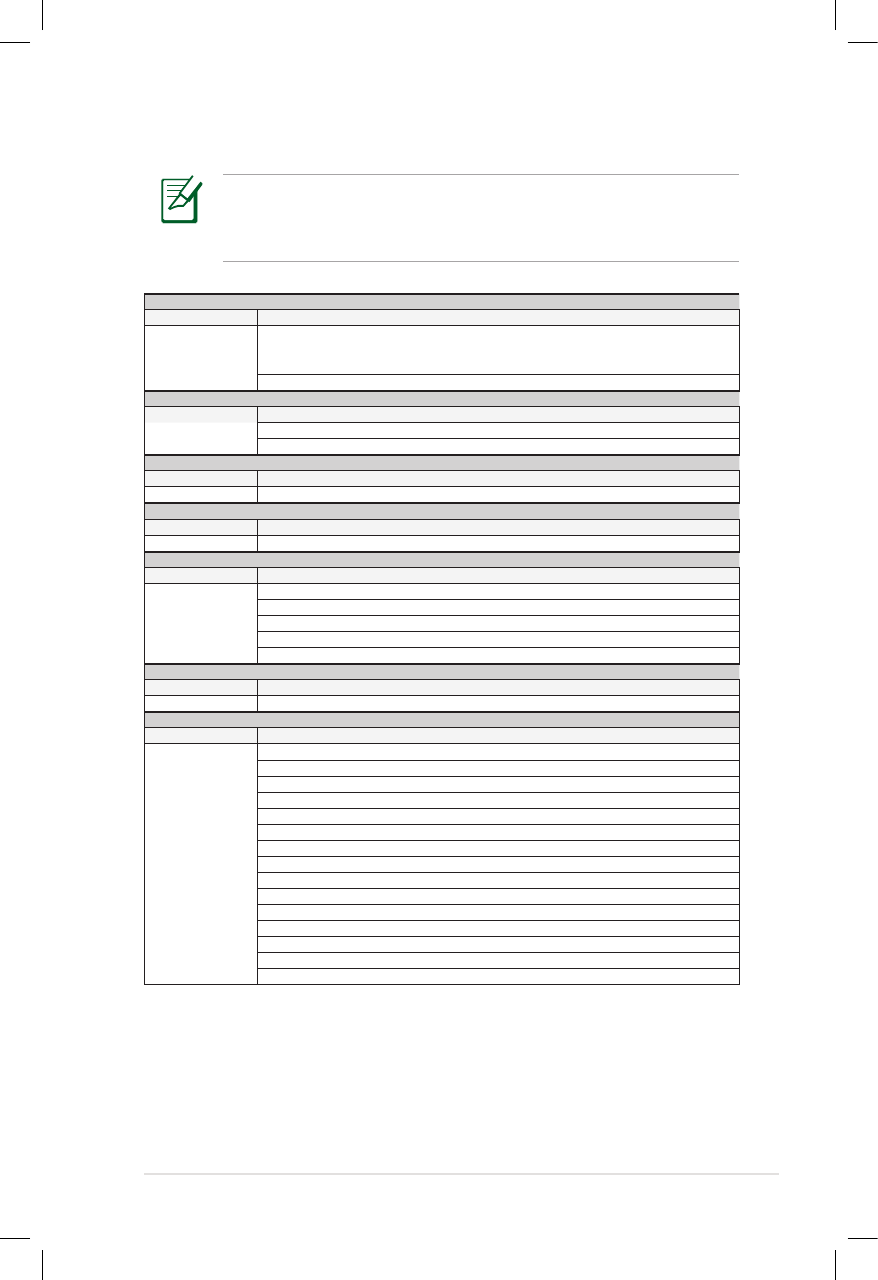
Qualied Vendor List
Analog TV Tuner Cards
Type Model
USB2.0 Leadtek WinFast
PalmTop TV
Upmost Mobile TV 3
Bluetooth Adapter Devices
Type Model
USB 1.1 Billionton GUBTCR41A-BT
Easy RU5AWBC5U
Dial-Up Modem Devices
Type Model
USB 1.1 Galileo DU-560M
Digital Home Devices
Type Model
USB 1.1 ASUS Ai Guru S1
Digital TV Tuner Cards
Type Model
USB 2.0 Compro U3
Upmost DVB250
Upmost AD350
V-Gear MobiDTV
Upmost DVB870
Direct Cable Connect Devices
Type Model
USB 2.0 BELKIN-Transfer cable
Display Devices
Type Model
D-Sub
Acer AL1916W
Acer AL2216W
AOC L154W
AOC 210V
AOC 2212PH
AOC 511VWB
ASUS PW191
ASUS PW201
ASUS MW221U
ASUS TLW32001D
BenQ DV2680
BenQ T905
BenQ FP22W
Dell 1907FP
Dell FP2407FWP
The Linux-based Eee PC may not support all PC peripherals. Visit
our ASUS website for the latest qualified vendor list before you
purchase peripherals for your Eee PC.
A-4
Appendix
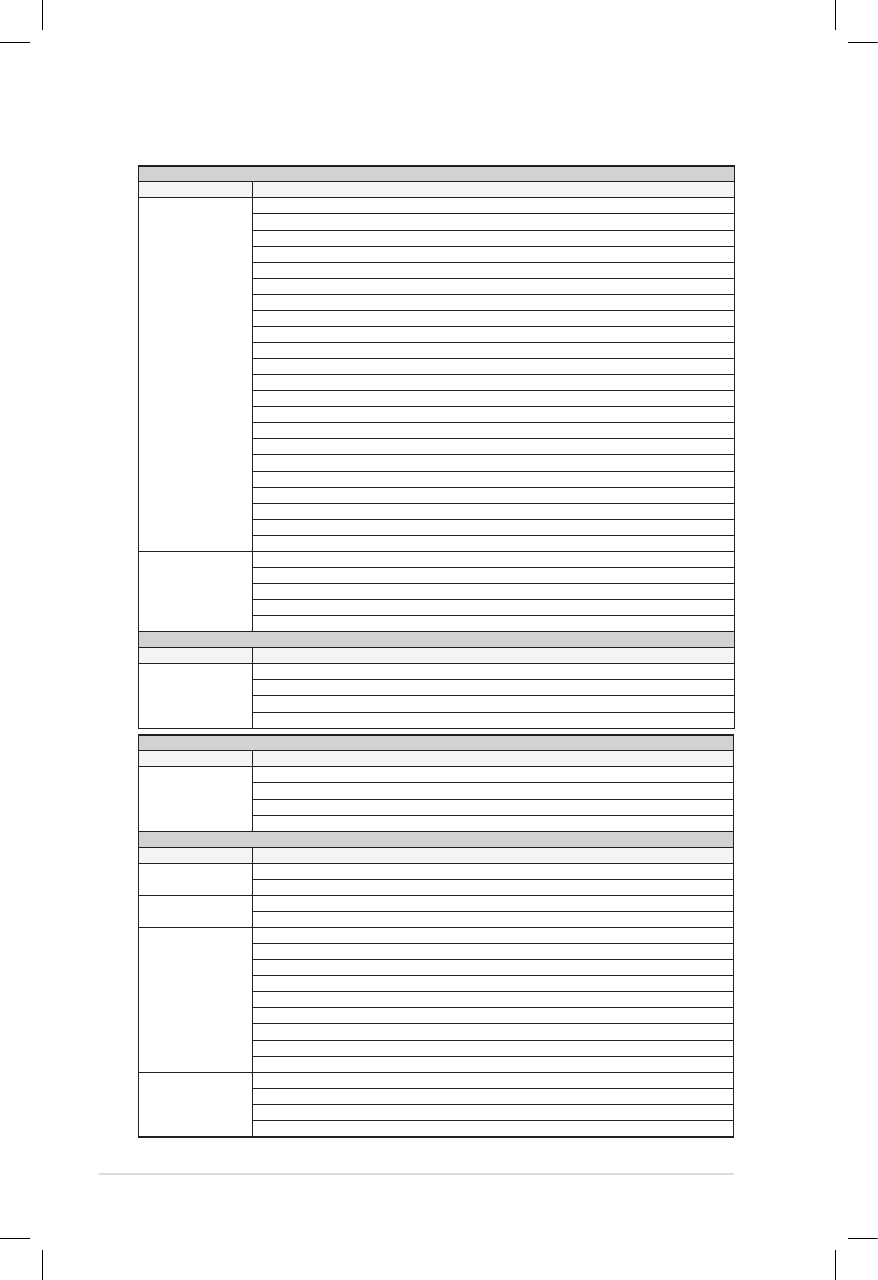
Display Devices
Type Model
D-Sub EIZO HD2441W
Hannsg GF191
Hannsg HG281D
Hannsg HW216
LG L245WP
LG L1930B
Philips 150P2
Philips 170B5
Philips 190B6
Philips 32PF7320
Samsung 740NW
Samsung 225MS
Samsung 940B
Sony KDL-26S2020
Tatung V22ECBF
ViewSonic P227F
ViewSonic VA1716W
ViewSonic VX2235WM
ViewSonic VX2435WM
ViewSonic VX2835WM
ViewSonic VX912
ViewSonic N3206W
Projector Hitachi CP-X253
Jector PT-XA2
Premier LX-2200
Premier PD-X730
Toshiba TDP-T90
Earphone Devices
Type Model
Earphone AKG K601
Audio-techia ATH-AD300
OZAKI TX079
Sennheiser PX100
Earphone Devices
Type Model
Ear-Mic Creative HS-300
Hiawk 03-M58720
Logitech Precision PC Gaming
Philips SBC HM450
Fast Ethernet Unmanaged Switch/Hub Adapter
Type Model
Home Plug D-Link-DHP200
PCI-PLC-85AA
Hub 3com 3C16754
D-Link DFE908DX
Switch 3com 3C16792A
ASUS GIGAX1116
ASUS GIGAX2024
ASUS GIGAX2124X
CISCO WS-C2950T24
D-Link DGS-1005D
D-Link DGS-1008D
SMC SMC8505T
ZyXel GS-105A
Router Buffalo-BBR-4HG
Corega CG-BARPS
D-Link DI-707P
PCi BRL-04AX