ASUSTeK Computer O2G1 Cellphone with WLAN & Bluetooth User Manual Part 1
ASUSTeK Computer Inc Cellphone with WLAN & Bluetooth Users Manual Part 1
UserManual.wiki
>
ASUSTeK Computer
>
O2G1 User Manual
>
Users Manual Part 1
Contents
1.
Users Manual
2.
Users Manual Part 1
3.
Users Manual Part 2
Users Manual Part 1
Navigation menu
Upload a User Manual
Namespaces
Wiki Guide
HTML
PDF
Info
Views
User Manual
Discussion / Help
Navigation


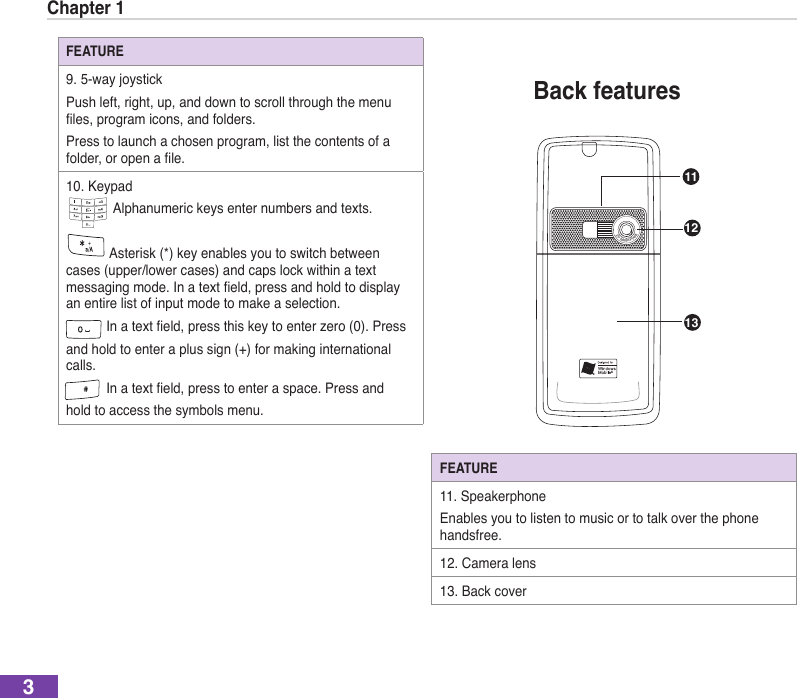
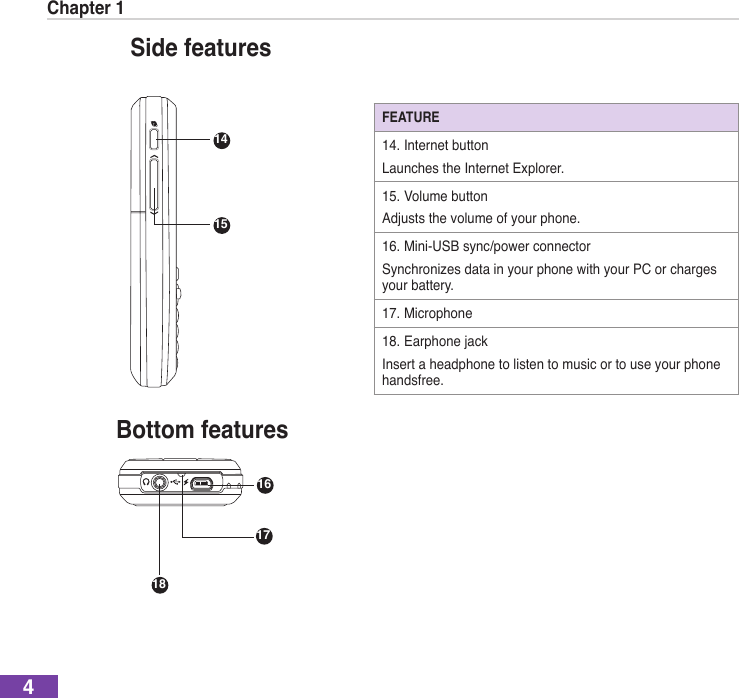
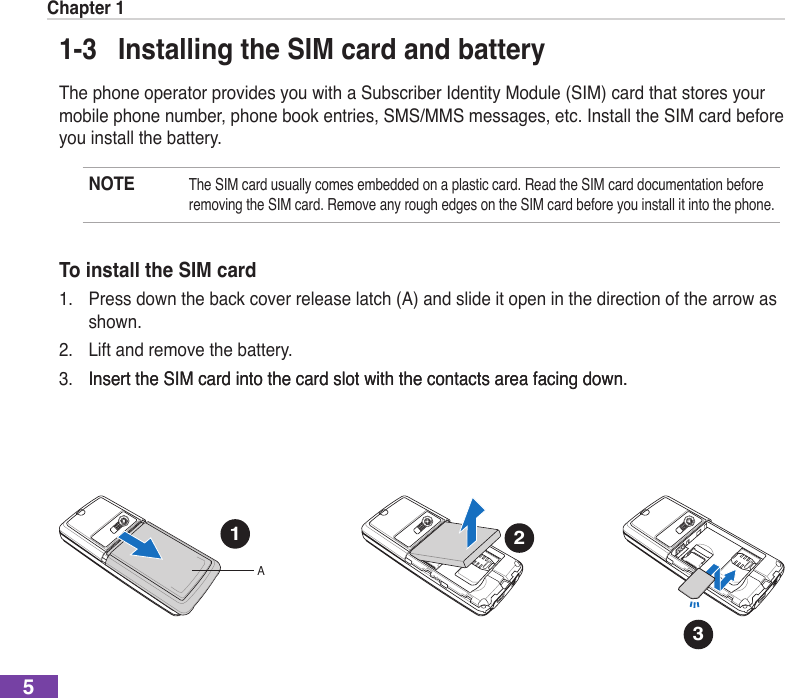
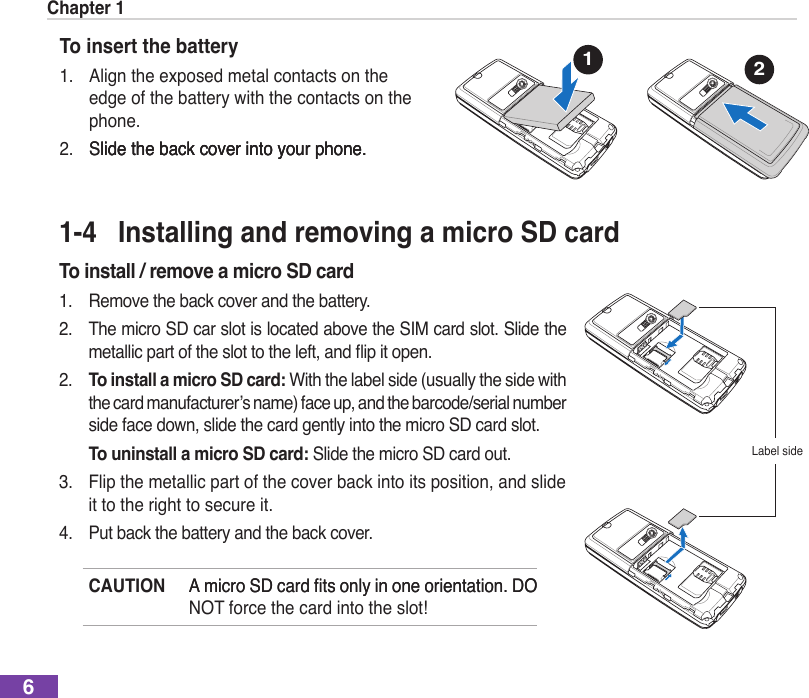


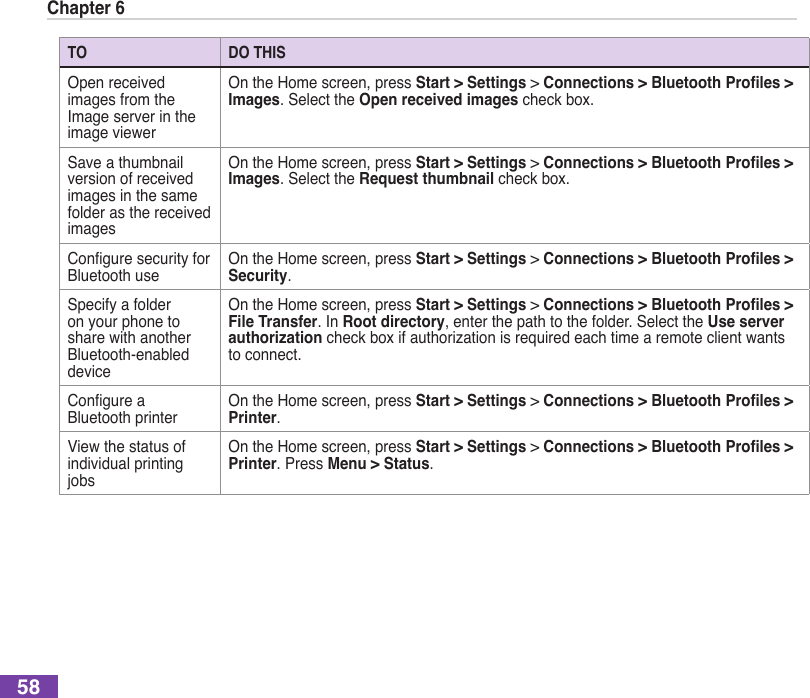
![Chapter 657TO DO THISBeam information using BluetoothMake sure that Bluetooth is turned on and that the device that you want to beam to is discoverable. Select the item that you want to beam and press Menu > Beam [item]. Select the Bluetooth device to which you want to beam the item and press Beam.Accept a Bluetooth partnershipMake sure that Bluetooth is turned on and that your phone is discoverable. When prompted to accept a Bluetooth partnership with the other device, press Yes. In PIN, enterapersonalidenticationnumber(PIN)between1and16characters,andpressDone. You must enter the same PIN that was entered on the device requesting the Bluetooth partnership.Receive beamed informationOn the Home screen, press Start > Settings > Connections > Beam. Select Receive incoming beams.Do the following:• To receive beams by using Bluetooth, ensure Bluetooth is turned on and that your phone is discoverable and within close range.Press Yes.Rename a Bluetooth deviceOn the Home screen, press Start > Settings > Connections > Bluetooth > Menu > Devices. Select the Bluetooth device to rename and press Menu > Rename. In Name, enter a new name for the Bluetooth device, and press Done.SynchronizeusingBluetoothOn the Home screen, press Start > ActiveSync > Menu > Connect via Bluetooth. See “Using Bluetooth” in 4-5 Synchronizing with a PC for more information.End a Bluetooth partnershipOn the Home screen, press Start > Settings > Connections > Bluetooth > Menu > Devices. Select the Bluetooth device with which you want to end the partnership and press Menu > Delete.Specify a folder for received images from the Image serverOn the Home screen, press Start > Settings > Connections > Bluetooth Proles > Image. In Default image directory, enter the desired directory for storing received images.](https://usermanual.wiki/ASUSTeK-Computer/O2G1.Users-Manual-Part-1/User-Guide-730832-Page-66.png)