ASUSTeK Computer P1802T ASUS Portable AiO User Manual
ASUSTeK Computer Inc ASUS Portable AiO
UserManual.wiki
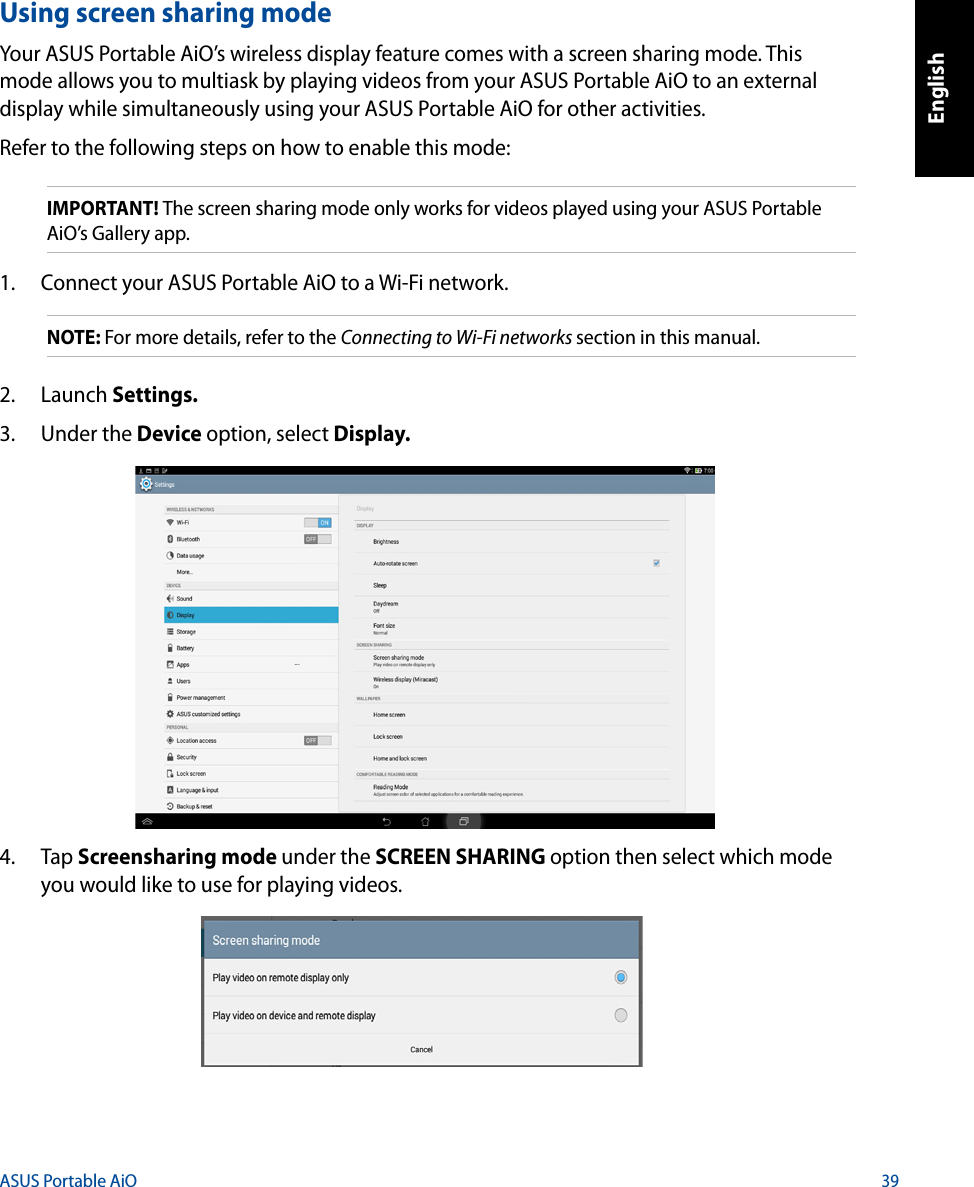
>
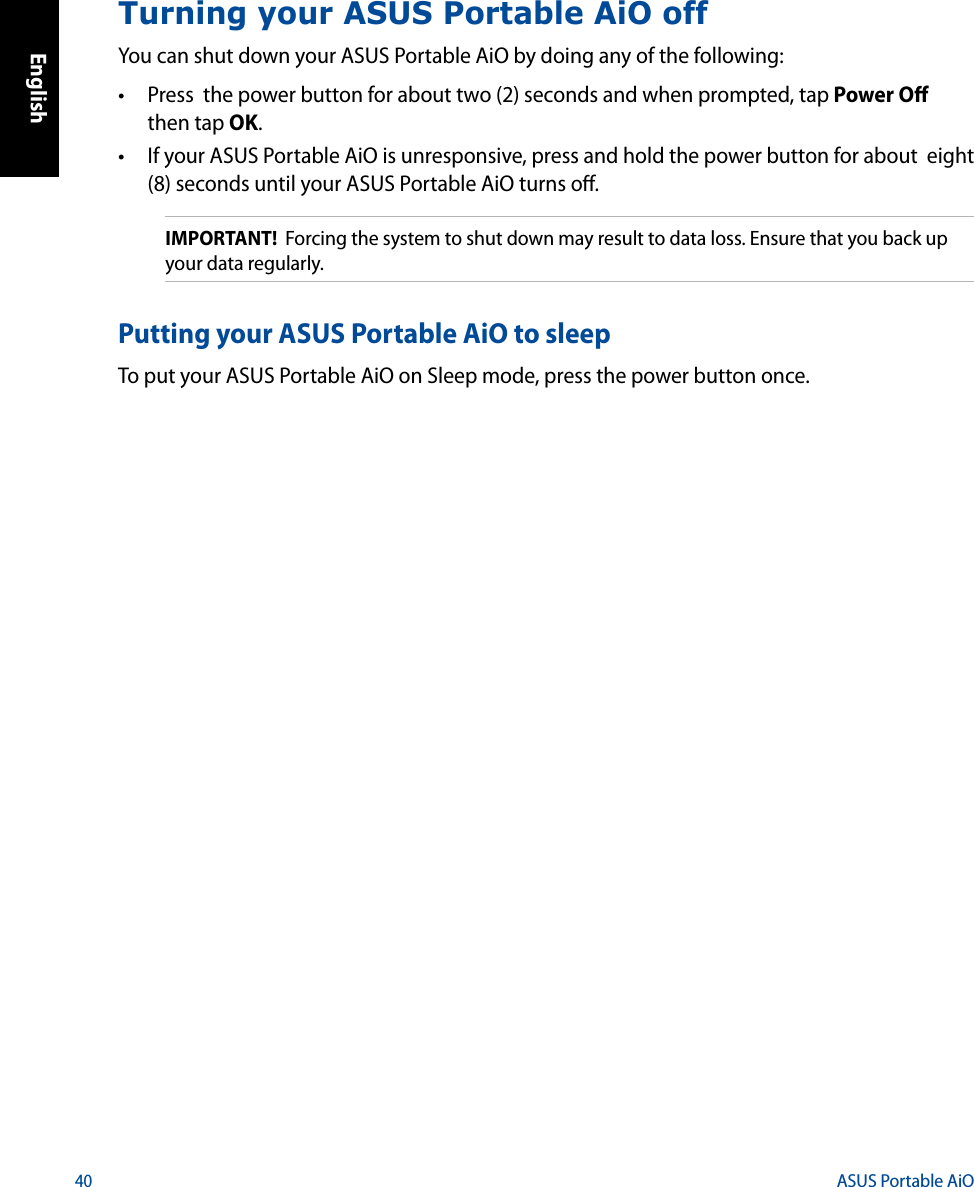
ASUSTeK Computer
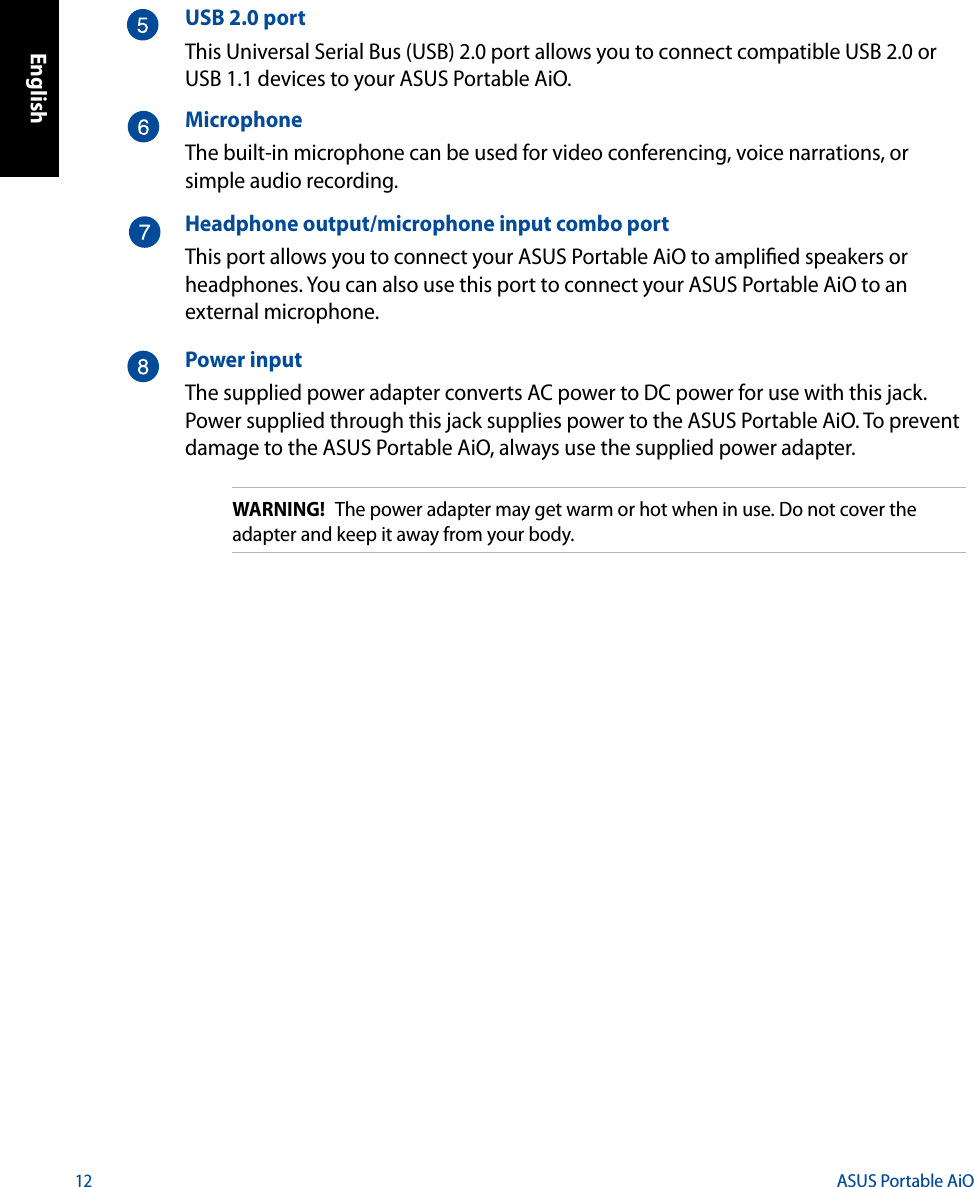
>
P1802T User Manual
User Manual.pdf
Navigation menu
Upload a User Manual
Namespaces
Wiki Guide
HTML
PDF
Info
Views
User Manual
Discussion / Help
Navigation

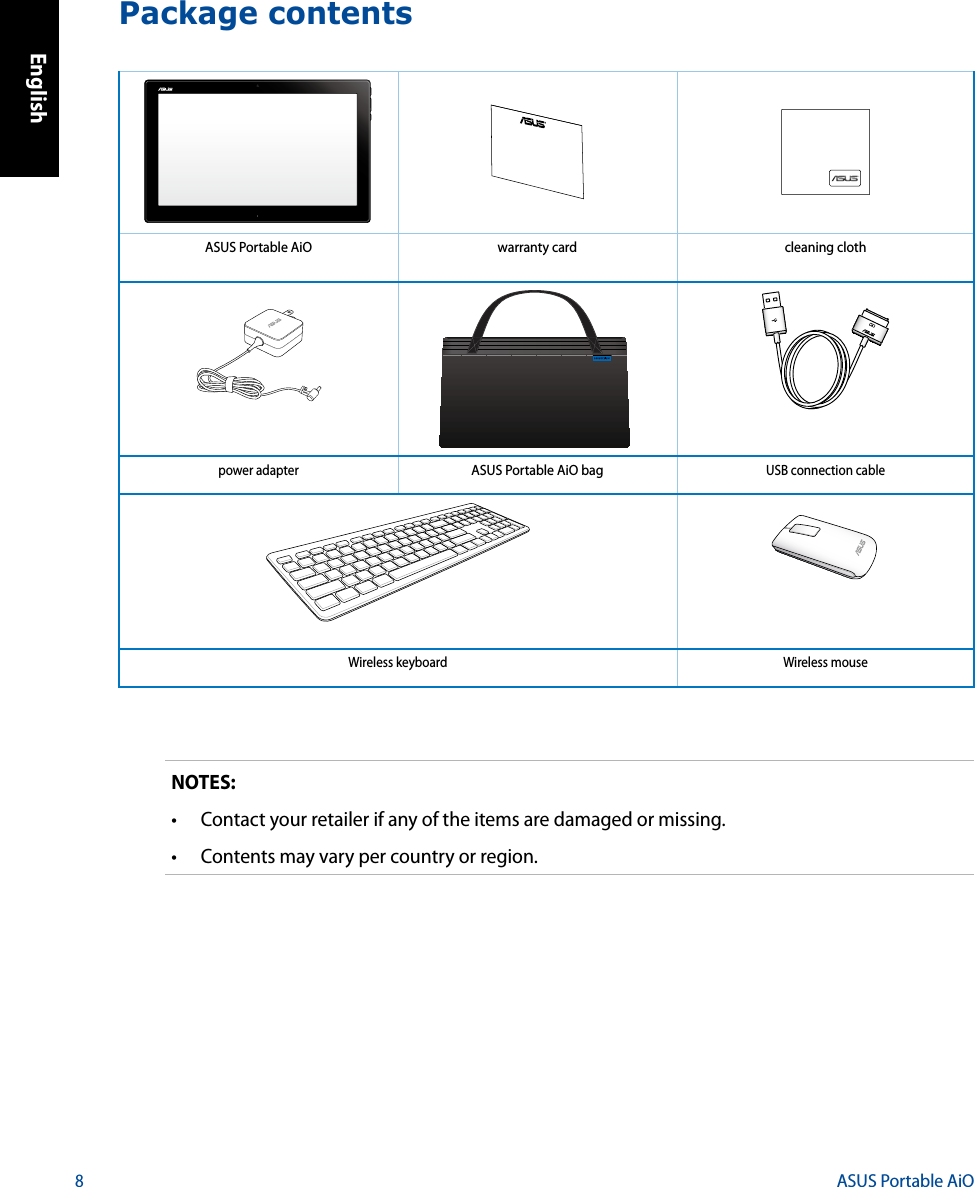
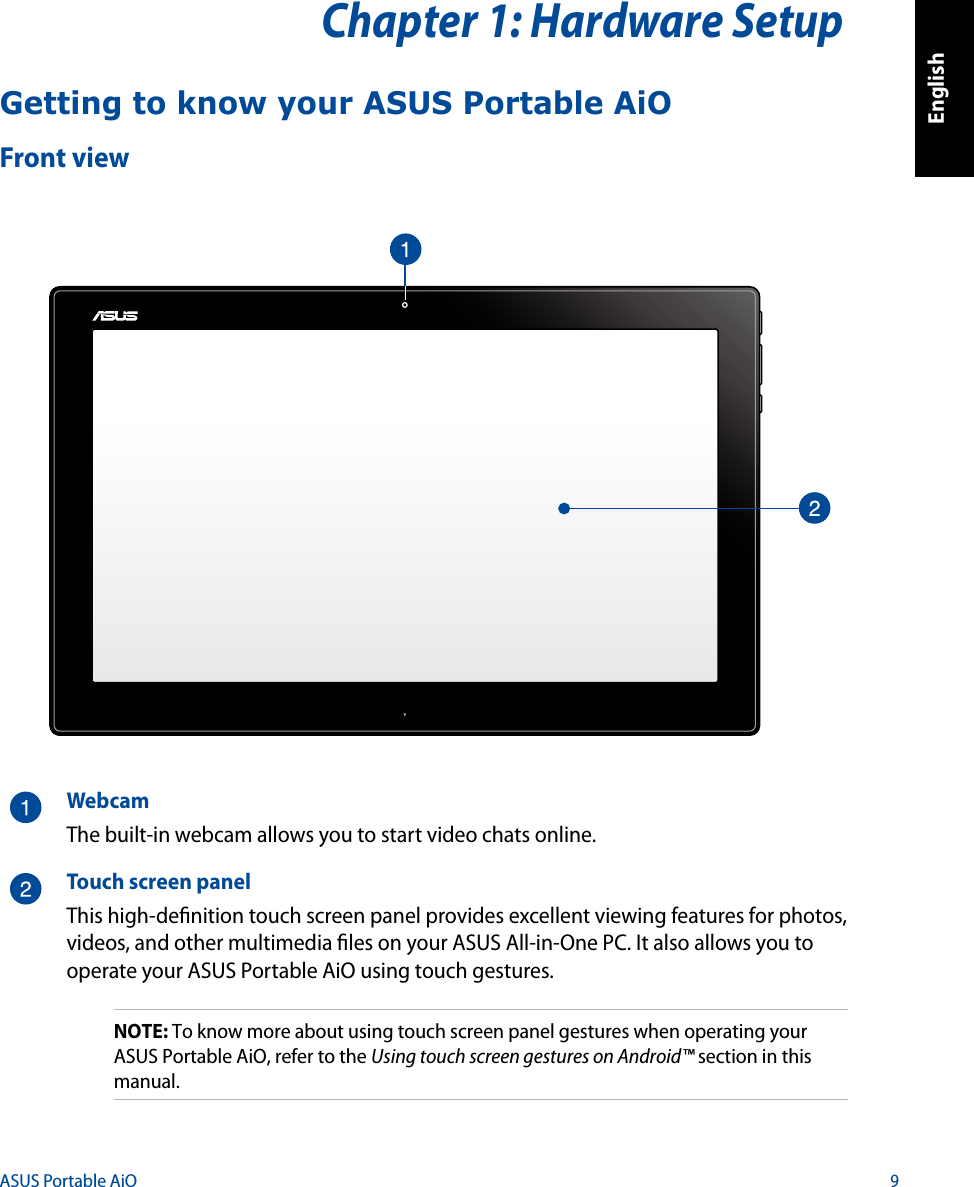
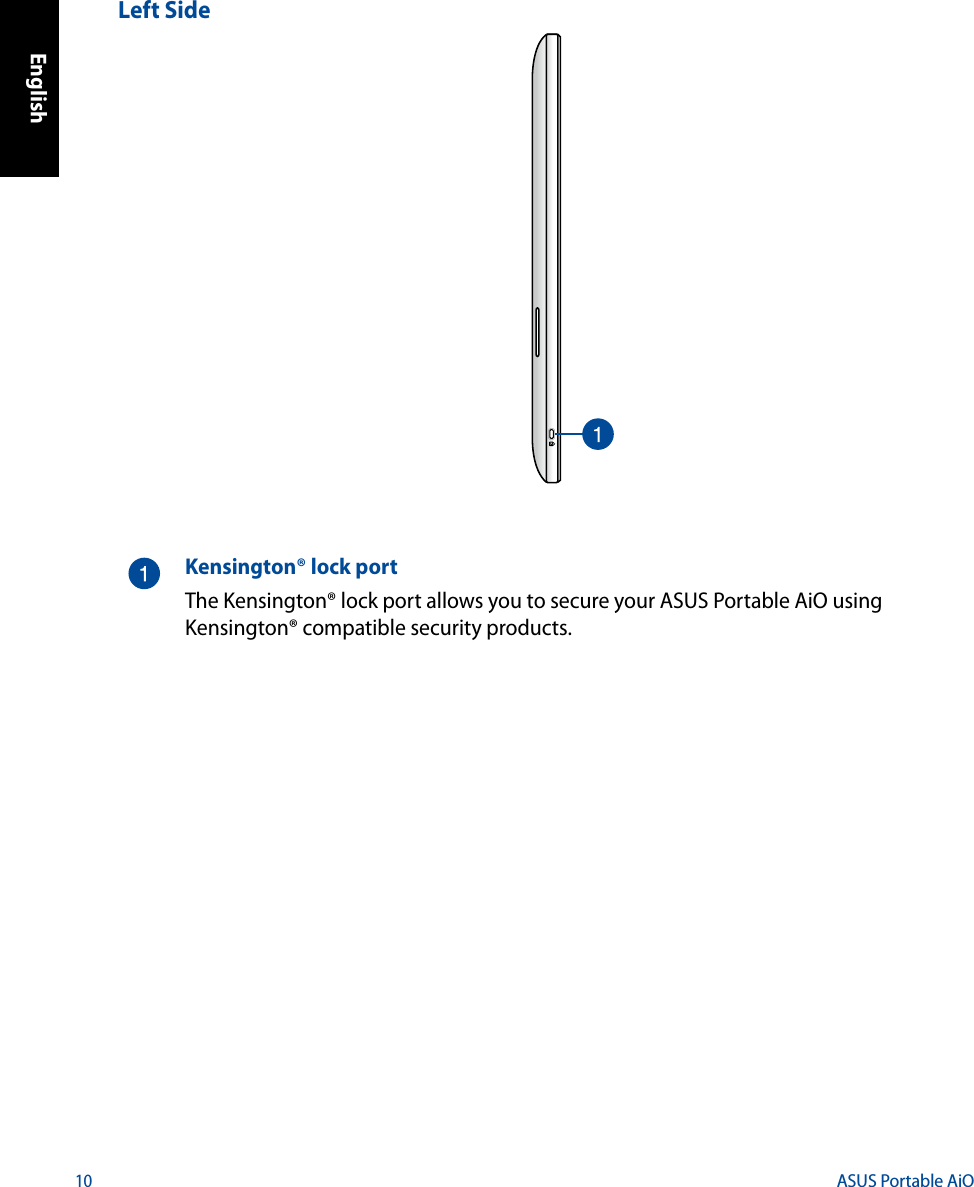
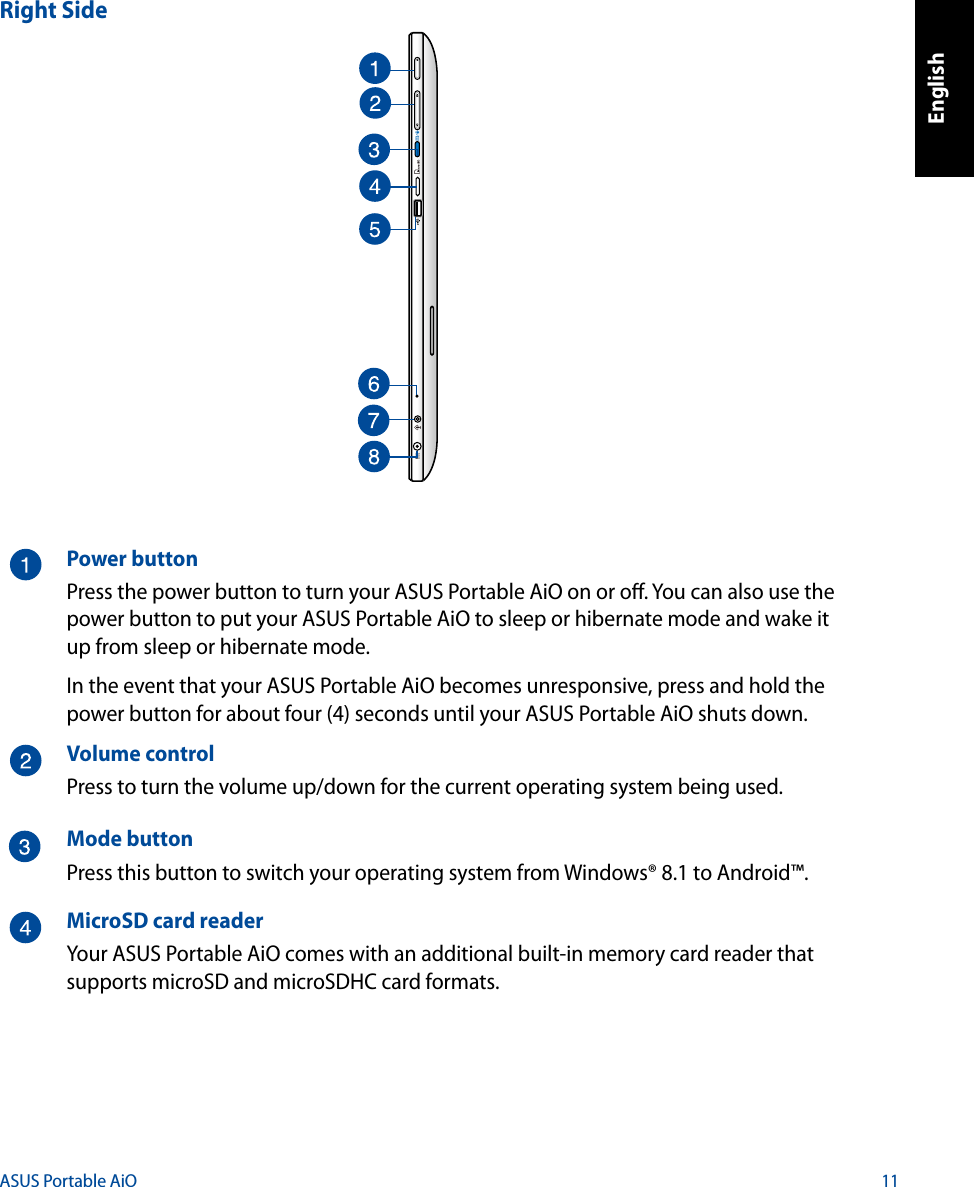
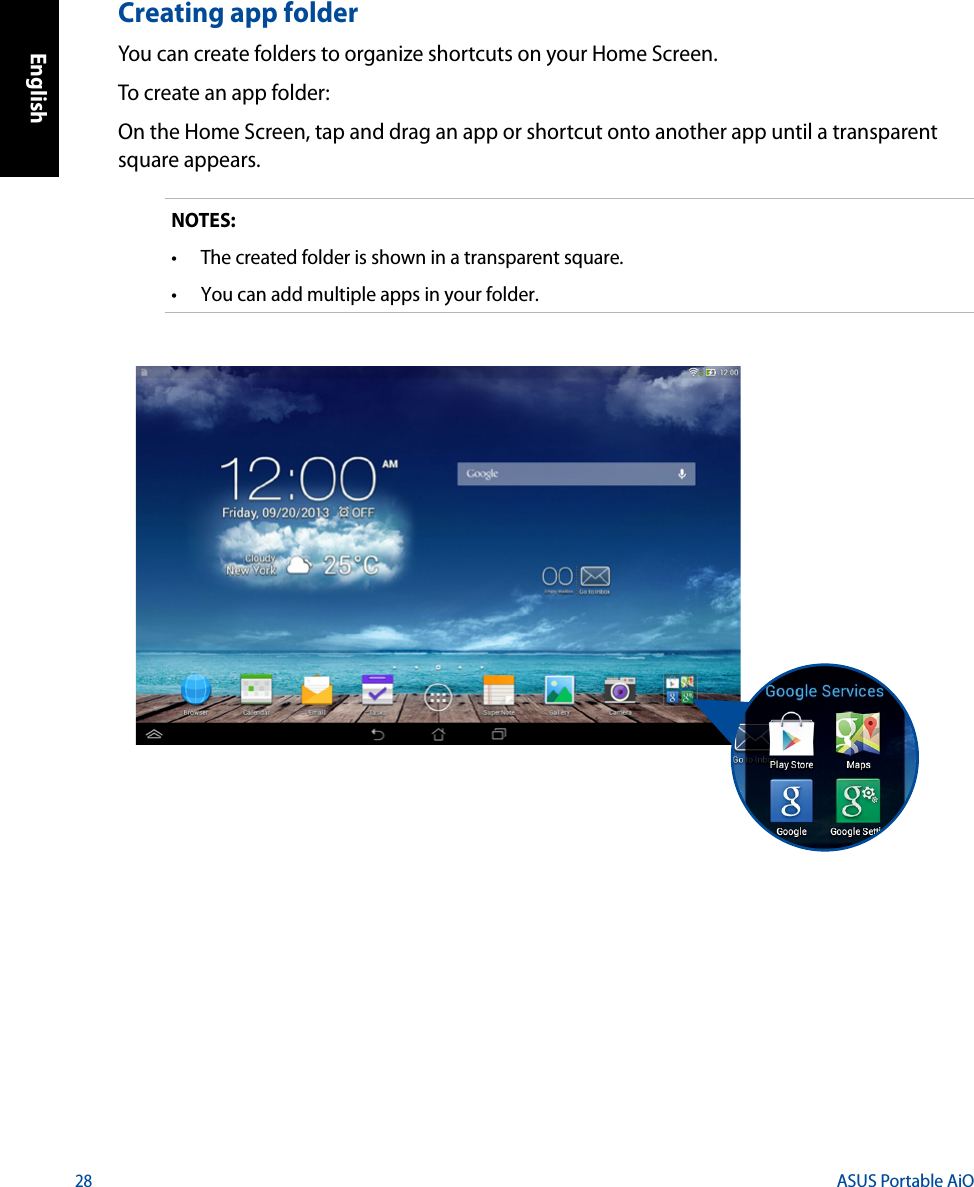


![English44ASUS Portable AiODeclaration of Conformity (R&TTE directive 1999/5/EC)The following items were completed and are considered relevant and sucient:Essential requirements as in [Article 3]Protection requirements for health and safety as in [Article 3.1a]Testing for electric safety according to [EN 60950]Protection requirements for electromagnetic compatibility in [Article 3.1b]Testing for electromagnetic compatibility in [EN 301 489-1] & [EN 301 489-17]Eective use of the radio spectrum as in [Article 3.2]Radio test suites according to [EN 300 328-2]CE Mark WarningThis is a Class B product, in a domestic environment, this product may cause radio interference, in which case the user may be required to take adequate measures.CE marking for devices without wireless LAN/BluetoothThe shipped version of this device complies with the requirements of the EEC directives 2004/108/EC “Electromagnetic compatibility” and 2006/95/EC “Low voltage directive”.Maximum authorized power indoors is 100mW Maximum authorized power outdoors is 10mW Departments in which the use of the 2400–2483.5 MHz band is permitted with an EIRP of less than 100mW indoors and less than 10mW outdoors:01 Ain 02 Aisne 03 Allier05 Hautes Alpes 08 Ardennes 09 Ariège11 Aude 12 Aveyron 16 Charente24 Dordogne 25 Doubs 26 Drôme32 Gers 36 Indre 37 Indre et Loire41 Loir et Cher 45 Loiret 50 Manche55 Meuse 58 Nièvre 59 Nord•••••••••](https://usermanual.wiki/ASUSTeK-Computer/P1802T/User-Guide-2169132-Page-44.png)