ASUSTeK Computer WL500W MIMO WIRELESS ROUTER User Manual USERS MANUAL 2 OF 6
ASUSTeK Computer Inc MIMO WIRELESS ROUTER USERS MANUAL 2 OF 6
Contents
USERS MANUAL 2 OF 6
WL-500W Wireless Router User Manual
7
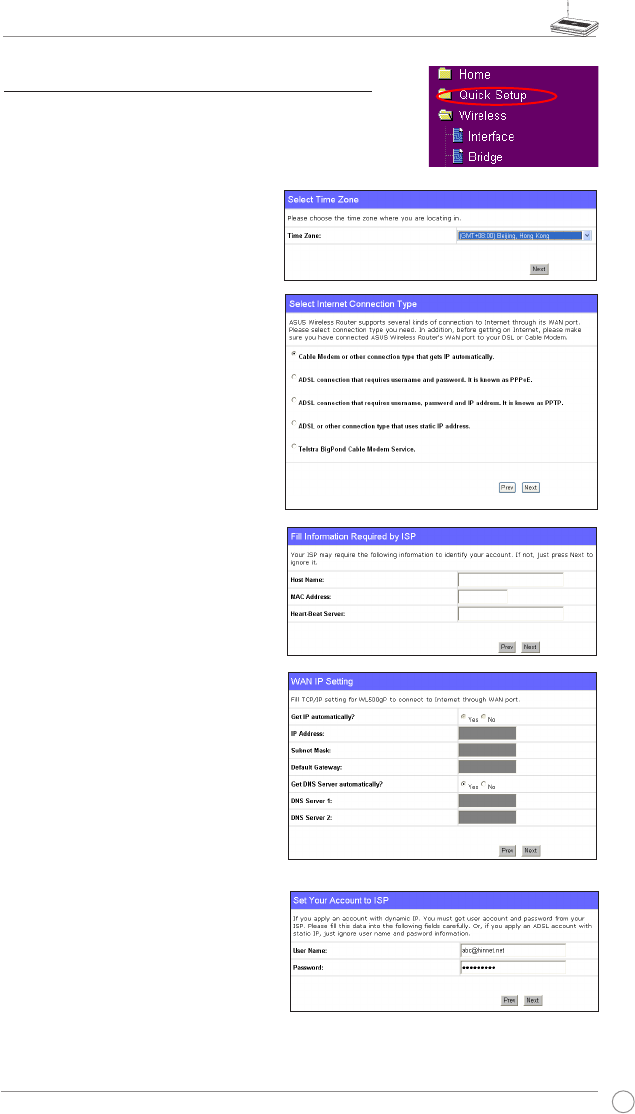
1. Select your time zone and click
Next.
5) Quick setup
To start quick setup, click Next to enter the “Quick Setup”
page. Follow the instructions to setup the ASUS Wireless
Router.
2. ASUS wireless router supports
five types of ISP services: cable,
PPPoE, PPTP, static WAN IP,
and Telstra BigPond. Select your
connection type and click Next to
continue.
Cable or dynamic IP user
If you are using services provided by
cable ISP, select Cable Modem or other
connection that gets IP automatically.
If you r ISP p rovides yo u with th e
hostname, the MAC address, and the
heartbeat server address, fill these
information into the boxes on the setting
page; if not, click Next to skip this step.
PPPoE user
If you use PPPoE service, select ADSL
connection that requires username
and password. It is known as PPPoE.
You need to input the username and
password provided by your ISP. Click
Next to continue.
WL-500W Wireless Router User Manual
8
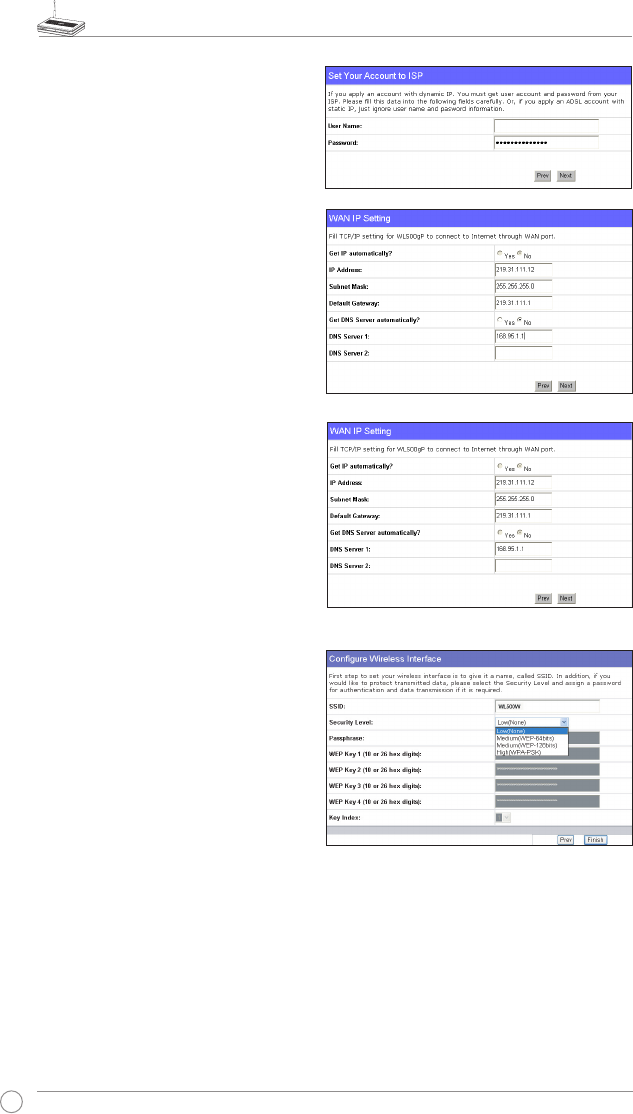
PPTP user
If you are using PPTP services, select ADSL
connection that requires username,
password and IP address. Fill in the
username, the password and the IP address
provided by your ISP into the fields. Click
Next to continue.
Static IP user
If you are using ADSL or other connection
type that uses static IP address, select ADSL
or other connection type that uses static
IP address. Input the IP address, the subnet
mask, and the default gateway provided by
your ISP. You can specify DNS servers, or
get DNS information automatically.
herk036@adsl-comfort
3. After the connection type setting is
complete, you are to set up your
wireless interface. Specify to your
wireless router an SSID (Service Set
Identifier), which is a unique identifier
attached to packets sent over WLAN.
This identifier emulates a password
when a device attempts to communicate
with your wireless router via WLAN.
If you want to protect transmitted data, select a Security Level to enable encryption methods.
Medium: Only users with the same WEP key settings can connect to your wireless router
and transmit data using 64bits or 128bits WEP key encryption.
High: Only users with the same WPA pre-shared key settings can connect to your wireless
router and transmit data using TKIP encryption.
WL-500W Wireless Router User Manual
9
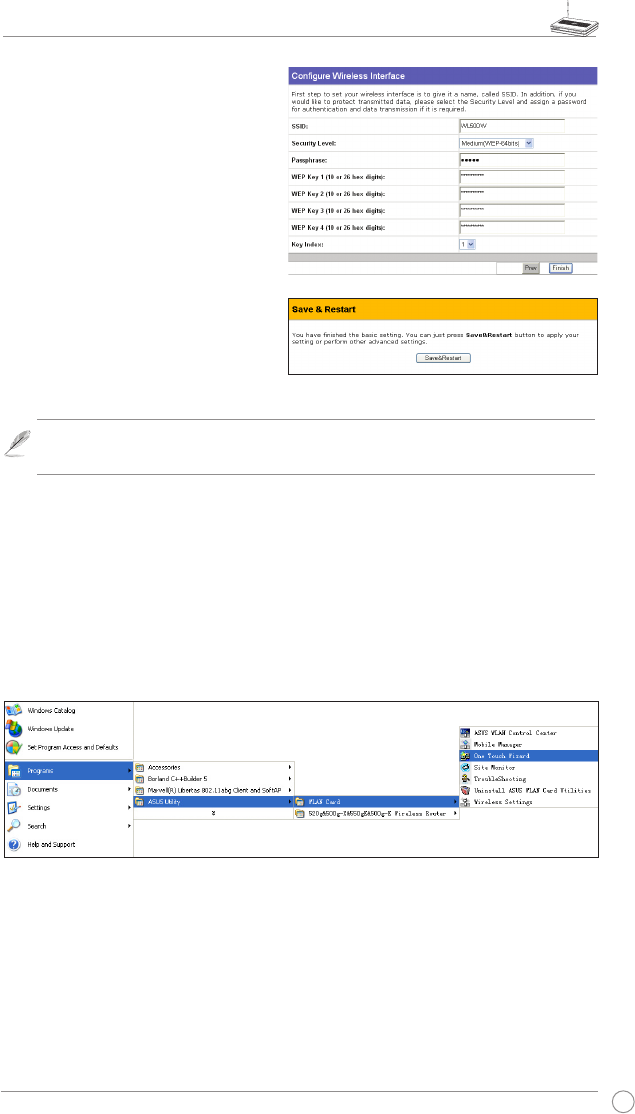
4. Input four sets of WEP keys in the WEP
Key fields (10 hexadecimal digits for
WEP 64bits, 26 hexadecimal digits
for WEP 128bits). You can also let the
system generate the keys by inputting
a Passphrase. Record the PassphraseRecord the Passphrase
and the WEP keys in your notebook, then
click Finish.
For example, if we select WEP 64bitsFor example, if we select WEP 64bits
encryption mode and input 11111 as
the Passphrase, the WEP Keys are
generated automatically.
5. Click Save&Restart to restart the
wireless router and activate the new
settings.
Note: We recommend using WL-100W wireless adapters to connect WL-500W so
as to achieve high speed data transmission.
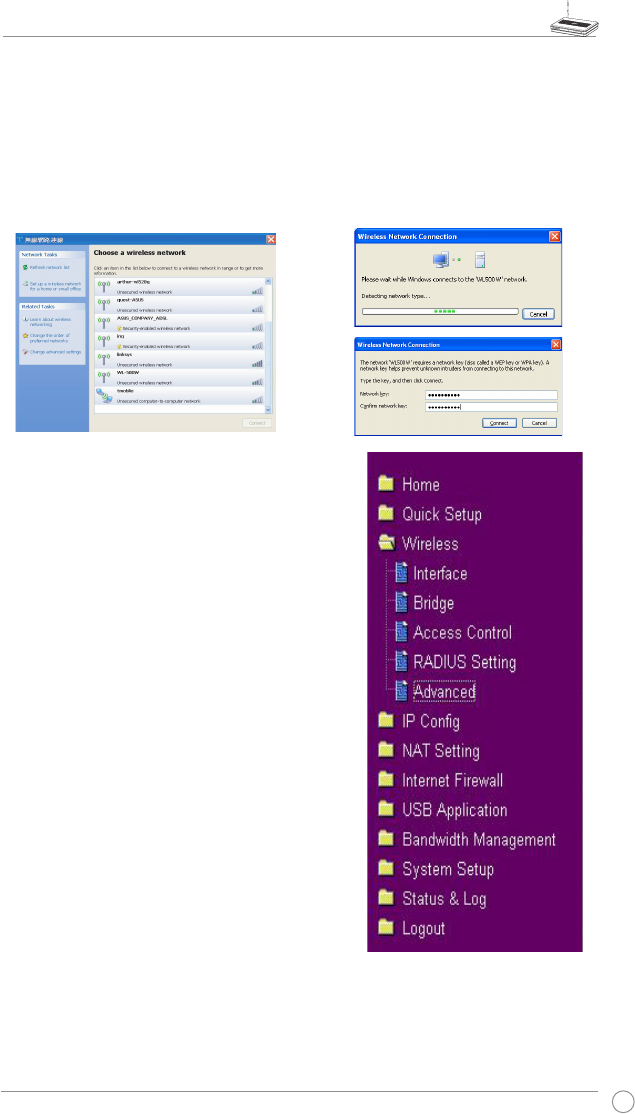
6. To connect the wireless router from a wireless client, you can use Windows® Wireless
Zero Conguration service to set up the connection. If you use ASUS Wireless Card on
your computer, you can use the One Touch Wizard utility supplied in WLAN Card support
CD for wireless connection.
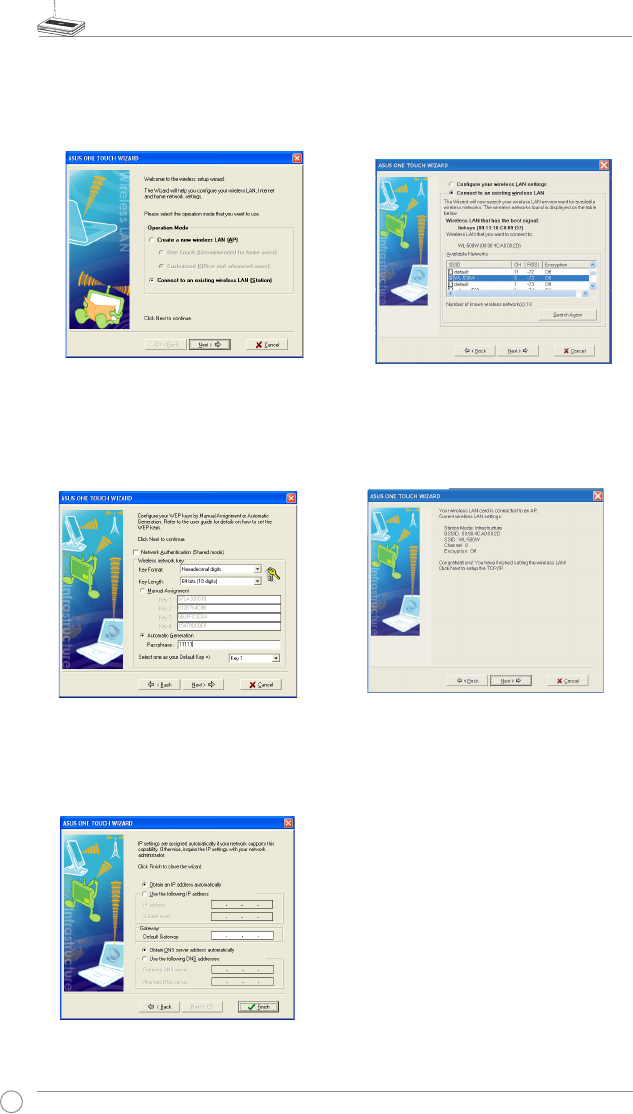
Conguring ASUS WLAN Card with One Touch Wizard
If you have installed ASUS wireless card together with its utilities and drives on your PC, click
Start -> All Programs -> ASUS Utility-> WLAN Card -> One Touch Wizard to launch the One
Touch Wizard utility.
WL-500W Wireless Router User Manual
10
3) Set the authentication and encryption of
your WLAN card the same with those at
WL-500W. In the previous steps the Key
Length is 64 bits, Passphrase is 11111
Click Next to continue.
1) Select Connect to an existing wireless
LAN (Station) radio button and click
Next to continue.
2) One Touch Wizard searches and displays
the available APs in the Available
Networks list. Select WL-500W and
press Next to continue.
4) It takes several seconds for the wireless
card to associate with WL-500W. Press
Next to setup TCP/IP for your WLAN Card.
5) Setup the IP address of the WLAN Card
according to your network condition.
After the setup is complete, click Finish
to exit the One Touch Wizard.
WL-500W Wireless Router User Manual
11
7. Conguring advanced features
To view and adjust other settings of the wireless router,
enter the Web conguration page of WL-500W. Click
on items on the menu to open a submenu and follow
the instructions to setup the router. Tips show up when
you move your cursor over each item.
Conguring WLAN card with Windows® WZC service
If you use non-ASUS wireless card, you can set up the wireless connection with Windows®
Wireless Zero Conguration (WZC) service.
2) Input the 10-digit keys you have set on
the wireless router and click Connect.
The connection is complete within
several seconds.
1) Double-click the wireless network icon on
the task bar to view available networks.
Select your wireless router and click
Connect.
WL-500W Wireless Router User Manual
12
4. Wireless router features
This chapter provides setup examples of some frequently used router features. You
can set up these features via your Web browser.
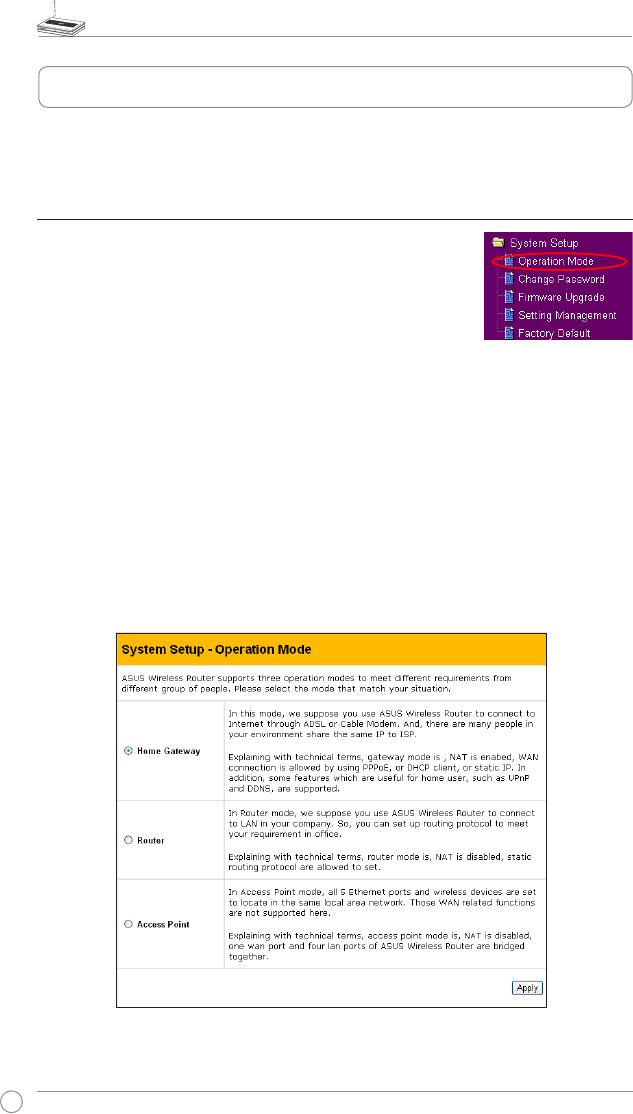
1) Choosing an appropriate operation mode
ASUS WL-500W Wireless Router supports three operation
modes: home gateway, router, and access point. Click
System Setup -> Operation mode to open the conguration
page.
Home gateway mode is for home or SOHO users who
want to connect to their ISPs for Internet services. In this operation mode, NAT,
WAN connection, Internet rewall functions are supported.
Router mode is for ofce use where multiple routers and switches co-exist.
You can set up routing policies in this mode; however, NAT function is disabled.
Access point mode works when you setup WL-500W as a wireless bridge. In
this mode, all Ethernet ports on WL-500W (4 LAN ports and 1 WAN port) are
recognized as LAN ports. WAN connection, NAT, and Internet rewall functions
are disabled in access point mode.
Select a proper mode which complies to your network scenario and press Apply
button, and then you can continue to set up the advanced features for your
WL-500W.