ASUSTeK Computer WLHDD25 WIRELESS HARD DRIVE BOX User Manual Asustek WLHDD2 5 UM EN
ASUSTeK Computer Inc WIRELESS HARD DRIVE BOX Asustek WLHDD2 5 UM EN
UserManual.wiki
>
ASUSTeK Computer
>
WLHDD25 User Manual
USERS MANUAL
Navigation menu
Upload a User Manual
Namespaces
Wiki Guide
HTML
PDF
Info
Views
User Manual
Discussion / Help
Navigation
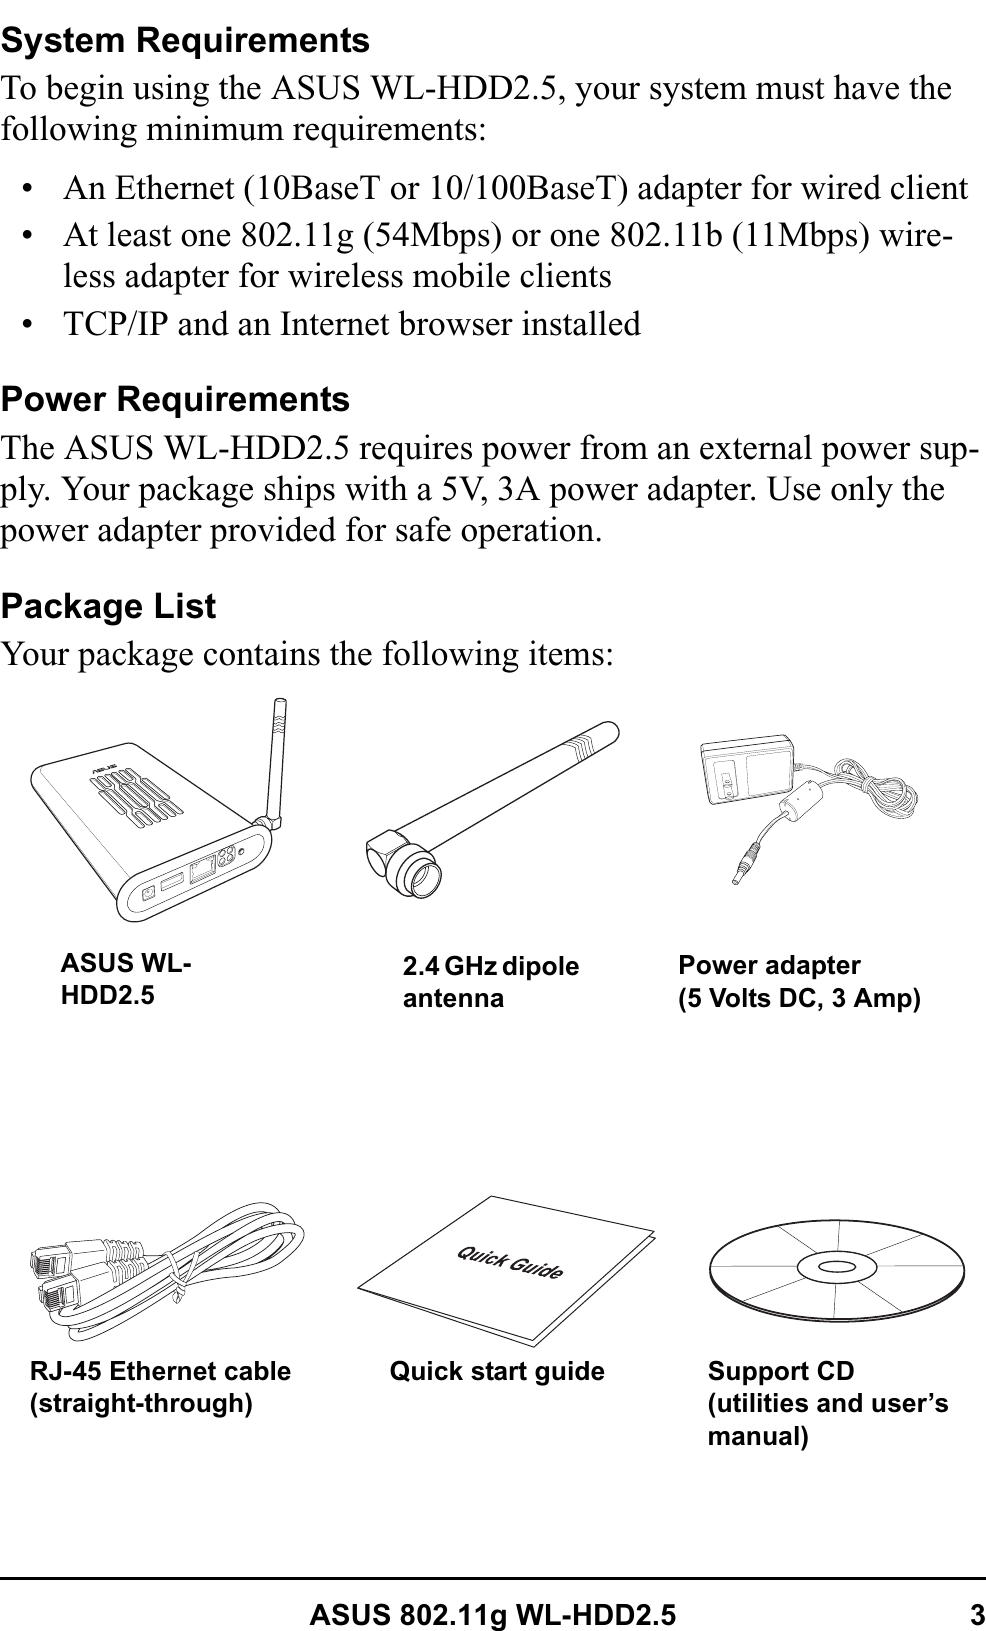

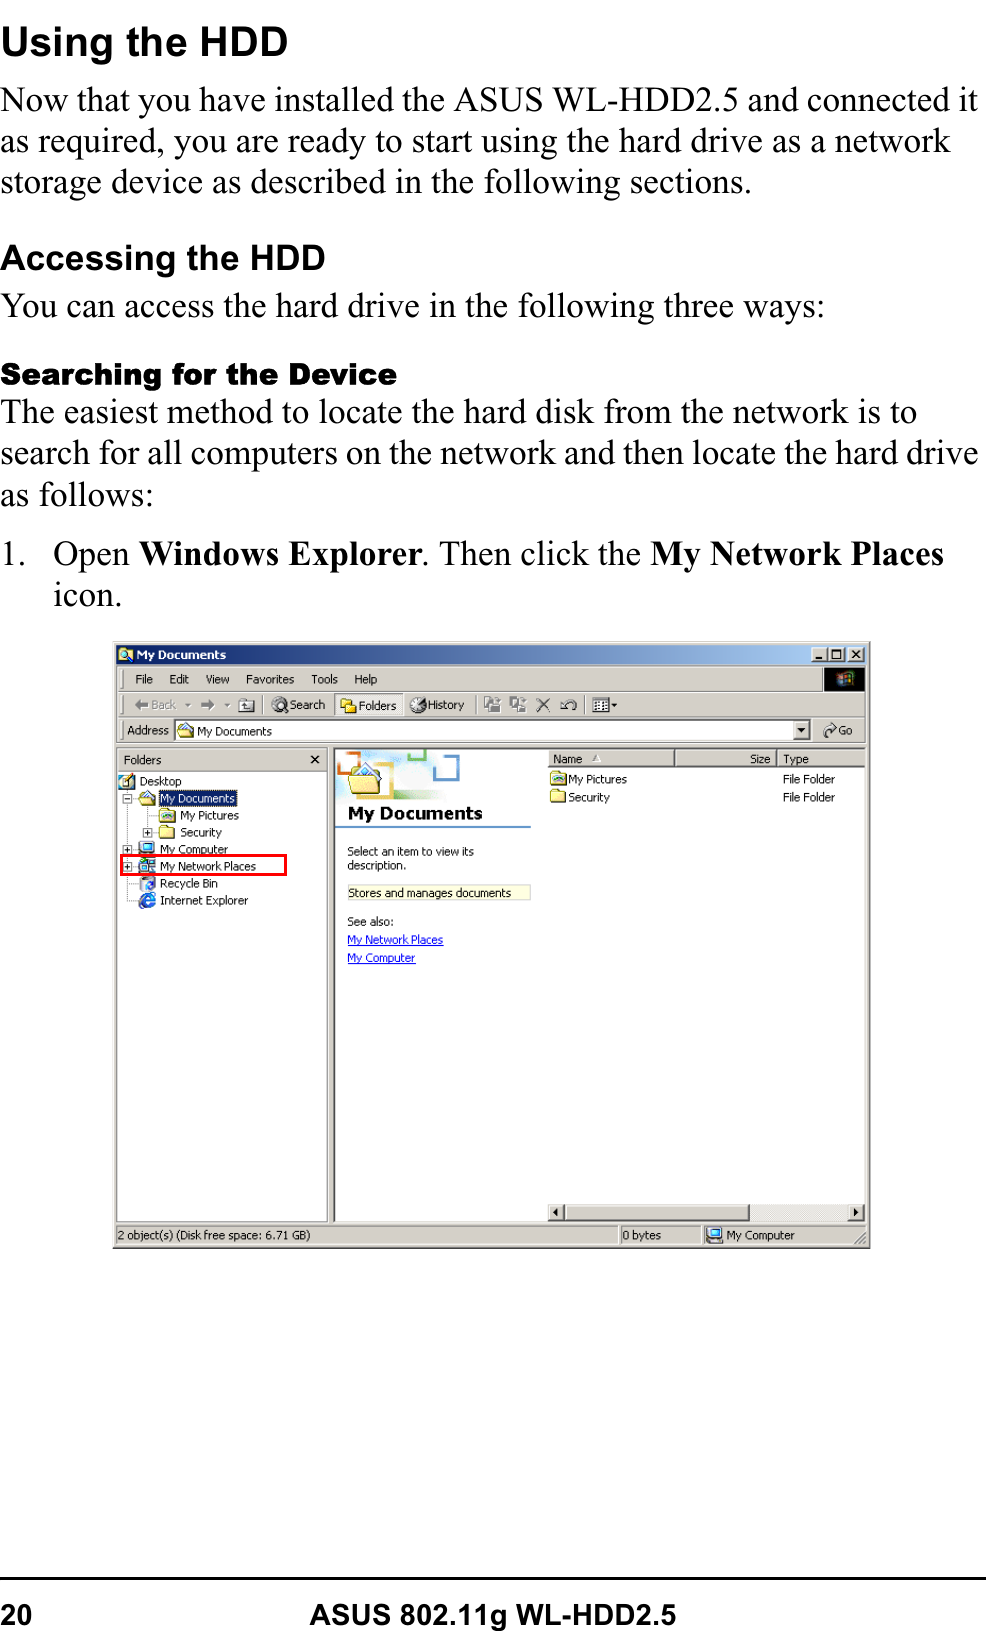
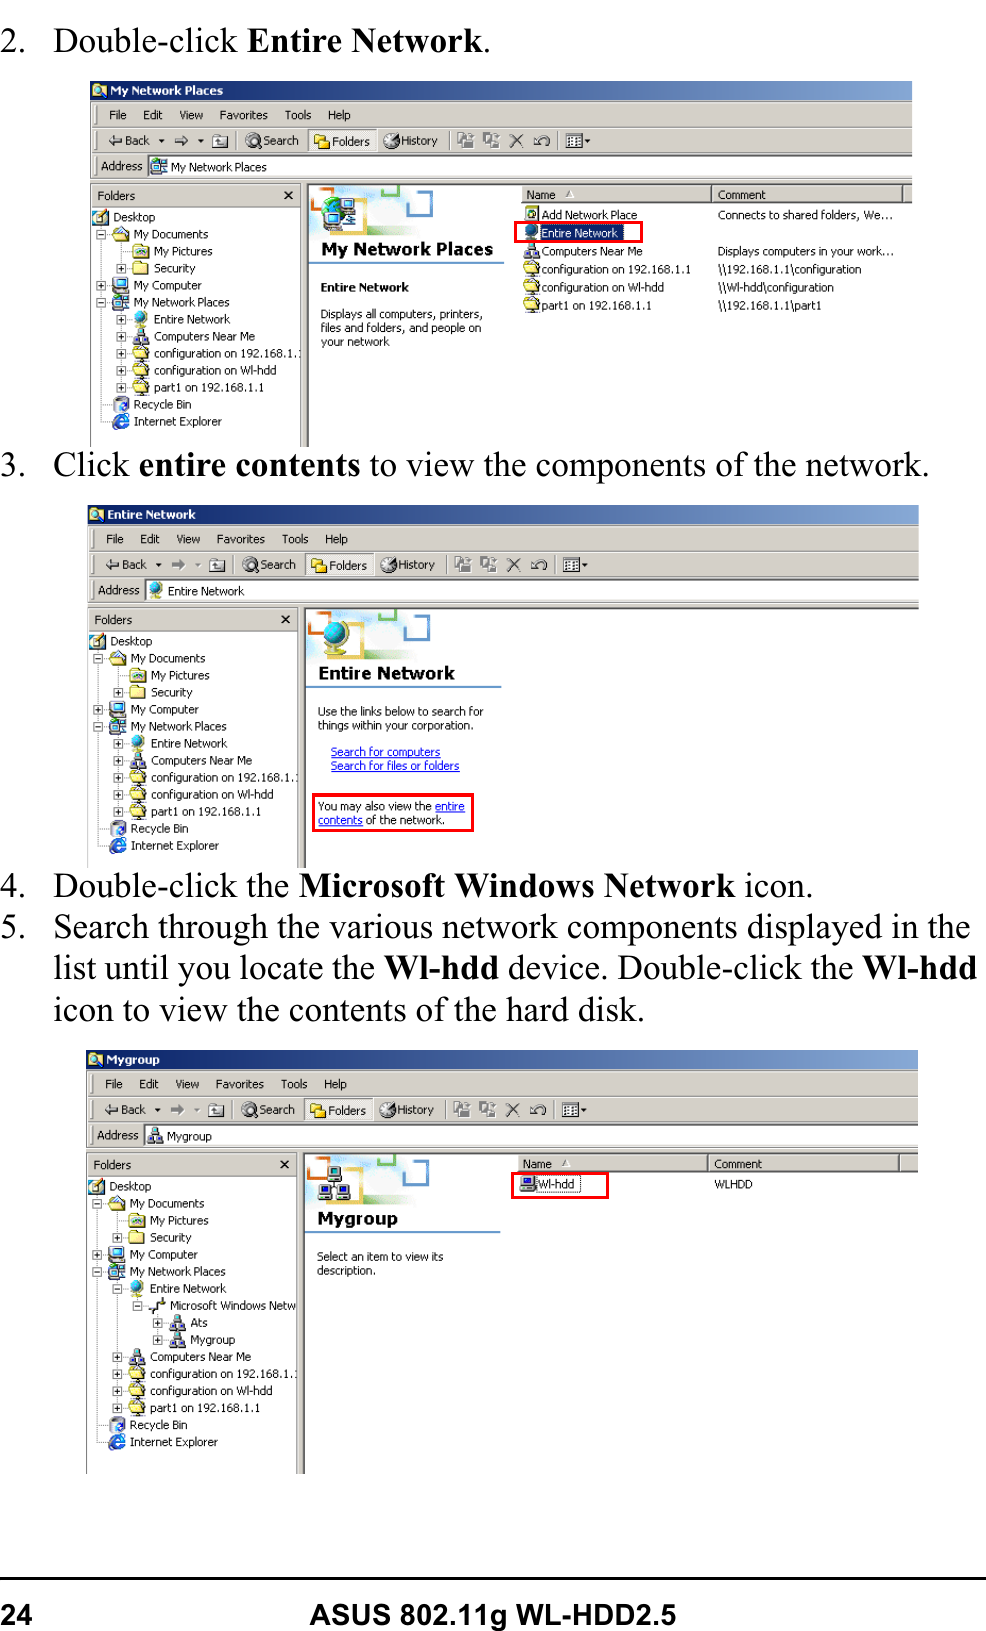
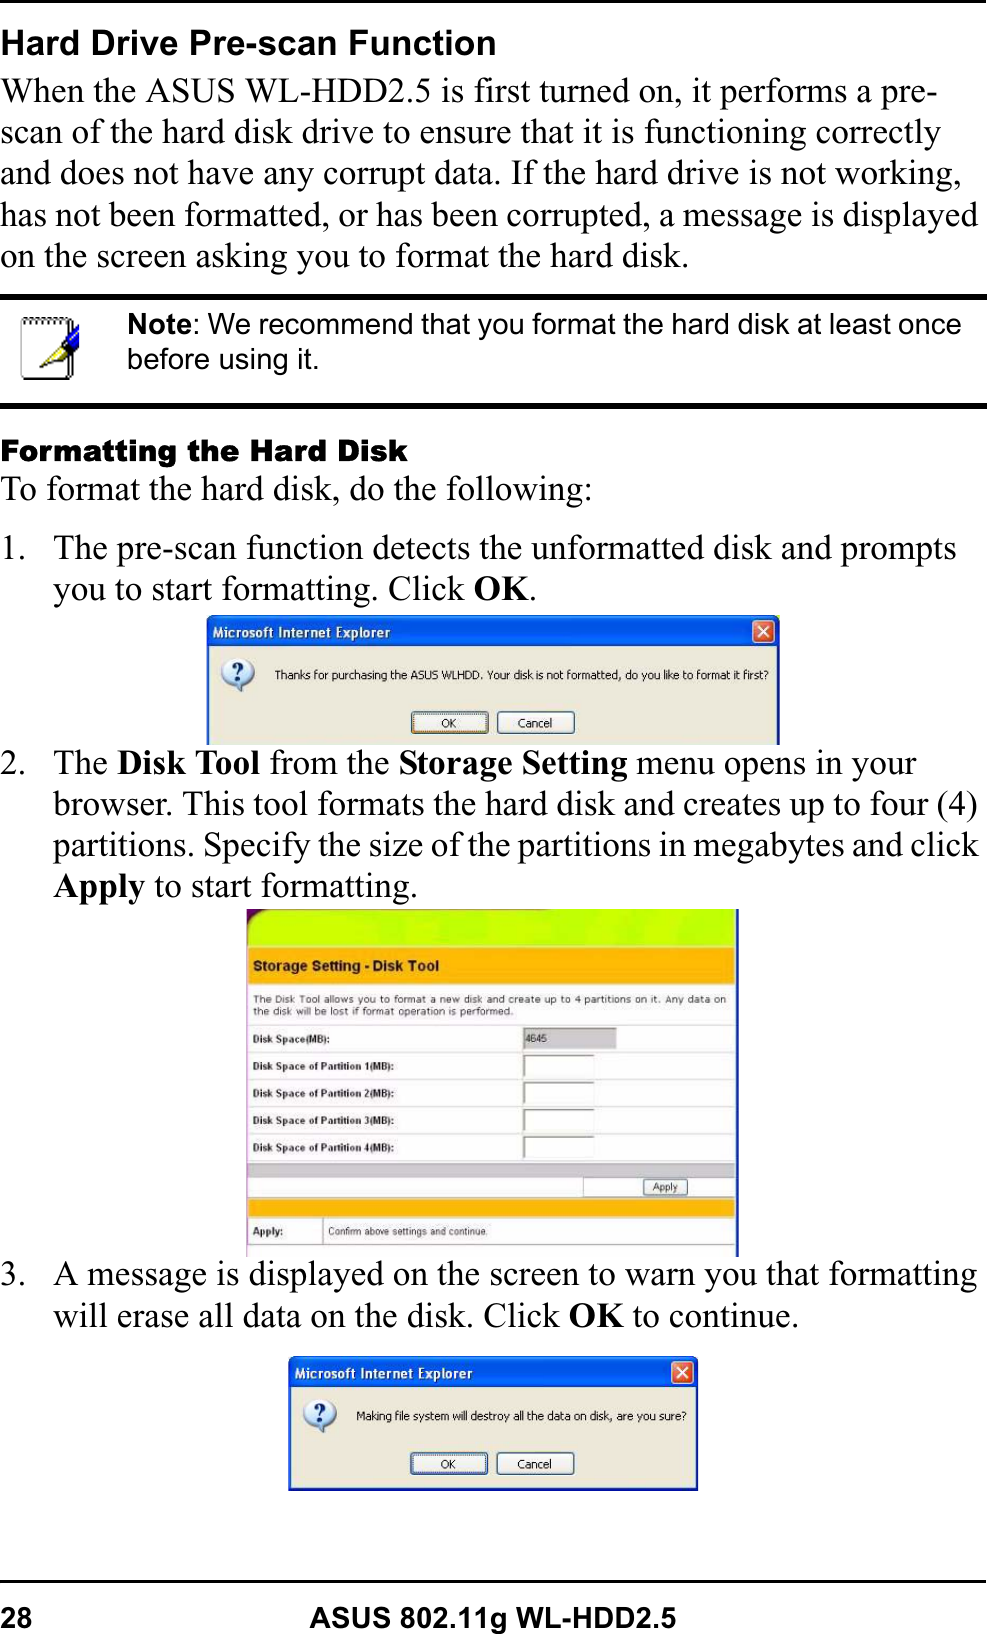

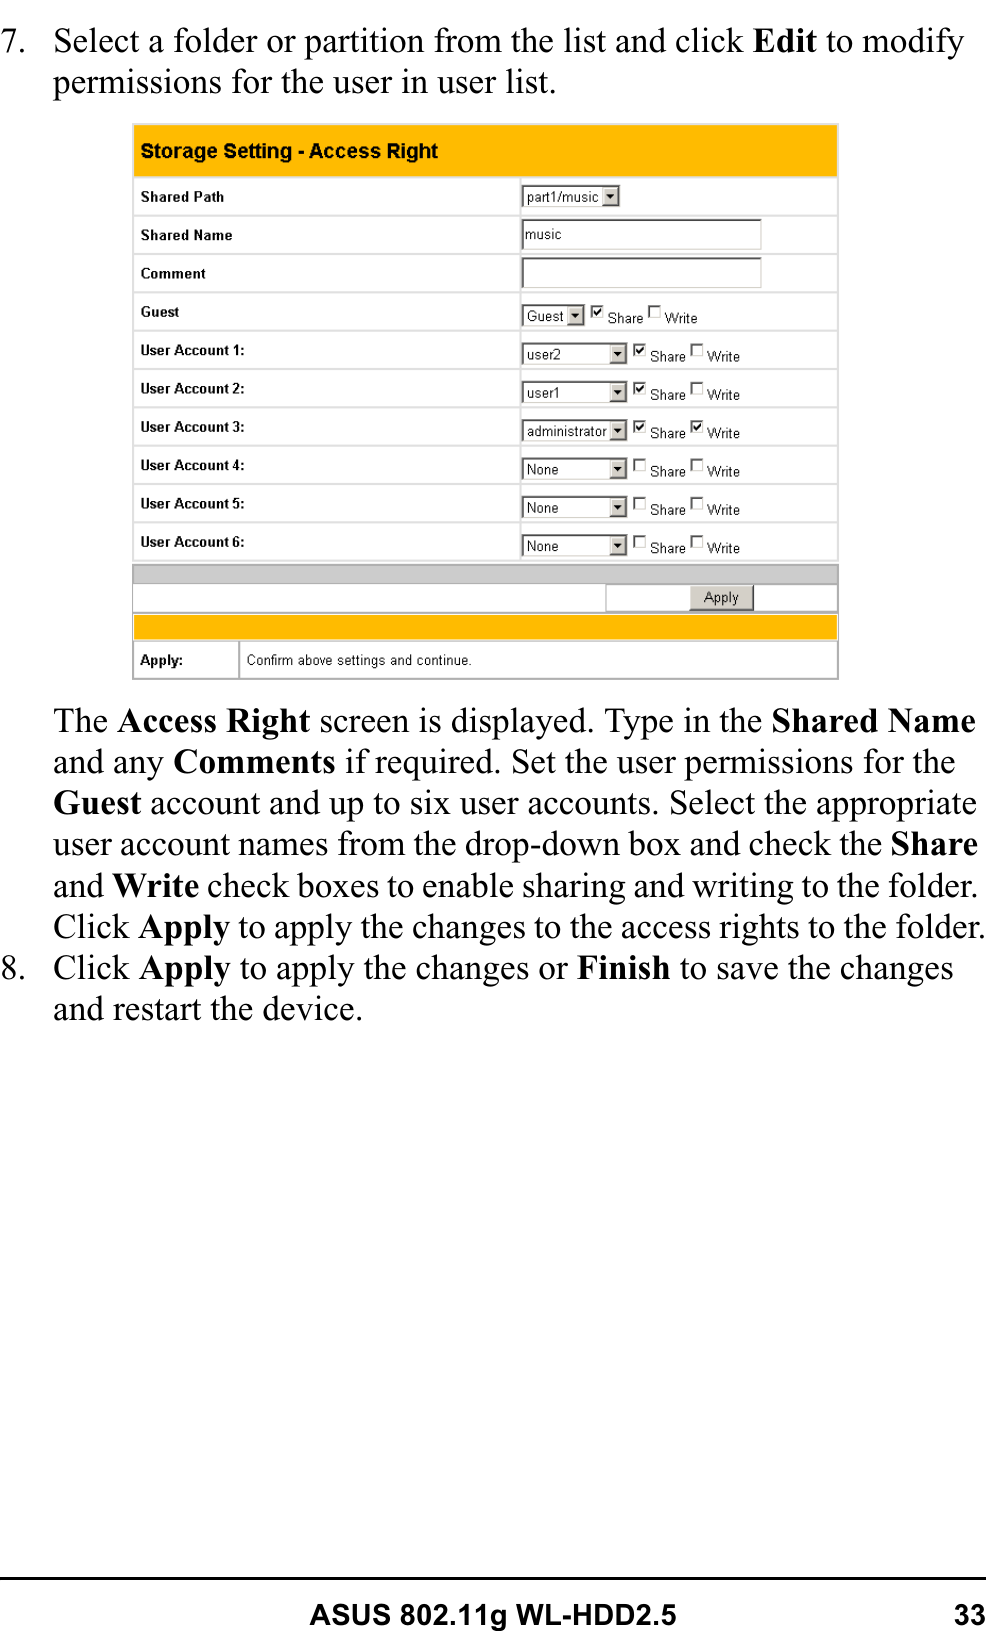
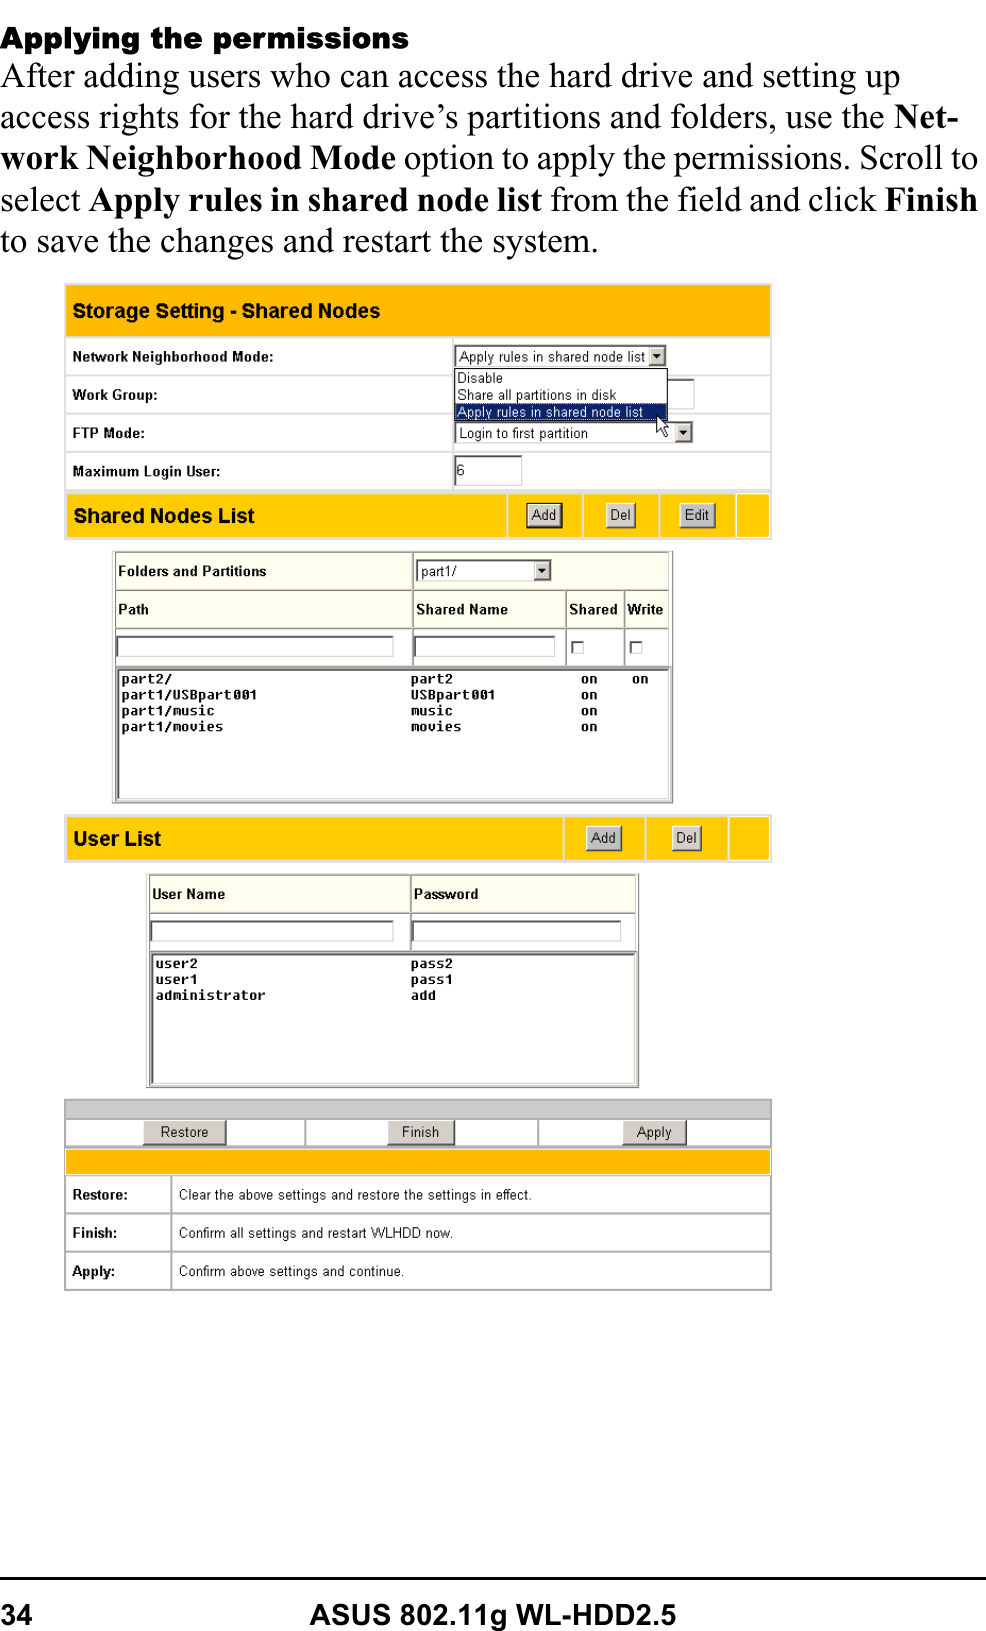

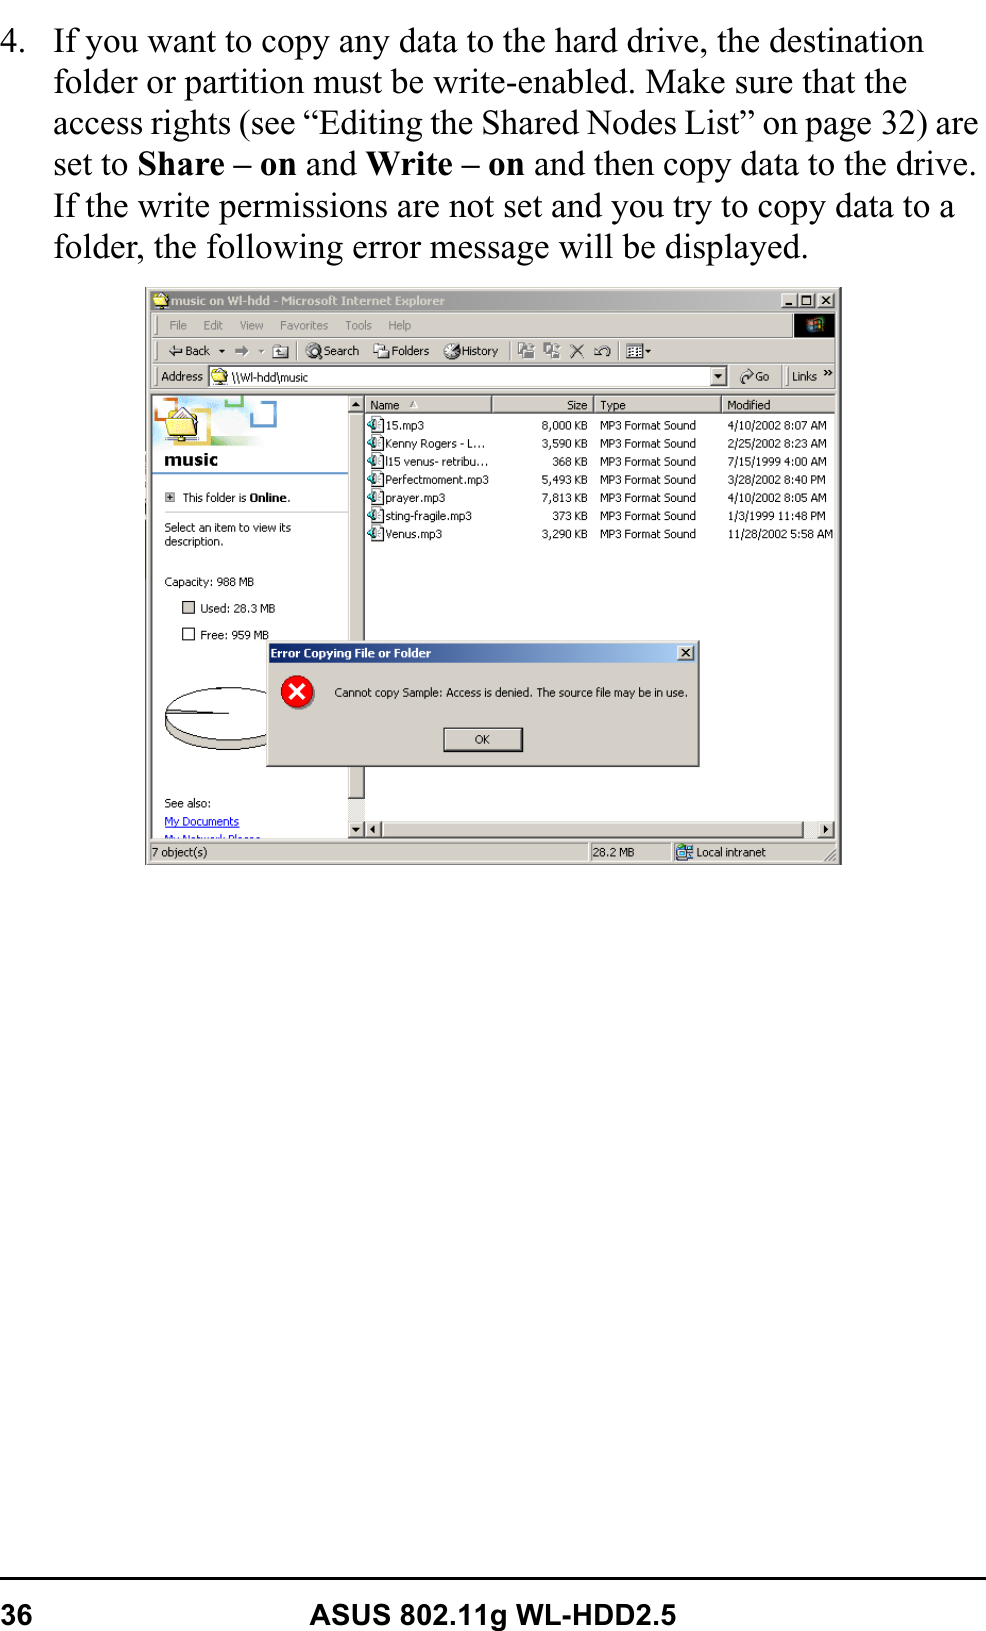
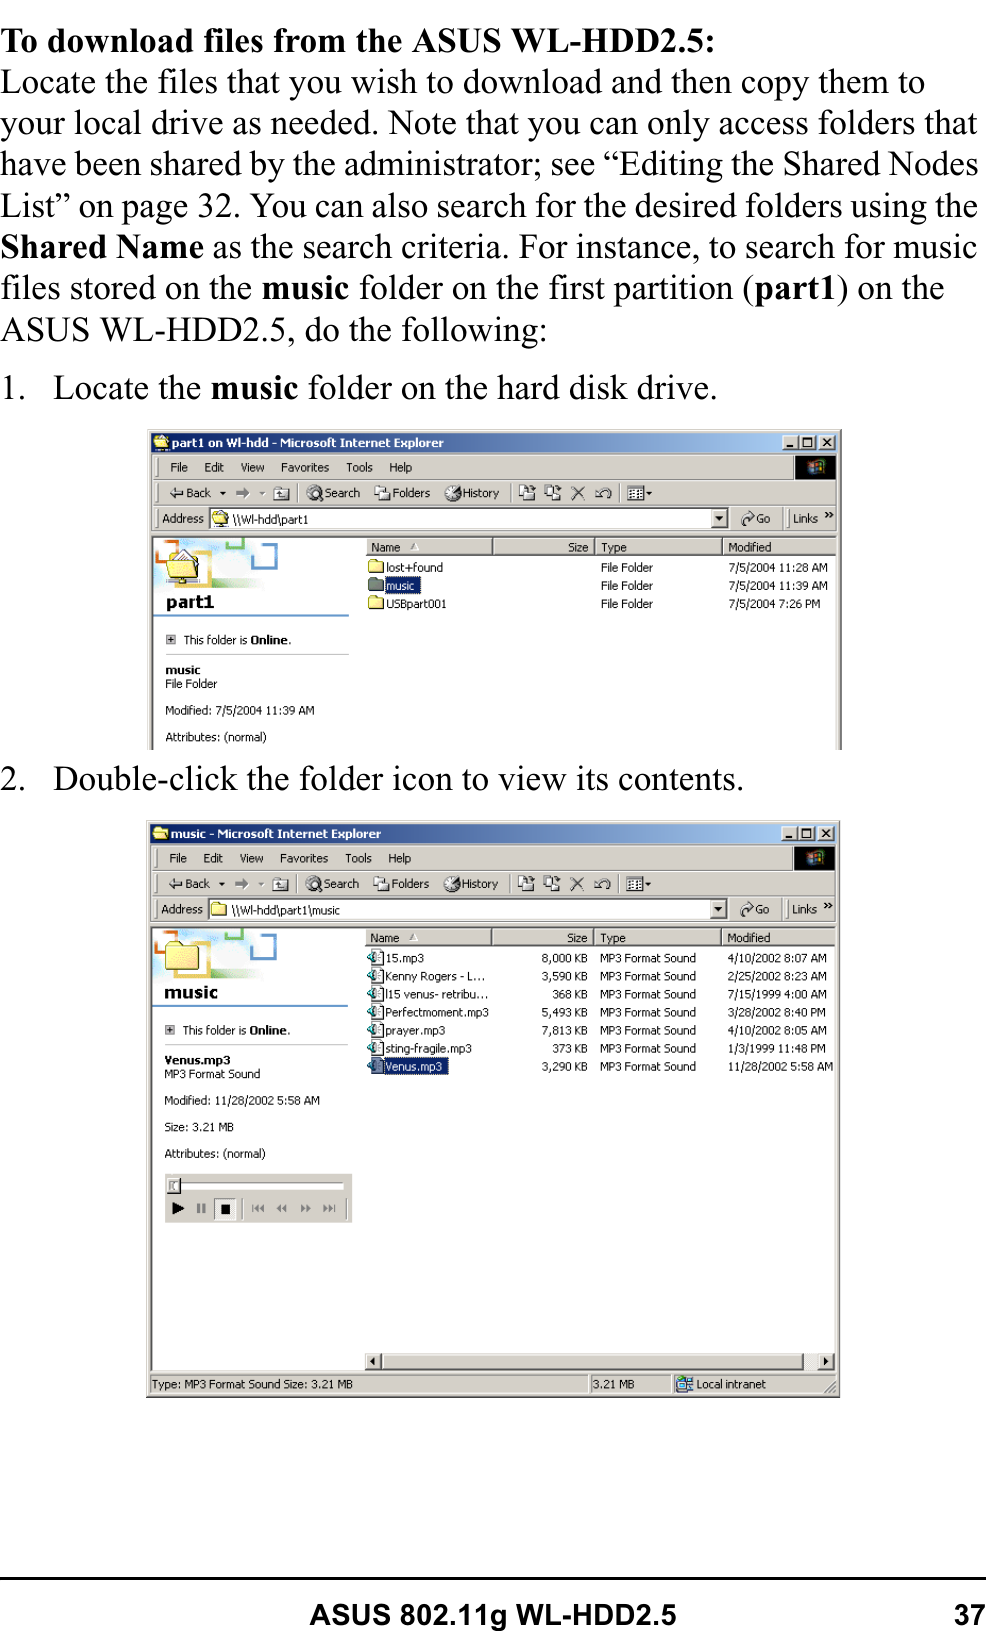
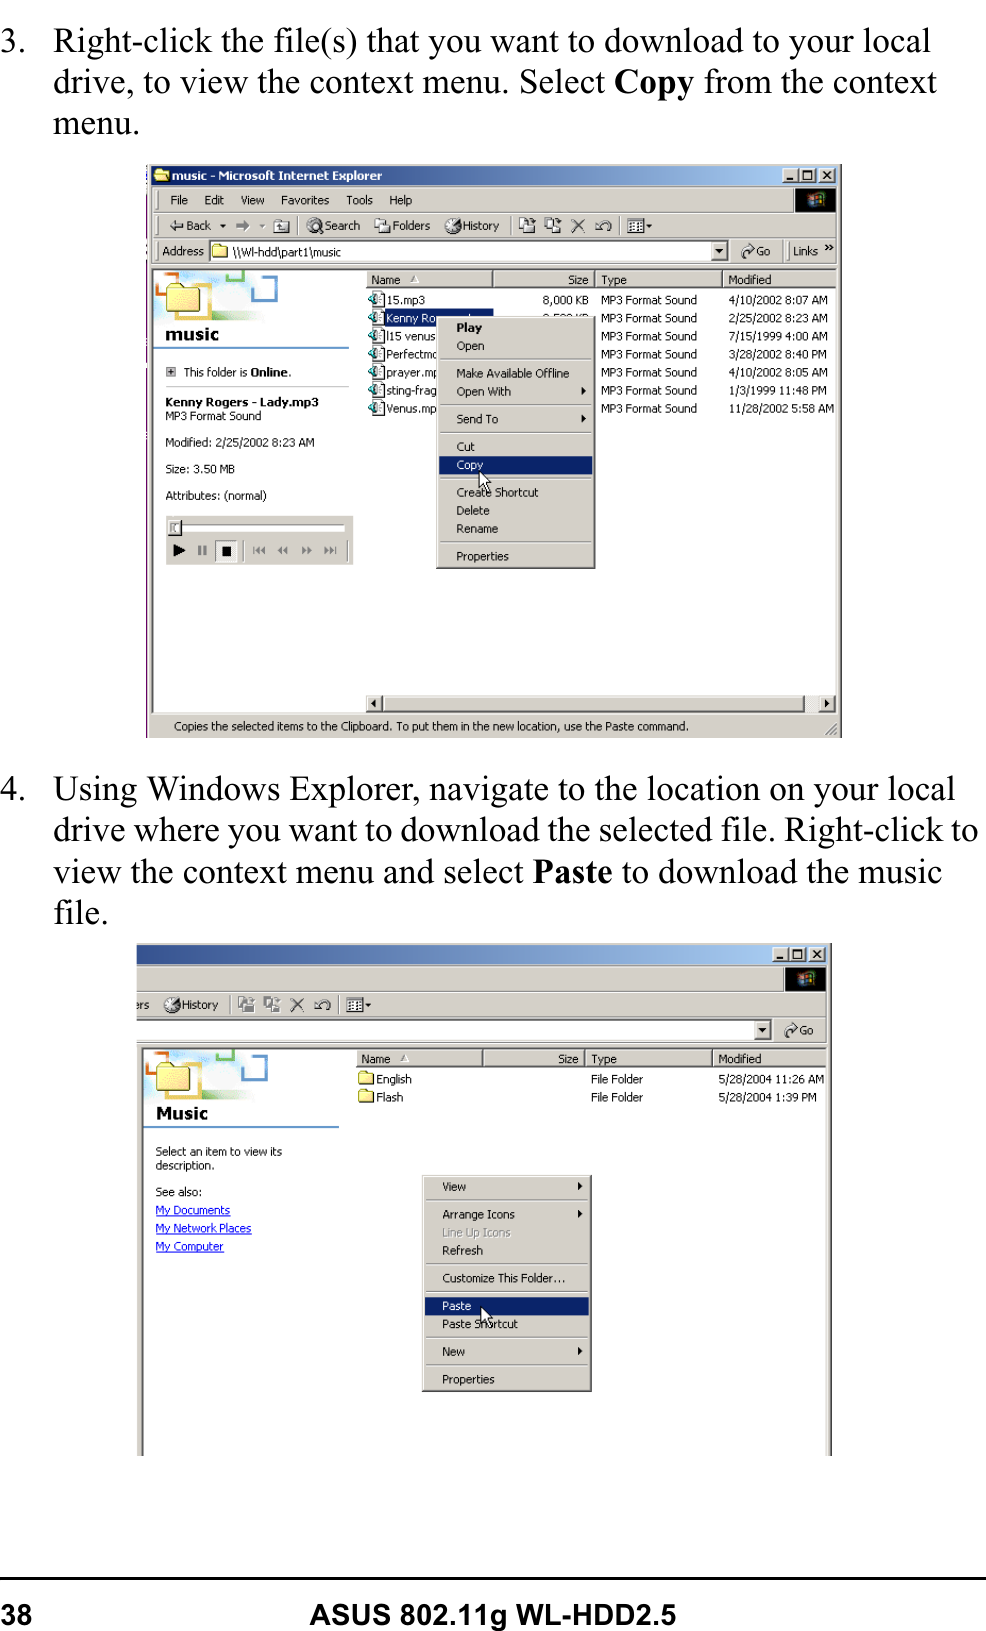
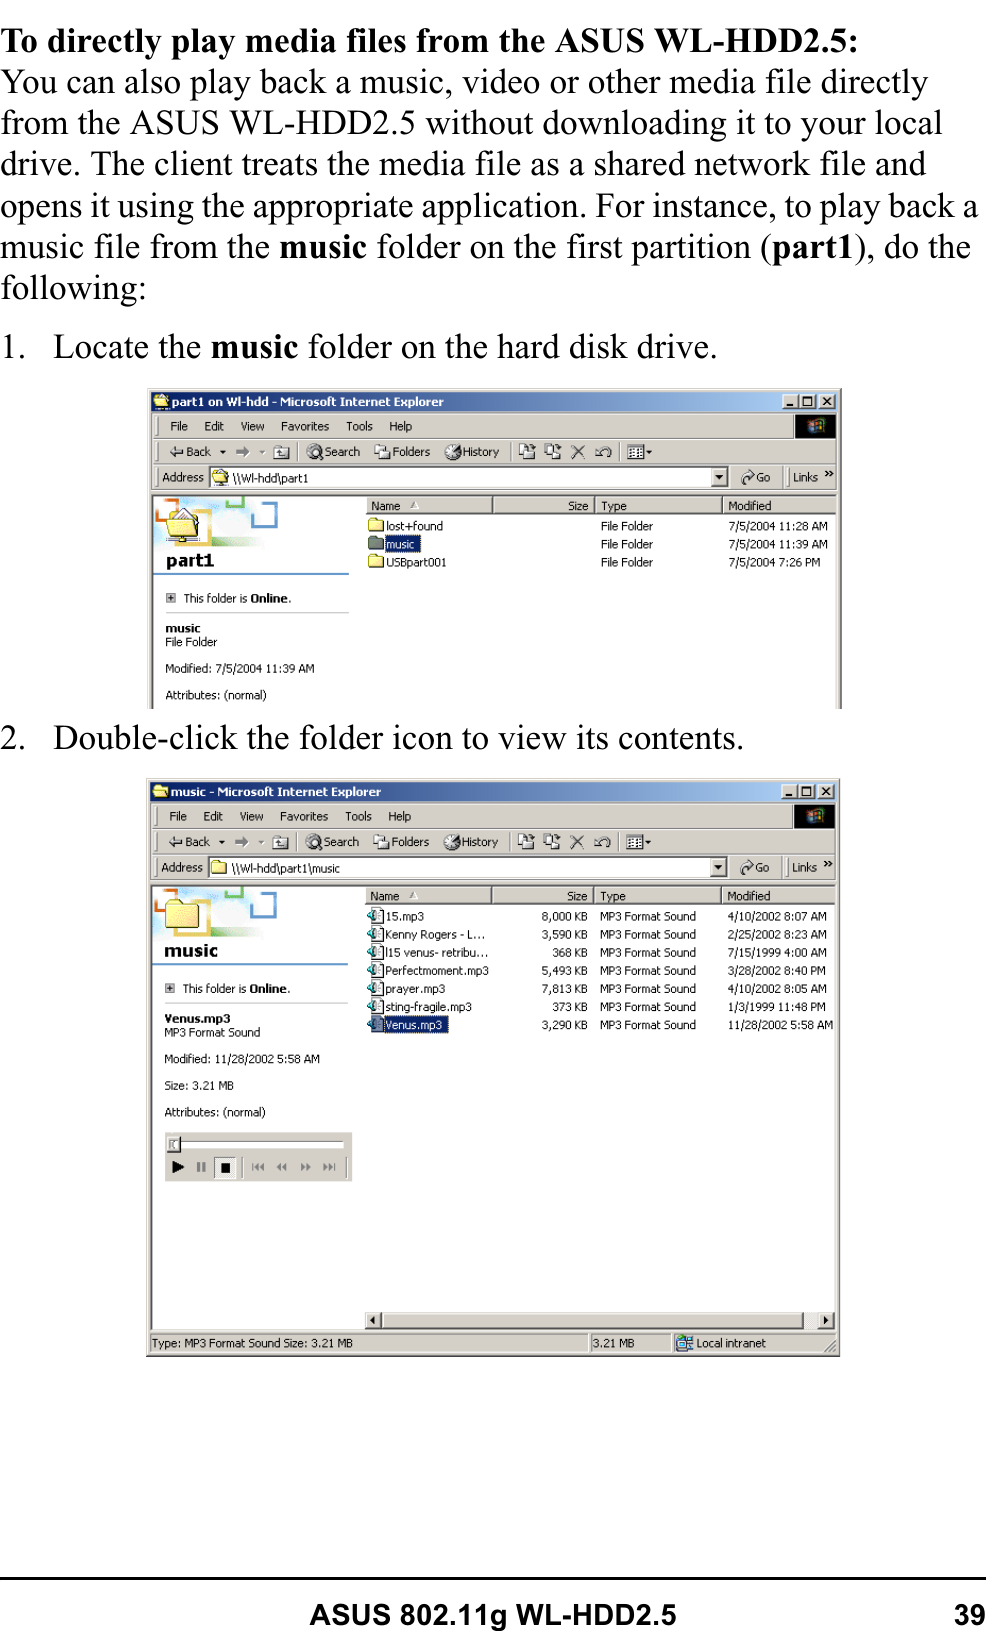
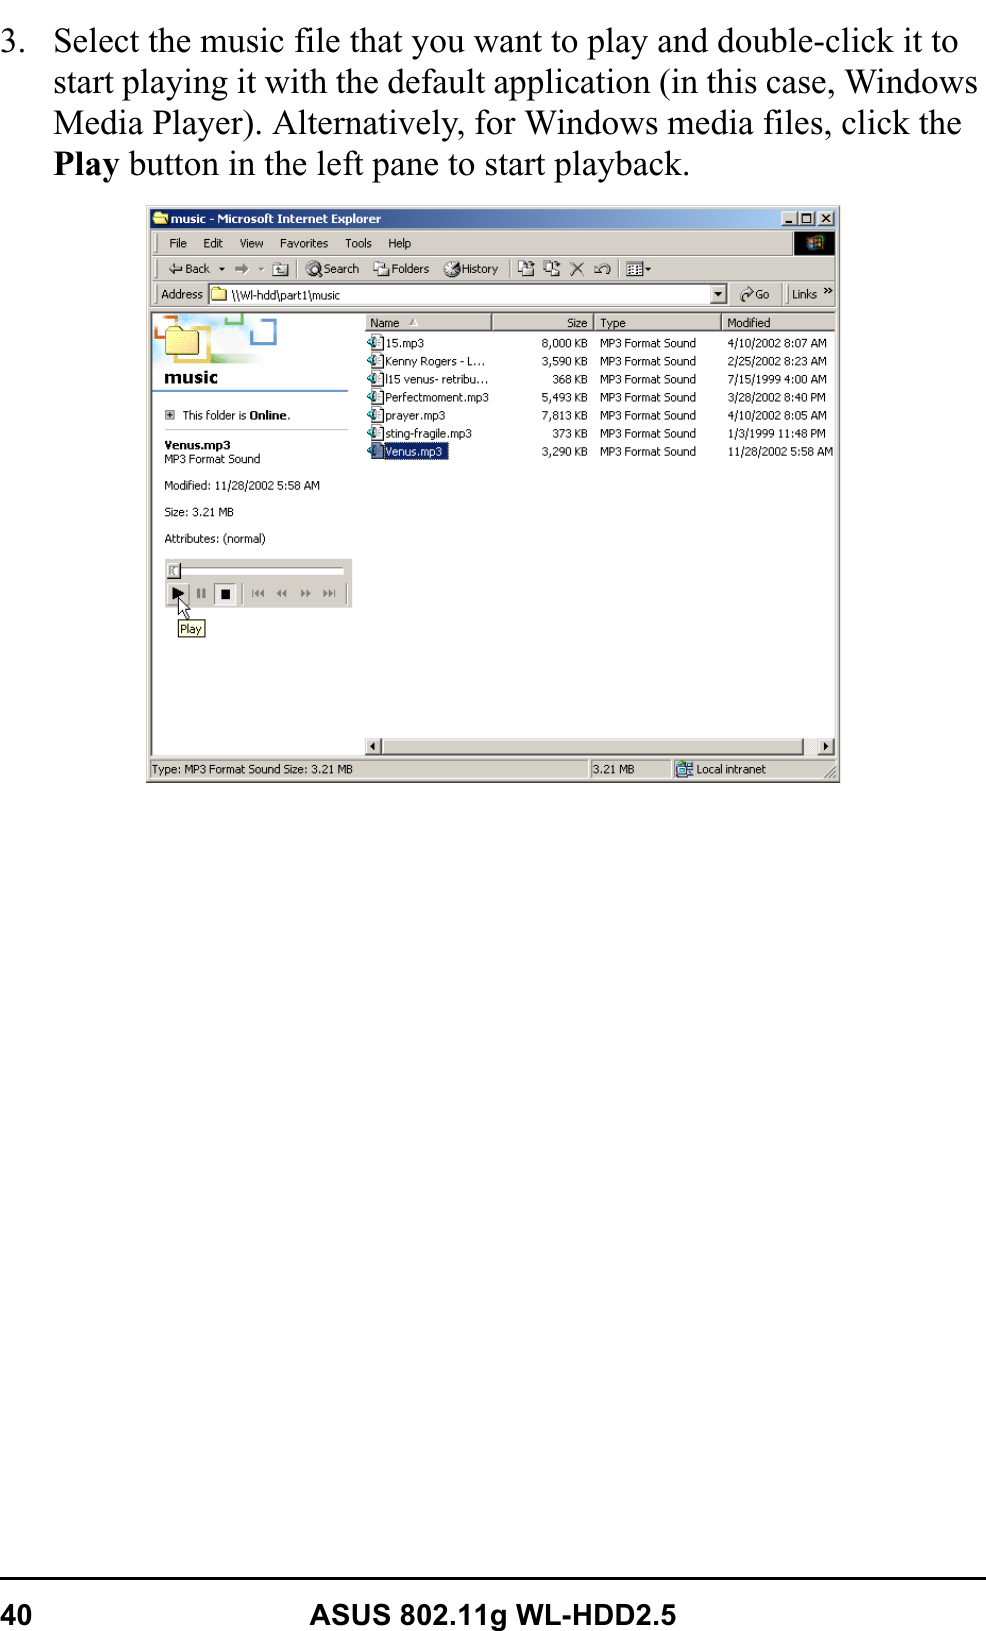
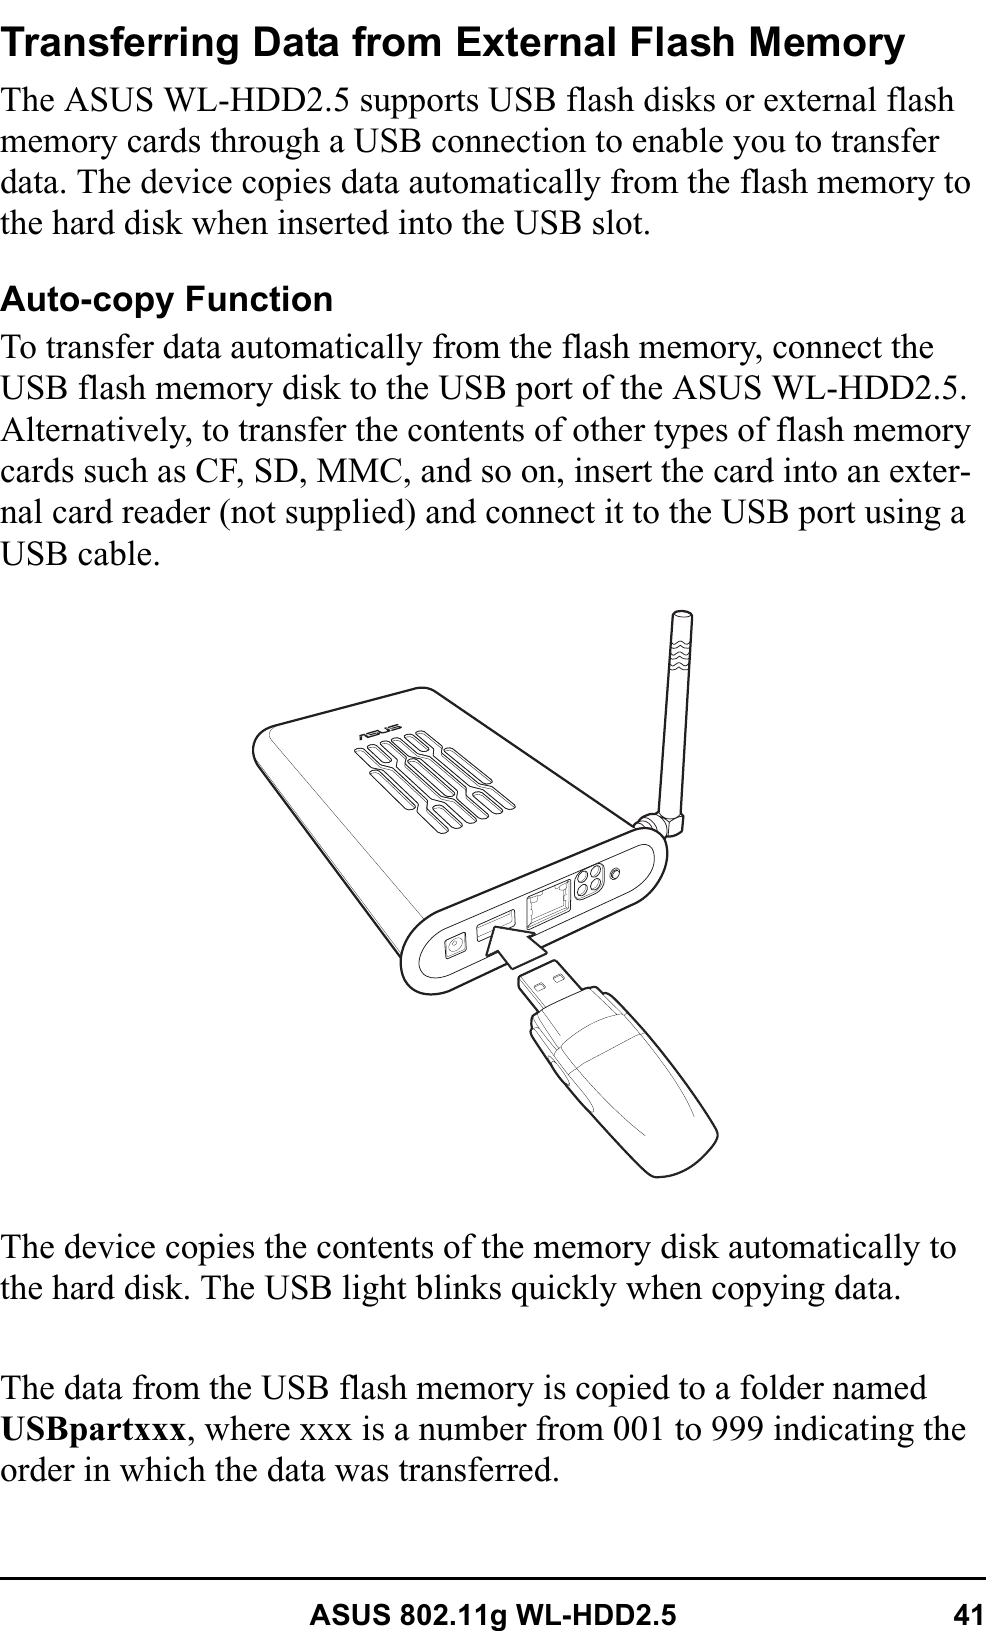
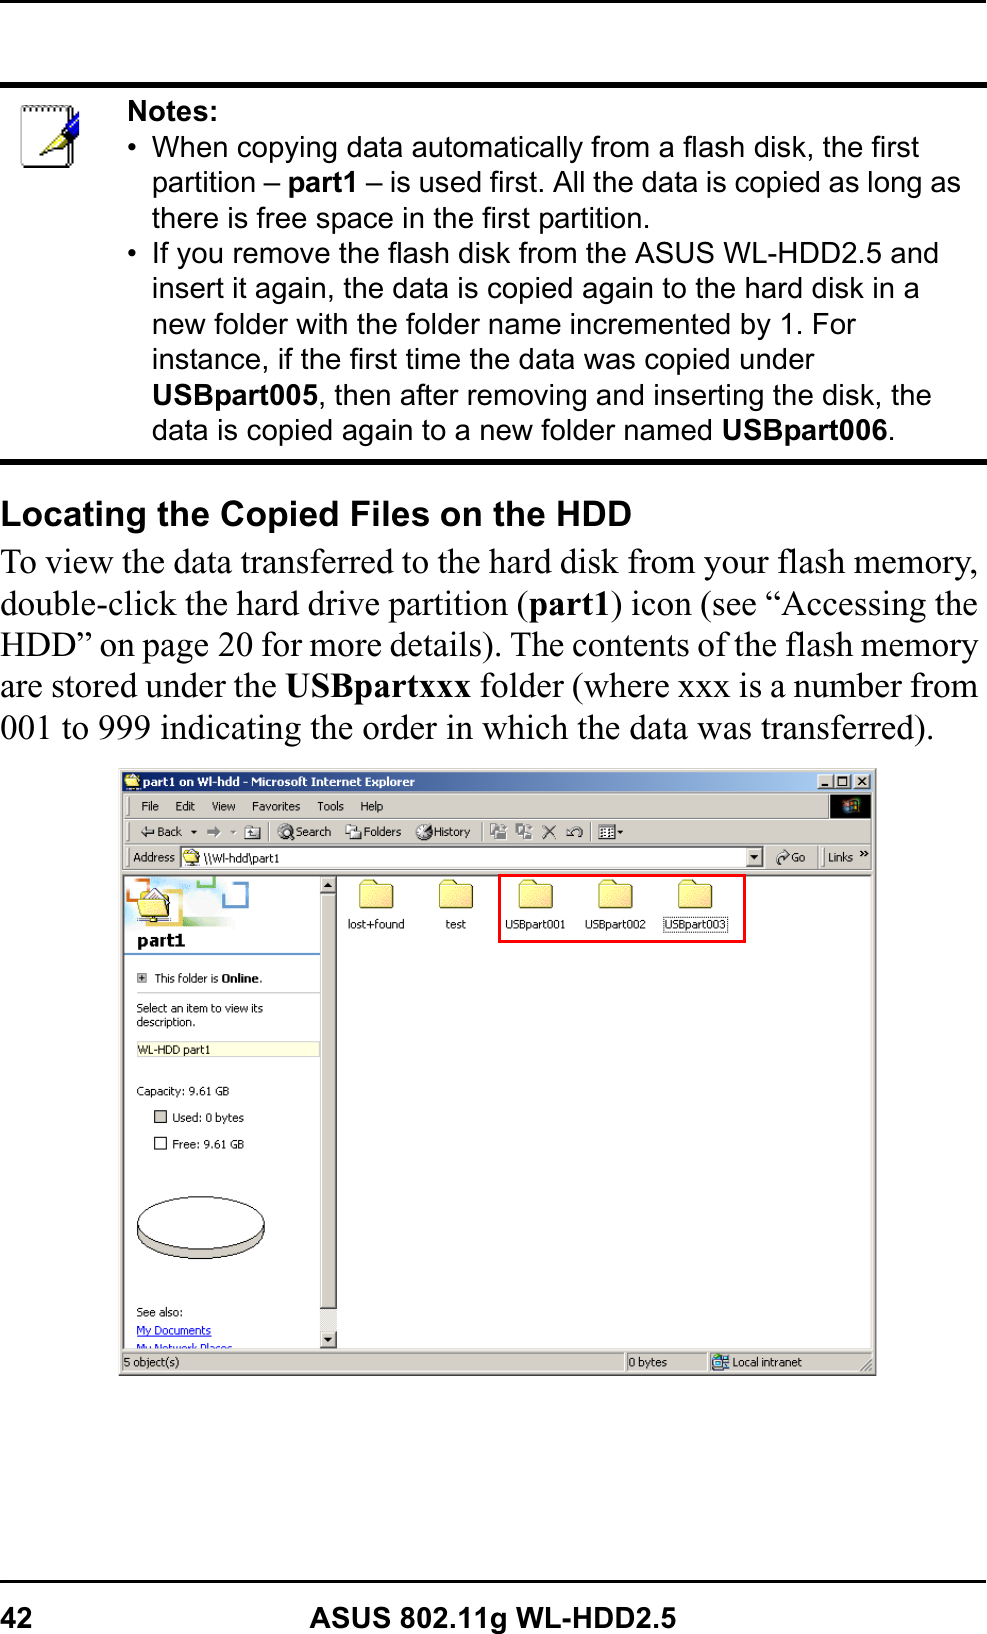
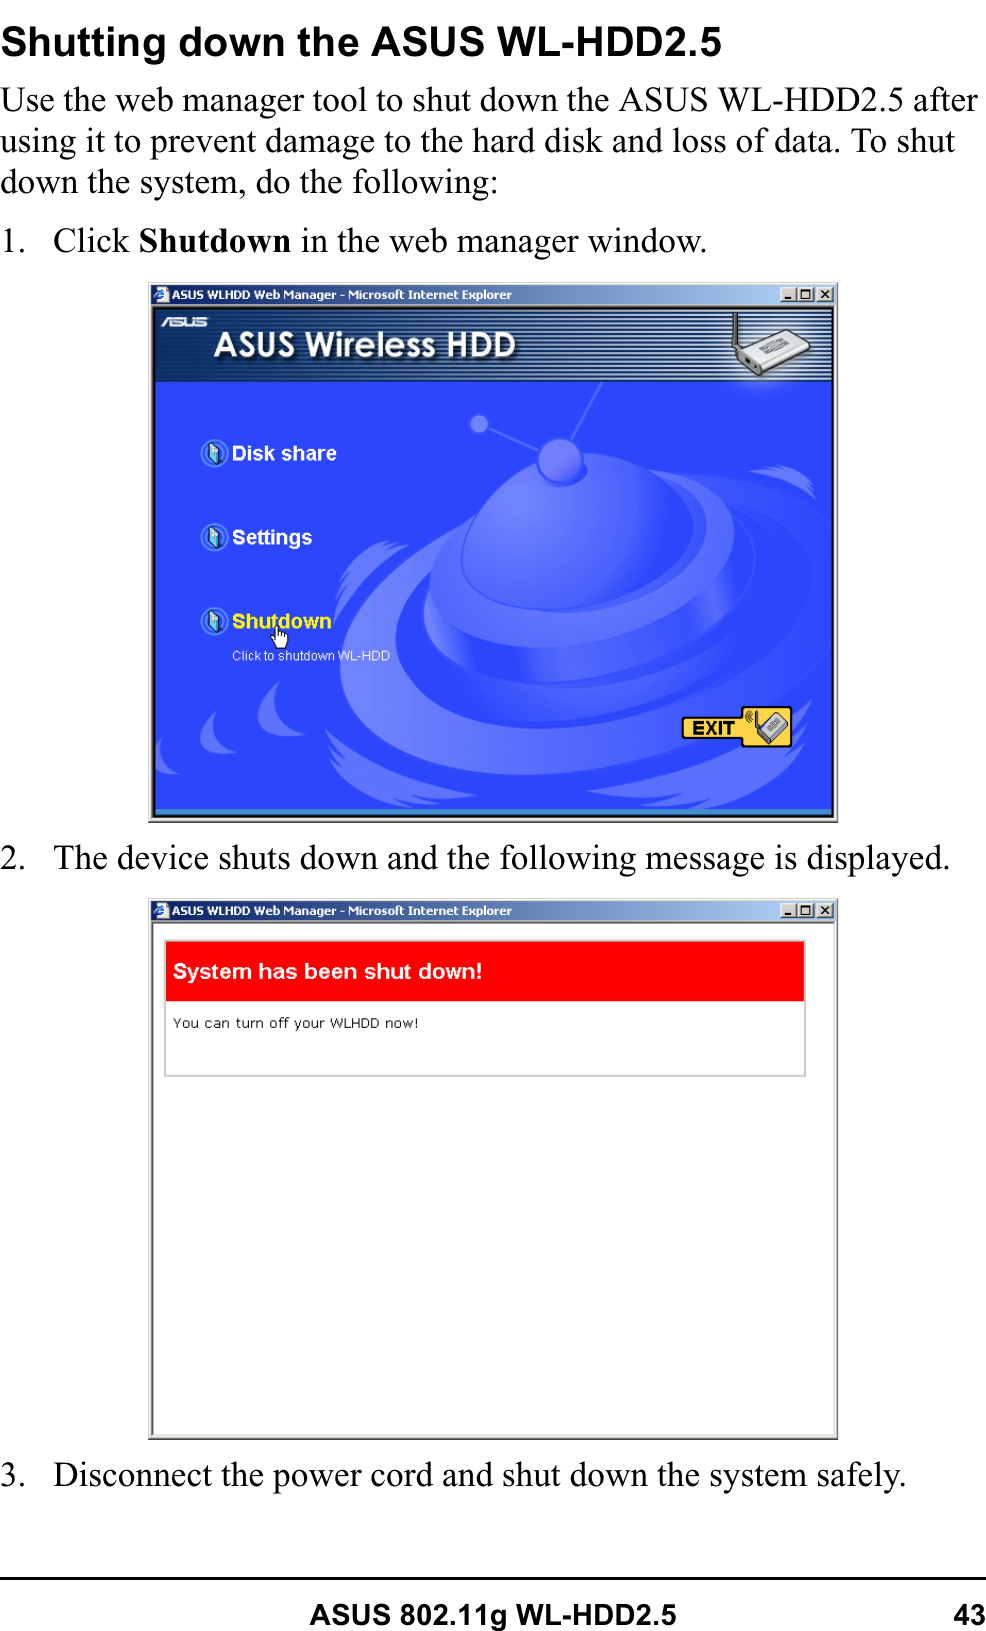
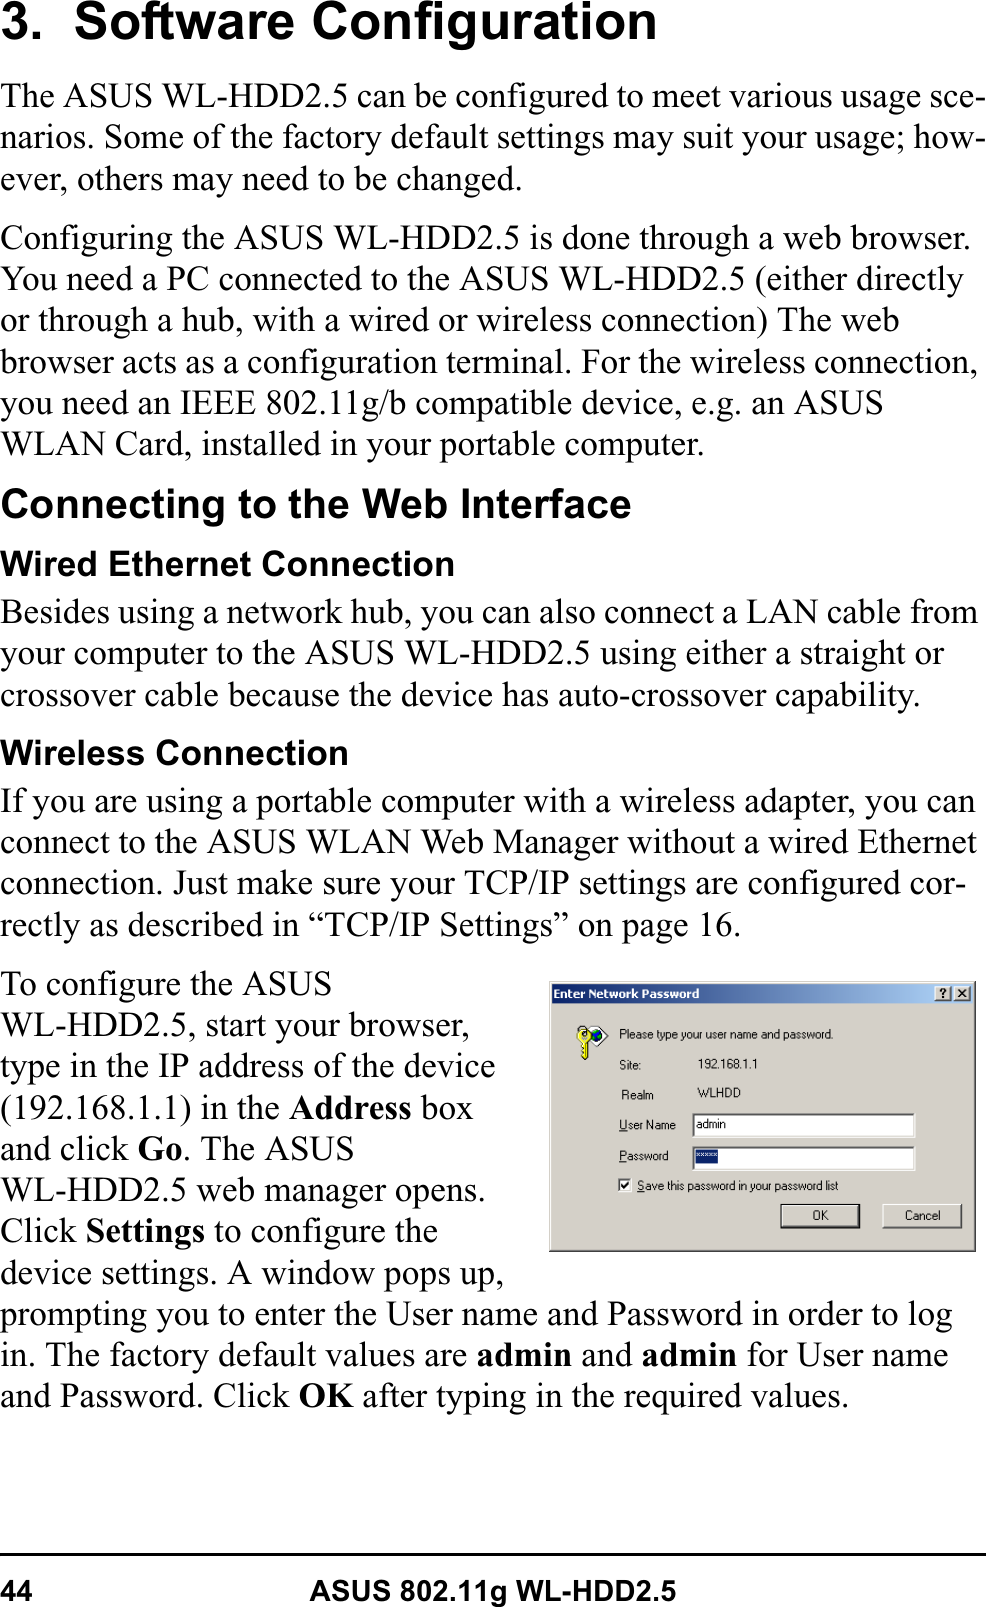
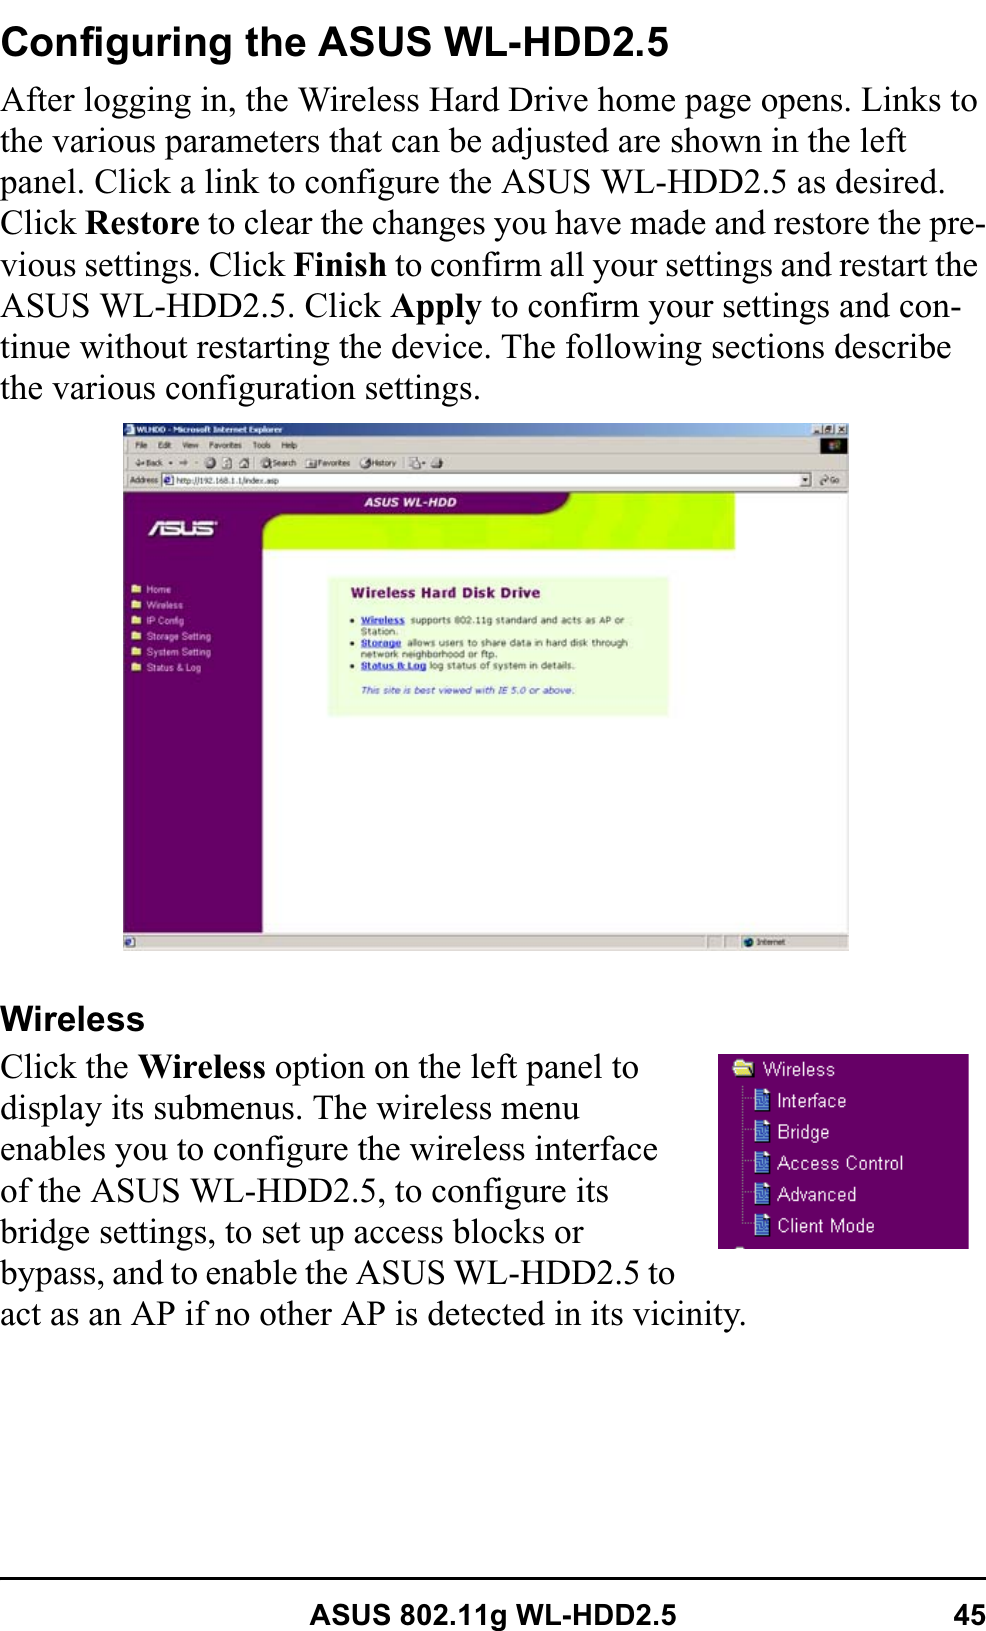
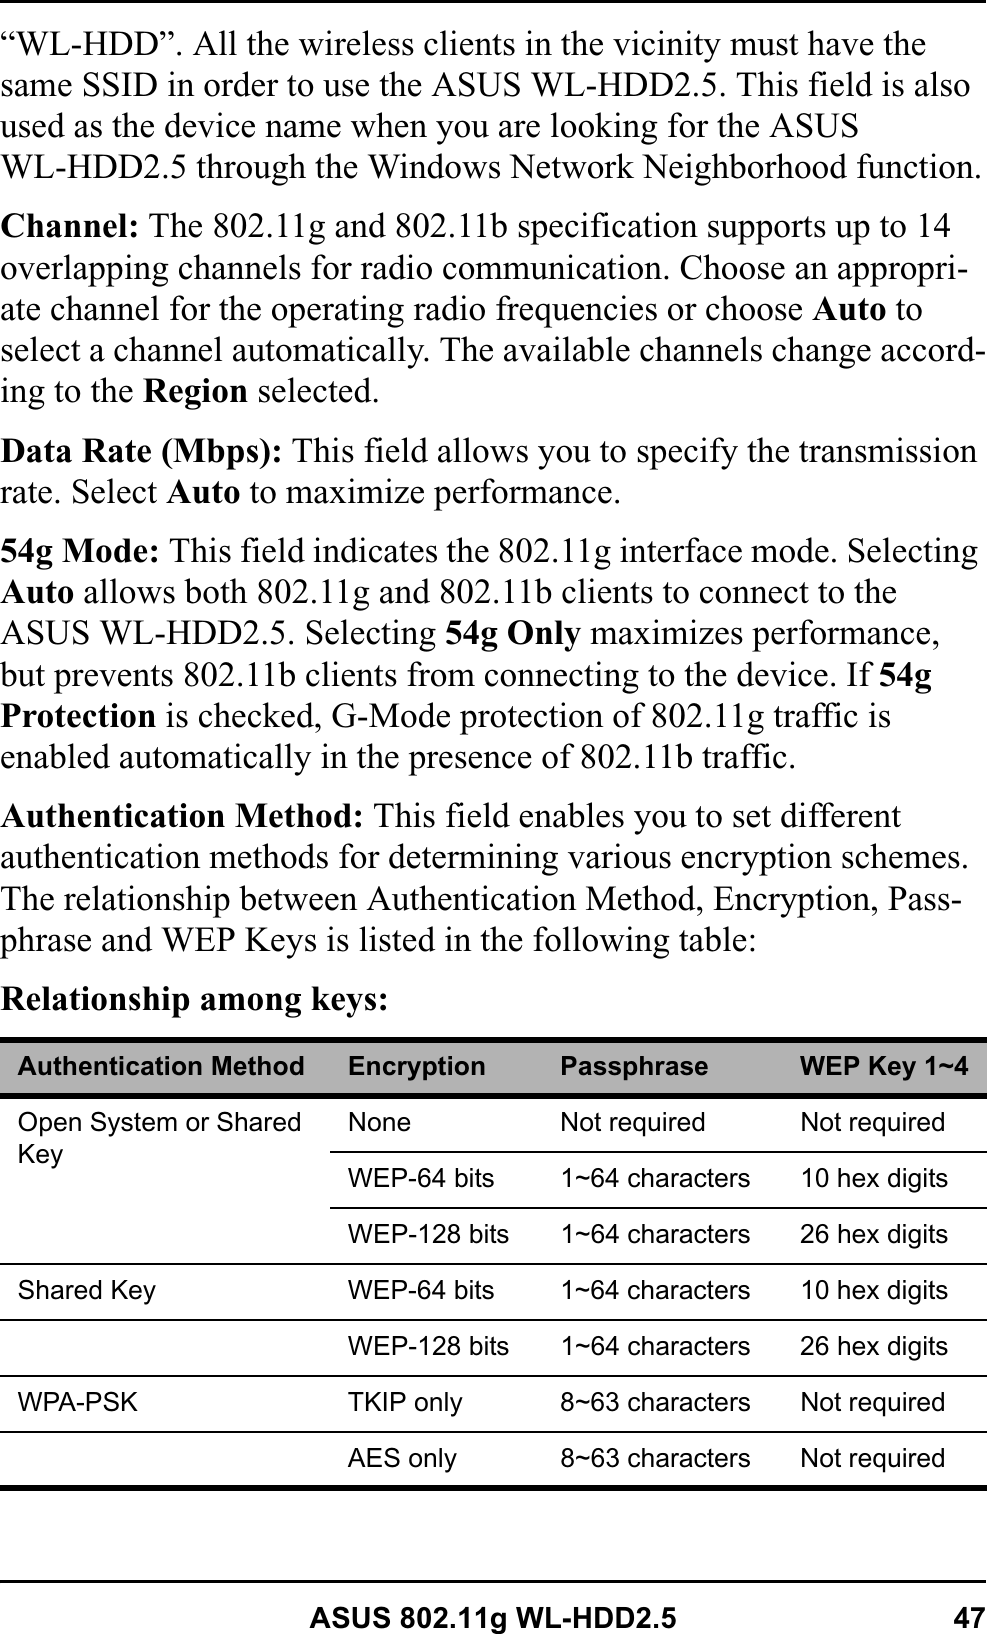
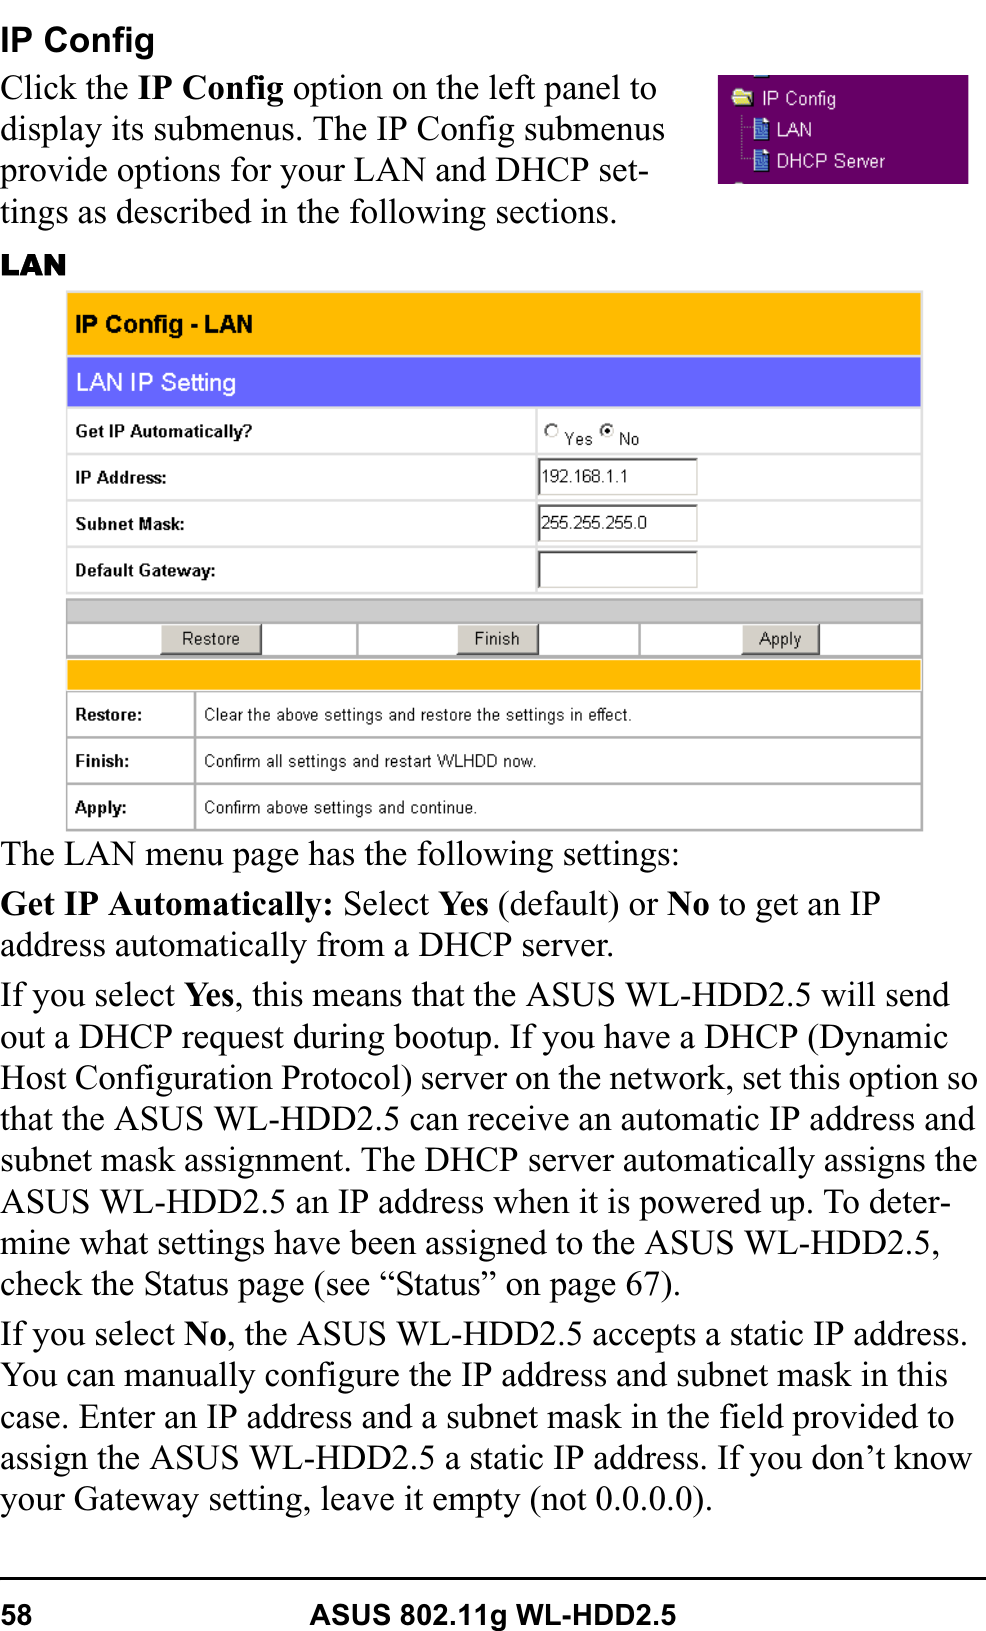
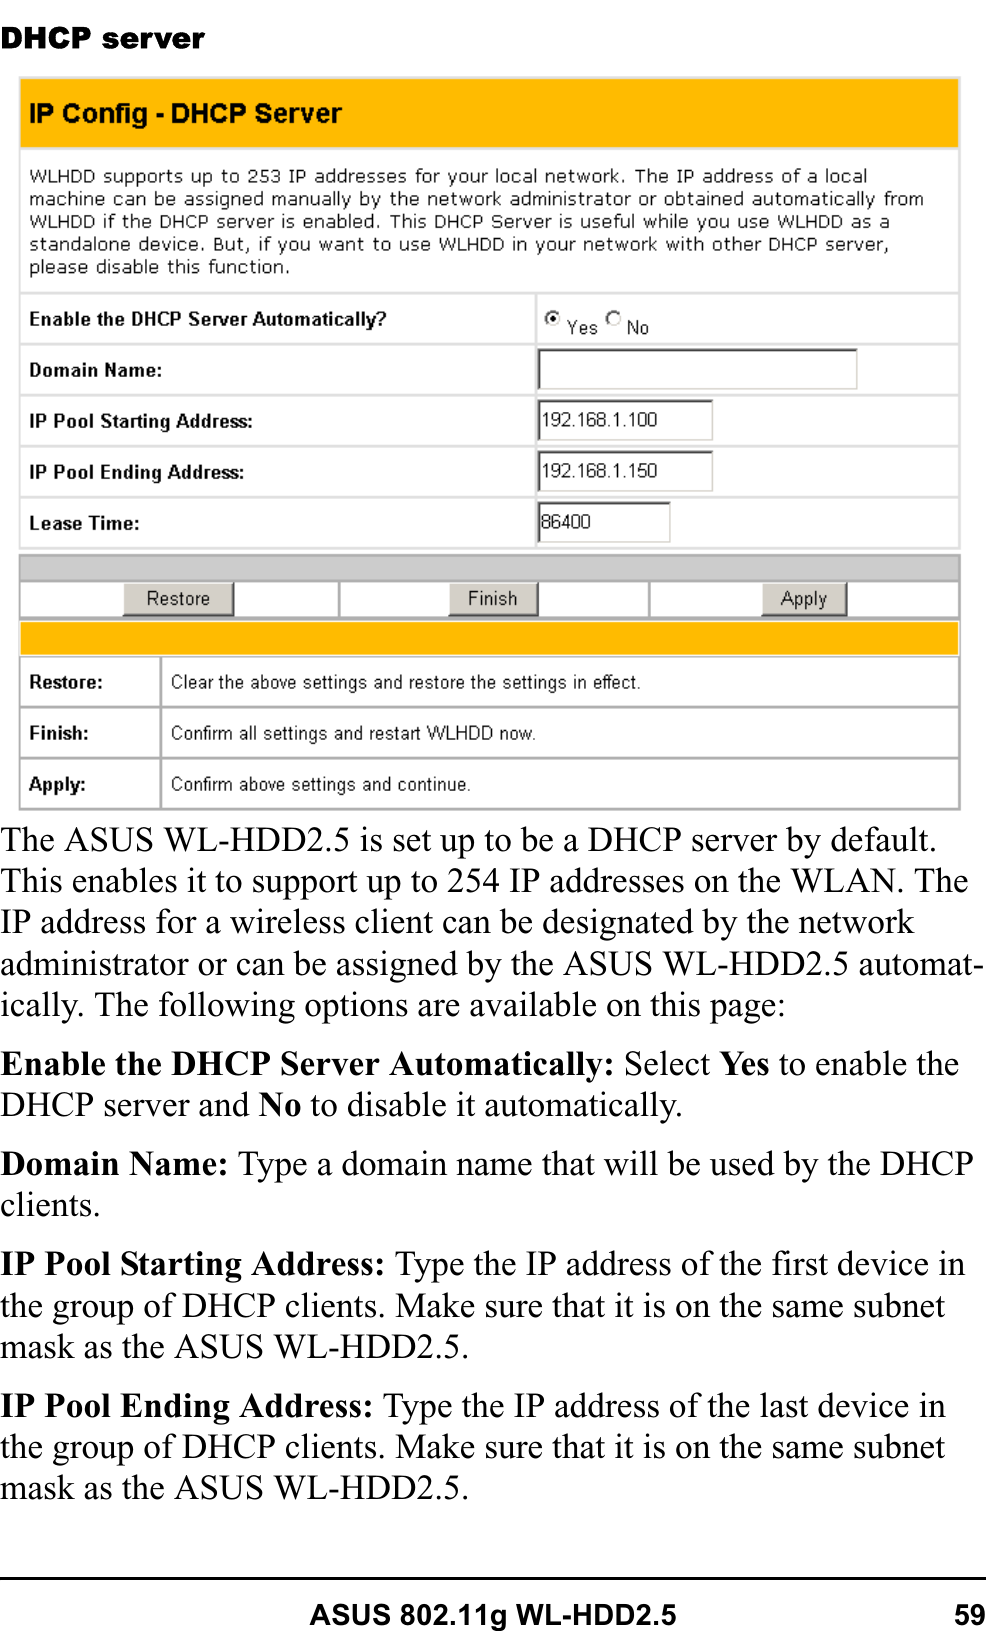
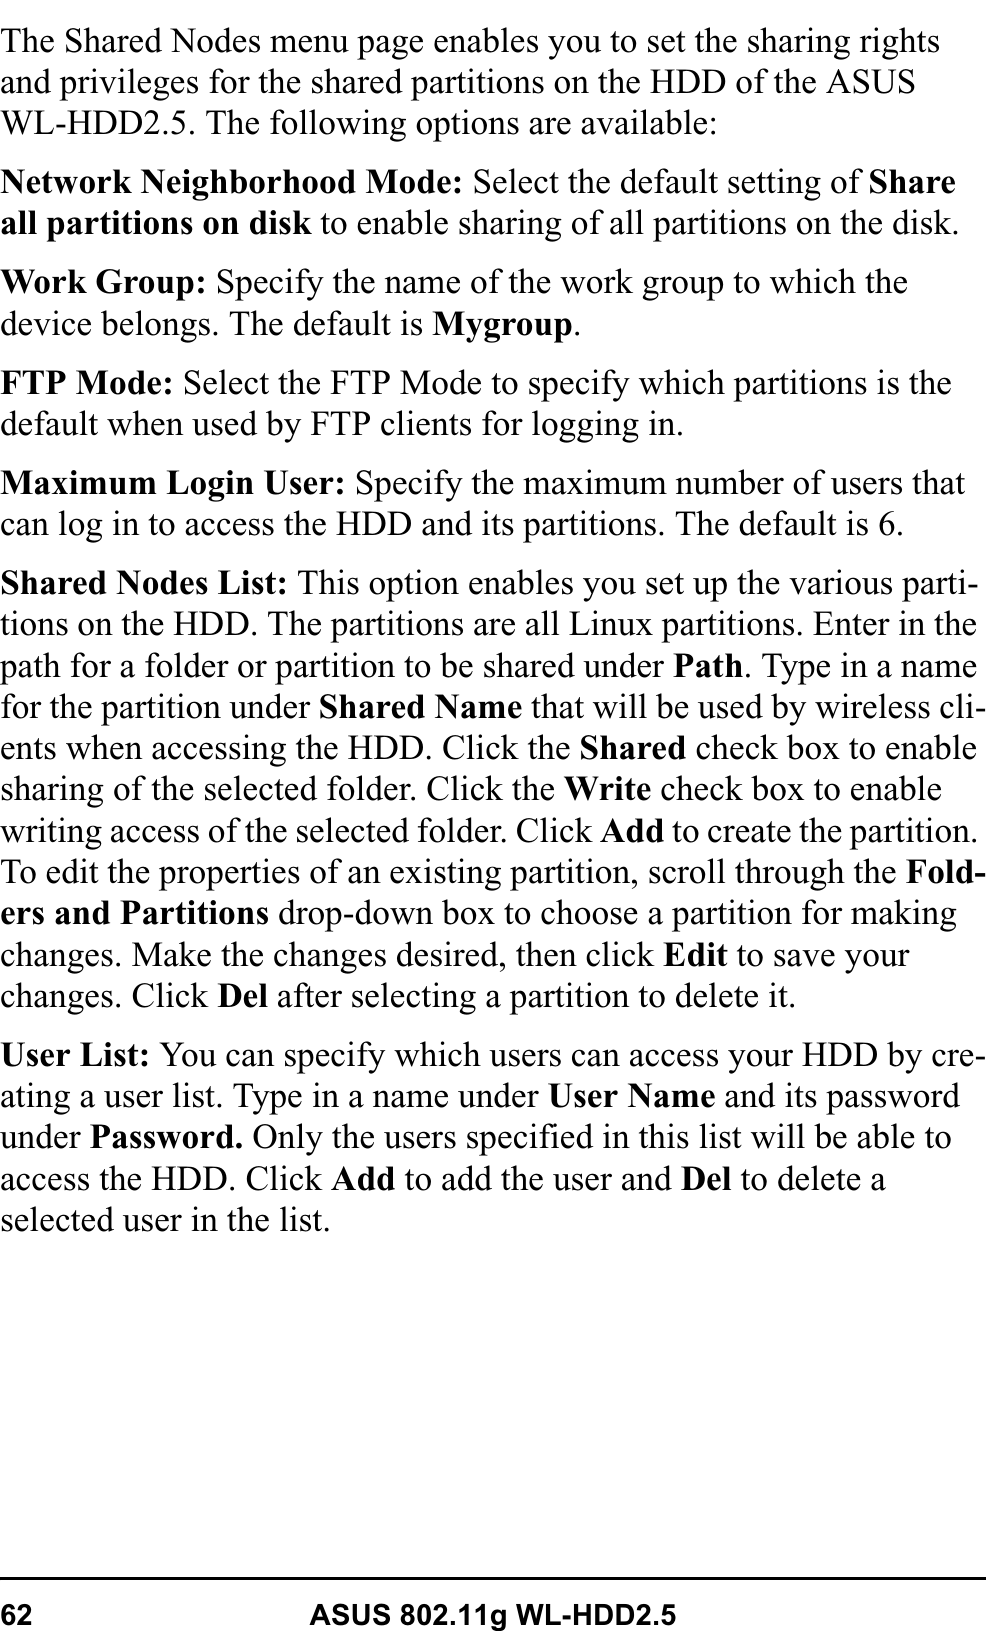
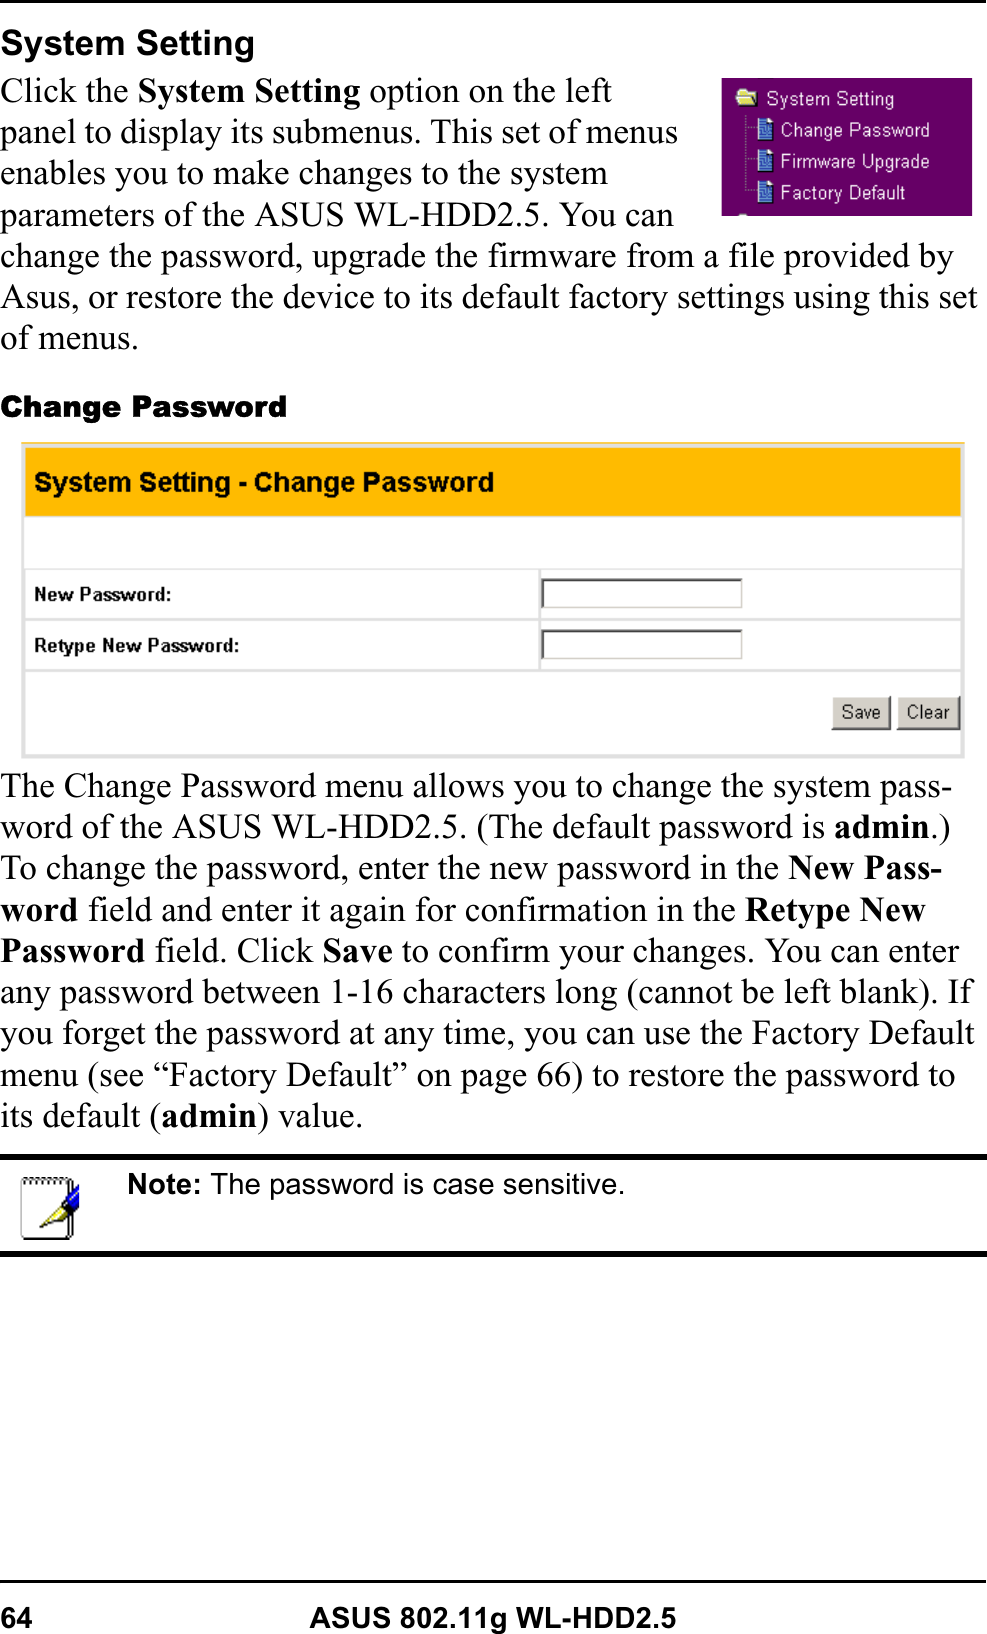
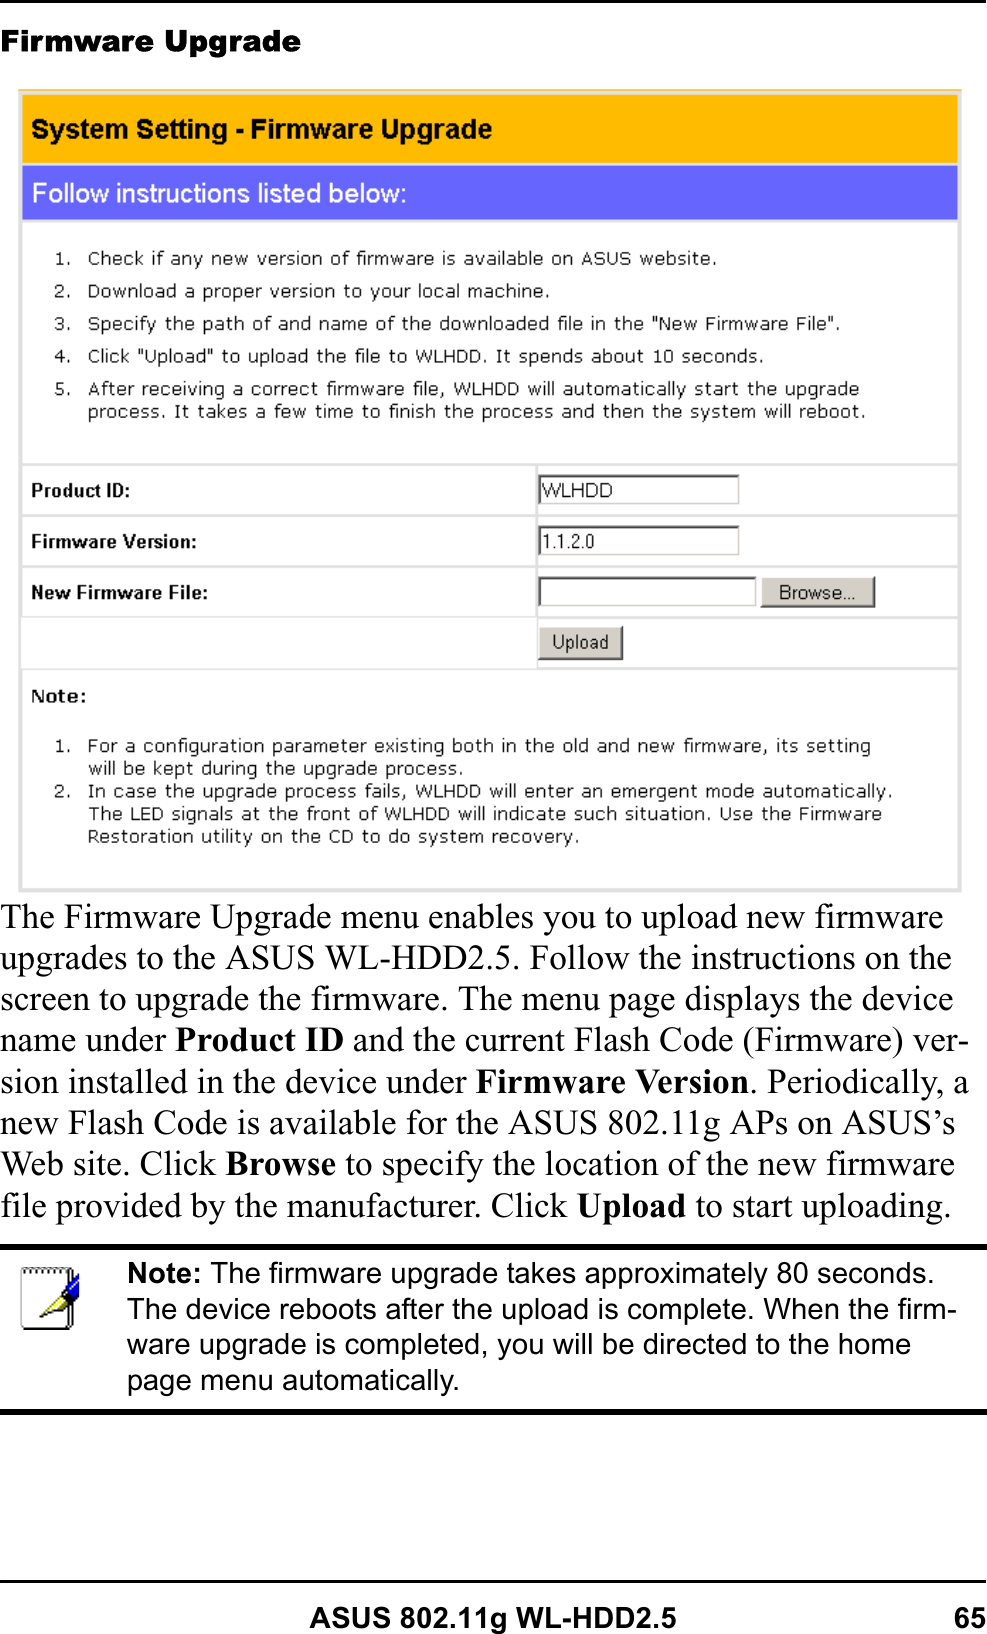
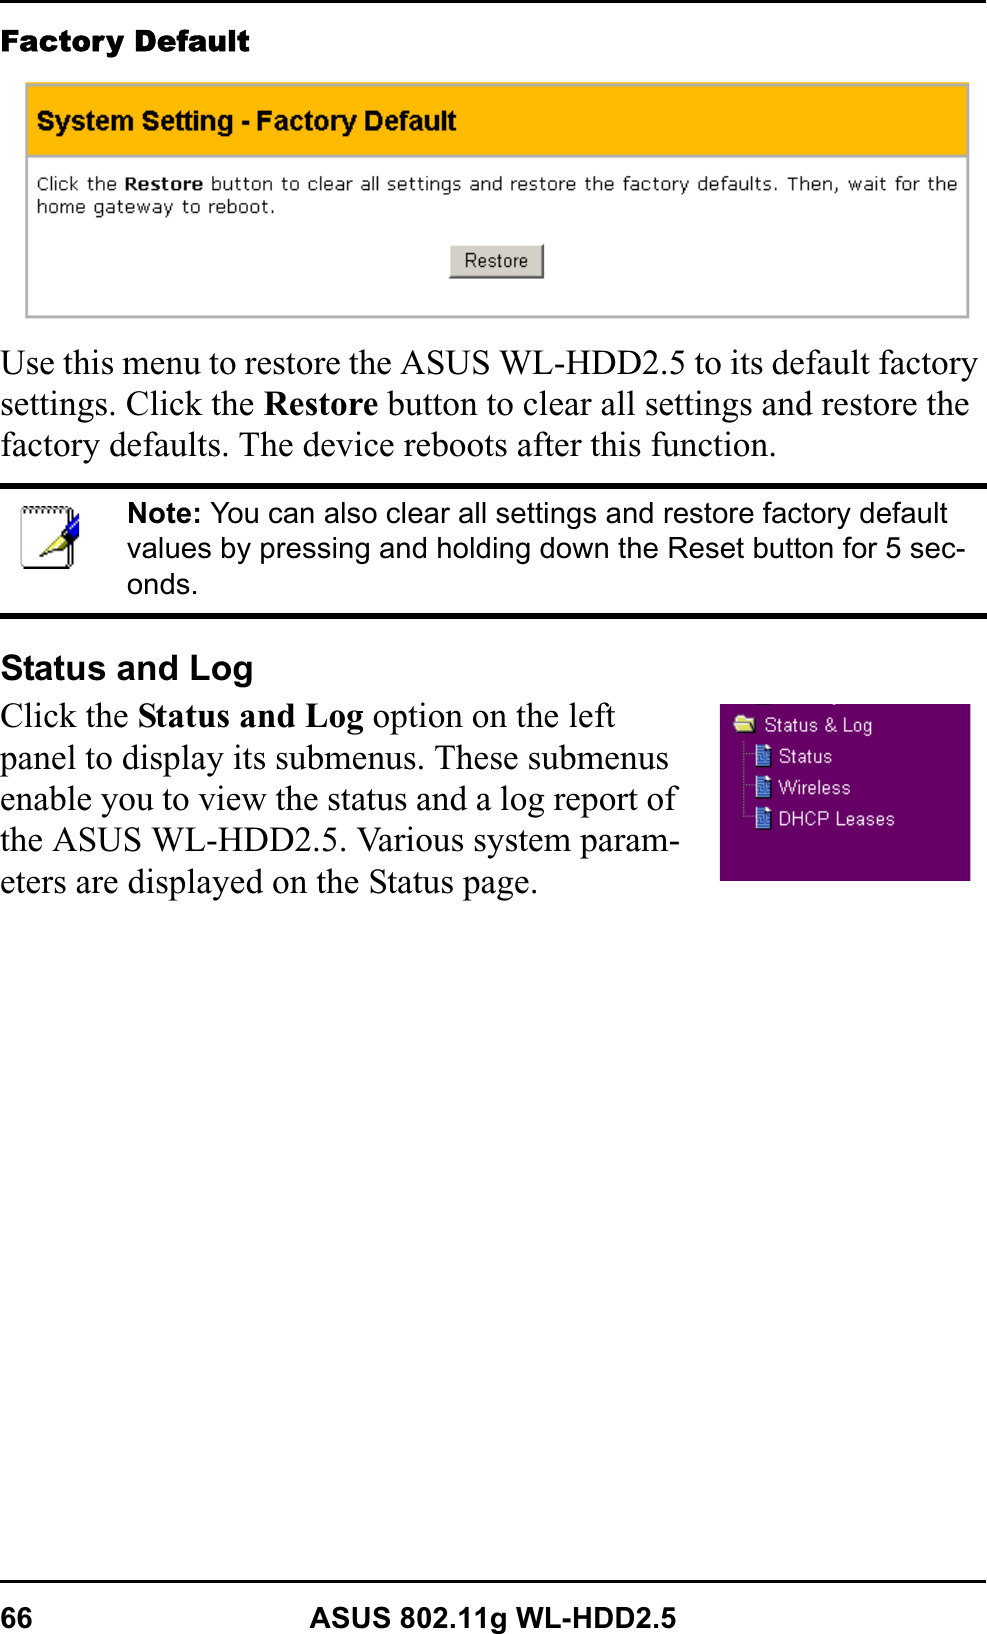
![48 ASUS 802.11g WL-HDD2.5Encryption: If the Open System or Shared Key or Shared Keyauthentication method is used, WEP (Wired Equivalent Privacy) encryption is applied. If the WPA-PSK method is used, a newly pro-posed TKIP or AES encryption in WPA is applied. Enabling WEP can protect your data from eavesdroppers. If you do not need this feature, select None to skip the following setting. The ASUS WL-HDD2.5 supports both 64-bit and 128-bit encryption using the WEP algorithm. Select the type of encryption you want to use (64 or 128 bit) and configure one to four WEP Keys. The 128-bitmethod is more secure than the 64-bit method.64/128 bits versus 40/104 bits: You may be confused about config-uring WEP encryption, especially when using multiple wireless LAN products from different vendors. There are two levels of WEP Encryption: 64 bits and 128 bits. 64-bit WEP and 40-bit WEP are the same encryption method and can inter-operate in the wireless net-work. This lower level of WEP encryption uses a 40 bit (10 hex digits [0~9, a~f, and A~F]) as a “secret key” (set by user), and a 24 bit “ini-tialization vector” (not under user control). This together makes 64 bits (40 + 24). Some vendors refer to this level of WEP as 40 bits and others refer to this as 64 bits. Asus WLAN products use the term 64 bits when referring to this lower level of encryption. Secondly, 104 bit WEP and 128 bit WEP are the same encryption method and can inter-operate in the wireless network. This higher level of WEP encryption uses 104 bits (26 hex digits) as a “secret key” (set by user), and a 24 bit “initialization vector” (not under user control). This together makes 128 bits (104 + 24). Some vendors refer to this level of WEP as 104 bits and others refer to this as 128 bits. ASUS WLAN products use the term 128 bits when referring to this higher level of encryption.Passphrase: If you select TKIP only or AES only as the Encryption method, this field will be used as a password for the encryption pro-cess. A password with 8 to 63 characters is required. If you select WEP-64 bits or WEP-128 bits as the Encryption method, this field will be used to generate four WEP keys automatically. A WEP key is either 10 or 26 hexadecimal digits based on whether you select 64 bit](https://usermanual.wiki/ASUSTeK-Computer/WLHDD25/User-Guide-455079-Page-56.png)