ATCOM TECHNOLOGY A68W IP Phone User Manual 15 A68W UserMan
ATCOM TECHNOLOGY CO., LIMITED IP Phone 15 A68W UserMan
UserManual.wiki
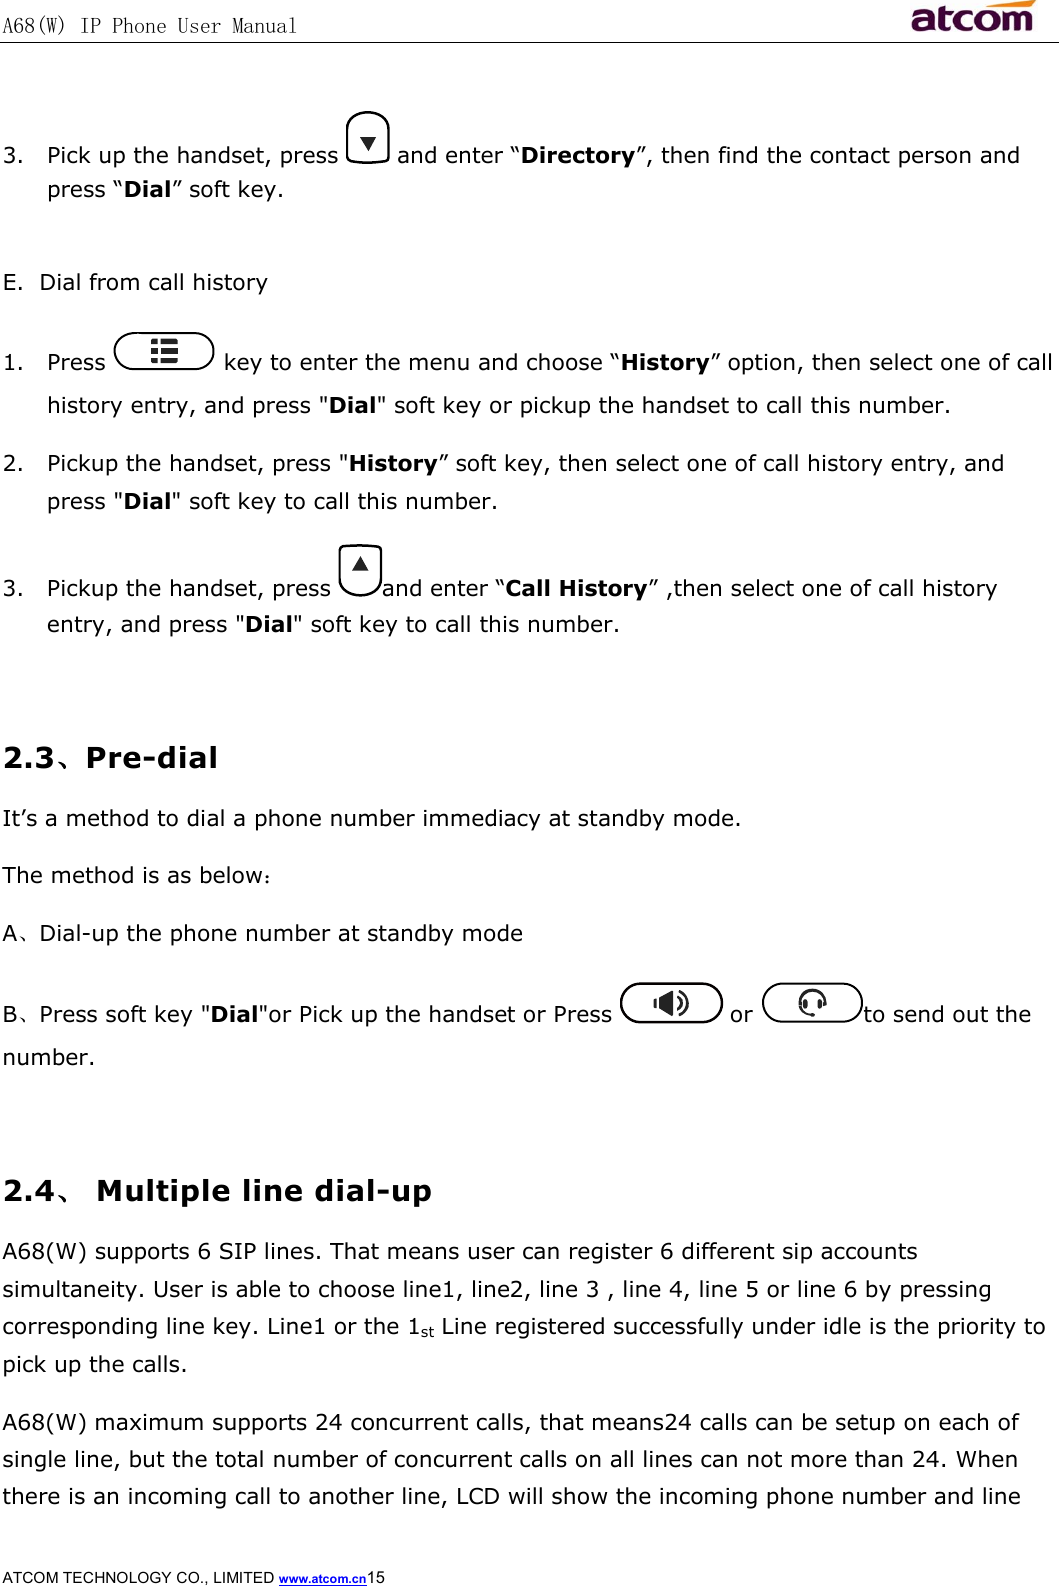
>
ATCOM TECHNOLOGY
>
A68W User Manual
15_A68W UserMan.pdf
Navigation menu
Upload a User Manual
Namespaces
Wiki Guide
HTML
PDF
Info
Views
User Manual
Discussion / Help
Navigation
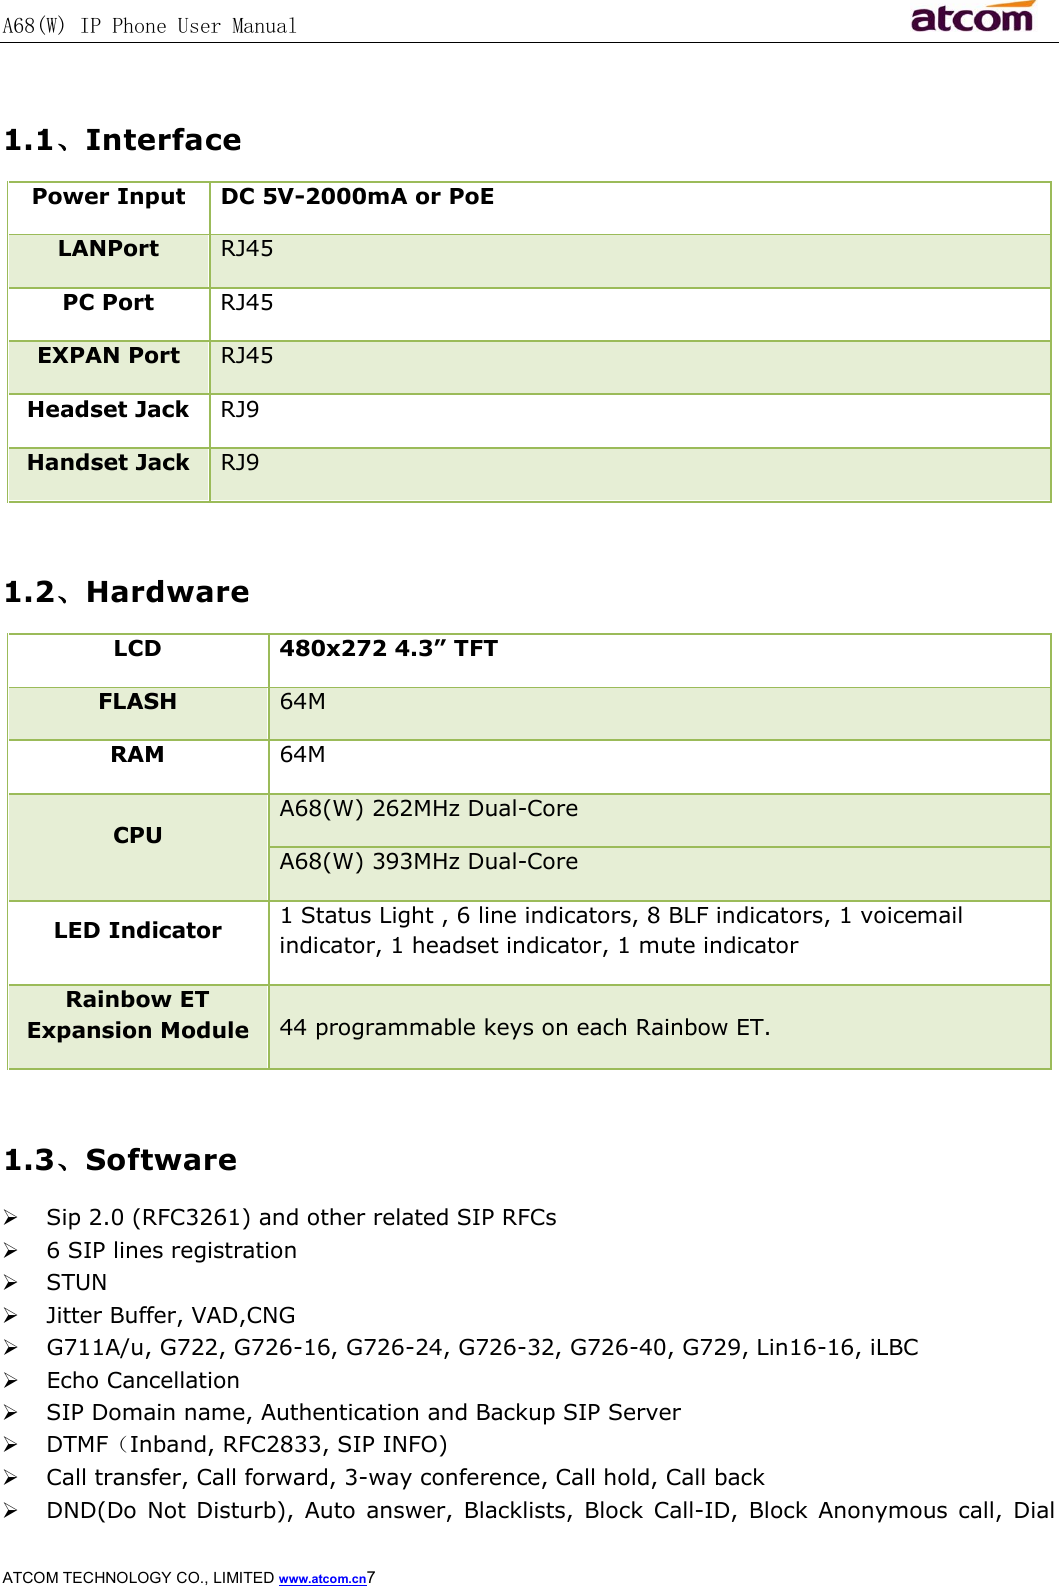

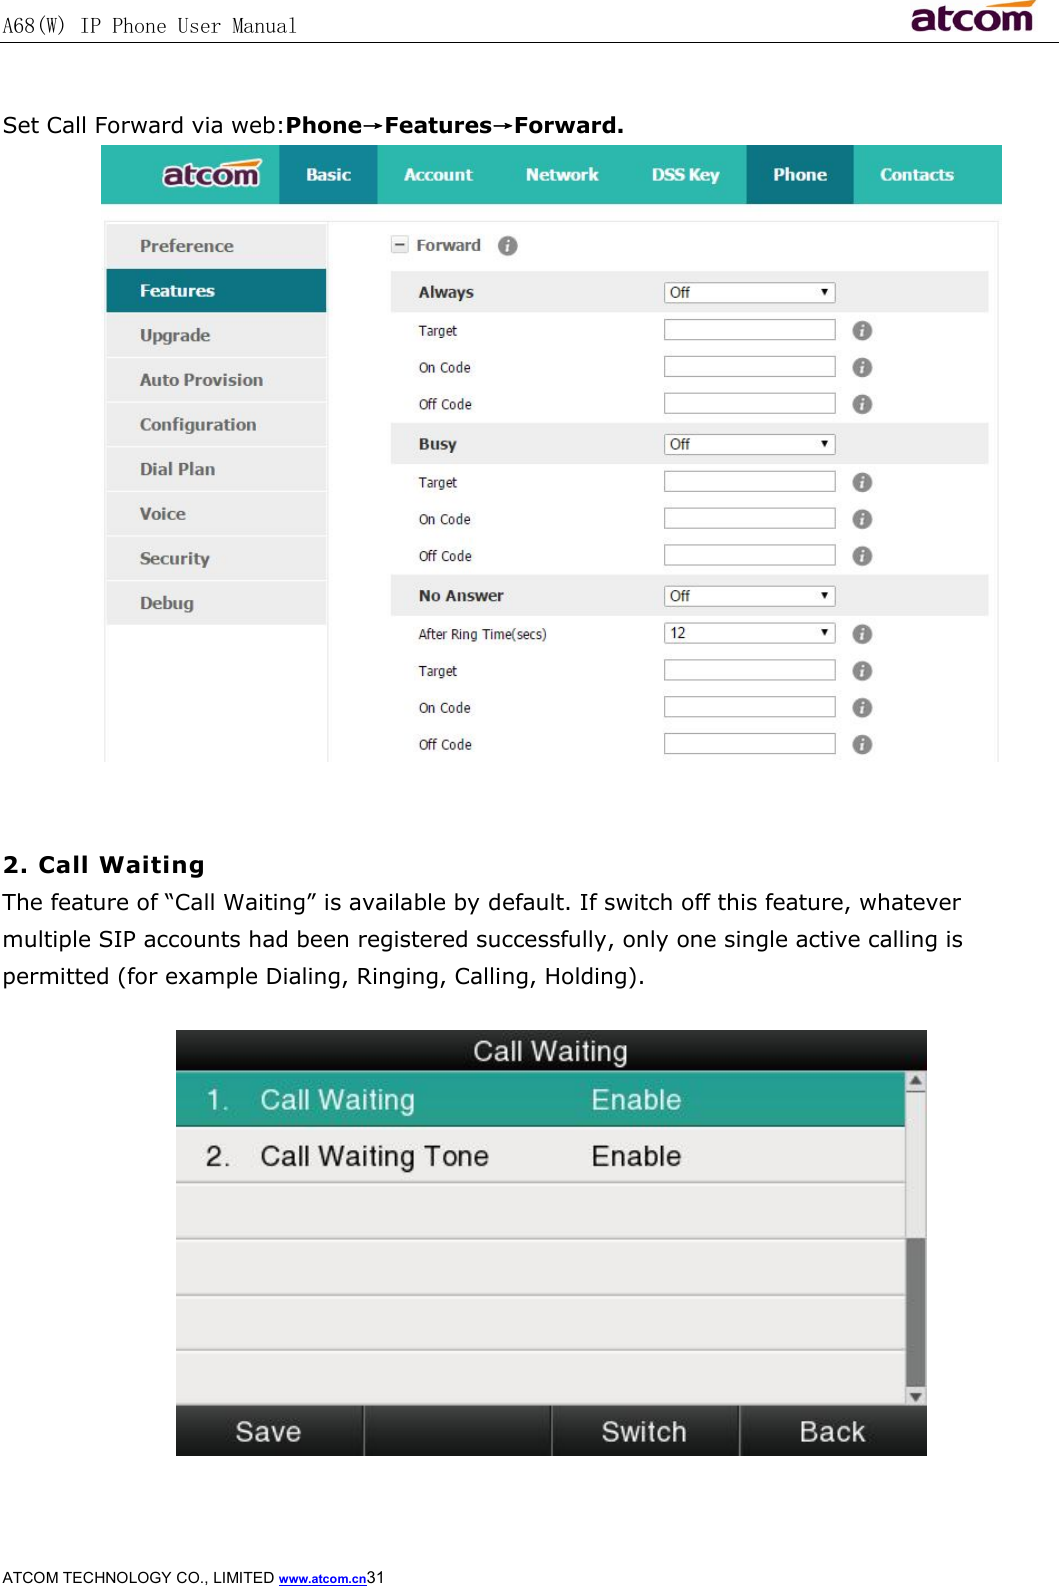
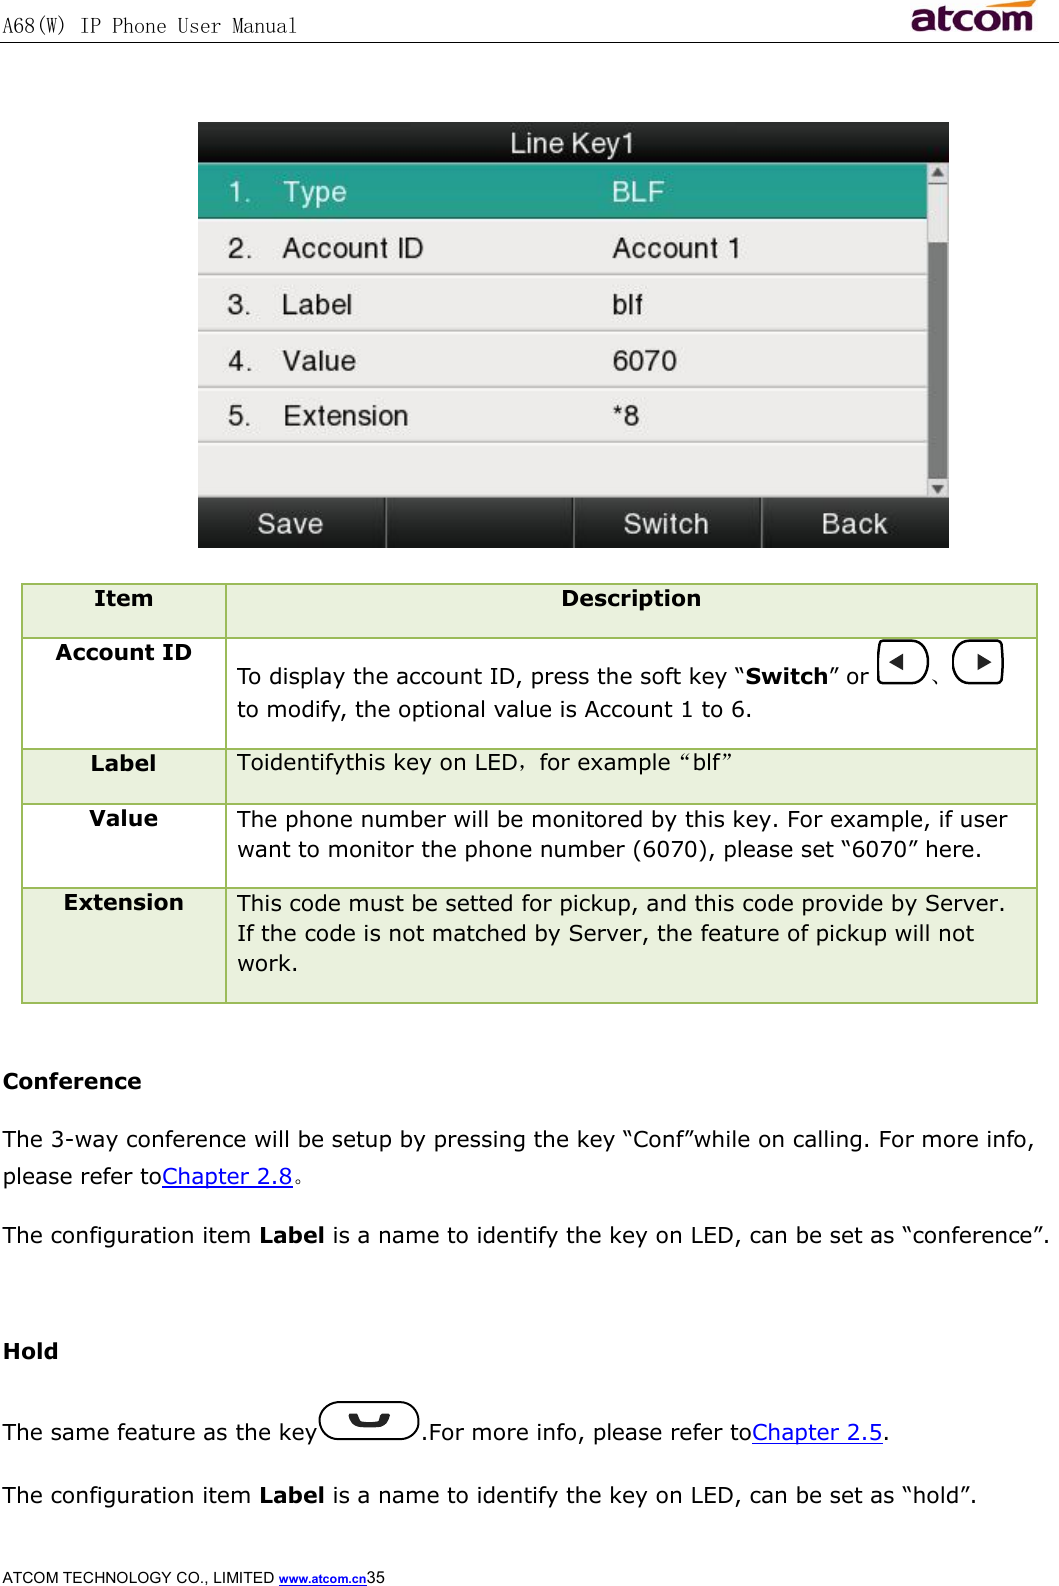


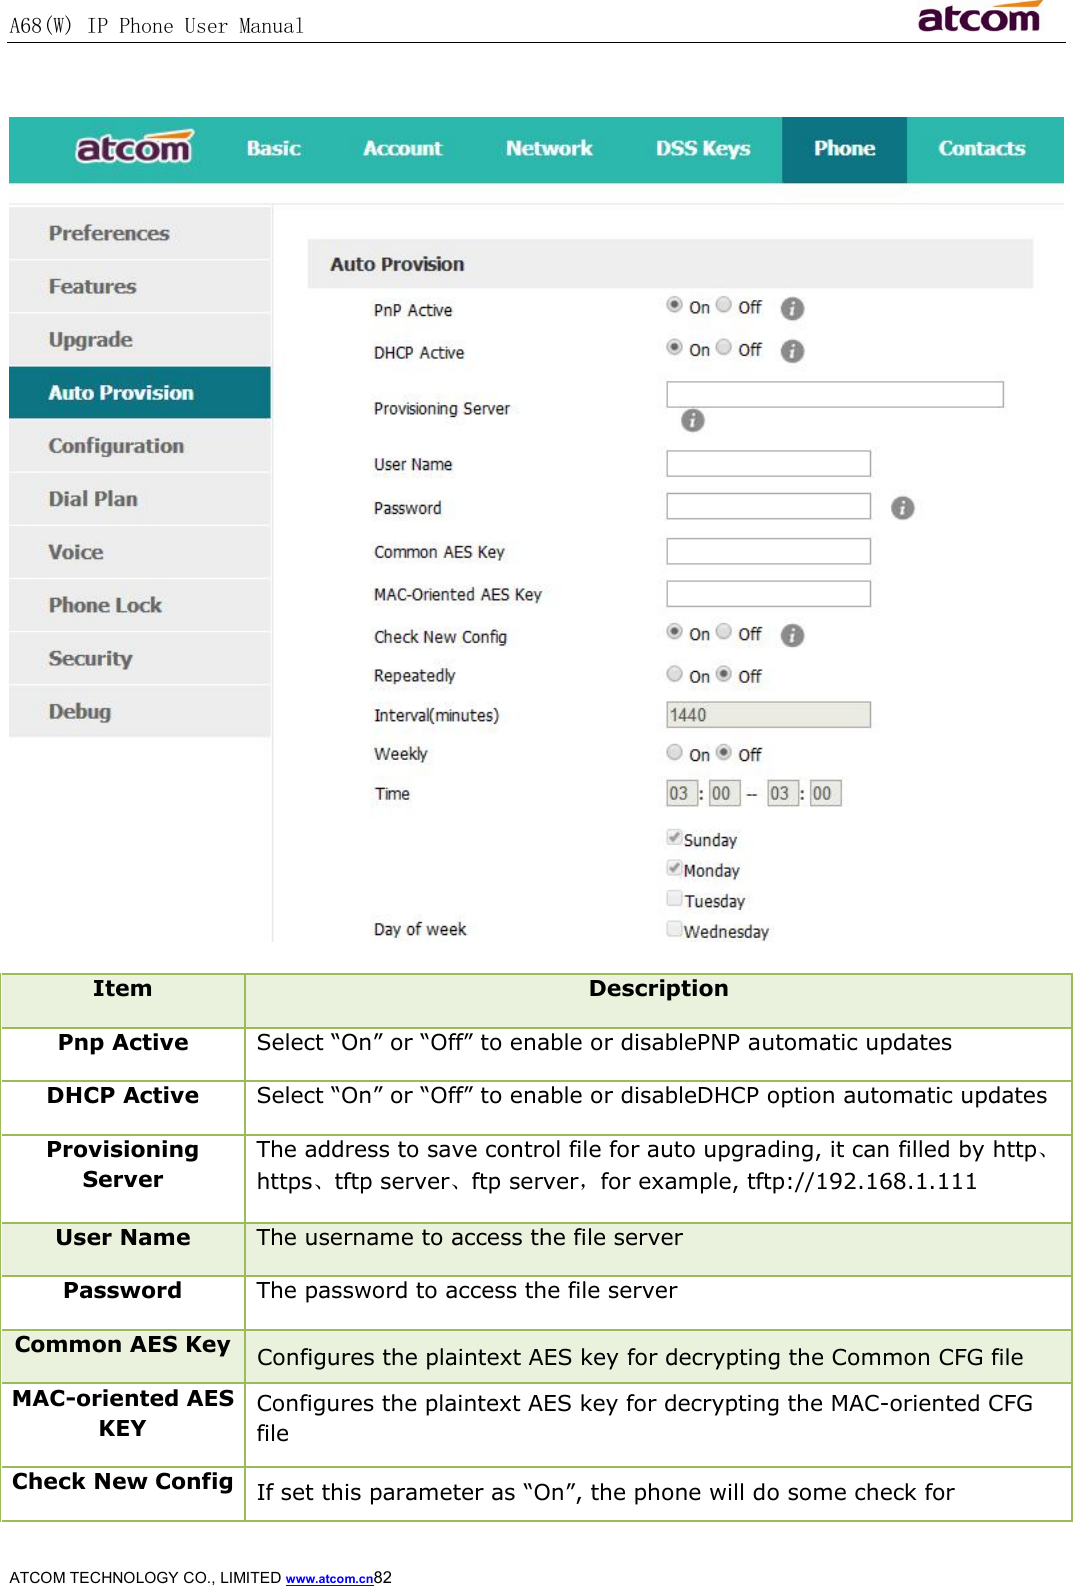

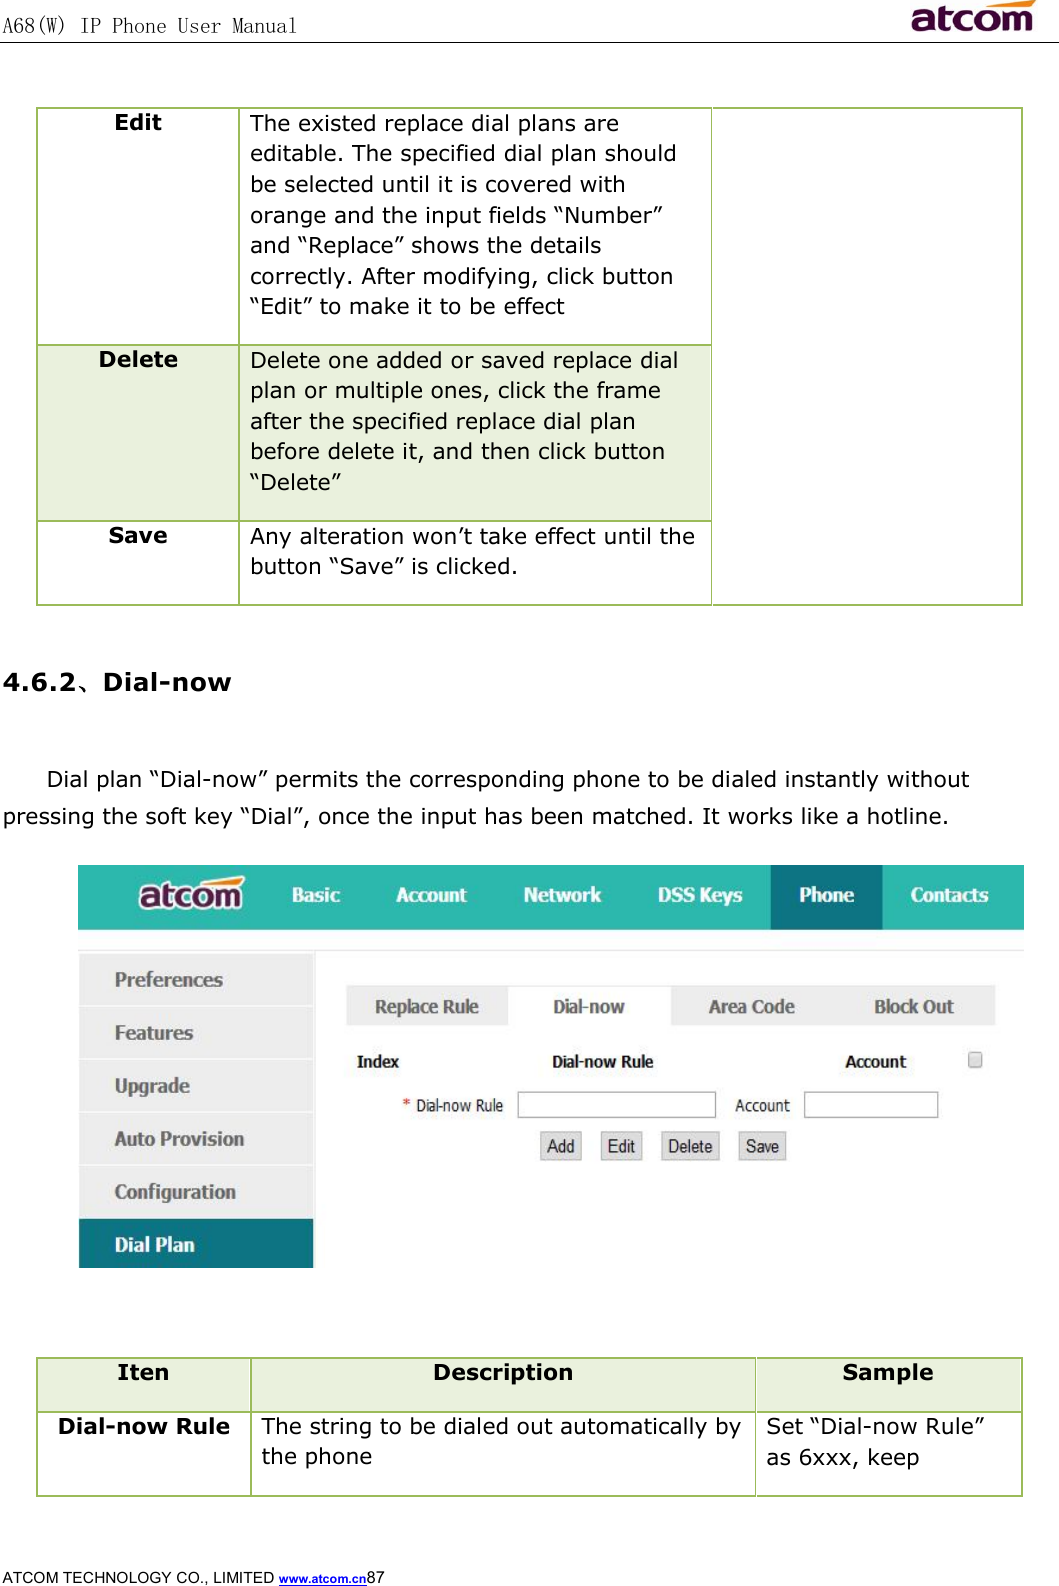
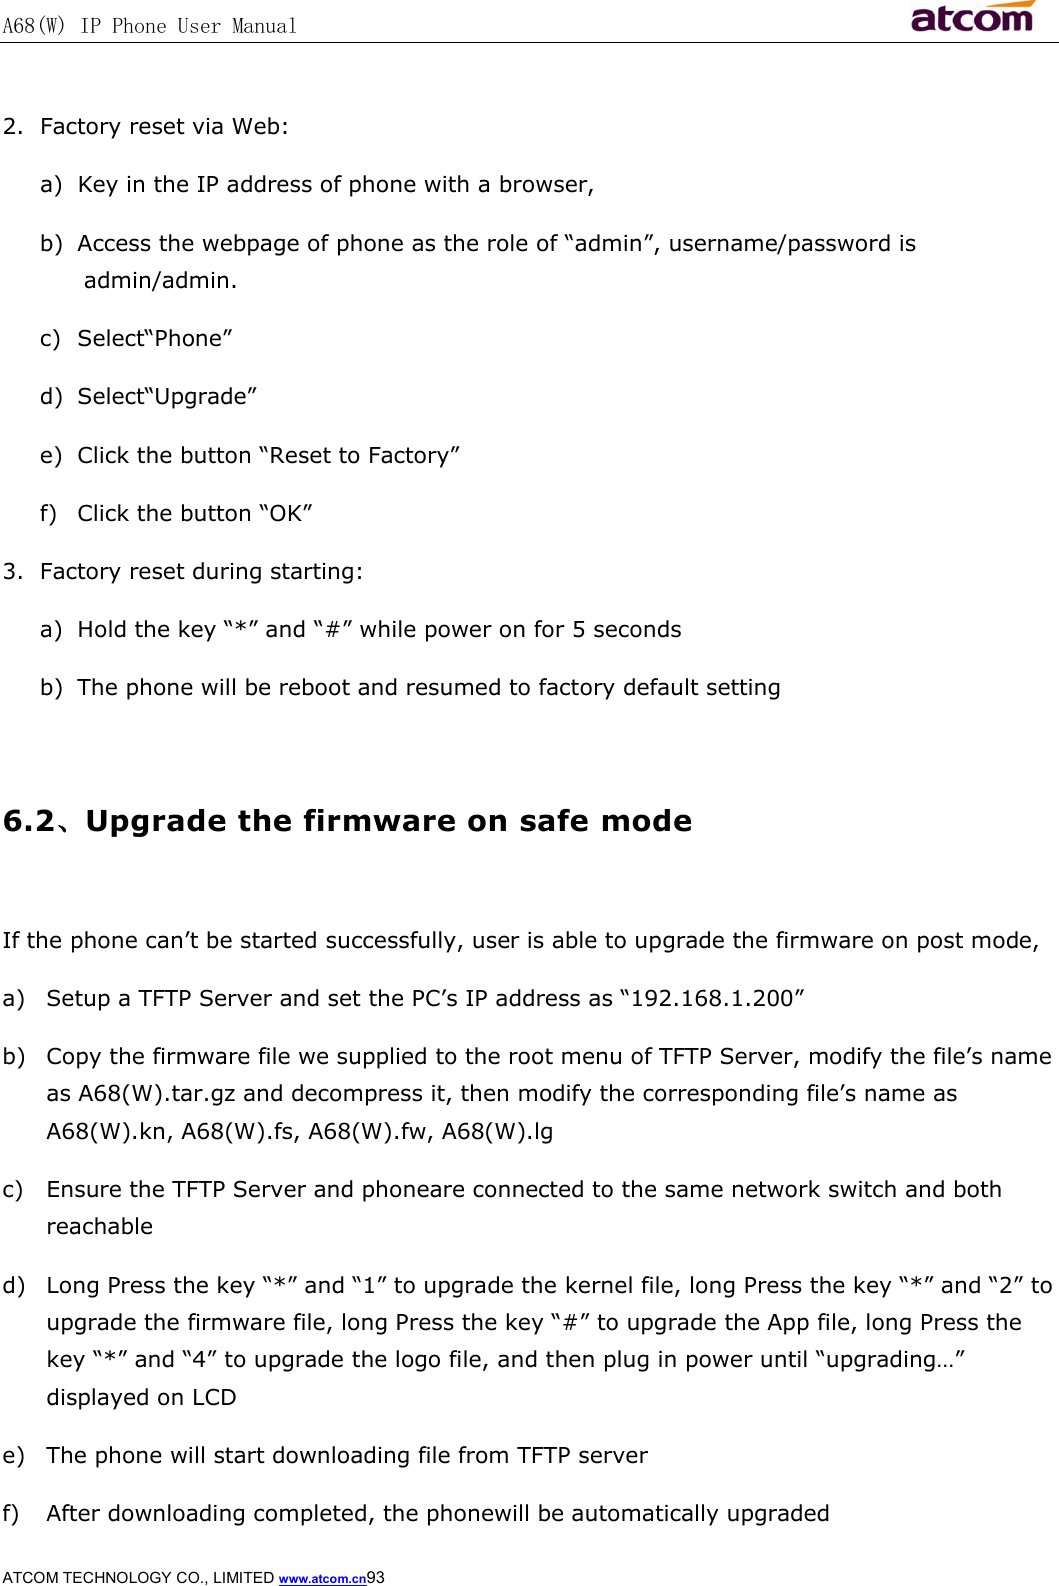
![A68(W) IP Phone User Manual ATCOM TECHNOLOGY CO., LIMITED www.atcom.cn85 Item Description Log Location You can import the system log to local PC or remote Server. Server Name User must fill the address of server if you choose to export the system log to remote server. Log Level It defines thedetail of system log as 5 different levels, Fatal, Error, Warning, Info, and Debug. The Debug level is the most detailed. 4.6、Dial plan The customized Dial Plan are available on Rainbow 4(s), for example , the rule of replacement, Instant Calling, Area code, Restriction of Outbound. Before customizing the dial plan, user must learn the basic grammar as below, . Represent acharacter or multiple ones,e.g., “6.” can match “66”,“678”,“6plus” and so on x Represent one character, e.g., “6x” can match “61”,“62”, “ 6s” and so on [] Represent a character in one range, e.g., “ 83[0-5]18618”can matche“83018618”,“83488618” and so on () Represent the combination of characters, e.g., “([1-9])([2-7])3” can match “923”,“153”,“773” and so on](https://usermanual.wiki/ATCOM-TECHNOLOGY/A68W/User-Guide-3013157-Page-85.png)
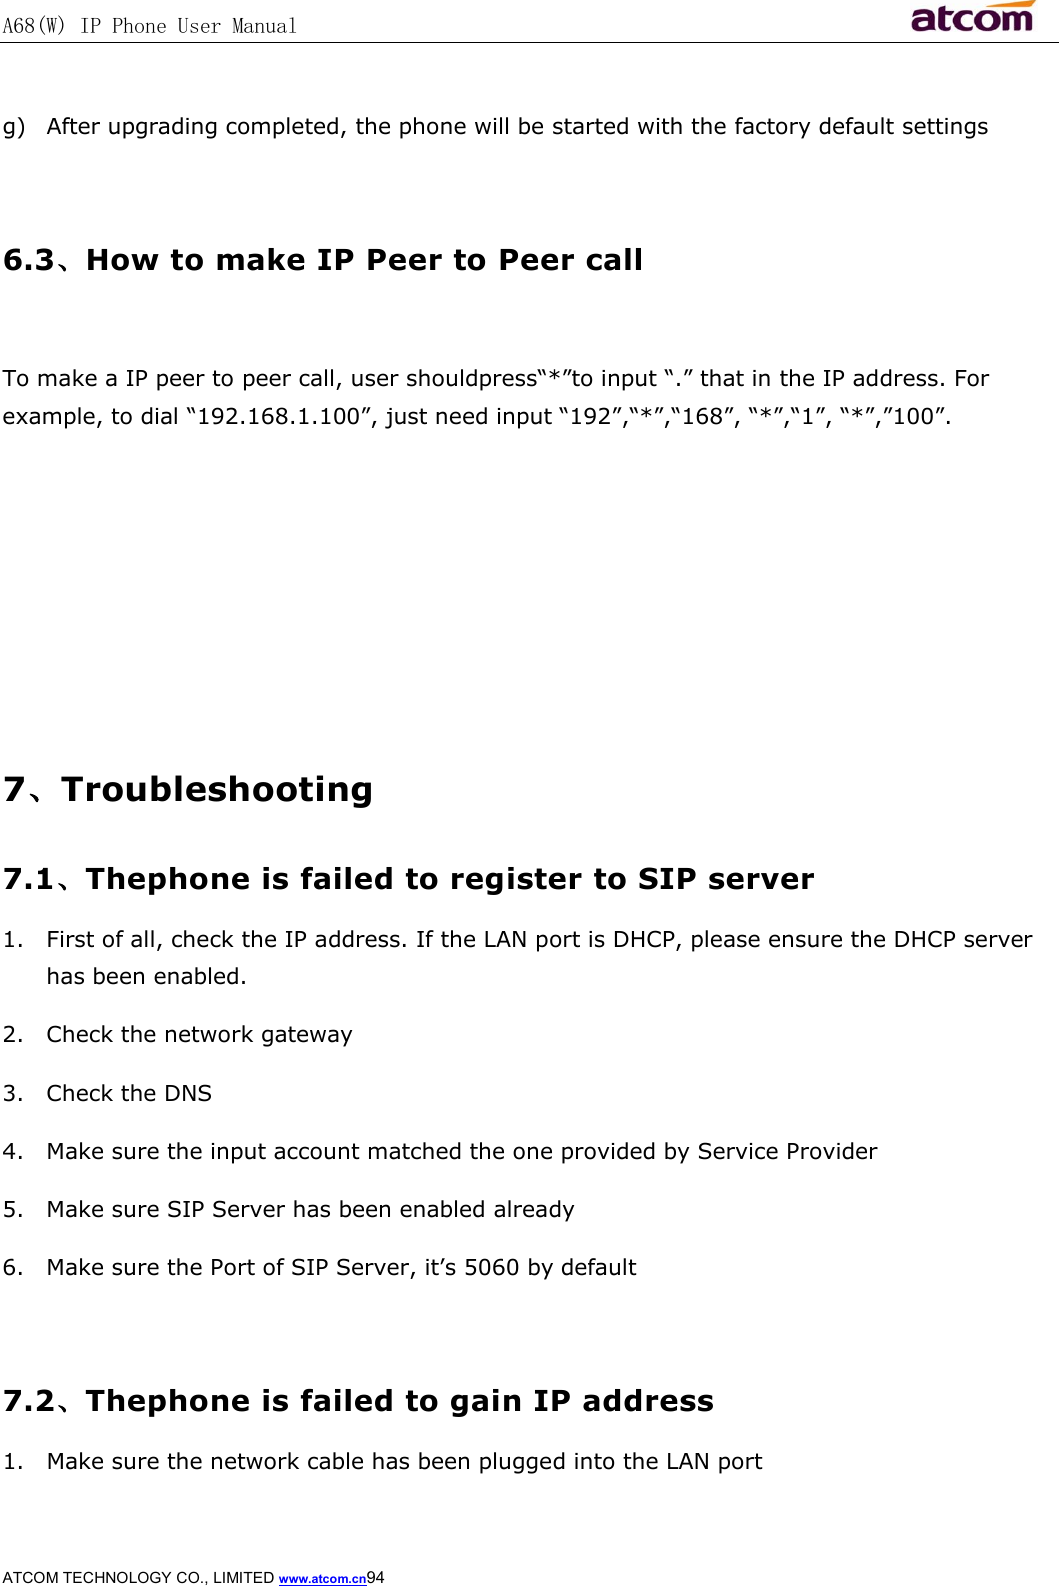
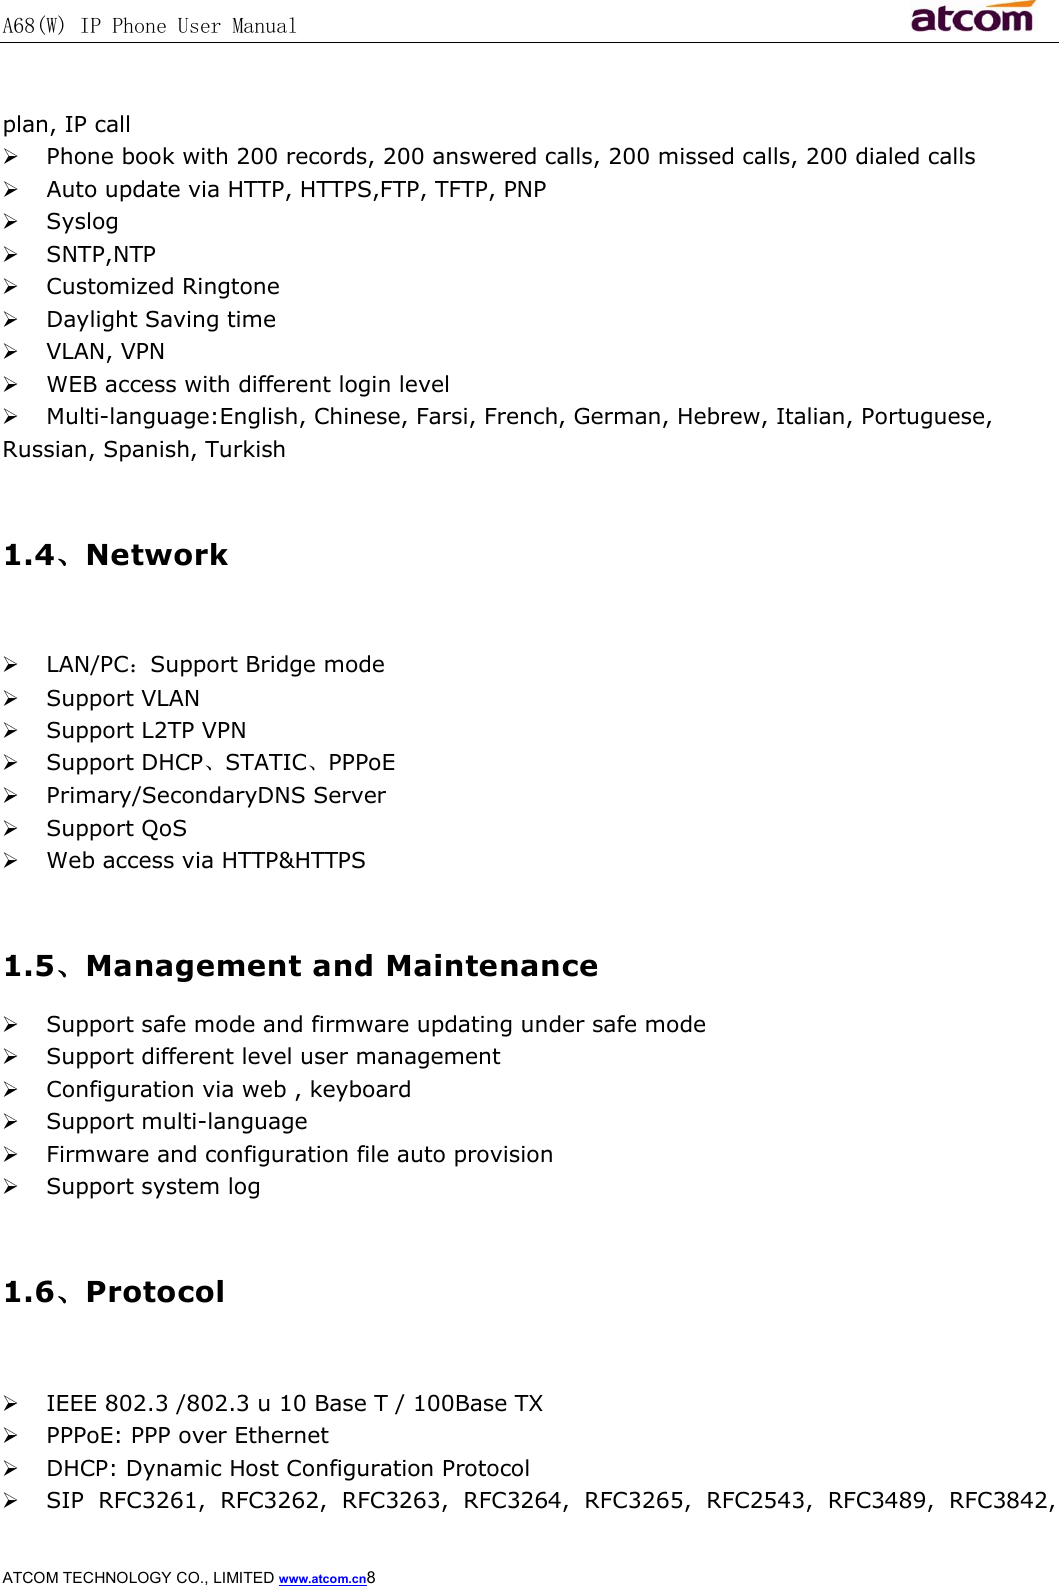
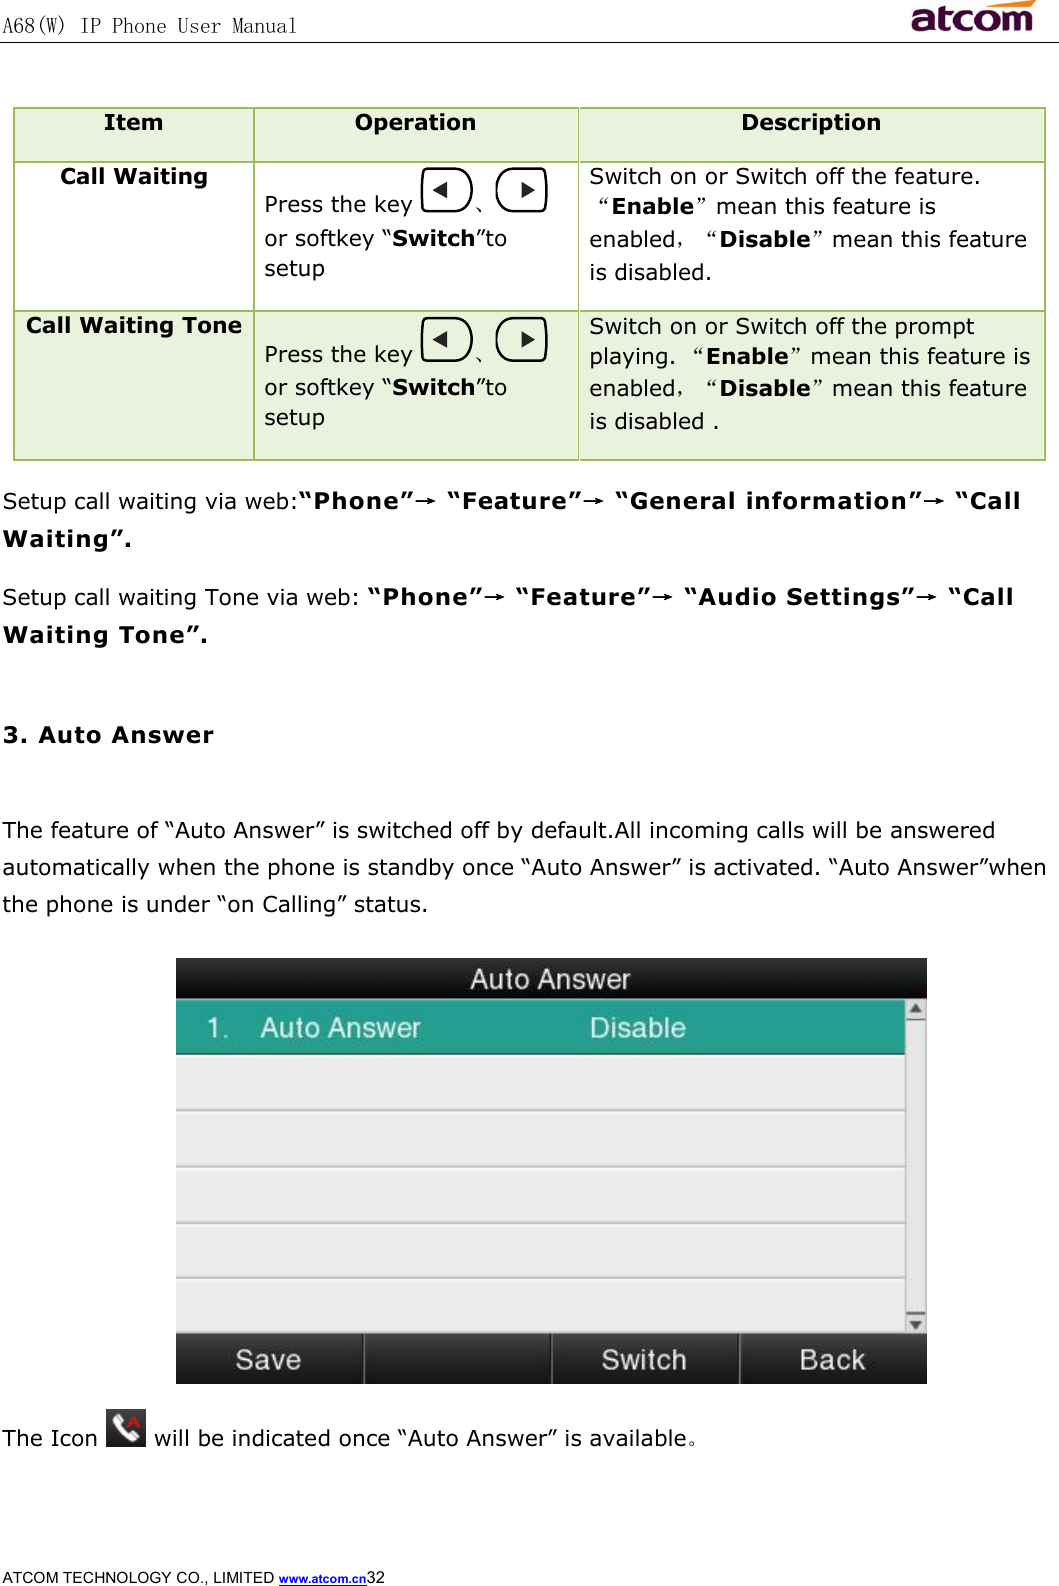
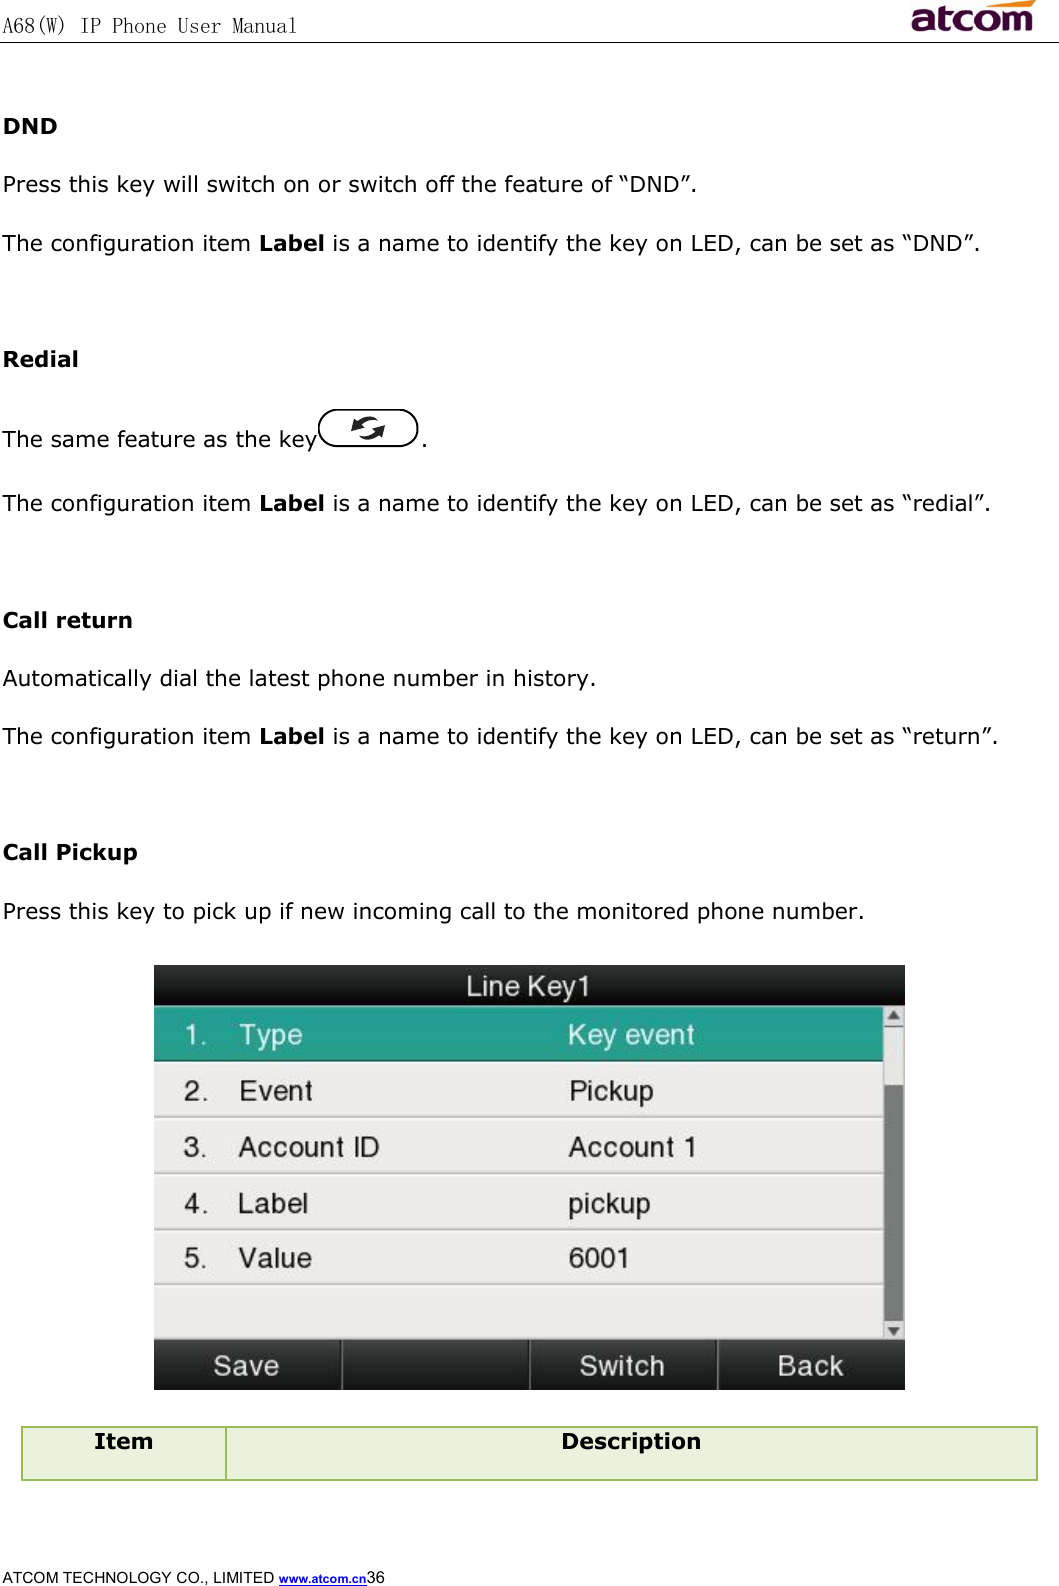
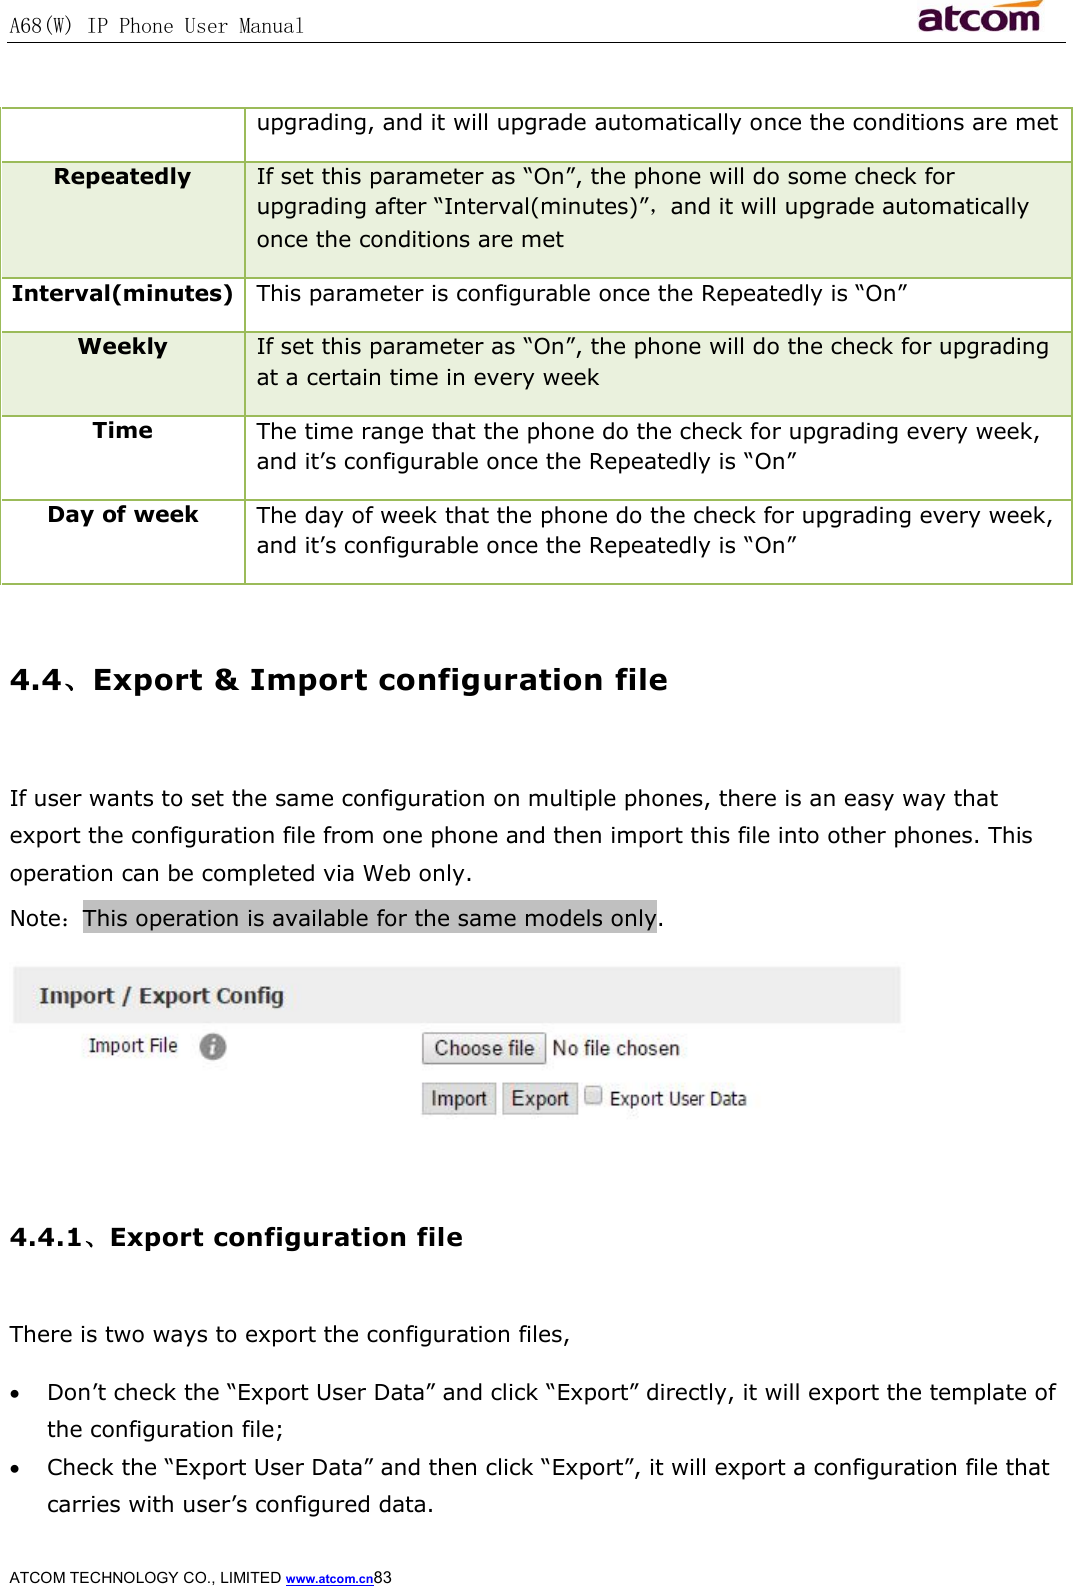
![A68(W) IP Phone User Manual ATCOM TECHNOLOGY CO., LIMITED www.atcom.cn86 $ Add a number after the character “$” to define the location of the characters, e.g., use the prefix “ 8([1-3])(.)” to replace “7$2”, the phone will call “7837” after dialing out “82837” Note:Any operations (add, modify or delete) on the current dial plan will be not effective until click “Save”. 4.6.1、Replace Rule Dial plan “Replace Rule” means to replace a batch of complicated character string by some simple characters, to make a speed dial. Item Description Sample Number The string works as replacer, not null Set Numberas “6”, Set Replace as“6032”, Set Account as “1,3,4”. It means when dial 6, the phone will dial 6032 via the 1st available line in account 1,3,and 4 automatically Replace The string that to be replaced, not null Account The account to apply this dial plan, blank or 1 to 6 is valid. Number 1 to 6 means account 1 to 6. If you want to apply this rule to account 1、3 and 4,just type in 1,3,4; And if keep it as blank, it means applying this dial plan to all accounts Add Multiply replace rules can be configured in one phone, after one replace dial plan configured, click this button to add a new one](https://usermanual.wiki/ATCOM-TECHNOLOGY/A68W/User-Guide-3013157-Page-86.png)