ATTOWAVE STR65 RADAR DETECTOR User Manual S650 manual E
ATTOWAVE CO., LTD. RADAR DETECTOR S650 manual E
UserManual.wiki
>
ATTOWAVE
>
STR65 User Manual
User Manual
Navigation menu
Upload a User Manual
Namespaces
Wiki Guide
HTML
PDF
Info
Views
User Manual
Discussion / Help
Navigation
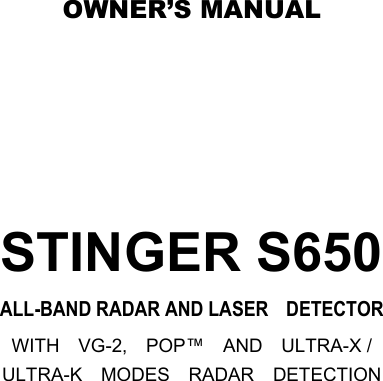


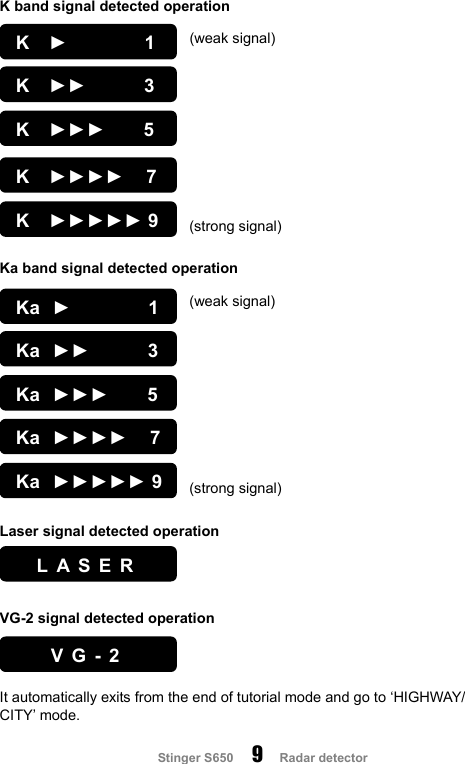
![Stinger S650 10 Radar detector Compass Calibration Set-up Press ‘DIM/MENU’ and ‘MUTE/CITY’ buttons simultaneously more than 2 seconds to go ‘Compass Calibration Mode’. Perform the calibration on a level surface, following these steps: 1. When entering ‘Calibration mode’, it speaks “start your calibration”. 2. The Calibration will be continued until user presses any key. Please drive 2 circles and press any key when finished. It displays and toggles ‘Drive_2’ and ‘CIRCLE’ during drive. The size of the circles and the direction you drive does not matter. The circles do not need to be perfect circles but must be completed in the same direction. Each circle should take a minimum of 20 seconds but no more than 1 minute to complete. 3. In case ‘Compass Calibration’ is completed successfully, it display ‘COMPLETE’ with voice of ‘Calibration completed’ and exit automatically. 4. In case it is not completed successfully, it displays ‘CANCELLED’ and exit. 5. If any button is not pressed during one minute, the calibration is stopped and displays ‘ERROR’ and a ‘CANCELLED’ message. Menu Mode Pressing ‘DIM/MENU’ button for 3 seconds to go to ‘Menu’ mode. You can set each sub menu as follows. Press ‘DIM/MENU’ button again to scroll each sub menu and press ‘MUTE/ CITY’ button to select sub menu. After selecting sub menu, press ‘DIM/ MENU’ button more than 3 seconds to save and exit. Otherwise it is automatically exit after 5 seconds with selected sub menu. SUB MENU SELECTION REMARK Language Mode [LANG:ENG] / [LANG:RUS] ENGLISH or RUSSIAN VG-2 Mode [VG-2:ON] / [VG-2:OFF] VG-2 ON or OFF Voice Mode [VOICEoN] / [VOICEoFF] VOICE ON or OFF Tone Mode [TONE:HIG] / [TONE:LOW] High tone or Low tone Compass Mode [CMPS:ON] / [CMPS:OFF] Compass ON or OFF](https://usermanual.wiki/ATTOWAVE/STR65/User-Guide-1261717-Page-10.png)