Abocom Systems CB1522M IP Camera User Manual CA1522M Instructions v1 1
Abocom Systems Inc IP Camera CA1522M Instructions v1 1
User Manual
Abocom Systems, Inc.
CA1522M Camera Setting Instructions (Android)
[Introduction]
This file will show you how to use the “P2PCamLive” app of the phone,
and environment architecture chart of the “CA1522M”.
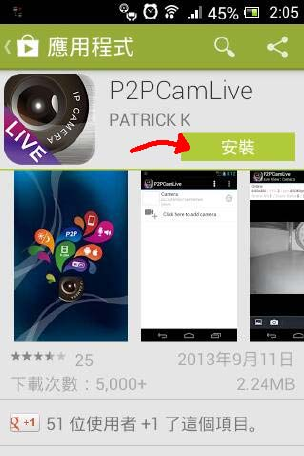
[Install]
For the first time, please download “P2PCamLive” app and install.
Click Install, this app will be installed to your phone.
[Connect to CA1522M]
Users have 3 ways to connect to CA1522M, and then there are 3
ways to connect P2PCamLive app and use.
1. Local Link
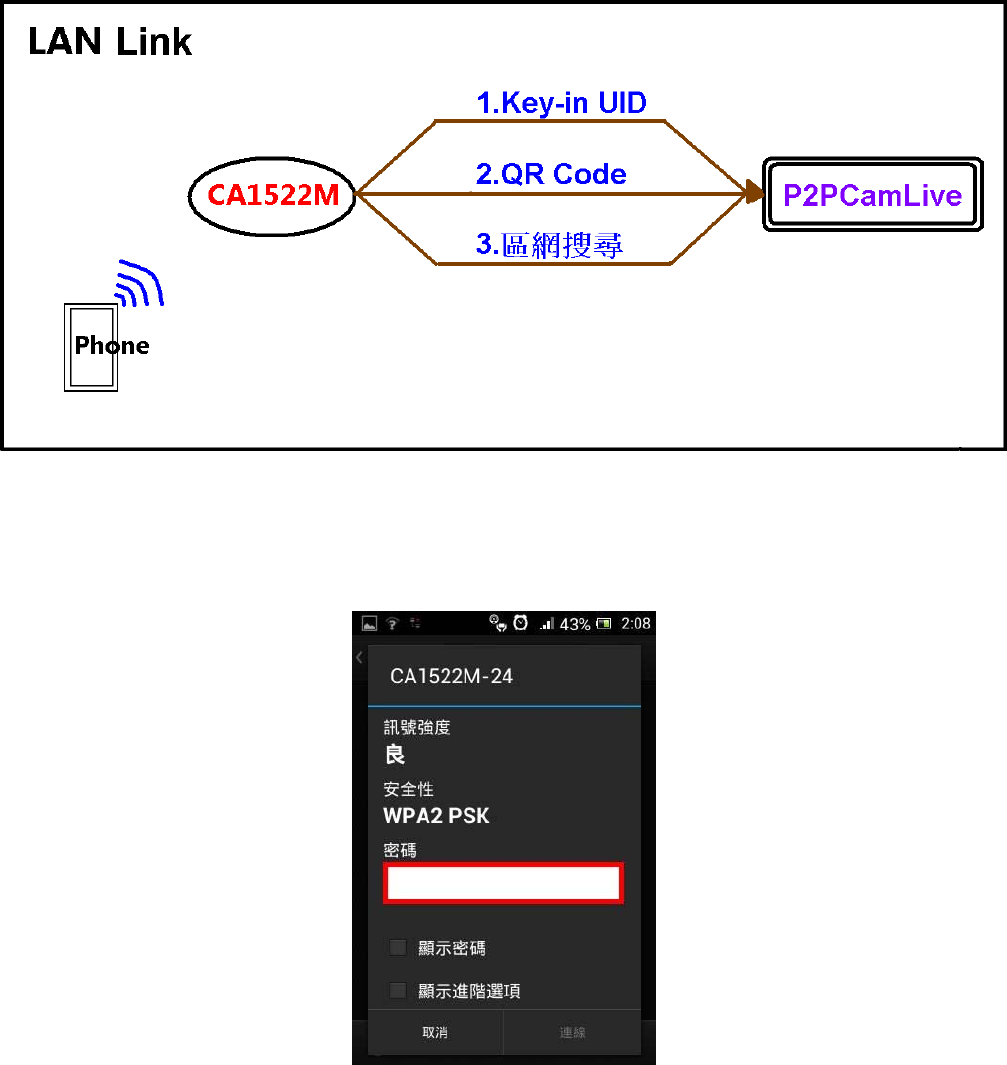
Users use Wi-Fi direct link CA1522M. (The default SSID is
“CA1522M-24”, default password is “12345678”.)
As shown, users using Wi-Fi direct link CA1522M, and then there are 3
ways to connect P2PCamLive app.
Search default SSID “CA1522M-24”, and the default password is
“12345678”.
Confirm the connection status, this status shows “Connected”.
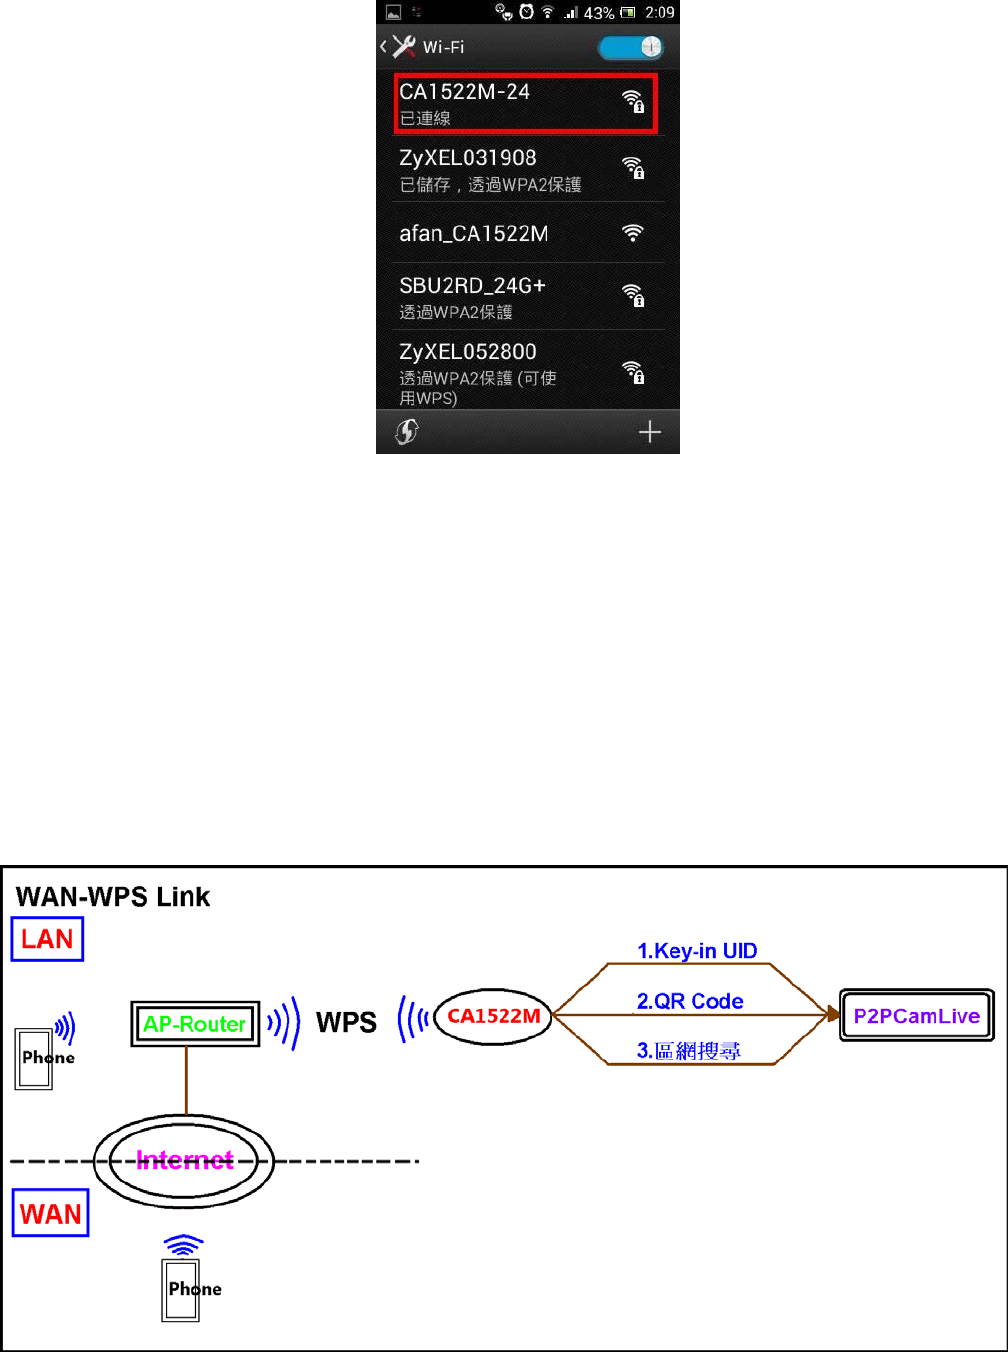
2. Internet-WPS Link
Users using the AP-Router connected by WPS on CA1522M, and then
using the phone Wi-Fi (or Internet) link to this AP-Router, so will be
able to complete.
As shown, users using the AP-Router connected by WPS on CA1522M,
and then there are 3 ways to connect P2PCamLive app.
As shown, users pressed the WPS-button (over 2 seconds) to create
a link with the AP-Router.
After creating the link, you will see a link to the information on the
AP-Router screen.
As shown, you can use the phone Wi-Fi (or Internet) connected to the
AP-Router, then connect CA1522M.
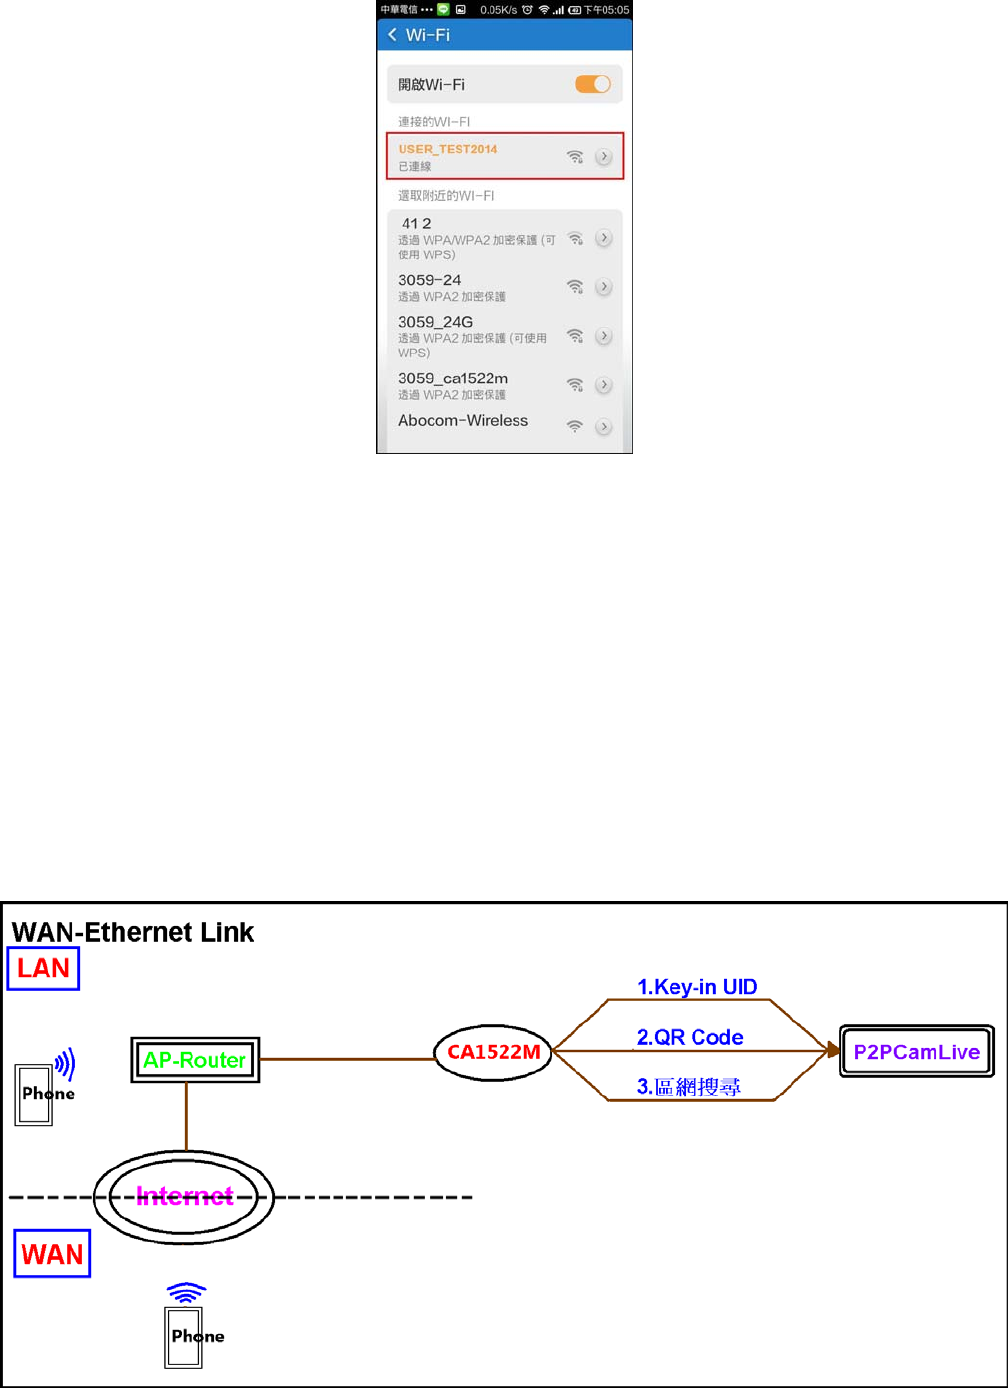
3. Internet -Ethernet Link
Users using the AP-Router connected by Ethernet on CA1522M, and
then using the phone Wi-Fi (or Internet) link to this AP-Router, so will
be able to complete.
As shown, users using the AP-Router connected by Ethernet on
CA1522M, and then there are 3 ways to connect P2PCamLive app.
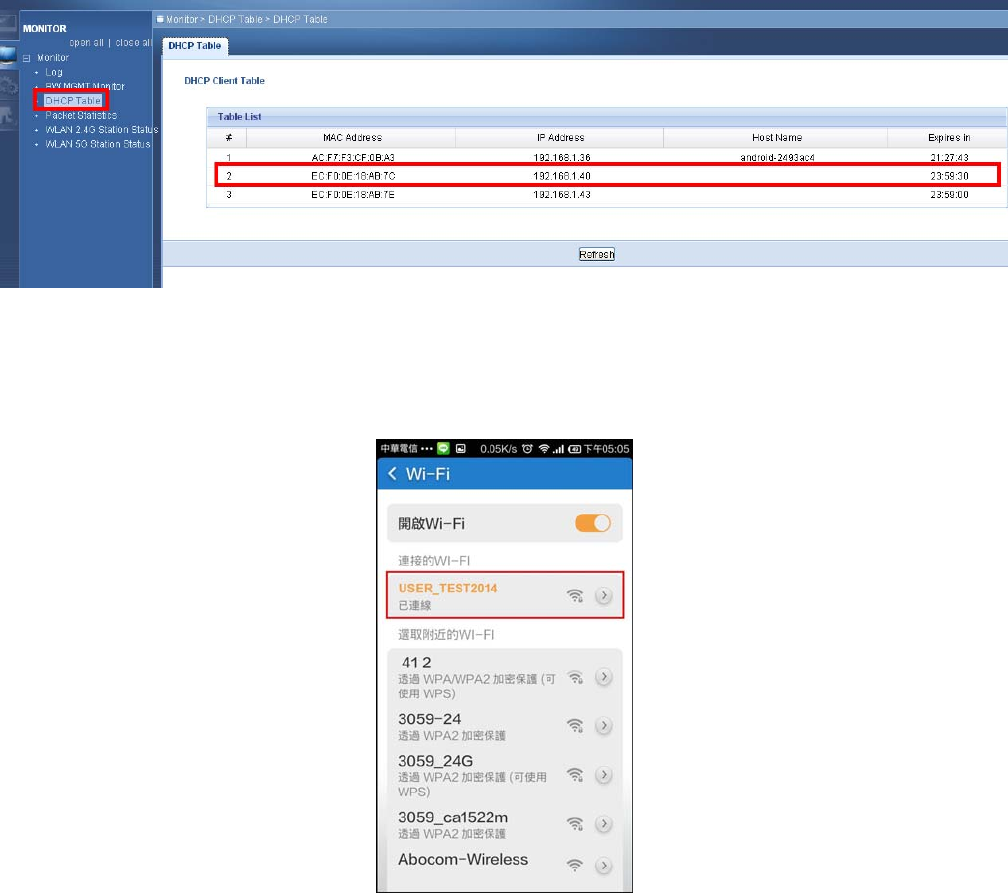
After creating the link, you will see a link to the information on the
AP-Router screen.
As shown, you can use the phone Wi-Fi (or Internet) connected to the
AP-Router, then connect CA1522M.
[Add Camera and Setting]
When completed confirmation link CA1522M, and then open
P2PCamLive app main screen, then select the “click here to add
cameras” to enter the editing screen, and there are 3 ways to
connect and use.
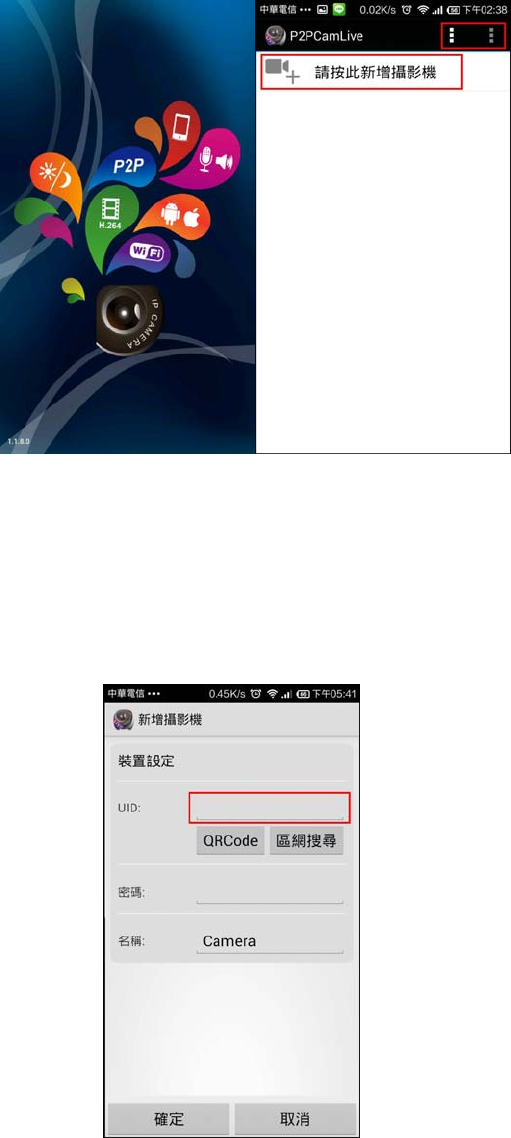
Open P2PCamLive app, then enter the main screen
I. Key-in UID
Please key-in a corresponding UID. (UID number is 20 yards)
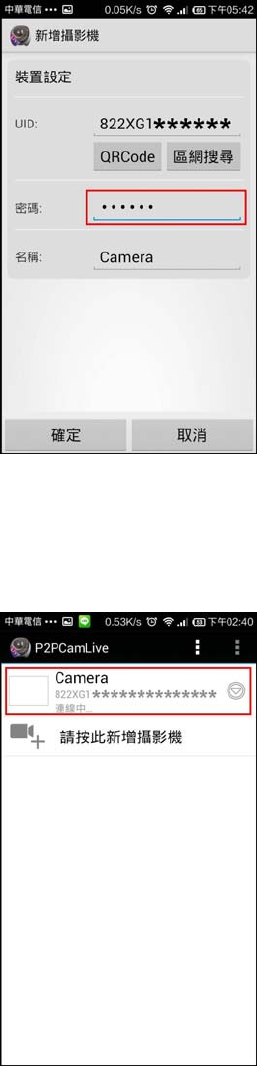
Please key-in password, then select OK. (The default password is
“888888”)
Congratulations, you have finished adding the camera, and then tap the
screen to enter the camera.
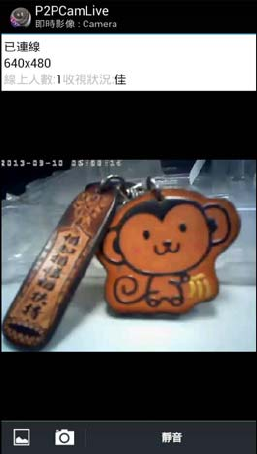
As shown, you can find out the video captured by the camera.
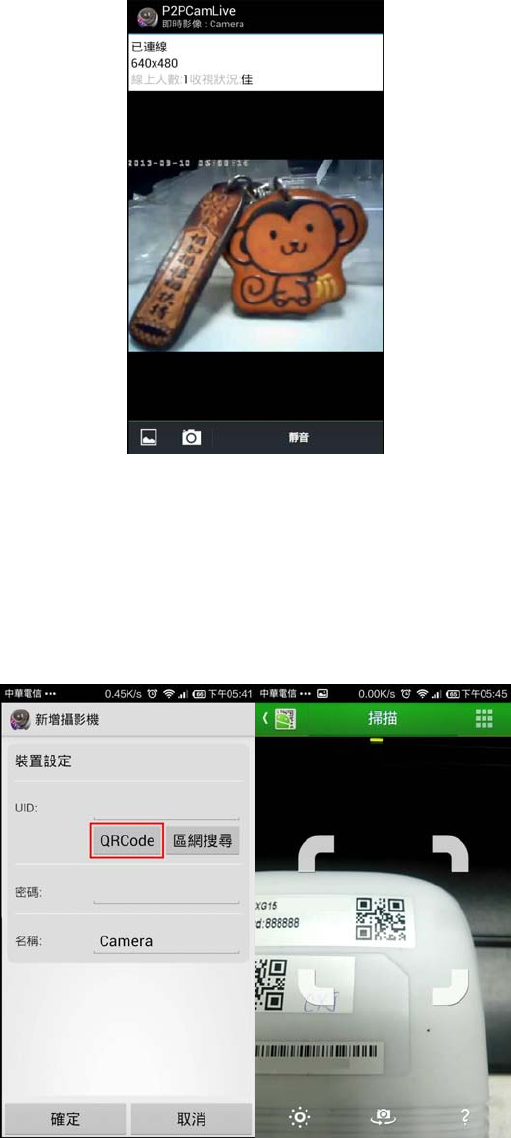
II. QR Code
Please scan the QR Code, and confirm whether an error.

Please key-in password, then select OK. (The default password is
“888888”)
Congratulations, you have finished adding the camera, and then tap the
screen to enter the camera.
As shown, you can find out the video captured by the camera.
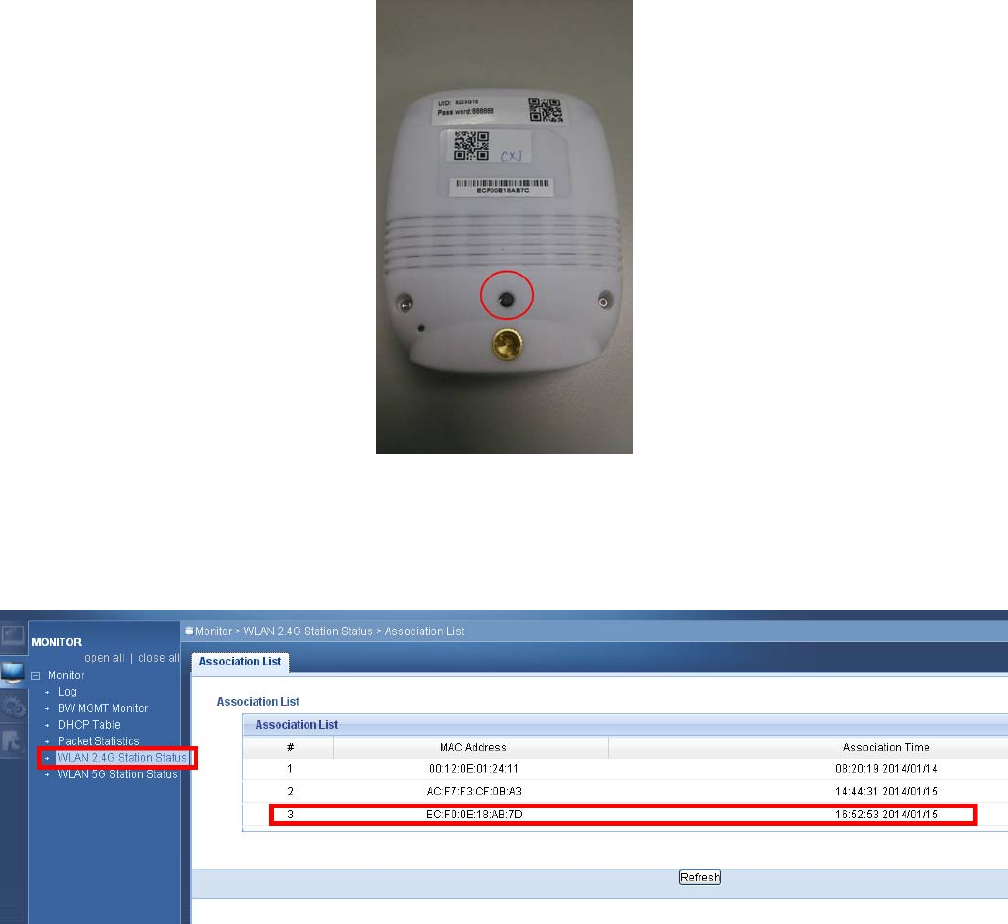
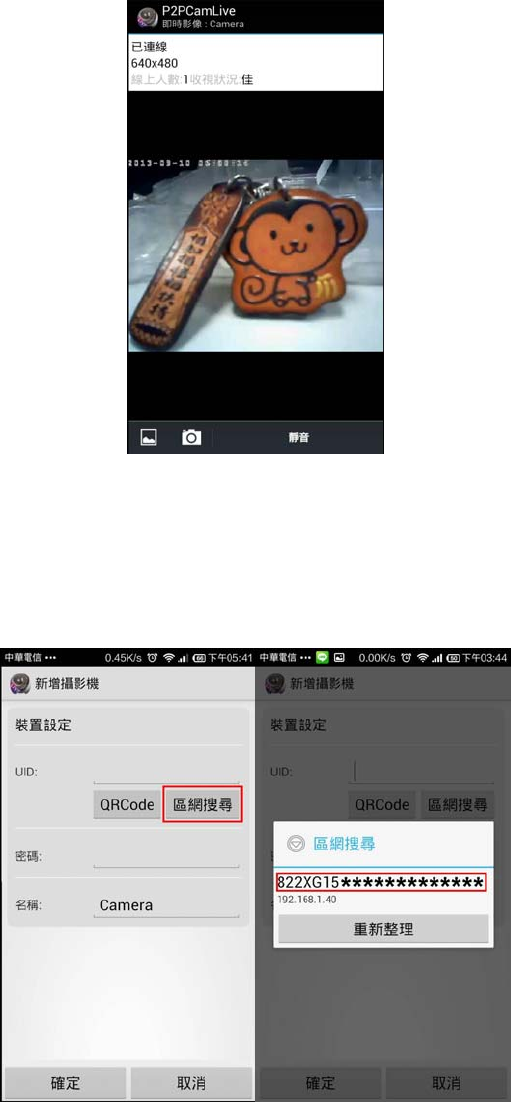
III. LAN Search
Select LAN Search. And confirm UID number is 20 yards, selected after
confirmation.

Please key-in password, then select OK. (The default password is
“888888”)
Congratulations, you have finished adding the camera, and then tap the
screen to enter the camera.
As shown, you can find out the video captured by the camera.
FCC Statement:
Federal Communication Commission Interference Statement
This equipment has been tested and found to comply with the limits for a Class B digital device,
pursuant to Part 15 of the FCC Rules. These limits are designed to provide reasonable
protection against harmful interference in a residential installation. This equipment generates,
uses and can radiate radio frequency energy and, if not installed and used in accordance with
the instructions, may cause harmful interference to radio communications. However, there is no
guarantee that interference will not occur in a particular installation. If this equipment does
cause harmful interference to radio or television reception, which can be determined by turning
the equipment off and on, the user is encouraged to try to correct the interference by one of the
following measures:
● Reorient or relocate the receiving antenna.
● Increase the separation between the equipment and receiver.
● Connect the equipment into an outlet on a circuit different from that to which the receiver is
connected.
● Consult the dealer or an experienced radio/TV technician for help.
FCC Caution: Any changes or modifications not expressly approved by the party
responsible for compliance could void the user’s authority to operate this equipment.
This device complies with Part 15 of the FCC Rules. Operation is subject to the following two
conditions: (1) This device may not cause harmful interference, and (2) this device must accept
any interference received, including interference that may cause undesired operation.
For product available in the USA/Canada market, only channel 1~11 can be operated. Selection
of other channels is not possible.
This device and it's antennas(s) must not be co-located or operating in conjunction with any
other antenna or transmitter except in accordance with FCC multi-transmitter product
procedures.
IMPORTANT NOTE:
FCC Radiation Exposure Statement:
This equipment complies with FCC radiation exposure limits set forth for an uncontrolled
environment. This equipment should be installed and operated with minimum distance 20cm
between the radiator & your body.