Abocom Systems MFJ25P21J1 10.4" Portable Wireless Thin Client User Manual user manual
Abocom Systems Inc 10.4" Portable Wireless Thin Client user manual
UserManual.wiki
>
Abocom Systems
>
MFJ25P21J1 User Manual
User Manual
Navigation menu
Upload a User Manual
Namespaces
Wiki Guide
HTML
PDF
Info
Views
User Manual
Discussion / Help
Navigation
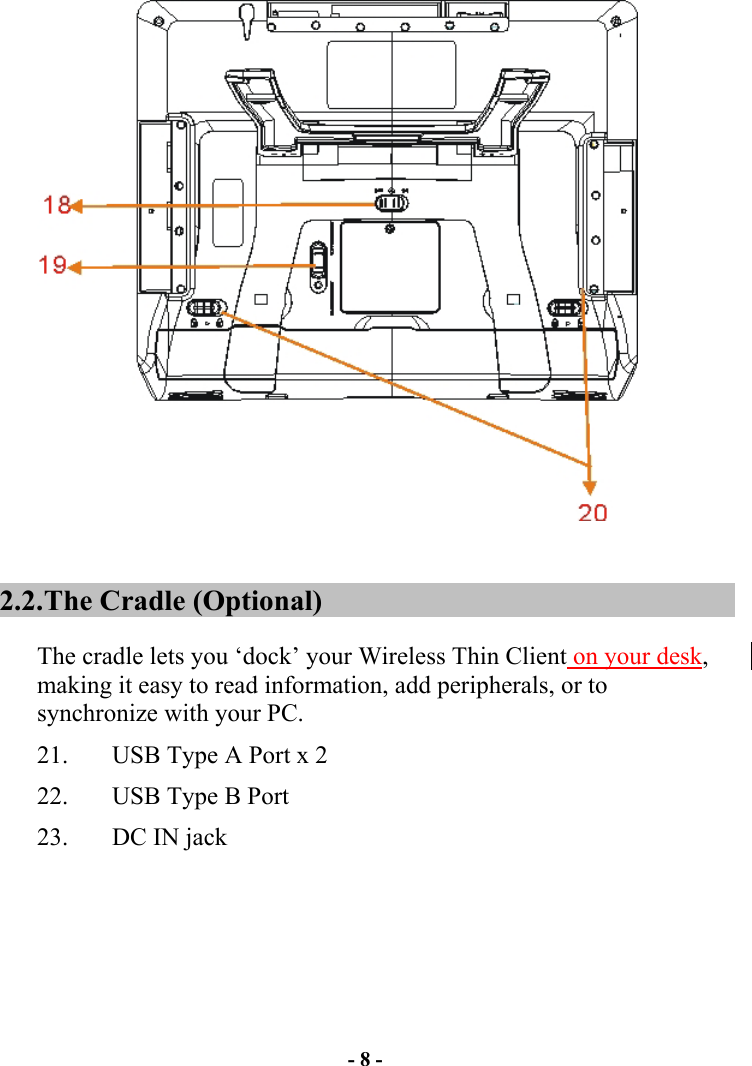


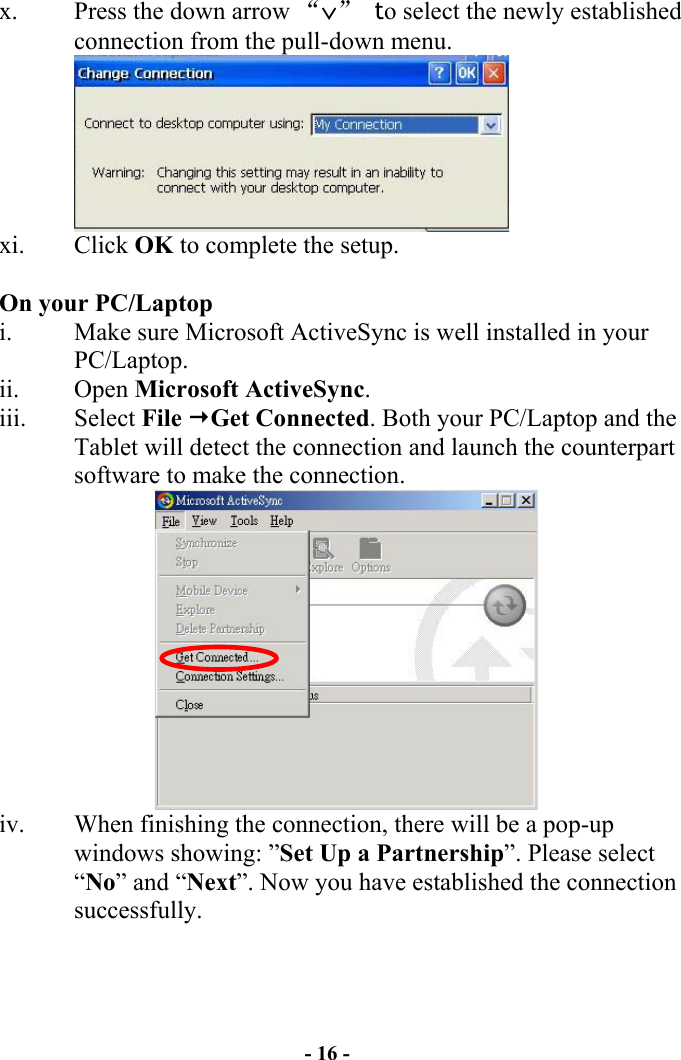
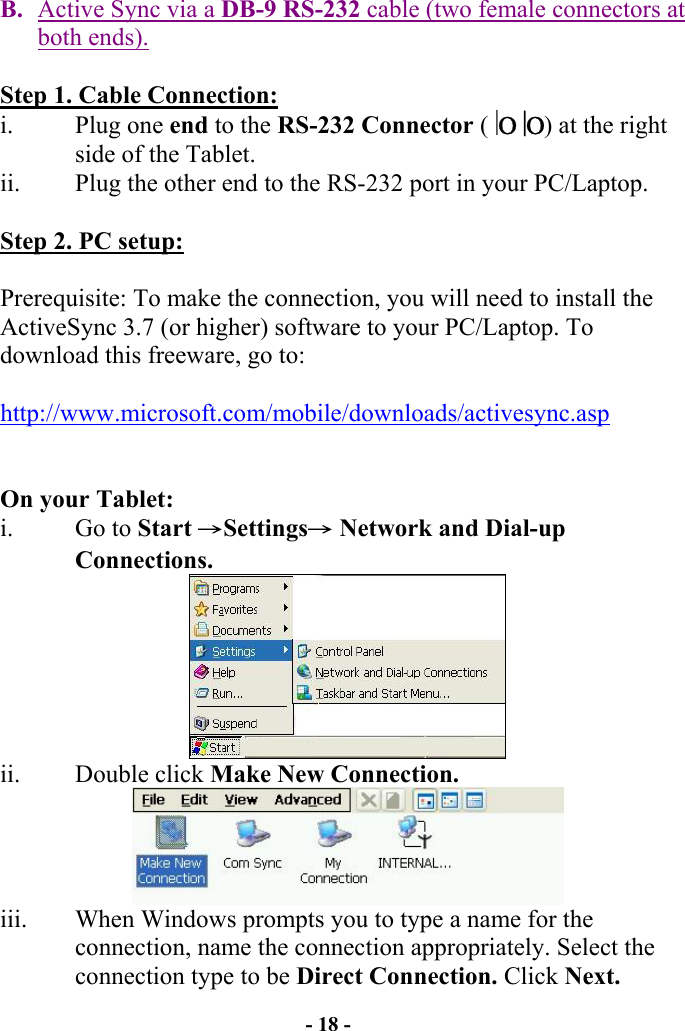
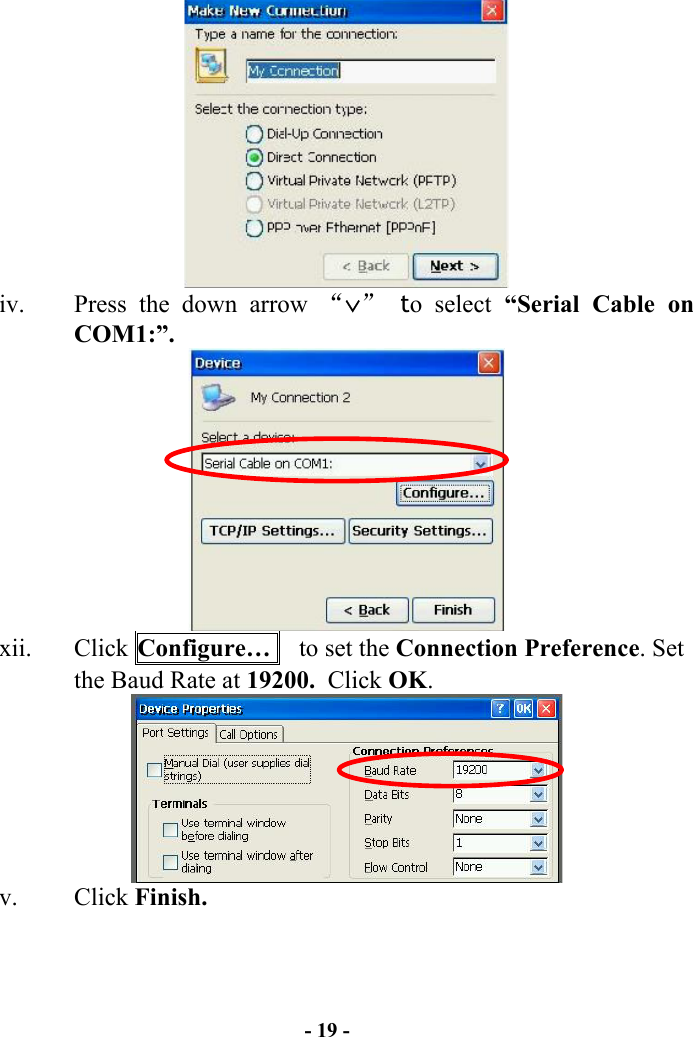
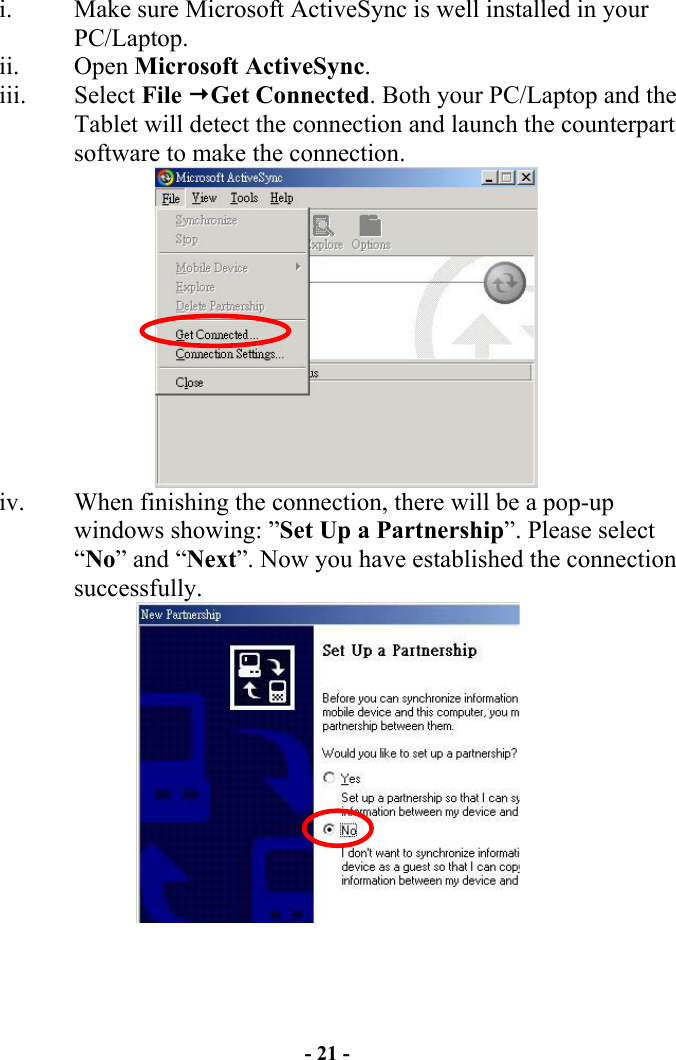
![- 11 - The ON/Suspend switch on the topside of your Wireless Thin Client, when in the Suspend position, ensures that the Tablet isn’t accidentally turned on. Sliding the switch to the ON position resumes the Tablet. 2.5. Touch-screen Display Your Wireless Thin Client is equipped with a touch screen. You can use the stylus that works like a mouse to click or double-click a selected icon, and open it. In addition, tap your Tablet’s desktop with your stylus for over one (1) second,, it will act as ‘right-click”. 2.6. Display Properties This function allows you to set the background on your desktop, and the colors displayed on your interface. To access these functions, go to Start→Settings→ Control Panel→Display→Background, or tap the desktop with your stylus over one (1) second, and it will act as ‘right-click’ to run the Display properties. 2.7. The Cradle (Optional) The cradle lets you ‘dock’ your Wireless Thin Client, making it easy to use your desk, to read information, or to add peripherals such as a keyboard or a mouse.In addition, the cradle increases your connectivity, with USB Type A and B (for synchronization with your PC) ports [2 A-Type and 1 B-Type]. By removing the insert in the cradle’s pocket (by sliding the insert to the right and lifting it up), the cradle can accommodate Wireless Thin Client with the battery.](https://usermanual.wiki/Abocom-Systems/MFJ25P21J1/User-Guide-497877-Page-13.png)