Accton Technology WA3001B17 EZ Connect 2.4 GHz Wireless Ethernet Adapter User Manual 00
Accton Technology Corp EZ Connect 2.4 GHz Wireless Ethernet Adapter 00
UserManual.wiki
>
Accton Technology
>
WA3001B17 User Manual
>
User manual part 1
Contents
1.
User manual part 1
2.
User manual part 2
User manual part 1
Navigation menu
Upload a User Manual
Namespaces
Wiki Guide
HTML
PDF
Info
Views
User Manual
Discussion / Help
Navigation

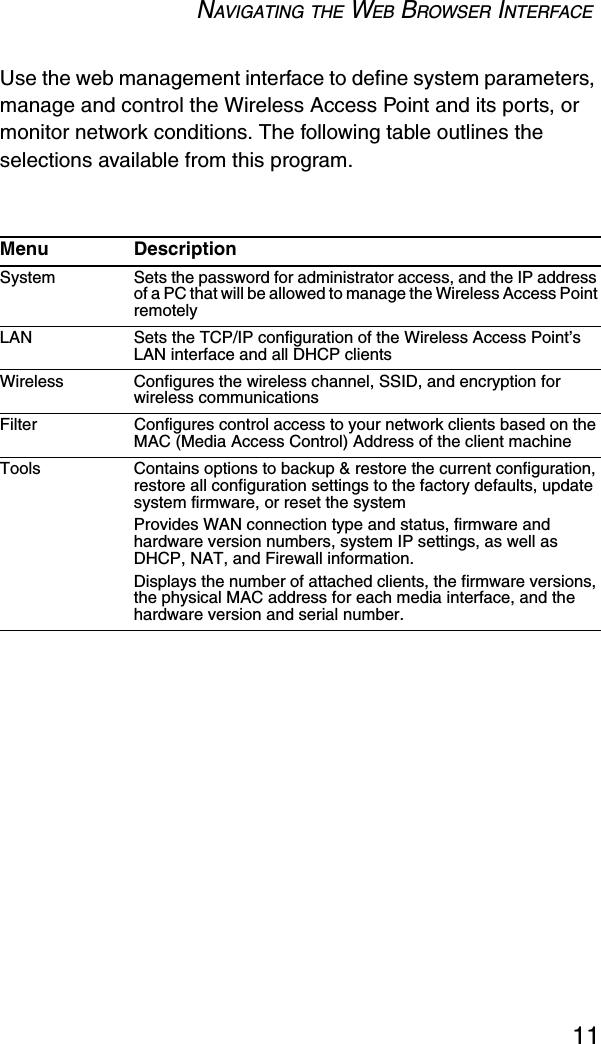
![SYSTEM CONFIGURATION14LANWith Obtain an IP Address Automaticly [DHCP] enabled, the IP address, subnet mask and default gateway can be dynamically assigned to the SMC2671W by the network DHCP server. (Default: Disable)Note: If there is no DHCP server on your network, then the SMC2671W will automatically start up with its default IP address, 192.168.2.254.By using the SMC2671W’s built-in DHCP (Dynamic Host Configuration Protocol) server, you are allowing the SMC2671W to handle all the IP addressing on your Local Area Network (LAN) (when in Access Point mode). This can save you much of the time and hassle of setting up your network. If you have a server on your network that requires a static IP address, you may still use the “DHCP Server” and manually assign a static IP address to your server. (Default: Disable)](https://usermanual.wiki/Accton-Technology/WA3001B17.User-manual-part-1/User-Guide-337355-Page-26.png)