Aclara Technologies 11583 TRANSMITTER FOR METER READING User Manual MTU Instruction
Aclara Technologies LLC TRANSMITTER FOR METER READING MTU Instruction
USERS MANUAL
MTU Instruction
for Actaris/Sprague/Schlumberger Gas Meters
Purpose & Scope
This instruction provides a procedure for installing a STAR direct-mount MTU on the
following Actaris/Sprague/Schlumberger residential gas meters: 175, 250 and 400 (Slant-
face).
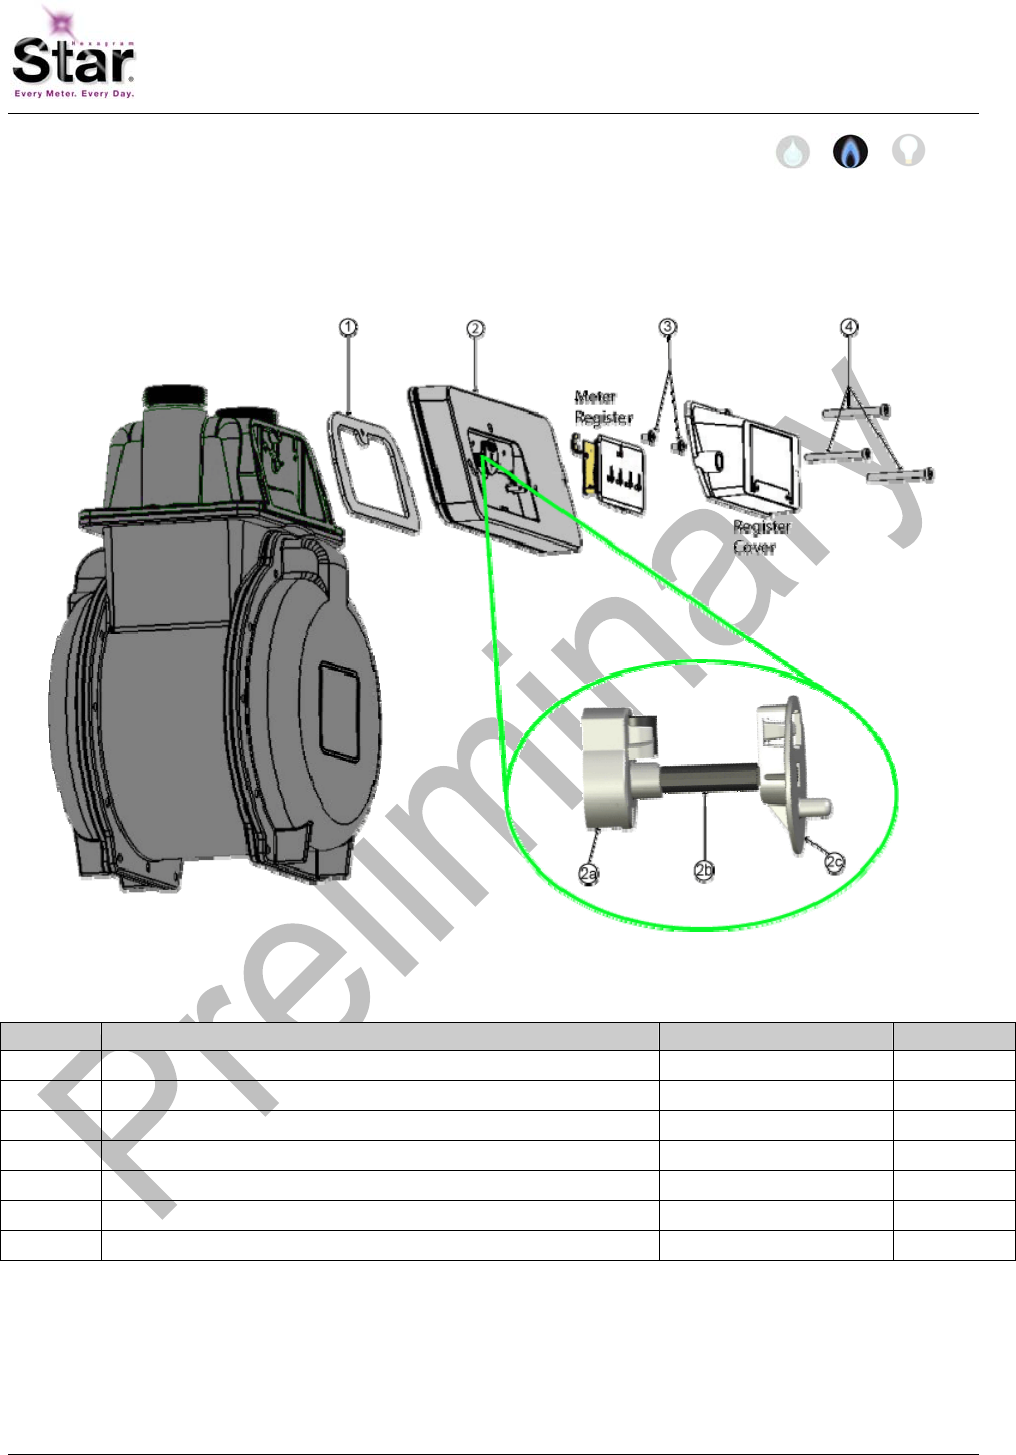
Parts Required
Ref. # Item Part Number Quantity
1 Gasket 066-11583 1
2 MTU, Direct Mount 506-11583 1
2a Magnet Coupler part of 506-7712BSP1 1
2b Coupler Shaft part of 506-7712BSP1 1
2c Register Coupler part of 506-7712BSP1 1
3 #10 x 3/8” combo head thread form screw, Type B, zinc 069-100012C4A 2
4 10-24 x 2” slotted fillister head machine screw, zinc 069-102464HA 3
471-2031 - 11/15/2006 PRELIMINARY
MTU Instruction
for Actaris/Sprague/Schlumberger Gas Meters
Tools Required
PRELIMINARY
To mount the MTU to these meters, you
will need the following tools and
equipment:
• Safety glasses
• Phillips screwdriver
• Slotted screwdriver
Installation Procedure
Before installing the MTU, all anti-tamper,
safety, and security hardware must be
removed from the clear register cover.
Step 1 - Remove the existing clear
register cover by removing the three
screws that hold it. Set the cover aside
and discard the screws.
Step 2 - Remove the register by
removing the two screws that hold it. Set
the register aside and discard the screws.
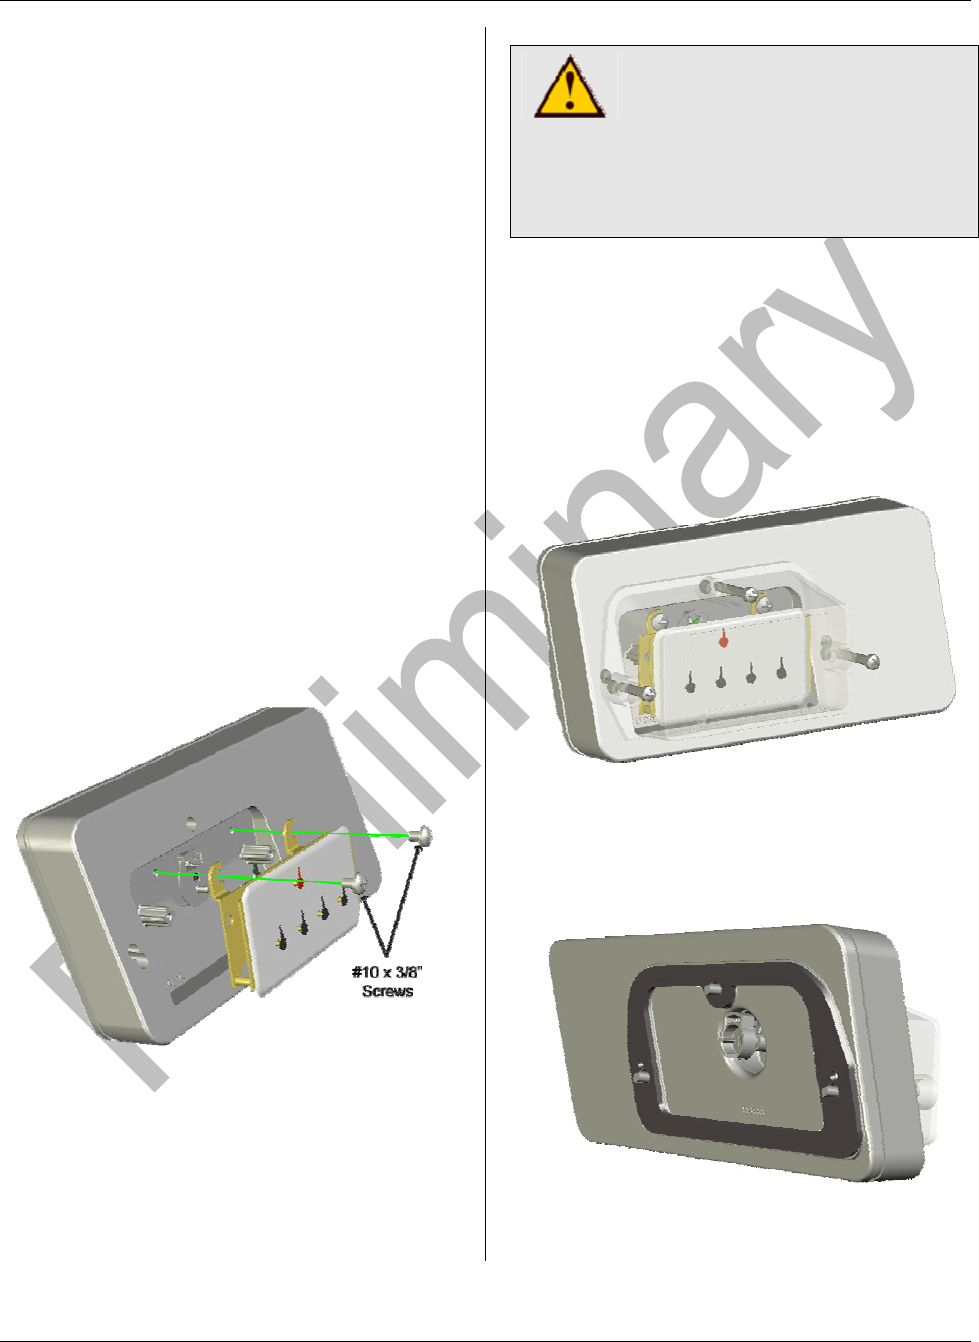
Step 3 – Next, mount the register onto
the MTU (see illustration below) fastening
the register to the MTU with the #10 x
3/8” screws provided.
Start the two screws into the mounting
holes, and then slide the register beneath
the screws, making sure that the wiggler
on the register is aligned with the MTU
coupler. Tighten both screws to a torque
not to exceed 3-5 inch-pounds.
CAUTION!
Do not over tighten screws.
Excessive torque may
damage the MTU enclosure.
Use of power tools is not
recommended.
Step 4 – Check that the register is
properly engaged by rotating the coupler
on the back of the MTU and observing
the register dials.
Step 5 – Next, Insert the three 10-24 x 2”
machine screws through the holes on the
register cover and MTU as shown below.
Step 6– Turn the MTU over and place the
gasket on the back of the MTU so that it
aligns over the three mounting screws.

MTU Instruction
for Actaris/Sprague/Schlumberger Gas Meters
Step 7 – Next, position the MTU on the
meter. Rotate the coupler into position to
ensure that it engages correctly with the
wiggler on the gas meter.
Step 8 – Now, firmly hand tighten the
mounting screws to 12 to 15 in-lb. The
gasket should be compressed slightly.
Be careful not to over tighten the screws.
Excessive torque may damage the MTU
enclosure. Because of this, power tools
are not recommended for this procedure.
Step 9 - Replace any anti-tamper, safety,
or security hardware onto the plastic
cover as required.
Step 10 – Once Installation is complete,
program the MTU using the STAR
Programmer Software and your MTU
Programmer.
PRELIMINARY

MTU Instruction
for Actaris/Sprague/Schlumberger Gas Meters
The FCC wants you to know…..
This equipment has been tested and complies with Part 15 and Part 90 of the FCC Rules. These limits are
designed to provide reasonable protection against harmful interference. This equipment generates, uses
and can radiate radio frequency energy, and, if not installed and used in accordance with the instructions,
may cause harmful interference to radio communications. However, there is no guarantee that interference
will not occur in a particular installation. If this equipment does cause harmful interference to radio or
television reception, try to correct the interference by one or more of the following measures:
• Reorient or relocate the equipment.
• Increase the separation distance between the affected equipment and receiver.
• Consult Hexagram, Inc. for help.
Any changes or modifications to this equipment not expressly approved by the Hexagram, Inc. could void the
authorization to operate the equipment.
FCC RF Exposure Guidelines
Hexagram’s low power RF devices and their antennas must be fixed-mounted on indoor or outdoor
permanent structure(s) providing a separation distance of at least 20 cm from all persons during normal
operation. This device is not designed (and it has no external connection) to operate in conjunction with any
other antennas or transmitters. No other operating instructions for satisfying RF exposure compliance are
needed. This unit has no user or installer serviceable parts, and requires no field adjustment or calibration.
Units are sealed at the factory, and disruption of this seal could void the authorization to operate the
equipment.
Hexagram, Inc.
23905 Mercantile Road
Cleveland, OH 44122