Actiontec Electronics MWTV3RX MyWirelessTV3 Wireless HD Receiver 4K Wireless HD Connection Kit User Manual Users manual
Actiontec Electronics Inc MyWirelessTV3 Wireless HD Receiver 4K Wireless HD Connection Kit Users manual
UserManual.wiki
>
Actiontec Electronics
>
MWTV3RX User Manual
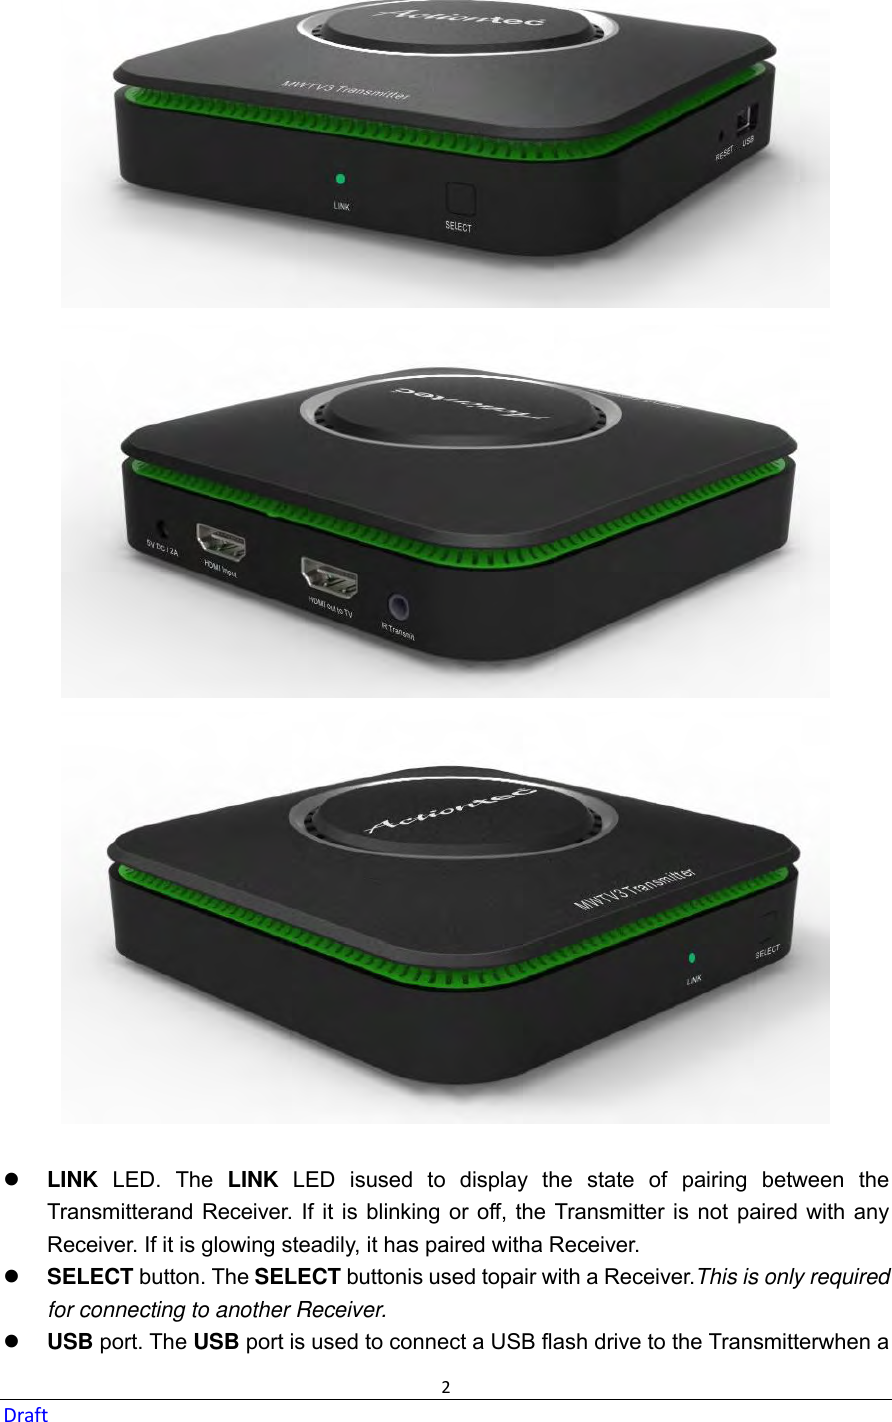
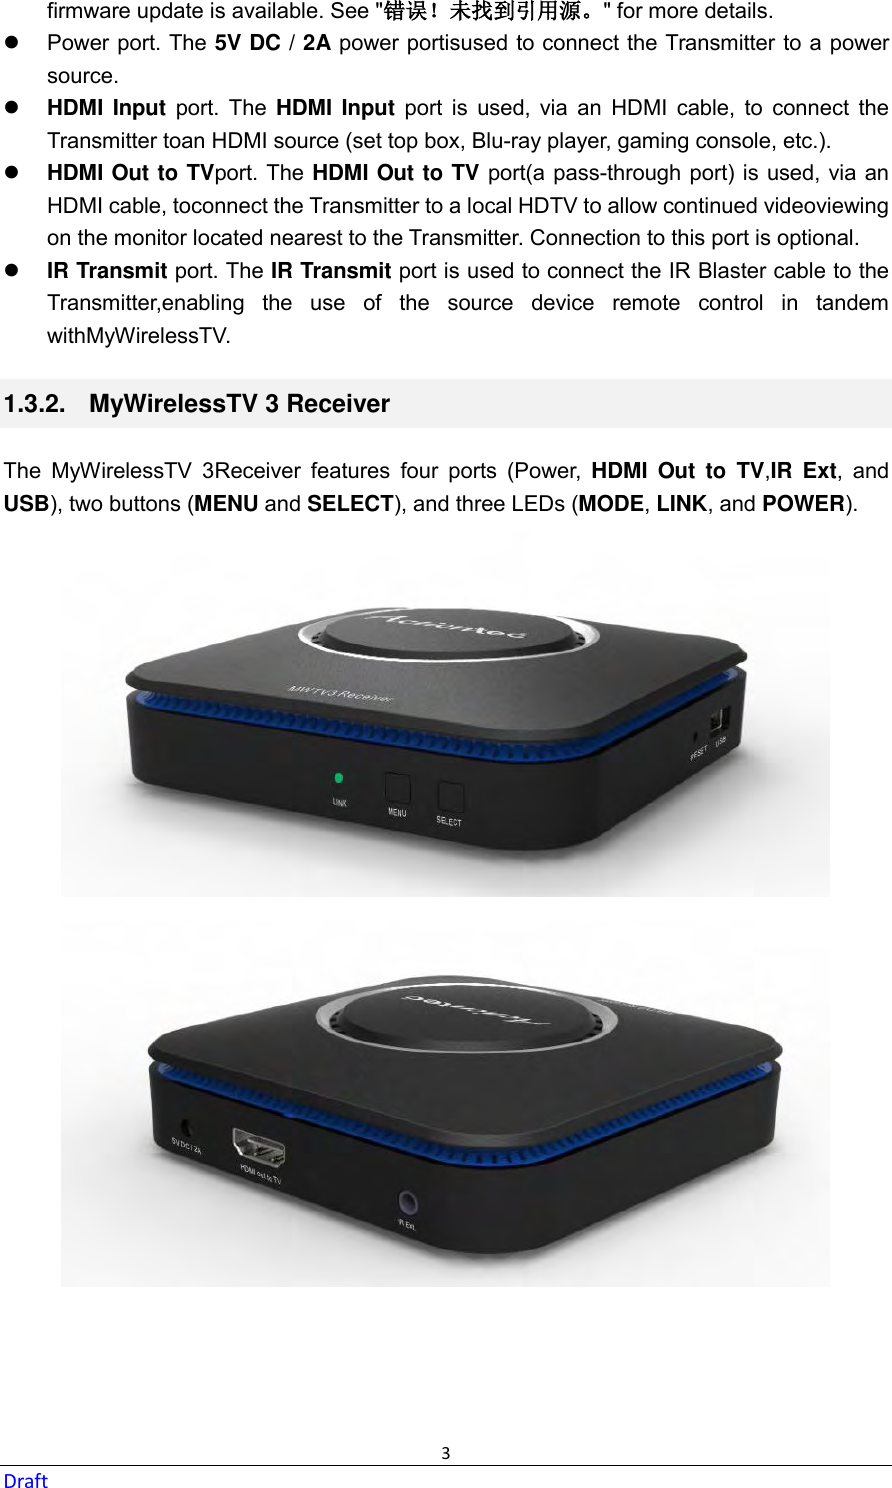
Users manual
Navigation menu
Upload a User Manual
Namespaces
Wiki Guide
HTML
PDF
Info
Views
User Manual
Discussion / Help
Navigation