Ademco 8DLLRS500 Lyric Smart Peripheral - Siren User Manual Installation Manual
Honeywell International Inc. Lyric Smart Peripheral - Siren Installation Manual
Ademco >
Contents
- 1. Manual Information
- 2. Installation Manual
- 3. Quick Install Guide
Installation Manual
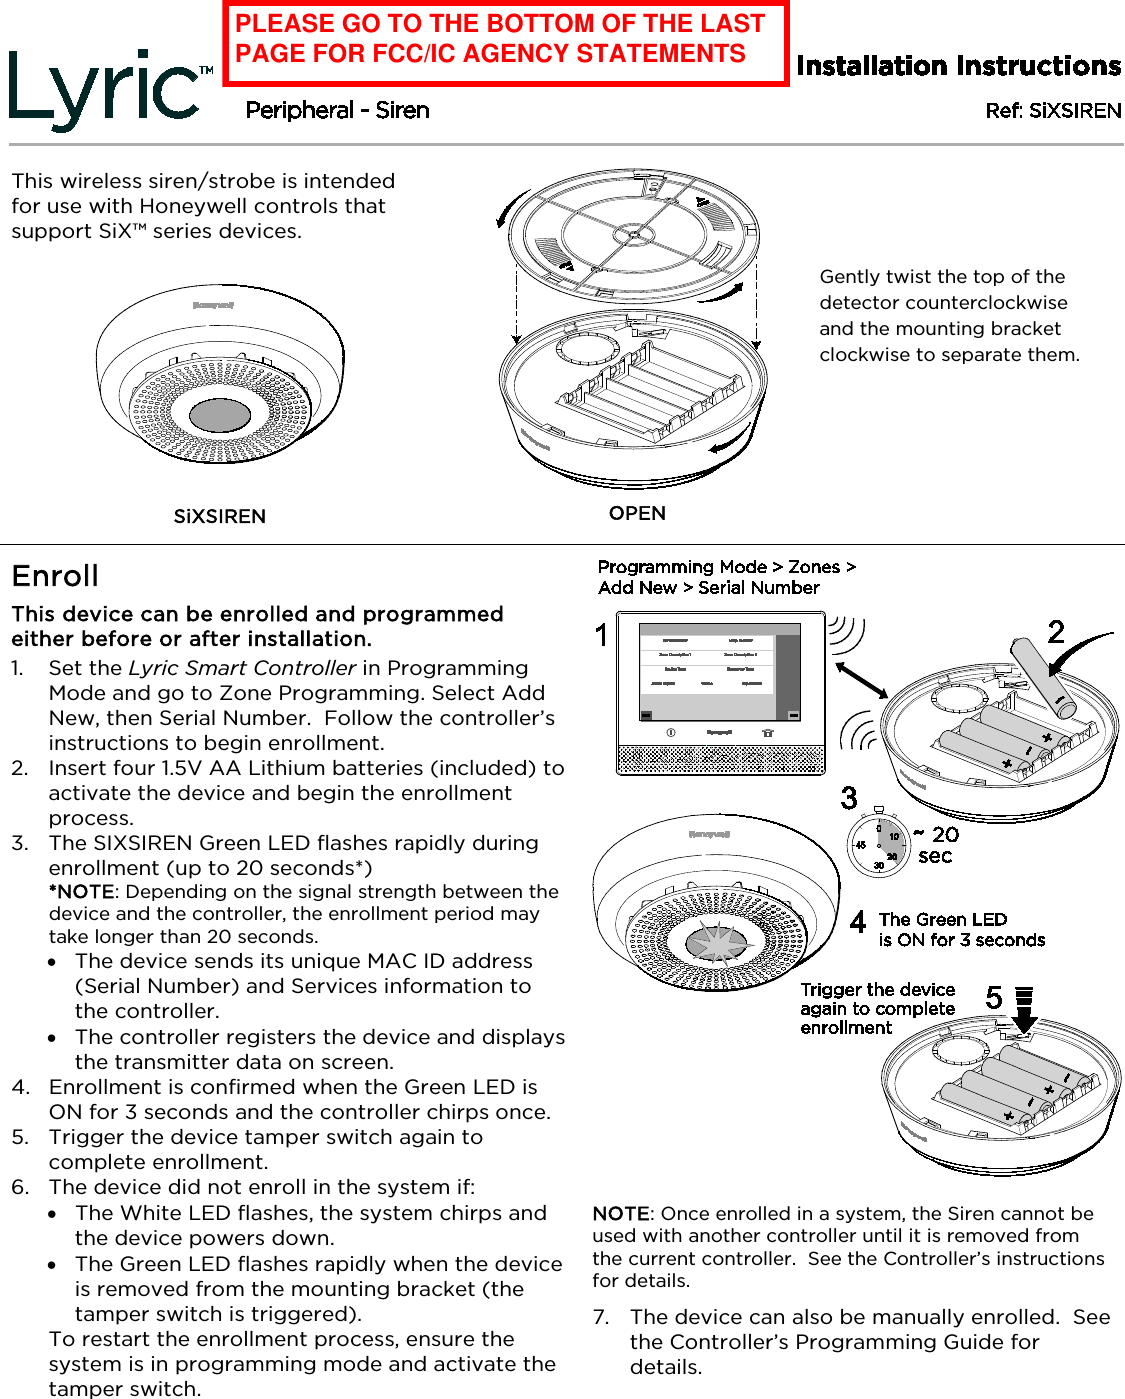
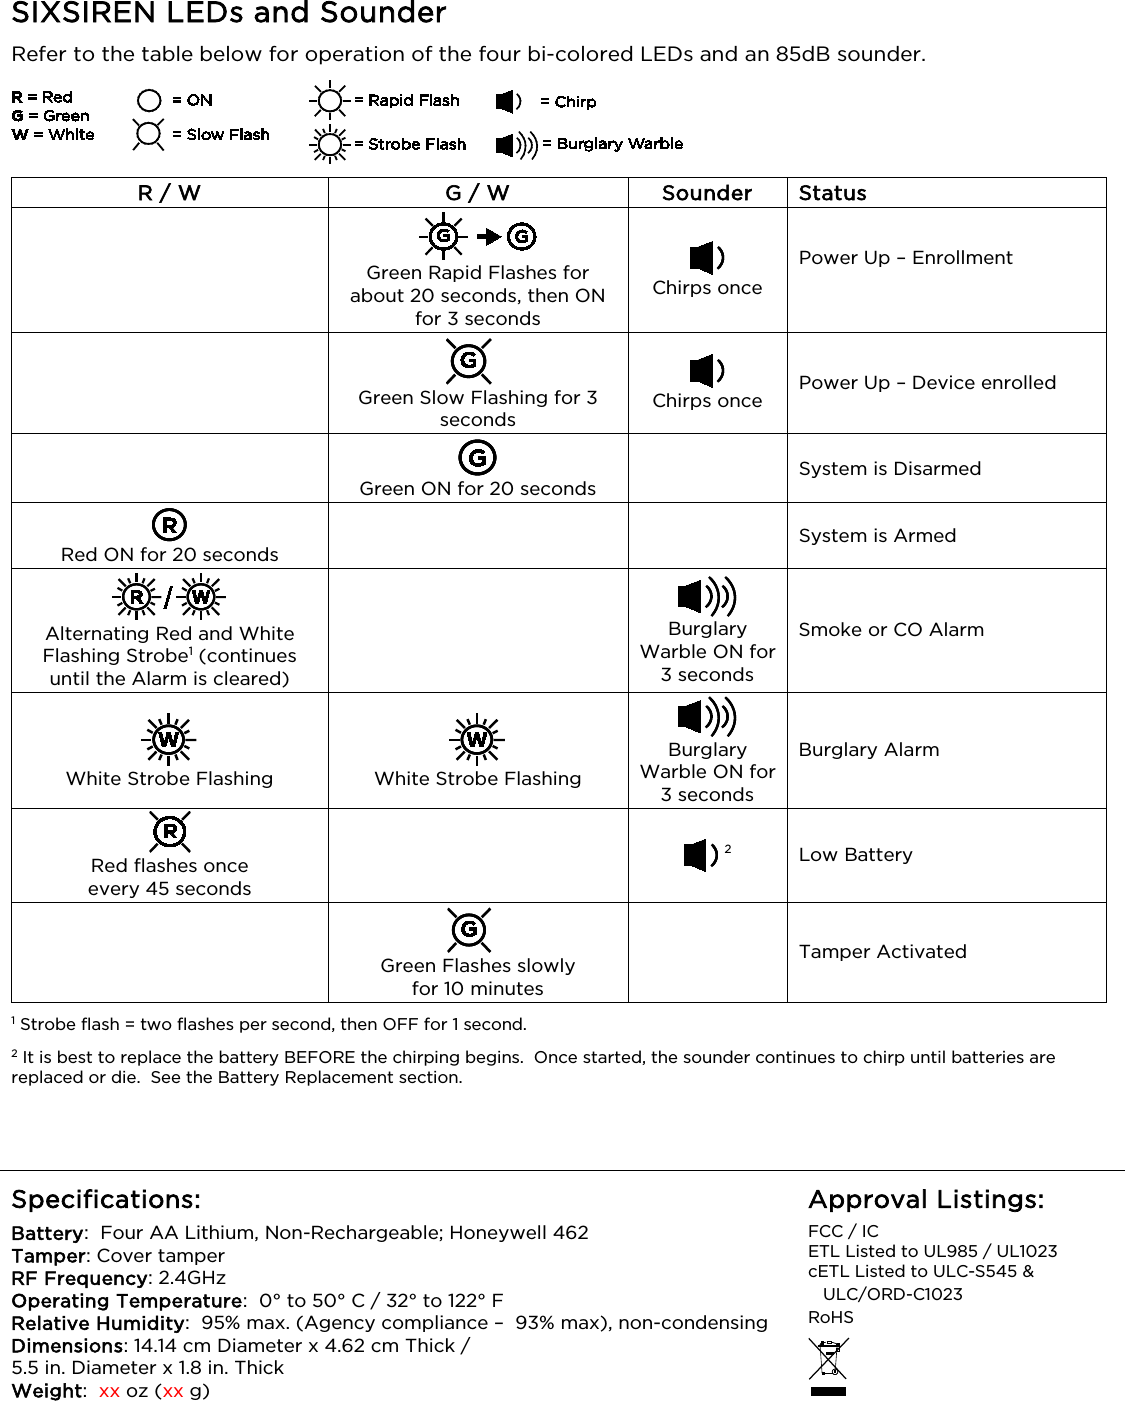
![Program the SIXSIREN Consult the Controller’s instructions for programming the device in the system. Fault the device features to “Learn” the device “Services” in the control: - Siren Chime Mode - Set sound level at the control: • Low = 35Db1 • High = 55dB • Life Safety2 – select 85dB - Cover tamper: The 10 minute tamper timer is reset every time tamper switch closed and opened or the siren cover is opened. - Temperature sensing – range is 0° – 120° F (-18° – 49° C); accuracy ±3° F (1.67° C) 35dB 1 55dB 85dB 2 1Factory default Program Mounting NOTE: Before mounting the device permanently, conduct Go/No Go tests (see controller’s instructions) to verify adequate signal strength and adjust the device location and orientation as necessary. The SIXSIREN can be mounted on the wall or on the ceiling. The rear tamper breakout MUST be mounted to a stud, solid wood, or with a robust wall anchor. Test the SIXSIREN The SIXSIREN should be tested immediately after installation and at least once a year. Activate Test Mode remotely from the Controller (see Controller’s manual for details). Test Mode tests the sounder and LED: - Sounder – the Burglary warble tone will sound for 3 seconds. - LED – the White LED strobe will flash for 15 seconds. Battery Replacement • Twist the front cover counterclockwise and separate it from the mounting bracket. • Remove the batteries, wait 10 seconds and insert four new batteries of the same type and brand. Recommended replacement batteries: - 1.5V AA Lithium Batteries [Non-Rechargeable] - AA Alkaline batteries can be used, but battery life will be significantly reduced. NOTE: Do not mix old and new batteries, battery types or manufacturers. • Reattach the front cover and twist clockwise to secure it in place. BATTERY CAUTION: Risk of fire, explosion and burns. Do not recharge, disassemble, heat above 212 F (100 C) or incinerate. Dispose of used batteries properly. Keep away from children.](https://usermanual.wiki/Ademco/8DLLRS500.Installation-Manual/User-Guide-2730883-Page-2.png)