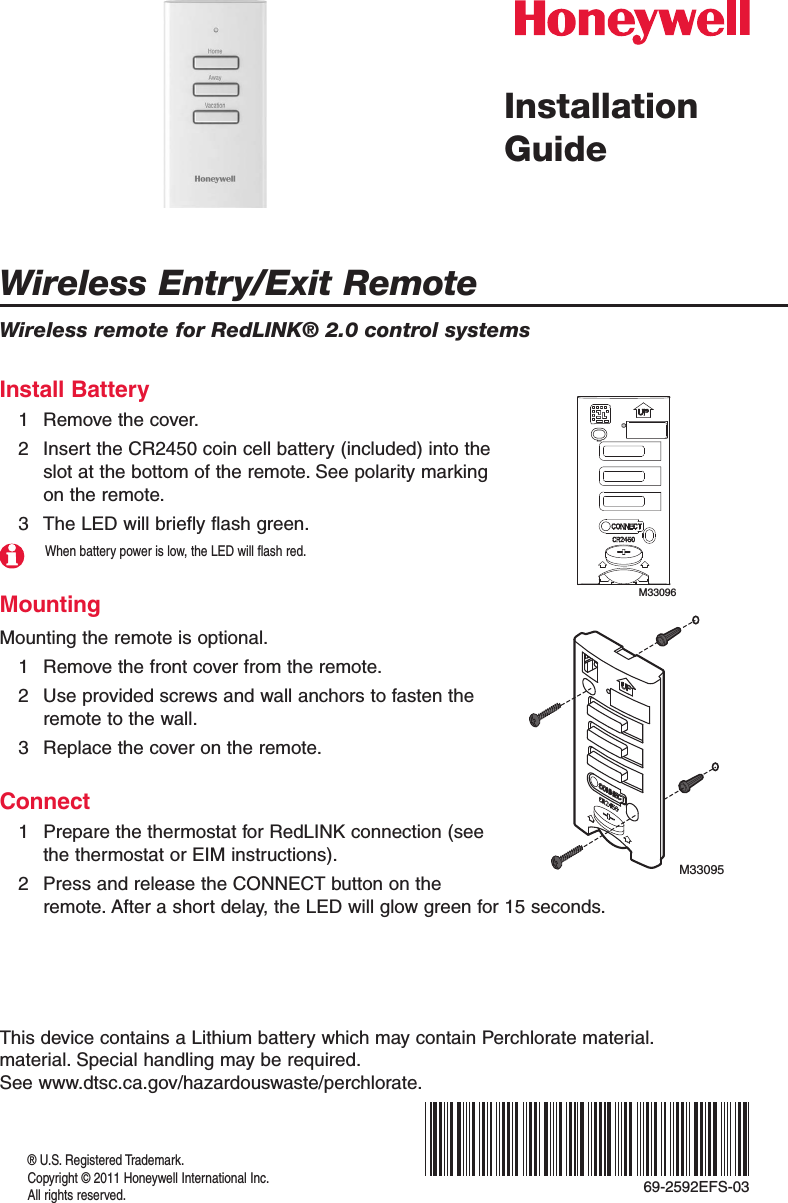
Ademco REM1000R01 Wireless Entry/Exit Remote; Wireless Vent & Filter Boost Remote User Manual 69 2592EFS 03 Wireless Entry Exit Remote

Honeywell International Inc Wireless Entry/Exit Remote; Wireless Vent & Filter Boost Remote 69 2592EFS 03 Wireless Entry Exit Remote

Contents

manual 1

Wireless Entry/Exit RemoteWireless remote for RedLINK® 2.0 control systems® U.S. Registered Trademark.Copyright © 2011 Honeywell International Inc.All rights reserved.Installation GuideInstall Battery1  Remove the cover.2  Insert the CR2450 coin cell battery (included) into the slot at the bottom of the remote. See polarity marking on the remote.3  The LED will briefly flash green.When battery power is low, the LED will flash red.MountingMounting the remote is optional.1  Remove the front cover from the remote.2  Use provided screws and wall anchors to fasten the remote to the wall.3  Replace the cover on the remote.Connect1  Prepare the thermostat for RedLINK connection (see the thermostat or EIM instructions).2  Press and release the CONNECT button on the remote. After a short delay, the LED will glow green for 15 seconds.M33096M33095This device contains a Lithium battery which may contain Perchlorate material. material. Special handling may be required.  See www.dtsc.ca.gov/hazardouswaste/perchlorate.69-2592EFS-03
Installation Guide269-2592EFS—03LED OperationDuring normal operation the LED will be off when the remote is idle. If the LED remains off when a button is pressed then the battery has failed.After a button press the LED will function as follows:•฀ Green฀when฀a฀button฀is฀pressed.•฀ Quickly฀flashing฀red฀when฀the฀battery฀needs฀to฀be฀replaced.•฀ Slowly฀flashing฀amber฀when฀the฀remote฀is฀disconnected฀from฀the฀system.•฀ The฀LED฀will฀be฀off฀when฀the฀remote฀is฀idle.During wireless connection to the system the LED will function as follows:•฀ Solid฀green฀for฀15฀seconds:฀connected฀to฀the฀system.•฀ Solid฀red:฀the฀remote฀did฀not฀connect฀to฀the฀system.Disconnect from RedLINK SystemPress and hold the CONNECT button on the remote until the LED glows amber (about 10 seconds) to disconnect from the RedLINK system.If you replace a thermostat or Equipment Interface Module, disconnect the remote from the old device. Then follow the steps on page 1 to re-connect the remote to the wireless network.OperationThe remote has three buttons. The button that is pressed sets the thermostat to that setting of the program schedule. That setting is held until another button is pressed on the remote or the regular program schedule is resumed at the thermostat.Residential model:•฀ Home: Sets the thermostat to the Home setting of the program schedule.•฀ Away: Sets the thermostat to the Away setting of the program schedule.•฀ Vacation: Sets the thermostat to the Vacation setting of the program schedule.Commercial model:•฀ Occupied: Sets the thermostat to the Occupied setting of the program schedule.•฀ Unoccupied: Sets the thermostat to the Unoccupied setting of the program schedule.•฀ Holiday: Sets the thermostat to the Holiday setting of the program schedule.M33097
Wireless Entry/Exit Remote369-2592EFS—03SpecificationsOperating Ambient Temperature35 to 114° F (1.7 to 45.6° C)Operating Relative Humidity5% to 90% (non-condensing)Physical Dimensions (height, width, depth)2-7/8 x 1-7/8 x 15/16 inches (74 x 48 x 24 mm)
Automation and Control SolutionsHoneywell International Inc.1985 Douglas Drive NorthGolden Valley, MN 55422http://customer.honeywell.com® U.S. Registered Trademark. © 2011 Honeywell International Inc.69-2592EFS—03  M.S.  Rev.  11-11Printed in U.S.A.Need Help?For assistance please visit http://customer.honeywell.com, or call toll-free: 1-800-468-1502 (residential installation)  •  1-888-245-1051 (commercial installation)Regulatory informationFCC Compliance Statement (Part 15.19) (USA only)  This device complies with Part 15 of the FCC Rules. Operation is subject to the following two conditions:1  This device may not cause harmful interference, and2  This device must accept any interference received, including interference that may cause undesired operation.FCC Warning (Part 15.21) (USA only)Changes or modifications not expressly approved by the party responsible for compliance could void the user’s authority to operate the equipment.FCC Interference Statement (Part 15.105 (b)) (USA only)This equipment has been tested and found to comply with the limits for a Class B digital device, pursuant to Part 15 of the FCC Rules. These limits are designed to provide reasonable protection against harmful interference in a residential installation. This equipment generates uses and can radiate radio frequency energy and, if not installed and used in accordance with the instructions, may cause harmful interference to radio communications. However, there is no guarantee that interference will not occur in a particular installation. If this equipment does cause harmful interference to radio or television reception, which can be determined by turning the equipment off and on, the user is encouraged to try to correct the interference by one of the following measures:•฀ Reorient฀or฀relocate฀the฀receiving฀antenna.•฀ Increase฀the฀separation฀between฀the฀equipment฀and฀receiver.•฀ Connect฀the฀equipment฀into฀an฀outlet฀on฀a฀circuit฀different฀from฀that฀to฀which฀the฀receiver฀is฀connected.•฀ Consult฀the฀dealer฀or฀an฀experienced฀radio/TV฀technician฀for฀help.Equipment interface module, thermostats and indoor sensorTo฀comply฀with฀FCC฀and฀Industry฀Canada฀RF฀exposure฀limits฀for฀general฀population/฀uncontrolled฀exposure,฀the฀antenna(s)฀used฀for฀these transmitters must be installed to provide a separation distance of at least 20 cm from all persons and must not be co-located or operating in conjunction with any other antenna or transmitter.Section 7.1.2 of RSS-GENUnder฀Industry฀Canada฀regulations,฀this฀radio฀transmitter฀may฀only฀operate฀using฀an฀antenna฀of฀type฀and฀maximum฀(or฀lesser)฀gain approved for the transmitter by Industry Canada. To reduce potential radio interference to other users, the antenna type and its฀gain฀should฀be฀so฀chosen฀that฀the฀equivalent฀isotropically฀radiated฀power฀(e.i.r.p.)฀is฀not฀more฀than฀that฀necessary฀for฀successful฀communication.Section 7.1.3 of RSS-GENOperation is subject to the following two conditions:1  this device may not cause interference, and2  this device must accept any interference, including interference that may cause undesired operation of the device.
® Marque déposée américaine.Copyright © 2011 Honeywell International Inc.Tous droits réservés.Dispositif à distance sans fil de point d’entrée/sortieGuide d’installationInstallation de la pile1  Retirer le couvercle.2  Insérer une pile bouton CR2450 (incluse) dans l'emplacement au bas du dispositif à distance. Voir la polarité indiquée sur le dispositif à distance.3  Le voyant DEL clignotera rapidement vert.Lorsque la pile est faible, le voyant DEL clignotera rouge.MontageLe montage du dispositif à distance est optionnel. 1  Retirer le couvercle avant du dispositif à distance.2  Utiliser la visserie et les ancres de montage inclus pour fixer le dispositif au mur.3  Remettre le couvercle avant sur le dispositif à distance.Connexion1  Préparer le thermostat à la connexion RedLINK (voir instructions du thermostat ou de l’EIM).2  Appuyer sur le bouton CONNECT et le relâcher du dispositif à distance. Après un court délai, le voyant DEL s'allume en vert pendant 15 secondes.M33096M33095Ce dispositif contient une pile au lithium pouvant contenir du perchlorate. Une manipulation spéciale peut être requise. Voir www.dtsc.ca.gov/hazardouswaste/perchlorate.
269-2592EFS—03Guide d’installationFonctionnement du voyant DELLors du fonctionnement normal, le voyant DEL est éteint lorsque le dispositif à distance est en veille. Si le voyant DEL reste éteint lorsqu’une touche est appuyée, la pile est morte.Le voyant DEL fonctionne de la façon suivante lorsqu’une touche est appuyée :•฀ Vert฀lorsqu'une฀touche฀est฀appuyée.•฀ Clignotements฀rouges฀rapides฀lorsque฀la฀pile฀doit฀être฀remplacée.•฀ Clignotements฀oranges฀lents฀lorsque฀le฀dispositif฀à฀distance฀est฀débranché฀du฀système.•฀ Le฀voyant฀DEL฀est฀éteint฀lorsque฀le฀dispositif฀à฀distance฀est฀en฀veille.Durant la connexion sans fil au système, le voyant DEL fonctionne de la façon suivante :•฀ Vert฀en฀continu฀pendant฀15฀secondes฀:฀branché฀au฀système.•฀ Rouge฀en฀continu฀:฀le฀dispositif฀à฀distance฀n'a฀pas฀fait฀la฀connexion฀au฀système.Déconnexion du système RedLINKAppuyer sans relâcher sur le bouton CONNECT et du dispositif à distance jusqu'à ce que le voyant s'illumine ambre (environ 10 secondes) pour déconnecter du système RedLINK.Pour remplacer un thermostat ou un module d’interface d’équipement, déconnecter le dispositif à distance de l'ancien appareil. Puis suivre les étapes à la page 1 pour effectuer la reconnexion du dispositif à distance au réseau sans fil.FonctionnementLe dispositif à distance possède trois touches. La touche qui est appuyée règle le thermostat au réglage de l'horaire programmé. Ce réglage est tenu jusqu'à ce qu'une autre touche soit appuyée sur la commande à distance ou lorsque l'horaire programmé régulier reprenne au thermostat.Modèle résidentiel :•฀ Home (À la maison) : Règle le thermostat sur le réglage À la maison de l'horaire programmé.•฀ Away (Absent) : Règle le thermostat sur le réglage Absent de l'horaire programmé.•฀ Vacation (Vacances) : Règle le thermostat sur le réglage Vacances de l'horaire programmé.Modèle commercial :•฀ Occupied (Occupé) : Règle le thermostat sur le réglage Occupé de l'horaire programmé.•฀ Unoccupied (Inoccupé) : Règle le thermostat sur le réglage Inoccupé de l'horaire programmé.•฀ Holiday (Jour férié) : Règle le thermostat sur le réglage Jour férié de l'horaire programmé.M33097
369-2592EFS—03Dispositif à distance sans fil de point d’entrée/sortieCaractéristiques techniquesTempérature ambiante de service1,7 à 45,6 °C (35 à 114 °F)Humidité relative de service5 % à 90 % (sans condensation)Dimensions (hauteur, largeur, profondeur)74 x 48 x 24 mm (2-7/8 x 1-7/8 x 15/16 po)
Besoin d’aide?Pour obtenir de l’aide, merci de visiter http://customer.honeywell.com, ou d’appeler le numéro gratuit : 1-800-468-1502 (installation résidentielle)  •  1-888-245-1051 (installation commerciale)Solutions de régulation et d’automatisationHoneywell International Inc.1985 Douglas Drive NorthGolden Valley, MN 55422http://customer.honeywell.com® Marque de commence enregistrée aux États-Unis. © 2011 Honeywell International Inc.69-2592EFS—03  M.S.  Rev.  11-11Imprimé aux États-UnisInformations réglementairesDéclaration de conformité de la FCC (Partie 15.19) (États-Unis uniquement) Ce dispositif est conforme à la Partie 15 du règlement de la FCC. Le fonctionnement est soumis aux deux conditions suivantes :1  Ce dispositif ne doit pas causer d’interférences nuisibles, et2  Ce dispositif doit accepter toutes les interférences reçues, y compris celles pouvant causer un fonctionnement non souhaité.Avertissement de la FCC (Partie 15.21) (États-Unis uniquement)Les changements et les modifications non expressément approuvés par la partie responsable de la conformité peuvent annuler l’autorité de l’utilisateur à utiliser l’équipement.Déclaration d’interférence de la FCC (Partie 15.105 (b)) (États-Unis uniquement)Cet équipement a été testé et est conforme aux limites des dispositifs numériques de Classe B , conformément à la Partie 15 du règlement de la FCC. Ces limites sont conçues pour fournir une protection raisonnable contre les interférences nuisibles dans une installation résidentielle. Cet équipement génère, utilise et peut émettre de l’énergie de radiofréquence, et s’il n’est pas installé et utilisé conformément aux instructions, peut causer des interférences nuisibles aux communications radio. Il n’y a toutefois aucune garantie qu’une interférence n’aura pas lieu dans une installation particulière. Si cet équipement cause des interférences nuisibles à la réception radio et télévision, ce qui peut être déterminé en éteignant le dispositif et en le remettant en marche, il est recommandé à l’utilisateur de tenter de corriger l’interférence par l’une des mesures suivantes:•฀ Réorienter฀ou฀déplacer฀l’antenne฀réceptrice.•฀ Augmenter฀la฀séparation฀entre฀l’équipement฀et฀le฀récepteur.•฀ Brancher฀l’équipement฀dans฀la฀prise฀d’un฀circuit฀différent฀de฀celui฀auquel฀le฀récepteur฀est฀connecté.•฀ Consulter฀le฀distributeur฀ou฀un฀technicien฀radio/TV฀compétent฀pour฀obtenir฀de฀l’aide.Module d’interface d’équipement, thermostats et capteur d’intérieurPour฀assurer฀la฀conformité฀aux฀limites฀d’exposition฀RF฀de฀la฀FCC฀et฀d’Industrie฀Canada฀pour฀la฀population฀générale/l’exposition฀non฀contrôlée, la ou les antennes utilisées pour ces transmetteurs doivent être installées de façon à fournir une distance de séparation d’au moins 20 cm de toutes les personnes et ne doivent pas être situées ou fonctionner avec toute autre antenne ou transmetteur.Section 7.1.2 de RSS-GENConformément aux normes d’Industrie Canada, ce transmetteur radio ne peut fonctionner qu’avec une antenne dont le type et le gain maximum sont approuvés par Industrie Canada. Pour réduire les risques d’interférences radio encourus par d’autres utilisateurs, le฀type฀et฀le฀gain฀de฀l’antenne฀doivent฀être฀choisis฀de฀façon฀à฀ce฀que฀la฀puissance฀rayonnée฀isotrope฀équivalente฀(PIRE)฀ne฀soit฀pas฀supérieure à celle nécessaire pour établir une bonne communication.Section 7.1.3 de RSS-GENLe fonctionnement est soumis à deux conditions :1  Ce dispositif ne doit pas causer d’interférences, et2  Ce dispositif doit accepter toutes les interférences, y compris celles pouvant causer un fonctionnement non souhaité.
 salidaRemoto inalámbrico para sistemas de control RedLINK® 2.0.Guía de instalación® Marca comercial registrada en los EE. UU.Copyright © 2011 Honeywell International Inc.Todos los derechos reservados.Instalación de la batería1฀ Quite฀la฀cubierta.2  Inserte una nueva batería de botón CR2450 (que se incluye) en la ranura en la parte inferior del remoto. Observe las marcas de la polaridad en el remoto.3  El LED destellará brevemente en verde.Cuando la batería tiene poca carga, el LED destellará en rojo.MontajeEl montaje del remoto es opcional.1  Retire la cubierta frontal del remoto.2  Utilice los tornillos y los tarugos de pared que se suministran para fijar el remoto a la pared.3  Vuelva a colocar la cubierta del remoto.Conexión1  Prepare el termostato para la conexión RedLINK (refiérase a las instrucciones del termostato o del EIM).2  Presione y suelte el botón CONNECT del remoto. Después de una breve demora, el LED brillará en verde durante 15 segundos.M33096M33095Este dispositivo tiene baterías de litio que pueden contener material con perclorato. Es posible que necesite una manipulación especial. Visite www.dtsc.ca.gov/hazardouswaste/perchlorate.
269-2592EFS—03Guía de instalaciónFuncionamiento de LEDDurante el funcionamiento normal el LED estará apagado cuando el remoto está inactivo. Si el LED permanece apagado cuando se oprime un botón, la batería está agotada.Después de que presiona un botón, el LED funcionará como sigue:•฀ Verde฀cuando฀se฀oprime฀un฀botón.•฀ Destella฀rápidamente฀en฀rojo฀cuando฀debe฀cambiar฀la฀batería.•฀ Destella฀lentamente฀en฀ámbar฀cuando฀el฀remoto฀está฀desconectado฀del฀sistema.•฀ El฀LED฀estará฀apagado฀cuando฀el฀remoto฀está฀inactivo.Durante la conexión inalámbrica al sistema, el LED funcionará como sigue:•฀ Verde฀fijo฀durante฀15฀segundos:฀conectado฀al฀sistema.•฀ Rojo฀fijo:฀el฀remoto฀no฀se฀conectó฀al฀sistema.Desconexión del sistema RedLINKPresione y sostenga oprimido el botón CONNECT del remoto hasta que el LED destelle en ámbar (aproximadamente 10 segundos) para desconectarse del sistema RedLINK.Si cambia un termostato o un módulo de interfaz del equipo, desconecte el remoto del dispositivo antiguo. Siga el procedimiento de la página 1 para reconectar el remoto a la red inalámbrica.FuncionamientoEl remoto tiene tres botones. El botón que se presiona coloca el termostato en esa configuración de horario del programa. Esa configuración se mantiene hasta que se presione otro botón en el remoto o se reanude el horario del programa regular en el termostato.Modelo residencial:•฀ Home (en casa): Ajusta el termostato en la configuración Home (en casa) del horario del programa.•฀ Away (ausente): Ajusta el termostato en la configuración Away (ausente) del horario del programa.•฀ Vacation (vacaciones): Ajusta el termostato en la configuración Vacation (vacaciones) del horario del programa.Modelo comercial:•฀ Occupied (ocupado): Ajusta el termostato en la configuración Occupied (ocupado) del horario del programa.•฀ Unoccupied (desocupado): Ajusta el termostato en la configuración Unoccupied (desocupado) del horario del programa.•฀ Holiday (días festivos): Ajusta el termostato en la configuración Holiday (días festivos) del horario del programa.M33097
369-2592EFS—03Remoto inalámbrico para punto de entrada/salidaEspecificacionesTemperatura ambiente de funcionamiento35 a 114° F (1.7 a 45.6° C)Humedad relativa de funcionamiento5% al 90% (sin condensación)Dimensiones físicas (alto, ancho, profundidad)2-7/8 x 1-7/8 x 15/16 in (74 x 48 x 24 mm)
¿Necesita ayuda?Para obtener ayuda, visite http://customer.honeywell.com, o bien llame de manera  gratuita al: 1-800-468-1502 (instalaciones residenciales) • 1-888-245-1051 (instalaciones comerciales)Automatización y control desenlaceHoneywell International Inc.1985 Douglas Drive NorthGolden Valley, MN 55422http://customer.honeywell.com® Marca comercial registrada en los EE. UU. © 2011 Honeywell International Inc.69-2592EFS—03  M.S.  Rev.  11-11Impreso en los EE. UU.Información regulatoriaDeclaración de conformidad con las regulaciones FCC (Sección 15.19) (sólo en los EE. UU.) Este dispositivo cumple con la Sección 15 de las regulaciones FCC. El funcionamiento está sujeto a las dos condiciones siguientes1  Este dispositivo no debe causar interferencia perjudicial, y2  Este dispositivo deberá aceptar cualquier interferencia que se reciba, incluso la interferencia que pudiese causar el funcionamiento no deseado.Advertencia de la FCC (Sección 15.21) (sólo en los EE. UU.)Los cambios o las modificaciones que no hayan sido expresamente aprobados por la parte responsable del cumplimiento de las regulaciones podrían anular la autoridad del usuario para hacer funcionar el equipo.Declaración de la FCC sobre interferencias (Sección 15.105 (b)) (sólo en los EE. UU.)Este equipo fue probado y cumple con los límites de los dispositivos digitales clase B, conforme a la Sección 15 de las regulaciones FCC. Estos límites están diseñados para ofrecer una protección razonable contra la interferencia perjudicial en una instalación residencial. Este equipo genera, usa y puede irradiar energía de frecuencia de radio y, si no se instala y se utiliza según las instrucciones, puede producir una interferencia perjudicial en la comunicación radial. Sin embargo, no se garantiza que no habrá interferencia en una instalación particular. Si este equipo produce una interferencia perjudicial en la recepción televisiva o radial, lo cual puede determinarse al apagar y encender el equipo, se recomienda que el usuario intente corregir la interferencia con una o más de las siguientes medidas:•฀ Vuelva฀a฀orientar฀y฀ubicar฀la฀antena฀receptora.•฀ Aumente฀la฀distancia฀entre฀el฀equipo฀y฀el฀receptor.•฀ Conecte฀el฀equipo฀a฀un฀tomacorriente฀en฀un฀circuito฀diferente฀a฀aquel฀en฀el฀que฀está฀conectado฀el฀receptor.•฀ Consulte฀con฀su฀distribuidor฀o฀con฀un฀técnico฀experto฀en฀radio/televisión฀para฀recibir฀ayuda.Módulo de interfaz del equipo, termostatos y sensor para interioresPara฀cumplir฀con฀los฀límites฀de฀exposición฀RF฀que฀establece฀la฀FCC฀y฀el฀Industry฀Canada฀para฀la฀población฀en฀general/exposición฀no controlada, la o las antenas usadas para estos transmisores deben instalarse a una distancia de, al menos, 20 cm de todas las personas, y no deben ubicarse ni utilizarse junto con otra antena o transmisor.Sección 7.1.2 de RSS-GENDe acuerdo con las regulaciones del Industry Canada, este transmisor de radio puede funcionar únicamente utilizando un tipo de฀antena฀y฀una฀ganancia฀máxima฀(o฀inferior)฀aprobada฀para฀el฀transmisor฀por฀el฀Industry฀Canada.฀Para฀disminuir฀la฀interferencia฀potencial de radio con otros usuarios, el tipo de antena y su ganancia deben elegirse de tal forma que la potencia isótropa radiada equivalente฀(equivalent฀isotropically฀radiated฀power,฀e.i.r.p.)฀no฀sea฀mayor฀de฀lo฀necesario฀para฀una฀comunicación฀eficaz.Sección 7.1.3 de RSS-GENEl funcionamiento está sujeto a las dos condiciones siguientes:1  Este dispositivo no debe causar interferencia, y2  Este dispositivo deberá aceptar cualquier interferencia, incluso la interferencia que pudiese causar el funcionamiento no deseado del dispositivo.

Navigation menu