Advance Security TR64 Remote Control User Manual
Advance Security Inc Remote Control Users Manual
UserManual.wiki
>
Advance Security
>
TR64 User Manual
Users Manual
Navigation menu
Upload a User Manual
Namespaces
Wiki Guide
HTML
PDF
Info
Views
User Manual
Discussion / Help
Navigation
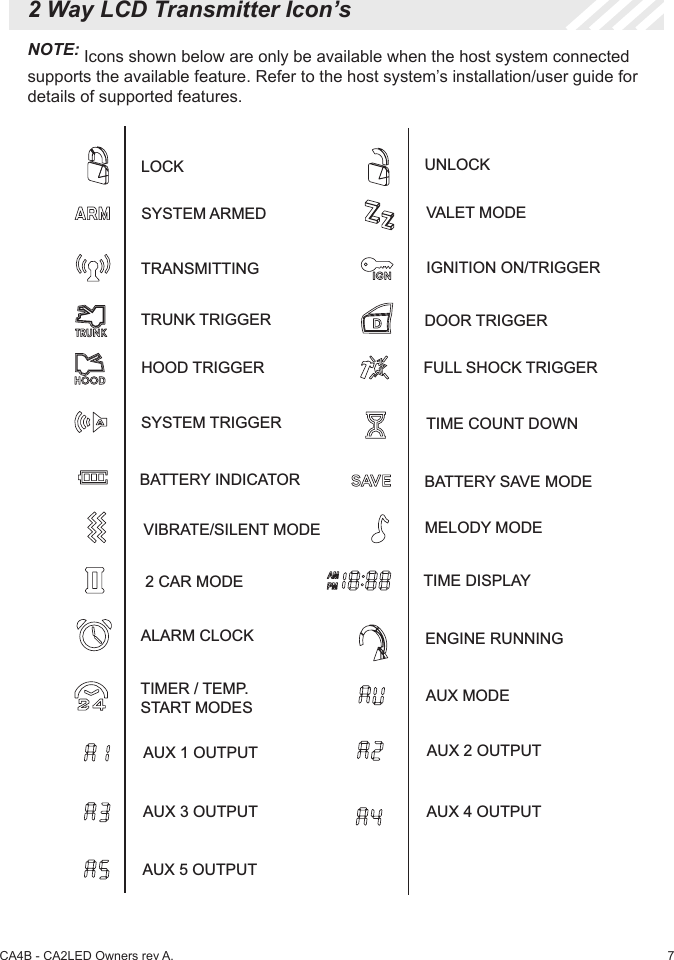
![42015 Audiovox Electronics Corporation. All rights reserved. Remote Start Valet Mode Enter / Exit Valet mode for systems using an Flashlogic FLRS kit. 1. Cycle ignition ON ve times [5x OFF/ON] rapidly. (complete this step within 7 seconds) 2. Wait, LED 1 (on the FLRS kit) will turn solid RED for 2 seconds. 3. Turn ignition to OFF position. 4. Valet Mode Programming Procedure completed. NOTE: In Valet Mode, the Remote starter is not functional. On units with Keyless Entry, Lock and Unlock will remain functional. To exit valet mode: repeat steps 1 to 4. Entering the Vehicle while it is Running via Remote Vehicle Start 1. Unlock the vehicle’s doors. 2. Enter the vehicle. DO NOT PRESS THE BRAKE PEDAL! 3. Insert the key into the ignition switch and turn to the ON or RUN position. 4. Press the brake pedal. The remote vehicle starter will disengage and the vehicle will operate normally. Preheating or Precooling the Vehicle’s interior Before exiting the vehicle, set the temperature controls to the desired setting and operation. After the system starts the vehicle, the heater or air conditioner will activate and heat or cool the vehicle’s interior to your setting.](https://usermanual.wiki/Advance-Security/TR64/User-Guide-2791440-Page-4.png)