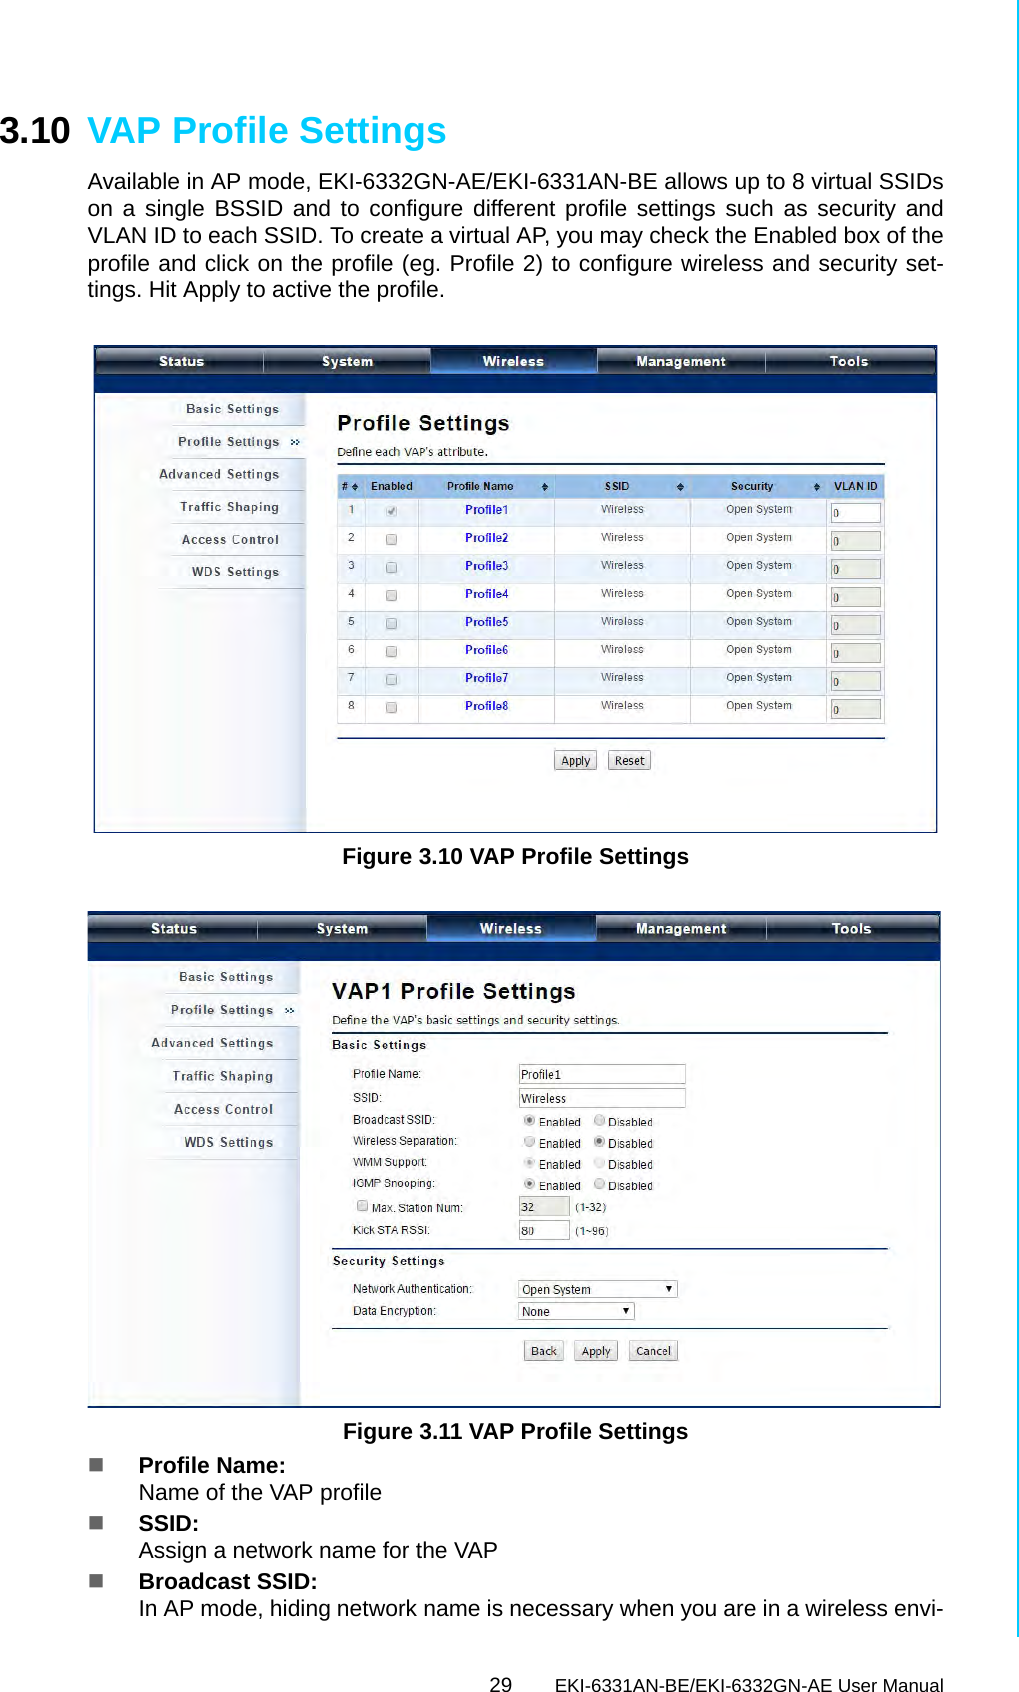
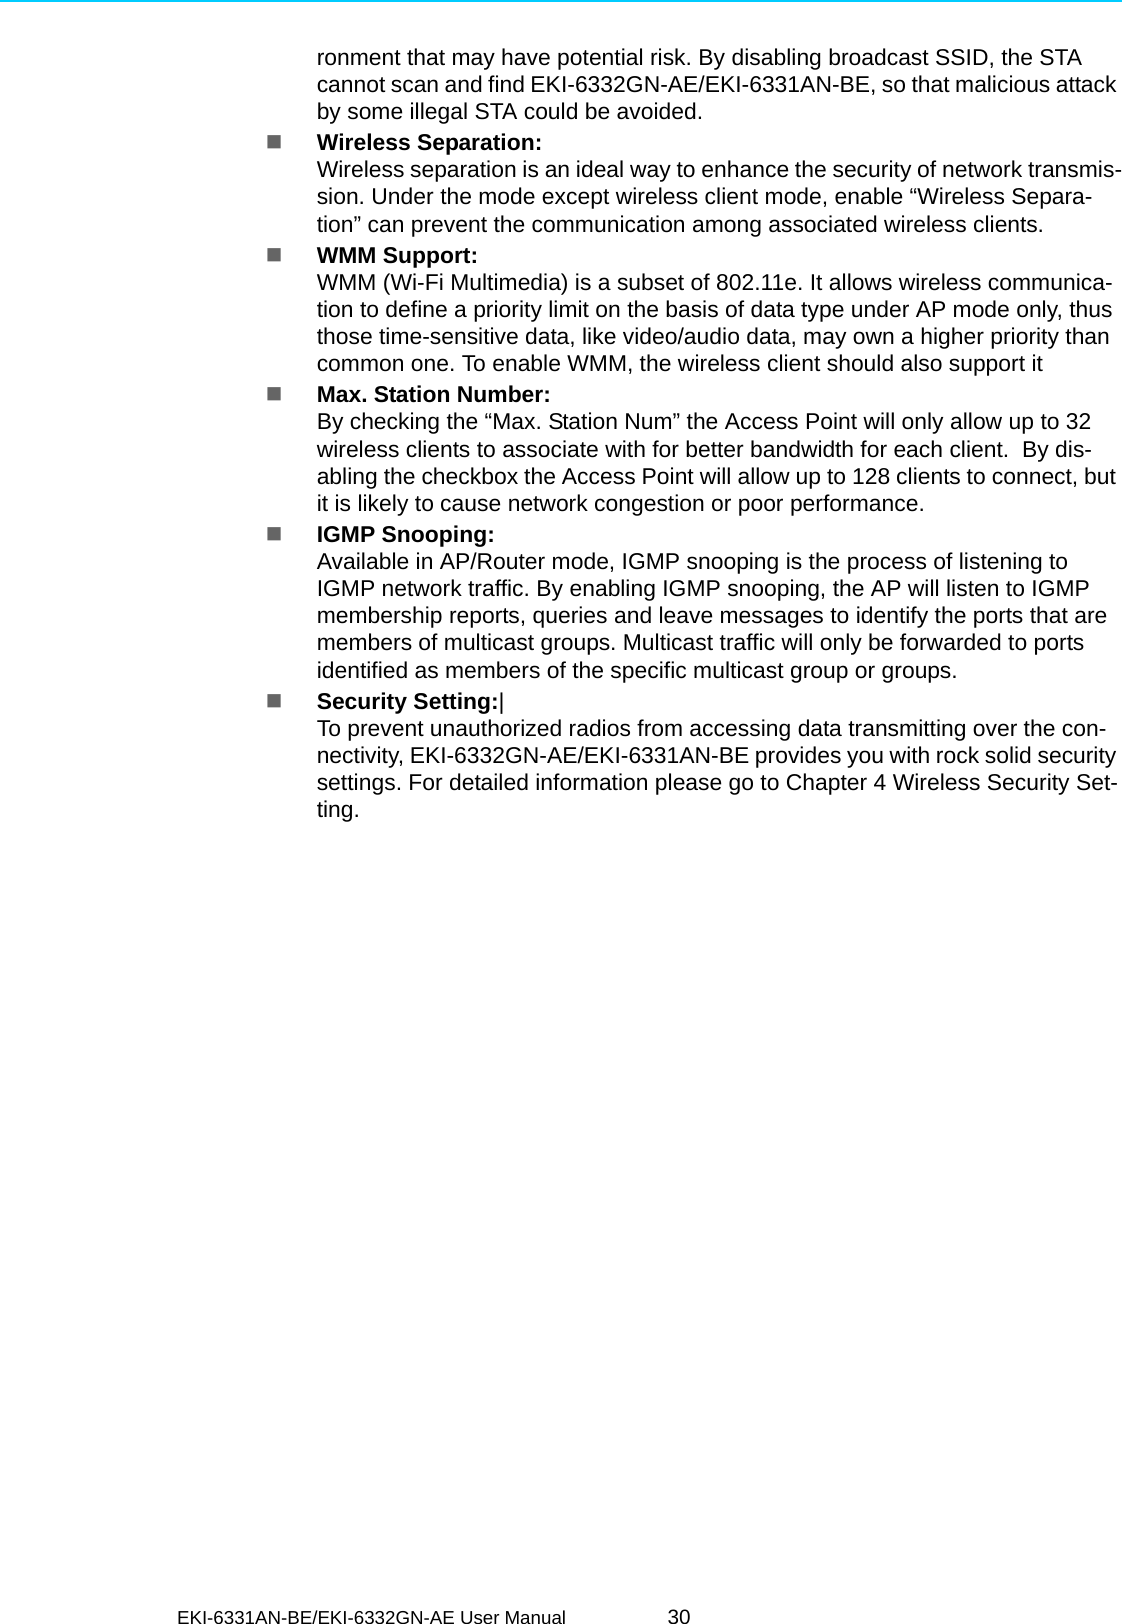
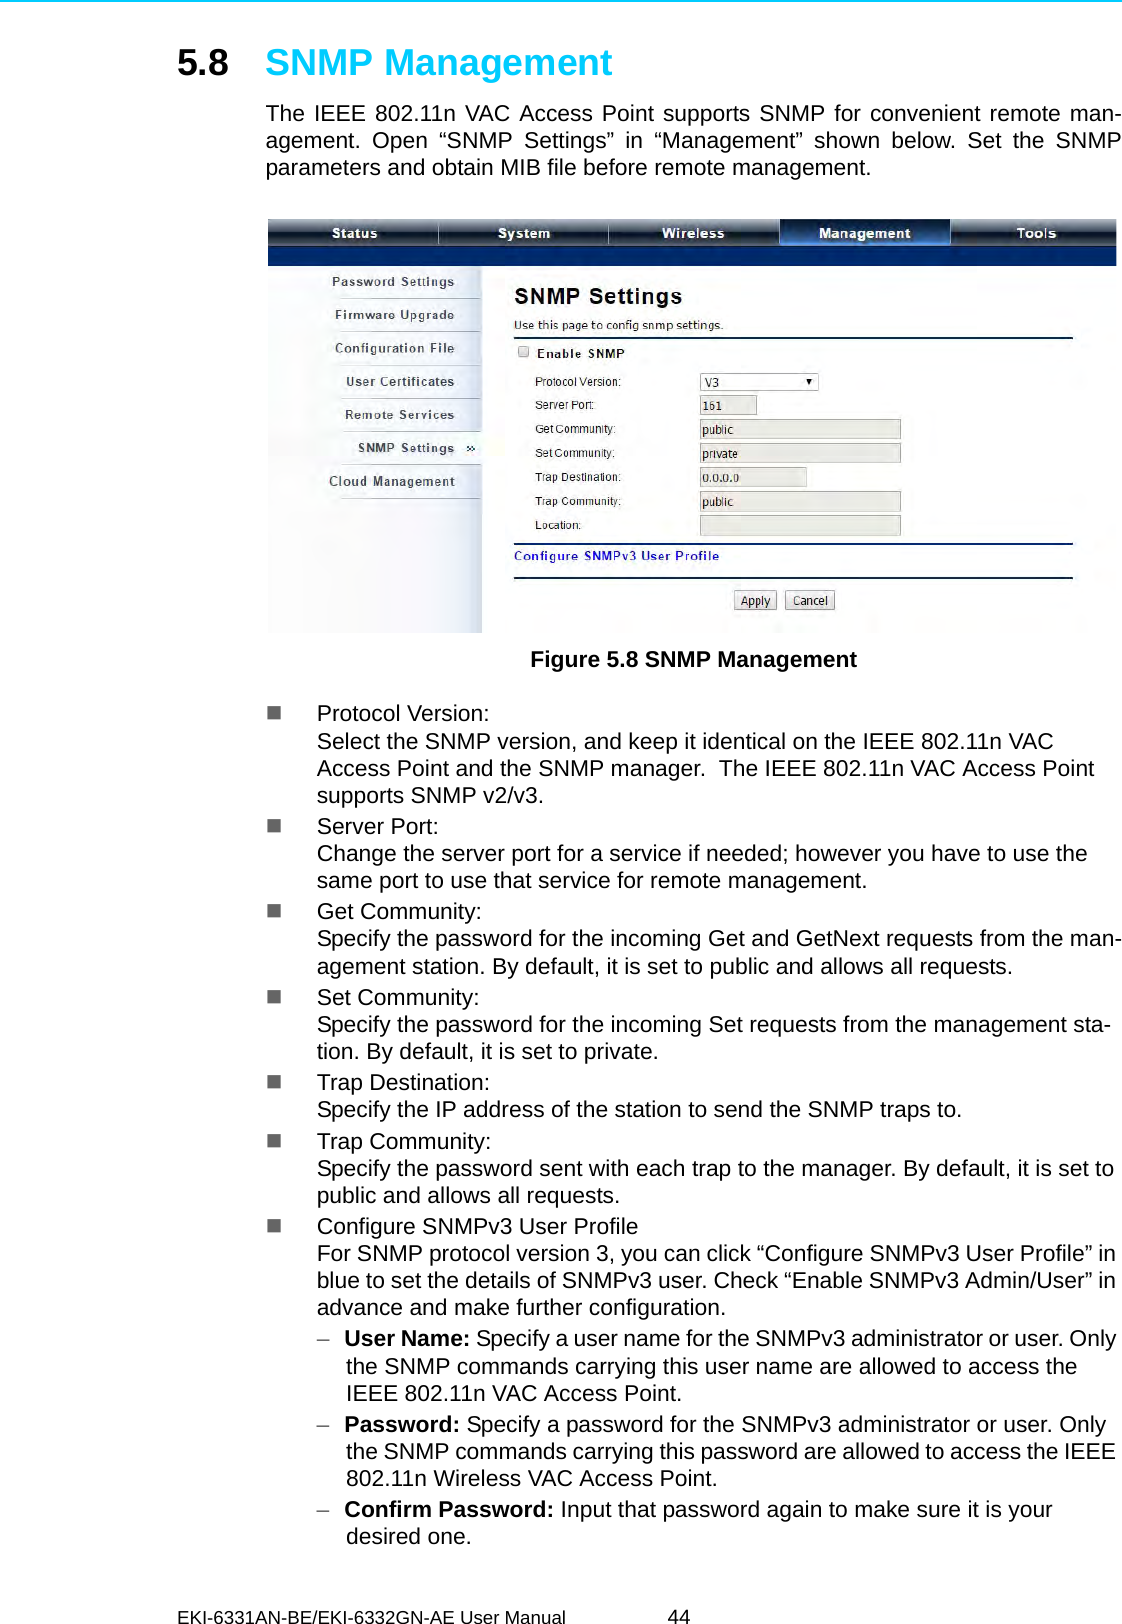
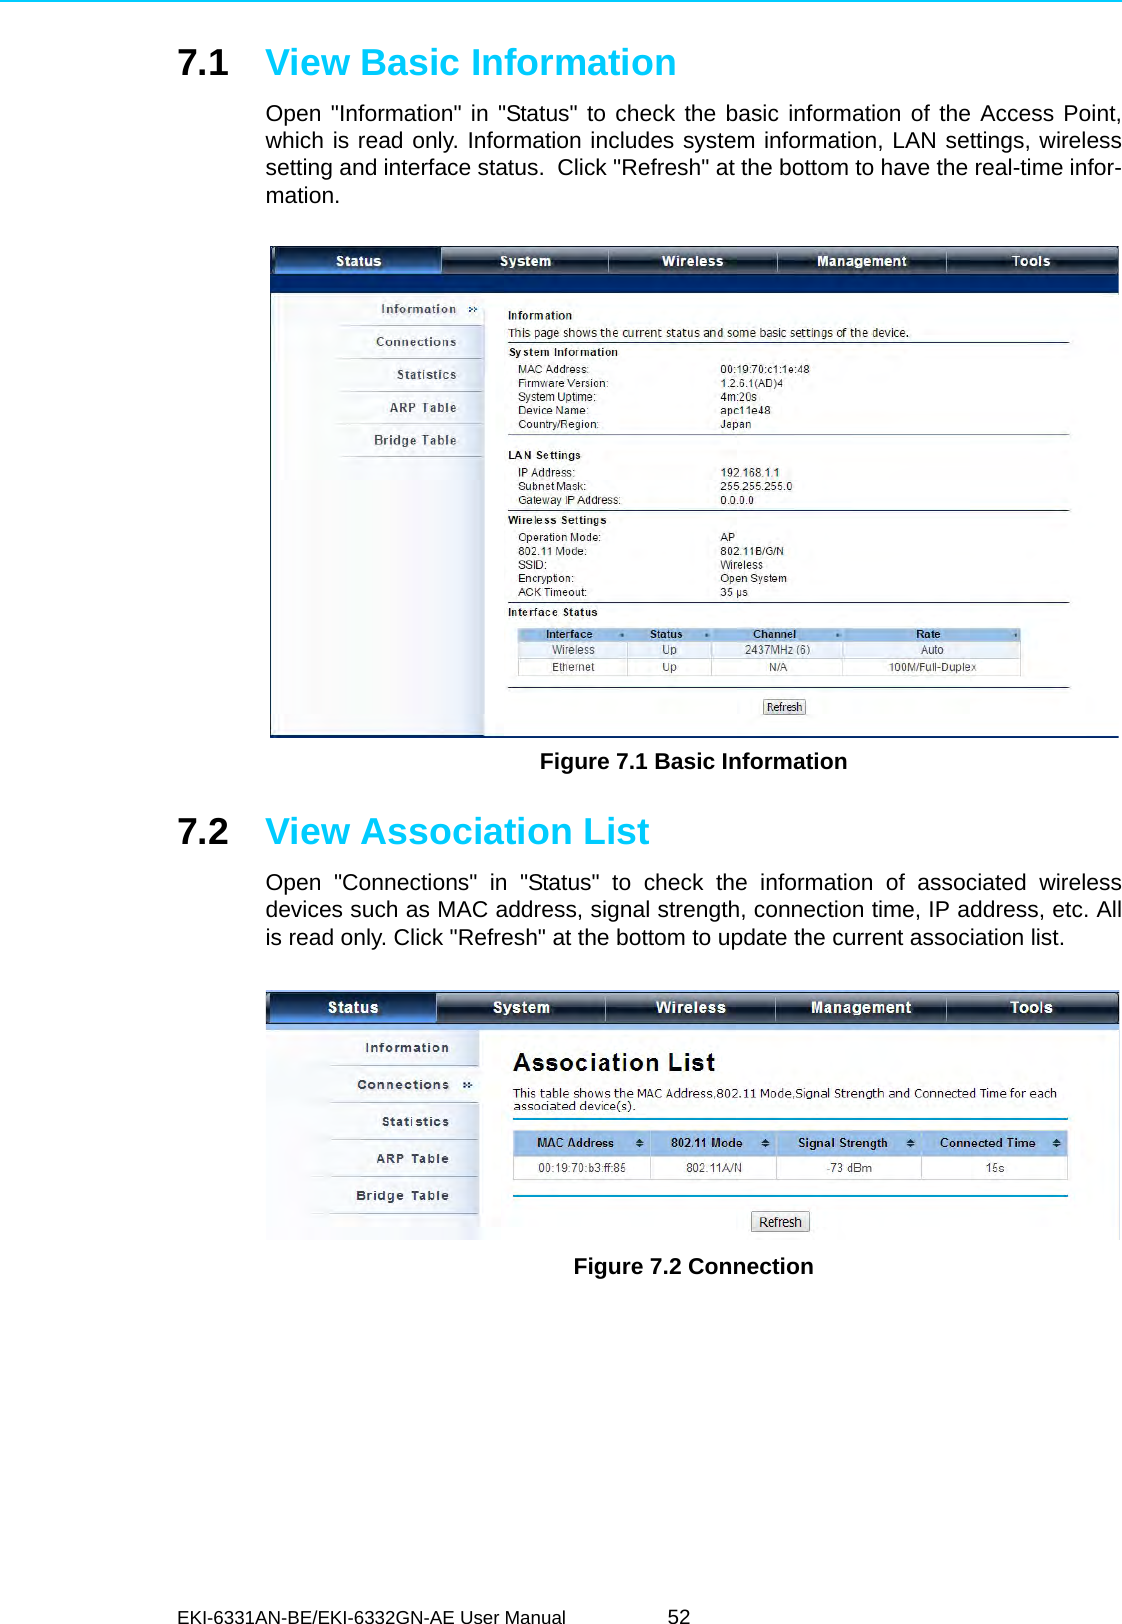
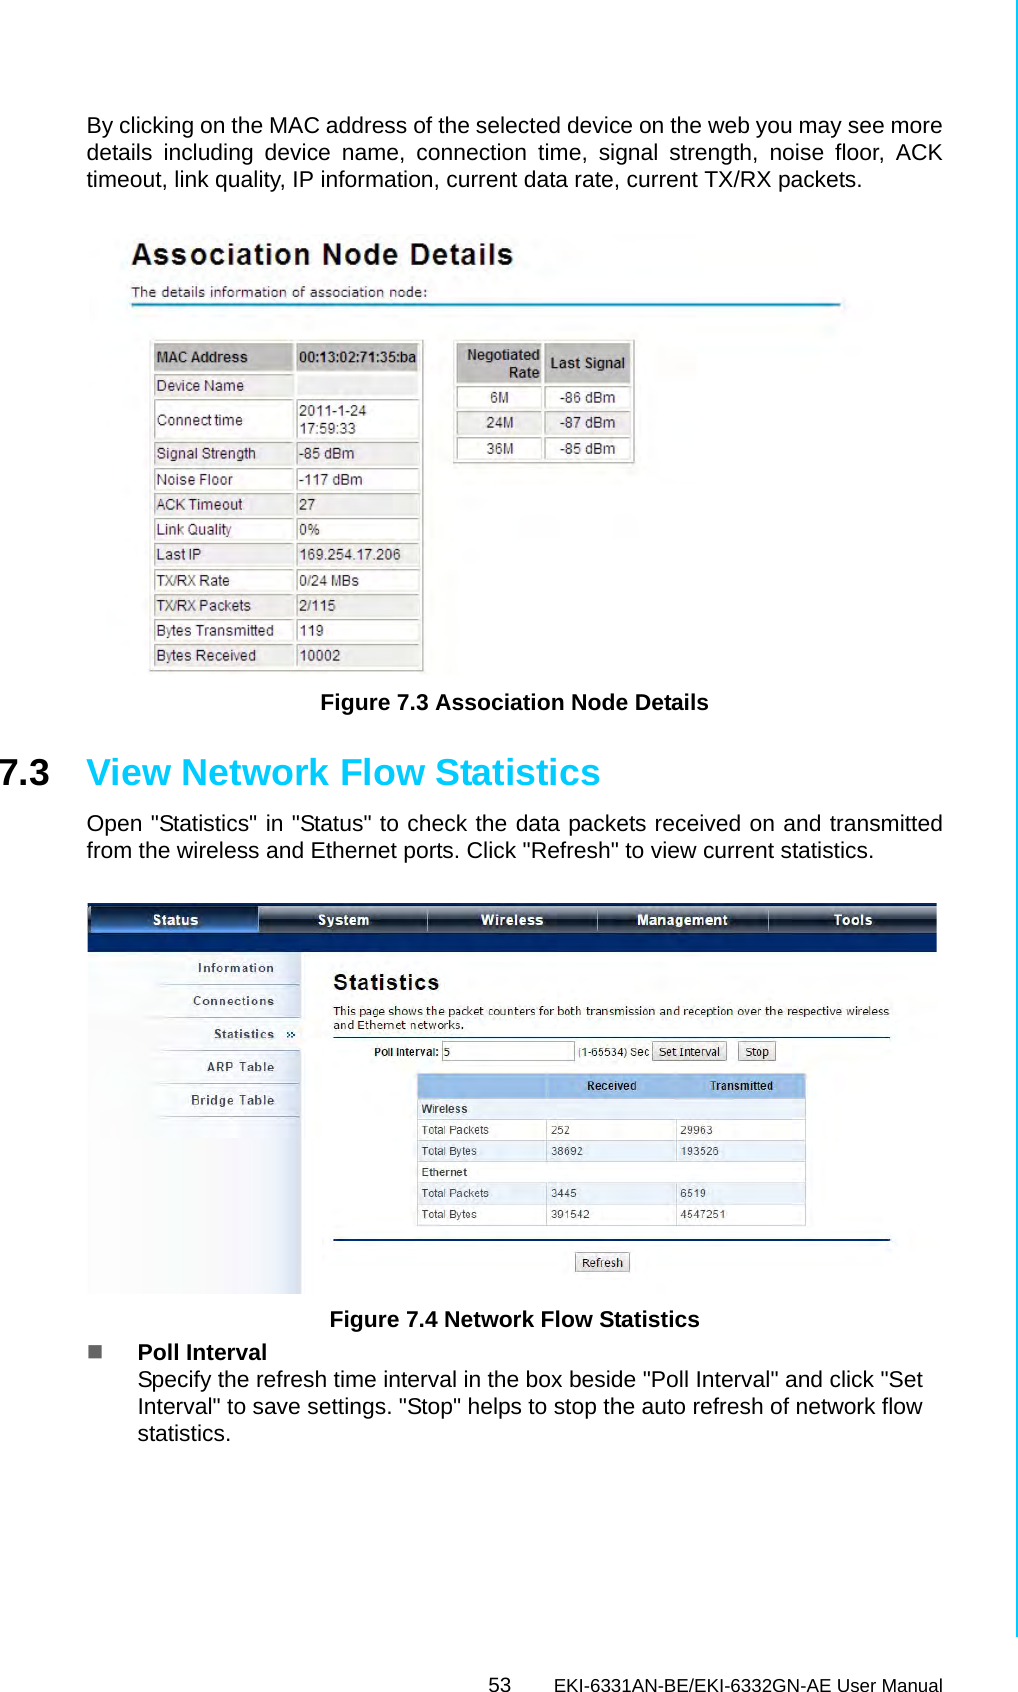
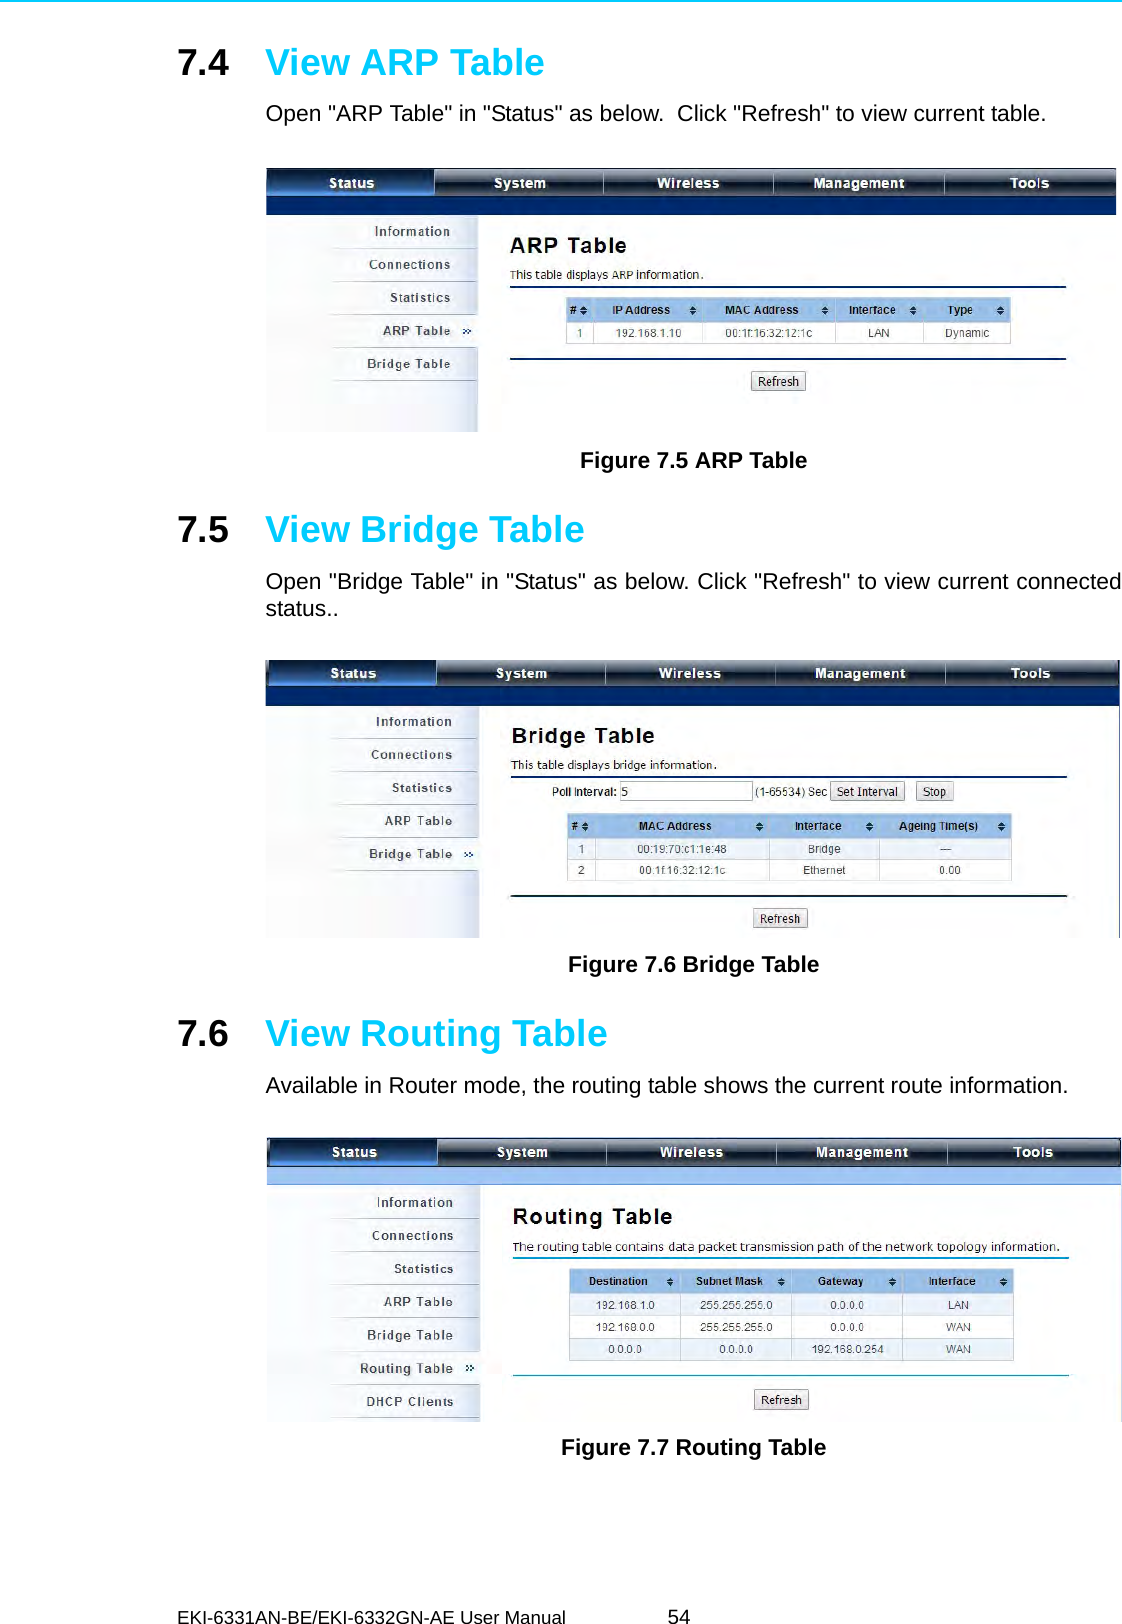
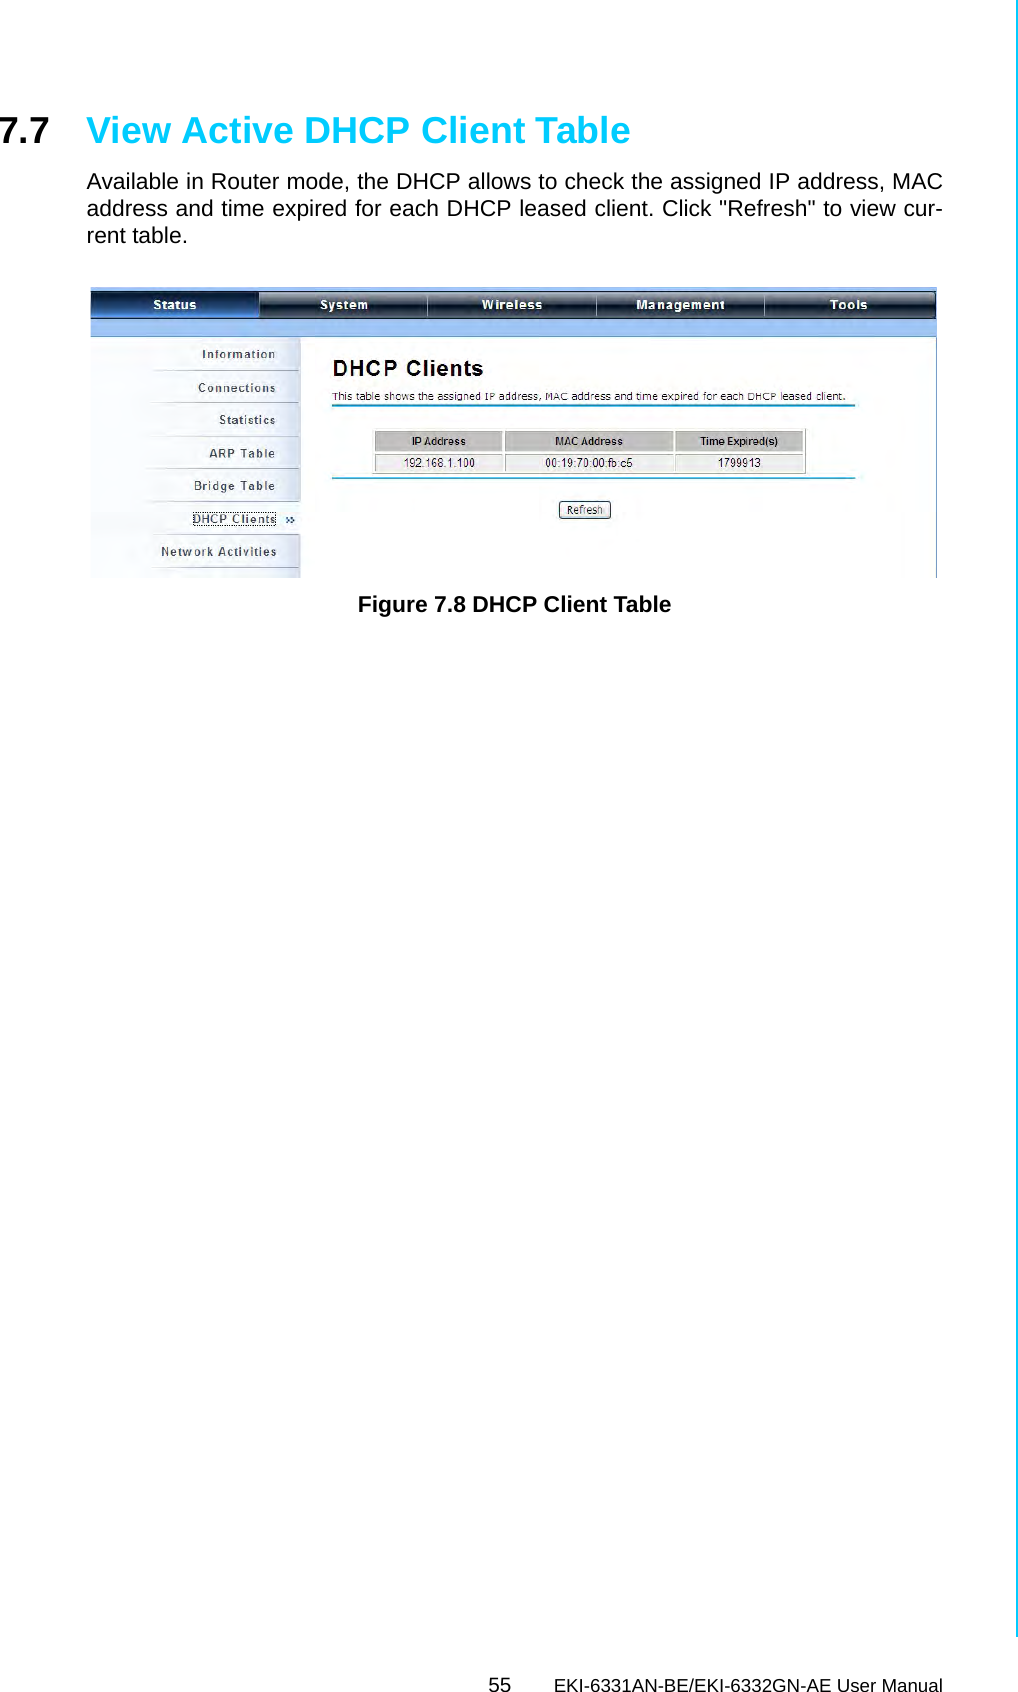
Advantech Co EKI6332GNAE IEEE 802.11 b/g/n Wireless AP/Client/Bridge User Manual V4 12 EA User Manual
Advantech Co Ltd IEEE 802.11 b/g/n Wireless AP/Client/Bridge V4 12 EA User Manual
UserManual.wiki
>
Advantech Co
>
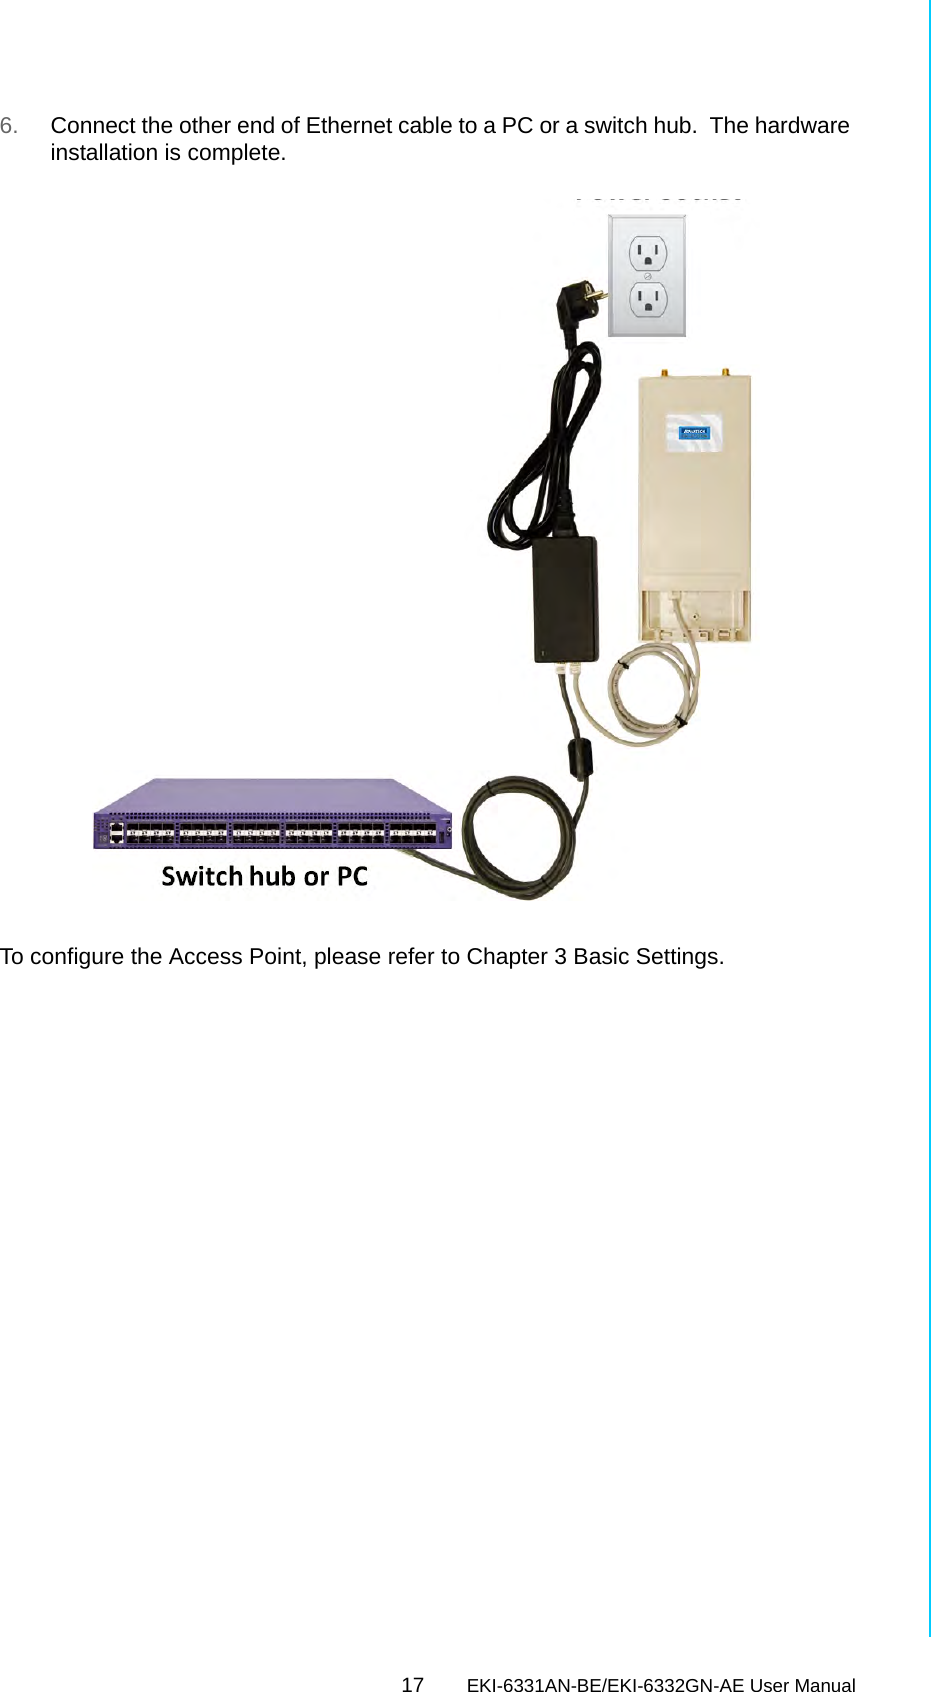
EKI6332GNAE User Manual
EKI-6331AN_6332GN_User_Manual
Navigation menu
Upload a User Manual
Namespaces
Wiki Guide
HTML
PDF
Info
Views
User Manual
Discussion / Help
Navigation

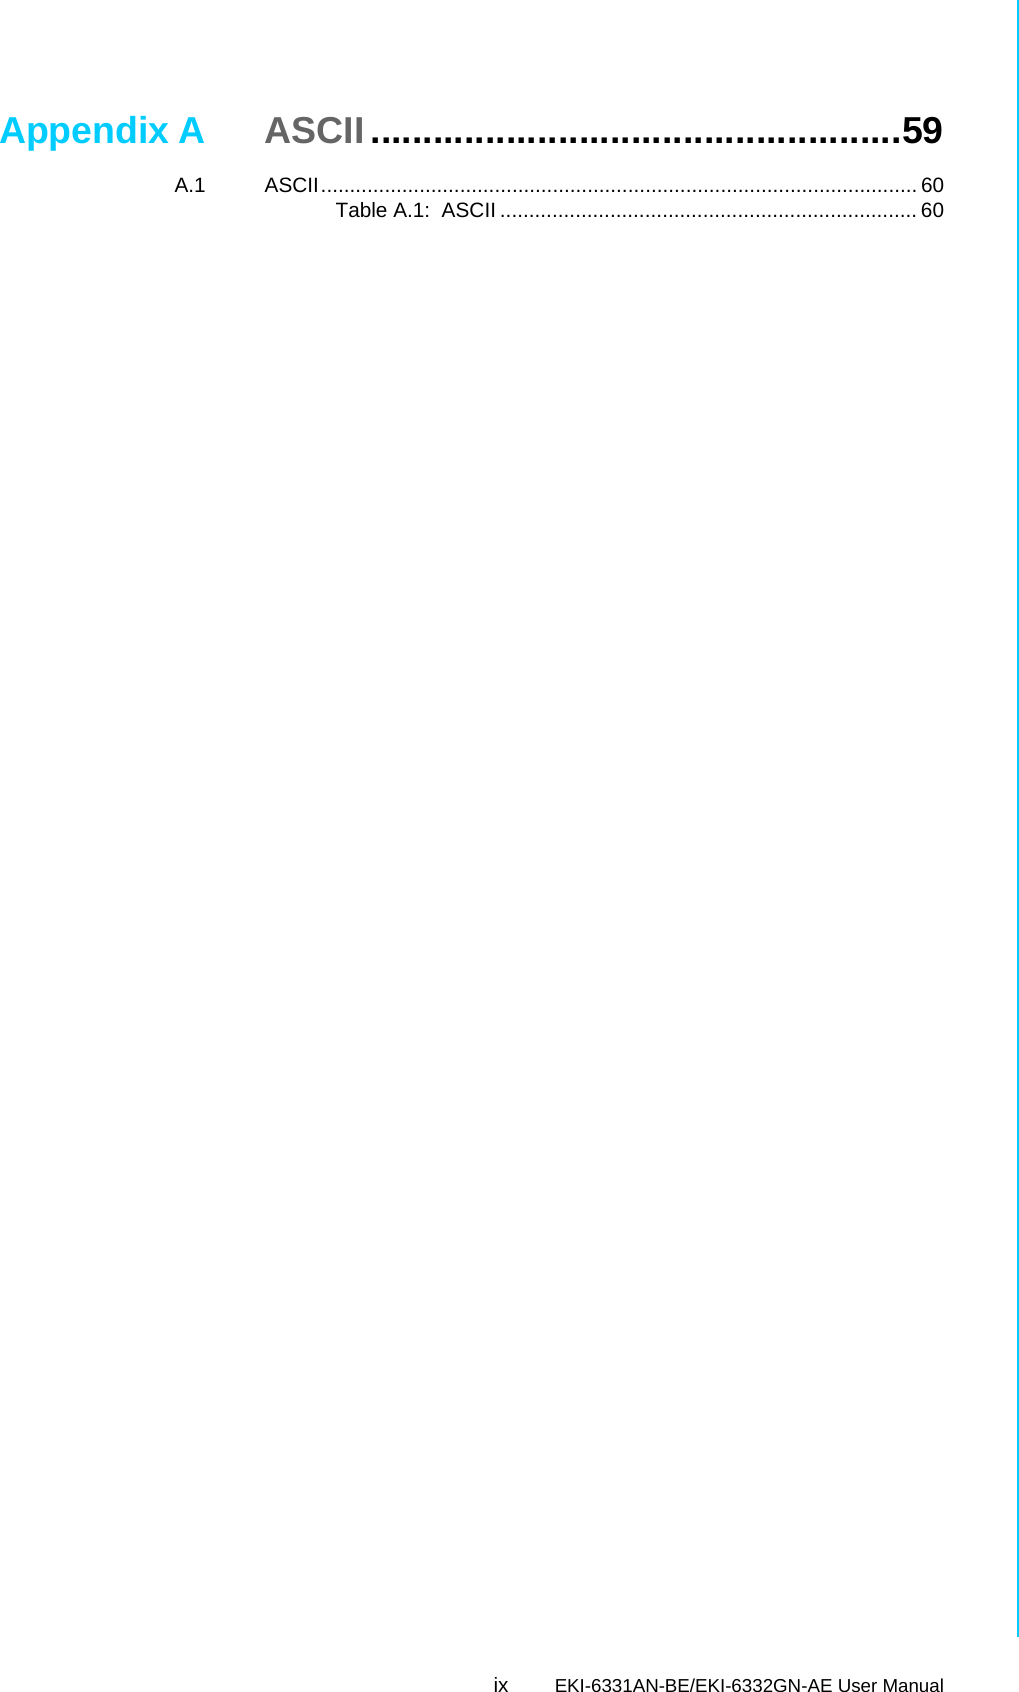


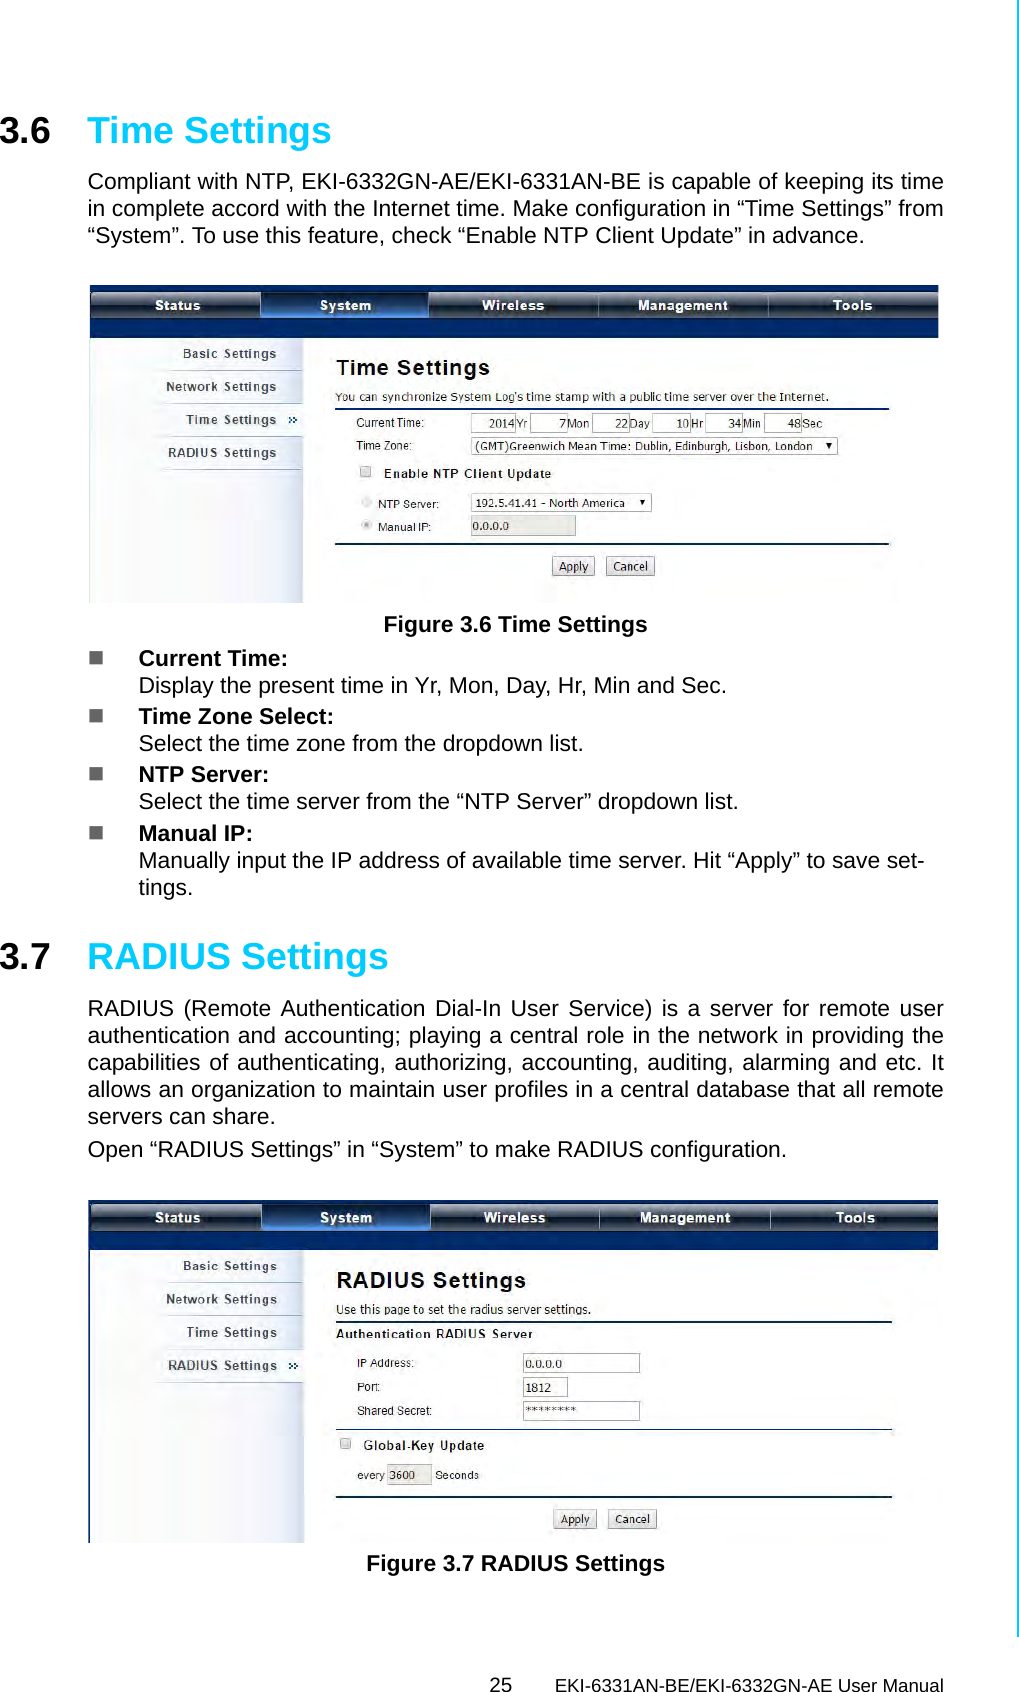


![EKI-6331AN-BE/EKI-6332GN-AE User Manual 60A.1 ASCIIWEP can be configured with a 64-bit, 128-bit or 152-bit Shared Key (hexadecimalnumber or ACSII). As defined, hexadecimal number is represented by 0-9, A-F or a-f;ACSII is represented by 0-9, A-F, a-f or punctuation. Each one consists of two-digithexadecimal.Table A.1: ASCIIASCIICharacter HexEquivalent ASCIICharacter HexEquivalent ASCIICharacter HexEquivalent ASCIICharacter HexEquivalent!21939Q51i 69"22:3AR52j 6A#23; 3BS53k 6B$24<3CT54l 6C%25= 3DU 55m 6D&26>3EV 56n 6E‘27?3FW57o6F(28@40X58p70)29A41Y59q71*2AB42Z5Ar 72+2BC43[ 5Bs 73,2CD44\ 5Ct 74-2DE45] 5Du75.2EF46^5Ev76/2FG47_5Fw77030H48` 60x 78131I 49a 61y 79232J4Ab 62z 7A333K4Bc 63{ 7B434L4Cd 64| 7C535M4De 65} 7D636N4Ef 66~ 7E737O4Fg 67838P50h 68](https://usermanual.wiki/Advantech-Co/EKI6332GNAE/User-Guide-2921086-Page-70.png)