AiRISTA Flow B400 Wi-Fi Location Tag User Manual B4
Ekahau Inc. Wi-Fi Location Tag B4
UserManual.wiki
>
AiRISTA Flow
>
B400 User Manual
>
User Guide
Contents
1.
Manual 1
2.
Manual 2
3.
User Guide
User Guide
Navigation menu
Upload a User Manual
Namespaces
Wiki Guide
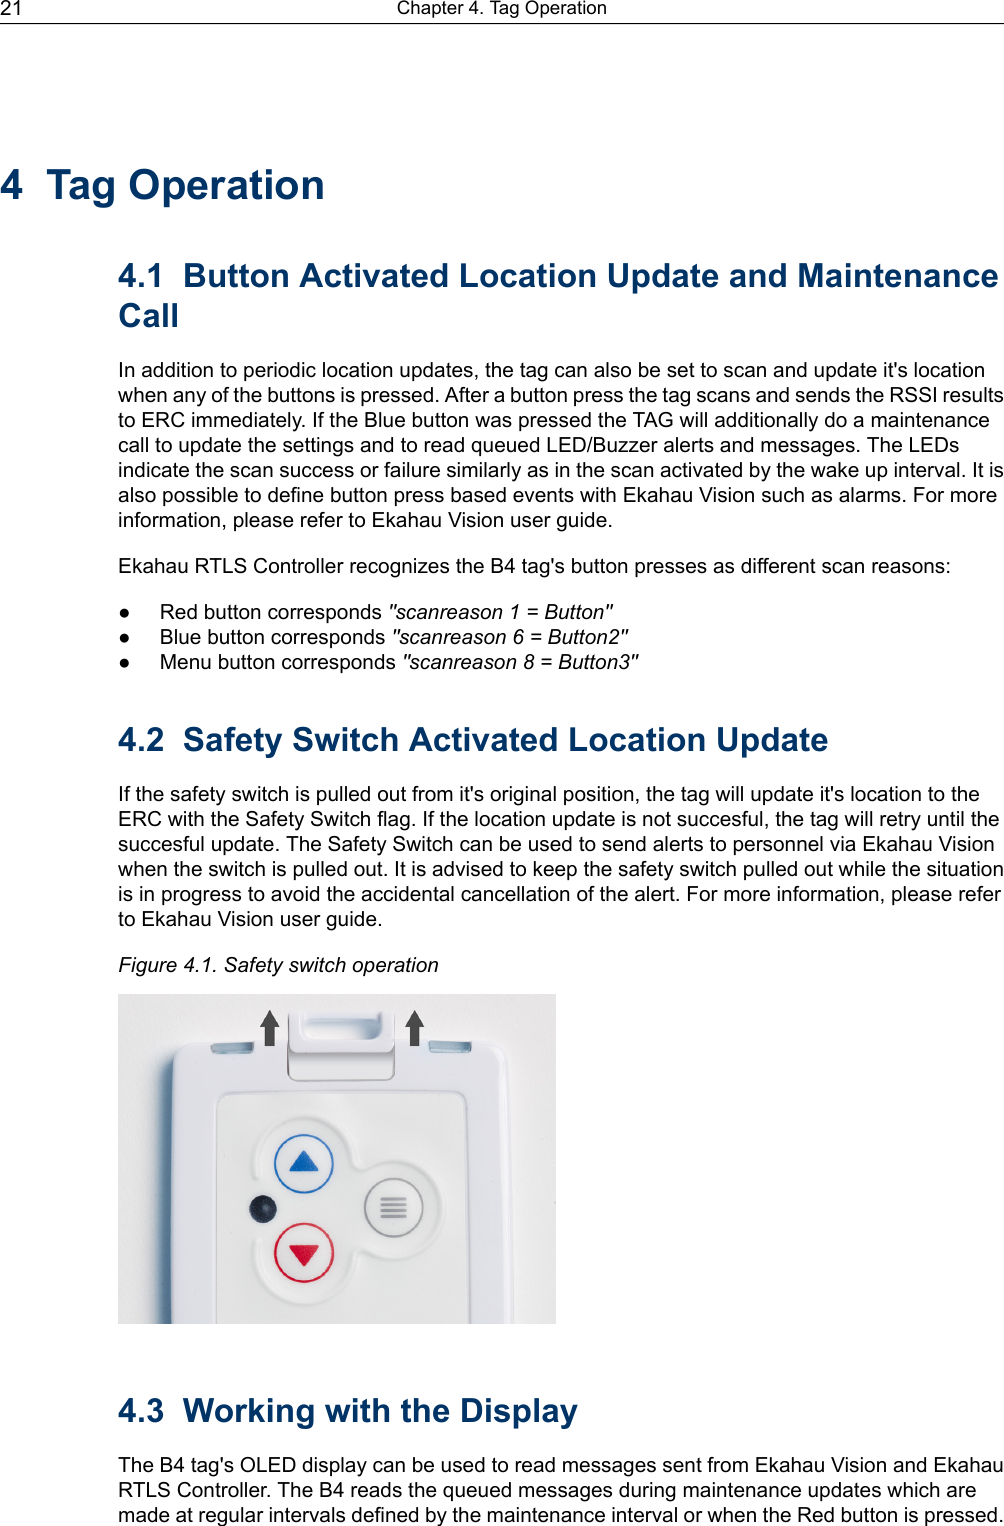
HTML
PDF
Info
Views
User Manual
Discussion / Help
Navigation


![(2) Cet appareil doit accepter toute autre interférence reçue, y compris les interférences susceptiblesd'entraîner un fonctionnement non désiré.6.2 Industry Canada Statements for Portable DevicesThis Class [B] digital apparatus complies with Canadian ICES-003.Cet appareil numérique de la classe [B] est conforme à la norme NMB-003 du Canada.IC: 6864A-B400Section 7.1.3 of RSS-GENOperation is subject to the following two conditions:1) this device may not cause interference, and2) this device must accept any interference, including interference that may cause undesiredoperation of the device.Le fonctionnement de ce système est assorti aux deux conditions suivantes :1 L’appareil ne peut causer d’interférences nuisibles, et2 L’appareil doit accepter les interférences reçues, y compris celles qui pourraient nuire à sonfonctionnement.Section 7.1.2 of RSS-GEN"Under Industry Canada regulations, this radio transmitter may only operate using an antenna ofa type and maximum (or lesser) gain approved for the transmitter by Industry Canada. To reducepotential radio interference to other users, the antenna type and its gain should be so chosen thatthe equivalent isotropically radiated power (e.i.r.p.) is not more than that necessary for successfulcommunication.""Conformément à la réglementation d'Industrie Canada, le présent émetteur radio peut fonctionneravec une antenne d'un type et d'un gain maximal (ou inférieur) approuvé pour l'émetteur parIndustrie Canada. Dans le but de réduire les risques de brouillage radioélectrique à l'intention desautres utilisateurs, il faut choisir le type d'antenne et son gain de sorte que la puissance isotroperayonnée équivalente (p.i.r.e.) ne dépasse pas l'intensité nécessaire à l'établissement d'unecommunication satisfaisante."30Chapter 6. Certifications](https://usermanual.wiki/AiRISTA-Flow/B400.User-Guide/User-Guide-2148222-Page-34.png)