AirVast Technology WN220 802.11b WLAN USB Stick User Manual 802 11b WLAN USB Stick
AirVast Technology Inc. 802.11b WLAN USB Stick 802 11b WLAN USB Stick
UserManual.wiki
>
AirVast Technology
>
WN220 User Manual
User Manual
Navigation menu
Upload a User Manual
Namespaces
Wiki Guide
HTML
PDF
Info
Views
User Manual
Discussion / Help
Navigation
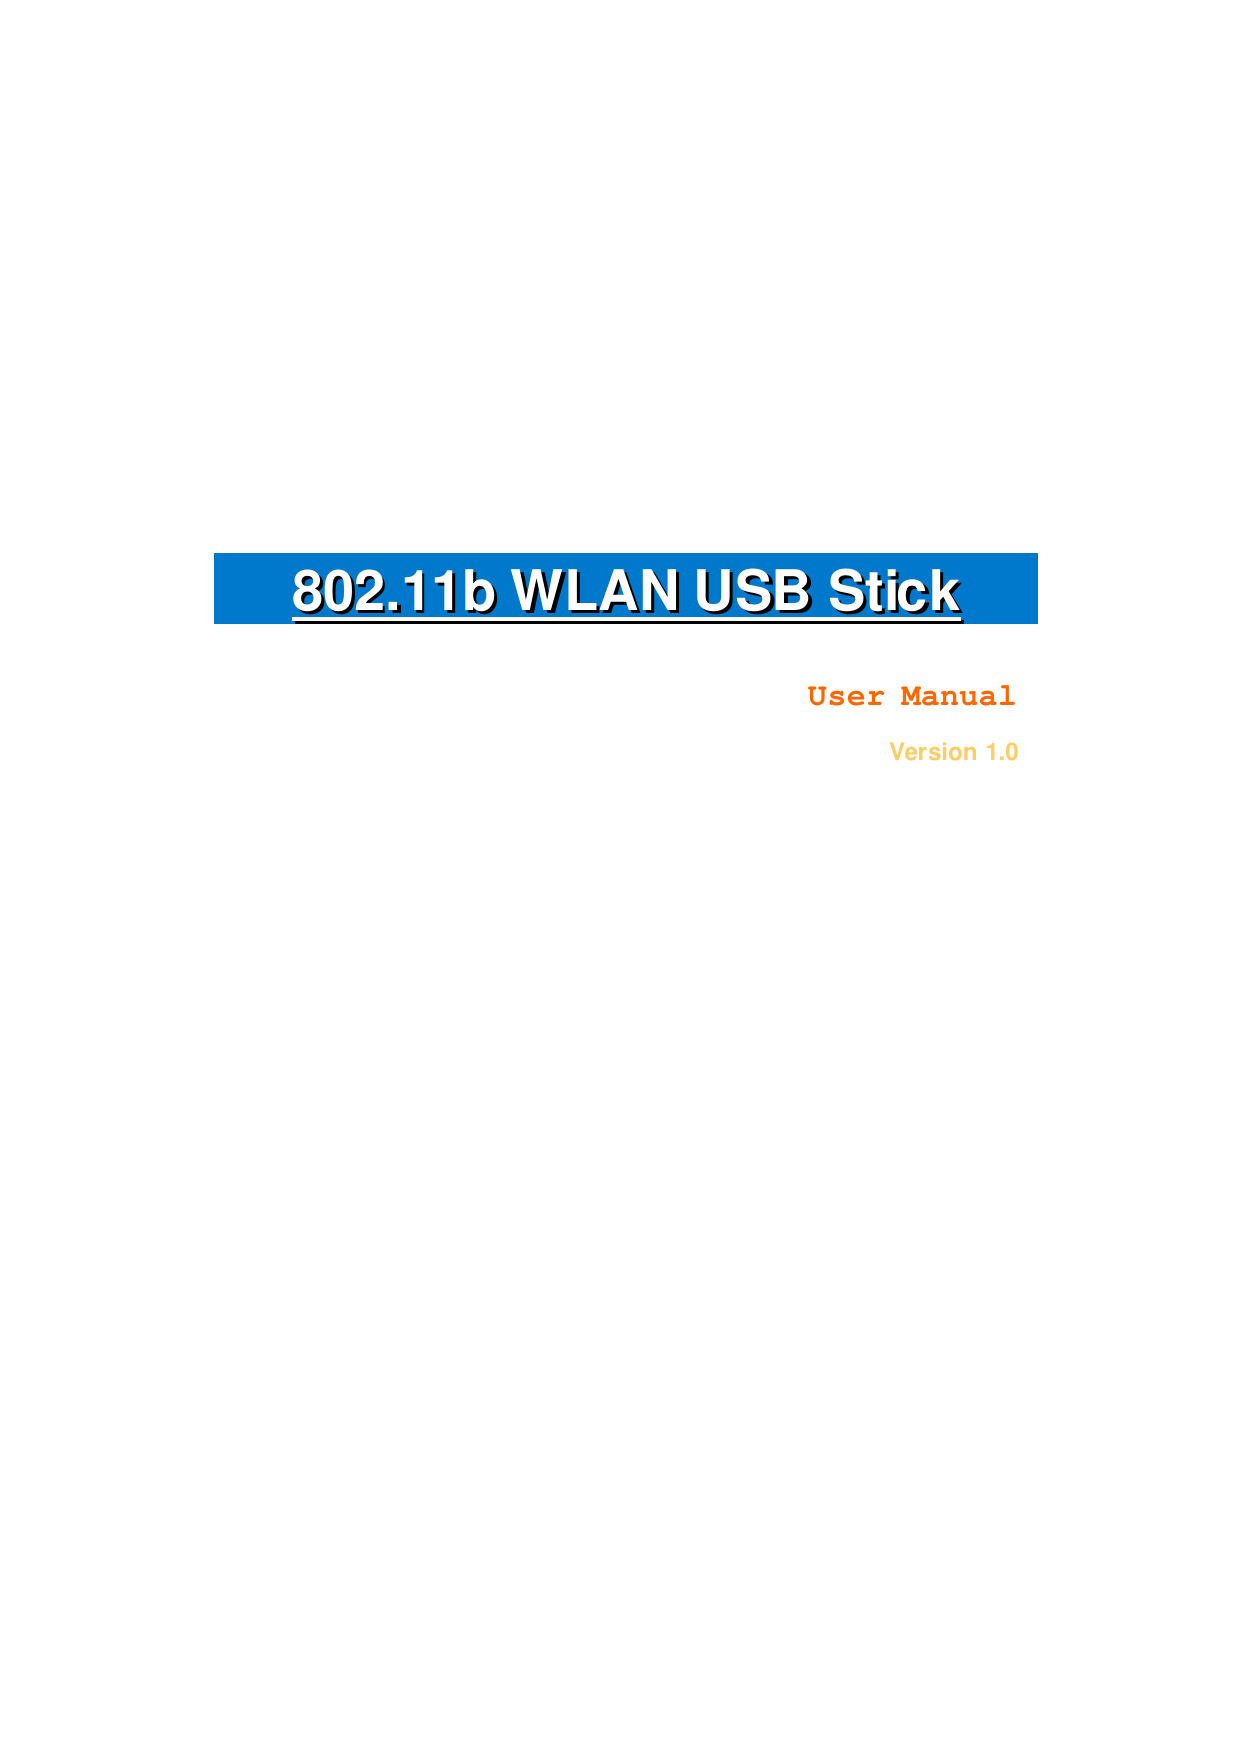
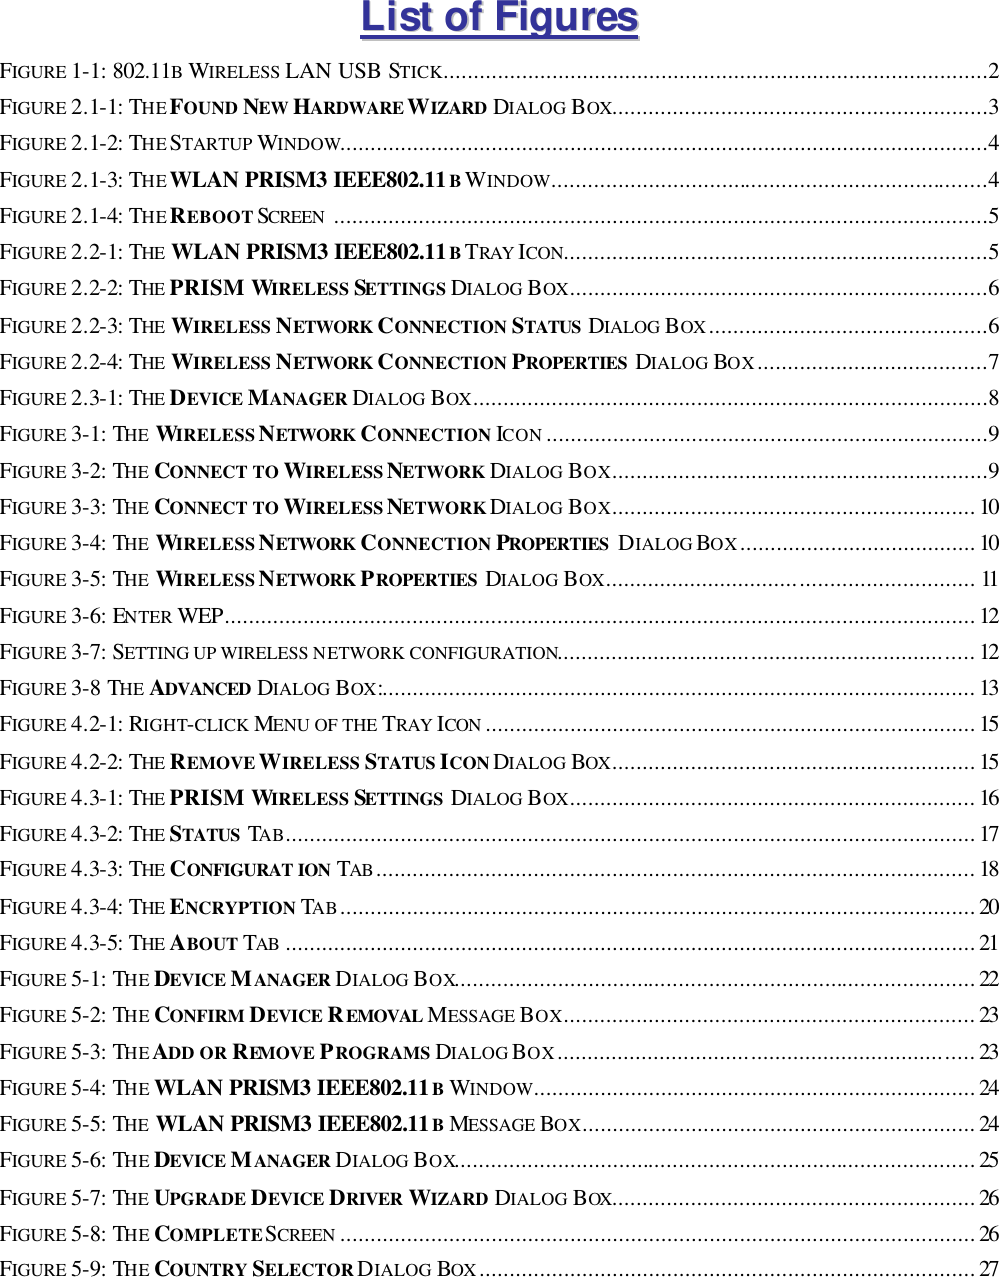
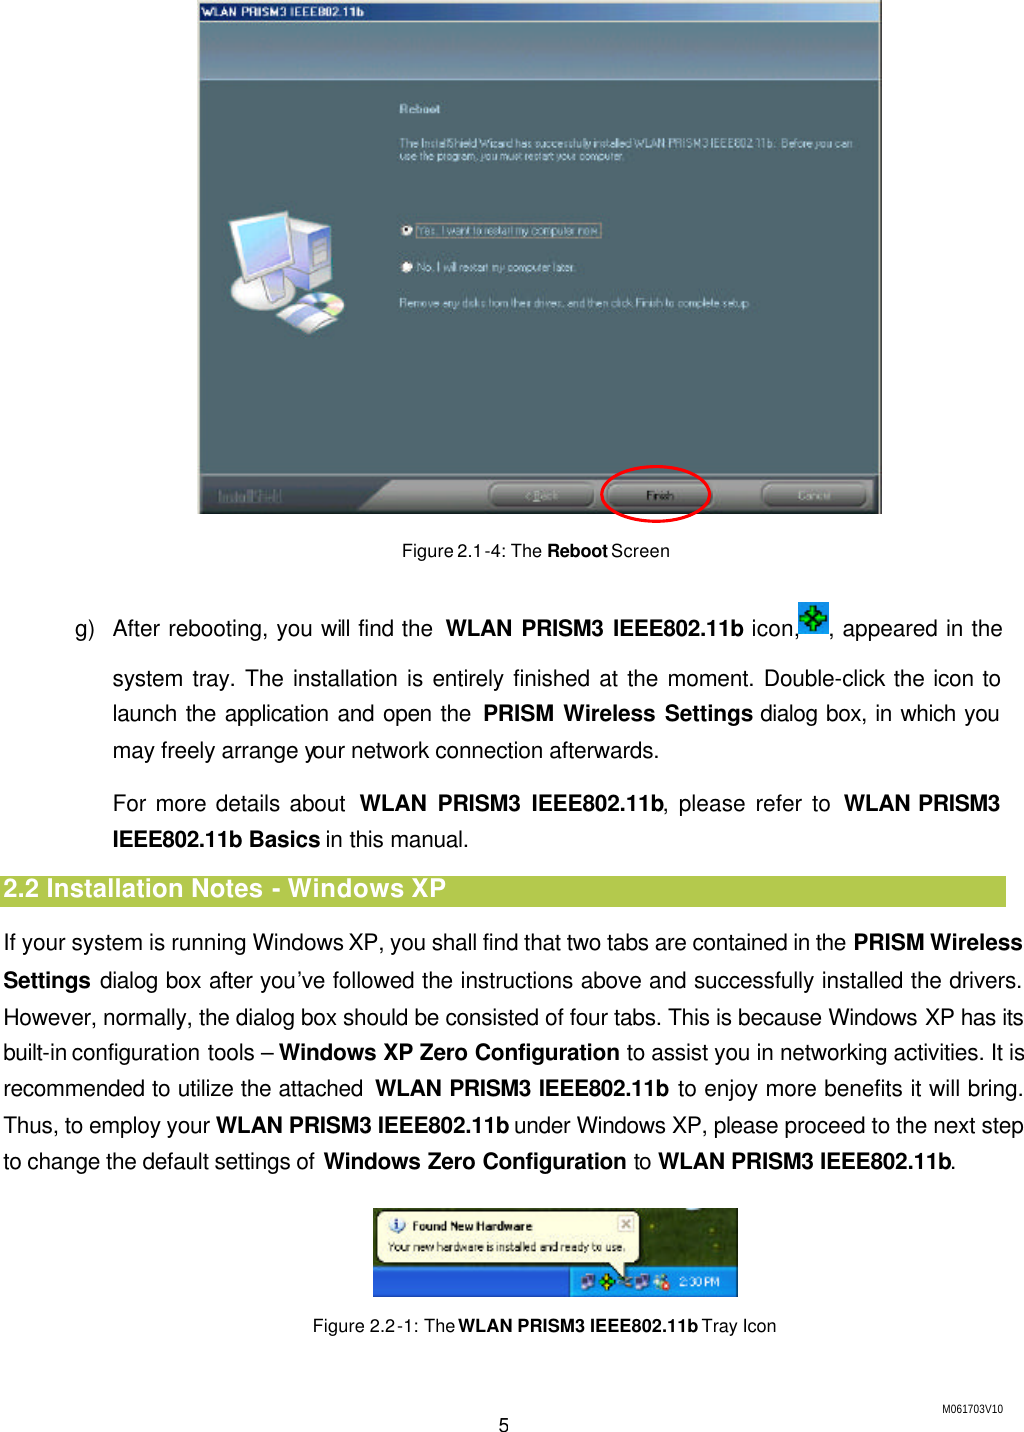
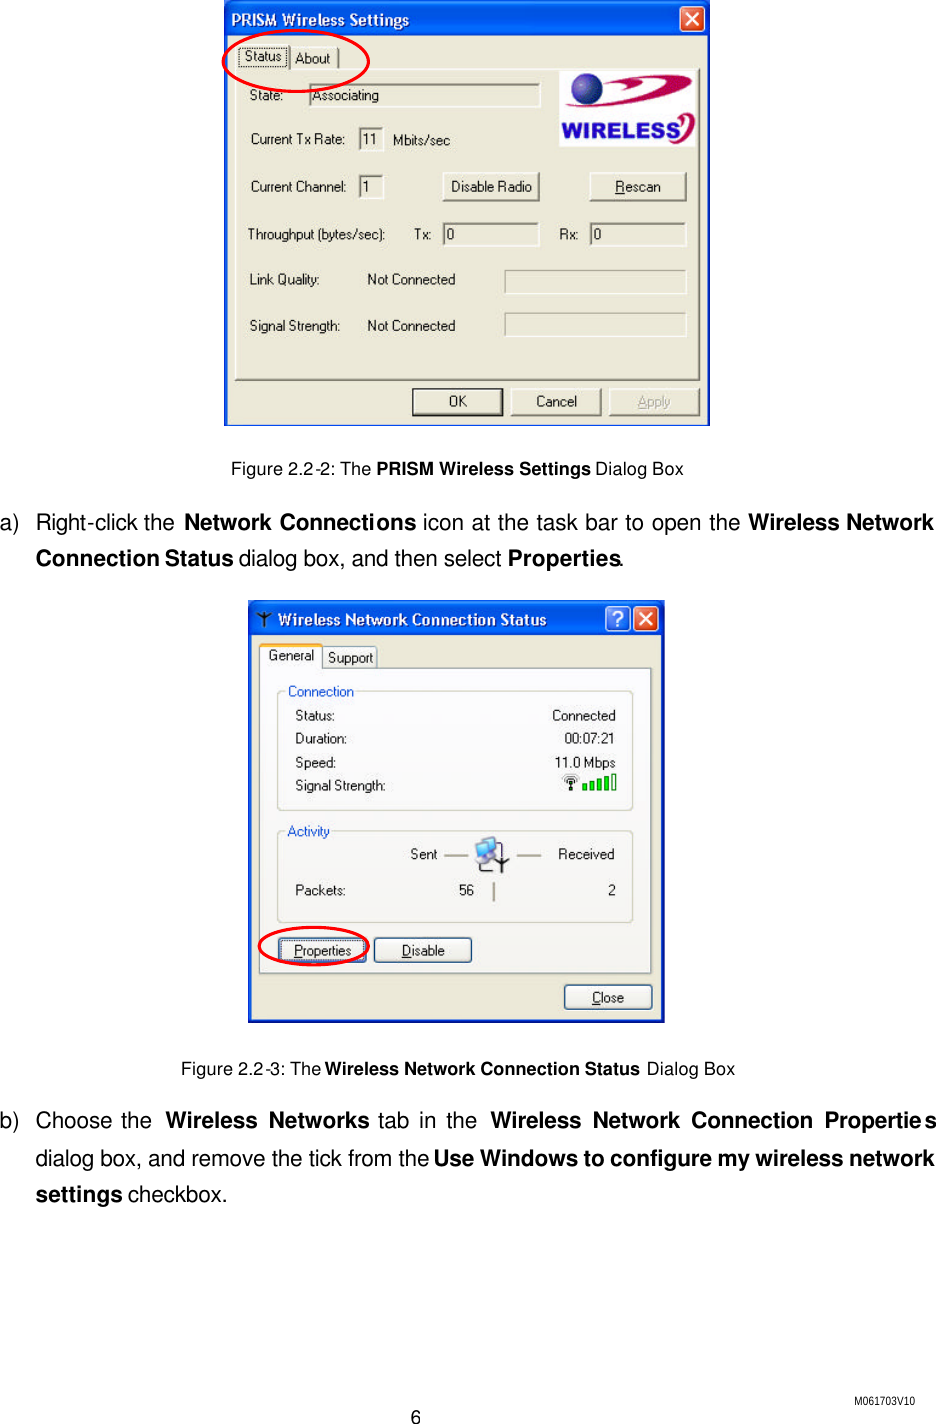


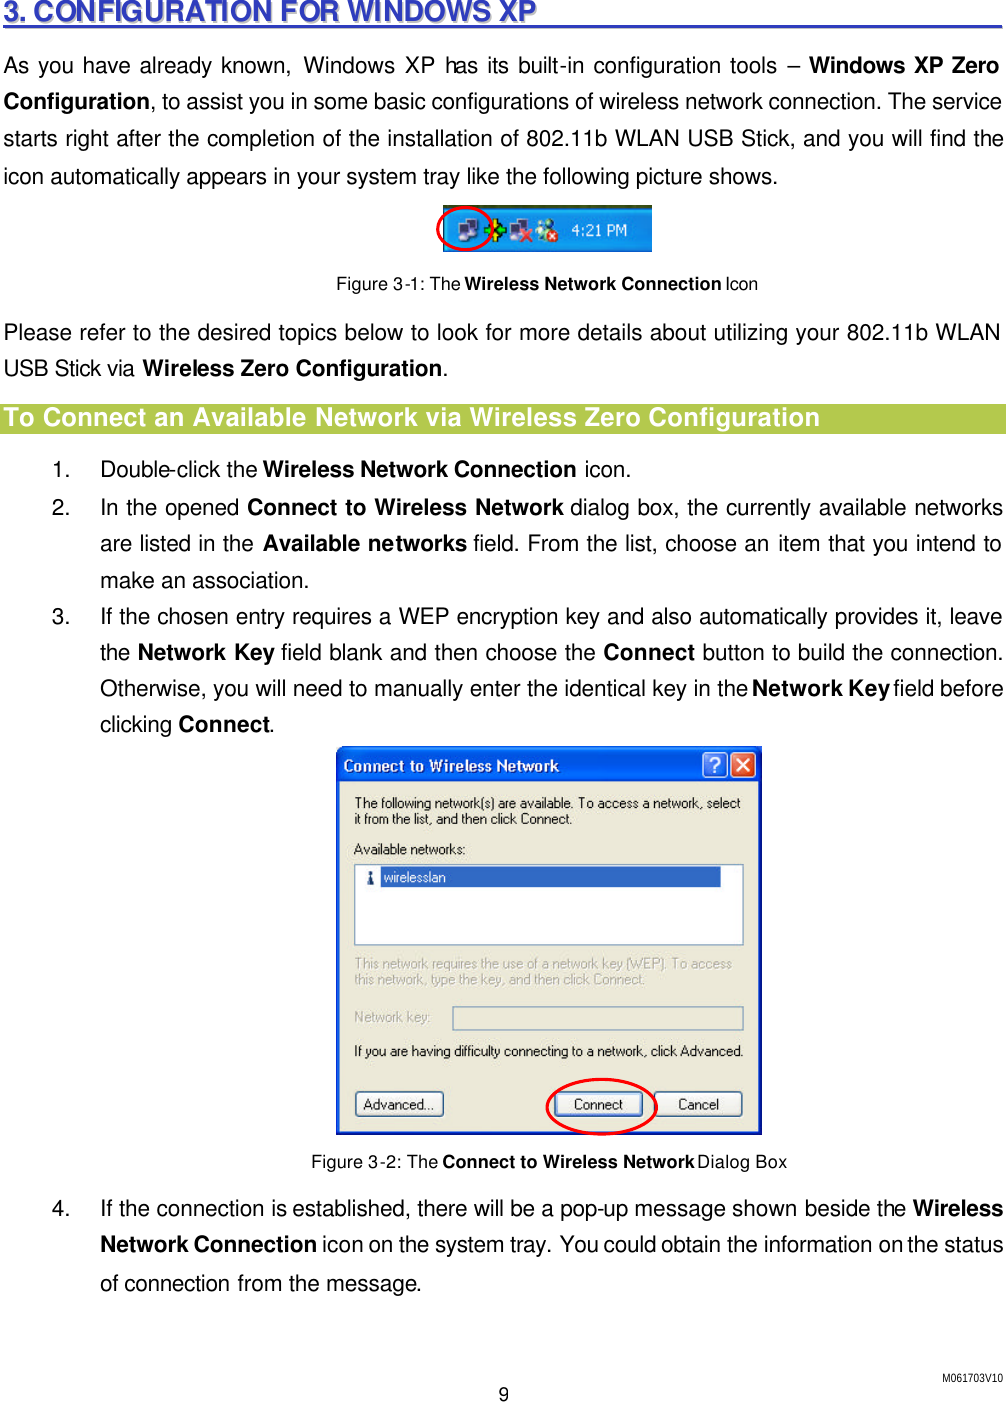
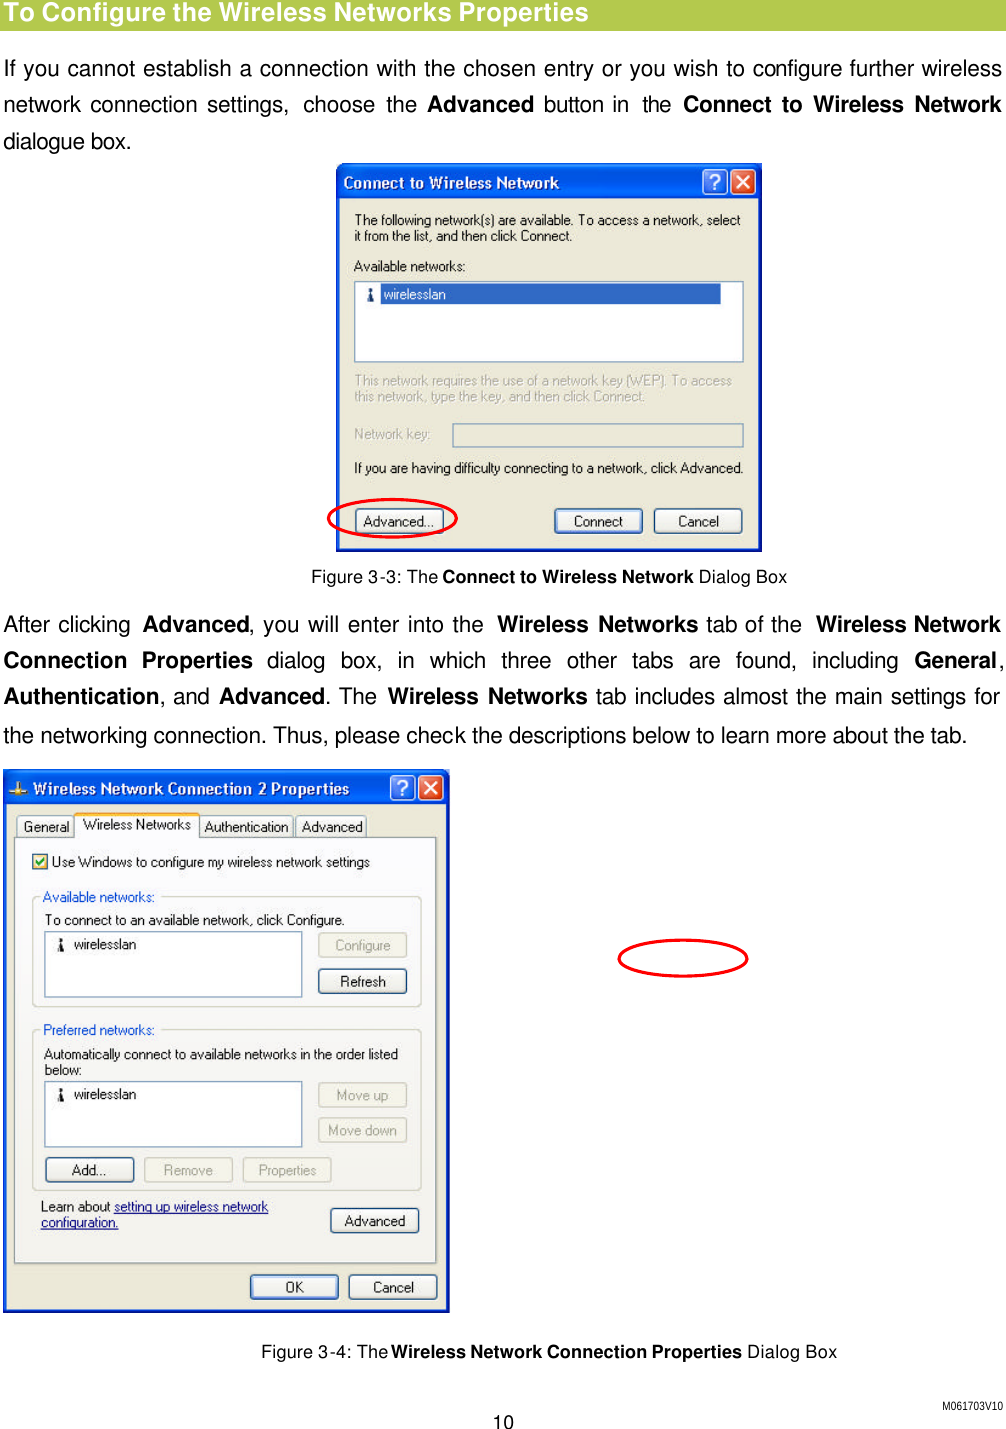
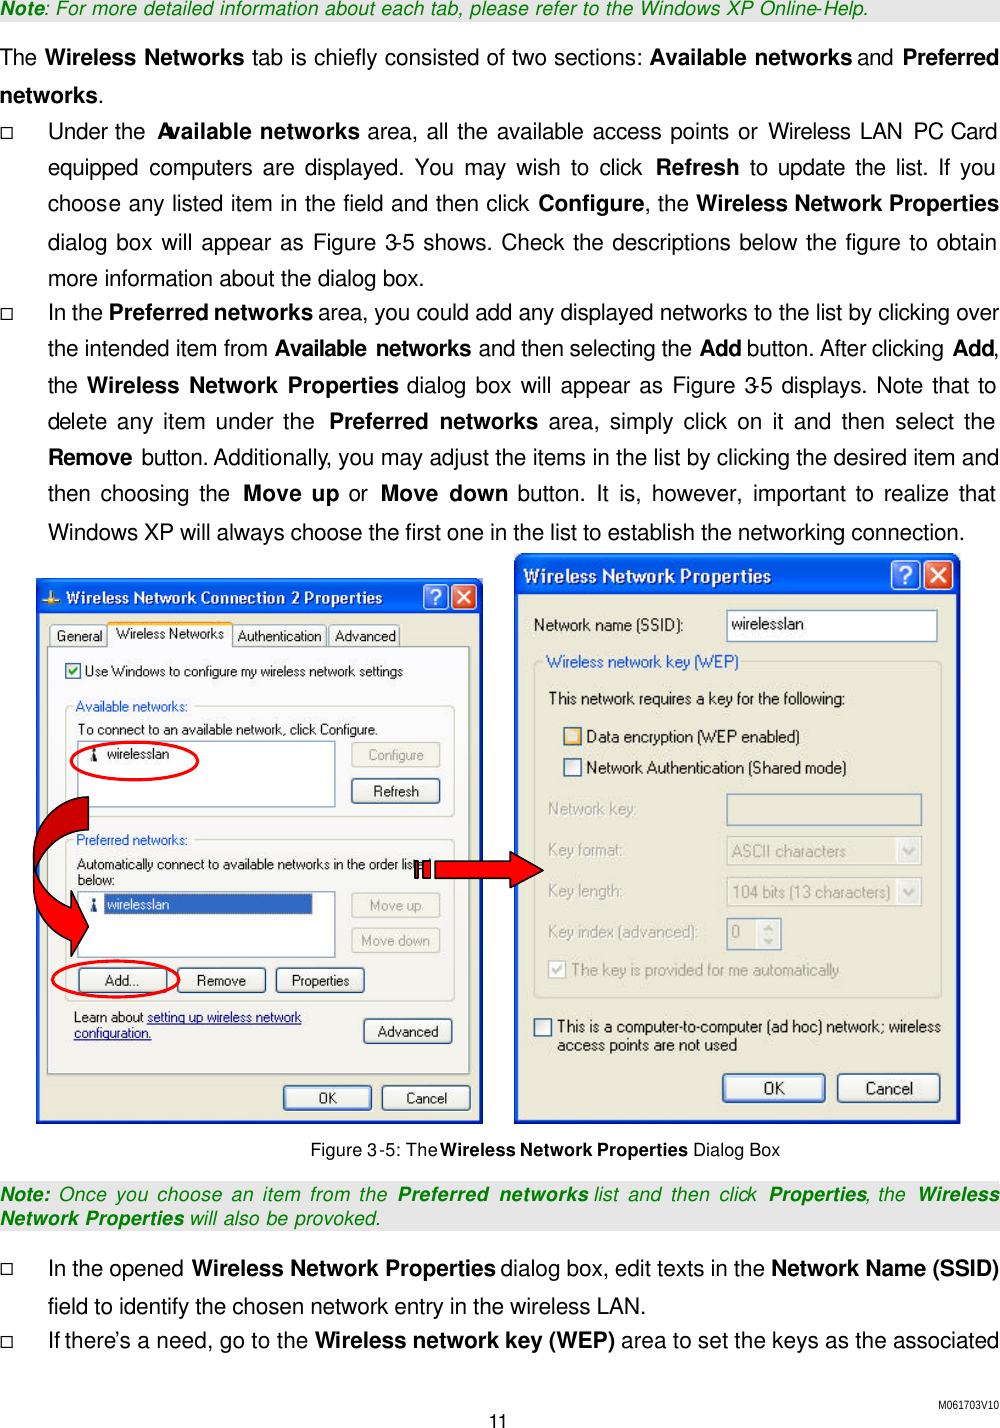
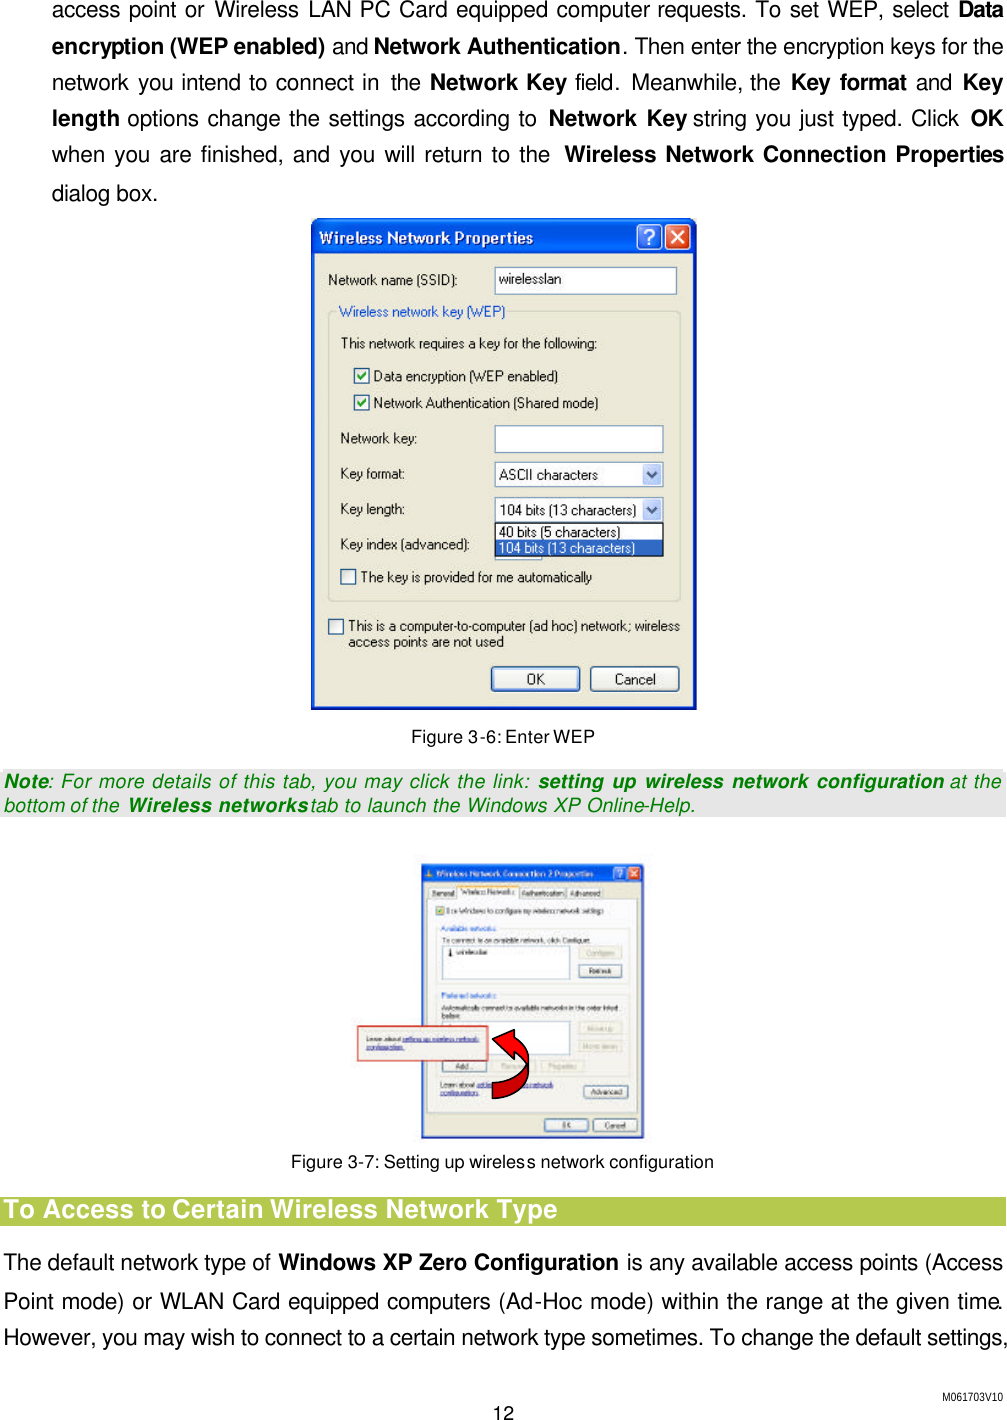
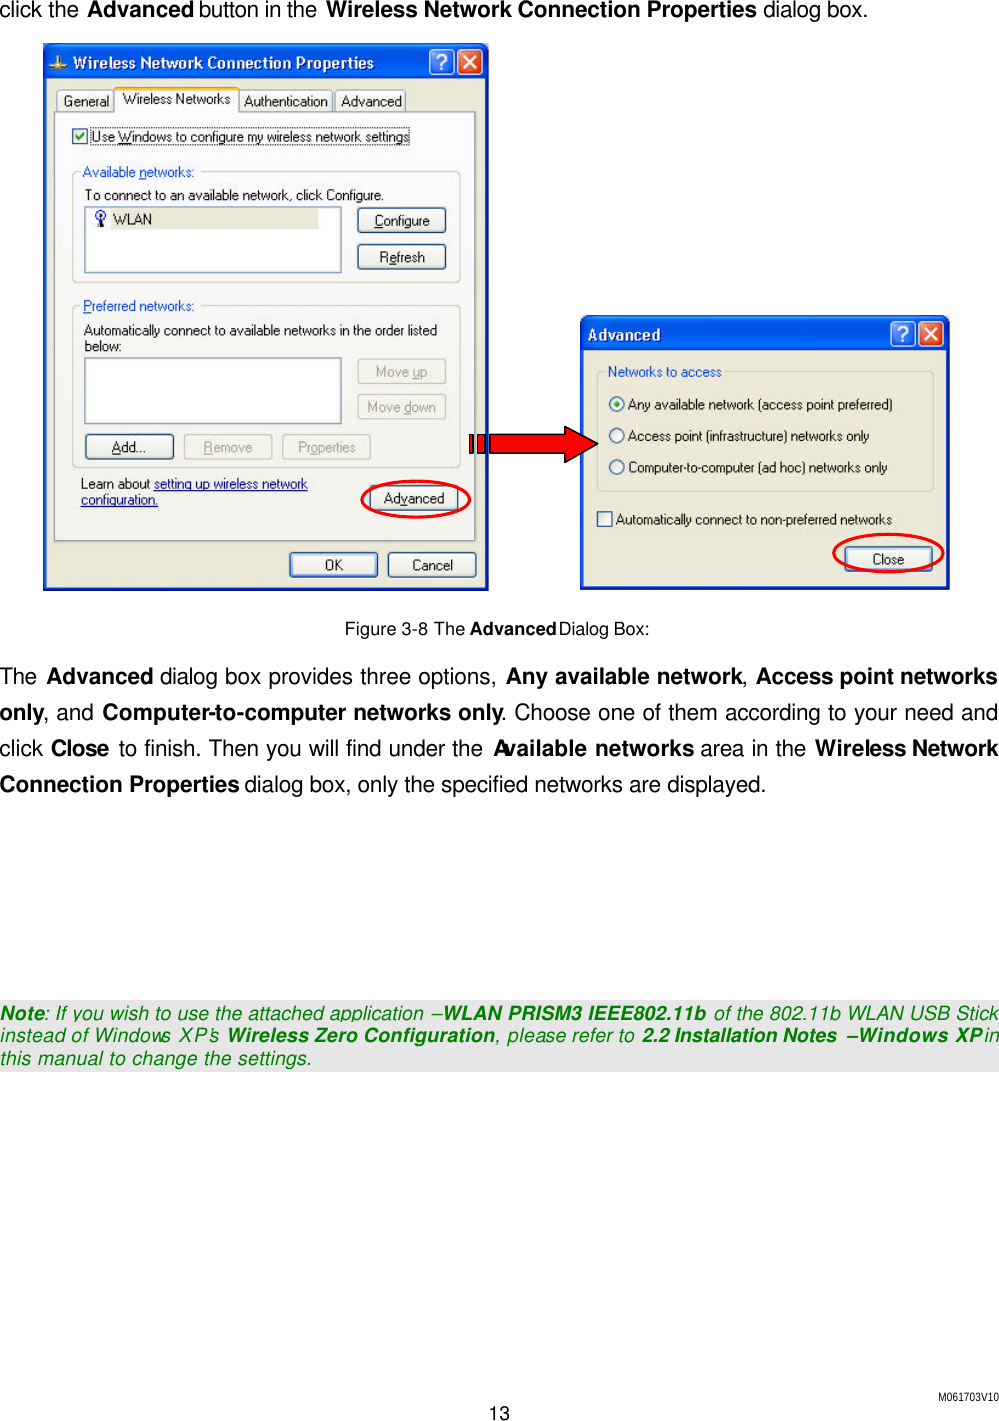


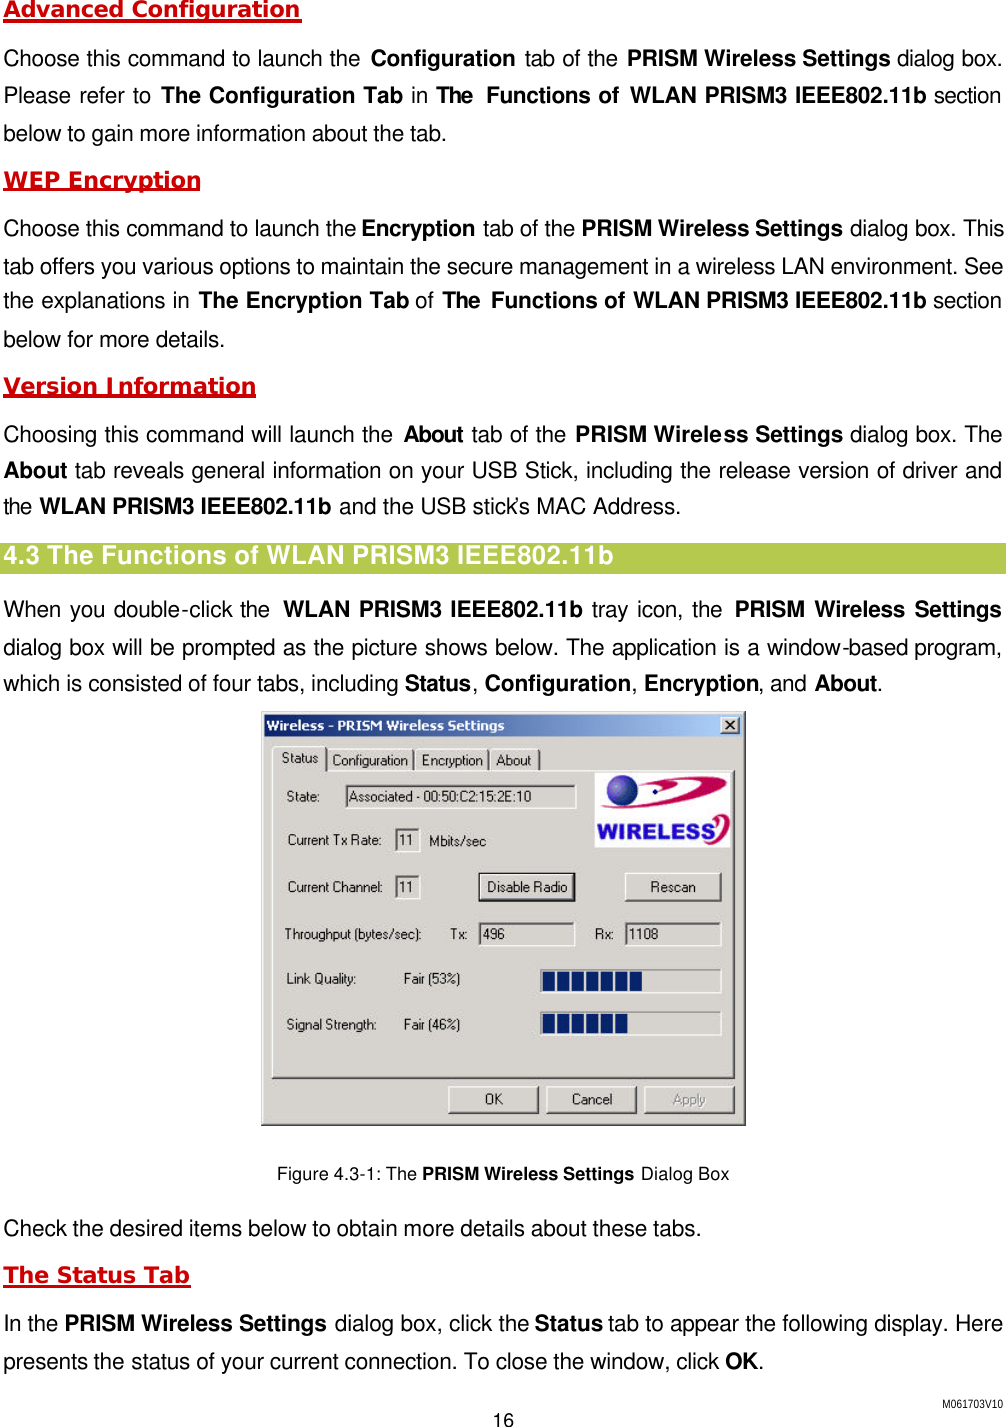
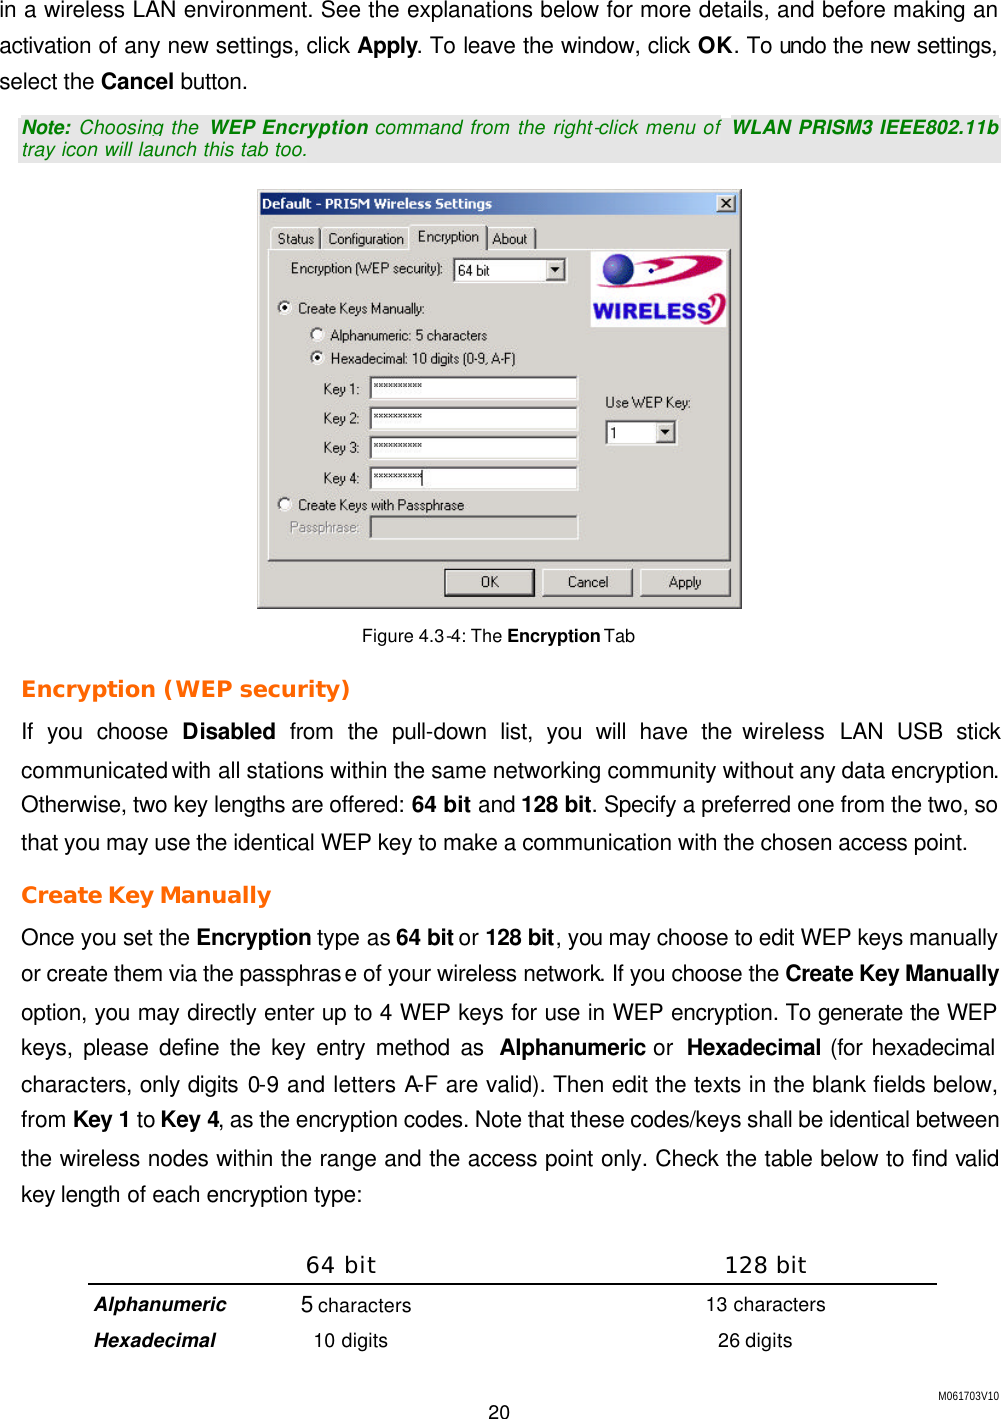

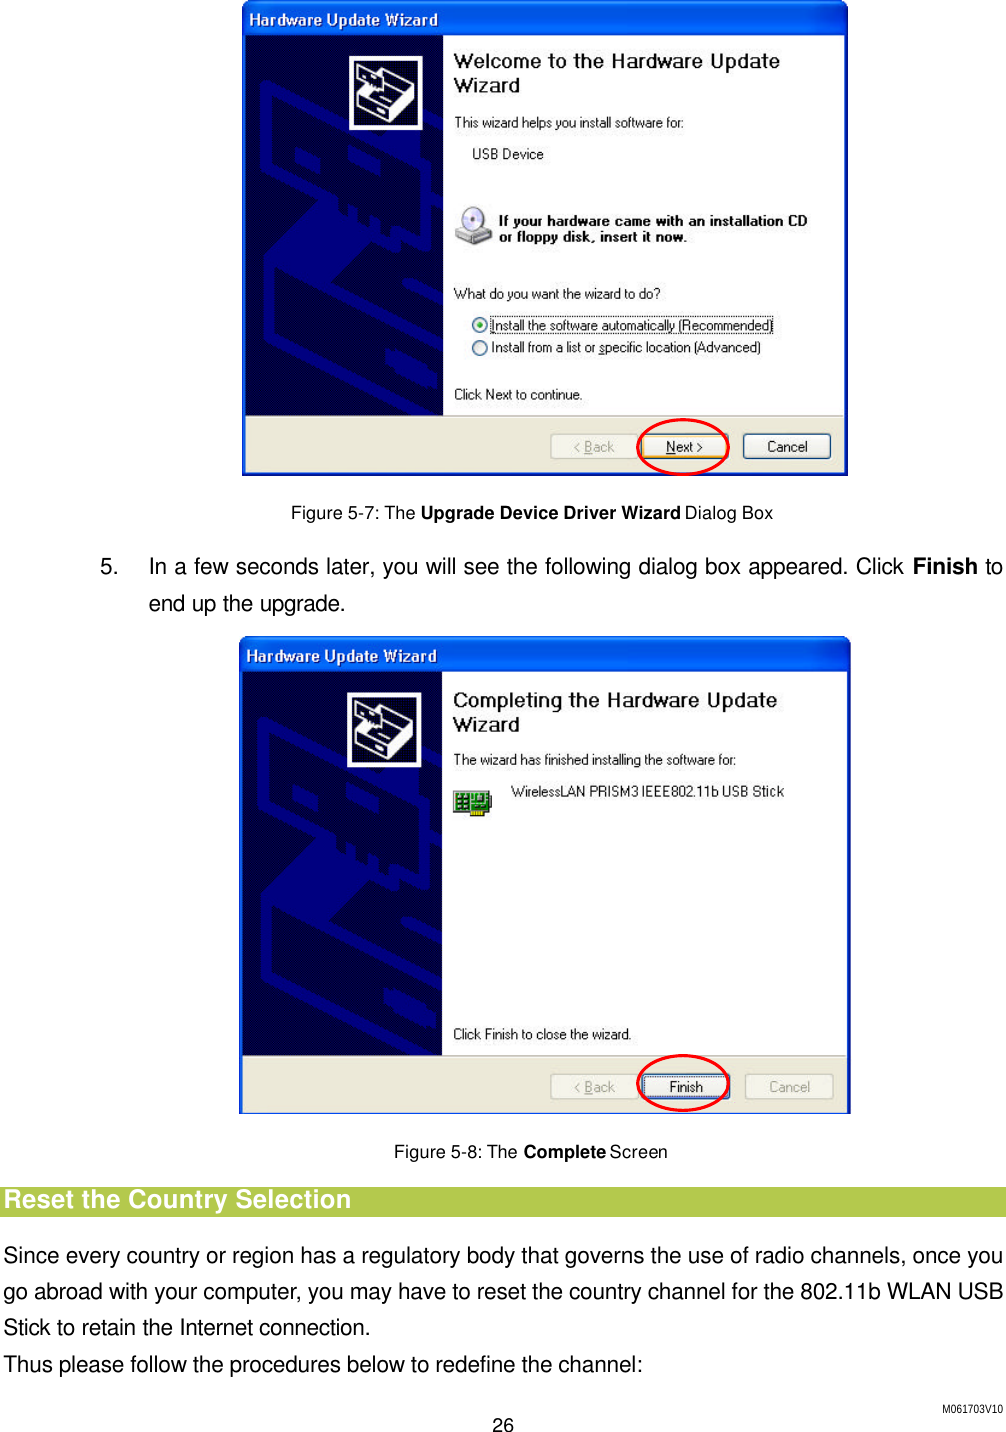
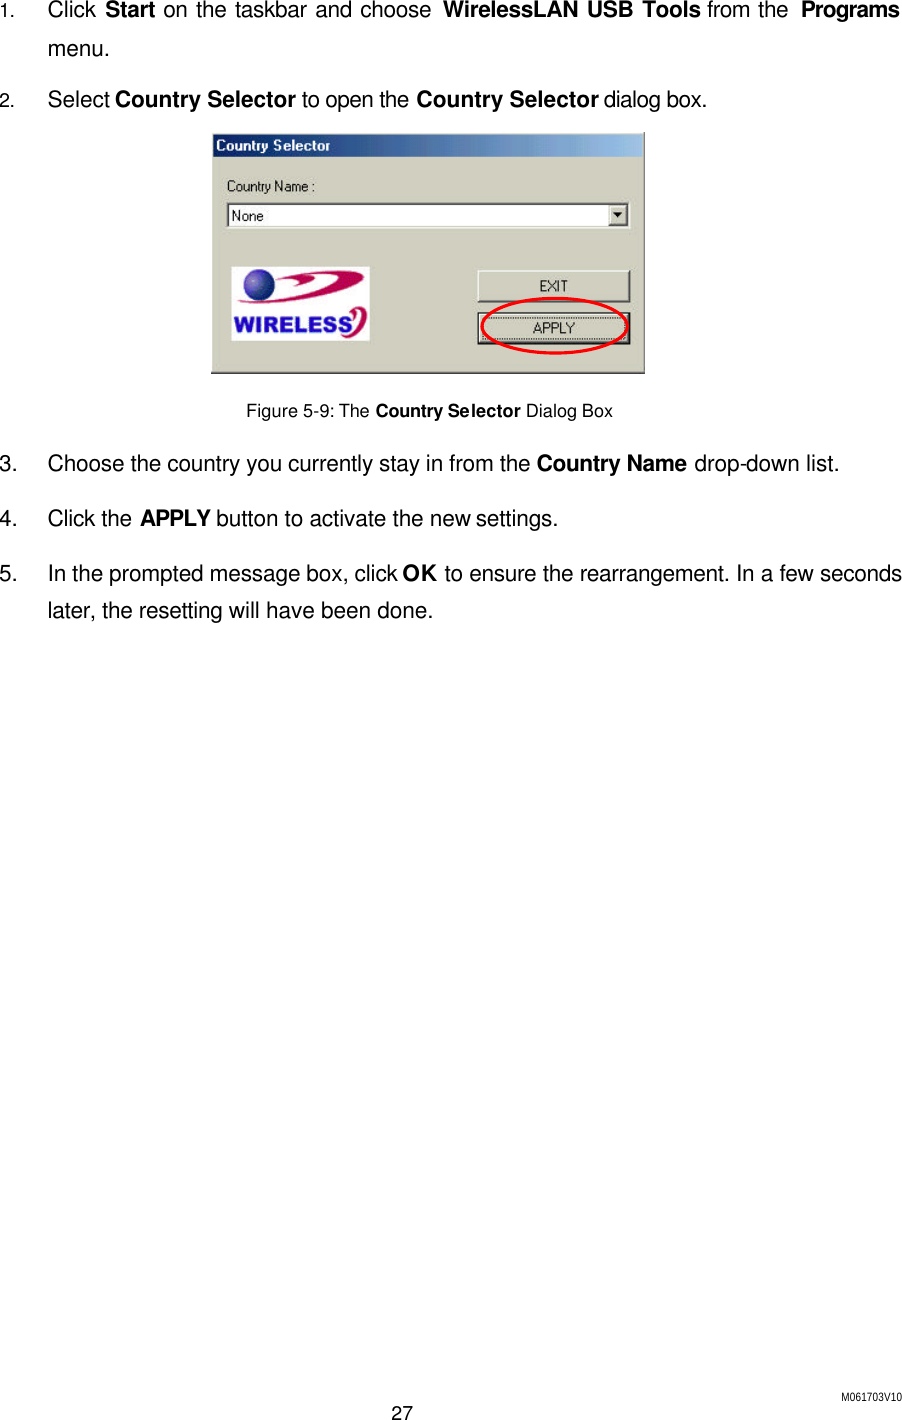
![M061703V10 25 6. When finished, open the Device Manager window again to verify if the installation is approved. The yellow exclamation mark shall be removed for this time. Upgrade WLAN PRISM3 IEEE802.11b and the Stick’s Driver To upgrade the drivers for WLAN PRISM3 IEEE802.11b and the 802.11b Wireless LAN USB Stick, follow the procedures below. Please note that the details might be slightly different according to the Windows system you are using. Here we are taking the example of Windows XP. 1. Click Start on the taskbar and choose Control Panel from the Settings menu. 2. Select System to open the System Properties dialog box, and then under the Hardware tab, click the Device Manager button to open the Device Manager dialog box. 3. Double-click the Other devices item in the list to show the IEEE 802.11b PRISM3 USB icon, which is displayed with a yellow icon beside. Right-click the icon and choose Update Driver from the opened menu. Figure 5 -6: The Device Manager Dialog Box 4. In the Hardware Update Wizard dialog box, choose Install the software automatically [Recommended] and then click Next to continue.](https://usermanual.wiki/AirVast-Technology/WN220/User-Guide-339704-Page-31.png)