Altai Technologies C22221000 C2s Dual-band 2x2 802.11ac WiFi AP/Bridge User Manual
Altai Technologies Limited C2s Dual-band 2x2 802.11ac WiFi AP/Bridge
UserManual.wiki
>
Altai Technologies
>
C22221000 User Manual
User Manual
Navigation menu
Upload a User Manual
Namespaces
Wiki Guide
HTML
PDF
Info
Views
User Manual
Discussion / Help
Navigation


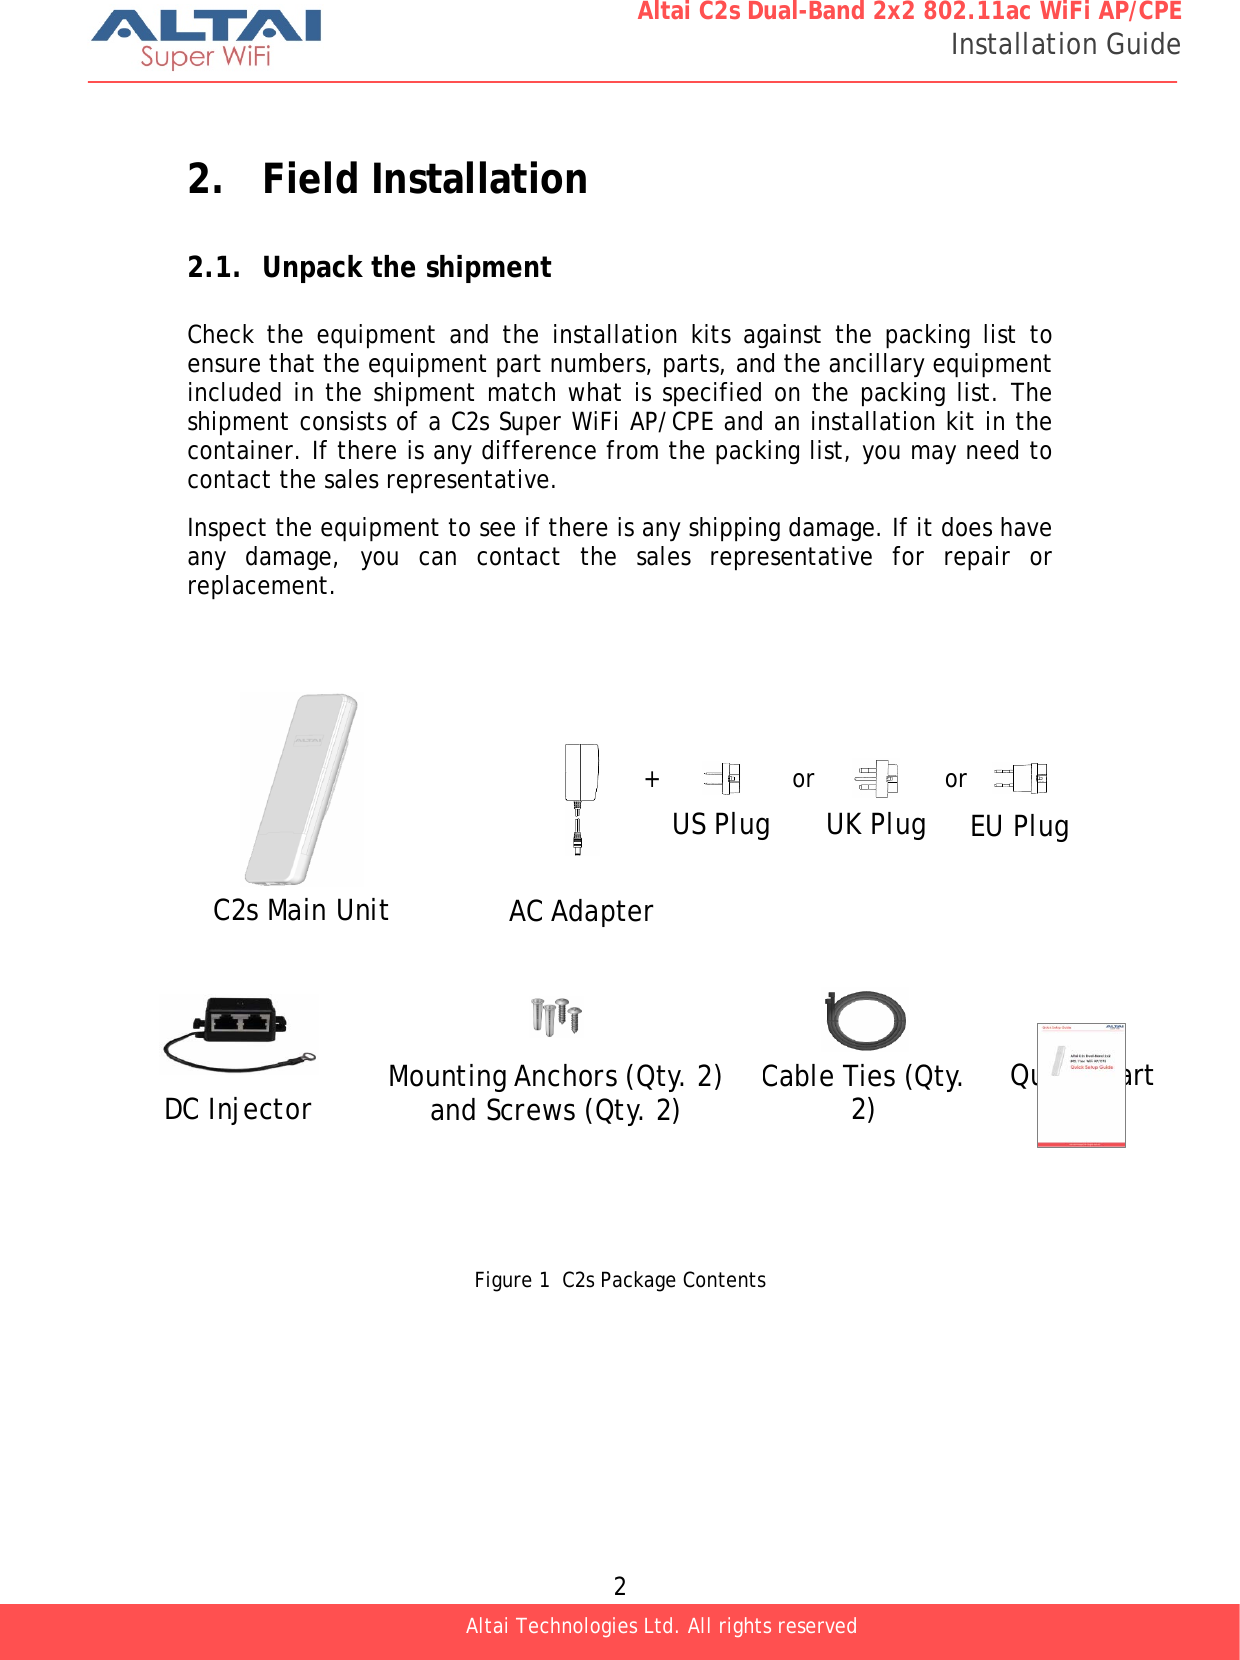
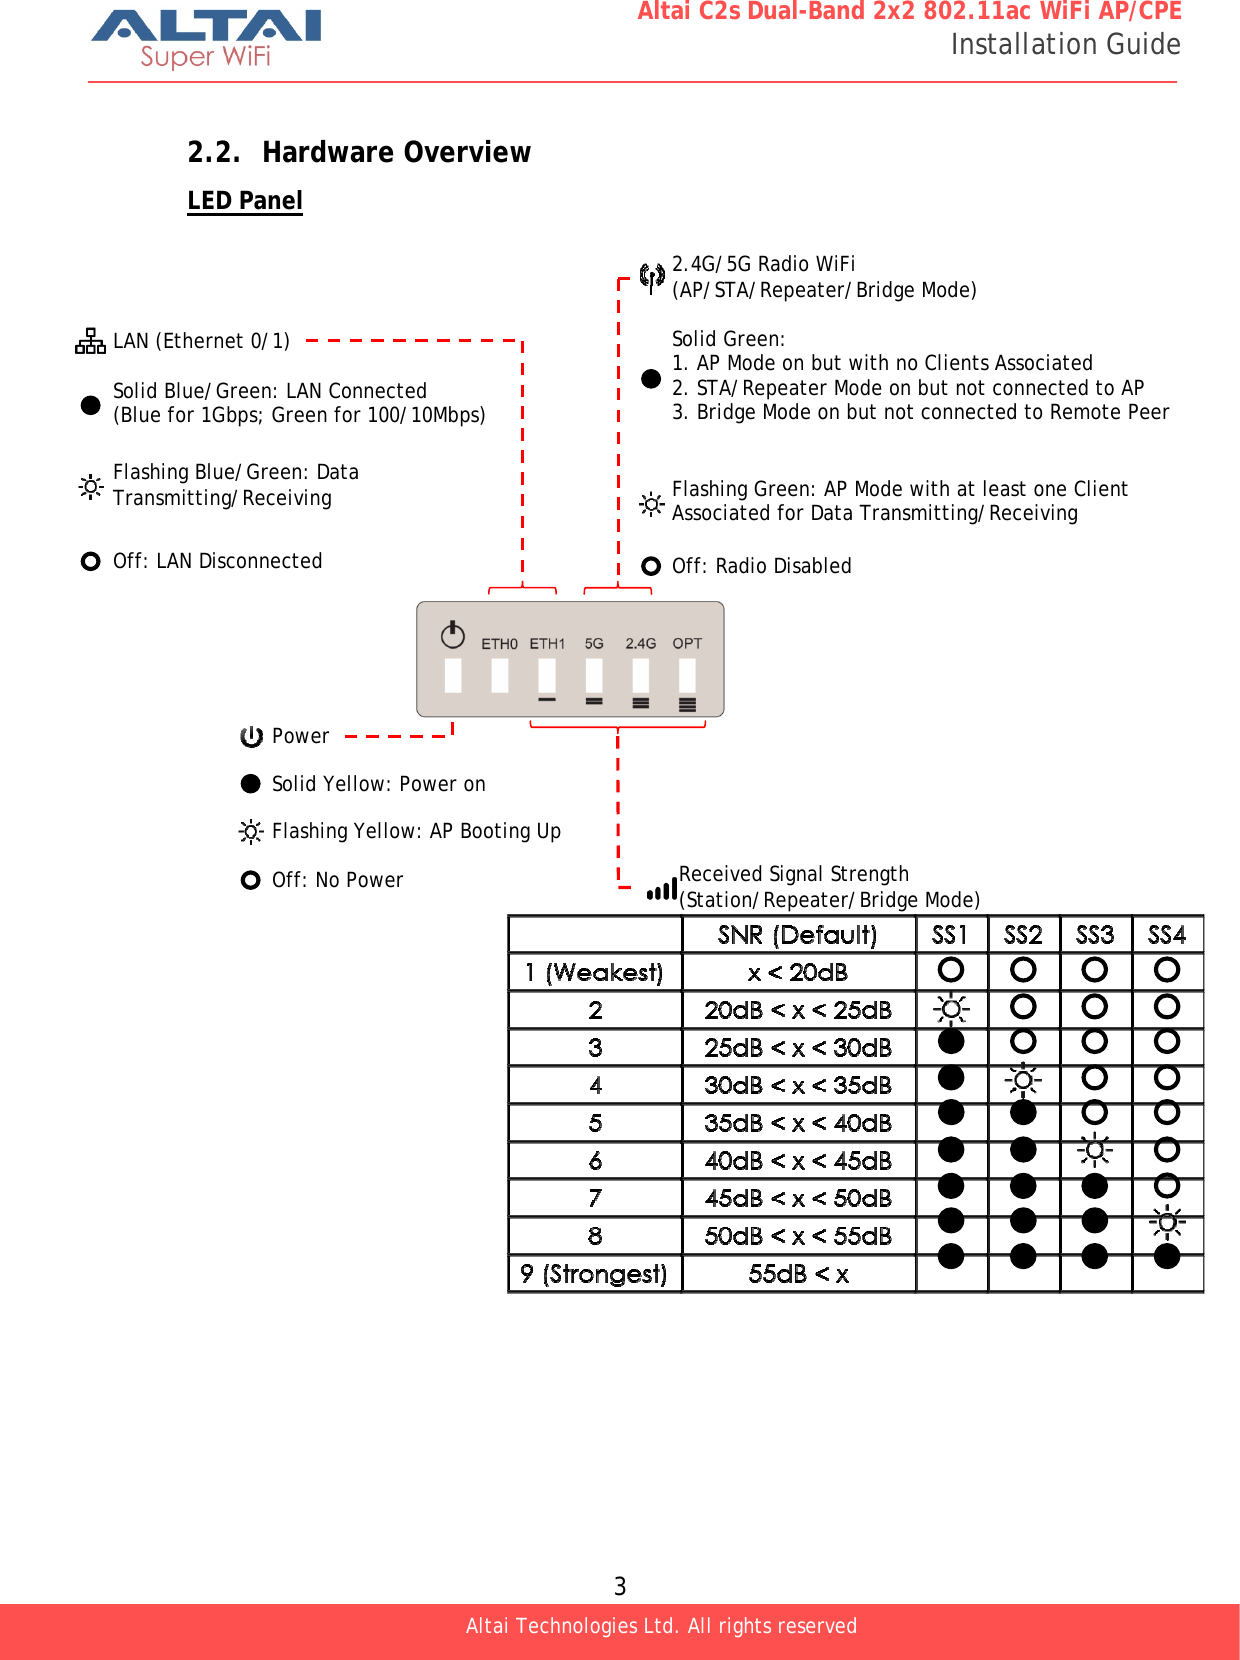
![1 Altai C2s Dual-Band 2x2 802.11ac WiFi AP/CPE Installation Guide Altai Technologies Ltd. All rights reserved 1. Introduction This guide is designed to provide the information needed to mount Altai C2s Super WiFi AP/CPE at the site location. The document is applicable for hardware platform C2s and the following models. Product name: C2s Dual-band 2x2 802.11ac WiFi AP/Bridge It is assumed in this document that a site survey has been performed before the site installation. The appropriate antenna pole and AP locations have been selected. It is a good practice to have a document which consists of a map and drawing illustrating the AP and poles locations. A planning on IP network is also an important issue for network planning. The user may need to refer the following document during C2s installation and Configuration. [1] C2s Configuration Manual [2] C2s Data Sheet](https://usermanual.wiki/Altai-Technologies/C22221000/User-Guide-3061669-Page-6.png)