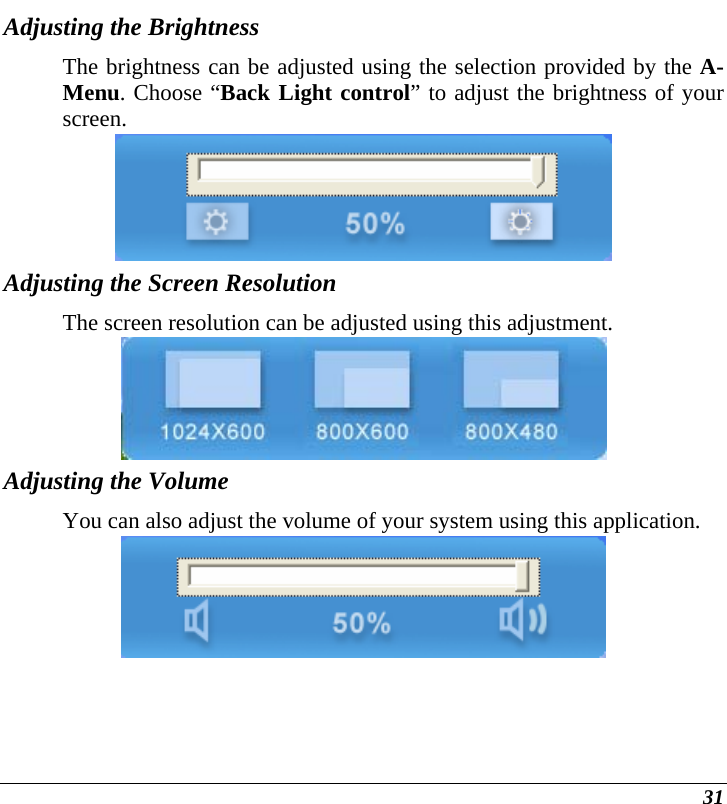
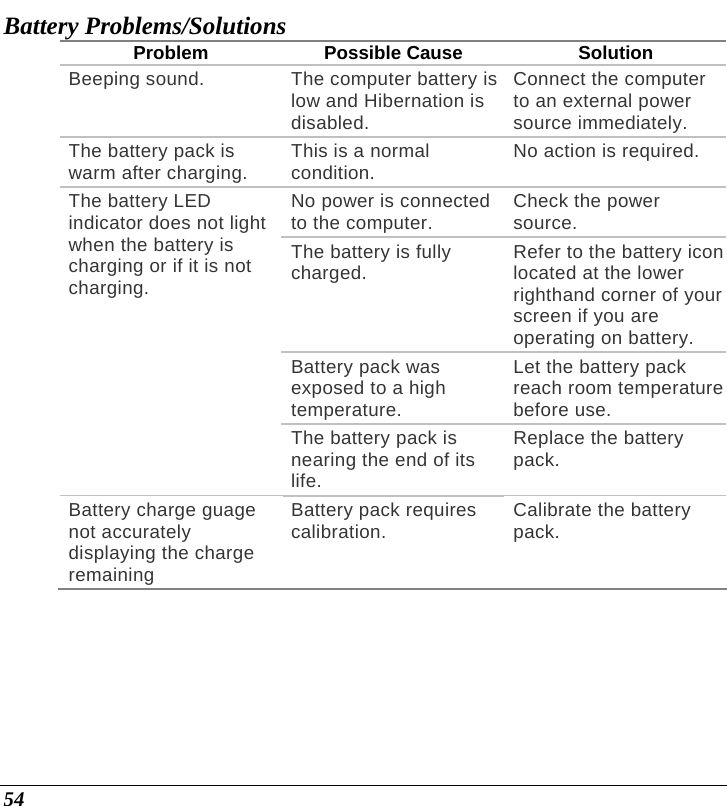
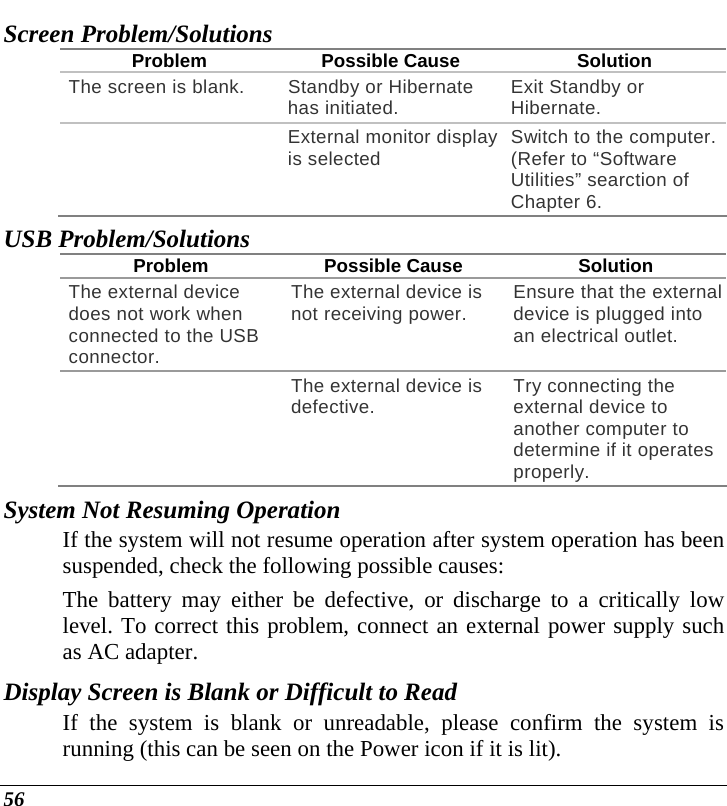
Amtek System AIRT710UMPC Ultra Mobile PC User Manual T700 Final 031006
Amtek System Co., Ltd. Ultra Mobile PC T700 Final 031006
UserManual.wiki
>
Amtek System
>
AIRT710UMPC User Manual
Manual
Navigation menu
Upload a User Manual
Namespaces
Wiki Guide
HTML
PDF
Info
Views
User Manual
Discussion / Help
Navigation


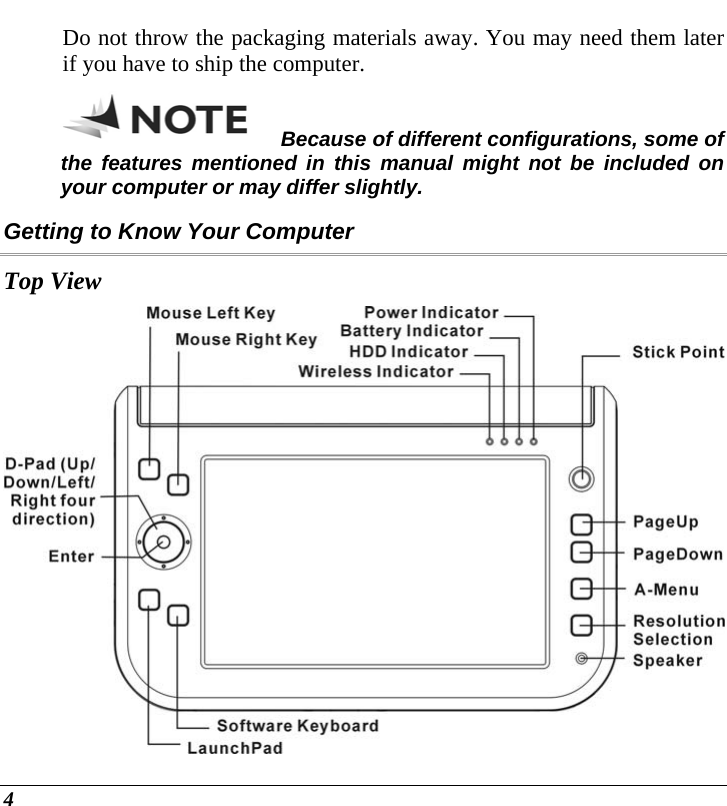
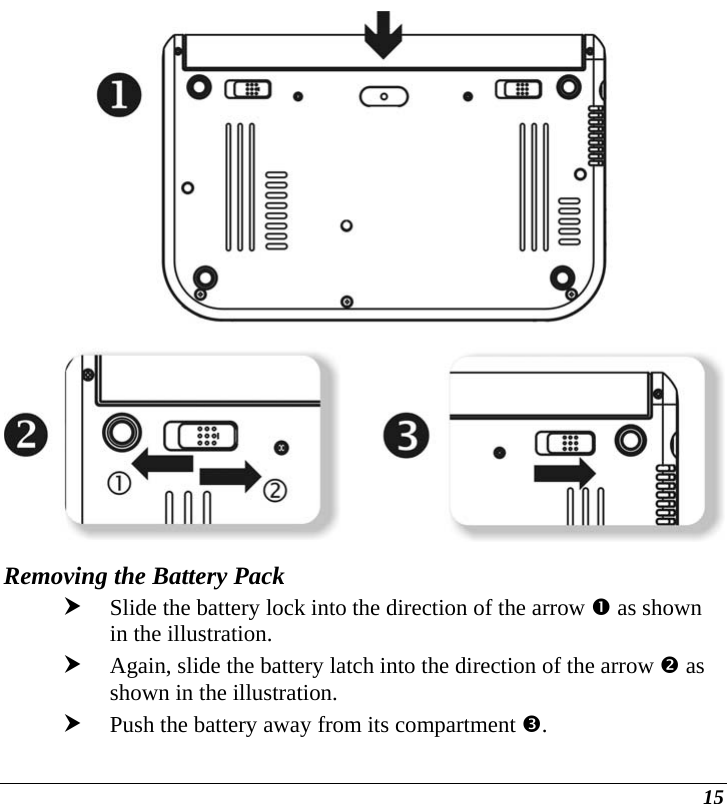
![5 Mouse Left/Right Key This is equivalent to the left and right key on an average mouse that you are using. D-Pad (4 Direction + Enter) h [↑]/[↓] Buttons Press on the [↑]/[↓] buttons to scroll down on the item vertically that you wish to execute or run. h [←] [→] Buttons Press on the [→] or [←] buttons to scroll down on the item horizontally that you wish to execute or run. h Enter Button This button operates the same as when you are using the enter key on the keyboard. LaunchPad You can select the program you want to start when you press this tablet button. Software Keyboard Press this button to open the onscreen keyboard and use the stylus to tap and select the major function that you usually use on the keyboard. Power On indicator This LED icon represents the status when you are using the computer by using the adapter. y Green light indicates it is in On status](https://usermanual.wiki/Amtek-System/AIRT710UMPC/User-Guide-831854-Page-15.png)