Anchor Audio BPW-300 2.4GHz Wireless Intercom User Manual
Anchor Audio Inc 2.4GHz Wireless Intercom
user manual
7
WWHHAATT IISS PPOORRTTAACCOOMM PPRROO??
PortaCom PRO is a wireless full duplex intercom system that's easy to set up and easy to use. The belt packs
communicate directly to each other via a wireless signal that can travel up to 700 feet. If there are solid obsta-
cles between two belt pack users, such as a concrete wall, the range will be diminished. Two people can talk at
once into their microphones which are connected to the headsets. An unlimited number of people on 15 differ-
ent channels can listen via their headsets. If a third person attempts to talk over the other two, their conversa-
tion will be locked out until one of the other two stops talking.
2
AA MMEESSSSAAGGEE FFRROOMM TTHHEE OOWWNNEERR
Thank you for choosing an Anchor Audio wireless intercom system. Our products incorporate state-of-the-art design
and the finest quality of materials and workmanship. We’re proud of our products and appreciate the confidence
which you have shown by selecting an Anchor system.
I hope you’ll take a few minutes to review this manual. We’ve incorporated several unique features into our prod-
ucts, and your knowledge of how to use them will enhance the performance and your enjoyment of the system.
David Jacobs, President
on behalf of all Anchor Employees
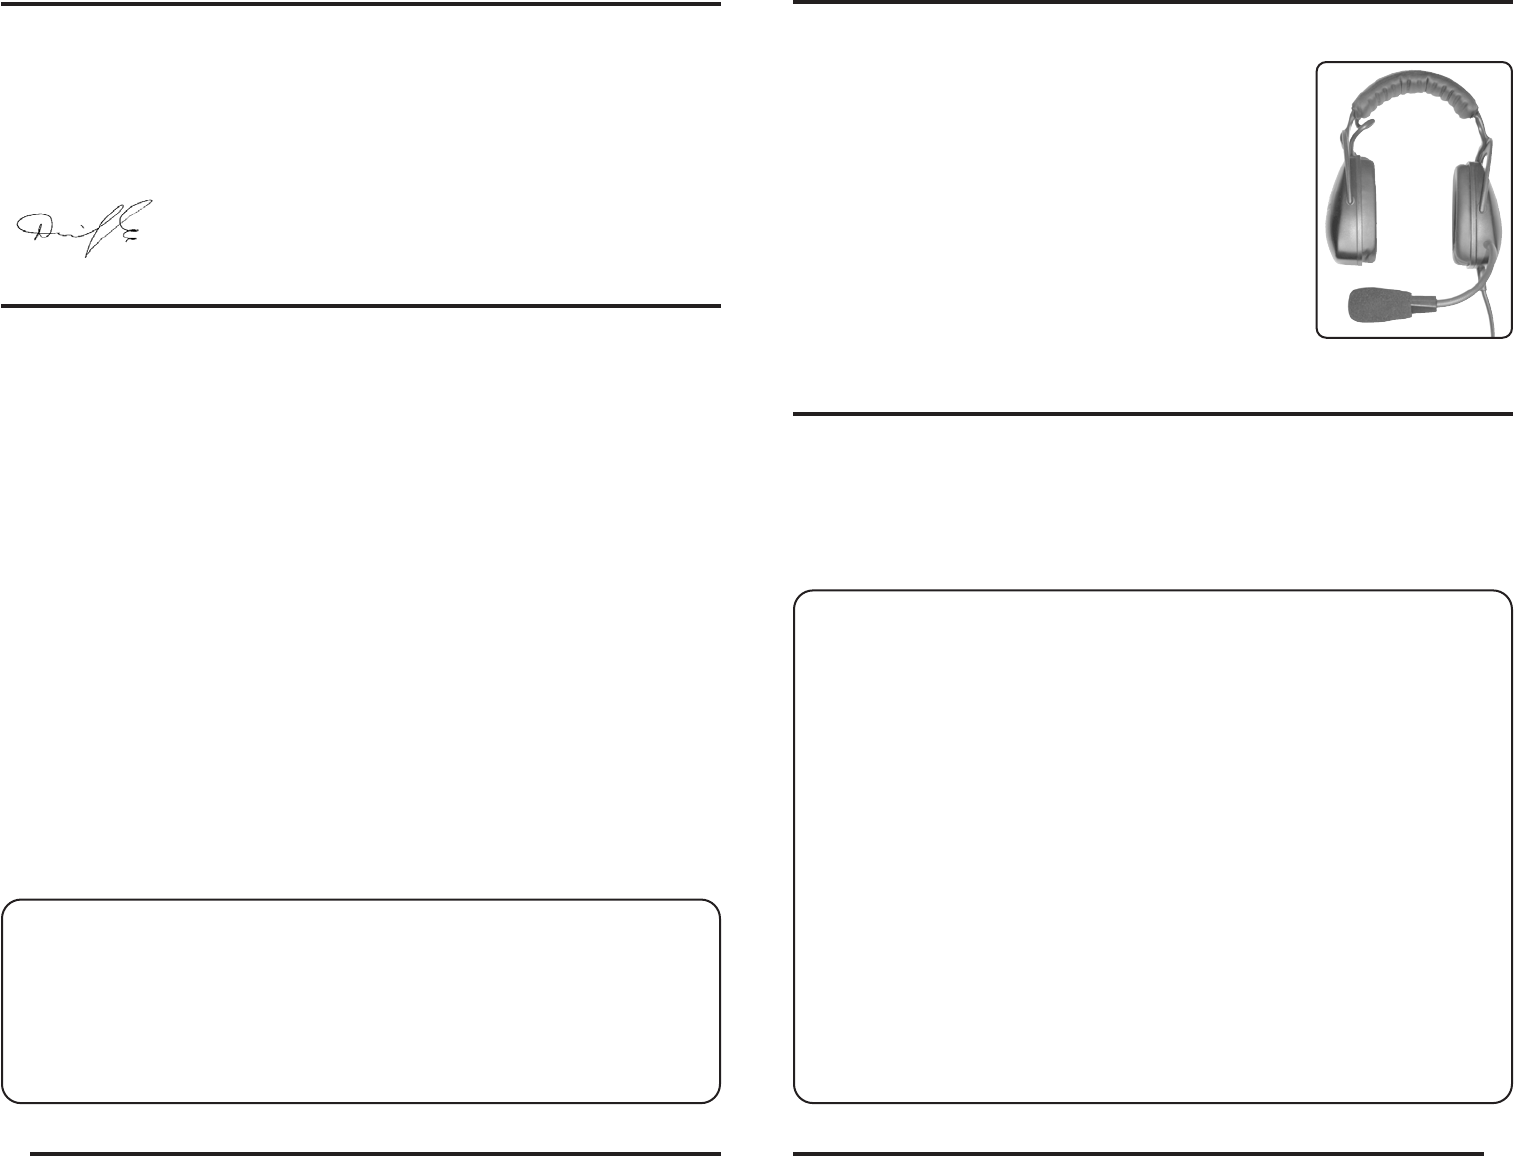
HHEEAADDSSEETT OOPPEERRAATTIIOONN
PortaCom PRO noise canceling headsets feature a dual ear piece design for maxi-
mum comfort. Our headsets also include 6 pin mini-XLR gold tipped connectors,
adjustable microphones and electret condenser type microphone elements.
OPERATION
1. Plug the headset connector into the belt pack headset jack
2. Turn on power & adjust volume on each belt pack in use
3. Select a transmission channel for the group, 1 thru 16
(9 is reserved for All Call)
4. Set each belt pack in the group to the same channel
5. Adjust headset boom so the microphone is located near the mouth
6. Depress the PTT button to start talking, the system is voice activated
GGEETTTTIINNGG SSTTAARRTTEEDD
Please check your new unit carefully for any damage which may have occurred during shipment. Each Anchor prod-
uct is carefully inspected at the factory and packed in specially designed boxes for safe transport.
Notify the freight carrier immediately of any damage to the shipping box or product. Repack the unit in the origi-
nal box and wait for inspection by the carrier’s claim agent. Notify your dealer of the pending freight claim.
NOTE: All damage claims must be made with freight carrier!
RETURNING SYSTEMS FOR SERVICE OR REPAIR
For service or repair, please contact the dealer where system was purchased or Anchor Audio Customer Service
(800/262-4671 or 310/784-2300) to obtain a RA (Return Authorization) number. All shipments to Anchor Audio
must include RA number and be shipped prepaid. C.O.D. shipments will be refused and returned at your expense.
Customers outside the USA must contact dealer where system was purchased for service or repair instructions.
IMPORTANT: Save the shipping box & packing materials, they were specially designed to ship your unit!
WARRANTY REGISTRATION & INFORMATION
Please go to our website (www.anchoraudio.com) and select “Warranty Registration”. Completing this online regis-
tration form will activate your limited two-year warranty.
Warranty is void if the belt pack case or headset has been opened, screws have been removed or there is evidence
of tampering. The case screws are tamper proof and will be damaged if you attempt to remove them.
TTRROOUUBBLLEESSHHOOOOTTIINNGG PPOORRTTAACCOOMM PPRROO
CAN'T HEAR PERSON SPEAKING? Turn up the listen volume control using the thumbwheel on the side
of the belt pack. If you are in an extremely loud environment, you will need to use the dual muff headset
with noise canceling properties. If you still can't hear the person speaking, you must be out of range and
need to move closer. Check USE switches/use PTT to ensure that unit is transmitting.
MICROPHONE NOT PICKING UP YOUR VOICE? First, check that you have pushed down the PTT but-
ton one click and you are in active mode, note the fast flashing light. Move the mic closer to your mouth
and speak up clearly. You can also adjust the VOX by turning up the mic gain knob.
BACKGROUND NOISE TRANSMITTING ACROSS SYSTEM? Stay in listen mode until you are ready
to speak. Then, push and hold the PTT button to ensure your system is activated only when you speak.
TRANSMISSION IS WEAK? Make certain the batteries are charged by checking for the green battery
light. If batteries are weak, and you need to keep going, either plug the unit into the charger and a wall
outlet, or replace the rechargeable batteries with disposable alkaline batteries.
PROPER INTERCOM ETIQUETTE! The PortaCom PRO is designed to handle two people speaking at
once. Use proper intercom etiquette and wait to break into the conversation when the two people have
stopped talking. If multiple users want to jump into and out of the conversation, use PTT (push to talk).
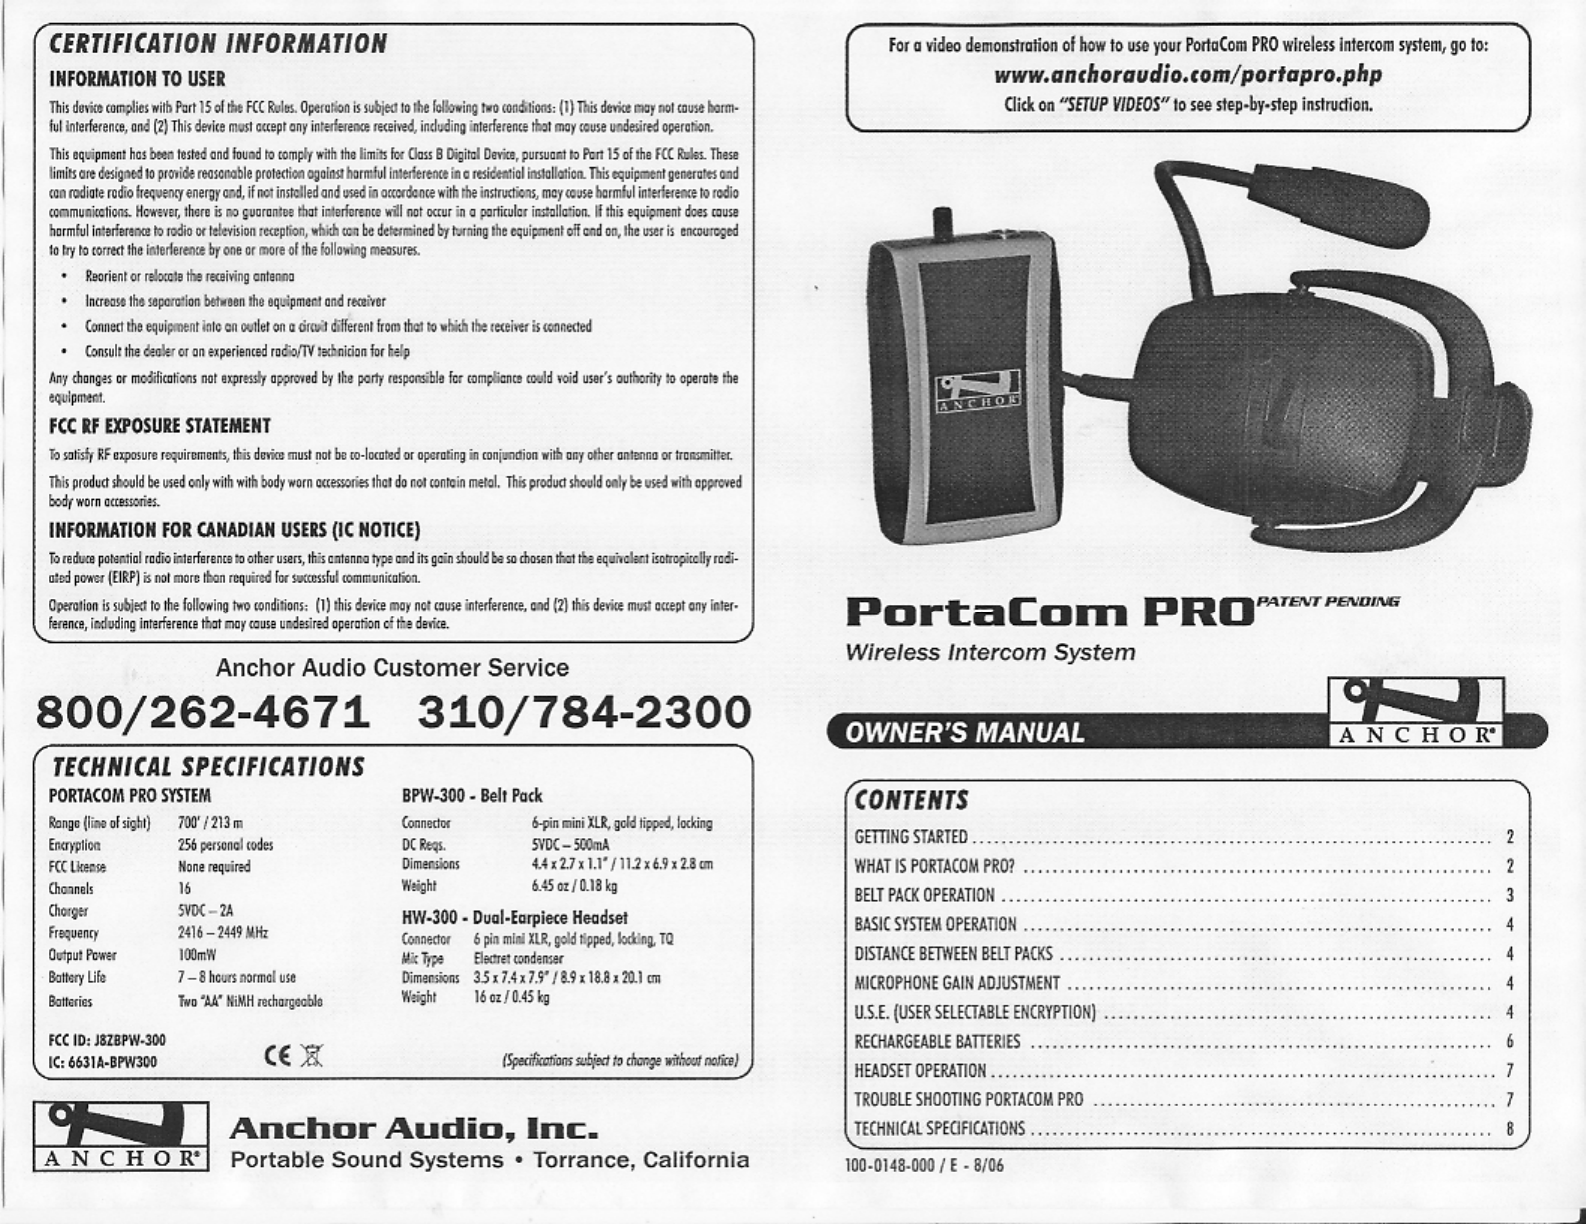
HW-300
Dual-Earpiece Headset
For a video demonstration of how to use your PortaCom PRO wireless intercom system, go to:
www.anchoraudio.com/portapro.php
Click on “SETUP VIDEOS” to see step-by-step instruction.

CAUTION: WHEN STORING YOUR SYSTEM IN THE PORTACOM PRO HARD CASE, PLACE
EACH BELT PACK INTO ITS STORAGE SLOT CAREFULLY. TURNING THE THUMB WHEEL
DURING INSERTION WILL TURN THE POWER ON AND DRAIN THE BATTERY.
RREECCHHAARRGGEEAABBLLEE BBAATTTTEERRIIEESS
Each PortaCom PRO belt pack comes with two rechargeable AA NiMH batteries installed in the battery compartment
located on the back of the belt pack. If the LED Indicator light turns red or your transmission is becoming weak, the
batteries are low and need charging. You may continue using the belt pack while it is charging.
CHARGING THE BATTERIES
1. Turn the belt pack off (you may leave system on during charging if you wish to continue use)
2. Plug the included AC-300 power adapter into the jack on the side of belt pack and an AC outlet
- Amber light indicates the batteries are charging
3. Allow belt pack to charge for 7 hours to reach full capacity (charge time will increase if system is in use)
- Green light indicates the batteries are fully charged
NOTE: Battery Life When Fully Charged - 7 to 8 Hours Normal Use.
Users who must leave their charger plugged in (emergency preparedness crews, etc.) are advised to replace the
rechargeable batteries once every 12 months.
AA alkaline batteries can be substituted for the rechargeable batteries. However, connecting the charger when
alkaline batteries are installed could seriously damage your belt pack!
CAUTION: DO NOT ATTEMPT TO CHARGE ALKALINE BATTERIES.
36
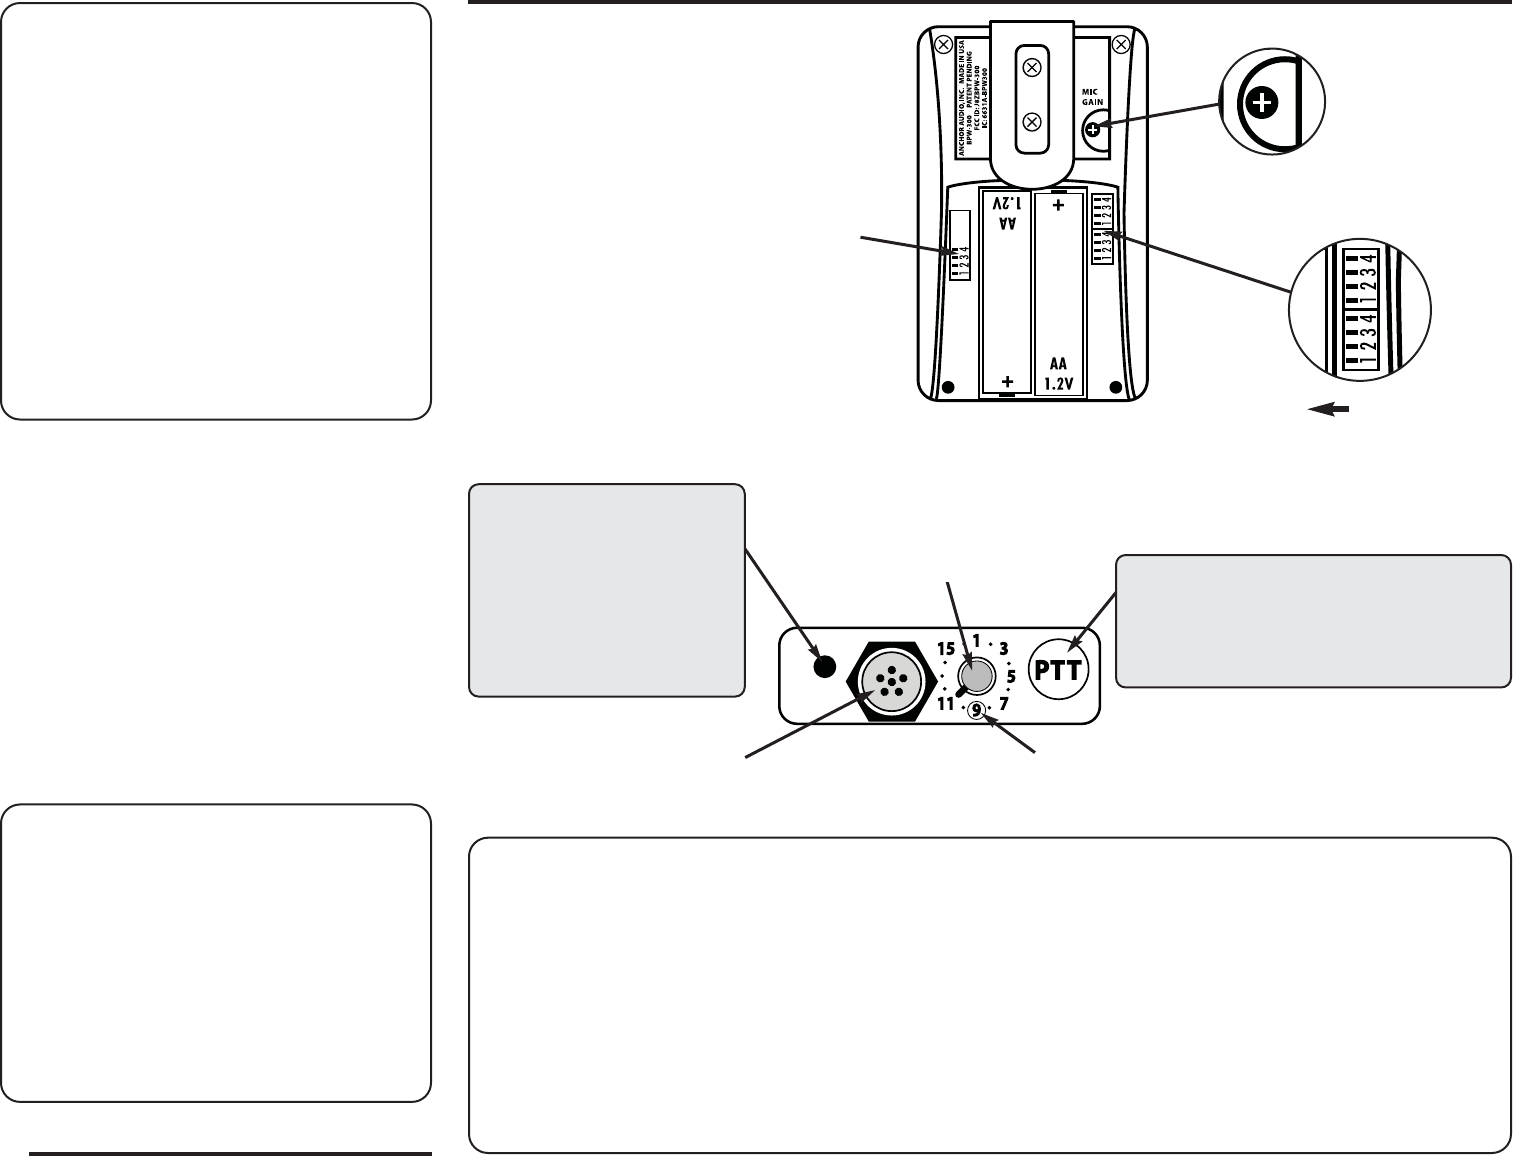
BBEELLTT PPAACCKK OOPPEERRAATTIIOONN
The BPW-300 belt pack has a 6 pin mini-XLR headset jack, channel selector, universal LED indicator light and the
PTT (Push To Talk) button. Located on the side is the POWER/VOLUME CONTROL thumb wheel, the battery com-
partment is on the back.
CHANNEL SELECTOR
To create a belt pack group, each group member must set their Channel Selector to the same number. The
PortaCom PRO has 15 available channels to choose from, so you can set up 15 separate groups.
1. Select an available transmission channel for the group - 1 thru 16
NOTE: Channel 9 is not available for a group, it is reserved as the All Call channel.
2. Set each belt pack in a group to the same channel
EXAMPLE: Athletic Department
The head coach assigns the offense channel 6, defense channel 11 & special teams channel 8. You now have
the ability to speak to one group at a time by selecting their channel. If you need to speak to all groups at
once select channel 9, the All Call channel.
LISTEN ONLY, ACTIVE & PUSH TO TALK MODE
• Listen Only Mode: When the belt pack is powered on the LED Indicator light will show a slow flashing light,
you are in Listen Only Mode. Use this setting when you don't wish to talk on the system, but merely listen.
• Active Mode: Press the PTT button once for Active Mode, the LED Indicator light will flash quickly. Active
Mode is voice activated, simply speak into your mic to be heard by all of the other users in your group.
Press the PTT button again to return to Listen Only Mode.
CAUTION: Excessive background noise can broadcast into mic & trigger voice activation.
• Push To Talk Mode: Press & hold the PTT button for Push To Talk Mode, like a walkie talkie, the mic will
only pick up your voice when the button is held down. Release the button to return to Listen Only Mode.
Use when in loud environments so background noise won’t continually broadcast over your mic.
NOTE: Push To Talk Mode is preferred if many users are jumping in & out of the conversation.
ALL CALL CHANNEL
The All Call feature allows one user to speak to everyone in every group on the system simultaneously regardless of
their channel selection. When All Call is engaged the belt pack LED Indicator light will turn amber, this alerts all
users that All Call is in use.
1. Select channel 9 to engage the All Call feature
2. When the All Call operator stops speaking, all other users revert to their original channel selection
3. Select a different channel (other then 9) to disengage All Call
BBAASSIICC SSYYSSTTEEMM OOPPEERRAATTIIOONN
IMPORTANT: Batteries Are Shipped Fully Charged!
1. Charge installed NiMH batteries w/ included charger
2. Select a transmission channel on the belt pack
(1 thru 16, 9 is reserved for All Call channel)
3. Plug headset connector into jack on belt pack
4. Turn on power & adjust volume w/ thumbwheel on side
Slow flashing light indicates power on / Listen Only Mode
5. Press PTT button once for Active Mode
6. Press & hold PTT button for Push To Talk Mode
4. Set each belt pack in a group to the same channel
NOTE: Repeat the steps above for each belt pack/user.
AADDJJUUSSTTIINNGG MMIICCRROOPPHHOONNEE GGAAIINN
Adjust the microphone sensitivity (gain level) to compensate for
individual users voice levels and surroundings. For soft voices or
when whispering raise sensitivity, lower it if you need to shout.
1. Remove rubber plug on back of belt pack to access dial
2. Using a small screwdriver turn the VOX dial clockwise to
raise mic sensitivity, counterclockwise to lower
3. Replace plug to keep dirt & debris out of unit
NOTE: Lower gain level if your voice sounds distorted.
SSYYSSTTEEMM RRAANNGGEE
Under ideal conditions the distance between belt packs can be up to
700’ line of sight. However, system performance can be affected by
many external sources. To minimize the effects of interference:
• Keep the distance between belt packs as short as possible
• Make sure that there are no obstructions between belt packs
• Maintain visual contact with all users in the group
CAUTION: Attempting to operate the PortaCom PRO
through or around walls, through ceilings and/or around
metal objects will reduce system range and clarity.
PORTACOM PRO BELT PACK
TOP & BACK VIEW
Model Shown: BPW-300
Belt Pack Shown w/ Battery
Compartment Cover Removed
4
ENCRYPTION
SELECTION SWITCHES
“ON”
POSITION
GAIN ADJUSTMENT
HEADSET JACK
(plug in headset) ALL CALL CHANNEL
(set to channel 9 for All Call)
LED INDICATOR - OPERATING STATUS
Slow Flash: Listen Only Mode
Fast Flash: Active Mic Mode (talk or listen)
Solid On: Transmitting/Receiving
LED INDICATOR - BATTERY STATUS
Green: Battery Good
Red: Battery Low/Charging Error
Amber: Charging Battery/All Call Mode
PUSH TO TALK BUTTON
Turn Unit On w/ Thumbwheel: Listen Only mode
Single-Click: Lock In Active Mic (talk or listen)
Single-Click Again: Switch to Listen Only Mode
Push & Hold: Push to Talk Mode
UU..SS..EE.. ((UUSSEERR SSEELLEECCTTAABBLLEE EENNCCRRYYPPTTIIOONN))
PortaCom PRO comes with a simple, easy to use encryption method to make certain no one can listen in on your conversations. All belt packs are shipped with the
encryption settings in the OFF position, this allows all your belt packs to operate together out of the box. Follow the instructions below to enable encryption.
SETTING USER ENCRYPTION
NOTE: Belt packs must be powered off and on every time encryption settings are changed for proper operation.
1. Remove the battery compartment cover by sliding the door down
2. Locate the opening that houses eight small selection switches (see above)
3. With a small screwdriver (included) set the ON/OFF settings of the eight
switches to any pattern you desire
4. Set the same ON/OFF pattern to the switches on each belt pack in the
group so they can communicate with each other
5. Turn power for each belt pack off and back on the engage encryption
6. Test all of the units to verify that the code has been set correctly
FACTORY USE ONLY
REMOVE
RUBBER PLUG
TO ACCESS
CHANNEL SELECTOR
(set to match other belt packs)