Contents
Users Guide 2

iPad
User Guide
For iOS 4.3 Software

Contents
9 Chapter 1: At a Glance
9 Overview
10 Buttons
12 Micro-SIM Card Tray
13 Home Screen
17 Multi-Touch Screen
18 Onscreen Keyboard
23 Chapter 2: Getting Started
23 What You Need
24 Setting Up iPad
24 Syncing with iTunes
29 Connecting to the Internet
31 Adding Mail, Contacts, and Calendar Accounts
33 Disconnecting iPad from Your Computer
33 Viewing the User Guide on iPad
33 Battery
35 Using and Cleaning iPad
36 Chapter 3: Basics
36 Using Apps
40 Printing
42 Searching
43 Using Bluetooth Devices
44 File Sharing
45 Using AirPlay
46 Security Features
47 Chapter 4: Safari
47 About Safari
47 Viewing Webpages
50 Searching the Web
51 Bookmarks
52 Web Clips
2

53 Chapter 5: Mail
53 About Mail
53 Setting Up Email Accounts
54 Sending Email
55 Checking and Reading Email
58 Searching Email
59 Printing Messages and Attachments
59 Organizing Email
60 Chapter 6: Camera
60 About Camera
61 Taking Photos and Recording Videos
62 Viewing and Sharing Photos and Videos
62 Trimming Videos
62 Uploading Photos and Videos to Your Computer
63 Chapter 7: FaceTime
63 About FaceTime
64 Signing In
65 Making a FaceTime Call
65 While You’re Talking
66 Chapter 8: Photo Booth
66 About Photo Booth
66 5GNGEVKPICP'ÒGEV
67 Taking a Photo
67 Viewing and Sharing Photos
68 Uploading Photos to Your Computer
69 Chapter 9: Photos
69 About Photos
69 Syncing Photos and Videos with Your Computer
70 Importing Photos and Videos from iPhone or a Digital Camera
70 Viewing Photos and Videos
73 Sharing Photos
75 Assigning a Photo to a Contact
75 Printing Photos
75 Wallpaper and Lock Screen Photos
76 Using Picture Frame
77 Chapter 10: Videos
77 About Videos
78 Playing Videos
78 Controlling Video Playback
3
Contents

79 Syncing Videos
80 Watching Rented Movies
80 Watching Videos on a TV
80 Deleting Videos from iPad
81 Chapter 11: YouTube
81 Finding and Viewing Videos
83 Controlling Video Playback
84 Managing Videos
84 Watching YouTube on a TV
85 Chapter 12: Calendar
85 About Calendar
85 Syncing Calendars
86 Adding, Editing, and Deleting Calendar Events
86 Viewing Your Calendars
88 Searching Calendars
88 Subscribing to Calendars
89 Responding to Meeting Invitations
90 Importing Calendar Files from Mail
90 Alerts
91 Chapter 13: Contacts
91 About Contacts
92 Syncing and Adding Contacts
92 Searching Contacts
93 Managing Contacts
93 Using Contact Information
94 7PK°GF%QPVCEVs
95 Chapter 14: Notes
95 Writing and Reading Notes
96 Searching Notes
96 Emailing Notes
96 Syncing Notes
97 Chapter 15: Maps
97 About Maps
97 Finding and Viewing Locations
102 Getting Directions
103 5JQYKPI6TCÓE%QPFKVKQPs
103 Finding and Contacting Businesses
104 Sharing Location Information
4Contents

105 Chapter 16: iPod
105 Adding Music and More to iPad
105 Playing Music and Other Audio
109 Using Playlists
112 Home Sharing
112 Transferring Content
113 Chapter 17: iTunes Store
113 About the iTunes Store
113 Transferring Content
114 Finding Music, Videos, and More
114 Following Artists and Friends
115 Purchasing Music or Audiobooks
116 Purchasing or Renting Videos
117 Listening to or Watching Podcasts
117 Checking Download Status
118 Syncing Content
118 Viewing Apple ID Information
118 Verifying Purchases
119 Chapter 18: App Store
119 About the App Store
120 Browsing and Searching
120 Getting More Information
121 Buying Apps
121 Using Apps
122 Updating Apps
122 Writing Reviews
123 Deleting Apps
123 Syncing Purchases
124 Chapter 19: iBooks
124 About iBooks
125 Syncing Books and PDFs
125 Using the iBookstore
126 Reading Books
127 Reading PDFs
127 Changing a Book’s Appearance
128 Searching Books and PDFs
128 .QQMKPIWRVJG&G°PKVKQPQHC9QTd
128 Having a Book Read to You
128 Printing or Emailing a PDF
129 Organizing the Bookshelf
5
Contents

130 Chapter 20: Game Center
130 About Game Center
130 Setting Up Game Center
132 Games
134 Friends
135 Your Status and Account Information
136 Parental Controls
137 Chapter 21: Accessibility
137 Universal Access Features
138 VoiceOver
148 Zoom
149 Large Text
149 White on Black
149 Mono Audio
149 Speak Auto-Text
150 Triple-Click Home
150 Closed Captioning and Other Helpful Features
151 Chapter 22: Settings
151 About Settings
151 Airplane Mode
152 VPN
152 Wi-Fi
153 0QVK°ECVKQPs
153 Location Services
154 Carrier
154 Cellular Data
154 Brightness & Wallpaper
155 Picture Frame
155 General
163 Mail, Contacts, Calendars
166 Safari
168 iPod
168 Video
169 Photos
169 FaceTime
170 Notes
170 Store
171 Appendix A: iPad in the Enterprise
171 iPad at Work
171 7UKPI%QP°IWTCVKQP2TQ°NGs
6Contents

172 Setting Up Microsoft Exchange Accounts
172 VPN Access
173 LDAP and CardDAV Accounts
174 Appendix B: International Keyboards
174 Adding Keyboards
174 Switching Keyboards
175 Chinese
177 Japanese
177 Korean
177 Vietnamese
178 Creating Dictionaries
179 Appendix C: Tips and Troubleshooting
179 Tips and Troubleshooting
180 iTunes and Syncing
181 Backing Up iPad
182 Updating and Restoring iPad Software
184 Safari, Mail, and Contacts
185 Sound, Music, and Video
187 FaceTime
188 iTunes Store and App Store
188 Restarting and Resetting iPad
188 iPad Still Doesn’t Respond After Reset
188 Safety, Service, and Support Information
189 Disposal and Recycling Information
189 Apple and the Environment
190 Index
7
Contents
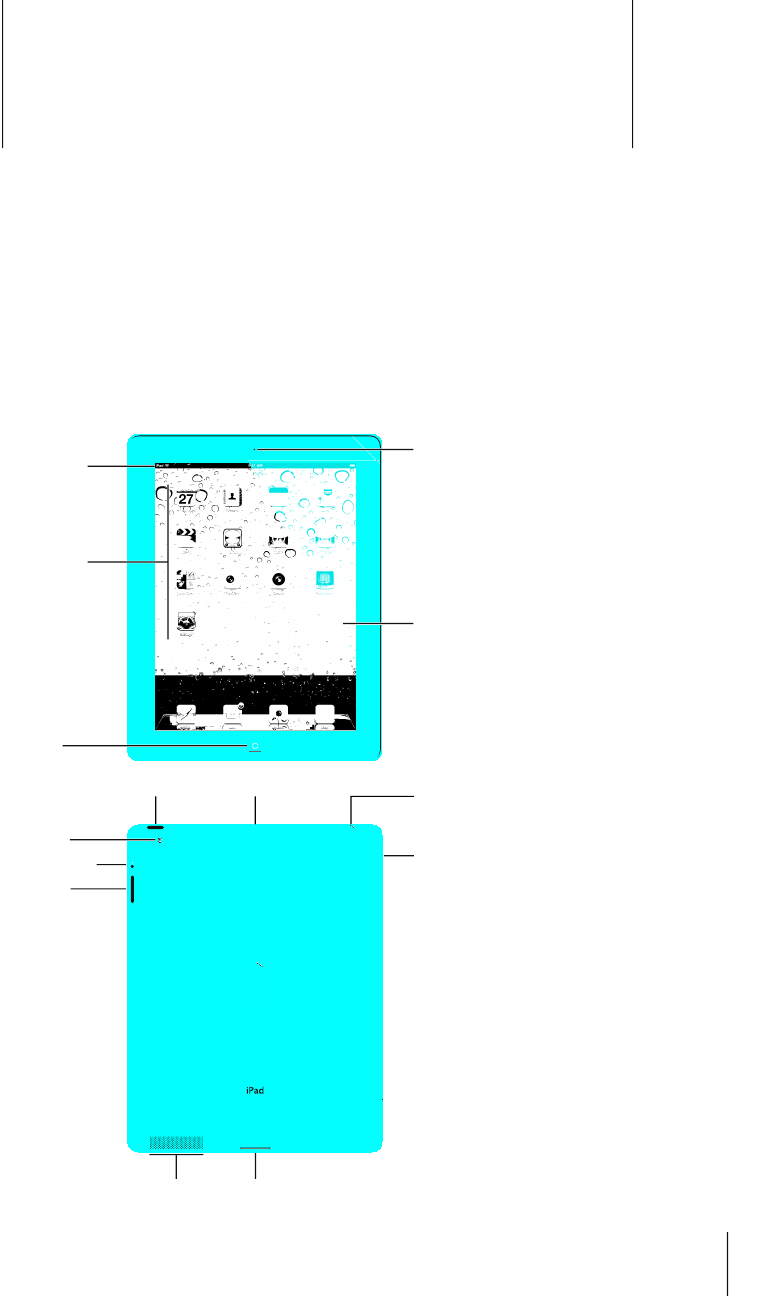
At a Glance 1
Read this chapter to learn about iPad features, how to use the controls, and more.
Overview
4\S[P;V\JO
ZJYLLU
:[H[\ZIHY
/VTL
-YVU[
JHTLYH
(WWPJVUZ
:WLHRLY
4PJYV:04[YH`
VUZVTLTVKLSZ
4PJYVWOVUL /LHKWOVUL
QHJR
=VS\TL
I\[[VUZ
:PKL:^P[JO
:SLLW>HRL
+VJRJVUULJ[VY
)HJR
JHTLYH
9
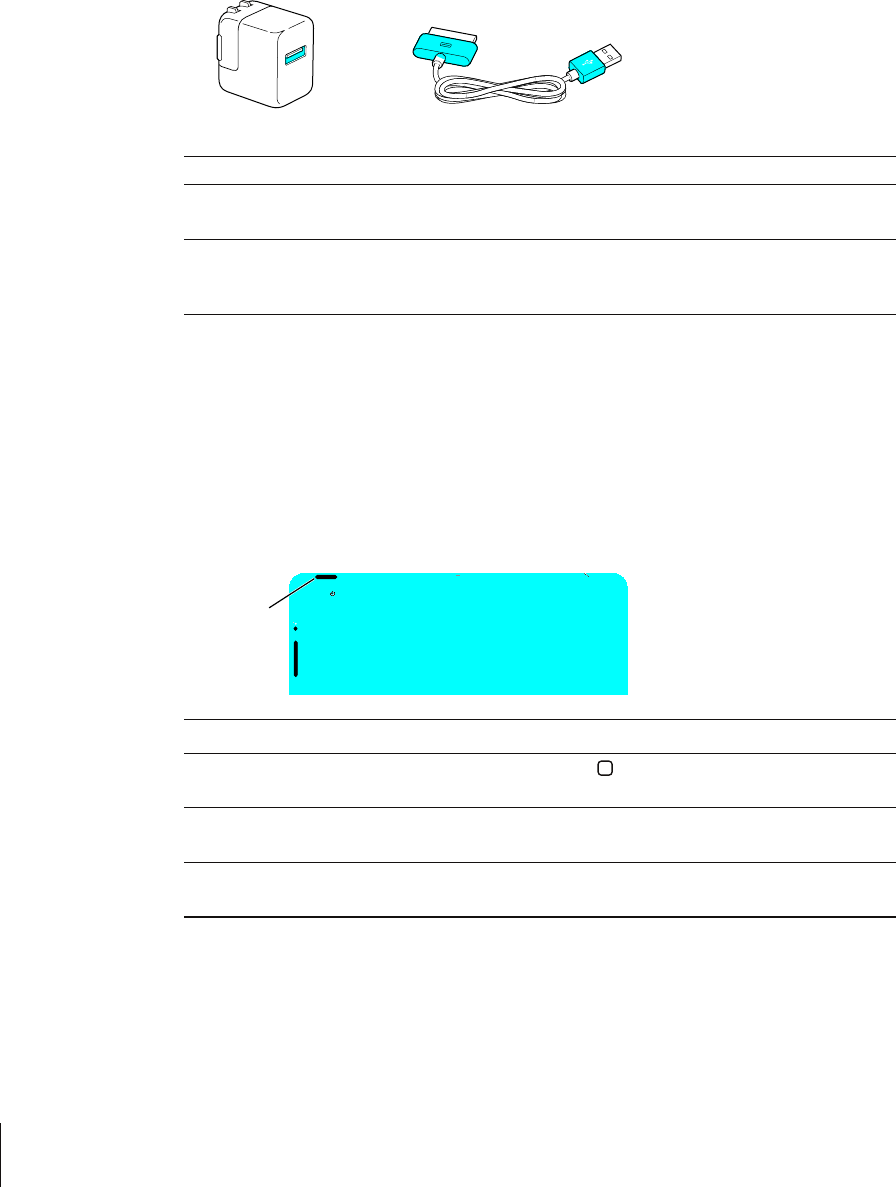
Accessories
+VJR*VUULJ[VY[V<:)*HISL
><:)7V^LY(KHW[LY
Item What you can do with it
10W USB power adapter Use the 10W USB power adapter to provide power to iPad
and charge the battery.
Dock Connector to USB Cable Use this cable to connect iPad to your computer to sync,
or to the 10W USB power adapter to charge. Use the cable
with the optional iPad Dock, or plug it directly into iPad.
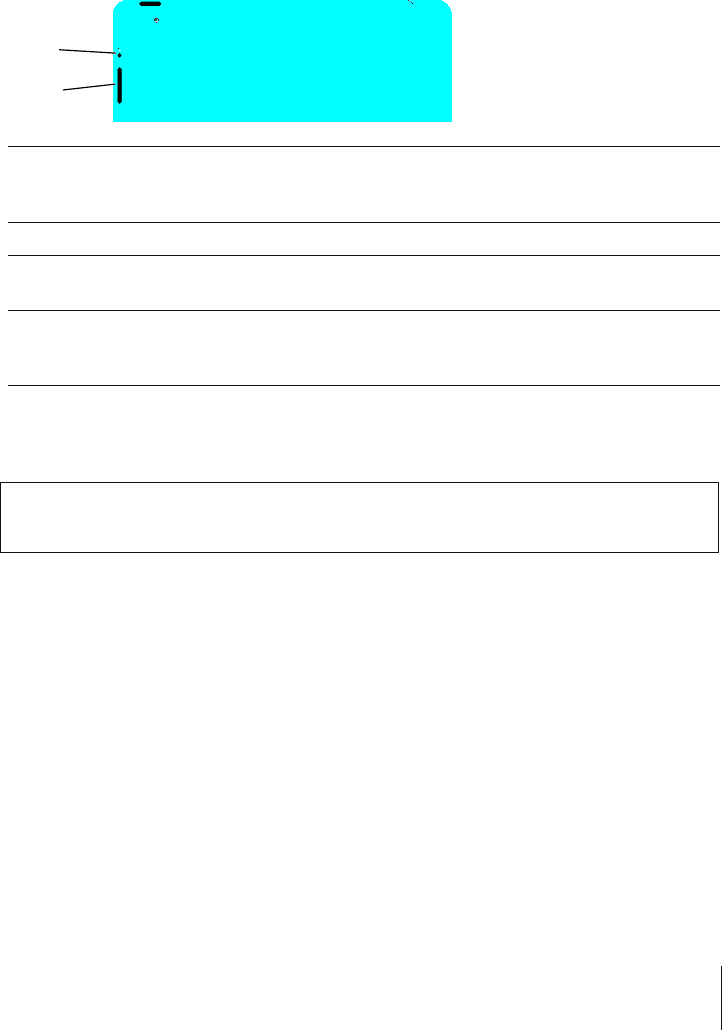
Buttons
#HGYUKORNGDWVVQPUOCMGKVGCU[VQVWTPK2CFQPCPFQÒCPFCFLWUVVJGXQNWOG
Sleep/Wake Button
You can lock iPad by putting it to sleep when you’re not using it. When you lock iPad,
nothing happens if you touch the screen, but music continues playing and you can
use the volume buttons.
:SLLW>HRL
I\[[VU
Lock iPad Press the Sleep/Wake button.
Unlock iPad Press the Home button or the Sleep/Wake button,
then drag the slider.
6WTPK2CFQÒ Press and hold the Sleep/Wake button for a few seconds
until the red slider appears, then drag the slider.
Turn iPad on Press and hold the Sleep/Wake button until the Apple
logo appears.
If you don’t touch the screen for a minute or two, iPad locks automatically. To change
this, see “Auto-Lock” on page 157. If you want to require a passcode to unlock iPad, see
“Passcode Lock” on page 157.
10 Chapter 1 At a Glance
You can use the iPad Smart Cover, available separately, to automatically unlock
iPad 2 when you open the cover and lock iPad 2 when you close it. See “iPad Cover
Lock/Unlock” on page 15 8 .
Volume Buttons
7UGVJGXQNWOGDWVVQPUVQCFLWUVVJGCWFKQXQNWOGQHUQPIUCPFQVJGTOGFKCCPFQH
CNGTVUCPFUQWPFGÒGEVU
=VS\TL
I\[[VUZ
:PKL
:^P[JO
Increase the volume Press the Volume Up button. To set a volume limit for
music and other media, in Settings, choose iPod > Volume
Limit.
Decrease the volume Press the Volume Down button.
Mute the sound Press and hold the Volume Down button to mute audio or
video playback.
5WRRTGUUPQVK°ECVKQPUCPF
UQWPFGÒGEVU
5NKFGVJG5KFG5YKVEJFQYPVQOWVGPQVK°ECVKQPUCPF
UQWPFGÒGEVU6JKUUYKVEJFQGUP¨VOWVGCWFKQQTXKFGQ
playback. See “Sounds” on page 156.
You can also use the Side Switch to lock the screen rotation. In Settings, choose
General > Use Side Switch…, then tap Lock Rotation. See “Side Switch” on page 160.
WARNING: For important information about avoiding hearing loss, see the
iPad Important Product Information Guide at support.apple.com/manuals/ipad.
11
Chapter 1 At a Glance

Micro-SIM Card Tray
The micro-SIM card in some iPad Wi-Fi + 3G models is used for cellular data. It’s also
known as a third form factor (or 3FF) SIM. If your micro-SIM card wasn’t preinstalled or if
you change cellular data carriers, you may need to install or replace the micro-SIM card.
:04LQLJ[
[VVS
4PJYV:04
JHYK
:04
[YH`
Open the SIM tray:
1 +PUGTVVJGVKRQHVJG5+/GLGEVVQQNKPVQVJGJQNGQPVJG5+/VTC[
2TGUU°TON[CPFRWUJVJGVQQNUVTCKIJVKPWPVKNVJGVTC[RQRUQWV+H[QWFQP¨VJCXGC
5+/GLGEVVQQN[QWECPWUGVJGGPFQHCRCRGTENKR
2 Pull out the SIM tray to install or replace the micro-SIM card.
For more information, see “Joining a Cellular Data Network ” on page 30.
12 Chapter 1 At a Glance
Home Screen
Press the Home button at any time to go to the Home screen, which contains your
iPad apps. Tap any icon to open the app.
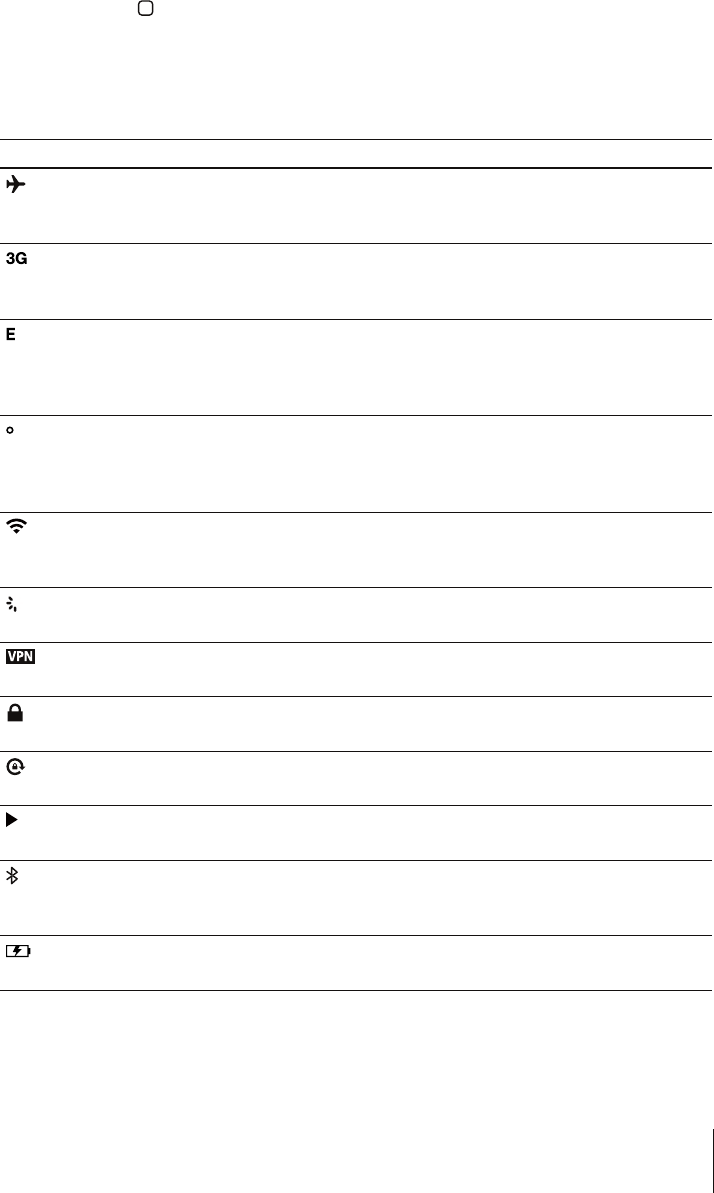
Status Icons
The icons in the status bar at the top of the screen give information about iPad:
Status icon What it means
Airplane mode Shows that airplane mode is on—you can’t access the
Internet, or use Bluetooth® devices. Non-wireless features
are available. See “Airplane Mode” on page 151.
3G Shows that your carrier’s 3G network (iPad Wi-Fi + 3G) is
available, and you can connect to the Internet over 3G.
See “Connecting to the Internet” on page 29.
EDGE Shows that your carrier’s EDGE network (some iPad Wi-Fi
+ 3G models) is available, and you can connect to the
Internet over EDGE. See “Connecting to the Internet” on
page 29.
GPRS Shows that your carrier’s GPRS network (some iPad Wi-Fi
+ 3G models) is available, and you can connect to the
Internet over GPRS. See “Connecting to the Internet” on
page 29.
Wi-Fi Shows that iPad has a Wi-Fi Internet connection. The more
bars, the stronger the connection. See “Connecting to the
Internet” on page 29.
Activity Shows network and other activity. Some third-party apps
may also use this icon to indicate an active process.
VPN Shows that you’re connected to a network using VPN. See
“VPN” on page 152 .
Lock Shows that iPad is locked. See “Sleep/Wake Button” on
page 10.
Screen orientation lock Shows that the screen orientation is locked. See “Viewing
in Portrait or Landscape” on page 16.
Play Shows that a song, audiobook, or podcast is playing. See
“Playing Songs” on page 105.
Bluetooth White icon: Bluetooth is on and a device, such as a headset
or keyboard, is connected. Gray icon: Bluetooth is on, but
no device is connected. No icon: $NWGVQQVJKUVWTPGFQÒ
Battery Shows the battery level or charging status. See “Charging
the Battery” on page 33.
13
Chapter 1 At a Glance
iPad Apps
The following apps are included with iPad:
Safari
Browse websites on the Internet. Rotate iPad sideways for widescreen viewing. Double-
VCRVQ\QQOKPQTQWV¤5CHCTKCWVQOCVKECNN[°VUVJGYGDRCIGEQNWOPVQVJGUETGGP
Open multiple pages. Sync bookmarks with Safari or Microsoft Internet Explorer on
your computer. Add Safari web clips to the Home screen for fast access to favorite
websites. Save images from websites to your Photo Library. Print webpages using
AirPrint. See Chapter 4, “Safari,” on page 47.
Mail
Send and receive mail using many of the most popular email services, Microsoft
Exchange, or most industry-standard POP3 and IMAP mail services. Send and save
RJQVQU8KGY2&(°NGUCPFQVJGTCVVCEJOGPVUQTQRGPVJGOKPQVJGTCRRU2TKPV
messages and attachments using AirPrint. See Chapter 5, “Mail,” on page 53.
Photos
Organize your favorite photos and videos into albums. Watch a slideshow. Zoom in
for a closer look. Share photos and videos using mail or MobileMe (sold separately), or
print photos using AirPrint. See Chapter 9, “Photos,” on page 69.
iPod
Sync with your iTunes library and listen to your songs, audiobooks, and podcasts on
iPad. Create and manage playlists, or use Genius to create playlists for you. Listen to
Genius Mixes of songs from your library. Use Home Sharing to play music from your
computer. Stream your music or videos wirelessly to an Apple TV or compatible audio
system using AirPlay. See Chapter 16, “iPod,” on page 105.
Calendar
Keep your calendar current on iPad, or sync it with your Mac OS X or Windows calendar.
Subscribe to others’ calendars. Sync over the Internet with Microsoft Exchange or
CalDAV servers. See Chapter 12, “Calendar,” on page 85.
Contacts
Organize your address book and keep it up to date on iPad, or sync it with
your Mac OS X or Windows address book. Sync wirelessly with MobileMe (sold
separately), Google Contacts, Yahoo! Address Book, and Microsoft Exchange. See
Chapter 13, “Contacts,” on page 91.
Notes
Jot notes on the go—reminders, grocery lists, brilliant ideas. Send them in email. Sync
notes to Mail or Microsoft Outlook or Outlook Express. See Chapter 14, “Notes,” on
page 95.
Maps
See a classic, satellite, hybrid, or terrain view of locations around the world. Zoom in for
a closer look, or check out Google Street View. Find your current location. Get detailed
FTKXKPIRWDNKEVTCPUKVQTYCNMKPIFKTGEVKQPUCPFUGGEWTTGPVJKIJYC[VTCÓEEQPFKVKQPU
Find businesses in the area. See Chapter 15, “Maps,” on page 97.
Videos
Play movies, TV shows, podcasts, videos from your iTunes library or your movie
collection. Buy or rent movies on iPad using the iTunes Store. Download video
podcasts. See Chapter 10, “Videos,” on page 77.
YouTube
Play videos from YouTube’s online collection. Search for any video, or browse featured,
most viewed, most recently updated, and top-rated videos. Set up and log in to your
YouTube account—then rate videos, sync your favorites, show subscriptions, and more.
See Chapter 11 , “YouTube,” on page 81.
14 Chapter 1 At a Glance
iTunes
Search the iTunes Store for music, audiobooks, TV shows, music videos, and movies.
Browse, preview, purchase, and download new releases, top items, and more. Buy or rent
movies and TV shows to view on iPad. Download podcasts. Read reviews, or write your
own reviews for your favorite store items. See Chapter 17, “iTunes Store,” on page 113 .
App Store
Search the App Store for apps you can purchase or download. Read reviews, or write
your own reviews for your favorite apps. Download and install the apps on your Home
screen. See Chapter 18, “App Store,” on page 119 .
Game
Center
Discover new games and share your game experiences with friends. Invite a friend, or
request a match with an opponent. Check player rankings on the leaderboards. Gain
achievements for extra points. See Chapter 20, “Game Center,” on page 13 0.
FaceTime
Make video calls to other FaceTime users over Wi-Fi. Use the front camera to talk face to
face, or the back camera to share what you see. See Chapter 7, “FaceTime,” on page 63.
Camera
Take photos and record videos. View them on iPad, email them, or upload them to your
computer or the Internet. Tap to set the exposure. Trim and save video clips. Upload
videos directly to YouTube or MobileMe. See Chapter 6, “Camera,” on page 60.
Photo
Booth
7UGVJGHTQPVQTDCEMECOGTCVQVCMGCUPCRUJQV#FFCURGEKCNGÒGEVUWEJCUVYKTNQT
stretch, before you take a snapshot. Snapshots are saved in an album in the Photo app.
See Chapter 8, “Photo Booth,” on page 66.
Settings
Personalize your iPad settings in one convenient place—network, mail, web, music,
video, photos, and more. Set up Picture Frame, mail accounts, contacts, and calendars.
Manage your cellular data account (iPad Wi-Fi + 3G). Set auto-lock and a passcode for
security. See Chapter 22, “Settings,” on page 151.
Additionally, you can get the following apps from the App Store on iPad:
iBooks
Download the free iBooks app from the App Store. Tap the store button and browse
tens of thousands of ePub and PDF books—many of them free. Print PDFs using
AirPrint. Use bookmarks and highlights to save your place and note your favorite
passages. See Chapter 19, “iBooks,” on page 124.
Pages
Use Multi-Touch gestures to create and share documents on iPad. Develop letters,
±[GTUDTQEJWTGUTGRQTVUCPFOQTG$GIKPCFQEWOGPVQPK2CFCPF°PKUJKVQP[QWT
computer. You can purchase the Pages app from the App Store.
Numbers
Develop spreadsheets with tables, charts, photos, and text. With a few taps, you can
QTICPK\GFCVCRGTHQTOECNEWNCVKQPUCPFOCPCIGNKUVU0WODGTUQÒGTUOCP[VGORNCVGU
or you can choose the Blank template to create a unique spreadsheet. You can
purchase the Numbers app from the App Store.
Keynote
Choose from Keynote themes to create a presentation. Add photos and videos from
the Photos app; organize data with tables and charts; and when your presentation is
ready, use full-screen view to play it on iPad. Import Keynote presentations you create
on your computer. You can purchase the Keynote app from the App Store.
15
Chapter 1 At a Glance
Note: App functionality and availability may vary depending on where you purchase
and use iPad.
Viewing in Portrait or Landscape
You can view iPad‘s built-in apps in either portrait or landscape orientation. Rotate iPad
CPFVJGUETGGPTQVCVGUVQQCFLWUVKPICWVQOCVKECNN[VQ°VVJGPGYQTKGPVCVKQP
You may prefer landscape orientation for viewing webpages in Safari, for example, or
when entering text. Webpages automatically scale to the wider screen, making the
text and images larger. The onscreen keyboard also becomes larger, which may help
increase your typing speed and accuracy. Lock the screen orientation if you want to
keep the screen from rotating.
Lock the screen in portrait or landscape orientation: Double-click the Home
DWVVQPVQXKGYVJG/WNVKVCUMKPIUVCVWUDCTVJGP±KEMHTQONGHVVQTKIJV6CR to lock
the screen orientation.
You can also set the Side Switch to lock the screen orientation instead of silencing
UQWPFGÒGEVUCPFPQVK°ECVKQPU)QVQ5GVVKPIU )GPGTCN
16 Chapter 1 At a Glance
Multi-Touch Screen
The controls on the Multi-Touch screen change dynamically, depending on the task
[QW¨TGRGTHQTOKPI6QEQPVTQNK2CFWUG[QWT°PIGTUVQVCRFQWDNGVCRCPFUYKRG
Adjusting Brightness
6QCFLWUVVJGUETGGP¨UDTKIJVPGUUFQWDNGENKEMVJG*QOG button to view the
Multitasking status bar. Flick from left to right, then drag the brightness slider.
)YPNO[ULZZ
;QWECPWUG#WVQ$TKIJVPGUUVQCWVQOCVKECNN[CFLWUVVJGUETGGP¨UDTKIJVPGUU
+P5GVVKPIUEJQQUG$TKIJVPGUU9CNNRCRGTVJGPVWTP#WVQ$TKIJVPGUUQPQTQÒ
See “Brightness & Wallpaper” on page 154.
Using Lists
Some lists have an index along the side to help you navigate quickly.
0UKL_
Find items in an indexed list: 6CRCNGVVGTVQLWORVQKVGOUUVCTVKPIYKVJVJCVNGVVGT
&TCI[QWT°PIGTCNQPIVJGKPFGZVQUETQNNSWKEMN[VJTQWIJVJGNKUV
Choose an item: Tap an item in the list.
&GRGPFKPIQPVJGNKUVVCRRKPICPKVGOECPFQFKÒGTGPVVJKPIU¤HQTGZCORNGKVOC[
open a new list, play a song, open an email message, or show someone’s contact
information.
Return to a previous list: Tap the back button in the upper-left corner.
17
Chapter 1 At a Glance
Zooming In or Out
When viewing photos, webpages, email, or maps, you can zoom in and out. Pinch your
°PIGTUVQIGVJGTQTCRCTV(QTRJQVQUCPFYGDRCIGU[QWECPFQWDNGVCRVCRVYKEG
quickly) to zoom in, then double-tap again to zoom out. For maps, double-tap to zoom
KPCPFVCRQPEGYKVJVYQ°PIGTUVQ\QQOQWV
Zoom is also an accessibility feature that lets you magnify the entire screen of any app
you’re using and helps you see what’s on the display. See “Zoom” on page 148.
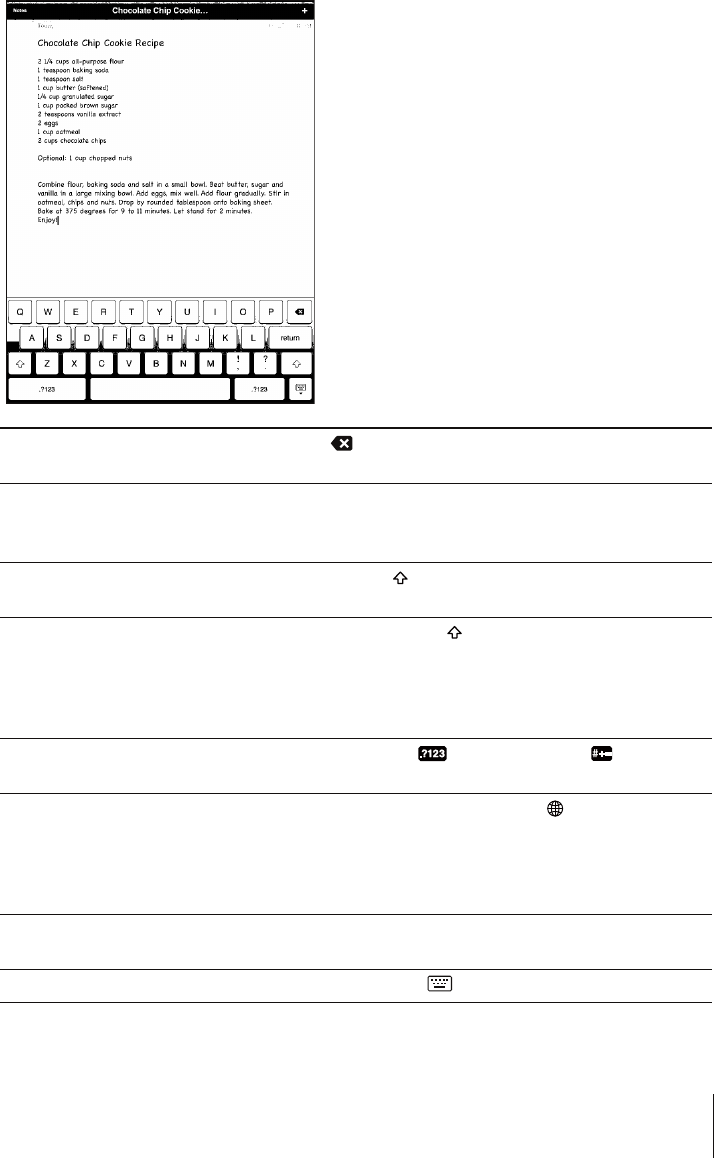
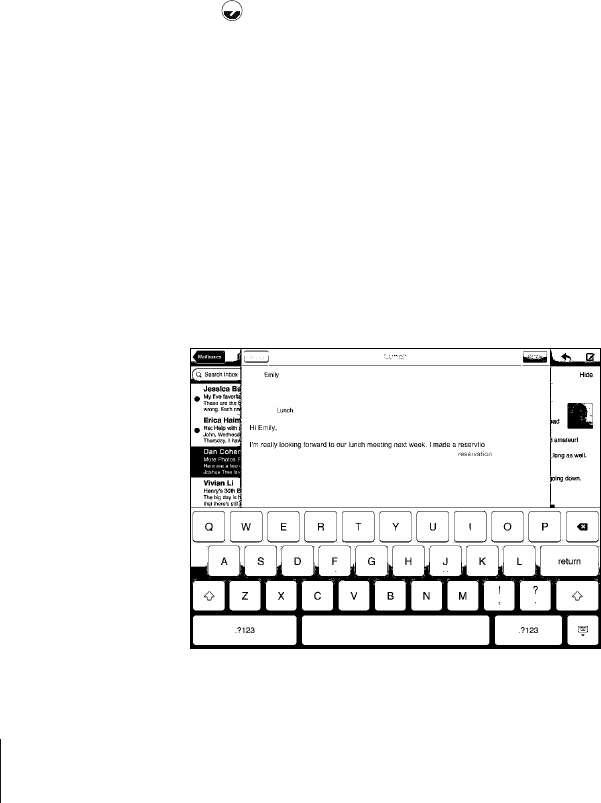
Onscreen Keyboard
The onscreen keyboard appears automatically anytime you need to type. Use the
keyboard to enter text, such as contact information, email, and web addresses. The
keyboard corrects misspellings, predicts what you’re typing, and learns as you use it.
You can also use an Apple Wireless Keyboard to type. When you use an external
keyboard, the onscreen keyboard doesn’t appear. See “Using an Apple Wireless
Keyboard” on page 20.
Typing
Depending on the app you’re using, the intelligent keyboard may automatically
suggest corrections as you type, to help prevent mistyped words.
Enter text:
1 6CRCVGZV°GNFUWEJCUKPCPQVGQTPGYEQPVCEVVQDTKPIWRVJGMG[DQCTF
2 Tap keys on the keyboard.
18 Chapter 1 At a Glance
+H[QWVQWEJVJGYTQPIMG[[QWECPUNKFG[QWT°PIGTVQVJGEQTTGEVMG[6JGNGVVGTKUP¨V
GPVGTGFWPVKN[QWTGNGCUG[QWT°PIGTHTQOVJGMG[
Backspace to delete the
previous character
Tap .
Quickly type a period and space Double-tap the space bar.
;QWECPVWTPVJKUHGCVWTGQPQTQÒKP5GVVKPIU )GPGTCN
Keyboard.
Type uppercase Tap the Shift key before tapping a letter. Or touch and
hold the Shift key, then slide to a letter.
Turn caps lock on Double-tap the Shift key. The Shift key turns blue, and
all letters you type are uppercase. Tap the Shift key to turn
ECRUNQEMQÒ
;QWECPVWTPVJKUHGCVWTGQPQTQÒKP5GVVKPIU )GPGTCN
Keyboard.
Show numbers, punctuation,
or symbols
Tap the Number key. Tap the Symbol key to see
additional punctuation and symbols.
Use an international keyboard Touch and hold the Next Keyboard key to display
a menu of languages, then tap the language. See
Appendix B, “International Keyboards,” on page 174 .
You can add or remove international keyboards in
Settings > General > Keyboard.
Type letters or symbols that aren’t
on the keyboard
Touch and hold the related letter or symbol, then slide to
choose a variation.
Hide the onscreen keyboard Tap the Keyboard key to hide the onscreen keyboard.
19
Chapter 1 At a Glance
Using an Apple Wireless Keyboard
For ease of typing, you can use an Apple Wireless Keyboard with iPad.
The Apple Wireless Keyboard connects using Bluetooth, so you must pair the keyboard
with iPad. See “Pairing Bluetooth Devices” on page 43.
Once the keyboard is paired with iPad, it connects whenever the keyboard is within
range (up to 33 feet or 10 meters). You can tell that the keyboard is connected if the
QPUETGGPMG[DQCTFFQGUP¨VCRRGCTYJGP[QWVCRKPCVGZV°GNF
Switch the language when using a hardware keyboard: Hold down the Command
key and tap the space bar to display a list of available languages. Tap the space bar
again to choose a language.
Disconnect a wireless keyboard from iPad: Hold down the power button on the
MG[DQCTFWPVKNVJGITGGPNKIJVIQGUQÒ
iPad disconnects the keyboard when it’s out of range.
Unpair a wireless keyboard from iPad: In Settings, choose General > Bluetooth,
tap next to the keyboard name, then tap “Forget this Device.”
;QWECPCRRN[FKÒGTGPVNC[QWVUVQCYKTGNGUUMG[DQCTF5GG#RRGPFKZB, “International
Keyboards,” on page 174 and “Keyboard Layouts” on page 22.
Dictionary
For many languages, iPad has dictionaries to help you type. The appropriate dictionary
is activated automatically when you select a supported keyboard.
To see a list of supported languages, from Settings, choose General > International >
Keyboards.
iPad uses the active dictionary to suggest corrections or complete the word you’re
typing. You don’t need to interrupt your typing to accept the suggested word.
20 Chapter 1 At a Glance
Accept or reject dictionary suggestions:
BTo reject the suggested word, °PKUJV[RKPIVJGYQTFCU[QWYCPVKVVJGPVCRVJG
UWIIGUVKQPVQFKUOKUUKVDGHQTGV[RKPICP[VJKPIGNUG'CEJVKOG[QWTGLGEVCUWIIGUVKQP
for the same word, iPad becomes more likely to accept your word.
BTo use the suggested word, type a space, punctuation mark, or return character.
Reset dictionary suggestions: In Settings, choose General > Reset > Reset Keyboard
Dictionary. This resets all the suggestions you’ve made to the dictionary.
6WTP#WVQ%QTTGEVKQPQPQTQÒIn Settings, choose General > Keyboard, then turn
#WVQ%QTTGEVKQPQPQTQÒ#WVQ%QTTGEVKQPKUPQTOCNN[QP
6WTP5RGCM#WVQVGZVQPQTQÒIn Settings, choose General > Accessibility, then turn
5RGCM#WVQVGZVQPQTQÒ5RGCM#WVQVGZVURGCMUVJGVGZVUWIIGUVKQPU
Note: If you’re entering Chinese or Japanese characters, tap one of the alternatives the
dictionary suggests.
Editing—Cut, Copy, and Paste
The Multi-Touch screen makes it easy to make changes to text you’ve entered. An
onscreen magnifying glass helps you position the insertion point precisely where you
need it. Grab points on selected text let you quickly select more or less text. You can
also cut, copy, and paste text and photos within apps, or across multiple apps.
Position the insertion point: Touch and hold to bring up the magnifying glass, then
drag to position the insertion point.
Select text: Tap the insertion point to display the selection buttons. Tap Select to
UGNGEVVJGCFLCEGPVYQTFQTVCR5GNGEV#NNVQUGNGEVCNNVGZV;QWECPCNUQFQWDNGVCRC
word to select it. In read-only documents such as webpages, touch and hold a word
to select it.
Drag the grab points to select more or less text.
Cut or copy text: Select text, then tap Cut or Copy.
21
Chapter 1 At a Glance

Paste text: Tap the insertion point, then tap Paste to insert the last text that you cut or
copied. Or, select text, then tap Paste to replace the text.
Undo the last edit: Shake iPad, or tap undo on the keyboard.
Keyboard Layouts
You can use Settings to set the layouts for the onscreen software keyboard and for any
hardware keyboards. Available layouts depend on the keyboard language.
Select a keyboard layout: In Settings, choose General > Keyboard > International
Keyboards, then select a keyboard. For each language, you can make separate
selections for both the onscreen software keyboard and any external hardware
keyboards.
The software keyboard layout determines the layout of the keyboard on the iPad
screen. The hardware keyboard layout determines the layout of an Apple Wireless
Keyboard connected to iPad.
22 Chapter 1 At a Glance

Getting Started 2
Connect iPad to your computer and use iTunes to set up, register, and sync content.
What You Need
WARNING: 6QCXQKFKPLWT[TGCFCNNQRGTCVKPIKPUVTWEVKQPUKPVJKUIWKFG
and safety information in the iPad Important Product Information Guide at
support.apple.com/manuals/ipad before using iPad.
To use iPad, you need:
A Mac or a PC with a USB 2.0 port and one of the following operating systems:
Mac OS X version 10.5.8 or later
Windows 7, Windows Vista, or Windows XP Home or Professional with Service Pack 3
or later
iTunes 10.2 or later, available at www.itunes.com/download
An Apple ID
Broadband Internet access
23
Setting Up iPad
Before you can use iPad, you must use iTunes to set it up. You can also register iPad
and create an Apple ID (not available in some countries) if you don’t already have one.
Set up iPad:
1 Download and install the latest version of iTunes from www.itunes.com/download.
2 Connect iPad to a USB 2.0 port on your Mac or PC using the cable that came with iPad.
3 Follow the onscreen instructions in iTunes to register iPad and sync iPad with music,
video, and other content from your iTunes library, and with your contacts, calendars,
and bookmarks on your computer.
In the Set Up Your iPad screen, select “Automatically sync contacts, calendars and
bookmarks” to have those items sync automatically when you connect iPad to
your computer.
Syncing with iTunes
Use iTunes to sync your music, videos, downloaded apps, and other iTunes library
content from your computer. You can also sync your contacts, calendars, and your
browser bookmarks. iTunes lets you choose the content and information that you
want to sync with iPad. By default, iTunes syncs automatically whenever you connect
iPad to your computer. When you sync, you can also transfer information you create
or purchase on iPad to your computer.
Setting Up Syncing
You can set iTunes to sync the following:
Music
Movies
TV Shows
Games and apps downloaded from the App Store
Music videos
Podcasts
24 Chapter 2 Getting Started

Books and audiobooks
iTunes U collections
Photos and videos (in your computer’s photo app or folder)
Contacts—names, phone numbers, addresses, email addresses, and more
Calendars—appointments and events
Notes
Email account settings
Webpage bookmarks
;QWECPCFLWUVU[PEUGVVKPIUYJGPGXGT[QWEQPPGEVK2CFVQ[QWTEQORWVGT
Sync your music, audiobooks, podcasts, iTunes U collections, videos, books, and apps
from your iTunes library. If you don’t already have content in iTunes, go to the iTunes
Store (available in some countries) to preview and download content to iTunes. You
can also add music to your iTunes library from your CDs. To learn about iTunes and the
iTunes Store, open iTunes and choose Help > iTunes Help.
Contacts, calendars, notes, and webpage bookmarks are synced with applications
on your computer. New entries or changes you make on iPad are synced to your
computer, and vice versa.
iTunes also lets you sync photos and videos, either from an application or from a folder.
Email account settings are synced only one direction, from your computer’s email app
VQK2CF6JKUCNNQYU[QWVQEWUVQOK\G[QWTGOCKNCEEQWPVUQPK2CFYKVJQWVCÒGEVKPI
email account settings on your computer.
Note: You can also set up email accounts directly on iPad. See “Adding Mail, Contacts,
and Calendar Accounts” on page 31.
iTunes Store and App Store purchases you make on iPad are synced with the iTunes
library on your computer when you connect. You can also purchase or download
content and apps from the iTunes Store on your computer, and then sync them to iPad.
25
Chapter 2 Getting Started

You can set iPad to sync only a portion of what’s on your computer. For example, you
might want to sync only certain music playlists, or only unwatched video podcasts.
Important: You should log in to your own user account on your computer before
connecting iPad.
Set up iTunes syncing:
1 Connect iPad to your computer, and open iTunes (if it doesn’t open automatically).
2 In iTunes, select iPad in the sidebar.
3 %QP°IWTGVJGU[PEUGVVKPIUKPGCEJQHVJGUGVVKPIURCPGU
See the following section for a description of each pane.
4 Click Apply in the lower-right corner of the screen.
By default, “Open iTunes when this iPad is connected” is selected.
26 Chapter 2 Getting Started

iPad Settings Panes in iTunes
The following sections provide an overview of each of the iPad settings panes.
For more information, open iTunes and choose Help > iTunes Help.
Summary Pane
Select “Open iTunes when this iPad is attached” to have iTunes open and sync iPad
automatically whenever you connect it to your computer. Deselect this option if you
want to sync only by clicking the Sync button in iTunes. For more information about
preventing automatic syncing, see “Preventing Automatic Syncing” on page 29.
Select “Sync only checked songs and videos” if you want iTunes to skip unchecked
items in your iTunes library when syncing.
5GNGEV¥/CPWCNN[OCPCIGOWUKECPFXKFGQU¦VQVWTPQÒCWVQOCVKEU[PEKPIKPVJG/WUKE
and Video settings panes.
Select “Encrypt iPad backup” if you want to encrypt the information stored on your
computer when iTunes makes a backup. Encrypted backups are shown with a lock
icon, and require a password to restore the information to iPad. See “Updating and
Restoring iPad Software” on page 182.
6QVWTPQPCEEGUUKDKNKV[HGCVWTGUENKEM%QP°IWTG7PKXGTUCN#EEGUU(QTOQTGKPHQTOCVKQP
see “Universal Access Features” on page 137.
Info Pane
6JG+PHQRCPGNGVU[QWEQP°IWTGVJGU[PEUGVVKPIUHQT[QWTEQPVCEVUECNGPFCTUGOCKN
accounts, and web browser.
Contacts
You can sync contacts with applications such as Mac OS X Address Book, Yahoo!
Address Book, and Google Contacts on a Mac, or with Yahoo! Address Book, Google
Contacts, Windows Address Book (Microsoft Outlook Express), Windows Vista
Contacts, or Microsoft Outlook 2003, 2007, or 2010 on a PC. (On a Mac, you can sync
contacts with multiple applications. On a PC, you can sync contacts with only one
application at a time.)
+H[QWU[PEYKVJ;CJQQ#FFTGUU$QQM[QWQPN[PGGFVQENKEM%QP°IWTGVQGPVGT[QWT
new login information when you change your Yahoo! ID or password after you’ve
set up syncing.
Calendars
You can sync calendars from applications such as iCal on a Mac, or from Microsoft
Outlook 2003, 2007, or 2010 on a PC. (On a Mac, you can sync calendars with multiple
applications. On a PC, you can sync calendars with only one application at a time.)
27
Chapter 2 Getting Started

Mail Accounts
You can sync email account settings from Mail on a Mac, and from Microsoft
Outlook 2003, 2007, or 2010 or Microsoft Outlook Express on a PC. Account settings
are only transferred from your computer to iPad. Changes you make to an email
CEEQWPVQPK2CFFQP¨VCÒGEVVJGCEEQWPVQP[QWTEQORWVGT
Note: The password for your Yahoo! email account isn’t saved on your computer, so
it can’t be synced and must be entered on iPad. In Settings, choose “Mail, Contacts,
Calendars,” tap your Yahoo! account, and enter the password.
Other
Sync bookmarks from Safari on a Mac, or from Safari or Microsoft Internet Explorer
on a PC.
Sync notes in the Notes app on iPad with notes in Mail on a Mac or with Microsoft
Outlook 2003 or 2007 on a PC.
Advanced
Select one or more of these options if your want to replace the information on iPad
with the information on your computer during the next sync.
Apps Pane
Use the Apps pane to sync App Store apps, arrange apps on the iPad Home screen,
or copy documents between iPad and your computer.
Select “Automatically sync new apps” to sync new apps to iPad that you downloaded
or synced from another device. If you delete an app on iPad, you can reinstall it from
the Apps pane if it was previously synced.
You can create documents on iPad, and then copy them to your computer. You can
also copy documents from your computer to iPad, and use them with apps that
UWRRQTV°NGUJCTKPI#RRUVJCVUWRRQTV°NGUJCTKPICTGUJQYPKPVJG(KNG5JCTKPI#RRU
NKUV(QTOQTGKPHQTOCVKQPCDQWV°NGUJCTKPIUGG¥File Sharing” on page 44.
Music, Movies, TV Shows, Podcasts, and iTunes U Panes
Use these panes to specify the media you want to sync. You can sync all music, movies,
TV shows, podcasts, and iTunes U collections, or select the content you want on iPad.
To watch rented movies in your iTunes library on iPad, transfer them to iPad using
the Movies pane.
Books Pane
You can sync books you’ve downloaded from the iBookstore, and many free ePub
books from other sources. You can also sync audiobooks, and if the book has more
VJCPQPGRCTVLWUVVJGRQTVKQPU[QWYCPV
28 Chapter 2 Getting Started

Photos Pane
You can sync photos and videos with iPhoto 6.0.6 or later, or Aperture 3.0.2 or later
on a Mac; or with Adobe Photoshop Elements 8.0 or later on a PC. You can also sync
photos and videos in any folder on your computer that contains images or videos.
Preventing Automatic Syncing
You can prevent iPad from syncing automatically when you connect iPad to a
FKÒGTGPVEQORWVGT
Prevent automatic syncing for all iPads: In iTunes choose iTunes > Preferences (on a
Mac) or Edit > Preferences (on a PC), click Devices, then select “Prevent iPods, iPhones,
and iPads from syncing automatically.”
If this checkbox is selected, iPad won’t sync automatically, even if “Open iTunes when
this iPad is connected” is selected in the Summary pane.
Prevent automatic syncing one time, without changing settings: Open iTunes,
connect iPad to your computer, then press and hold Command-Option (on a Mac) or
Shift-Control (on a PC) until iPad appears in the sidebar.
Sync manually: In iTunes, select iPad in the sidebar, then click Sync in the lower-right
corner of the window. Or, if you’ve changed any sync settings, click Apply.
Connecting to the Internet
K2CFECPLQKP#KT2QTVCPFQVJGT9K(KPGVYQTMUCVJQOGCVYQTMQTCV9K(KJQVURQVU
CTQWPFVJGYQTNF9JGPLQKPGFVQC9K(KPGVYQTMVJCV¨UEQPPGEVGFVQVJG+PVGTPGV
iPad connects to the Internet automatically whenever you use Mail, Safari, YouTube,
the App Store, or the iTunes Store. iPad connects to the Internet using a Wi-Fi network.
iPad Wi-Fi + 3G can also connect to the Internet using a cellular data network. Data
service is sold separately.
Joining a Wi-Fi Network
7UG9K(KUGVVKPIUVQVWTPQP9K(KCPFLQKP9K(KPGVYQTMU
Turn on Wi-Fi: Choose Settings > Wi-Fi and turn Wi-Fi on.
Join a Wi-Fi network: Choose Settings > Wi-Fi, wait a moment as iPad detects
PGVYQTMUKPTCPIGVJGPUGNGEVCPGVYQTMHGGUOC[CRRN[VQLQKPUQOG9K(KPGVYQTMU
If necessary, enter a password and tap Join (networks that require a password appear
with a lock icon).
1PEG[QWLQKPC9K(KPGVYQTMK2CFCWVQOCVKECNN[EQPPGEVUVQKVYJGPGXGTVJGPGVYQTM
KUKPTCPIG+HOQTGVJCPQPGRTGXKQWUN[WUGFPGVYQTMKUKPTCPIGK2CFLQKPUVJGQPG
last used.
When iPad has a Wi-Fi connection, the Wi-Fi icon in the status bar shows the
connection strength. The more bars you see, the stronger the connection.
(QTKPHQTOCVKQPCDQWVEQP°IWTKPI9K(KUGVVKPIUUGG¥Wi-Fi” on page 152.
29
Chapter 2 Getting Started

Joining a Cellular Data Network
$GHQTG[QWECPLQKPCEGNNWNCTFCVCPGVYQTMQPK2CF9K(K)[QWOWUVUKIPWRHQTC
cellular data plan with an iPad service carrier in your area. With some carriers, you can
choose a data plan, track your data usage, and change or cancel your plan on iPad.
On some models, 3G, EDGE, and GPRS provide Internet connectivity over the cellular
network available through your carrier’s wireless service. Check the carrier’s network
coverage in your area for availability.
If iPad is connected to the Internet using the cellular data network, you see the
3G ( ), EDGE ( ), or GPRS ( ) icon in the status bar.
Turn Data Roaming on: If you’re outside your carrier’s network, you may be able to
use a cellular data network from another carrier. In Settings, choose Cellular Data and
turn Data Roaming on.
Important: Roaming charges may apply. To avoid data roaming charges, make sure
&CVC4QCOKPIKUVWTPGFQÒ
Monitor your cellular data network usage: In Settings, choose Cellular Data >
View Account.
Set up a cellular data plan on iPad: From the iPad Home screen, tap Settings and
choose Cellular Data. Tap View Account, then follow the onscreen instructions.
Cellular data settings may vary depending on the carrier.
iPad is unlocked, so you can choose your preferred carrier. Cellular data settings vary,
depending on the carrier. If your iPad Wi-Fi + 3G didn’t come with a micro-SIM card,
contact your carrier to set up an account and obtain a compatible micro-SIM card.
0QVCNNECTTKGTUQÒGT)FCVCRNCPU
Internet Access on an Airplane
#KTRNCPGOQFGQPK2CF9K(K)VWTPUQÒVJGK2CFTCFKQVTCPUOKVVGTUVQEQORN[
with airline regulations. In some regions, where allowed by the aircraft operator and
applicable laws and regulations, you can turn on Wi-Fi while airplane mode is on, to:
Send and receive email
Browse the Internet
Sync your contacts and calendars over the air
Stream YouTube videos
Purchase music and apps
For more information, see “Airplane Mode” on page 151.
30 Chapter 2 Getting Started

Adding Mail, Contacts, and Calendar Accounts
iPad works with MobileMe, Microsoft Exchange, and many of the most popular
Internet-based email, contacts, and calendar service providers. If you don’t
already have an email account, you can get a free account online at www.yahoo.com,
www.google.com, or www.aol.com. To try a free MobileMe trial, go to
www.apple.com/mobileme.
For information about setting up a Microsoft Exchange account in a corporate
environment, see “Setting Up Microsoft Exchange Accounts” on page 172.
Setting Up MobileMe Accounts
To use MobileMe on iPad, you can set up a MobileMe Free Account or a MobileMe
Paid Subscription.
A MobileMe Free Account lets you use Find My iPad—a feature that helps you locate
iPad if it’s been lost or stolen, and protect the information on it (not available in all
countries or regions). See “Security Features” on page 46.
A MobileMe Free Account is available to any customer who has an iPad with iOS 4.2 or
later. If you’ve already created an Apple ID for the App Store or Game Center, you can
use the same Apple ID to set up your MobileMe account. Create a new account if you
don’t already have one.
Set up a MobileMe Free Account:
1 In Settings, tap “Mail, Contacts, Calendars.”
2 Tap Add Account, then tap MobileMe.
3 Enter your Apple ID and password, or tap Create Free Apple ID.
4 Follow the onscreen instructions.
Verify your email address if required.
5 %QP°TOVJCV(KPF/[K2CFKUVWTPGFQP
Set up a MobileMe Paid Subscription:
1 In Settings, tap “Mail, Contacts, Calendars.”
2 Tap Add Account, then tap MobileMe.
3 Enter your Apple ID and password, or chose to create a new account.
4 Turn on the services you want to use on iPad.
A MobileMe Paid Subscription lets you use Find My iPad, plus the following features:
Mail account at me.com
Over-the-air contacts, calendars, bookmarks, and notes syncing
MobileMe Gallery for sharing photos and videos
/QDKNG/GK&KUMHQTUVQTKPICPFUJCTKPI°NGU
31
Chapter 2 Getting Started

You can try out these features with a 60-day free trial at www.apple.com/mobileme.
Services you turn on are synced automatically over the air without having to connect
iPad to your computer. See “Syncing with iTunes” on page 24.
You can set up multiple MobileMe accounts; however, only one MobileMe account at
a time can be used for Find My iPad and for syncing contacts, calendars, bookmarks,
and notes.
To use Gallery, iDisk, and Find My iPad on iPad, download the free MobileMe Gallery,
MobileMe iDisk, and Find My iPhone apps from the App Store.
Setting Up Google, Yahoo!, and AOL Accounts
For many popular accounts (Google, Yahoo!, AOL), iPad enters most of the settings for
you. When setting up the account, you can choose which account services you want to
use with iPad. Services you turn on are synced automatically over the air. See “Syncing
with iTunes” on page 24.
Set up an account:
1 In Settings, tap “Mail, Contacts, Calendars.”
2 Tap Add Account, then tap Google, Yahoo!, or AOL.
3 Enter your name, email address, password, and a description.
4 Tap the items you want to use on iPad. Available items depend on the service provider.
Setting Up Other Accounts
Choose Other Accounts to set up other accounts for mail (such as POP), contacts
(such as LDAP or CardDAV), or calendars (such as CalDAV). Contact your service
provider or system administrator to get the account settings you need.
Set up an account:
1 In Settings, tap “Mail, Contacts, Calendars.”
2 Tap Add Account, then tap Other.
3 Choose the account type you want to add (Mail, Contacts, or Calendars).
4 Enter your account information and tap Save.
32 Chapter 2 Getting Started
Disconnecting iPad from Your Computer
Unless iPad is syncing with your computer, you can disconnect it at any time.
When iPad is syncing with your computer, the iPad Home screen shows “Sync in
RTQITGUU¦+H[QWFKUEQPPGEVK2CFDGHQTGKV°PKUJGUU[PEKPIUQOGFCVCOKIJVPQV
VTCPUHGT9JGPK2CF°PKUJGUU[PEKPIK6WPGUUJQYU¥K2CFU[PEKUEQORNGVG¦
Cancel a sync: Drag the slider on iPad.
Viewing the User Guide on iPad
The iPad User Guide can be viewed on iPad in Safari, or by installing the free iBooks
app and downloading the guide from the iBookstore.
View the user guide in Safari: In Safari, tap , then tap the iPad User Guide bookmark.
Or go to http://help.apple.com/ipad.
Add an icon for the user guide to the Home screen: Tap , then tap “Add to
Home Screen.”
View the user guide in iBooks
1 If you haven’t installed iBooks, open App Store, search for “iBooks,” then tap it in the
results list. Tap Free, then tap Install.
2 Open iBooks and tap Store.
3 Search for “iPad User Guide” and tap the user guide in the results list.
4 Tap Free, then tap Get Book.
For more information about iBooks, see Chapter 19, “iBooks,” on page 124 .
Battery
iPad has an internal rechargeable battery. The battery isn’t user accessible and should
only be replaced by an Apple Authorized Service Provider. For more information about
iPad batteries, go to www.apple.com/batteries/ipad.html.
Charging the Battery
WARNING: For important safety information about charging iPad, see the iPad
Important Product Information Guide at support.apple.com/manuals/ipad.
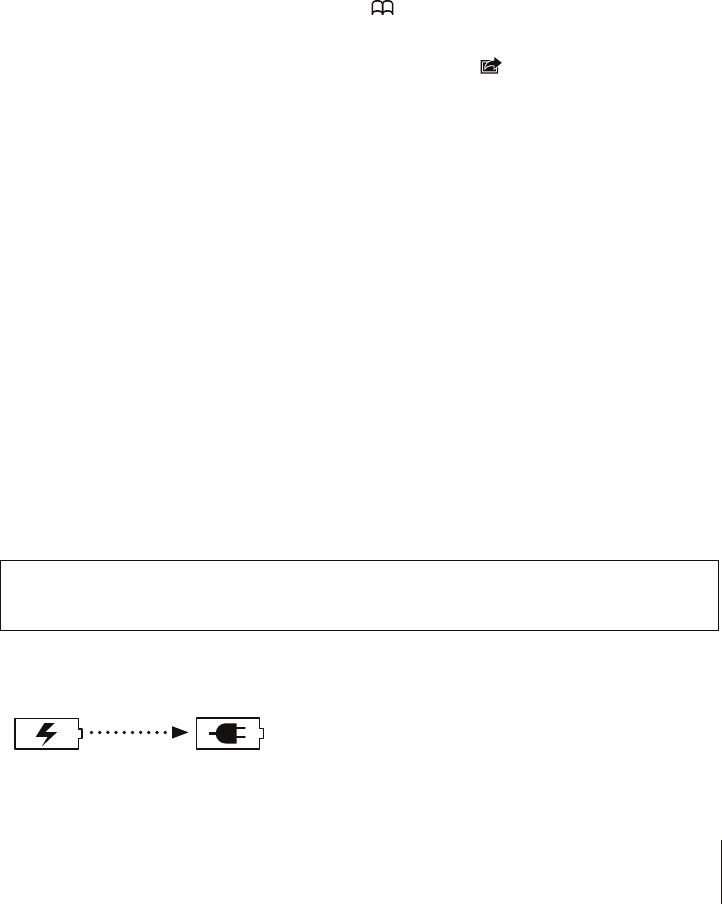
The battery icon in the upper-right corner of the status bar shows the battery level or
charging status.
*OHYNPUN *OHYNLK
33
Chapter 2 Getting Started
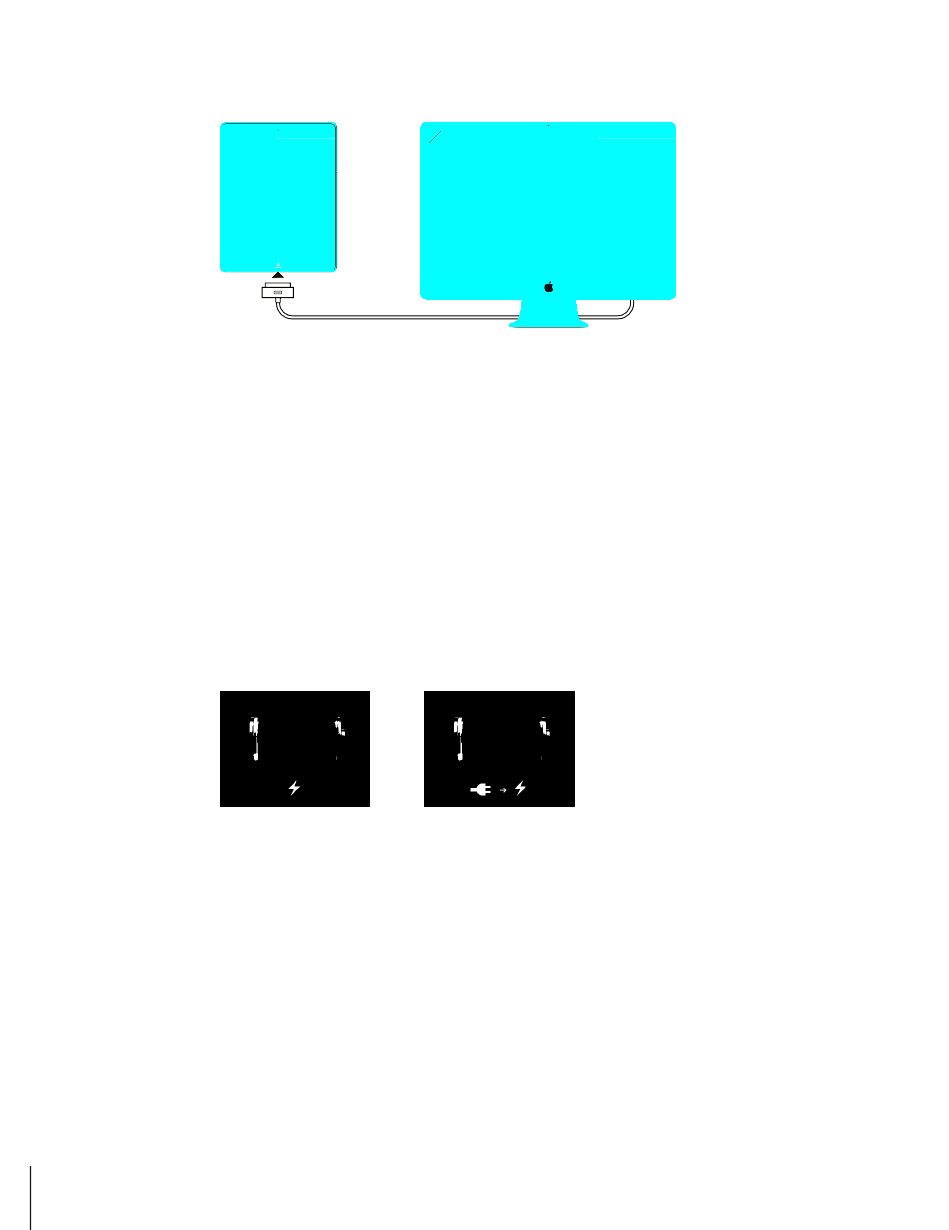
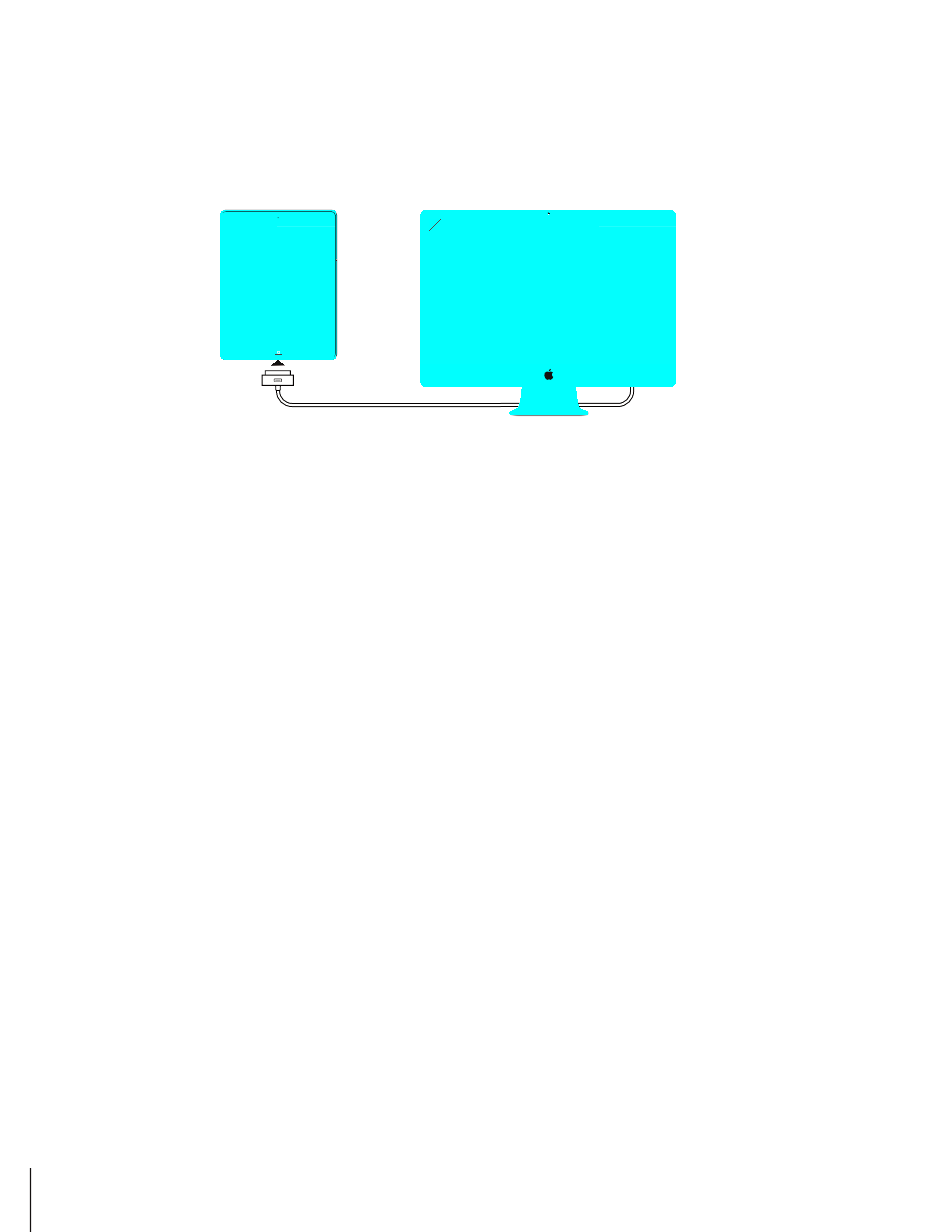
Charge the battery: The best way to charge the iPad battery is to connect iPad to a
power outlet using the included Dock Connector to USB Cable and 10W USB power
adapter. When you connect iPad to a USB 2.0 port on a Mac with the Dock Connector
to USB Cable, iPad may charge slowly while syncing.
Important: The iPad battery may drain instead of charge if iPad is connected to a PC,
VQCEQORWVGTVJCV¨UVWTPGFQÒQTKUKPUNGGRQTUVCPFD[OQFGVQC75$JWDQTVQVJG
USB port on a keyboard.
If your Mac or PC doesn’t provide enough power to charge iPad, a Not Charging
message appears in the status bar. To charge iPad, disconnect it from your computer
and connect it to a power outlet using the included Dock Connector to USB Cable and
10W USB Power Adapter.
Important: If iPad is very low on power, it may display one of the following images,
indicating that iPad needs to charge for up to ten minutes before you can use it. If iPad
is extremely low on power, the display may be blank for up to two minutes before one
of the low-battery images appears.
VY
Maximizing Battery Life
iPad uses a lithium-ion battery. For information about maximizing the battery life of
iPad, go to www.apple.com/batteries/ipad.html.
Replacing the Battery
Rechargeable batteries have a limited number of charge cycles and may
eventually need to be replaced. The iPad battery isn’t user replaceable; it can be
replaced only by an Apple Authorized Service Provider (AASP). AASPs also recycle
iPad batteries according to local laws and regulations. For information, go to
www.apple.com/batteries/replacements.html.
34 Chapter 2 Getting Started

Using and Cleaning iPad
Handle iPad with care to maintain its appearance. If you’re concerned about scratching
or abrasion of the screen, you can use a case or a cover, sold separately.
Using iPad Comfortably
+V¨UKORQTVCPVVQ°PFCEQOHQTVCDNGRQUVWTGYJGPWUKPIK2CFCPFVQVCMGHTGSWGPV
breaks. Use your lap, or a table, case, or dock accessory, to support iPad during use.
Cleaning iPad
6QENGCPK2CFWPRNWICNNECDNGUCPFVWTPQÒK2CFRTGUUCPFJQNFVJG5NGGR9CMG
button, then slide the onscreen slider). Use a soft, slightly damp, lint-free cloth. Avoid
getting moisture in openings. Don’t use window cleaners, household cleaners, aerosol
sprays, solvents, alcohol, ammonia, or abrasives to clean iPad. The iPad screen has an
oleophobic coating; simply wipe the screen with a soft, lint-free cloth to remove oil
left by your hands. The ability of this coating to repel oil will diminish over time with
normal usage, and rubbing the screen with an abrasive material will further diminish
KVUGÒGEVCPFOC[UETCVEJ[QWTUETGGP
For more information about handling iPad, see the iPad Important Product Information
Guide at support.apple.com/manuals/ipad.
35
Chapter 2 Getting Started
Basics 3
4GCFVJKUEJCRVGTVQNGCTPJQYVQWUGCRRUQPK2CFCPFVQUGCTEJRTKPVUJCTG°NGU
and more.
Using Apps
6JGJKIJTGUQNWVKQP/WNVK6QWEJUETGGPCPFUKORNG°PIGTIGUVWTGUOCMGKVGCU[VQWUG
iPad apps. Open an app by tapping its icon. You can switch between apps, rearrange
apps, and organize them into folders.
Opening and Switching Apps
Open an app: Tap its icon on the Home screen.
Return to the Home screen: Press the Home button.
Multitasking allows certain apps to run in the background, so you can quickly switch
between the apps you’re using.
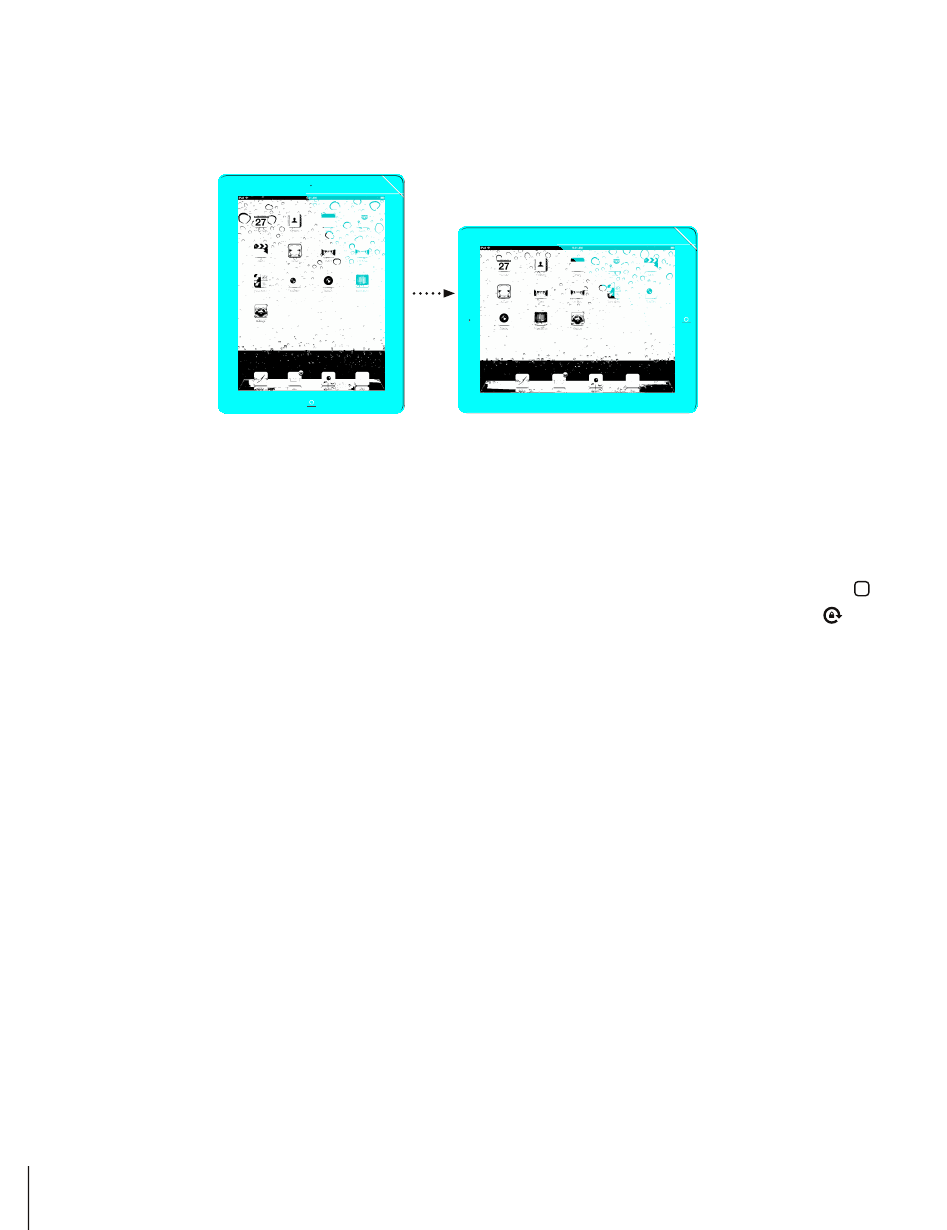
View the most recently used apps: Double-click the Home button.
The most recently used apps appear in the recents list at the bottom of the screen.
Flick left to see more apps.
36
Remove an app from the recents list: Touch and hold the app icon until it begins to
LKIINGVJGPVCR .
The app is added to the recents list again the next time you open it.
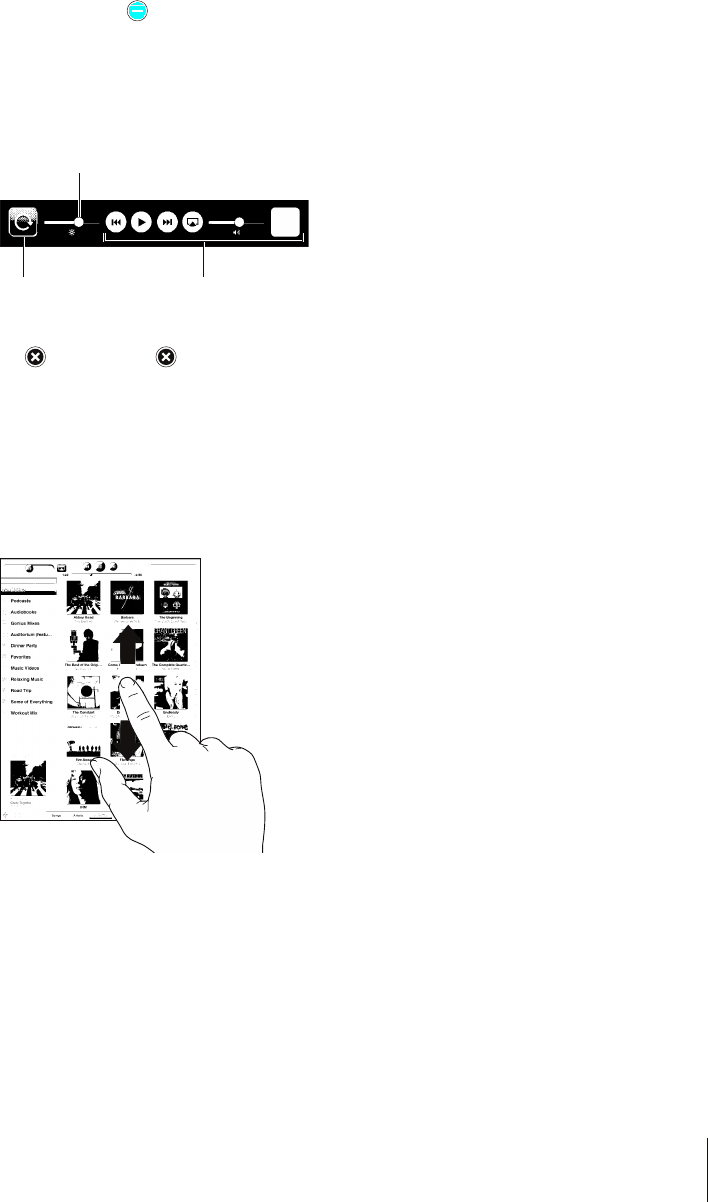
Lock the screen orientation or use the iPod controls: Double-click the Home button,
VJGP±KEMVJGDQVVQOQHVJGUETGGPHTQONGHVVQTKIJV
The screen orientation lock, brightness slider, and iPod controls appear.
:JYLLU
VYPLU[H[PVUSVJR
P7VK
JVU[YVSZ
)YPNO[ULZZ
Delete an app from the Home screen: 6QWEJCPFJQNFVJGKEQPWPVKNKVLKIINGUCPF
an appears. Tap to delete the app.
Important: Deleting an app from iPad also deletes the documents and data created
by the app.
Scrolling
Drag up or down to scroll. You can also scroll sideways in apps such as Safari, Photos,
and Maps.
&TCIIKPI[QWT°PIGTVQUETQNNFQGUP¨VEJQQUGQTCEVKXCVGCP[VJKPIQPVJGUETGGP
37
Chapter 3 Basics
Swipe to scroll quickly.
You can wait for the scrolling to come to a stop, or touch anywhere on the screen to
stop it immediately. Touching the screen to stop scrolling doesn’t choose or activate
anything on the screen.
To quickly scroll to the top of a list, webpage, or email message, tap the status bar at
the top of the screen.
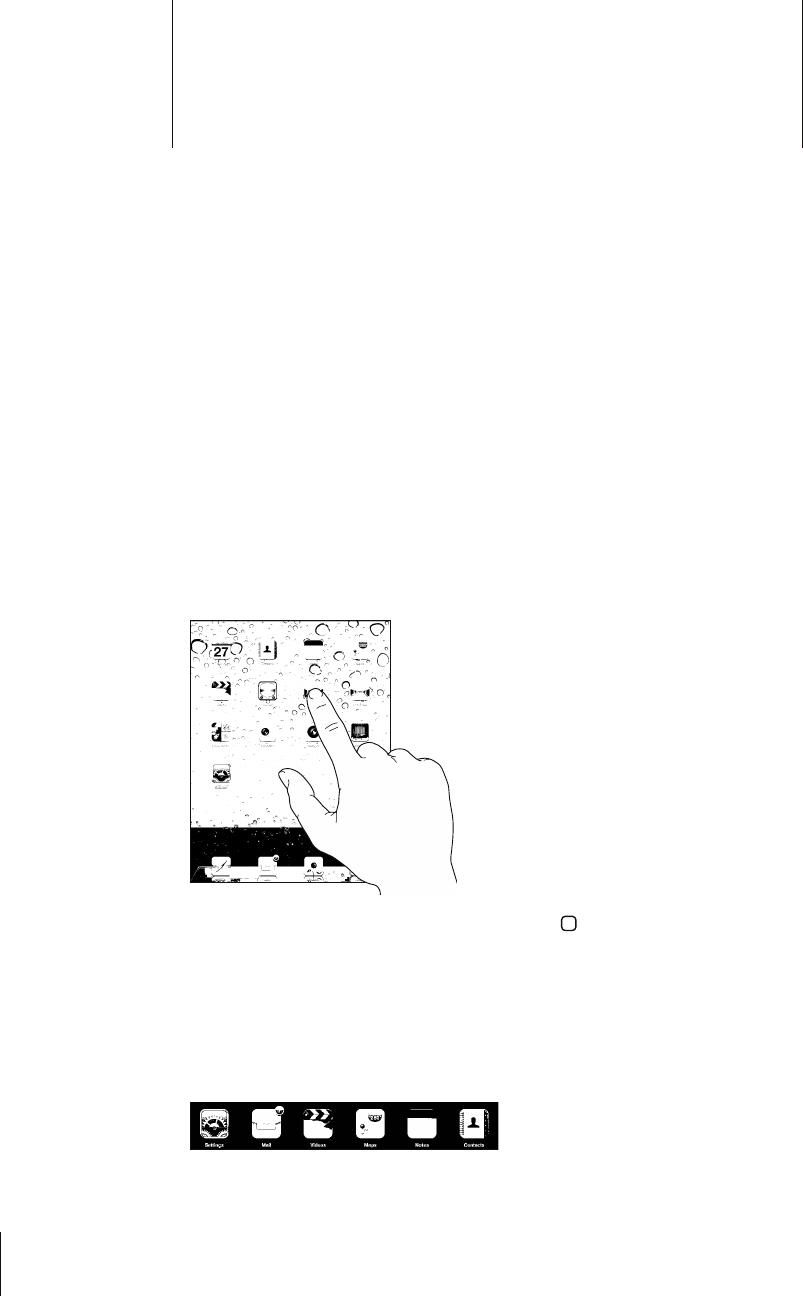
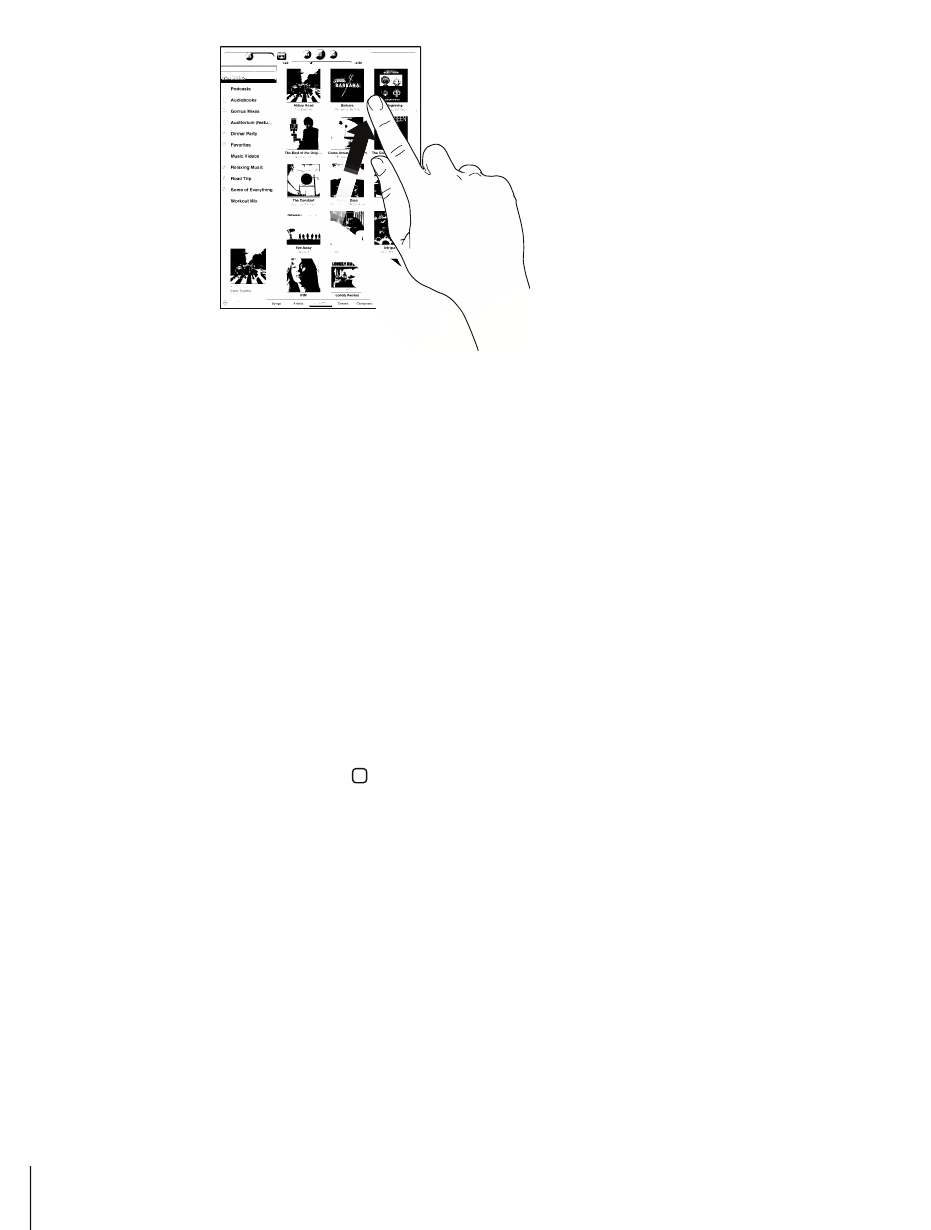
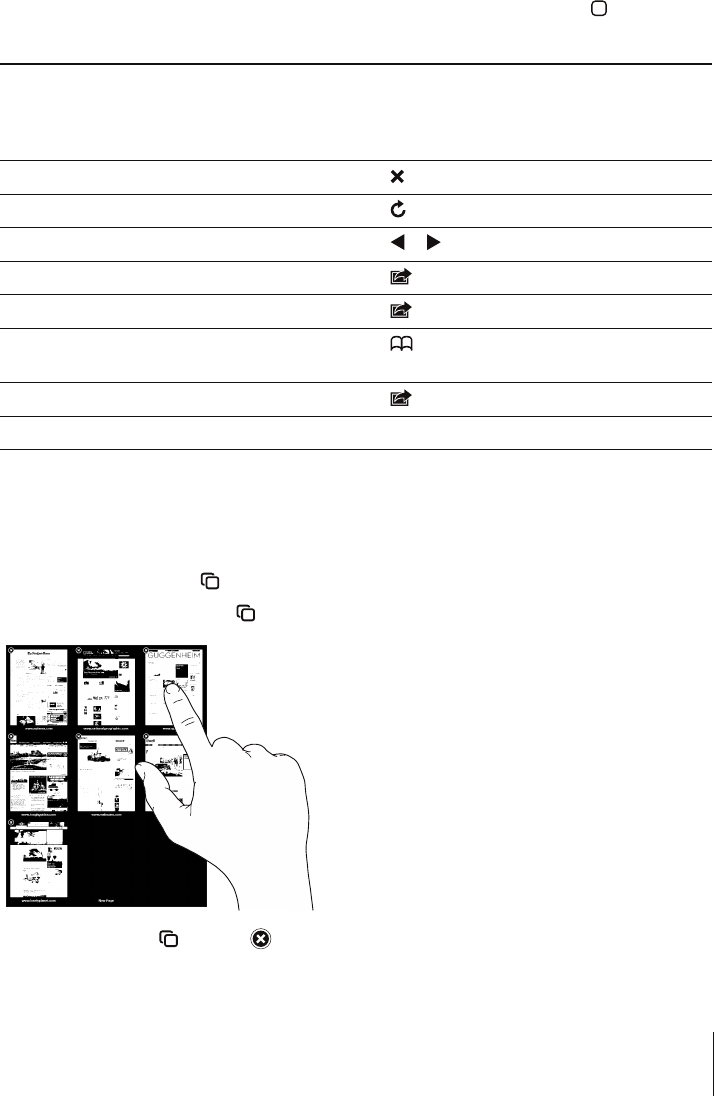
Rearranging App Icons
You can customize the layout of app icons on the Home screen—including the icons
in the Dock along the bottom of the screen. If you want, arrange them over multiple
Home screens.
Rearrange icons:
1 6QWEJCPFJQNFCP[KEQPWPVKNVJGKEQPULKIING
2 Arrange the icons by dragging them.
3 Press the Home button to save your arrangement.
You can also rearrange the icons on the Home screen, as well as the order of the
screens, when you connect iPad to your computer. Select iPad in the iTunes sidebar,
then click the Apps tab.
38 Chapter 3 Basics
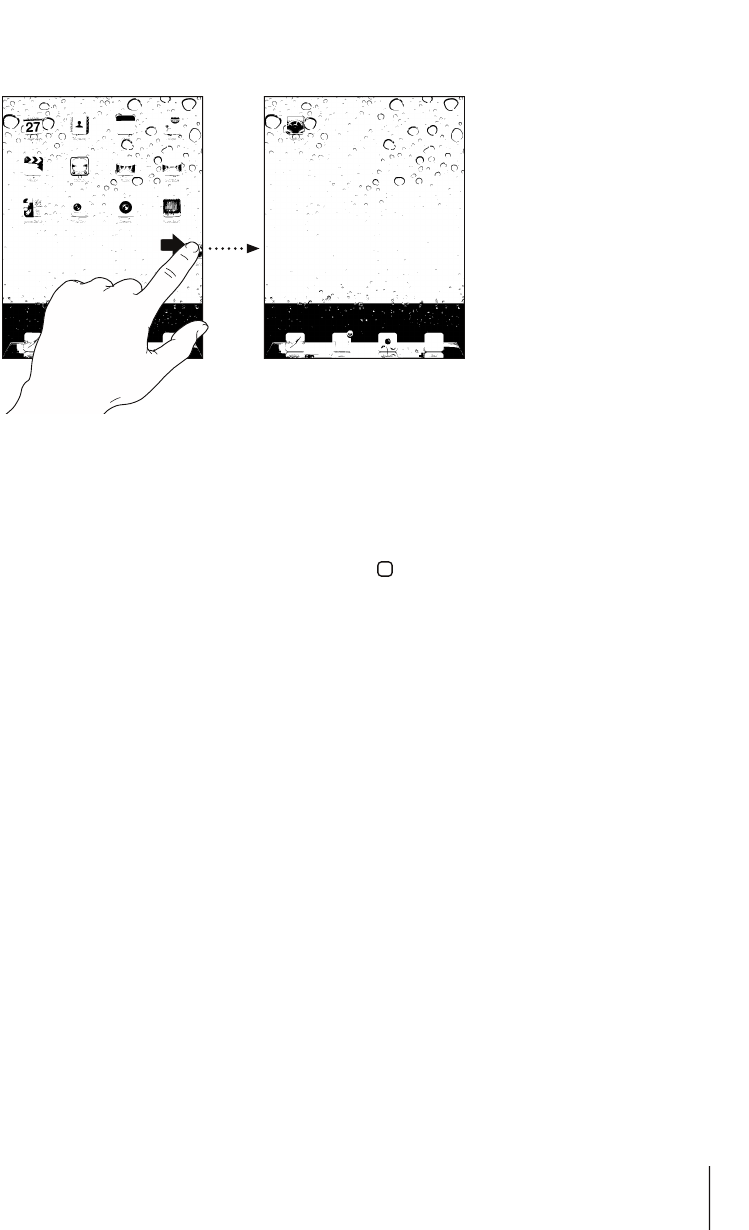
Create additional Home screens: While arranging icons, drag an icon to the right
edge of the screen until a new screen appears. You can return to a previous screen and
drag more icons to the new screen.
You can have up to 11 screens. The dots above the Dock show the number of screens
you have, and which screen you’re viewing.
)QVQCFKÒGTGPV*QOGUETGGPFlick left or right, or tap to the left or right of the
row of dots.
)QVQVJG°TUV*QOGUETGGPPress the Home button.
Reset the Home screen to its original layout: Choose Settings > General > Reset,
then tap Reset Home Screen Layout.
Organizing with Folders
Folders let you organize icons on the Home screen. You can put up to 20 icons in a
folder. iPad automatically names a folder when you create it, based on the icons you
use to create the folder, but you can change the name. Rearrange folders by dragging
them on the Home screen or by moving them to a new Home screen or to the Dock.
Create a folder: 6QWEJCPFJQNFCPKEQPWPVKNVJG*QOGUETGGPKEQPUDGIKPVQLKIING
then drag the icon onto another icon.
iPad creates a new folder that includes the two icons, and shows the folder’s name.
;QWECPVCRVJGPCOG°GNFVQGPVGTCFKÒGTGPVPCOG
You can also create iPad folders using iTunes.
Create a folder using iTunes: With iPad connected to your computer, select iPad in
the Devices list in iTunes. Click Apps at the top of the screen, and on the Home screen
near the top of the window, drag an app onto another.
39
Chapter 3 Basics
Add an icon to a folder While arranging icons, drag the icon onto the folder.
Remove an icon from a folder While arranging icons, tap to open the folder, then drag
the icon out of the folder.
Open a folder Tap the folder. You can then tap an app icon to open
that app.
Close a folder Tap outside the folder, or press the Home button.
Delete a folder Remove all icons from the folder.
The folder is deleted automatically when empty.
Rename a folder While arranging icons, tap to open the folder, then tap
the name at the top and use the keyboard to enter a new
name. Press the Home button to save your changes.
9JGP[QW°PKUJQTICPK\KPI[QWT*QOGUETGGPRTGUUVJG*QOG button to save
your changes.
Many apps, such as Mail and the App Store, display a badge on their Home screen
icon with a number (to indicate incoming items) or an exclamation mark (to indicate a
problem). If the app is in a folder, the badge appears on the folder as well. A numbered
badge shows the total number of items you haven’t attended to, such as incoming
email messages and updated apps to download. An alert badge indicates a problem
with the app.
Printing
AirPrint lets you print wirelessly to AirPrint-enabled printers. You can print from the
following iPad apps:
Mail—email messages and viewable attachments
Photos—photos
5CHCTK¤YGDRCIGU2&(°NGUCPFXKGYCDNGCVVCEJOGPVU
K$QQMU¤2&(°NGU
Other apps available from the App Store may also support AirPrint.
#KT2TKPVGPCDNGFRTKPVGTUFQP¨VTGSWKTGRTKPVGTUQHVYCTGVJG[LWUVPGGFVQDG
connected to the same Wi-Fi network as iPad. If you’re not sure whether your printer
is AirPrint-enabled, refer to its documentation.
For more information, go to support.apple.com/kb/HT4356.
40 Chapter 3 Basics
Printing a Document
#KT2TKPVWUGU[QWT9K(KPGVYQTMVQUGPFRTKPVLQDUYKTGNGUUN[VQ[QWTRTKPVGTK2CFOWUV
be connected to the same wireless network as the AirPrint printer.
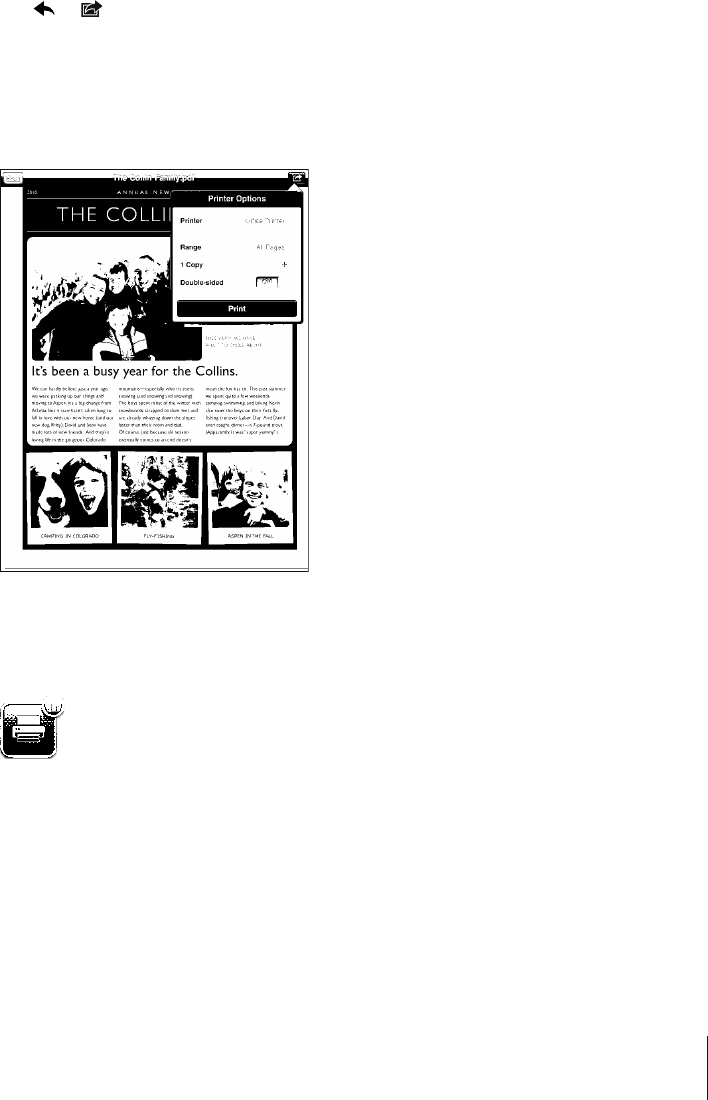
Print a document:
1 Tap or (depending on the app you’re using), then tap Print.
2 Tap Select Printer to select a printer.
3 Set printer options, such as number of copies and double-sided output (if the printer
supports it). Some apps also let you set a range of pages to print.
4 Tap Print.
If you double-click the Home button while a document is printing, the Print Center app
appears as the most recent app. A badge on the icon shows how many documents are
ready to print, including the currently printing document.
41
Chapter 3 Basics
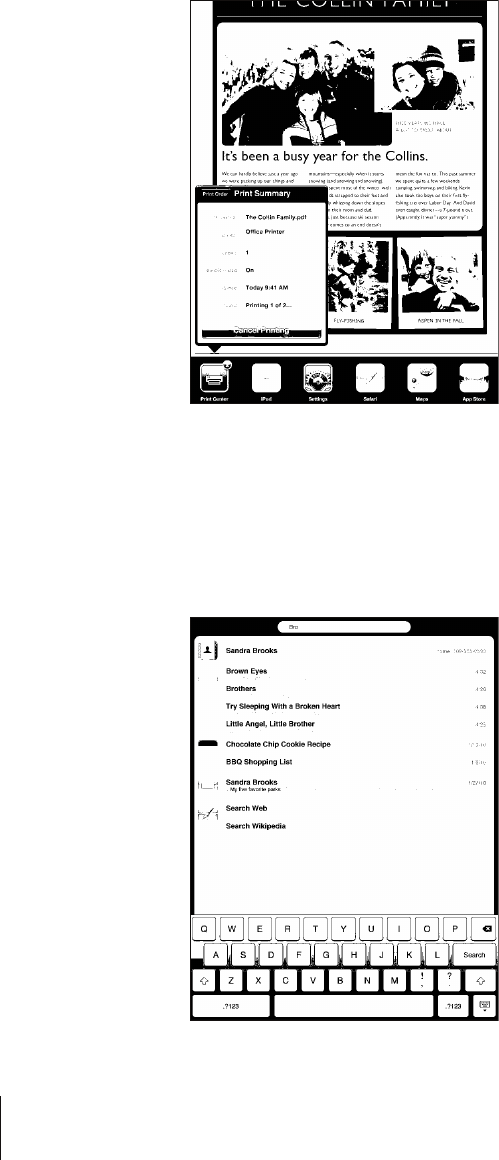
Get the status of a print job: Double-click the Home button, tap the Print Center icon,
VJGPUGNGEVCRTKPVLQD
Cancel a print job: Double-click the Home button, tap the Print Center icon, select the
RTKPVLQDVJGPVCR%CPEGN2TKPVKPI
Searching
You can search iPad‘s built-in apps, including Mail, Calendar, iPod, Video, Notes, and
Contacts. Search an individual app, or search all the apps at once using Spotlight.
42 Chapter 3 Basics

Go to Spotlight: 1PVJGOCKPRCIGQHVJG*QOGUETGGP±KEMTKIJVQTRTGUUVJG*QOG
button. On the Spotlight page, you can press the Home button to return to the main
Home screen.
Search iPad: 1PVJG5RQVNKIJVRCIGGPVGTVGZVKPVJG5GCTEJ°GNF5GCTEJTGUWNVU
appear automatically as you type. Tap Search to dismiss the keyboard and see more
of the results.
Tap an item in the results list to open it. Icons to the left of the search results let you
know which app the results are from.
At the top of the list, iPad shows your top hits based on previous searches. At the bottom
of the list, the search results also include options to search the web or search Wikipedia.
App What’s searched
Contacts First, last, and company names
Mail 6Q(TQOCPF5WDLGEV°GNFUQHCNNCEEQWPVUVJGVGZVQH
messages isn’t searched)
Calendar Event titles, invitees, and locations
iPod Music (names of songs, artists, and albums) and the titles
of podcasts and audiobooks
Notes Text of notes
Spotlight also searches the names of built-in and installed apps on iPad. If you have a
lot of apps, you can use Spotlight to locate and open them.
Open an app from Spotlight: Enter the app name, then tap to open the app.
You can choose which apps are searched and the order in which they’re searched.
In Settings, choose General > Spotlight Search.
Using Bluetooth Devices
You can use iPad with the Apple Wireless Keyboard and other Bluetooth devices,
UWEJCU$NWGVQQVJJGCFRJQPGU(QTUWRRQTVGF$NWGVQQVJRTQ°NGUIQVQ
support.apple.com/kb/HT3647.
Pairing Bluetooth Devices
;QWOWUV°TUVRCKT$NWGVQQVJFGXKEGUUWEJCUCMG[DQCTFQTJGCFRJQPGUYKVJK2CF
before you can use them.
Pair a Bluetooth device with iPad:
1 Follow the instructions that came with the device to make it discoverable.
2 In Settings, choose General > Bluetooth, and turn Bluetooth on.
43
Chapter 3 Basics

3 Select the device and, if prompted, enter the passkey or PIN number. See the
instructions about the passkey or PIN that came with the device.
Note: Before you pair an Apple Wireless Keyboard, press the power button to turn the
keyboard on. You can pair only one Apple Wireless Keyboard with iPad at a time. To
RCKTCFKÒGTGPVMG[DQCTF[QWOWUV°TUVWPRCKTVJGEWTTGPVQPG
After you pair the keyboard with iPad, the product name and a Bluetooth icon
appear on the screen.
After you pair headphones with iPad, the product name and a Bluetooth audio icon
appear on the screen when you’re viewing audio or video playback controls. Tap to
UYKVEJVQCFKÒGTGPVCWFKQQWVRWVUWEJCUVJGKPVGTPCNURGCMGT
6QWUGVJGQPUETGGPMG[DQCTFCICKPVWTPQÒ$NWGVQQVJ5GVVKPIU )GPGTCN
$NWGVQQVJQTRTGUUVJG'LGEVMG[QPVJG$NWGVQQVJMG[DQCTF
Bluetooth Status
The Bluetooth icon appears in the iPad status bar at the top of the screen:
(white): Bluetooth is on and a device is connected to iPad.
(gray): Bluetooth is on but no device is connected. If you’ve paired a device with
K2CFKVOC[DGQWVQHTCPIGQTVWTPGFQÒ
No Bluetooth icon: $NWGVQQVJKUVWTPGFQÒ
Unpairing a Bluetooth Device from iPad
+H[QWRCKTK2CFYKVJQPG$NWGVQQVJFGXKEGCPFVJGPYCPVVQWUGCFKÒGTGPVFGXKEGQH
VJGUCOGV[RGKPUVGCF[QWOWUVWPRCKTVJG°TUVFGXKEG
Unpair a Bluetooth device:
1 In Settings, choose General > Bluetooth, then turn Bluetooth on.
2 Choose the device, then tap “Forget this Device.”
File Sharing
(KNG5JCTKPINGVU[QWVTCPUHGT°NGUDGVYGGPK2CFCPF[QWTEQORWVGT;QWECPUJCTG°NGU
created with a compatible app and saved in a supported format.
#RRUVJCVUWRRQTV°NGUJCTKPICRRGCTKPVJG(KNG5JCTKPI#RRUNKUVKPK6WPGU(QTGCEJ
app, the Files list shows the documents that are on iPad. See the app’s documentation
HQTJQYKVUJCTGU°NGUPQVCNNCRRUUWRRQTVVJKUHGCVWTG
44 Chapter 3 Basics

6TCPUHGTC°NGHTQOK2CFVQ[QWTEQORWVGT
1 Connect iPad to your computer.
2 In iTunes, select iPad in the Devices list, then click Apps at the top of the screen.
3 In the File Sharing section, select an app from the list on the left.
4 1PVJGTKIJVUGNGEVVJG°NG[QWYCPVVQVTCPUHGTVJGPENKEM¥5CXGVQ¦CPFEJQQUGC
destination on your computer.
6TCPUHGTC°NGHTQO[QWTEQORWVGTVQK2CF
1 Connect iPad to your computer.
2 In iTunes, select iPad in the Devices list, then click Apps at the top of the screen.
3 In the File Sharing section, click Add.
4 5GNGEVC°NGVJGPENKEM%JQQUG/CEQT1-2%
6JG°NGKUVTCPUHGTTGFVQ[QWTFGXKEGCPFECPDGQRGPGFWUKPICPCRRVJCVUWRRQTVU
VJCV°NGV[RG6QVTCPUHGTOQTGVJCPQPG°NGUGNGEVGCEJCFFKVKQPCN°NG
&GNGVGC°NGHTQOK2CF5GNGEVVJG°NGKPVJG(KNGUNKUVVJGPVCR&GNGVG
Using AirPlay
You can wirelessly stream music, photos, and video to your HDTV and speakers using
AirPlay and Apple TV.
You can also use AirPlay to stream audio to an Airport Express or AirPort Extreme
base station. Other AirPlay-enabled receivers are available from third-parties, see the
Apple Store for details.
Start streaming to an AirPlay-enabled device:
1 Make sure iPad and the device (such as an Apple TV) are connected to the same
Wi-Fi network.
2 Start the video, slideshow, or music, then tap and choose the AirPlay device you
want to use. Some devices may ask for a passcode.
Once streaming starts, you can exit the app.
Stop steaming to an AirPlay-enabled device:
1 Open the app (such as Videos) that you’re streaming from.
2 Tap and choose iPad from the list.
For troubleshooting help, see “No Video or Sound when Using AirPlay” on page 186.
45
Chapter 3 Basics

Security Features
Security features help protect the information on iPad from being accessed by others.
Passcodes and Data Protection
For security, you can set up a passcode that you must enter each time you turn on or
wake up iPad.
Set a passcode: Choose Settings > General > Passcode Lock > Turn Passcode On.
Enter a 4-digit passcode, then enter it again to verify it. iPad will require you to enter
the passcode to unlock it, or to display the passcode lock settings.
Setting a passcode turns on data protection, which uses the passcode as the key for
encrypting mail messages and attachments stored on iPad. (Data protection may
also be used by some apps available in the App Store.) A notice at the bottom of the
Passcode Lock screen in Settings shows that data protection is enabled.
6QKPETGCUGUGEWTKV[VWTPQÒ5KORNG2CUUEQFGCHQWTFKIKVPWODGTCPFWUGCOQTG
robust passcode that has a combination of numbers, letters, punctuation, and special
characters. For more information, see “Passcode Lock” on page 157.
Find My iPad
Find My iPad may help you locate a lost or misplaced iPad using another iPhone, iPad,
or iPod touch with the free Find My iPhone app, or a Mac or PC with a web browser.
Find My iPad includes:
Find: Locates your iPad on a full-screen map on your computer
Display a Message or Play a Sound: Lets you specify a message to display or a
sound to play on your iPad
Remote Passcode Lock: Lets you remotely lock your iPad and create a 4-digit
passcode, if you haven’t set one previously
Remote Wipe: Erases all the information and media on your iPad and restores iPad
to its original factory settings
Use Find My iPad: Turn on Find My iPad in your MobileMe account settings. See
“Setting Up MobileMe Accounts” on page 31.
Locate your missing iPad: Download and use the free Find My iPhone app from the
#RR5VQTGQPCFKÒGTGPVK15FGXKEGQTUKIPKPVQme.com in a web browser on a Mac
or PC.
Note: Find My iPad requires a MobileMe account. MobileMe is an online service
that provides Find My iPad free to iPad, iPhone, and iPod touch 4th generation
customers. MobileMe provides additional features with a paid subscription.
MobileMe may not be available in all countries or regions. For more information,
go to www.apple.com/mobileme.
46 Chapter 3 Basics
Safari 4
About Safari
Use Safari on iPad to browse the web and visit your favorite sites. Use AirPrint to print
webpages and PDFs. Open multiple pages and add web clips to the Home screen for
quick access. Create bookmarks on iPad and sync them with your computer.
To use Safari, iPad must have an Internet connection. See “Connecting to the
Internet” on page 29.
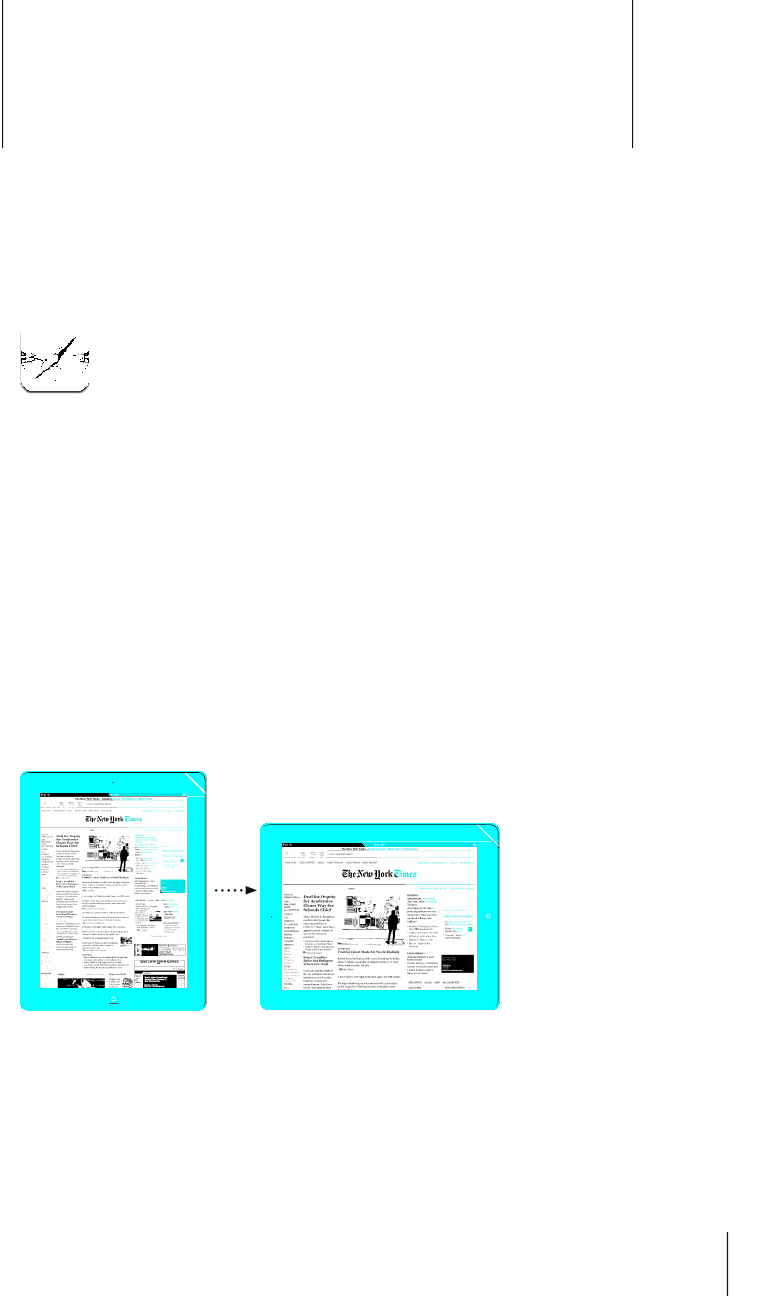
Viewing Webpages
You can view webpages in portrait or landscape orientation. Rotate iPad and the
YGDRCIGTQVCVGUCWVQOCVKECNN[CFLWUVKPIVQ°VVJGRCIG
47
Opening Webpages
Open a webpage: 6CRVJGCFFTGUU°GNFKPVJGVKVNGDCTVQDTKPIWRVJGQPUETGGP
MG[DQCTFV[RGVJGYGDCFFTGUUVJGPVCR)Q+HVJGCFFTGUU°GNFKUP¨VXKUKDNGVCRVJG
UVCVWUDCTCVVJGVQRQHVJGUETGGPVQSWKEMN[UETQNNWRVQVJGCFFTGUU°GNF
As you type, web addresses that start with those letters appear. These are bookmarked
pages or recent pages you’ve opened. Tap an address to go to that page. Keep typing
if you want to enter a web address that’s not in the list.
'TCUGVJGVGZVKPVJGCFFTGUU°GNF6CRVJGCFFTGUU°GNFVJGPVCR .
Zooming and Scrolling
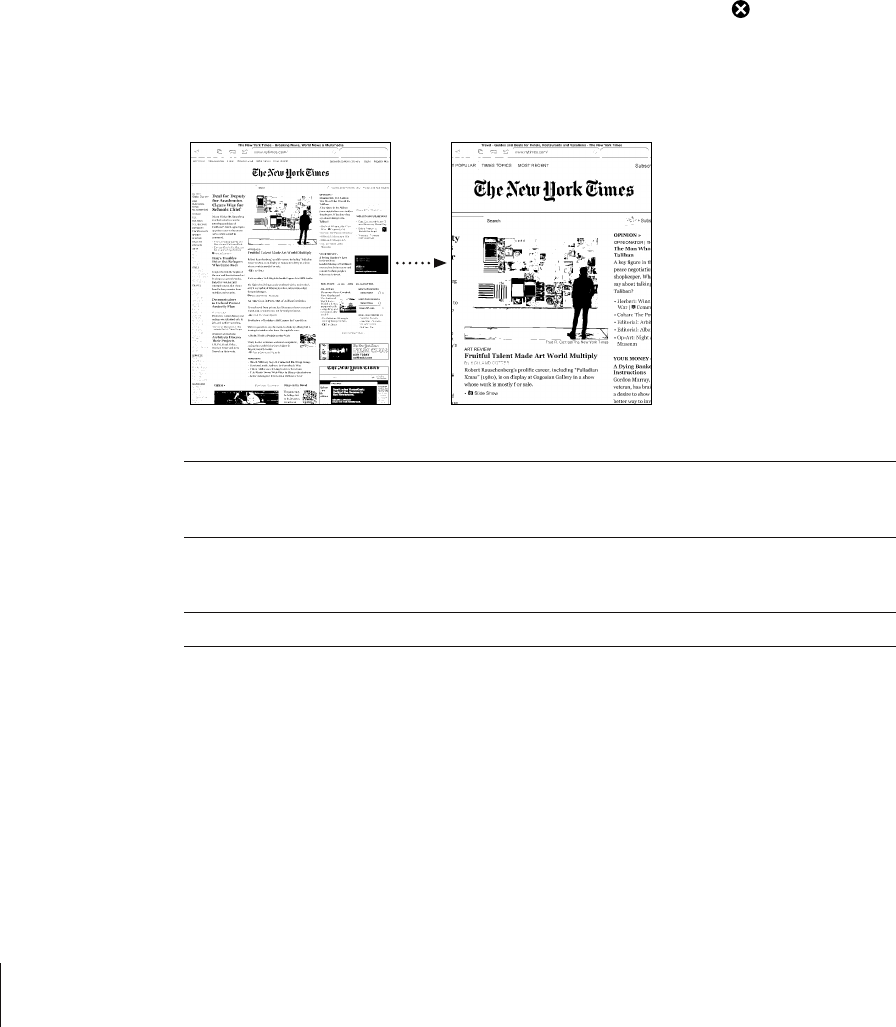
Zoom in or out: Double-tap a column on a webpage to expand the column.
Double-tap again to zoom out.
You can also pinch to zoom in or out.
Scroll around a webpage Drag up, down, or sideways. When scrolling,
you can touch and drag anywhere on the page
without activating any links.
Scroll within a frame on a webpage 7UGVYQ°PIGTUVQUETQNNYKVJKPCHTCOGQP
CYGDRCIG7UGQPG°PIGTVQUETQNNVJG
entire webpage.
Scroll quickly to the top of a webpage Tap the status bar at the top of the iPad screen.
48 Chapter 4 Safari
Navigating Webpages
.KPMUQPYGDRCIGUV[RKECNN[VCMG[QWVQCFKÒGTGPVRNCEGQPVJGYGD
Follow a link on a webpage: Tap the link.
Links on iPad can also display a location in Maps or create a preaddressed Mail message.
To return to Safari after a link opens another app, double-click the Home button and
tap Safari.
See a link’s destination address Touch and hold the link. The address appears in
CYKPFQYPGZVVQ[QWT°PIGT;QWECPQRGPVJG
link in the active page, open it in a new page, or
copy the address.
Stop a webpage from loading Tap .
Reload a webpage Tap .
Return to the previous or next page Tap or at the top of the screen.
Bookmark a page Tap and tap Bookmark.
Add a web clip of a page to the Home screen Tap and tap “Add to Home Screen.”
Return to a recently viewed page Tap and tap History. To clear the history list,
tap Clear.
Send a webpage address in email Tap and tap “Mail Link to this Page.”
Save an image or photo to your Photo Library Touch and hold the image, then tap Save Image.
Opening Multiple Pages
You can open up to nine pages at a time. Some links automatically open a new page
instead of replacing the current one.
Open a new page: Tap , then tap New Page.
)QVQCFKÒGTGPVRCIGTap , then tap the page you want to view.
Close a page: Tap and tap .
49
Chapter 4 Safari

Entering Text and Filling Out Forms
5QOGYGDRCIGUJCXGVGZV°GNFUCPFHQTOUVQ°NNQWV;QWECPUGV5CHCTKVQTGOGODGT
PCOGUCPFRCUUYQTFUQHYGDUKVGU[QWXKUKVCPF°NNQWVVGZV°GNFUCWVQOCVKECNN[YKVJ
information from Contacts.
Bring up the keyboard 6CRKPUKFGCVGZV°GNF
/QXGVQCPQVJGTVGZV°GNF 6CRCPQVJGTVGZV°GNFQTVCRVJG0GZVQT2TGXKQWU
buttons above the onscreen keyboard.
Submit a form #HVGT°NNKPIQWVCHQTOVCR)QQT5GCTEJ/QUV
pages also have a link you can tap to submit
the form.
Close the keyboard without submitting
the form
Tap the Keyboard key to hide the onscreen
keyboard.
'PCDNG#WVQ(KNNVQJGNR[QW°NNQWVYGDHQTOUIn Settings, choose Safari > AutoFill,
then do one of the following:
To use information from contacts, turn Use Contact Info on, then choose My Info and
select the contact you want to use.
5CHCTKWUGUKPHQTOCVKQPHTQO%QPVCEVUVQ°NNKPEQPVCEV°GNFUQPYGDHQTOU
To use information from names and passwords, turn Names & Passwords on.
When this feature is on, Safari remembers names and passwords of websites you
XKUKVCPFCWVQOCVKECNN[°NNUKPVJGKPHQTOCVKQPYJGP[QWTGXKUKVVJGYGDUKVG
To remove all AutoFill information, tap Clear All.
2TKPVKPI9GDRCIGUCPF2&(°NGU
Use AirPrint to print webpages and PDFs from Safari.
Print a webpage or PDF: Tap at the top of the screen, then tap Print. Tap Select
Printer to select a printer and set the printer options. Then tap Print.
For more information about printing from iPad, see “Printing” on page 40.
Searching the Web
'PVGTYQTFUQTRJTCUGUKPVJGUGCTEJ°GNFVQUGCTEJVJGYGDCPFVJGEWTTGPVYGDRCIG
As you type, suggested and recent searches appear.
Search the web:
1 6CRVJGUGCTEJ°GNFQPVJGTKIJVUKFGQHVJGVKVNGDCT
2 Type a word or phrase that describes what you’re looking for, and then tap Search.
3 Tap a link in the list of search results to open a webpage.
50 Chapter 4 Safari

For tips about searching the Internet, visit www.google.com/help/features.html or
help.yahoo.com/us/yahoo/search/basics.
Find the search word or phrase on the current webpage: At the bottom of the
TGUWNVUNKUVVCRVJGGPVT[DGNQY1P6JKU2CIGVQ°PFVJG°TUVQEEWTTGPEGQHCYQTFQT
RJTCUG6Q°PFUWDUGSWGPVQEEWTTGPEGUVCR0GZVCVVJGDQVVQOQHVJGUETGGP
$[FGHCWNV5CHCTKUGCTEJGUWUKPI)QQING6QEJCPIGVJGFGHCWNVVQCFKÒGTGPVUGCTEJ
engine, in Settings, choose Safari > Search Engine, and choose a search engine.
Bookmarks
You can bookmark a webpage you want to return to later.
Bookmark a webpage: Open the page and tap . Then tap Add Bookmark.
When you save a bookmark, you can edit its title. By default, bookmarks are saved at
VJGVQRNGXGNQH$QQMOCTMU6CR$QQMOCTMUVQEJQQUGCFKÒGTGPVHQNFGT
If you use Safari on a Mac, or Safari or Microsoft Internet Explorer on a PC, you can sync
bookmarks with the web browser on your computer.
Sync bookmarks with your computer:
1 Connect iPad to your computer.
2 In iTunes, select iPad in the sidebar.
3 Click the Info tab, select “Sync Safari bookmarks” under Other, then click Apply.
For more information, see “Syncing with iTunes” on page 24.
Sync bookmarks with MobileMe: In Settings on iPad, select Bookmarks in your
MobileMe account. See “Setting Up MobileMe Accounts” on page 31.
Open a bookmarked webpage: Tap , then choose a bookmark or tap a folder to
see the bookmarks inside.
Edit a bookmark or bookmark folder: Tap , choose the folder that has the
bookmark or folder you want to edit, then tap Edit. Then do one of the following:
To make a new folder, tap New Folder.
To delete a bookmark or folder, tap , then tap Delete.
To reposition a bookmark or folder, drag .
6QGFKVVJGPCOGQTCFFTGUUQTVQRWVKVKPCFKÒGTGPVHQNFGTtap the bookmark or folder.
9JGP[QW°PKUJVCR&QPG
51
Chapter 4 Safari

Web Clips
Add web clips to the Home screen for fast access to your favorite webpages. Web clips
appear as icons on the Home screen, and you can arrange them along with the app
icons. See “Rearranging App Icons” on page 38.
Add a web clip: Open the webpage and tap . Then tap “Add to Home Screen.”
When you open a web clip, Safari automatically zooms and scrolls to the area of the
webpage that was displayed when you saved the web clip. The displayed area is also
used to create the icon for the web clip on your Home screen, unless the webpage
comes with its own custom icon.
When you add a web clip, you can edit its name. If the name is too long (more than
about 10 characters), it may appear abbreviated on the Home screen.
Web clips aren’t synced by MobileMe or iTunes, but they are backed up by iTunes.
Delete a web clip:
1 6QWEJCPFJQNFCP[KEQPQPVJG*QOGUETGGPWPVKNVJGKEQPUUVCTVVQLKIING
2 Tap in the corner of the web clip you want to delete.
3 Tap Delete, then press the Home button to save your arrangement.
52 Chapter 4 Safari

Mail 5
About Mail
Read this chapter to learn how to use Mail to read your email messages and compose
new messages.
You can view messages from all your email accounts at once, and Mail displays
message threads so it’s easy to follow a conversation. You can send or receive
embedded photos and graphics, and view PDFs and other attachments. Use AirPrint
to print messages and their attachments.
Mail works with MobileMe, Microsoft Exchange, and many of the most popular
email services—including Yahoo! Mail, Google email, and AOL—as well as other
industry-standard POP3 and IMAP email services.
To send or receive messages in Mail, iPad must have an Internet connection. See
“Connecting to the Internet” on page 29.
Setting Up Email Accounts
You can set up email accounts on iPad in either of the following ways:
Set up an account directly on iPad. See “ Adding Mail, Contacts, and Calendar
Accounts” on page 31.
In iTunes, use the iPad settings panes to sync email accounts settings from your
computer. See “Syncing with iTunes” on page 24.
53

Sending Email
You can send an email message to anyone who has an email address.
Compose and send a message:
1 Tap at the top of the screen.
26[RGCPCOGQTGOCKNCFFTGUUKPVJG6Q°GNFQTVCR to add a name from your contacts.
As you type an email address, matching email addresses from your contacts list appear.
Tap an address to add it. To add more names, tap .
Note: If you’re composing a message from your Microsoft Exchange account and
have access to your enterprise Global Address List (GAL), matching addresses from the
EQPVCEVUQPK2CFCRRGCT°TUVHQNNQYGFD[OCVEJKPI)#.CFFTGUUGU
3 Tap Cc/Bcc/From if you want to copy or blind copy the message to others, or change
the account you send the message from. If you have more than one email account,
[QWECPVCRVJG(TQO°GNFVQEJCPIGVJGCEEQWPV[QW¨TGUGPFKPIHTQO
4 'PVGTCUWDLGEVVJGP[QWTOGUUCIG
;QWECPVCR4GVWTPVQOQXGHTQOVJG5WDLGEV°GNFVQVJGOGUUCIG°GNF
5 Tap Send.
Send a photo in an email message In Photos, choose a photo, tap , then tap Email Photo.
To send multiple photos in the same message, tap
when viewing thumbnails in an album. You can also copy
and paste photos.
The photo is sent using your default email account. To
change your default sending account, see “Mail, Contacts,
Calendars” on page 163.
Save a draft of a message to
complete later
Tap Cancel, then tap Save. The message is saved in the
Drafts mailbox. To quickly open the most recently saved
draft, touch and hold .
Reply to a message Open a message and tap . Tap Reply to reply only
to the sender or Reply All to reply to the sender and all
recipients. Type your return message, then tap Send.
Files or images attached to the initial message aren’t
sent back.
Forward a message Open a message and tap , then tap Forward. Add one
or more email addresses, type your message, and then
tap Send.
9JGP[QWHQTYCTFCOGUUCIG[QWECPKPENWFGVJG°NGUQT
images attached to the original message.
Share contact information In Contacts, choose a contact, then tap Share. Add one or
more email addresses, type your message, then tap Send.
54 Chapter 5 Mail
Checking and Reading Email
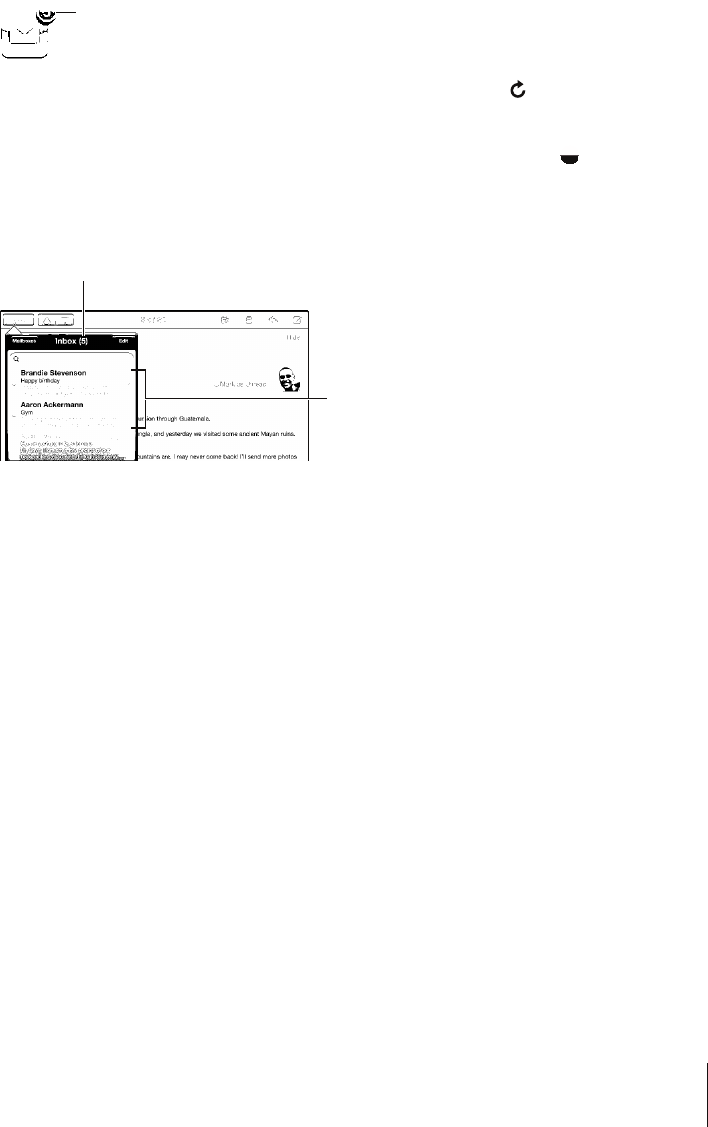
The Mail icon shows the total number of unread messages in all your inboxes. You may
have other unread messages in other mailboxes.
5\TILYVM\UYLHK
TLZZHNLZPU`V\Y
PUIV_LZ
Check for new messages: Choose a mailbox, tap Inbox, or tap .
On each account screen, you can see the number of unread messages in each mailbox.
Tap a mailbox to see its messages. Unread messages have a blue dot next to them.
If you have more than one mail account, tap Mailboxes to switch between accounts.
6QXKGYCNNQH[QWTOGUUCIGUKPCWPK°GFKPDQZVCR#NN+PDQZGU
5\TILYVM
\UYLHKTLZZHNLZ
<UYLHK
TLZZHNLZ
Related messages are grouped together in a thread1PN[VJG°TUVOGUUCIGKUFKURNC[GF
in the inbox, and the number of related messages is indicated. To view the thread, tap
KV6QVWTPOGUUCIGVJTGCFUQÒIQVQ5GVVKPIU ¥/CKN%QPVCEVU%CNGPFCTU¦CPFVWTPQÒ
“Organize by Thread.”
9JGP[QWQRGPCOCKNDQZ/CKNNQCFUVJGPWODGTQHOQUVTGEGPVOGUUCIGUURGEK°GF
in your Mail settings, if the messages haven’t already been loaded automatically. See
“Mail, Contacts, Calendars” on page 163.
55
Chapter 5 Mail
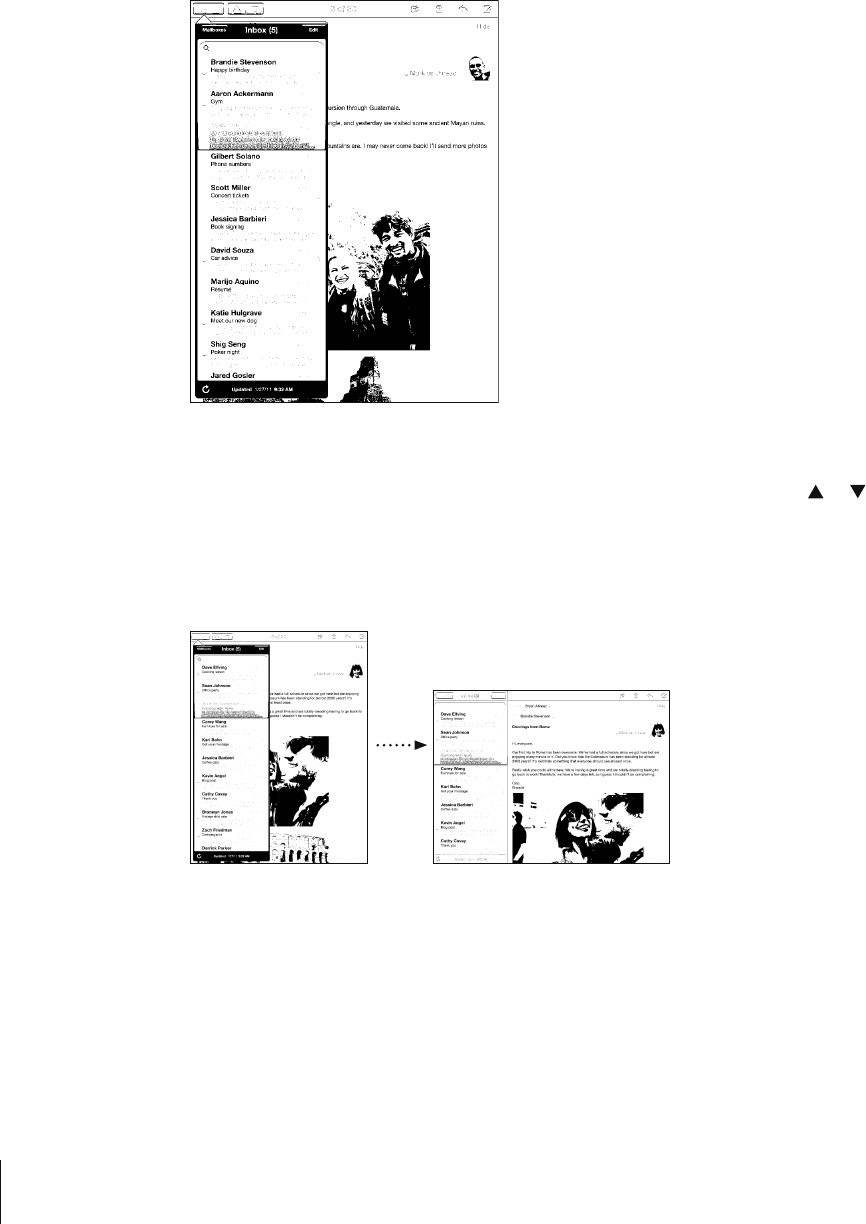
Load additional messages: Scroll to the bottom of the list of messages and tap Load
More Messages.
Read a message: Tap a mailbox, then tap a message. Within a message, tap or to
see the next or previous message.
Rotating iPad between portrait and landscape orientation lets you focus on a single
message, or see all the messages so you can quickly scan and view the ones you’re
most interested in.
56 Chapter 5 Mail

Zoom in on part of a message Double-tap the area to zoom in. Double-tap again to
zoom out.
4GUK\GCP[EQNWOPQHVGZVVQ°V
the screen
Double-tap the text.
Resize a message Pinch to zoom in or out.
Follow a link Tap the link.
Text links are typically underlined and blue. Many images
are also links. A link can take you to a webpage, open a
map, or open a new preaddressed email message.
Web and map links open Safari or Maps on iPad. To return
to Mail, press the Home button and tap Mail.
See a link’s destination address Touch and hold the link. You can open the link in Safari or
copy the link address to the clipboard.
iPad displays picture attachments in many commonly used formats (JPEG, GIF, and
TIFF) inline with the text in email messages. iPad can play many audio attachments
UWEJCU/2##%9#8CPF#+((;QWECPFQYPNQCFCPFXKGY°NGUUWEJCU2&(
webpage, text, Pages, Keynote, Numbers, and Microsoft Word, Excel, and PowerPoint
documents) attached to messages you receive.
1RGPCPCVVCEJGF°NGTap the attachment to download it to iPad and then open it.
+HK2CFFQGUP¨VUWRRQTVVJGHQTOCVQHCPCVVCEJGF°NG[QWECPUGGVJGPCOGQHVJG°NG
but you can’t open it.
1RGPCPCVVCEJGF°NGYKVJCFKÒGTGPVCRRTouch and hold the attachment, then
choose an app. If you don’t have any apps that can open the attachment, you can
XKGYKVRTQXKFGFKV¨UC°NGV[RGVJCVK2CFUWRRQTVU
For a list of supported document formats, see “Email Attachment Won’t Open” on
page 185.
Save an attached photo to your Saved Photos album: Tap the photo, then tap
Save Image.
See all the recipients of a message Tap Details at the top of the screen.
Tap a name or email address to see the recipient’s contact
information. Tap the email address to contact the person.
Tap Hide to hide the recipients.
Add an email recipient to your
contacts list
Tap the message and tap Details to see the recipients.
Then tap a name or email address and tap Create New
Contact or “Add to Existing Contact.”
Mark a message as unread Open the message and tap “Mark as Unread” next to the
UWDLGEVNKPG
A blue dot appears next to the message in the mailbox
list until you open it again.
57
Chapter 5 Mail

Open a meeting invitation: Tap the invitation.
You can get contact information for the organizer and other invitees, set an alert, add
notes to the event, and add comments that are included in your response emailed
to the organizer. You can accept, tentatively accept, or decline the invitation. See
“Responding to Meeting Invitations” on page 89.
Save an attached photo to Photos: Tap the photo, then tap Save Image.
Searching Email
;QWECPUGCTEJVJG6Q(TQOCPF5WDLGEV°GNFUQHGOCKNOGUUCIGU/CKNUGCTEJGUVJG
downloaded messages in the currently open mailbox. For MobileMe, Exchange, and
some IMAP mail accounts, you can also search messages on the server.
Search email messages: Open a mailbox, scroll to the top, and enter text in the Search
°GNF6CR(TQO6Q5WDLGEVQT#NN(TQO6QCPF5WDLGEVVQEJQQUGYJKEJ°GNFU[QW
want to search. (Tap the status bar to scroll quickly to the top of the list and reveal the
UGCTEJ°GNF
Search results for the messages already downloaded to iPad appear automatically as
you type. Tap Search to dismiss the keyboard and see more of the results.
Delete or move found messages: After completing a search, tap Edit, then select the
messages you want to delete or move. A checkmark appears next to each message
you select. To delete the messages, tap Delete. To move the messages, tap Move, then
tap a destination folder.
Search messages on the server: Tap “Continue Search on Server” at the end of the
search results.
Note: Search results of messages on servers may vary, because some servers search
only whole words.
58 Chapter 5 Mail

Printing Messages and Attachments
You can use AirPrint to print email messages, and attachments that iPad can view.
Print an email message: Tap , then tap Print. Select the print options you want,
then tap Print.
To print an image without the rest of the email message, save the image (tap the
image and tap Save Image), then open Photos and print the image from your Saved
Photos album.
Print an attachment: Tap the attachment to view it, then tap and tap Print. Select
the options you want, then tap Print.
For information about using AirPrint printers see “Printing” on page 40.
Organizing Email
You can delete messages one at a time, or select a group to delete all at once. You can
also move messages from one mailbox or folder to another.
Delete a message: Open the message and tap . Or, swipe left or right over the
message title in the message list, then tap Delete.
Delete multiple messages: When viewing a list of messages, tap Edit, select the
messages you want to delete, then tap Delete. You can also search for messages and
choose the ones you want to delete. See “Searching Email” on page 58.
/QXGCOGUUCIGVQCFKÒGTGPVOCKNDQZQTHQNFGTWhen viewing a message, tap ,
then choose a mailbox or folder.
Move multiple messages: When viewing a list of messages, tap Edit, select the
messages you want to move, then tap Move and select a mailbox or folder. You can
also search for messages and choose the ones you want to move. See “Searching
Email” on page 58.
59
Chapter 5 Mail

Camera 6
About Camera
With iPad, you have a great still camera and video camera wherever you go. iPad has a
DCEMECOGTCVJCVVCMGURJQVQUCPFJKIJFG°PKVKQPXKFGQCPFCHTQPVECOGTCVJCVNGVU
you make FaceTime video calls and take photos and videos of yourself.
Use the screen to control the back camera and to see the photo or video you’re
VCMKPI;QWECPVCRCP[YJGTGQPVJGUETGGPVQUGNGEVCURGEK°EQDLGEVQTCTGCCPF
CWVQOCVKECNN[CFLWUVVJGGZRQUWTGDCUGFQPVJCVRCTVQHVJGKOCIG#WVQHQEWUWRVQ
about 4 inches or 10 cm) and a 5x digital zoom let you take great close-ups.
If you have an Internet connection and location services is turned on, photos and
videos are tagged with location data. You can use location data with some apps and
photo-sharing websites to track and post where you took the photos. For example, the
Photos app organizes photos by location.
Note: +HNQECVKQPUGTXKEGUKUVWTPGFQÒYJGP[QWQRGP%COGTC[QWOC[DGCUMGFVQ
turn it on. If you don’t want to include location data with your photos and videos,
you can use Camera without turning on location services. See “Location Services” on
page 153 .
60
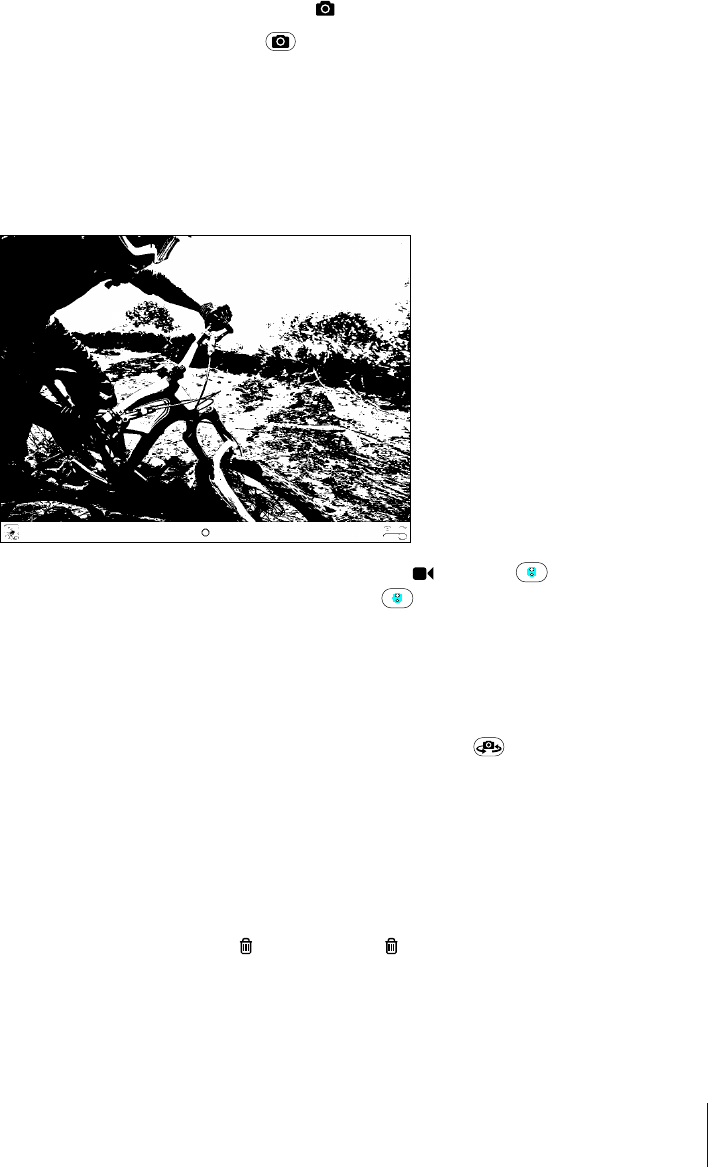
Taking Photos and Recording Videos
Taking photos and recording videos with iPad is as easy as pointing and tapping. Make
sure the Camera/Video switch is set to .
Take a photo: Aim iPad and tap .
When you take a photo or start a video recording, iPad makes a shutter sound. You can
use the volume buttons to control the volume of the shutter sound. You don’t hear a
sound if you set the Side Switch to silent. See “Buttons” on page 10.
Note: +PUQOGTGIKQPUVJGUQWPFGÒGEVUHQT%COGTCCTGRNC[GFGXGPKHVJG5KFG5YKVEJ
is set to silent.
Record a video: Slide the Camera/Video switch to , then tap to start recording.
The record button blinks while you record. Tap again to stop recording.
Change the focus area and set the exposure: Tap where you want to focus or set the
GZRQUWTG%COGTCCFLWUVUVJGGZRQUWTGHQTVJGUGNGEVGFCTGCQHVJGKOCIG
Zoom in or out: Tap the screen, then drag the slider at the bottom to zoom in or out
(back camera, in camera mode only).
Switch between the front camera and back camera: Tap in the upper-right
corner of the screen.
Review a photo or video you’ve just taken: Tap the thumbnail of your last shot, in the
lower-left corner of the screen.
Use the left and right arrows at the bottom of the screen to review other photos and
XKFGQUKPVJG%COGTC4QNNQTLWUV±KEMNGHVQTTKIJV6CR&QPGVQTGVWTPVQECOGTCQT
video mode. If you don’t see the controls, tap the screen to display them.
Delete a photo or video: Tap . If you don’t see , tap the screen to display the controls.
Take a screenshot: Quickly press and release both the Sleep/Wake button and the
*QOGDWVVQP6JGUETGGP±CUJGUYJGPVJGUETGGPUJQVKUVCMGPCPFVJGUETGGPUJQVKU
added to the Camera Roll album.
61
Chapter 6 Camera

Viewing and Sharing Photos and Videos
The photos and videos you take with Camera are saved in the Camera Roll album on
iPad. You can view the Camera Roll album from either Camera or Photos.
View photos and videos in the Camera Roll album: In Camera, tap the thumbnail
image in the lower-left corner of the screen. In Photos, tap the Camera Roll album. Tap
VJGNGHVQTTKIJVDWVVQPQT±KEMNGHVQTTKIJVVQ±KRVJTQWIJVJGRJQVQUCPFXKFGQU
When viewing a photo or video in the Camera Roll album, tap the screen to display
the controls.
For more information about viewing and sharing photos and videos, see:
“ Viewing Photos and Videos” on page 70
“ Sharing Photos” on page 73
Trimming Videos
;QWECPVTKOVJGHTCOGUHTQOVJGDGIKPPKPICPFGPFQHCXKFGQVJCV[QWLWUVTGEQTFGF
or any other video in the Camera Roll album. You can replace the original video or save
the trimmed version as a new video clip.
Trim a video:
1 While viewing a video, tap the screen to display the controls.
2 Drag either end of the frame viewer at the top of the video, then tap Trim.
3 Tap Trim Original or “Save as New Clip.”
Important: If you choose Trim Original, the trimmed frames are permanently deleted
from the original video. If you choose “Save as New Clip,” a new trimmed video clip is
UCXGFKPVJG%COGTC4QNNCNDWOCPFVJGQTKIKPCNXKFGQKUWPCÒGEVGF
Uploading Photos and Videos to Your Computer
You can upload the photos and videos you take with Camera to photo applications on
your computer, such as iPhoto on a Mac.
Upload photos and videos to your computer: Connect iPad to your computer.
Mac: Select the photos and videos you want and click the Import or Download
button in iPhoto or other supported photo application on your computer.
PC: Follow the instructions that came with your photo application.
If you delete the photos and videos from iPad when you upload them to your
computer, they’re removed from the Camera Roll album. You can use the Photos
settings pane in iTunes to sync photos and videos (videos can be synced with Macs
only) to the Photos app on iPad.
62 Chapter 6 Camera
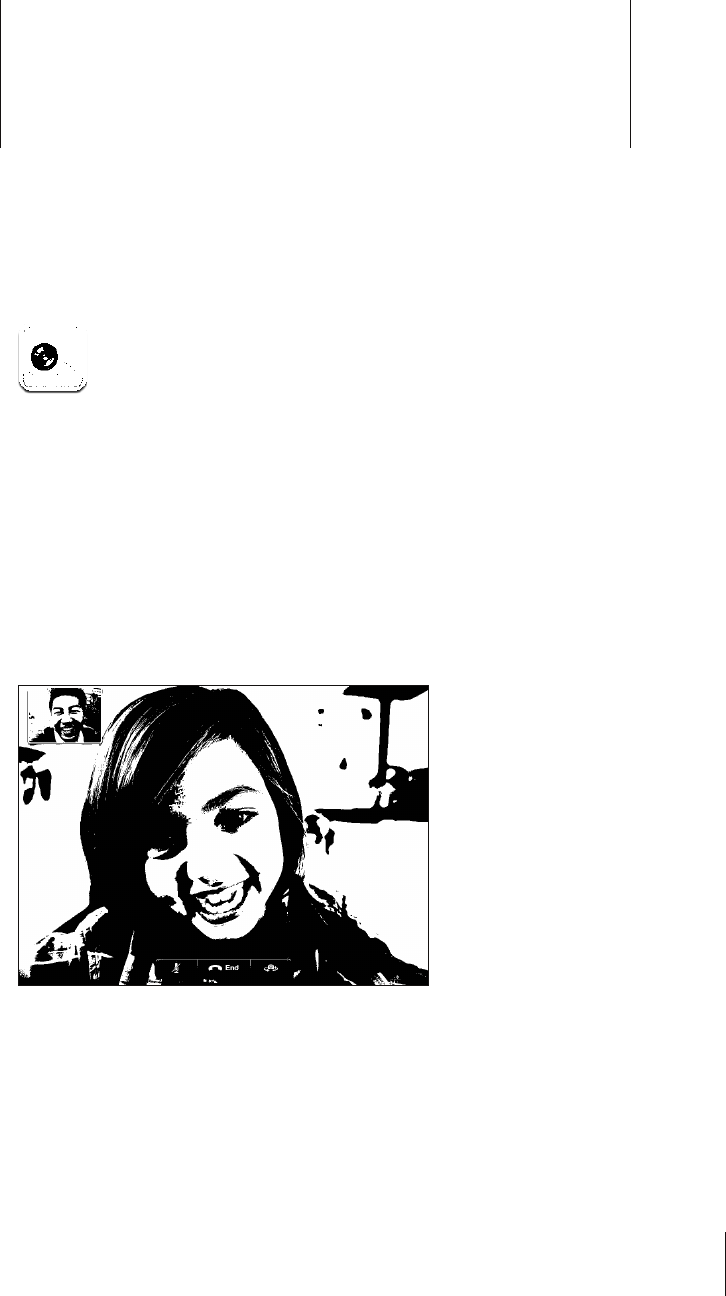
FaceTime 7
About FaceTime
FaceTime lets you make video calls over Wi-Fi. Use the front camera to talk face-to-face,
or the back camera to share what you see around you.
To use FaceTime, you need iPad 2 and a Wi-Fi connection to the Internet. The person
you call must also have a device or computer that works with FaceTime. For more
information, see “FaceTime” on page 169.
Note: FaceTime may not be available in all countries or regions.
63

Signing In
To use FaceTime, you need an Apple ID. If you have an iTunes Store account, MobileMe
account, or other Apple account, you can use that Apple ID with FaceTime. If you don’t
have an Apple ID, you can create one when you open FaceTime.
You don’t need to sign in or out every time you use FaceTime. Once you sign in, you
can start a FaceTime call right away.
Sign in to FaceTime:
1 Open FaceTime, enter your Apple ID and password, then tap Sign In. If you don’t
already have an Apple account, you can tap Create New Account and set one up now.
2 On the FaceTime screen, enter the email address others should use to call you in
(CEG6KOGVJGPVCR0GZV+HVJKUKUVJG°TUVVKOG[QW¨XGWUGFVJKUCFFTGUUHQT(CEG6KOG
[QWOC[PGGFVQEJGEMHQTPGYGOCKNKPVJCVCEEQWPVCPFTGRN[VQVJGEQP°TOCVKQP
OGUUCIGHTQO#RRNG+H[QW¨XGCNTGCF[CFFGFVJGCEEQWPVVQ/CKNQPK2CFXGTK°ECVKQP
is automatic.)
Now you can choose a contact and start a FaceTime call, and others can call you using
the email address you provided. If you use more than one email address, you can add
the others as described below.
Create a new account:
1 Open FaceTime and tap Create New Account.
2 Follow the onscreen instructions. The email address you enter will be the Apple ID for
the new account.
3 On the FaceTime screen, enter the email address you want others to use to call you.
This address doesn’t need to be the same as the address you entered for your Apple ID,
but it must be a working email address.
4 4GRN[VQVJGEQP°TOCVKQPGOCKNUGPVHTQO#RRNGVQVJGGOCKNCFFTGUU[QWGPVGTGFKP
the previous step.
If you have more than one email address, you can let people call you using any of them.
Add email addresses: Choose Settings > FaceTime, then tap Add Another Email.
Sign out: ;QWFQP¨VPQTOCNN[PGGFVQUKIPQWVQH(CEG6KOG¤LWUVUKIPKPQPEG
and open FaceTime later without being asked to sign in again. You can’t receive
FaceTime calls while you’re signed out. But if you do need to sign out, choose
Settings > FaceTime, then tap Account.
6WTPQÒ(CEG6KOGIf you don’t want to receive FaceTime calls, choose Settings >
(CEG6KOGCPFVWTPQÒ(CEG6KOG
64 Chapter 7 FaceTime

Making a FaceTime Call
To make a FaceTime call, open the FaceTime app, then choose someone from your
contacts, favorites, or list of recent calls.
Call a contact: Tap Contacts, choose a name, then tap the email address or phone
number they use with FaceTime.
Add a contact: Tap Contacts, tap , then enter the person’s name and their email
address or phone number. For a contact outside your region, be sure to enter
the complete number, including country code and area code—for example,
+1 (408) 555-1234 in the United States.
Restart a recent call: Tap Recents, then choose a name or number.
Call a favorite: Tap Favorites, then tap a name in the list.
While You’re Talking
While talking to someone in FaceTime, you can switch cameras, change camera
orientation, mute your microphone, move your picture-in-picture display, open
CPQVJGTCRRNKECVKQPCPF°PCNN[GPF[QWTECNN
Switch between the front and back cameras: Tap .
Change camera orientation: Rotate iPad. The image your friend sees changes to match.
To avoid rotating the screen as you move the camera around, turn on the orientation
lock. See “Viewing in Portrait or Landscape” on page 16.
Mute your microphone: Tap . Your friend can still see you, and you can still see and
hear your friend.
Move your picture-in-picture display: Drag the small window to any corner.
Use another application during a call: Press the Home button, then tap an
application icon. You can still talk with your friend, but you can’t see each other. To
return to the video, tap the green bar at the top of the screen.
End the call: Tap .
65
Chapter 7 FaceTime

Photo Booth 8
About Photo Booth
It’s easy to take a photo using Photo Booth. Make your photo more interesting by
CRRN[KPICPGÒGEVYJGP[QWVCMGKV2JQVQ$QQVJYQTMUYKVJDQVJVJGHTQPVCPF
back cameras.
5GNGEVKPICP'ÒGEV
$GHQTG[QWVCMGCRKEVWTG[QWECPUGNGEVCPGÒGEVVQCRRN[VQVJGRKEVWTG
5GNGEVCPGÒGEVTap VJGPVCRVJGGÒGEV[QWYCPVVQWUG
Distort an image: +H[QWUGNGEVCFKUVQTVKQPGÒGEVFTCI[QWT°PIGTCETQUUVJGUETGGP
to change the distortion. You can also pinch, swipe, or rotate the image to change
the distortion.
66

Taking a Photo
To take a Photo Booth photo, simply aim iPad and tap.
Take a photo: Aim iPad and tap .
When you take a photo, iPad makes a shutter sound. You can use the volume buttons
on the side of the iPad to control the volume of the shutter sound. You won’t hear a
sound if you set the Side Switch to silent. See “Buttons” on page 10
Note: +PUQOGTGIKQPUVJGUQWPFGÒGEVUCTGRNC[GFGXGPKHVJG5KFG5YKVEJKUUGV
to silent.
Switch between the front and back cameras: Tap at the bottom of the screen.
Review the photo you’ve just taken: Tap the thumbnail of your last shot. Swipe left or
right to view more thumbnails.
If you don’t see the controls, tap the screen to display them.
Delete a photo: Select a thumbnail, then tap .
Manage photos: Tap the thumbnail of the photo—you can select more than one.
Tap , then tap Email, Copy, or Delete.
Viewing and Sharing Photos
The photos you take with Photo Booth are saved in the Camera Roll album on iPad.
You can view the Camera Roll album in the Photos app.
View photos in the Camera Roll album: +P2JQVQUVCRVJG%COGTC4QNNCNDWO6Q±KR
through the photos, tap the left or right button, or swipe left or right.
You can use Mail to send a Photo Booth photo in an email message.
Send a photo: Tap a thumbnail to select the photo, or tap again to select more than
one photo. Tap , then tap the Email button at the bottom of the screen.
Mail opens and creates a new message with the photo attached.
67
Chapter 8 Photo Booth

Uploading Photos to Your Computer
Upload the photos you take with Photo Booth to photo applications on your
computer, such as iPhoto on a Mac.
Upload photos to your computer: Connect iPad to your computer.
Mac: Select the photos to upload, then click the Import or Download button in
iPhoto or other supported photo application on your computer.
PC: Follow the instructions that came with your photo application.
If you delete the photos from iPad when you upload them to your computer, they’re
removed from the Camera Roll album. You can use the Photos settings pane in iTunes
to sync photos to the Photos app on iPad.
68 Chapter 8 Photo Booth

Photos 9
About Photos
K2CFNGVU[QWECTT[RJQVQUCPFXKFGQUYKVJ[QWUQ[QWECPGPLQ[VJGOYJGTGXGT[QW
are. You can easily share them with family and friends, either directly on iPad, or on an
HDTV using AirPlay and Apple TV. You can even print photos from iPad using AirPrint.
If your iPad has a camera, you can view photos and videos as you take them. You can
sync photos and videos from your computer, import them from a digital camera or
iPhone, or save them from email or the web. Use them in apps, send them in email
messages, or upload them to your MobileMe Gallery. You can use iPad as a photo
frame that displays an animated slideshow of your images.
Syncing Photos and Videos with Your Computer
iPad supports standard photo formats such as JPEG, TIFF, GIF, and PNG. You use iTunes
to sync photos to iPad. When syncing photos to iPad, iTunes automatically creates a
size optimized for iPad, if necessary. See “Setting Up Syncing” on page 24.
iPad supports H.264 and MPEG-4 video formats, with AAC audio. You use iTunes to
sync videos taken with a digital camera, iPhone, or iPod touch (4th generation) to iPad.
69

Importing Photos and Videos from iPhone or a Digital Camera
With the iPad Camera Connection Kit (sold separately), you can import photos and
videos directly from a digital camera or iPhone, or from an SD memory card.
Import photos:
1 Insert the SD Card Reader or Camera Connector, included in the iPad Camera
Connection Kit, into the iPad dock connector.
To connect a camera or iPhone, use the USB cable that came with the camera or
iPhone, and connect it to the USB port on the Camera Connector. If you’re using
iPhone, make sure it’s turned on and unlocked. To connect a camera, make the sure
the camera is turned on and in transfer mode. For help, see the documentation that
came with the camera.
To use an SD memory card, insert it in the slot on the SD Card Reader. Don’t force
VJGECTFKPVQVJGUNQVKV°VUQPN[QPGYC[
For more information about the connectors, see the iPad Camera Connection Kit
documentation.
2 Unlock iPad.
3 The Photos app opens and displays the photos and videos that are available for
importing.
4 Select the photos and videos you want to import.
To import all of the items, tap Import All.
6QKORQTVLWUVUQOGQHVJGKVGOUVCRVJGQPGU[QWYCPVVQKPENWFGCEJGEMOCTM
appears on each), then tap Import, and select Import Selected.
5 After the photos are imported, you can choose to keep or delete the photos and
videos on the card, camera, or iPhone.
6 Disconnect the SD Card Reader or Camera Connector.
To view the photos, look in the Last Import album. A new Event contains all the photos
that were selected for import.
To transfer the photos to your computer, connect iPad to your computer and import
the images with a photo application such as iPhoto or Adobe Elements.
Viewing Photos and Videos
Photos lets you view photos synced from your computer’s photo application, imported
from a digital camera or iPhone, or saved from an email message or webpage.
Photos organizes collections by Albums, Events, Faces, and Places. Places uses
the location information encoded in photos, but not all photos may have this
information—it requires a camera that supports geotagging. Events and Faces must
°TUVDGEQP°IWTGFKPK2JQVQQT#RGTVWTGQPC/CEVJGPU[PEGFVQK2CF
70 Chapter 9 Photos
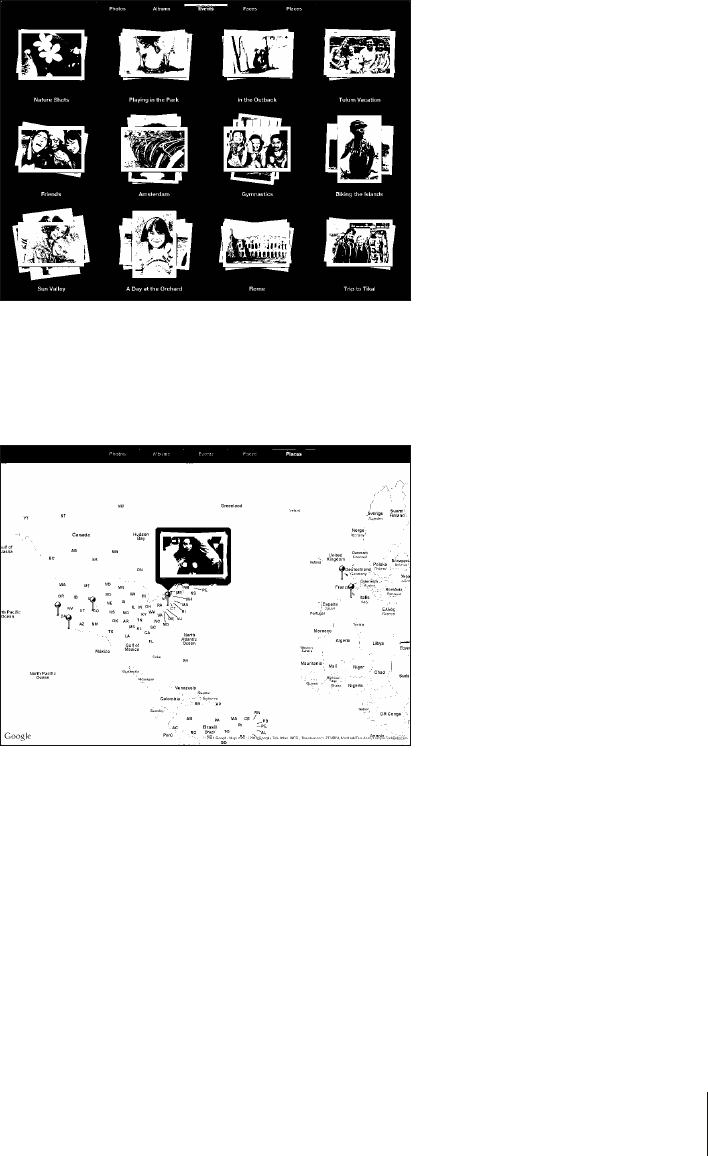
View photos:
1 In Photos, tap Photo, Albums, Events, Faces, or Places.
To open a collection, tap it. Or, pinch the collection to spread out a preview of the
photos it contains, then let go to open it. Photos are sorted by creation date.
When you’re viewing Places, tap a pin on the map to display the location, then pinch
to zoom and show all photos taken at this location.
2 Tap a thumbnail to view a photo in full screen.
You can also pinch to zoom in on the photo.
71
Chapter 9 Photos
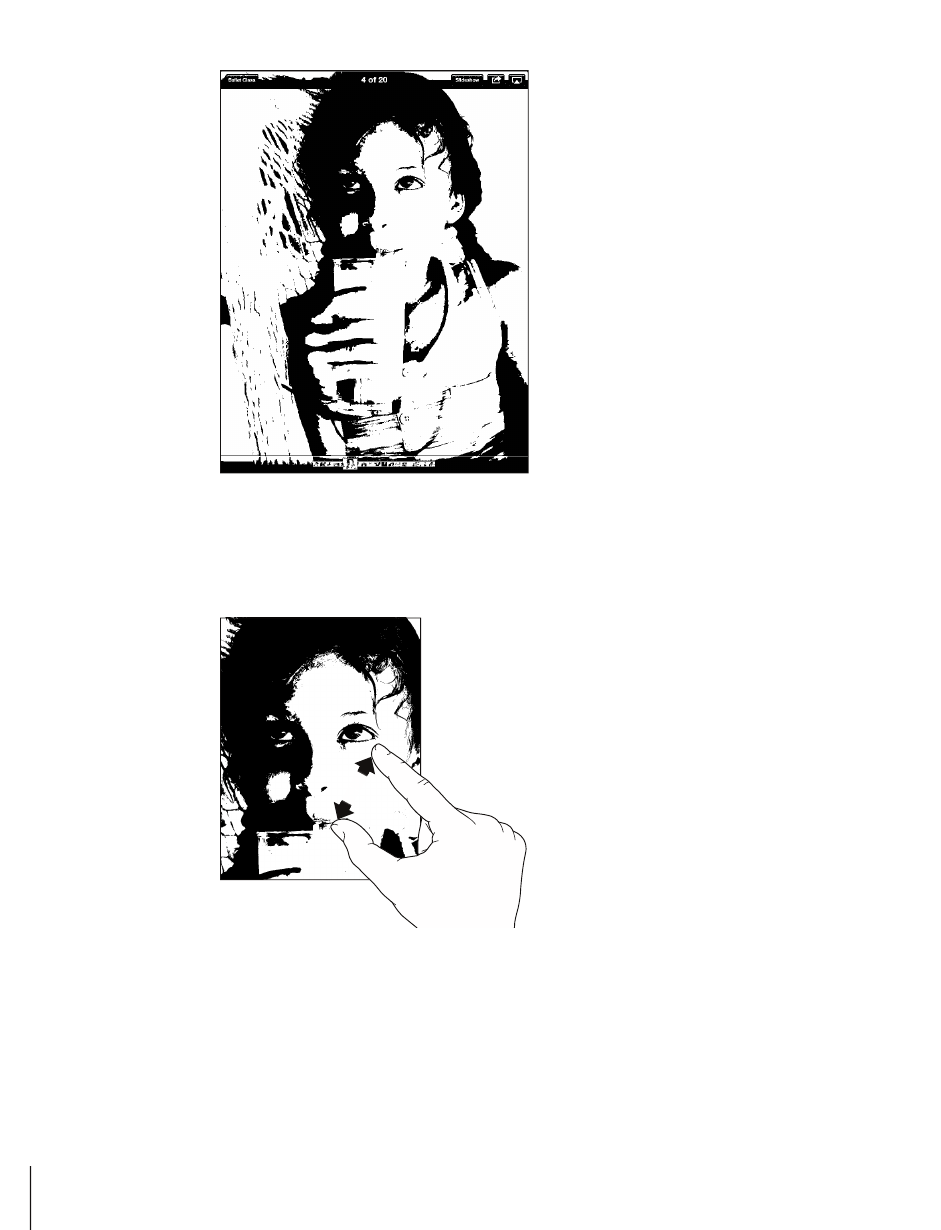
Show or hide the controls: Tap the photo to show the controls. Tap again to hide
the controls.
View a photo in landscape orientation: Rotate iPad sideways. The photo or video
TGUK\GUCWVQOCVKECNN[VQ°VVJGUETGGP
Zoom in on part of a photo: Double-tap where you want to zoom in. Double-tap
again to zoom out. You can also pinch to zoom in or out.
Pan a photo: Drag the photo.
See the next or previous photo: Flick left or right. Or tap the screen to show the
VJWODPCKNUCETQUUVJGDQVVQOVJGPVCRQTFTCIVQXKGYCFKÒGTGPVRJQVQ
Delete a photo: You can delete photos from the Saved Photos album, which contains
photos you save from email or the web. For photos synced from your computer, you
need to delete the photo from the album on your computer, then sync iPad again.
72 Chapter 9 Photos

Rotate a photo: Tap . To rotate it more, tap again.
View photos or videos on a TV using AirPlay and Apple TV: Make sure iPad is on the
same wireless network as Apple TV, then tap and choose Apple TV from the list.
9JGP[QW±KEMVJTQWIJRJQVQUQPK2CFVJGXKFGQQPVJG68WRFCVGUCU[QWRCWUG
See “Using AirPlay” on page 45 for more information.
Sharing Photos
You can share your photos as slideshows, complete with music and transitions. With
AirPlay and Apple TV, you can wirelessly stream your photos to a TV. You can send
photos and videos in email messages, and add photos to your MobileMe Gallery. You
can also copy and paste photos, save photos from email messages to Photos, and save
images from webpages to a photo album.
Slideshows
You can create and view a slideshow that shows your photos with transitions and
music. You can view a slideshow on iPad, or stream it wirelessly to an Apple TV. You can
CNUQWUGK2CFVQXKGYCUNKFGUJQYQPCPGZVGTPCNFKURNC[UWEJCUCRTQLGEVQT
View a slideshow:
1 Tap an album to open it.
You can select an album that contains photos, videos, or both. If your iPad has a
camera, photos and videos you’ve shot appear in the Camera Roll album.
2 Tap the Slideshow button and, in the list that appears, select slideshow options. You can:
Select a song from your music library to play music during the slideshow.
5GNGEVCVTCPUKVKQPGÒGEVVJCVRNC[UDGVYGGPRJQVQU
To set how long each photo is displayed, go to General > Settings > Photos. You can
also set whether the slideshow repeats, or plays in a random sequence.
Available transitions are determined by how you view the slideshow. If you’re
connected to an Apple TV, choose one of the available transitions. If iPad is connected
VQC68QTRTQLGEVQTWUKPICXKFGQECDNGEJQQUGVJG&KUUQNXGVTCPUKVKQP(QTKPHQTOCVKQP
about connecting to an external display, see Chapter 10, “Videos,” on page 77.
3 Tap Start Slideshow.
To stop the slideshow, tap the screen.
If you’re using AirPlay to stream the photos to an Apple TV, tap and select the
Apple TV from the list. See “Using AirPlay” on page 45 for more information.
Sending a Photo or Video in an Email Message
Send a photo or video: Tap a photo or video, tap , then tap Email Photo.
If you don’t see , tap the screen to show the controls.
73
Chapter 9 Photos

Send multiple photos or videos: Tap an album, then tap . Tap each of the photos
or videos you want to send (a checkmark appears on each thumbnail), then tap Email.
If the Email button is unavailable, select fewer items.
Copy a photo or video:
1 Tap .
2 Tap to select the photo or video you want to copy.
3 Tap Copy.
Paste a photo or video: Tap to place the insertion point where you want to paste the
photo or video, then tap the insertion point and tap Paste.
Adding a Photo or Video to a MobileMe Gallery
If you’re a MobileMe subscriber, you can add photos and videos from iPad to your
MobileMe Gallery. You can also add items to someone else’s MobileMe Gallery if they
allow email contributions.
Before you can add photos to a gallery in your MobileMe account, you must:
Set up your MobileMe account on iPad. If you don’t have a MobileMe account,
go to www.apple.com/mobileme/setup/ipad.html.
Publish a MobileMe Gallery and allow adding photos from email or iPad.
Add a photo or video to your gallery: Choose a photo or video and tap , then tap
“Send to MobileMe.” Enter a title and description if you like, select the album to add
the photo to, then tap Publish.
If you don’t see , tap the screen to show the controls.
iPad tells you when the photo has been published, and gives you options to view it on
MobileMe or email a link to a friend.
Add a photo to someone else’s gallery: Choose a photo and tap , then tap “Email
Photo.” Enter the album’s email address, then click Send.
Saving Photos from Email Messages or Webpages
Save a photo from an email message to your Saved Photos album: Tap the photo,
VJGPVCR5CXG+OCIG+HVJGRJQVQJCUP¨VDGGPFQYPNQCFGFVCRVJGFQYPNQCFKEQP°TUV
Save a photo from a webpage to your Saved Photos album: Touch and hold the
photo, then tap Save Image.
Copy photos from the Saved Photos album to your computer: Connect iPad to your
computer’s USB port, then use a photo application, such as iPhoto on a Mac, to copy
the images.
74 Chapter 9 Photos

Assigning a Photo to a Contact
You can assign a photo to a contact.
Assign a photo to a contact:
1 Choose a photo on iPad, then tap .
2 Tap “Assign to Contact,” then choose a contact.
3 Drag the photo to pan, and pinch to zoom in or out, until the photo looks the way
you want.
4 Tap Set Photo.
In Contacts, you can assign a photo to a contact by tapping Edit and then tapping
the picture icon.
Printing Photos
You can use AirPrint to print photos from iPad.
Print a photo: Tap , then tap Print. Tap Select Printer to select a printer and set
printer options such as the number of copies, then tap Print. If your printer has a tray
for photo paper, it may automatically switch to that tray when you print a photo.
For more information, see “Printing” on page 40.
Wallpaper and Lock Screen Photos
You can display a photo in the wallpaper background of the Lock screen and Home
screen. You can choose from several wallpaper pictures included with iPad, or you can
use a photo of your own.
Set a photo as screen wallpaper:
1 Choose any photo and tap , then tap Use As Wallpaper.
2 Drag to pan the photo, or pinch the photo to zoom in or out, until it looks the way you
YCPV#RJQVQVJCV¨UCVNGCUVZRKZGNU°NNUVJGUETGGPYJGPK2CFKUTQVCVGF
3 Tap Set Wallpaper. Then tap to use the image as wallpaper for the Home screen, on the
Lock screen, or both.
To choose from several wallpaper pictures included with iPad, go to Settings >
Brightness & Wallpaper.
75
Chapter 9 Photos
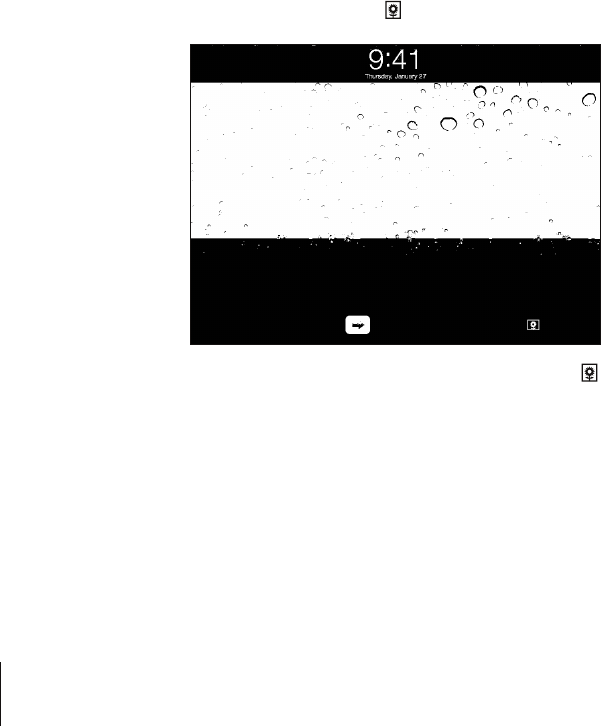
Using Picture Frame
9JGPK2CFKUNQEMGF[QWECPFKURNC[CPCNDWOQHRJQVQU6JKUKUCITGCVYC[VQGPLQ[
iPad while charging it in an iPad Dock.
To change Picture Frame settings, go to Settings > Picture Frame, then set any of the
following options:
The transition you select is played between photos. The duration of the slideshow
can’t be changed.
Picture Frame can zoom the image to focus on faces in the image. It can also
randomly select one of the faces as the center of focus, if more than one face is
RTGUGPVKPVJGKOCIG2KEVWTG(TCOGWUGUVJGHCEGKFGPVK°ECVKQPKPHQTOCVKQPKP
photos imported from iPhoto or Aperture on a Mac. Zooming in on faces isn’t an
option with the Origami transition.
2KEVWTG(TCOGECPFKURNC[CNNRJQVQUQTLWUVVJQUGKPCP#NDWO(CEGUQT'XGPV
ECVGIQT[5GNGEVCPQRVKQPVJGPTG°PG[QWTUGNGEVKQPKPVJGNKUVVJCVCRRGCTU6JG
Faces, Albums, and Event selections are the same as those in the Photos app.
Start or stop Picture Frame:
1 Press the Sleep/Wake button to lock iPad.
2 On the Lock screen, tap .
3 Tap the screen to pause the slideshow, then tap to return to the Lock screen,
or slide the slider to unlock iPad.
6QVWTPQÒ2KEVWTG(TCOGIQVQ5GVVKPIU )GPGTCN 2CUUEQFG.QEM
76 Chapter 9 Photos

Videos 10
About Videos
You can use iPad to view movies, music videos, video podcasts, and, if they’re available
in your area, TV shows. iPad also supports special features such as chapters, subtitles,
alternate audio, and closed captioning.
You can rent or purchase videos from the iTunes Store, and you can use a video
CFCRVGTECDNGVQYCVEJXKFGQUQPC68QTRTQLGEVQT+H[QWJCXGCP#RRNG68[QWECP
use AirPlay to watch the videos wirelessly on a TV.
77

Playing Videos
Play a video: Tap Videos, then tap a category of videos, such as Movies. Tap the video
[QWYCPVVQYCVEJ+HVJGXKFGQJCUEJCRVGTUVCRCEJCRVGTVKVNGQTLWUVVCR .
Display playback controls: While a video is playing, tap the screen to show the
controls. Tap again to hide them.
Controlling Video Playback
Rotate iPad to play videos in widescreen orientation and take full advantage of
the display.
&TCIVJGRNC[JGCFCNQPIVJGUETWDDGTDCTVQUMKRVQCP[RQKPVKPVJGXKFGQ6QCFLWUV
VJGUETWDTCVGHTQOHCUVVQUNQYUNKFG[QWT°PIGTFQYPCU[QWFTCIVJGRNC[JGCFCNQPI
the scrubber bar.
78 Chapter 10 Videos
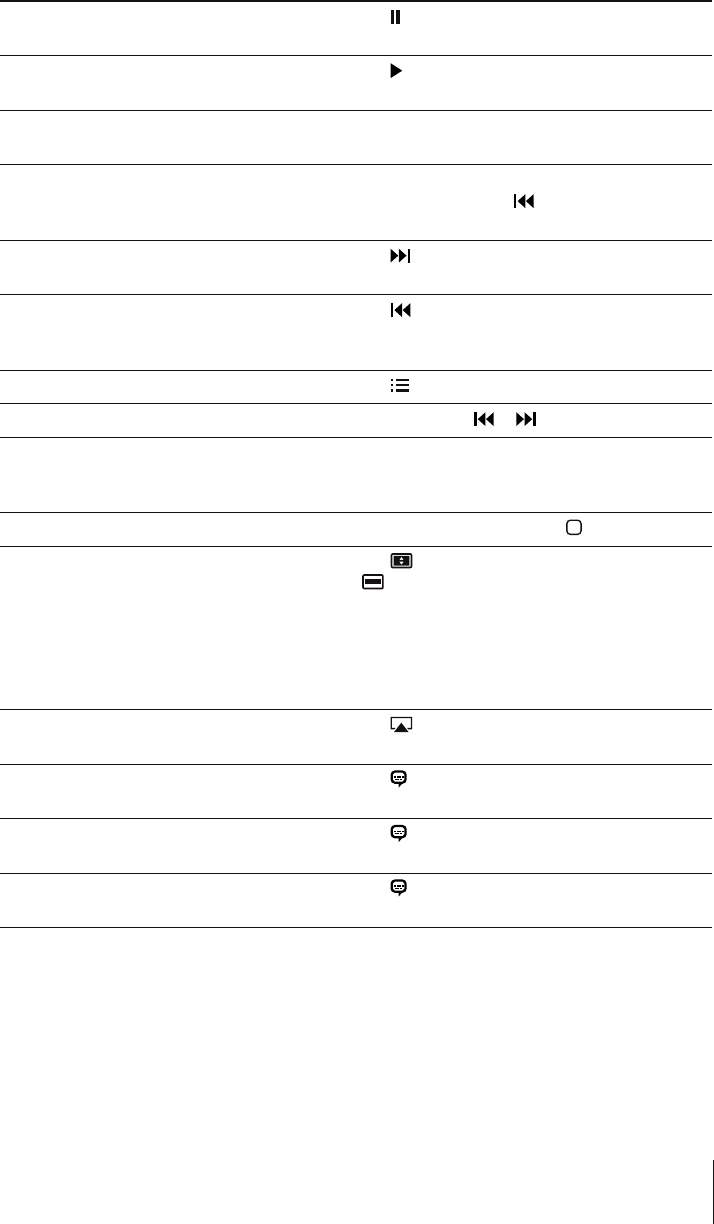
Pause a video Tap or press the center button (or equivalent
button) on a compatible headset.
Resume playback Tap or press the center button (or equivalent
button) on a compatible headset.
Raise or lower the volume Drag the volume slider, or use the iPad volume
buttons or the buttons on a compatible headset.
Start a video over Drag the playhead on the scrubber bar all the
way to the left, or tap if the video doesn’t
contain chapters.
Skip to the next chapter (if available) Tap or press the center button (or equivalent
button) on a compatible headset twice quickly.
Go to the previous chapter (if available) Tap or press the center button (or equivalent
button) on a compatible headset three times
quickly.
5VCTVRNC[KPICVCURGEK°EEJCRVGTKHCXCKNCDNG Tap , then choose a chapter from the list.
Rewind or fast-forward Touch and hold or .
Skip to any point in a video Drag the playhead along the scrubber bar. Slide
[QWT°PIGTFQYPVQCFLWUVVJGUETWDTCVGHTQO
fast to slow.
5VQRYCVEJKPICXKFGQDGHQTGKV°PKUJGURNC[KPI Tap Done, or press the Home button.
5ECNGCXKFGQVQ°NNVJGUETGGPQT°VVQVJG
screen
Tap VQOCMGVJGXKFGQ°NNVJGUETGGPQTVCR
VQOCMGKV°VVJGUETGGP;QWECPCNUQFQWDNG
tap the video to switch views.
9JGP[QWUECNGCXKFGQVQ°NNVJGUETGGPVJG
sides or top may be cropped. When you scale it
VQ°VVJGUETGGP[QWOC[UGGDNCEMDCTUQPVJG
sides or above and below the video.
Play a video on Apple TV using AirPlay Tap and choose an Apple TV. See “Watching
Videos on a TV” on page 80.
5GNGEVCFKÒGTGPVCWFKQNCPIWCIGKHCXCKNCDNG Tap , then choose a language from the Audio
list.
Show or hide subtitles (if available) Tap VJGPEJQQUGCNCPIWCIGQT1ÒHTQOVJG
Subtitles list.
Show or hide closed captioning (if available) Tap to show or hide captions, if the movie has
them.
Syncing Videos
Use iTunes to sync videos to iPad. When iPad is connected to your computer, use the
Movies, TV Shows, Podcasts, and iTunes U panes to select which videos to sync.
79
Chapter 10 Videos

Watching Rented Movies
;QWECPTGPVOQXKGUKPUVCPFCTFQTJKIJFG°PKVKQPHQTOCVHTQOVJGK6WPGU5VQTGCPF
watch them on iPad. You can download rented movies on iPad, or transfer them from
iTunes on your computer to iPad. (Rented movies aren’t available in all regions.)
A movie must be completely downloaded before you can watch it. You can pause a
download and continue it later. Rented movies expire after a certain number of days,
CPFQPEG[QWUVCTVCOQXKG[QWJCXGCNKOKVGFCOQWPVQHVKOGVQ°PKUJYCVEJKPIKV
Movies are automatically deleted when they expire. Before renting a movie, check the
iTunes Store for the expiration time.
View a rented movie: Choose Videos, tap the Movies category, then tap the movie
[QWYCPVVQYCVEJ5GNGEVCEJCRVGTQTLWUVVCR .
Transfer rented movies to iPad: Connect iPad to your computer. Then select iPad in
the iTunes sidebar, click Movies, and select the rented movies you want to transfer.
Your computer must be connected to the Internet. Movies rented on iPad cannot be
transferred to a computer.
Watching Videos on a TV
To watch videos on a TV, you can connect iPad using AirPlay and Apple TV, or use a
cable to connect iPad directly to your TV or AV receiver. For more information about
EQPPGEVKPIK2CFVQC68QTRTQLGEVQTUGG¥Video” on page 168.
Connect using AirPlay: Start video playback, then tap and choose your Apple TV
from the list of AirPlay devices. See “Using AirPlay” on page 45 for more information.
While video is playing, you can exit Video and use other apps.
To return playback to iPad: Open Videos, then tap and choose iPad from the list.
Deleting Videos from iPad
To save space, you can delete videos from iPad.
Delete a video: In the videos list, tap and hold a movie until the delete button
appears, then tap 6CR%CPEGNQT*QOGYJGP[QW°PKUJFGNGVKPIXKFGQU
When you delete a video (other than rented movies) from iPad, it isn’t deleted from
your iTunes library on your computer, and you can sync the video back to iPad later.
If you don’t want to sync the video back to iPad, set iTunes to not sync the video. See
“Syncing with iTunes” on page 24.
Important: If you delete a rented movie from iPad, it’s deleted permanently and can’t
be transferred back to your computer.
80 Chapter 10 Videos

YouTube 11
Finding and Viewing Videos
YouTube features short videos submitted by people from around the world.
You can watch the latest, most popular videos, search for videos about topics of
KPVGTGUV±CI[QWTHCXQTKVGUCPFSWKEMN[CEEGUUXKFGQUVJCV[QWWRNQCFVQ;QW6WDG
from your computer.
To use certain YouTube features on iPad, you need to sign in to a YouTube account
when prompted. For information about requirements and how to get a YouTube
account, go to www.youtube.com.
Note: YouTube isn’t available in all languages and locations.
To use YouTube, iPad must have an Internet connection. See “Connecting to the
Internet” on page 29.
Browse videos: Tap a button in the toolbar to select a category.
Featured: 8KFGQUTGXKGYGFCPFHGCVWTGFD[;QW6WDGUVCÒ
Top Rated: Videos most highly rated by YouTube viewers. You can rate videos on
iPad, if you have a YouTube account.
Most Viewed: Videos most seen by YouTube viewers. Tap All for all-time most viewed
videos, or Today or This Week for most-viewed videos of the day or week.
Favorites: Videos you added to Favorites. When you sign in to a YouTube account,
account favorites appear.
Most Recent: Videos most recently submitted to YouTube.
Subscriptions: Videos from YouTube accounts you subscribe to. You must be signed
in to a YouTube account to use this feature.
81

Playlists: Videos you add to playlists. You must be signed in to a YouTube account to
use this feature.
My Videos: Videos that you’ve upload to YouTube. You must be signed in to a
YouTube account to use this feature.
History: Videos you’ve viewed most recently.
Search for a video:
1 6CRVJG;QW6WDGUGCTEJ°GNF
2 Type a word or phrase, then tap Search.
YouTube shows results based on searching video titles, descriptions, tags, and user
names. Each search result shows the title, rating, number of views, length, and the
name of the account the video was posted from.
Play a video: Tap the video.
The video begins downloading to iPad, and a progress bar appears. When enough of
the video has downloaded, it begins to play. You can also tap to start the video.
82 Chapter 11 YouTube
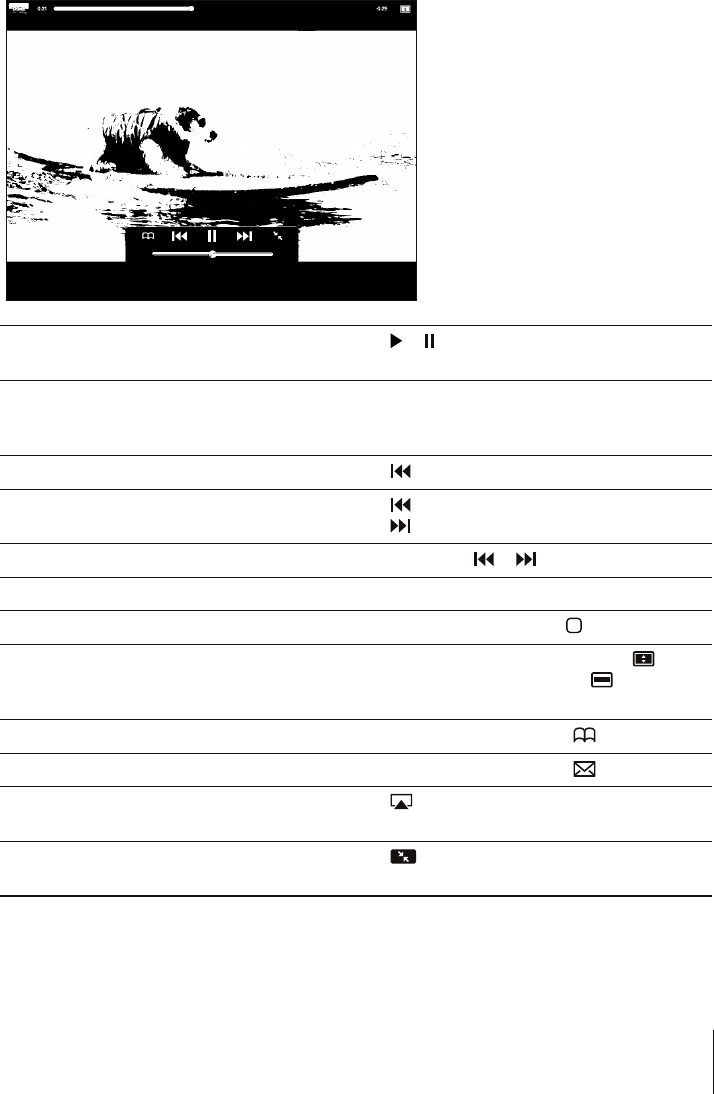
Controlling Video Playback
Rotate iPad to landscape orientation to view the video at its maximum size. When a
video is playing, the controls disappear so they don’t obscure the video.
Show or hide the video controls: Tap the screen.
Play or pause a video Tap or . You can also press the center button
(or equivalent button) on a compatible headset.
Adjust the volume Drag the volume slider, or use the iPad volume
buttons or the volume buttons on a compatible
headset.
Start a video over Tap .
Skip to the next or previous video in a list Tap twice to skip to the previous video.
Tap to skip to the next video.
Rewind or fast-forward Touch and hold or .
Skip to any point in a video Drag the playhead along the scrubber bar.
Stop watching a video Tap Done, or press the Home button.
Toggle between full-screen and standard mode Double-tap the video. You can also tap to
OCMGVJGXKFGQ°NNVJGUETGGPQT to make it
°VVJGUETGGP
Add a video to Favorites Start playing a video, then tap .
Email a link to the video Start playing a video, then tap .
Play a video on Apple TV using AirPlay Tap and choose Apple TV. For information, see
“Using AirPlay” on page 45.
View information about a video Tap to exit full-screen mode and view related
videos, comments, and more controls.
83
Chapter 11 YouTube
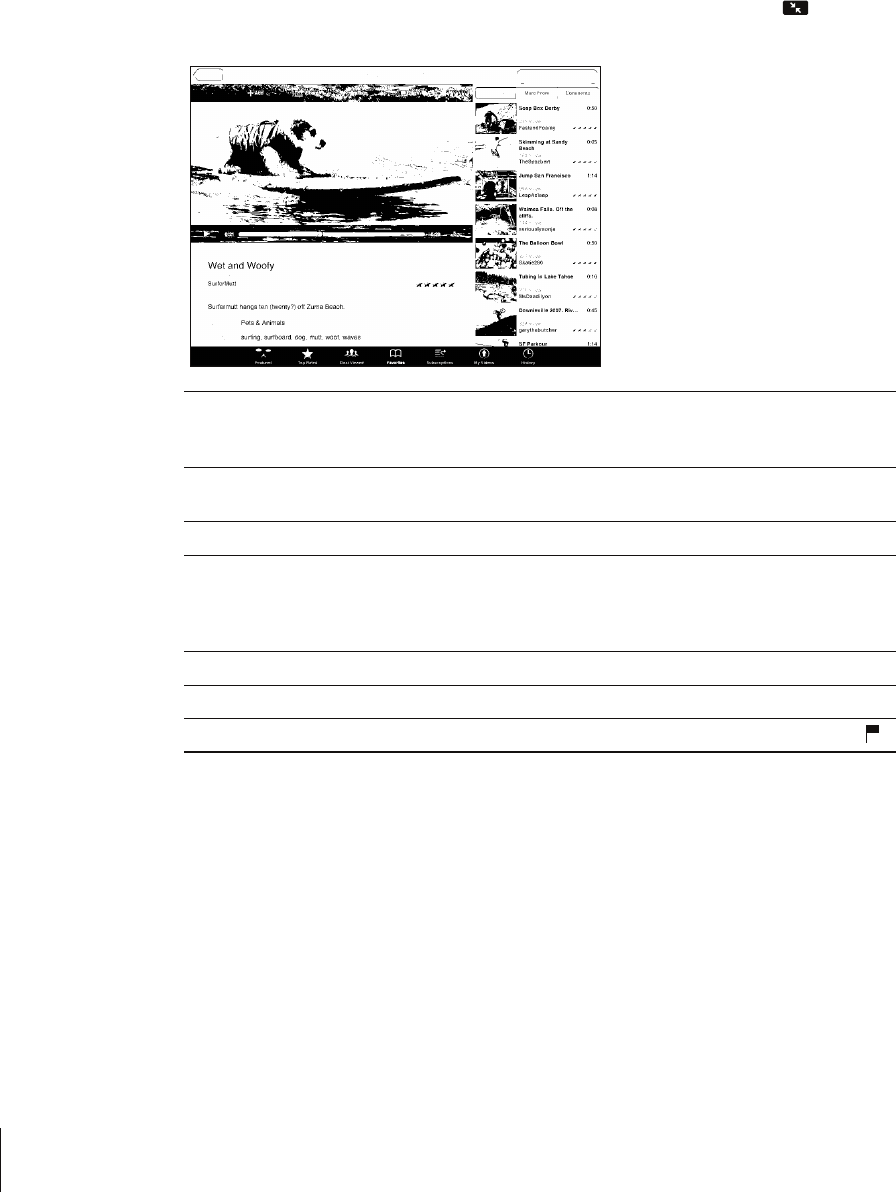
Managing Videos
While watching a full-screen video, tap to display the controller, then tap to see
related videos and options for managing videos.
Rate a video or add a comment Tap the video to display the toolbar, then tap
Rate and select a rating. You must be signed in to
a YouTube account.
See more videos from this YouTube user In the sidebar, tap “More From.” You must be
signed in to a YouTube account.
See videos similar to this one In the sidebar, tap “Related.”
Subscribe to videos by this YouTube user On the More Info screen, tap More Videos, then
tap “Subscribe to <account>” at the bottom
of the video list. You must be signed in to a
YouTube account.
Add a video to Favorites or a playlist Tap Add, then select Favorites or a playlist.
Email a link to a video Tap Share.
Flag a video Tap the movie to display the toolbar, then tap .
Watching YouTube on a TV
If you have an Apple TV, you can use AirPlay to watch YouTube videos on a TV. See
“Controlling Video Playback” on page 83.
;QWECPCNUQEQPPGEVK2CFFKTGEVN[VQ[QWT68QTCRTQLGEVQTCPFYCVEJ;QW6WDGQP
VJGNCTIGUETGGP(QTOQTGKPHQTOCVKQPCDQWVWUKPIK2CFYKVJC68QTRTQLGEVQTUGG
“Video” on page 168.
84 Chapter 11 YouTube

Calendar 12
About Calendar
iPad makes it easy to stay on schedule. You can view calendars individually, or several
calendars at once. You can view your events by day, week, or month, or in a list. You
can also search events by title, invitee, or location.
You can sync iPad with the calendars on your computer. You can also create, edit,
or cancel events on iPad, and sync them back to your computer. You can subscribe
to Google, Yahoo!, or iCal calendars. You can subscribe to read-only iCalendar (.ics)
ECNGPFCTUQTKORQTVKEU°NGUHTQOGOCKN+H[QWJCXGC/KETQUQHV'ZEJCPIGCEEQWPVQTC
supported CalDAV account, you can receive and respond to meeting invitations from
others, and invite people to events you’ve scheduled.
Syncing Calendars
You can sync your calendars in these ways:
In iTunes, use the iPad settings panes to sync with iCal or Microsoft Entourage on a
Mac, or with Microsoft Outlook on a PC, when you connect iPad to your computer.
See “Syncing with iTunes” on page 24.
In Settings on iPad, turn on Calendars in your MobileMe, Google, Yahoo!, or
Microsoft Exchange account to sync your calendar information over the air. If your
company or organization supports it, you can also set up a CalDAV account. See
“Adding Mail, Contacts, and Calendar Accounts” on page 31. To sync calendars over
the air, iPad must be connected to the Internet.
85

Adding, Editing, and Deleting Calendar Events
You can create and edit calendar events directly on iPad.
If you have a Microsoft Exchange account with calendars enabled, or a supported
CalDAV account, you can invite other people to your event or meeting.
Add an event: Tap and enter event information, then tap Done.
You can enter the following:
Title
Location
Starting and ending times (or turn on All-day, if it’s an all-day event)
Repeat times—none, or every day, week, two weeks, month, or year
#NGTVVKOG¤HTQO°XGOKPWVGUVQVYQFC[UDGHQTGVJGGXGPV
When you set an alert, the option to set a second alert appears. When an alert
occurs, iPad displays a message. To set iPad to play a sound, see “Alerts” on page 90.
Important: When you travel, iPad may not alert you at the correct local time. To
manually set the correct time, see “Date and Time” on page 160. For information
CDQWVCFLWUVKPIVJGECNGPFCTVKOG\QPGUGG¥Viewing Your Calendars” on page 86.
Notes
If you have more than one calendar, you can select which calendar to add the event to.
Read-only calendars don’t appear in the list.
Edit an event Tap the event, then tap Edit.
Delete an event Tap the event, tap Edit, then scroll down and tap
Delete Event.
Viewing Your Calendars
You can view a single calendar, selected calendars, or all calendars at once. This makes
it easy to manage work and family calendars at the same time.
8KGYCFKÒGTGPVECNGPFCTTap Calendars, then select the calendars you want to view.
6QXKGY[QWTEQPVCEVU¨DKTVJFC[UCUFG°PGFKP%QPVCEVUUGNGEVVJG$KTVJFC[UECNGPFCT
You can view calendar events in a list, or by day, week, or month. The events for all of
your selected calendars appear on iPad.
Switch views: Tap List, Day, Week, or Month.
86 Chapter 12 Calendar
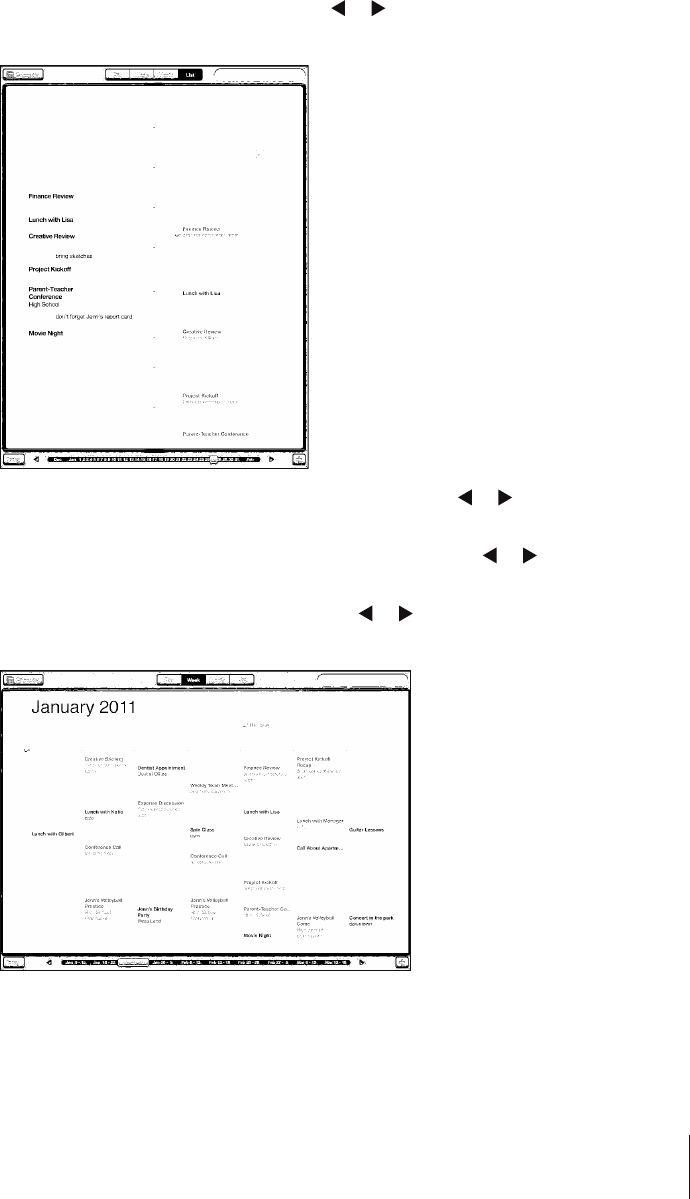
List view: All your appointments and events appear in a scrollable list, next to the
UGNGEVGFFC[6QXKGYCFKÒGTGPVFC[VCR or or select a day from the timeline
below the calendar.
Day view: Scroll up or down to see the day’s events. Tap or to see the previous
or next day’s events, or select a day from the timeline below the calendar.
Week view: Scroll up or down to see the week’s events. Tap or to see the
previous or next week, or select a week from the timeline below the calendar.
Month view: Tap a day to see its events. Tap or to see the previous or next
month, or select a month from the timeline below the calendar.
See the details of an event: Tap the event.
87
Chapter 12 Calendar

See events adjusted for a time zone: In Settings, go to “Mail, Contacts, Calendars.”
Under Calendars, tap Time Zone Support. Turn on Time Zone Support and select a
OCLQTEKV[HQTVJGVKOG\QPG[QWYCPVVQWUG9JGP6KOG<QPG5WRRQTVKUQÒ
iPad Wi-Fi + 3G displays events in the time zone of your current location as determined
by the cellular network time.
Searching Calendars
You can search the titles, invitees, notes, and locations of the events in your calendars.
%CNGPFCTUGCTEJGULWUVVJGECNGPFCTQTECNGPFCTU[QW¨TGEWTTGPVN[XKGYKPI
Search for events: 'PVGTVGZVKPVJGUGCTEJ°GNF
Search results appear as you type. Tap a result to view the event. Tap the calendar to
close the list of search results.
Subscribing to Calendars
You can subscribe to calendars that use the iCalendar (.ics) format. Many calendar-based
services, including Yahoo!, Google, and iCal on the Mac, support calendar subscriptions.
Subscribed calendars are read-only. You can read events from subscribed calendars on
iPad, but you can’t edit them or create new events.
Subscribe to a CalDAV or .ics calendar:
1 In Settings, choose “Mail, Contacts, Calendars,” then tap Add Account.
2 Choose Other, then choose Add Subscribed Calendar.
3 Enter your account information, then tap Next to verify the subscription.
4 Tap Save.
Apple provides links to a number of free iCal calendars—for national holidays or sports
events, for example—that you may want to subscribe to.
You can also subscribe to an iCal (or other .ics) calendar published on the web, by
tapping a calendar link you receive in an email message on iPad.
88 Chapter 12 Calendar

Responding to Meeting Invitations
If you have a Microsoft Exchange account on iPad with Calendars enabled, a supported
CalDAV account, or a MobileMe calendar, you can receive and respond to meeting
invitations from people in your organization.
When you receive an invitation, the meeting appears in your calendar with a dotted
line around it. The icon in the lower-right corner of the screen shows the number
of new invitations you have. To receive and respond to meeting invitations, iPad must
have an Internet connection.
Respond to an invitation in Calendar:
1 Tap a meeting invitation in the calendar, or tap to display the Event screen and
then tap an invitation.
Tap “Invitation from” to get contact information for the meeting organizer. Tap the
email address to send the organizer a message.
Tap Invitees to see who is invited to the meeting. Tap a name to see the attendee’s
contact information. Tap an email address to send a message to the attendee.
Tap Alert to set iPad to sound an alert before the meeting.
Tap Add Comments to add comments for the meeting organizer. Your comments
will also appear in the Info screen for the meeting.
Notes are made by the meeting organizer.
2 Tap Accept, Maybe, or Decline.
When you accept, tentatively accept, or decline the invitation, the organizer is sent a
response that includes any comments you add.
You can change your response later, unless you decline. Tap Add Comments to change
or add comments.
89
Chapter 12 Calendar

Importing Calendar Files from Mail
;QWECPCFFGXGPVUVQCECNGPFCTD[KORQTVKPICECNGPFCT°NGHTQOCPGOCKNOGUUCIG
;QWECPKORQTVCP[UVCPFCTFKEUECNGPFCT°NG
+ORQTVGXGPVUHTQOCECNGPFCT°NGIn Mail, open the message and tap the calendar
°NG9JGPVJGNKUVQHGXGPVUCRRGCTUVCR#FF#NNEJQQUGVJGECNGPFCT[QWYCPVVQCFF
the events to, and tap Done.
Alerts
Set calendar alerts: In Settings, choose General > Sounds, then turn Calendar Alerts
QP+H%CNGPFCT#NGTVUKUQÒYJGPCPGXGPVQEEWTUK2CFFKURNC[UCOGUUCIGDWVOCMGU
no sound.
Sound alerts for invitations: In Settings, choose “Mail, Contacts, Calendar.” Under
Calendars, tap New Invitation Alert to turn it on.
90 Chapter 12 Calendar
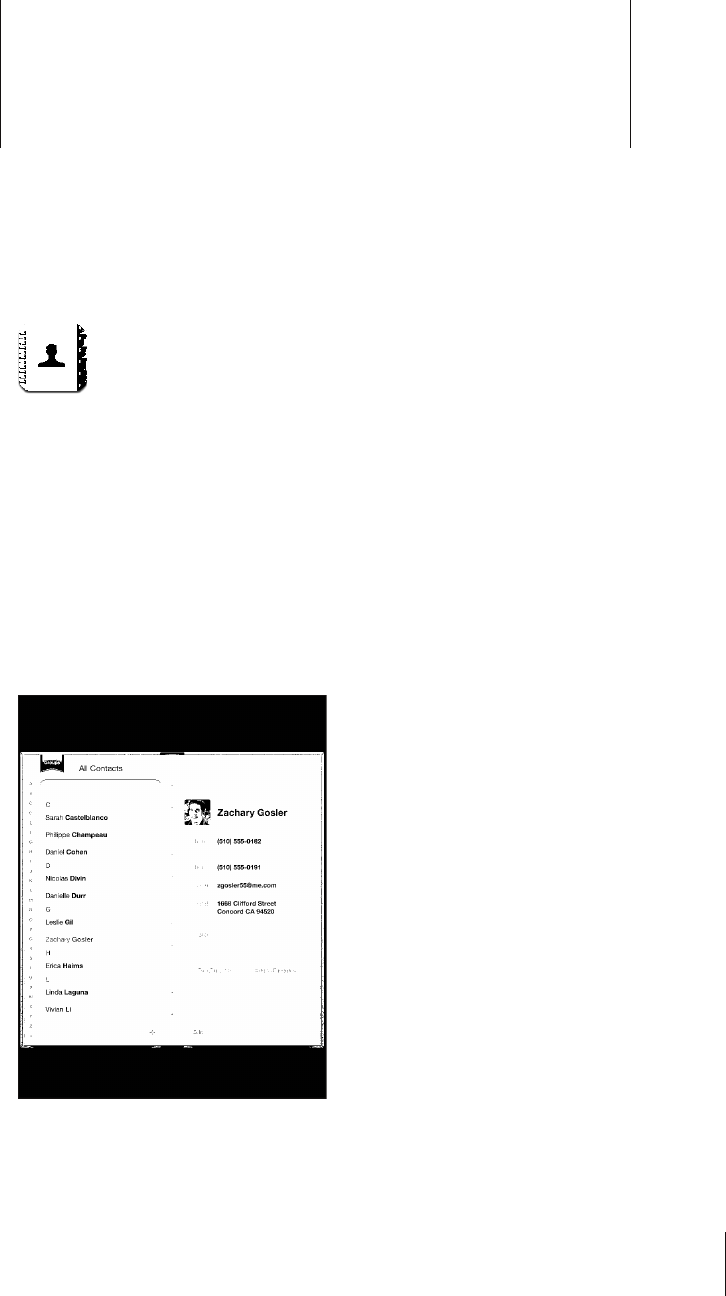
Contacts 13
About Contacts
iPad lets you easily access and edit your contact lists from personal, business, and
organizational accounts. You can search across all of your groups, and the information
in Contacts is automatically accessed to make addressing emails quick and easy.
You can add contacts directly on iPad, or sync contacts from applications on your
computer. If you have a MobileMe or Microsoft Exchange account with Contacts
enabled, or a supported CardDAV account, you can sync your contacts over the air
without connecting iPad to your computer.
91

Syncing and Adding Contacts
You can add contacts to iPad in these ways:
Enter contacts on iPad
In iTunes, sync contacts from Google or Yahoo!, or sync with applications on your
computer (see “Syncing with iTunes” on page 24)
Set up a MobileMe or Microsoft Exchange account on iPad with Contacts enabled
(see “Adding Mail, Contacts, and Calendar Accounts” on page 31)
+PUVCNNCRTQ°NGVJCVUGVUWRCP'ZEJCPIGCEEQWPVYKVJ%QPVCEVUGPCDNGFUGG
“Setting Up Microsoft Exchange Accounts” on page 172)
Set up an LDAP or CardDAV account on iPad to access business or school directories
(see “LDAP and CardDAV Accounts” on page 173)
Searching Contacts
;QWECPUGCTEJ°TUVNCUVCPFEQORCP[PCOGUKP[QWTEQPVCEVUQPK2CF+H[QWJCXGC
Microsoft Exchange account on iPad, you may also be able to search your enterprise
Global Address List (GAL) for contacts in your organization. If you have an LDAP
account on iPad, you can search contacts on your organization’s LDAP server. If you
have a CardDAV account, you can search contacts synced to iPad, or searchable
contacts on a supported CardDAV server.
When you enter search information, contacts with matching information appear as
you type.
Search contacts: +P%QPVCEVUVCRVJGUGCTEJ°GNFCVVJGVQRQHVJGUETGGPCPFGPVGTC
°TUVNCUVQTEQORCP[PCOG6QUETQNNSWKEMN[VQVJGVQRQHVJGNKUVVCRVJGUVCVWUDCT
Search a GAL: 6CR)TQWRUVCRVJG'ZEJCPIGUGTXGTPCOGVJGPGPVGTC°TUVNCUVQT
company name.
You can’t edit GAL contacts or save them to iPad.
Search an LDAP server: 6CR)TQWRUVCRVJG.UGTXGTPCOGVJGPGPVGTC°TUVNCUV
or company name.
You can’t edit LDAP contacts or save them to iPad.
Search a CardDAV server: Tap Groups, tap the searchable CardDAV group at the
bottom of the list, then enter your search.
You can’t edit searchable CardDAV contacts from the server, but you can edit synced
CardDAV contacts on iPad.
92 Chapter 13 Contacts

Managing Contacts
You can edit your contacts and mark as favorites the ones you use frequently
with FaceTime.
Add a contact on iPad: Tap Contacts, then tap .
Delete a contact In Contacts, choose a contact, then tap Edit.
Scroll down, then tap Delete Contact.
Add a contact to FaceTime Favorites In Contacts, choose a contact, then tap Favorites.
Edit FaceTime Favorites In FaceTime, tap Favorites, then tap Edit. To delete
an item, tap .
Edit contact information In Contacts, choose a contact, then tap Edit. To
add an item, tap . To delete an item, tap .
Assign a photo to a contact:
1 Tap Contacts, then choose a contact.
2 Tap Edit and tap Add Photo, or tap the existing photo.
3 Tap an album, then tap a photo.
4 Drag and scale the photo.
5 Tap Choose.
Using Contact Information
You can use the information on a contact’s Info screen to:
Create an email message in Mail, addressed to the contact
Open the contact’s home page in Safari
Find the location of the contact’s address in Maps, and get directions
Share the contact information with others
Call a contact using FaceTime
Use a contact’s info screen: Tap Contacts and choose a contact, then tap an item.
Placing a FaceTime call: Tap Contacts and choose a contact, then tap FaceTime and
choose an email address or phone number to use for the call. If you don’t see the
FaceTime button, turn on FaceTime in Settings > FaceTime.
93
Chapter 13 Contacts

7PK°GF%QPVCEVU
When you sync contacts with multiple accounts, you might have entries for the same
person in more than one account. To keep redundant contacts from appearing in the
#NN%QPVCEVUNKUV[QWECPNKPMEQPVCEVUVJCVJCXGVJGUCOG°TUVCPFNCUVPCOGDWVPQV
CFKÒGTGPVRTG°ZUWÓZQTOKFFNGPCOGCPFFKURNC[VJGOCUCUKPINGWPK°GFEQPVCEV.
9JGP[QWXKGYCWPK°GFEQPVCEVVJGVKVNG7PK°GF+PHQCRRGCTUCVVJGDQVVQOQHVJG
EQPVCEV¨UGPVT[7PK°GFEQPVCEVUCRRGCTQPN[YJGP[QWXKGYVJG#NN%QPVCEVUNKUV
Link contacts: (KPFVJG°TUVEQPVCEVVJCV[QWYCPVVQNKPMVJGPVCR'FKV6CR and
select the other contact, then tap Link.
When a contact is linked, tap the silhouette icon to view, add, or delete linked entries.
.KPMGFEQPVCEVUCTGP¨VOGTIGF7PNGUU[QWGFKVCWPK°GFEQPVCEVVJGEQPVCEVKPGCEJ
UQWTEGCEEQWPVTGOCKPUUGRCTCVG+H[QWEJCPIGKPHQTOCVKQPKPCWPK°GFEQPVCEVVJG
changes are copied to each source account that information already exists in. If you
CFFKPHQTOCVKQPVQCWPK°GFEQPVCEVVJCVKPHQTOCVKQPKUCFFGFVQVJGEQPVCEVKPGCEJ
source account.
94 Chapter 13 Contacts
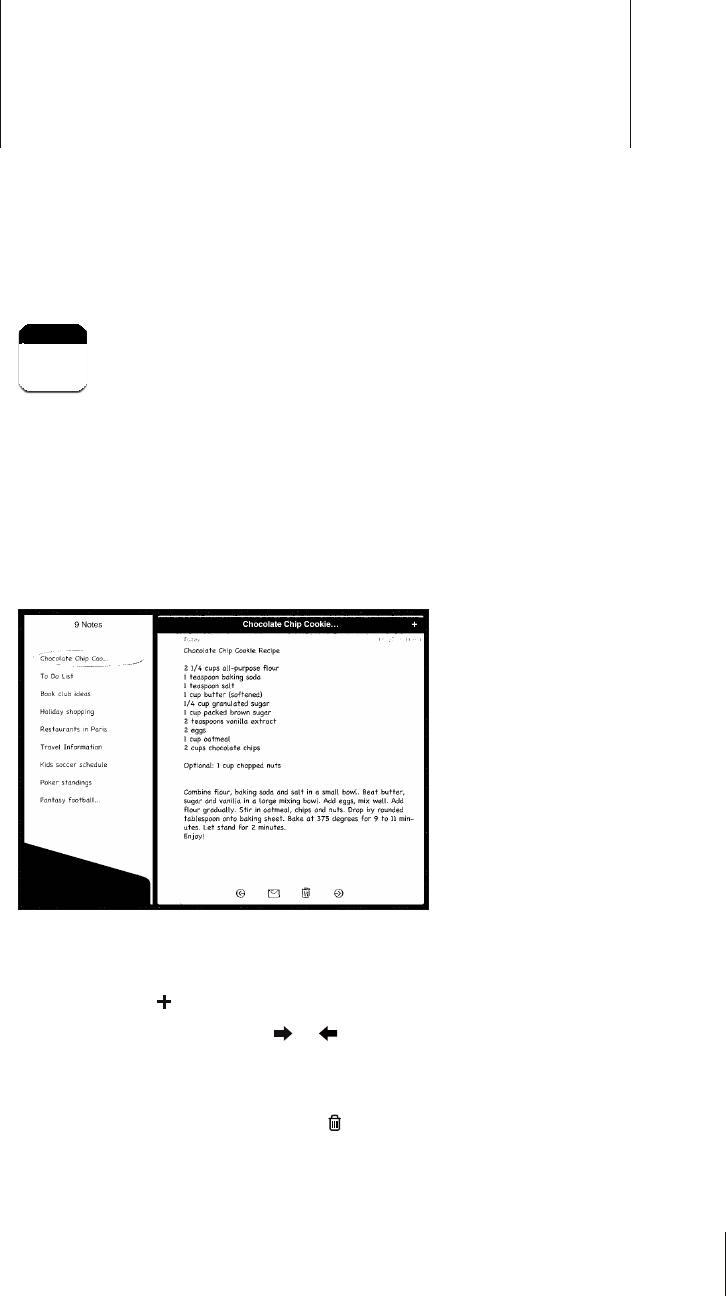
Notes 14
Writing and Reading Notes
9KVJKVUNCTIGFKURNC[CPFQPUETGGPMG[DQCTFK2CFOCMGULQVVKPIPQVGUGCU[
You can view notes in landscape or portrait orientation. In portrait orientation, tap
Notes to view a list of your notes. In landscape orientation, the list of notes appears on
the left, and the current note is circled in red.
0QVGUCTGNKUVGFD[NCUVOQFK°GFFCVGYKVJVJGOQUVTGEGPVPQVGCVVJGVQR6JGNKUV
UJQYUVJG°TUVHGYYQTFUQHGCEJPQVG6CRCPQVGKPVJGNKUVVQXKGYQTGFKVKV
Add a note: Tap , type the note, then tap Done.
Read a note: Tap the note. Tap or to see the next or previous note.
Edit a note: Tap anywhere on the note to bring up the keyboard. Edit the note, then
tap Done.
Delete a note: Tap the note, then tap .
Change the font used to display notes: In Settings, choose Notes and select a font
from the list.
95

Searching Notes
;QWECPUGCTEJVJGVGZVQHPQVGUVQ°PFCRCTVKEWNCTPQVG
Search for notes: 'PVGTVGZVKPVJGUGCTEJ°GNFVJCVCRRGCTUCVVJGVQRQHVJGPQVGUNKUV
(In portrait orientation, tap Notes to display the notes list.)
Search results appear automatically as you type. Tap the keyboard button to dismiss
the keyboard and see more results. To view a note, tap it in the search results list.
Emailing Notes
Email a note: Tap the note, then tap .
To email a note, iPad must be set up for email. See “Setting Up Email Accounts” on
page 53.
Syncing Notes
You can set iTunes to automatically sync your notes with some email applications.
See “Setting Up Syncing” on page 24.
You can also sync notes over the air, when iPad has an Internet connection. Go to
Settings > Notes, then select the default mail account for syncing notes. New notes
you create on iPad will be stored in the account you select. To view notes stored in a
URGEK°ECEEQWPVQRGP0QVGUCPFVCR#EEQWPVU
96 Chapter 14 Notes
Maps 15
About Maps
Maps provides classic, satellite, hybrid, and terrain views of locations in many countries.
Search for a location, then get detailed driving, public transit, or walking directions, as
YGNNCUVTCÓEKPHQTOCVKQP
WARNING: For important information about driving and navigating safely, see the
Important Product Information Guide at support.apple.com/manuals/ipad.
To use Maps, iPad must have an Internet connection. See “Connecting to the
Internet” on page 29.
Important: Maps, directions, and location-based apps provided by Apple depend
QPFCVCUGTXKEGURTQXKFGFD[VJKTFRCTVKGU6JGUGFCVCUGTXKEGUCTGUWDLGEVVQEJCPIG
and may not be available in all geographic areas, resulting in maps, directions, or
location-based information that may be unavailable, inaccurate, or incomplete.
Compare the information provided on iPad to your surroundings, and defer to posted
signs to resolve any discrepancies. To provide your location, data is collected which
doesn’t identify you personally. If you don’t want this data collected, don’t use the
HGCVWTG0QVWUKPIVJKUHGCVWTGFQGUP¨VCÒGEVVJGPQP£NQECVKQPDCUGFHWPEVKQPCNKV[QH
your iPad.
+HNQECVKQPUGTXKEGUKUVWTPGFQÒYJGP[QWQRGP/CRU[QWOC[DGCUMGFVQVWTPKV
on. You can use Maps without turning on location services. See “Location Services” on
page 153 .
Finding and Viewing Locations
;QWECPUGCTEJHQTNQECVKQPU°PF[QWTEWTTGPVNQECVKQPFTQRCRKPVQOCTMCNQECVKQP
CPFIGVFKÒGTGPVOCRXKGYUKPENWFKPI)QQING5VTGGV8KGYU
97
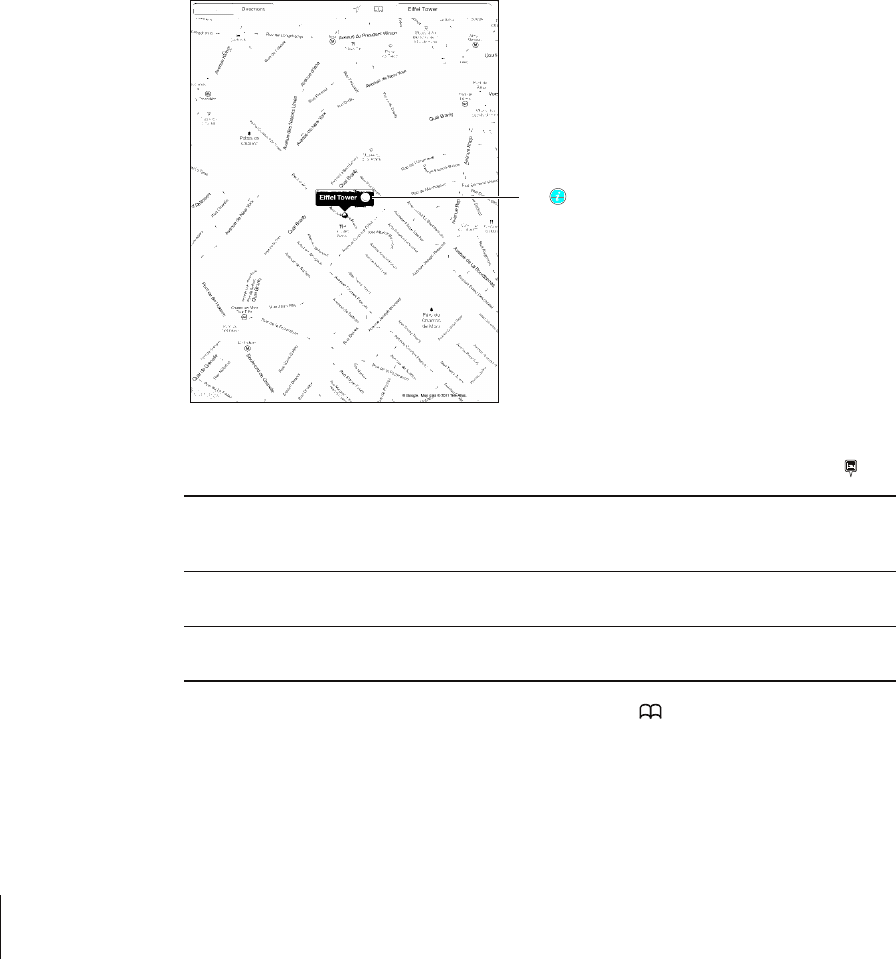
Searching for Locations
You can search for locations in many ways—by address, intersection, area, landmark,
bookmark, contact, or zip code.
Find a location and see a map:
1 6CRVJGUGCTEJ°GNFVQDTKPIWRVJGMG[DQCTF
2 Type an address or other search information.
3 Tap Search.
A pin marks the location.
;HW[VNL[
PUMVYTH[PVUHIV\[
[OLSVJH[PVUNL[
KPYLJ[PVUZHKK[OL
SVJH[PVU[V`V\Y
IVVRTHYRZVY
JVU[HJ[ZSPZ[VY
LTHPSHSPUR[V
.VVNSL4HWZ
A location can include places of interest added by Google My Maps users (“User-
created content”), and sponsored links that appear as special icons (for example, ).
Zoom in 2KPEJVJGOCRYKVJVYQ°PIGTU1TFQWDNGVCRVJGRCTV
you want to zoom in on. Double-tap again to zoom in
even closer.
Zoom out 2KPEJ[QWT°PIGTUCRCTVQPVJGOCR1TVCRVJGOCRYKVJ
VYQ°PIGTU6CRYKVJVYQ°PIGTUCICKPVQ\QQOQWVHWTVJGT
Pan or scroll &TCIWRFQYPNGHVQTTKIJVVQXKGYCFKÒGTGPVRCTVQH
the map.
See the location of an entry in your Contacts list: Tap at the top of the screen and
choose a contact.
The contact must include at least one address. If the contact has more than one address,
EJQQUGVJGQPGVQNQECVG;QWECPCNUQVCRCPCFFTGUUKP%QPVCEVUVQ°PFCNQECVKQP
98 Chapter 15 Maps

Finding Your Current Location
#SWKEMVCR°PFU[QWTEWTTGPVNQECVKQP6JGQPUETGGPFKIKVCNEQORCUUUJQYUYJKEJ
direction you’re facing.
Find your current location: Tap in the status bar at the top of the screen.
A blue marker shows your current location. If Maps can’t determine your exact
location, a blue circle appears around the marker. The size of the circle depends on
how precisely your location can be determined—the smaller the circle, the greater
the precision.
If you drag the map, then tap again, iPad centers the map back to your current
location.
Use the digital compass: Tap a second time. changes to and a small digital
compass CRRGCTUQPUETGGP7UGVJGFKIKVCNEQORCUUVQ°PFYJKEJFKTGEVKQP
you’re heading.
Note: ;QWPGGFVQECNKDTCVGVJGEQORCUUVJG°TUVVKOG[QWWUGKVCPF[QWOC[PGGFVQ
calibrate it occasionally after that.
Calibrate the compass: When the calibrate U[ODQNCRRGCTUYCXGK2CFKPC°IWTG
eight. You may be asked to move away from a source of interference.
See which way you’re facing: Hold iPad level to the ground. The compass rotates to
point north.
Return to map view: Tap to go back to the map view.
iPad uses Location Services to determine your location. Location Services uses
available information from local Wi-Fi networks if you have Wi-Fi turned on. This
feature isn’t available in all areas.
;QWTEWTTGPVNQECVKQPECP¨VDGHQWPFKH.QECVKQP5GTXKEGUKUVWTPGFQÒUQ[QWOC[DG
prompted to turn it on. See “Location Services” on page 153.
9JGP[QW¨TGPQVWUKPI.QECVKQP5GTXKEGU[QWECPVWTPKVQÒVQEQPUGTXGDCVVGT[RQYGT
In Settings, choose General > Location Services.
Get information about your current location: Tap the blue marker, then tap . iPad
displays the address of your current location, if available. You can use this information to:
Get directions to or from this location
Add the location to contacts
Send the address in email
Bookmark the location
See a street view (when available)
99
Chapter 15 Maps
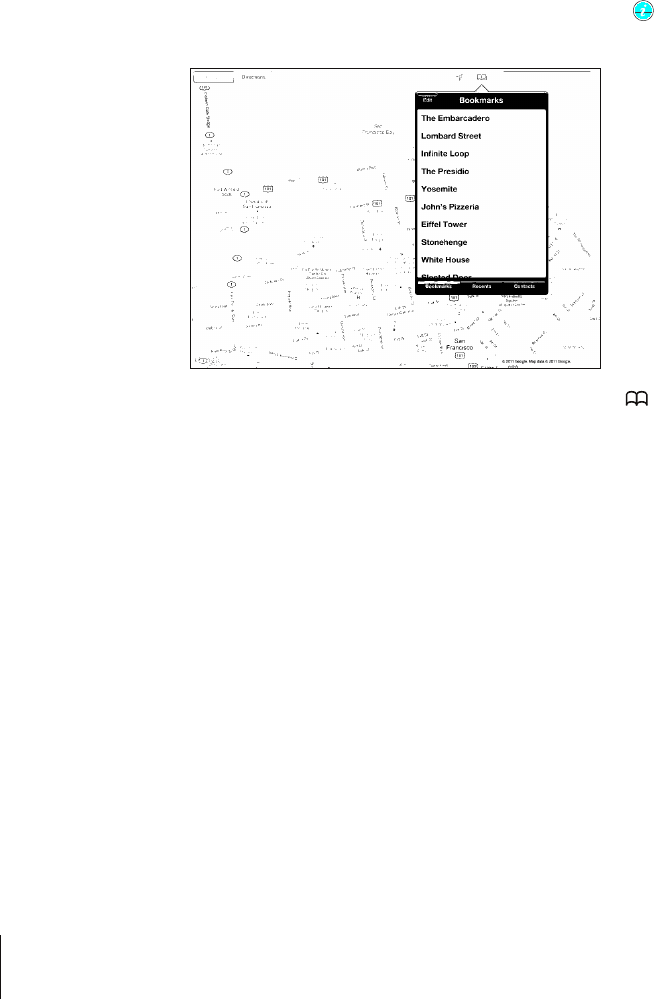
Marking a Location with a Drop Pin
A drop pin lets you mark a location by hand.
Drop a pin: Touch and hold any location on the map. Or, you can drag or tap the
lower-right corner of the screen, then tap Drop Pin.
A pin drops on the map. Touch and hold the pin, then drag it to any location you choose.
Bookmarking Locations
;QWECPDQQMOCTMCP[NQECVKQPVJCV[QWYCPVVQ°PFNCVGT
Bookmark a location: Find a location, tap the pin, tap next to the name or
description, then tap “Add to Bookmarks.”
See a bookmarked or recently viewed location: Tap at the top of the screen, then
tap Bookmarks or Recents.
Clear the list of recents: Tap Clear.
Rearrange or delete a bookmark: Tap Edit.
100 Chapter 15 Maps
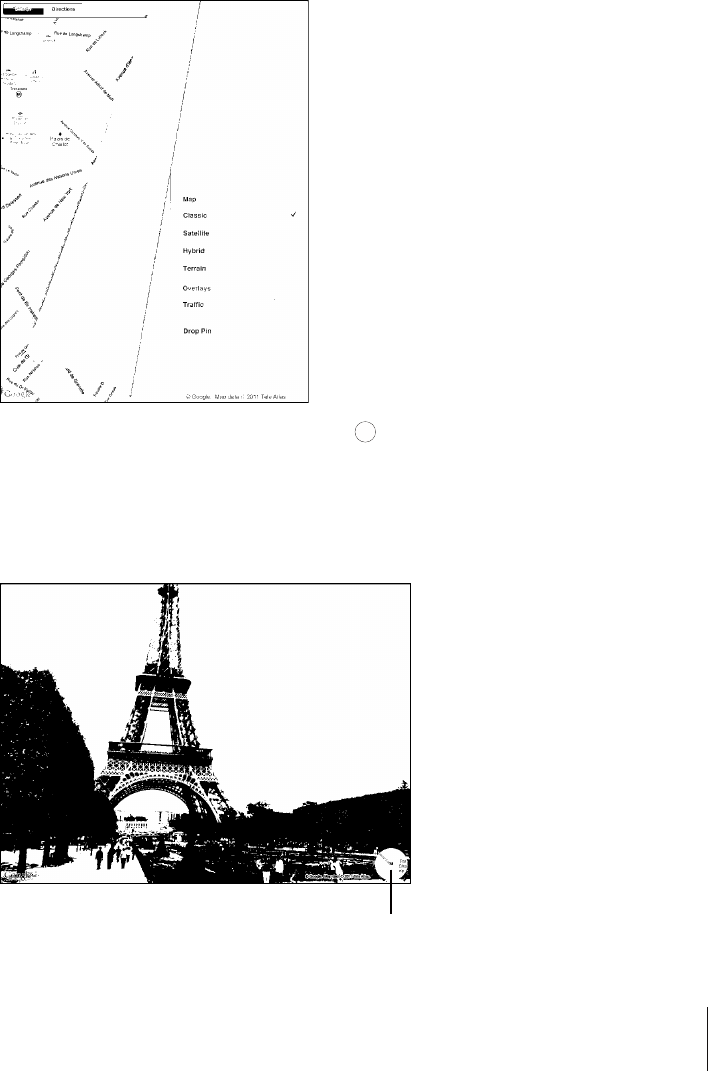
Map Views
You can choose classic, satellite, hybrid, or terrain view. You can also see a location in
street view, when available.
Change the view: Tap or drag the bottom-right corner of the screen, then tap Classic,
Satellite, Hybrid, or Terrain.
See a street view: Tap a drop pin, then tap ;QWECP±KEMWRQTFQYPQTNGHVQT
right, to pan through the 360° panoramic view. The inset in the lower-right corner
shows your current view. Tap an arrow to move down the street. Street view isn’t
available in all areas.
To return to map view, tap the inset.
;HW[VYL[\YU[VTHW]PL^
101
Chapter 15 Maps

Getting Directions
You can get step-by-step driving, public transit, or walking directions.
Get directions:
1 Tap Directions.
2 6CRVJG°GNFUCVVJGVQRQHVJGUETGGPVQGPVGT[QWTUVCTVKPICPFGPFKPINQECVKQPU
Normally, iPad starts with your current location (if available).
If an address is in your contacts list, tap , choose the contact, and tap Directions
To Here or Directions From Here.
Tap to reverse the directions.
3 Select directions for driving ( ), public transit ( ), or walking ( ) at the bottom of
the screen.
The available travel options depend on the route.
4 Do one of the following:
To view directions one step at a time, tap Start, and then tap to see the next leg of
the trip. Tap to go back.
To view the directions in a list, tap Start, and then tap . Tap any item in the list
to see a map showing that leg of the trip. Tap Route Overview to return to the
overview screen.
;QWECPCNUQIGVFKTGEVKQPUD[°PFKPICNQECVKQPQPVJGOCRVCRRKPIVJGRKPVJCV
points to it, tapping , then tapping Directions To Here or Directions From Here.
Get reverse directions: Tap to switch the start and end points.
See recently viewed directions: Tap KPVJGUGCTEJ°GNFVJGPVCR4GEGPVU
See driving or walking directions: Tap or .
If you’re driving or walking, the approximate distance and travel time appear onscreen.
+HVTCÓEFCVCKUCXCKNCDNGVJGFTKXKPIVKOGCFLWUVUCEEQTFKPIN[
See public transit directions: Tap .
Tap to set your departure or arrival time, and to choose a schedule for the trip.
Tap Start, then tap to see the Route Overview screen. From there, you see the
estimated arrival time, total fare, information about each leg of the trip, and the
mode of transportation—including where you need to walk.
102 Chapter 15 Maps

5JQYKPI6TCÓE%QPFKVKQPU
9JGPCXCKNCDNG[QWECPUJQYVTCÓEEQPFKVKQPUHQTOCLQTUVTGGVUCPFJKIJYC[UQP
the map.
5JQYQTJKFGVTCÓEEQPFKVKQPUTap or drag the bottom-right corner of the screen,
VJGPVWTP6TCÓEQPQTQÒ
.YLLU$WVZ[LK
ZWLLKSPTP[
@LSSV^$ZSV^LY
[OHU[OLWVZ[LK
ZWLLKSPTP[
9LK$Z[VWHUKNV
5VTGGVUCPFJKIJYC[UCTGEQNQTEQFGFCEEQTFKPIVQVJG±QYQHVTCÓE+HCUVTGGVQT
JKIJYC[KUITC[VTCÓEFCVCKUP¨VCXCKNCDNG
+H[QWFQP¨VUGGVTCÓEEQPFKVKQPU\QQOQWVVQUGGOCLQTTQCFU6TCÓEEQPFKVKQPUCTG
not available in all areas.
Finding and Contacting Businesses
Find businesses in an area:
1 Find a location—for example, a city or a street address—or scroll to a location on
the map.
2 6[RGVJGMKPFQHDWUKPGUUKPVJG5GCTEJ°GNFCPFVCR5GCTEJQPVJGMG[DQCTF
Pins appear for matching locations in the area. For example, if you locate your city and
then type “movies” and tap Search, pins mark movie theaters in your city.
Tap the pin that marks a business to see its name or description.
(KPFDWUKPGUUGUYKVJQWV°TUV°PFKPIVJGNQECVKQPType things like:
restaurants san francisco ca
apple inc new york
103
Chapter 15 Maps
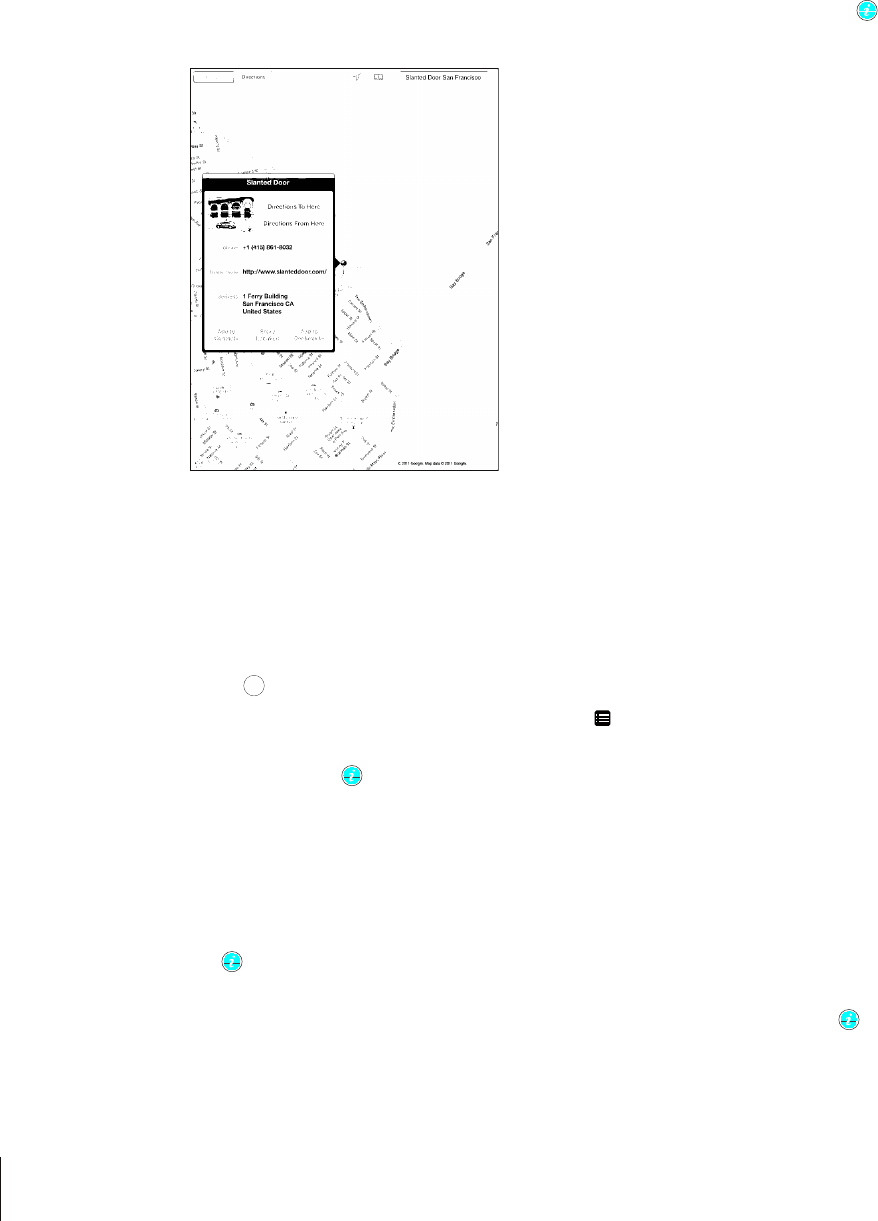
Contact a business or get directions: Tap the pin that marks a business, then tap
next to the name.
From there, you can do the following:
6CR&KTGEVKQPU6Q*GTGQT&KTGEVKQPU(TQO*GTGVQ°PFFKTGEVKQPU
Tap Home Page to visit the website, or Email to send an email.
Tap “Add to Contacts,” and then tap “Create New Contact” or “Add to Existing
Contact.”
Share the location of the business by email.
Tap to see a street view.
See a list of businesses found in the search: Tap KPVJGUGCTEJ°GNF
Choose a business from the Results list to see its location. Tap the pin that marks a
business, then tap next to the business to see its information.
Sharing Location Information
You can add a location to your contacts. You can also send links to a map location
in email.
Add a location to your contacts list: Find a location, tap the pin that points to it,
tap next to the name or description, tap “Add to Contacts,” and then tap “Create
New Contact” or “Add to Existing Contact.”
Email a link to a map location: Find a location, tap the pin that points to it, tap ,
and then tap Share Location.
104 Chapter 15 Maps

iPod 16
Adding Music and More to iPad
Browse your music collection by song, artist, album, genre, or composer. Listen to your
songs, audiobooks, and podcasts. Create and manage playlists, or use Genius to create
playlists for you. Stream your music, podcasts, or audiobooks wirelessly to an Apple TV
using AirPlay.
There are two ways to get music and other content onto iPad:
Transfer content by syncing it from iTunes on your computer. You can sync all of
[QWTOWUKEQT[QWECPUGNGEVURGEK°EUQPIURQFECUVUCPFK6WPGU7EQNNGEVKQPU5GG
“Syncing with iTunes” on page 24.
Use the iTunes Store on iPad to purchase and download songs, albums, TV shows,
movies, music videos, and audiobooks. You can also stream and download audio
and video podcasts, as well as iTunes U content. After listening to a podcast or
watching a TV show, you can tap a link to get more episodes from the iTunes Store.
See Chapter 17, “iTunes Store,” on page 113 .
Playing Music and Other Audio
Listen to audio using the built-in speaker. You can also attach wired headphones to the
headphones port, or pair wireless Bluetooth headphones. Sound doesn’t come out of
the speaker when you attach or pair headphones.
WARNING: For important information about avoiding hearing loss, see the
iPad Important Product Information Guide at support.apple.com/manuals/ipad.
Playing Songs
Browse your collection: Tap Music, Podcasts, Audiobooks, iTunes U, or Purchased. At
the bottom of the screen, tap Songs, Artists, Albums, Genres, or Composers to browse.
105
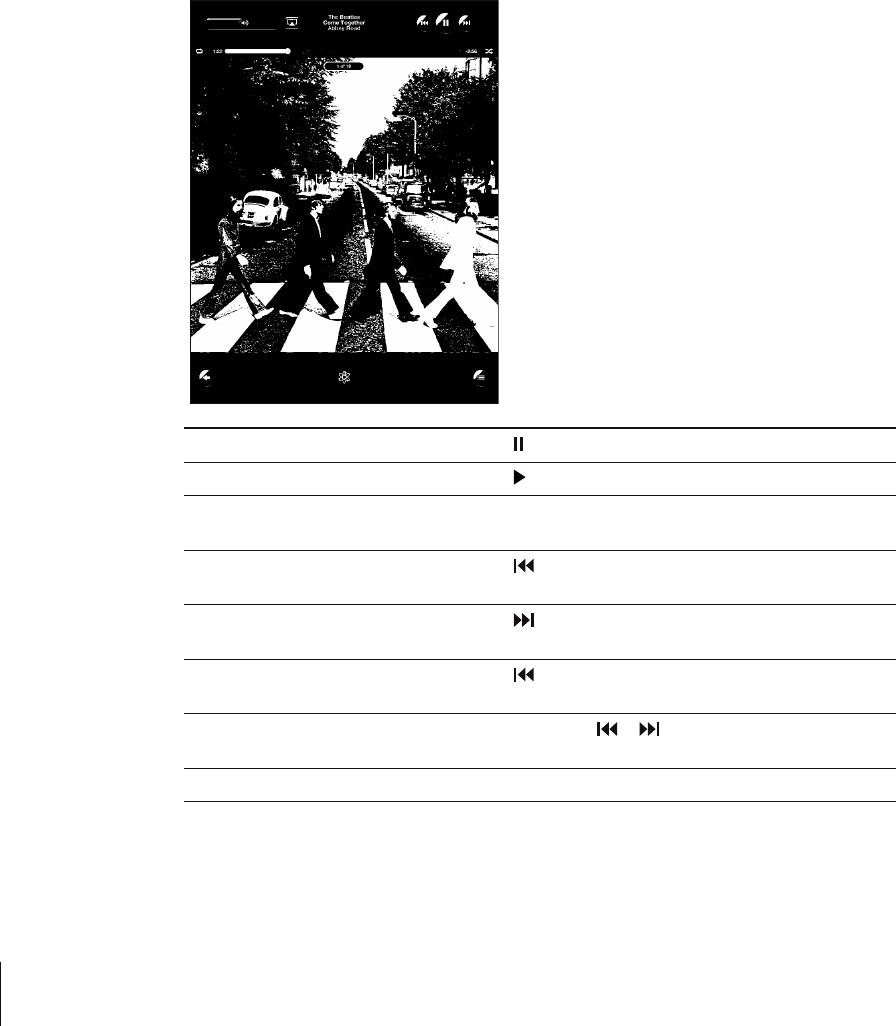
Browse Genius playlists or Genius Mixes: Tap Genius or Genius Mixes. If Genius
doesn’t appear, you may need to turn on Genius in iTunes, then sync iPad. See “Making
Genius Playlists” on page 110 .
Play a song: Tap the song.
Controlling Song Playback
When you play a song, the Now Playing screen appears.
Pause a song Tap .
Resume playback Tap .
Raise or lower the volume Drag the onscreen volume slider or use the iPad
volume buttons.
Restart a song or a chapter in an
audiobook or podcast
Tap .
Skip to the next song or chapter in
an audiobook or podcast
Tap .
Go to the previous song or chapter
in an audiobook or podcast
Tap twice.
Rewind or fast-forward Touch and hold or —the longer you hold the
control, the faster the song rewinds or fast-forwards.
View album art full-size Tap the album cover when playing a song.
You can display playback controls when you’re listening to music and using another
app—or even when iPad is locked.
106 Chapter 16 iPod
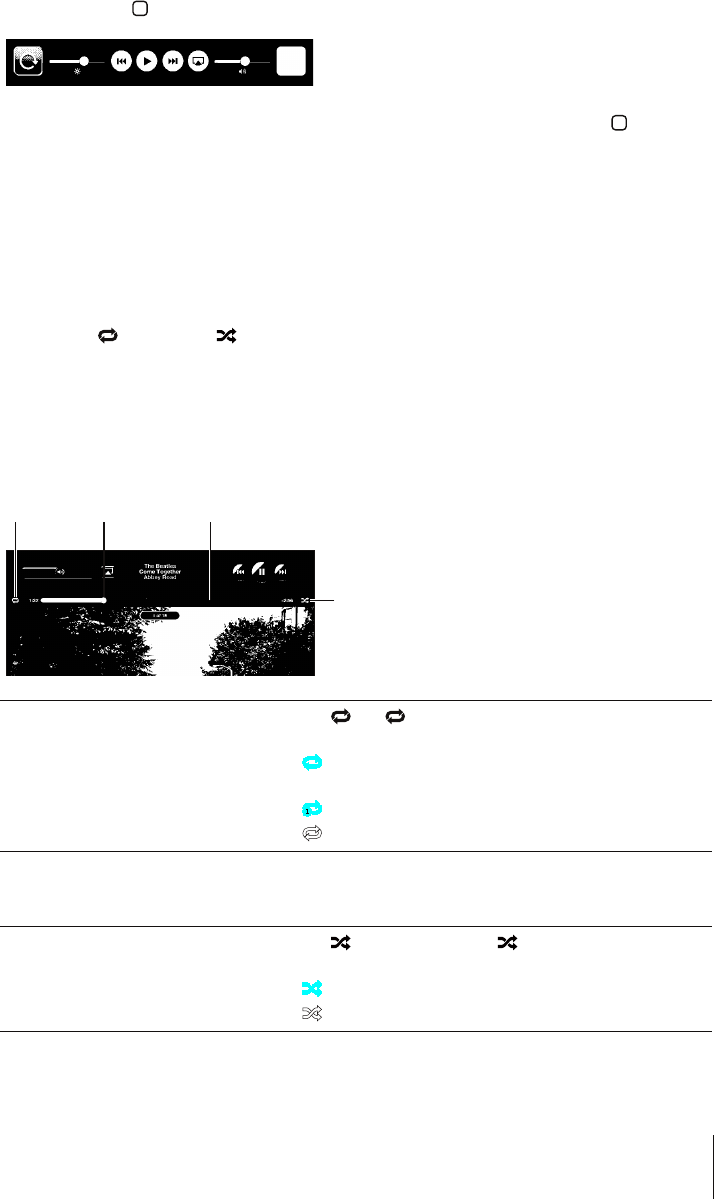
Display audio playback controls from another app or from the Lock screen: Double-
click the Home DWVVQPVJGP±KEMHTQONGHVVQTKIJVCNQPIVJGDQVVQOQHVJGUETGGP
After using the controls, tap iPod to go your iPod library or click the Home button to
return to the app you were using.
If iPad is locked, the controls appear at the top of the screen and then disappear after
[QW°PKUJWUKPIVJGO
Additional Song Controls
From the Now Playing screen, tap the album cover to see the controls.
The repeat CPFUJWÔG controls appear along with the scrubber bar. You can see
elapsed time, remaining time, and the song number.
Drag the playhead along the scrubber bar to skip to any point in the song. You can
CFLWUVVJGUETWDTCVGHTQOJKIJURGGFVQ°PGD[UNKFKPI[QWT°PIGTFQYPCU[QWFTCI
the playhead along the scrubber bar. The scrub rate becomes slower the farther down
[QWUNKFG[QWT°PIGT
9LWLH[ 7SH`OLHK :JY\IILYIHY
:O\MMSL
Set iPad to repeat songs Tap . Tap again to set iPad to repeat only the
current song.
= iPad is set to repeat all songs in the current album
or list.
= iPad is set to repeat the current song over and over.
= iPad isn’t set to repeat songs.
Skip to any point in a song Drag the playhead along the scrubber bar. Slide your
°PIGTFQYPVQCFLWUVVJGUETWDTCVG6JGUETWDTCVG
DGEQOGUUNQYGTVJGHCTVJGTFQYP[QWUNKFG[QWT°PIGT
5GVK2CFVQUJWÔGUQPIU Tap VQUJWÔGUQPIU6CR again to set iPad to play
songs in order.
K2CFKUUGVVQUJWÔGUQPIU
= iPad is set to play songs in order.
107
Chapter 16 iPod
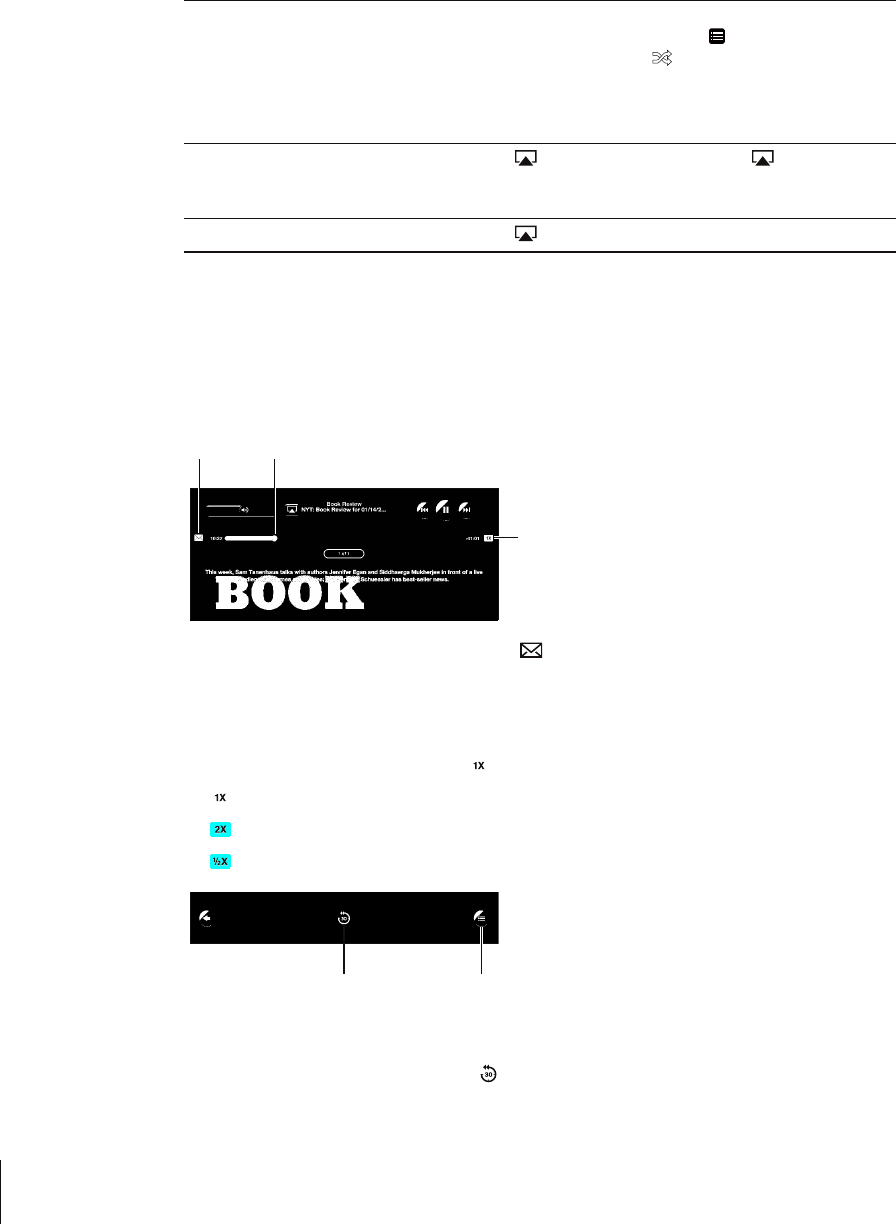
5JWÔGVJGVTCEMUKPCP[RNC[NKUV
album, or other list of songs
From the Now Playing screen, tap the album art to show
the song controls onscreen. Tap at the bottom of the
UETGGPVJGPVCR5JWÔG at the top of the list of songs.
9JGVJGTQTPQVK2CFKUUGVVQUJWÔGKH[QWVCR5JWÔGCV
the top of a list of songs, iPad plays the songs from that
list in random order.
Play music on an AirPlay sound system
or Apple TV
Tap and choose a sound system. If doesn’t appear
or if you don’t see the AirPlay system you’re looking for,
make sure it’s on the same wireless network.
Switch from AirPlay back to iPad Tap and choose iPad from the list.
Podcast and Audiobook Controls
From the Now Playing screen, tap the podcast or audiobook cover to see the controls.
The email control and playback speed control appear along with the scrubber bar.
You can see elapsed time, remaining time, and the episode or chapter number. The
scrubber bar lets you skip to any point in the podcast or audiobook.
,THPS 7SH`OLHK
7SH`IHJR
ZWLLK
Send an email link to this podcast: Tap .
Skip to any point: &TCIVJGRNC[JGCFCNQPIVJGUETWDDGTDCT#FLWUVVJGUETWDTCVG
HTQOJKIJURGGFVQ°PGD[UNKFKPI[QWT°PIGTFQYPCU[QWFTCIVJGRNC[JGCFCNQPI
VJGUETWDDGTDCT6JGUETWDTCVGDGEQOGUUNQYGTVJGHCTVJGTFQYP[QWUNKFG[QWT°PIGT
Change the playback speed: Tap to change the speed.
= Play at normal speed
= Play at double speed
= Play at half speed
;YHJRSPZ[
ZLJVUK
YLWLH[
The 30-second repeat control and track list control appear at the bottom of the screen.
Play back the last 30 seconds: Tap .
108 Chapter 16 iPod

See other podcasts in a series or chapters in an audiobook: Tap . Tap the podcast or
audiobook thumbnail to return to the Now Playing screen.
Viewing All Tracks on an Album
See all the tracks on the album that contains the current song: On the Now Playing
screen, tap . Tap a track to play it. Tap the album thumbnail to return to the Now
Playing screen.
In track list view, you can assign ratings to songs. You can use ratings to create smart
playlists in iTunes that dynamically update to include, for example, your highest
rated songs.
Rate a song: &TCI[QWTVJWODCETQUUVJGTCVKPIDCTVJG°XGFQVUWPFGTVJGRNC[JGCF
VQIKXGVJGUQPI\GTQVQ°XGUVCTU
Searching Music
You can search the titles, artists, albums, and composers of songs, podcasts, and other
content you’ve synced to iPad.
Search music, podcasts, audiobooks, or other content in your library: Enter text in the
UGCTEJ°GNFCVVJGVQRQHCUQPINKUVRNC[NKUVCTVKUVNKUVQTQVJGTXKGYQH[QWTK2QFEQPVGPV
6CRVJGUVCVWUDCTVQUETQNNSWKEMN[VQVJGVQRQHCNKUVCPFTGXGCNVJGUGCTEJ°GNF
Search results appear automatically as you type. Tap Search to dismiss the keyboard
and see more of the results.
You can also use Spotlight to search for music. See “Spotlight Search” on page 157.
Using Playlists
A playlist is a custom compilation of songs. You might want to create a playlist for a
URGEK°EOQQFQTQEECUKQPQTQTICPK\G[QWTOWUKENKDTCT[;QWECPWUGVJTGGMKPFUQH
playlists on iPad—standard playlists, Genius playlists, and Genius Mixes.
Creating Playlists
You can make playlists from the music, podcasts, or audiobooks in your iPod library.
Make a standard playlist:
1 Tap iPod, then tap at the bottom of the screen.
2 Enter a name for the playlist, then tap Save.
3 Tap PGZVVQ[QWTUGNGEVKQPUVJGPVCR&QPGYJGP[QW°PKUJUGNGEVKPI;QWECPCNUQ
tap Sources to browse for selections.
4 9JGP[QW°PKUJVCR&QPG
109
Chapter 16 iPod

You can also make playlists from other categories in your iPod library, such as podcasts
or audiobooks.
When you make a playlist on iPad, the playlist is also saved in the iTunes library on
your computer the next time you sync.
Edit a playlist: Tap the playlist, tap Edit, then do one of the following:
To move a selection higher or lower in the list, drag next to the selection.
To delete a selection, tap next to the selection, then tap Delete. Deleting a song
from a playlist doesn’t delete it from iPad.
To add more songs, tap Add Songs, tap next to the selection, then tap Done.
Clear a playlist: Tap the playlist, tap Edit, then tap .
Making Genius Playlists
)GPKWU°PFUUQPIUKP[QWTK6WPGUNKDTCT[VJCVIQITGCVVQIGVJGT#)GPKWURNC[NKUVKUC
collection of songs that are picked for you to go with a song you choose from your library.
You can create Genius playlists in iTunes and sync them to iPad. You can also create
and save Genius playlists on iPad.
6QWUG)GPKWUQPK2CF°TUVVWTPQP)GPKWUKPK6WPGUVJGPU[PEK2CFYKVJK6WPGU
Genius is a free service, but requires an Apple ID.
110 Chapter 16 iPod

Make a Genius playlist on iPad:
1 Tap , then tap New.
2 Tap a song in the list. Genius creates a playlist of similar songs.
You can also make a Genius playlist of songs that go great with the song you’re
playing. From the Now Playing screen, tap the album cover to display additional
controls, then tap .
Save a Genius playlist: In the playlist, tap Save. The playlist is saved in Genius with the
title of the song you picked.
You can make and save as many Genius playlists as you want. If you save a Genius
playlist created on iPad, it syncs back to iTunes the next time you connect.
Refresh a Genius playlist: In the playlist, tap Refresh.
4GHTGUJKPIC)GPKWURNC[NKUVETGCVGUC)GPKWURNC[NKUVQHFKÒGTGPVUQPIUVJCVIQITGCV
with the song you picked. You can refresh any Genius playlist, whether it was created
in iTunes and synced to iPad, or created on iPad.
Create a Genius playlist from a new song: In the playlist, tap New, then pick a new song.
Delete a saved Genius playlist: Tap the Genius playlist, then tap Delete.
Once a Genius playlist is synced back to iTunes, you won’t be able to delete it directly
from iPad. You can use iTunes to edit the playlist name, stop syncing, or delete the playlist.
Playing Genius Mixes
)GPKWUCWVQOCVKECNN[UGCTEJGU[QWTK2CFNKDTCT[CPF°PFUUQPIUHTQO[QWTNKDTCT[KP
that genre or format. Genius Mixes are recreated each time you listen to them, so
they’re always new and fresh.
)GPKWU/KZGUETGCVGUFKÒGTGPVOKZGUFGRGPFKPIQPVJGXCTKGV[QHOWUKE[QWJCXGKP
your iPad library. For example, you may have Genius Mixes that highlight Classical,
Jazz, or Alternative Rock songs.
Browse Genius Mixes: On the left side of the iPod window (below Genius), tap
Genius Mixes.
Play a Genius Mix: Tap the mix.
111
Chapter 16 iPod

Home Sharing
Home Sharing lets you play music, movies, and TV shows on iPad from the iTunes
library on your Mac or PC.
Note: Booklets, albums, LPs, and other bonus content can’t be shared.
iPad and your computer must be on the same Wi-Fi network. iTunes on your computer
must be open, with Home Sharing turned on and logged in to the same Apple
account as Home Sharing on iPad.
Turn on Home Sharing in iTunes: On your computer, open iTunes and choose
Advanced > Turn On Home Sharing. Enter your Apple ID and password, then click
Create Home Share.
Play music or video on iPad from your iTunes library:
1 In Settings, choose iPod then, under Home Sharing, enter the same Apple ID and
password you used when turning on Home Sharing in iTunes.
2 In iPod, tap More, then tap Shared and choose your iTunes library.
The Playlists, Artists, Songs, and other tabs in iPod now show the content of your
iTunes library, instead of your iPad content.
Return to the content on your iPad: In iPod, tap More, then tap Shared and choose
iPad at the top of the list.
Transferring Content
You can transfer purchases you make on iPad to a computer that’s authorized to play
content from your Apple ID. To authorize the computer, open iTunes on the computer
and choose Store > Authorize This Computer.
Transfer purchased content: Connect iPad to your computer. iTunes asks if you want
to transfer purchased content.
112 Chapter 16 iPod

iTunes Store 17
About the iTunes Store
Use the iTunes Store to add content to your iPad. You can browse and purchase
music and TV shows, buy and rent movies, or download and play podcasts or
iTunes U collections.
/CP[OQXKGUCPF68UJQYUCTGCXCKNCDNGKPDQVJUVCPFCTFCPFJKIJFG°PKVKQP6Q
access the iTunes Store, iPad must have an Internet connection. See “Connecting to the
Internet” on page 29.
Note: The iTunes Store is not available in all regions, and iTunes Store content may
vary across regions.
Transferring Content
You can transfer purchases you make on iPad to a computer authorized to play
content from your Apple ID.
Authorize a computer: Open iTunes on the computer, then choose Store >
Authorize Computer.
Transfer purchased content: %QPPGEVK2CFVQ[QWTEQORWVGTK6WPGUXGTK°GUVJCV
you want to transfer purchased content.
113

Finding Music, Videos, and More
Browse content: At the top of the screen, browse by Genres, Featured, Top Charts,
or Genius. At the bottom of the screen, tap Music, Movies, TV Shows, Podcasts,
Audiobooks, iTunes U, or Downloads.
Search for content: 6CRVJGUGCTEJ°GNFCVVJGVQRQHVJGUETGGPVJGPWUGVJG
onscreen keyboard to enter one or more words. Tap Search on the keyboard. Search
results are grouped by category, such as Movies, Albums, or Podcasts.
Tap an item to see more information. You can read reviews, write your own review,
or email a link about the item to a friend. Depending on the item, you can also buy,
download, or rent it.
Following Artists and Friends
Use iTunes Ping to connect with the world’s music fans. Follow favorite artists to learn
about new releases and upcoming concerts and tours, get an insider’s perspective
VJTQWIJVJGKTRJQVQUCPFXKFGQUCPFNGCTPCDQWVVJGKTOWUKECNKP±WGPEGU4GCF
friends’ comments about the music they’re listening to, and see what they’re buying
and which concerts they plan to attend. Express your musical likes and post comments
for your own followers.
6QETGCVGCPFGZRNQTGOWUKECNEQPPGEVKQPU[QWPGGFVQETGCVGCRTQ°NG
%TGCVG[QWTK6WPGU2KPIRTQ°NGOpen the iTunes application on your Mac or PC,
click Ping, and follow the onscreen instructions.
114 Chapter 17 iTunes Store

Explore iTunes Ping on your iPad: 1RGPVJGK6WPGUCRRVCR2KPIVCR/QTG°TUV
if Ping isn’t visible), and then:
Tap Activity to see the latest from the people you follow. Updates include purchases,
reviews, likes, comments, and posts.
Tap People to see who you’re following and who’s following you, and to search for
artists or friends.
6CR/[2TQ°NGVQTGXKGY[QWTRTQ°NGKPHQTOCVKQP
Follow an artist: 6CR(QNNQYQPVJGCTVKUV¨URTQ°NGRCIG
By searching: 6CR2GQRNGGPVGTVJGCTVKUV¨UPCOGKPVJGUGCTEJ°GNFCVVJGVQRQHVJG
page, then tap Search. Tap the artist’s name in the list of results, then tap Follow.
While browsing: 6CR2TQ°NGCVVJGDQVVQOQHCP[CNDWORCIGVJGPVCR(QNNQY
Follow a friend: %JQQUG[QWTUVCTVKPIITQWRQHHTKGPFUYJGP[QWUGVWR[QWTRTQ°NG
using iTunes on your Mac or PC. After that, you can follow friends using Ping on iPad.
By searching: 6CR2GQRNGGPVGT[QWTHTKGPF¨UPCOGKPVJGUGCTEJ°GNFVJGPVCR
Search. Tap your friend’s name in the list of matches, then tap Follow.
While exploring Ping: Tap a person’s name, then tap Follow.
9JGP[QWHQNNQYUQOGQPGVJG[FQP¨VCWVQOCVKECNN[HQNNQY[QW+P[QWTRTQ°NG[QWECP
choose to approve or decline follow requests as they arrive, or simply accept all new
followers without review.
Share your thoughts: As you browse albums and songs, tap Post to comment on a
RKGEGQHOWUKEQTVCR.KMGLWUVVQUC[[QWNKMGKV;QWTHTKGPFUYKNNUGG[QWTVJQWIJVUKP
their iTunes Ping Activity feed.
Share concert plans: 6CR%QPEGTVUQP[QWTRTQ°NGRCIGVQUGGWREQOKPI
performances by the artists you follow, and to see which of your friends are going to a
show. Tap Tickets to buy your own ticket, or tap I’m Going to let others know you’ll be
there too. (Not available in all countries or regions.)
Purchasing Music or Audiobooks
9JGP[QW°PFCUQPICNDWOQTCWFKQDQQM[QWNKMGKPVJGK6WPGU5VQTG[QWECP
purchase and download it to iPad. You can also preview it to make sure it’s what you
want.
To make purchases or write reviews, you need an Apple ID. iPad gets your account
settings from iTunes when you sync. If you don’t have an Apple ID, or if you want to
OCMGRWTEJCUGUHTQOCFKÒGTGPV#RRNG+&IQVQ5GVVKPIU 5VQTG
You don’t need an Apple ID to play or download podcasts or iTunes U classes.
Preview a song: Tap the number in the column, then tap .
Preview an audiobook: Tap the item.
115
Chapter 17 iTunes Store

Purchase and download a song, album, or audiobook:
1 Tap the price and tap Buy.
2 Sign in using your Apple ID if requested, then tap OK.
If you don’t have an Apple ID, tap Create New Apple ID to set one up.
Purchases are charged to your Apple ID. If you make additional purchases within
°HVGGPOKPWVGU[QWFQP¨VJCXGVQGPVGT[QWTRCUUYQTFCICKP
An alert appears if you previously purchased one or more songs from an album.
Tap Buy if you want to purchase the entire album including the songs you already
purchased, or tap Cancel if you want to purchase any remaining songs individually.
Once you purchase an item, it begins downloading. See “Checking Download Status” on
page 117.
Purchased songs are added to the Purchased playlist on iPad (iPod > Purchased). If you
delete the Purchased playlist, iTunes creates a new one when you buy an item from
the iTunes Store.
;QWECPWUGK6WPGU5VQTGIKHVECTFUIKHVEGTVK°ECVGUQTQVJGTRTQOQVKQPCNEQFGUVQ
make purchases. When you sign in to your account, your remaining store credit
appears with your account information at the bottom of most iTunes Store screens.
Enter a redemption code: Tap Music, scroll to the bottom of the screen, tap Redeem,
and follow the onscreen instructions.
Purchasing or Renting Videos
9JGP[QW°PFCOQXKG68UJQYQTOWUKEXKFGQ[QWNKMGKPVJGK6WPGU5VQTG[QWECP
purchase and download it to iPad. You can purchase movies and TV shows in standard
RQTJKIJFG°PKVKQPRHQTOCV+H[QWRWTEJCUGCJKIJFG°PKVKQPXGTUKQP[QW
CNUQTGEGKXGVJGUVCPFCTFFG°PKVKQPXGTUKQP
Preview a video: Tap Preview.
Purchase or rent a video:
1 Tap Buy or Rent.
2 Sign in using your Apple ID if requested, then tap OK.
If you don’t have an Apple ID, tap Create New Apple ID to set one up.
Your purchase is charged to your Apple ID. For additional purchases made within the
PGZV°HVGGPOKPWVGU[QWFQP¨VJCXGVQGPVGT[QWTRCUUYQTFCICKP
Once you purchase an item it begins downloading. Rented movies won’t begin playing
until the download completes. See “Checking Download Status” on page 117.
Purchased videos are added to the Purchased playlist on iPad (iPod > Purchased). If
you delete the Purchased playlist, iTunes creates a new one the next time you buy an
item from the iTunes Store. Purchased videos also appear in the Video app.
116 Chapter 17 iTunes Store

;QWECPWUGK6WPGU5VQTGIKHVECTFUIKHVEGTVK°ECVGUQTQVJGTRTQOQVKQPCNEQFGUVQOCMG
purchases. When you’re signed in using your Apple ID, your remaining store credit
appears with your account information at the bottom of most iTunes Store screens.
Enter a redemption code: Tap Music, then tap Redeem at the bottom of the screen
and follow the onscreen instructions.
Listening to or Watching Podcasts
You can listen to audio podcasts or watch video podcasts on iPad. You can also
download podcasts to iPad, and sync them to the iTunes library on your computer
when you connect.
Tap Podcasts at the bottom of the iTunes Store screen. Browse by Featured or Top
Charts. To see a list of episodes, tap a podcast. The icon indicates video podcasts.
Listen to a podcast: Tap the podcast title.
Download a podcast: Tap the Free button, then tap Get Episode. Downloaded
podcasts appear in the Podcasts list in iPod.
Listen to or watch a podcast you downloaded: In iPod, tap Podcasts, then tap the
podcast. Video podcasts also appear in the Video app.
Get more episodes of the podcast you downloaded: In the Podcasts list in iPod,
tap the podcast, then tap Get More Episodes.
Delete a podcast: In the Podcasts list in iPod, swipe left or right on the podcast, then
tap Delete.
Checking Download Status
You can check the Downloads screen to see the status of in-progress and scheduled
downloads, including purchases you’ve pre-ordered.
See the status of items being downloaded: Tap Downloads.
To pause a download, tap .
If a download is paused or interrupted, iPad starts the download again the next time
it connects to the Internet. Or, if you open iTunes on your computer, iTunes completes
the download to your iTunes library (if your computer has an Internet connection and
is signed in using the same Apple ID).
See the status of pre-ordered items: Tap Downloads.
Pre-ordered items appear in a list until the date the item is released. Tap the item for
release date information. Once the item is available for download, a download icon
appears next to the download.
Download a pre-ordered item: Tap the item, then tap .
117
Chapter 17 iTunes Store

Pre-ordered items aren’t downloaded automatically when they’re released. Return to
the Downloads screen to begin the download.
Some albums include bonus content, which is downloaded to your iTunes library on
your computer. Not all bonus content is downloaded directly to iPad.
Download bonus content: Sign in using your Apple ID. In iTunes, choose Store >
“Check for Available Downloads,” then click Check.
Syncing Content
iTunes automatically syncs everything you download or purchase on iPad to your
iTunes library when you connect iPad to your computer. This lets you access the
downloads on your computer and provides a backup if you delete purchased content
from iPad.
Purchased content is synced to the “Purchased on <name of your iPad>” playlist.
iTunes creates the playlist if it doesn’t exist. iTunes also syncs your purchases to the
Purchased playlist that iTunes uses for purchases you make on your computer, if that
playlist exists and is set to sync with iPad.
Podcasts you download sync to the Podcast list in your iTunes library.
Viewing Apple ID Information
To view iTunes Store information for your Apple ID on iPad, scroll to the bottom of the
screen and tap Sign In. If you’re already signed in, tap Account. Or, go to Settings >
Store and tap View Apple ID. You must be signed in to view your account information.
Verifying Purchases
You can use iTunes on your computer to verify that all the music, videos, apps, and
other items you bought from the iTunes Store or App Store are in your iTunes library.
You might want to do this if a download was interrupted.
Verify your purchases:
1 Make sure your computer has an Internet connection.
2 In iTunes, choose Store > Check for Available Downloads.
3 Enter your Apple ID and password, then click Check.
Purchases not yet on your computer are downloaded.
The Purchased playlist displays your purchases. However, because you can add or
remove items in this list, it might not be accurate. To see all of your purchases, sign in
to your account, choose Store > View My Account, then click Purchase History.
118 Chapter 17 iTunes Store

App Store 18
About the App Store
Use the App Store to add apps to iPad. Browse, purchase, and download apps
URGEK°ECNN[FGUKIPGFHQTK2CFQTHQTK2JQPGCPFK2QFVQWEJ
Apps you download from the App Store and install on iPad are backed up to your
iTunes library the next time you sync. When you sync, you can also install apps on iPad
that you purchase through iTunes on your computer. iPad works with most iPhone and
iPod touch apps, so if you already have apps for your iPhone or iPod touch, you can
sync them to iPad from your Mac or PC. Use them at their original size, or tap in the
lower-right corner of the screen to expand them.
Note: The App Store and some apps are not available in all areas. App availability and
RTKEKPICTGUWDLGEVVQEJCPIG
To use the App Store, iPad must have an Internet connection. See “Connecting to the
Internet” on page 29. You also need an Apple ID (not available in some countries) to
download apps. iPad gets your Apple ID settings from iTunes. If you don’t have an
#RRNG+&QTKH[QWYCPVVQOCMGRWTEJCUGUWUKPICFKÒGTGPV#RRNG+&IQVQ5GVVKPIU
Store. See “Store” on page 170.
119
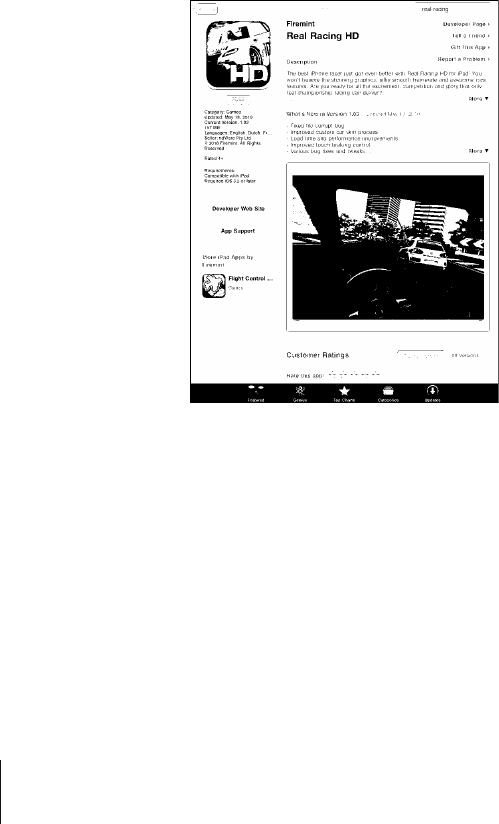
Browsing and Searching
Browse Featured to see new, notable, or recommended apps, or browse Top Charts to
UGGVJGOQUVRQRWNCTCRRNKECVKQPU+H[QW¨TGNQQMKPIHQTCURGEK°ECRRWUG5GCTEJ
Browse apps: Tap Featured, Top Charts, or Categories at the bottom of the screen.
Browse using Genius: Tap Genius to see a list of recommended apps, based on what’s
already in your app collection. To turn Genius on, follow the onscreen instructions.
Genius is a free service, but it requires an Apple ID.
Search for apps: 6CRVJGUGCTEJ°GNFCVVJGVQRQHVJGUETGGPCPFGPVGTQPGQTOQTG
words. Choose from the list of suggestions, or tap Search on the keyboard.
Getting More Information
Tap any app in a list to see the Info screen, which shows the app’s price, screenshots,
and ratings.
Email a link to the app’s Info page: Tap “Tell a Friend” at the top of the screen.
Report a problem: Tap “Report a Problem” at the top of the Info screen. Select a
problem from the list or type your comments, then tap Report.
View screenshots: 5ETQNNFQYPVQVJGUETGGPUJQVUVJGP±KEMNGHVQTTKIJVVQUGG
additional screenshots.
Get ratings and read reviews: Scroll down to “Customer Ratings and Reviews.”
120 Chapter 18 App Store

Buying Apps
9JGP[QW°PFCPCRR[QWYCPVKPVJG#RR5VQTG[QWECPRWTEJCUGCPFFQYPNQCFKV
to iPad. If the app is free, you can download it without charge.
Once you download an app, it’s immediately installed on iPad.
Purchase and download an app:
1 Tap the price, then tap Buy App (or tap Free, then tap Install App).
2 Sign in using your Apple ID if requested, then tap OK.
If you don’t have an Apple ID, tap Create New Apple ID to set one up.
Purchases are charged to your Apple ID. If you make additional purchases within
°HVGGPOKPWVGU[QWFQP¨VJCXGVQGPVGT[QWTRCUUYQTFCICKP
;QWECPWUGK6WPGU5VQTGIKHVECTFUIKHVEGTVK°ECVGUQTQVJGTRTQOQVKQPCNEQFGUVQ
make purchases. When you sign in using your Apple ID, your remaining store credit
appears with your account information at the bottom of most App Store screens.
Enter a redemption code: Tap Featured or Top Charts, scroll to the bottom of the
screen, tap Redeem, then follow the onscreen instructions.
See the status of app downloads: After you begin downloading an app, its icon
appears on the Home screen with a progress indicator.
If a download is interrupted, iPad starts the download again the next time it connects
to the Internet. Or, if you open iTunes on your computer, iTunes completes the
download to your iTunes library (if your computer is connected to the Internet and
signed in using the same Apple ID).
Using Apps
Apps designed for iPad work in any orientation—portrait or landscape. When you use
CPCRRKPNCPFUECRGQTKGPVCVKQPKV°NNUVJGUETGGP
On iPad, you can use apps designed for iPhone or iPod touch at their original size,
or expand them.
Expand an app: Tap in the lower-right corner.
Return an app to its original size: Tap in the lower-right corner.
Some apps let you make purchases within the app. You can restrict in-app purchases
in Settings. See “Restrictions” on page 158 .
121
Chapter 18 App Store

5QOGCRRUWUGRWUJPQVK°ECVKQPUVQCNGTV[QWQHPGYKPHQTOCVKQPGXGPYJGPVJG
CRRKUP¨VTWPPKPI0QVK°ECVKQPUXCT[D[CRRDWVOC[KPENWFGVGZVQTUQWPFCNGTVUQTC
number on the app icon on the Home screen.
Updating Apps
The App Store checks for updates to apps you install. The App Store icon shows the
total number of app updates available.
If an update is available when you access the App Store, the Updates screen appears
immediately. App updates are downloaded and installed when you choose to
update them.
Note: App upgrades are new releases, which you can purchase or download.
Update an app:
1 At the bottom of the screen, tap Updates.
2 Tap an app to see more information about the update.
3 Tap Update.
Update all apps: At the bottom of the screen, tap Updates, then tap Update All.
+H[QWVT[VQWRFCVGCPCRRRWTEJCUGFYKVJCFKÒGTGPV#RRNG+&[QW¨TGRTQORVGFHQT
that Apple ID and password.
Writing Reviews
You can write and submit app reviews on iPad.
Write a review:
1 On the Info screen, scroll down to “Customer Ratings and Reviews.”
2 Tap “Write a Review.”
3 5GVVJGTCVKPI£UVCTUGPVGTCVKVNGHQTVJGTGXKGYCPFCFFQRVKQPCNTGXKGY
comments.
4 Tap Submit.
Before submitting a review, you must be signed in with your Apple ID and have
purchased or downloaded the app.
122 Chapter 18 App Store

Deleting Apps
You can delete iPad apps that you’ve installed from the App Store. You can’t delete
built-in iPad apps.
When you sync, iTunes automatically backs up any apps you download to iPad. If you
delete an app on iPad, you can reinstall it if it was previously synced.
Important: If you delete an app, the documents associated with the app are deleted
from iPad, unless you reinstall the app and restore its data from a backup using iTunes.
Delete an App Store app:
1 6QWEJCPFJQNFCP[CRRKEQPQPVJG*QOGUETGGPWPVKNVJGKEQPUUVCTVVQLKIING
2 Tap in the corner of the app you want to delete.
3 Tap Delete.
Press the Home button to cancel.
When you delete an app, its data is no longer accessible, but it isn’t erased from
iPad. For information about erasing all content and settings, see “Resetting iPad” on
page 162.
Syncing Purchases
When you connect iPad to your computer, iTunes automatically syncs apps you
download or purchase on iPad to your iTunes library. This lets you access the
downloaded apps on your computer and provides a backup if you delete apps
from iPad.
Downloaded apps are backed up the next time you sync with iTunes. Afterwards, only
app data is backed up when you sync with iTunes.
Apps are synced to the Apps list in your iTunes library.
123
Chapter 18 App Store
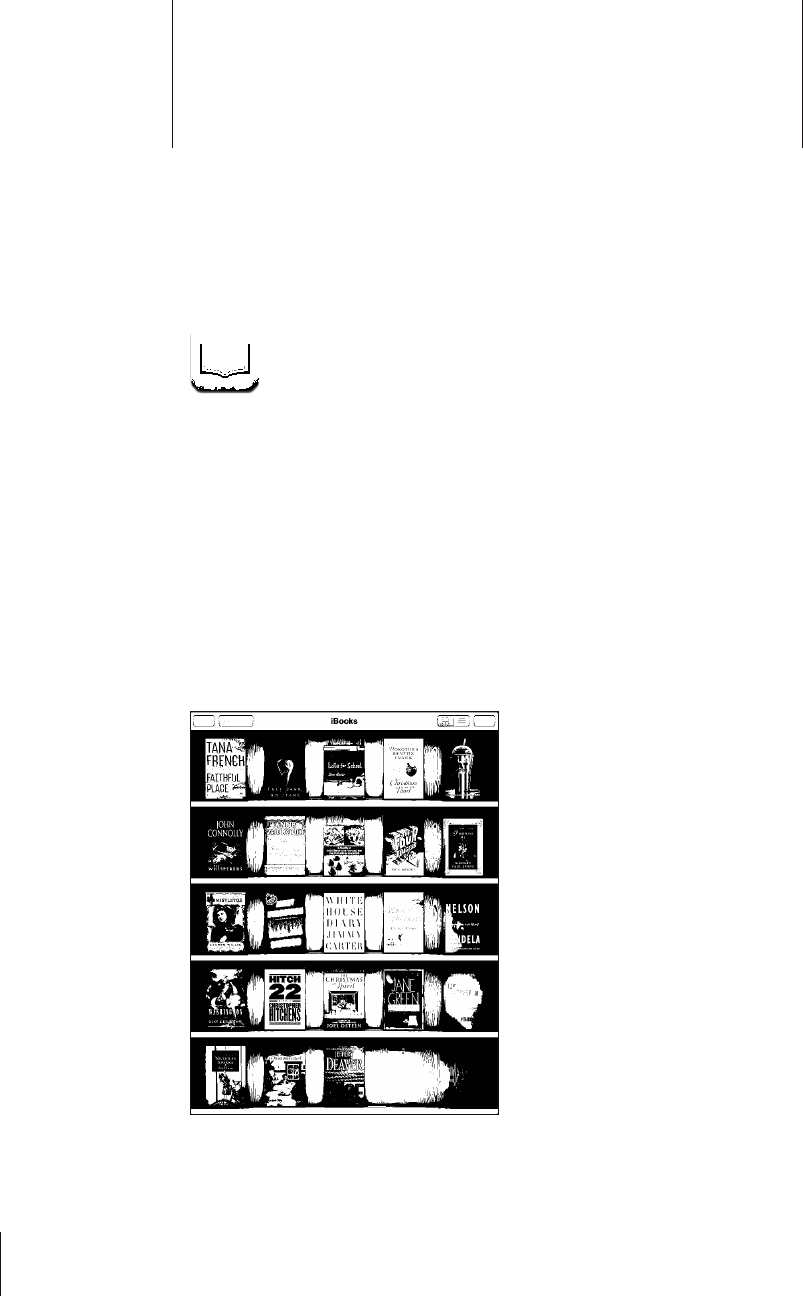
iBooks 19
About iBooks
iBooks is a great way to read and buy books. Download the free iBooks app from
the App Store, and then get everything from classics to best sellers from the built-in
iBookstore. Once you download a book, it’s displayed on your bookshelf.
Add ePub books and PDFs to your bookshelf using iTunes. Then tap a book to start
TGCFKPIK$QQMUTGOGODGTU[QWTNQECVKQPUQ[QWECPGCUKN[TGVWTPVQYJGTG[QWNGHVQÒ
A wide range of display options makes the books easy to read.
iBooks and the iBookstore aren’t available in all languages and locations.
(]HPSHISLVU[OLP)VVRZ[VYL;P[SLH]HPSHIPSP[`PZZ\IQLJ[[VJOHUNL
124

To download the iBooks app and use the iBookstore, you need an Internet connection
and an Apple account. If you don’t have an Apple account, or if you want to make
RWTEJCUGUWUKPICFKÒGTGPV#RRNG+&IQVQ5GVVKPIU 5VQTG
Syncing Books and PDFs
You can download or purchase from the iBookstore. You can also add DRM-free ePub
DQQMUCPF2&(UVQ[QWTK6WPGUNKDTCT[6JGTGCTGUGXGTCNYGDUKVGUVJCVQÒGTDQQMUKP
ePub and PDF format.
Use iTunes to sync your books and PDFs between iPad and your computer. When iPad
is connected to your computer, the Books pane lets you select which items to sync.
Sync an ePub book or PDF to iPad: Download the book or PDF using your computer.
6JGPKPK6WPGUEJQQUG(KNG #FFVQ.KDTCT[CPFUGNGEVVJG°NG%QPPGEVK2CFVQ[QWT
computer, select the book or PDF in the Books pane in iTunes, and then sync iPad.
If a PDF doesn’t appear in the Books pane, you need to change its type in iTunes.
5GCTEJ[QWTK6WPGUNKDTCT[VQ°PFVJG2&(°NGUGNGEVKVVJGPEJQQUG(KNG )GV+PHQ+P
VJG1RVKQPUUGEVKQPQHVJG°NGKPHQTOCVKQPYKPFQYEJQQUG$QQMHTQOVJG/GFKC-KPF
pop-up menu, then click OK.
Using the iBookstore
In the iBooks app, tap Store to open the iBookstore. From there, you can browse
HGCVWTGFDQQMUQTDGUVUGNNGTUCPFDTQYUGHQTDQQMUD[CWVJQTQTVQRKE9JGP[QW°PF
a book you like, you can purchase and download it.
Note: Some features of the iBookstore may not be available in all locations.
Get more information: In the iBookstore, you can read a summary of the book, read
or write a review, and download a sample of the book before buying it.
Purchase a book: Find a book you want, tap the price, then tap Buy Now. Sign in using
your Apple ID, then tap OK. Some books may be free for downloading.
The purchase is charged to your Apple account. If you make additional purchases
YKVJKPVJGPGZV°HVGGPOKPWVGU[QWFQP¨VJCXGVQGPVGT[QWTRCUUYQTFCICKP
If you’ve already purchased a book and want to download it again, tap Purchases in
VJGK$QQMUVQTGCPF°PFVJGDQQMKPVJGNKUV6JGPVCR4GFQYPNQCF
Books that you purchase are synced to your iTunes library the next time you sync iPad
with your computer. This provides a backup in case you delete the book from iPad.
125
Chapter 19 iBooks

Reading Books
Reading a book is easy. Go to the bookshelf and tap the book you want to read. If you
don’t see the book you’re looking for, tap Collections to view other groups of books.
Turn pages: 6CRPGCTVJGTKIJVQTNGHVOCTIKPQHCRCIGQT±KEMNGHVQTTKIJV6QEJCPIG
the direction the page turns when you tap the left margin, go to Settings > iBooks.
)QVQCURGEK°ERCIGTap near the center of the current page to show the controls.
Drag the page navigation control at the bottom of the screen to the desired page,
then let go.
Go to the table of contents: Tap near the center of the current page to show the
controls, then tap 6CRCPGPVT[VQLWORVQVJCVNQECVKQPQTVCR4GUWOGVQTGVWTPVQ
the current page.
Add or remove a bookmark: Tap the ribbon button to set a bookmark. You can have
multiple bookmarks. To remove a bookmark, tap it. You don’t need to add a bookmark
YJGP[QWENQUGCDQQMDGECWUGK$QQMUTGOGODGTUYJGTG[QWNGHVQÒCPFTGVWTPU
there when you open the book again.
Add, remove, or edit a highlight: Touch and hold any word until it’s selected. Use the
ITCDRQKPVUVQCFLWUVVJGUGNGEVKQPVJGPVCR*KIJNKIJV6QTGOQXGCJKIJNKIJVVCRVJG
highlighted text, then tap Remove Highlight. To change the color of a highlight, tap
the highlighted text, then tap Colors and select a color from the menu.
Add, view, or remove a note: Touch and hold any word until it’s selected. Use the grab
RQKPVUVQCFLWUVVJGUGNGEVKQPVJGPVCR0QVG6[RGUQOGVGZVVJGPVCR&QPG6QXKGYC
note, tap the indicator in the margin near the highlighted text. To remove a note, tap
the highlighted text, then choose Delete Note. To change the color of a note, tap the
highlighted text, then tap Colors and select a color from the menu.
126 Chapter 19 iBooks

See all your bookmarks, highlights and notes: To see the bookmarks, highlights, and
notes you’ve added, tap , then tap Bookmarks. To view a note, tap its indicator.
Enlarge an image: Double-tap an image.
To read a book while lying down, use the screen rotation lock to prevent iPad from
rotating the display when you tilt iPad. For information, see “Viewing in Portrait or
Landscape” on page 16.
Reading PDFs
You can use iBooks to read PDFs. Go to the bookshelf and tap Collections, select a
collection, then tap the PDF you want to read.
Turn pages: Flick left or right.
Enlarge a page: Pinch to zoom in on the page, then scroll to see the portion you want.
)QVQCURGEK°ERCIGTap near the center of the current page to show the controls.
Then, in the page navigation controls at the bottom of the page, drag until the desired
RCIGPWODGTCRRGCTUQTVCRCVJWODPCKNVQLWORVQVJCVRCIG
Add or remove a bookmark: To add a bookmark, tap the ribbon button. You can have
multiple bookmarks. To remove a bookmark, tap it. You don’t need to set a bookmark
YJGP[QWENQUGC2&(DGECWUGK$QQMUTGOGODGTUYJGTG[QWNGHVQÒCPFTGVWTPUVJGTG
when you open the PDF again.
Go to the table of contents: Tap near the center of the current page to show the
controls, then tap 6CRCPGPVT[VQLWORVQVJCVNQECVKQPQTVCR4GUWOGVQTGVWTPVQ
VJGEWTTGPVRCIG+HVJGCWVJQTJCUP¨VFG°PGFCVCDNGQHEQPVGPVU[QWECPVCRCRCIG
icon instead.
Changing a Book’s Appearance
To change the appearance of a book, access the controls by tapping near the center of
a page.
Change the font or type size: Tap , then in the list that appears, tap or to
reduce or enlarge the type size. To change the font, tap Fonts, then select one from the
list. Changing the font and size also changes text formatting.
Change the brightness: Tap VJGPCFLWUVVJGDTKIJVPGUU
Change the page and type color: Tap , then turn the Sepia option on to change
the color of the page and type. This setting applies to all books.
;QWECPEJCPIGVJGYC[VJCVK$QQMULWUVK°GUVJGVGZVQHRCTCITCRJUKP5GVVKPIU K$QQMU
127
Chapter 19 iBooks

Searching Books and PDFs
You can search for the title or author of a book to quickly locate it on the bookshelf.
;QWECPCNUQUGCTEJVJGEQPVGPVUQHCDQQMVQ°PFCNNVJGTGHGTGPEGUVQCYQTFQT
RJTCUG[QW¨TGKPVGTGUVGFKP;QWECPCNUQUGPFCUGCTEJVQ9KMKRGFKCQT)QQINGVQ°PF
other related resources.
Search for a book: Go to the bookshelf. Tap the status bar to scroll to the top of the
screen, then tap the magnifying glass. Enter a word that’s in the title of a book, or the
author’s name, then tap Search. Matching books appear on the bookshelf.
Search in a book: Open a book and tap near the center of the page to show the
controls. Tap the magnifying glass, then enter a search phrase and tap Search. Tap a
search result to go to that page in the book.
To send your search to Google or Wikipedia, tap Search Google or Search Wikipedia.
Safari opens and displays the result.
To quickly search for a word in a book, touch and hold the word, then tap Search.
.QQMKPIWRVJG&G°PKVKQPQHC9QTF
;QWECPNQQMWRVJGFG°PKVKQPQHCYQTFWUKPIVJGFKEVKQPCT[
Look up a word: Select a word in a book, then tap Dictionary in the menu that
appears. Dictionaries may not be available for all languages.
Having a Book Read to You
If you have a visual impairment, you can use VoiceOver to read a book aloud. See
“VoiceOver” on page 13 8 .
Some books may not be compatible with VoiceOver.
Printing or Emailing a PDF
You can use iBooks to send a copy of a PDF via email, or to print all or a portion of the
PDF to a supported printer.
Email a PDF: Open the PDF, then tap and choose Email Document. A new message
CRRGCTUYKVJVJG2&(CVVCEJGF6CR5GPFYJGP[QW°PKUJCFFTGUUKPICPFYTKVKPI[QWT
message.
Print a PDF: Open the PDF, then tap and choose Print. Select a printer and the
page range and number of copies, then tap Print. For information about supported
printers, see “Printing” on page 40.
You can only email or print PDFs. These options aren’t available for ePub books.
128 Chapter 19 iBooks

Organizing the Bookshelf
Use the bookshelf to browse your books and PDFs. You can also organize items
into collections.
Sort the bookshelf: Go to the bookshelf and tap , then select a sort method from
the choices at the bottom of the screen.
Rearrange items: Touch and hold a book or PDF, then drag it to a new location on
the bookshelf.
Delete an item from the bookshelf: Go to the bookshelf and tap Edit. Tap each book
or PDF that you want to delete so that a checkmark appears, then tap Delete. When
[QW°PKUJFGNGVKPIVCR&QPG+H[QWFGNGVGCDQQM[QWRWTEJCUGF[QWECPFQYPNQCFKV
again from Purchases in iBookstore. If you’ve synced your device with your computer,
the book also remains in your iTunes Library.
Create, rename, or delete a collection: Tap Collections to display the collections list.
Tap New to add a new collection. To delete a collection tap Edit, then tap and tap
Delete. You can’t edit or remove the built-in Books and PDFs collections. To edit the
PCOGQHCEQNNGEVKQPVCRKVUPCOG9JGP[QW°PKUJVCR&QPG
Move a book or PDF to a collection: Go to the bookshelf and tap Edit. Tap each book
or PDF that you want to move so that a checkmark appears, then tap Move and select
a collection. An item can be in only one collection at a time. When you add a book
or PDF to your bookshelf, it’s put in the Books or PDF collection. From there, you can
OQXGKVVQCFKÒGTGPVEQNNGEVKQP;QWOKIJVYCPVVQETGCVGEQNNGEVKQPUHQTYQTMCPF
school, for example, or for reference and leisure reading.
View a collection: Tap Collections, then tap an item in the list that appears.
129
Chapter 19 iBooks

Game Center 20
About Game Center
You can discover new games and share your game experiences with friends around
the world in Game Center.
+PXKVG[QWTHTKGPFUVQRNC[QTWUGCWVQOCVEJVQ°PFQVJGTGSWCNN[OCVEJGF
opponents. Check leaderboards to see who the best players are. Earn bonus points by
CEJKGXKPIURGEK°ECEEQORNKUJOGPVUKPCICOG
Note: Game Center may not be available in all countries or regions, and the available
games may vary by country or region.
To use Game Center, you need an Internet connection and an Apple ID. If you already
have an iTunes Store, MobileMe, or other Apple account, you can use that Apple ID
with Game Center. If you don’t already have an Apple ID, you can create one in Game
Center, as described below.
Setting Up Game Center
9JGP[QW°TUVQRGP)COG%GPVGT[QW¨TGCUMGFKH[QWYCPVVQCNNQYRWUJPQVK°ECVKQPU
0QVK°ECVKQPUKPENWFGCNGTVUUQWPFUCPFKEQPDCFIGUVJCVNGV[QWMPQYCDQWV)COG
Center events, even if you’re not using Game Center. For example, you might receive
an alert that a friend has invited you to play a game.
#NNQYPQVK°ECVKQPUTap OK.
+H[QWVCR&QP¨V#NNQY[QWYQP¨VTGEGKXGPQVK°ECVKQPUHQT)COG%GPVGT;QWECP
VWTPPQVK°ECVKQPUQPCVCNCVGTVKOGKH[QWYCPVCPF[QWECPURGEKH[YJCVMKPFUQH
PQVK°ECVKQPU[QWYCPVVQIGV
130

6WTPPQVK°ECVKQPUQPQTQÒ+P5GVVKPIUEJQQUG0QVK°ECVKQPU6WTPKPIQÒ0QVK°ECVKQPU
FKUCDNGUCNNPQVK°ECVKQPUHQTCNNCRRU;QWECPCNUQUKNGPEGPQVK°ECVKQPUWUKPIVJG5KFG
Switch (see “Side Switch” on page 160).
5RGEKH[YJKEJPQVK°ECVKQPU[QWYCPVHQT)COG%GPVGTIn Settings, choose
0QVK°ECVKQPU )COG%GPVGTVJGPEQP°IWTGVJG5QWPFU#NGTVUCPF$CFIGUUGVVKPIU
+H)COG%GPVGTFQGUP¨VCRRGCTVWTPQP0QVK°ECVKQPU
Set up Game Center information for your Apple ID:
1 Enter your Apple ID and password, then tap Sign In.
You may be asked to provide additional information. If you don’t have an Apple ID, you
can create one by tapping Create New Account.
2 Tap Agree to accept the Game Center Terms & Conditions.
3 Enter a nickname—the name others will see and know you by.
4 %QP°IWTG[QWT)COG%GPVGTUGVVKPIU
To allow other users to invite you to play a game, leave Allow Game Invites turned
QP1VJGTYKUGVCRVQVWTPKVQÒ
6QCNNQYQVJGTWUGTUVQ°PF[QWD[[QWTGOCKNCFFTGUUNGCXG(KPF/G$['OCKN
VWTPGFQP1VJGTYKUGVCRVQVWTPKVQÒ
8GTKH[[QWTCEEQWPVGOCKN;QWECPGPVGTCFKÒGTGPVCFFTGUUKH[QWFQP¨VYCPVVQWUG
VJGQPGHQTVJG#RRNG+&[QWWUGFVQUKIPKP6QEQP°TOVJKUCFFTGUUCU[QWTU[QW
need to respond to the email that will be sent to that address.
To add other email addresses that people can use to contact you in Game Center,
tap Add Another Email.
5 6CR0GZVYJGP[QWTCEEQWPVKUEQP°IWTGF
Change Game Center settings for your Apple ID:
1 Tap Me, then tap your account banner.
2 Tap View Account.
3 Make your changes, then tap Done.
5KIPKPWUKPICFKÒGTGPV#RRNG+&
1 Tap Me, then tap the account banner.
2 Tap Sign Out.
3 Enter the new Apple ID and password, then tap Sign In.
131
Chapter 20 Game Center

Games
Purchasing and Downloading Games
Games for the Game Center are available from the App Store. If you haven’t entered
credit card information for your Apple ID, you’ll be prompted to enter that information
before you can purchase and download games.
Purchase and download games: Tap Games, then tap Find Game Center Games.
The Game Center section of App Store displays games that work with Game Center.
You can browse this section, and purchase and download games from it. See
Chapter 18, “App Store,” on page 119 .
If you want to purchase a game that a friend has, tap the game on your friend’s info
screen to go directly to that game in the App Store.
Playing Games
The Games screen displays the games you download from the App Store. For each
of the games, your number of achievements and your ranking among all the game’s
players are displayed.
Get information about a game: Tap Games, then tap a game. If available, you can
FKURNC[VJGICOG¨UNGCFGTDQCTFUUGG[QWTCEJKGXGOGPVUHQTVJGICOGCPF°PFQWV
who’s recently played the game.
Play a game: Tap Games, choose a game, then tap Play.
Depending on the game, the home screen may provide instructions or other
information, and let you view leaderboards and achievements, set game options, and
start a single or multiplayer game. To play against others, you can either invite a friend
QTWUGCWVQOCVEJVQJCXG)COG%GPVGT°PFQVJGTRNC[GTUHQT[QW(QTKPHQTOCVKQP
about making friends in Game Center, see “Friends” on page 134.
For multiplayer games, you can also send a game invitation from the Friends screen.
Invite a friend to a multiplayer game from the Friends screen:
1 Tap Friends at the bottom of the screen.
2 Choose a friend.
3 Choose a game and tap Play.
If the game allows or requires additional players, you can choose players to invite,
then tap Next.
4 Enter and send your invitation, then wait for the others to accept.
5 Start the game.
If a friend isn’t available or doesn’t respond to your invitation, you can tap Auto-Match
VQJCXG)COG%GPVGT°PFCPQVJGTRNC[GTHQT[QWQTVCR+PXKVG(TKGPFVQVT[KPXKVKPI
some other friend.
132 Chapter 20 Game Center

Other players may invite you to play the game.
Respond to an invitation to play a game: Tap Accept or Decline in the alert
that appears.
You can disable multiplayer games in Restrictions. See “Restrictions” on page 158 .
;QWECPRTGXGPVQVJGTRNC[GTUHTQOKPXKVKPI[QWVQRNC[ICOGUD[VWTPKPIQÒ#NNQY
Game Invites in Game Center settings. See “Your Status and Account Information” on
page 135.
Return to Game Center: Press the Home button, then tap Game Center on the
Home screen.
You can also press the Home button twice quickly and choose Game Center from your
recent apps.
Leaderboards
Some games provide one or more leaderboards to show the ranking of the game’s
players, with their scores, times, or other measures of the players’ success.
See a game’s leaderboard: Tap Games, then choose the game and tap Leaderboard.
You may also be able to view leaderboards from within a game.
If a game has variations (such as Easy, Normal, and Hard), the Categories screen lets
you choose the leaderboard for the game in general, or for one of the variations.
The leaderboard shows the ranking of your friends, and of all players. You may be able
VQXKGYNGCFGTDQCTFUVCVUHQTCURGEK°EVKOGRGTKQFUWEJCUVQFC[VJKUYGGMQTCNNVKOG
Rotate iPad to see a leaderboard in landscape orientation.
Start playing a game from the leaderboard: Tap Play in the upper-right corner.
133
Chapter 20 Game Center

Achievements
5QOGICOGUTGYCTF[QWYKVJDQPWURQKPVUHQTURGEK°ECEJKGXGOGPVU
See the possible achievements for a game: Tap Games, choose a game, then
tap Achievements.
For each achievement, Game Center shows how many bonus points are awarded,
and whether you’ve completed the achievement. The total points awarded for your
CEJKGXGOGPVUCRRGCTCVVJGVQR;QWECPIGVDQPWURQKPVUHQTCURGEK°ECEJKGXGOGPV
only once.
You may also be able to view achievements from within a game.
Recently Played
Some games let you see which of your friends have recently played the game.
See who’s recently played a game: Tap Games, tap a game, then tap Recently Played.
Get information about a player: Tap a player’s name in the list.
Friends
Game Center puts you in contact with players around the world. You add friends to
Game Center by making a request, or by accepting a request from another player.
Add a friend to Game Center:
1 Tap Friends or Requests.
2 Tap , then enter a friend’s email address or Game Center nickname.
Matching addresses and names from your contacts appear as you type. Tap a contact
to include that person in your request. Tap to browse your contacts.
To add several friends at once, enter additional contacts.
3 Enter a message for your request, then tap Send.
To become a friend, a person must accept your request.
Other players might send you a request. If you receive an alert, you can accept the
request from there, or close it and respond to the request later from the Request
screen. A badge on the Requests button displays the number of outstanding
friend requests.
Respond to a friend request: Tap Requests, tap the name of the person making the
request, then tap Accept, Ignore, or Report a Problem.
When a player accepts another player’s request, they each become the other’s friend.
Friends’ names appear on the Friends screen.
Get information about a friend: Tap the friend’s name.
134 Chapter 20 Game Center

Search for a friend: Tap the status bar to scroll to the top of the screen, then tap the
UGCTEJ°GNFCPFUVCTVV[RKPI(TKGPFUYJQOCVEJ[QWTUGCTEJCRRGCTCU[QWV[RG
A friend’s info page shows how many friends (including you) the person has, the
PWODGTQHFKÒGTGPVICOGU[QWTHTKGPFJCURNC[GFCPFJQYOCP[CEJKGXGOGPVU[QWT
friend has completed. The info screen may also show:
The games you’ve played together
The games you have in common
Other games your friend has
You can tap a game in any of the lists to see your position and your friend’s position
on the overall leaderboard, and your respective accomplishments for the game.
Invite a friend to play a game: Tap Friends, tap the friend’s name, tap a game, then
tap Play. See “Playing Games” on page 132.
Remove a friend: Tap Friends, tap a name, then tap Unfriend and tap Remove.
+HCRNC[GTKUQÒGPUKXGQTGZJKDKVUKPCRRTQRTKCVGDGJCXKQT[QWECPTGRQTVVJGRTQDNGO
Report a problem with a friend: Tap Friends, tap the friend’s name, then tap “Report a
Problem.” Describe the problem, then tap Report to send the report.
+H[QWVWTPQÒ/WNVKRNC[GT)COGUKP5GVVKPIU[QWECP¨VUGPFQTTGEGKXGCKPXKVCVKQPUVQ
play games. See “Restrictions” on page 15 8 .
Your Status and Account Information
The Me screen summarizes information about your friends, your games, and your
achievements.
6JGVGZV°GNFKPVJGEGPVGTQHVJGUETGGPNGVU[QWGPVGT[QWTEWTTGPVUVCVWUOGUUCIG
Your status appears along with your nickname in other players’ Friends screens.
Change your status: 6CRVJGUVCVWU°GNFVQGPVGTQTWRFCVG[QWTUVCVWU
View your account information: Tap the account banner, then tap View Account.
You can change or update the following settings:
Nickname
Allow game invites
Find Me By Email
Your email address for Game Center
Additional email addresses
9JGP[QW°PKUJVCR&QPG
135
Chapter 20 Game Center

;QWECPCNUQUKIPQWVCPFUKIPKPVQCFKÒGTGPVCEEQWPVQTETGCVGCPGYCEEQWPV
Sign out: Tap the account banner, then tap Sign Out.
5KIPKPVQCFKÒGTGPVCEEQWPVEnter the username and password, then tap Sign In.
Create a new account: Tap Create New Account and follow the onscreen instructions.
Parental Controls
;QWECPWUGRCTGPVCNEQPVTQNUVQOCPCIGVJGYC[[QWTHCOKN[CFFUHTKGPFUCPFLQKPU
multiplayer games in Game Center.
Set up Game Center parental controls: Choose Settings > General > Restrictions, then
tap Enable Restrictions. Enter a four-digit passcode, then reenter the passcode.
You can enable restrictions for the following settings:
Multiplayer games
Adding friends
For more information, see “Restrictions” on page 158.
136 Chapter 20 Game Center

Accessibility 21
In addition to the many features that make iPad easy to use for everyone, iPad includes
universal access features.
Universal Access Features
Universal access features make iPad easy to use for people who have a vision
impairment, are deaf or hard of hearing, or have a physical or learning disability.
The accessibility features on iPad include:
Support for playback of closed-captioned content
VoiceOver screen reader
<QQOOCIPK°ECVKQP
White on Black
Large Text
Mono Audio
Speak Auto-text
Support for braille displays
Zoom, White on Black, and Mono Audio work with all apps. Large Text works with Mail
and Notes. VoiceOver works with the built-in iPad apps, and with some third-party
apps you can download from the App Store. Closed-captioning works with videos and
podcasts that support it.
For more information about the iPad accessibility features, go to
www.apple.com/accessibility/ipad.
;QWECPVWTPKPFKXKFWCNCEEGUUKDKNKV[HGCVWTGUQPQTQÒKP#EEGUUKDKNKV[UGVVKPIUQPK2CF
;QWECPCNUQVWTPUQOGCEEGUUKDKNKV[HGCVWTGUQPQTQÒKPK6WPGUYJGP[QWEQPPGEV
iPad to your computer.
137

6WTPCEEGUUKDKNKV[HGCVWTGUQPQTQÒKPK6WPGU
1 Connect iPad to your computer.
2 In iTunes, select iPad in the sidebar.
3 +PVJG5WOOCT[RCPGENKEM%QP°IWTG7PKXGTUCN#EEGUUKPVJG1RVKQPUUGEVKQP
4 Select the accessibility features you want to use and click OK.
The features you select are available immediately on iPad when you click OK.
VoiceOver
VoiceOver describes aloud what appears onscreen, so that you can use iPad without
seeing it.
VoiceOver tells you about each element on the screen as you select it. When you select
CPGNGOGPVCDNCEMTGEVCPINGGPENQUGUKVHQTVJGDGPG°VQHVJQUGYJQECPUGGVJG
screen) and VoiceOver speaks the name or describes the item. The enclosing rectangle
is referred to as the VoiceOver cursor.
6QWEJVJGUETGGPQTFTCI[QWT°PIGTUVQJGCTFKÒGTGPVKVGOUQPVJGUETGGP6QKPVGTCEV
with items on the screen, such as buttons and links, use the gestures described in
“VoiceOver Gestures” on page 140. When you select text, VoiceOver reads the text.
If you turn on Speak Hints, VoiceOver may tell you the name of the item. When you
select a control (such as a button or switch), VoiceOver provides instructions for you—
for example, “double-tap to open.”
When you go to a new screen, VoiceOver plays a sound and automatically selects and
URGCMUVJG°TUVGNGOGPVQHVJGUETGGPV[RKECNN[VJGKVGOKPVJGWRRGTNGHVEQTPGT
VoiceOver also lets you know when the display changes to landscape or portrait
orientation, and when the screen is locked or unlocked.
Note: 8QKEG1XGTURGCMUKPVJGNCPIWCIGURGEK°GFKP+PVGTPCVKQPCNUGVVKPIUYJKEJOC[
DGKP±WGPEGFD[VJG4GIKQP.QECNGUGVVKPI8QKEG1XGTKUCXCKNCDNGKPOCP[NCPIWCIGU
but not all.
138 Chapter 21 Accessibility

Setting Up VoiceOver
VoiceOver changes the gestures you use to control iPad. Once you turn VoiceOver on,
[QWOWUVWUG8QKEG1XGTIGUVWTGUVQQRGTCVGK2CF¤GXGPVQVWTP8QKEG1XGTQÒCICKP
and resume standard operation.
6WTP8QKEG1XGTQPQTQÒQPK2CFIn Settings, choose General > Accessibility >
8QKEG1XGTVJGPVCRVJG8QKEG1XGT1P1ÒUYKVEJ
6WTP8QKEG1XGTQPQTQÒKPK6WPGUSelect iPad in the iTunes sidebar. In the Options
UGEVKQPQHVJG5WOOCT[RCPGENKEM%QP°IWTG7PKXGTUCN#EEGUU5GNGEV8QKEG1XGTVJGP
click OK.
;QWECPCNUQUGV6TKRNGENKEM*QOGVQVWTP8QKEG1XGTQPQTQÒ5GG¥Triple-Click
Home” on page 150.
Note: You cannot use VoiceOver and Full-screen Zoom at the same time.
VoiceOver Settings
You can set VoiceOver to give spoken hints, increase or decrease the speaking rate, or
give typing feedback.
6WTPURQMGPJKPVUQPQTQÒIn Settings, choose General > Accessibility > VoiceOver,
VJGPVCRVJG5RGCM*KPVU1P1ÒUYKVEJ5RQMGPJKPVUCTGVWTPGFQPD[FGHCWNV
Set the VoiceOver speaking rate: In Settings, choose General > Accessibility >
8QKEG1XGTVJGPCFLWUVVJG5RGCMKPI4CVGUNKFGT
You can choose what kind of feedback you get when you type. You can set VoiceOver
to speak characters, words, both, or nothing. If you choose to hear both characters and
words, VoiceOver speaks each character as you type it, then speaks the whole word
when you enter a space or punctuation.
Choose typing feedback: In Settings, choose General > Accessibility > VoiceOver >
Typing Feedback. You can choose Characters, Words, Characters and Words, or Nothing
for software keyboards and for Apple Wireless Keyboards.
Use phonetics In Settings, choose General > Accessibility > VoiceOver, then tap
the Use Phonetics switch to turn it on.
Use this feature when you type or read character-by-character,
to help make clear which characters were spoken. When Use
2JQPGVKEUKUVWTPGFQP8QKEGQXGT°TUVURGCMUVJGEJCTCEVGTVJGP
speaks a word beginning with the character. For example, if you
type the character “f,” VoiceOver speaks “f,” and then a moment
later, “foxtrot.”
Use pitch change In Settings, choose General > Accessibility > VoiceOver, then tap
the Use Pitch Change switch to turn it on.
VoiceOver uses a higher pitch when entering a letter, and a lower
pitch when deleting a letter. VoiceOver also uses a higher pitch
YJGPURGCMKPIVJG°TUVKVGOQHCITQWRUWEJCUCNKUVQTVCDNG
and a lower pitch when speaking the last item of a group.
139
Chapter 21 Accessibility

$[FGHCWNV8QKEG1XGTWUGUVJGNCPIWCIGVJCV¨UUGVHQTK2CF;QWECPUGVCFKÒGTGPV
language for VoiceOver.
Change the language spoken by VoiceOver: In Settings, choose General >
International > Language, then select a language and tap OK.
5QOGNCPIWCIGUOC[DGKP±WGPEGFD[VJG4GIKQP.QECNUGVVKPI+P5GVVKPIUEJQQUG
General > International > Region Format, then select the format.
Set the rotor options for web browsing: In Settings, choose General > Accessibility >
VoiceOver > Web Rotor. Tap to select or deselect options. To change the position of an
item in the list, touch next to the item, then drag up or down.
Select the languages available in the Language rotor: In Settings, choose General
> Accessibility > VoiceOver > Language Rotor and tap to select the language or
languages you want to appear in the Language rotor. To change the position of a
language in the list, touch next to the language and drag up or down.
The Language rotor is always available when you’ve selected more than one language.
VoiceOver Gestures
When VoiceOver is turned on, it changes the gestures you use to control iPad, so that
you can hear descriptions without activating buttons. These VoiceOver gestures let you
move around the screen and control the individual elements that you select. Some
8QKEG1XGTIGUVWTGUWUGVYQVJTGGQTHQWT°PIGTUVQVCRQT±KEM(QTDGUVTGUWNVUYJGP
WUKPIOQTGVJCPQPG°PIGTTGNCZCPFNGV[QWT°PIGTUVQWEJVJGUETGGPYKVJUQOG
space between them.
6JGTGCTGOCP[YC[UVQGPVGT8QKEG1XGTIGUVWTGU(QTGZCORNG[QWECPVYQ°PIGTVCR
D[WUKPIGKVJGTVYQ°PIGTUQPQPGJCPFQTQPG°PIGTQPGCEJJCPF;QWECPCNUQWUG
[QWTVJWODU6T[FKÒGTGPVVGEJPKSWGUVQFKUEQXGTYJCVYQTMUDGUVHQT[QW
If your gestures don’t work, try quicker movements, especially for double-tapping and
±KEMKPIIGUVWTGU6Q±KEMVT[SWKEMN[DTWUJKPIVJGUETGGPYKVJ[QWT°PIGTQT°PIGTU
Practice gestures: In Settings, choose General > Accessibility > VoiceOver > Practice
Gestures, then tap the Practice VoiceOver Gestures button. Practice the gestures
described in “VoiceOver Settings¦DGNQY9JGP[QW°PKUJRTCEVKEKPIVCR&QPG
/CMGUKPING°PIGT±KEMKPIIGUVWTGUSWKEMN[VQFKUVKPIWKUJVJGOHTQOFTCIIKPIIGUVWTGU
140 Chapter 21 Accessibility

Here’s a summary of VoiceOver gestures:
Navigate and Read
Tap: Speak item.
Flick right or left: Select the next or previous item.
Flick up or down:6JGGÒGEVXCTKGUFGRGPFKPIQPVJG4QVQT%QPVTQNUGVVKPI5GG
“Using VoiceOver” on page 143.
6YQ°PIGTVCR Stop speaking the current item.
6YQ°PIGT±KEMWR Read all, from the top of the screen.
6YQ°PIGT±KEMFQYP Read all, from the current position.
6JTGG°PIGT±KEMWRQTFQYP Scroll one page at a time.
6JTGG°PIGT±KEMTKIJVQTNGHV Go to the next or previous page (for example, on the
Home screen or in Safari).
6JTGG°PIGTVCR Speak the scroll status (which page or rows are visible).
(QWT°PIGT±KEMWRQTFQYP)QVQVJG°TUVQTNCUVGNGOGPVQPCRCIG
(QWT°PIGT±KEMTKIJVQTNGHV Go to the next or previous section (for example, on
a webpage).
Select and Activate
Double-tap: Activate selected item.
6QWEJCPKVGOYKVJQPG°PIGTVCRVJGUETGGPYKVJCPQVJGT°PIGT¥URNKVVCRRKPI¦
Activate item.
Double-tap and hold (1 second) + standard gesture: Use a standard gesture.
The double-tap and hold gesture tells iPad to interpret the subsequent gesture as
standard. For example, you can double-tap and hold, and then without lifting your
°PIGTFTCI[QWT°PIGTVQUNKFGCUYKVEJ
You can use standard gestures when VoiceOver is turned on, by double-tapping
CPFJQNFKPI[QWT°PIGTQPVJGUETGGP#UGTKGUQHVQPGUKPFKECVGUVJCVPQTOCN
IGUVWTGUCTGKPHQTEG6JG[TGOCKPKPGÒGEVWPVKN[QWNKHV[QWT°PIGTVJGP8QKEG1XGT
gestures resume.
6YQ°PIGTFQWDNGVCR Play or pause in iPod, YouTube, or Photos. Start or stop
the stopwatch.
6JTGG°PIGTFQWDNGVCR Mute or unmute VoiceOver.
6JTGG°PIGTVTKRNGVCR6WTPVJGFKURNC[QPQTQÒ
141
Chapter 21 Accessibility

Rotor Control
The rotor is a virtual control that acts like a physical dial when VoiceOver is turned
on. Use the rotor to change VoiceOver settings and to access additional commands
and features.
Operate the rotor: 4QVCVGVYQ°PIGTUQPVJGK2CFUETGGPVQ¥VWTP¦VJGFKCNCPFEJQQUG
items on the rotor. Flick up and down to use the selected item.
6JGGÒGEVQHVJGTQVQTFGRGPFUQPYJCV[QW¨TGFQKPI(QTGZCORNGKH[QW¨TGTGCFKPI
text in an email, you can use the rotor to switch between hearing text spoken word-
D[YQTFEJCTCEVGTD[EJCTCEVGTQTNKPGD[NKPGYJGP[QW±KEMWRQTFQYP9JGP[QW
browse a webpage, use the rotor to choose whether you hear text word-by-word or
EJCTCEVGTD[EJCTCEVGTJGCTLWUVVJGJGCFGTUJGCTLWUVVJGNKPMUCNNQHVJGOXKUKVGF
links, or links not yet visited), hear form elements, or hear descriptions of images. You
ECPWUGVJGTQVQTUGVVKPIVQJGCTCNNQHVJGVGZVQTVQLWORHTQOQPGGNGOGPVQHC
certain type (such as headers or links) to another.
Reading text
Select and hear text by:
Character
Word
Line
Browsing a webpage
Select and hear text by:
Character
Word
Line
Heading
Link
Visited link
Non-visited link
In-page link
Form control
Table
Row (when navigating a table)
List
Landmark
Image
Static text
Zoom in or out
142 Chapter 21 Accessibility

Entering text
Move insertion point and hear text by:
Character
Word
Line
Select edit function
Select language
Using a control
Select and hear values by:
Character
Word
Line
#FLWUVVJGXCNWGQHVJGEQPVTQNQDLGEV
Using VoiceOver
Unlock iPad: Select the Unlock button, then double-tap the screen.
Select items on the screen: &TCI[QWT°PIGTCETQUUVJGUETGGP8QKEG1XGTKFGPVK°GU
each element as you touch it. You can also move systematically from one element
VQVJGPGZVD[±KEMKPINGHVQTTKIJVYKVJQPG°PIGT'NGOGPVUCTGUGNGEVGFHTQONGHV
VQTKIJVVQRVQDQVVQO(NKEMTKIJVVQIQVQVJGPGZVGNGOGPVQT±KEMNGHVVQIQVQVJG
previous element.
“Tap” a selected item when VoiceOver is turned on: Double-tap anywhere on
the screen.
Speak the text of an element, character-by-character, word-by-word, or line-by-line:
9KVJVJGGNGOGPVUGNGEVGF±KEMWRQTFQYPYKVJQPG°PIGT(NKEMFQYPVQTGCFVJG
PGZVEJCTCEVGTQT±KEMWRVQTGCFVJGRTGXKQWUEJCTCEVGT6YKUVVJGTQVQTEQPVTQNVQTGCF
word-by-word or line-by-line.
Adjust a slider: 9KVJQPG°PIGT±KEMWRVQKPETGCUGVJGUGVVKPIQTFQYPVQFGETGCUG
VJGUGVVKPI8QKEG1XGTURGCMUVJGUGVVKPICU[QWCFLWUVKV
Scroll a list or area of the screen: (NKEMWRQTFQYPYKVJVJTGG°PIGTU(NKEMFQYPVQ
RCIGFQYPQT±KEMWRVQRCIGWR9JGPRCIKPIVJTQWIJCNKUV8QKEG1XGTURGCMUVJG
range of items displayed (for example, “showing rows 5 through 10”).
Scroll continuously through a list: Double-tap and hold. When you hear a series of
VQPGU[QWECPOQXG[QWT°PIGTWRQTFQYPVQUETQNNVJGNKUV%QPVKPWQWUUETQNNKPI
UVQRUYJGP[QWNKHV[QWT°PIGT
143
Chapter 21 Accessibility

Use an index: Some lists have an alphabetical index along the right side. The index
ECP¨VDGUGNGEVGFD[±KEMKPIDGVYGGPGNGOGPVU[QWOWUVVCRVJGKPFGZVQUGNGEV
KV9KVJVJGKPFGZUGNGEVGF±KEMWRQTFQYPVQOQXGCNQPIVJGKPFGZ;QWECPCNUQ
FQWDNGVCRVJGPUNKFG[QWT°PIGTWRQTFQYP
Rearrange the Home screen: On the Home screen, select the icon you want to move.
Double-tap and hold, then drag the icon. VoiceOver speaks the row and column
position as your drag the icon. Release the icon when it’s in the location you want. You
can drag additional icons. Drag an item to the left or right edge of the screen to move
KVVQCFKÒGTGPVRCIGQHVJG*QOGUETGGP9JGP[QW°PKUJTGCTTCPIKPIVJGKEQPURTGUU
the Home button.
;QWECPVWTPURGCMKPIQÒUVQRURGCMKPICPKVGOVWTPVJGFKURNC[QÒQTJCXG
VoiceOver speak the entire screen.
Mute VoiceOver &QWDNGVCRYKVJVJTGG°PIGTU&QWDNGVCRYKVJVJTGG
°PIGTUCICKPVQVWTPURGCMKPIDCEMQP6QOWVGQPN[
VoiceOver sounds, set the Side Switch to silent.
Stop speaking an item 6CRQPEGYKVJVYQ°PIGTU6CRCICKPYKVJVYQ°PIGTUVQ
resume speaking. Speaking automatically resumes when
you select another item.
6WTPQÒVJGFKURNC[YJKNG[QWWUG
VoiceOver
6TKRNGVCRYKVJVJTGG°PIGTU4GRGCVVQVWTPVJGFKURNC[
on again.
Speak the entire screen from the top (NKEMWRYKVJVYQ°PIGTU
Speak from the current item to the
bottom of screen
(NKEMFQYPYKVJVYQ°PIGTU
You can hear iPad status information by tapping the status bar at the top of the screen.
This includes the time, battery life, Wi-Fi signal strength, and more.
Entering and Editing Text
9JGP[QWUGNGEVCVGZV°GNFYKVJ8QKEG1XGT[QWECPWUGVJGQPUETGGPMG[DQCTFVQ
GPVGTVGZV;QWECPWUGVJGGFKVKPIHGCVWTGUQHK2CFVQEWVEQR[QTRCUVGKPVJGVGZV°GNF
Note: Safari doesn’t support copying webpage content. The editing features work only
KPGFKVCDNGVGZV°GNFU
Enter text:
1 7UG8QKEG1XGTVQUGNGEVCPGFKVCDNGVGZV°GNFVJGPFQWDNGVCRVQFKURNC[VJGKPUGTVKQP
RQKPVCPFDTKPIWRVJGQPUETGGPMG[DQCTF+HVJG°GNFCNTGCF[EQPVCKPUVGZVVJG
insertion point is placed at the beginning or at the end of the text. Double-tap again
to place the insertion point at the opposite end. VoiceOver tells you the position of the
insertion point.
144 Chapter 21 Accessibility

The insertion point and onscreen keyboard may appear automatically when you
UGNGEVCVGZV°GNF8QKEG1XGTCPPQWPEGUYJGP[QW¨TGKPGFKVKPIOQFG¤DCUGFQPVJG
rotor setting.
2 To type, do one of the following:
¥6QWEJV[RG¦D[FTCIIKPI[QWT°PIGTVQUGNGEVCMG[VJGPNKHVKPI[QWT°PIGTVQGPVGT
the character.
¥5VCPFCTFV[RG¦D[±KEMKPINGHVQTTKIJVVQUGNGEVCMG[QPVJGMG[DQCTFVJGPFQWDNG
tapping to enter the character.
'PVGTCEJCTCEVGTD[FTCIIKPI[QWT°PIGTCTQWPFVJGMG[DQCTFVQUGNGEVCMG[CPF
YJKNGJQNFKPIVJGMG[YKVJQPG°PIGTVCRRKPIVJGUETGGPYKVJCPQVJGT°PIGT
VoiceOver speaks the key when it’s selected, and again when it’s entered.
Enter an accented character: Double-tap and hold, until you hear a sound indicating
that the alternate characters have appeared, then drag left or right to select and hear
VJGEJQKEGU4GNGCUG[QWT°PIGTVQGPVGTVJGEWTTGPVUGNGEVKQP
Move the insertion point: Flick up or down to move the insertion point forward or
backward in the text. VoiceOver makes a sound when the insertion point moves, and
speaks the character that the insertion point moved across. Use the rotor to choose
whether you want to move the insertion point by characters, words, or lines.
Select text: Use the rotor to choose edit. Flick up or down to choose between the
Select and Select All functions, then double-tap. If you chose Select, the word closest
to the insertion point is selected when you double-tap. If you chose Select All, all the
text is selected.
Pinch to increase or decrease the selection.
Cut, copy, or paste: /CMGUWTGVJGTQVQTKUUGVVQGFKV9KVJVGZVUGNGEVGF±KEMWRQT
down to choose Cut, Copy, or Paste, then double-tap.
Undo: 5JCMGK2CFQT±KEMNGHVQTTKIJVVQEJQQUGVJGCEVKQPVQWPFQVJGPFQWDNGVCR
Change the pitch: In Settings, choose General > Accessibility > VoiceOver, then tap the
Use Pitch Change button. Then, when you delete a letter, it’s spoken with a lower pitch.
Speak keys phonetically: In Settings, choose General > Accessibility > VoiceOver,
then tap the Use Phonetics button. Then, when you pause on a key, VoiceOver speaks
the letter of that key phonetically (for example, alpha for a, bravo for b, charlie for c,
and so on).
145
Chapter 21 Accessibility

Controlling VoiceOver Using an Apple Wireless Keyboard
You can control VoiceOver using an Apple Wireless Keyboard paired with iPad. See
“Using Bluetooth Devices” on page 43.
The VoiceOver keyboard commands let you navigate the screen, select items, read
UETGGPEQPVGPVUCFLWUVVJGTQVQTCPFRGTHQTOQVJGT8QKEG1XGTCEVKQPU#NNVJGMG[DQCTF
commands (except one) include Control-Option, abbreviated in the table below as “VO.”
VoiceOver Help speaks keys or keyboard commands as you type them. You can
use VoiceOver Help to learn the keyboard layout and the actions associated with
key combinations.
VoiceOver Keyboard Commands
VO = Control-Option
Read all, starting from the current position 81£#
Read from the top 81£$
Move to the status bar 81£/
Press the Home button 81£*
Select the next or previous item 81£4KIJV#TTQYQT81£.GHV#TTQY
Tap an item 81£5RCEGDCT
&QWDNGVCRYKVJVYQ°PIGTU 81£¦¦
Choose the next or previous rotor item 81£7R#TTQYQT81£&QYP#TTQY
Choose the next or previous speech rotor item 81£%QOOCPF£.GHV#TTQYQT81£%QOOCPF£
Right Arrow
Adjust speech rotor item 81£%QOOCPF£7R#TTQYQT81£%QOOCPF£
Down Arrow
Mute or unmute VoiceOver 81£5
6WTPVJGUETGGPEWTVCKPQPQTQÒ 81£5JKHV5
Turn on VoiceOver help 81£-
4GVWTPVQVJGRTGXKQWUUETGGPQTVWTPQÒ
VoiceOver help
Escape
Quick Nav
6WTPQP3WKEM0CXVQEQPVTQN8QKEG1XGTWUKPIVJGCTTQYMG[U3WKEM0CXKUQÒD[FGHCWNV
6WTP3WKEM0CXQPQTQÒ .GHV#TTQY£4KIJV#TTQY
Select the next or previous item Right Arrow or Left Arrow
5GNGEVVJGPGZVQTRTGXKQWUKVGOURGEK°GF
by the rotor setting
Up Arrow or Down Arrow
146 Chapter 21 Accessibility

5GNGEVVJG°TUVQTNCUVKVGO %QPVTQN£7R#TTQYQT%QPVTQN£&QYP#TTQY
“Tap” an item 7R#TTQY£&QYP#TTQY
Scroll up, down, left, or right 1RVKQP£7R#TTQY1RVKQP£&QYP#TTQY
1RVKQP£.GHV#TTQYQT1RVKQP£4KIJV#TTQY
Change the rotor 7R#TTQY£.GHV#TTQYQT7R#TTQY£4KIJV#TTQY
Using Maps
Use VoiceOver to zoom in or out, select pins, and get information about locations.
Zoom in or out: 7UGVJGTQVQTVQEJQQUG\QQOOQFGVJGP±KEMWRQTFQYPVQ\QQO
in or out.
Select a pin: 6QWEJCRKPQT±KEMNGHVQTTKIJVVQOQXGHTQOQPGKVGOVQCPQVJGT
Get information about a location: With a pin selected, double-tap to display the
KPHQTOCVKQP±CI(NKEMNGHVQTTKIJVVQUGNGEVVJG±CIVJGPFQWDNGVCRVQFKURNC[VJG
information page.
Using a Braille Display with VoiceOver
Setting Up a Braille Display
You can use a refreshable Bluetooth braille display to read VoiceOver output in
braille. In addition, braille displays with input keys and other controls can be used
to control iPad when VoiceOver is turned on. iPad works with many of the most
popular wireless braille displays. For a list of supported braille displays, see
www.apple.com/accessibility/voiceover/devicesupport.
Set up a braille display:
1 Turn on the braille display.
2 On iPad, turn on Bluetooth.
In Settings, choose General > Bluetooth, then tap the Bluetooth switch.
3 In Settings, choose General > Accessibility > VoiceOver > Braille, then choose the
braille display.
6WTPEQPVTCEVGFDTCKNNGQPQTQÒIn Settings, choose General > Accessibility >
VoiceOver > Braille, then tap the Contracted Braille switch.
Choosing a Language
The braille display uses the language that’s set for Voice Control. By default, this is the
language that’s set for iPad in Settings > International > Language. You can use the
8QKEG1XGTNCPIWCIGUGVVKPIVQUGVCFKÒGTGPVNCPIWCIGHQT8QKEG1XGTCPFDTCKNNGFKURNC[U
Set the language for VoiceOver: In Settings, choose General > International >
Voice Control, then choose the language.
If you change the language for iPad, you may need to reset the language for VoiceOver
and your braille display.
147
Chapter 21 Accessibility

Controlling VoiceOver with Your Braille Display
You can set the leftmost or rightmost cell of your braille display to provide system
status and other information:
Announcement History contains an unread message
The current Announcement History message has not been read
VoiceOver speech is muted
The iPad battery is low (less than 20% charge)
iPad is in landscape orientation
6JGUETGGPFKURNC[KUVWTPGFQÒ
The current line contains additional text to the left
The current line contains additional text to the right
Set the leftmost or rightmost cell to display status information: In Settings, choose
General > Accessibility > VoiceOver > Braille > Status Cell, then tap Left or Right.
See an expanded description of the status cell: On your braille display, press the
status cell’s router button.
Zoom
The Zoom accessibility feature lets you magnify the entire screen to help you see
what’s on the display.
6WTP<QQOQPQTQÒIn Settings, choose General > Accessibility > Zoom, then tap the
<QQO1P1ÒUYKVEJ1TWUG6TKRNGENKEM*QOGUGG¥Triple-Click Home” on page 150).
Zoom in or out: &QWDNGVCRVJGUETGGPYKVJVJTGG°PIGTU$[FGHCWNVVJGUETGGPKU
OCIPK°GFRGTEGPV+H[QWOCPWCNN[EJCPIGVJGOCIPK°ECVKQPD[WUKPIVJGVCR
CPFFTCIIGUVWTGFGUETKDGFDGNQYK2CFCWVQOCVKECNN[TGVWTPUVQVJCVOCIPK°ECVKQP
YJGP[QW\QQOKPD[FQWDNGVCRRKPIYKVJVJTGG°PIGTU
+PETGCUGOCIPK°ECVKQP9KVJVJTGG°PIGTUVCRCPFFTCIWRVQKPETGCUGOCIPK°ECVKQP
QTFQYPVQFGETGCUGOCIPK°ECVKQP6JGVCRCPFFTCIIGUVWTGKUUKOKNCTVQCFQWDNGVCR
GZEGRV[QWFQP¨VNKHV[QWT°PIGTUQPVJGUGEQPFVCR¤KPUVGCFFTCI[QWT°PIGTUQP
the screen.
Move around the screen: 9JKNG\QQOGFKPFTCIVJGUETGGPYKVJVJTGG°PIGTU
*QNFQPG°PIGTPGCTVJGGFIGQHVJGFKURNC[VQRCPVQVJCVUKFGQHVJGUETGGPKOCIG
/QXG[QWT°PIGTENQUGTVQVJGGFIGVQRCPOQTGSWKEMN[9JGP[QWQRGPCPGY
screen, Zoom always goes to the upper-center of the screen.
While using Zoom with an Apple Wireless Keyboard (see “Controlling VoiceOver Using
an Apple Wireless Keyboard” on page 14 6), the screen image follows the insertion
point, keeping it in the center of the display.
148 Chapter 21 Accessibility

Large Text
Large Text lets you make the text larger in Mail and Notes. You can choose 20-point,
24-point, 32-point, 40-point, 48-point, or 56-point text.
Set the text size: In Settings, choose General > Accessibility, tap Large Text, then tap
the text size you want.
White on Black
Use White on Black to invert the colors on the iPad display, which may make it
easier to read the screen. When White on Black is turned on, the screen looks like a
photographic negative.
Invert the screen’s colors: In Settings, choose General > Accessibility, then tap “White
on Black.”
Mono Audio
Mono Audio combines the sound of the left and right channels into a mono signal
played on both sides. This lets users with hearing impairment in one ear hear the
entire sound signal with the other ear.
6WTP/QPQ#WFKQQPQTQÒIn Settings, choose General > Accessibility, then tap the
Mono Audio button.
Speak Auto-Text
Speak Auto-text speaks the text corrections and suggestions iPad makes when you type.
6WTP5RGCM#WVQVGZVQPQTQÒIn Settings, choose General > Accessibility, then tap
the Speak Auto-text button.
Speak Auto-text also works with VoiceOver or Zoom.
149
Chapter 21 Accessibility

Triple-Click Home
6TKRNGENKEM*QOGKUCPGCU[YC[VQVWTPUQOGCEEGUUKDKNKV[HGCVWTGUQPQTQÒD[
quickly pressing the Home button three times. You can set Triple-click Home to turn
8QKEG1XGTQPQTQÒVWTP9JKVGQP$NCEMQPQTQÒQTCUMKH[QWYQWNFNKMGVQVTKRNGENKEM
the Home button to:
6WTP8QKEG1XGTQPQTQÒ
6WTP9JKVGQP$NCEMQPQTQÒ
6WTP<QQOQPQTQÒ
6TKRNGENKEM*QOGKUPQTOCNN[VWTPGFQÒ
Set the Triple-click Home function: In Settings, choose General > Accessibility >
Triple-click Home, then choose the function you want.
Closed Captioning and Other Helpful Features
Many standard features available on iPad also help make it accessible to all users,
including those with disabilities.
Widescreen Keyboards
All the built-in iPad apps show a larger onscreen keyboard when you rotate iPad to
landscape view. You can also type using an Apple Wireless Keyboard.
Minimum Font Size for Mail Messages
To increase readability, set the minimum font size for Mail message text to Large,
Extra Large, or Giant. See “Mail” on page 164.
Universal Access in Mac OS X
Take advantage of the Universal Access features in Mac OS X when you use iTunes to
sync information and content from your iTunes library to iPad. In the Finder, choose
Help > Mac Help, then search for “universal access.”
For more information about iPad and Mac OS X accessibility features, go to
www.apple.com/accessibility.
Closed Captioning
You can turn on closed captioning for videos in Video settings. See “Video” on
page 168.
150 Chapter 21 Accessibility

Settings 22
About Settings
7UG5GVVKPIUVQRGTUQPCNK\GK2CFCRRUUGVVJGFCVGCPFVKOGEQP°IWTG[QWTPGVYQTM
connection, and change other iPad settings.
Airplane Mode
Airplane Mode disables the wireless features of iPad to comply with airline regulations.
6WTP#KTRNCPG/QFGQPQTQÒ6CR5GVVKPIUCPFVWTP#KTRNCPG/QFGQPQTQÒ
When airplane mode is on, a small appears in the status bar at the top of the
UETGGP9K(KCPF$NWGVQQVJUKIPCNUCTGP¨VGOKVVGFCPF)25TGEGRVKQPKUVWTPGFQÒ
disabling many iPad features. You won’t be able to:
Send or receive email
Browse the Internet
Sync your contacts, calendars, or bookmarks
Stream YouTube videos
Get weather reports
Get map locations
Use the iTunes Store, iBookstore, or the App Store
Use Game Center
If allowed by the aircraft operator and applicable laws and regulations, you can
continue to use iPad to:
Listen to music or watch videos
Check your calendar
View photos
151

Take notes
Read email messages stored on iPad
Where allowed by the aircraft operator and applicable laws and regulations, you can
turn Wi-Fi back on, so you can:
Send and receive email
Browse the Internet
Sync your contacts, calendars, and bookmarks
Stream YouTube videos
Use the iTunes Store, iBookstore, or the App Store
Use Game Center
You may also be allowed to turn on Bluetooth and use Bluetooth devices with iPad.
VPN
6JKUUGVVKPICRRGCTUYJGP[QWEQP°IWTGC8KTVWCN2TKXCVG0GVYQTM8205GG¥VPN
Access” on page 172.
6WTP820QPQTQÒ6CR820VQVWTPKVQPQTQÒ
5GVWRC820EQP°IWTCVKQPChoose General > Network > VPN.
Wi-Fi
Wi-Fi settings determine whether iPad uses local Wi-Fi networks to connect to the
+PVGTPGV+HC9K(KPGVYQTMKUP¨VCXCKNCDNGQTKH[QWVWTP9K(KQÒVJGPK2CFEQPPGEVUVQ
the Internet over your cellular data network (iPad Wi-Fi + 3G).
6WTP9K(KQPQTQÒ%JQQUG9K(KVJGPVWTP9K(KQPQTQÒ
Join a Wi-Fi network: Choose Wi-Fi, wait a moment as iPad detects networks in range,
then select a network. If necessary, enter a password and tap Join. (Networks that
require a password appear with a lock icon.)
1PEG[QWLQKPC9K(KPGVYQTMK2CFCWVQOCVKECNN[LQKPUKVYJGPGXGTVJGPGVYQTMKU
KPTCPIG+HOQTGVJCPQPGRTGXKQWUPGVYQTMKUKPTCPIGK2CFLQKPUVJGQPGOQUV
recently used.
9JGPK2CFLQKPUC9K(KPGVYQTMVJG9K(K icon in the status bar at the top of the
screen shows signal strength. The more bars you see, the stronger the signal.
Set iPad to ask if you want to join a new network: Choose Wi-Fi, then turn “Ask to
,QKP0GVYQTMU¦QPQTQÒ
152 Chapter 22 Settings

When you try to access the Internet—by using Safari or Mail for example—and you
aren’t in range of a Wi-Fi network you’ve previously used, this option tells iPad to
look for another network. iPad displays a list of available Wi-Fi networks that you
can choose from. Networks that require a password show a lock icon. If “Ask to
,QKP0GVYQTMU¦KUVWTPGFQÒCPFCRTGXKQWUN[WUGF9K(KQTEGNNWNCTFCVCPGVYQTMKUP¨V
CXCKNCDNG[QWOWUVOCPWCNN[LQKPCPGVYQTMVQEQPPGEVVQVJG+PVGTPGV
Forget a network, so iPad doesn’t join it automatically: Choose Wi-Fi, then tap
PGZVVQCPGVYQTM[QW¨XGLQKPGFDGHQTG6JGPVCR¥(QTIGVVJKU0GVYQTM¦
Join a closed Wi-Fi network: 6QLQKPC9K(KPGVYQTMVJCVKUP¨VUJQYPKPVJGNKUV
of networks, choose Wi-Fi > Other, then enter the network name. If the network
requires a password, tap Security, tap the type of security the network uses, and
enter the password.
To connect to a closed network, you must know the network name, password, and
security type.
Some Wi-Fi networks may require you to provide additional information, such as a
client ID or static IP address. Ask your network administrator what settings to use.
Adjust settings to connect to a Wi-Fi network: Choose Wi-Fi, then tap next to
a network.
0QVK°ECVKQPU
This setting appears when you open an app, such as Game Center, that uses the Apple
2WUJ0QVK°ECVKQPUGTXKEG2WUJPQVK°ECVKQPUCNGTV[QWVQPGYKPHQTOCVKQPGXGPYJGP
VJGCRRKUP¨VTWPPKPI0QVK°ECVKQPUXCT[D[CRRDWVOC[KPENWFGVGZVQTUQWPFCNGTVU
CPFCPWODGTGFDCFIGQPVJGCRRKEQPQPVJG*QOGUETGGP6WTPPQVK°ECVKQPUQÒKH
[QWFQP¨VYCPVVQDGPQVK°GFQTVQEQPUGTXGDCVVGT[NKHG5GG¥Side Switch” on page 160.
6WTPCNNPQVK°ECVKQPUQPQTQÒ6CR0QVK°ECVKQPUVJGPVWTP0QVK°ECVKQPUQPQTQÒ
6WTPUQWPFUCNGTVUQTDCFIGUQPQTQÒHQTCPCRR6CR0QVK°ECVKQPUEJQQUGCPCRR
HTQOVJGNKUVVJGPEJQQUGVJGV[RGUQHPQVK°ECVKQPU[QWYCPVVQVWTPQPQTQÒ
Location Services
Location Services allows apps such as Maps to gather and use data based on your
location. Location Services doesn’t connect the data it collects with your personally
KFGPVK°CDNGKPHQTOCVKQP+H[QWJCXG9K(KVWTPGFQP[QWTCRRTQZKOCVGNQECVKQPKU
determined using available information from local Wi-Fi networks. iPad Wi-Fi + 3G also
uses cellular networks and GPS to determine your location.
When an app is using location services, appears in the status bar.
153
Chapter 22 Settings

Every app that uses location services appears on the Location Services settings screen,
UJQYKPIYJGVJGTNQECVKQPUGTXKEGUKUVWTPGFQPQTQÒHQTVJCVCRR appears for each
app that has requested your location within the last 24 hours. If you don’t want to use
VJKUHGCVWTG[QWECPVWTPNQECVKQPUGTXKEGUQÒHQTUQOGCRRUQTHQTCNNCRRU+H[QWVWTP
NQECVKQPUGTXKEGUQÒ[QW¨TGRTQORVGFVQVWTPKVQPCICKPVJGPGZVVKOGCPCRRVTKGUVQ
use the feature.
6WTPNQECVKQPUGTXKEGUQPQTQÒHQTCNNCRRUChoose General > Location Services,
VJGPVWTPNQECVKQPUGTXKEGUQPQTQÒ
6WTPNQECVKQPUGTXKEGUQPQTQÒHQTUQOGCRRUChoose General > Location Services,
EJQQUGCPCRRVJGPVWTPNQECVKQPUGTXKEGUQPQTQÒHQTVJCVCRR
6QEQPUGTXGDCVVGT[NKHGVWTPNQECVKQPUGTXKEGUQÒYJGP[QW¨TGPQVWUKPIKV
Carrier
This setting appears on iPad Wi-Fi + 3G when you’re outside of your carrier’s
network and other local carrier data networks are available to use for cellular
network Internet connections.
Select a carrier: Choose Carrier and select the network you want to use.
Cellular Data
7UG%GNNWNCT&CVCUGVVKPIUK2CF9K(K)VQVWTP&CVC4QCOKPIQPQTQÒXKGYQT
EJCPIG[QWTCEEQWPVKPHQTOCVKQPQTCFFC2GTUQPCN+FGPVK°ECVKQP0WODGT2+0VQ
lock the micro-SIM card (on some models).
6WTPVJGEGNNWNCTFCVCPGVYQTMQPQTQÒChoose Cellular Data, then turn cellular data
QPQTQÒ
6WTPFCVCTQCOKPIQPQTQÒ%JQQUG&CVC4QCOKPIVJGPVWTPFCVCTQCOKPIQPQTQÒ
View your account information: Tap View Account to view or change your account
information.
Add a SIM PIN (on some models): Tap SIM PIN and add a PIN to lock your micro-SIM
card.
Brightness & Wallpaper
7UG$TKIJVPGUUUGVVKPIUVQCFLWUVVJGUETGGPDTKIJVPGUUVQCEQOHQTVCDNGNGXGN7UG
Wallpaper settings to personalize iPad.
Adjust the screen brightness: Choose Brightness, then drag the slider.
154 Chapter 22 Settings

Set whether iPad adjusts the screen brightness automatically: Choose Brightness,
VJGPVWTP#WVQ$TKIJVPGUUQPQTQÒ+H#WVQ$TKIJVPGUUKUQPK2CFCFLWUVUVJGUETGGP
brightness for current light conditions using the built-in ambient light sensor. To
OCPWCNN[CFLWUVVJGUETGGPDTKIJVPGUUUGG¥#FLWUVKPI$TKIJVPGUU” on page 17.
A wallpaper background picture is displayed on the Lock screen and on the Home
screen. You can choose one of the images that came with iPad, an image you’ve saved
to iPad, or a photo in your Photo Library. An image that’s at least 1024 x 1024 pixels
°NNUVJGUETGGPYJGPK2CFKUTQVCVGF
Set wallpaper: Choose Wallpaper, then choose an image and then do one of
the following:
To use the image as the background for the Lock screen, tap Set Lock Screen.
To use the image as the background for the Home screen, tap Set Home Screen.
To use the image as the background for both the Lock screen and Home screen,
tap Set Both.
Picture Frame
Picture Frame mode turns iPad into an animated picture frame. Choose which
transitions and photos to display. Choose whether to zoom in on faces and whether to
UJWÔGRJQVQU
Activate Picture Frame: Tap on the Lock screen.
General
)GPGTCNUGVVKPIUKPENWFGFCVGCPFVKOGUGEWTKV[PGVYQTMCPFQVJGTUGVVKPIUVJCVCÒGEV
OQTGVJCPQPGCRR6JKUKUCNUQYJGTG[QWECP°PFKPHQTOCVKQPCDQWV[QWTK2CFQT
reset iPad to its original state.
About
Choose General > About to get information about iPad, including:
Number of songs, videos, photos, and apps
Total storage capacity
Space available
Software version
Model and serial numbers
Cellular data number (iPad Wi-Fi + 3G), and Wi-Fi and Bluetooth addresses
/QFGO°TOYCTGXGTUKQPQHVJGEGNNWNCTVTCPUOKVVGTK2CF9K(K)
IMEI (International Mobile Equipment Identity) and ICCID (Integrated Circuit Card
+FGPVK°GTQT5OCTV%CTFPWODGTUK2CF9K(K)
Legal and Regulatory information
155
Chapter 22 Settings

Usage
Show battery percentage: Turn Battery Percentage on to display the percentage of
battery charge next to the battery icon in the upper-right corner.
See cellular network data: On iPad Wi-Fi + 3G, see the amount of data sent and
received using a cellular data network.
Reset your usage statistics: Tap Reset Statistics to clear accumulated data and statistics.
Sounds
Adjust the ringer and alert volume: Choose General > Sounds and drag the slider. If
“Change with Buttons” is turned on, use the volume buttons on the side of iPad. The
volume buttons don’t change the ringer and alert volume if a song or video is playing.
Use the volume buttons to adjust the ringer and alert volume: Choose General >
Sounds, then tap “Change with Buttons.”
Set the ringtone: Choose General > Sounds > Ringtone, then choose a ringtone.
5GVCNGTVCPFGÒGEVUUQWPFU%JQQUG)GPGTCN 5QWPFUVJGPVWTPKVGOUQPQTQÒ
9JGP¥%JCPIGYKVJ$WVVQPU¦KUQPK2CFRNC[UUQWPFUHQTCNGTVUCPFGÒGEVUVJCVCTG
turned on.
You can set iPad to play a sound whenever you:
Get a new email message
Send an email message
Have an Calendar event that you’ve set to alert you
Lock iPad
Type using the onscreen keyboard
Network
7UG0GVYQTMUGVVKPIUVQEQP°IWTGC820XKTVWCNRTKXCVGPGVYQTMEQPPGEVKQPQT
access your Wi-Fi settings.
#FFCPGY820EQP°IWTCVKQPChoose General > Network > VPN > Add VPN
%QP°IWTCVKQP
VPNs used within organizations allow you to communicate private information
UGEWTGN[QXGTCPQPRTKXCVGPGVYQTM;QWOC[PGGFVQEQP°IWTG820HQTGZCORNG
to access your work email on iPad.
iPad can connect to any VPN that uses the L2TP, PPTP, or Cisco IPSec protocol. VPN
works over both Wi-Fi and cellular data network (iPad Wi-Fi + 3G) connections.
Ask your network administrator which settings to use. In most cases, if you’ve set up
VPN on your computer, you can use the same VPN settings for iPad.
Once you enter VPN settings, a VPN switch appears in the Settings menu, which you
ECPWUGVQVWTP820QPQTQÒ
156 Chapter 22 Settings

820OC[CNUQDGCWVQOCVKECNN[UGVWRD[CEQP°IWTCVKQPRTQ°NG5GG¥Using
%QP°IWTCVKQP2TQ°NGU” on page 171.
%JCPIGC820EQP°IWTCVKQPChoose General > Network > VPN and tap the
EQP°IWTCVKQP[QWYCPVVQWRFCVG
6WTP820QPQTQÒ6CR5GVVKPIUVJGPVWTP820QPQTQÒ9JGP820KUQP[QWUGGVJG
icon in the status bar at the top of the screen.
&GNGVGC820EQP°IWTCVKQPChoose General > Network > VPN, tap the blue arrow
VQVJGTKIJVQHVJGEQP°IWTCVKQPPCOGVJGPVCR&GNGVG820CVVJGDQVVQOQHVJG
EQP°IWTCVKQPUETGGP
Bluetooth
iPad can connect wirelessly to an Apple Wireless Keyboard for wireless typing or to
Bluetooth headphones for wireless listening. See “Using Bluetooth Devices” on page 43.
6WTP$NWGVQQVJQPQTQÒ%JQQUG)GPGTCN $NWGVQQVJCPFVWTP$NWGVQQVJQPQTQÒ
When Bluetooth is on, you see the Bluetooth icon in the status bar at the top of
the screen.
Spotlight Search
You can specify the content areas you want to search on iPad using Spotlight.
Set the content areas Spotlight searches: Choose General > Spotlight Search and tap
an item to select or deselect it.
Set the search result order: Choose General > Spotlight Search, touch next to an
item, and drag it up or down to rearrange the search order.
Auto-Lock
5GV#WVQ.QEMVQVWTPQÒVJGFKURNC[CPFRTGXGPVWPKPVGPFGFQRGTCVKQPQH[QWTK2CF
Set the amount of time before iPad locks: Choose General > Auto-Lock and choose
a time.
Passcode Lock
Initially, iPad doesn’t require you to enter a passcode to unlock it. For security, you can
create a passcode.
Set a passcode: Choose General > Passcode Lock > Turn Passcode On. Enter a 4-digit
passcode, then enter the passcode again to verify it. iPad then requires you to enter
the passcode to unlock it or to display the passcode lock settings.
Set how long before your passcode is required: Choose General > Passcode Lock,
then enter your passcode. Tap Require Passcode and select how long iPad can be idle
before you need to enter a passcode to unlock it.
6WTPVJGRCUUEQFGQÒ%JQQUG)GPGTCN 2CUUEQFG.QEM 6WTP2CUUEQFG1ÒVJGP
enter your passcode.
157
Chapter 22 Settings

Change the passcode: Choose General > Passcode Lock, enter your passcode,
then tap Change Passcode. Enter your passcode again, then enter and reenter your
new passcode.
If you forget your passcode, you must restore the iPad software. See “Removing a
Backup” on page 182.
6WTP5KORNG2CUUEQFGQPQTQÒChoose General > Passcode Lock, then turn Simple
2CUUEQFGQPQTQÒ
#UKORNGRCUUEQFGKUCHQWTFKIKVPWODGT6QKPETGCUGUGEWTKV[VWTPQÒ5KORNG2CUUEQFG
and use a longer passcode that has a combination of numbers, letters, punctuation,
and special characters.
6WTP2KEVWTG(TCOGQPQTQÒChoose General > Passcode Lock and turn Picture Frame
QPQTQÒ
When Picture Frame is on, iPad displays your photos from the locked screen. See
“Picture Frame” on page 155.
Erase all data after ten failed passcode attempts: Choose General > Passcode Lock,
enter your passcode, and tap Erase Data to turn it on.
After ten failed passcode attempts, your settings are reset to their original values, all
your information and media are erased, and the encryption key is removed.
iPad Cover Lock/Unlock
You can automatically lock or unlock iPad 2 when you use it with the iPad Smart Cover
(available separately).
Use the cover to lock or unlock iPad: Choose General > iPad Cover Lock/Unlock, then
tap On. iPad automatically locks and goes to sleep when you close the cover, and then
wakes and unlocks when you open the cover.
If you have a passcode set, you have to enter it when you open the cover to wake iPad.
Restrictions
You can set restrictions for the use of some apps and for iPod content on iPad. For
GZCORNGRCTGPVUECPTGUVTKEVCEEGUUVQGZRNKEKVEQPVGPVQTVWTPQÒ;QW6WDGCEEGUU
Turn on restrictions:
1 Choose General > Restrictions, then tap Enable Restrictions.
2 Enter a four-digit passcode.
3 Reenter the passcode.
6WTPQÒTGUVTKEVKQPUChoose General > Restrictions, then enter the passcode.
Tap Disable Restrictions, then reenter the passcode.
If you forget your passcode, you must restore the iPad software using iTunes.
See “Removing a Backup” on page 182.
158 Chapter 22 Settings

Set app restrictions: Set the restrictions you want by tapping individual controls on or
QÒ+PKVKCNN[CNNEQPVTQNUCTGQPWPTGUVTKEVGF6CRCPKVGOVQVWTPKVQÒCPFTGUVTKEVKVUWUG
Safari
Safari is disabled and its icon is removed from the Home screen. You cannot use
Safari to browse the web or access web clips. Other third-party apps may allow web
browsing even if Safari is disabled.
YouTube
YouTube is disabled and its icon is removed from the Home screen.
Camera
The Camera app is disabled and its icon is removed from the Home screen. You cannot
take photos or videos with iPad.
FaceTime
You cannot make or receive FaceTime video chats.
iTunes
The iTunes Store is disabled and its icon is removed from the Home screen. You cannot
preview, purchase, or download content.
Ping
Ping is disabled. You cannot follow artists or other people.
Installing
Apps
Installing apps is disabled and the App Store icon is removed from the Home screen.
Deleting
Apps
Deleting apps from iPad is disabled. doesn’t appear on app icons when you
customize the Home screen.
Location
Location Services settings cannot be changed.
Accounts
Mail account settings cannot be changed.
Restrict purchases within apps: 6WTPQÒ+P#RR2WTEJCUGU9JGPGPCDNGFVJKUHGCVWTG
allows you to purchase additional content or features within apps downloaded from
the App Store.
159
Chapter 22 Settings

Set content restrictions: Tap Ratings For, then select a country in the list. You can set
restrictions using that country’s ratings system for the following categories of content:
Music & Podcasts
Movies
TV Shows
Apps
In the United States, for example, to allow only movies rated PG or below, tap Movies,
then select PG from the list.
Note: Not all countries or regions have a rating system.
Restrict multiplayer games: 6WTPQÒ/WNVKRNC[GT)COGU
9JGP/WNVKRNC[GT)COGUKUVWTPGFQÒ[QWECP¨VTGSWGUVCOCVEJQTUGPFQTTGEGKXG
invitations to play games or add friends in Game Center.
Restrict adding friends: 6WTPQÒ#FFKPI(TKGPFU
9JGP#FFKPI(TKGPFUKUVWTPGFQÒ[QWECP¨VOCMGQTTGEGKXGHTKGPFTGSWGUVUKP)COG
Center. You can continue to play with existing friends if Multiplayer Games is turned on.
Side Switch
;QWECPWUGVJG5KFG5YKVEJVQNQEMUETGGPQTKGPVCVKQPQTVQUKNGPEGPQVK°ECVKQPUCPF
UQWPFGÒGEVU
Lock the screen in portrait or landscape orientation: Choose General > Use the Side
Switch…, then tap Lock Rotation.
/WVGPQVK°ECVKQPUCPFQVJGTUQWPFGÒGEVUChoose General > Use the Side Switch…,
then tap Mute.
The Side Switch doesn’t mute audio or video playback.
Date and Time
These settings apply to the time shown in the status bar at the top of the screen,
and in world clocks and calendars.
Set whether iPad shows 24-hour time or 12-hour time: Choose General > Date
6KOGCPFVWTP*QWT6KOGQPQTQÒ*QWT6KOGOC[PQVDGCXCKNCDNGKPCNN
countries or regions.)
Set whether iPad updates the date and time automatically: Choose General >
&CVG6KOGVJGPVWTP5GV#WVQOCVKECNN[QPQTQÒ
Set the date and time manually: Choose General > Date & Time, then turn Set
#WVQOCVKECNN[QÒ6CR6KOG<QPGCPFGPVGTVJGPCOGQHCOCLQTEKV[KP[QWTVKOG\QPG
Tap the “Date & Time” button, then tap “Set Date & Time” and enter the date and time.
160 Chapter 22 Settings

Keyboard
6WTP#WVQ%CRKVCNK\CVKQPQPQTQÒChoose General > Keyboard, then turn Auto-
%CRKVCNK\CVKQPQPQTQÒ
Normally, iPad automatically capitalizes words after you type sentence-ending
punctuation or a return character.
6WTP#WVQ%QTTGEVKQPQPQTQÒChoose General > Keyboard and turn Auto-Correction
QPQTQÒ
Normally, if the default keyboard for the language you select has a dictionary, iPad
automatically suggests corrections or completed words as you type.
Check spelling as you type: Choose General > Keyboard and turn Check Spelling
QPQTQÒ
Enable caps lock: %JQQUG)GPGTCN -G[DQCTFCPFVWTP'PCDNG%CRU.QEMQPQTQÒ
If caps lock is enabled and you double-tap the Shift key on the onscreen keyboard,
all letters you type are uppercase. The Shift key turns blue when caps lock is on.
6WTPVJG¥¦UJQTVEWVQPQTQÒ%JQQUG)GPGTCN -G[DQCTFCPFVWTP¥¦5JQTVEWVQPQTQÒ
The “.” shortcut lets you double-tap the space bar to enter a period followed by a space
when you’re typing. It’s initially on.
Add international keyboards: Choose General > Keyboards > International Keyboards
> Add New Keyboard, and tap the keyboards you want to add.
Change a keyboard layout: Choose General > Keyboards > International Keyboards
and select a keyboard. For some languages, you can change the both the onscreen
keyboard layout and the external hardware keyboard layout.
International
7UG+PVGTPCVKQPCNUGVVKPIUVQUGVVJGNCPIWCIGHQTK2CFCFFMG[DQCTFUHQTFKÒGTGPV
languages, and set the date, time, and telephone number formats for your region.
You can also choose a calendar format.
Set the language for iPad: Choose General > International > Language, choose the
language you want to use, and tap Done.
6WTPKPVGTPCVKQPCNMG[DQCTFUQPQTQÒChoose General > International > Keyboards,
and add the keyboards you want to use.
If more than one keyboard is turned on, press and hold on the keyboard to see a
menu of keyboards. See Appendix B, “International Keyboards,” on page 174.
Set date, time, and telephone number formats: Choose General > International >
Region Format, and choose your region.
The Region Format also determines the language used for the days and months that
appear in built-in iPad apps.
Set a calendar format: Choose General > International > Calendar and select the
calendar format you want to use—for example Gregorian, Japanese, or Buddhist.
161
Chapter 22 Settings

Accessibility
To turn on accessibility features, go to Accessibility settings and choose the features
you want. See Chapter 21, “Accessibility,” on page 137.
Resetting iPad
Reset all settings: Choose General > Reset > Reset All Settings.
Enter your passcode if you have one. All your settings are reset. Information (such as
your contacts and calendars) and media (such as your songs and videos) aren’t deleted.
Erase all content and settings: Choose General > Reset > Erase All Content and Settings.
Enter your passcode if you have one. This resets all iPad settings to their original values
and erases all your information and media.
Reset network settings: Choose General > Reset > Reset Network Settings.
Enter your passcode if you have one. When you reset network settings, your list of
RTGXKQWUN[WUGFPGVYQTMUCPF820UGVVKPIUPQVKPUVCNNGFD[CEQP°IWTCVKQPRTQ°NGCTG
TGOQXGF9K(KKUVWTPGFQÒCPFVJGPDCEMQPFKUEQPPGEVKPI[QWHTQOCP[PGVYQTM
you’re on. The Wi-Fi and “Ask to Join Networks” settings remain turned on.
6QTGOQXG820UGVVKPIUKPUVCNNGFD[CEQP°IWTCVKQPRTQ°NGEJQQUG5GVVKPIU )GPGTCN
2TQ°NGVJGPUGNGEVVJGRTQ°NGCPFVCR4GOQXG
Reset the keyboard dictionary: Choose General > Reset > Reset Keyboard Dictionary.
Enter your passcode if you have one. You add words to the keyboard dictionary by
TGLGEVKPIYQTFUK2CFUWIIGUVUCU[QWV[RG6CRCYQTFVQTGLGEVVJGEQTTGEVKQPCPF
add the word to the keyboard dictionary. Resetting the keyboard dictionary erases all
words you’ve added.
Reset the Home screen layout: Choose General > Reset > Reset Home Screen Layout
to reset your Home screen to its original settings.
Reset the location warnings: Choose General > Reset > Reset Location Warnings, and
enter your passcode if you have one.
Location warnings are the requests made by an app (such as Maps) to use Location
Services with that app. iPad stops presenting the warning for an app the second time
you tap OK. Tap Reset Location Warnings to resume the warnings.
162 Chapter 22 Settings

Mail, Contacts, Calendars
Use Mail, Contacts, Calendars settings to set up and customize accounts for iPad:
Microsoft Exchange
MobileMe
Google email
Yahoo! Mail
AOL
Other POP and IMAP mail systems
LDAP accounts for Contacts
CalDAV or iCalendar (.ics) accounts for Calendars
Accounts
6JG#EEQWPVUUGEVKQPNGVU[QWUGVWRCEEQWPVUQPK2CF6JGURGEK°EUGVVKPIUVJCV
appear depend on the type of account you’re setting up. Your service provider or
system administrator should be able to provide the information you need to enter.
For more information, see:
“ Adding Mail, Contacts, and Calendar Accounts” on page 31
“ Syncing and Adding Contacts” on page 92
“ Subscribing to Calendars” on page 88
Change an account’s settings: Choose “Mail, Contacts, Calendars,” choose an account,
then make the changes you want.
Changes you make to an account’s settings on iPad are not synced to your computer,
UQ[QWECPEQP°IWTG[QWTCEEQWPVUVQYQTMYKVJK2CFYKVJQWVCÒGEVKPIVJGCEEQWPV
settings on your computer.
Stop using an account: Choose “Mail, Contacts, Calendars,” choose an account, then
VWTP#EEQWPVQÒ
+HCPCEEQWPVKUQÒK2CFFQGUP¨VFKURNC[VJGCEEQWPVCPFFQGUP¨VUGPFQTEJGEMGOCKN
from or sync other information with that account, until you turn it back on.
Adjust advanced settings: Choose “Mail, Contacts, Calendars,” choose an account, tap
Advanced, then do one of the following:
To set whether drafts and deleted messages are stored on iPad or remotely on your email
server (IMAP accounts only), tap Drafts Mailbox or Deleted Mailbox.
If you store messages on iPad, you can see them even when iPad isn’t connected to
the Internet.
To adjust SSL and password settings, tap Advanced. Ask your network administrator or
Internet service provider for the correct settings.
163
Chapter 22 Settings

Delete an account from iPad: Choose “Mail, Contacts, Calendars,” choose an account,
then scroll down and tap Delete Account.
Deleting an account means you can no longer access the account on iPad. All email
and the contacts, calendar, and bookmark information synced with the account are
removed from iPad. However, deleting an account doesn’t remove the account or its
associated information from your computer.
Fetch New Data
6JKUUGVVKPINGVU[QWVWTP2WUJQPQTQÒHQT/QDKNG/G/KETQUQHV'ZEJCPIG;CJQQ
Mail, and any other push accounts on iPad. Push accounts automatically deliver new
information to iPad when new information appears on the server (delays may occur).
6QHGVEJQTU[PERWUJGFFCVCK2CFOWUVJCXGCP+PVGTPGVEQPPGEVKQP6WTP2WUJQÒVQ
suspend delivery of email and other information, or to conserve battery life.
9JGP2WUJKUQÒCPFYKVJCEEQWPVUVJCVFQP¨VUWRRQTVRWUJK2CFECPUVKNNEJGEM
the server to see if new information is available. Use the Fetch New Data setting
to determine how often data is requested. For optimal battery life, don’t fetch
too frequently.
Turn Push on: Choose “Mail, Contacts, Calendars” > Fetch New Data, then tap to
turn Push on.
Set how often to fetch data: Choose “Mail, Contacts, Calendars” > Fetch New Data, then
choose how often you want to fetch data. To conserve battery life, fetch less frequently.
Setting Push to OFF or setting Fetch to Manually in the Fetch New Data screen
overrides individual account settings.
Note: When Push is set to OFF, Find My iPad doesn’t work.
Mail
The Mail settings, except where noted, apply to all accounts you’ve set up on iPad.
6QVWTPCNGTVUUQWPFUHQTPGYQTUGPVOCKNQPQTQÒWUGVJG)GPGTCN 5QWPFUUGVVKPIU
Set the number of messages shown on iPad: Choose “Mail, Contacts, Calendars” >
Show, then choose a setting.
Choose to see the most recent 25, 50, 75, 100, or 200 messages. To download
additional messages when you’re in Mail, scroll to the bottom of your inbox and tap
Load More Messages.
Note: For Microsoft Exchange accounts, choose “Mail, Contacts, Calendars,” then
choose the Exchange account. Tap “Mail days to sync” and choose the number of days
of mail you want to sync with the server.
Set how many lines of each message are previewed in the message list: Choose
“Mail, Contacts, Calendars” > Preview, then choose a setting.
164 Chapter 22 Settings

;QWECPEJQQUGVQUGGWRVQ°XGNKPGUQHGCEJOGUUCIG6JCVYC[[QWECPUECPCNKUVQH
messages in a mailbox and get an idea of what each message is about.
Set a minimum font size for messages: Choose “Mail, Contacts, Calendars” > Minimum
Font Size, then choose Small, Medium, Large, Extra Large, or Giant.
Set whether iPad shows To and Cc labels in message lists: Choose “Mail, Contacts,
%CNGPFCTU¦VJGPVWTP5JQY6Q%E.CDGNQPQTQÒ
If Show To/Cc Label is on, or
Cc
next to each message in a list indicates whether
the message was sent directly to you or you received a copy.
5GVYJGVJGTK2CFEQP°TOUVJCV[QWYCPVVQFGNGVGCOGUUCIGChoose “Mail,
%QPVCEVU%CNGPFCTU¦VJGPKP/CKNUGVVKPIUVWTP#UM$GHQTG&GNGVKPIQPQTQÒ
Set whether iPad automatically loads remote images: Choose “Mail, Contacts,
%CNGPFCTU¦VJGPVWTP.QCF4GOQVG+OCIGUQPQTQÒ
+H.QCF4GOQVG+OCIGUKUQÒ[QWECPNQCFKOCIGUOCPWCNN[YJGPTGCFKPICOGUUCIG
Set whether iPad sends you a copy of every message you send: Choose “Mail,
%QPVCEVU%CNGPFCTU¦VJGPVWTP#NYC[U$EE/[UGNHQPQTQÒ
Add a signature to your messages: Choose “Mail, Contacts, Calendars” > Signature,
then type a signature.
You can set iPad to add a signature—your favorite quote, or your name, title, and
phone number, for example—to the bottom of every message you send.
Set the default email account: Choose “Mail, Contacts, Calendars” > Default Account,
then choose an account.
This setting determines which of your accounts a message is sent from when you
create a message from another iPad app—for example, by sending a photo from
Photos or tapping the email address of a business in Maps. To send the message from
CFKÒGTGPVCEEQWPVVCRVJG(TQO°GNFKPVJGOGUUCIGCPFEJQQUGVJGCEEQWPV
Contacts
Set how contacts are sorted: Choose “Mail, Contacts, Calendars,” then under Contacts
tap Sort Order and do one of the following:
6QUQTVD[°TUVPCOG°TUVtap First, Last.
6QUQTVD[NCUVPCOG°TUVtap Last, First.
Set how contacts are displayed: Choose “Mail, Contacts, Calendars,” then under
Contacts tap Display Order and do one of the following:
6QUJQY°TUVPCOG°TUVtap First, Last.
6QUJQYNCUVPCOG°TUVtap Last, First.
165
Chapter 22 Settings

Calendars
Set alerts to sound when you receive meeting invitations: Choose “Mail, Contacts,
Calendars,” then under Calendar tap “New Invitation Alerts” to turn it on.
Set how far back in the past to show your calendar events on iPad: Choose “Mail,
Contacts, Calendars” > Sync, then choose a period of time.
Turn on Calendar time zone support: Choose “Mail, Contacts, Calendars” > Time Zone
Support, then turn Time Zone Support on. Select a time zone for calendars by tapping
6KOG<QPGCPFGPVGTKPIVJGPCOGQHCOCLQTEKV[
When Time Zone Support is on, Calendar displays event dates and times in the time
\QPGQHVJGEKV[[QWUGNGEVGF9JGP6KOG<QPG5WRRQTVKUQÒ%CNGPFCTFKURNC[UGXGPVU
in the time zone of your current location as determined by the network time.
Important: If you’re traveling, iPad may not display events or sound alerts at the
correct local time. To manually set the correct time, see “Date and Time” on page 160.
Set alerts to sound when you receive a meeting invitation: Choose “Mail, Contacts,
Calendars,” then under Calendar tap “New Invitation Alerts” to turn it on.
Safari
Safari settings let you select your Internet search engine, set security options, and for
developers, turn on debugging.
General
To perform Internet searches, you can set the default search engine to Google, Yahoo!,
or Bing.
Select a search engine: Choose Safari > Search Engine and select the search engine
you want to use.
;QWECPUGV5CHCTKVQCWVQOCVKECNN[°NNQWVYGDHQTOUWUKPIEQPVCEVKPHQTOCVKQPPCOGU
and passwords you previously entered, or both.
Enable AutoFill: Choose Safari > AutoFill, then do one of the following:
To use information from contacts, turn Use Contact Info on, choose My Info, and
select the contact you want to use.
9JGPVJKUHGCVWTGKUQP5CHCTKWUGUKPHQTOCVKQPHTQO%QPVCEVUVQ°NNKPEQPVCEV°GNFU
on web forms.
To use information from names and passwords, turn Names and Passwords on.
When this feature is on, Safari remembers names and passwords of websites you
XKUKVCPFCWVQOCVKECNN[°NNUKPVJGKPHQTOCVKQPYJGP[QWTGXKUKVVJGYGDUKVG
To remove all AutoFill information, tap Clear All.
166 Chapter 22 Settings

Security
By default, Safari is set to show features of the web, such as some movies, animation,
and web apps. You may wish to change security settings to help protect iPad from
possible security risks on the Internet.
Change security settings: Choose Safari, then do one of the following:
To set whether you’re warned when visiting potentially fraudulent websites, turn Fraud
9CTPKPIQPQTQÒ
Fraud warning protects you from potentially fraudulent Internet sites. When you visit
a suspicious site, Safari warns you about its suspect nature and doesn’t load the page.
To enable or disable JavaScript, VWTP,CXC5ETKRVQPQTQÒ
JavaScript lets web programmers control elements of the page—for example, a
page that uses JavaScript might display the current date and time or cause a linked
page to appear in a new pop-up page.
To block or allow pop-ups, VWTP$NQEM2QRWRUQPQTQÒ$NQEMKPIRQRWRUUVQRUQPN[
pop-ups that appear when you close a page or open a page by typing its address.
It doesn’t block pop-ups that open when you tap a link.
To set whether Safari accepts cookies, tap Accept Cookies and choose Never, “From
visited,” or Always.
A cookie is a piece of information that a website puts on iPad so the website can
remember you when you visit again. This way, webpages can be customized for you
based on information you may have provided.
Some webpages won’t work correctly unless iPad accepts cookies.
To clear the history of webpages you’ve visited, tap Clear History.
To clear all cookies from Safari, tap Clear Cookies.
To clear the browser cache, tap Clear Cache.
The browser cache stores the content of pages so the pages open faster the next
time you visit them. If a page you open doesn’t show new content, clearing the
cache may help.
Developer
The debug console can help you resolve webpage errors. If this feature is turned on,
the console appears whenever a webpage error occurs.
6WTPVJGFGDWIEQPUQNGQPQTQÒChoose Safari > Developer, then turn Debug
%QPUQNGQPQTQÒ
167
Chapter 22 Settings

iPod
7UGK2QF5GVVKPIUVQCFLWUVVJGCWFKQRNC[DCEMUGVVKPIUKPVJGK2QFCRRQPK2CF
Set iTunes to play songs at the same sound level: In iTunes, choose iTunes >
Preferences if you’re using a Mac, or Edit > Preferences if you’re using a PC. Then click
Playback and select Sound Check.
Set iPad to use the iTunes volume settings (Sound Check): Choose iPod and turn
5QWPF%JGEMQPQTQÒ
Use EQ to customize the sound: Choose iPod, tap EQ, and choose an equalizer setting.
Set a volume limit: %JQQUGK2QFVCR8QNWOG.KOKVCPFFTCIVJGUNKFGTVQCFLWUVVJG
maximum volume.
Tap Lock Volume Limit to assign a code to prevent the setting from being changed.
Get song lyrics and information about podcasts: Choose iPod and turn Lyrics &
2QFECUV+PHQQPQTQÒ
Share your iTunes library: Enter your Apple ID and password, then use Home Sharing to
KORQTVKVGOUHTQOWRVQ°XGK6WPGUNKDTCTKGUQPQVJGTEQORWVGTUKP[QWTJQOGPGVYQTM
WARNING: For important information about avoiding hearing loss, see the
iPad Important Product Information Guide at support.apple.com/manuals/ipad.
Video
Video settings apply to video content, including rented movies and TV shows. You can
set where to resume playing videos that you previously started, turn closed captioning
QPQTQÒCPFUGVWRK2CFVQRNC[XKFGQUQP[QWT68
Set where to resume playing: Choose Video > Start Playing, then select whether
you want videos that you previously started watching to resume playing from the
DGIKPPKPIQTYJGTG[QWNGHVQÒ
6WTPENQUGFECRVKQPKPIQPQTQÒ%JQQUG8KFGQCPFVWTP%NQUGF%CRVKQPKPIQPQTQÒ
6WTPYKFGUETGGPQPQTQÒ%JQQUG8KFGQCPFVWTP9KFGUETGGPQPQTQÒ+HVJGXKFGQ
you’re playing is in widescreen format, turning this on preserves the widescreen
aspect ratio.
Set the TV signal to NTSC or PAL: Choose Video > TV Signal and select NTSC or PAL.
065%CPF2#.CTG68DTQCFECUVUVCPFCTFUWUGFKPFKÒGTGPVTGIKQPU+H[QW¨TGKPVJG
Americas, NTSC is probably the correct choice. Elsewhere, try PAL. If you’re not sure,
EJGEMVJGFQEWOGPVCVKQPVJCVECOGYKVJ[QWT68QTRTQLGEVQT
Use TV Out settings to set up how iPad plays videos on your TV.
168 Chapter 22 Settings

7UGQPGQHVJGUGVQEQPPGEVK2CFVQC68QTRTQLGEVQT
Apple Digital AV Adapter and an HDMI cable
Apple Component AV Cable
Apple Composite AV Cable
Apple VGA Adapter
If you use the Apple Digital AV Adapter or the Apple Component AV Cable, high-
resolution videos are shown in HD quality. Apple cables are available for purchase in
many countries. Go to www.apple.com/store.
9KVJK2CFYJGPVJGECDNGKUEQPPGEVGFVQC68QTRTQLGEVQTVJGK2CFUETGGPKU
automatically mirrored on the external display in up to 1080p resolution, and videos
play at a maximum resolution of 720p. Some apps such as Keynote may use the
external display as a second video monitor. With previous iPad models, only certain
applications (including YouTube, Videos, and Photos) use the external display.
Photos
Use Photos settings to specify how slideshows display your photos.
Set the length of time each slide is shown: Choose Photos > Play Each Slide For, and
select the length of time.
Set whether to repeat slideshows: %JQQUG2JQVQUCPFVWTP4GRGCVQPQTQÒ
Set photos to appear randomly or in order: %JQQUG2JQVQUCPFVWTP5JWÔGQPQTQÒ
FaceTime
Use FaceTime settings to turn on FaceTime or change your address.
Enter your Apple ID and password to enable FaceTime. If you don’t have an Apple ID,
tap Create New Account and follow the onscreen instructions. The email address you
specify when creating the account will be your FaceTime address.
6WTP(CEG6KOGQPQTQÒ9JGP(CEG6KOGKUQÒ[QWECPPQVRNCEGQTTGEGKXG
FaceTime calls.
Specify additional FaceTime addresses: To add an email address so that others can
use it to call you with FaceTime, tap Add Another Email.
169
Chapter 22 Settings

Notes
Use Notes settings to choose the font used to display your notes.
Choose a font: Choose Notes and select a font.
Store
Use Store settings to create or change an Apple ID. By default, the Apple ID you’re
signed in to when you sync iPad with your computer appears in Store settings. You can
EJCPIGCEEQWPVUQPK2CFVQRWTEJCUGOWUKEQTCRRUHTQOCFKÒGTGPVCEEQWPV+H[QW
don’t have an Apple ID, you can create one in Store settings.
Create a new account: Choose Store and tap Create New Account, then follow the
onscreen instructions.
Sign in to an account: Choose Store and tap Sign in, then enter your Apple ID
and password.
View your Apple ID information: Choose Store, sign in using your Apple ID, and tap
View Apple ID.
5KIPKPVQCFKÒGTGPVCEEQWPVChoose Store and tap Sign out, then tap Sign in and
enter your username and password.
170 Chapter 22 Settings

iPad in the Enterprise A
Appendix
iPad at Work
With support for secure access to corporate networks, directories, and Microsoft
Exchange, iPad is ready to go to work. For detailed information about using iPad in
business go to www.apple.com/ipad/business.
7UKPI%QP°IWTCVKQP2TQ°NGU
If you’re in an enterprise environment, you may be able to set up accounts and other
KVGOUQPK2CFD[KPUVCNNKPICEQP°IWTCVKQPRTQ°NG%QP°IWTCVKQPRTQ°NGUNGV[QWT
administrator set up your iPad to use the information systems at your company, school,
QTQTICPK\CVKQP(QTGZCORNGCEQP°IWTCVKQPRTQ°NGOKIJVUGVWR[QWTK2CFVQCEEGUU
the Microsoft Exchange servers at work, so iPad can access your Exchange email,
calendars, and contacts.
#UKORNGEQP°IWTCVKQPRTQ°NGECPEQP°IWTGOCP[FKÒGTGPVUGVVKPIUQPK2CF(QT
GZCORNGCEQP°IWTCVKQPRTQ°NGECPUGVWR[QWT/KETQUQHV'ZEJCPIGCEEQWPV820
CEEQWPVCPFEGTVK°ECVGUHQTUGEWTGCEEGUUVQ[QWTEQORCP[¨UPGVYQTMCPFKPHQTOCVKQP
#EQP°IWTCVKQPRTQ°NGOC[CNUQVWTPQP2CUUEQFG.QEMYJKEJTGSWKTGU[QWVQETGCVG
and enter a passcode for using iPad.
;QWTCFOKPKUVTCVQTOC[FKUVTKDWVGEQP°IWTCVKQPRTQ°NGUGKVJGTD[GOCKND[RWVVKPIVJGO
on a secure webpage, or by installing them directly on iPad for you. Your administrator
OC[JCXG[QWKPUVCNNCRTQ°NGVJCVVKGU[QWTK2CFVQCOQDKNGFGXKEGOCPCIGOGPVUGTXGT
YJKEJCNNQYU[QWTCFOKPKUVTCVQTVQEQP°IWTG[QWTUGVVKPIUTGOQVGN[
+PUVCNNKPIEQP°IWTCVKQPRTQ°NGU
1 1PK2CFQRGPVJGGOCKNOGUUCIGQTFQYPNQCFVJGEQP°IWTCVKQPRTQ°NGUHTQOVJG
website your administrator provides.
2 (QTGCEJEQP°IWTCVKQPRTQ°NGVCRVJGRTQ°NGVJGPVCR+PUVCNN
3 Enter passwords and other information that’s requested.
Important: ;QWOC[DGCUMGFYJGVJGTCEQP°IWTCVKQPRTQ°NGKUVTWUVGF+HKPFQWDV
CUM[QWTCFOKPKUVTCVQTDGHQTGKPUVCNNKPIVJGEQP°IWTCVKQPRTQ°NG
171

;QWECP¨VEJCPIGVJGUGVVKPIUKPCEQP°IWTCVKQPRTQ°NG+H[QWYCPVVQEJCPIGUGVVKPIU
[QWOWUV°TUVTGOQXGVJGEQP°IWTCVKQPRTQ°NGQTKPUVCNNCPGYEQP°IWTCVKQPRTQ°NG
with the new settings.
4GOQXGCRTQ°NG+P5GVVKPIUEJQQUG)GPGTCN 2TQ°NGVJGPUGNGEVVJGEQP°IWTCVKQP
RTQ°NGCPFVCR4GOQXG
4GOQXKPICEQP°IWTCVKQPRTQ°NGFGNGVGUVJGUGVVKPIUCPFCNNQVJGTKPHQTOCVKQP
KPUVCNNGFD[VJGRTQ°NG
Setting Up Microsoft Exchange Accounts
Microsoft Exchange provides email, contact, and calendar information that you can
automatically sync wirelessly to iPad. You can set up an Exchange account directly
on iPad.
Set up an Exchange account on iPad:
1 On the iPad Home screen, tap Settings.
2 Tap “Mail, Contacts, Calendars,” then tap Add Account.
3 Tap Microsoft Exchange.
4 Enter your account information, then tap Save.
Your service provider or administrator can provide the account settings you need.
Exchange accounts: Enter your email address, domain (optional), user name, password,
and a description.
iPad supports Microsoft’s Autodiscovery service, which uses your user name and
password to determine the address of the Exchange server. If the server address can’t
be determined, you’re asked to enter it. Once you connect to the Exchange server, you
may be prompted to change your passcode to meet server requirements.
5 When setting up a Microsoft Exchange account, tap the items you want to use on
iPad—mail, contacts, and calendars.
VPN Access
VPN (virtual private network) provides secure access over the Internet to private
networks, such as the network at your company or school. Use Network settings on iPad
VQEQP°IWTGCPFVWTPQP820#UM[QWTCFOKPKUVTCVQTYJCVUGVVKPIU[QWUJQWNFWUG
820ECPCNUQDGUGVWRCWVQOCVKECNN[D[CEQP°IWTCVKQPRTQ°NG9JGP820KUUGVWR
D[CEQP°IWTCVKQPRTQ°NGK2CFOC[VWTP820QPCWVQOCVKECNN[YJGPGXGTKV¨UPGGFGF
For more information, see “7UKPI%QP°IWTCVKQP2TQ°NGU” on page 171 or contact
your administrator.
172 Appendix A iPad in the Enterprise

LDAP and CardDAV Accounts
When you set up an LDAP account, you can view and search for contacts on your
company or organization’s LDAP server. The server appears as a new group in Contacts.
Because LDAP contacts aren’t downloaded to iPad, you must have an Internet
connection to view them. Check with your administrator for account settings and
other requirements (such as VPN).
When you set up a CardDAV account, your account contacts are synced with iPad over
the air. You may also be able to search for contacts on your company or organization’s
CardDAV server.
Set up an LDAP or CardDAV account:
1 In Settings, tap “Mail Contacts, Calendars,” then tap Add Account.
2 Tap Other, then tap Add LDAP Account or Add CardDAV Account.
3 Enter your LDAP account information, then tap Next to verify the account.
4 Tap Save.
173
Appendix A iPad in the Enterprise

International Keyboards B
Appendix
+PVGTPCVKQPCNMG[DQCTFUCNNQY[QWVQGPVGTVGZVKPOCP[FKÒGTGPVNCPIWCIGUKPENWFKPI
Asian languages and languages written from right to left.
Adding Keyboards
6QGPVGTVGZVKPFKÒGTGPVNCPIWCIGUQPK2CF[QWWUGFKÒGTGPVMG[DQCTFU$[FGHCWNV
only the keyboard for the language you’ve set is available. To make keyboards for other
languages available, use Keyboard settings.
Add a keyboard:
1 In Settings, choose General > Keyboard > International Keyboards.
The number before the arrow indicates the number of keyboards currently enabled.
2 Tap Add New Keyboard, then choose a keyboard from the list.
Repeat to add more keyboards. Some languages have multiple keyboards available.
For a list of keyboards supported by iPad, go to www.apple.com/ipad/specs.
Edit your keyboard list: Choose General > Keyboard > International Keyboards, then
tap Edit and do one of the following:
To delete a keyboard, tap , then tap Delete.
To reorder the list, drag next to a keyboard to a new place in the list.
Switching Keyboards
6QGPVGTVGZVKPCFKÒGTGPVNCPIWCIGUYKVEJMG[DQCTFU
Switch keyboards when you’re typing: Tap . When you tap the symbol, the name of
VJGPGYN[CEVKXCVGFMG[DQCTFCRRGCTUDTKG±[
You can also touch and hold to display a list of available keyboards. To choose a
MG[DQCTFHTQOVJGNKUVUNKFG[QWT°PIGTVQVJGPCOGQHVJGMG[DQCTFVJGPTGNGCUG
Many keyboards provide letters, numbers, and symbols not visible on the keyboard.
174

Type letters, numbers, or symbols that aren’t on the keyboard: Touch and hold the
TGNCVGFNGVVGTPWODGTQTU[ODQNVJGPUNKFG[QWT°PIGTVQEJQQUGCXCTKCVKQP1PVJG
Thai keyboard, for example, you can choose native numbers by touching and holding
the related Arabic number.
Chinese
;QWECPWUGMG[DQCTFUVQGPVGT%JKPGUGKPUGXGTCNFKÒGTGPVYC[UKPENWFKPI2KP[KP
%CPILKG9WDK*WCCPF<JW[KP;QWECPCNUQWUG[QWT°PIGTVQYTKVG%JKPGUG
characters on the screen.
'PVGTKPI5KORNK°GFQT6TCFKVKQPCN%JKPGUG2KP[KP
Use the QWERTY keyboard to enter Pinyin for Chinese characters. As you type,
suggested Chinese characters appear. Tap a suggestion to choose it, or continue
entering Pinyin to see more options.
If you keep entering Pinyin without spaces, sentence suggestions appear.
Entering Chinese Cangjie
7UGVJGMG[DQCTFVQDWKNF%JKPGUGEJCTCEVGTUHTQOVJGEQORQPGPV%CPILKGMG[U
As you type, suggested Chinese characters appear. Tap a character to choose it, or
EQPVKPWGV[RKPIWRVQ°XGVQVCNEQORQPGPVUVQUGGOQTGEJCTCEVGTQRVKQPU
'PVGTKPI5KORNK°GF%JKPGUG5VTQMG9WDK*WC
7UGVJGMG[RCFVQDWKNF%JKPGUGEJCTCEVGTUWUKPIWRVQ°XGUVTQMGUKPVJGEQTTGEV
writing sequence: from left to right, top to bottom, outside to inside, and from inside
to the closing stroke (for example, the Chinese character 圈 (circle) should begin with
the vertical stroke 丨).
As you type, suggested Chinese characters appear (the most commonly used
EJCTCEVGTUCRRGCT°TUV6CRCEJCTCEVGTVQEJQQUGKV
If you’re not sure of the correct stroke, enter an asterisk (*). To see more character
options, type another stroke, or scroll through the character list.
Tap the match (匹配) key to show only characters that match exactly what you typed.
For example, if you type 一一 (one one) and tap the match (匹配) key, the more
commonly used 二 (two) appears as an exact match.
Entering Traditional Chinese Zhuyin
Use the keyboard to enter Zhuyin letters. As you type, suggested Chinese characters
appear. Tap a suggestion to choose it, or continue entering Zhuyin letters to see more
options. After you type an initial letter, the keyboard changes to show more letters.
If you keep entering Zhuyin without spaces, sentence suggestions appear.
175
Appendix B International Keyboards

'PVGTKPI*CPFYTKVVGP5KORNK°GFQT6TCFKVKQPCN%JKPGUG
9TKVG%JKPGUGEJCTCEVGTUFKTGEVN[QPVJGUETGGPYKVJ[QWT°PIGT#U[QWYTKVGEJCTCEVGT
strokes, iPad recognizes them and shows matching characters in a list, with the closest
match at the top. When you choose a character, its likely follow-on characters appear
in the list as additional choices.
You can get some complex characters by writing two or more component characters.
For example, enter 魚°UJVJGP巤 (bristle), to get 鱲 (partial name of Hong Kong
International Airport), which appears in the character list with an arrow next to it. Tap
the character to replace the characters you entered.
9KVJ5KORNK°GF%JKPGUGJCPFYTKVKPI4QOCPEJCTCEVGTUCTGCNUQTGEQIPK\GF
%QPXGTVKPI$GVYGGP5KORNK°GFCPF6TCFKVKQPCN%JKPGUG
Select the character or characters you want to convert, then tap Replace.
Drawing Chinese Characters
9JGP5KORNK°GFQT6TCFKVKQPCN%JKPGUGJCPFYTKVKPIHQTOCVUCTGVWTPGFQP[QWECP
GPVGT%JKPGUGEJCTCEVGTUYKVJ[QWT°PIGTCUUJQYP
;V\JOWHK
176 Appendix B International Keyboards

Japanese
;QWECPGPVGT,CRCPGUGWUKPIVJG4QOCLKMG[DQCTFQT(KHV[-G[MG[DQCTF
Entering Japanese Romaji
7UGVJG4QOCLKMG[DQCTFVQGPVGTU[NNCDNGU#NVGTPCVKXGEJQKEGUCRRGCTCNQPIVJGVQRQH
the keyboard; tap one to enter it.
Entering Japanese Fifty Key
Use the Fifty Key keyboard to input code for Japanese syllables. As you type, suggested
syllables appear. Tap the syllable to choose it.
Korean
Use the 2-Set Korean keyboard to type Hangul letters. To type double consonants or
compound vowels, touch and hold the letter, then slide to choose the double letter.
Vietnamese
Touch and hold a character to see the available diacritical marks, then slide to choose
the one you want.
You can also type the following key sequences to enter characters with diacritical marks:
aa—âCEKTEWO±GZ
aw —ă (a caron)
ee—êGEKTEWO±GZ
oo—ôQEKTEWO±GZ
ow —ơ (o hook)
w —ư (u hook)
dd —đ (d dash)
as—á (a acute)
af —à (a grave)
ar—ả (a question mark)
ax —ã (a rising accent)
aj —ạ (a drop tone)
177
Appendix B International Keyboards

Creating Dictionaries
When using certain Chinese or Japanese keyboards, you can create a dictionary
of word and input pairs. When you type a word from the dictionary while using a
supported keyboard, the associated input is substituted for the word. The dictionary is
available for the following keyboards:
%JKPGUG5KORNK°GF2KP[KP
Chinese - Traditional (Pinyin)
Chinese - Traditional (Zhuyin)
,CRCPGUG4QOCLK
Japanese (50 Key)
Add a word to the dictionary: In Settings, choose General > Keyboard > Edit User
Dictionary. Tap VCRVJG9QTF°GNFCPFGPVGTVJGYQTFVJGPVCRVJG;QOK2KP[KP
QT<JW[KP°GNFCPFGPVGTVJGKPRWV
You can have multiple inputs for each word, based on which keyboards are turned on.
Delete a word from the dictionary: Tap the word in the User Dictionary list, then tap
Delete Word.
178 Appendix B International Keyboards

Tips and Troubleshooting C
Appendix
Tips and Troubleshooting
Apple iPad Support Site
Comprehensive support information is available online at www.apple.com/support/ipad.
You can also use Express Lane for personalized support (not available in all countries).
See expresslane.apple.com.
Low-Battery Image or “Not Charging” Message Appears
iPad is low on power and needs to charge for up to ten minutes before you can use it.
For information about charging iPad, see “Charging the Battery” on page 33.
VY
When charging, make sure you’re using the 10W USB power adapter that came with
iPad or the USB port on a recent Mac. The fastest way to charge is to use the power
adapter. See “Charging the Battery” on page 33.
(QTHCUVGTEJCTIKPIVWTPK2CFQÒ
iPad may not charge when connected to the USB port on an older Mac, a PC, a
keyboard, or to a USB hub.
If your Mac or PC doesn’t provide enough power to charge iPad, a Not Charging
message appears in the status bar. To charge iPad, disconnect it from your computer
and connect it to a power outlet using the included Dock Connector to USB Cable and
10W USB power adapter.
iPad Doesn’t Respond
iPad may be low on power. Connect iPad to the 10W USB power adapter to charge.
See “Charging the Battery” on page 33.
Press and hold the Sleep/Wake for a few seconds until a red slider appears, then
press and hold the Home button until the app you were using quits.
179

+HVJCVFQGUP¨VYQTMVWTPK2CFQÒCPFVJGPVWTPKVQPCICKP2TGUUCPFJQNFVJG
Sleep/Wake button until a red slider appears, then drag the slider. Then press and
hold the Sleep/Wake button until the Apple logo appears.
If that doesn’t work, reset iPad. Press and hold both the Sleep/Wake button and the
Home button for at least ten seconds, until the Apple logo appears.
If the screen doesn’t rotate when you turn iPad, hold iPad upright, and make sure
that the screen rotation lock is not engaged.
“This accessory is not supported by iPad” Appears
The accessory you attached may not work with iPad. Make sure the Dock Connector to
USB Cable is free of debris, and refer to the documentation that came with the accessory.
Connect-to-iTunes Screen Appears
6QWUGK2CF[QWOWUV°TUVUGVKVWRKPK6WPGU%QPPGEVK2CFVQ[QWTEQORWVGTQRGP
iTunes if it doesn’t open automatically, then follow the onscreen instructions.
An App Appears Too Small
Most apps for iPhone and iPod touch can be used with iPad, but they might not take
advantage of the large screen. In this case, tap to zoom in on the app. Tap to
return to the original size.
Look in the App Store to see if there’s a version of the app that’s optimized for iPad,
or a universal version that’s optimized for iPhone, iPod touch, and iPad.
Onscreen Keyboard Doesn’t Appear
If iPad is paired with a Bluetooth keyboard, the onscreen keyboard doesn’t appear. To
OCMGVJGQPUETGGPMG[DQCTFCRRGCTRTGUUVJG'LGEVMG[QPC$NWGVQQVJMG[DQCTF;QW
can also make the onscreen keyboard appear by moving the Bluetooth keyboard out
QHTCPIGQTVWTPKPIKVQÒ
iTunes and Syncing
iPad Doesn’t Appear or Syncing Doesn’t Work
If iPad doesn’t appear in iTunes on your computer or is unable to sync content,
contacts, calendars, or bookmarks, try the following:
Recharge the battery if iPad is low on power. See “ Charging the Battery” on page 33.
&KUEQPPGEVQVJGT75$FGXKEGUHTQO[QWTEQORWVGTCPFEQPPGEVK2CFVQCFKÒGTGPV
USB 2.0 port on your computer (not on your keyboard or a USB hub).
Unlock iPad if it’s locked with a passcode.
Restart your computer and reconnect iPad to your computer.
Restart iPad.
180 Appendix C Tips and Troubleshooting

Download and install (or reinstall) the latest version of iTunes from
www.apple.com/itunes.
For push accounts, make sure iPad has an Internet connection. See “ Connecting to
the Internet” on page 29.
Backing Up iPad
Backing Up
iTunes creates a backup of settings, app data, and other information on iPad when you:
Sync iPad with iTunes on your computer
Update iPad using iTunes
Restore iPad using iTunes, if you choose to back up when asked
You can restore backup information to iPad after updating or restoring iPad software,
or you can use a backup to copy your current iPad information to another iPad. See
“Updating and Restoring iPad Software” on page 182.
Backups don’t include synced items, such as songs and videos from your iTunes
library, or information such as contacts and calendars from your computer. To restore
synced items, you must sync iPad after restoring backup information. If iPad is set to
sync automatically, synced items are restored immediately after a software restore or
update. See “Syncing with iTunes” on page 24.
#RRUHTQOVJG#RR5VQTGCTGKPENWFGFKPVJG°TUVDCEMWRCHVGTVJGCRRUCTG
FQYPNQCFGF5WDUGSWGPVDCEMWRUKPENWFGLWUVVJGCRRFCVC
For extra security, you can set iTunes to encrypt your backups.
Encrypt iPad backups:
1 Connect iPad to your computer.
2 In iTunes, select iPad in the sidebar.
3 In the Summary pane, select “Encrypt backups.”
4 Select a password, then click Set Password.
If the backup is encrypted, you’ll need to enter your password before restoring your
backup information to iPad. Encrypted backups are shown with a lock icon in the
list of backups in the Devices pane of iTunes preferences.
181
Appendix C Tips and Troubleshooting

Removing a Backup
You can remove an iPad backup from the list of backups in iTunes. You may want to do
this, for example, if a backup was created on someone else’s computer.
Remove a backup:
1 In iTunes, open iTunes Preferences.
Mac: Choose iTunes > Preferences.
Windows: Choose Edit > Preferences.
2 Click Devices (iPad does not need to be connected).
3 Select the backup you want to remove, then click Delete Backup.
4 %NKEM&GNGVG$CEMWRVQEQP°TO[QWYKUJVQTGOQXGVJGUGNGEVGFDCEMWR
5 Click OK.
Updating and Restoring iPad Software
About Updating and Restoring Software
You can use iTunes to update or restore iPad software.
If you update, the iPad software is updated. Your downloaded apps, settings, and
FCVCCTGP¨VCÒGEVGF
Note: In some cases, an update may also include restoring iPad.
If you restore, the latest version of iPad software is reinstalled, settings are restored
to their default, and all data stored on iPad is deleted, including downloaded apps,
songs, videos, contacts, photos, calendar information, and any other data. If you’ve
backed up iPad with iTunes on your computer, you can restore data from the
backup at the end of the restore process.
Deleted data is no longer accessible through the iPad user interface, but it isn’t erased
from iPad. For information about erasing all content and settings, see “Resetting
iPad” on page 162.
If you use a Bluetooth headset or keyboard with iPad and you restore settings, you
must pair the Bluetooth device with iPad again to use it.
For more information about updating and restoring iPad software, go to
support.apple.com/kb/HT1414.
Updating iPad
Make sure your computer has an Internet connection and that you’ve installed the
latest version of iTunes from www.apple.com/itunes.
Update iPad:
1 Connect iPad to your computer.
182 Appendix C Tips and Troubleshooting

2 Select iPad in the iTunes sidebar, then click the Summary tab.
3 Click “Check for Update.” iTunes tells you if there’s a new version of the iPad software
available.
4 Click Update to install the latest version of the software.
Restoring iPad
Make sure your computer has an Internet connection and that you’ve installed the
latest version of iTunes from www.apple.com/itunes.
Restore iPad:
1 Connect iPad to your computer.
2 Select iPad in the iTunes sidebar, then click the Summary tab.
3 Click “Check for Update.” iTunes tells you if there’s a new version of the iPad software
available.
4 Click Restore. Follow the onscreen instructions to complete the restore process.
When restoring, it is recommended that you back up iPad when prompted.
When the iPad software has been restored, you can choose to set up iPad as a new
iPad, or restore your music, video, app data, and other content from a backup.
After restoring from a backup, previous data is no longer accessible through the iPad
user interface, but it isn’t erased from iPad. For information about erasing all content
and settings, see “Resetting iPad” on page 162.
Restoring from a Backup
You can restore the settings, app data, and other information from a backup, or
use this feature to copy these items to another iPad. Make sure your computer has
an Internet connection and that you’ve installed the latest version of iTunes from
www.apple.com/itunes.
Important: Restoring from a backup is not the same as restoring iPad from the
Summary pane in iTunes. Restoring from a backup doesn’t fully restore iPad software.
Also, restoring iPad from a backup restores all data in the backup, including data for
apps. If you choose an old backup, restoring it could replace the app data with data
that isn’t current. For more information, see “Resetting iPad” on page 162.
Restore iPad from a backup:
1 Connect iPad to the computer you normally sync with.
2 In iTunes, Control-click iPad in the sidebar, then choose “Restore from Backup” from the
menu that appears.
3 Choose the backup that you want to restore from the pop-up menu, then click Restore.
If the backup is encrypted, you’ll need to enter your password.
183
Appendix C Tips and Troubleshooting

After restoring from a backup, previous data is no longer accessible through the iPad
user interface, but it isn’t erased from iPad. For information about erasing all content
and settings, see “Resetting iPad” on page 162.
Safari, Mail, and Contacts
Can’t Send Email
If iPad is unable to send email, try the following:
In Settings, choose “Mail, Contacts, Calendars,” then select the account you’re trying
to use. Tap Account Info, then tap SMTP under Outgoing Mail Server. You can set up
additional SMTP servers, or select one from another mail account on iPad. Contact
[QWT+PVGTPGVUGTXKEGRTQXKFGTHQTEQP°IWTCVKQPKPHQTOCVKQP
Set up your email account directly on iPad instead of syncing it from iTunes. In
Settings, choose “Mail, Contacts, Calendars,” tap Add Account and enter your
account information. If iPad is unable to locate your service provider’s settings when
you enter your email address, go to support.apple.com/kb/HT1277 for help setting
up your account.
6WTPK2CFQÒCPFVJGPQPCICKP2TGUUCPFJQNFVJG5NGGR9CMGDWVVQPHQTCHGY
seconds until a red slider appears, then drag the slider. Then press and hold the
Sleep/Wake button until the Apple logo appears.
For additional troubleshooting information, go to www.apple.com/support/ipad.
If you still can’t send email, you can use Express Lane (not available in all countries).
Go to expresslane.apple.com.
Can’t Receive Email
If iPad can’t receive email, try the following:
If you use one or more computers to check the same email account, it may create a
lock-out. For more information, go to support.apple.com/kb/TS2621.
Set up your email account directly on iPad instead of syncing it from iTunes. In
Settings, choose “Mail, Contacts, Calendars,” tap Add Account, then enter your
account information. If iPad is unable to locate your service provider’s settings when
you enter your email address, go to support.apple.com/kb/HT1277 for help setting
up your account.
6WTPK2CFQÒCPFVJGPQPCICKP2TGUUCPFJQNFVJG5NGGR9CMGDWVVQPHQTCHGY
seconds until a red slider appears, then drag the slider. Then press and hold the
Sleep/Wake button until the Apple logo appears.
+H[QWTK2CF9K(K)WUGUCEGNNWNCTFCVCPGVYQTMVWTPQÒ9K(KUQK2CFEQPPGEVU
to the Internet through the cellular data network. In Settings, choose Wi-Fi and turn
QÒ9K(K
184 Appendix C Tips and Troubleshooting

For additional troubleshooting information, go to www.apple.com/support/ipad. If you
still can’t send email, you can use Express Lane (not available in all countries). Go to
expresslane.apple.com.
Email Attachment Won’t Open
K2CFOC[PQVUWRRQTVVJGCVVCEJOGPV°NGV[RGK2CFUWRRQTVUVJGHQNNQYKPIV[RGUQH
email attachments:
.doc Microsoft Word
.docx Microsoft Word (XML)
.htm webpage
.html webpage
.ics Calendar item
.key Keynote
.numbers Numbers
.pages Pages
.pdf Preview, Adobe Acrobat
.ppt Microsoft PowerPoint
.pptx Microsoft PowerPoint (XML)
.rtf Rich Text Format
.txt text
.vcf contact information
.xls Microsoft Excel
.xlsx Microsoft Excel (XML)
Sound, Music, and Video
No Sound
Make sure the iPad speaker isn’t covered.
Make sure the Side Switch isn’t set to silent. See “ Volume Buttons” on page 11.
If you’re using a headset, unplug it, then plug it in again. Make sure you push the
plug all the way in.
Make sure the volume isn’t turned all the way down.
Music on iPad might be paused. If you’re using a headset with a play button, try
pressing the play button to resume playback. Or from the Home screen, tap iPod,
then tap .
185
Appendix C Tips and Troubleshooting

Check to see if a volume limit is set. From the Home screen, choose Settings > iPod >
Volume Limit. For more information, see “iPod” on page 168.
If you’re using the line out port on the optional iPad Dock, make sure that you
turn on the external speakers or stereo, and that they’re plugged in correctly and
working properly. Use the volume controls on the the external speakers or stereo,
not on iPad.
If you're using an app that works with AirPlay, check to see if the AirPlay device
you're sending the sound to is turned on and the volume is turned up. If you want
to hear sound through iPad's speaker, tap and select it from the list.
A Song, Video, or Other Item Won’t Play
The song, video, audiobook, or podcast may be encoded in a format that iPad doesn’t
UWRRQTV(QTKPHQTOCVKQPCDQWVVJGCWFKQCPFXKFGQ°NGHQTOCVUK2CFUWRRQTVUIQVQ
www.apple.com/ipad/specs.
If a song or video in your iTunes library isn’t supported by iPad, you may be able to
convert it to a format iPad supports. For example, you can use iTunes for Windows
VQEQPXGTVPQPRTQVGEVGF9/#°NGUVQCHQTOCVK2CFUWRRQTVU(QTOQTGKPHQTOCVKQP
open iTunes and choose Help > iTunes Help.
No Video or Sound when Using AirPlay
To send video or audio to an AirPlay device such as an Apple TV, iPad and the AirPlay
device must be connected to the same wireless network. If you don't see the
button, iPad isn’t connected to the same Wi-Fi network as an AirPlay device, or the app
you’re using doesn’t support AirPlay.
When sound or video is being sent to an AirPlay device, iPad doesn’t display video
or play audio. To direct the content to iPad and disconnect iPad from the AirPlay
device, tap and select iPad in the list.
Some applications play only audio over AirPlay. If video isn't working, make sure that
the app you're using supports both audio and video.
If the Apple TV has been set up to require a passcode, you must enter it on iPad
when asked, in order to use AirPlay.
Make sure the speakers on the AirPlay device are turned on and turned up. If you’re
using an Apple TV, make sure the TV’s input source is set to Apple TV. Make sure the
volume control on iPad is turned up.
When iPad is streaming with AirPlay, it must remain connected to the Wi-Fi network.
If you take iPad out of range, playback stops.
Depending on the speed of your network, it may take 30 seconds or more for
playback to begin when using AirPlay.
For more information about AirPlay, go to support.apple.com/kb/HT4437.
186 Appendix C Tips and Troubleshooting

No Image on TV or Projector Connected to iPad
9JGP[QWEQPPGEVK2CFVQC68QTRTQLGEVQTVJGCVVCEJGFFKURNC[CWVQOCVKECNN[OKTTQTU
the iPad screen. Some apps may support using the attached display as a second
monitor. Check the app’s settings and documentation.
Go to Settings > Video and make sure the settings are correct for your TV or
RTQLGEVQT6QXKGY*&XKFGQUKPJKIJTGUQNWVKQP[QWOWUVWUGCEQORQPGPVXKFGQ
cable or the Apple Digital AV Adapter.
/CMGUWTGVJGXKFGQECDNGKU°TON[EQPPGEVGFCVDQVJGPFUCPFVJCVKV¨UC
supported cable. If iPad is connected to an A/V switchbox or receiver, try connecting
KVFKTGEVN[VQVJG68QTRTQLGEVQTKPUVGCF
Make sure that your TV has the proper video input selected, such as HDMI or
component video.
If no video appears, press the Home button, disconnect and reconnect the cable,
and try again.
FaceTime
Can’t make or receive FaceTime calls
6QWUG(CEG6KOG[QWOWUV°TUVCEVKXCVGKVYKVJ[QWT#RRNG+&5GG%JCRVGT7, “FaceTime,”
on page 63.
Make sure the person calling you is using an email address that’s associated with
FaceTime. This is normally your Apple ID, but you can add other email addresses too.
See “Sign in to FaceTime:” on page 64.
To use FaceTime, iPad must be connected to the Internet via Wi-Fi.
When you make a FaceTime call, allow enough time for the connection to be
established, which may take many rings.
Improving FaceTime quality
For best results with FaceTime, try these tips:
+HVJGXKFGQUGGOULGTM[QTUNQYOCMGUWTGDQVJ[QWCPFVJGRGTUQP[QW¨TGECNNKPI
are connected to the fastest Wi-Fi network available.
If your image is grainy, the camera needs more light. If the incoming image is grainy,
CUMVJGECNNGTVQCFLWUVVJGKTNKIJVKPI
;QWTKOCIGYQP¨V°NNVJGYJQNGUETGGPKH[QWJQNFK2CFKPNCPFUECRGQTKGPVCVKQP
The person you’re talking with might also need to rotate their device to send you a
bigger image.
187
Appendix C Tips and Troubleshooting

iTunes Store and App Store
iTunes or App Store Isn’t Available
To use the iTunes Store or the App Store, iPad must have an Internet connection.
See “Connecting to the Internet” on page 29.
To purchase content from the iTunes Store or the App Store, you need an Apple ID.
You can set up an Apple ID on iPad. From the Home screen, choose Settings > Store >
Create New Apple ID. See “Store” on page 170.
You can also set up an account on your computer by opening iTunes and choosing
Store > Create Account.
Note: The iTunes Store and the App Store aren’t available in some countries.
Restarting and Resetting iPad
If something isn’t working right, try restarting iPad, force quitting an app, or
resetting iPad.
Restart iPad: Press and hold the Sleep/Wake button until the red slider appears.
5NKFG[QWT°PIGTCETQUUVJGUNKFGTVQVWTPQÒK2CF6QVWTPK2CFDCEMQPRTGUUCPF
hold the Sleep/Wake until the Apple logo appears.
Force quit an app: Press and hold the Sleep/Wake button on top of iPad for a few
seconds until a red slider appears, then press and hold the Home button until the
app quits.
+H[QWECP¨VVWTPQÒK2CFQTKHVJGRTQDNGOEQPVKPWGU[QWOC[PGGFVQTGUGVK2CF6JKU
UJQWNFDGFQPGQPN[KHVWTPKPIK2CFQÒCPFQPFQGUP¨VTGUQNXGVJGRTQDNGO
Reset iPad: Press and hold the Sleep/Wake button and the Home button at the same
time for at least ten seconds, until the Apple logo appears.
iPad Still Doesn’t Respond After Reset
Reset iPad settings. From the Home screen choose Settings > General > Reset >
Reset All Settings. All your settings are reset, but your data and media aren’t deleted.
If that doesn’t work, erase all content on iPad. See “ Resetting iPad” on page 162.
If that doesn’t work, restore the iPad software. See “ Removing a Backup” on page 182.
Safety, Service, and Support Information
The following table describes where to get more iPad-related safety, software, and
service information.
188 Appendix C Tips and Troubleshooting

To learn about Do this
Using iPad safely See the iPad Important Product Information Guide
at support.apple.com/manuals/ipad for the latest
safety and regulatory information.
iPad service and support, tips, forums, and
Apple software downloads
Go to www.apple.com/support/ipad.
The latest information about iPad Go to www.apple.com/ipad.
Managing your Apple ID account Go to appleid.apple.com.
Using iTunes Open iTunes and choose Help > iTunes Help. For
an online iTunes tutorial (not available in some
areas), go to www.apple.com/support/itunes.
MobileMe Go to www.apple.com/mobileme.
Using iPhoto on Mac OS X Open iPhoto and choose Help > iPhoto Help.
Using Address Book on Mac OS X Open Address Book and choose Help >
Address Book Help.
Using iCal on Mac OS X Open iCal and choose Help > iCal Help.
Microsoft Outlook, Windows Address Book,
Adobe Photoshop Album, and Adobe
Photoshop Elements
See the documentation that came with
those apps.
Obtaining warranty service First follow the advice in this guide. Then go
to www.apple.com/support/ipad or see the
iPad Important Product Information Guide at
support.apple.com/manuals/ipad.
Battery replacement service Go to
www.apple.com/batteries/replacements.html.
Using iPad in an enterprise environment Go to www.apple.com/ipad/business.
Disposal and Recycling Information
Your iPad must be disposed of properly according to local laws and regulations.
Because it contains a battery, iPad must be disposed of separately from household
waste. When your iPad reaches its end of life, contact Apple or your local authorities to
learn about recycling options.
For information about Apple’s recycling program, go to www.apple.com/recycling.
Apple and the Environment
At Apple, we recognize our responsibility to minimize the environmental
impacts of our operations and products. For more information, go to
www.apple.com/environment.
189
Appendix C Tips and Troubleshooting

Index
3G 13
10W USB power adapter 10
12-hour time 160
24-hour time 160
A
accessibility
features 137
Large Text 149
Mono Audio 149
settings 162
Speak Auto-text 149
Triple-click Home 150
VoiceOver 138
White on Black 149
Zoom 148
accounts 163, 172
“push” 16 4
CFLWUVKPIDTKIJVPGUU17, 15 4, 155
Adobe Photoshop Elements 28, 29
airplane mode
status icon 13
AirPlay
about 45
music playback 108
Photos 73
troubleshooting 186
videos from the camera roll 73
Videos 80
AirPrint 14
about 40
printers 40
See also printing
album tracks 109
alerts
CFLWUVKPIXQNWOG11, 15 6
calendar 90
alternate audio language 79
anti-phishing. See Safari fraud warning
App Store
about 119
browsing 120
deleting apps 123
Genius 120
store account 119, 17 0
syncing 24, 25
syncing purchased content 123
updating apps 122
verifying purchases 118
Apple Component AV Cable 168
Apple Composite AV Cable 168
Apple Digital AV Adapter 168
Apple ID 23
Apple VGA Adapter 168
Apple Wireless Keyboard 20
apps 14
deleting 123
attachments
email 57
audio
alternate language 79
Mono Audio 149
audiobooks, syncing 25
Auto-Brightness 155
AutoFill 50, 166
B
backups
backing up iPad 27
removing 182
restoring from 180, 183
badge, numbered 40
battery
charging 33
low on power 34, 179
maximizing life 34
replacing 34, 189
status icon 13
Bluetooth
°PFKPICFFTGUU155
headphones 43
headset 79, 83, 182, 185
pairing headphones 43
status icon 13
VWTPKPIQPQTQÒ157
unpairing device 44
Index
190

bookmarking
iBooks 12 6
map locations 100
webpages 51
YouTube videos 83, 84
bookmarks, syncing 25, 28, 51
books
accessibility 128
annotating 126
brightness 127
FG°PKPIYQTFU128
deleting, rearranging 12 9
°PFKPI125
iBooks 124
purchasing 125
reading 126, 127
searching 128
syncing 25, 12 5
syncing books 25
text size 127
braille, using displays with VoiceOver 147
brightness
CFLWUVKPI154, 155
iBooks 127
DTKIJVPGUUCFLWUVKPI17
browser cache, clearing 167
browsing
App Store 120
iTunes Store 114
button
sleep/wake 10
C
cable, Dock Connector to USB 10, 24
cache, clearing browser 167
CalDAV 88
Calendar
about 85
KEU°NGU88
KORQTVKPIKEU°NGUHTQOGOCKN90
searching 88
syncing calendars 25, 27, 85
views 86
See also events
Camera Connection Kit 70
Camera
back camera 61
deleting photos 61
exposure 61
front camera 61
seeing photos and videos you’ve taken 61, 62
taking photos 61
upload photos to your computer 62
%CPILKG175
caps lock, enabling 161
Cc 165
cellular data
VWTPKPIQPQTQÒ15 4
cellular data plan 30
cellular network 30
charging battery 33
Chinese keyboard 175, 178
cleaning iPad 35
ENQUGFECRVKQPKPIVWTPKPIQPQTQÒ168
computer requirements 23
EQP°IWTCVKQPRTQ°NGU171
connecting to Internet 29
Contacts
about 91
adding and editing 93
adding from Maps 104
assigning photo to 75
display order 165
GAL (Global Address List) 54, 92
LDAP (Lightweight Directory Access Protocol) 92
photos 93
seeing location of 98
send info by email 54
sort order 165
syncing 25, 27, 92
Yahoo! Address Book 27
controls, using 17, 36
EQPXGTVKPIWPRTQVGEVGF9/#°NGU186
cookies 167
copying, text 21
cover 11
current location 102
cutting and pasting text 21
D
data plan 30
data protection 46
Data Roaming 30
VWTPKPIQPQTQÒ15 4
data, erasing 31, 46, 158, 162
date and time, setting 160
date format 161
debug console, Safari 167
deleting
all content and settings 162
apps from the App Store 123
contacts 93
email account 164
email messages 59
notes 95
photos 61, 67
playlists 110
removing 182
songs from a playlist 110
videos 80
developer settings, Safari 167
dictionary 178
Index 191

directions, getting 102
directories (LDAP) 173
disconnecting iPad from computer 33
display freezes 188
Dock Connector to USB cable 10, 24
downloading
apps 121
podcasts 117
E
editing
videos 62
editing text 21
email accounts, syncing 25
enterprise, using iPad 189
ePub books 125
equalizer 168
erasing data 31, 46, 158, 162
events, calendar 86
Exchange. See Microsoft Exchange
exposure 61
external keyboards 20
F
FaceTime 63
making a call 65
phone number format 65
signing in 64
using other apps while talking 65
Fetch New Data 164
Fifty Key 177
°NGHQTOCVU57, 185, 186
°NGUJCTKPI28, 44
Find My iPad 31, 46
force quitting an app 188
format, date and time 161
forwarding messages 54
G
GAL (Global Address List) 54, 92
Game Center
about 130
account information 135
achievements 134
downloading games 132
friends 13 4
inviting friends 132
leaderboards 133
parental controls 13 6
playing games 132
recently played games 134
restricting friend requests 160
restricting multiplayer games 160
restrictions 13 6
setting up 130
status information 135
Genius Mixes 106, 111
Genius playlists 110
Genius, App Store 120
gestures, VoiceOver 140
getting help 188
getting started 23
Google
contacts 27
search engine 166
searching the web 51
grab points 21
H
hardware keyboards 20
headset, center button 79, 83, 185
help, getting 188
Home screen 13, 36, 37
adding web clips 52
customizing 38
Home Sharing 112, 168
hybrid view 101
I
iBooks 124
iBookstore 25, 12 4
iCal 27, 189
ICCID number 155
icons
app 14
status 13
IMAP
accounts 53
searching email 58
IMEI number 155
installing
apps 121
EQP°IWTCVKQPRTQ°NGU171
international keyboards 161, 174
Internet, connecting to 29
iPad Smart Cover 11, 158
iPhoto 28, 29, 189
iPod controls 37
iPod
Genius Mixes 111
Genius playlists 110
playlists 110
TGRGCVKPIQTUJWÔKPIUQPIU107
searching 109
transferring content 112
iTunes Store
about 113
account 115, 116, 119, 170
browsing 114
checking download status 117
purchasing songs and albums 115
streaming or downloading podcasts 117
Index
192

syncing purchased content 118
verifying purchases 118
iTunes U
syncing 25, 28
iTunes
getting help 189
Home Sharing 112
iPad doesn’t appear in 180
settings panes 27
J
Japanese keyboard 177, 178
K
keyboards
Apple Wireless Keyboard 20
hardware 20
international 161, 174
layouts 22
switching 174
switching languages 20
typing on 18
Korea keyboard 177
L
landscape orientation 16
languages, switching keyboard 20
Large Text 149
LDAP (Lightweight Directory Access Protocol) 92,
173
links
in email 57
on webpages 49
location. See Maps
location services
using with Camera 60
Location Services 153
location warnings 162
locking iPad 10, 13
M
Mac system requirements 23
Mail
account setup 53, 163
attachments 57, 185
Cc 165
checking for new messages 55, 59
deleting email account 164
deleting messages 59
forwarding messages 54
links 57
load additional messages 56
marking messages as unread 57
organizing email 59
password settings 163
printing messages and attachments 59
problems opening an attachment 185
reading messages 56
replying to messages 54
resizing text column 57
saving drafts 54
searching 58
seeing recipients 57
sending messages 54
sending notes 96
sending photos 54
sending webpage addresses 49
sending YouTube video links 83, 84
settings 155, 163
share contact information 54
signatures 165
storing email on iPad or server 155, 163
syncing email account settings 25
zooming in a message 57
managing
photos 67
Maps
adding location to a contact 104
bookmarking location 100
classic view 101
current location 99, 102
dropped pin 100
°PFKPIDWUKPGUUGU103
°PFKPINQECVKQP98
getting directions 102
hybrid view 101
satellite view 101
seeing location of a contact 98
share location 104
street view 101
terrain view 101
VTCÓEEQPFKVKQPU103
zooming 98
Microsoft Exchange 14, 31, 54, 92, 171, 172
meeting invitations 89
searching email 58
setting up account 172
syncing 85, 172
Microsoft Internet Explorer 28, 51
Microsoft Outlook 27, 85
mirroring video 169
MobileMe 14, 31, 92
getting help 189
searching email 58
security features 31, 46
sending photos to a gallery 74
syncing 51, 85
model number 155
Mono Audio 149
Index 193

movies
rented 28, 80
syncing 24, 25
multitasking 37
music
managing manually 27
previewing 115
purchasing 115
searching 109
settings 168
syncing 24, 25, 28
See also iPod
music videos
syncing 24
mute
audio and video playback 11
UQWPFGÒGEVU11
VoiceOver 141, 14 4
N
navigating. See panning, scrolling
Network activity
status icon 13
networks 152
Notes 95
emailing 96
searching 96
syncing 25
PQVK°ECVKQPU153
numbered badge 40
O
onscreen keyboard 18
orientation, changing 47
Outlook Express. See Windows Address Book
Outlook. See Microsoft Outlook
overview, iPad apps 14
P
pairing
Bluetooth headphones 43
Bluetooth keyboard 43
removing 43
panning
maps 98
webpages 48
parental controls. See Restrictions
passcode 157
pasting
text 21
PC system requirements 23
PDF books 125
Photo Booth
back camera 67
front camera 67
seeing photos you’ve taken 67
taking photos 66, 67
upload photos to your computer 68
photos 69
albums 71
assigning photos to contacts 75
contact photos 93
emailing multiple photos 74
emailing photos 73
events 71
faces 71
geo-tagged 71
importing from camera or iPhone 70
picture frame 76
places 71
printing 75
saving from web or email 74
sending in email messages 54
settings 169
slideshow 73
syncing 25, 28, 29
taking 61, 66, 67
upload to computer 74
using photos as wallpaper 75
zooming photos 72
Photos
streaming with AirPlay 73
Picture Frame 76
pictures. See Camera, Photos
Pinyin 175, 178
playlists 110
creating 109
Genius 110
Genius Mixes 111
podcasts
downloading 117
streaming 117
syncing 24, 25, 28
pop-ups 167
portrait orientation 16
power adapter, 10W USB 10
power, low 34
previewing, music and videos 115, 116
print
AirPrint printers 40
Print Center 42
printing
cancelling 42
email messages and attachments 59
overview 40
photos 75
setting up 40
status 42
problems. See troubleshooting
purchased content
syncing 118, 123
Index
194

purchasing
apps 119
music 113, 115
videos 116
push accounts 164
Q
Quick Nav 146
R
rate a song 109
reading email 56
rechargeable batteries 34
removing backups 182
renting
movies 28, 80
videos 116
repeating 107
replacing battery 34, 189
replying to messages 54
requirements for using iPad 23
reset iPad 18 8
resizing webpage columns 48
restarting 188
restoring iPad software 182
restoring settings and information 180, 183
restrictions, setting 15 8
4QOCLK177, 178
rotor control 142
S
Safari
AutoFill 50, 166
bookmarking webpages 51
clearing cache 167
cookies 167
debug console 167
Debug Console 167
developer settings 167
fraud warning 167
Home screen web clips 52
navigating 49
opening webpages 47, 49, 50
pop-ups 167
reloading webpages 49
TGUK\KPIEQNWOPUVQ°VUETGGP48
saving images to your Photo Library 49
searching 50
searching the web 51
security 167
sending webpage addresses in email 49
settings 166
stopping webpages from loading 49
syncing bookmarks 25, 28
V[RKPIKPVGZV°GNFU50
zooming webpages 48
satellite view 101
screen 154, 155
brightness 17
UGVVKPIVQCFLWUVCWVQOCVKECNN[155
using 17, 36
screen orientation 16. See Side Switch
lock 16, 37
lock icon 16
lock status icon 13, 16
screenshot, taking a 61
scrolling
about 37
maps 98
webpages 48
SD Card Reader 70
search engine 166
searching
App Store 120
calendars 88
global 42
iTunes Store 114
Mail messages 58
music 109
notes 96
the web 51
using Spotlight 43
webpage text 50
Wikipedia 43
YouTube videos 82
security
erase data after ten failed passcode attempts 158
features 46
Find My iPad 46
setting passcode 157
web 167
selecting text 21
sending
email 54
photos from Photos 73
UGTKCNPWODGT°PFKPI155
service and support information 189
set up iPad 24
settings
accessibility 162
accounts 163
alerts 90
auto-capitalization 161
auto-correction 21, 161
Bluetooth 157
brightness 154
Calendar 90
date and time 160
developer 167
email server 155
Fetch New Data 164
international 161
Index 195

iPad cover lock 158
language 161
location services 153
Mail, Contacts, Calendars 163
Mail 163
music 168
passcode lock 157
Photos 169
Picture Frame 155
resetting 162
restrictions 158
Safari 166
screen brightness 154
security 167
sound 90
Store 170
usage statistics 156
video 168
VoiceOver 137
VPN 156
wallpaper 75, 155
Wi-Fi 152
sharing
photos in email messages 54
UJWÔKPIUQPIU107
Side Switch 11
signatures, email 165
SIM PIN
VWTPKPIQPQTQÒ15 4
5KORNK°GF%JKPGUG176
sleep/wake button 10
slideshows
settings 169
smart cover 11
software
getting help 189
updating and restoring 182
version 155
sound
CFLWUVKPICNGTVUXQNWOG15 6
CFLWUVKPICNGTVXQNWOG15 6
CFLWUVKPIXQNWOG11
no sound 185
setting limit 168
Sound Check 168
UQWPFGÒGEVU11
sounds
calendar alert 90
Speak Auto-text 149
SSL 163
status icons 13
storage capacity 155
Store, settings 170
subscribing, calendars 88
subtitles 79
UWT°PIVJGYGD47
switching between cameras 61, 67
syncing
calendars 85
Google Contacts 27
iTunes library contents 24, 25
Microsoft Exchange 85, 172
MobileMe 31, 85
preventing 29
purchased songs 118
“Sync in progress” message 33
webpage bookmarks 51
system requirements 23
T
taking photos 61, 66, 67
telephone number format 161
Ten Key 178
text
cutting or copying 21
increasing size 149
pasting 21
typing 18
typing in webpages 50
time format 161
time zone support 88, 166
time, setting 160
touchscreen, using 17, 36
Traditional Chinese 17 6
VTCÓEEQPFKVKQPUEJGEMKPI103
transfer settings and information 181
transferring
purchased content 112, 113, 118, 123
transferring settings and information 180, 183
trimming videos 62
Triple-click Home 150
troubleshooting
backing up 181
can’t open an attachment 185
can’t purchase music or apps 188
display freezes 179
iPad doesn’t appear in iTunes 180
iPad doesn’t respond 179
iPad doesn’t turn on 179
no sound 185
problems playing songs or other content 186
restarting 188
software update and restore 182
VWTPKPIK2CFQPQTQÒ10
TV shows
syncing 24, 25, 28
typing
international keyboards 174
keyboard 18
KPYGDRCIGVGZV°GNFU50
word substitution 178
Index
196

U
undoing edits 22
unlocking iPad 10
unpairing Bluetooth device 44
unread messages, marking 57
updating iPad software 182
usage statistics
battery percentage 156
resetting 156
seeing 156
USB
cable 10, 24
port 24
user dictionary 178
V
VGA connector 84
video settings 168
videos 77
alternate audio language 79
deleting 80
editing 62
playback controls 78
playing 78
previewing 116
purchasing 116
rented 80
subtitles 79
syncing 28
trimming 62
watching on a TV 80, 84
YouTube 81
See also iPod, Music, YouTube
Vietnamese keyboard 177
View Account
changing account information 154
virtual private network. See VPN
VoiceOver
about 138
braille displays 147
entering and editing text 144
gestures 140
keyboard control 144
Quick Nav 146
rotor control 142
volume
CFLWUVKPI11
CFLWUVKPIHQTCNGTVU15 6
setting limit 168
VPN
accessing networks using 172
EQP°IWTKPI156
UGVWRD[EQP°IWTCVKQPRTQ°NG171
VWTPKPIQPQTQÒ157
W
waking iPad 10
wallpaper
settings 75
using photo as 75
warranty service 189
watching videos on a TV 80, 84
web. See Safari
web clips, adding to Home screen 52
webpages
bookmarking 51
syncing 25, 28
White on Black 149
Wi-Fi
addresses 155
forgetting a network 153
LQKPKPIPGVYQTMU29, 152
settings 152
status icon 13
VWTPKPIQPQTQÒ151, 152
Wikipedia, searching 43
Windows Address Book 27
Windows XP 23
9/#°NGUEQPXGTVKPI186
Wubi Hua 175
Y
Yahoo!
Address Book 27
search engine 166
searching using 51
Yomi 178
YouTube
bookmarking videos 83, 84
emailing video links 83, 84
±CIIKPICXKFGQ84
playing videos 83
rating videos 84
searching for videos 82
subscribing to videos 84
Z
Zhuyin 175, 17 8
Zoom (Accessibility feature) 148
zooming
camera 61
email messages 57
maps 98
photos 72
webpages 48
Index 197
%Apple Inc.
© 2011 Apple Inc. All rights reserved.
Apple, the Apple logo, AirPlay, AirPort, AirPort Express,
AirPort Extreme, Aperture, Apple TV, FaceTime, Finder,
iBooks, iCal, iPhone, iPhoto, iPod, iPod touch, iTunes,
Keynote, Mac, Macintosh, Mac OS, Numbers, Pages,
Photo Booth, Safari, and Spotlight are trademarks of
Apple Inc., registered in the U.S. and other countries.
#KT2TKPVK2CF/WNVK6QWEJCPF5JWÔGCTGVTCFGOCTMU
of Apple Inc.
Apple, Apple Store, iDisk, and iTunes Store are service
marks of Apple Inc., registered in the U.S. and other
countries.
App Store, iBookstore, and MobileMe are service marks
of Apple Inc.
Adobe and Photoshop are trademarks or registered
trademarks of Adobe Systems Incorporated in the U.S.
and/or other countries.
The Bluetooth® word mark and logos are registered
trademarks owned by Bluetooth SIG, Inc. and any use of
such marks by Apple Inc. is under license.
IOS is a trademark or registered trademark of Cisco in
the U.S. and other countries and is used under license.
Ping is a registered trademark of Karsten Manufacturing
Corporation and is used in the U.S. under license.
© 2011 Google. Map data © 2011 Google, Tele Atlas,
INEGI, Transnavicom, ZENRIN, MapLink/Tele Atlas, Europa
Technologies.
© Google. Map data © 2011 Tele Atlas.
© 2011 Google. Map data © 2011 Google.
© 2011 Google.
#XCKNCDNGQPK6WPGU6KVNGCXCKNCDKNKV[KUUWDLGEVVQ
change. Airplane! © 1992 Paramount Pictures. All rights
reserved. Back to the Future © 1985 Universal Studios.
All rights reserved. Dear John © 2010 Dear John, LLC. All
rights reserved. Eat Pray Love © 2010 Columbia Pictures
Industries, Inc. All rights reserved. Iron Man 2, the movie,
© 2010 MVL Film Finance LLC. Iron Man, the character,
TM and © 2010 Marvel Entertainment, LLC and subs. All
rights reserved. The Karate Kid © 2010 Columbia Pictures
Industries, Inc. All rights reserved. Salt © 2010 Columbia
Pictures Industries, Inc. and Beverly Blvd. LLC. All rights
reserved. Tangled will be available on iTunes beginning
March 29, 2011. Tangled © 2010 Disney. Toy Story 3 ©
Disney/Pixar.
Other company and product names mentioned herein
may be trademarks of their respective companies.
Mention of third-party products is for informational
purposes only and constitutes neither an endorsement
nor a recommendation. Apple assumes no responsibility
with regard to the performance or use of these
products. All understandings, agreements, or warranties,
if any, take place directly between the vendors and the
RTQURGEVKXGWUGTU'XGT[GÒQTVJCUDGGPOCFGVQGPUWTG
that the information in this manual is accurate. Apple is
not responsible for printing or clerical errors.
019-2019/2011-03-07