Contents
- 1. User Manual Part 1
- 2. User Manual Part 2
- 3. User Manual Part 3
User Manual Part 2

Chapter 2 Get started 28
Note: AirDrop for iOS requires devices that have the Lightning connector and iOS 7 or later.
Not all older Macs support AirDrop (for a list of supported Macs, see the Apple Support article
support.apple.com/HT203106).
Send a le from the Finder. Click the Finder icon in the Dock, then click AirDrop in the sidebar
on the left. When the person you want to send a le to appears in the window, drag the le to
him or her.
Send a le from an app. While using an app like Pages or Preview, click the Share button and
choose AirDrop.
Control who can send items to you using AirDrop. Click the Finder icon in the Dock, click
AirDrop in the sidebar, then click “Allow me to be discovered by” and choose an option.
When you send a le to someone, the recipient can choose whether or not to accept the le.
When someone sends you a le, you can nd it in the Downloads folder on your MacBook Pro.
Tip: If you don’t see the recipient in the AirDrop window, make sure both devices have
AirDrop and Bluetooth turned on and are within 30 feet (9 meters) of each other.
To learn more about AirDrop, go to Mac Help (see Mac Help).
AirPrint
You can use AirPrint to print wirelessly to:
•An AirPrint-enabled printer on your Wi-Fi network
•A network printer or printer shared by another Mac on your Wi-Fi network
•A printer connected to the USB port of an AirPort base station
Print to an AirPrint printer. When you print from an app, click the Printer pop-up menu in the
Print dialog, then choose a printer in the Nearby Printers list.
Can’t nd the printer you’re looking for? Make sure it’s connected to the same Wi-Fi network
as your MacBook Pro. If it’s connected and you still don’t see it, try adding it: Click the System
Preferences icon in the Dock, click Printers & Scanners, then click Add . (You may have to
temporarily connect the printer to your MacBook Pro using a USB cable.)
For a list of AirPrint-enabled printers and other supported printers, see the Apple Support articles
support.apple.com/HT201311 and support.apple.com/HT201465.
74% resize factor
Appe Confidential

Chapter 2 Get started 29
To learn more about AirPrint, go to Mac Help (see Mac Help).
AirPlay
Show whatever’s on your MacBook Pro on the big screen using AirPlay Mirroring. Connect
your HDTV to Apple TV, and make sure the Apple TV is on the same Wi-Fi network as your
MacBook Pro to mirror the MacBook Pro screen on your TV screen or use the HDTV as a second
display. You can also play web videos directly on your HDTV without showing what’s on your
desktop—handy when you want to play a movie but keep your work private.
Mirror your desktop using AirPlay Mirroring. Click the AirPlay icon in the menu bar, then
choose your Apple TV. When an AirPlay display is active, the icon turns blue.
In some cases, you can use an AirPlay display even if your MacBook Pro isn’t on the same Wi-Fi
network as Apple TV (called peer-to-peer AirPlay). To use peer-to-peer AirPlay, you need an
Apple TV (3rd generation rev A, model A1469 or later) with Apple TV software 7.0 or later.
Play web videos without showing your desktop. When you nd a web video with an AirPlay
icon , click the icon, then select your Apple TV.
Tip: If the image doesn’t t your HDTV screen when you mirror the screen, adjust the desktop
size for the best picture. Click the AirPlay icon , then choose an option under “Match Desktop
Size To.”
Apple TV is sold separately at apple.com or your local Apple Store.
To learn more about AirPlay, go to Mac Help (see Mac Help). To learn more about using a second
display with your MacBook Pro, see Use an external display.
Migrate your data
It’s easy to move your les and settings from another Mac or PC to your MacBook Pro. You can
transfer information from an old computer to your MacBook Pro wirelessly, from a Time Machine
or other USB storage device, or with an Ethernet cable and adapters.
Tip: For best results, make sure your MacBook Pro is running the latest version of macOS. To
check for software updates, click the App Store icon in the Dock, then click Updates in the
App Store toolbar.
74% resize factor
Appe Confidential

Chapter 2 Get started 30
Transfer wirelessly. To transfer the data when you rst set up your MacBook Pro, use Setup
Assistant. To transfer data later, you can use Migration Assistant. Open a Finder window, go to
Applications > Utilities, then double-click Migration Assistant to do a wireless migration. Follow
the onscreen instructions.
Tip: You’ll get best results if you transfer the information wirelessly from your old computer
to your MacBook Pro. Make sure both computers are connected to the same network. Keep both
computers near each other throughout the migration process.
If you used Time Machine to back up your les from another Mac to a storage device (such
as an AirPort Time Capsule or an external disk), you can copy the les from the device to your
MacBook Pro. For more information about Time Machine backups, see Back up and restore.
Copy les from a USB storage device. Connect the AirPort Time Capsule or other storage device
to your MacBook Pro using an adapter, such as the USB-C to USB Adapter (see Accessories). Then
manually drag les to your MacBook Pro.
Transfer using Ethernet. To migrate over Ethernet, use a USB-C to Ethernet adapter (available
separately) to connect the Ethernet cable to your MacBook Pro. Connect the other end of the
Ethernet cable to your other computer (you might need another adapter, if your computer
doesn’t have an Ethernet port). Before migrating your data using Ethernet, make sure your
MacBook battery is fully charged.
For complete details about all the migration methods, see the Apple Support article
support.apple.com/HT204754. {REVIEWERS: Will the title of this article be updated to include
MacBook Pro?}
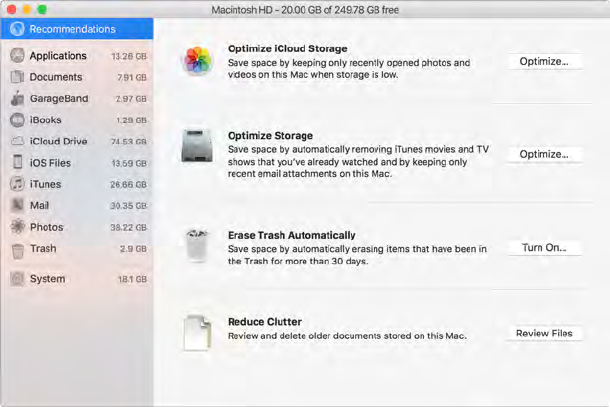
Save space on your MacBook Pro
macOS Sierra frees up space on your MacBook Pro and helps you save space as you work. You
can set options to free up even more space on your MacBook Pro.
74% resize factor
Appe Confidential
Chapter 2 Get started 31
Optimize storage. Set options in the Recommendations pane. Go to Apple menu > About This
Mac, click Storage, then click Details. When your Mac is low on storage, you’ll see an alert that will
open the Recommendations pane.
Set options to:
•Optimize iCloud Storage:
•Store les in iCloud, where they stay secure and available. You can turn on iCloud Drive to
store les on your desktop and in your Documents folder in iCloud.
•Turn on iCloud Photo Library to store items from the Photos app in iCloud.
Even though your les are stored in the cloud, you can get access to them right where you left
them on your Mac. For more information, see Access your content anywhere with iCloud.
•Optimize Storage: Remove iTunes movies and TV shows you’ve watched, and keep only recent
email attachments.
•Erase Trash Automatically: Automatically erase items that have been in the Trash for more than
30 days.
•Reduce Clutter: Review documents and delete older ones stored on your MacBook Pro.
macOS Sierra also prevents you from downloading the same le twice from Safari, alerts you to
remove installer software when you nish installing a new app, clears logs and caches that are
safe to remove when you’re low on storage, and more, to help you save space as you work.
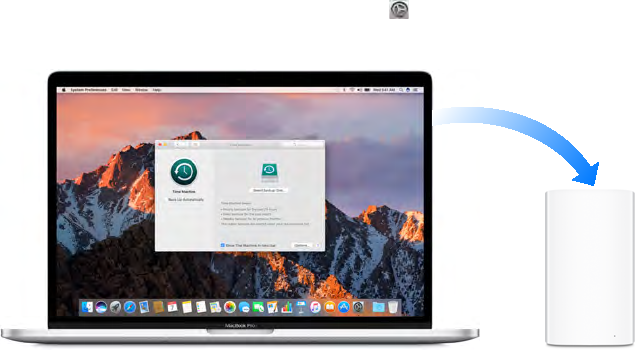
Back up and restore
To keep your les safe, it’s important to back up your MacBook Pro regularly. The easiest way to
back up is to use Time Machine—which is built into your MacBook Pro—with a wireless AirPort
Time Capsule (sold separately), or an external storage device connected to your MacBook Pro.
Files stored in iCloud Drive and photos in iCloud Photo Library are automatically backed up to
iCloud and don’t need to be part of your Time Machine or other backup.
74% resize factor
Appe Confidential
Chapter 2 Get started 32
Set up Time Machine. Make sure your MacBook Pro is on the same Wi-Fi network as your
AirPort Time Capsule, or connect your AirPort Time Capsule or external storage device to your
MacBook Pro. Click the System Preferences icon in the Dock, click Time Machine, then click On.
Select the drive you want to use for backup, and you’re all set.
Time Machine:
•Automatically backs up everything on your MacBook Pro, including system les, apps,
accounts, preferences, music, photos, movies, and documents.
•Remembers how everything looked on any given day, so you can revisit your MacBook Pro as
it appeared in the past or retrieve an older version of a document.
•Lets you restore your MacBook Pro from a Time Machine backup. So if anything happens to
your MacBook Pro, your les and settings are safe and sound.
To learn more about backing up and restoring your MacBook Pro, go to Mac Help (see Mac Help)
and search for “Time Machine,” “external storage device,” “backup,” or “restore.” To learn more
about AirPort Time Capsule, go to www.apple.com/airport-time-capsule.
AirPort Time Capsule is sold separately at apple.com or your local Apple Store.
74% resize factor
Appe Confidential
3
33
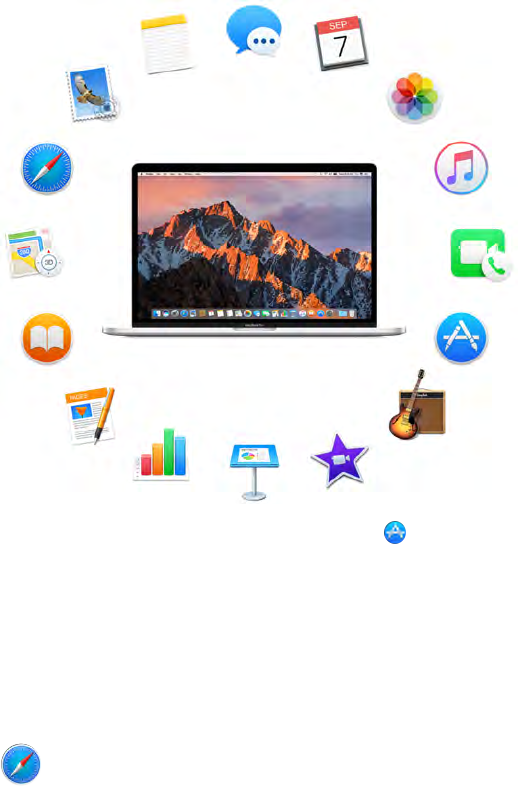
Included apps
Your MacBook Pro comes with a collection of great apps for things you do every day, like surng
the web, sending mail and messages, and arranging your calendar. It also comes with apps
like Photos, iMovie, GarageBand, Pages, Numbers, and Keynote—so you can be creative and
productive right from the start. The apps that come with your MacBook Pro are described in the
following sections.
Find even more apps. Click the App Store icon in the Dock to nd apps for everything you
want to do. See App Store to learn more.
Use the Touch Bar. If your MacBook Pro includes a Touch Bar, you can use it to perform shortcuts
for common tasks. Learn more in the app sections that follow.
Get help for any app. Click the Help menu (in the menu bar at the top of the screen) when
you’re using the app.
Safari
Safari is the fastest, safest, and most energy-ecient way to surf the web on your Mac.
Apps
74% resize factor
Appe Confidential
Chapter 3 Apps 34
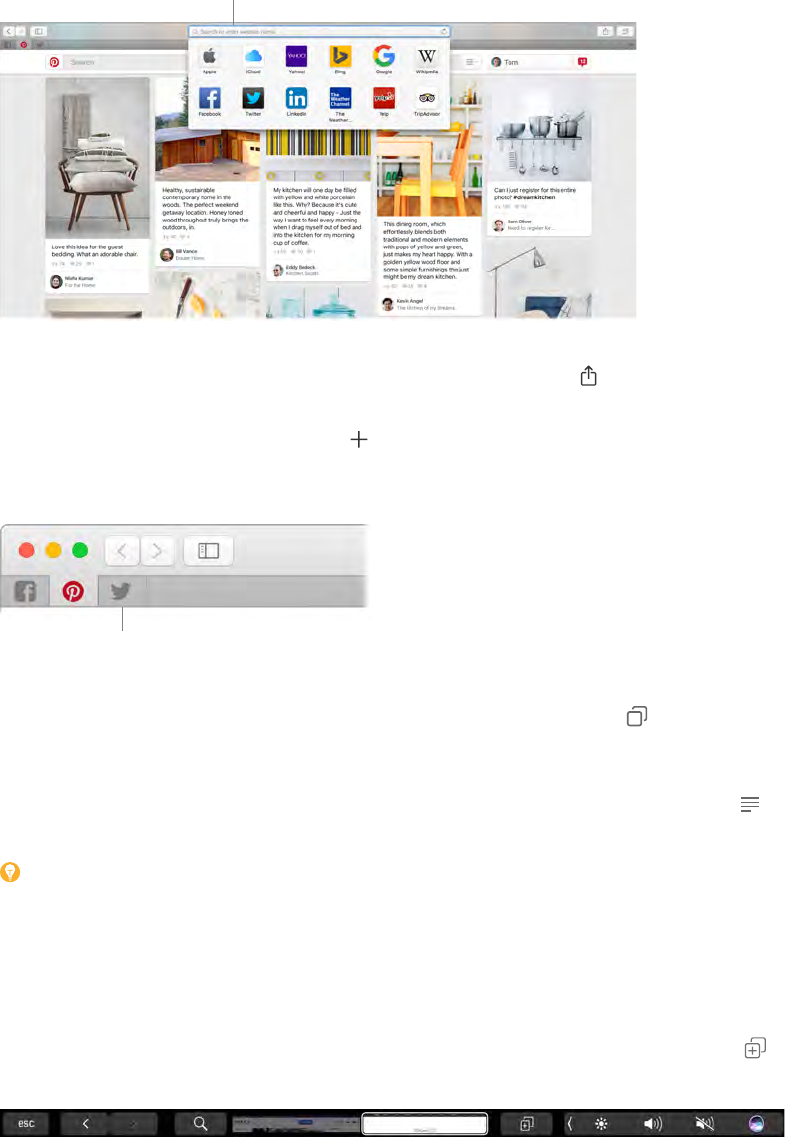
Start searching. Click the Smart Search eld at the top of the window to see websites you visit
most frequently. Or start typing a word or website address—Safari shows you matching websites,
as well as Safari Suggestions for news, Wikipedia articles, iTunes music, weather forecasts, sports
scores and player stats, stock prices, help from Apple, and nearby points of interest.
Type what you’re looking
for or click a favorite.
Spread the word. It’s easy to share a webpage on social media, save it to your bookmarks or
reading list, or add it to Notes or Reminders. Just click the Share button at the top of the
window and choose an option.
View multiple pages in one window. Click at the far right of the tab bar to open a new tab,
then enter an address. To keep a website handy, drag its tab left to “pin” it, and it stays put in the
tab bar.
Drag a tab to the left
to pin it in the tab bar.
See what’s open on each of your devices. You can see open webpages on all your devices that
are signed in to the same iCloud account. Just click the Show All Tabs button at the top of the
window and scroll down if necessary.
Read without distraction. If the article you’re reading includes animations or ashy ads, you can
use Reader view to strip out the distractions and focus on the text. Click the Reader button in
the Smart Search eld (if it’s available).
Tip: In a webpage, force click a word to see its denition or a Wikipedia article, if one is
available. Try force clicking text in other apps, like Messages or Mail, to get more info.
Shop with Apple Pay. When you’re shopping online on a supported website, click the Apple
Pay button to make a purchase. To complete the transaction, use Touch ID or the passcode on
your iPhone, or double-click the side button on your unlocked Apple Watch. If you’re using a
MacBook Pro that has Touch ID, use the Power button with Touch ID to complete your purchase.
Use the Touch Bar. Tap the Search eld in the Touch Bar, then tap a favorite to open it. Click to
open a new tab.
74% resize factor
Appe Confidential

Chapter 3 Apps 35
Click the right and left arrow buttons to go backward or forward. Tap the tab scrubber in the
Touch Bar to move between open tabs.
Customize the Touch Bar to add your favorite controls (choose View > Customize Touch Bar).
See Customize the Touch Bar for more information.
Mail
Mail lets you manage all your email accounts from a single app. It works with most popular email
services, such as iCloud, Gmail, Yahoo Mail, and AOL Mail.
One-stop email. Tired of signing in to multiple websites to check your email accounts? Set
up Mail with all your accounts so you can see all your messages in one place. Choose Mail >
Add Account.
Ask Siri. Say something like: “Any new mail from Laura today?”
Add events and contacts right from Mail. When Mail detects a new email address or event in a
message, just click Add to add it to Contacts or Calendar. Force click an address to see a preview
of the location, which you can open in Maps.
Add names or events to
your contacts or calendar
with a single click.
74% resize factor
Appe Confidential
Chapter 3 Apps 36
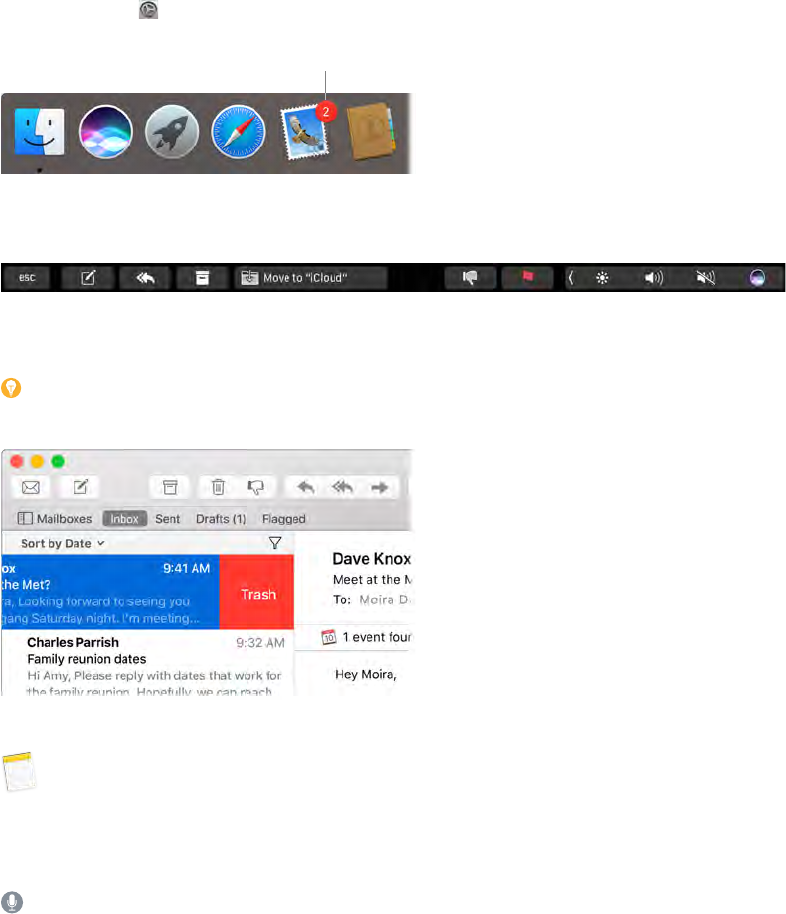
Never miss an email. Check the Mail icon in the Dock to see the number of unread messages.
When you get new email, a notication also appears at the top-right of the screen so you can
quickly preview the new messages. (Don’t want notications? To turn them o, click the System
Preferences icon in the Dock, then click Notications.)
You have unread
messages.
Use the Touch Bar. Use the Touch Bar for many common tasks, like composing, replying,
archiving, agging, marking as junk, and moving messages.
Customize the Touch Bar to add your favorite controls (choose View > Customize Touch Bar). See
Customize the Touch Bar for more information.
Tip: To quickly delete a message in your inbox, swipe left across the message with two ngers
on the trackpad, then click Trash. Or swipe right to mark the message as Unread.
Notes
Notes are more than just text. Add a checklist, and check o items as you complete them. Or
add photos, videos, and content from other apps, such as a web link from Safari or a location
from Maps.
Ask Siri. Say something like: “Create a new note.”
74% resize factor
Appe Confidential
Chapter 3 Apps 37
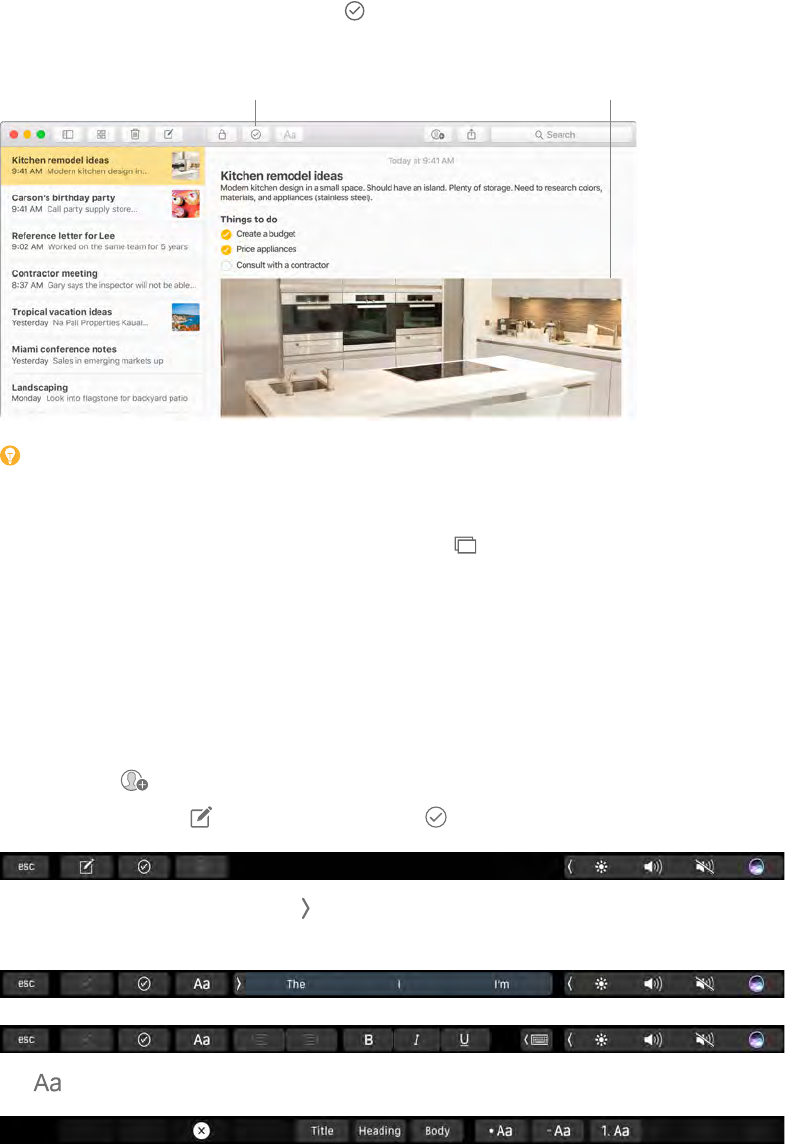
Check o tasks. Click the Checklist button to add an interactive checklist to a note—perfect
for completing a to-do list or working through a recipe.
Create a checklist.
Drag photos and other
items into your notes.
Tip: When you’re signed in to iCloud, your notes are kept up to date on all your devices—so
you can create a to-do list on your Mac, then check o items on your iPhone while you’re on
the go.
Add photos, videos, and more. Click the Photos button to add items from your Photos library
to a note. Or drag a photo, video, PDF, or other document from the desktop.
Sort notes. You can sort your notes by Date Created, Date Edited, or Title. Select “All iCloud,”
“Notes,” or a folder, then choose View > Sort Notes By and select a sort option.
Lock a note. You can lock a note with a password to make sure that only those who know the
password can see the note. Choose Notes > Set Password to assign a password to use with all
locked notes. Then select the note you want to lock, and choose File > Lock Note.
Share a note. You can invite people to view and edit your notes by sharing them. Click the
People button and select a method for sending the link.
Use the Touch Bar. Tap to create a new note. Tap to add a checklist item to your note.
Tap predictive input options and tap to display text formatting buttons to align text left or
right, and apply bold, italic, or underscore styles.
Tap to add note paragraph styles, like numbered or bulleted lists, or headings.
74% resize factor
Appe Confidential

Chapter 3 Apps 38
Messages
With Messages, it’s easy to stay in touch. Connect with one or more people through text, audio,
or video. And if you want to share les, you can do that too.
Start a FaceTime call.
Start a conversation.
Sign in and send. Sign in with your Apple ID to exchange unlimited iMessage texts—including
text, photos, live photos, video, and more—with anyone with a Mac, iPhone, iPad, iPod touch, or
Apple Watch.
Tip: You can also send and receive SMS and MMS messages on your Mac, so you can text
friends with an iPhone from your Mac, if your iPhone (with iOS 8.1 or later) is signed in to
Messages with the same Apple ID. On your iPhone, go to Settings & Messages, tap Message
Forwarding, then tap the name of your Mac to turn on Text Message Forwarding. On your Mac,
you’ll see an activation code. Enter this on your iPhone, then tap Allow.
Ask Siri. Say something like: “Read my last message from Mitch.”
Make messages fun. Liven up discussions by responding to messages with large emoji or
Tapbacks. To add a Tapback, force click or control-click a message bubble, then choose Tapback.
And look out for stickers, Digital Touch, invisible ink, and handwritten messages that your friends
send you from their iOS device or Apple Watch.
74% resize factor
Appe Confidential
Chapter 3 Apps 39
When a text isn’t enough. If your friend also has FaceTime, you can start a FaceTime video or
audio chat right from a conversation in Messages. Just click Details in the message window, then
click the Audio or Video button.
Share your screen. You can share your screen with a friend—and vice versa—and even open
folders, create documents, and copy les by dragging them to the desktop on the shared screen.
Click Details, then click the Screen Share button .
Use the Touch Bar. Tap to create a new message. Tap the predictive input options in Touch
Bar to add words, and tap to open the emoji picker and add emoji to your message. Click a
message in the thread to see Tapbacks on the Touch Bar, and tap to add them.
Calendar
Never miss an appointment with Calendar. Keep track of your busy schedule by creating multiple
calendars, and manage them all in one place.
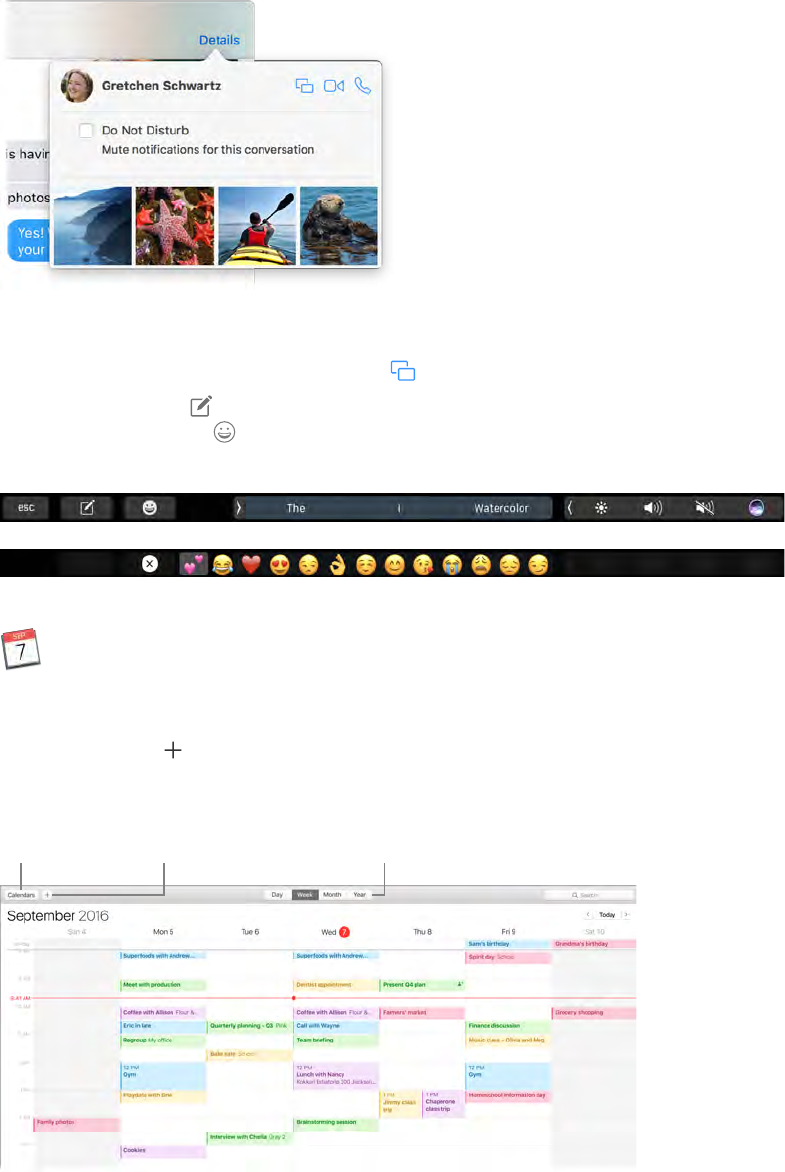
Create events. Click to add a new event. To invite someone, double-click the event, click
the Add Invitees section, then type an email address. Calendar lets you know when your
invitees reply.
Create a
new event.
Show the
calendar list.
Change the
calendar view.
74% resize factor
Appe Confidential
Chapter 3 Apps 40
See all your calendars—or just a few. Click the Calendars button to see a list of all your
calendars; click the ones you want to see in the window.
Ask Siri. Say something like: “Set up a meeting with Mark at nine in the morning.”
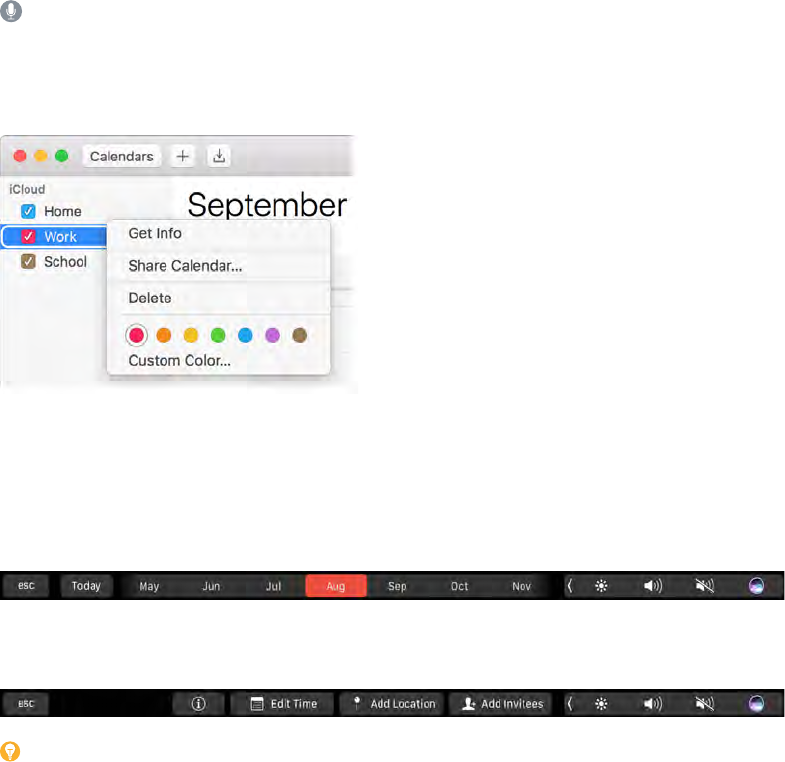
A calendar for every part of your life. Create separate calendars—for example, for home, work,
and school—each with its own color. Choose File > New Calendar to create a calendar, then
Control-click each calendar to choose a new color.
Share across your devices and with others. When you’re signed in to iCloud, your calendars are
kept up to date on all your Macs, iOS devices, and Apple Watch. You can also share calendars
with other iCloud users.
Use the Touch Bar. Tap the Today button to view or edit today’s events, and a slider to select the
month—past or future.
Select an event in your calendar, and tap buttons to get the event details, edit the time and
place, and add or delete invitees.
Tip: If you add a location to an event, Calendar shows you a map, estimated travel time
and time to leave, and even the weather forecast. Force click any event in Calendar to see
more details.
74% resize factor
Appe Confidential
Chapter 3 Apps 41
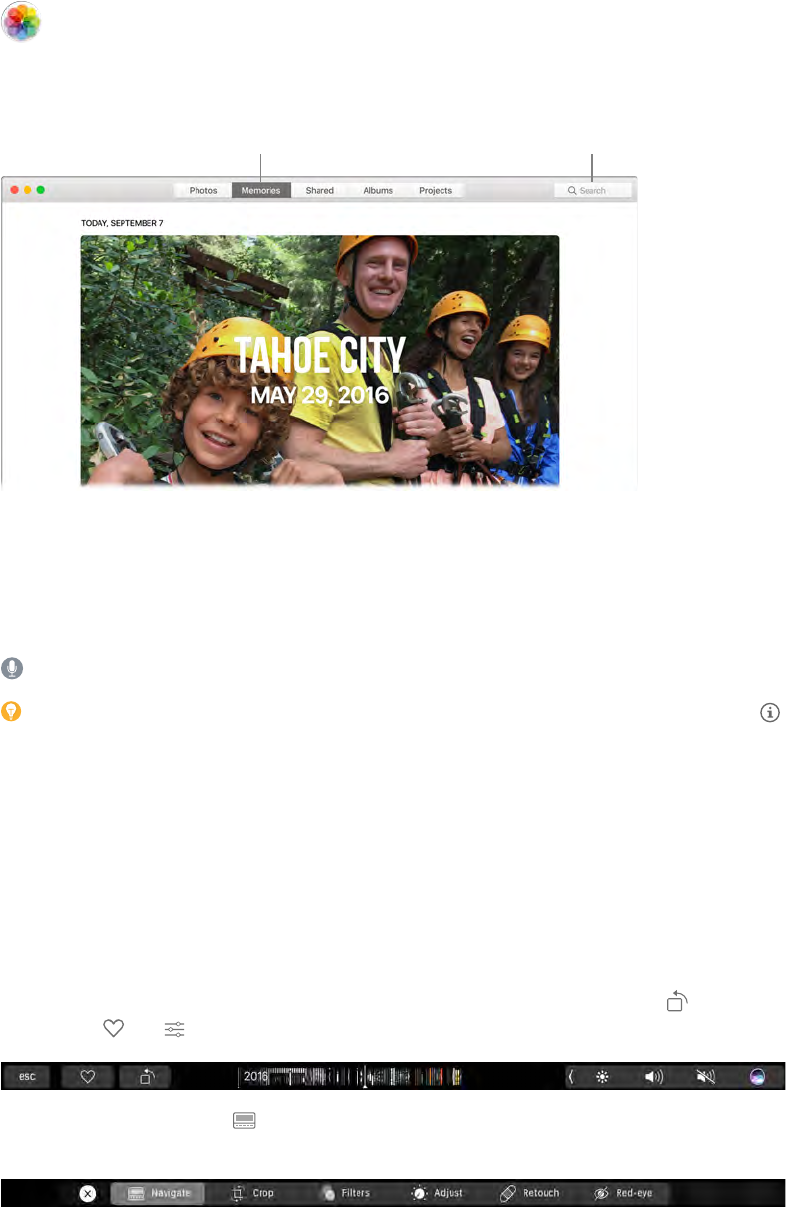
Photos
Use Photos to organize, edit, and share your photos, live photos, and videos, and keep your
entire photo library up to date on all your devices with iCloud Photo Library. You can also create
slideshows and beautiful photo gifts.
Find photos by what’s in them.Rediscover favorite occasions.
Relive meaningful moments. Click Memories to see favorite and forgotten occasions from your
photo library. Memories automatically creates photo collections from events like a wedding or
family vacation.
Find the perfect shot. Search your photos based on what’s in them. Photos identies objects,
scenes, and people, so you don’t have to use keywords to tag each photo.
Ask Siri. “Show me pictures of Sally at the beach.”
Tip: You can add location info to any photo. While viewing the photo, click the Info button ,
click Assign a Location, then start typing. Choose your location in the list, or type it and
press Return.
See who’s in your photo albums. The People feature automatically organizes your photo library
by people in your photos. The People album is arranged by how often each person appears
in your library. Make someone a favorite by dragging their photo to the top and they’ll always
appear at the top of the album.
See where you’ve been. Click the Places album to view your photo collection on a world map.
You can zoom in to see exactly where you took each shot.
Use the Touch Bar. The Touch Bar displays a scrubber organized by year, which speeds your
search for just the right photo. You can also quickly tap to rotate a selected photo or mark it
as a favorite . Tap to display the editing controls.
Select a photo to edit it. Tap to view editing options (crop, lters, adjust, retouch, and red-eye),
and tap the X when you nish.
74% resize factor
Appe Confidential
Chapter 3 Apps 42
Tap to enhance a photo, and tap and hold to view the before and after eects of your
edits. Adjust the red-eye and resize the photo. When you’re happy with your changes, tap Done.
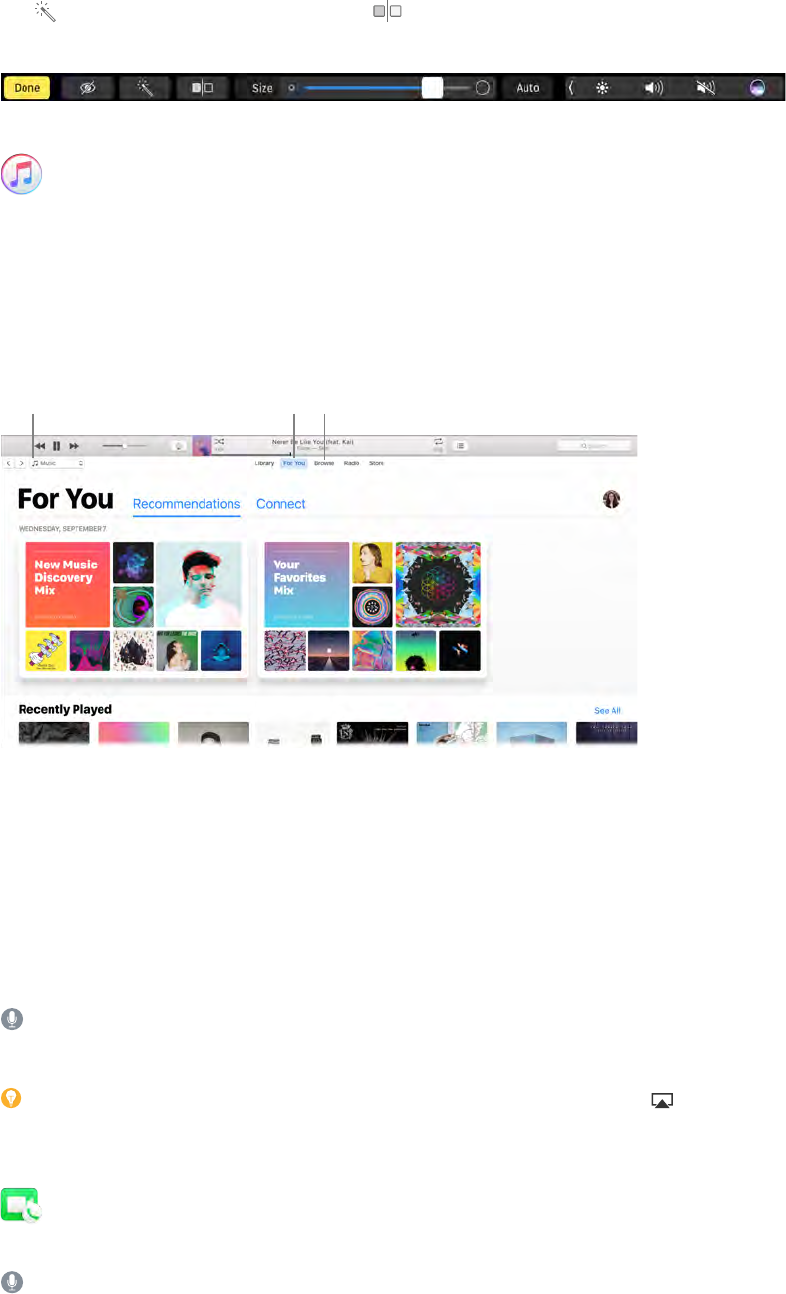
iTunes
iTunes makes it easy to organize and enjoy the music, movies, and TV shows you have—and
shop for the ones you want. iTunes includes Apple Music (which lets you listen to millions of
songs on demand), Beats 1 live radio, and Connect, a fun way for fans and artists to interact.
It’s in your library. Your iTunes library contains your music, movies, TV shows, podcasts, iTunes U
content, audiobooks, apps, ringtones, and Internet radio. Click the menu in the top-left corner to
change views.
Subscribe to
Apple Music.
Explore new
music releases.
View the items
in your library.
Find your new favorite song. Click For You to browse albums and playlists recommended for you
based on the artists and genres you love. The reorganized, easy-to-understand sections highlight
why each album or playlist was selected for you. For You also shows posts from artists you follow,
so it’s easier than ever to discover new music.
Browse the best of Apple Music. Click Browse to see new music and exclusive releases from
Apple Music. Choose from a huge selection of playlists to nd the perfect mix for any moment.
Tune in. Click Radio to tune in to Beats 1 live or listen to any episode from the Beats 1 family of
shows. Explore the wide variety of music-only stations created for almost every genre of music.
Ask Siri. “Play NPR Radio.”
Use the Touch Bar. {need info; haven’t seen any content in DFR yet}
Tip: To play music or radio from a speaker using AirPlay, click the AirPlay icon in the menu
bar and select an available speaker.
FaceTime
Make video and audio calls from your Mac with FaceTime.
Ask Siri. Say something like: “Make a FaceTime call to Sharon.”
74% resize factor
Appe Confidential

Chapter 3 Apps 43
Video or audio only? Click the Video button to make a FaceTime video call. If it’s not convenient
to make a video call, click the Audio button to make an audio-only call.
Tip: While a video call is in progress, you can drag the small picture-in-picture window to any
corner of the FaceTime window.
Search or enter
contact details.
List of recent calls.
Choose the
type of call.
Leave a message. If your FaceTime video call is declined or unanswered, click Message to send
an iMessage.
Make a phone call. If you have an iPhone with iOS 8 or later, make phone calls right from your
Mac using FaceTime. Just make sure your Mac and iPhone are signed in to the same iCloud
account and have the feature turned on. (On your Mac, open FaceTime, choose FaceTime >
Preferences, then select “Calls from iPhone.”)
Note: A Wi-Fi connection is required in order to make or receive calls on your MacBook Pro.
Use the Touch Bar. Make and answer voice or video calls, get info about a caller, and send a
message when you can’t talk, all from the Touch Bar.
74% resize factor
Appe Confidential
Chapter 3 Apps 44
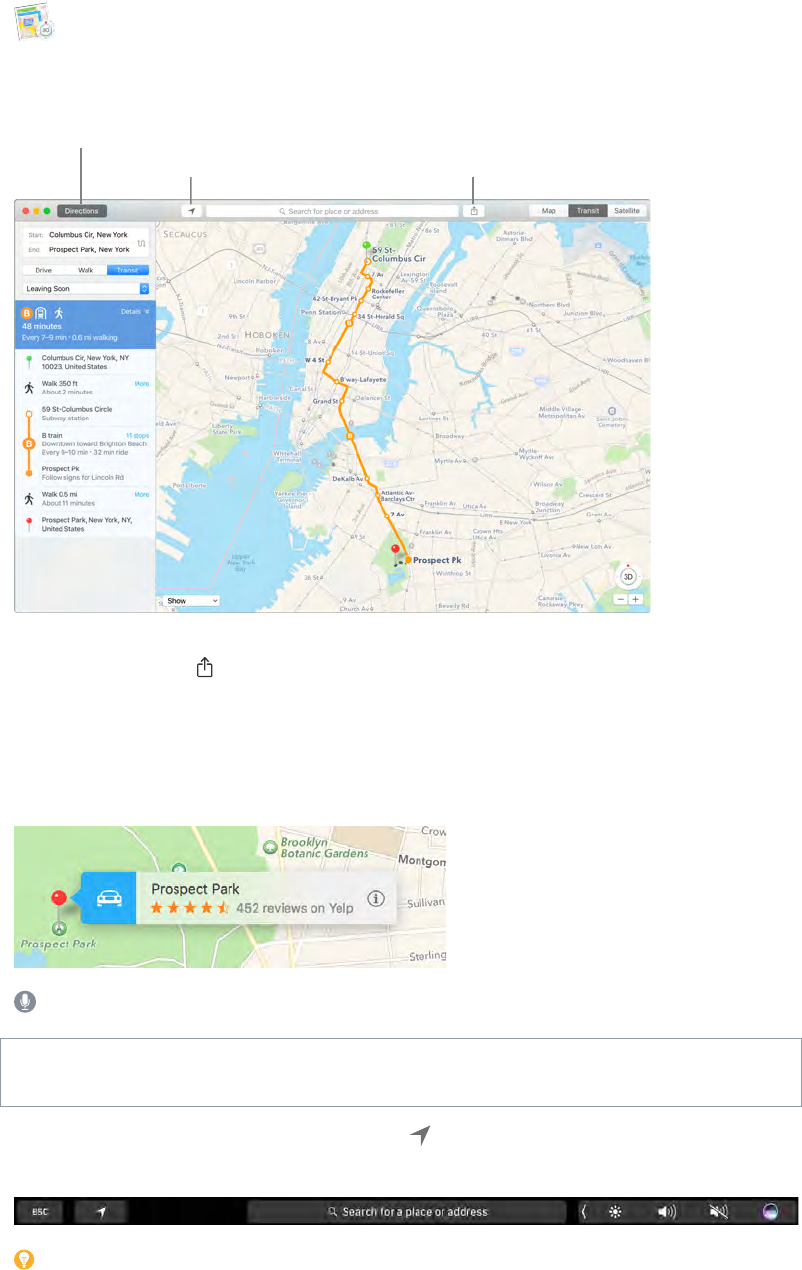
Maps
Get directions and view locations using a map or a satellite image. Or use Flyover to view select
cities in 3D. Force click a location to drop a pin there.
Get detailed directions, including
for travel by mass transit. Send directions
to your iPhone.
Show your current location.
Let iPhone show you the way. Click Directions to nd the best route to your destination, then
click the Share button to send the directions to your iPhone for turn-by-turn voice navigation.
Get there on public transit. Maps provides public transit information for select cities. Click
Transit, then click a destination to get suggested travel routes and estimated travel time.
More than just maps. For local points of interest such as hotels and restaurants, Maps shows you
phone numbers, photos, and even reviews.
Ask Siri. Say something like: “Find coee near me.”
WARNING: For important information about navigation and avoiding distractions that could
lead to dangerous situations, see Important safety information.
Use the Touch Bar. Specify your current location on the map and open the search eld to
enter where you want to go. Tap the Directions button to get the route.
Tip: Maps can show you what trac is like in both Map and Satellite view. Click Show, then
choose Show Trac.
74% resize factor
Appe Confidential

Chapter 3 Apps 45
iBooks
Use iBooks to read and organize your library of books, and to purchase new books on your Mac.
A bookshelf right on your Mac. Browse or search all the items in your library—or click iBooks
Store to nd new books and other publications. To buy, just sign in with your Apple ID: Choose
Store > Sign in.
Ask Siri. Say something like: “Find books by Jane Austen.”
Type what you’re
looking for.
View your books.
Browse curated
content.
Never lose your place or your markups. Your purchased books, collections, highlights, notes,
bookmarks, and the current page are available automatically on your Mac and iOS devices, if
you’re signed in on them with the same Apple ID.
Find your way back. You can quickly go to pages you’ve bookmarked. Click the arrow next to
to view your list of bookmarks.
Use the Touch Bar. {need info}
Tip: Change to Night mode to read more easily in low-light situations. Choose View > Theme,
then choose Night. Or click the Fonts button , then click the black circle.
74% resize factor
Appe Confidential

Chapter 3 Apps 46
Pages
Use the Pages app to create stunning, media-rich documents on your Mac. Open and edit
Microsoft Word les, and easily share a link to your work in Mail or Messages, right from
the toolbar.
Look good! Pages includes a variety of beautiful templates for yers, newsletters, reports, and
résumés, among others, making it easy to start your project.
Add charts, movies,
and more.
Share your
document.
Open or close the
Format sidebar.
All your formatting tools, in one place. Click the Format button in the toolbar to open the
Format inspector. Select an item in your document, and the formatting options for it appear.
Flow text around graphics. When you add an image to a text document, the text ows
automatically around the image. You can ne-tune how the text wraps in the Format sidebar.
Move a graphic into a text block… …and the text wraps around the
graphic automatically.
Start on your Mac, nish on iPad. You can keep documents up to date across all your devices
when you sign in to iCloud with the same Apple ID. So you can start composing on one device,
and pick up where you left o on another.
Tip: Turn on change tracking to see the changes you and others make to the document. Each
person’s edits and comments are color-coded so you can see who made the change. Choose
Edit > Turn on Tracking to show the change tracking toolbar.
74% resize factor
Appe Confidential
Chapter 3 Apps 47
Use the Touch Bar. Tap to align text left or right, and to add predictive text. Tap to see more
formatting options.
Tap to choose text color, style options (bold, italic, and so on), line spacing, and bullet and list
formats. Tap to return to predictive input.
Tap Styles to see paragraph style format options, like Title, Subtitle, and Heading.
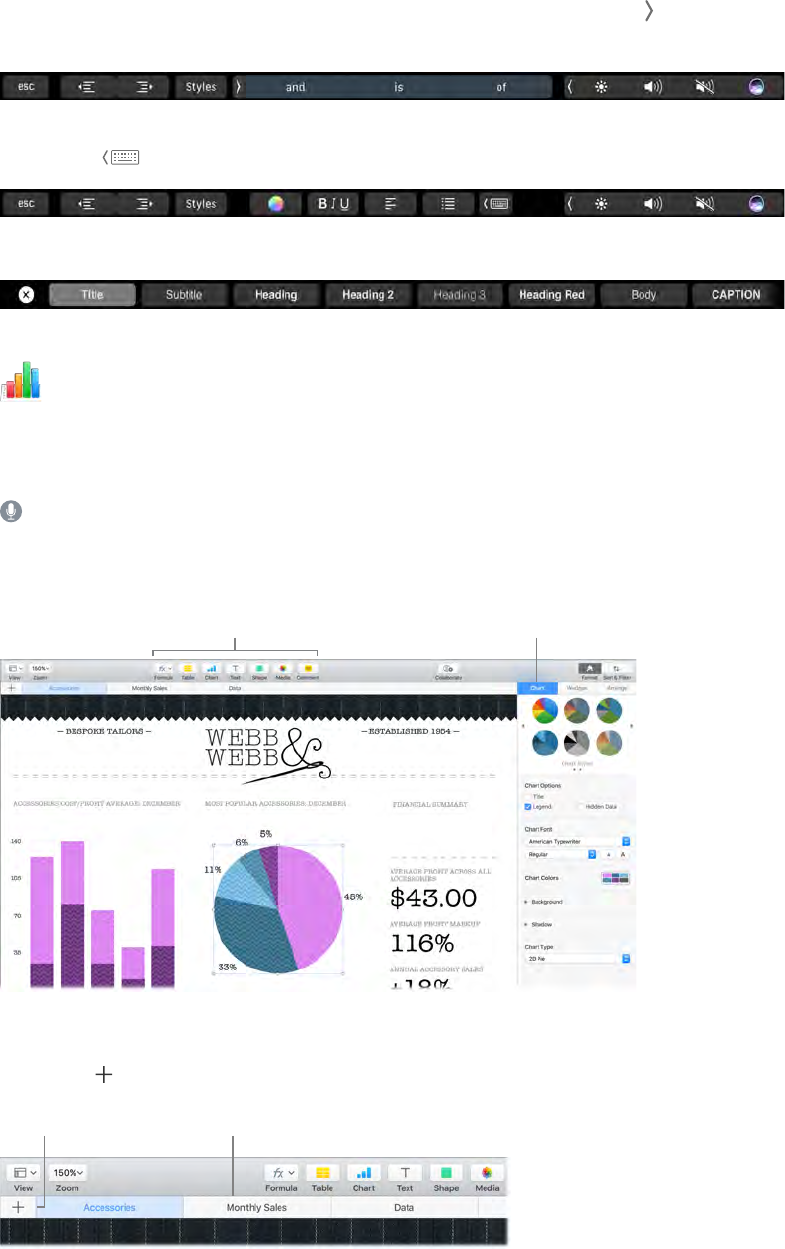
Numbers
Use Numbers to create attractive and powerful spreadsheets on your Mac. More than 30 Apple-
designed templates give you a head start creating budgets, invoices, team rosters, and more.
Numbers can also open and export Microsoft Excel spreadsheets.
Ask Siri. Say something like: “Open a new spreadsheet.”
Start with a template—then add what you want. Select the sample text in the template, then
type new text. To add images, drag a graphic le from your Mac onto the placeholder image.
Add objects like
shapes and charts.
View formatting options
for the selected object.
Get organized with sheets. Use multiple sheets or tabs to show dierent views of your
information. For example, use one sheet for your budget, another for a table, and a third for
notes. Click to add a new sheet. Drag a tab left or right to reorder sheets.
Click + to add
a new sheet.
Drag a tab left or right
to reorder sheets.
74% resize factor
Appe Confidential
Chapter 3 Apps 48
Formulas are a snap. Get built-in help for more than 250 powerful functions—just type the
equal sign (=) in a cell, and you see a list of all the functions and their descriptions in the sidebar.
Start typing a formula to get instant suggestions.
Tip: To get instant calculations based on a series of values, select the range of cells containing
the values. At the bottom of the window you’ll see the sum, average, minimum, maximum, and
count of the selected values. Click the Settings button to see even more options.
Use the Touch Bar. Tap Format, Autoll, and Formula to display the options shown below, or tap
text style and format buttons to display more Touch Bar controls for choosing color, justication,
wrapping, and top/bottom alignment for text.
Tap Format to display these text formatting buttons.
Tap Autoll to display these autoll options.
Tap Formula to display the quick formula buttons.
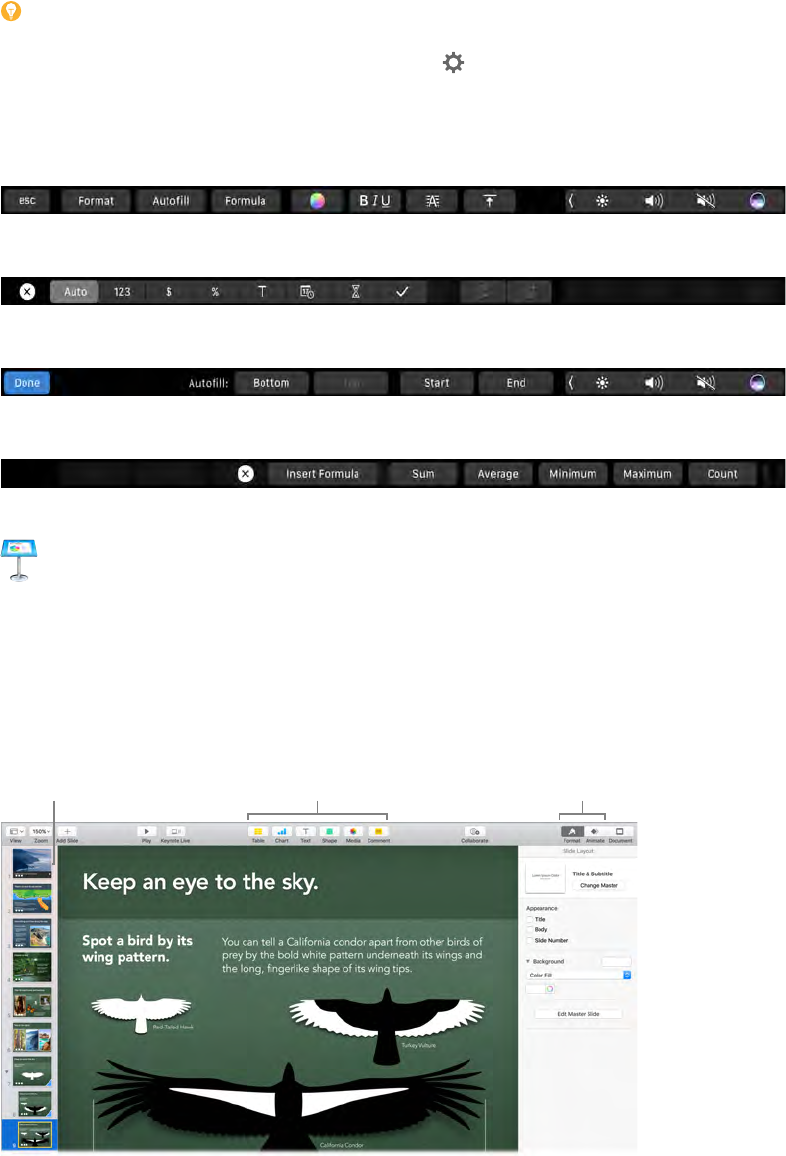
Keynote
Create professional, cutting-edge presentations with Keynote. Start with one of the more than
30 predesigned themes and make it your own by adding text, new objects, and changing the
color scheme.
Organize visually. Use the slide navigator on the left to quickly add, delete, or rearrange slides.
Click a slide to see it in the main window, drag a slide to change its order, or select it and press
Delete to remove it.
Drag to
reorder slides.
Add objects to
your slides.
See format and
animation options.
74% resize factor
Appe Confidential
Chapter 3 Apps 49
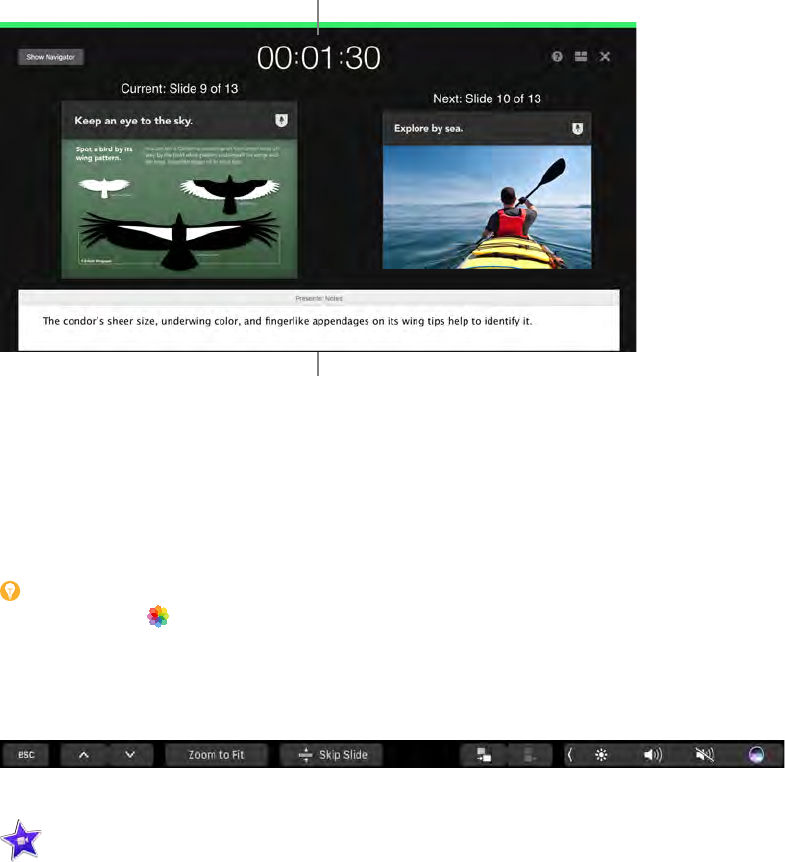
Practice makes perfect. To rehearse your presentation, choose Play > Rehearse Slideshow. You’ll
see each slide along with your notes—and a clock to keep you on track.
See how you’re doing on time.
Remind yourself
of key points to make.
Share your presentation. If your manager wants to review your presentation or you want to
share it with others on a conference call, click Share > Send a Copy to send a copy by Mail,
Messages, AirDrop, or even social media.
Follow the bouncing ball. Get their attention by animating an object on a slide. Select the
object, click Animate in the toolbar, click Action in the sidebar, then click Add an Eect.
Tip: You can embed a video in your presentation. Click where you want it to be, then click
the Media button in the toolbar. Click Movies, then nd the movie you want and drag it to
your slide.
Use the Touch Bar. Tap the arrow keys to move up and down through your slides, tap buttons to
zoom or skip a slide, and tap to group or ungroup slides.
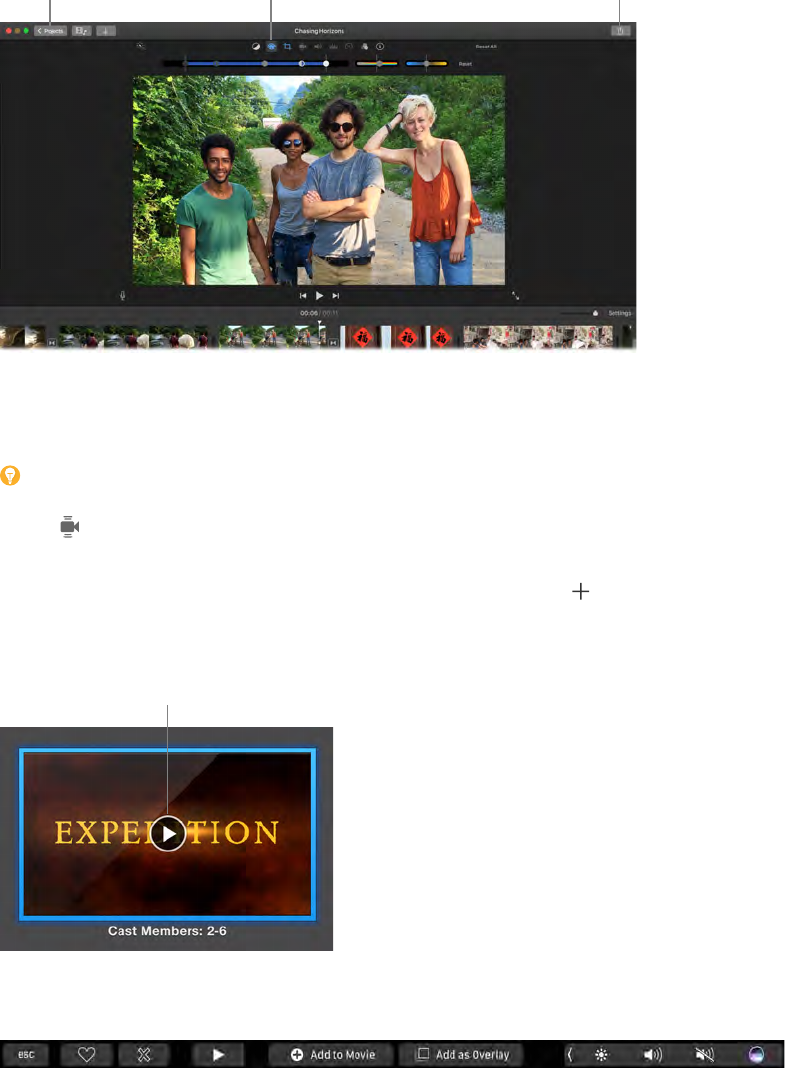
iMovie
iMovie lets you turn your home videos into beautiful movies and epic Hollywood-style trailers,
and makes it easy to share your clips.
74% resize factor
Appe Confidential
Chapter 3 Apps 50
Import a video. Import video or photos from your iPhone, iPad, or iPod touch, from a camera, or
from media les already on your Mac. iMovie creates a new library and event for you.
Correct and adjust
color in your clip.
Share a movie,
trailer, or clip.
View your
projects.
Record video with the built-in camera. Use the FaceTime camera on your Mac to record video
and add it to your project. Select an event in the sidebar, click Import in the toolbar, select
FaceTime HD Camera (Built-in), then click the Record button to start and stop recording.
Tip: Shooting video with a handheld device can produce shaky results, but you can stabilize
the video so the playback is smoother. Select the shaky clip in the timeline, click the Stabilization
button , then click Stabilize Shaky Video.
Create Hollywood-style trailers. Make clever trailers, complete with titles and music. Just add
your own movie clips and customize the credits. Click the New button , click Trailer, then
choose a template from the Trailer window. Click Create, select the event you want to use, type a
name, then click OK.
Click Play to
preview the trailer.
Use the Touch Bar. Tap buttons to mark a favorite clip, delete, play, add a clip to a movie, or add
as an overlay.
74% resize factor
Appe Confidential
Chapter 3 Apps 51
When a clip is playing, use the Touch Bar buttons to rewind, play, fast-forward, and split the clip
into two parts, at the point where you click. Tap the volume button to open the volume slider.
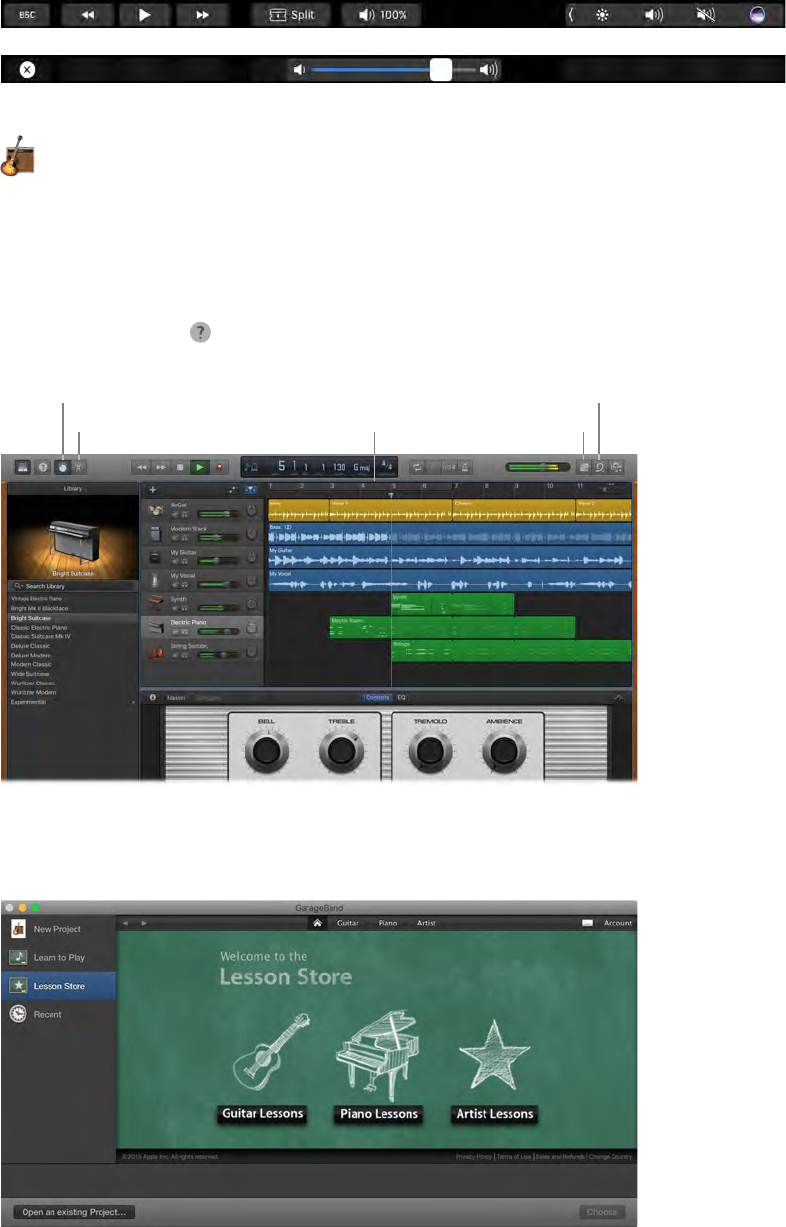
GarageBand
GarageBand is an app for creating, recording, and sharing your music. It has everything you
need in order to learn to play an instrument, write music, or record a song—your own home
recording studio.
Create a new project. You can start with a song template, select a tempo, key, and other options,
then click Record and start playing. Build your song—for example, with dierent tracks and
loops. Click Quick Help and hold the pointer over items to learn what they are and how
they work.
Show Smart Controls.
View Editors.
View Apple Loops.
Open the Note Pad.Tracks area
No more excuses—learn to play. GarageBand comes with a lesson to start learning piano and
one for guitar. Open the Lesson Store in the Project Chooser to view more lessons to download
or purchase—including Artist Lessons from famous musicians.
74% resize factor
Appe Confidential
Chapter 3 Apps 52
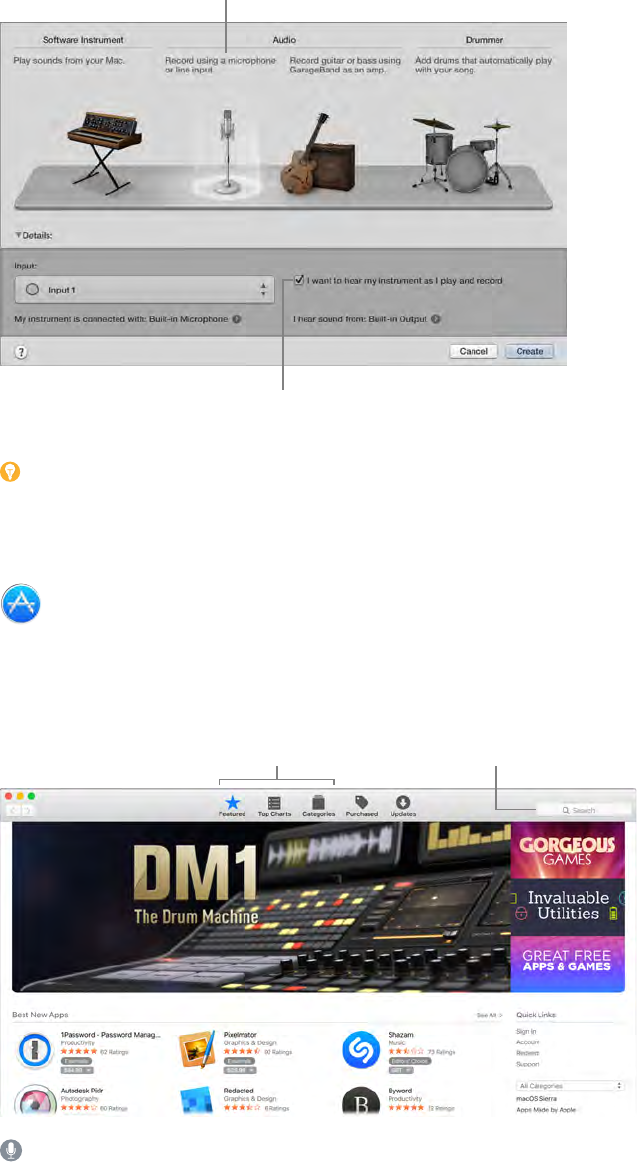
Record your voice. Connect a microphone, choose Track > New Track, then select the
microphone under Audio. Click the triangle next to Details to set options for input, output, and
monitoring, then click Create. Click the Record button to start recording or the Play button to
stop recording. Don’t forget to sing!
Click to record your voice.
Hear yourself while you record.
Use the Touch Bar. {need info; content coming 9/2 or 9/3}
Tip: Make your own ringtones, then sync them to your iPhone using iTunes. Choose File >
New, select Ringtone, click Choose, then import a le to use. Customize the ringtone the way you
want it, then choose Share > Ringtone to iTunes.
App Store
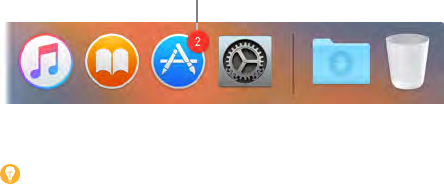
Search the App Store to nd and download apps, and get the latest updates for your apps.
Find the perfect app. Know exactly what you’re looking for? Type the name in the search eld,
then press Return. Or click Top Charts to see the most popular apps.
Click a category
to browse it.
Search for an
app by name.
Ask Siri. Say something like: “Find apps by Apple.”
74% resize factor
Appe Confidential
Chapter 3 Apps 53
All you need is an Apple ID. To download apps, just sign in with your Apple ID—choose Store >
Sign In, or click Sign In on the right side of the window. If you don’t have an Apple ID yet, choose
Store > Create Account. If you can’t remember your password, click the Forgot link in the login
window to recover it.
Get the latest updates. If you see a badge on the App Store icon in the Dock, there are updates
available for your apps or macOS. Click the icon to open App Store, then click Updates in the
toolbar.
You have
available updates.
Use the Touch Bar. {need info; don’t see anything}
Tip: You can spread the word about your favorite apps to your friends. While viewing an app,
click the down arrow next to the price, then choose Tell a Friend.
74% resize factor
Appe Confidential
4
54
Mac Help
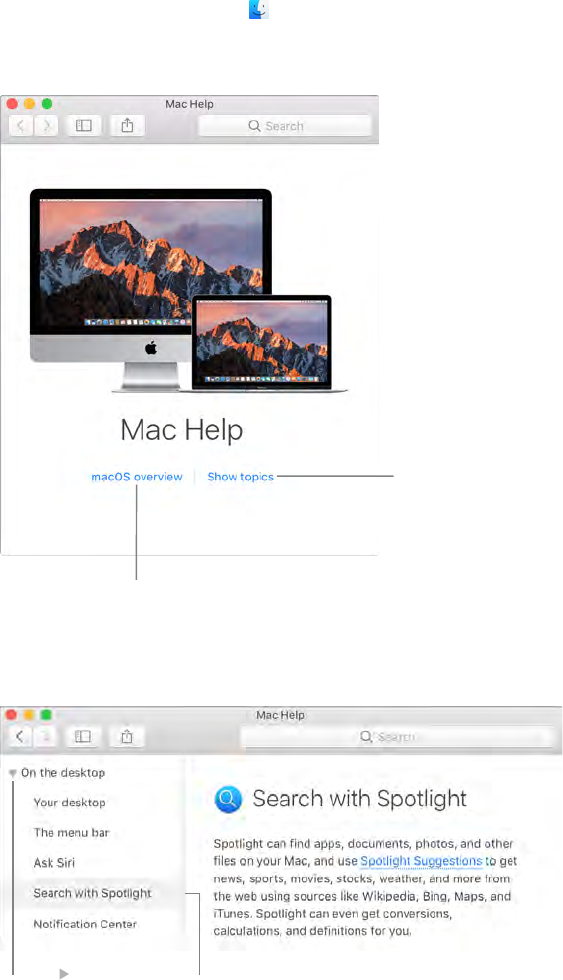
Mac Help has a lot more information about how to use your MacBook Pro.
Get help. Click the Finder icon in the Dock, then click the Help menu in the menu bar and
choose Mac Help. Or type a question or term in the search eld, then choose a topic in the
results list.
Show the table
of contents.
Learn about macOS.
Explore topics. To nd a topic in Mac Help, you can browse or search. To browse, click “Show
topics” to see the list of topics, then click a topic to read it. Or type what you want to nd in the
search eld to go right to your answer.
Click to view
more topics.
Click a topic
to read it.
Find answers
74% resize factor
Appe Confidential