Apple E2407 802.11 bgn + BT 2.1 (EDR) User Manual A1367 User Guide
Apple Inc. 802.11 bgn + BT 2.1 (EDR) A1367 User Guide
UserManual.wiki
>
Apple
>
E2407 User Manual
>
Full user manual
Contents
1.
Regulatory section of user manual
2.
Full user manual
Full user manual
Navigation menu
Upload a User Manual
Namespaces
Wiki Guide
HTML
PDF
Info
Views
User Manual
Discussion / Help
Navigation

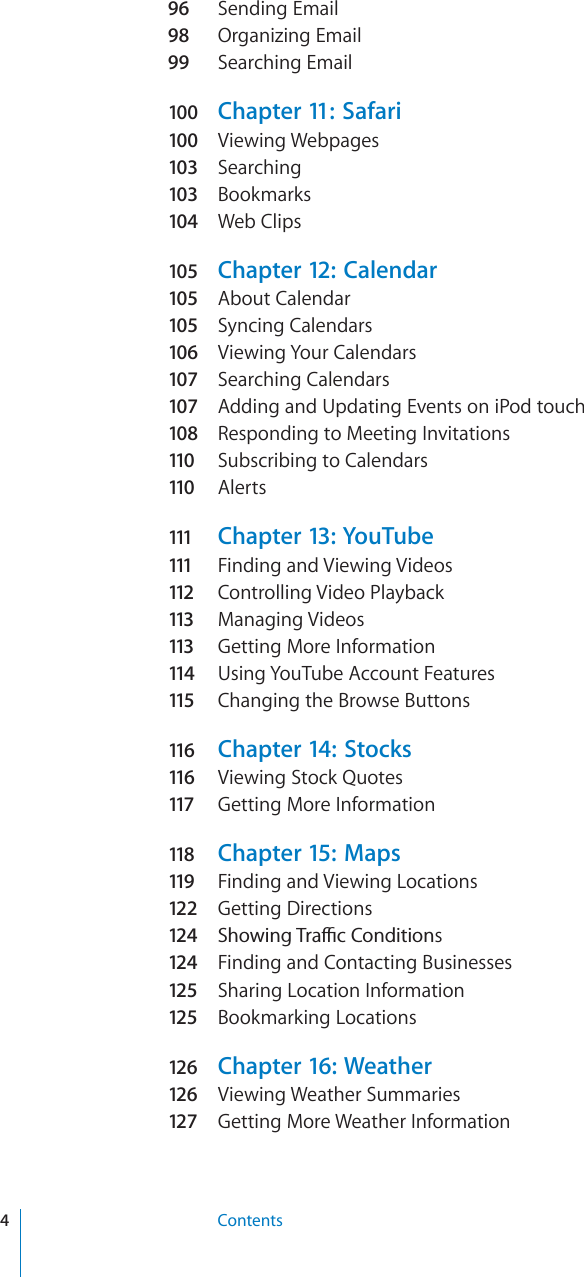

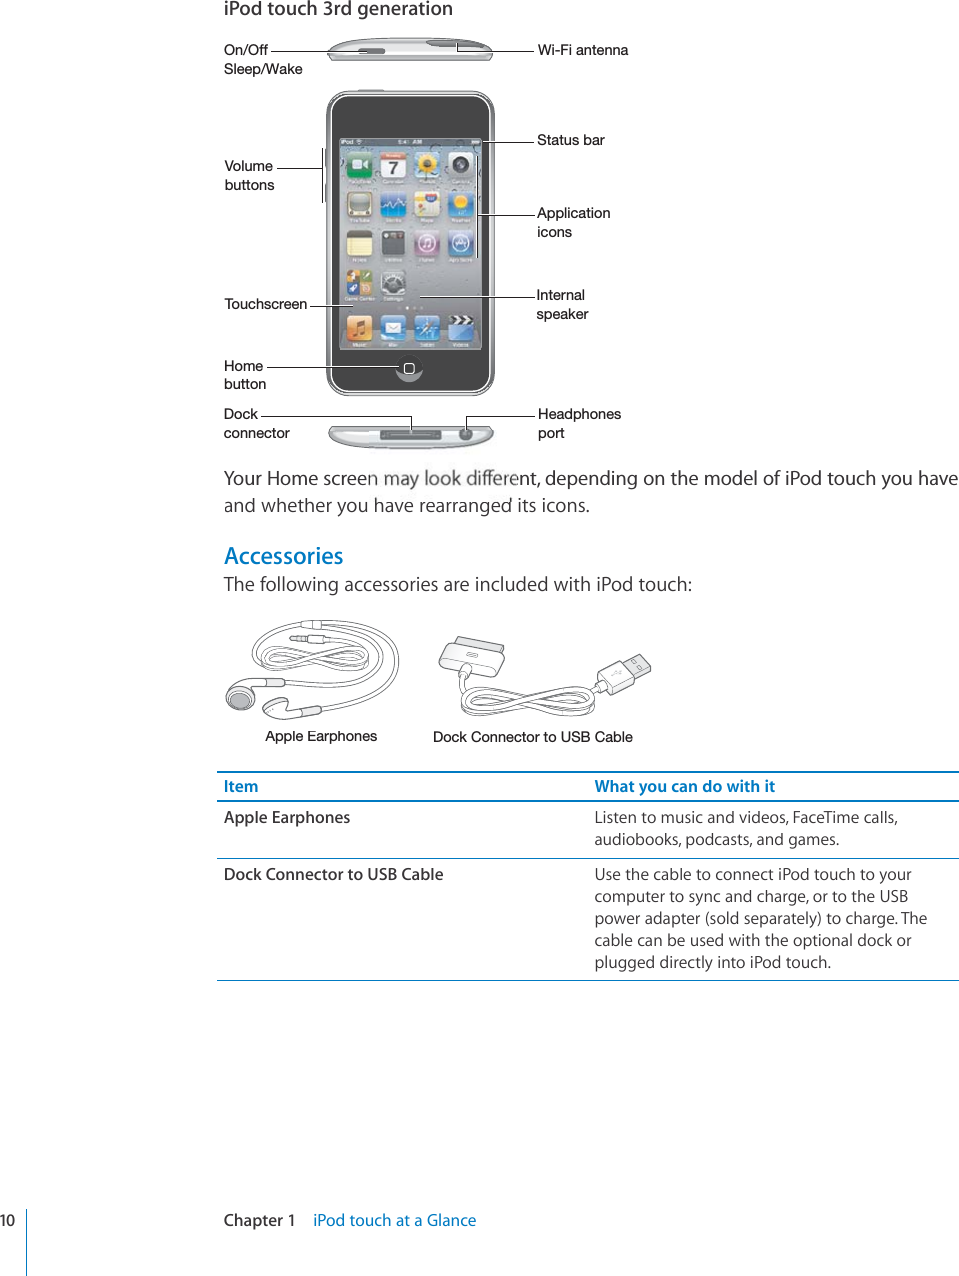

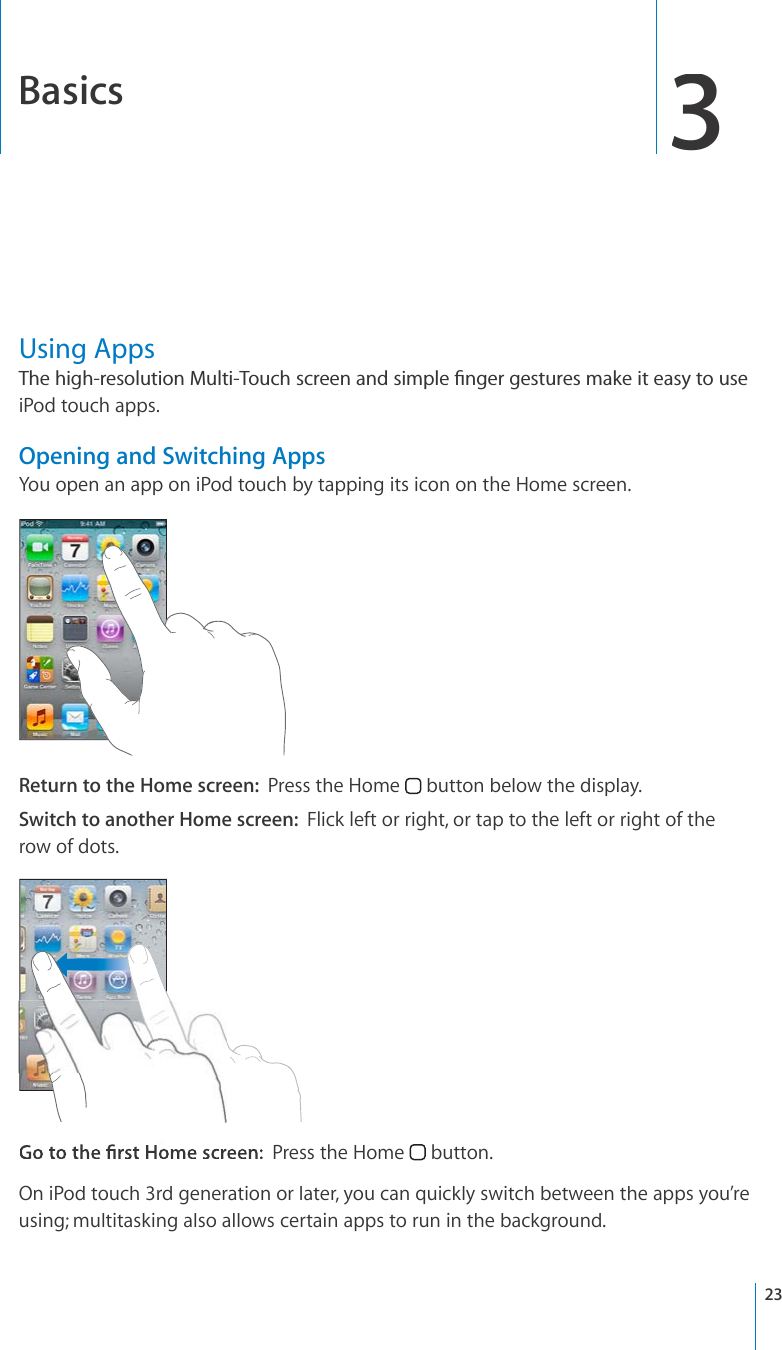

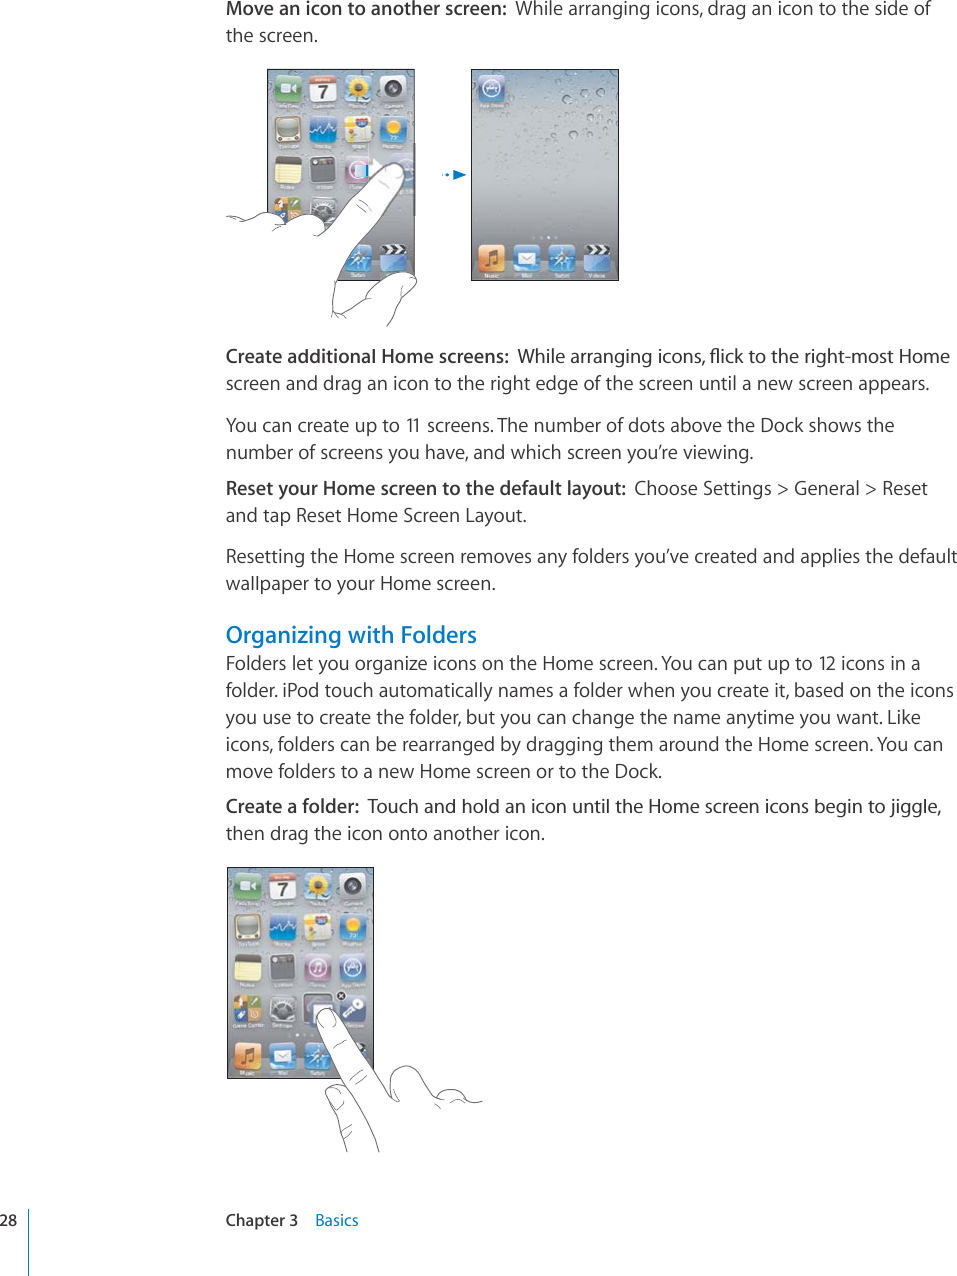
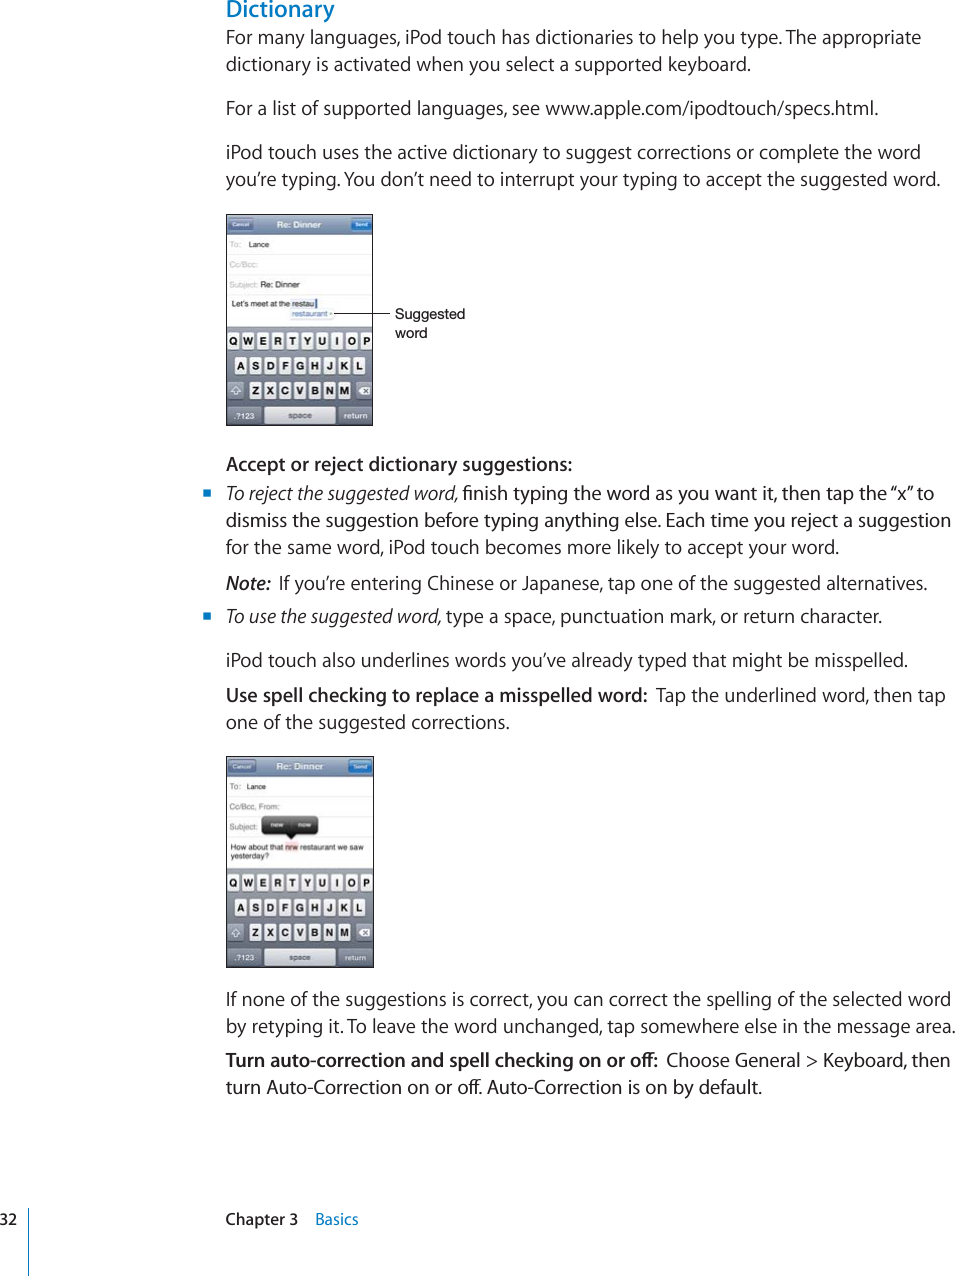
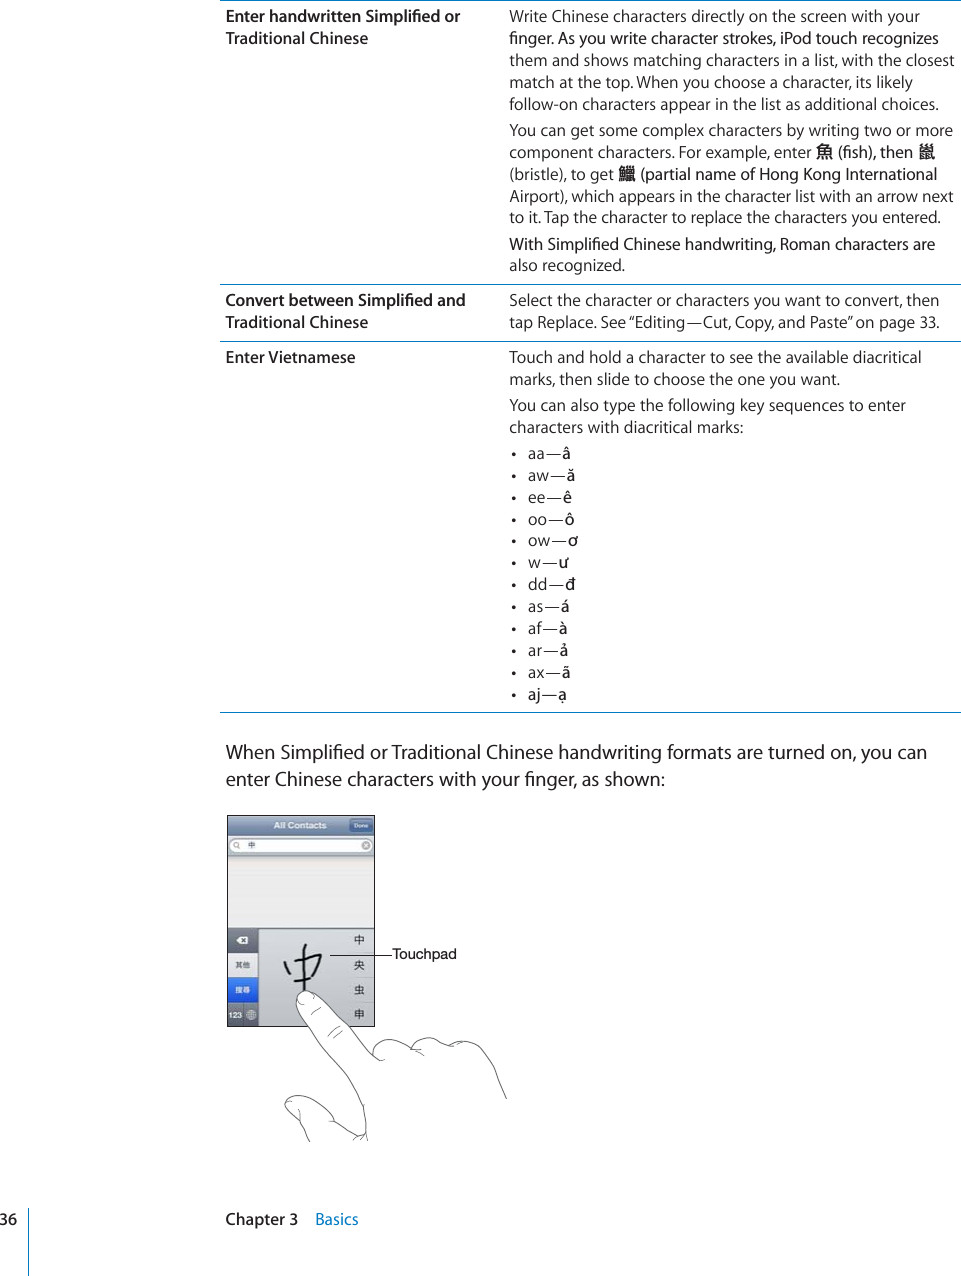
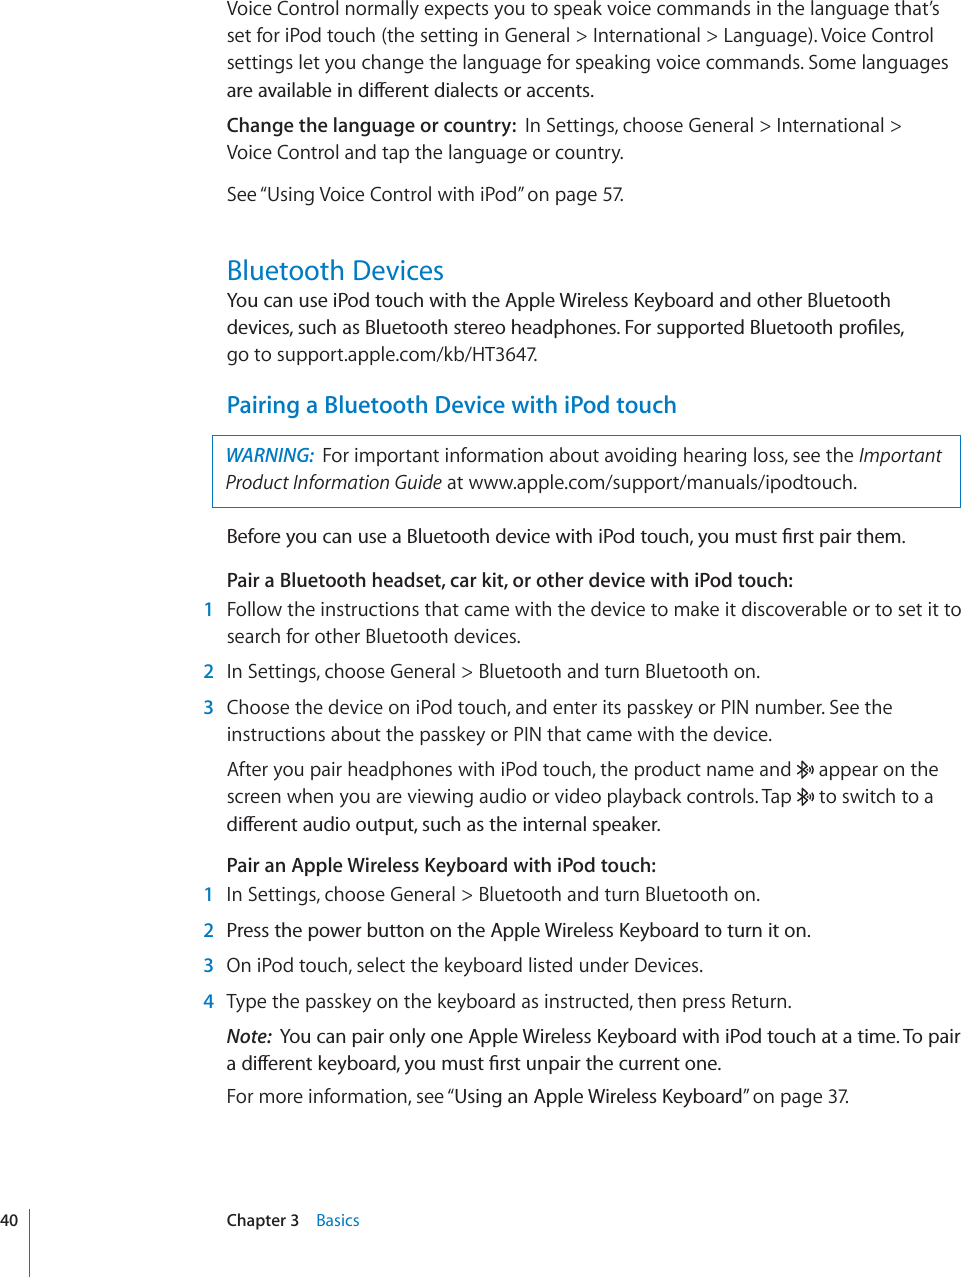
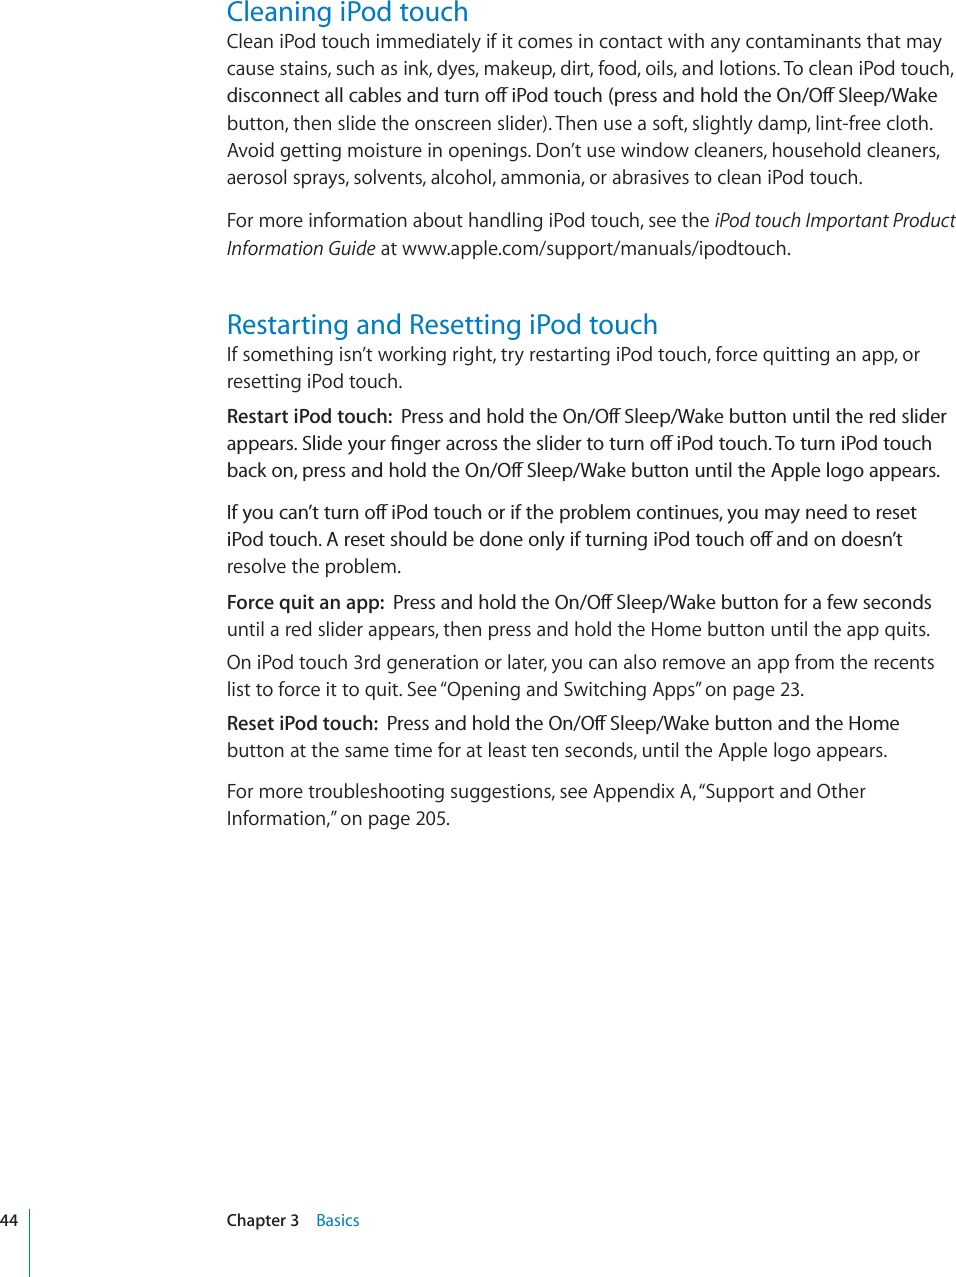


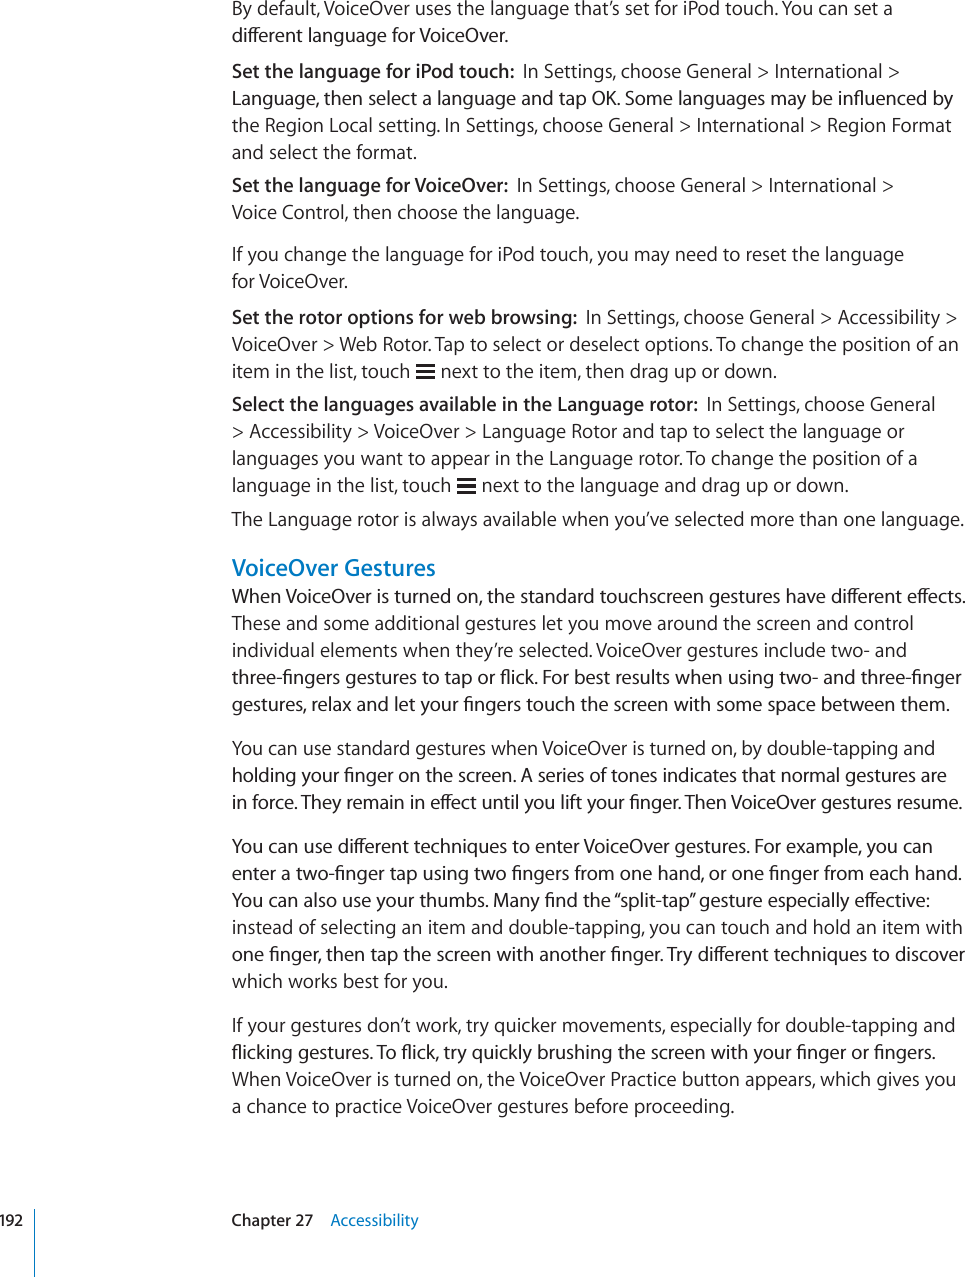
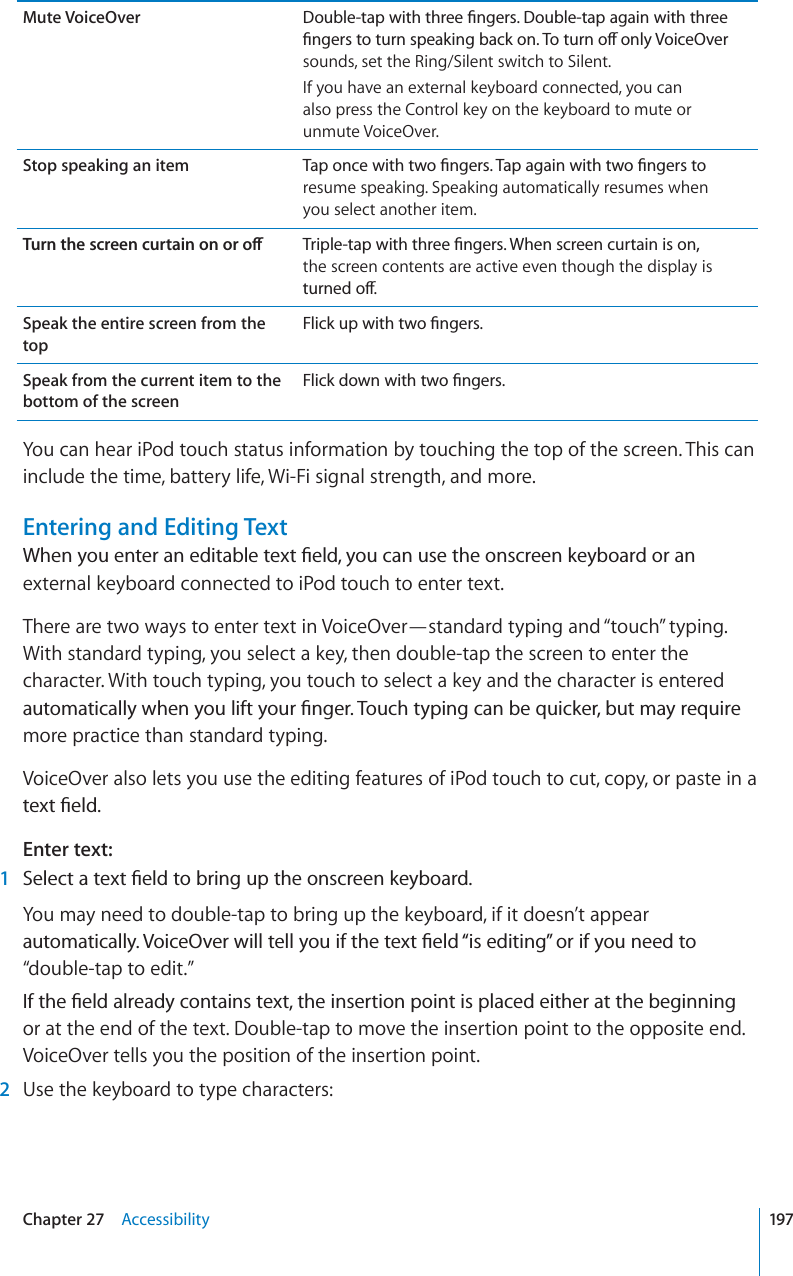
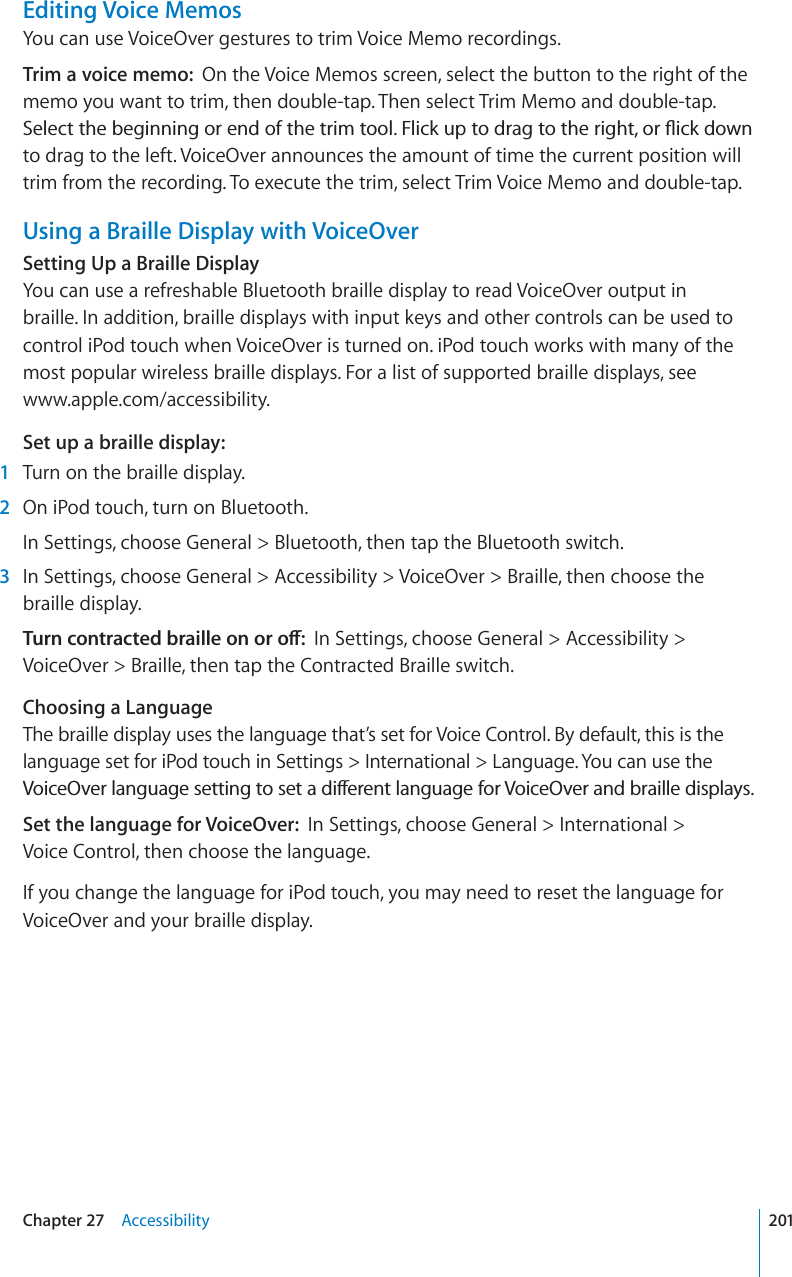
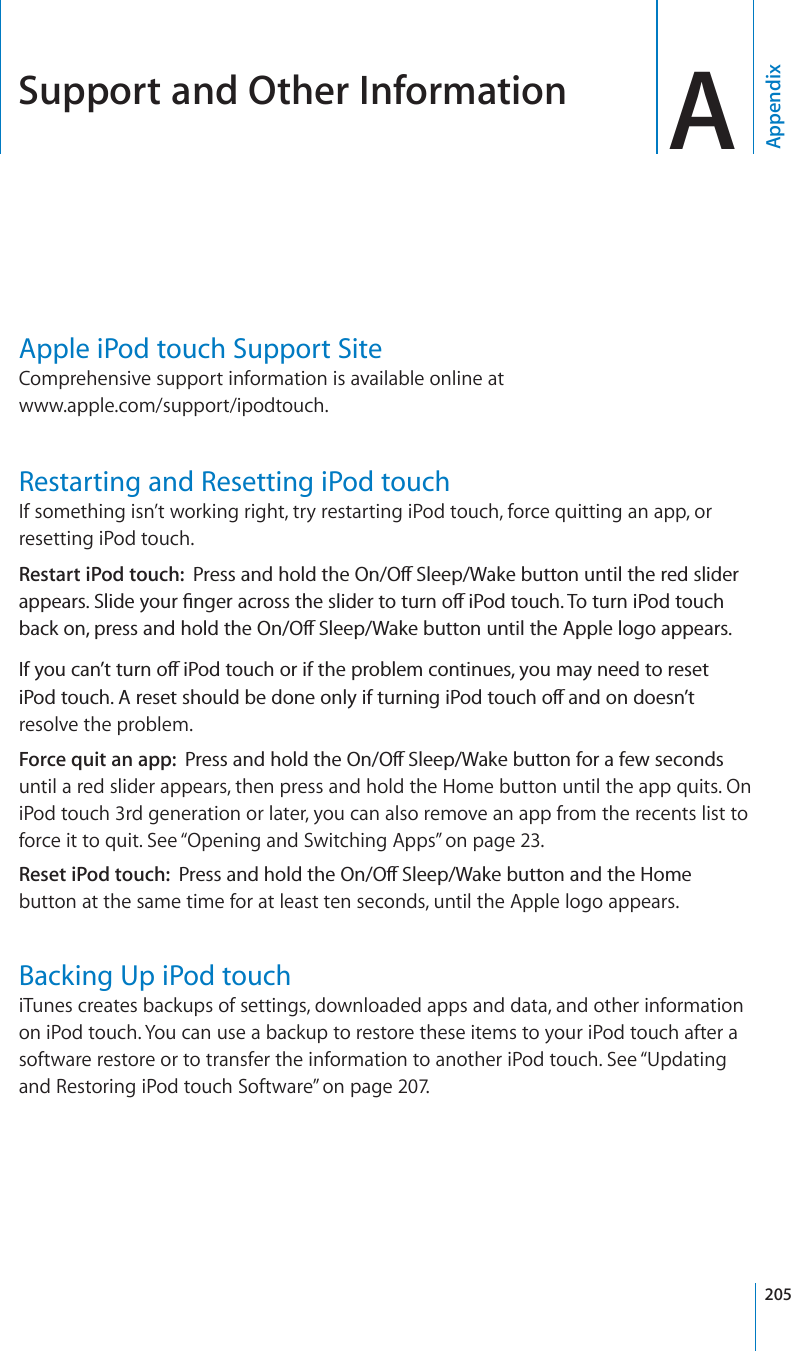
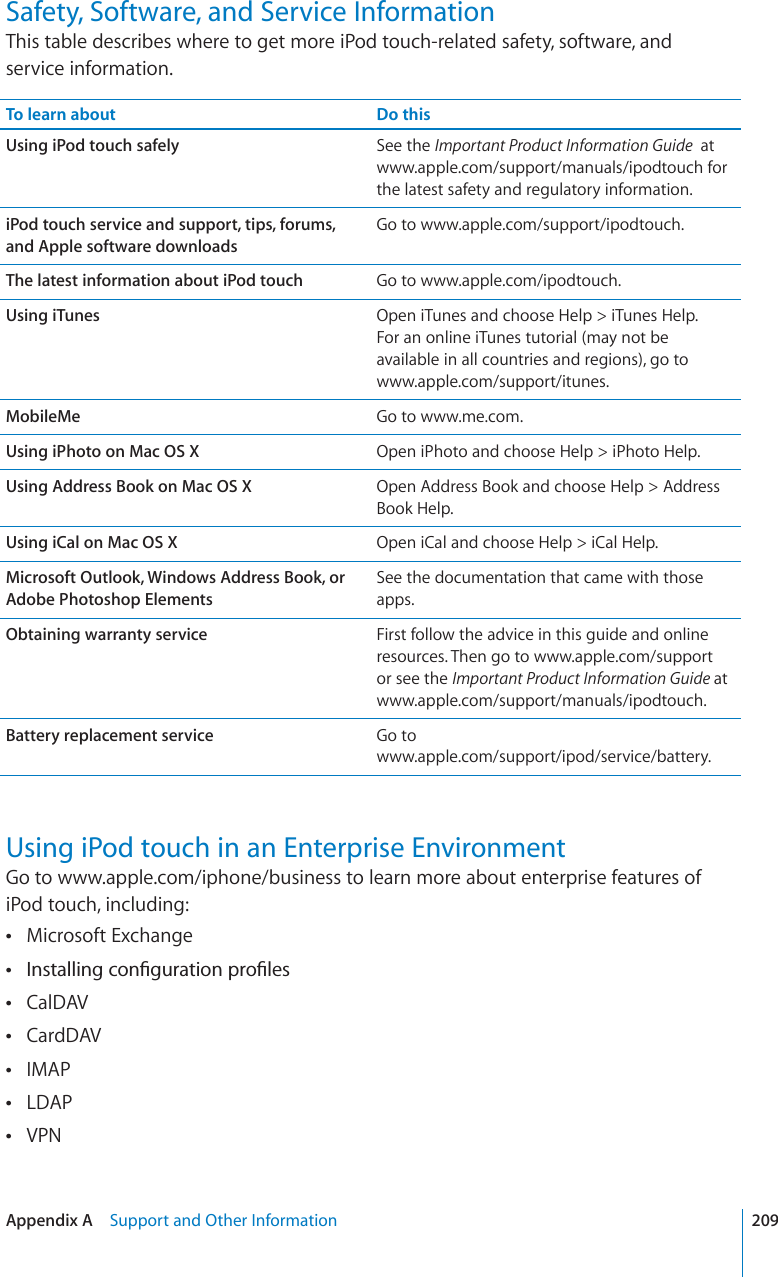
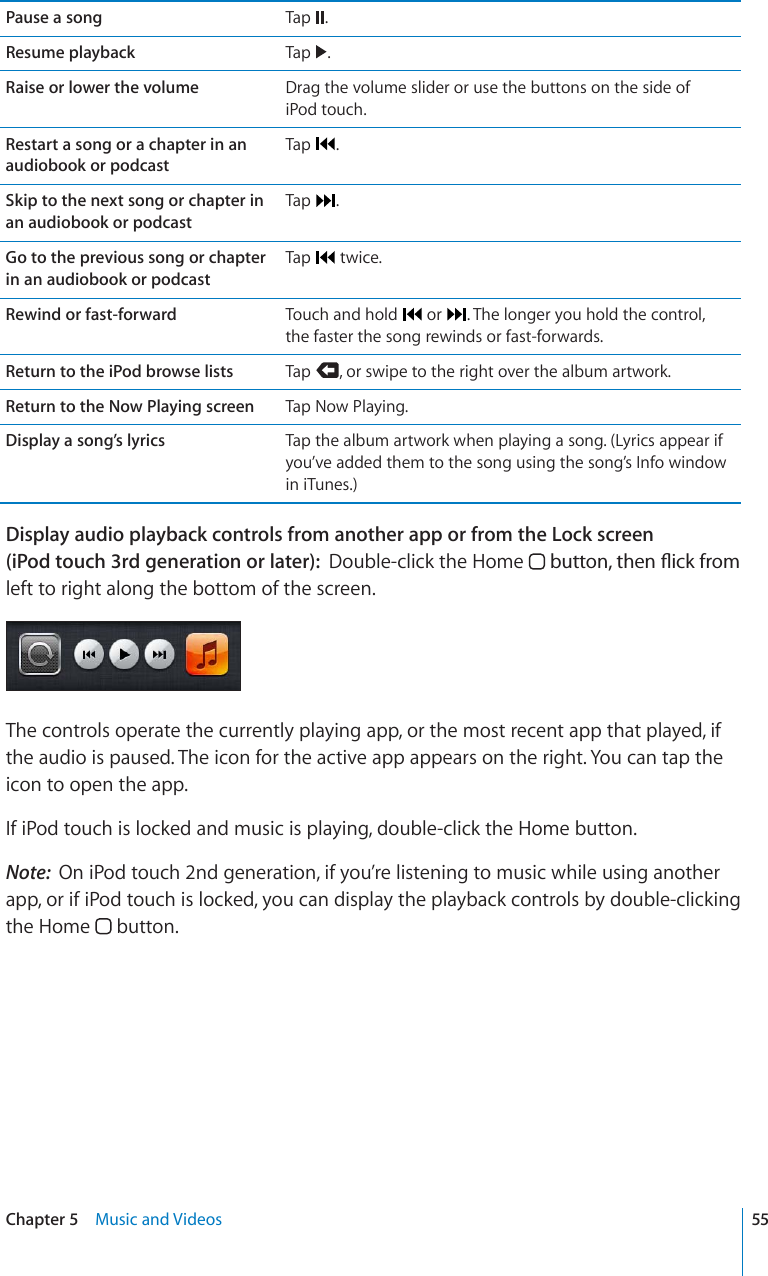
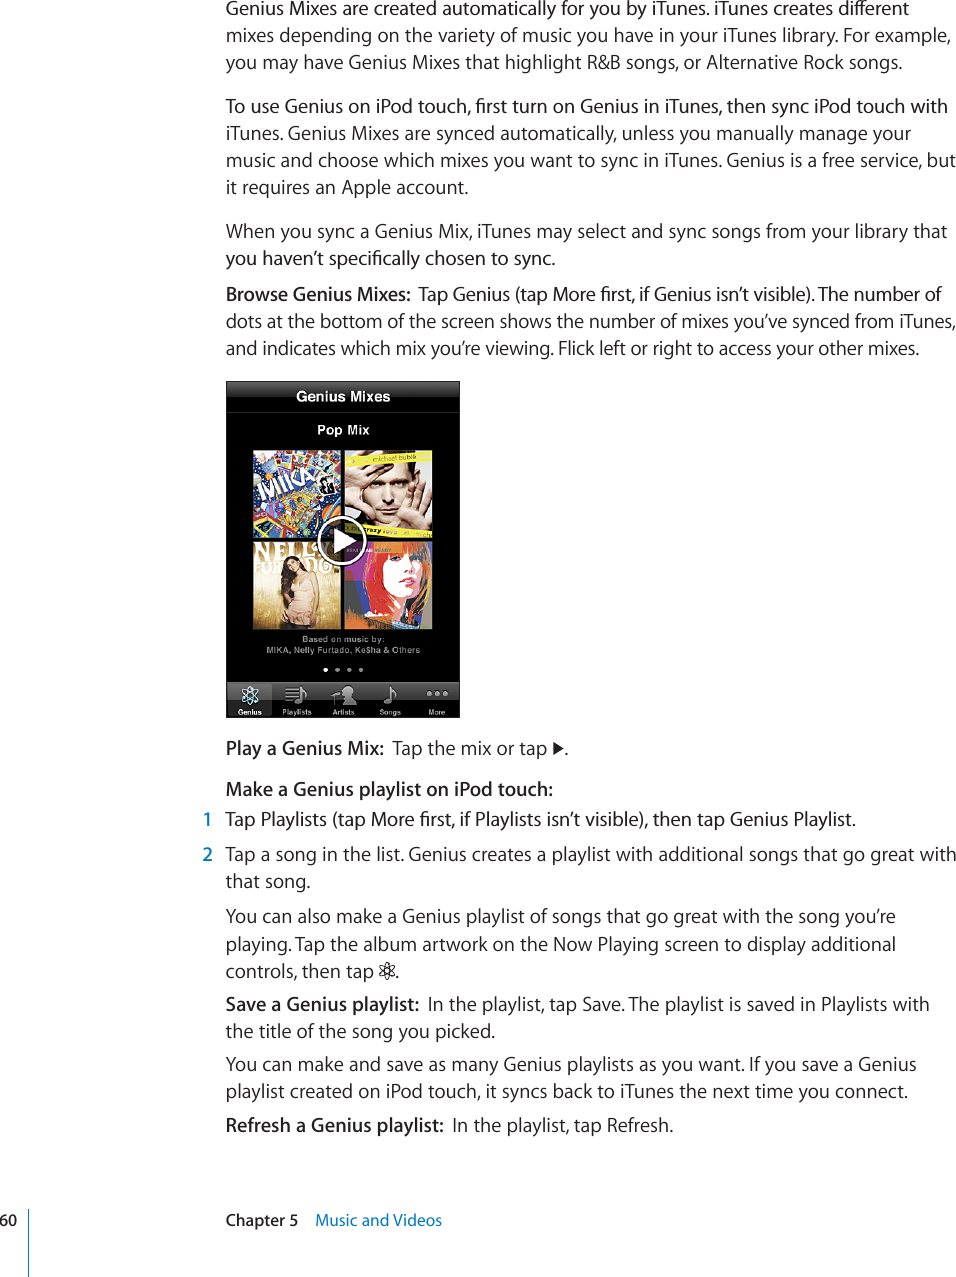
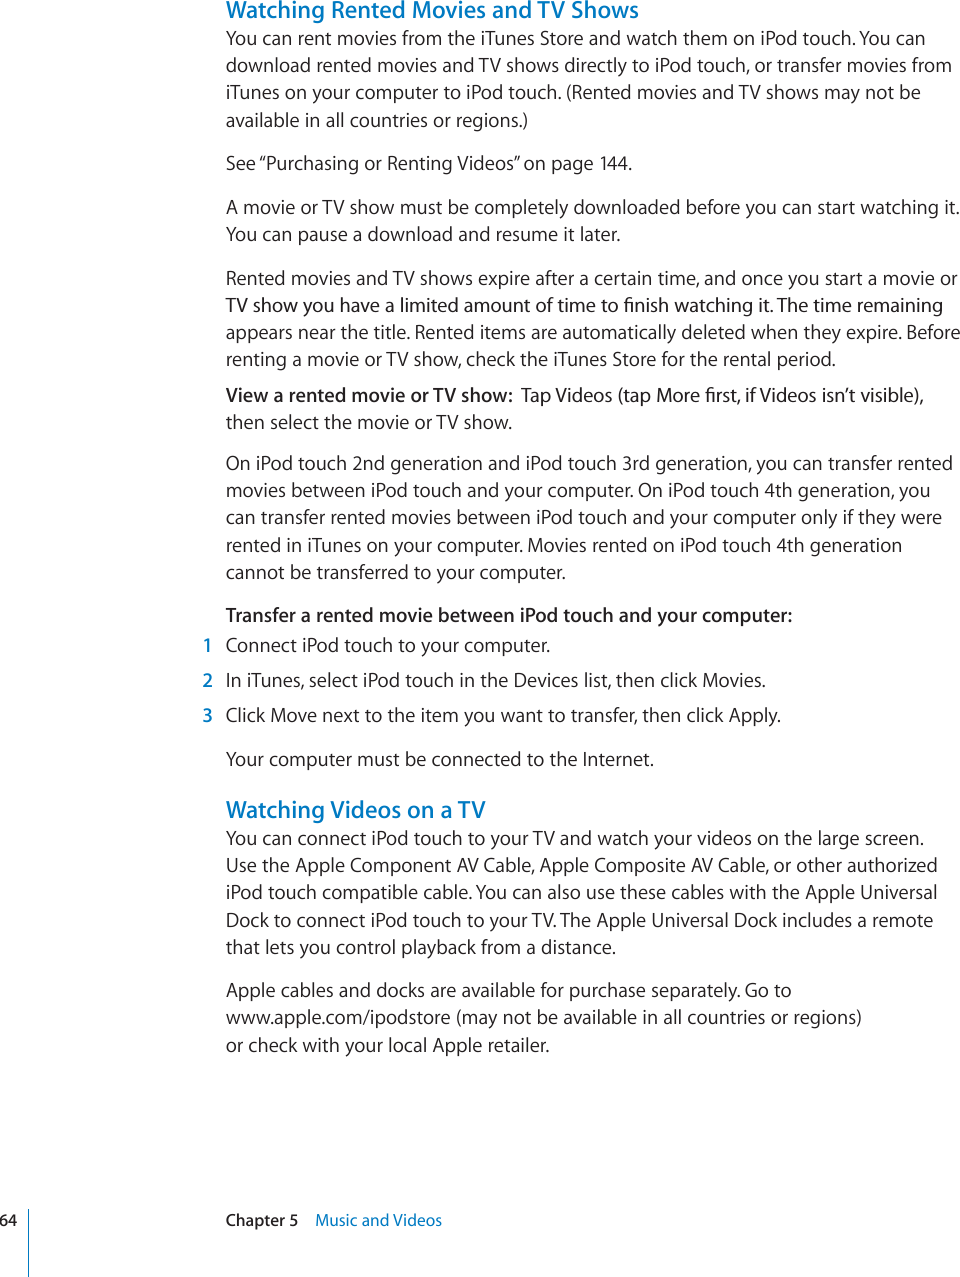
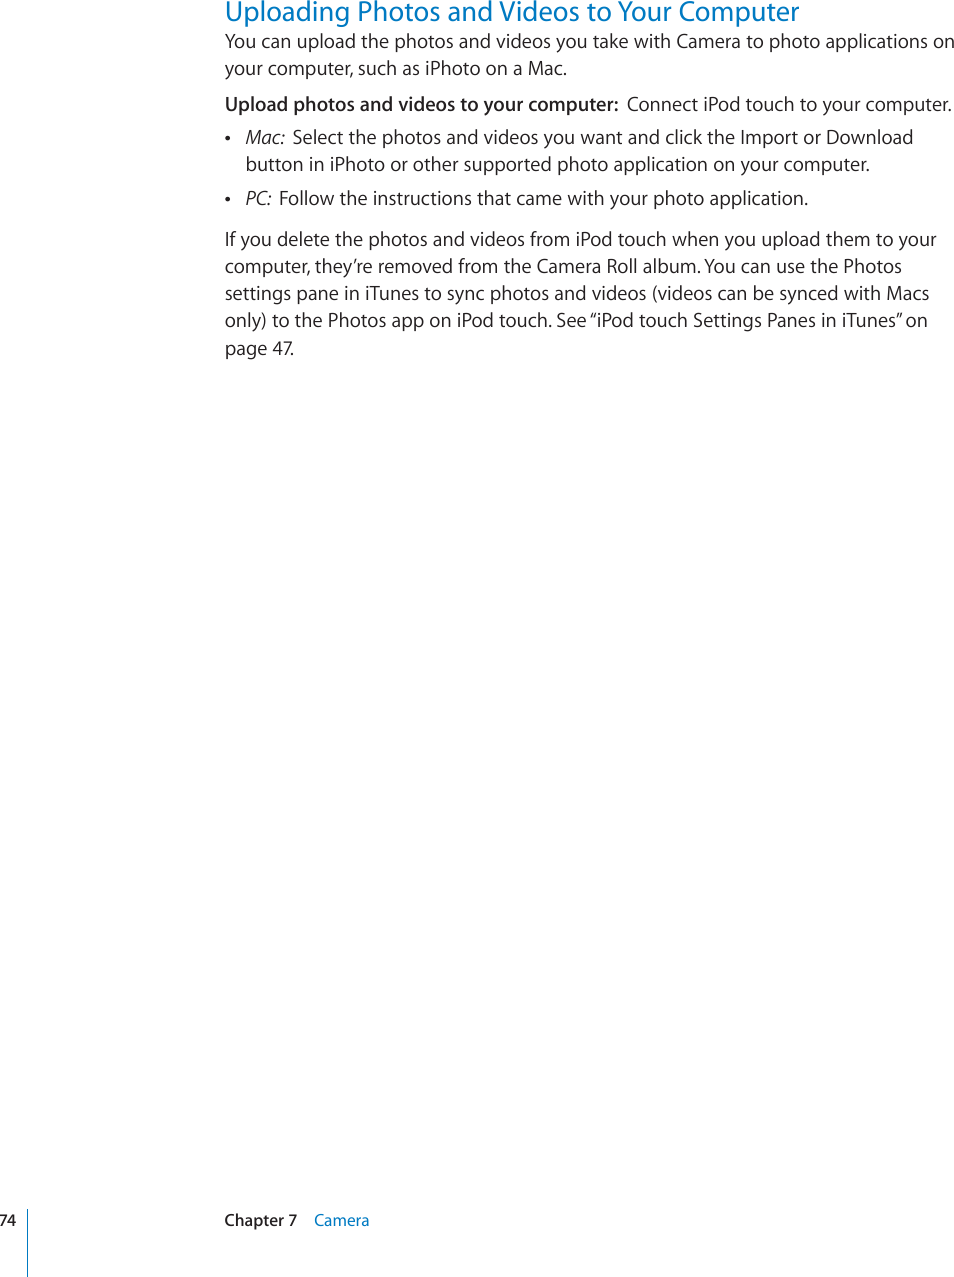
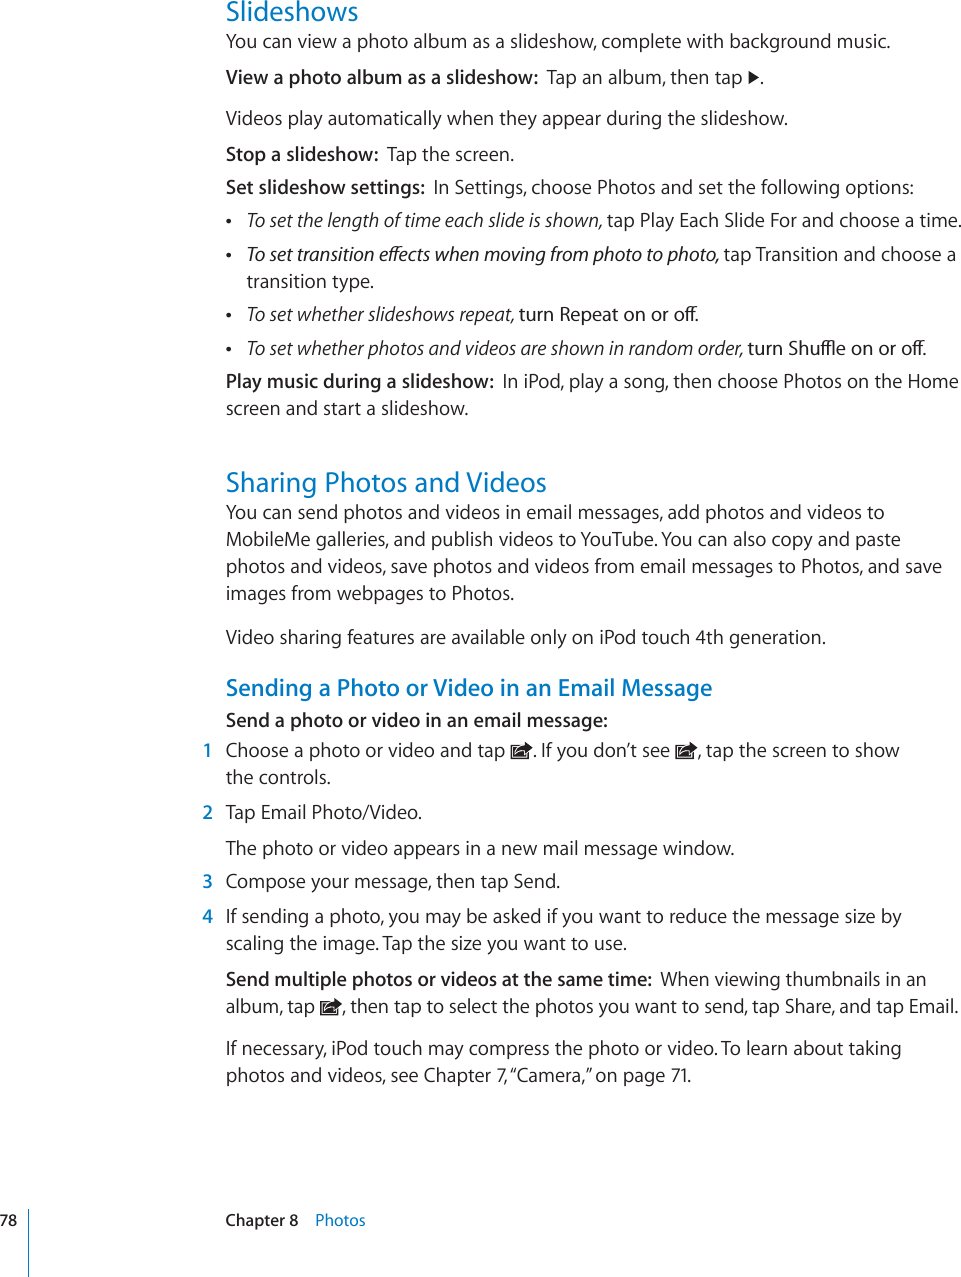
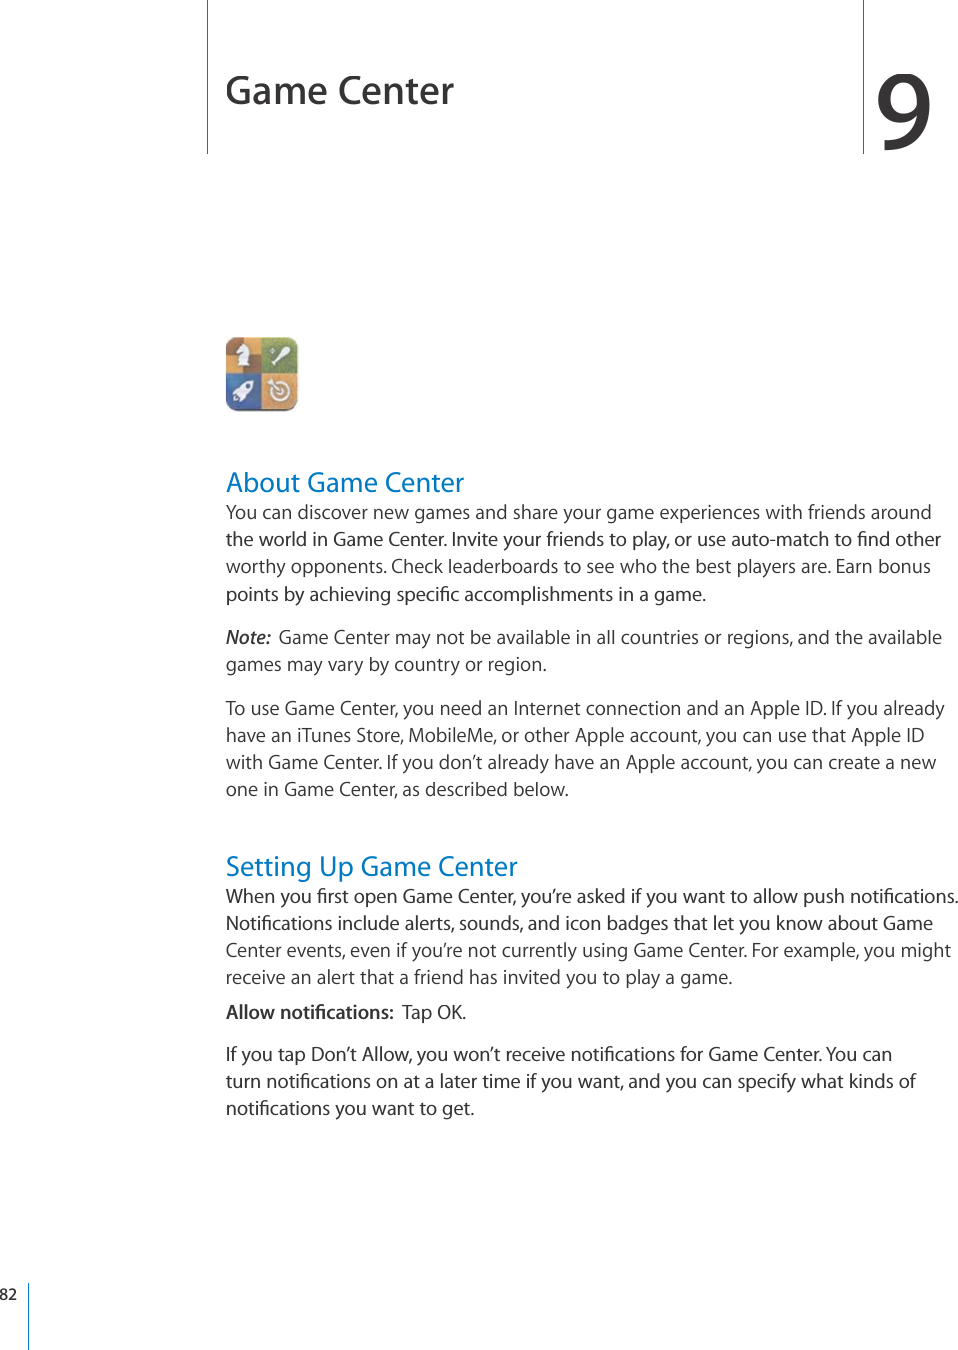
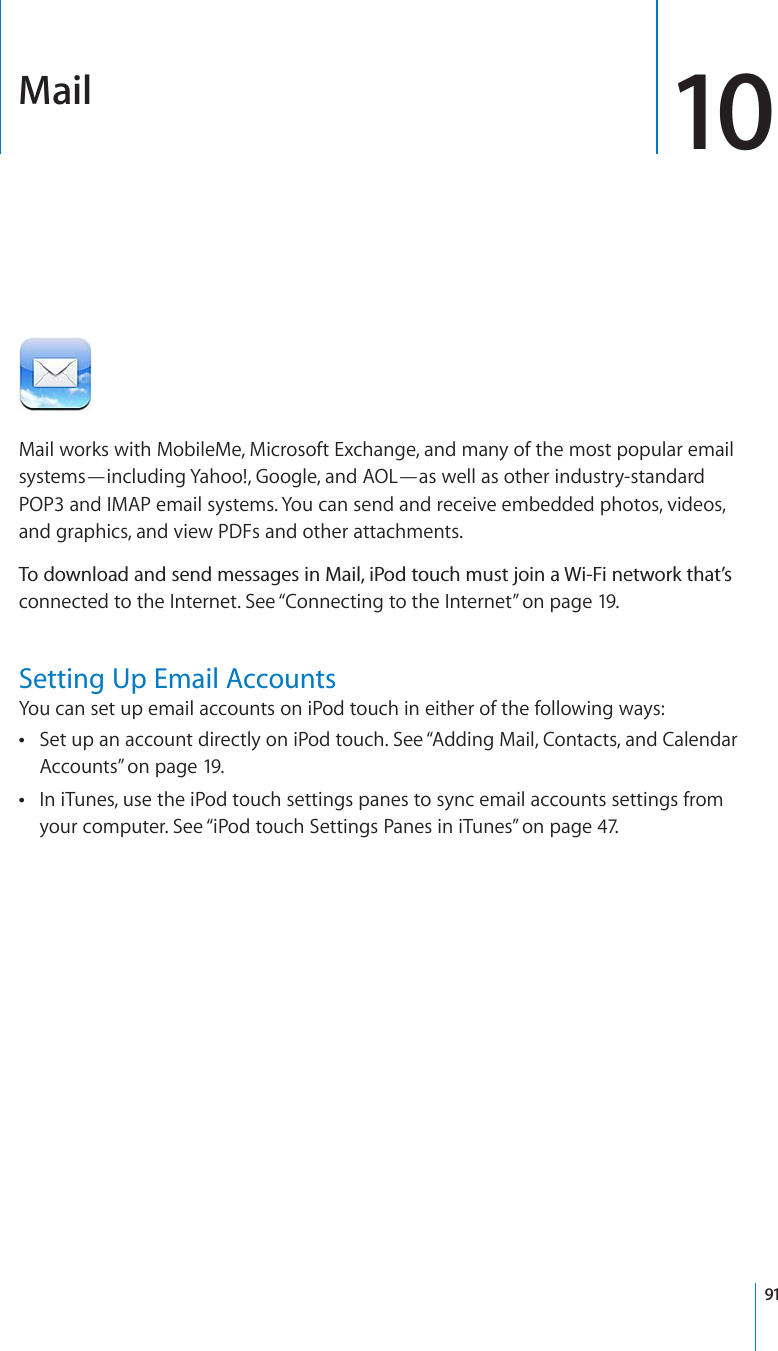
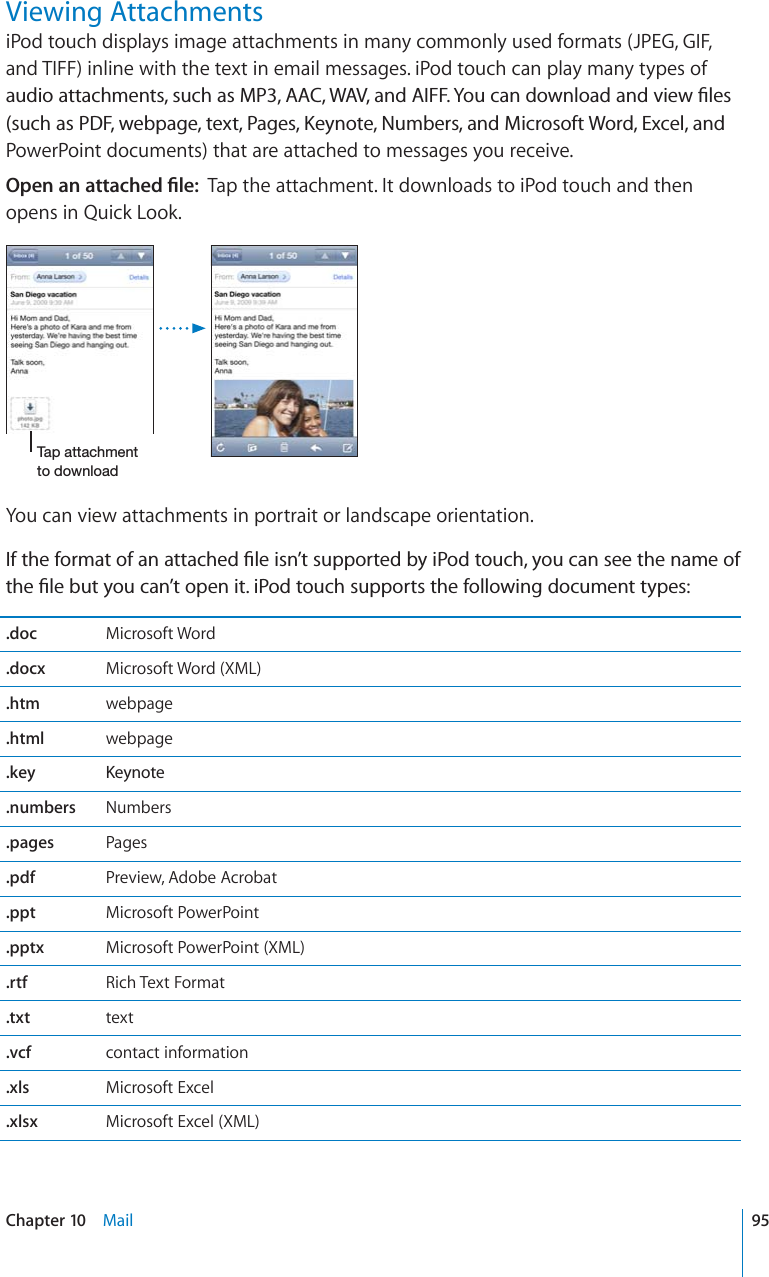
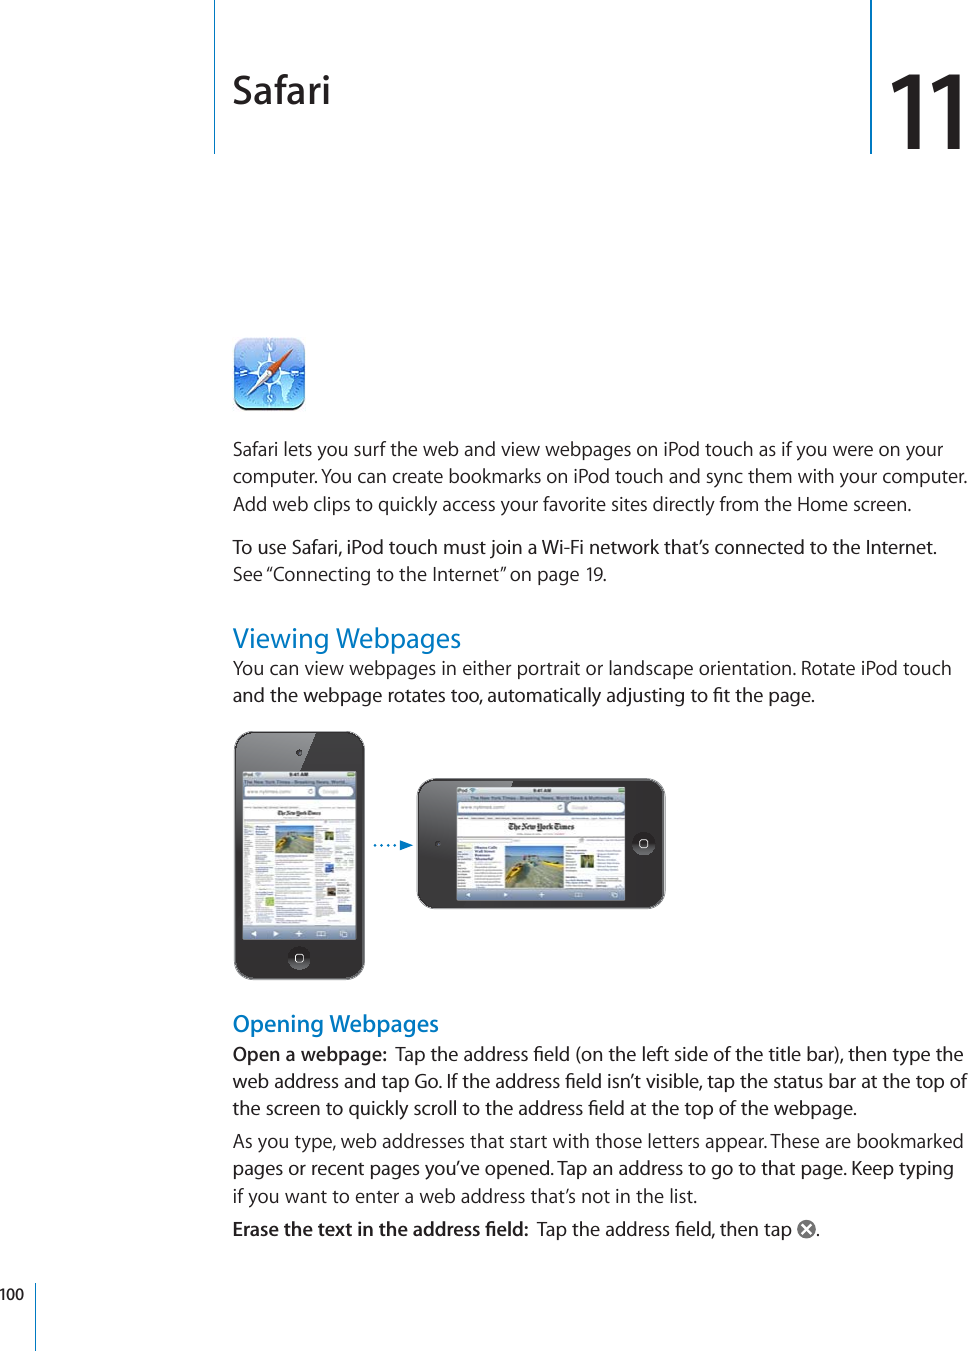
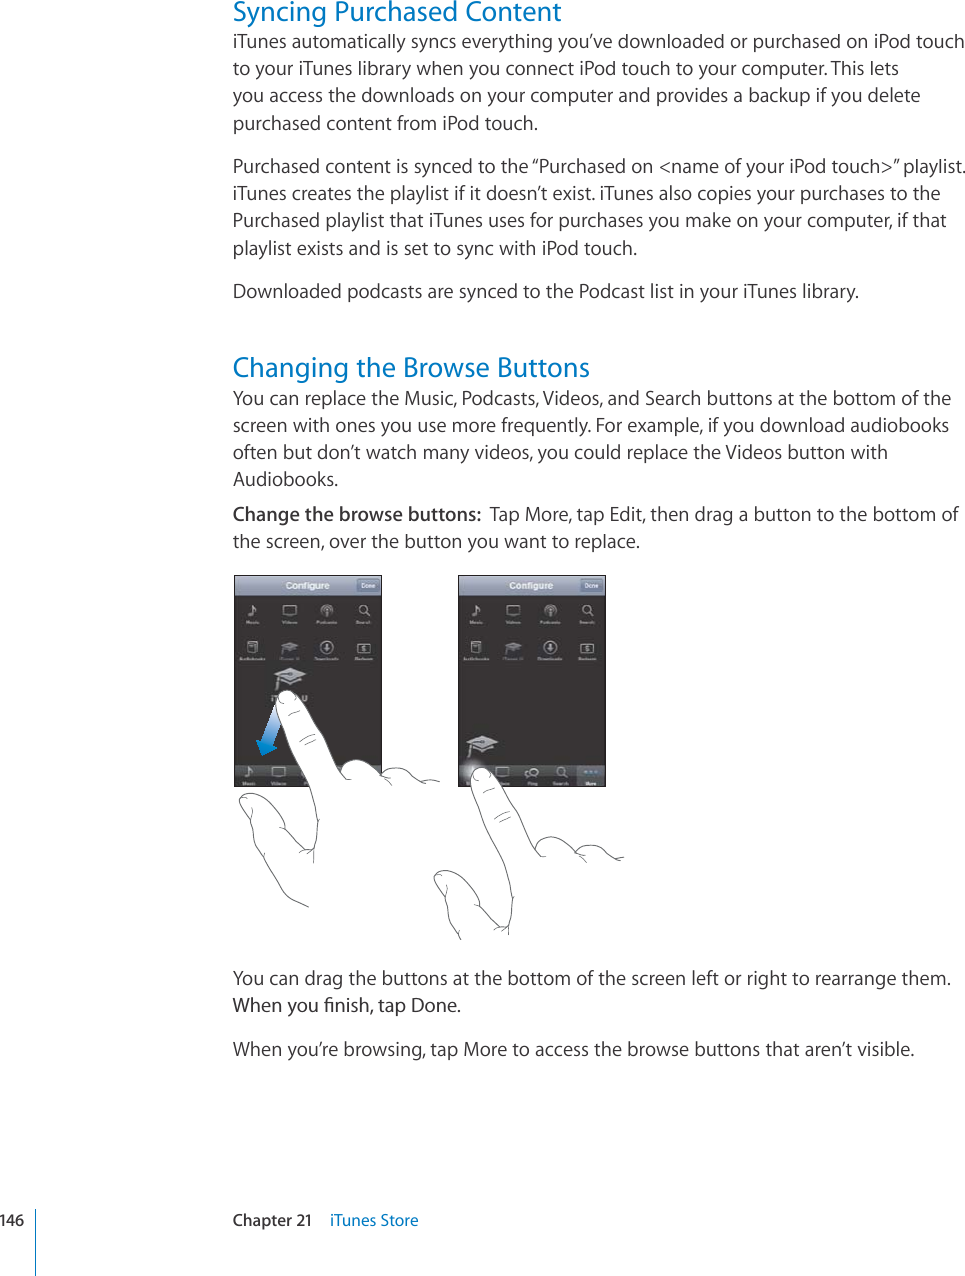
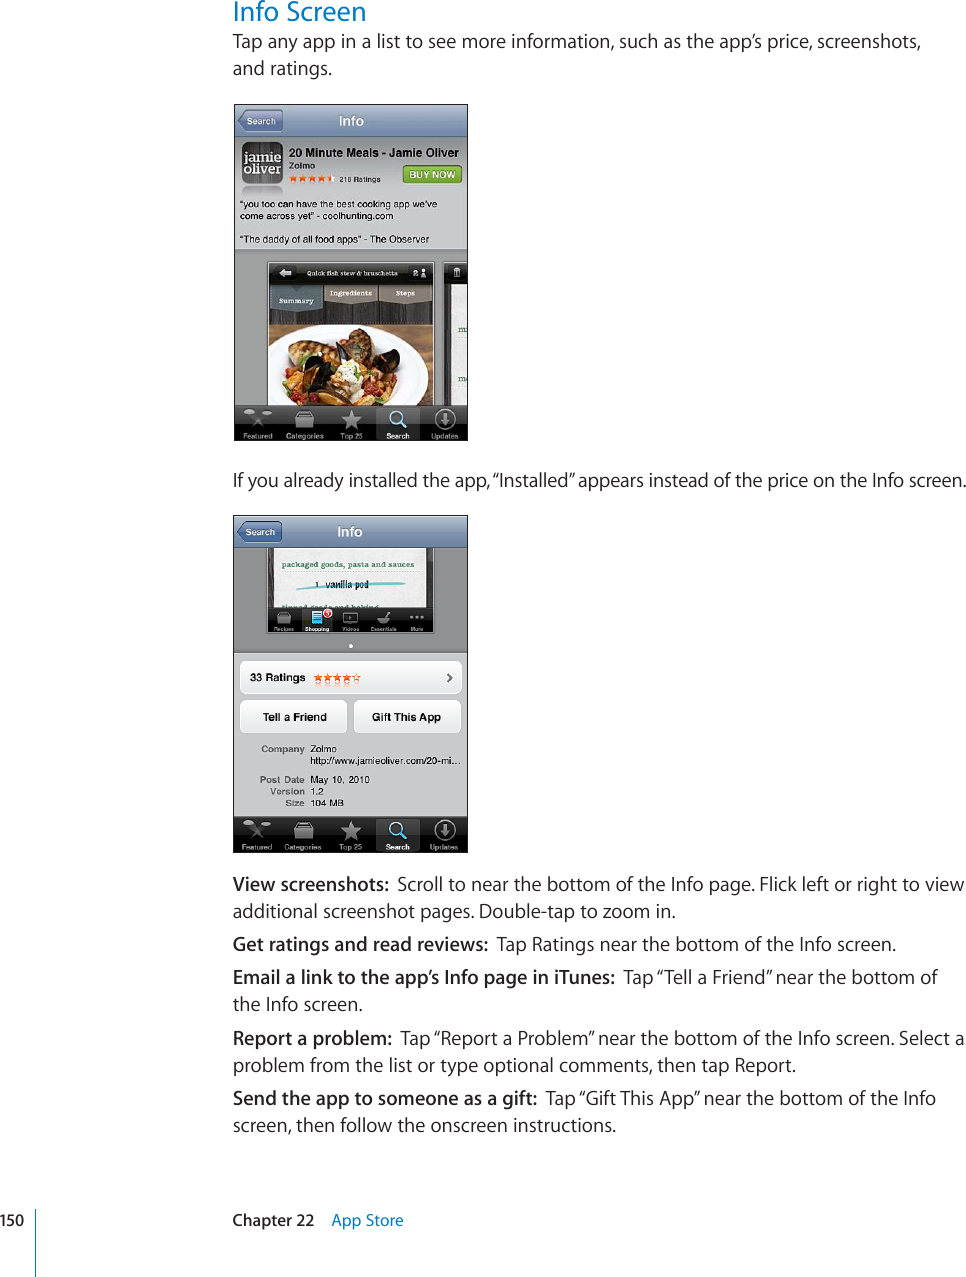
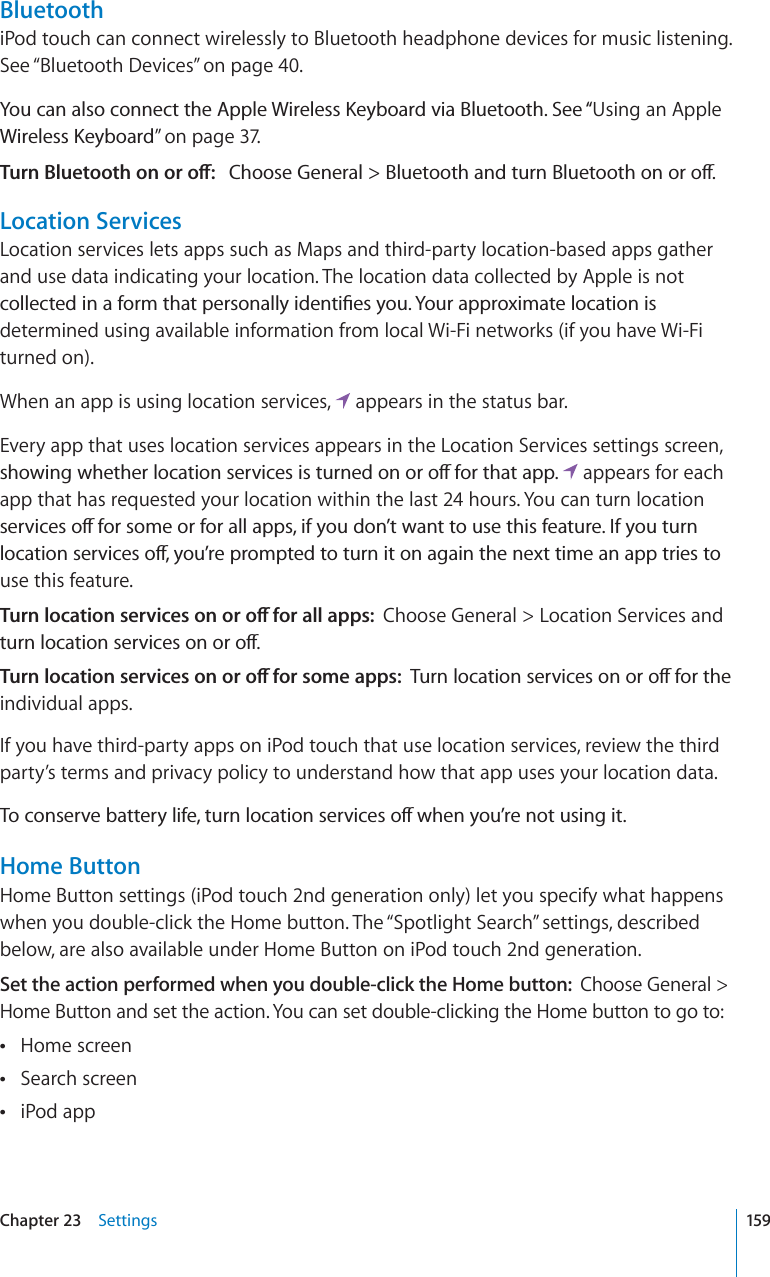
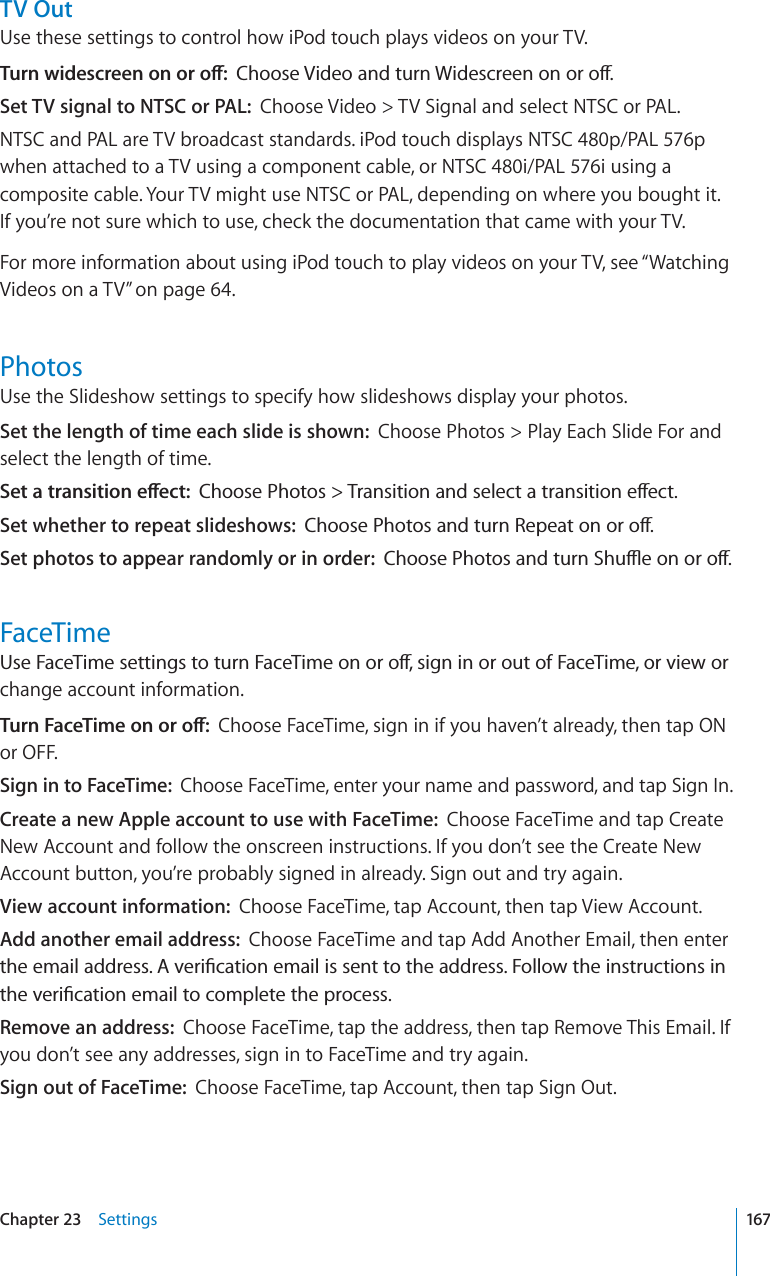
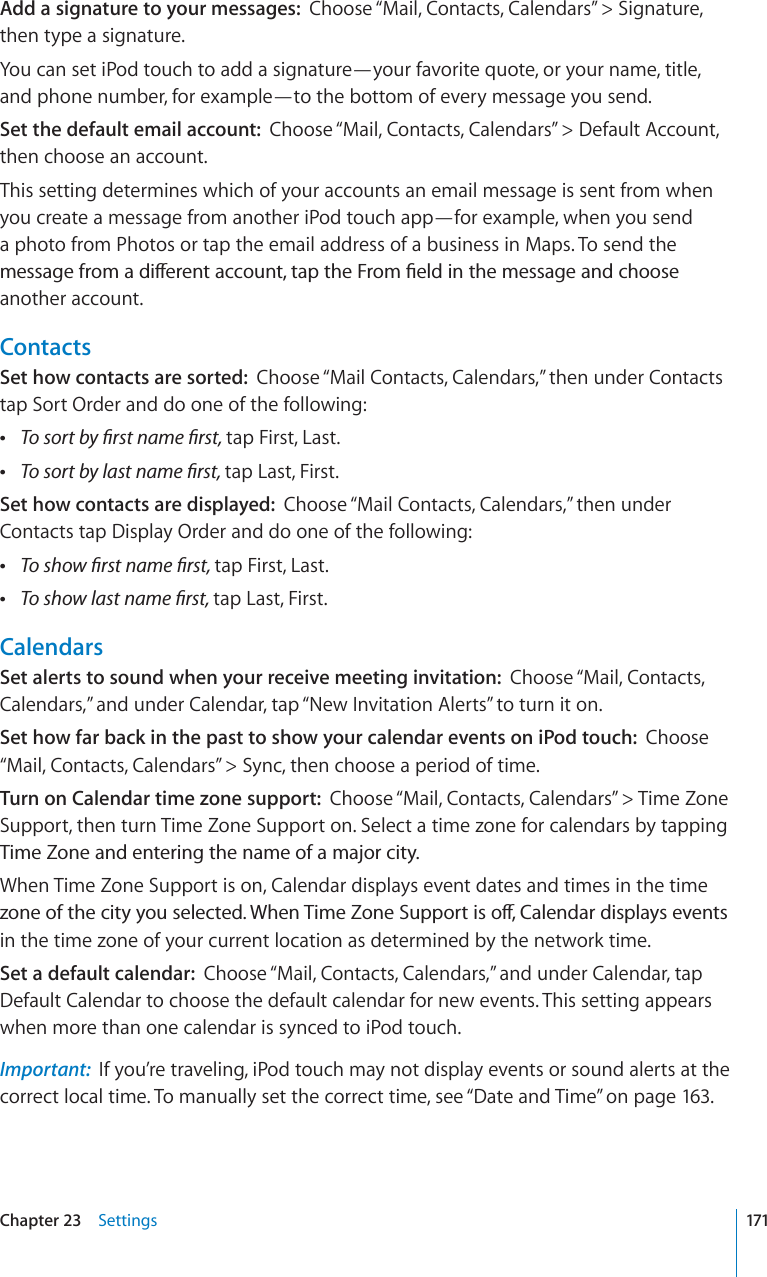
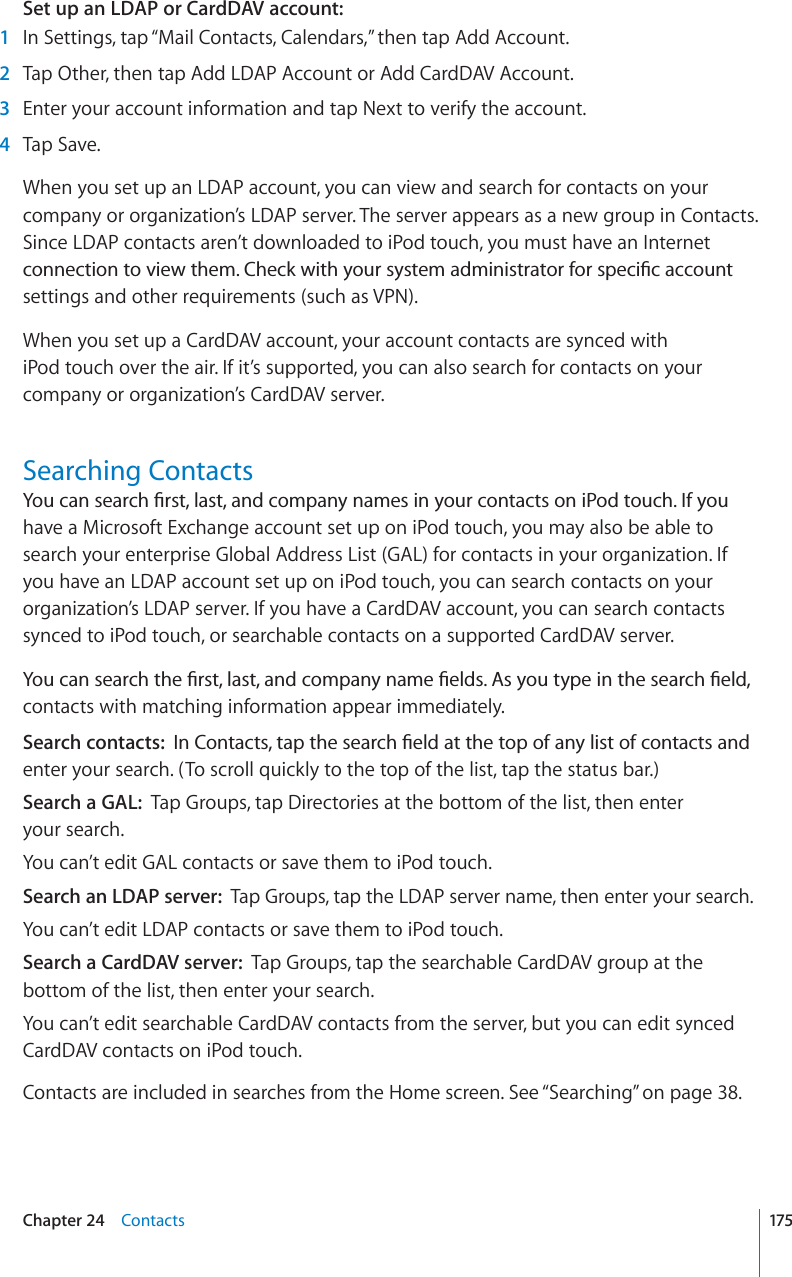
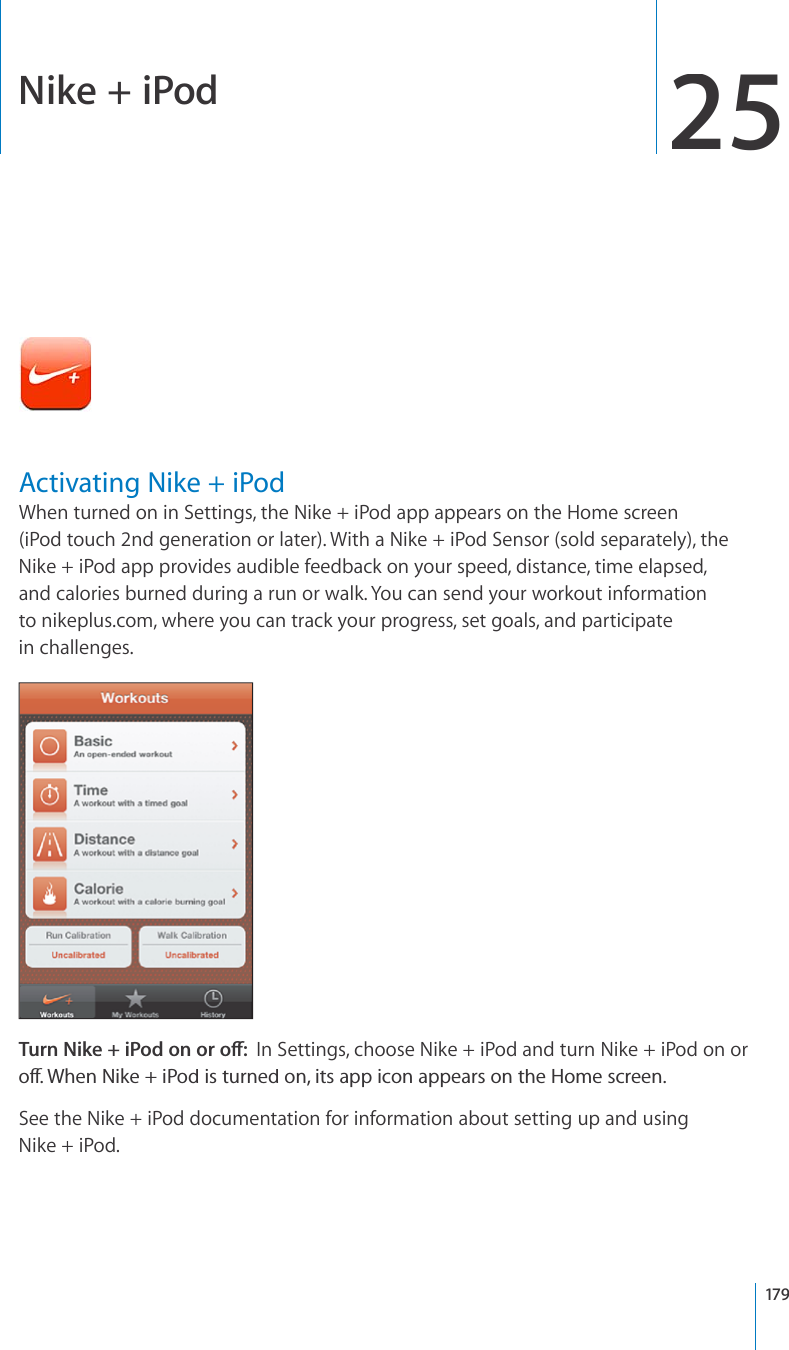
![Playing Songs and Other AudioYou can browse content on iPodtouch by playlists, artists, songs, videos, and othercategories, or browse your album artwork using Cover Flow. Playlist folders, which youcan sync from iTunes, let you organize playlists into groups.Browse your collection:Tap Playlists, Artists, or Songs. Tap More to browse Albums, Audiobooks, Compilations, Composers, Genres, iTunes U, Podcasts, or Videos.You can replace the browse buttons at the bottom of the screen with buttons you usemore frequently. See “Changing the Browse Buttons”on page66.Get more podcast episodes:6CR2QFECUVUVCR/QTG°TUVKH2QFECUVUKUP¨VXKUKDNGVJGPtap a podcast to see a list of episodes. Tap “Get More Episodes…” to see a list of moreepisodes in the iTunes Store.Browse Genius Mixes:6CR)GPKWUVCR/QTG°TUVKH)GPKWUKUP¨VXKUKDNG+H)GPKWUdoesn’t appear, you need to turn on Genius in iTunes, and then sync iPodtouch withiTunes. See “Using Genius on iPodtouch”on page59.Play a song:Tap the song.5JCMGVQUJWÔG5JCMGK2QFVQWEJVQVWTPUJWÔGQPCPFEJCPIGUQPIU5JCMGanytime to change to another song.;QWECPVWTP5JCMGVQ5JWÔGQPQTQÒKP5GVVKPIU /WUKEKV¨UQPD[FGHCWNV5GG¥¦QPpage166.Controlling Audio PlaybackWhen you play a song, the Now Playing screen appears.5L_[-HZ[MVY^HYK7SH`7H\ZL;YHJR3PZ[)HJR=VS\TL7YL]PV\Z9L^PUK54Chapter 5 Music and Videos](https://usermanual.wiki/Apple/E2407.Full-user-manual/User-Guide-1336214-Page-54.png)
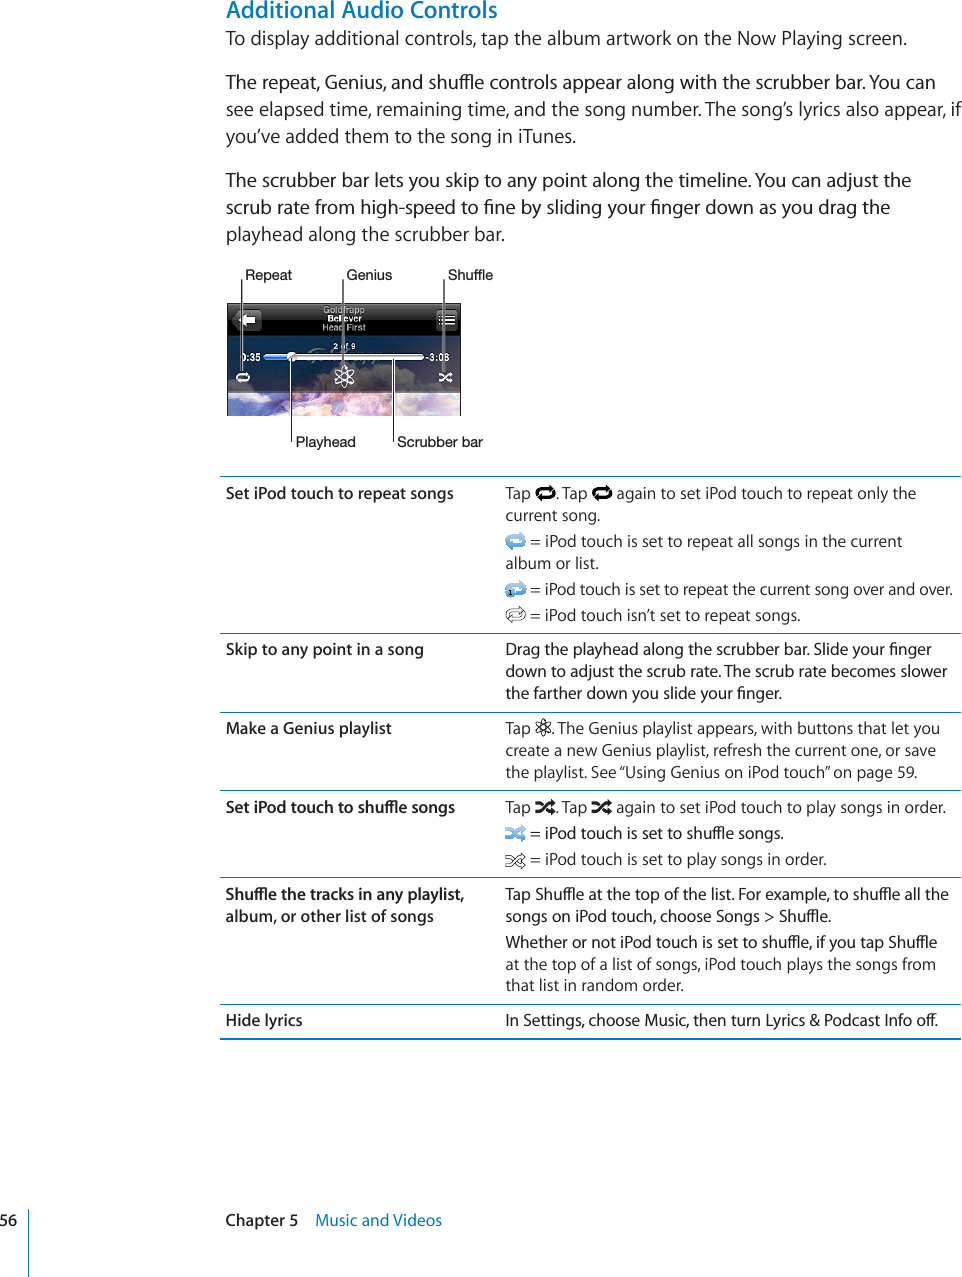

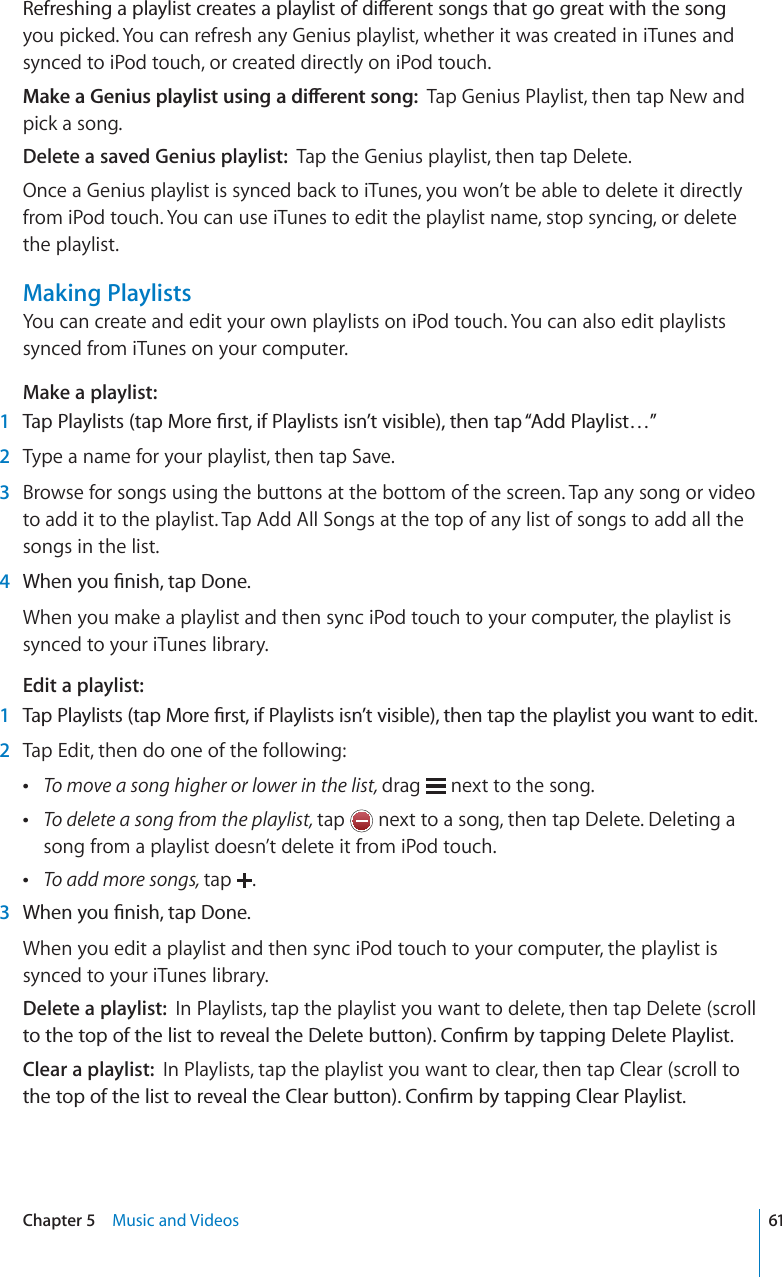
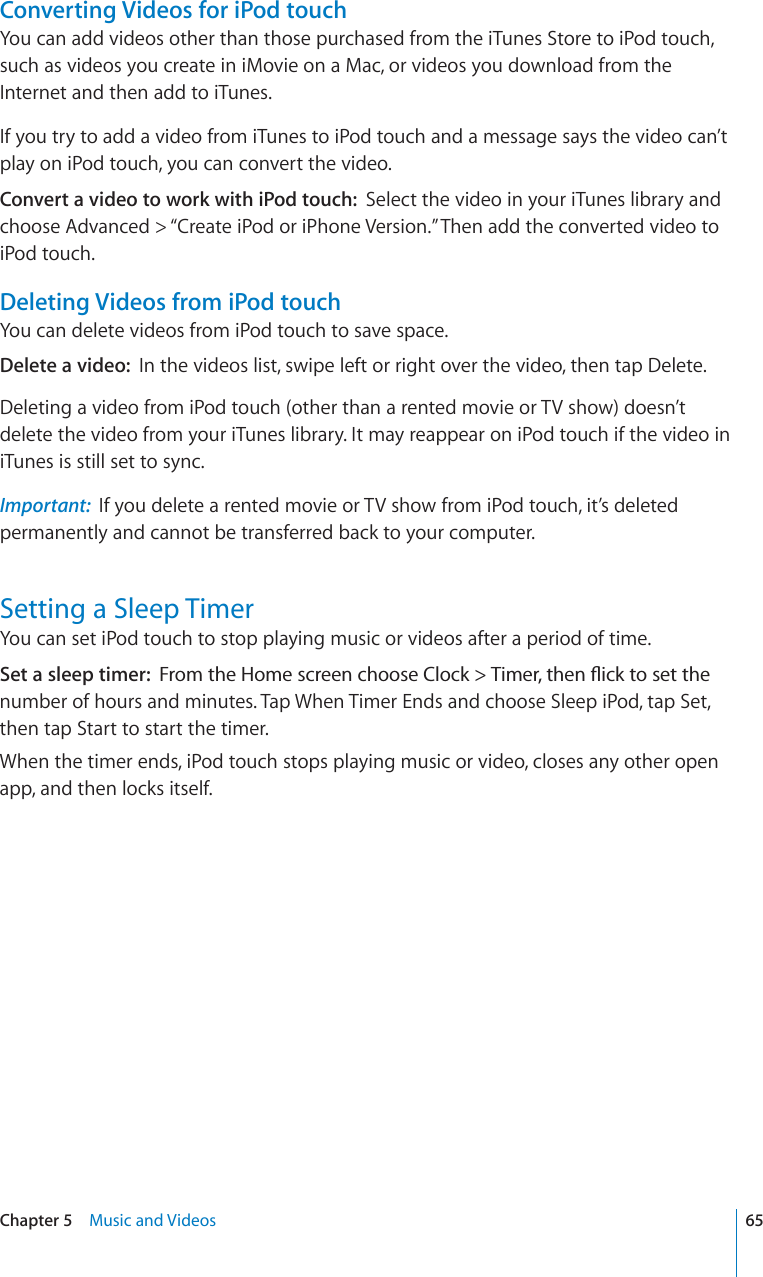


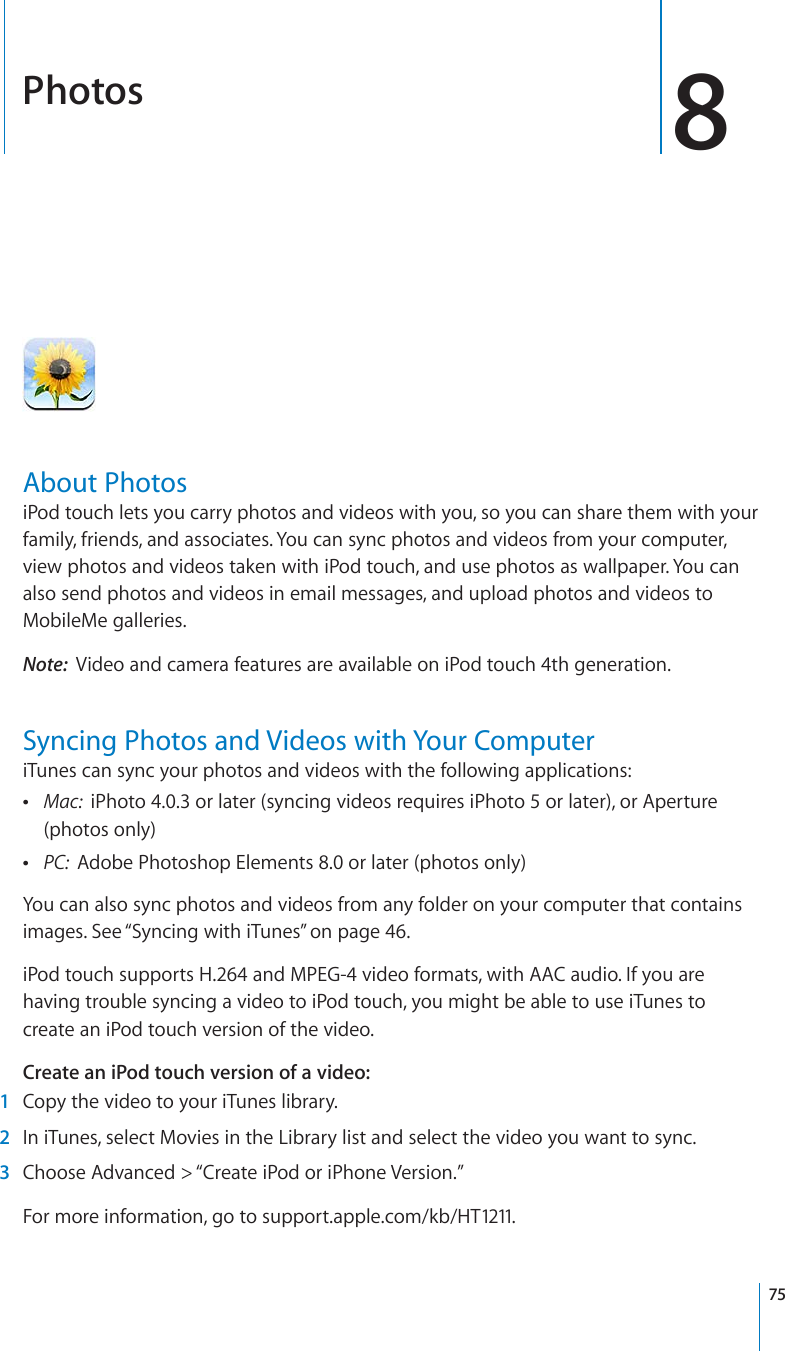
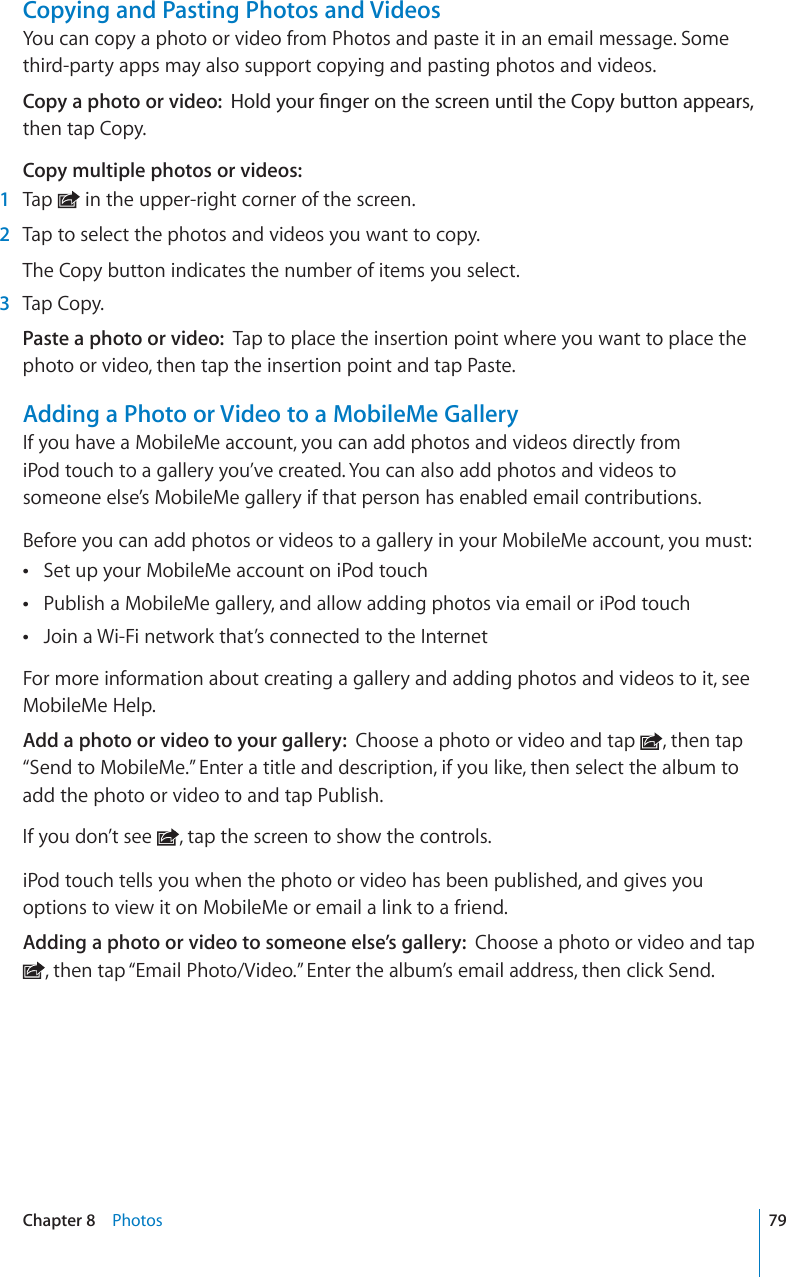
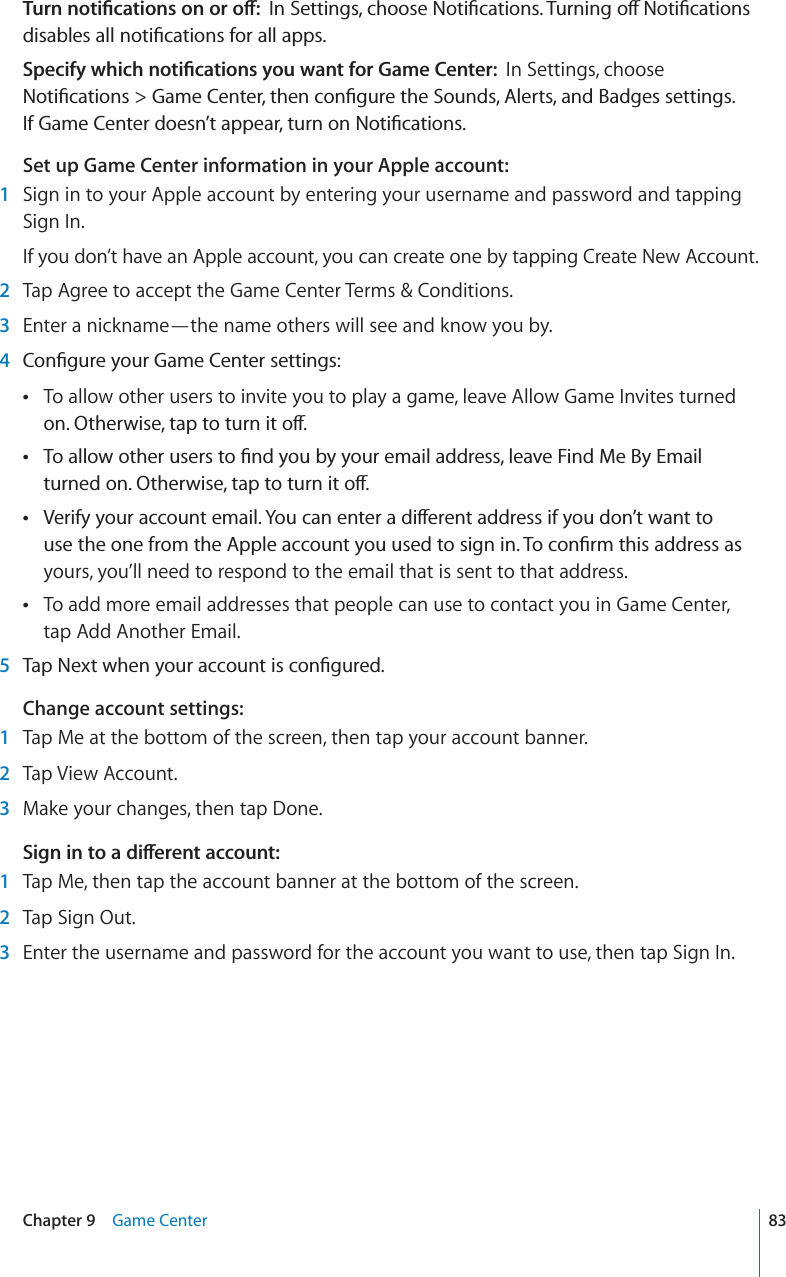

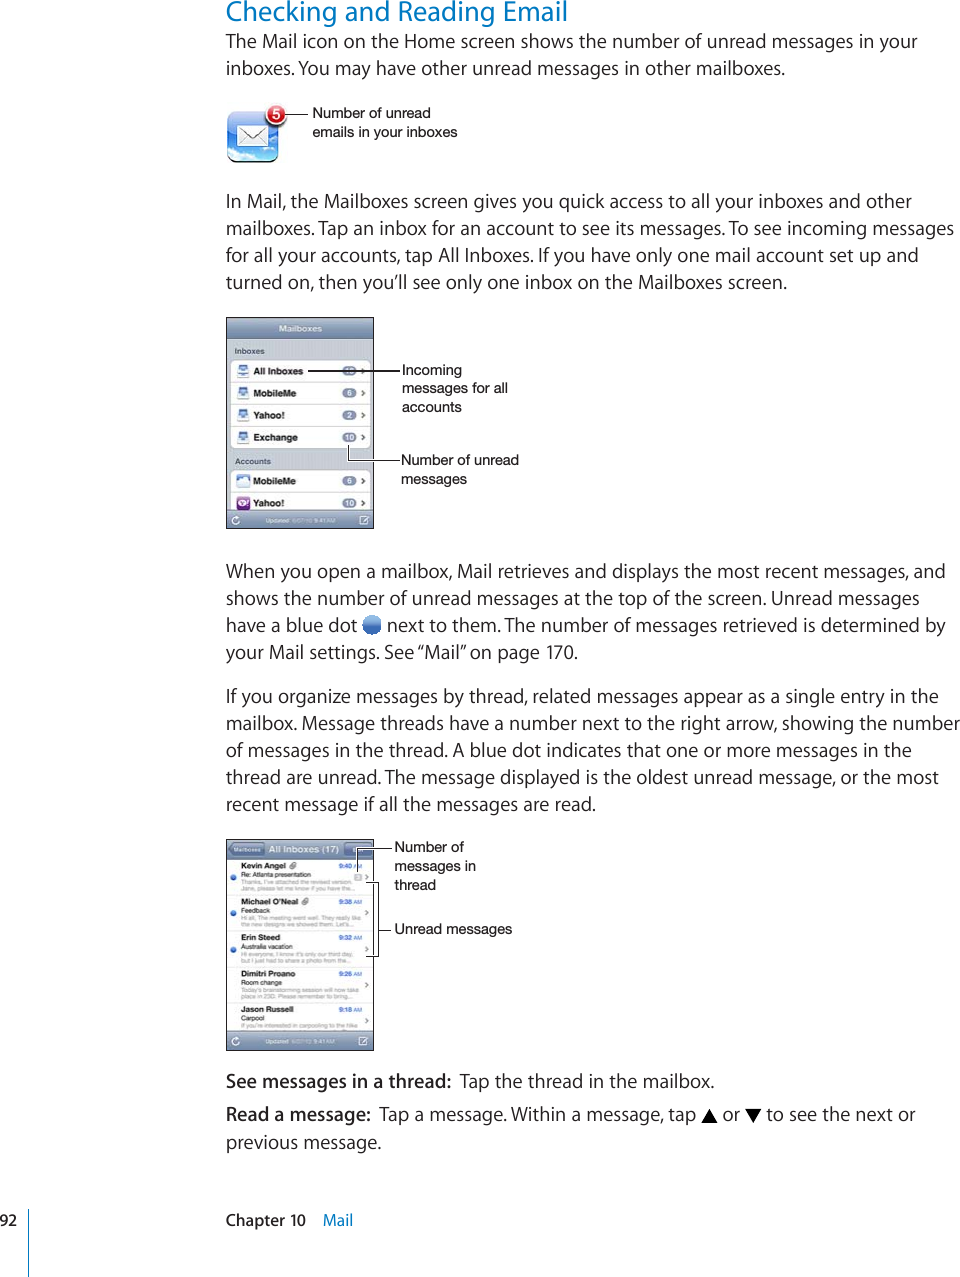
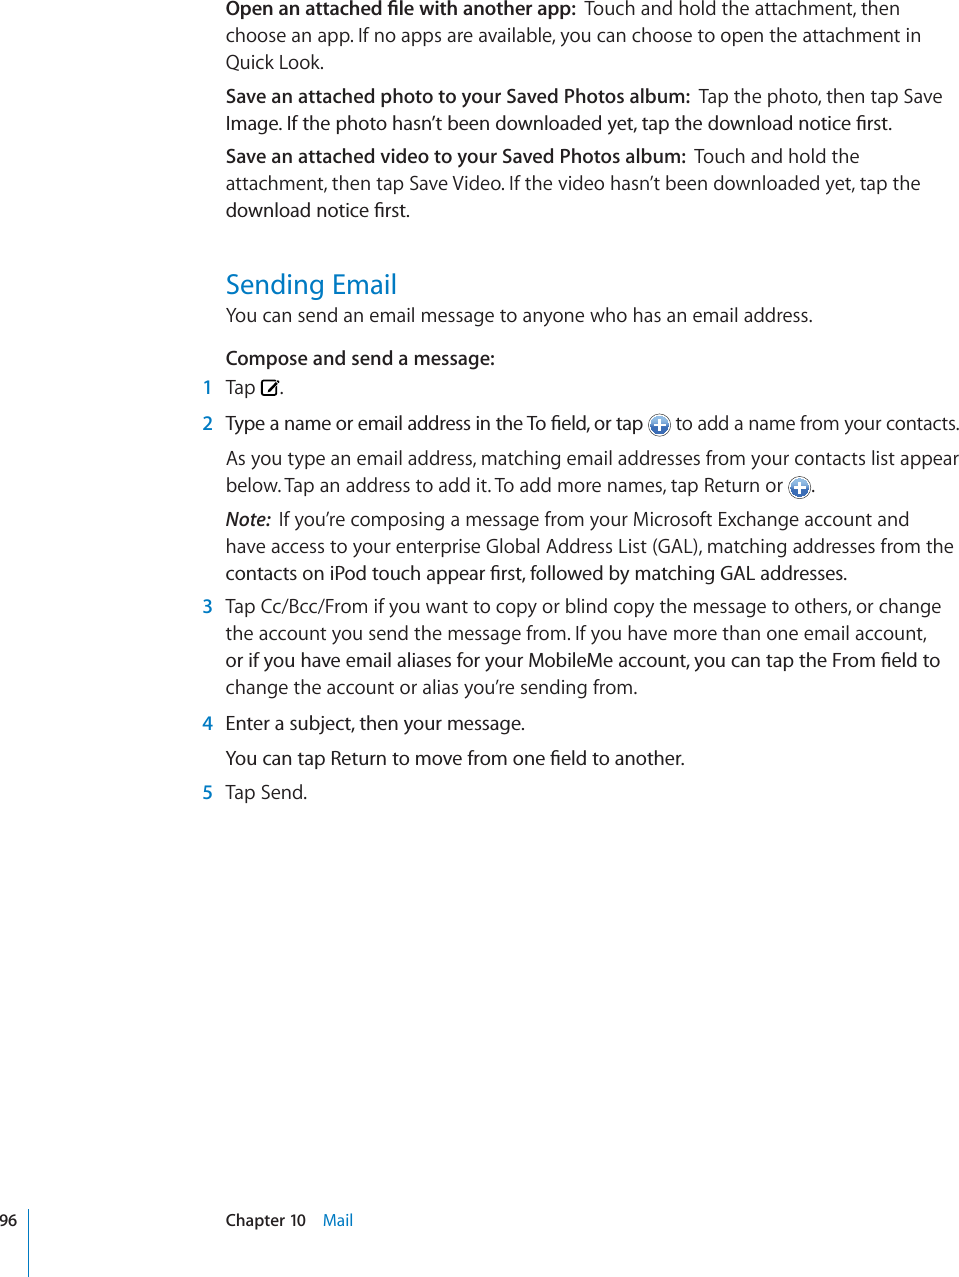
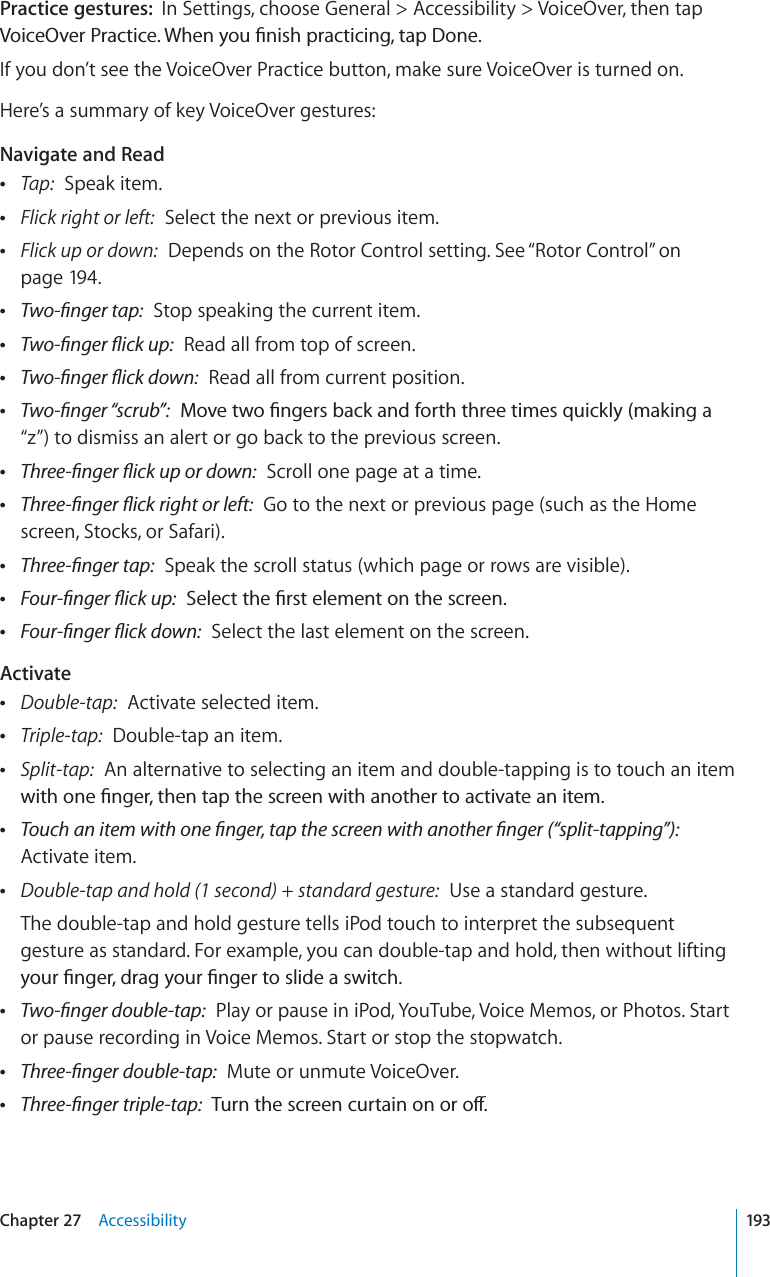
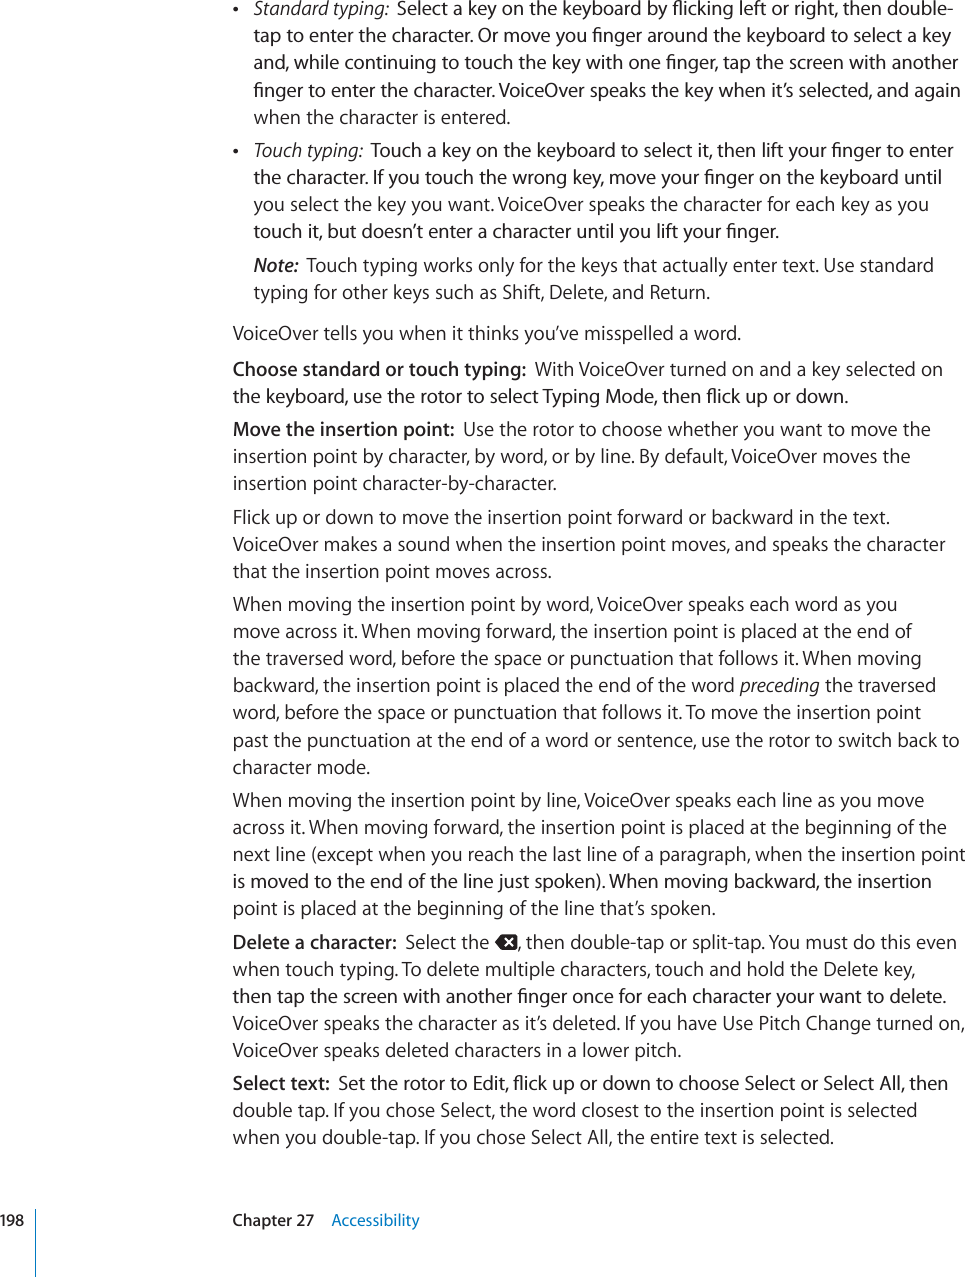
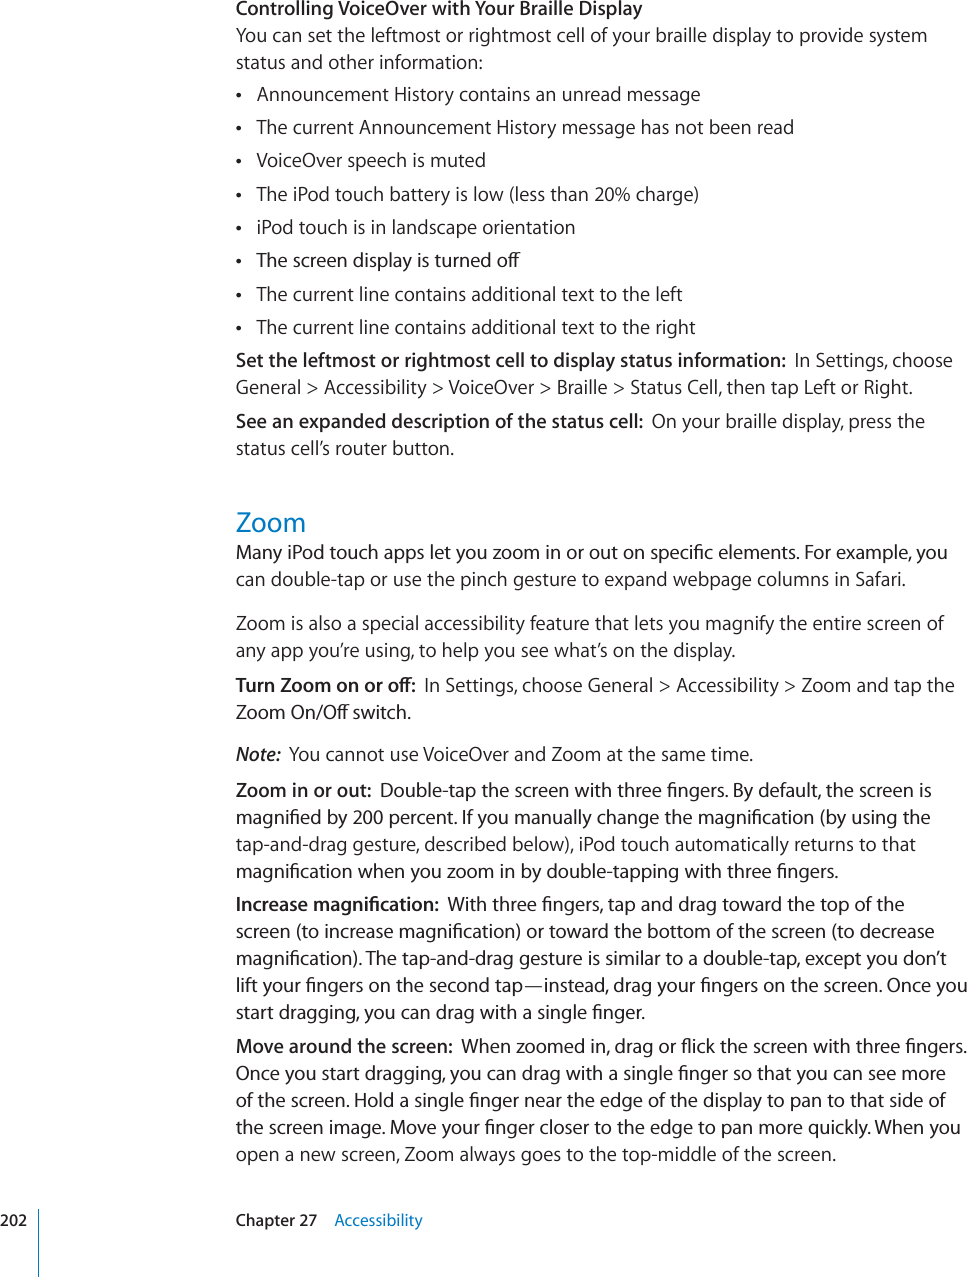
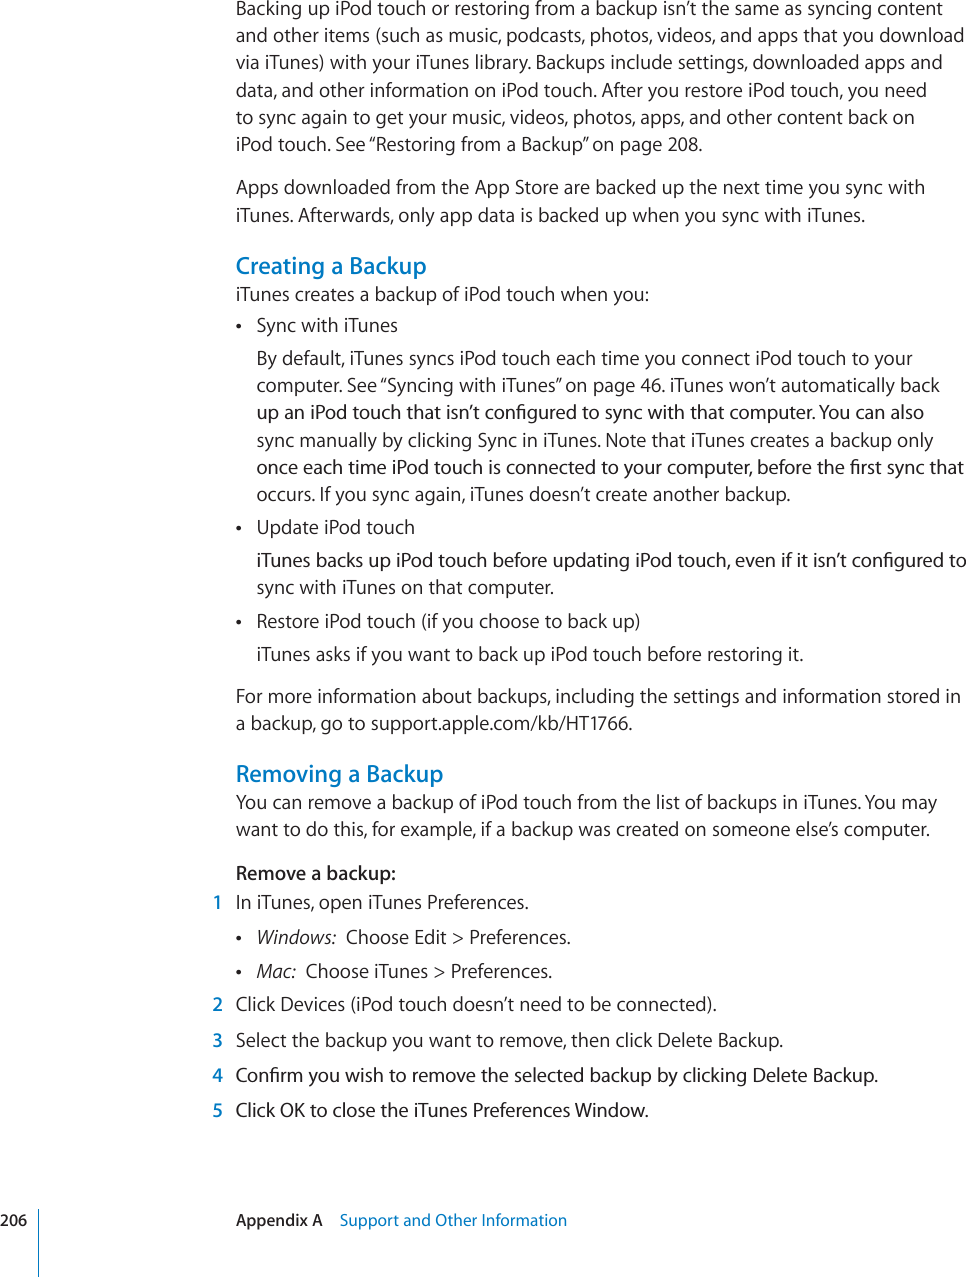
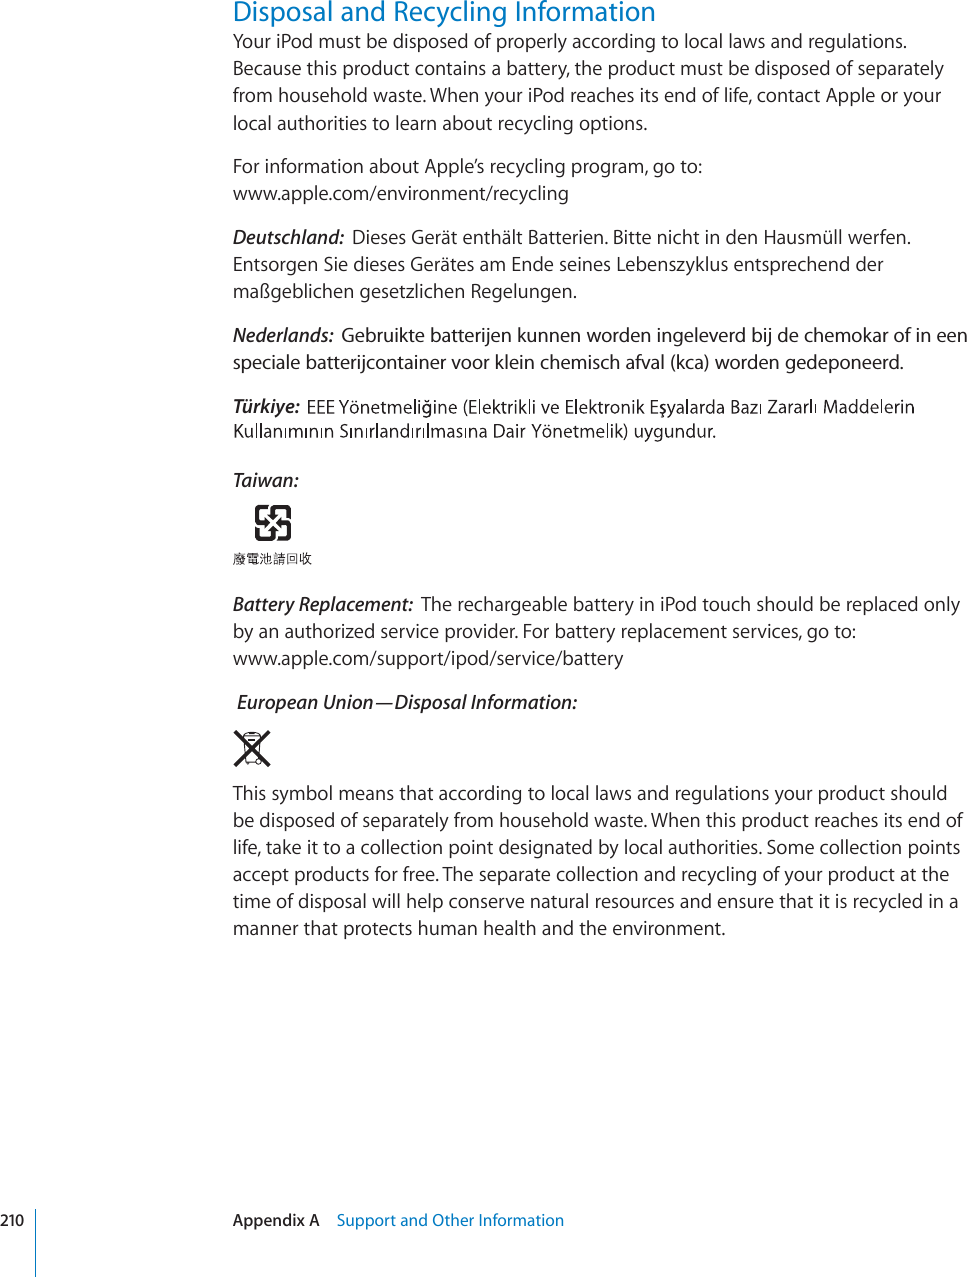
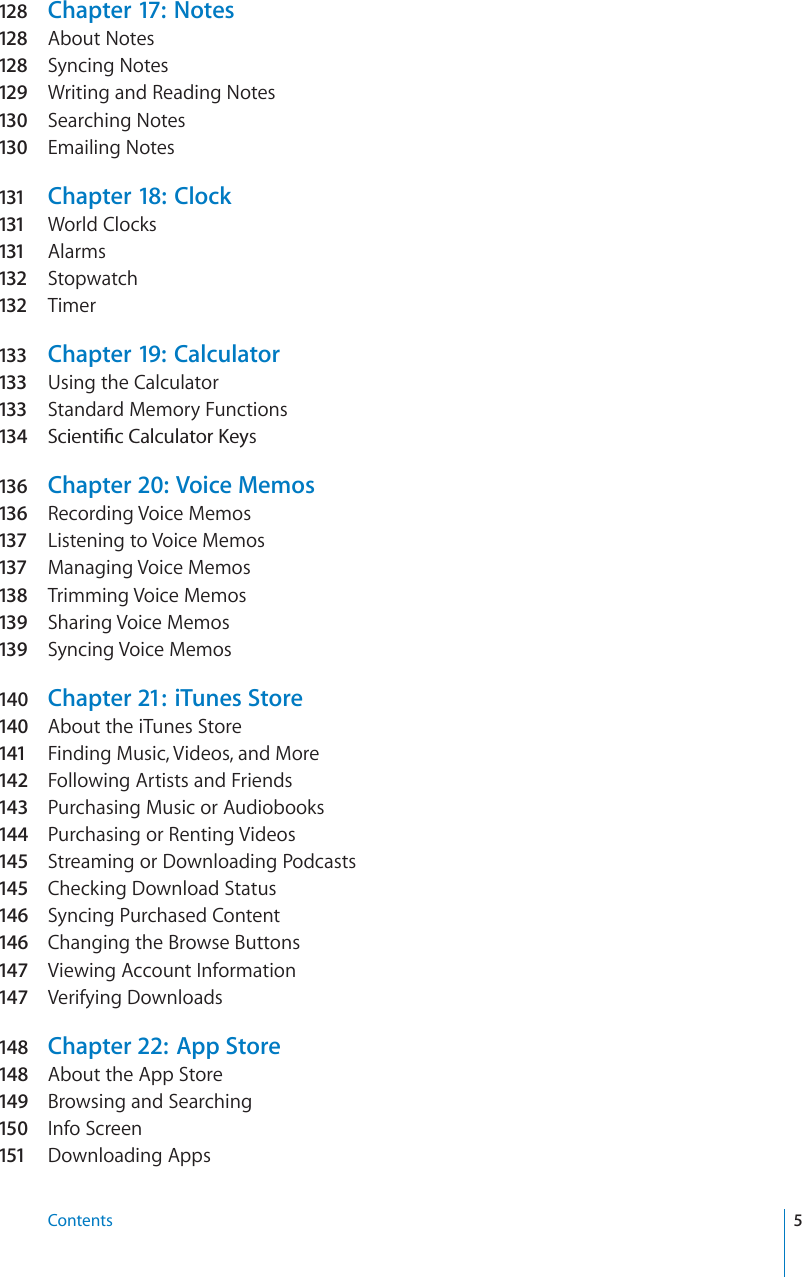
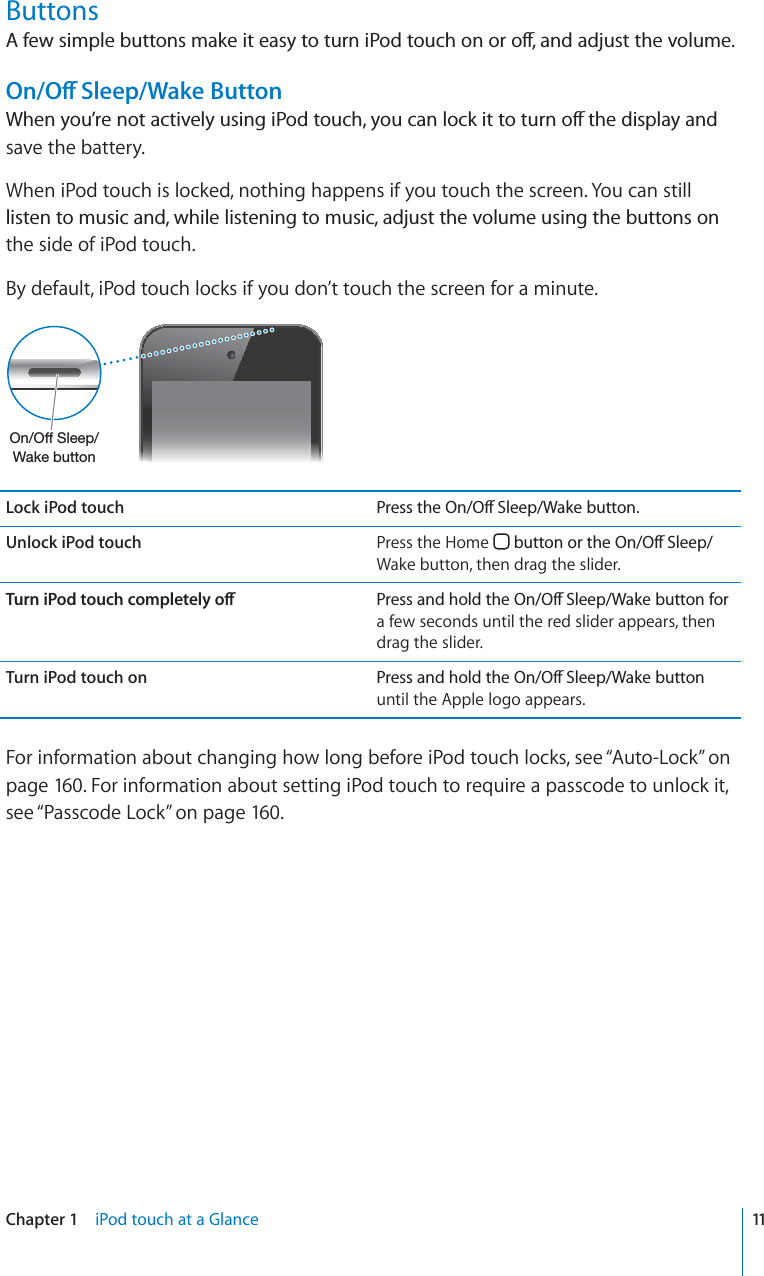
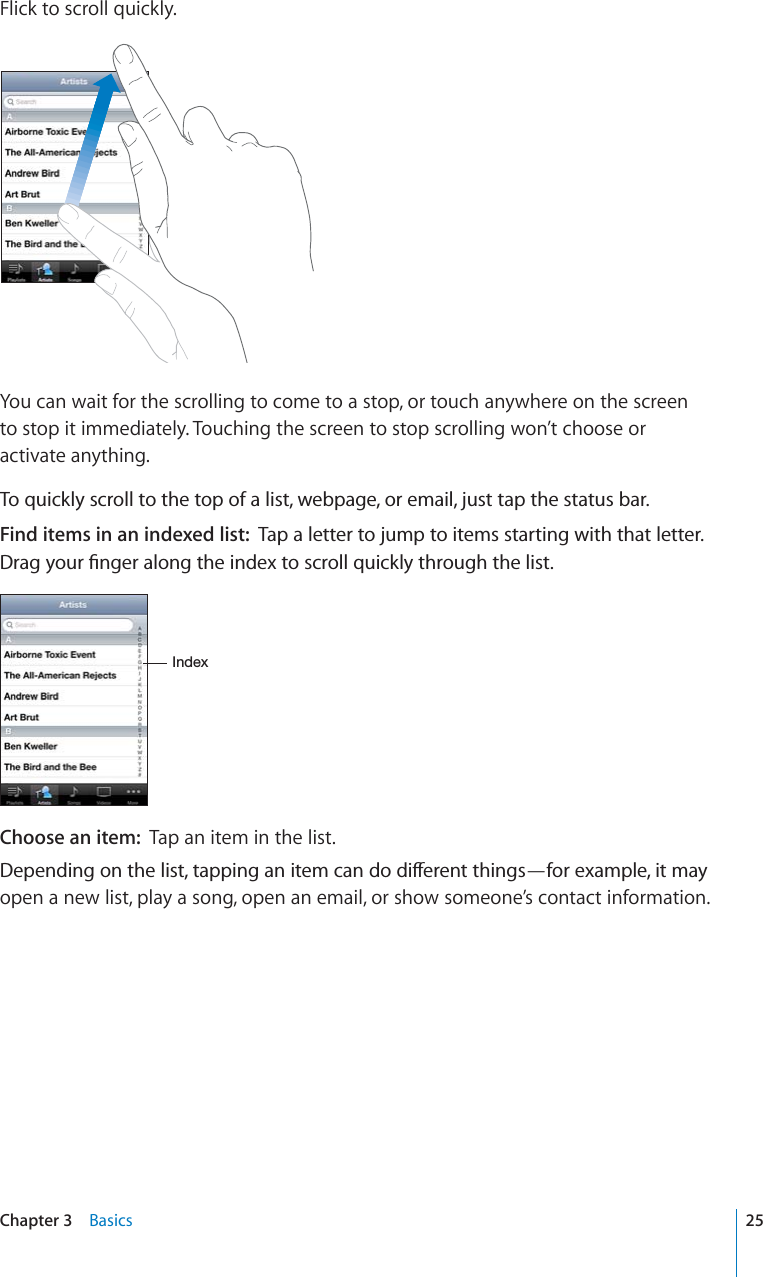
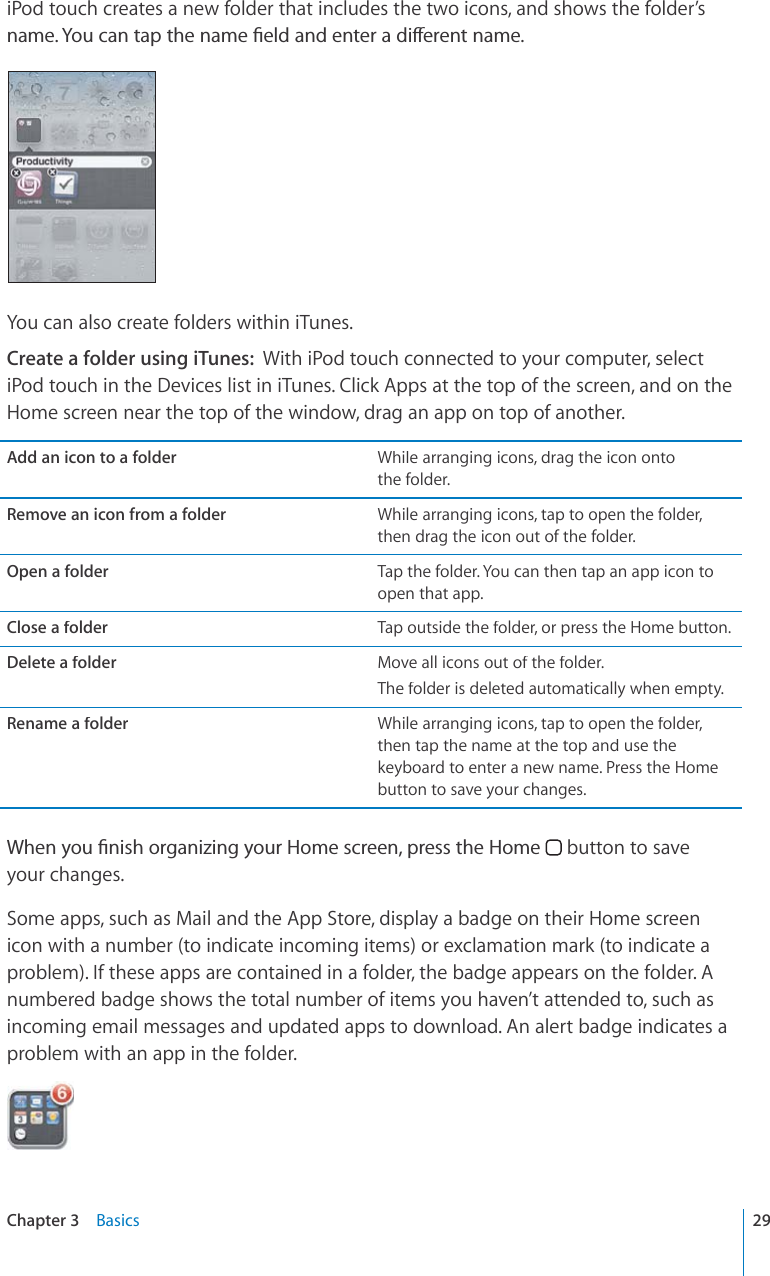
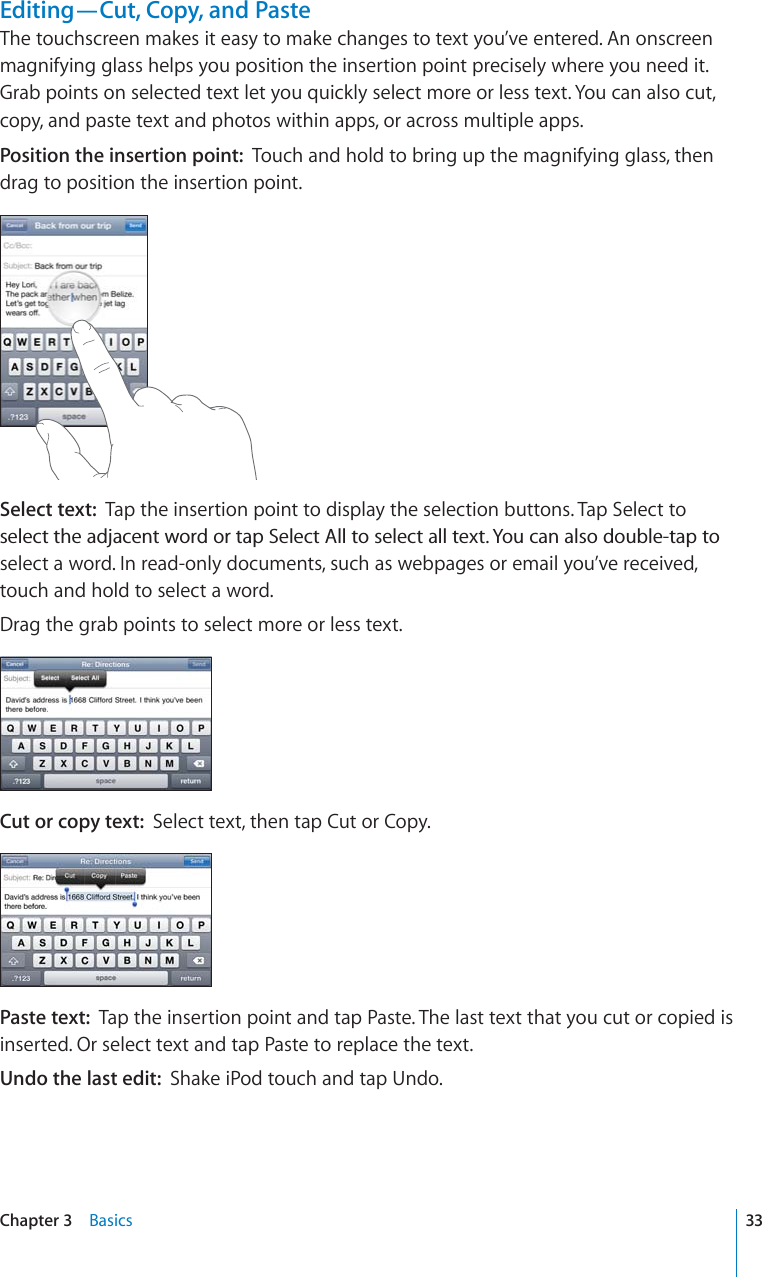
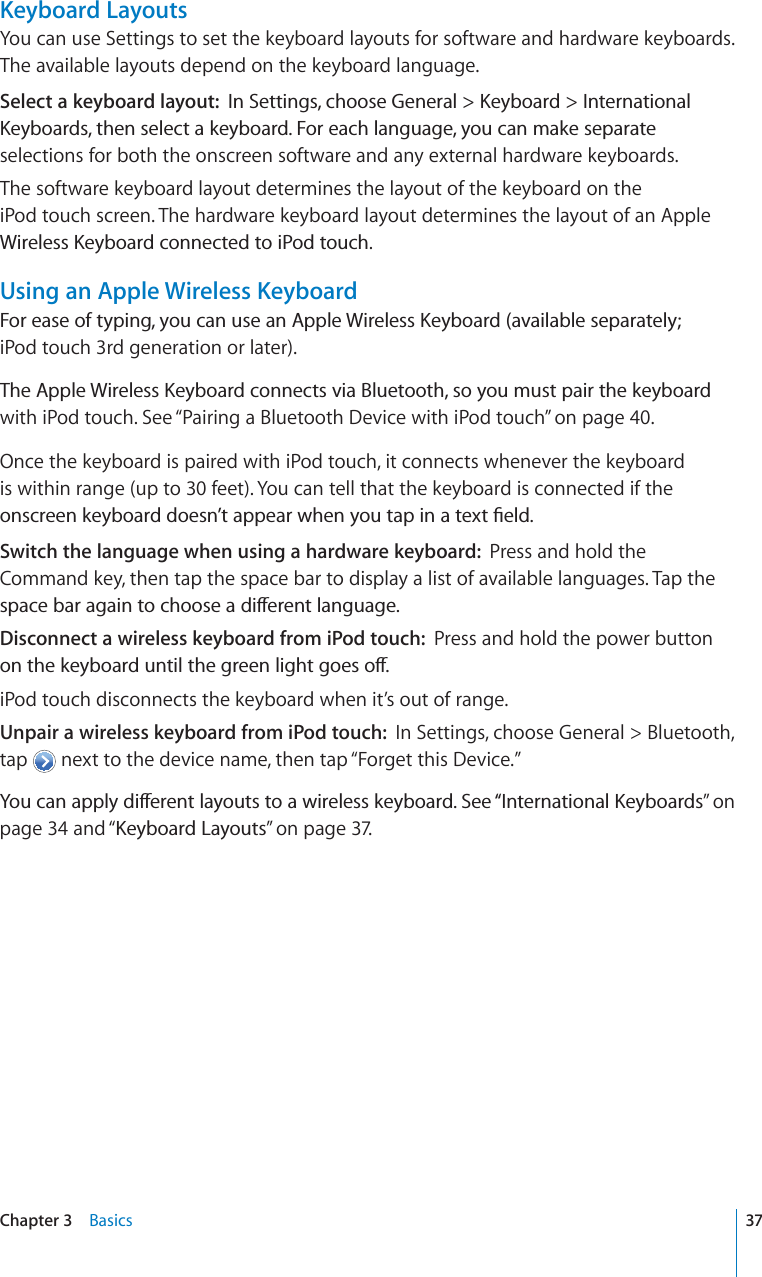
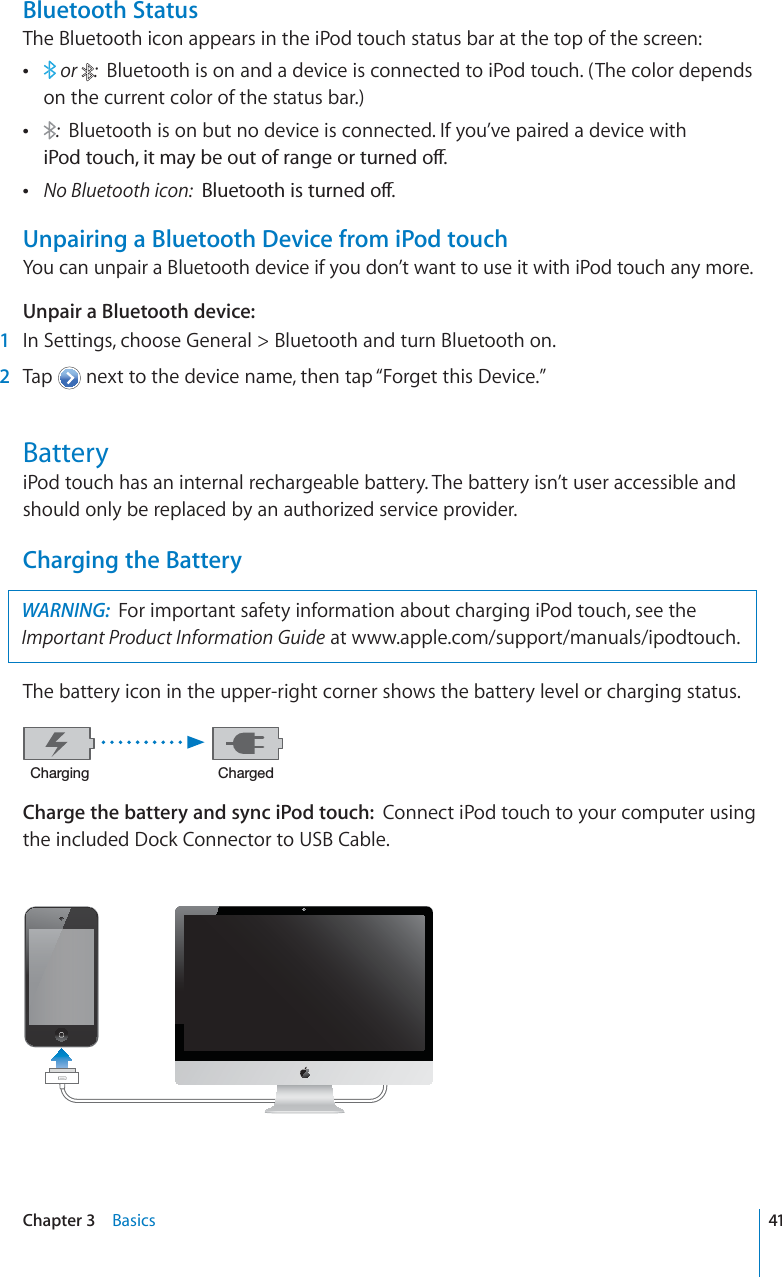
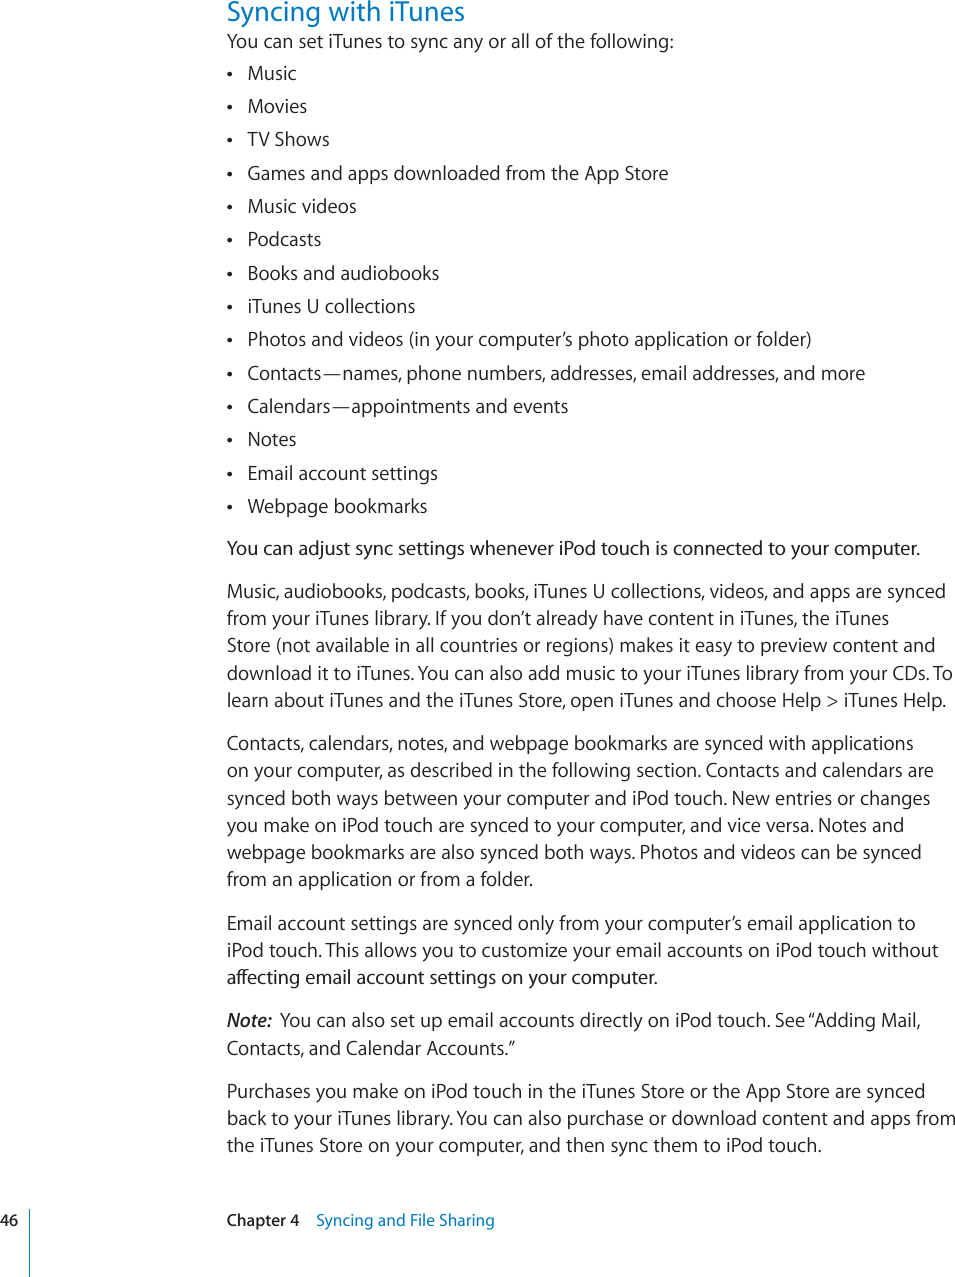
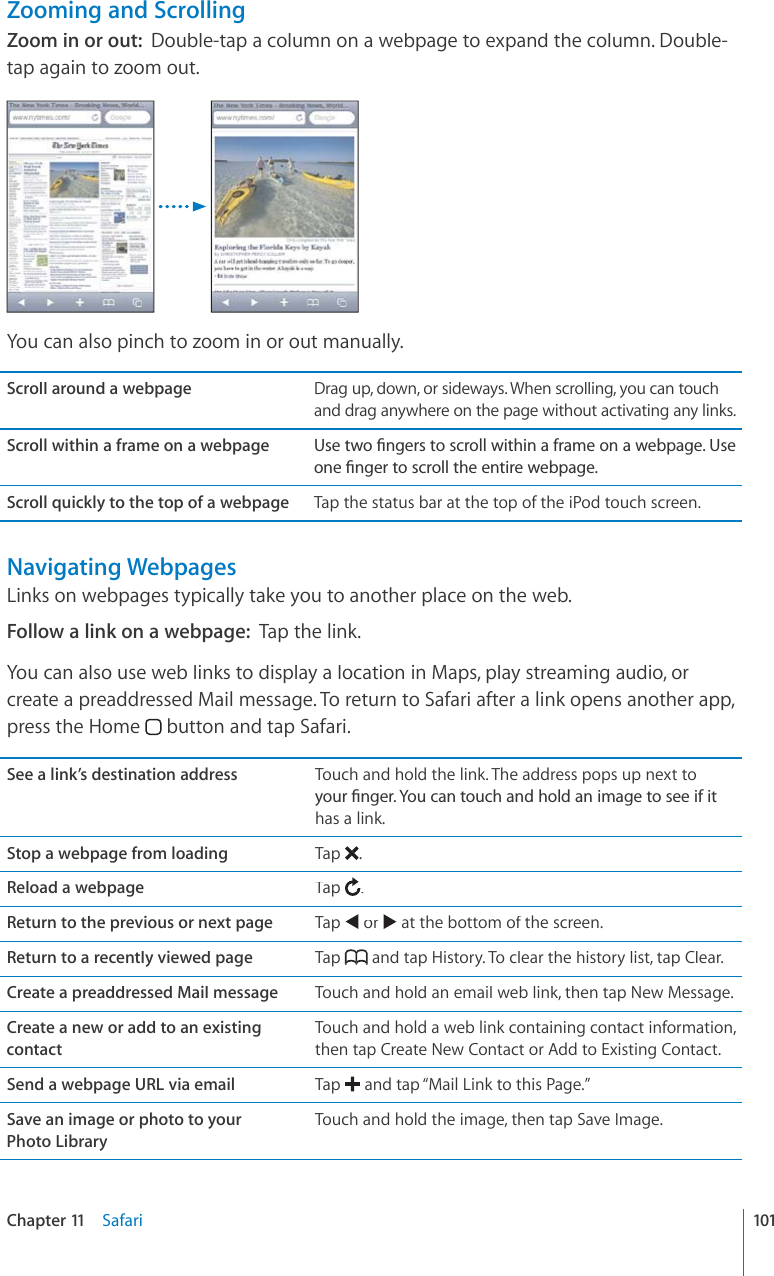
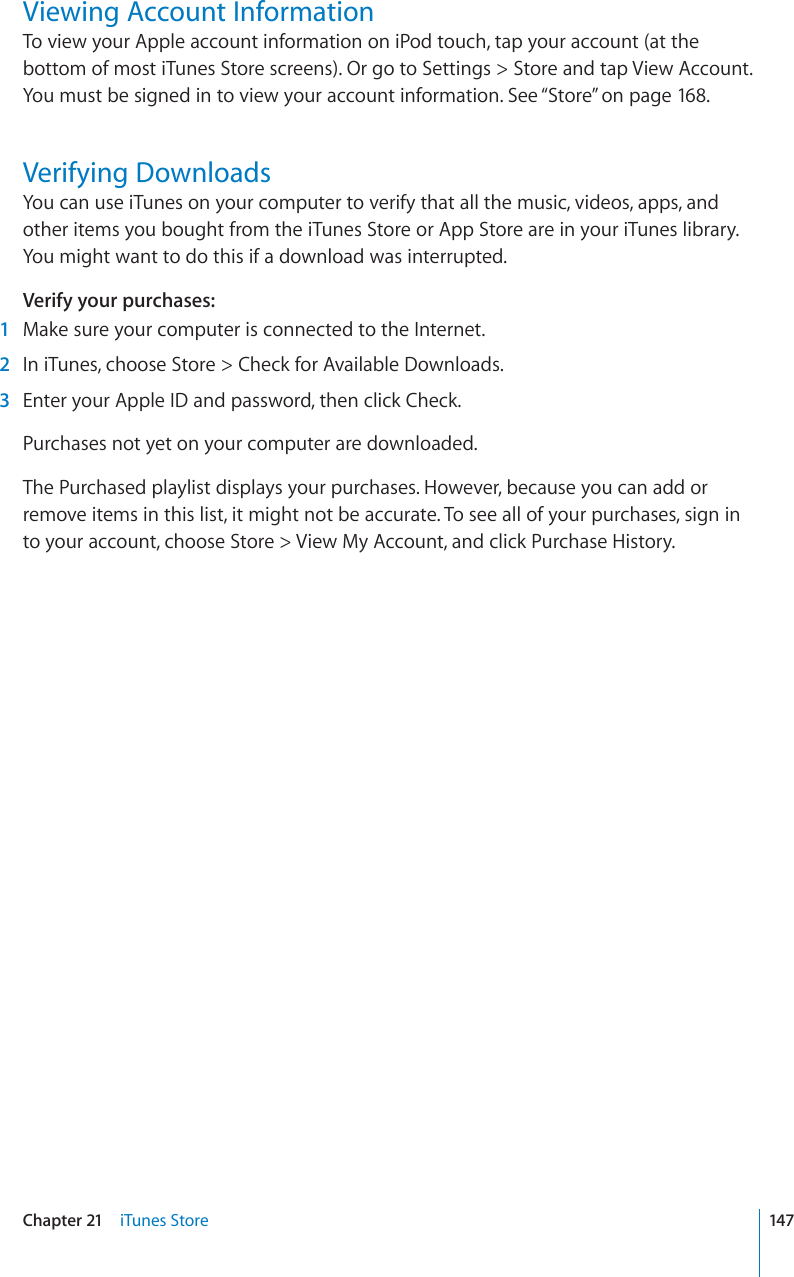
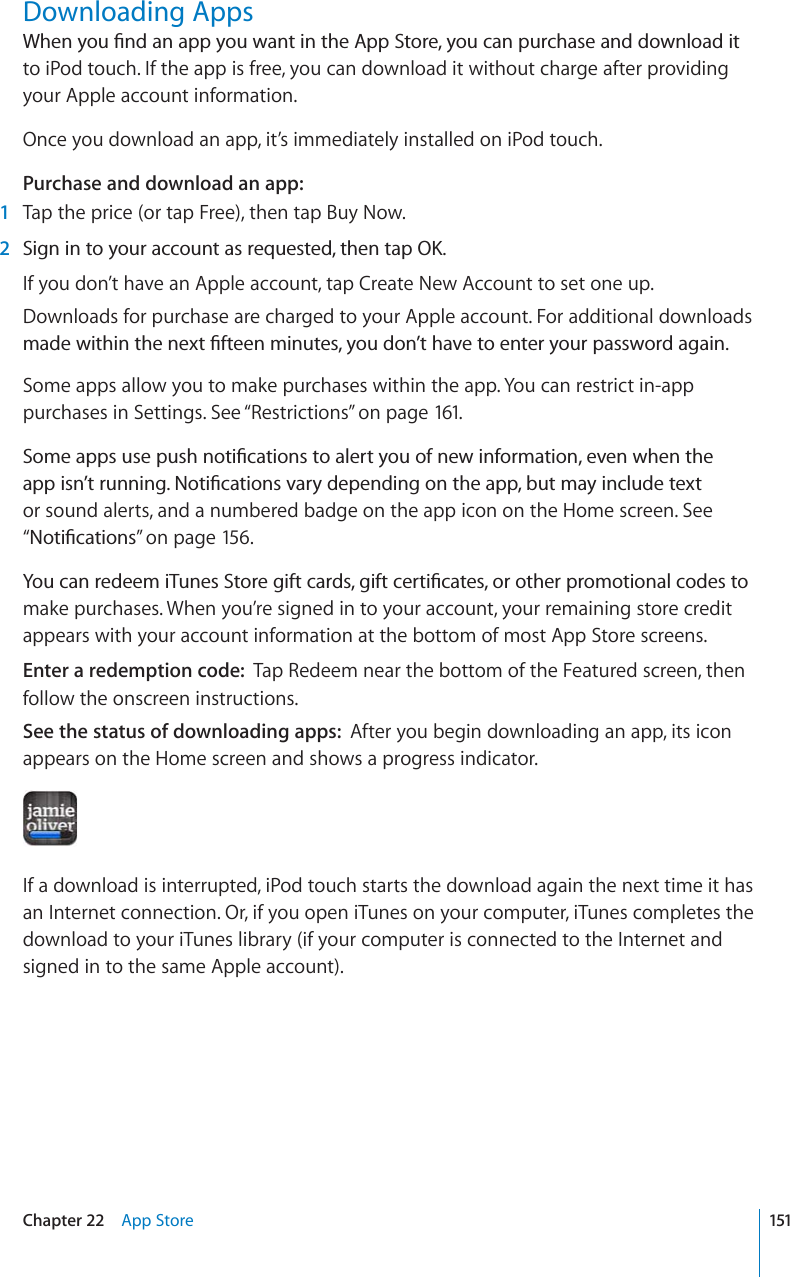
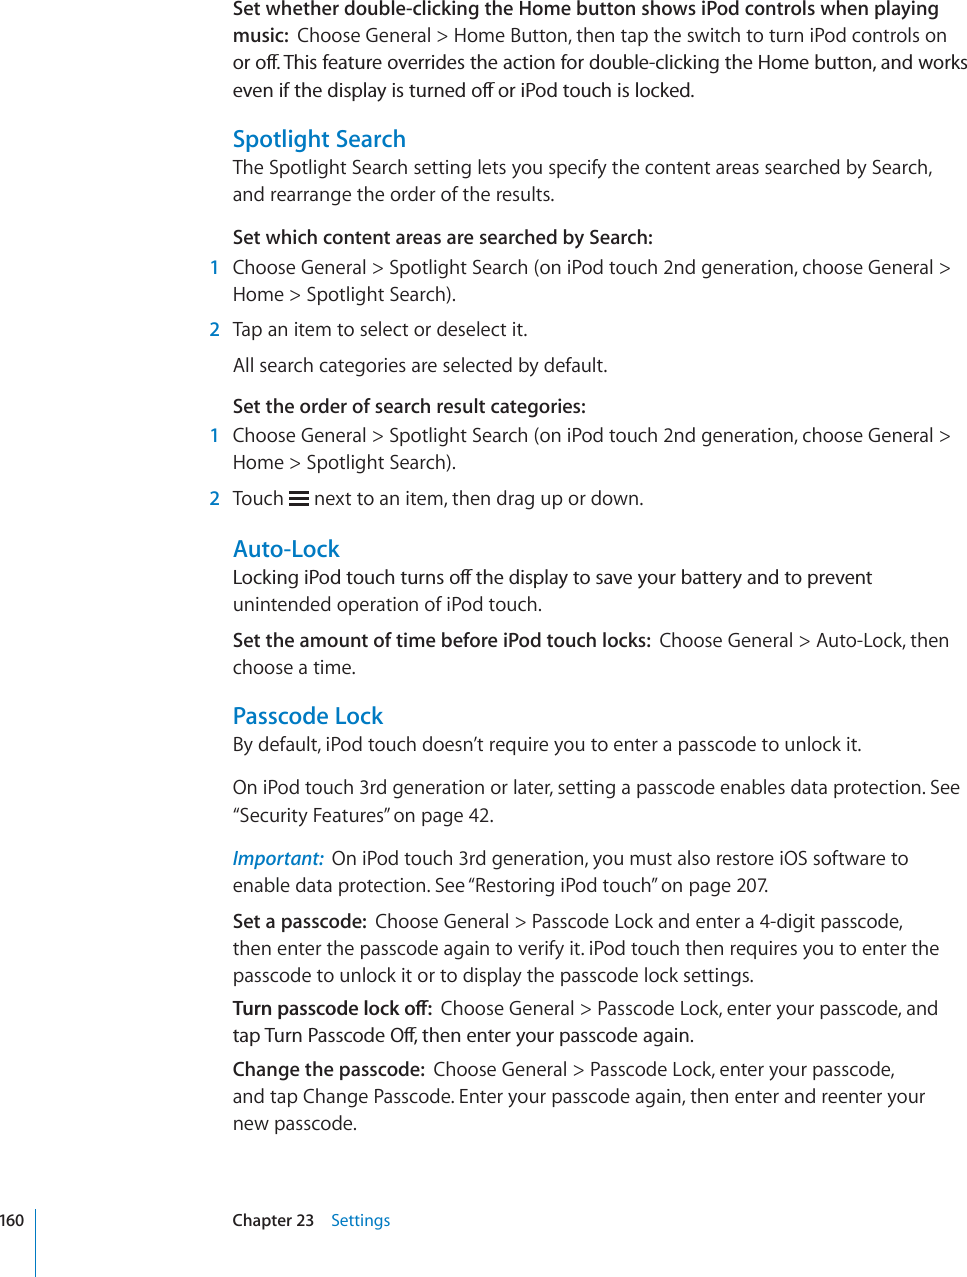
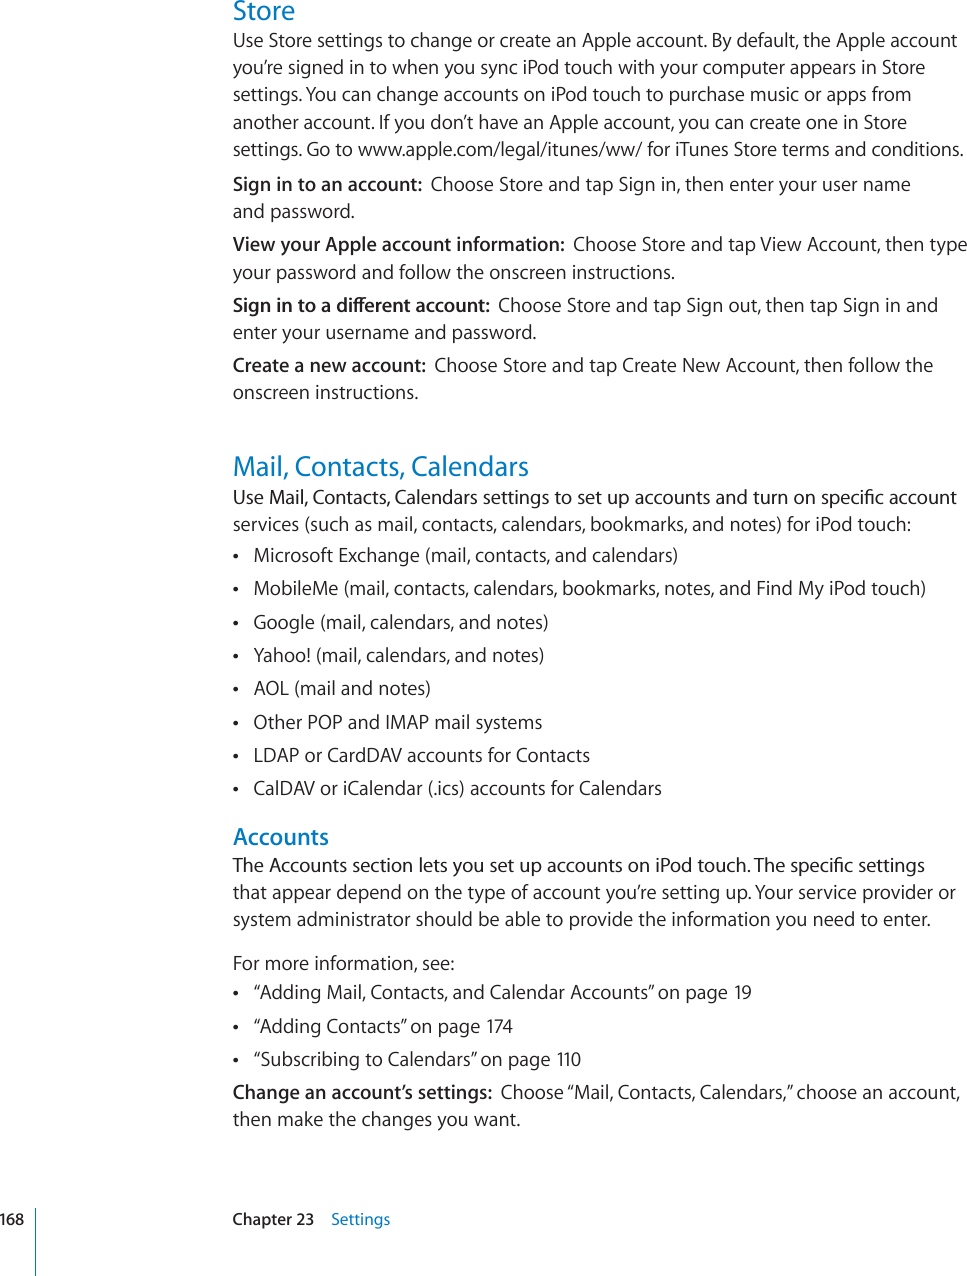
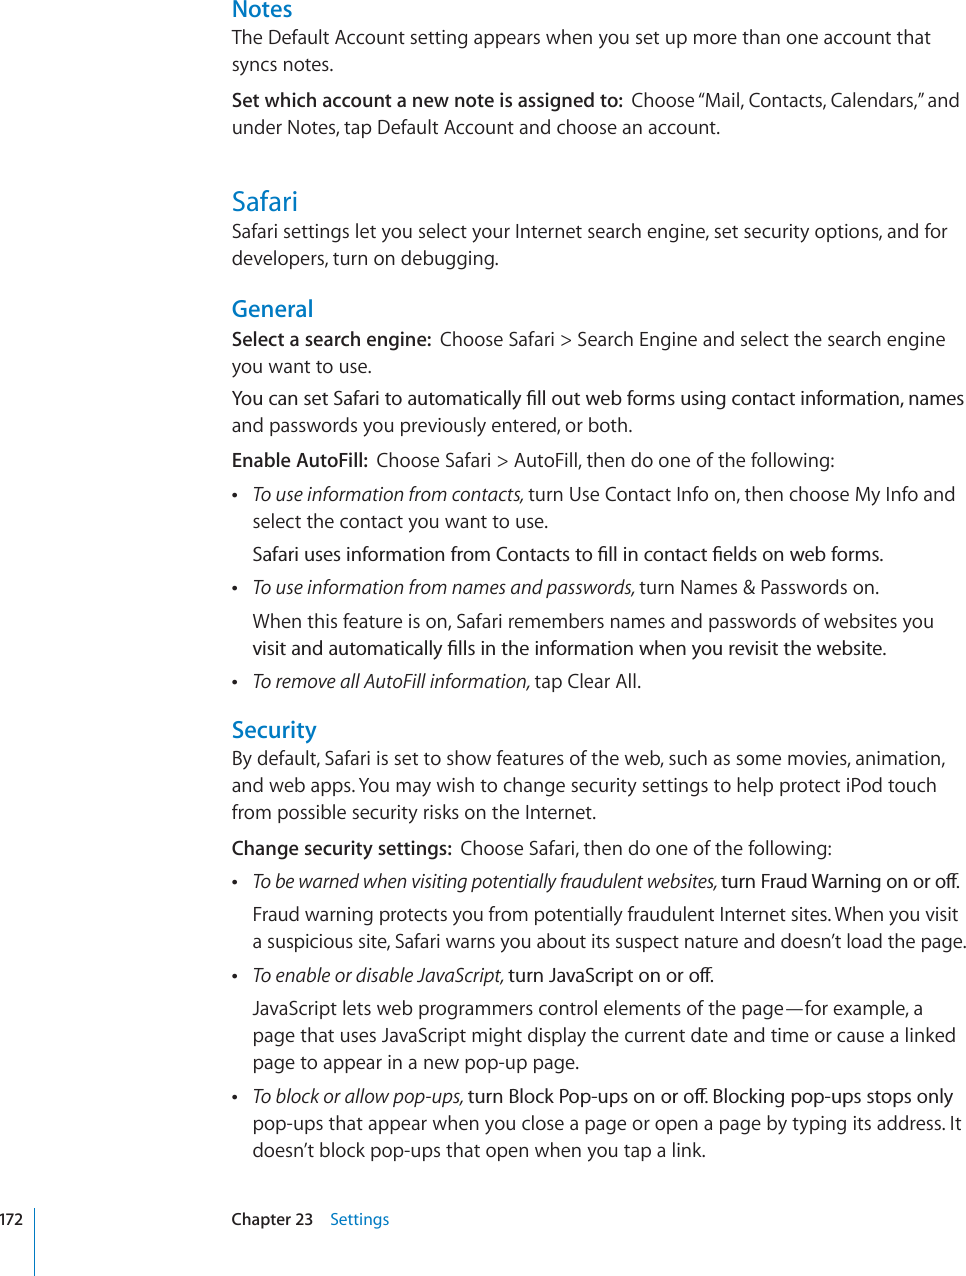
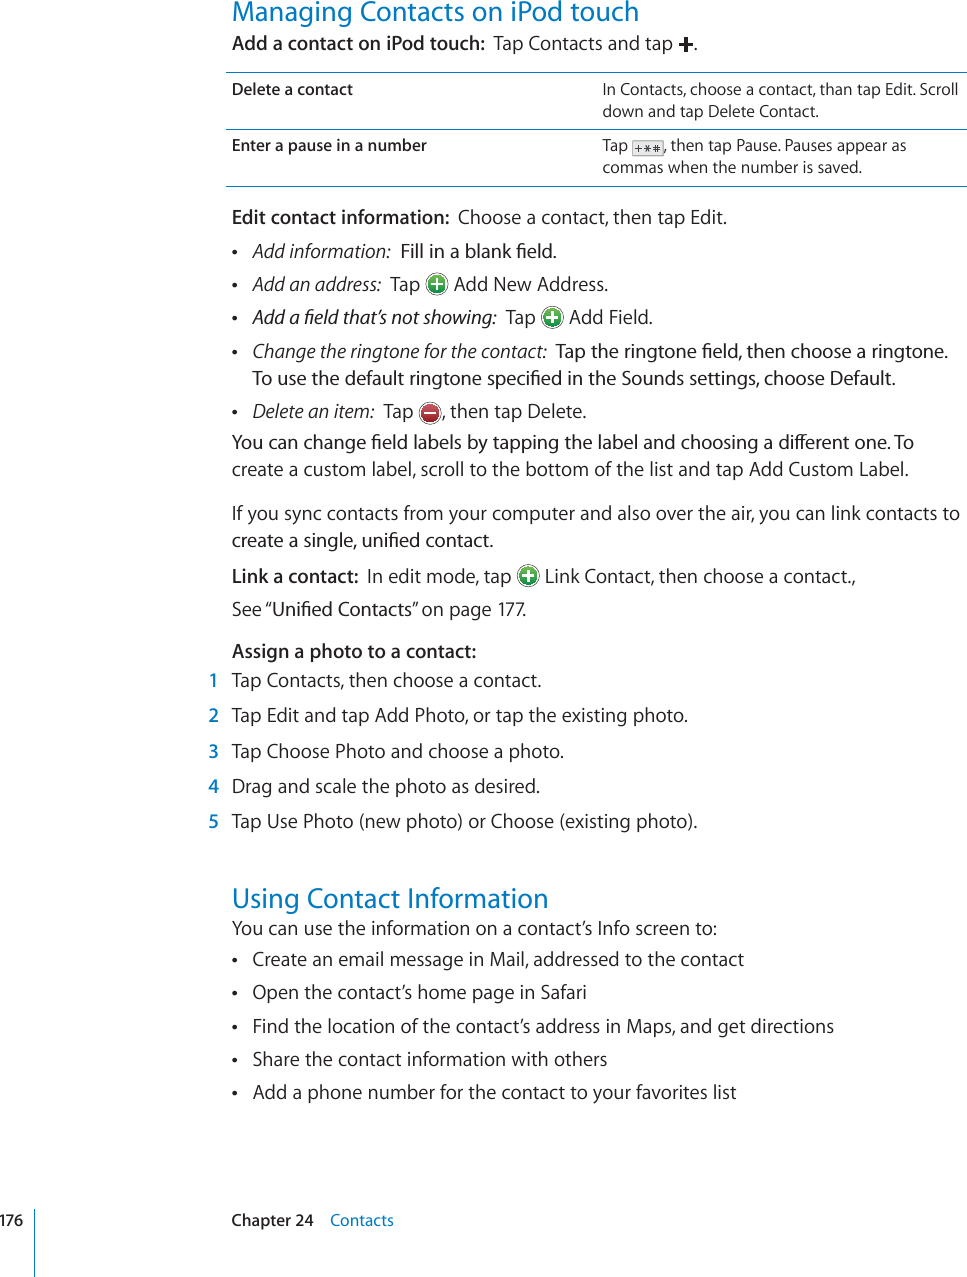
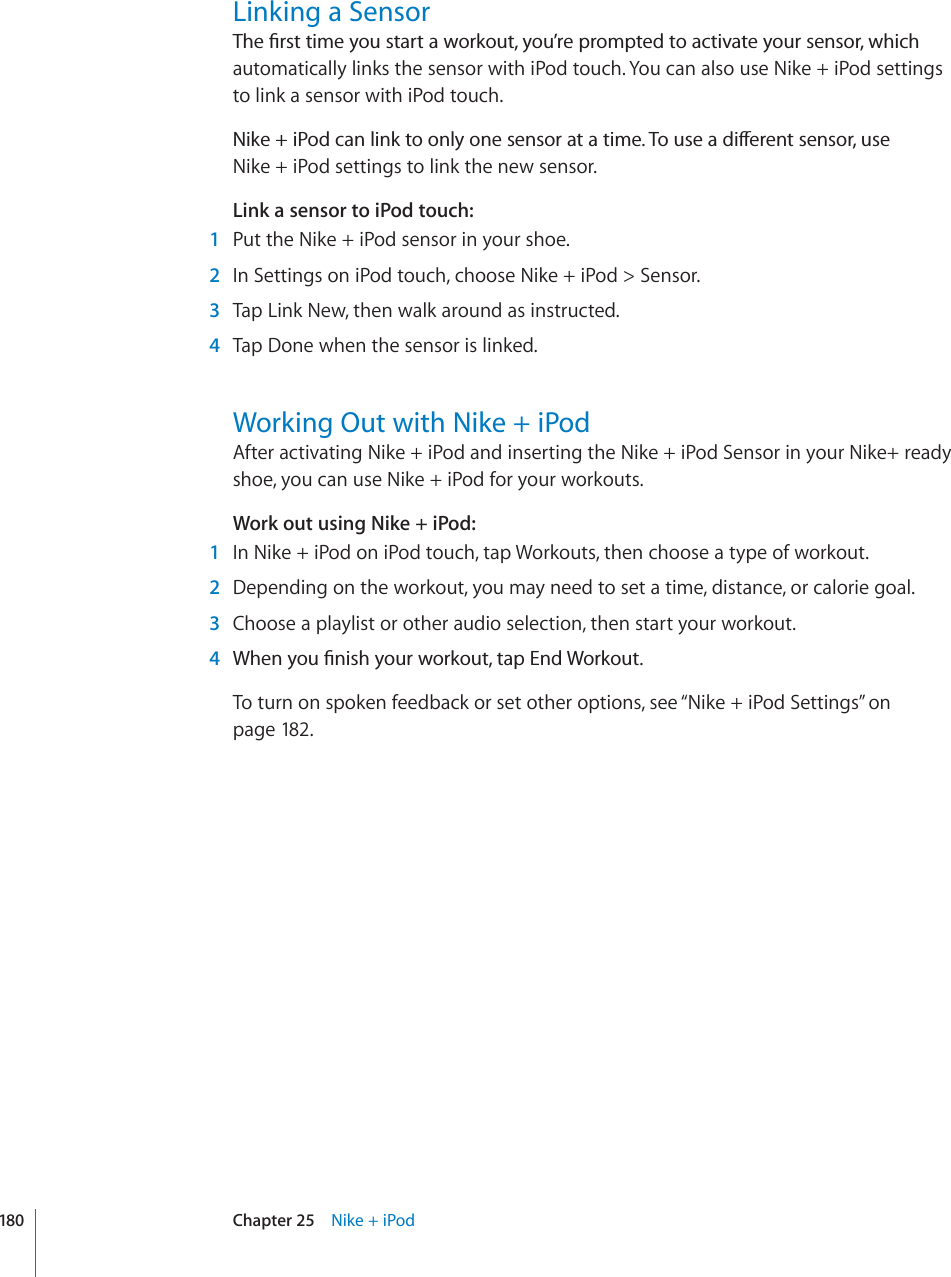
![Organizing EmailYou can organize messages in any mailbox, folder, or search results window. You can delete messages one at a time, or select a group to delete all at once. You can also move messages from one mailbox or folder to another in the same account or DGVYGGPFKÒGTGPVCEEQWPVUDelete a message: Open the message and tap .You can also delete a message directly from the mailbox message list by swiping left or right over the message title, then tapping Delete.;VZOV^[OL+LSL[LI\[[VUZ^PWLSLM[VYYPNO[V]LY[OLTLZZHNLNote: For Google accounts, tap Archive. Messages aren’t deleted, but are moved to your account archive.Delete multiple messages: When viewing a list of messages, tap Edit, select the messages you want to delete, then tap Delete.Move a message to another mailbox or folder: When viewing a message, tap , then choose a mailbox or folder.Tap Accounts to choose a mailbox or folder for another account.Move multiple messages: When viewing a list of messages, tap Edit, select the messages you want to move, then tap Move and choose a mailbox or folder.98 Chapter 10 Mail](https://usermanual.wiki/Apple/E2407.Full-user-manual/User-Guide-1336214-Page-98.png)
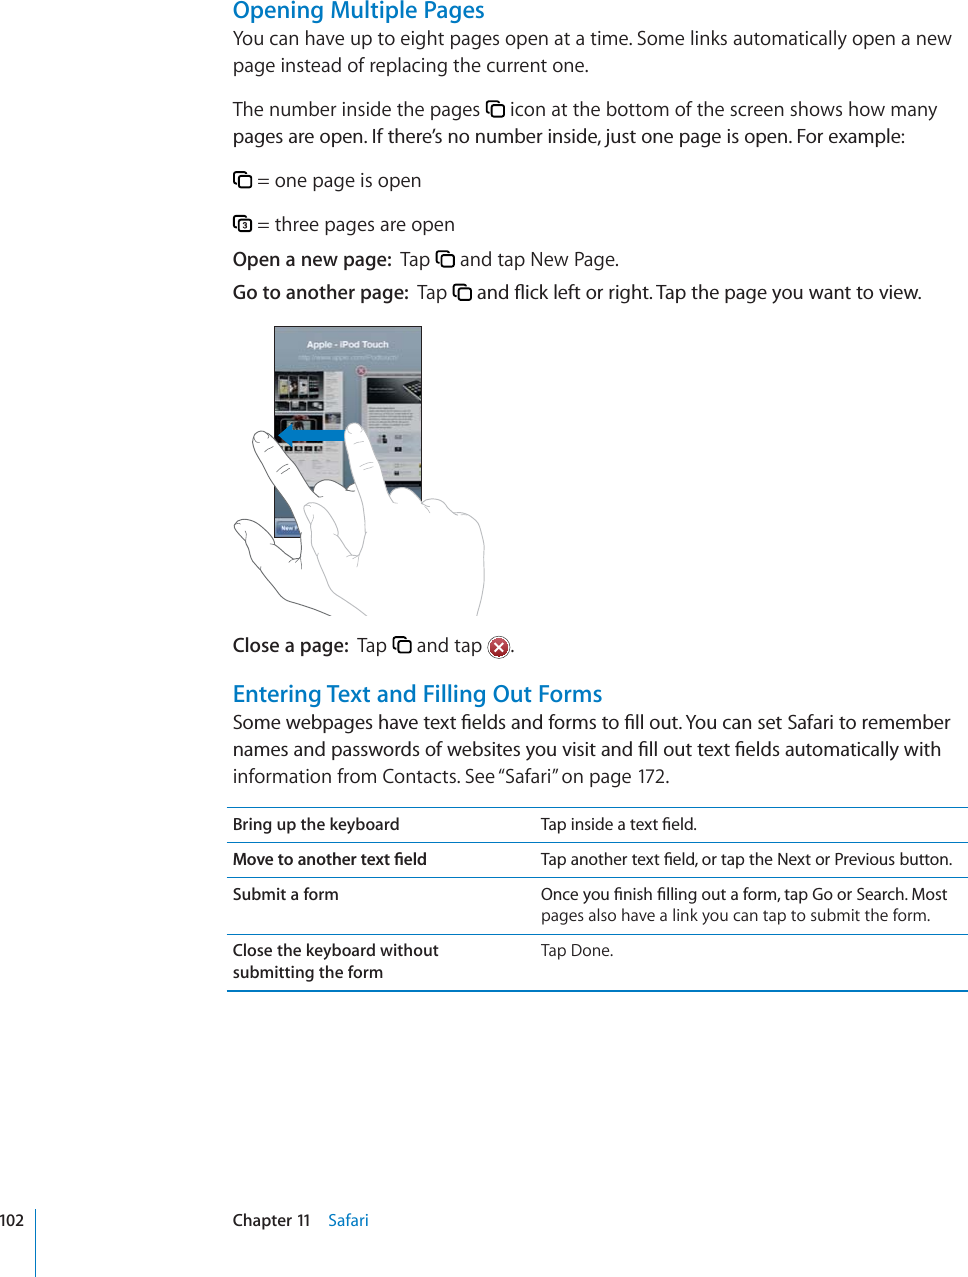
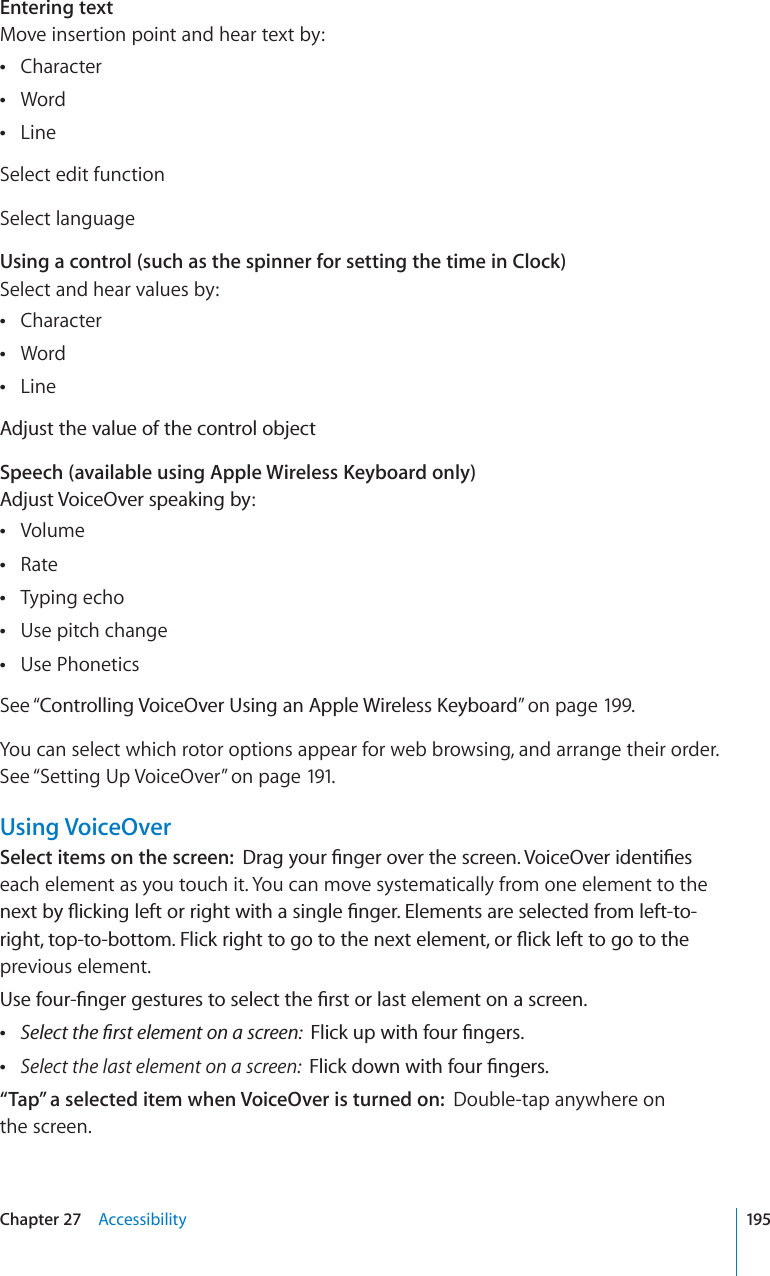
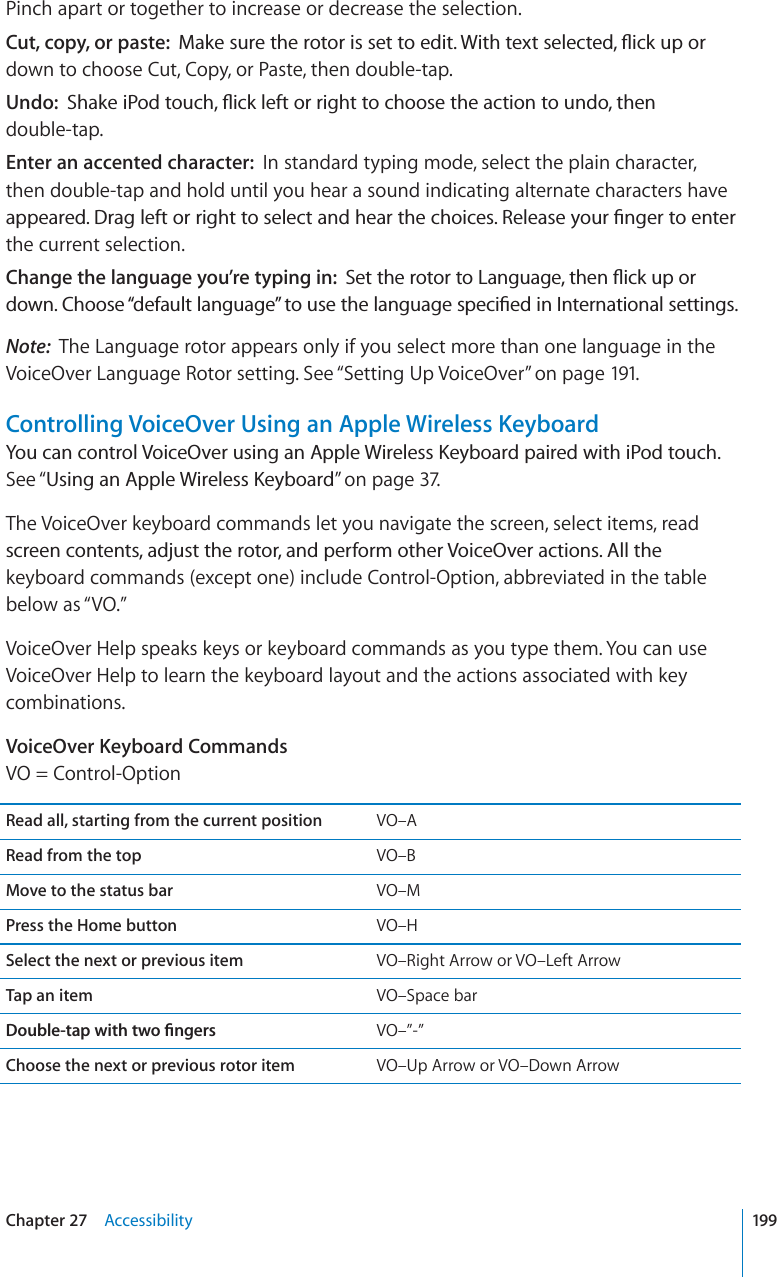
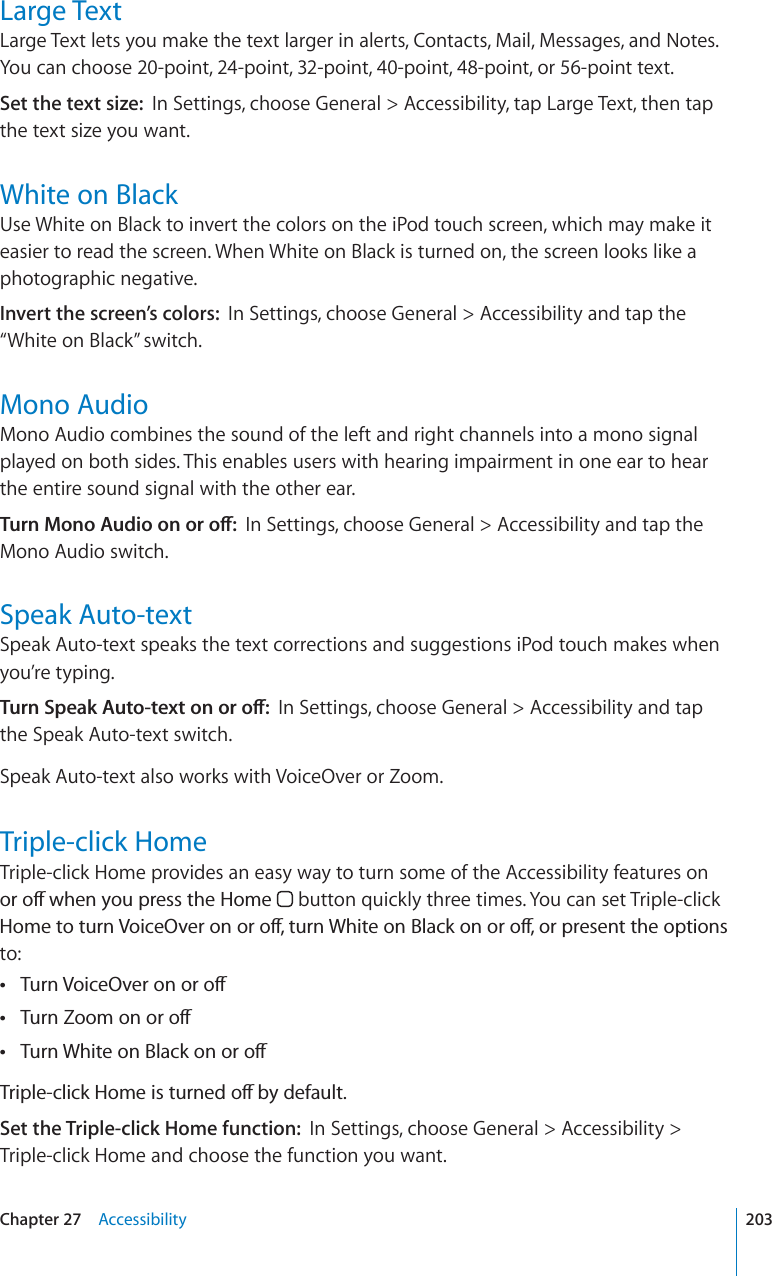
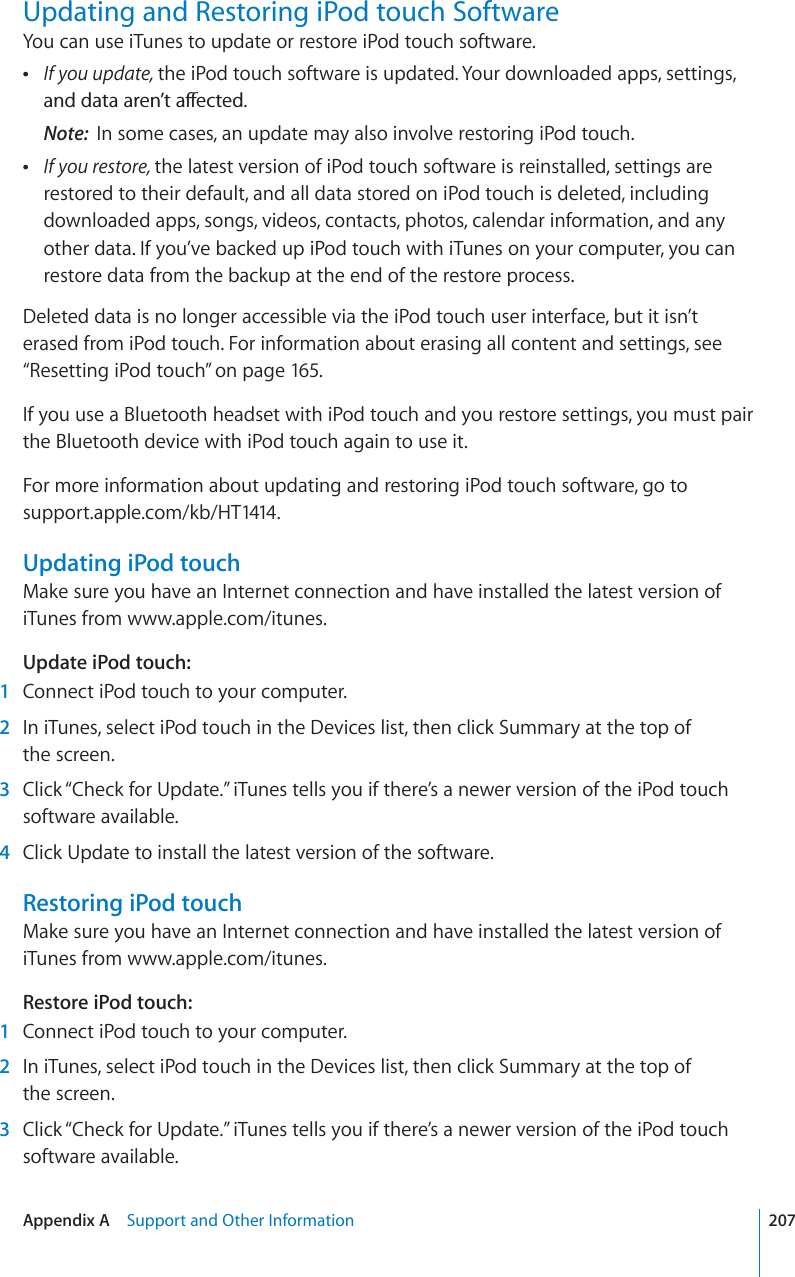
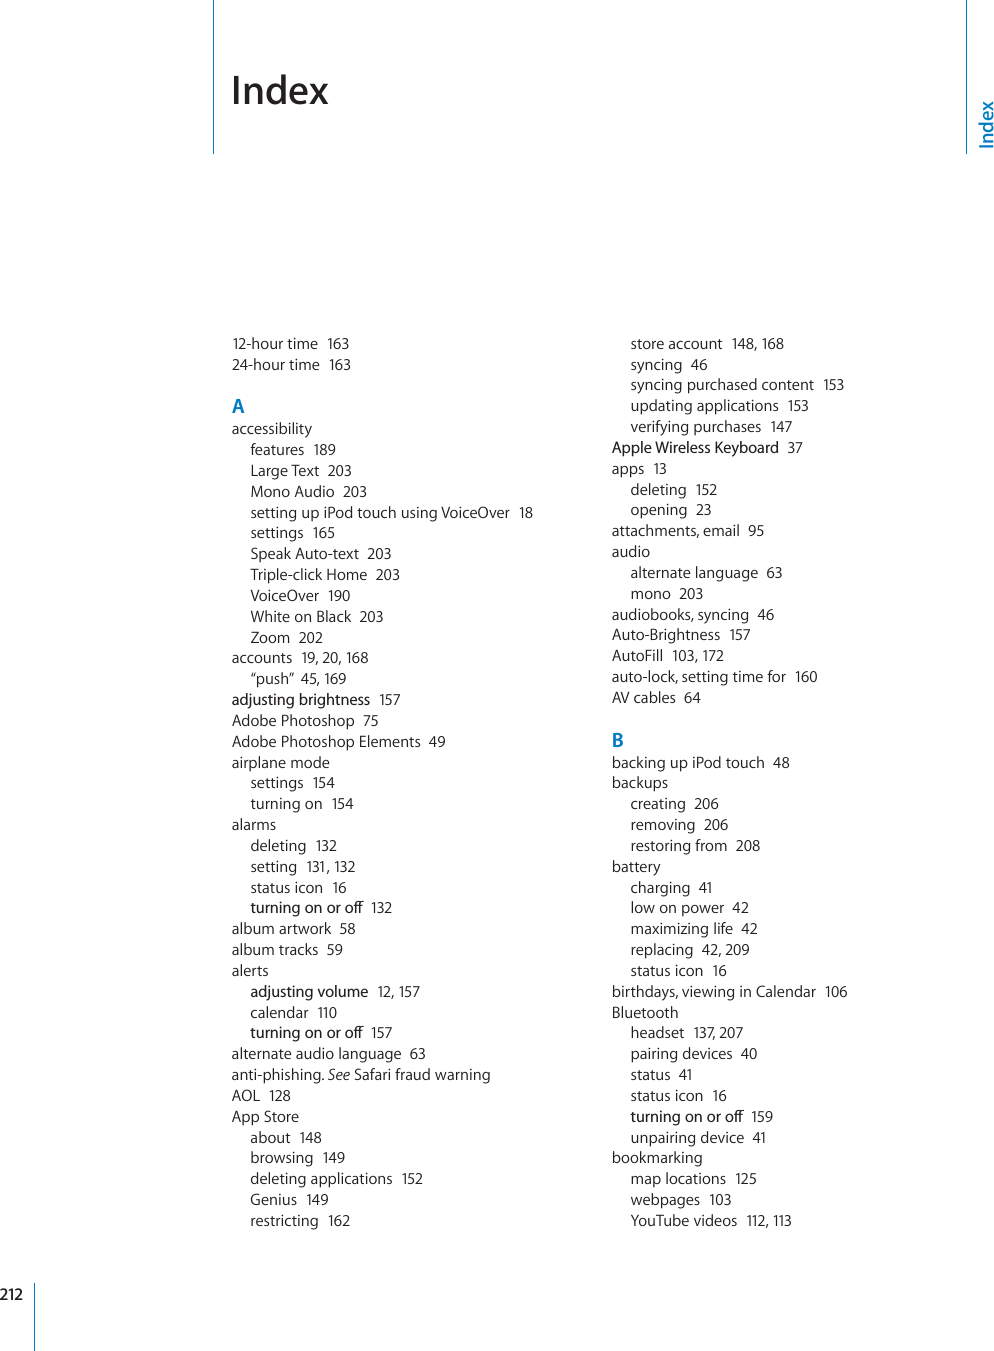
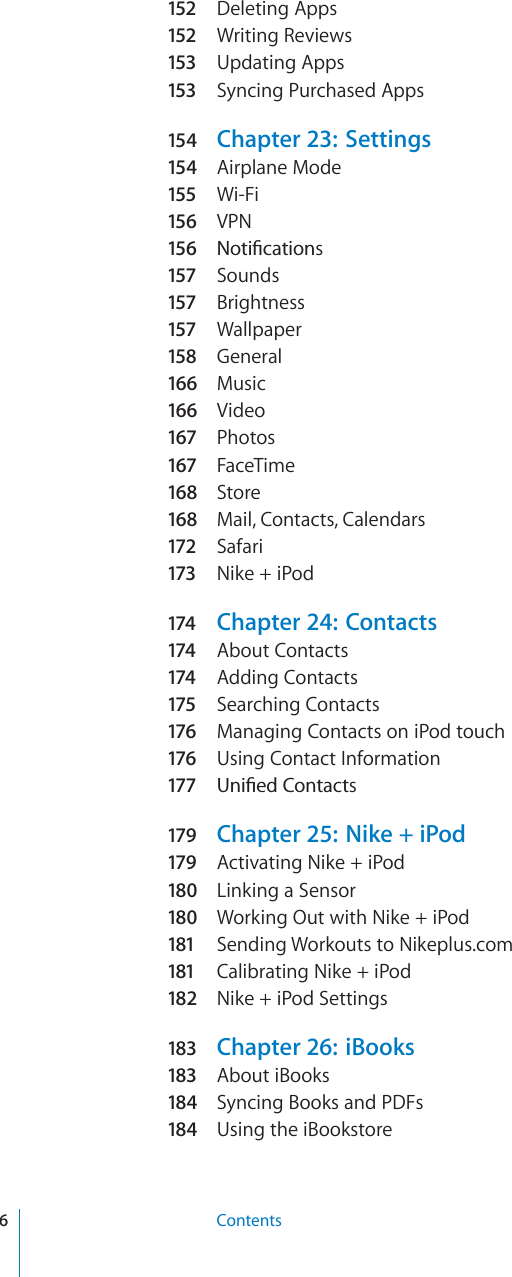
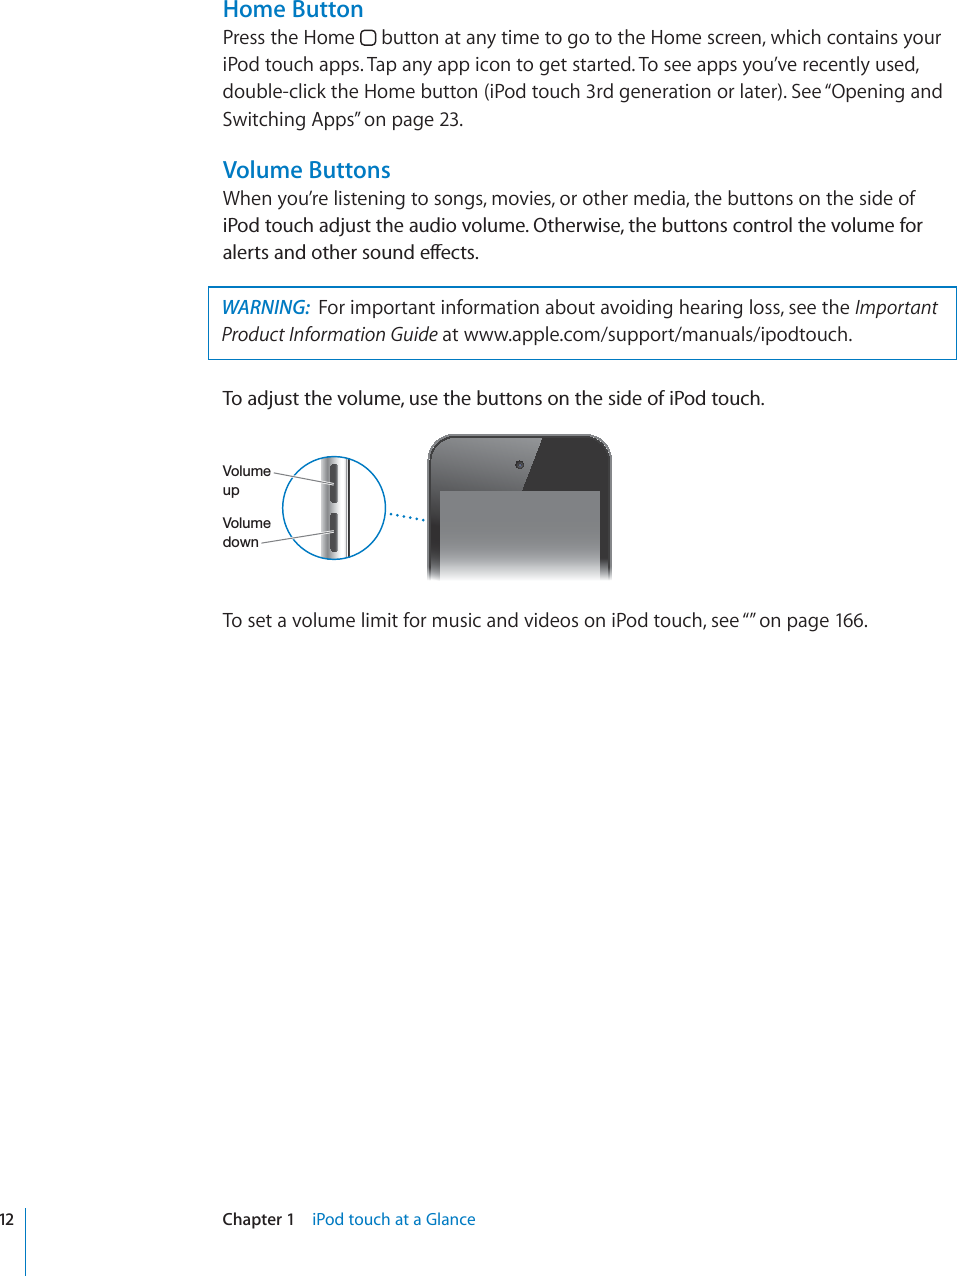
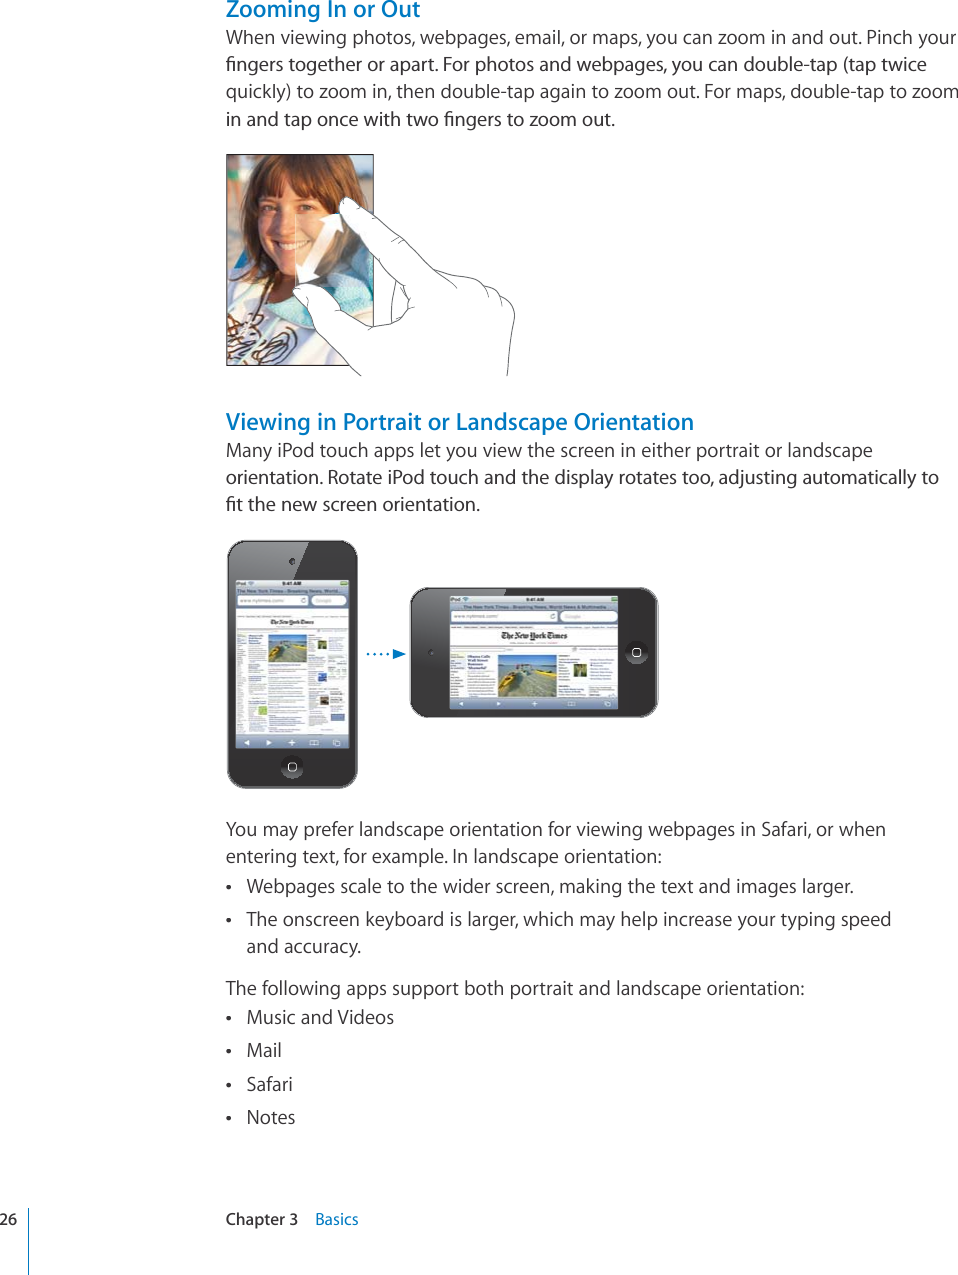
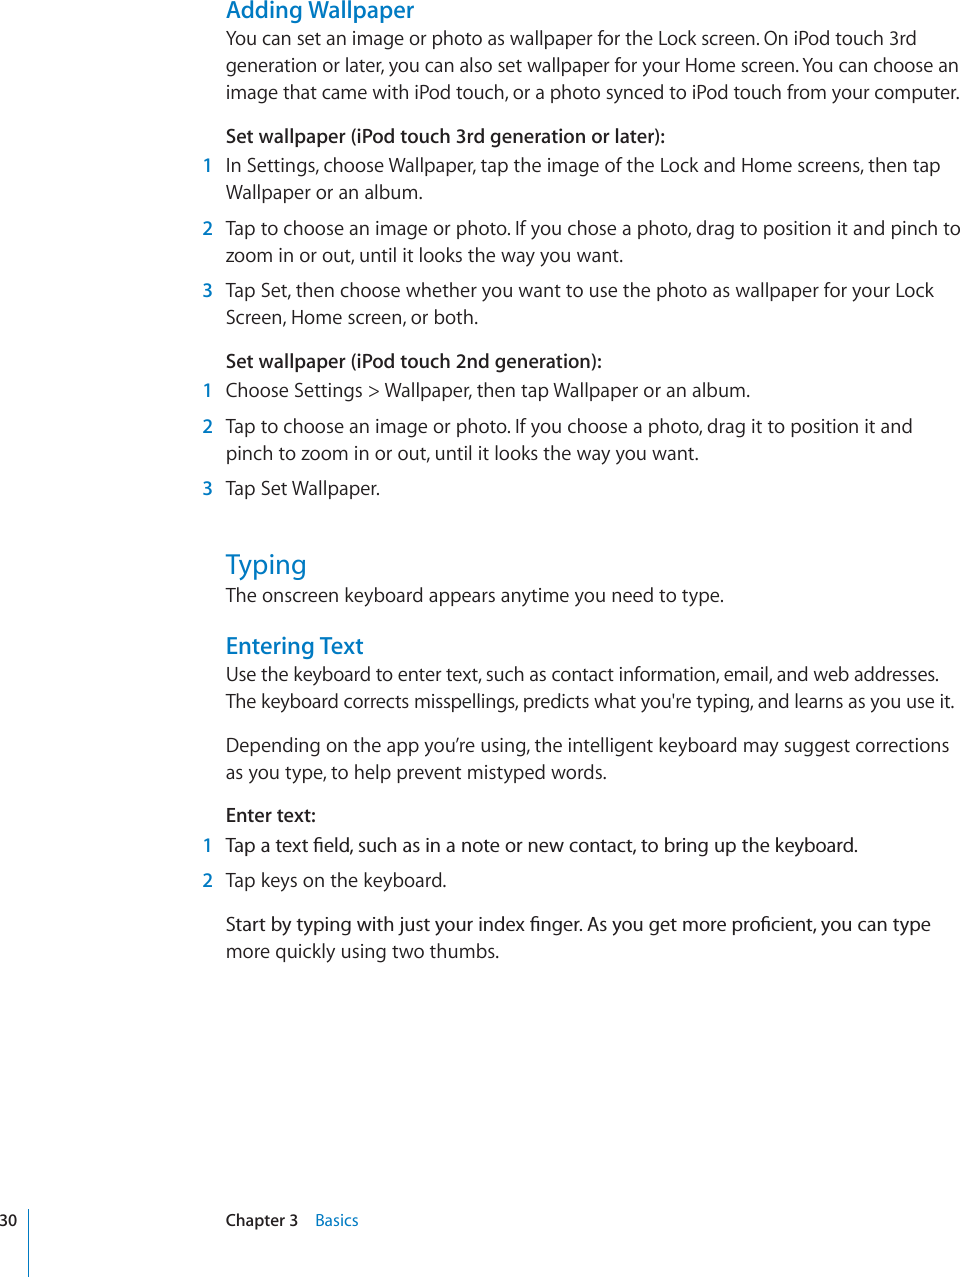
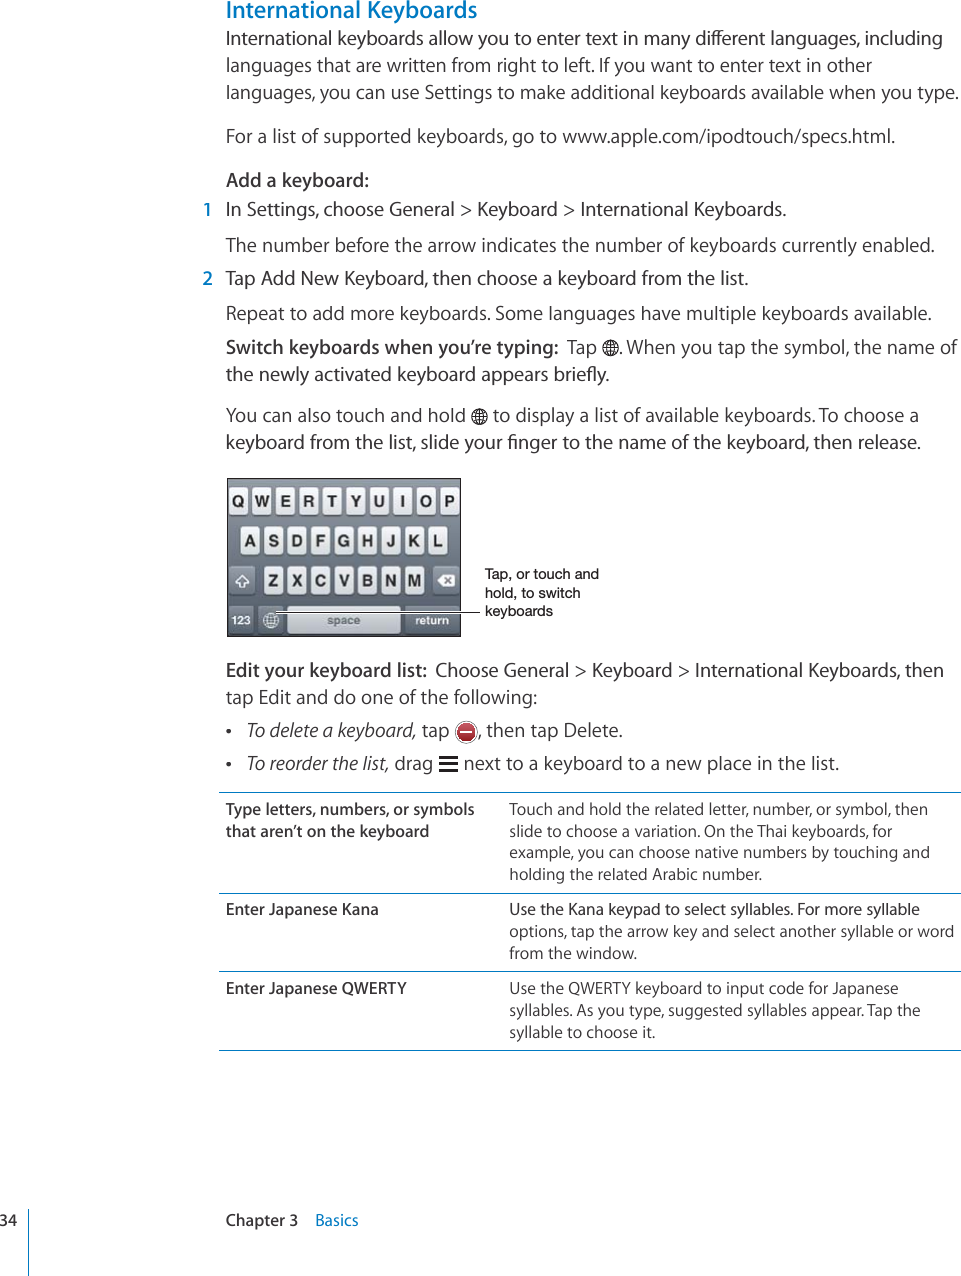
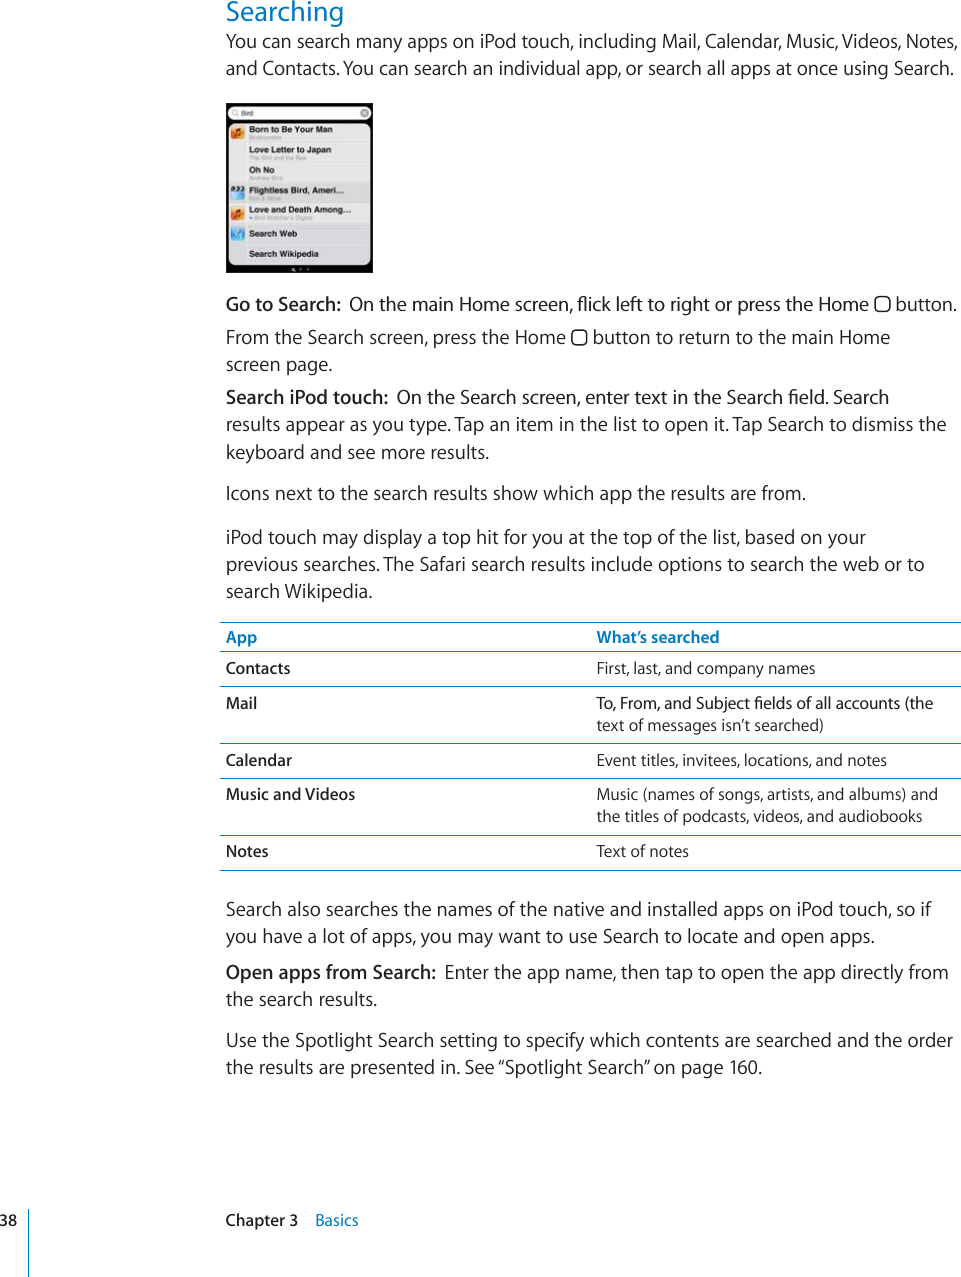
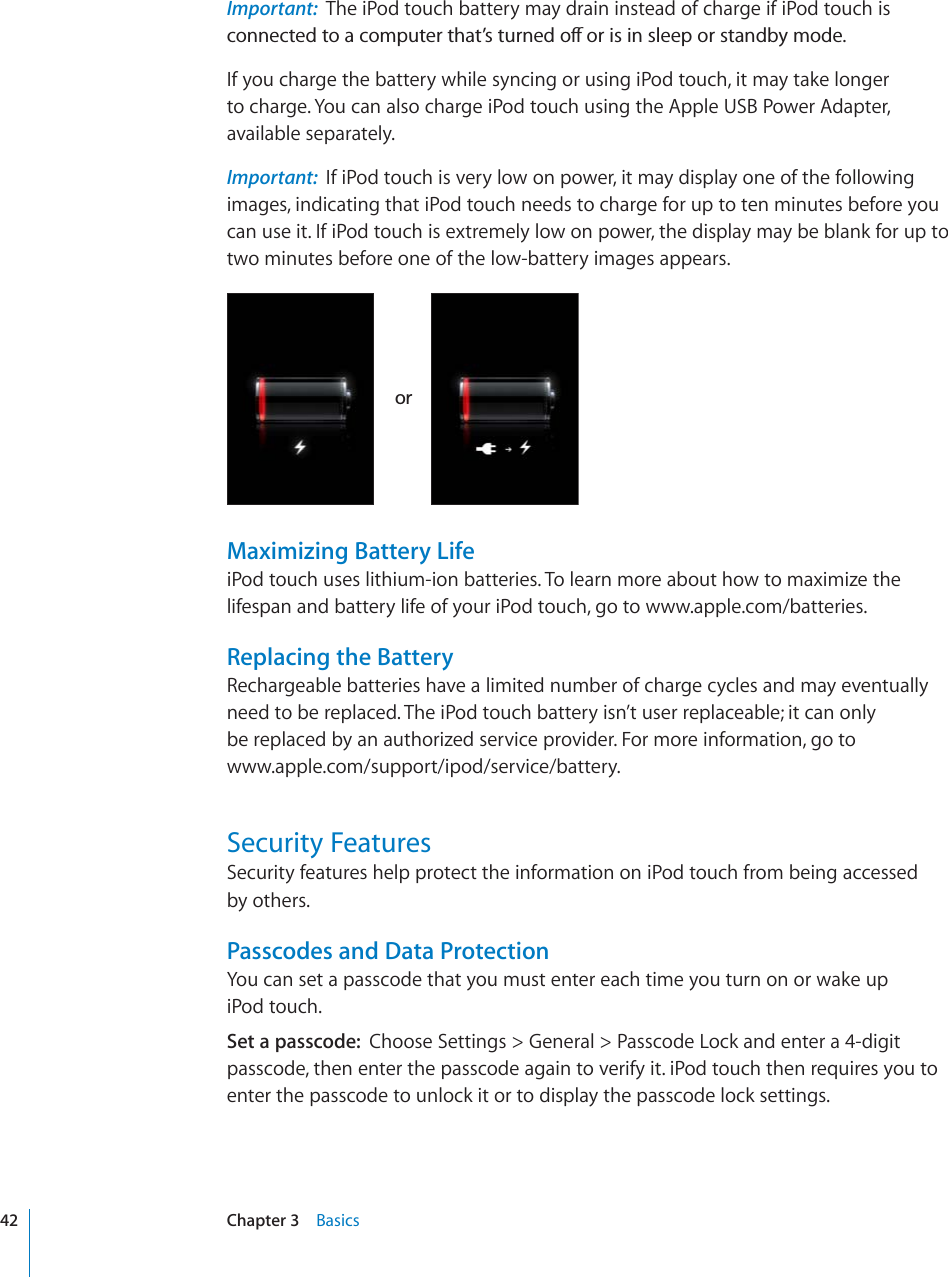
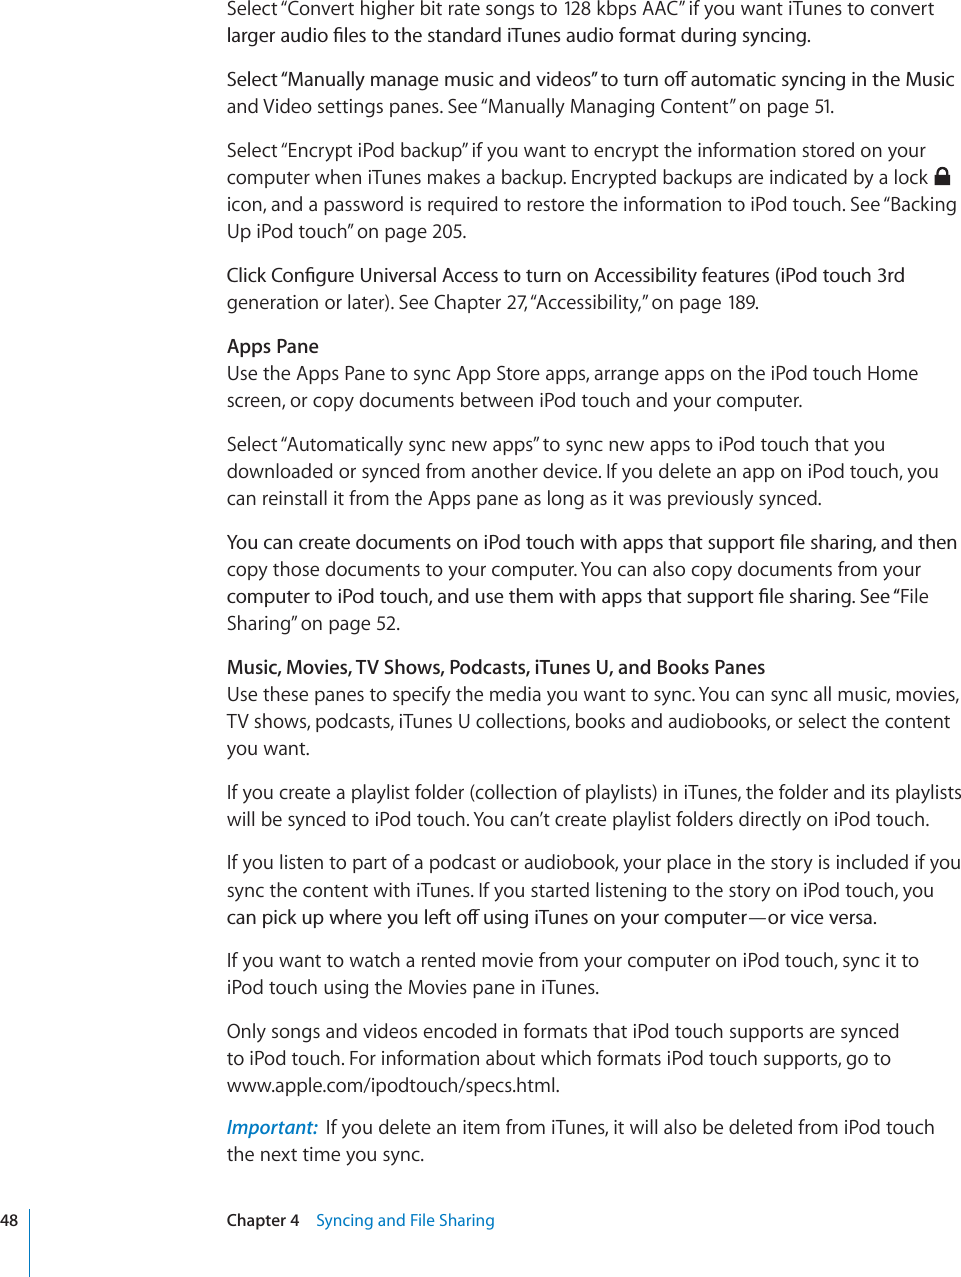
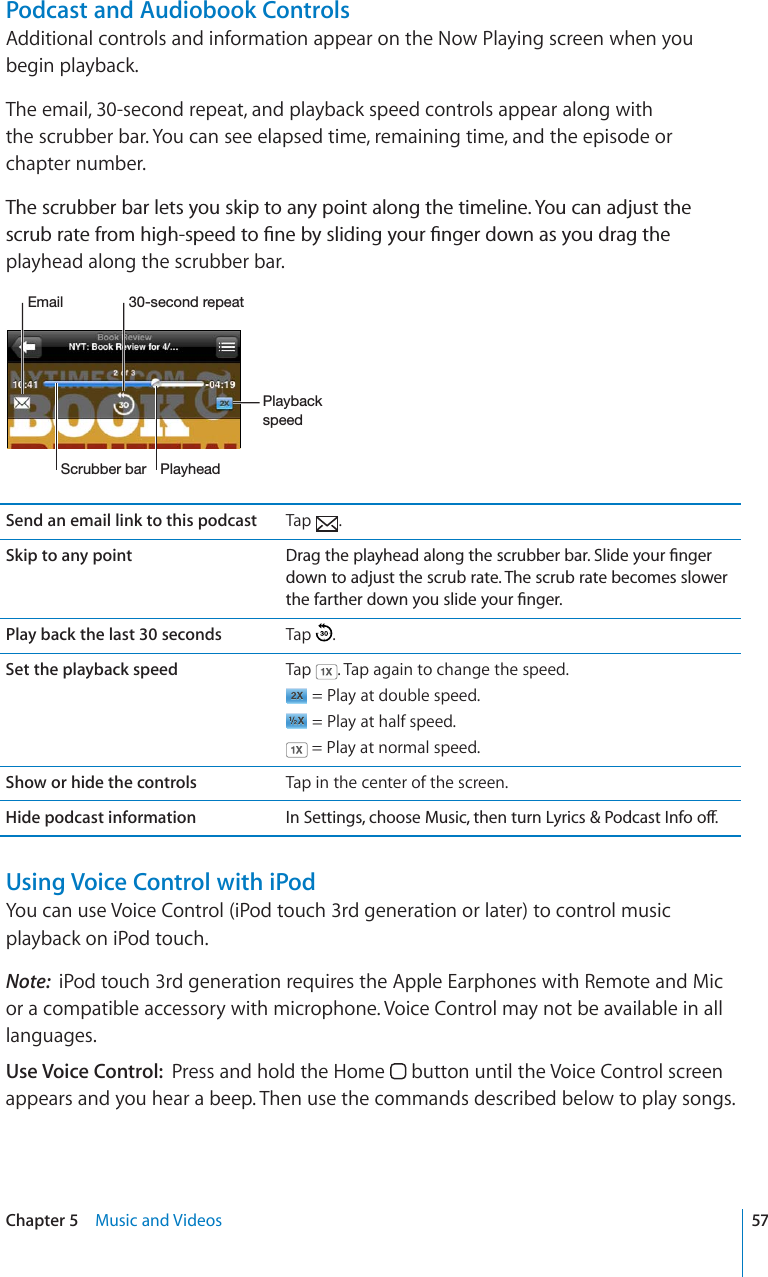
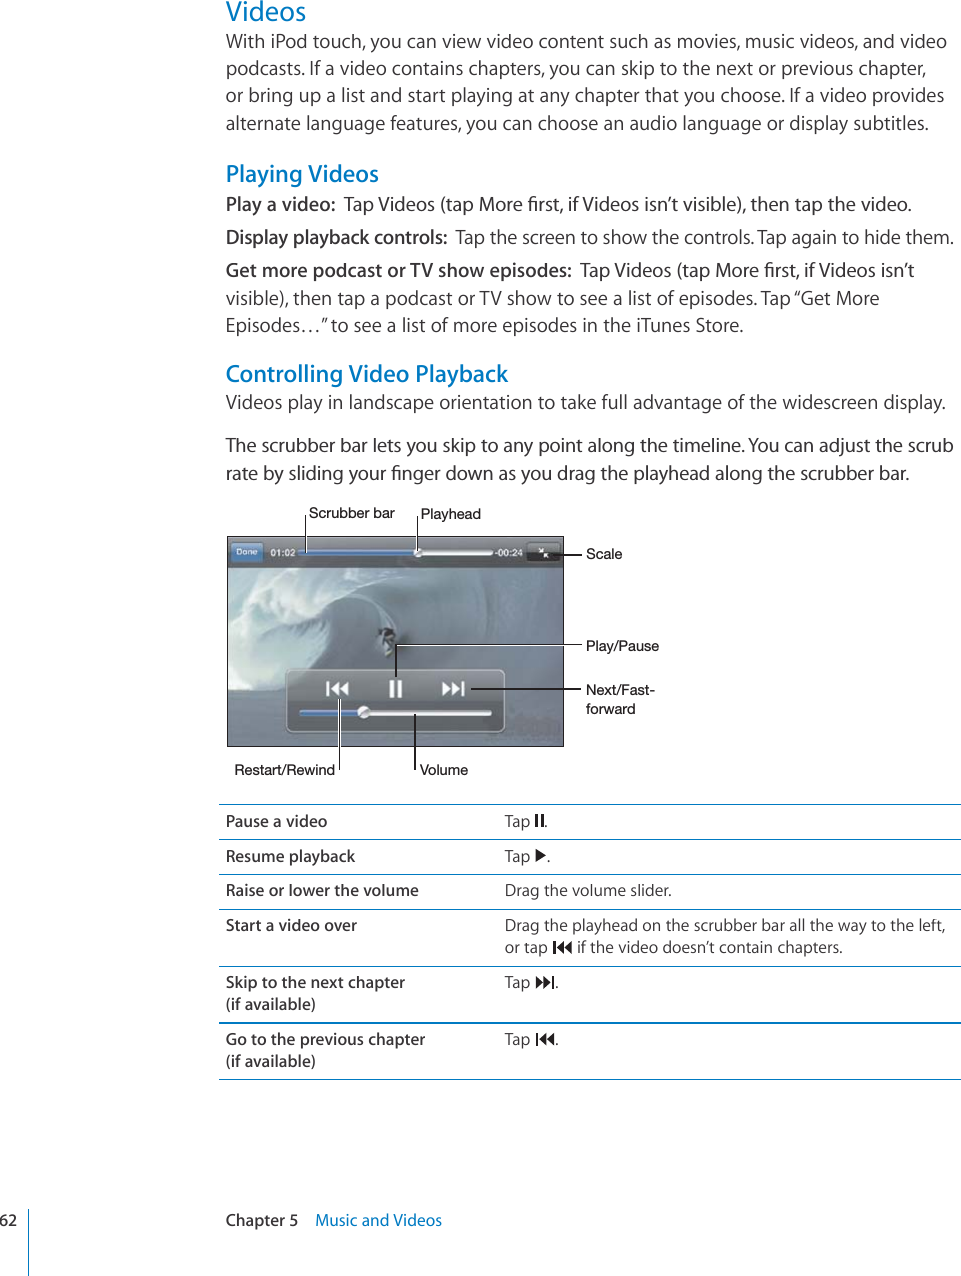
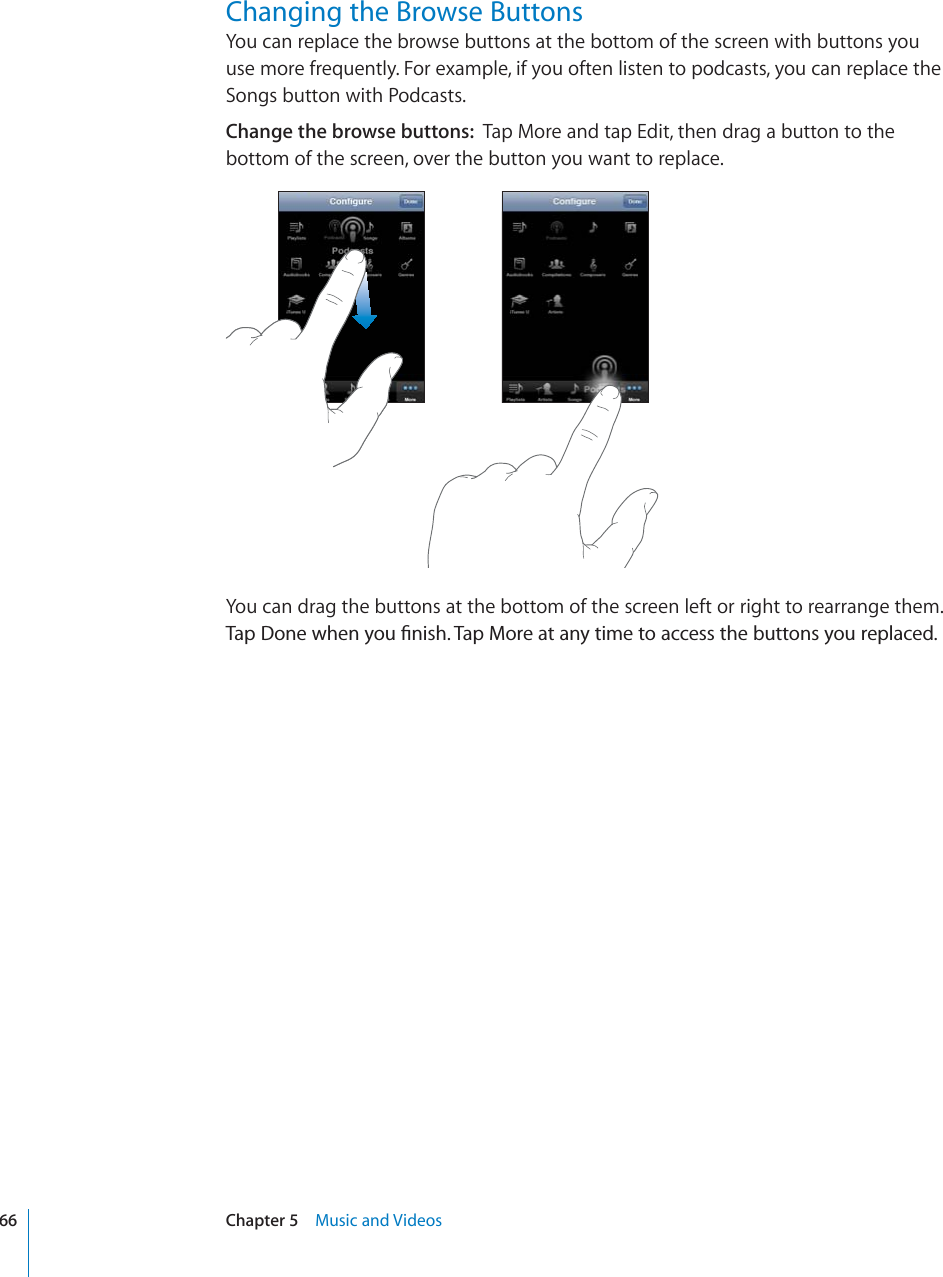
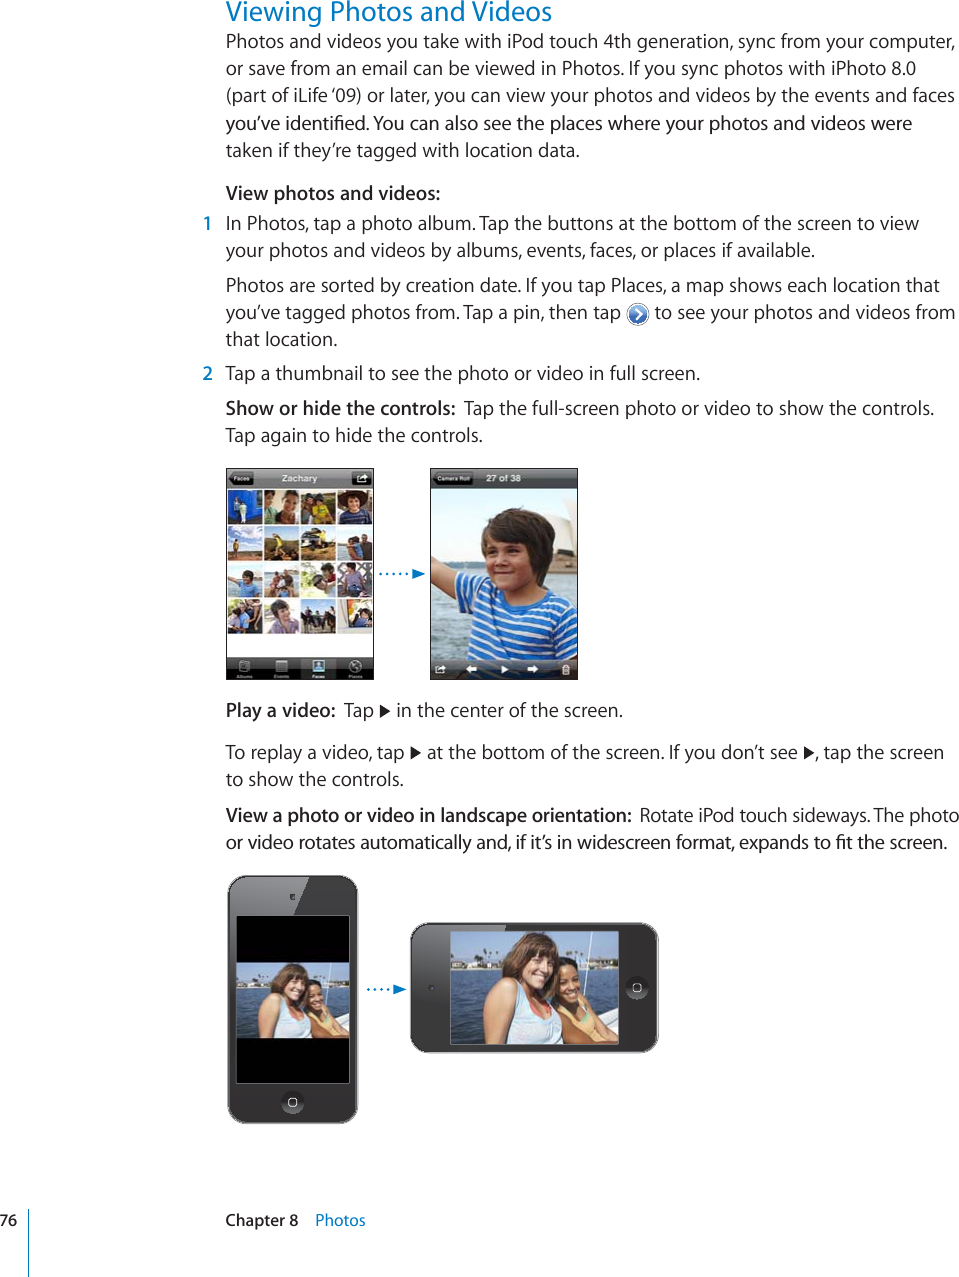
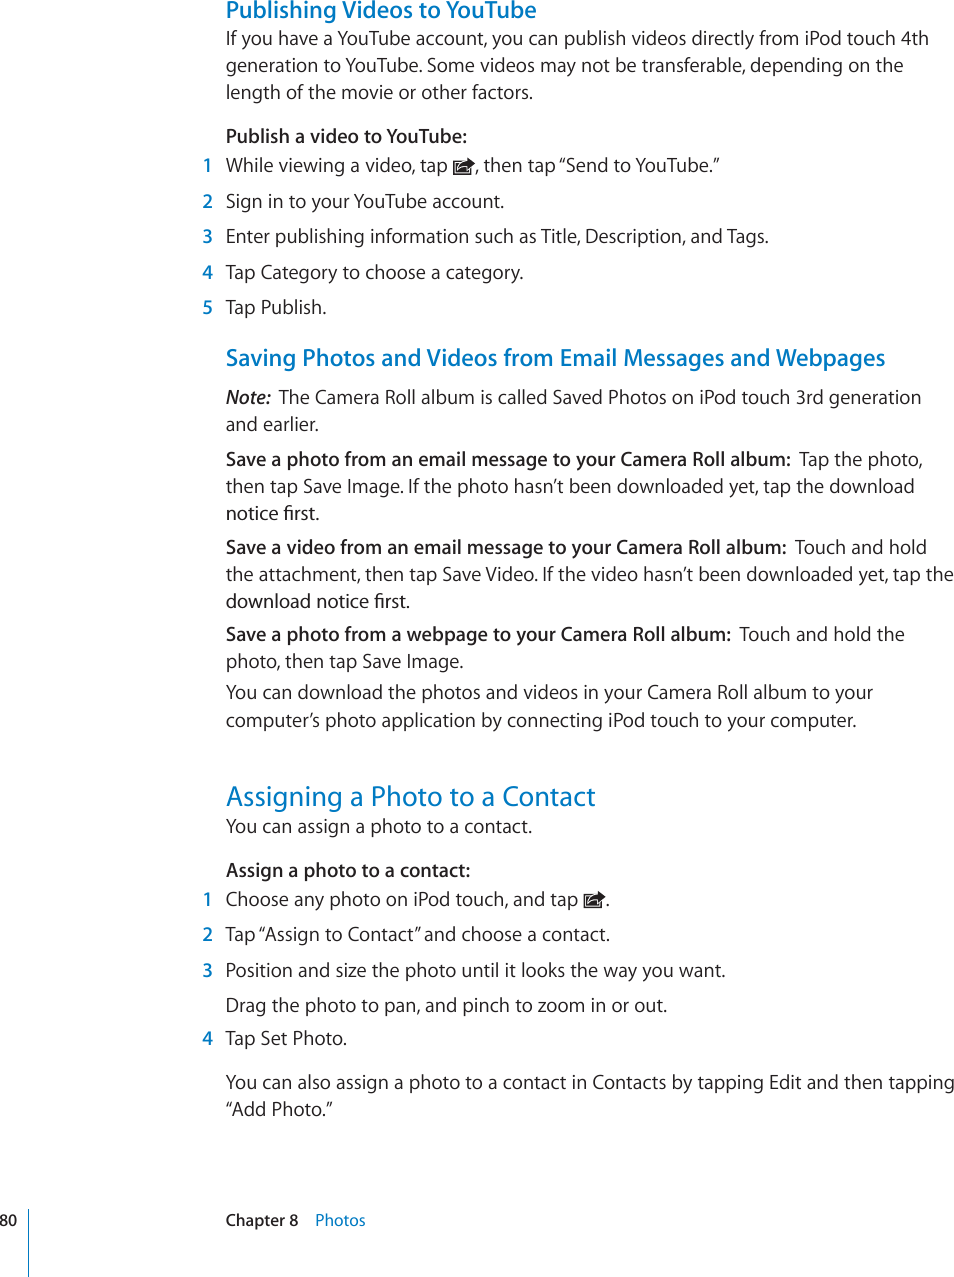
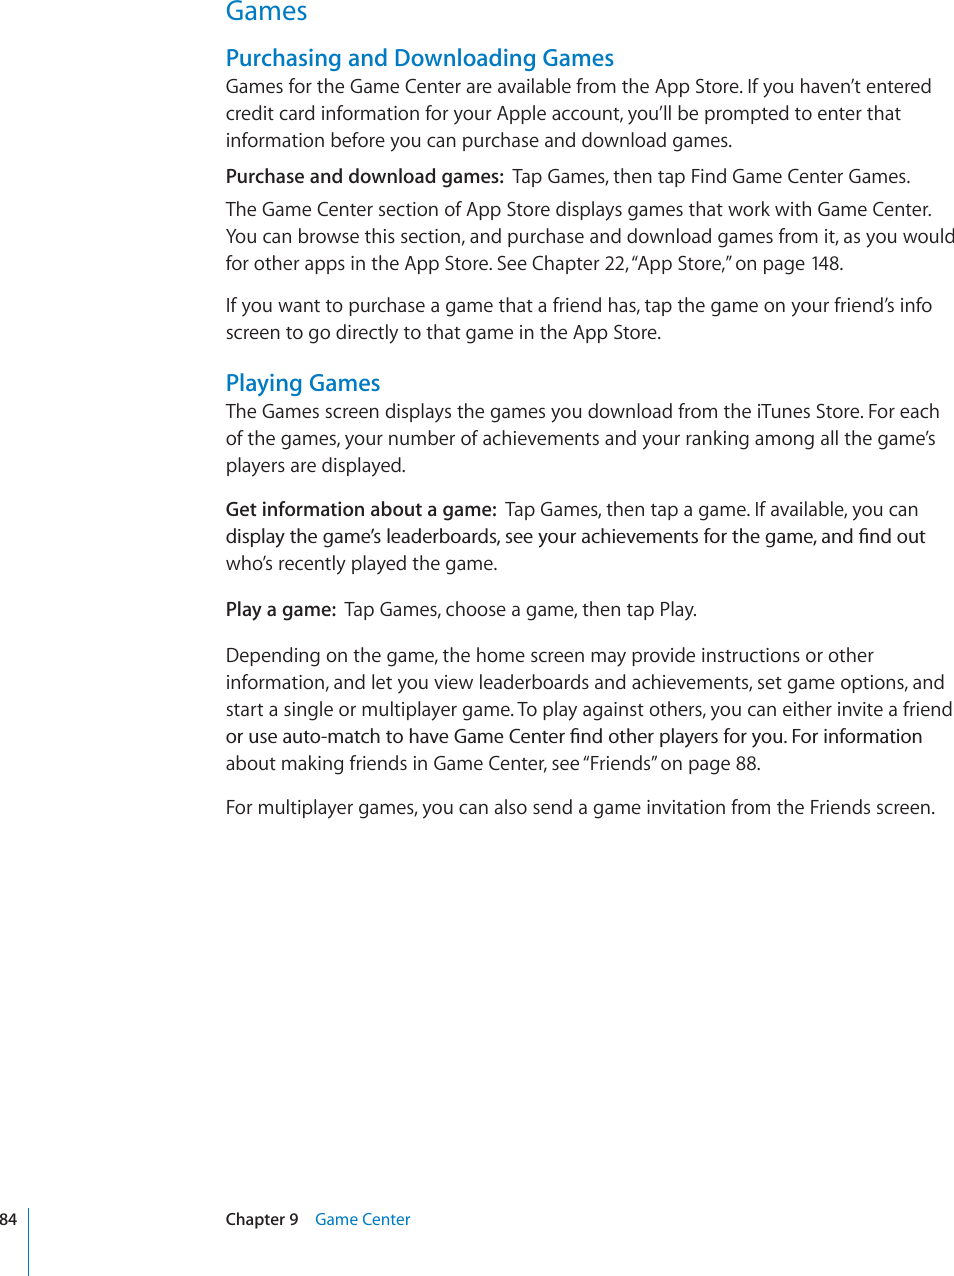
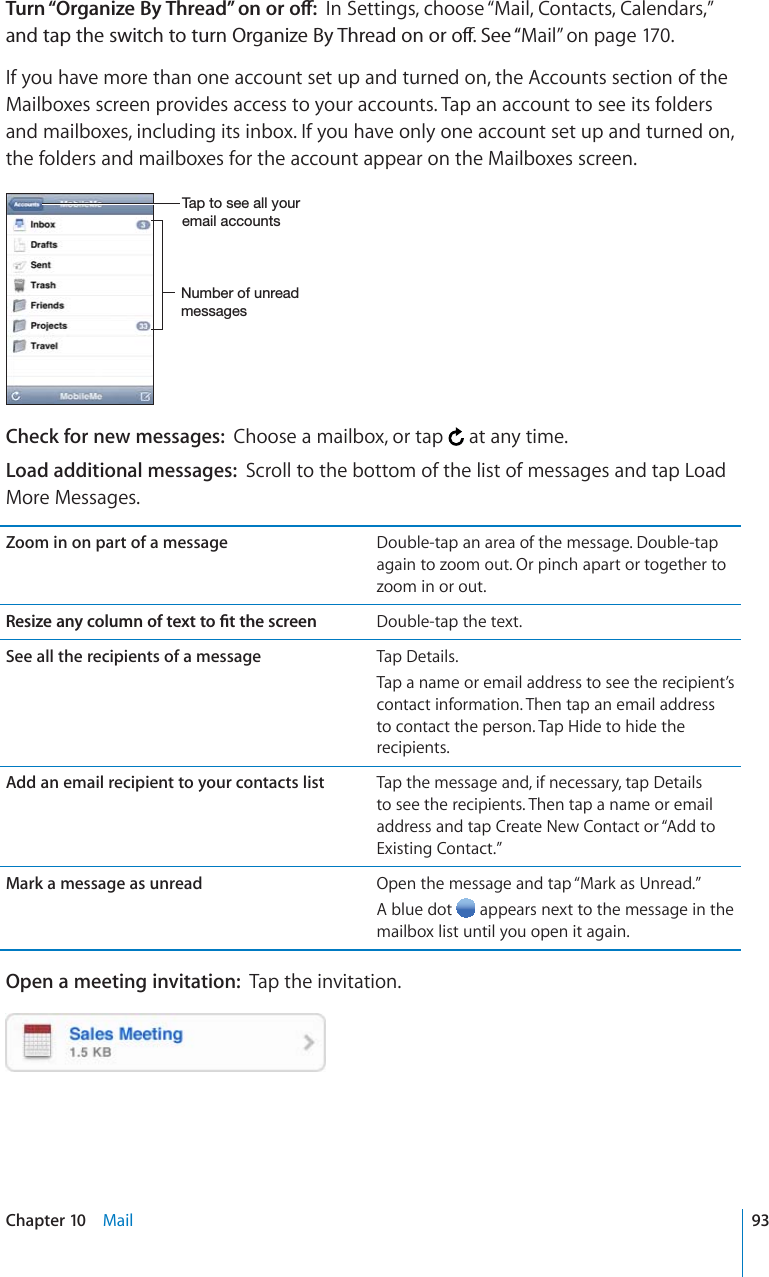
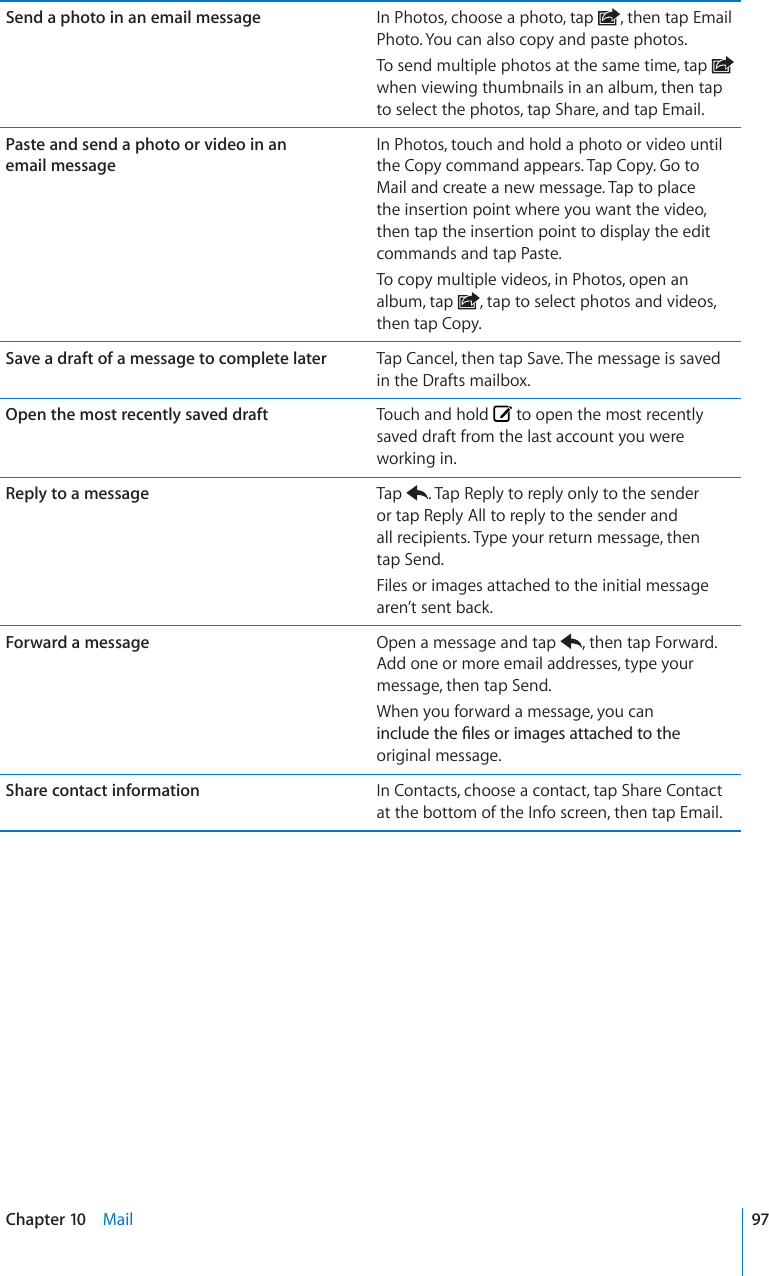
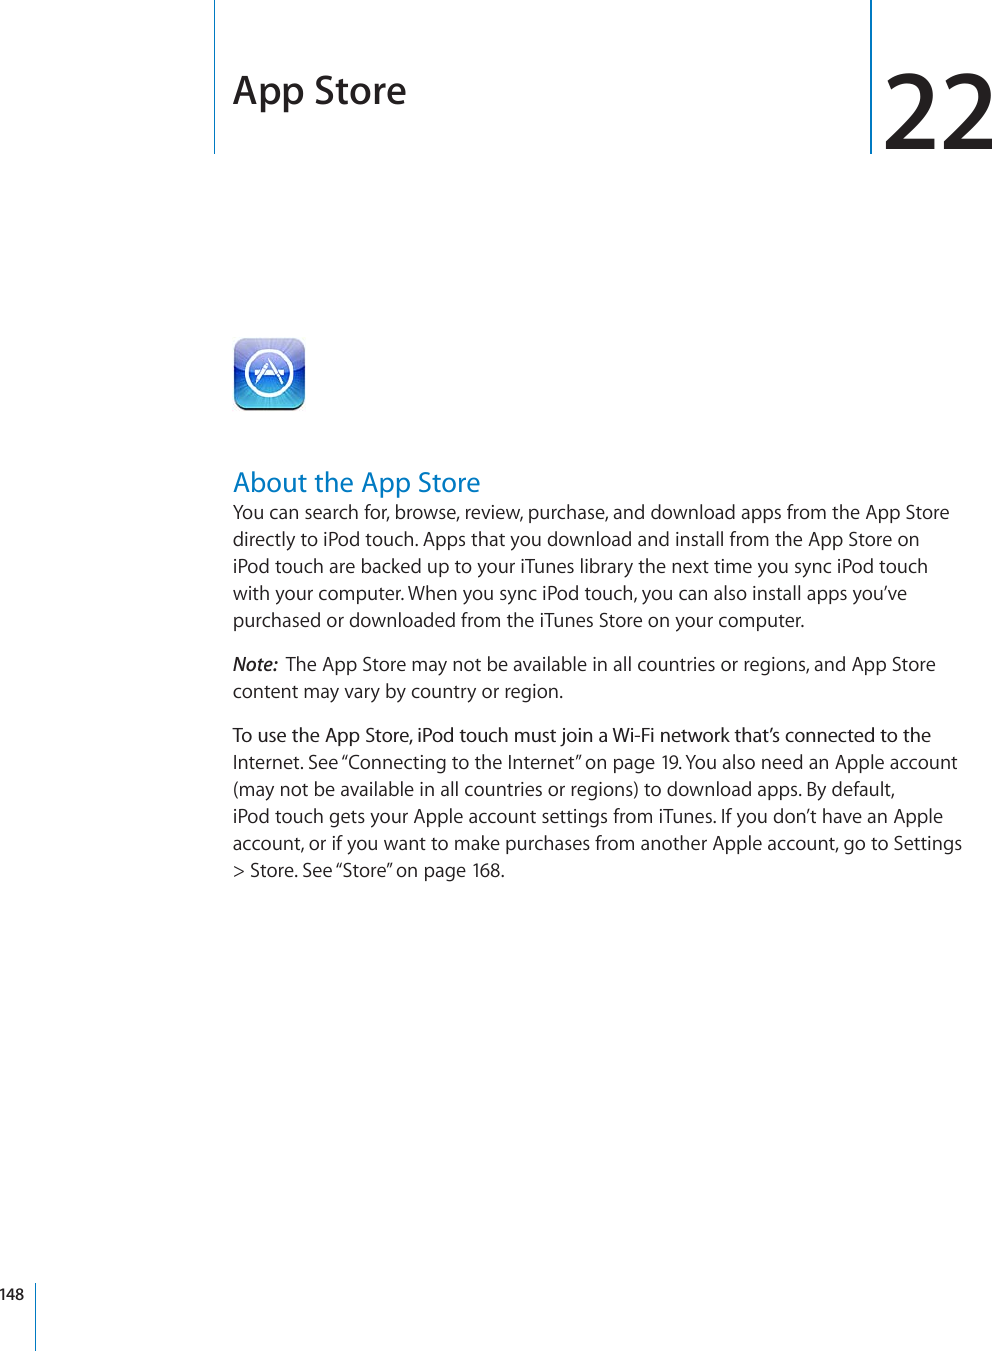
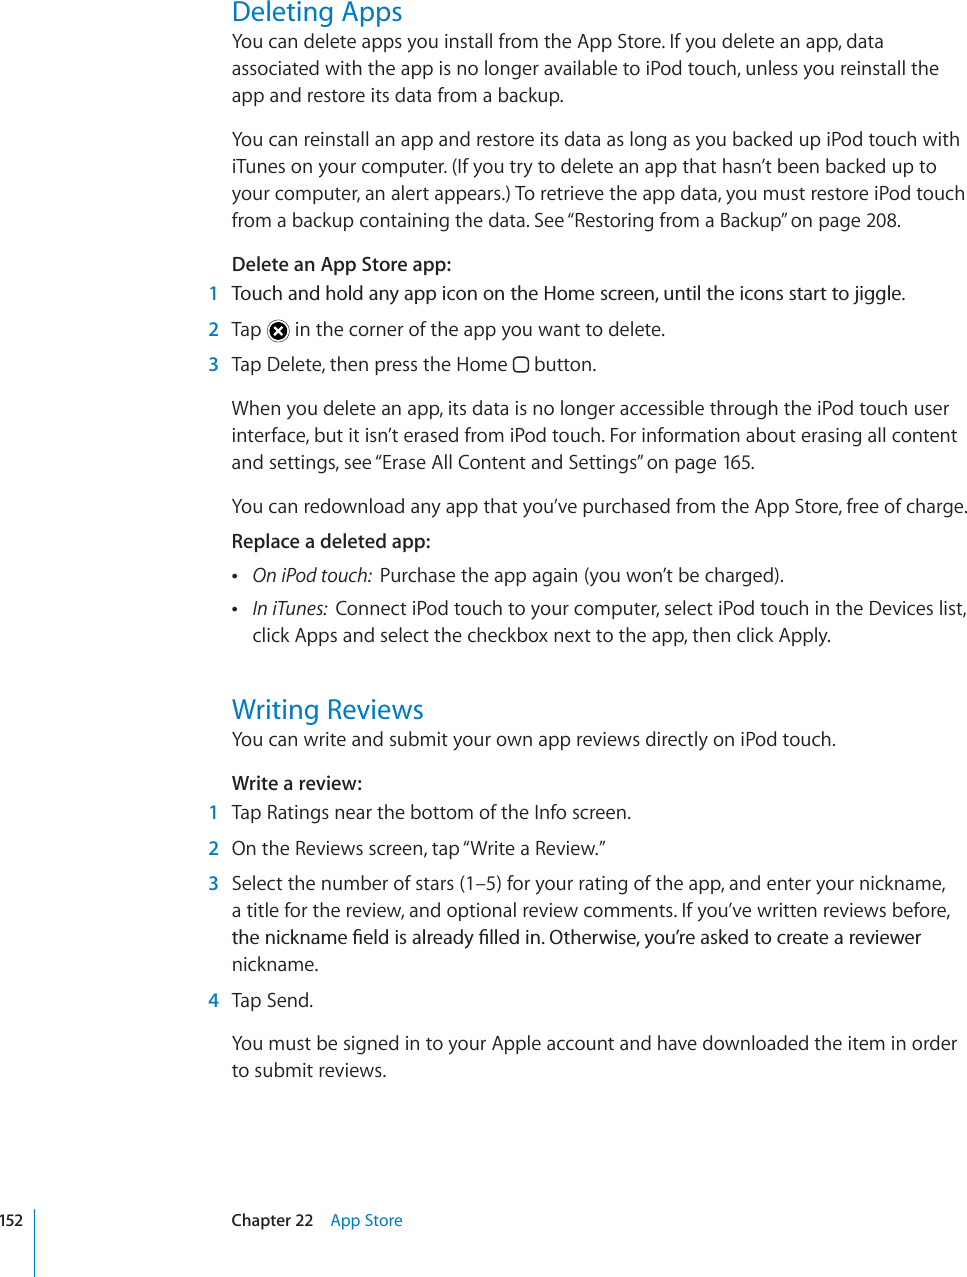
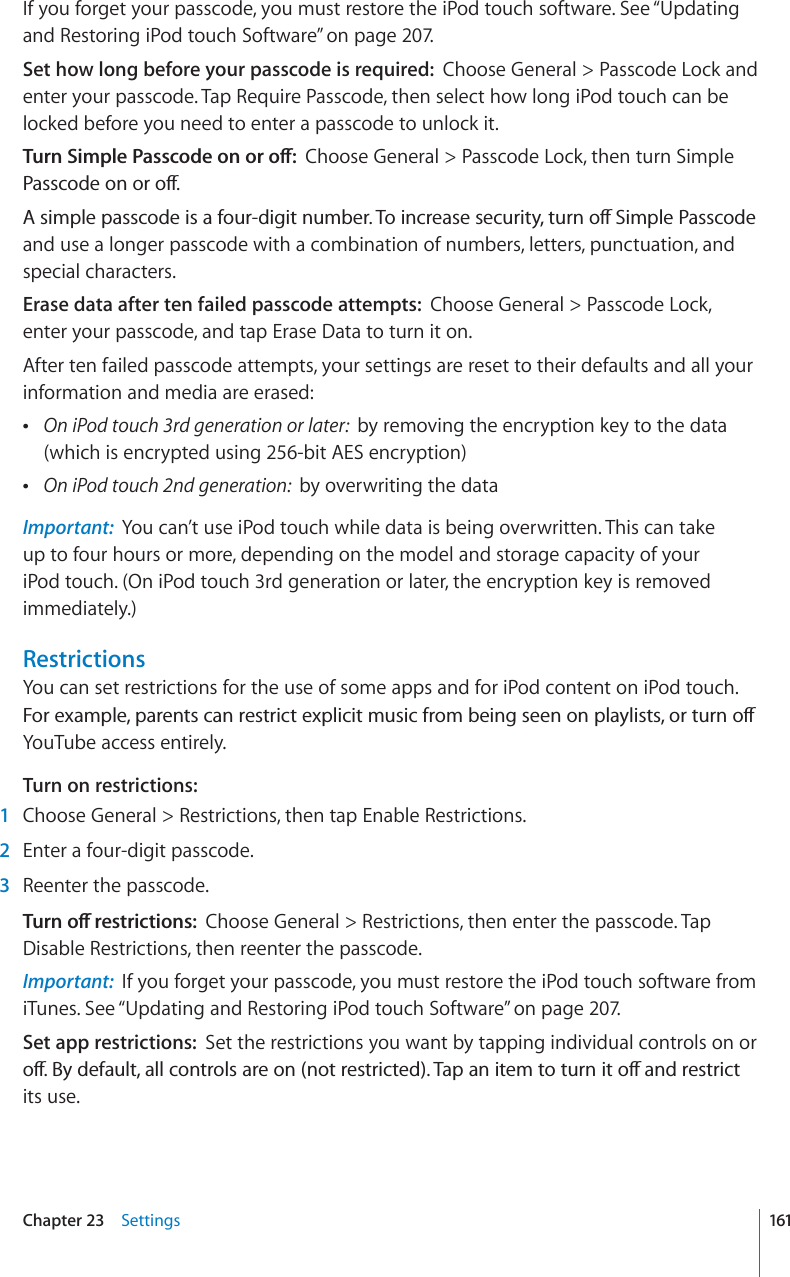
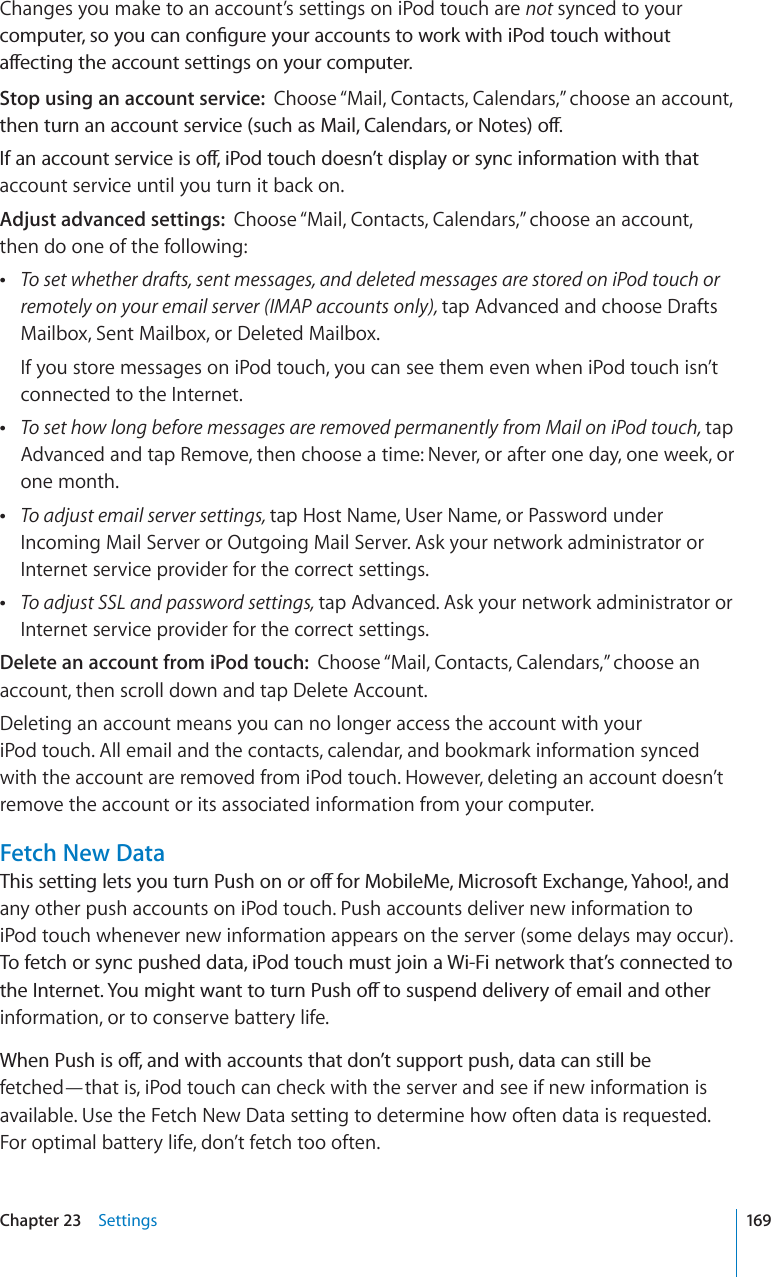
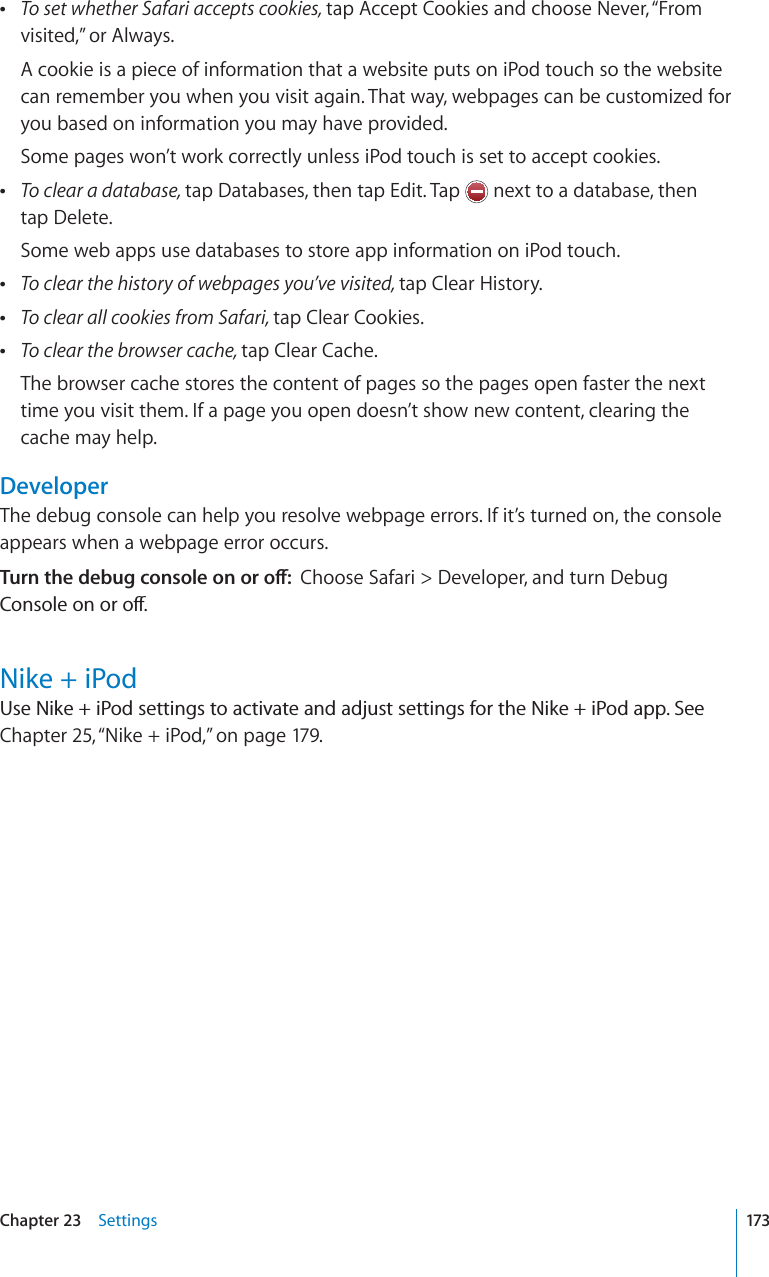
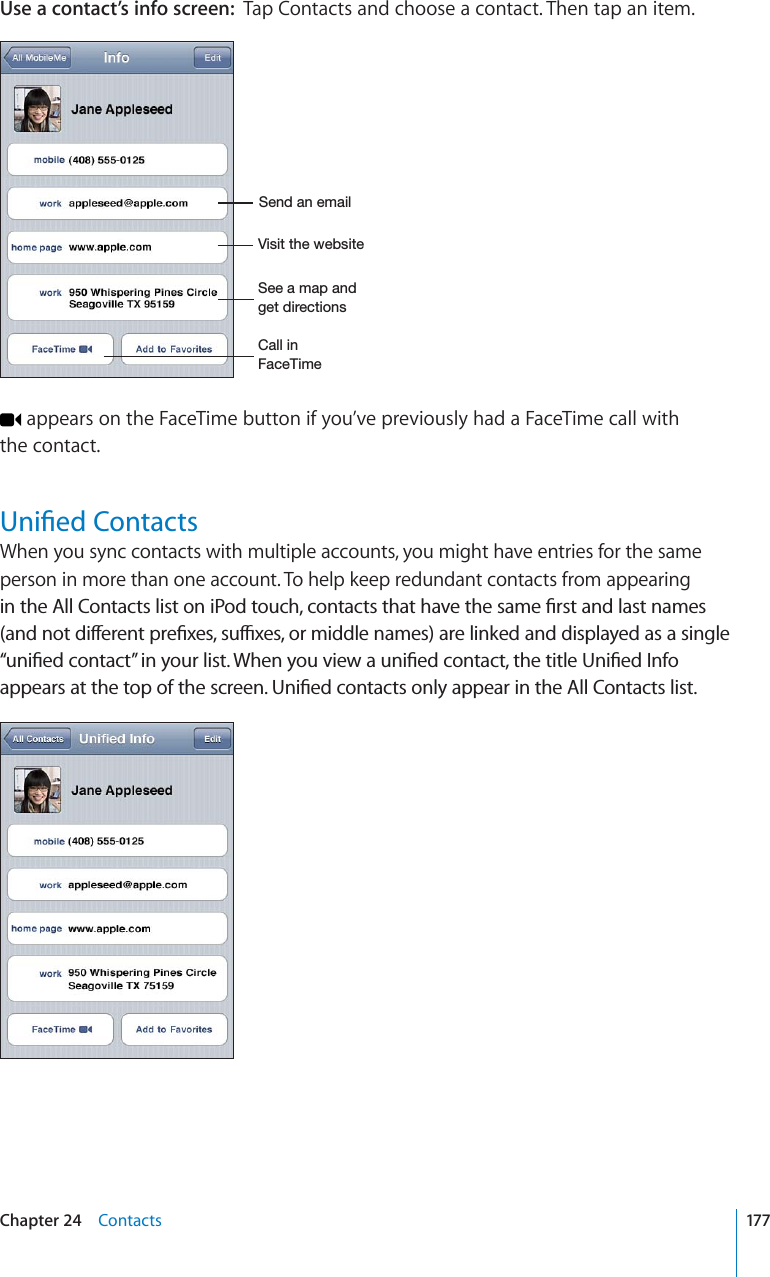
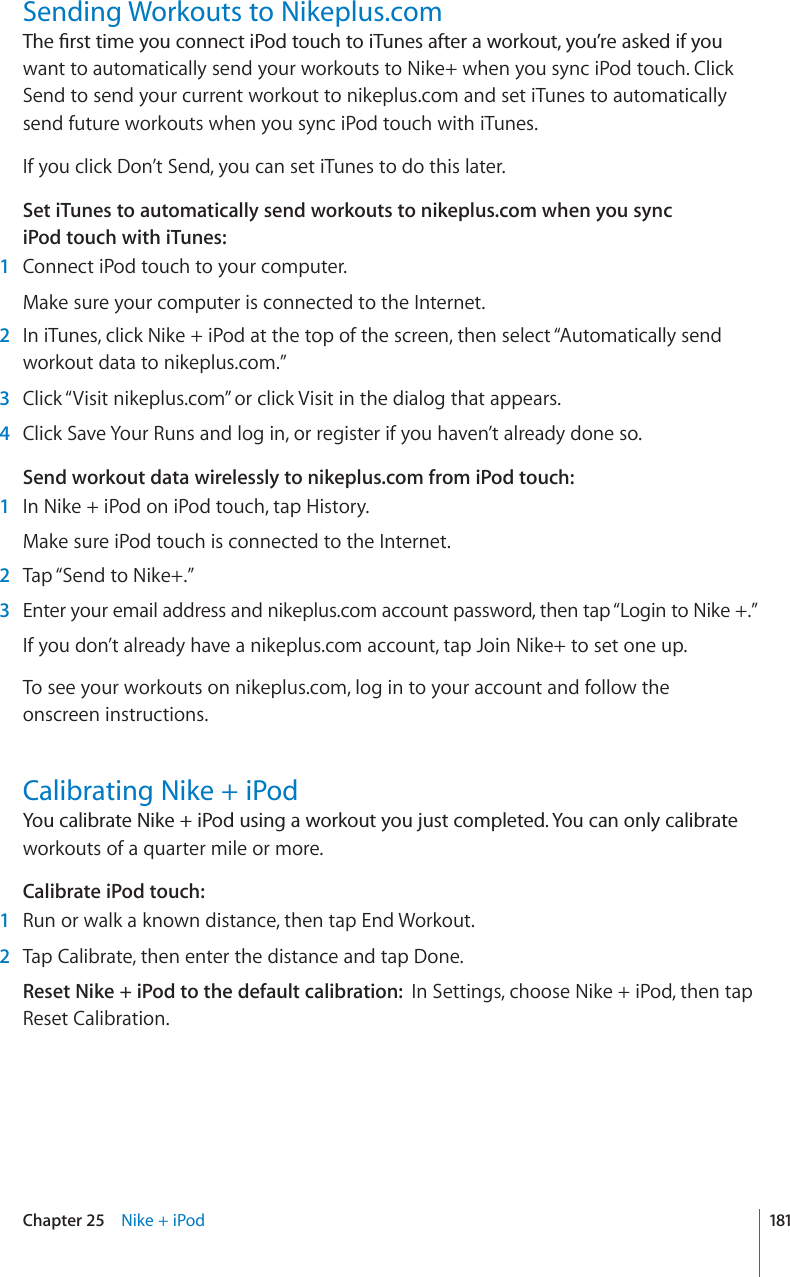
![In Settings on iPod touch, turn on Calendars in your MobileMe, Microsoft Exchange, Google, or Yahoo! accounts to sync your calendar information over the air, or set up a CalDAV account if your company or organization supports it. See “Adding Mail, Contacts, and Calendar Accounts” on page 19.6QU[PEECNGPFCTUK2QFVQWEJOWUVLQKPC9K(KPGVYQTMVJCV¨UEQPPGEVGFVQVJGInternet. See “Connecting to the Internet” on page 19.Viewing Your CalendarsYou can view a single calendar, selected calendars, or all calendars at once.Select calendars to view: Tap Calendars, then tap to select the calendars you want to view. To quickly select or deselect all calendars, tap Show All Calendars or Hide All Calendars. To view your contacts’ birthdays, tap Birthdays at the bottom of the screen. Tap Done to view the selected calendars.The events for all selected calendars appear in a single calendar on iPod touch. You can view your calendar events in a list, by day, or by month. Switch views: Tap List, Day, or Month.List view: All your appointments and events appear in a scrollable list.Day view: Scroll up or down to see the events in a day. Tap or to see the previous or next day’s events.Month view: Tap a day to see its events. Tap or to see the previous or next month.(KKHUL]LU[+H`Z^P[OKV[ZOH]LZJOLK\SLKL]LU[Z.V[V[VKH` :^P[JO]PL^Z9LZWVUK[VJHSLUKHYPU]P[H[PVU,]LU[ZMVYZLSLJ[LKKH`See the details of an event: Tap the event.106 Chapter 12 Calendar](https://usermanual.wiki/Apple/E2407.Full-user-manual/User-Guide-1336214-Page-106.png)
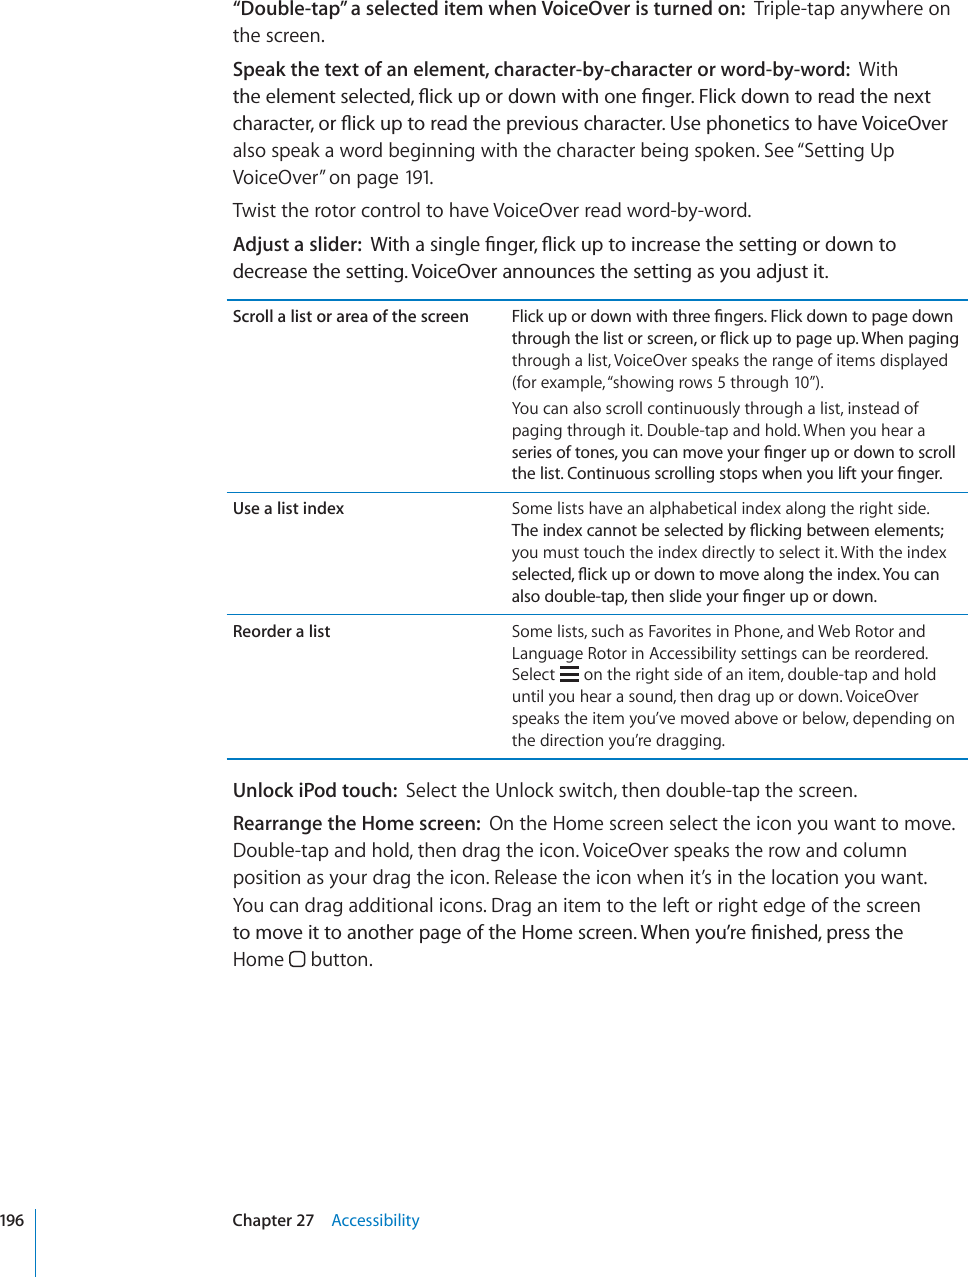
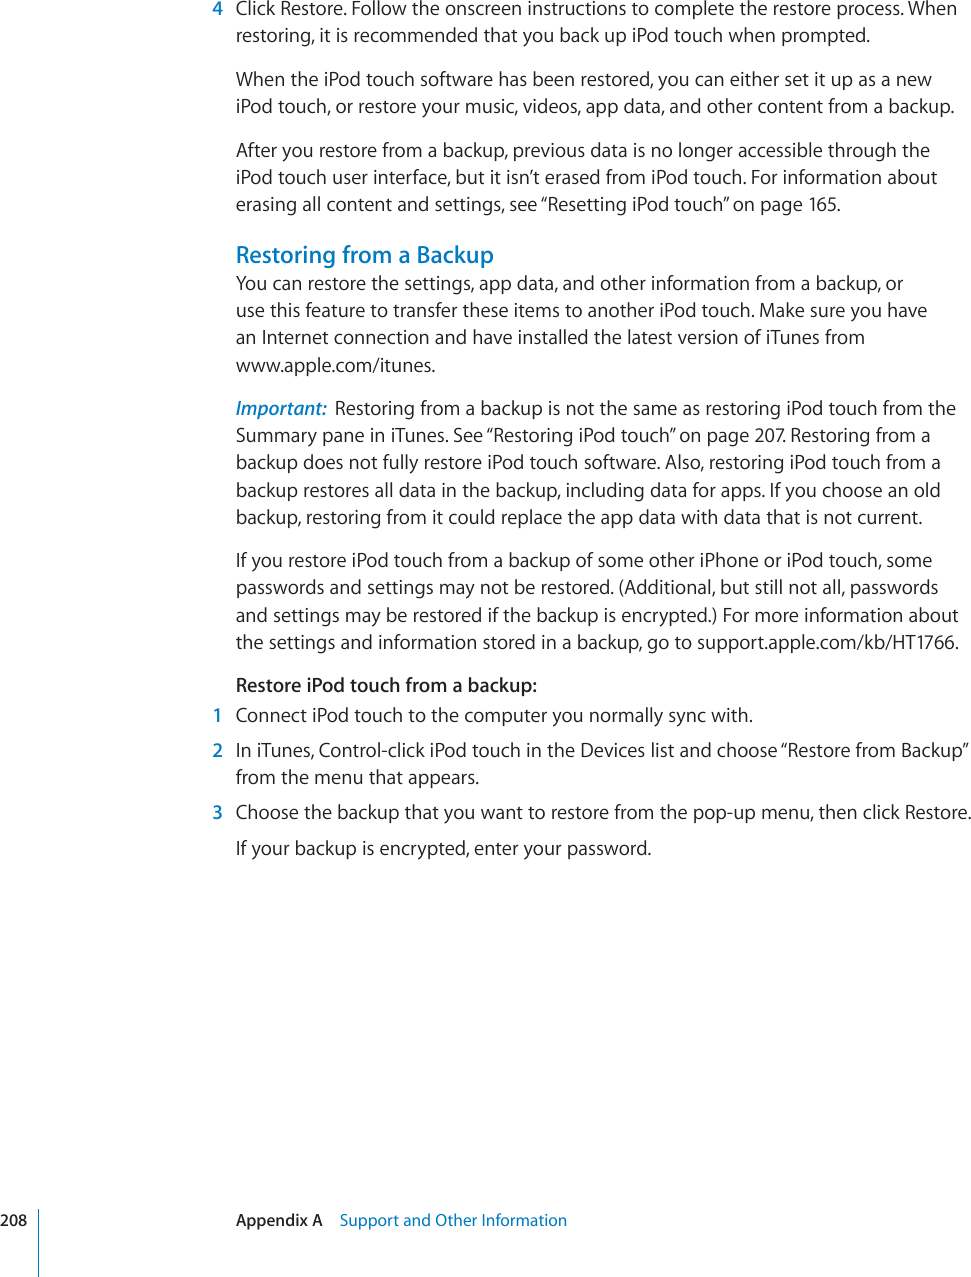
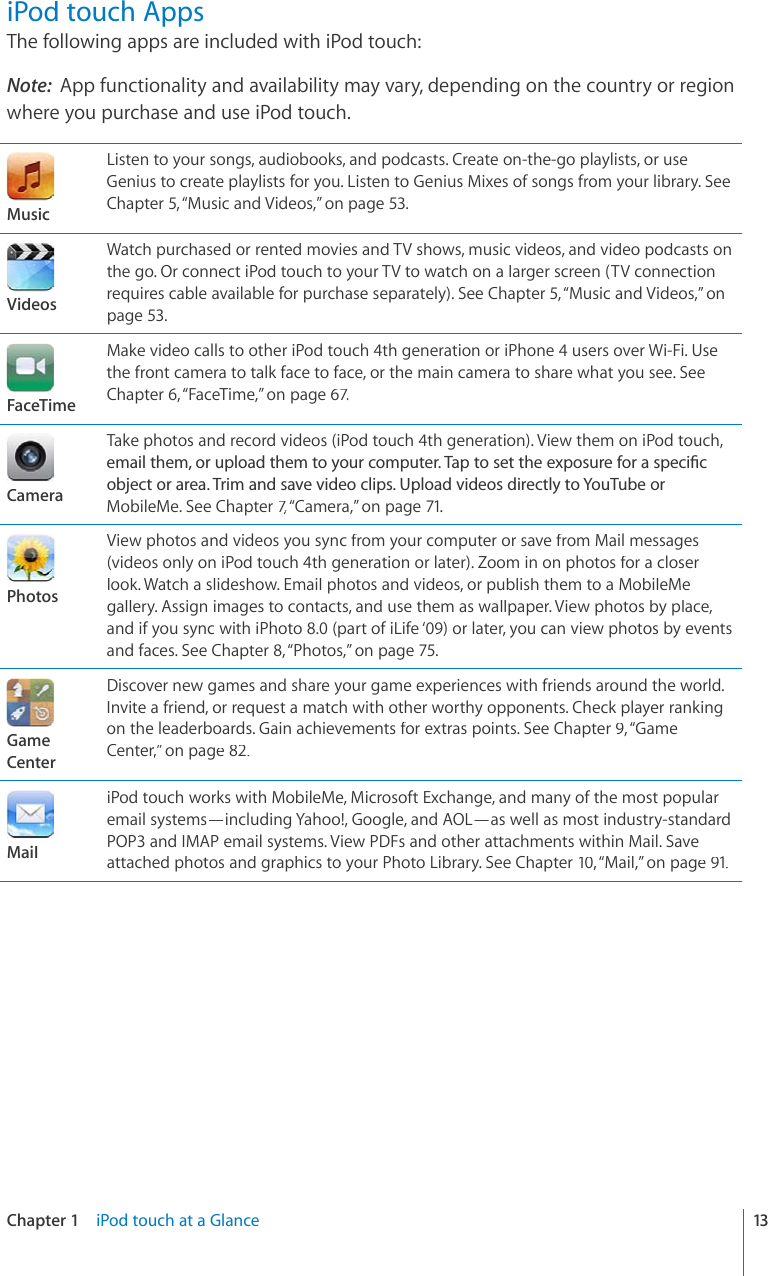
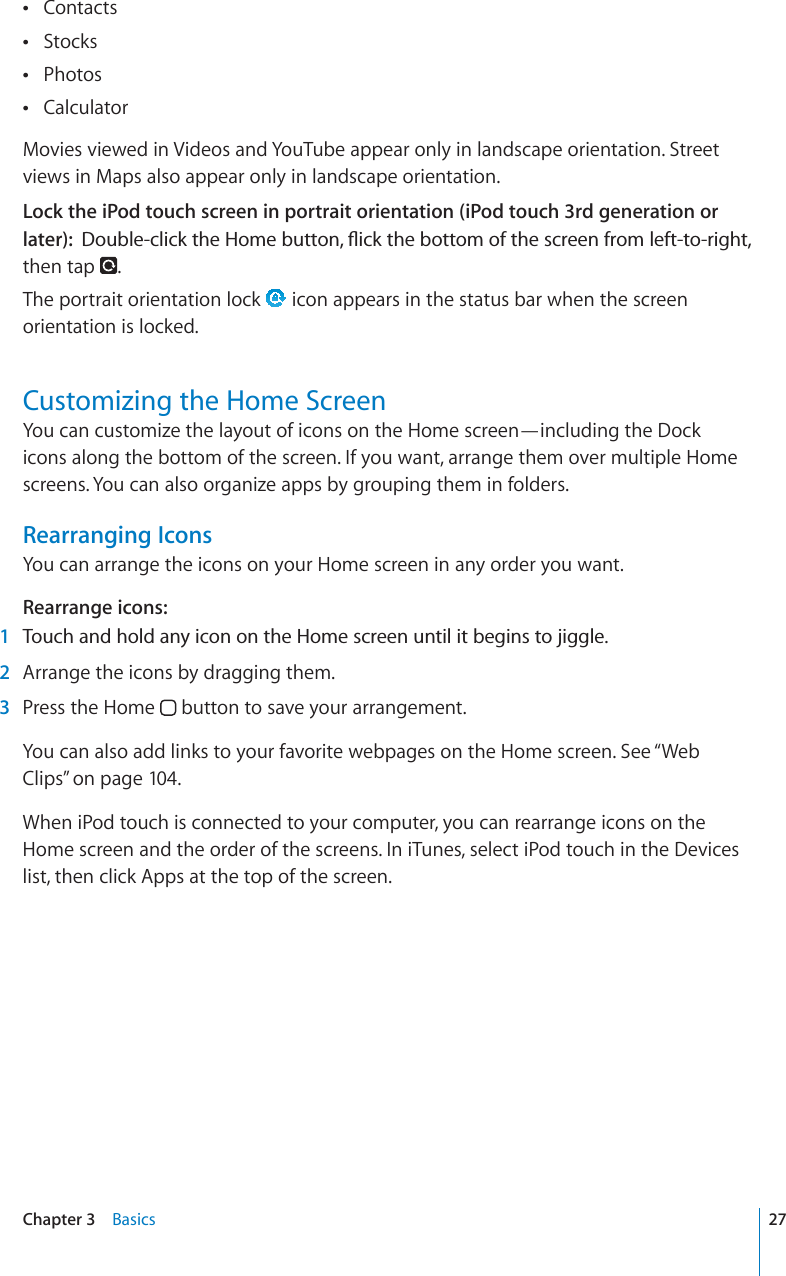
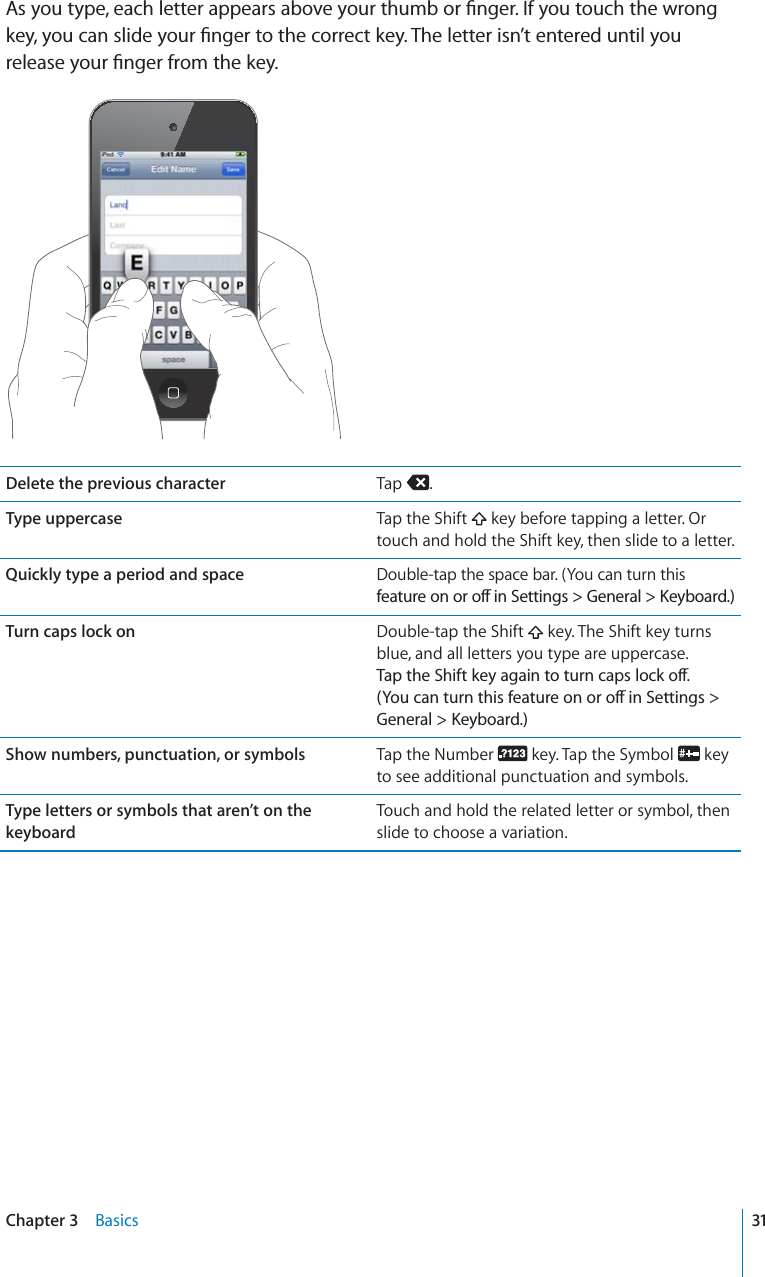
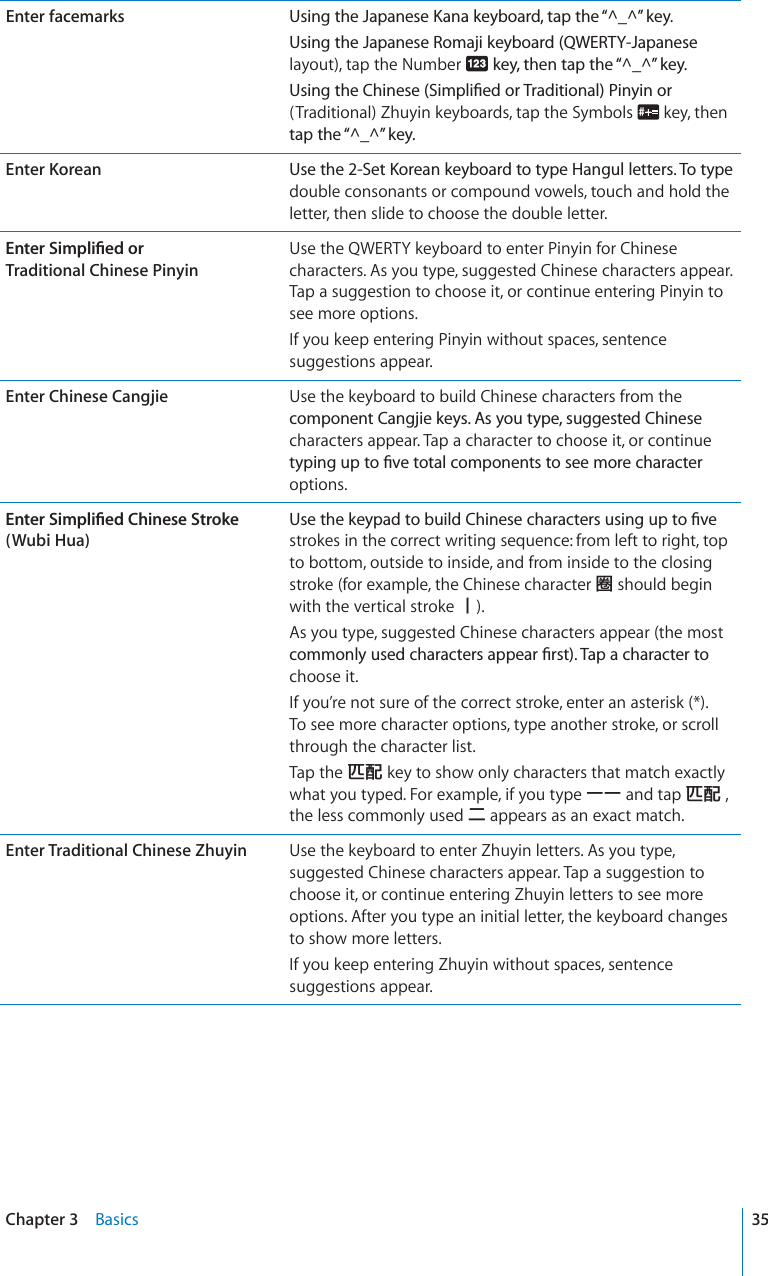
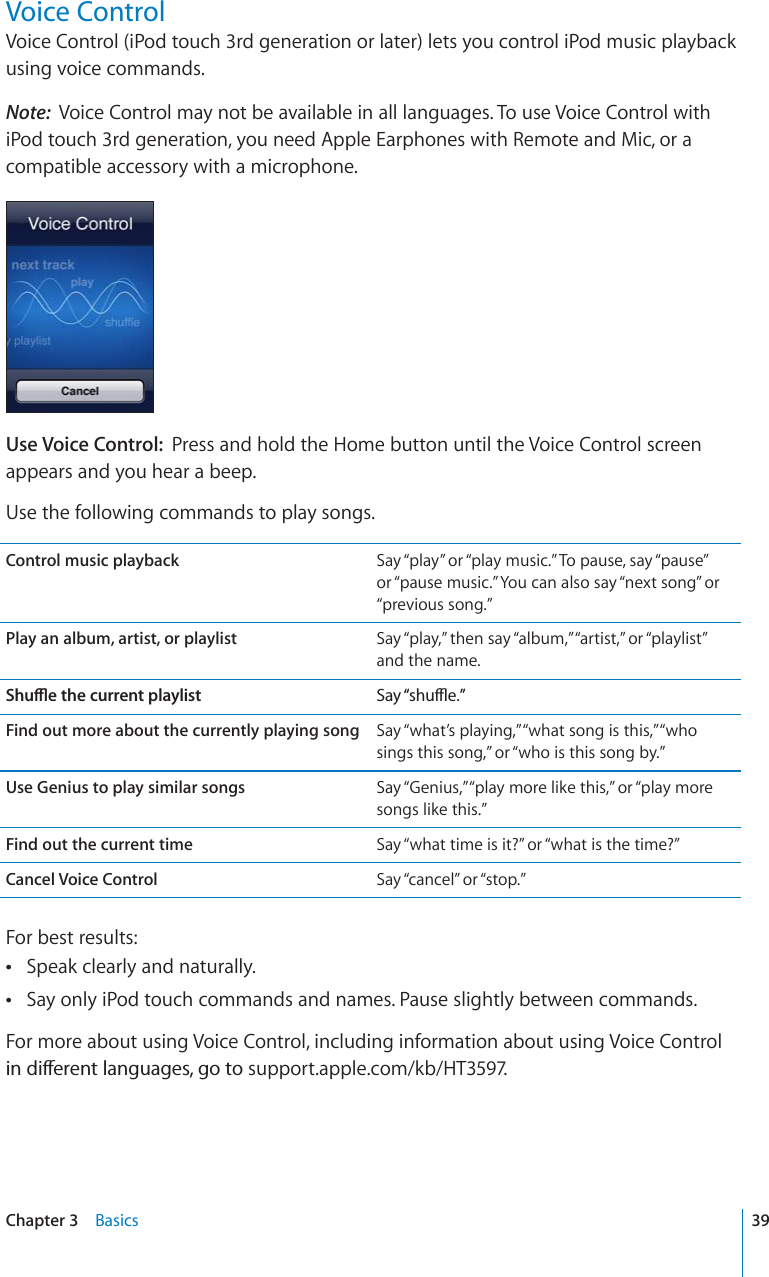
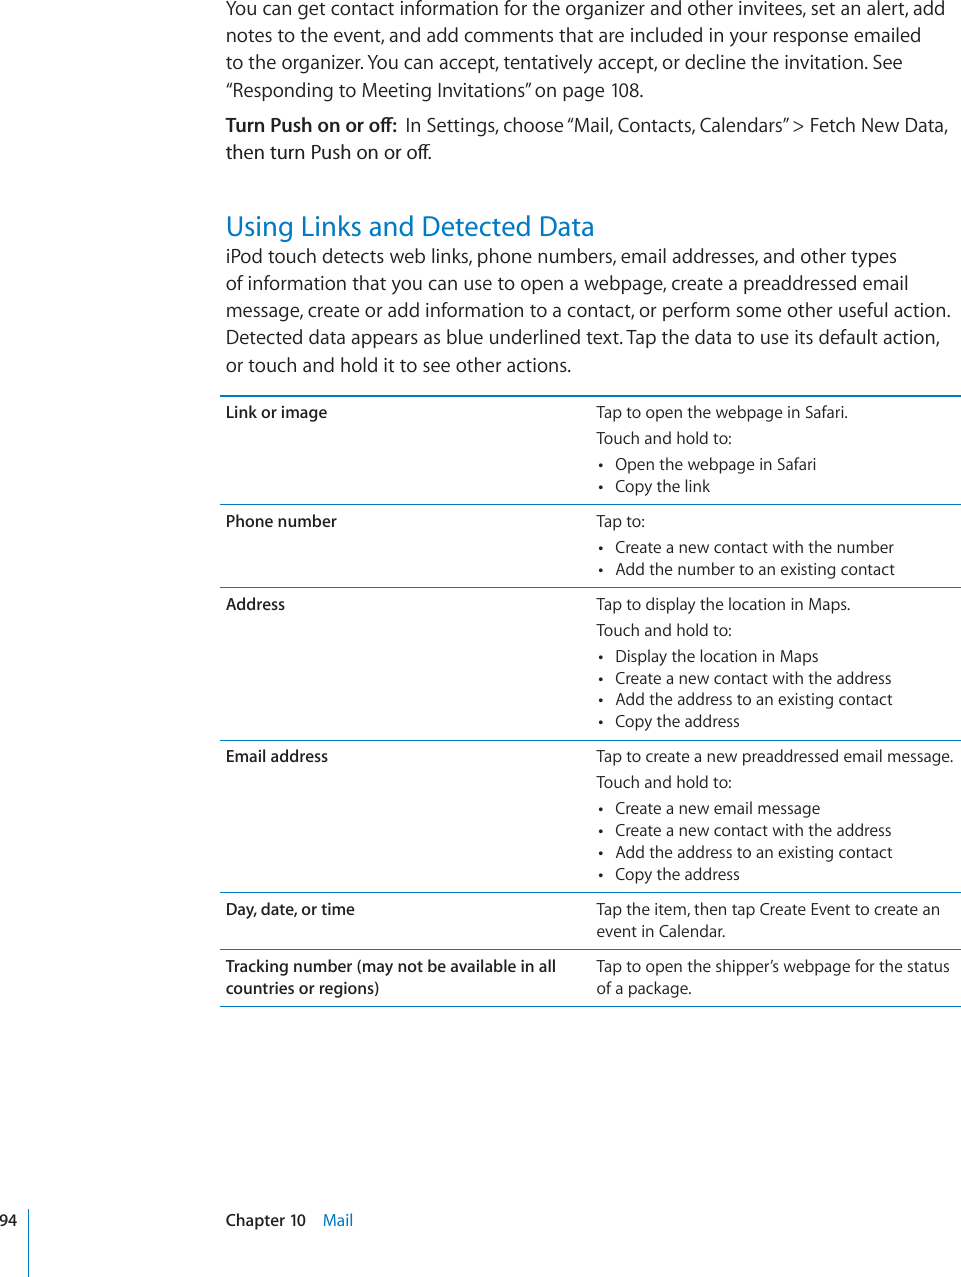
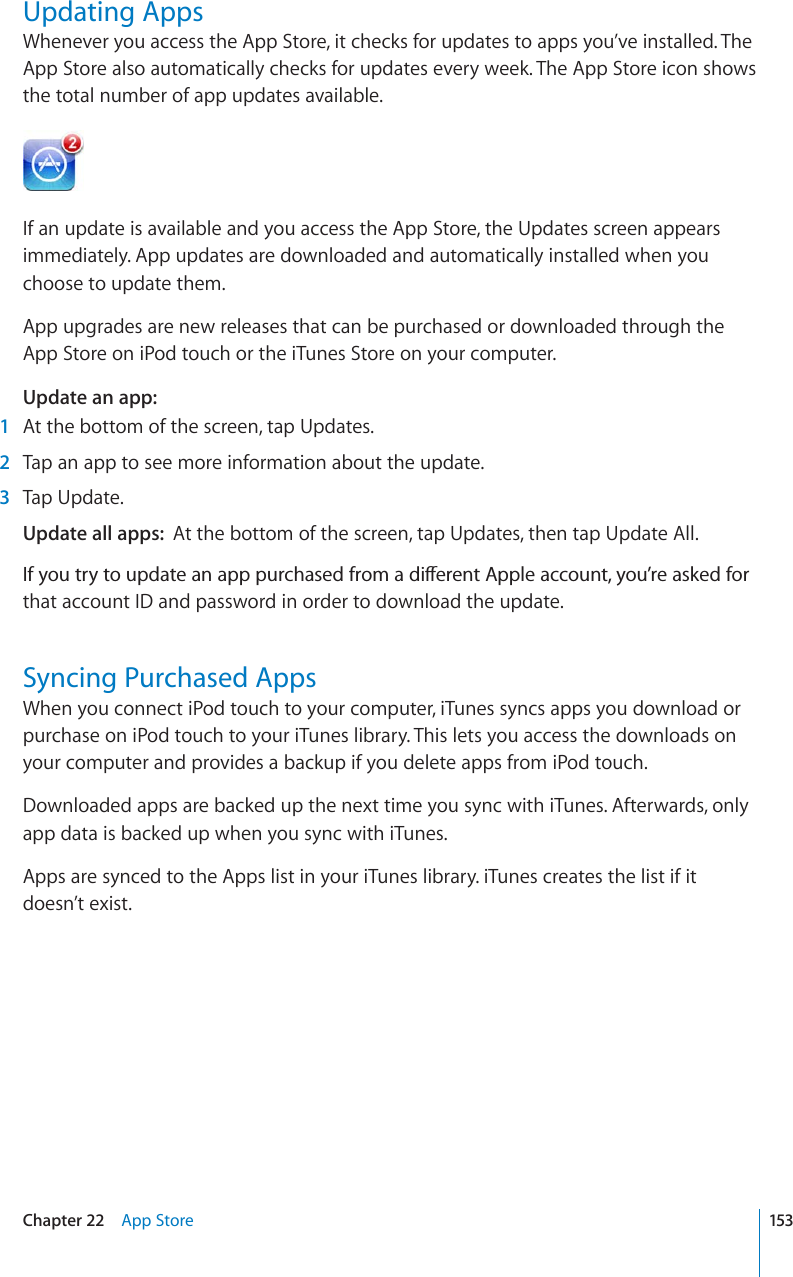
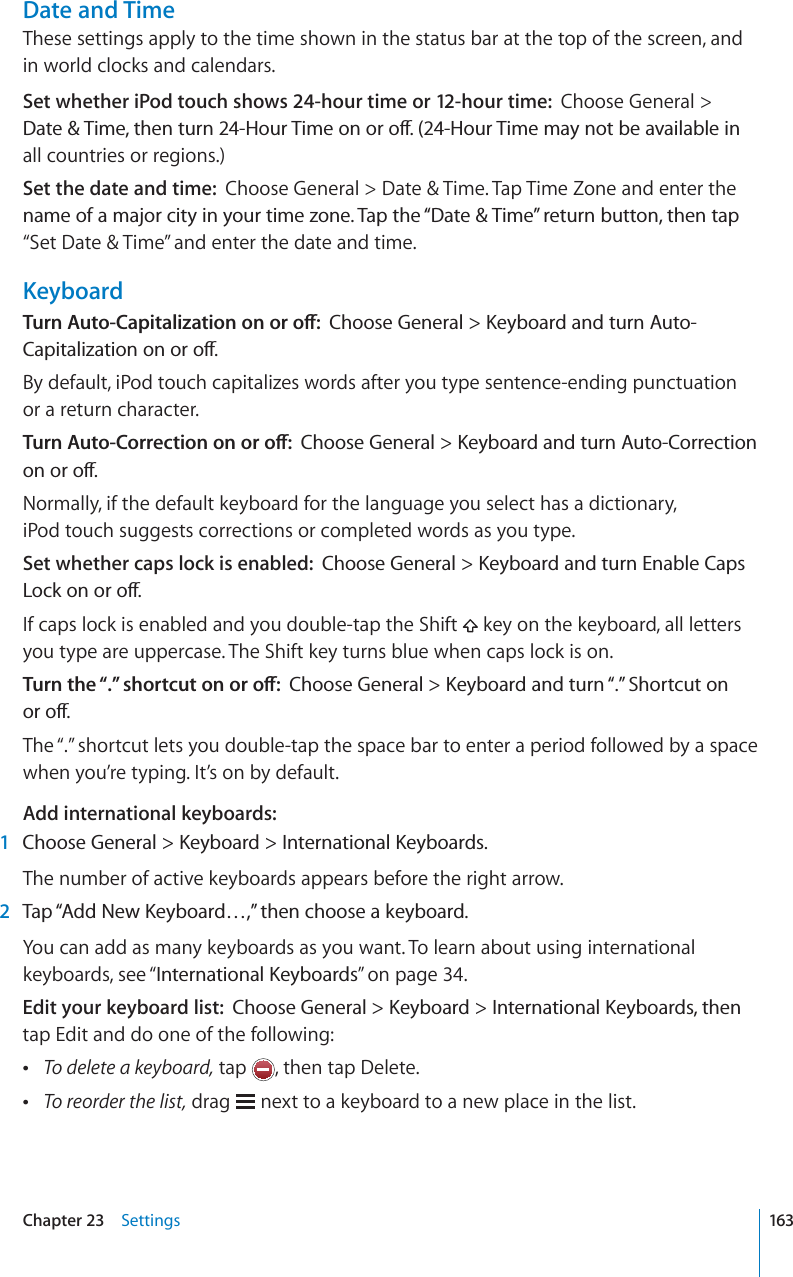
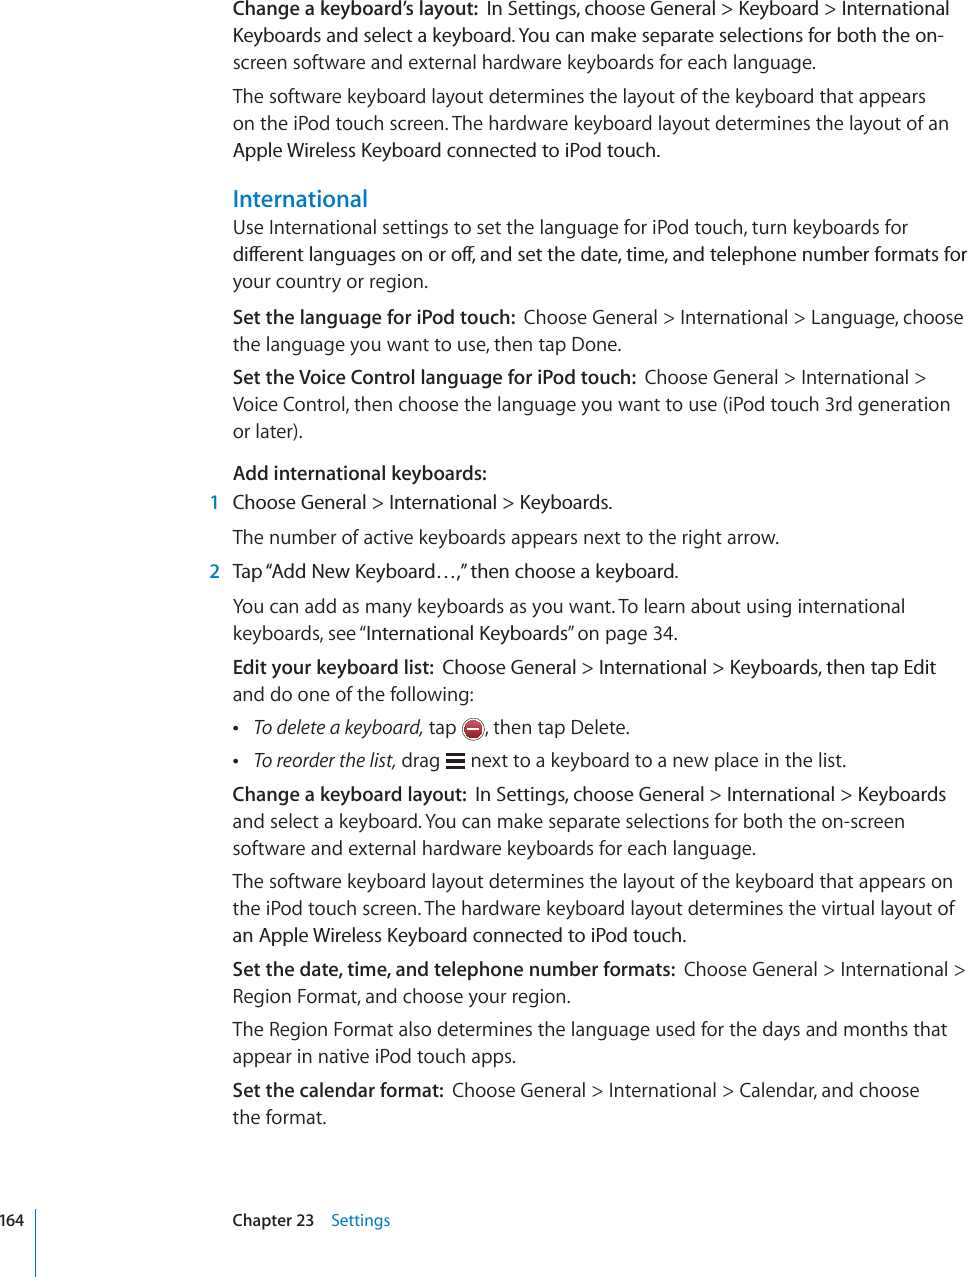
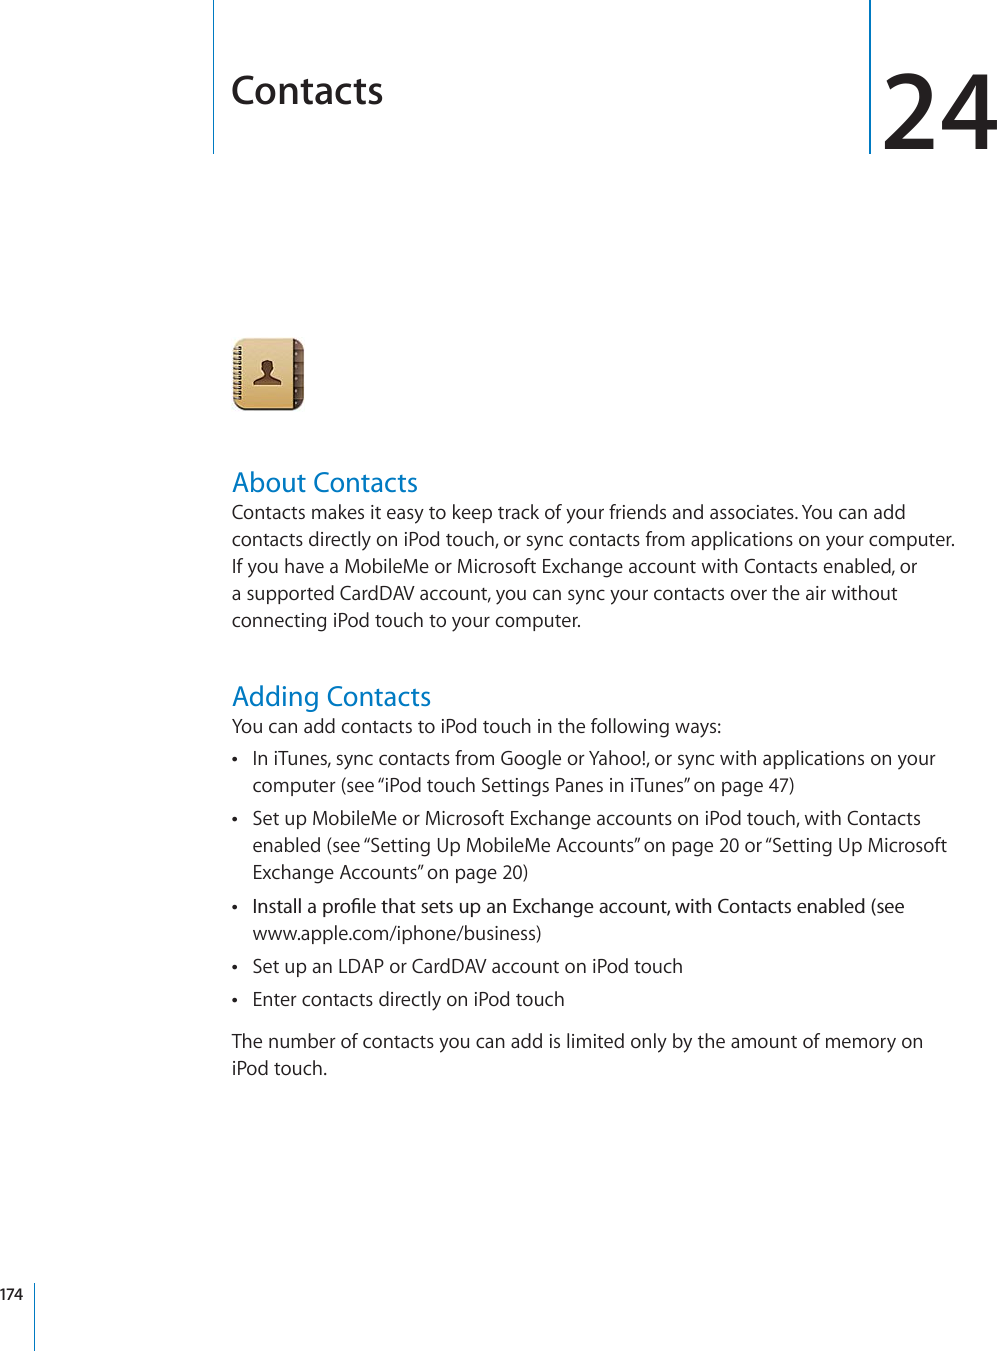
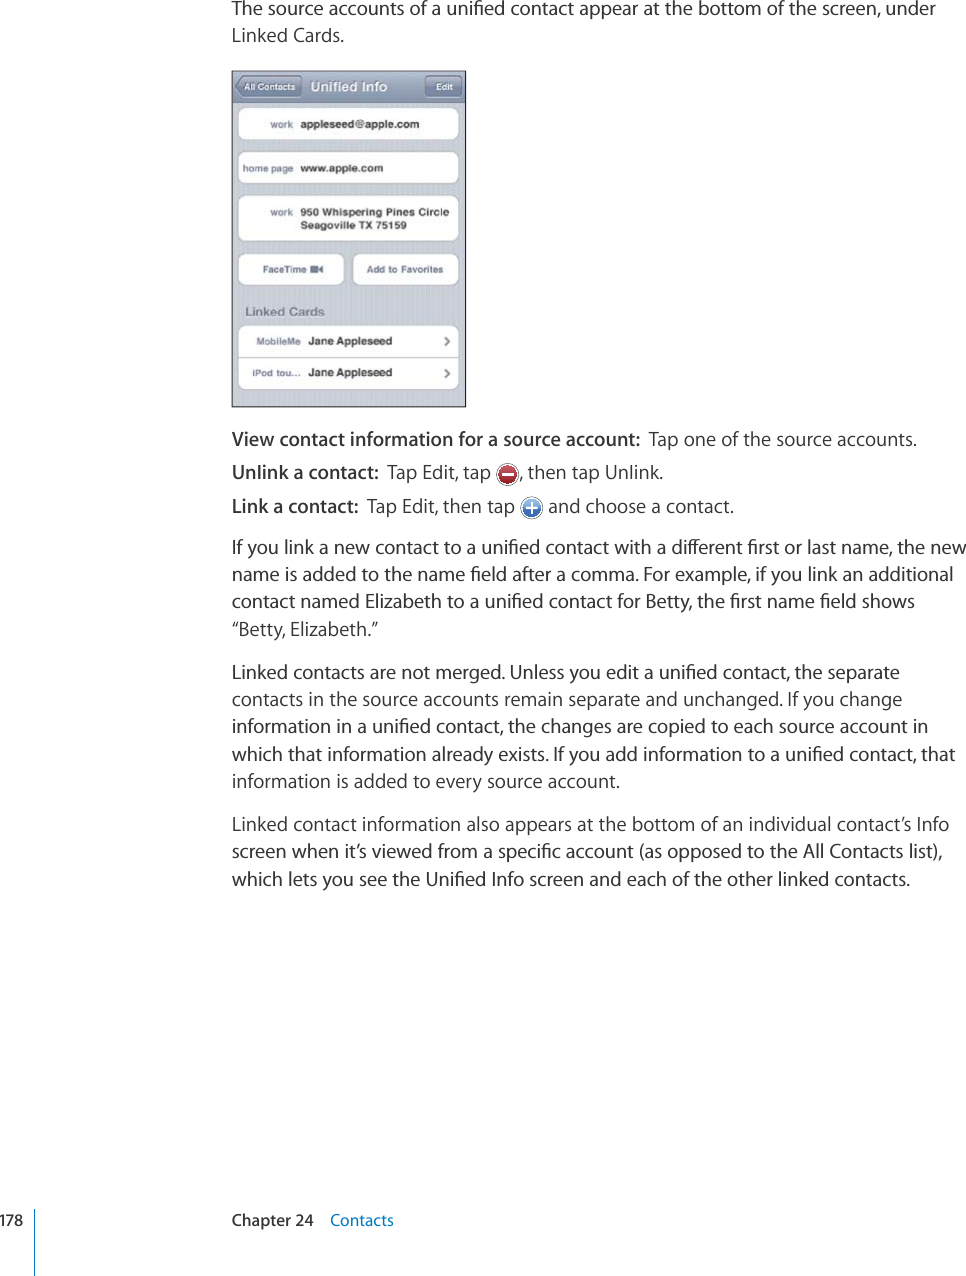
![Important: If you’re traveling, iPod touch may not alert you at the correct local time. To manually set the correct time, see “Date and Time” on page 163.CalendarYou can change the default calendar using the Default Calendar setting. See “Calendars”on page 171.NotesYou can’t assign an event to a read-only calendar.Events can also be created by tapping a day, date, or time in a Mail message. See “Using Links and Detected Data”on page 94.Update an event: Tap Edit and change event information. Tap Done when you’re °PKUJGFDelete an event: Tap the event, tap Edit, then scroll down and tap Delete Event.Responding to Meeting InvitationsIf you have a Microsoft Exchange account with calendars enabled, or a supported CalDAV account, you can receive and respond to meeting invitations from people in your organization. When you receive an invitation, the meeting appears in your ECNGPFCTYKVJCFQVVGFNKPGCTQWPFKV6JGPQVK°ECVKQPU button in the lower-right corner of the screen shows the total number of new invitations you have, as does the Calendar icon on the Home screen. To receive and respond to meeting invitations, K2QFVQWEJOWUVLQKPC9K(KPGVYQTMVJCV¨UEQPPGEVGFVQVJG+PVGTPGV5\TILYVMTLL[PUNPU]P[H[PVUZ108 Chapter 12 Calendar](https://usermanual.wiki/Apple/E2407.Full-user-manual/User-Guide-1336214-Page-108.png)
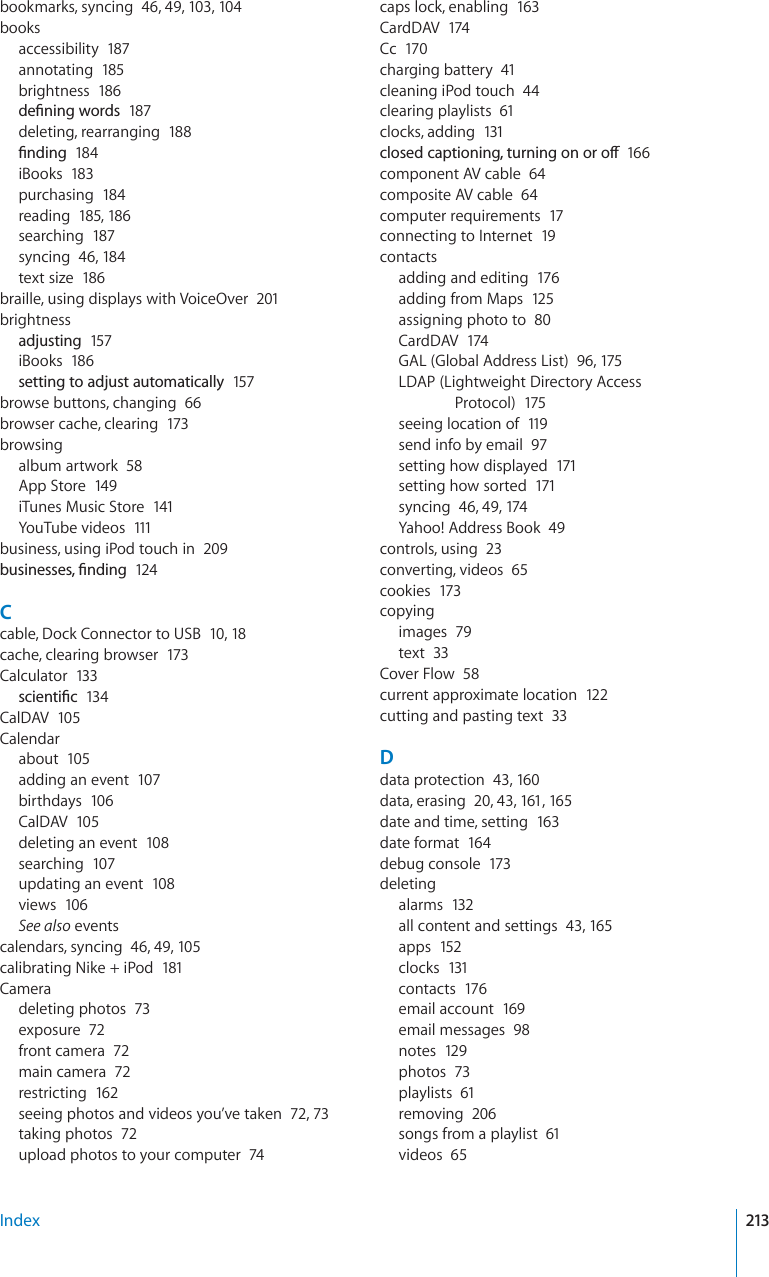
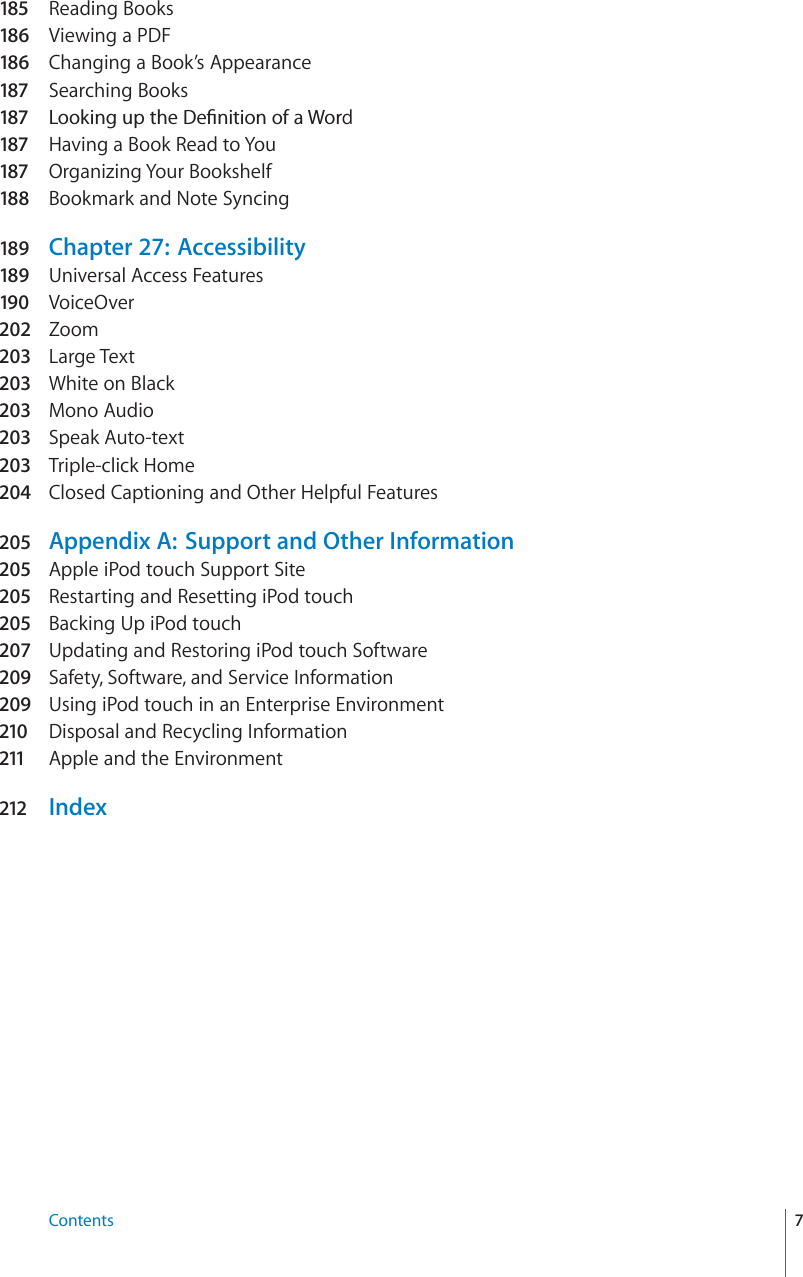
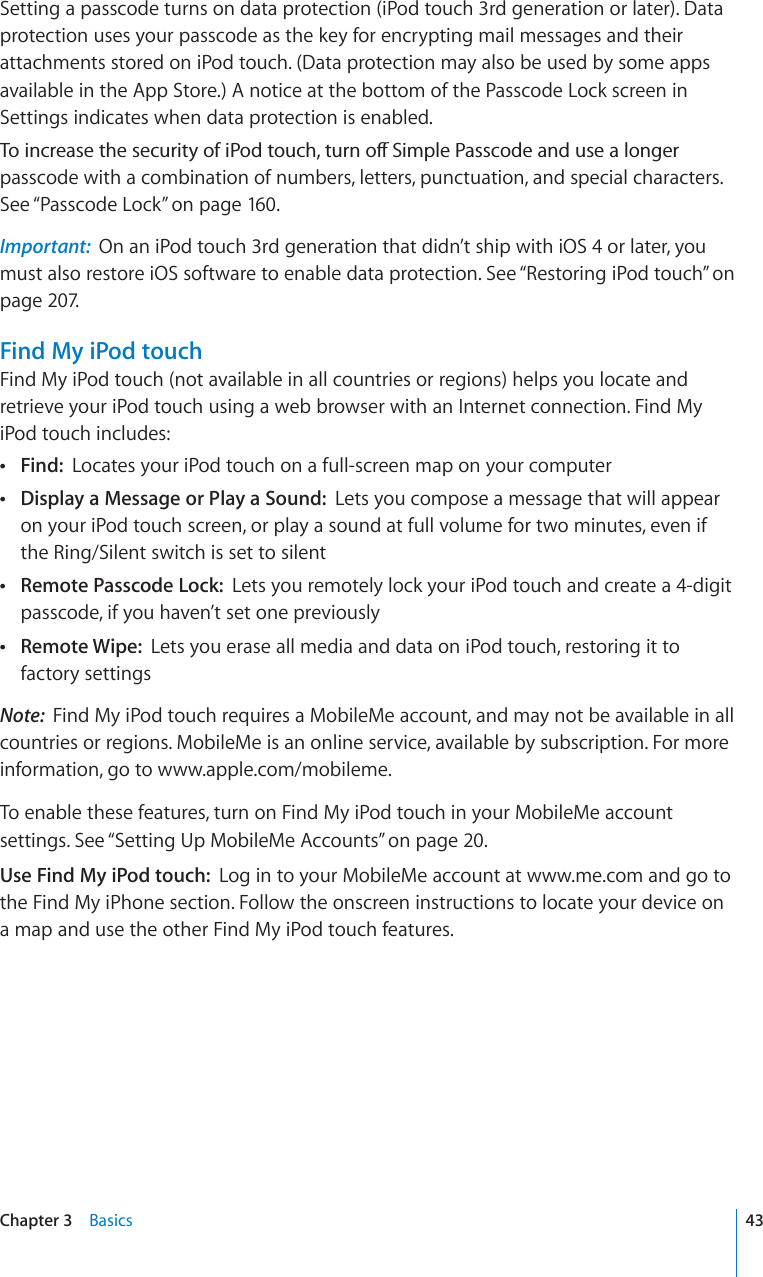
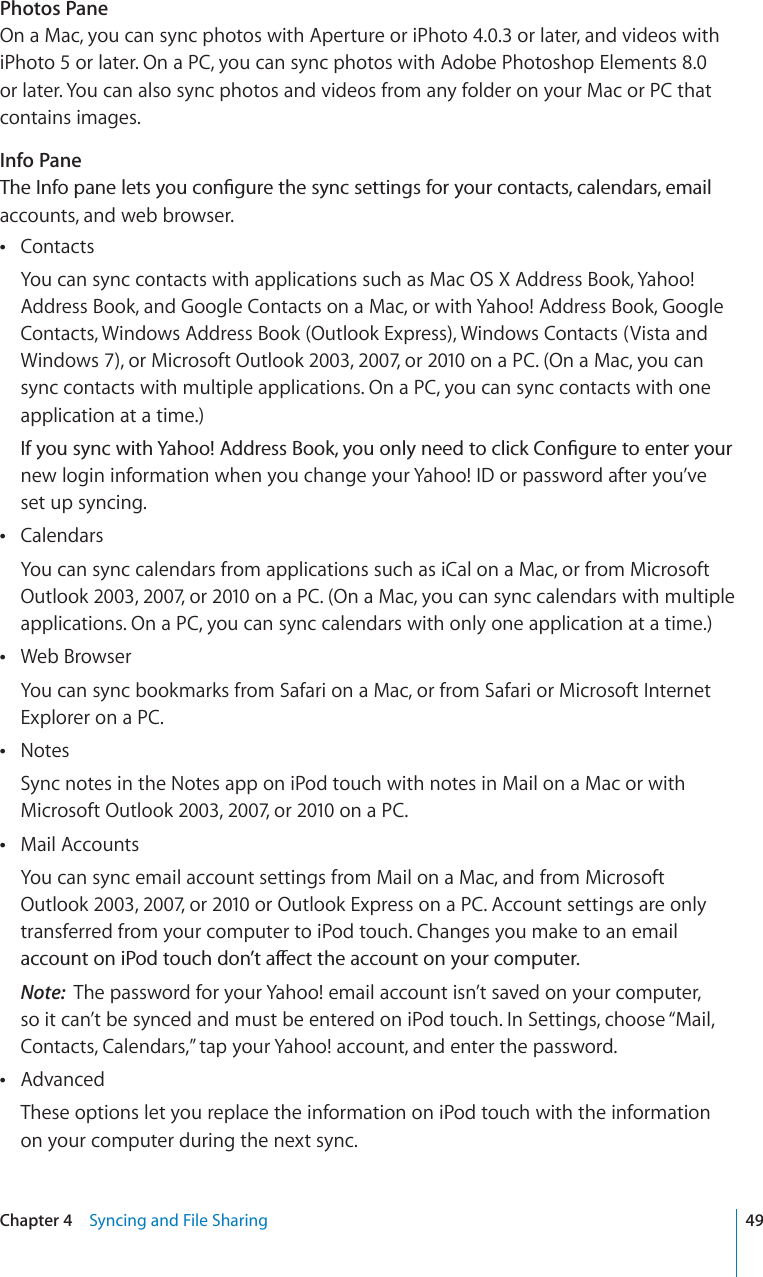
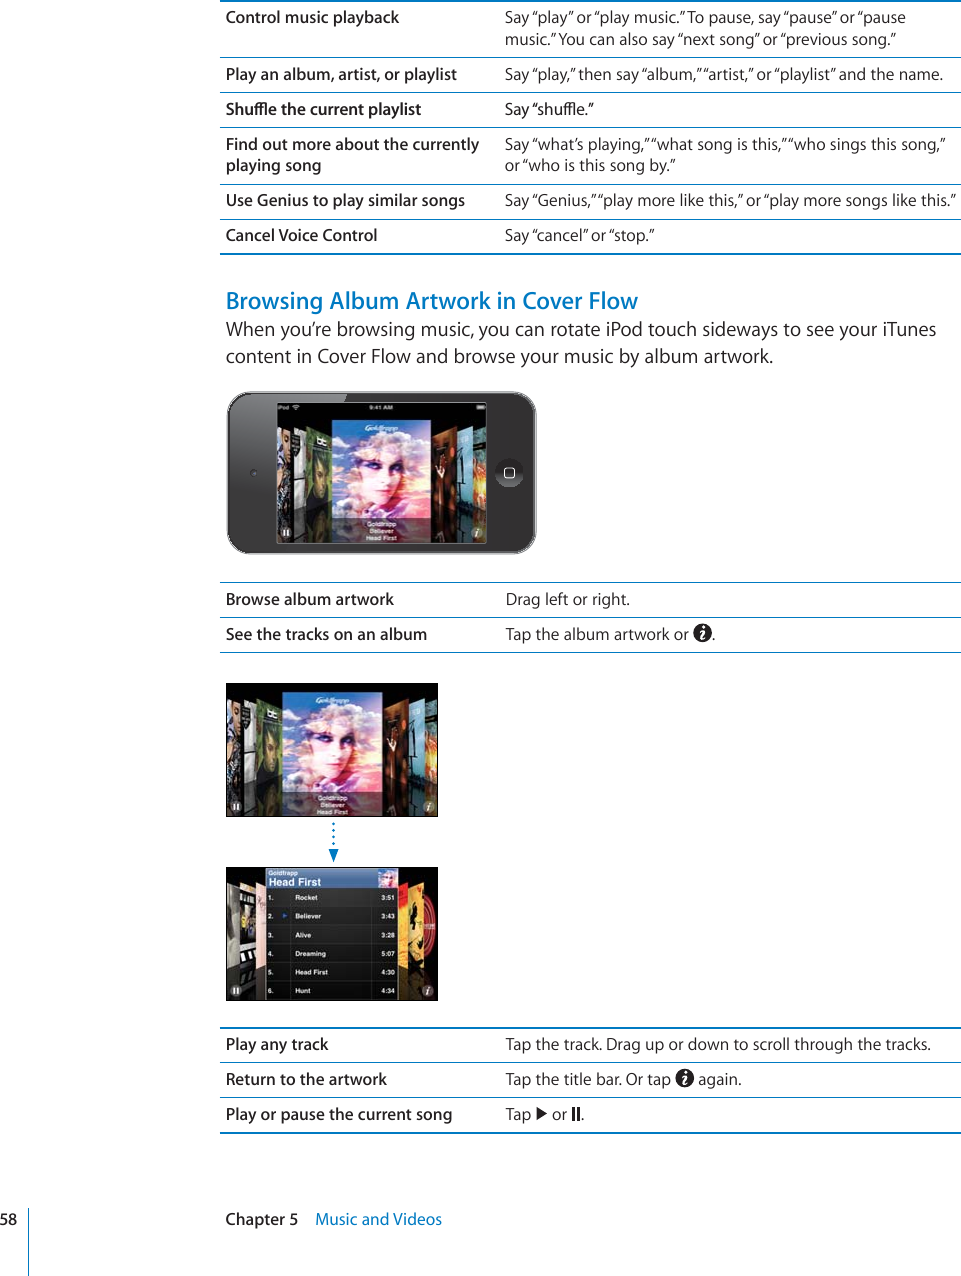
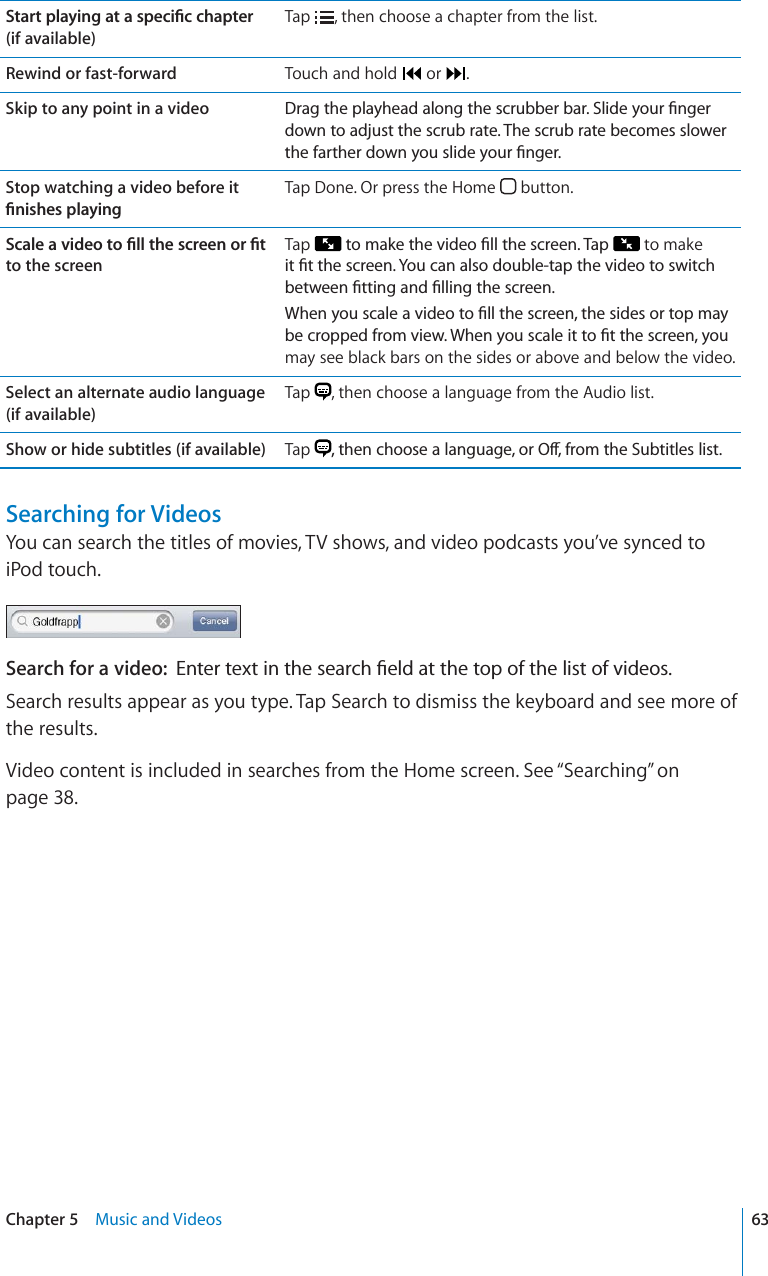
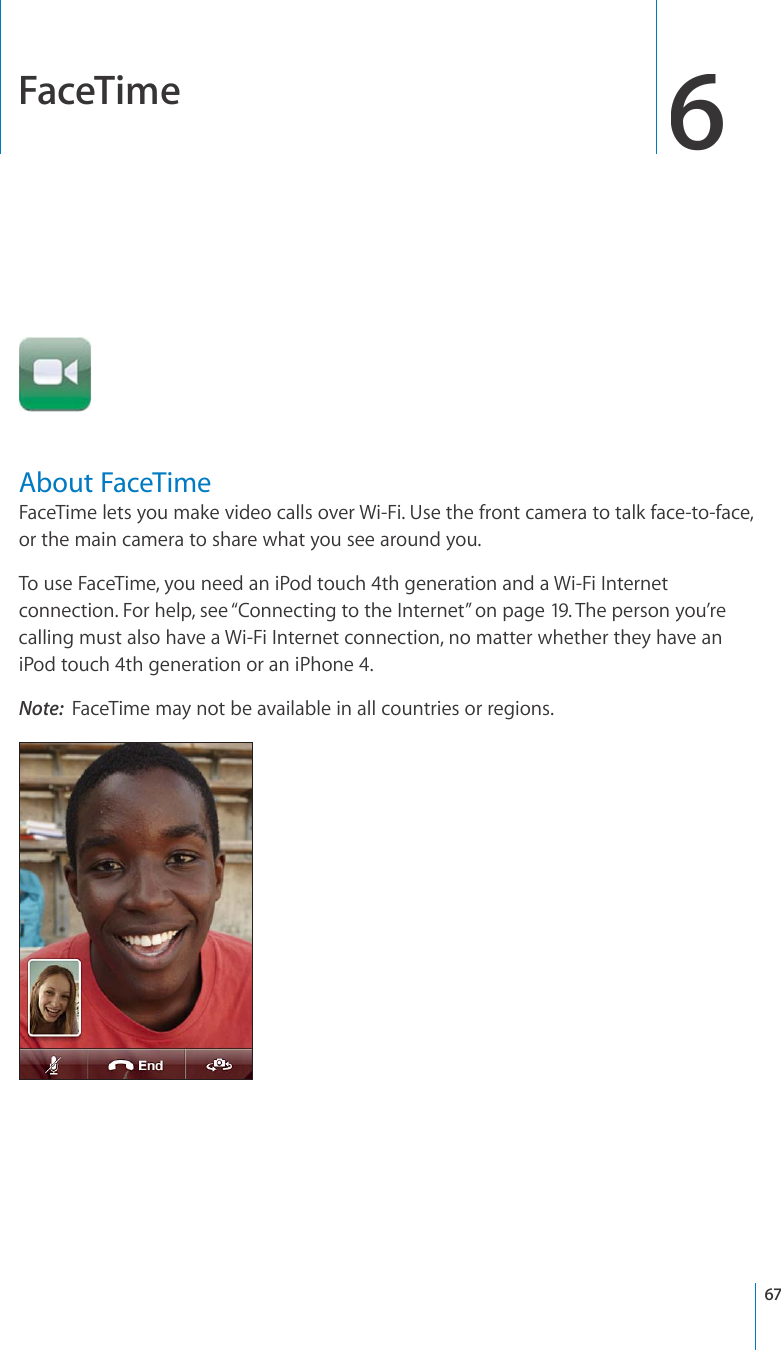
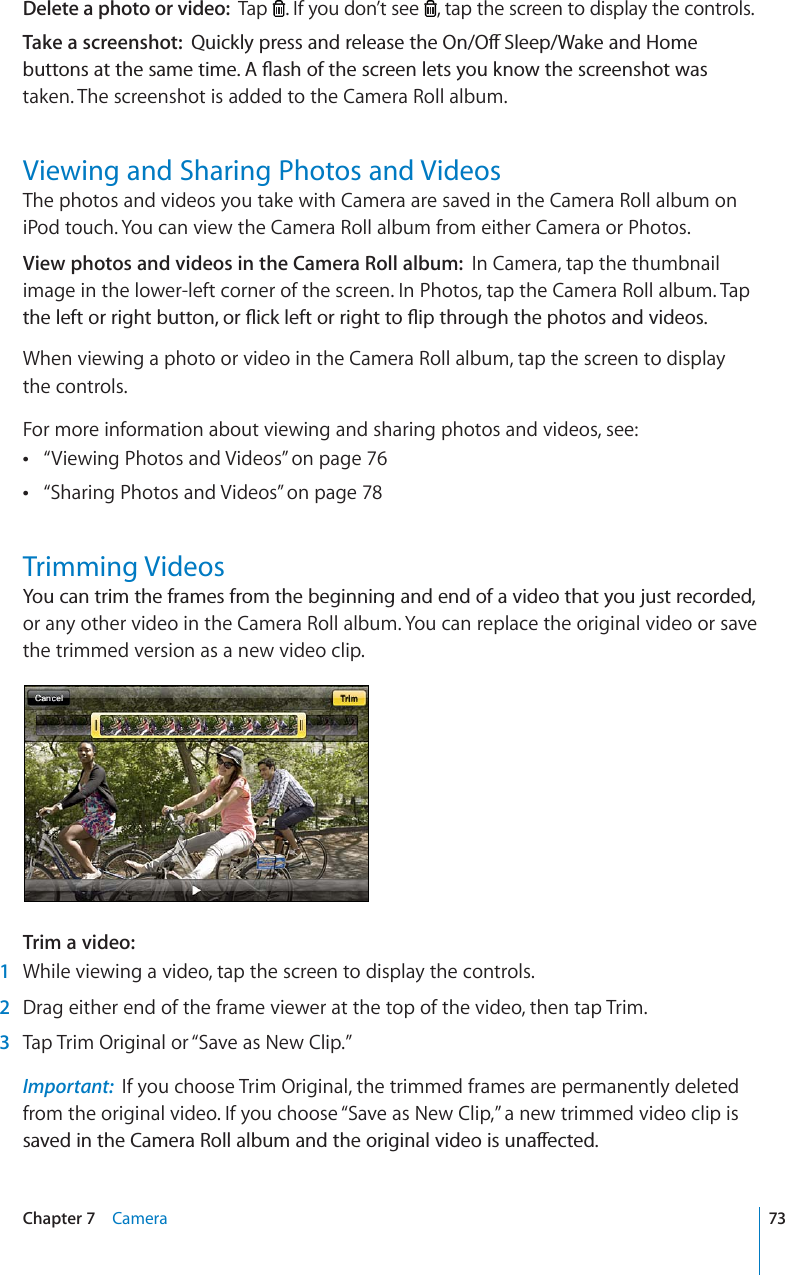
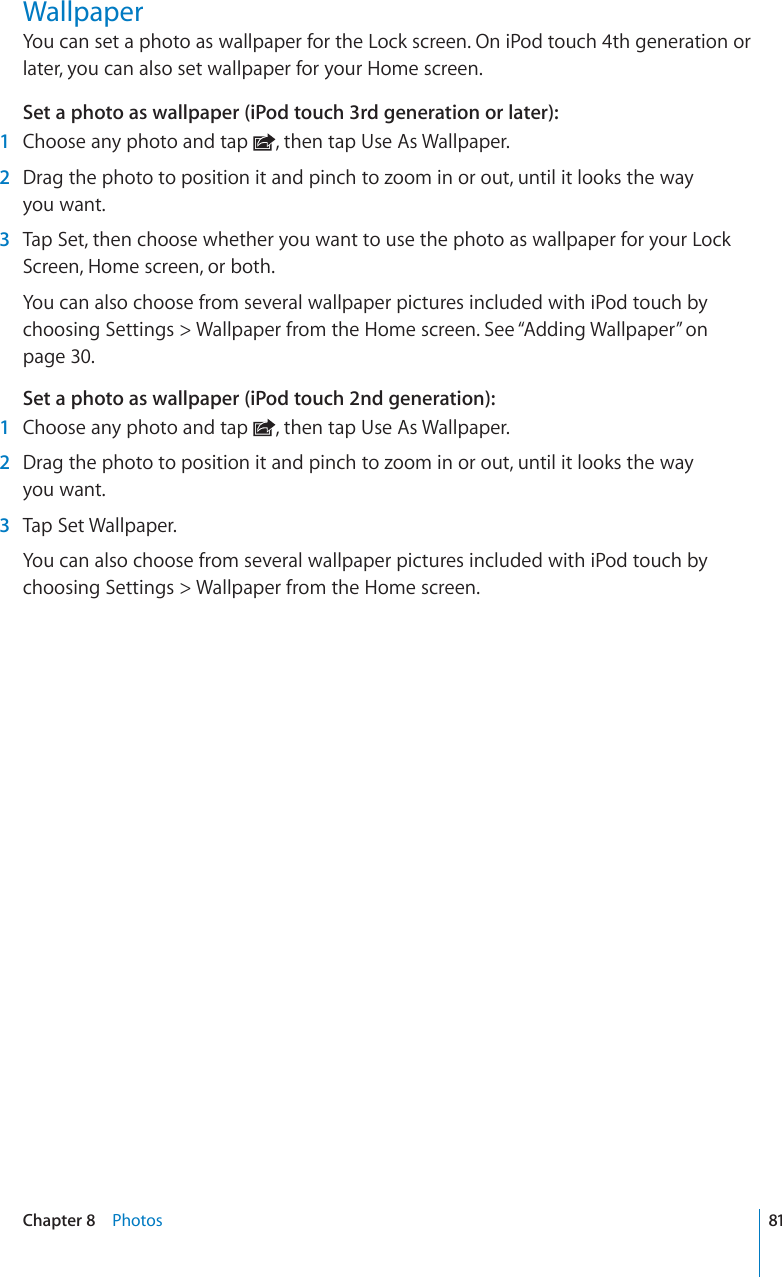
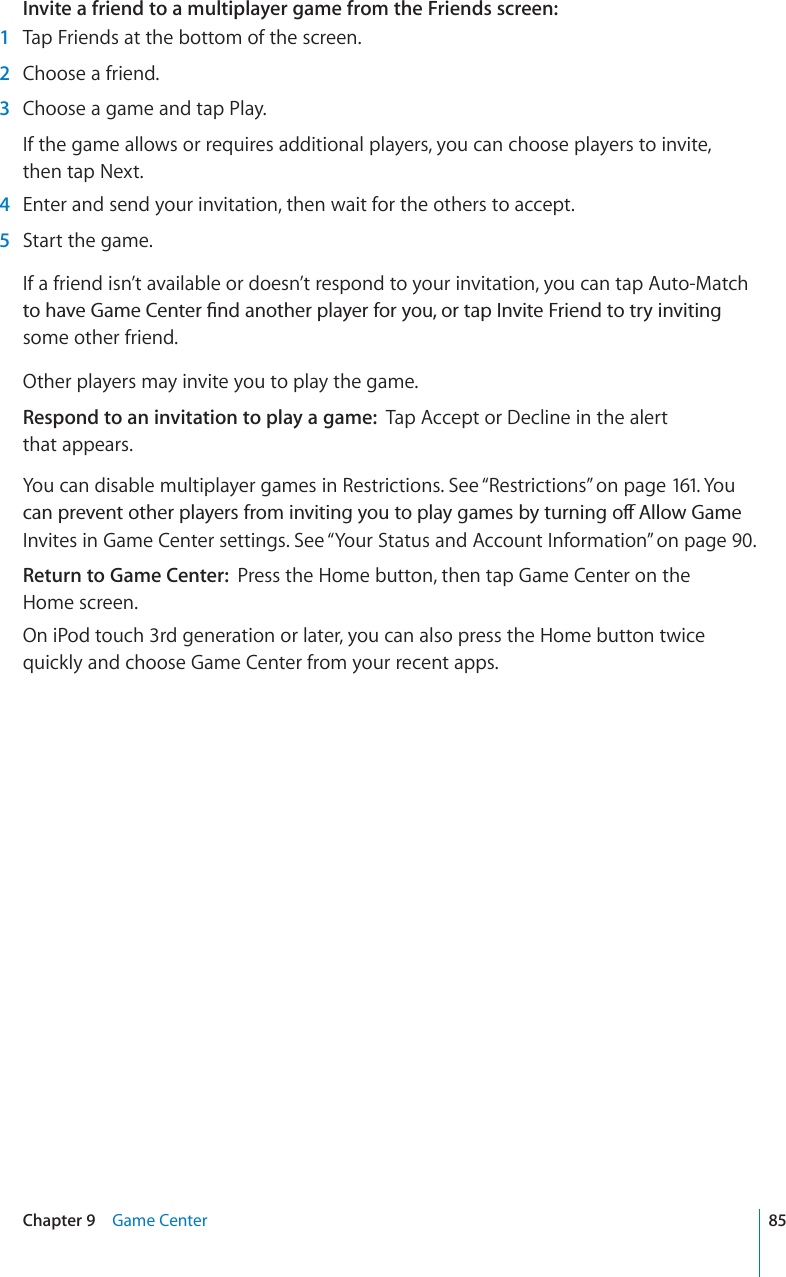
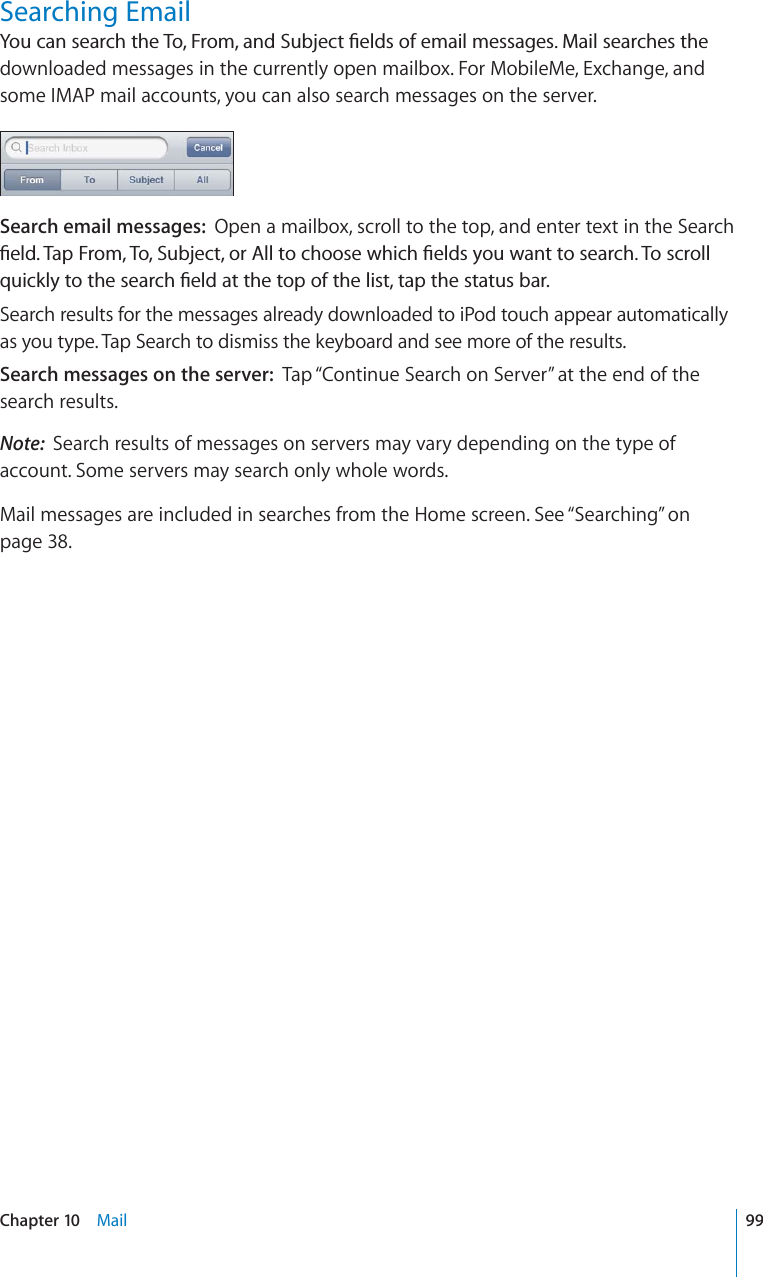
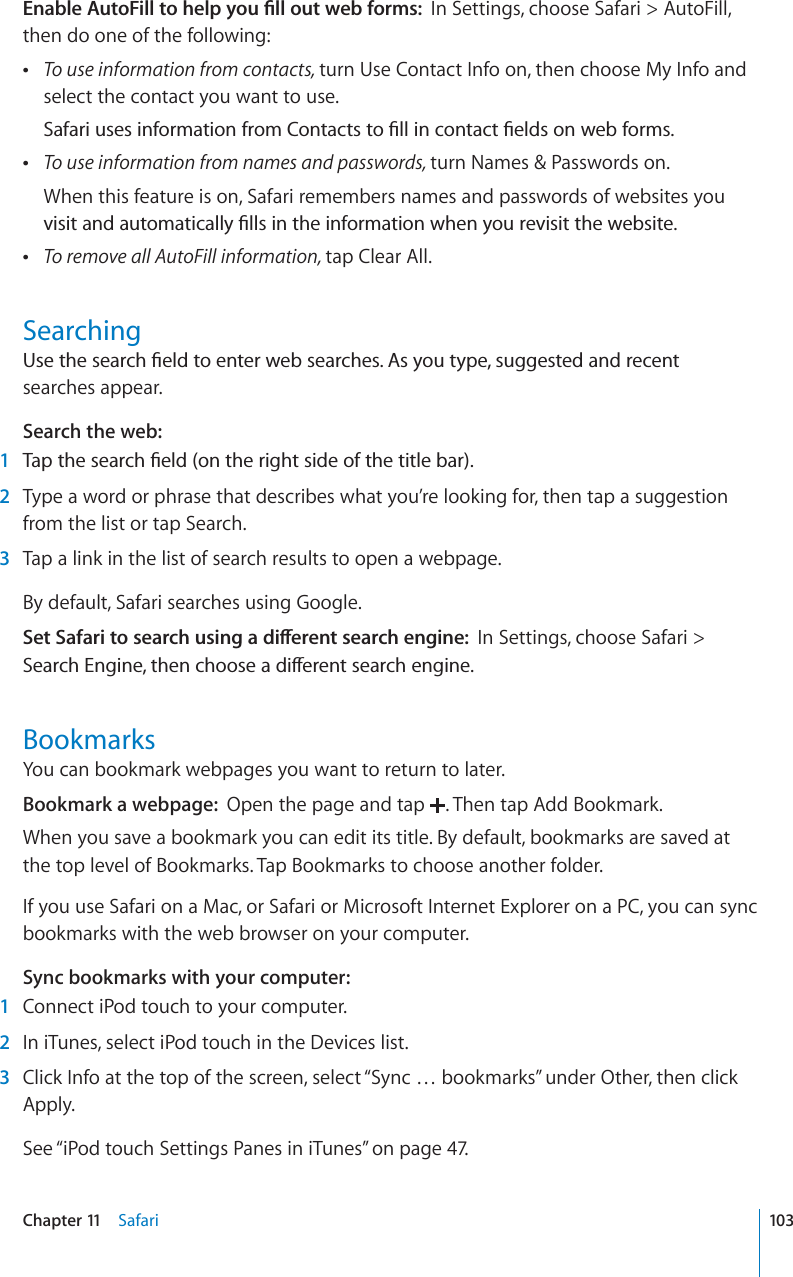
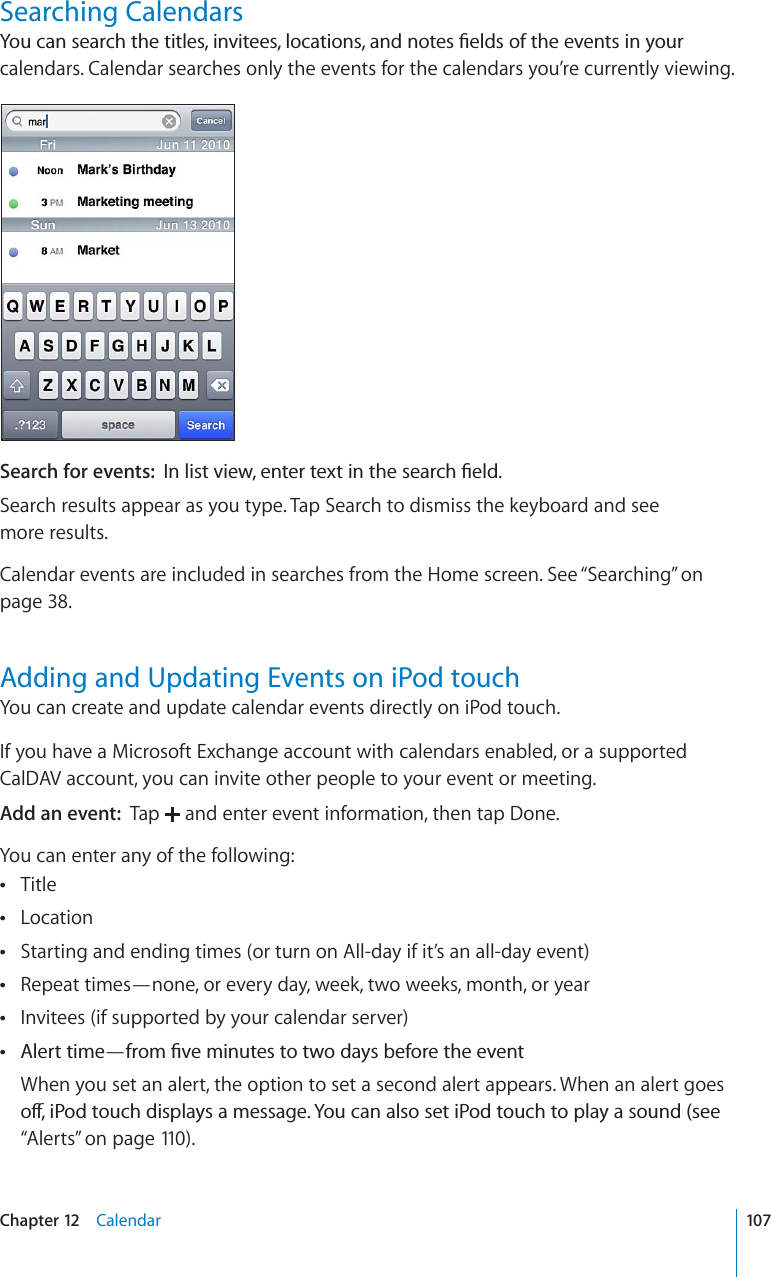
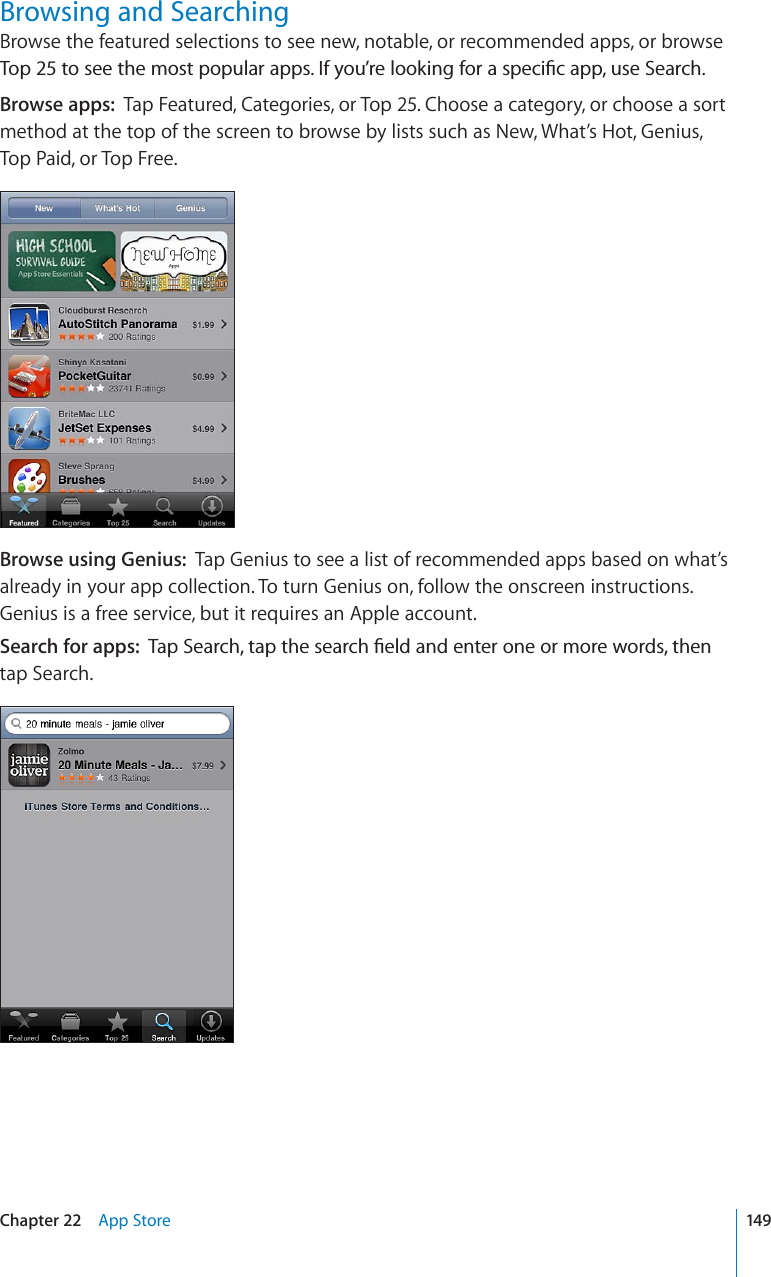
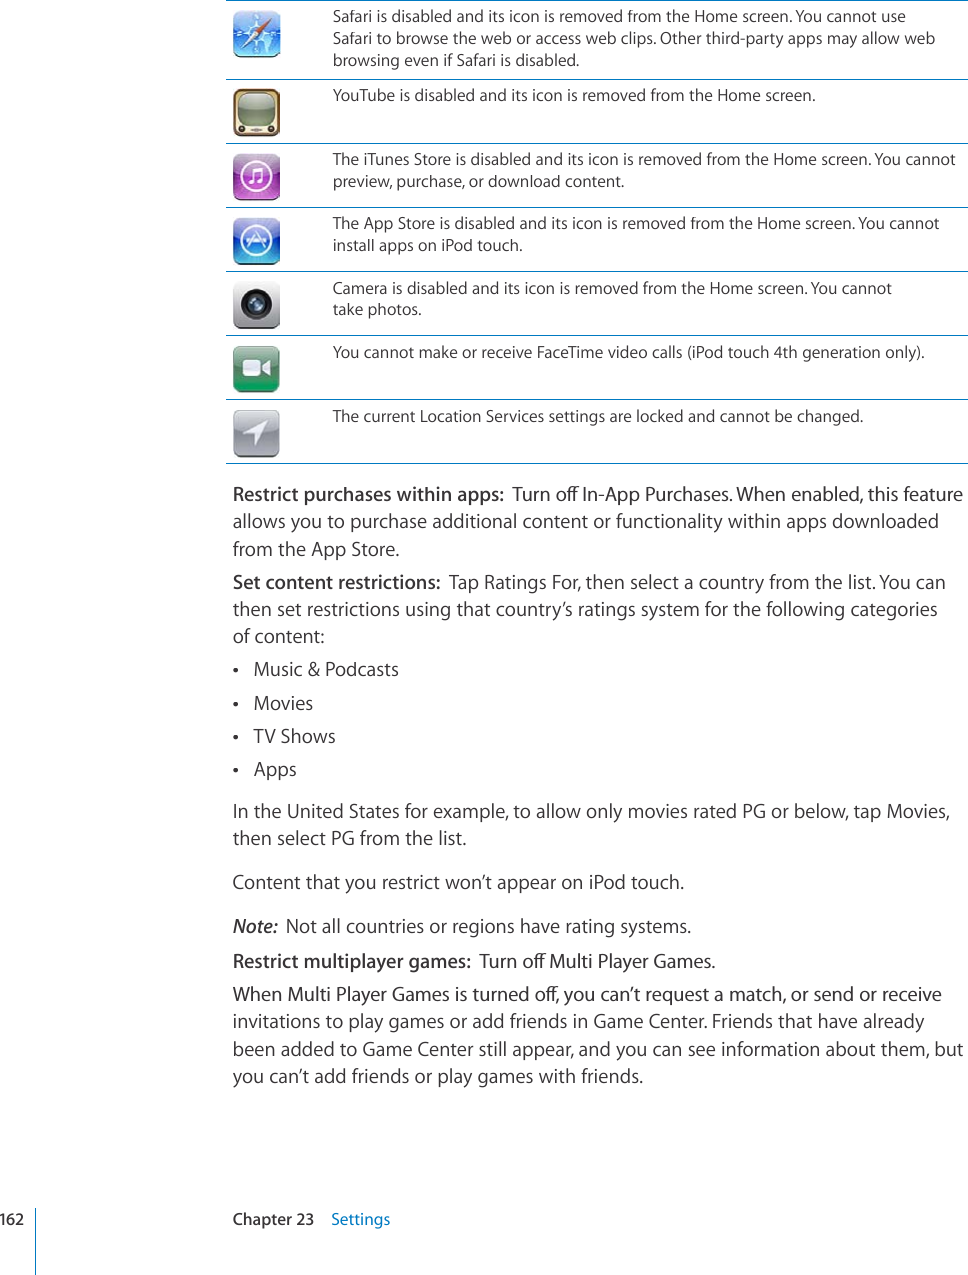
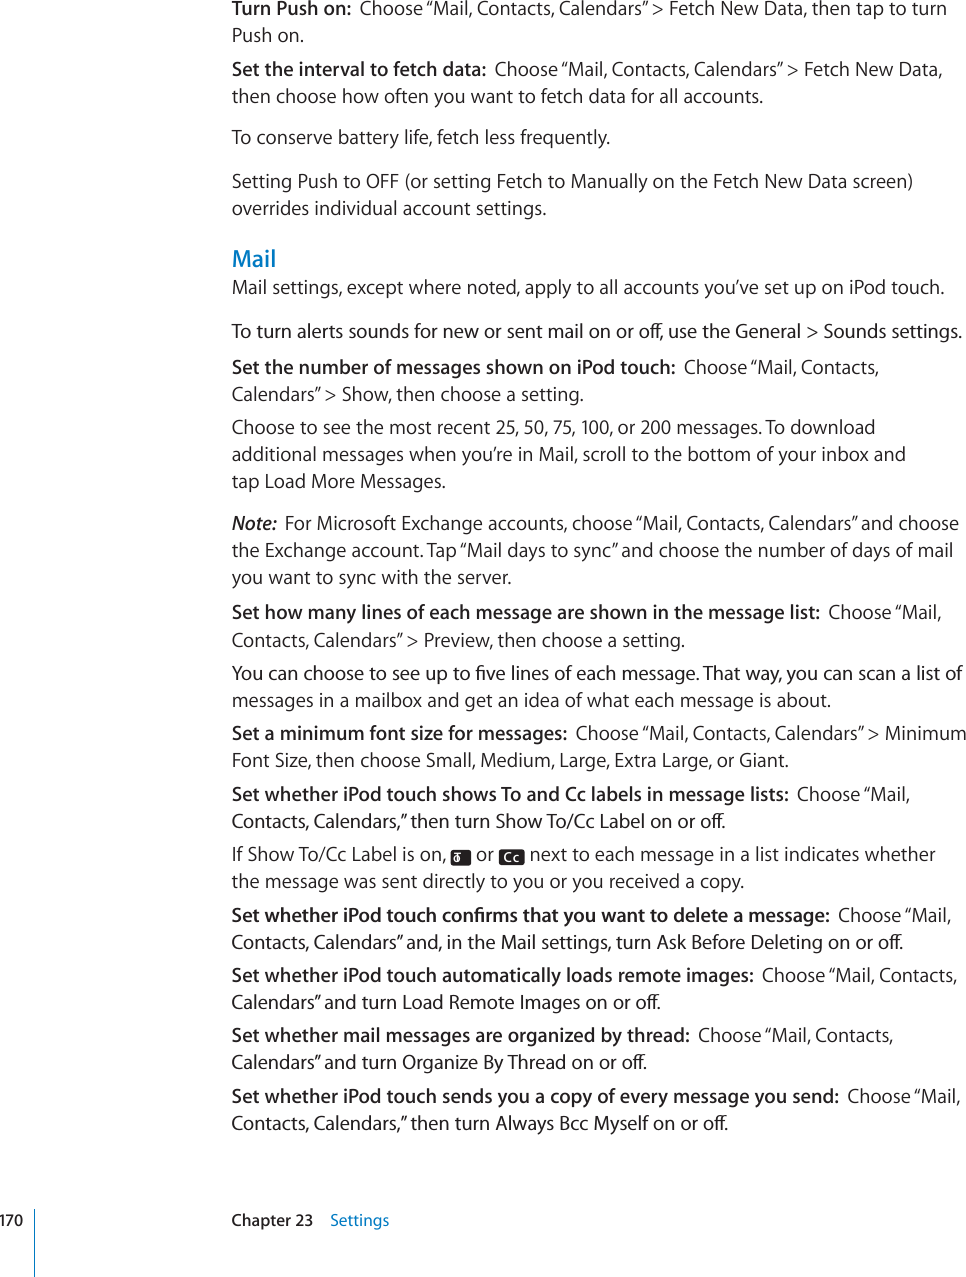
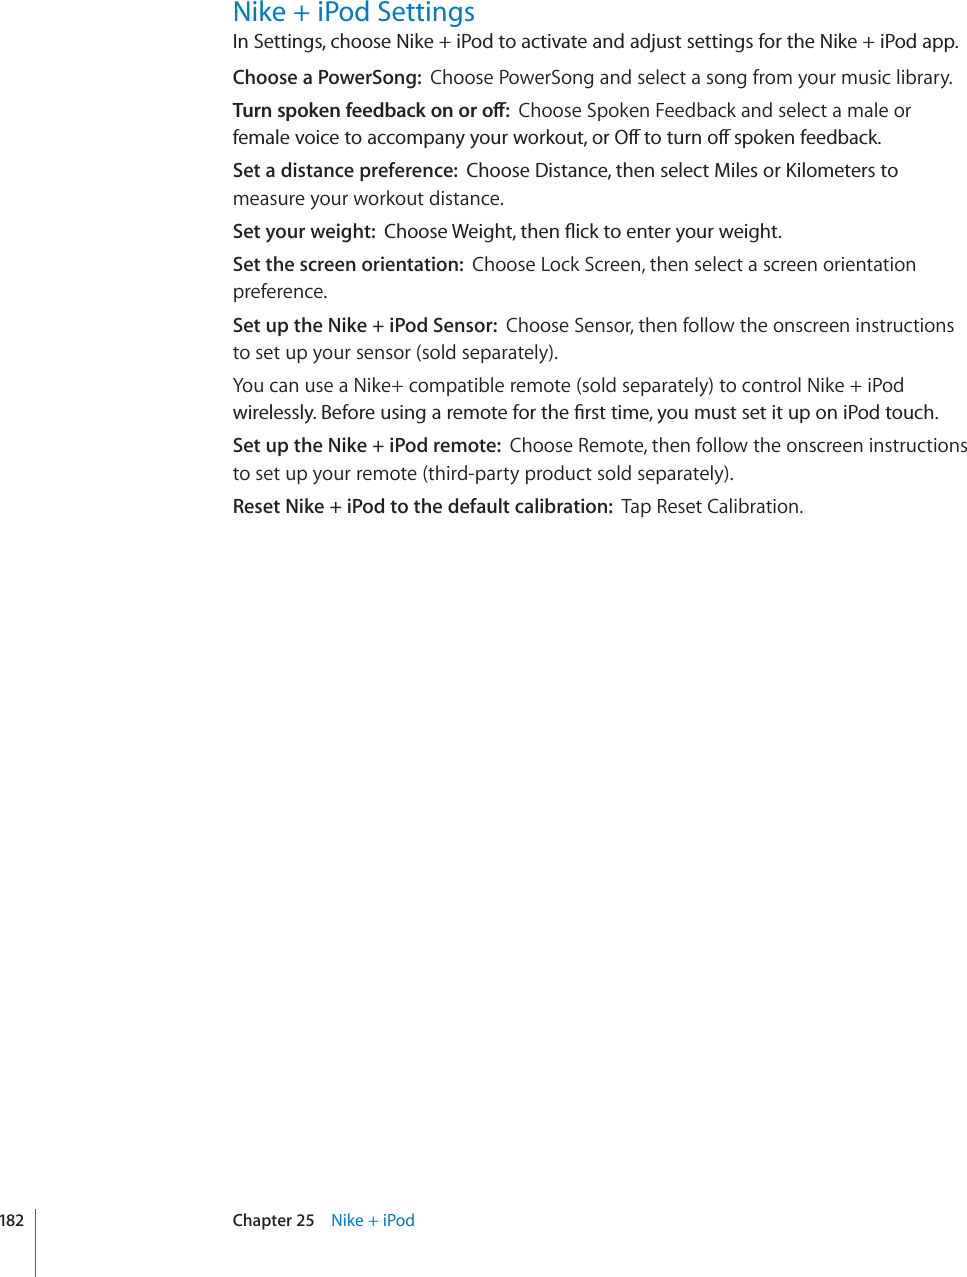
![Search for a video:1 6CR5GCTEJVCR/QTG°TUVKH5GCTEJKUP¨VXKUKDNGVJGPVCRVJG;QW6WDGUGCTEJ°GNF2Type a word or phrase that describes what you’re looking for, then tap Search.YouTube shows results based on video titles, descriptions, tags, and user names. Listed videos show title, rating, number of views, length, and the account name that posted the video.Play a video: Tap the video.The video begins to download to iPod touch and a progress bar appears. When enough of the video has downloaded, it begins to play. You can also tap to start the video.Controlling Video PlaybackWhen a video starts playing, the controls disappear so they don’t obscure the video.Show or hide the video controls: Tap the screen.5L_[-HZ[MVY^HYK7SH`7H\ZL,THPS:JHSL+V^USVHKWYVNYLZZ=VS\TL7SH`OLHK :JY\IILYIHY)VVRTHYR 7YL]PV\ZYL^PUKPlay or pause a video Tap or .Adjust the volume Drag the volume slider, or use the volume buttons on the side of iPod touch.Start a video over Tap .Skip to the next or previous video in a list Tap twice to skip to the previous video. Tap to skip to the next video.Rewind or fast-forward Touch and hold or .Skip to any point in a video Drag the playhead along the scrubber bar.5VQRYCVEJKPICXKFGQDGHQTGKV°PKUJGURNC[KPI Tap Done, or press the Home button.5YKVEJDGVYGGPUECNKPICXKFGQVQ°NNVJGUETGGPQT°VVQVJGUETGGPDouble-tap the video. You can also tap to OCMGVJGXKFGQ°NNVJGUETGGPQTVCR to make KV°VVJGUETGGPAdd a video to Favorites using video controls Start playing a video and tap .Email a link to the video using video controls Start playing a video and tap .112 Chapter 13 YouTube](https://usermanual.wiki/Apple/E2407.Full-user-manual/User-Guide-1336214-Page-112.png)

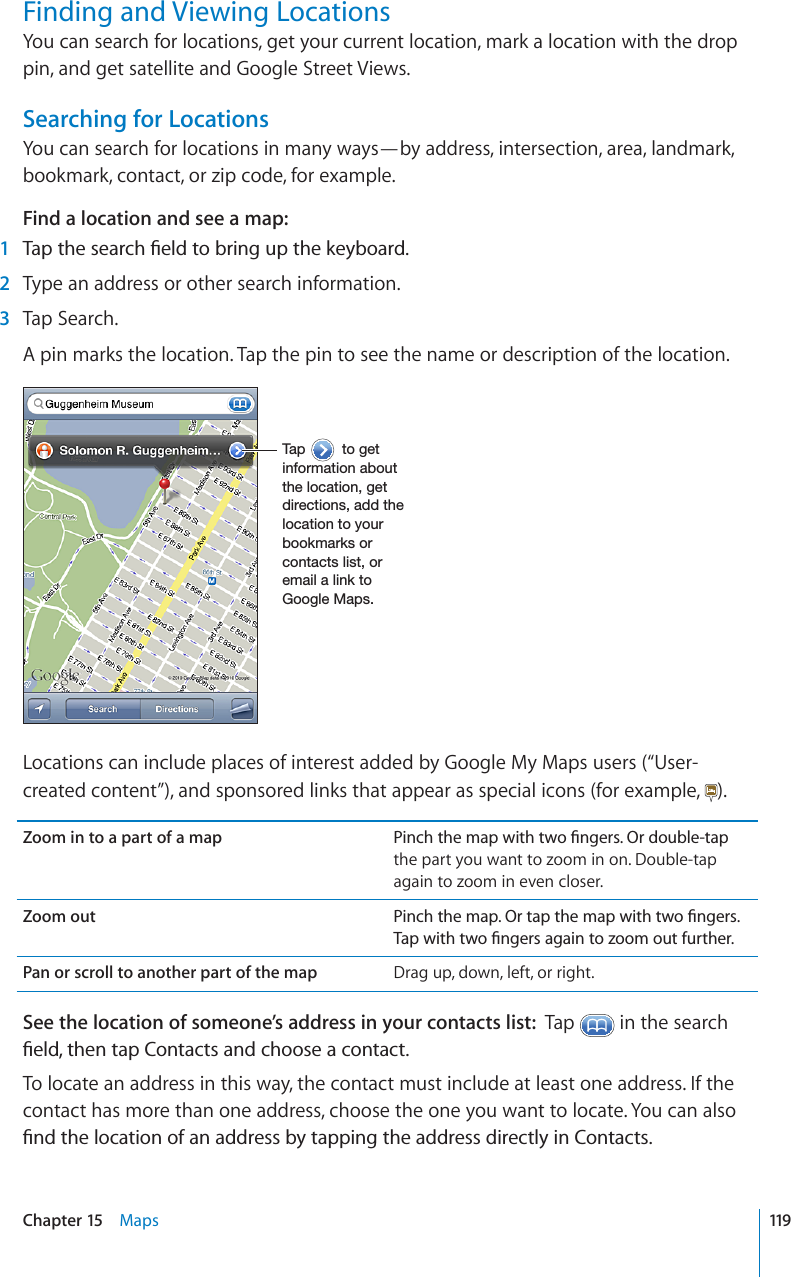
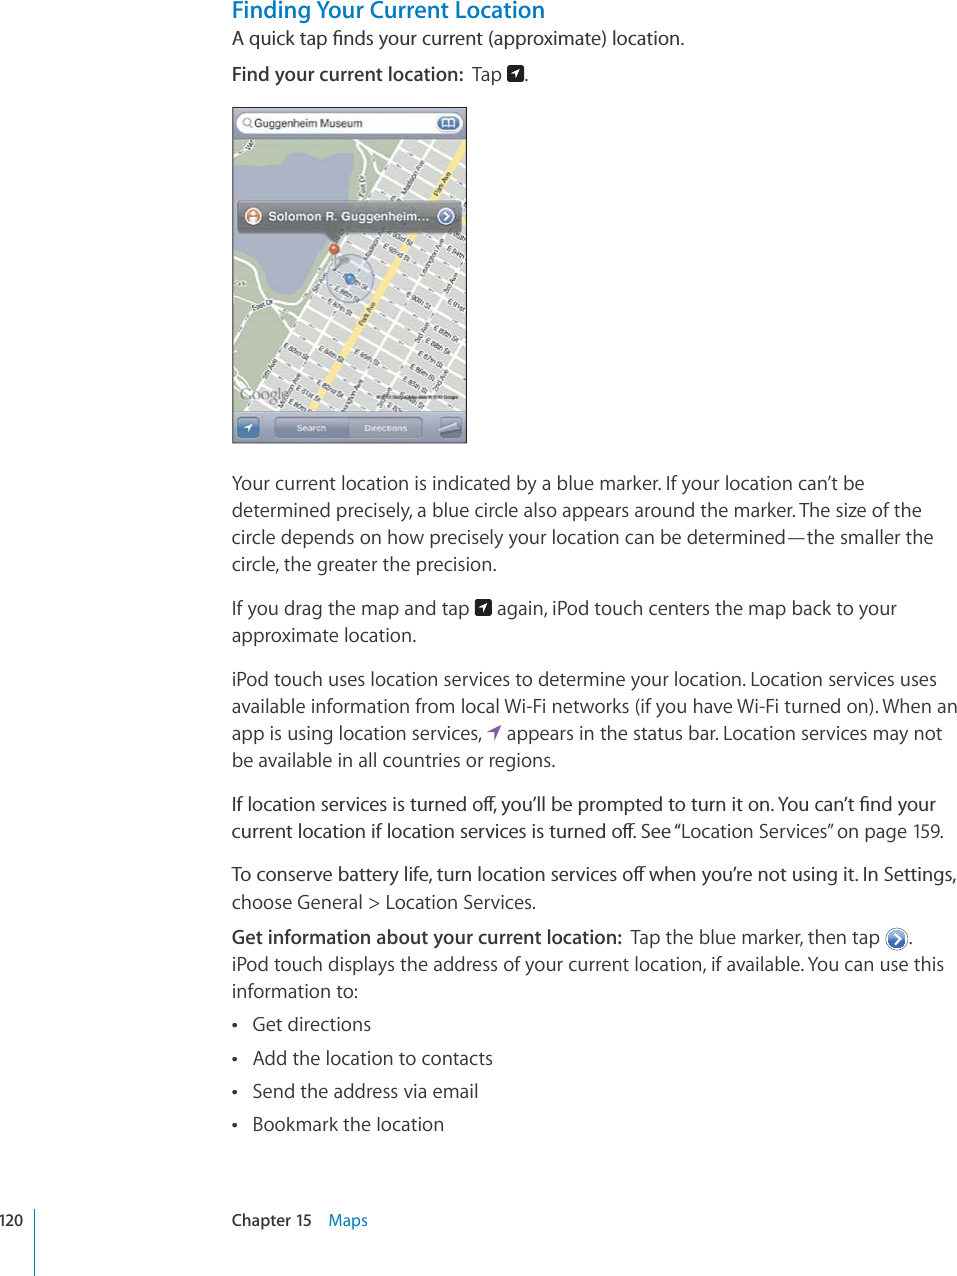
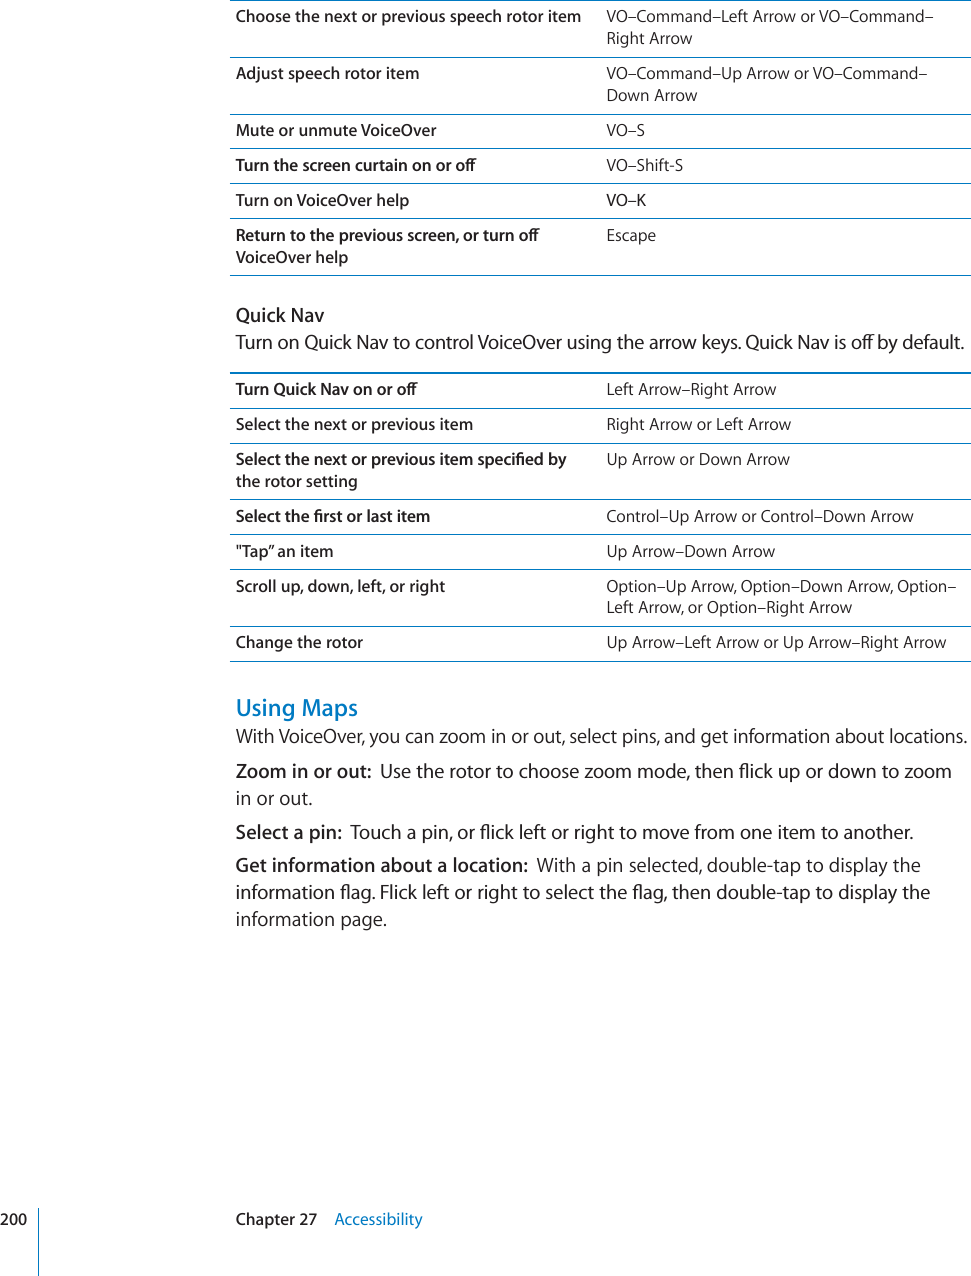
![See the Google Street View of a location:Tap. Flick left or right to pan throughthe 360° panoramic view. (The inset shows your current view.) Tap an arrow to movedown the street. To return to map view, tap the map inset in the lower-right corner.;HW[VYL[\YU[VTHW]PL^Street View may not be available in all areas.Getting DirectionsYou can get step-by-step directions for driving, taking public transit, or walking toa destination.Get directions:1Tap Directions.2'PVGTUVCTVKPICPFGPFKPINQECVKQPUKPVJG5VCTVCPF'PF°GNFU$[FGHCWNVK2QFVQWEJstarts with your current approximate location (if available). Tap KPGKVJGT°GNFVQchoose a location in Bookmarks (including your current location and the dropped pin, if available), Recents, or Contacts. If KUP¨VUJQYKPIFGNGVGVJGEQPVGPVUQHVJG°GNFFor example, if a friend’s address is in your contacts list, you can tap Contacts and tapyour friend’s name instead of having to type the address.To reverse the directions, tap.3Tap Route (if you entered locations manually), then select directions by car (), directions by public transit (), or directions by walking ().The travel options available depend on the route. 4Do one of the following:122Chapter 15Maps](https://usermanual.wiki/Apple/E2407.Full-user-manual/User-Guide-1336214-Page-122.png)

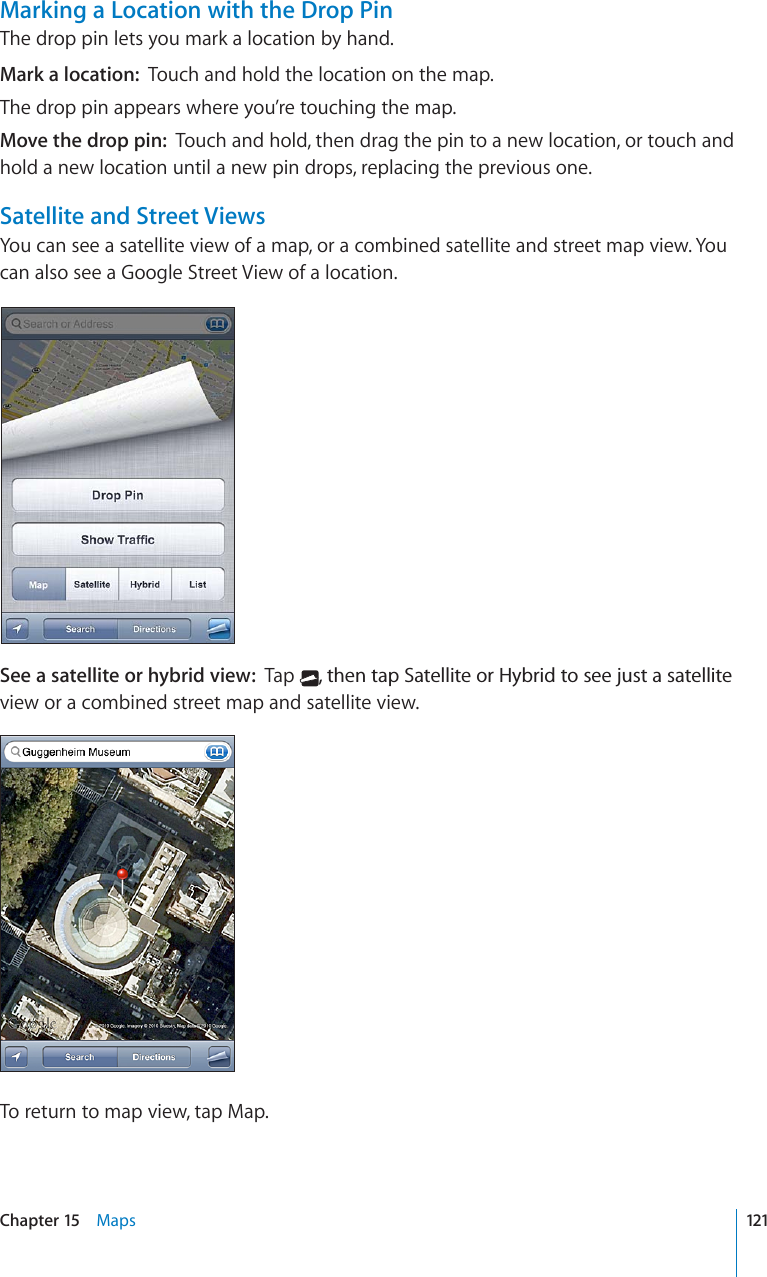
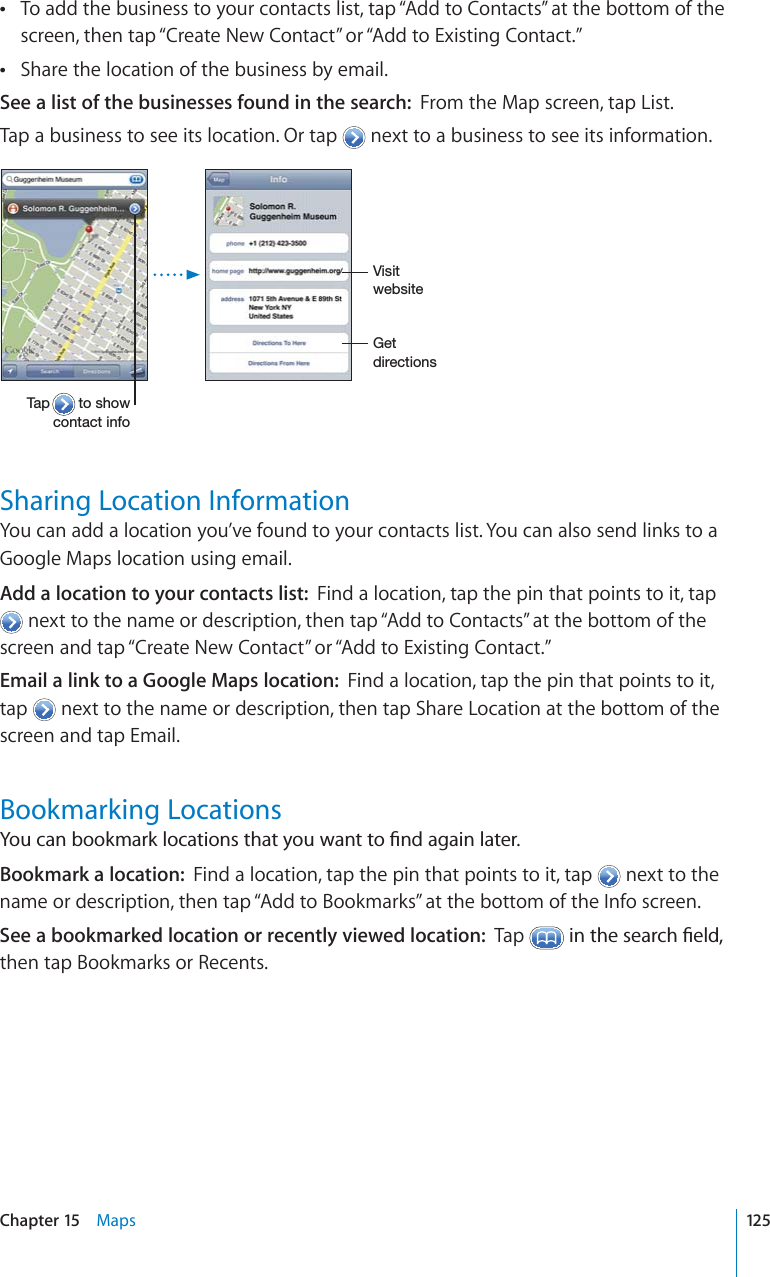
![5JQYKPI6TCÓE%QPFKVKQPU9JGPCXCKNCDNG[QWECPUJQYVTCÓEEQPFKVKQPUHQTOCLQTUVTGGVUCPFJKIJYC[UQPthe map. 5JQYQTJKFGVTCÓEEQPFKVKQPUTap VJGPVCR5JQY6TCÓEQT*KFG6TCÓE5VTGGVUCPFJKIJYC[UCTGEQNQTEQFGFVQKPFKECVGVJG±QYQHVTCÓE.YLLU$WVZ[LKZWLLKSPTP[@LSSV^$ZSV^LY[OHU[OLWVZ[LKZWLLKSPTP[.YH`$UVKH[HJ\YYLU[S`H]HPSHISL9LK$Z[VWHUKNV+H[QWFQP¨VUGGVTCÓE[QWOC[PGGFVQ\QQOQWVVQCNGXGNYJGTG[QWECPUGGOCLQTTQCFU6TCÓEEQPFKVKQPUCTGPQVCXCKNCDNGKPCNNCTGCUFinding and Contacting BusinessesFind businesses in an area:1Find a location—for example, a city and state or country, or a street address—or scroll to a location on a map.2 6[RGVJGMKPFQHDWUKPGUUKPVJGVGZV°GNFCPFVCR5GCTEJPins appear for matching locations in the area. For example, if you locate your city and then type “movies” and tap Search, pins mark movie theaters in your city.Tap the pin that marks a business to see its name or description.(KPFDWUKPGUUGUYKVJQWV°PFKPIVJGNQECVKQP°TUVType things like:restaurants san francisco caapple inc new yorkContact a business or get directions: Tap the pin that marks a business, then tap next to the name.From there, you can do the following:Tap an email address to send email to, or a web address to visit.For directions, tap Directions To Here or Directions From Here.124 Chapter 15 Maps](https://usermanual.wiki/Apple/E2407.Full-user-manual/User-Guide-1336214-Page-124.png)
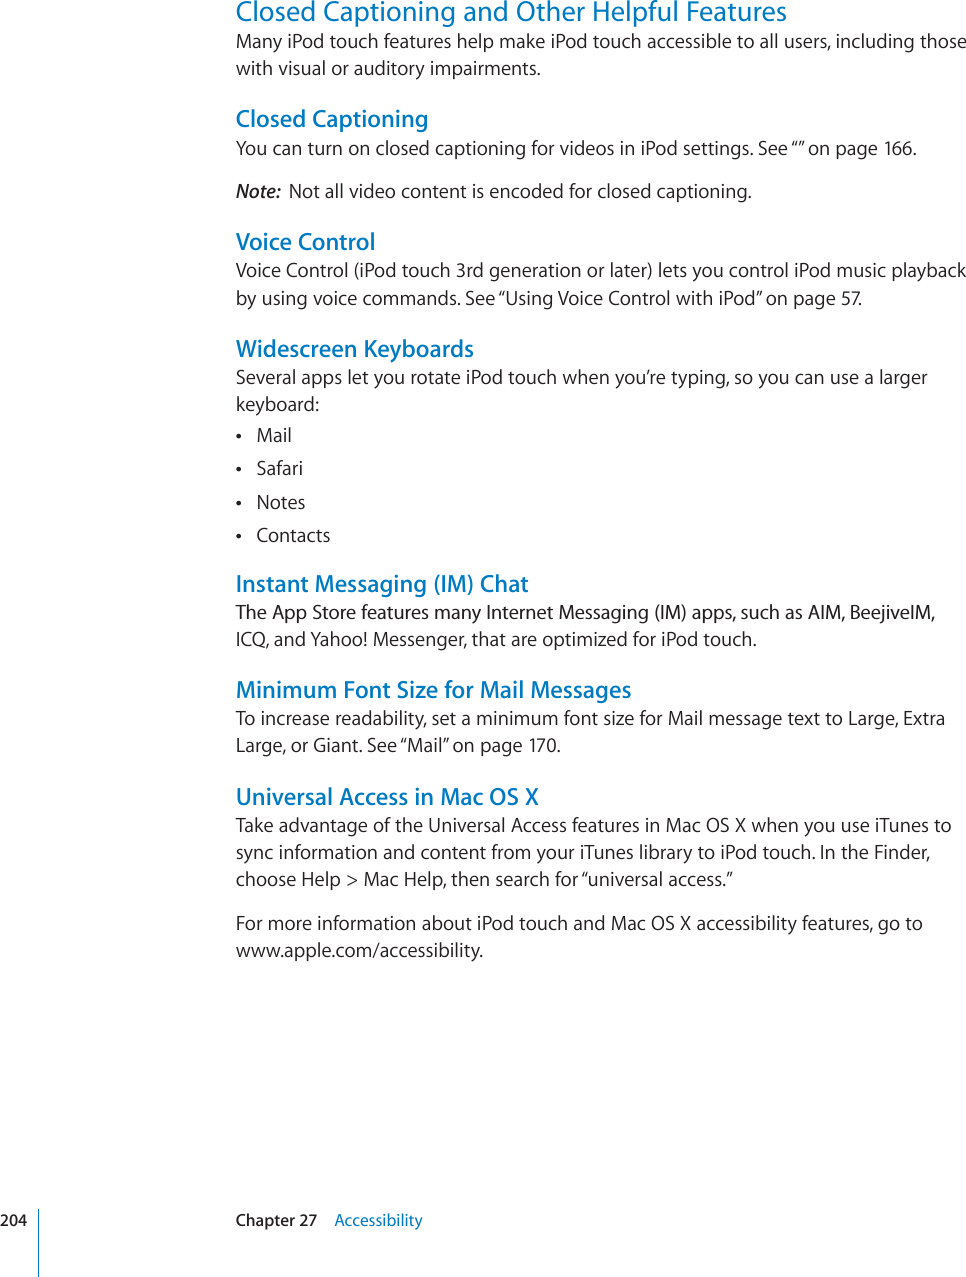
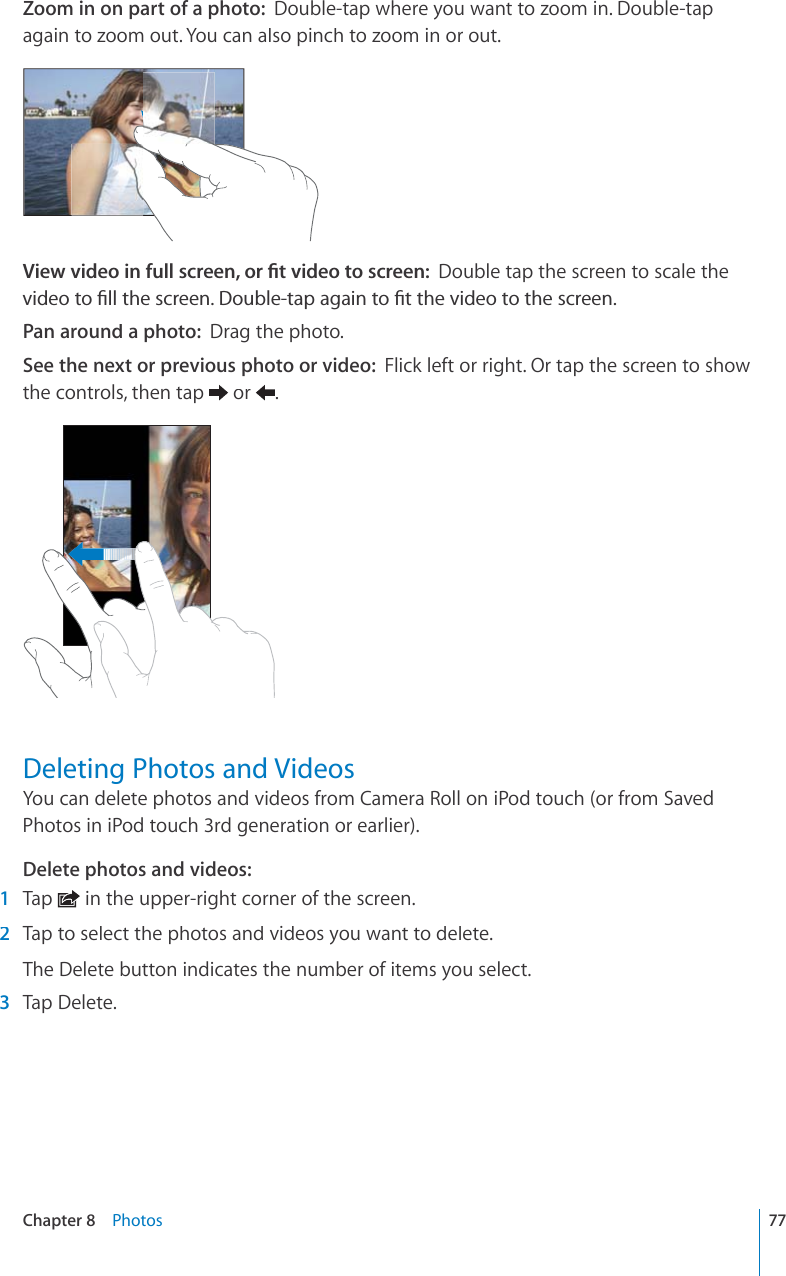
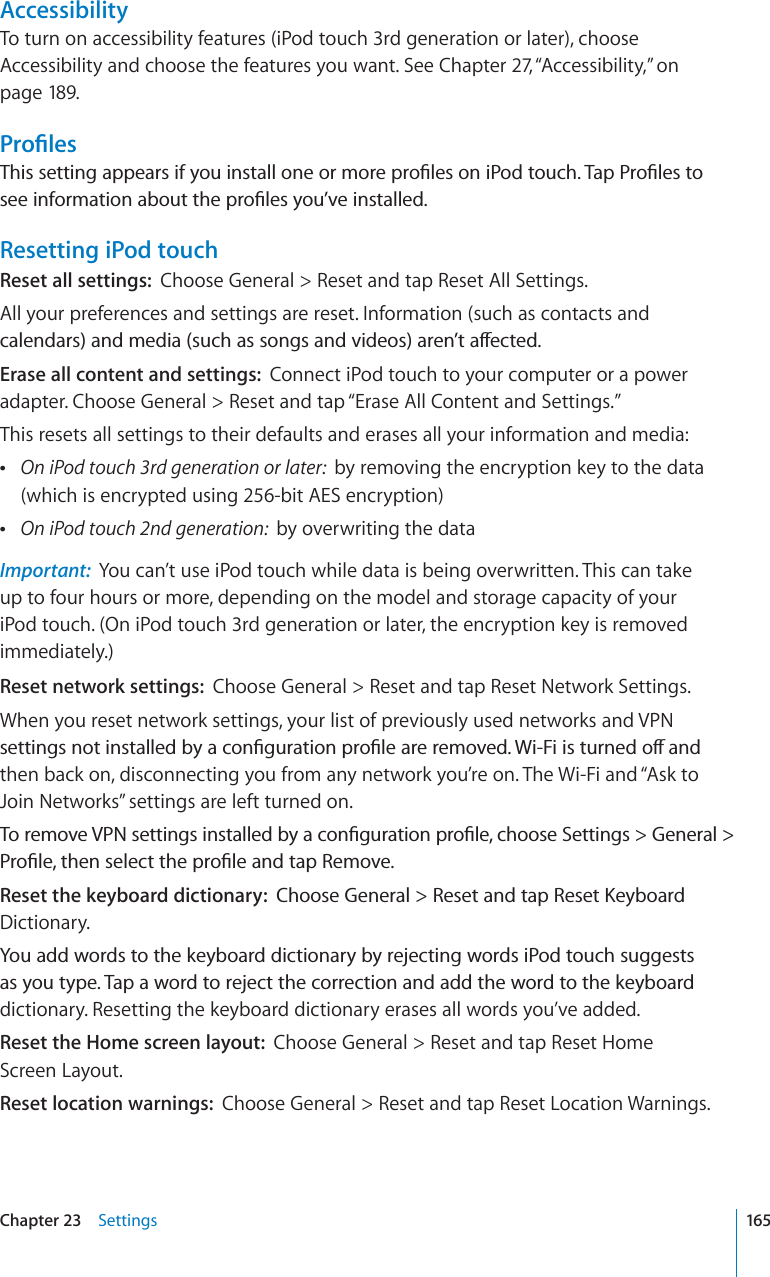
![Voice Memos 20Recording Voice MemosVoice Memos lets you use iPod touch as a portable recording device.Voice Memos uses the internal microphone in iPod touch 4th generation. To use Voice Memos on iPod touch 2nd generation or iPod touch 3rd generation, connect the Apple Earphones with Remote and Mic or a compatible accessory with a microphone. These include Apple-branded earbuds and authorized third-party accessories marked with the Apple “Made for iPod” logo.;QWECPCFLWUVVJGTGEQTFKPINGXGND[OQXKPIVJGOKETQRJQPGENQUGTVQQTHWTVJGTaway from what you’re recording. For better recording quality, the loudest level on the level meter should be between –3dB and 0 dB.9LJVYKI\[[VU(\KPVSL]LSTL[LY.V[V]VPJLTLTVZ136](https://usermanual.wiki/Apple/E2407.Full-user-manual/User-Guide-1336214-Page-136.png)


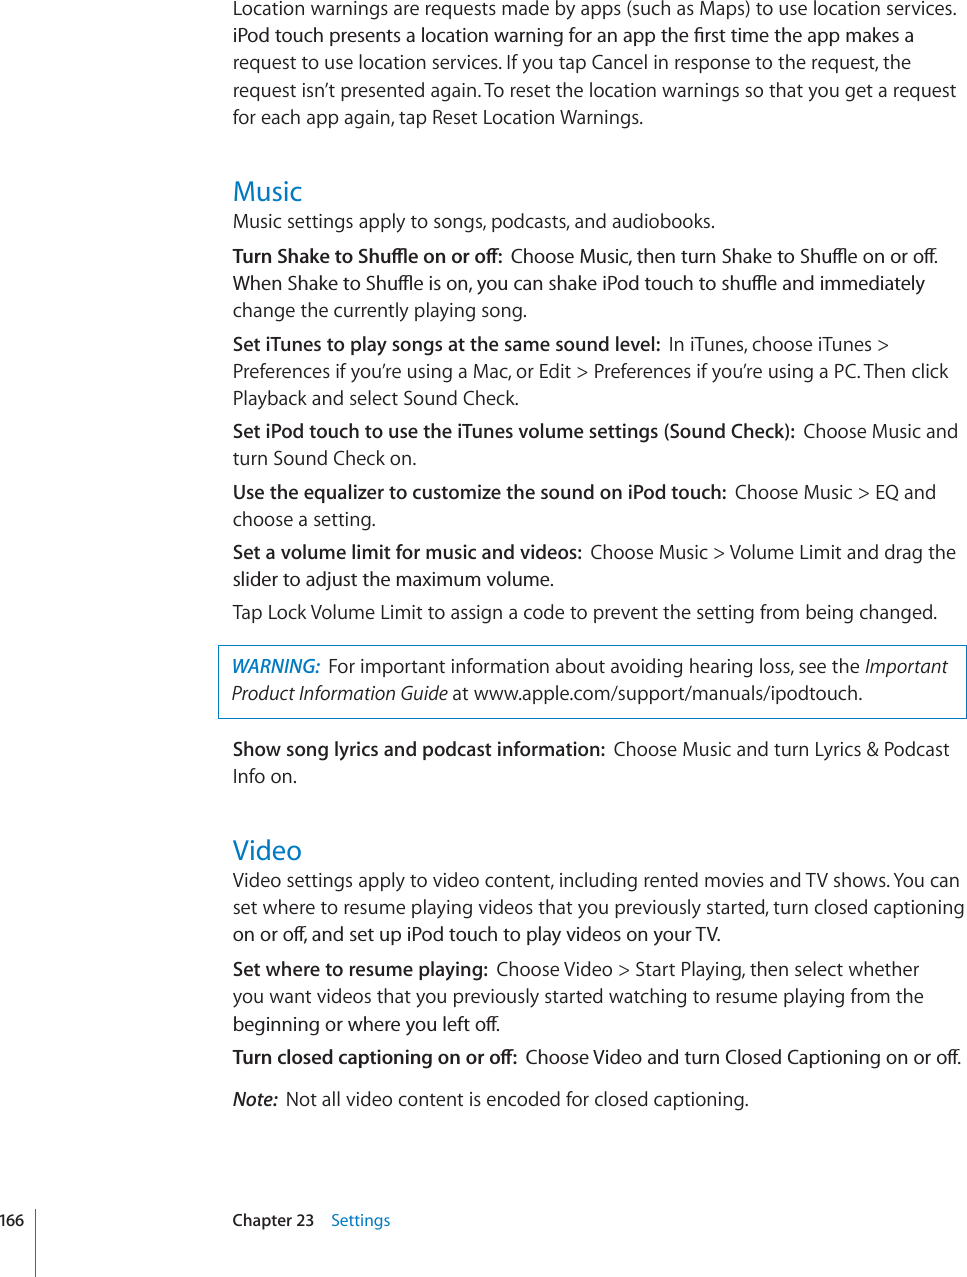
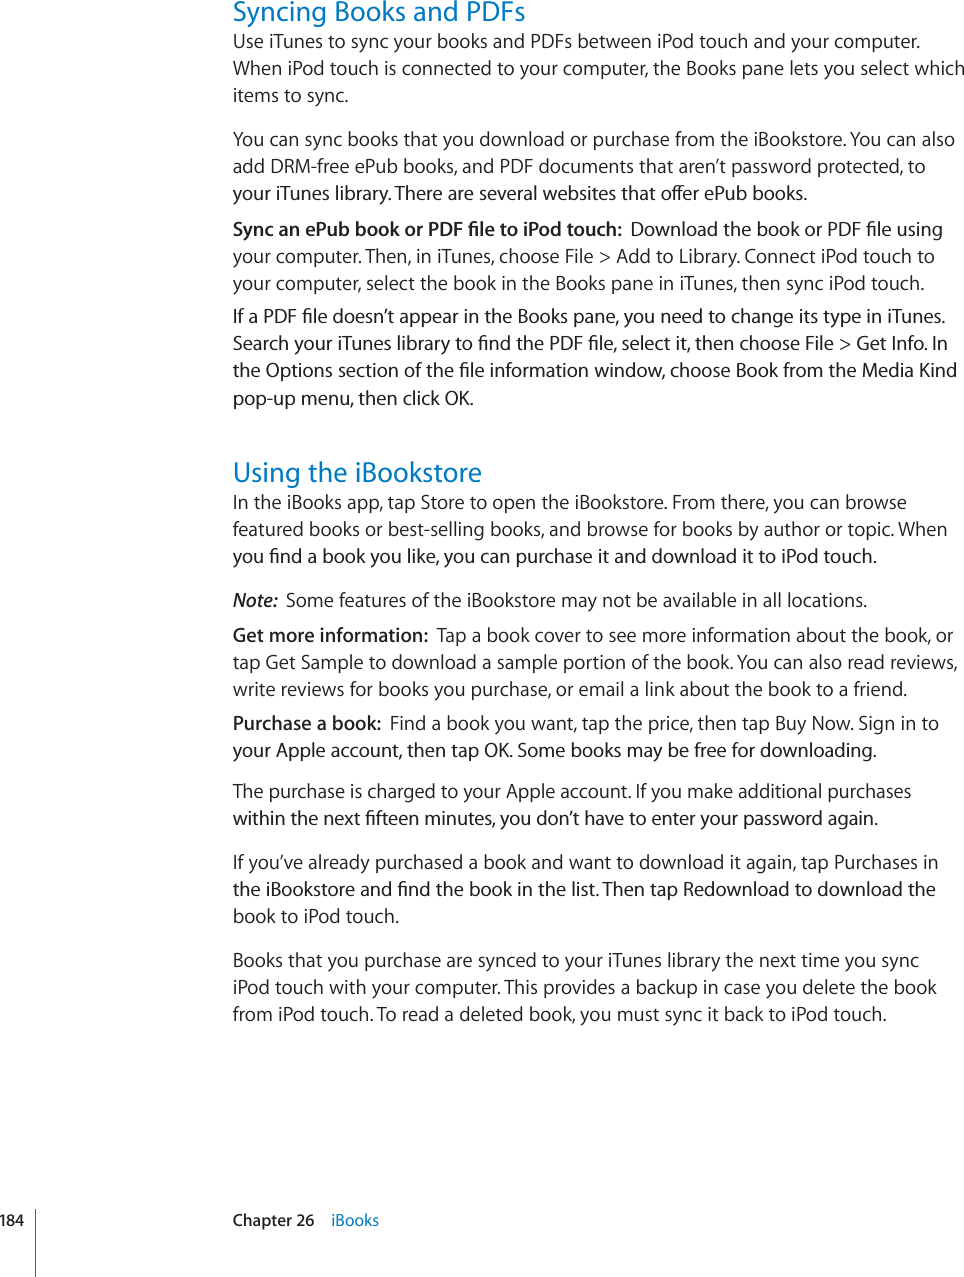
![iBooks26About iBooksiBooks is a great way to read and buy books. Download the free iBooks app fromthe App Store, and then get everything from classics to best sellers from the built-iniBookstore. Once you download a book, it’s displayed on your bookshelf. Add ePub and PDF books to your bookshelf using iTunes. Then tap a book to startTGCFKPIK$QQMUTGOGODGTU[QWTNQECVKQPUQ[QWECPGCUKN[TGVWTPVQYJGTG[QWNGHVQÒA wide range of display options makes the books easy to read.Note: The iBooks app and the iBookstore may not be available in all languagesor locations.(]HPSHISLVU[OLP)VVRZ[VYL;P[SLH]HPSHIPSP[`PZZ\IQLJ[[VJOHUNLTo download the iBooks app and use the iBookstore, you need an Internet connectionand an Apple account. If you don’t have an Apple account, or if you want to makepurchases from another Apple account, go to Settings > Store. See “Store”on page168.183](https://usermanual.wiki/Apple/E2407.Full-user-manual/User-Guide-1336214-Page-183.png)