Arcadyan Technology WG4005G DIGITAL TRANSMISSION SYSTEM User Manual P74808 A F5D7230 4 QIG indd
Arcadyan Technology Corporation DIGITAL TRANSMISSION SYSTEM P74808 A F5D7230 4 QIG indd
USERS MANUAL
Next
(click)
Next
(click)
Next
(click)
Next
(click)
Next
(click)
Next
(click)
Next
(click)
Next
(click)
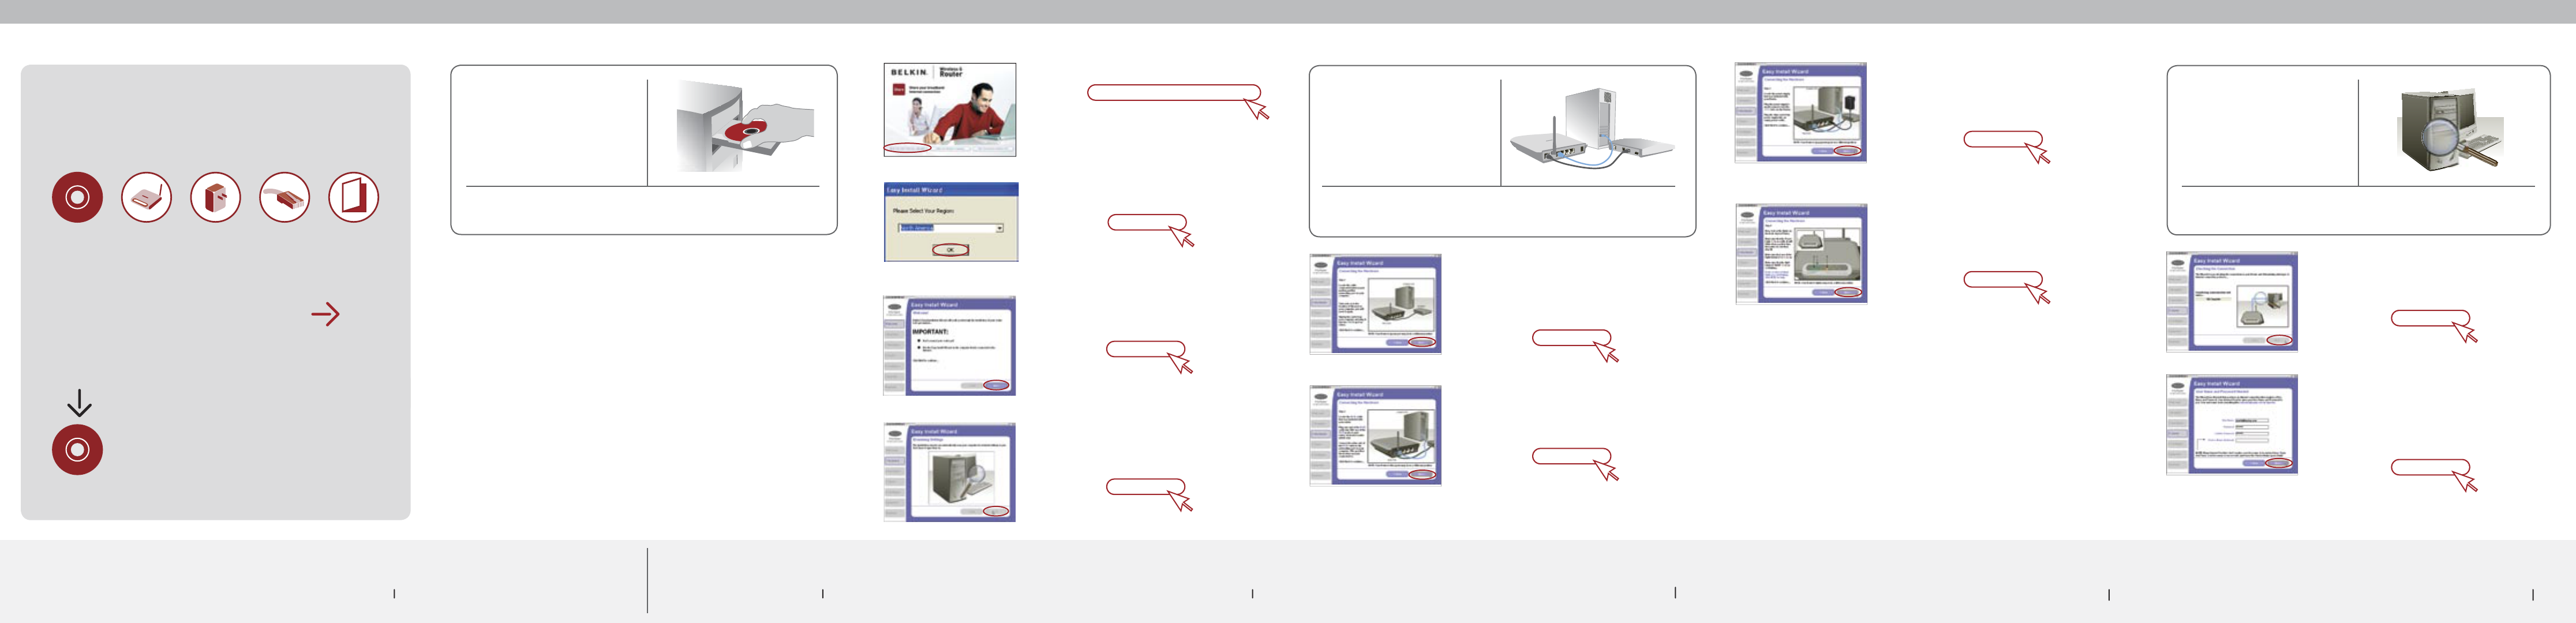
Run the Easy Install Wizard
(click)
OK
(click)
Run the Easy Install Wizard Software
NOTE for Windows Users:
If the Easy Install Wizard does not start up
automatically, select your CD-ROM drive from
“My Computer” and double-click on the file
named “EasyInstall.exe” on the CD-ROM.
Make sure you have
the following:
Wireless G
Router
Installation
Software CD
Auto Setup
Users of
Windows® 98SE
Windows Me
Windows 2000
Windows XP
Mac OS® 9.2
Mac OS X
can use Easy Install Wizard
IMPORTANT: Run the Easy Install
Wizard from the computer that is
directly connected to the cable or
DSL modem. DO NOT CONNECT
the Router at this time.
Make sure you have the following 1
1. Install
1.1 Shut down any programs that are running
on your computer. DO NOT CONNECT
THE ROUTER AT THIS TIME.
1.2 Turn off any firewall or Internet-connection-
sharing software on your computer.
1.3 Windows users: Insert the Easy Install
Wizard software CD into your
CD-ROM drive. The Easy Install Wizard
screen will automatically appear
on your screen within 15 seconds.
Mac OS Users: Insert the CD into your
CD-ROM drive. A drive will appear on
your desktop called “Belkin Easy Install”.
Double-click the drive to open it.
Mac OS 9 users—double-click the program
called “Easy Install OS 9”. Mac OS X
users—double-click the program called
“Easy Install OSX.dmg”.
1.4 You will see the Wizard’s welcome screen.
1.5 Select your region from the drop-down box
shown on the screen.
1.6 You will now see the first of a series of
progress screens to help you know where
you are in the setup process.
1.7 The next screen will tell you that the
Wizard is examining your network settings.
When the Wizard is finished examining
your settings, click “Next”.
Ethernet
Cable
2. Connect
Connect your Router to your Computer and Modem
Power
Supply
Manual Setup
Advanced Users
Go to “Alternate
Setup Method” in
your User Manual.
User
Manual
Install 2
2.1 This step instructs you to locate the
cable connected between your modem
and the networking port on your
computer. Unplug this cable from the
computer and plug it into the GREEN
modem port on the Router.
2.2 This step instructs you to locate the
wired computer cable that is included
with your Router. Plug one end of
this cable into ANY one of the BLUE
wired computer ports on your Router.
Plug the other end of the cable into the
networking port on your computer.
2.3 This step instructs you to locate the power
supply that is included with your Router.
Plug the power supply’s small connector
into the GRAY port on the Router. Plug the
power supply into an empty power outlet.
2.4 This step instructs you to look at the lights
on the front of your Router. Make sure the
appropriate lights are ON. Refer to the
Easy Install software on your computer’s
screen for more details. 3.1 Once you have connected the Router,
the Wizard will check the connection
and then determine what type of Internet
connection you have.
3.2 User Name and Password Needed
If you have a connection type that
requires a user name and password, the
Wizard will ask you to type them in. If
your connection type does not require
a user name and password, you will not
see this screen.
3. Check
Check the Router’s Connection
Connect 5Check 6
Connect 4
Install 3
Next
(click)
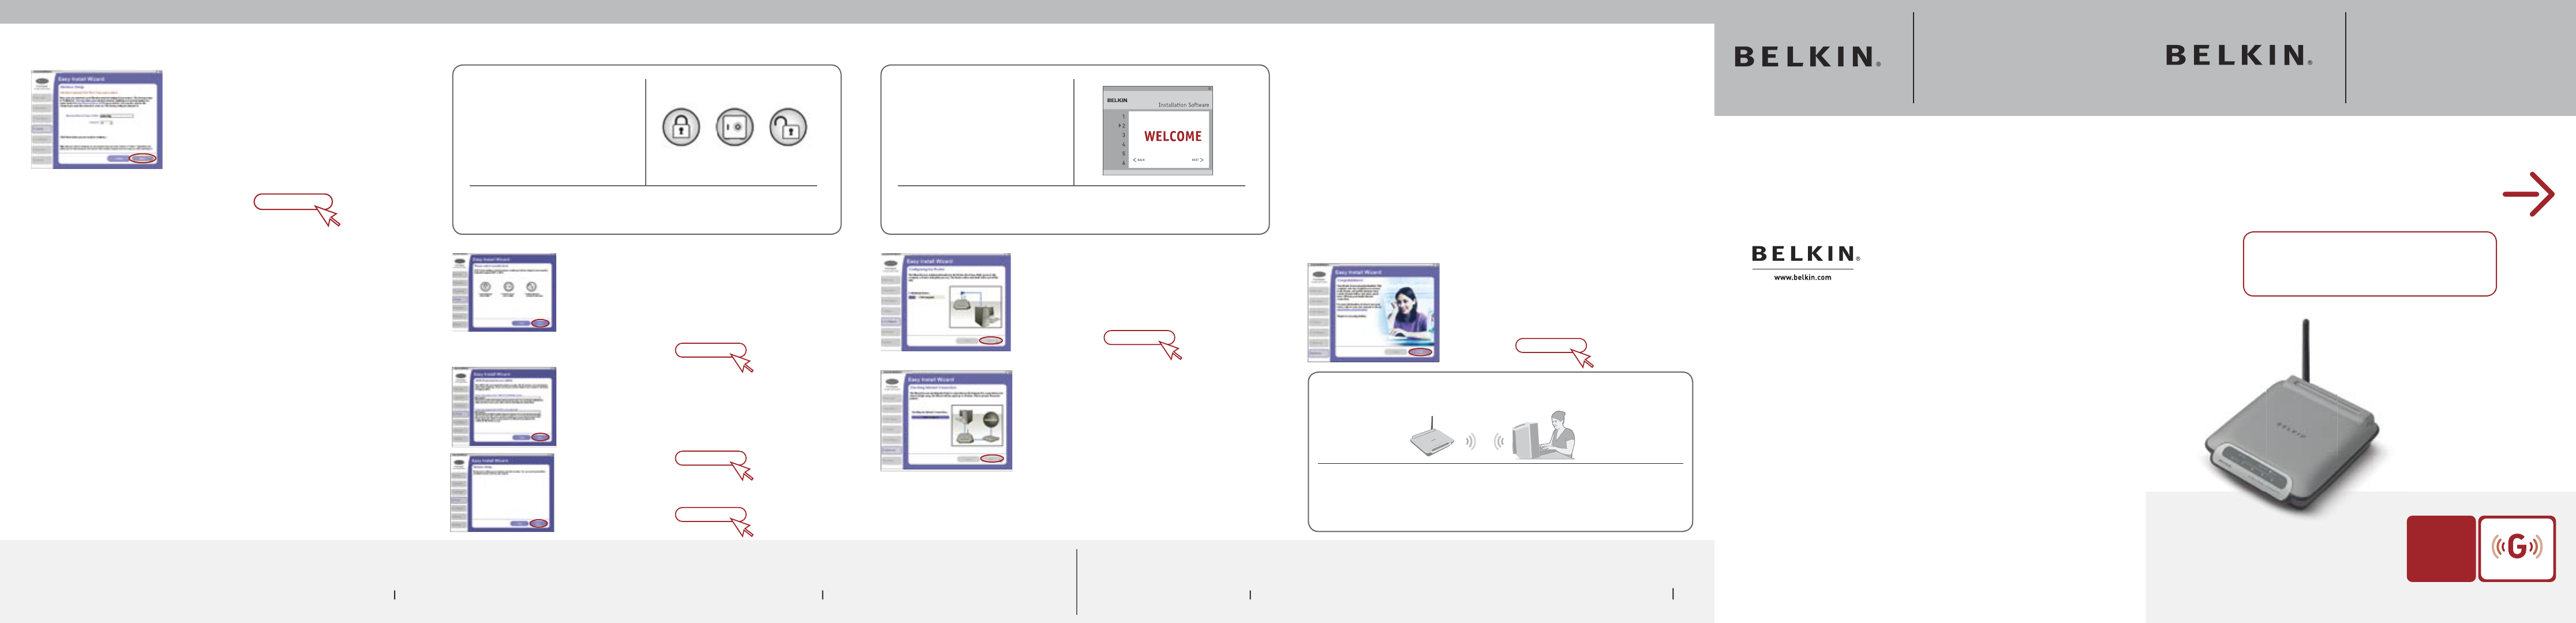
4. Secure
Set Up Network Security
Next
(click)
5. Confi gure
Confi gure the Router
Next
(click)
Next
(click)
Next
(click)
Finish
(click)
F5D7230-4
© 2005 Belkin Corporation. All rights reserved. All trade names are registered trademarks of respective
manufacturers listed. Mac OS is a trademark of Apple Computer, Inc., registered in the U.S. and other countries.
P74808-A
Check 7
Need Help?
Please visit http://www.belkin.com/networking for
latest software updates and technical information.
Secure 8
4.1 After connection has been established,
you will be prompted by the Easy Install
Wizard to select your desired security level.
4.2 WEP and WPA are the two security options.
If you do not want security or would prefer
to install at a later time, click the radio
button next to “NONE”, and click “Next.”
4.3 The Wi-Fi Protected Access (WPA)
security option features a two-password
setup. You can select one password that
provides COMPLETE NETWORK access
and another password for GUEST (Internet
only) access only. Click “Next”.
4.4 Security setup is now complete. Click
“Next” to configure.
Congratulations! You have finished installing your new Belkin Router. To test
your Internet connection, open your browser and visit any website, such as
www.belkin.com. A pop-up reminder screen for our included Parental Control
Web Content Filter will appear. Please refer to your “Parental Control Web
Content Filter” User Manual for detailed information.
Confi gure 9
Quick Installation
Guide
Start Networking!
3.3 Wireless Setup
This Step Is Optional. Click “Next” if you
want to skip it.
Using this step, you can customize
your wireless network settings if you
want to. Consult the User Manual for
more details. Follow the steps on the
screen to complete this step. Click
“Next” to continue.
Belkin Ltd.
7 Bowen Crescent, West Gosford
NSW 2250, Australia
+61 (0) 2 4372 8600
+61 (0) 2 4372 8603 fax
Belkin B.V.
Boeing Avenue 333
1119 PH Schiphol-Rijk, The Netherlands
+31 (0) 20 654 7300
+31 (0) 20 654 7349 fax
Belkin Tech Support
US: 877-736-5771
310-898-1100 ext. 2263
Europe: 00 800 223 55 460
Australia: 1800 235 546
New Zealand: 0800 235 546
Singapore: 800 616 1790
Belkin Corporation
501 West Walnut Street
Compton, CA 90220-5221, USA
310-898-1100
310-898-1111 fax
Belkin Ltd.
Express Business Park, Shipton Way
Rushden, NN10 6GL, United Kingdom
+44 (0) 1933 35 2000
+44 (0) 1933 31 2000 fax
If installing numerous networking devices at
the same time, always install your Router fi rst
before installing other network components,
such as notebook cards and desktop cards.
Start Here
Confi gure 10
establish an Internet connection. This step will
allow the modem to reconfigure itself properly
to work with the Router. Please follow the
instructions in the sequence indicated below:
1. Unplug the power from the modem
(supplied by your ISP).
2. Unplug the power supply from your Router.
3. Wait five minutes.
4. Reconnect power to the modem.
5. Wait for the modem to power up (about
one minute; please refer to the modem’s
documentation for more details).
6. Reconnect power to the Router.
7. Check your Internet connection.
5.3 Finished
When the Internet connection is complete,
the Wizard will tell you that you are finished.
The “Connected” LED on the front of the
Router will be solid GREEN, indicating that
the Router is now connected to the Internet.
5.1 The Wizard will now transfer all of the
configuration information to the Router.
This will take approximately one minute.
During this time, do not turn off the Router
or computer. The Router will restart itself
at the end of this step.
5.2 Checking Internet
The Wizard will now check for an Internet
connection. This can take a few minutes.
The Wizard may not detect a connection
right away. If not, it will retry a number of times.
The “Connected” light on the front panel
of the Router will flash during this time.
Please be patient through this process,
and wait for the connection to be detected.
Note: If the Easy Install Wizard repeatedly
displays an error stating that it cannot
make an Internet connection, you may need
to power cycle your modem in order to
�
�
�
�
Wireless G
Router
Wireless G
Router
(15.21)
•Warning: Changes or modifications to this unit not expressly approved by the party responsible for compliance could void the user authority to
operate the equipment.
15.19 (a)(3)
This device complies with Part 15 of the FCC Rules. Operation is subject to the following two conditions: (1) this device may not cause harmful
interference, and (2) this device must accept any interference received, including interference that may cause undesired operation.
The users manual or instruction manual for an intentional or unintentional radiator shall caution the user that changes or modifications not
expressly approved by the party responsible for compliance could void the user’s authority to operate the equipment.
CAUTION:
1. To comply with FCC RF exposure compliance requirements, a
separation distance of at least 20 cm must be maintained
between the antenna of this device and all persons.
2. This Transmitter must not be co-located or operating in
conjunction with any other antenna or transmitter