Arima Communication 2600 GSM Cellphone User Manual 2600 manual PA2
Arima Communication Corporation GSM Cellphone 2600 manual PA2
Users Manual Revised

2600 Operation Manual

Contents
Your phone
• Keys and connectors
Getting started
• Installing the SIM card and the battery
• Charging the battery
• Switching the phone on and off
Call functions
• Making a call
• Answering or rejecting an incoming call
• Call waiting
• Handling more than one call
Menu functions
1. Messages
2. Sound Settings
3. LCD Settings
4. Fun and Tools
5. Call Log
6. Phonebook
7. WAP
8. Phone Settings
9. Call Services
10. Security
General information
Care and Maintenance
Your phone
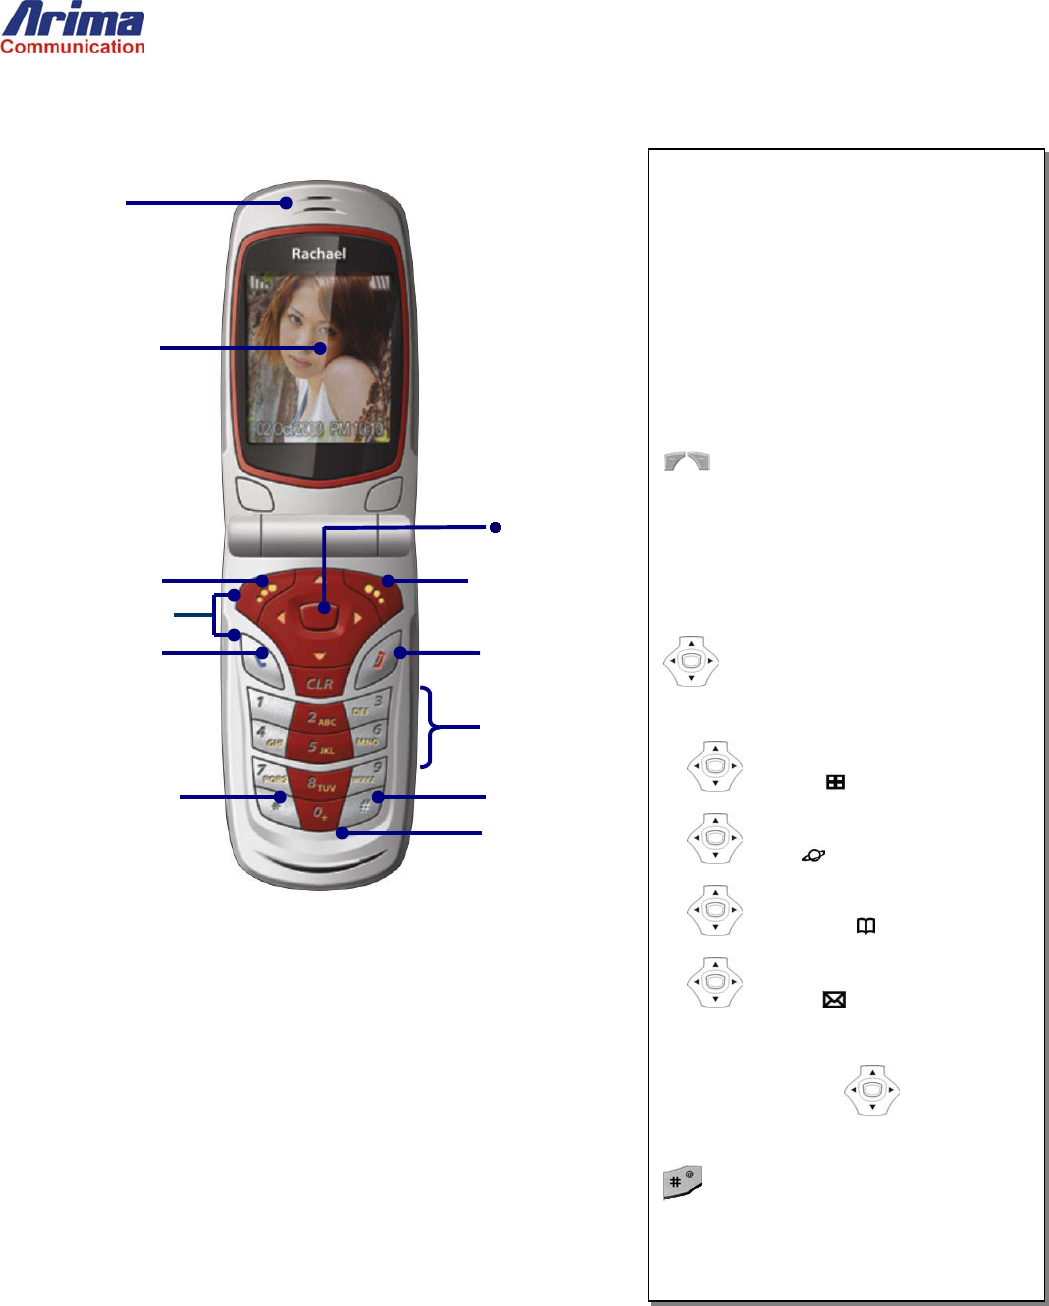
Keys and connectors
Earpiece
Side key
Main display
Power on/End call key
Left soft key Right soft key
Power on key
Navigation key
N
umeric key
# key
¼ key
Microphone
Side key
• During a call, adjusts the earpiece
volume.
• In standby mode, the keys adjust the ring
volume.
• To reject an incoming call, press the side
key twice.
Soft key
• The current functions are displayed in
the bottom line of LCD. The soft key
display as shortcut to access the sub
menu.
• In standby mode, quick access to
Profile
WAP
Phone book
Message
• In sub menu, use to scroll up
and down to select an item to view
• Long press to activate Silent mode

Getting Started
Installing the SIM Card and the Battery
You need to insert the SIM card and charge the battery before using the phone.
• Keep all miniature SIM cards out of the reach of small children.
• Be careful to handle, insert or remove the SIM card since the SIM card and its contacts can easily be damaged by scratched
or bending.
• Before installing/removing the SIM card, always make sure that the phone is switched off.
1. Remove the battery – Slide the catch above the battery toward the top of the phone and lock it in position, then Lift the battery
away.
2. Insert and slide the SIM card.
Note: To remove the card, slide it to the left as shown in the diagram below.
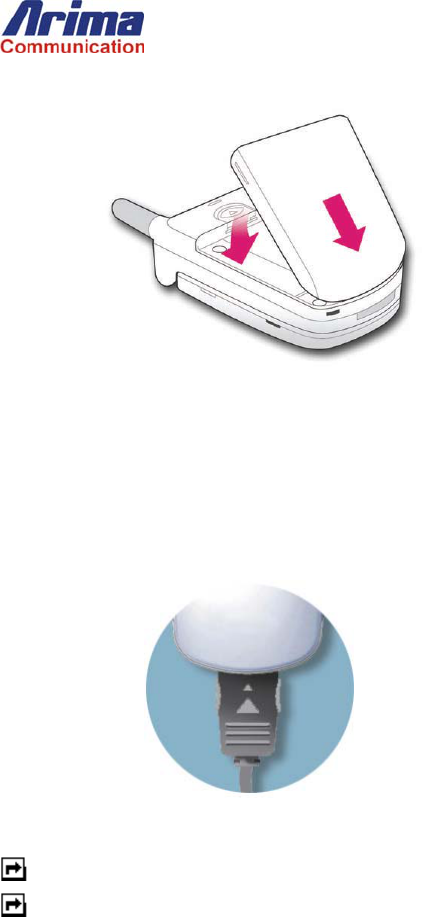
3. Engage the battery with the bottom edge of the phone and then lower the other end until it clicks into place.
Charging the Battery
You must fully charge the battery before using your phone for the first time.
1. Connect the lead from the travel adapter to the socket on the bottom of your phone .
2. Connect the charger to an AC wall outlet.
Note: You can use the phone while the charger is connected but charging is suspended during that time.
Note: When the battery is low, the phone will emit a warning tone and display a warning message. When the battery
becomes too low for the phone to operate, it switches off automatically.
Basic Operations
Switching the Phone on and off
• Hold down the key for more than one second to switch the phone on. A start-up welcome message will appear briefly
on the display.
• Hold down the key for more than one second to switch the phone off. A power-off melody will sound to confirm the
action. A “Good Bye” message will be briefly displayed on the screen. The phone will then switch off.
Note: Make sure the phone is switched off before removing the battery; otherwise data that needs to be saved in the SIM may
be lost.
Make a Call
• In standby mode, key in the number, including the area code, press .
Note: Use Right/Left key to move the cursor and the to delete the character.
Answer or Reject a Call
• Press the ANSWER to accept the call.
• To reject a call, briefly press the key.
Hang Up
To end a call, briefly press the key or close the flip-lid.
The call timer will stop. A Call Ended message will briefly be shown on the display.
Adjust the Volume
Use the Up/Down keys on the side of the phone to adjust volume. Ringer volume, voice volume, and key-tone volume can be
adjusted independently:
• While the phone is ringing, the Up/Down keys adjust the ringer volume.
• While in an active call, the keys adjust the voice volume.
• While the phone is idle, the keys adjust the key-tone volume, which is the sound made when you press the phone keys if key
tones are enabled.
Redial a Previous Number
1. The phone stores the last 30 dialed numbers in its memory.

2. In idle mode pressing the key will display the previously called numbers.
3. If the same number is called several times, it will appear only once and the date, time, and duration information is associated
with the last call to that number.
4. To redial a previously dialed number:
• Select a desired number using the Up/Down key.
• Press the key to initiate a call to that number.
Put a Caller on Hold
To place a call on hold:
1. Simply press the key or press the OPTIONS of call menu (activated by the right soft-key), and choose HOLD.
You are then free to make another call.
To reactivate a call that is on hold:
2. Simply press the key again or press the OPTIONS of call menu, and choose UNHOLD.
Answer Another Call While in a Call
This service is only available if you have subscribed to the Call Waiting supplementary service.
If you receive a call while you are already in a call, the phone will play a tone and display a screen to identify the new caller.
Also, the incoming call icon will blink until the waiting call has been connected.
To accept the call and put the first caller on hold, press the key.
To reject the call and return to the single active call, press the key.
Input Method
To change the input language selection:
When key in text, long press the key.
To Changing case:
Press to change capital or lower-case letters.
To Change input method:
Press to change the input method (T9ab, T9Ab, T9AB, Abc, ABC, 0..9)
Traditional English input
• Press to and select the desired character.
Note: Your phone provides Multi-tap function. For example, press twice to display the letter B, and press three times
to display the letter C.
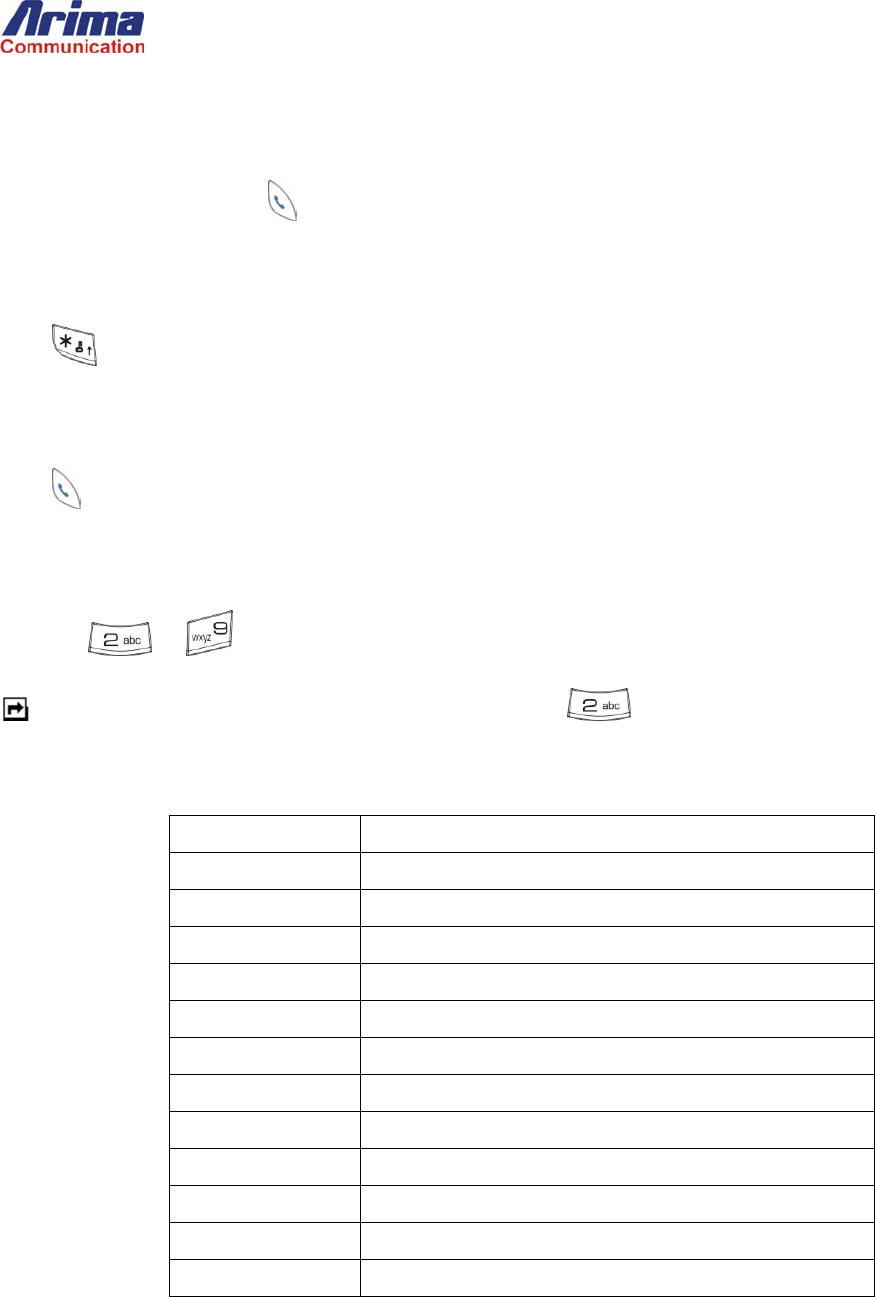
Characters Table
Key Characters
1 . , : ‘ ? ! - & 〜 _ / 1
2 A/a B/b C/c 2 ä á à â ã æ ç
3 D/d E/e F/f 3 è é ë ê
4 G/g H/h I/I 4 î ï í ì ı ğ
5 J/j K/k L/l 5 £
6 M/m N/n O/o 6 ö ô ò ó Θ ñ
7 P/p Q/q R/r S/s 7 $ ß
8 T/t U/u V/v 8 ü û ú
9 W/w X/x Y/y Z/z 9
0 0
# To switch between ABC/abc/Abc
* (space)

Symbol Mode
This mode is for typing symbols that are not available in the multi-tap mode.
To enter Symbol Mode, long press the key until symbol characters are displayed in the display.
• Use the 4-Way keys to find the symbol you want and then press the number key to select the symbol, then press
INSERT to transfer the character to the main display.

Menu Structure
1. Message
Settings for Messages
Before you send or receive a message, you can set up the following:
The message center number
The message format or type
The maximum amount of time a message will remain valid at the destination address without being read
Enable delivery reporting to confirm your message arrived at its destination
Enable a reply path so that the recipient can send you a reply
Set SMS (Short Message Service) options
Edit the list of preset messages that you can send.
To access the message settings menu:
Press the MENU key and then use the 4-Way key to highlight the Messages of main menu and press SELECT.
Press number 4 on the keypad to select the Settings entry, or use the Up/Down key highlight Settings and press the
SELECT key to select it.
Setting the Message Center Number
The Message Center Number menu lets you change the telephone number dialed to send and receive messages. The Service
Provider may have assigned this number when you purchased your phone.
To set the message center number:
1. Open the message Setting sub-menu as described in the preceding sub-section.
2. Press number 1 on the keypad to select the Center Number or use Up/Down key to highlight Center Number and
press the SELECT key to select it. The phone will display an SMS Center window where you can enter the number. The
display will accept up to 20 characters.
Select the Message Format
You can select the message format or type. Four formats are supported:
Fax
Text
X.400 (web-page standard)
Page (for pagers)
To select the message type:
1. Open the message Setting sub-menu as described in the “Settings for Messages” sub- section.
2. Press number 4 on the keypad to select the Type entry or use Up/Down key to highlight Type and press the
SELECT key to select it. The phone will display the four possible message types.
3. Use Up/Down key to highlight the type you want, and press the OK key to select it.
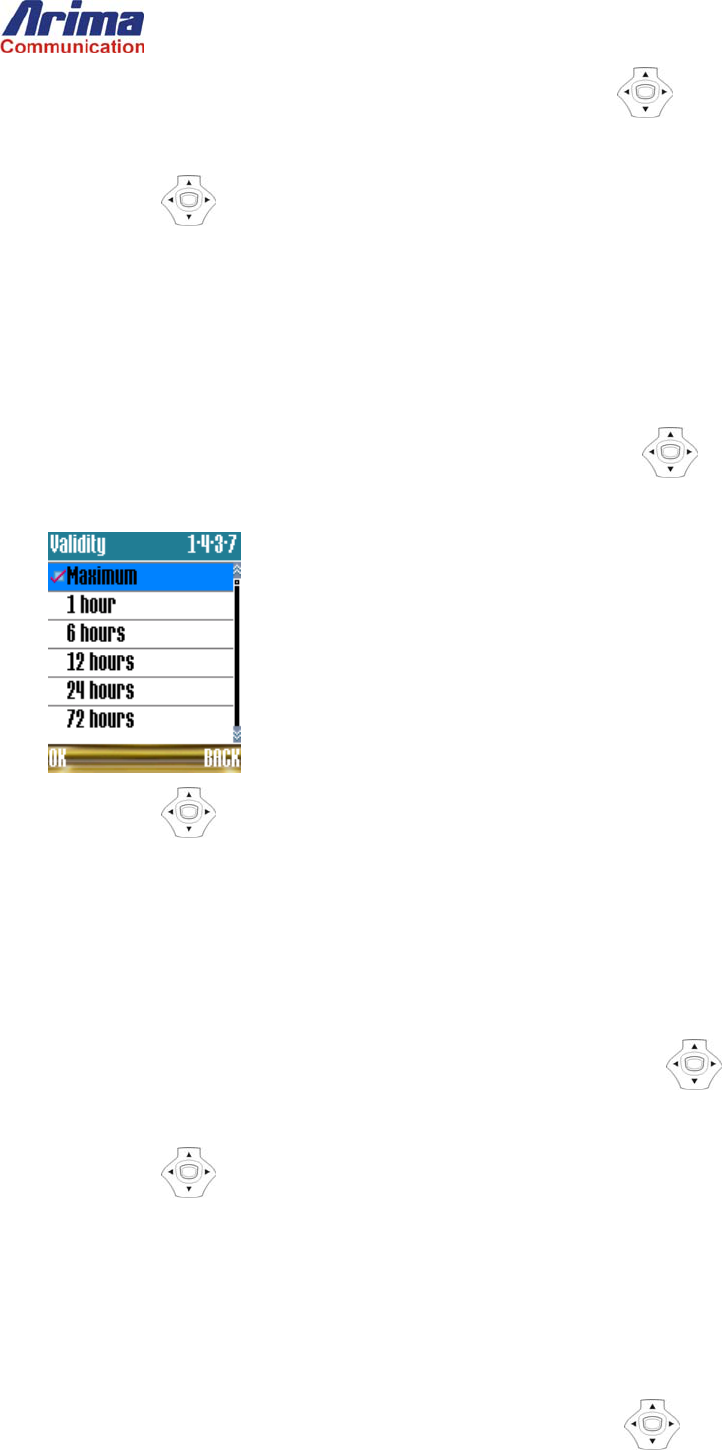
Set Message-Valid Time
This sets the maximum time an undeliverable message you send can remain valid.
To set the maximum message-valid time:
1. Open the message Setting sub-menu as described in the “Settings for Messages” sub-section.
2. Press number 3 on the keypad to select the Validity entry or use Up/Down key to highlight Validity and press the
SELECT key to select it. The phone will display the following Validity window:
3. Use Up/Down key to highlight the type you want, and press the OK key to select the Validity.
Enable/Disable Delivery Reporting
Delivery reporting, if enabled, confirms that messages you send are received at their destinations.
To change delivery reporting settings:
1. Open the message Setting sub-menu as described in the “Settings for Messages”.
2. Press number 5 on the keypad to select the Delivery Report or use Up/Down key to highlight Delivery Report and
press the SELECT key to select it.
3. Use Up/Down key to select whether delivery reporting will be set to On or Off, and press OK to confirm it.
Enable or Disable the Reply Path
This command enables a reply path so that the recipient can send you a reply.
To change the reply-path setting:
1. Open the message Setting sub-menu as described in the “Settings for Messages”.
2. Press number 6 on the keypad to select the Reply Path or use Up/Down key to highlight Reply Path and press the
SELECT key to select it.
3. Use Up/Down key to select whether the reply path will be set to On or Off, and press OK to confirm it.
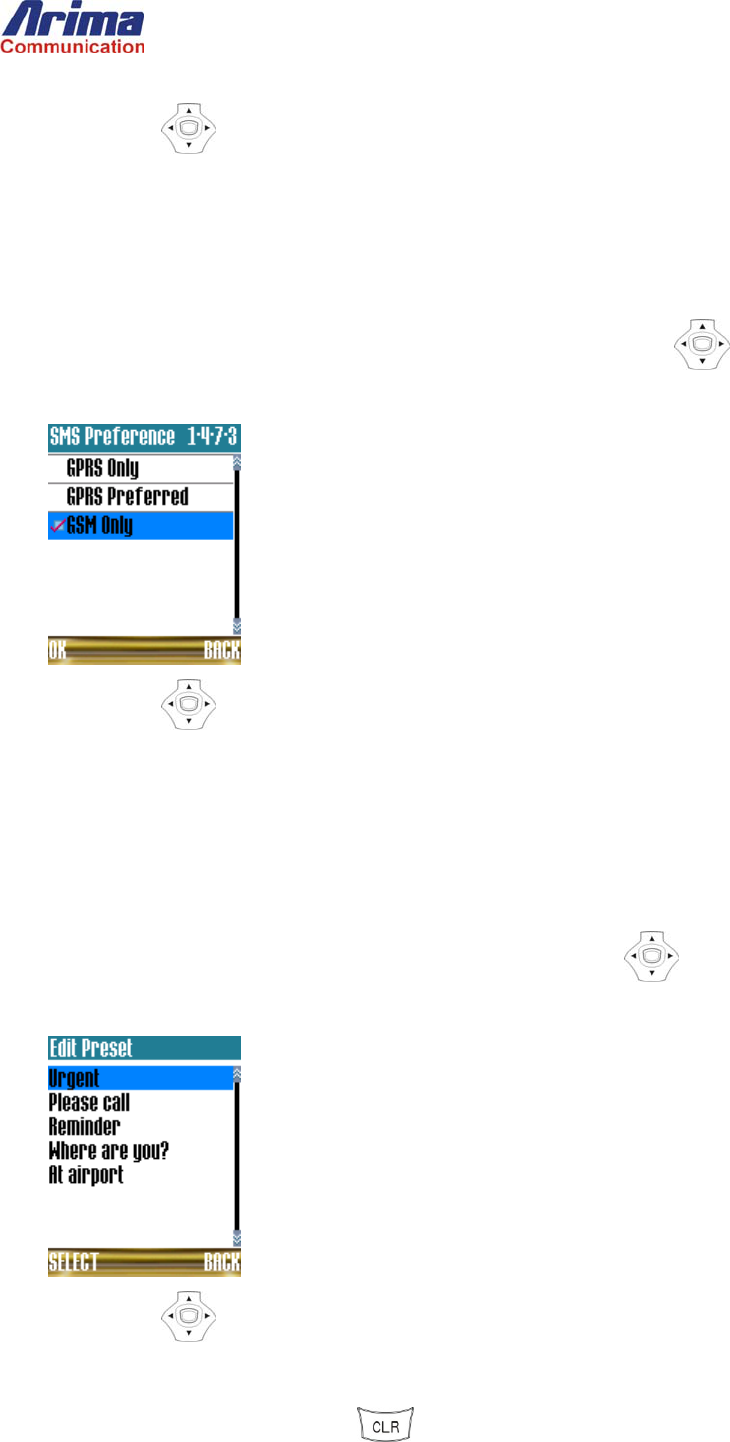
Message Service Preferences
To set your SMS (Short Message Service) preference:
1. Open the message Setting sub-menu as described in the “Settings for Messages”.
2. Press number 7 on the keypad to select the SMS Preferences or use Up/Down key to highlight SMS Preferences
and press the SELECT key to select it. The phone will display the following sub-menu:
3. Use Up/Down key to highlight the type you want, and press the OK key to select the Preference.
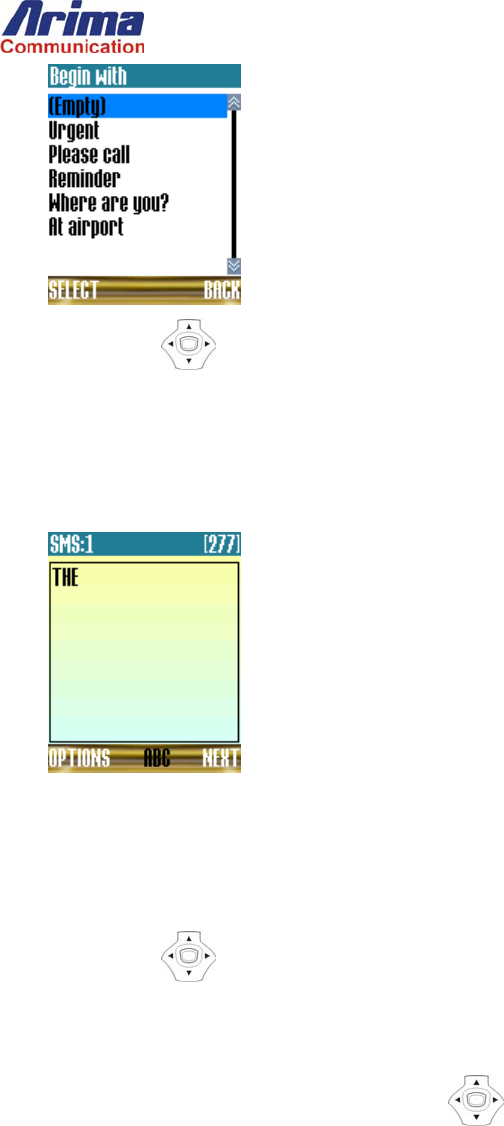
Edit the Preset Messages
You can edit the list of 5 preset messages. Each preset message can contain up to 280 characters. The number of preset
messages cannot be altered. To change a preset message:
1. Open the message Setting sub-menu as described in the “Settings for Messages”.
2. Press number 8 on the keypad to select the Edit Preset or use Up/Down key to highlight Edit Preset and press the
SELECT key to select it. The phone will display the current list of preset messages:
3. Use Up/Down key to highlight the message you want to edit, and press the SELECT key. The phone will display the
message in a text box where you can edit it.
4. If you want to clear any characters, the key acts as a backspace key. In the title bar of the window, the phone will

display the number of characters still available to you as you type.
Read Your Incoming Messages
When you receive a message, the phone will automatically display a MESSAGE notification window.
To read the message:
1. Press the VIEW button the phone will display the message Inbox.
2. Press the READ key to read the latest message delivered to your Inbox. The phone will display the message contents.
3. If the message is longer than can be displayed on the screen, the Up/Down key y will scroll the content of the screen
one line at a time.
4. When you have finished reading the message, press the key to return to the Inbox list.
5. To read other messages in the Inbox, scroll to the message you want to view using the Up/Down key, and repeat the
steps above.
Save a Number from a Received Message
You can store the number from where the message originated in SIM memory as follows:
1. View the message as described in the preceding subsection.
2. Press the OPTIONS to view the message submenu – Options.
3. Press number 5 on the keypad to select the Save Number or use Up/Down key to highlight Save Number and press
the SELECT key to select it. The phone will display a text box for entering the message sender’s name. You can use up
to 14 English characters or 6 Chinese characters. In the title bar of the window, the phone will display the number of
characters still available to you as you type.
4. When you have finished entering the name, press the OK key to complete the operation.
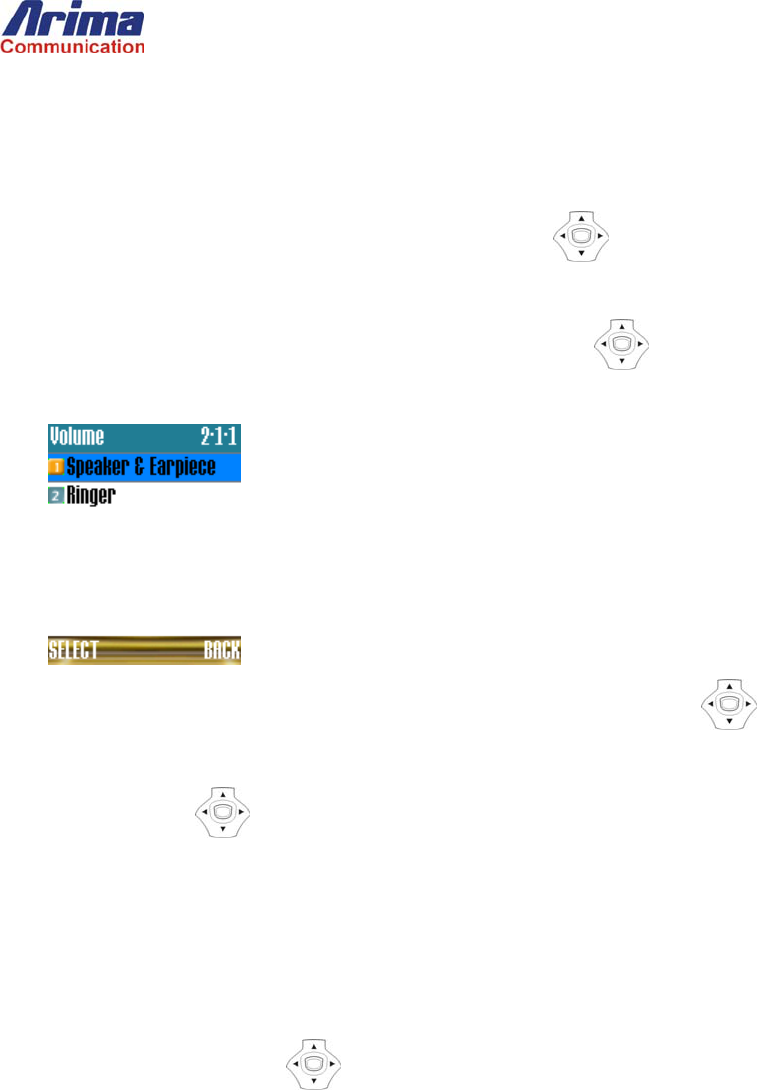
Create and Send a Message
To create and send a message:
1. From idle screen, press the MENU key and then Use 4-Way key to highlight the Messages of main menu and press
SELECT to open the Message menu.
2. Press number 1 on the keypad to select the Creat or use Up/Down key to highlight Create and press the SELECT
key to select it. The phone will display the current list of preset messages:
3. Use Up/Down key to highlight one of the preset messages or simply leave the highlight on the (Empty) entry.
Press the SELECT key to display the message (SMS) text box. If a preset message was selected, it will be transferred to
the text box. Otherwise, the box will be empty.
4. If desired, add to the message. The size of the message can be up to 280 characters. In the title bar of the window, the phone
will display the number of characters still available to you as you type.
5. At this stage you can either press the NEXT key to key in the phone number, or the OPTIONS key to preview the message
or attach an object. The following sub-sections describe these menu options.
6. Press NEXT key, the phone will display a To: window, where you can enter the destination address for the message.
7. Either enter the address manually or press the NAMES key to select a number from the one of the phonebooks.
8. Use Up/Down key to highlight one of the phonebook names, and press the SELECT key to select it. If there is
only one number associated with the name, it will be selected as the address. Otherwise, the phone will display the list of
phone numbers.
9. If a list of numbers is displayed, use the Up/Down key to highlight the number you want, and press the SELECT
key to select it.
10. Press the SELECT key again to select the number as the address. The selected number will be displayed in the address
box.
11. Press the OK key to confirm the choice. The phone will display the options:

12. If you select to send the message, the phone will display a Working… message followed by a completion NOTE screen.
Attach Objects to a Message
When you send a message, you have the option of sending one of the following objects as an attachment:
Symbols
Picture
Sound
Melody
Animation
To attach one of the above objects:
1. From the menu selected in step 5 in the subsection “Create and Send a Message”, use the Up/Down key to highlight
the object you want to insert.
2. Use the Up/Down key to scroll through the selection. In the case of pictures and animations, each item takes up a
whole screen. In the case of sounds and melodies, names representing the sounds will be displayed in a list. When you
scroll over each name, you will hear the corresponding sound.
3. When you have made your choice, press the SELECT key to insert the object into the message. The phone will display the
text box where you compose your message, and a static symbol will be displayed to indicate that an object has been inserted.
4. Continue the step 6 in the subsection “Create and Send a Message” to send the message.
Reply to a Message
When you read a message in your Inbox, you can send a reply as follows:
1. Press the OPTIONS key to display the incoming message Options submenu.

2. Press number 1 on the keypad to select the Reply or use Up/Down key to highlight Reply and press the SELECT
key to select it. The phone will display the list of preset messages and from this point forward works in the same way as the
message-create function used for sending messages.
Note: You can also access the incoming message Options menu from the Inbox list; you do not have to actually have the
message open to use these menu options.
Forward a Message
When you receive a message, you can forward it to somebody else:
1. With the message highlighted in the Inbox list or with the message open, press the OPTIONS key to display the incoming
message Options submenu.
2. Press number 2 on the keypad to select the Forward menu or use Up/Down key to highlight Forward and press the
SELECT key to select it. The phone will display the message (SMS) text box and from this point forward works in the
same way as the message-create function used for sending messages.
Delete Messages
You can delete a single message or delete all messages in the Inbox or Outbox.
Delete a Single Message
To delete a single message:
1. If the message is open, simply press the OPTIONS key and then press number 3 on the keypad or use Up/Down key
to highlight Delete and press the SELECT key to select it. (if it is in the Inbox)
2. If it is in the Outbox, press number 4 or use Up/Down key to highlight Delete and press the SELECT key to select
it.
Delete All Messages
To delete all messages in the Inbox:
1. From the idle screen, press the MENU key and then use 4-Way key to highlight the Messages of main menu and
press SELECT to select the Messages menu and press number 2 on the keypad to select the Inbox or use Up/Down
key to highlight Inbox and press the SELECT key to select it.
2. Use key to highlight any one of the Messages then press the READ key to open the Inbox Options menu
3. Press number 4 on the keypad to select the Delete All or use Up/Down key to highlight Delete All and press the

SELECT key to select it. The phone will display a CONFIRM window to make sure this is really what you want to do.
4. Press the YES button to complete the operation.
Deleting all messages from the Outbox is similar to above procedure, except:
In step 1, number 3 on the keypad selects the Outbox
2. Sound Setting
Set the Voice Volume
To change the volume of the speaker and earpiece when there is an active call:
1. From the idle screen, press the MENU key and then use 4-Way key to highlight the Sound Settings of main menu
and press SELECT to select the Sound Settings menu.
2. Press number 1 on the keypad to select the Volume or use Up/Down key to highlight Volume and press the
SELECT key to select it. The phone will display the following submenu:
3. Press number 1 on the keypad to select the Speaker & Earpiece or use Up/Down key to highlight Speaker &
Earpiece and press the SELECT key to select it. The phone will display the current volume level.
4. Use the Right/Left key to change the displayed volume level. Press the OK key to complete the operation.
Set the Ringer Volume
When a call is connected, while you can hear a dialing tone, you can adjust the volume of the ringer using the buttons on the side
of the phone.
To set the ringer volume at any time, use the procedure in the preceding subsection, but in step 3 press number 2 on the keypad to
select the Ringer or use Up/Down key to highlight Ringer and press the SELECT key to select it.
Set the Key-Tone Volume
You can set the key-tone volume while the phone is in idle mode using the Up/Down Side keys on the phone to change the
displayed volume level.
Alert Type
You have the following vibrator-ringer options:
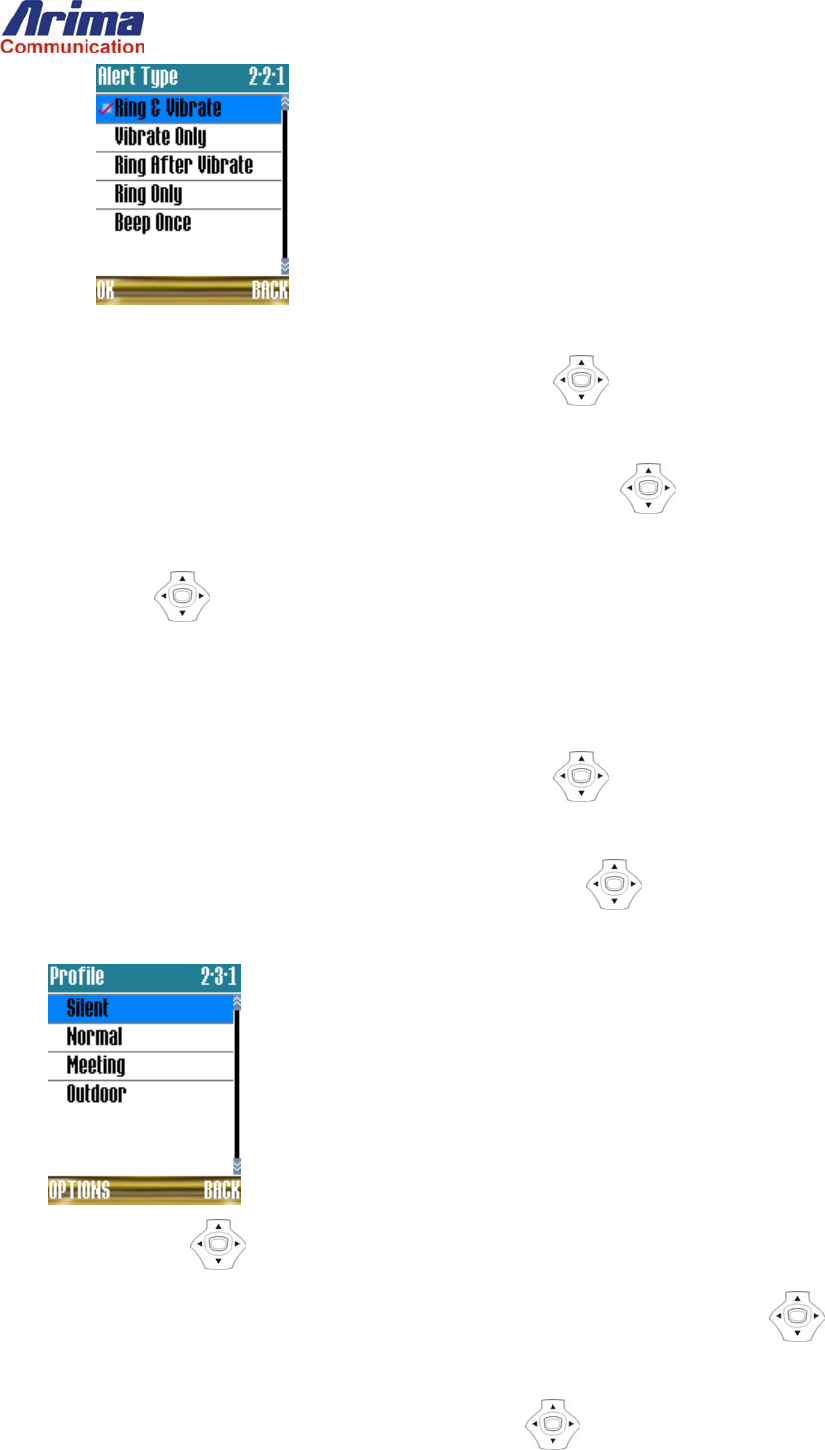
To make the selection:
1. From the idle screen, press the MENU key and then use 4-Way key to highlight the Sound Settings of main menu
and press SELECT to select the Sound Settings menu.
2. Press number 2 on the keypad to select the Alert Type or use Up/Down key to highlight Alert Type and press the
SELECT key to select it
Use the Up/Down key to highlight your preferred option, and press the OK key to complete the operation.
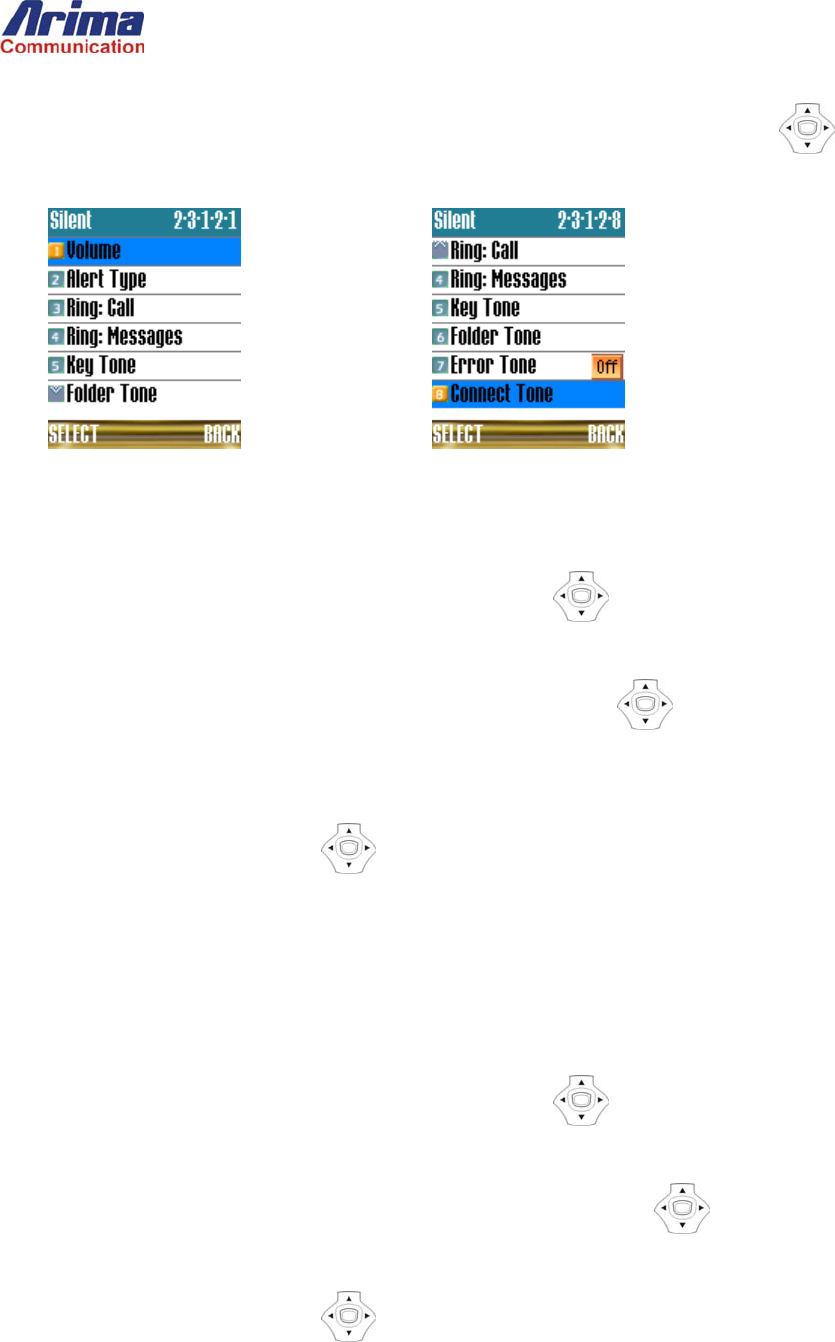
Profile
To make the selection:
1. From the idle screen, press the MENU key and then use 4-Way key to highlight the Sound Settings of main menu
and press SELECT to select the Sound Settings menu.
2. Press number 3 on the keypad to select the Profile or use Up/Down key to highlight Profile and press the SELECT
key to select it. The phone will display following options:
3. Use the Up/Down key to highlight your preferred option, and press the OPTIONS key to select the item.
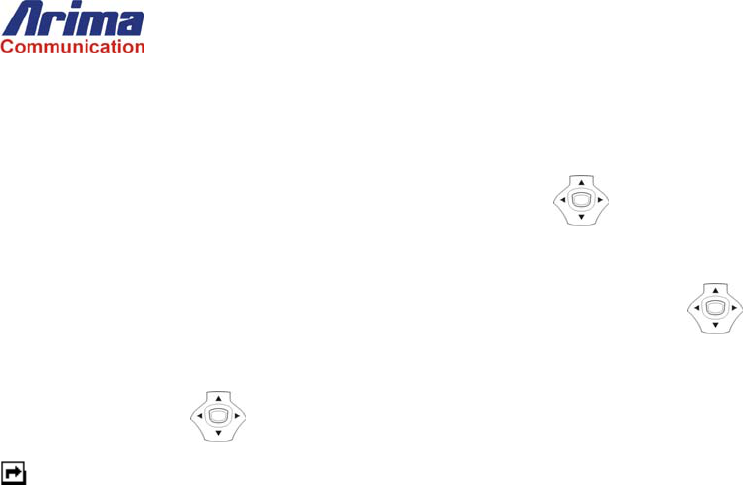
4. Press number 1 on the keypad to confirm the selection of the Profile item or use Up/Down key to highlight Select
and press the SELECT key to confirm the selection. You can change the setting of the selection by pressing number 2 on
the keypad to edit the selected Profile item or use Up/Down key to highlight Edit and press the SELECT key to
confirm the selection.
5. You can edit the following items of the profile by pressing the number key or use Up/Down key to highlight the
item.
Change the Ring-Tone Melody
To change the ring-tone melody:
1. From the idle screen, press the MENU key and then use 4-Way key to highlight the Sound Settings of main menu
and press SELECT to select the Sound Settings menu.
2. Press number 4 on the keypad to select the Ring: Call or use Up/Down key to highlight Ring: Call and press the
SELECT key to select it. The phone will display the list of melody names and briefly play the melody of the currently
selected ring tone.
3. Each time you press the Up/Down key, you will hear the melody associated with the highlighted entry. When you
have highlighted your preferred melody, press the OK key to complete the melody-selection operation.
Change Ring Tone on Receipt of Message, Voicemail or Report
You can the ring-tone notification melody played when you receive a message, voicemail, or report (a page without a message).
To change the ring-tone melody:
1. From the idle screen, press the MENU key and then use 4-Way key to highlight the Sound Settings of main menu
and press SELECT to select the Sound Settings menu.
2. Press number 5 on the keypad to select the Ring: Message or use Up/Down key to highlight Ring: Message and
press the SELECT key to select it.
3. Each time you press the Up/Down key, you will hear the melody associated with the highlighted entry. When you
have highlighted your preferred melody, press the OK key to complete the melody-selection operation.
Select the Sound Played when Keys are Pressed
You can choose between a simple tone, a human voice calling out the keypad number, or waterdrop.
To select the key-tone type:
1. From the idle screen, press the MENU key and then use 4-Way key to highlight the Sound Settings of main menu
and press SELECT to select the Sound Settings menu.
2. Press number 6 on the keypad to select the Key Tone submenu or use Up/Down key to highlight Key Tone and press
the SELECT key to select it.
3. Use the Up/Down key to highlight your preferred option, and press the OK key to complete the operation.
Note: If you do not want to hear any sound when you make a key-press, simply turn the key-tone volume down to 0.
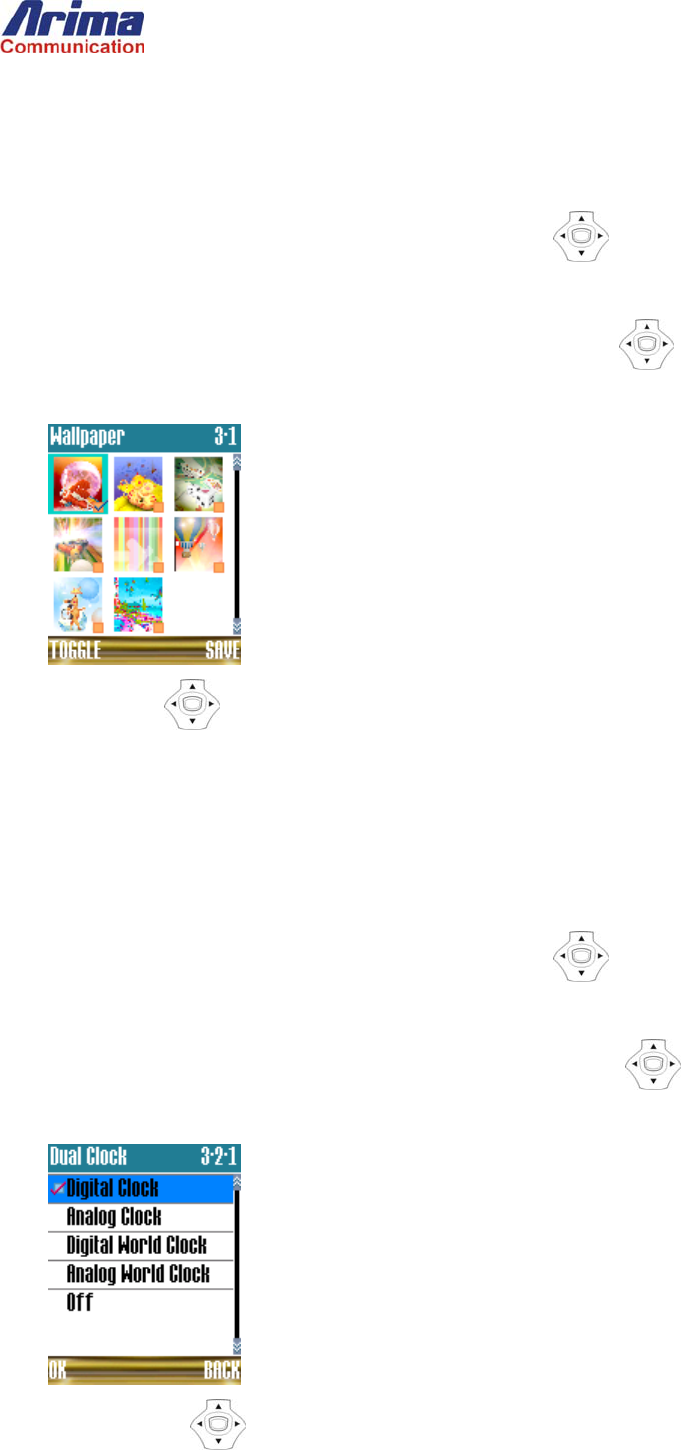
3. LCD Settings
Select Wallpaper Displayed in Idle State
To select the image:
1. From the idle screen, press the MENU key and then use 4-Way key to highlight the LCD Settings of main menu and
press SELECT to select the LCD Settings menu.
2. Press number 1 on the keypad to select the Wallpaper or use Up/Down key to highlight Dual Clock and press the
SELECT key to select it. The phone will display a screen similar to the following:
3. Use the 4-Way key to highlight the image you want, then press the TOGGLE key to select the wallpaper and press
SAVE to save the selections.
Change the Display of the Clock on the Display
You can configure your phone to use an analog or digital display.
To change the display type:
1. From the idle screen, press the MENU key and then use 4-Way key to highlight the LCD Settings of main menu and
press SELECT to select the LCD Settings menu.
2. Press number 2 on the keypad to select the Dual Clock or use Up/Down key to highlight Dual Clock and press the
SELECT key to select it. The phone will display following options:
3. Use the Up/Down key to highlight your preferred option, and press the OK key to complete the operation.
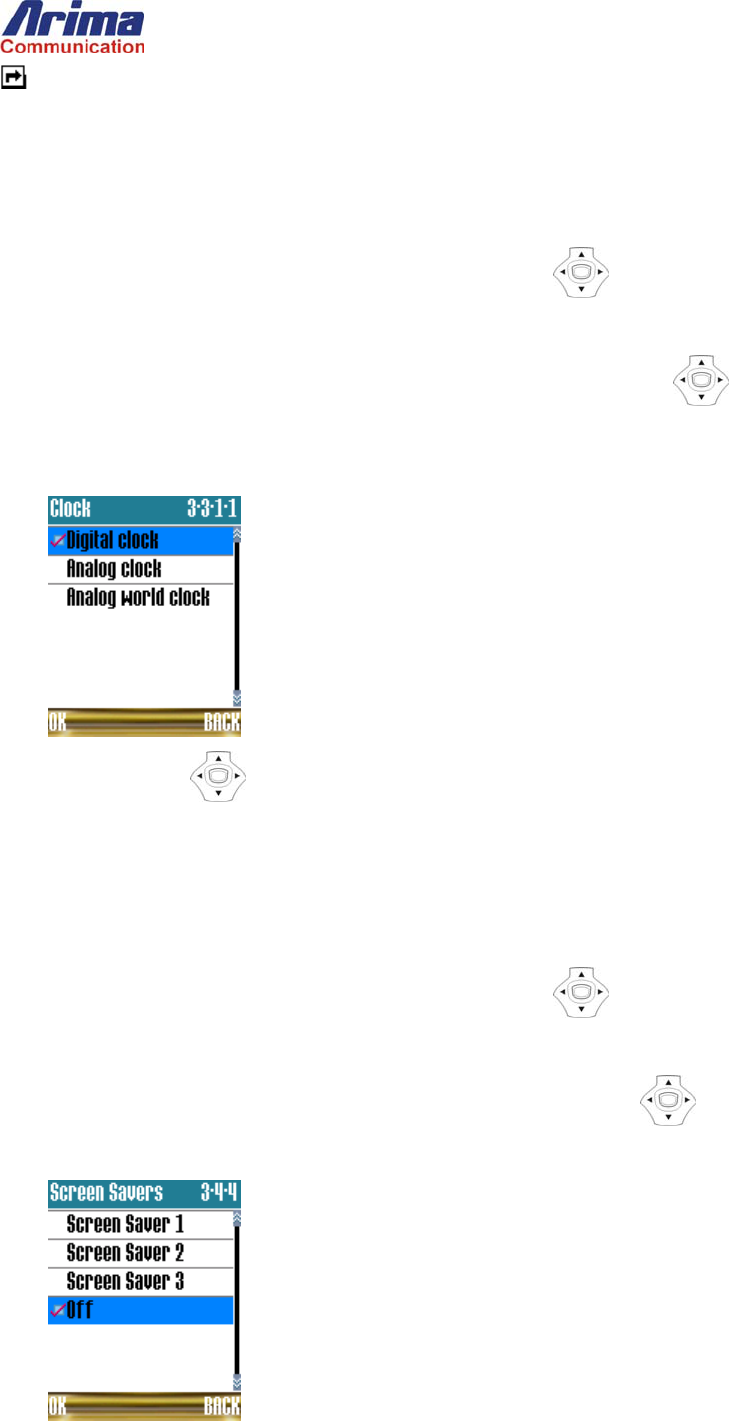
Note: The digital display includes indicator icons such as the signal-strength indicator and the battery-level indicator. The
analog display does not. These icons are always available on the main display.
Change the External Display
To change the display type:
1. From the idle screen, press the MENU key and then use 4-Way key to highlight the LCD Settings of main menu and
press SELECT to select the LCD Settings menu.
2. Press number 3 on the keypad to select the External Display or use Up/Down key to highlight External Display
and press the SELECT key to select it.
3. Select Clock, and the phone will display following options:
4. Use the Up/Down key to highlight your preferred option, and press the OK key to complete the operation.
Select Screen Saver
You have a choice of animations to be displayed while the phone is in the idle state.
To change the image:
1. From the idle screen, press the MENU key and then use 4-Way key to highlight the LCD Settings of main menu and
press SELECT to select the LCD Settings menu.
2. Press number 4 on the keypad to select the Screen Saver or use Up/Down key to highlight Screen Saver and press
the SELECT key to select it.. The phone will display the following:
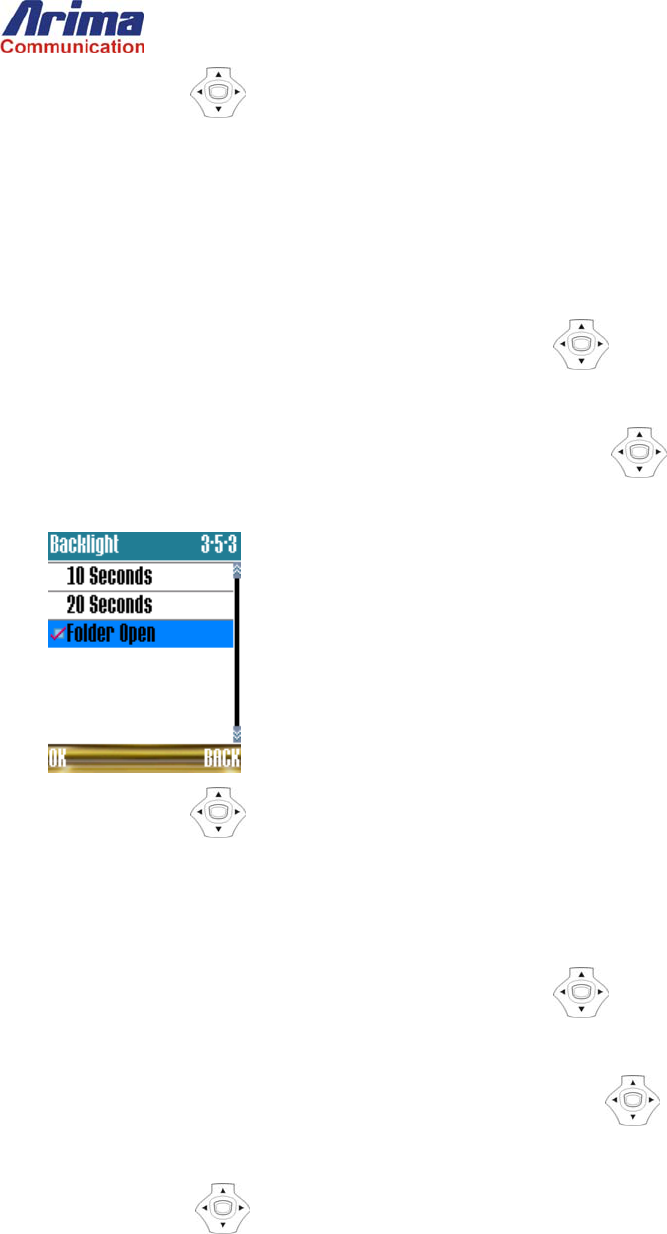
3. Use the Up/Down key to highlight the screen saver you want, and press the OK key to complete the operation.
The phone will display the animation of the currently selected screen saver.
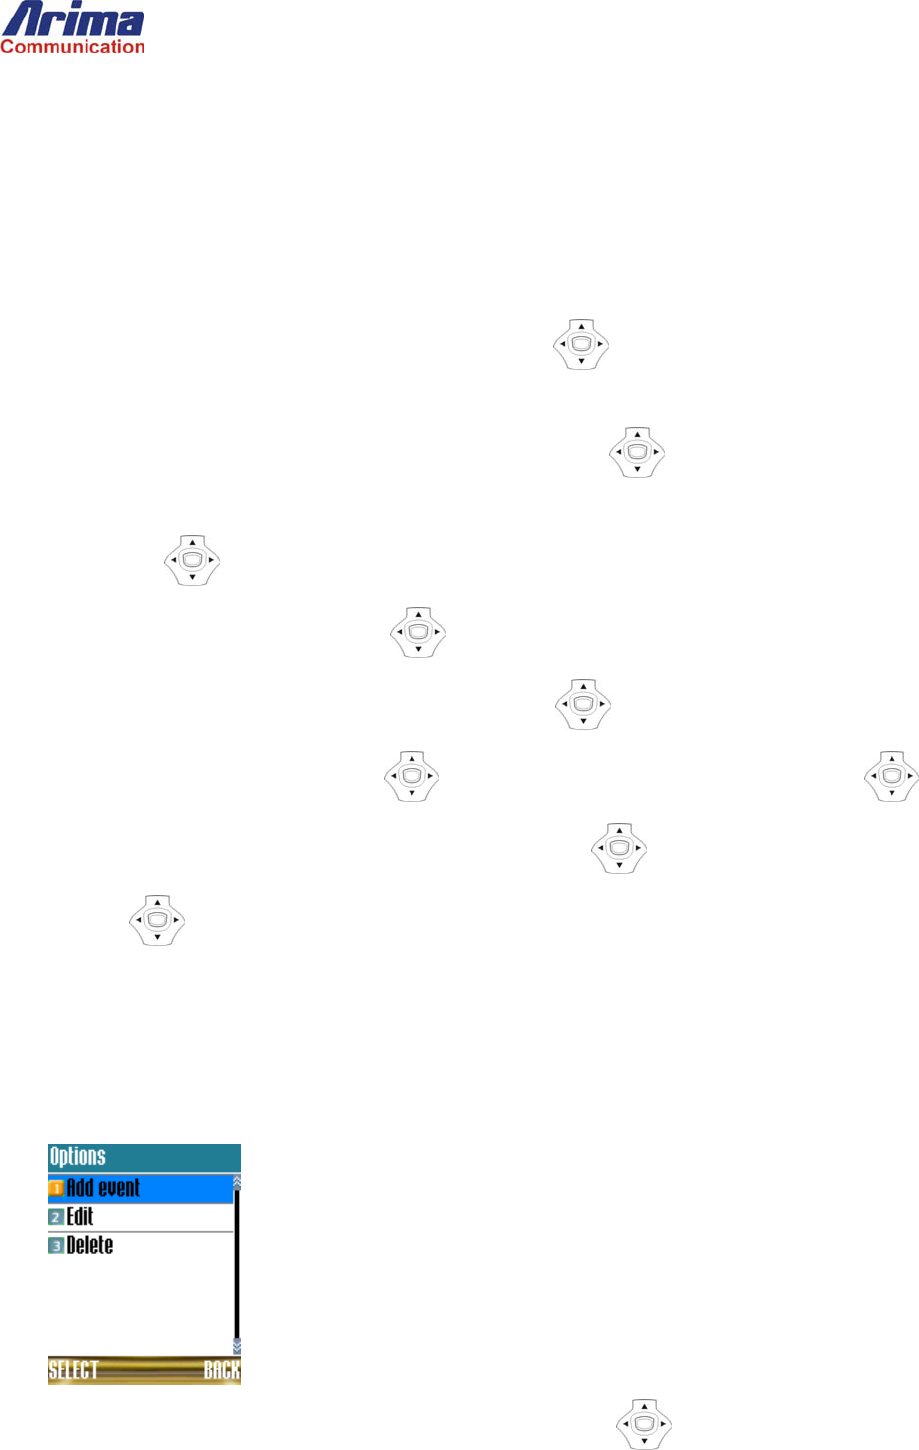
Configure the Backlight for the LCD and Keypad
You can set the duration of the backlight is on for the display and keypad after the lid is opened or a key is pressed.
To configure the backlight:
1. From the idle screen, press the MENU key and then use 4-Way key to highlight the LCD Settings of main menu and
press SELECT to select the LCD Settings menu.
2. Press number 5 on the keypad to select the Backlight or use Up/Down key to highlight Backlight and press the
SELECT key to select it. The phone will display the following submenu:
3. Use the Up/Down key to highlight your preferred option, and press the OK key to complete the operation.
Set the Display Contrast
To set the display contrast:
1. From the idle screen, press the MENU key and then use 4-Way key to highlight the LCD Settings of main menu and
press SELECT to select the LCD Settings menu.
2. Press number 6 on the keypad to select the Contrast or use Up/Down key to highlight Contrast and press the
SELECT key to select it.
3. Use the Right/Left key to change the displayed contrast level. Press the OK key to complete the operation.
4. Fun And Tools
Calendar
The phone includes a calendar, which you can use to schedule events and appointments. You can set the calendar up so that you
receive a reminder before the event or appointment, and you can set up regularly recurring appointments.
Set an Appointment
To set an appointment or event:
1. From the idle screen, press the MENU key and then use 4-Way key to highlight the Fun And Tools of main menu
and press SELECT to select the Fun And Tools menu.
2. Press number 1 on the keypad to select the Calendar or use Up/Down key to highlight Calendar and press the
SELECT key to select it.
3. Use the 4-Way key to highlight the date of the event or appointment. To view the next month, highlight the last day
of the displayed month and press the Right key. Similarly, to return to the current month, or view a previous month,
highlight the first day of the displayed month and press the Left key.
4. To move to a particular month, use the Up key to highlight the month, then use the Left/Right key to
highlight the desired month. To move a particular year, use the Up key to highlight the year, then use the
Left/Right key to highlight the desired year.
5. Press the VIEW key to check the events and appointments for the day you chose.
6. If the list for that day is empty, as shown in the first of the above diagrams, press the ADD key again to add an appointment
or event and continue from step 4. (Pressing the BACK key instead will return you to the calendar view.)
7. If the list for the currently selected day has at least one item, press the OPTIONS key to continue. The screen will display
the following submenu:
8. Press number 1 on the keypad to select the Add event or use Up/Down key to highlight Add event and press the
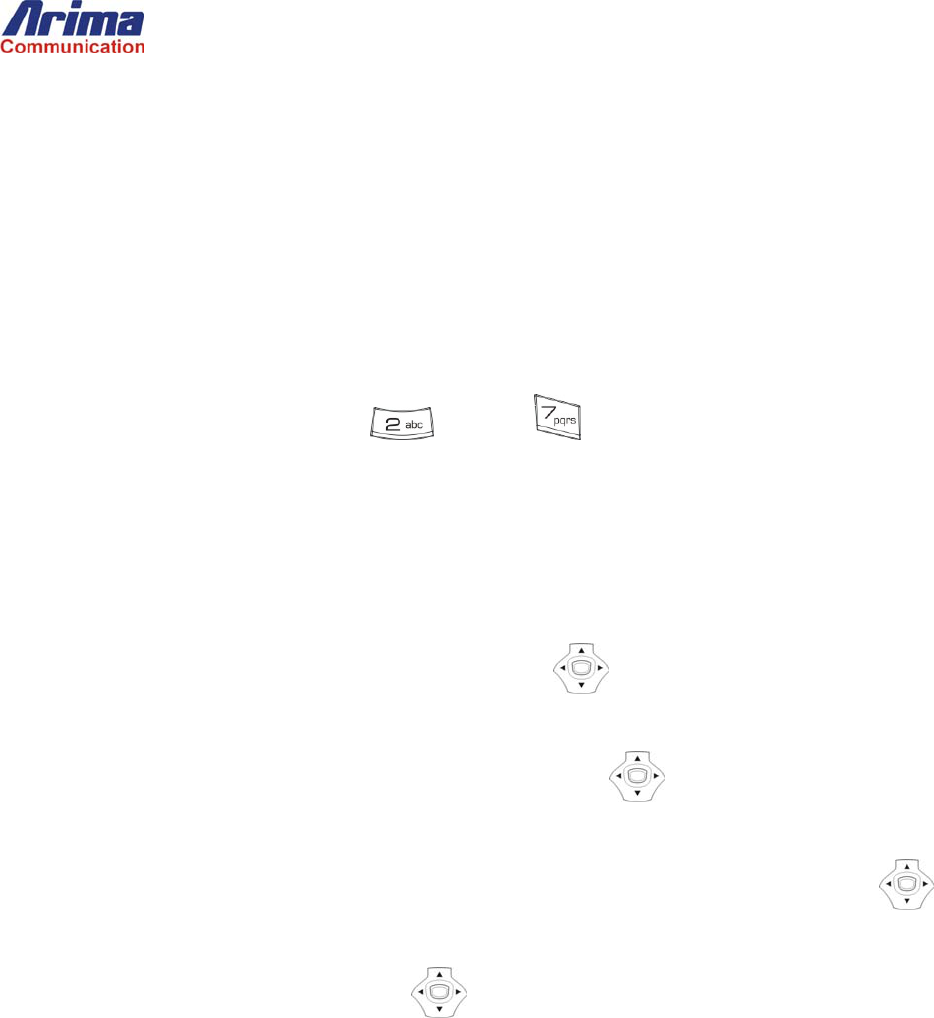
SELECT key to select it.
Press the number on the keypad corresponding to the type of entry you want to make.
For the Alarm Clock and Birthday entries you will be able to set a note and a time to receive your notification. The
difference between an Alarm Clock setting and a Birthday setting is that a Birthday is always a yearly recurring event and is
not deleted when you delete past events.
For the Meeting and Memo entries, you can also receive a notification in advance and you can set a start time and an end
time.
9. Enter text to identify the event.
10. Enter the Time of the event. If you selected the Meeting or Memo event, this will be the start time. To change the AM/PM
indicator, press the key corresponding to for AM or for PM. Press the SELECT key to continue. For a
meeting or memo, repeat this step to enter the end time.
Only items 1-4 are shown for the alarm clock.
View Your Future Appointments
To view all the upcoming events and appointments for the day:
1. From the idle screen, press the MENU key and then use 4-Way key to highlight the Fun And Tools of main menu
and press SELECT to select the Fun And Tools menu.
2. Press number 1 on the keypad to select the Calendar or use Up/Down key to highlight Calendar and press the
SELECT key to select it.
3. To view all the events for the day, press the VIEW key. To view the events on a future day, use 4-Way keys to
highlight the day and press the VIEW key.
4. To view details of an event, use the Up/Down key to highlight the event of interest and press the OPTIONS key to
display the calendar sub-menu.
The information is organized as follows:
The time the event is due. For meetings and memos, the length of the event is also given at the right of the screen.
Entry type (e.g. Alarm Clock or Meeting)
Alarm message
Advance notification (if any)
Edit an Event
To edit an event, such as adding a note or rescheduling the time:
1. Follow steps 1-4 in the preceding subsection to view the event list, highlight the event you want to edit, and open the calendar
submenu.

2. Press number 2 on the keypad to select the Edit or use Up/Down key to highlight Edit and press the SELECT key
to select it. The phone will display a screen that will allow you to select what you want to edit:
3. Press the number corresponding to the facet of the event that you want to change.
4. For the Description, Date, and Time, enter the revised data and press OK to complete the operation.
Delete an Event or Events
You have the option of deleting a specific event, all past events, or all events.
1. From the calendar view, use the navigation keys to highlight the day where you want to delete a single event. If you want to
delete all paste events or all events, just leave the highlight on the current day. Press the VIEW key to display the list of
events for the selected or current day.
2. If you want to delete a single event, use the Up/Down key to highlight it.
3. Press the OPTIONS key to display the Calendar submenu.
4. Press number 3 on the keypad to select the Delete or use Up/Down key to highlight Delete and press the SELECT
key to select it.
5. In all delete options, the phone will display the CONFIRM window. To complete the operation, press the YES button.
Alarm Clock
To set the alarm time:
1. From the idle screen, press the MENU key and then use 4-Way key to highlight the Fun And Tools of main menu
and press SELECT to select the Fun And Tools menu.
2. Press number 2 on the keypad to select the Alarm Clock or use Up/Down key to highlight Alarm Clock and press
the SELECT key to select it.
3. Use Up/Down key to Select the On or Off entry. Press the OK key to complete the selection.
4. Enter the alarm time using the numbers on the keypad. You can change the digit to be edited by changing the position of the
cursor using the Up/Down key. Press the OK key to complete the operation. The phone will display options for
repeated alarm as following:
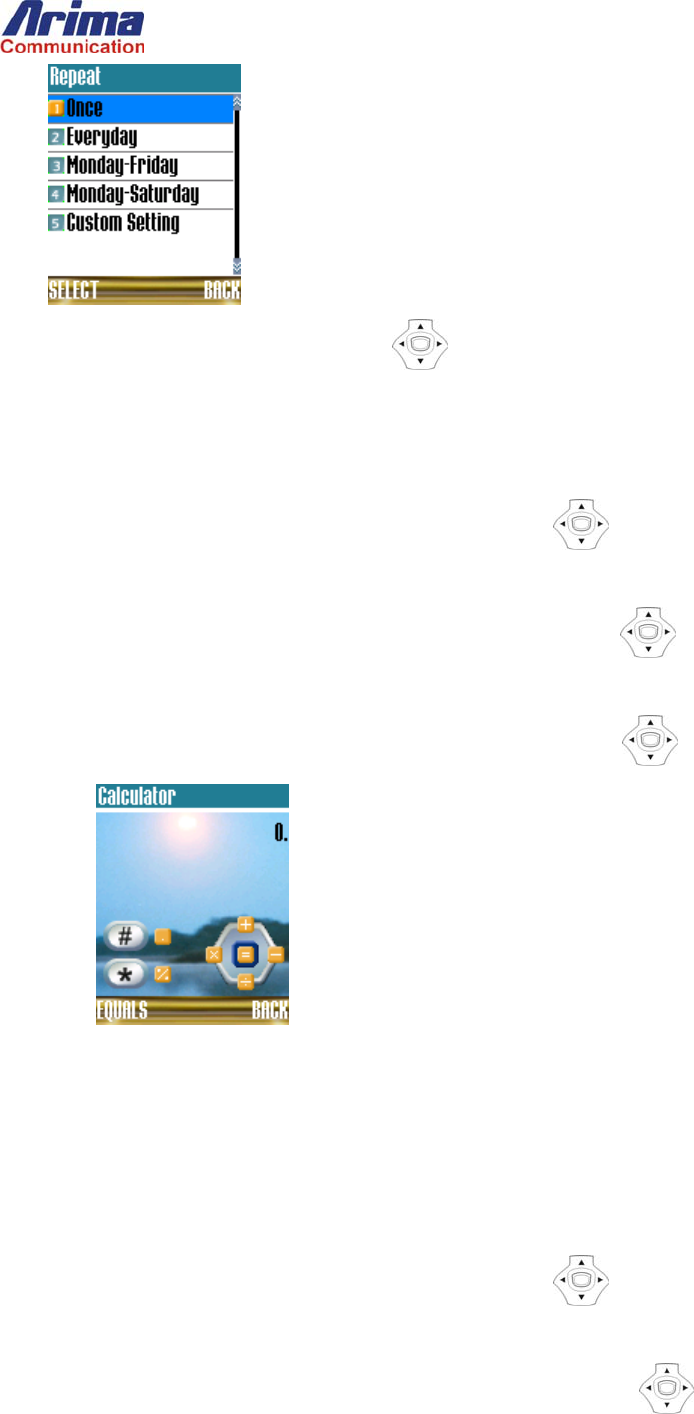
5. Press the number to select or use Up/Down key to highlight the selection and press the SELECT key to select it.
Calculator
You can use your phone as a simple calculator:
1. From the idle screen, press the MENU key and then use 4-Way key to highlight the Fun And Tools of main menu
and press SELECT to select the Fun And Tools menu.
2. Press number 3 on the keypad to select the Calculator or use Up/Down key to highlight Calculator and press the
SELECT key to select it.
The buttons at the bottom of the window indicate the functions of the 4-Way key, * key, and # key:
World Clock
The World Clock application lets you view the current time in different cities around the world.
Select Home and Local City
You can select your home city and, for when you are traveling, your local city.
To set your home city:
1. From the idle screen, press the MENU key and then use 4-Way key to highlight the Fun And Tools of main menu
and press SELECT to select the Fun And Tools menu.
2. Press number 4 on the keypad to select the World Clock or use Up/Down key to highlight World Clock and press

the SELECT key to select it.
3. Use Up/Down key to highlight Home and press the OPTIONS key to display the submenu.
4. Press number 1 on the keypad to select the Home City or use Up/Down key to highlight Home City and press the
SELECT key to select it. The phone will display a world map, home city, date, and time.
5. Use the 4-Way key to select the home city. Press the SELECT key to complete the operation. The phone will
return to the Home submenu.
To select your local city:
1. Perform steps 1-2 in the procedure above, to select the World Clock submenu.
2. Use Up/Down key to highlight Local and press the OPTIONS key to display the submenu.
3. Press number 1 on the keypad to select the Local City or use Up/Down key to highlight Local City and press the
SELECT key to select it. The phone will display a world map, home city, date, and time.
4. Use the 4-Way key to select the local city. Press the SELECT key to complete the operation. The phone will
return to the Local submenu.
Daylight Savings Time
Instead of adjusting the hour forward or backward twice a year, you can enable Daylight Savings Time (DST) during the summer
months and disable it during the winter months.
To change the DST setting for your home city:
1. From the idle screen, press the MENU key and then use 4-Way key to highlight the Fun And Tools of main menu
and press SELECT to select the Fun And Tools menu.
2. Press number 4 on the keypad to select the World Clock or use Up/Down key to highlight World Clock and press
the SELECT key to select it.
3. Use Up/Down key to highlight Home or Local and press the OPTIONS key to display the submenu.
4. Press number 2 on the keypad to select the Home DST or Local DST or use Up/Down key to highlight Home DST
or Local DST and press the SELECT key to select it.
5. Press number 4 on the keypad to select the Home DST entry.
6. Use the Up/Down key to select the On or Off entry. Press the OK key to complete the operation.

Adjust the Date and Time
You only need to set the time for your home city; the settings for the local city will be adjusted automatically.
To set the Time:
1. From the idle screen, press the MENU key and then use 4-Way key to highlight the Fun And Tools of main menu
and press SELECT to select the Fun And Tools menu.
2. Press number 4 on the keypad to select the World Clock or use Up/Down key to highlight World Clock and press
the SELECT key to select it.
3. Use Up/Down key to highlight Home and press the OPTIONS key to display the submenu.
4. Press number 3 on the keypad to select the Time or use Up/Down key to highlight Time and press the SELECT key
to select it.
5. Enter the current time using the numbers on the keypad. You can change the digit to be edited by changing the position of
the cursor using the Up/Down key. Press the OK key to complete the operation.
To set the Date:
1. Perform steps 1-3 in the date-setting procedure, above.
2. Press number 4 on the keypad to select the Date or use Up/Down key to highlight Date and press the SELECT key
to select it.
3. Enter the current time in the same way as you set the time, as described in step 5 of the time-setting procedure, above.
Select Time and Date Format
To select the Time format:
1. From the idle screen, press the MENU key and then use 4-Way key to highlight the Fun And Tools of main menu
and press SELECT to select the Fun And Tools menu.
2. Press number 4 on the keypad to select the World Clock or use Up/Down key to highlight World Clock and press
the SELECT key to select it.
3. Use Up/Down key to highlight Home and press the OPTIONS key to display the submenu.
4. Press number 5 on the keypad to select the Time Format or use Up/Down key to highlight Time Format and press
the SELECT key to select it. For time format, you can select between 12 and 24-hour mode.
5. Use the Up/Down key s to select your preferred format. Press the OK key to complete the operation.
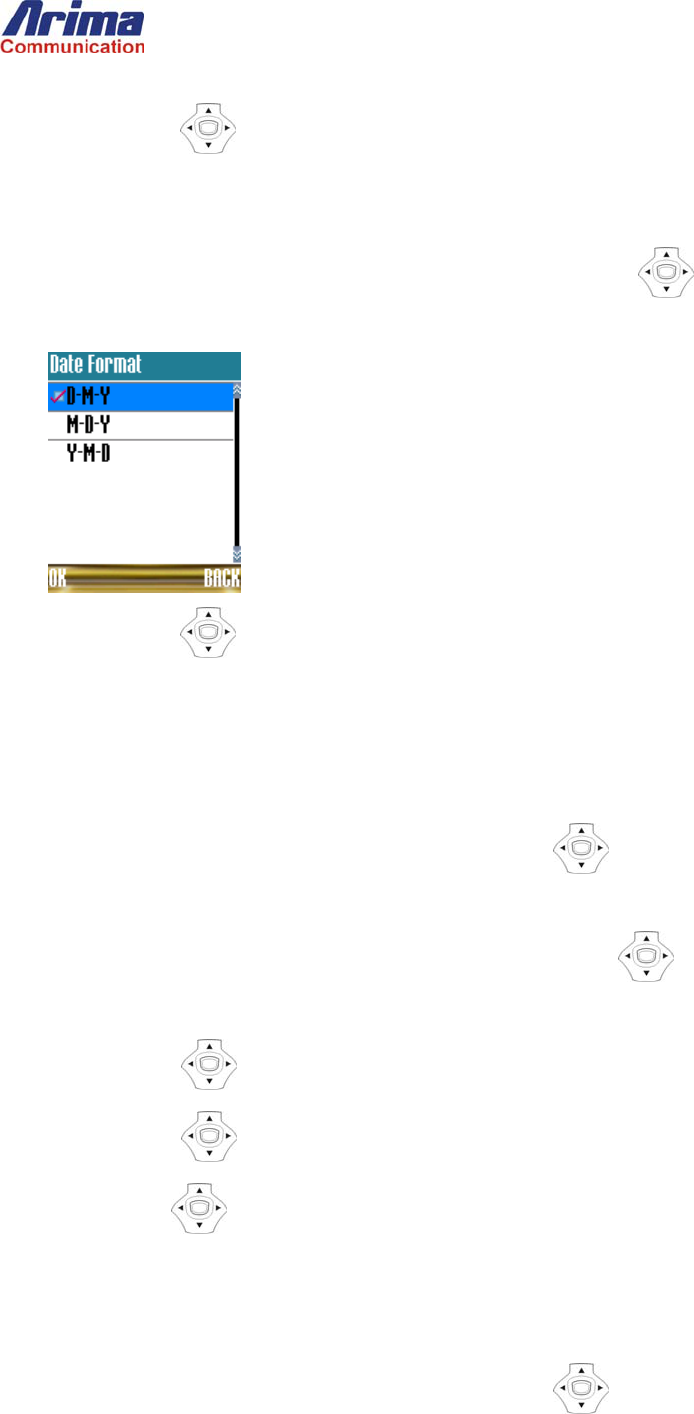
To select the Date format:
1. Perform steps 1-3 in the above procedure to access the World Clock submenu.
2. Press number 6 on the keypad to select the Date Format or use Up/Down key to highlight Date Format and press
the SELECT key to select it. For time format, you have following choices:
3. Use the Up/Down key to select your preferred format. Press the OK key to complete the operation.
Stopwatch
You can track the amount of time you spend on a task using the stopwatch function.
To open the stopwatch screen:
1. From the idle screen, press the MENU key and then use 4-Way key to highlight the Fun And Tools of main menu
and press SELECT to select the Fun And Tools menu.
2. Press number 5 on the keypad to select the Stopwatch or use Up/Down key to highlight Stopwatch and press the
SELECT key to select it.
3. Press the Central key to start the stopwatch. The phone will show the accumulating count.
4. Press the Central key again to stop the stopwatch.
5. Press the Down key to clear the accumulated count.
Games
To access the games:
1. From the idle screen, press the MENU key and then use 4-Way key to highlight the Fun And Tools of main menu
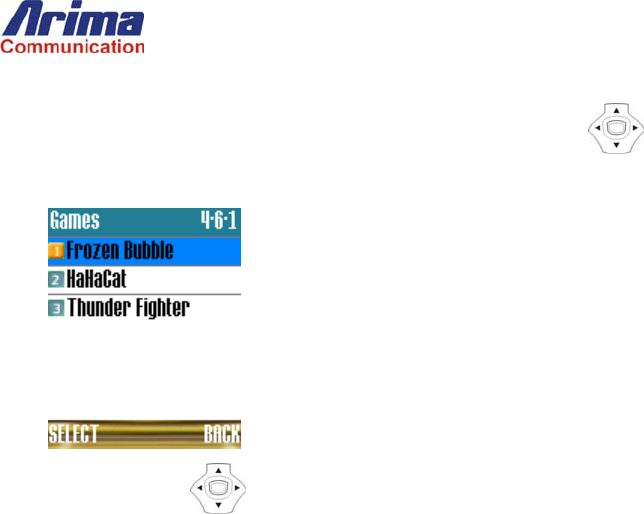
and press SELECT to select the Fun And Tools menu.
2. Press number 6 on the keypad to select the Games or use Up/Down key to highlight Games and press the SELECT
key to select it.
3. Use the Up/Down key to highlight your preferred option, and press the SELECT key to complete the selection.
5. Call Log
View Missed, Received, and Dialed Call History
Each of the Missed, Received, and Dialed Call lists can store information for up to 30 calls. When a list is full, a new log entry
will cause the oldest item on the list to be dropped.
1. To access the call log from the idle screen, press the key or the MENU key and then use 4-Way key to highlight
the Call Log of main menu and press SELECT to select the Call Log menu.
2. Use the Up/Down key to scroll to the Missed, Received, or Dialed Calls entry and press the SELECT key to view
the list of calls.
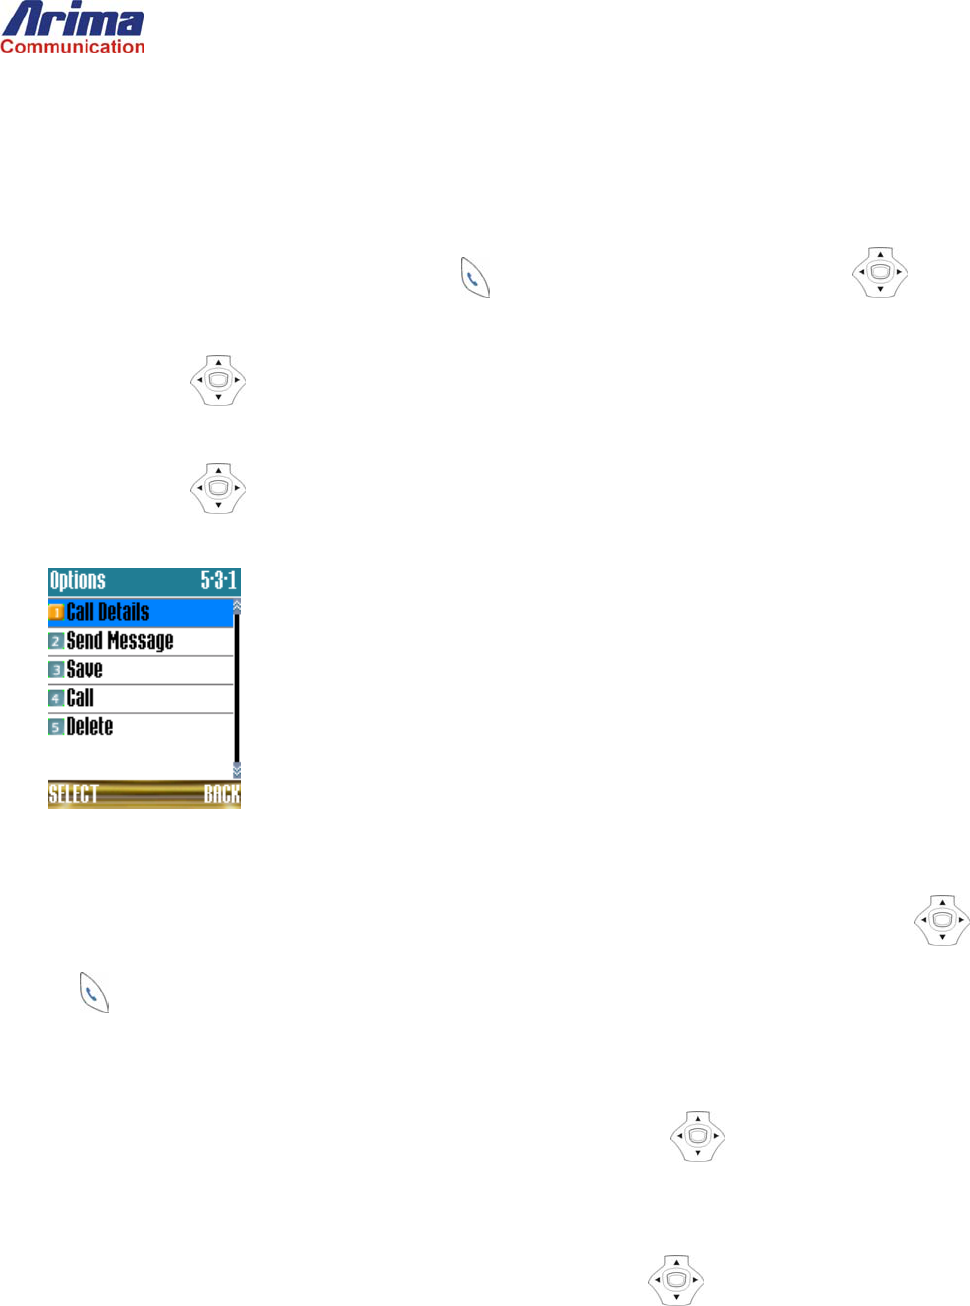
3. Use the Up/Down key to highlight a call and press the OPTIONS key will take the user to the detailed view of the
call. The details screen will include up to five items.
Call a Number Listed in the Call Log
From the Missed/Received/Dialed/Combined Calls list, scroll to the number you want to call using the Up/Down key and
press the key.
Send a Message to a Number in the Call Log
From the Missed, Received, Dialed, or Combined Calls list, use the Up/Down key to scroll to the number where you
want to send a message.
Press the OPTIONS key.
Press number 2 on the keypad to select the Send Message or use Up/Down key to highlight Send Message and
press the SELECT key to select it. You will be directed to the Message Create screen for editing a message.
Save a Number in Call Log to Phonebook
This is similar to the above procedure. But, instead of selecting option 2 in step 3, select option 3 to save the call.
Remove an Entry from a Call Log
This is similar to the procedure for sending a message. But, instead of selecting option 2 in step 3, select option 5 to delete the
call.
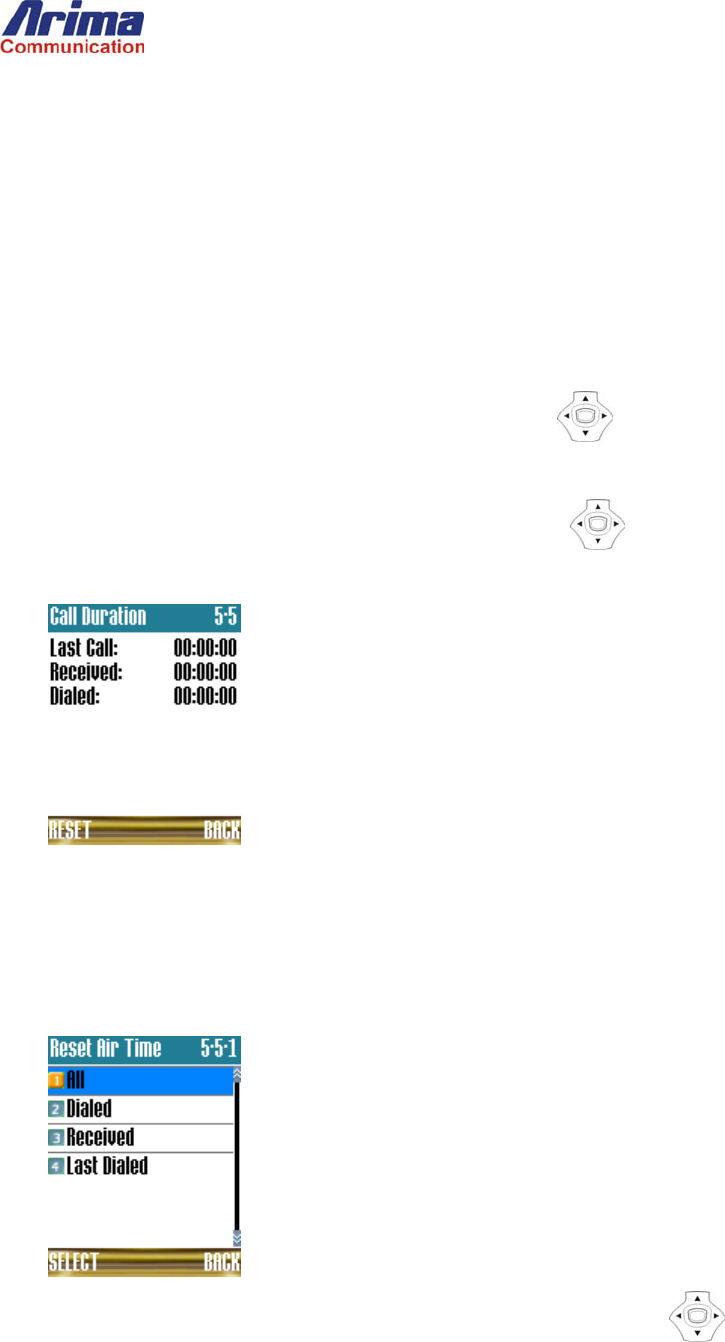
View Airtime for Previous Calls
You can view the accumulated airtime for received and dialed calls and the airtime of the last call.
3. From the idle screen, press the MENU key and then use 4-Way key to highlight the Call Log of main menu and press
SELECT to select the Call Log menu.
4. Press the number 5 to select the Call Duration or use Up/Down key to highlight Call Duration and press the
SELECT key to select it. The information will be displayed as following.
Reset the Airtime Logs
The accumulated times for received and dialed calls, and the last call, can be reset independently or together in one operation.
1. Perform steps 1-2 in the above procedure to access the Call Duration submenu.
2. Press RESET and the phone will display the following options.
3. Select the call list you want to delete by pressing the number or use Up/Down key to highlight the item and press the
SELECT key to select it. This will lead you to a confirmation window.
4. To reset the counter, press the YES button.
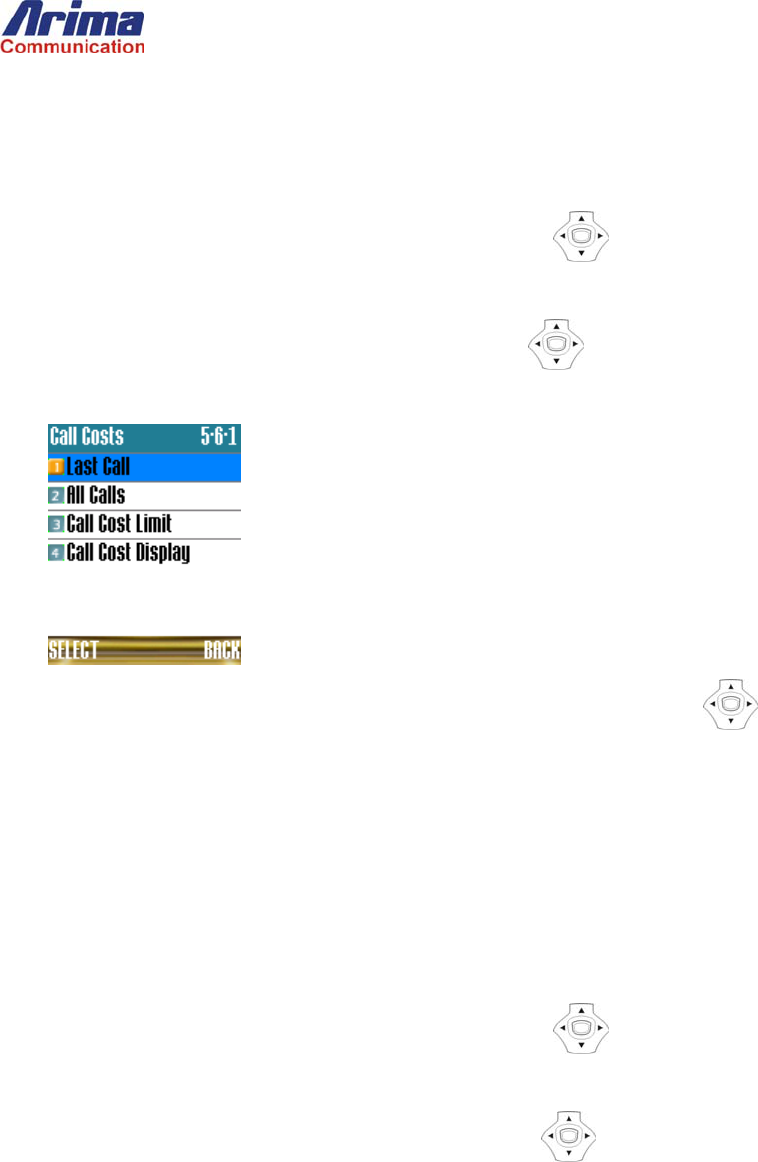
View Cost of Last Call or All Calls
The Call Costs submenu contains information about the cost of the Last Call and All Calls made or received on your mobile
phone. This information is displayed in either units or currency, and users set the displays to units or currency in the Call Cost
Display menu.
1. From the idle screen, press the MENU key and then use 4-Way key to highlight the Call Log of main menu and
press SELECT to select the Call Log menu.
2. Press the number 6 to select the Call Costs or use Up/Down key to highlight Call Costs and press the SELECT key
to select it.
3. Select the
data that you want to check by pressing the number or use Up/Down key to highlight the item and press
the SELECT key to view it.
4. The call costs can be displayed in units or currency. Changing the display method from units to currency requires password
authorization.
View Logs for GPRS Digital Data Calls
You can view the number of kilobytes of upload and download data transferred during the last GPRS (General Packet Radio
Service) data call, or for all calls since the counter was reset.
1. From the idle screen, press the MENU key and then use 4-Way key to highlight the Call Log of main menu and
press SELECT to select the Call Log menu.
2. Press the number 7 to select the GPRS Data or use Up/Down key to highlight GPRS Data and press the SELECT
key to select it and the phone will display the following options.
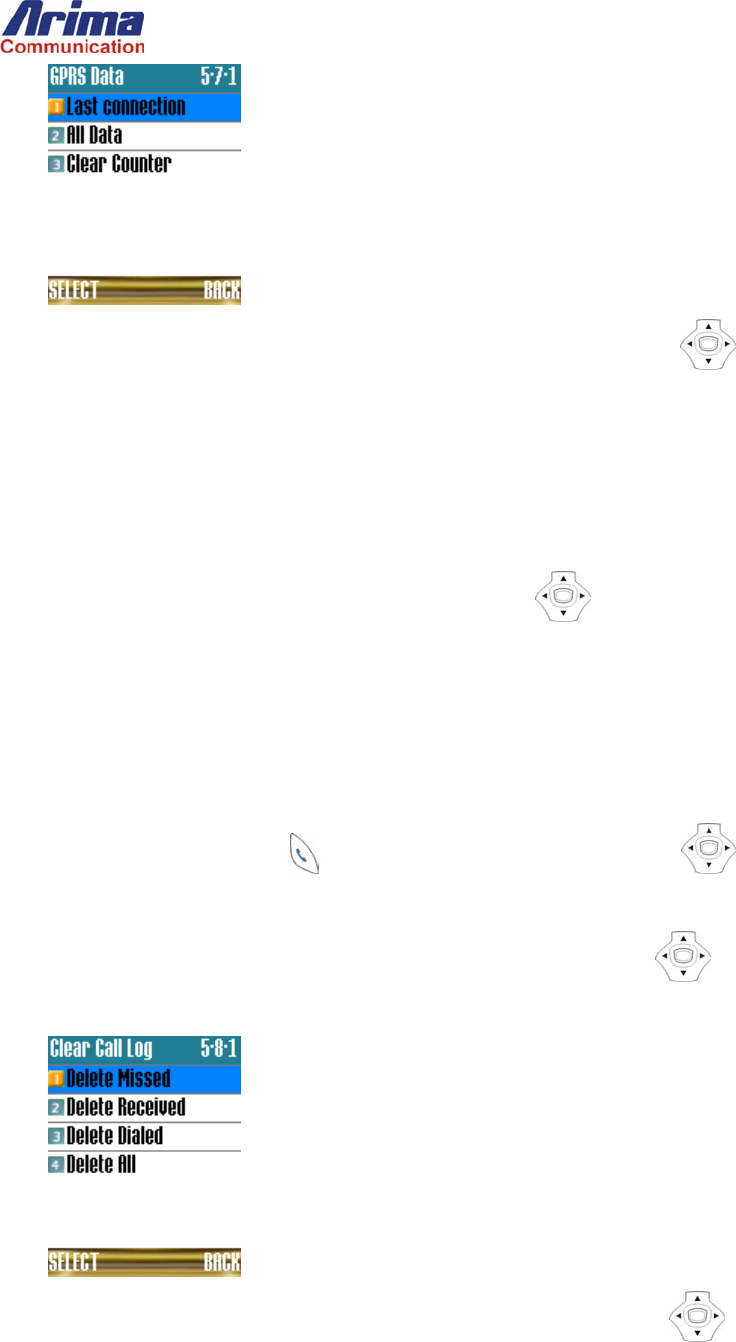
5. Select the data that you want to check by pressing the number or use Up/Down key to highlight the item and press the
SELECT key to view it.
Reset the GRPS Data Logs
The GPRS data logs can all be cleared together in one operation.
1. Perform steps 1-2 in the above procedure to access the GPRS Data submenu.
2. Press number 3 to select the Clear Counter or use Up/Down key to highlight Clear Counter and press the
SELECT key to select it. This will lead you to a confirmation window.
3. To delete the list, press the YES button.
Clear the Call Logs
You can clear all entries from the Missed, Received, or Dialed log independently, or you can clear all entries in one operation.
1. From the idle screen, press the key or the MENU key and then use 4-Way key to highlight the Call Log of
main menu and press SELECT to select the Call Log menu.
2. Press number 8 on the keypad to select the Clear Call Log or use Up/Down key to highlight Clear Call Log and
press the SELECT key to select it. The phone will display following options screen.
3. Select the call list you want to delete by pressing the number or use Up/Down key to highlight the item and press the
SELECT key to select it. This will lead you to a confirmation window.
4. To delete the list, press the YES button.
6. Phonebook
SIM Phonebook
The maximum number of entries that can be stored within the SIM Phonebook depends on the SIM card memory.
Phone Phonebook
The Phone Phonebook can store up to 1000 numbers and 400 records, called Name cards. Each Name card is constituted of
A name with up to 14 English characters or 6 Chinese characters
Up to Four 20-digit numbers
An E-mail address of up to 50 English characters and 24 Chinese characters
A Note containing up to 50 English characters and 24 Chinese characters
Group melody
Phonebook Name cards can also be organized into groups. The Phone Phonebook supports up to 10 groups.
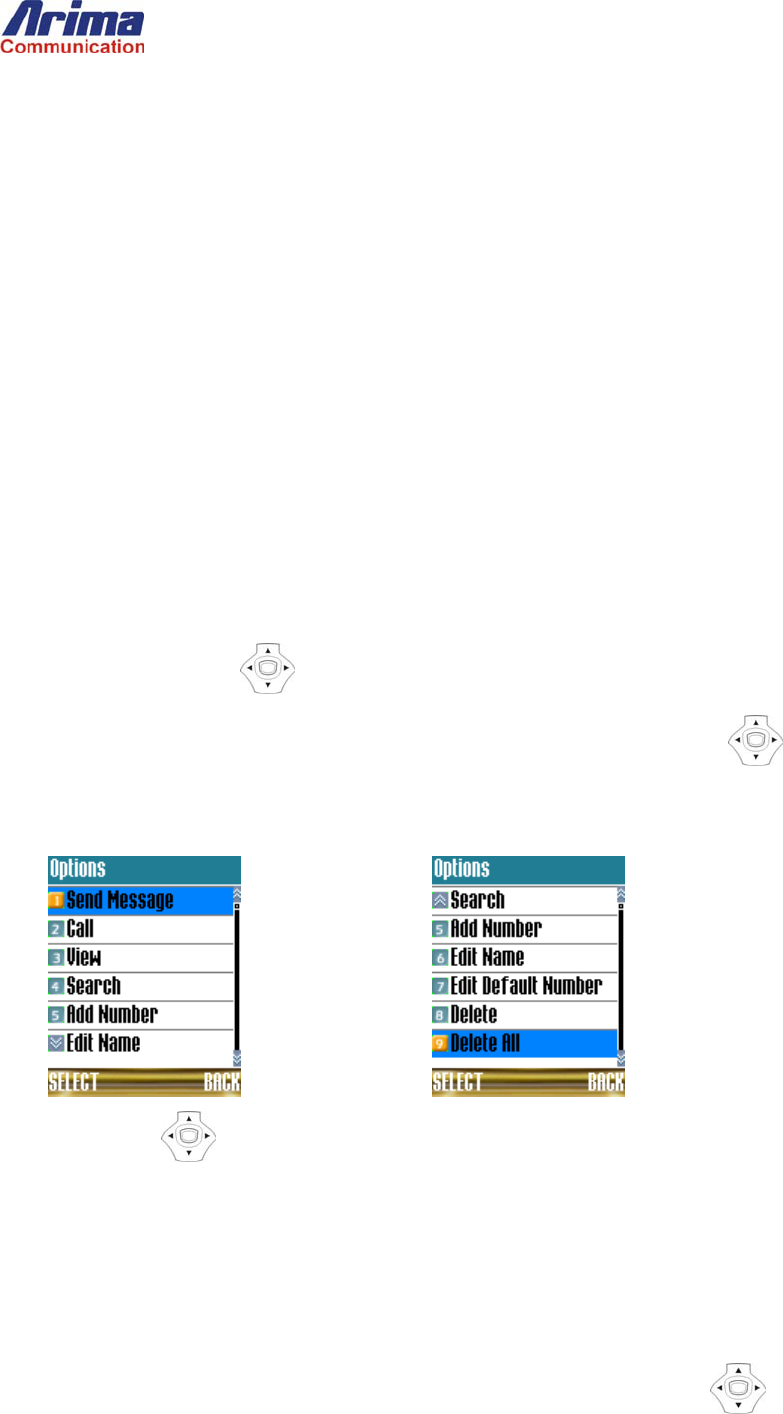
Search a Name
To add or edit an e-mail address in a phone card
1. From the idle screen, view the Phonebook by pressing the PHONEBOOK key and pressing the number 1 to select the
Search or use Up/Down key to highlight Search and press the SELECT key to select it.
2. Enter a name into the text box then press OK or press OK directly and use Up/Down key to highlight the name and
press the SELECT key to select it.
3. Press the OPTIONS key to view all the options.
4. Use Up/Down key to highlight the item and press the SELECT key to select the options.
Change the Default Number
The default number is the number that will be used when you select a name from the phonebook to call.
To change the default number:
1. Perform steps 1-3 in the above procedure to access the Options submenu.
2. Press number 7 on the keypad to select the Edit Default Number or use Up/Down key to highlight Edit Default
Number and press the SELECT key to select it.
Edit the number in the text box then press OK to make change.
Add a Name or Number
To add a name or number to a card in the Phonebook:
1. From the idle screen, view the Phonebook by pressing the PHONEBOOK key and pressing the number 2 to select the Add
or use Up/Down key to highlight Add and press the SELECT key to select it.
2. Enter a name into the text box then press OK. Enter a number into the text box then press OK to finish the entering.
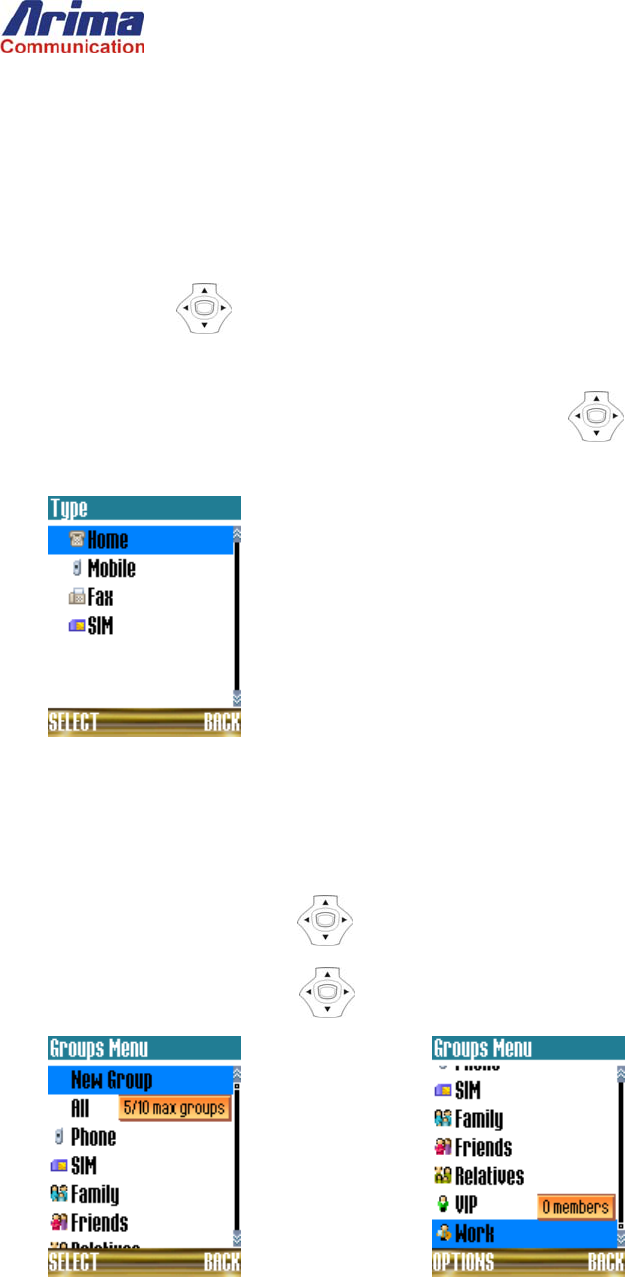
3. Select the entry can be saved in following types. Use Up/Down key to highlight the selection and press the
SELECT key to select it.
Create a Group
To create a group
1. From the idle screen, view the Phonebook by pressing the PHONEBOOK key and pressing the number 3 to select the
Caller Group or use Up/Down key to highlight Caller Group and press the SELECT key to select it.
2. In Group Menu, use Up/Down key to highlight New Group and press the SELECT key to select it.
3. Enter a group name in the text box.
4. Press the OK key. The phone will display a screen indicating the group is empty.
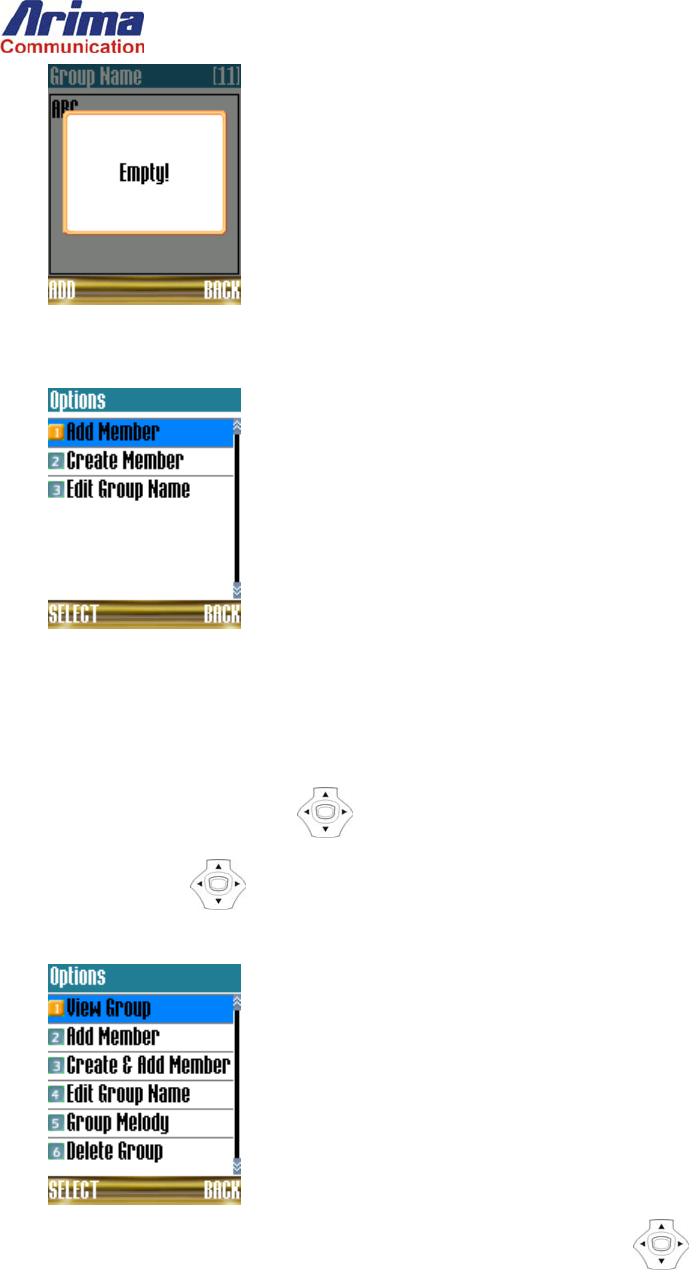
5. If you want to add members now, press the ADD key again. You will be presented with an Options menu that will allow
you to add or create a member of the group.
6. If you do not wish to add members at this stage, press the BACK key to finish the operation.
View Group Members
1. From the idle screen, view the Phonebook by pressing the PHONEBOOK key and pressing the number 3 to select the
Caller Group or use Up/Down key to highlight Caller Group and press the SELECT key to select it.
2. Use the Up/Down key to scroll down and highlight the group on which you want to operate.
3. Press OPTIONS key to access the Options submenu.
4. Press number 1 on the keypad to select the View Group or use Up/Down key to highlight View Group and press the
SELECT key to select it. The phone will display the list of phone cards that are currently members of the group.
Add a Member to a Group
To add a member:

1. Perform steps 1-3 in the above procedure to access the Options submenu.
2. Press number 2 on the keypad to select the Add Member or use Up/Down key to highlight Add Member and press
the SELECT key to select it. The phone will display the list of phone cards that are not currently members of any group.
3. Use the Up/Down key to scroll to and highlight the card you want to add to the group. Press the Select key to
complete the operation.
Remove a Group Member
To remove a card from a group:
1. View the members of the group by performing “View Group Members” sub-section.
2. Use the Up/Down key to select the member you want to remove, and press the OPTIONS key to select a group
Options menu.
3. Press number 6 on the keypad to select the Remove Member from Group or use Up/Down key to highlight
Remove Member from Group and press the SELECT key to select it.
4. The phone will display a CONFIRM window. Press the YES key to complete the operation.
Create a Group Member
To create a phone card and add it as a member of a group in one operation:
1. Perform steps 1-3 in the above procedure to access the Options submenu.
2. Press number 3 on the keypad to select the Create & Add Member or use Up/Down key to highlight Create & Add
Member and press the SELECT key to select it.
3. The phone will prompt you for a name, telephone number, and type (Home, Mobile, Work, or Fax) in the same way as when
you create a phone card on its own.
Rename a Group
To change the name of a group
1. Perform steps 1-3 in the above procedure to access the Options submenu.

2. Press number 4 to select the Edit Group Name or use Up/Down key to highlight Edit Group Name and press the
SELECT key to select it. The phone will display a text box where you can key in the new name.
3. Press the OK key when you have finished. The phone will display the Smart Phonebook list with the revised group name.
Associate a Group with a Specific Ring Tone Melody
You can associate each group with its own ring-tone melody so that you can identify incoming calls without having to pick up the
phone.
To set the ring-tone melody for a group:
1. Perform steps 1-3 in the above procedure to access the Options submenu.
2. Press the Menu key to display a phonebook Options menu.
3. Press number 5 on the keypad to select the Group Melody or use Up/Down key to highlight Group Melody and
press the SELECT key to select it.
4. Use the Up/Down key to highlight your preferred melody. Press the OK key to complete the operation.
Call a Group Member
The easiest way to call a group member is to simply open the group, highlight the member you want to call, and press the Send
key.
In detail:
1. View the group members as described in the preceding sub-section
2. Use the Up/Down key to highlight the member you want to call.
3. Press the key.
You can also call a member from the group options menu:
1. Highlight the group member by following steps 1 and 2 above.
2. Press the OPTIONS key to view the group Options menu.
3. Press number 1 on the keypad to select the Call Member or use Up/Down key to highlight Call Member and press
the SELECT key to select it.
Delete a Group
Deleting a group removes the members from the group, so that they will appear directly in the Smart Phonebook list, and then
deletes the group.
To delete a group:
1. From the idle screen, view the Phonebook by pressing the PHONEBOOK key and pressing the number 3 to select the
Caller Group or use Up/Down key to highlight Caller Group and press the SELECT key to select it.
2. Use the Up/Down key to scroll down and highlight the group on which you want to operate.
3. Press OPTIONS key to access the Options submenu.
4. Press number 6 on the keypad to select the Delete Group or use Up/Down key to highlight Delete Group and press
the SELECT key to select it.. The phone will display a CONFIRM window to confirm this really what you want to do.
5. Press the YES key to complete the operation.
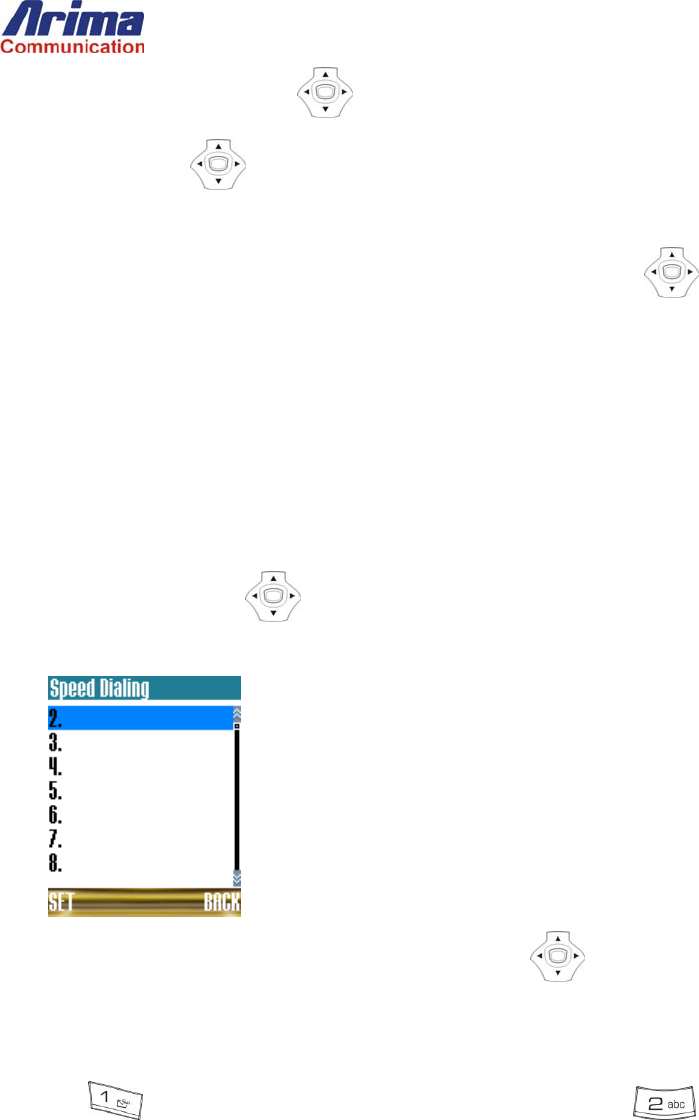
Speed Dialing
You can assign up to 8 numbers in your phonebook, as speed-dialing numbers, to numbers 2-9 on your keypad.
Set Up Speed Dialing
1. From the idle screen, view the Phonebook by pressing the PHONEBOOK key and pressing the number 4 to select the Speed
Dialing or use Up/Down key to highlight Speed Dialing and press the SELECT key to select it. The phone will
display the current speed-dialing list.
2. To assign a number to a speed dialing key, use the Up/Down key to highlight one of the speed-dialing keys and press
the SET key. In the screen above, pressing the SET key would start the process of assigning a phone number to keypad
number 2. The phone will display an Options submenu.
3. Press key to select a number from the Phone Phonebook or press key to select from the SIM Phonebook.
4. Continue to select a number in the same way as you would when using the phonebook to make a call.
Use Speed Dialing
Once speed dialing numbers are assigned, as described above, you can make a call simply by pressing down one of the assigned
speed-dialing keys for more than a second.
Copy all Numbers From the SIM Phonebook
To copy your Phone Phonebook numbers from the SIM:
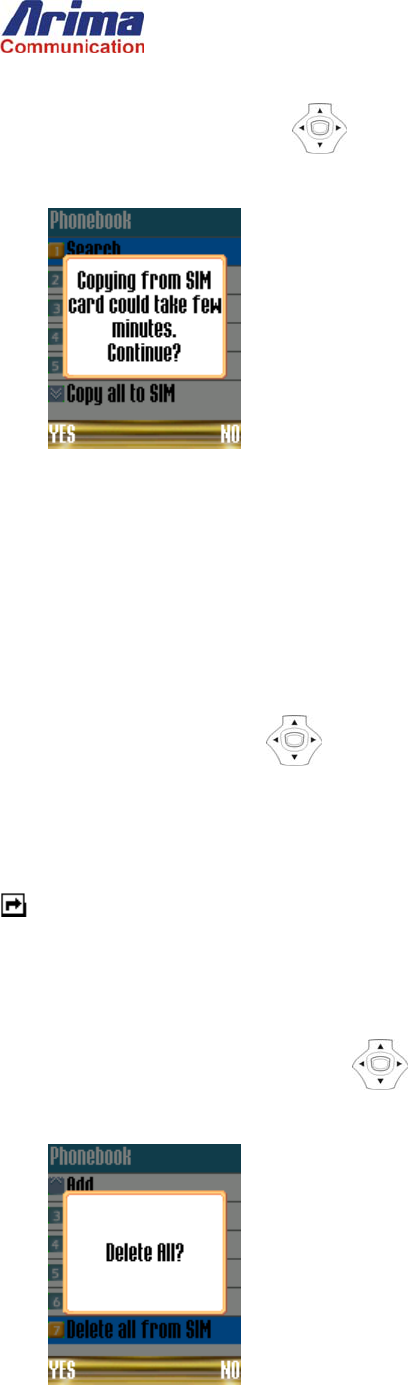
1. From the idle screen, view the Phonebook by pressing the PHONEBOOK key and pressing the number 5 to select the Copy
all from SIM or use Up/Down key to highlight Copy all from SIM and press the SELECT key to select it. The
phone will display a confirmation window to tell you the operation could take several minutes.
2. Press the YES button to start the operation.
Upon completion, the phone will display the status of the operation. The status screen automatically reverts to the phonebook
menu after approximately 2 seconds.
Copy all Numbers To the SIM Phonebook
To copy your Phone Phonebook numbers to the SIM:
1. From the idle screen, view the Phonebook by pressing the PHONEBOOK key and pressing the number 6 to select the Copy
all to SIM or use Up/Down key to highlight Copy all to SIM and press the SELECT key to select it. The phone
will display a confirmation window to tell you the operation could take several minutes.
2. Press the YES button to start the operation.
The progress and status windows with this operation are the same as copy-from-SIM operation.
Note: During phonebook-copy operations, incoming calls are not received until the copy operation is complete.
Delete Entire SIM Phonebook
1. From the idle screen, view the Phonebook by pressing the PHONEBOOK key and pressing the number 7 to select the
Delete all from SIM or use Up/Down key to highlight Delete all from SIM and press the SELECT key to select it.
2. The phone will display a CONFIRM window to make sure this is really what you want to do.
3. If you want to continue, press the YES button to complete the operation.

Delete Entire Phone Phonebook
Use the procedure described in the preceding sub-section but in step 1, press the number 8 on the keypad to select the Delete All
from Phone entry.

7. WAP
Launch the Browser
1. From the idle screen, press the MENU key then use 4-Way key to highlight the WA P of main menu and press
SELECT to select the WA P menu.
2. Then press number 1 on the keypad to select the Launch or use Up/Down key to highlight Launch and press the
SELECT key to select it.
Bookmark
You can bookmark a favorite page so that you can quickly launch it. You can also edit and delete your bookmark.
Set a Bookmark
To set a bookmark from the page you want to bookmark:
1. Press the MENU key to view the web-page menu.
2. Use the Up/Down key to highlight the Browser menu entry and press SELECT.
3. Press number 3 on the keypad to select Mark Site or use Up/Down key to highlight Mark Site and press the
SELECT key to select it. The phone will display a Bookmark Name screen.
4. Type a name for the bookmark, using up to 20 English characters or 10 Chinese characters. In the title bar of the window, the
phone will display the number of characters still available to you as you type. Press the OK key to display the URL screen.
5. Press OK to accept the URL and complete the operation.
6. You can also set a bookmark from the idle screen, although this is less convenient because you have to enter the URL of the
page manually.
To set a bookmark from the idle screen:
1. From the idle screen, press the MENU key then use 4-Way key to highlight the WA P of main menu and press
SELECT to select the WA P menu.
2. Press number 2 on the keypad to select the Bookmark or use Up/Down key to highlight Bookmark and press the
SELECT key to select it. The phone will display your current bookmarks.
3. If the bookmark list is empty, press the NEW key to start a new entry, and continue from step 0.
4. If the bookmark already has at least one entry, press the OPTIONS key to display the bookmark Options menu.
5. Press number 3 on the keypad to select the New or use Up/Down key to highlight New and press the SELECT key
to select it.

Type a name for the bookmark, using up to 20 English characters or 10 Chinese characters. In the title bar of the window, the
phone will display the number of characters still available to you as you type. Press the OK key to display the URL screen.
6. Enter the address of the page you want to bookmark, and press the OK key to complete the operation.
Go To a Bookmark
To go to a bookmark from the idle screen:
1. Press the MENU key then use 4-Way key to highlight the WA P of main menu and press SELECT to select the
WA P menu.
2. Press number 2 on the keypad to select the Bookmark or use Up/Down key to highlight Bookmark and press the
SELECT key to select it. The phone will display your current bookmarks.
3. Press the OPTIONS key and number 1 on the keypad or use Up/Down key to highlight Go To and press the
SELECT key to select it to launch the WAP browser and go to the book-marked page.
Edit a Bookmark
6. To change the name or URL (web address) of a bookmark:
7. Follow step 1-2 in the preceding section to select the bookmark.
Press the OPTIONS key and number 4 on the keypad or use Up/Down key to highlight Edit and press the SELECT
key to edit the entry.
8.
Delete a Bookmark
To delete an existing bookmark:
1. Select the bookmark by following steps 1-2 in the “Go To a Bookmark” subsection.
2. Press the OPTIONS key and press number 5 on the keypad or use Up/Down key to highlight Delete and press the
SELECT key to delete entry. The phone will display a CONFIRM screen.
3. Press the YES key to complete the operation.
Return to the Last Page Visited
The phone remembers the last web page you visited. To return to that page:
1. From the idle screen, press the MENU key then use 4-Way key to highlight the WA P of main menu and press
SELECT to select the WA P menu.
2. Press number 3 on the keypad to select the Last Page or use Up/Down key to highlight Last Page and press the
SELECT key to select it. This will return to the last page you visited.
Cache a Page for Viewing Offline
WAP pages are stored (cached) in the phone. If you cache a page, you have the following options for controlling when it is
displayed:
Display from cache if available or
Display from cache only those pages that do not expire.
To control caching behavior:
1. From the idle screen, press the MENU key then use 4-Way key to highlight the WA P of main menu and press
SELECT to select the WA P menu.
2. Press number 5 on the keypad to select the Cache or use Up/Down key to highlight Cache and press the SELECT
key to select it.
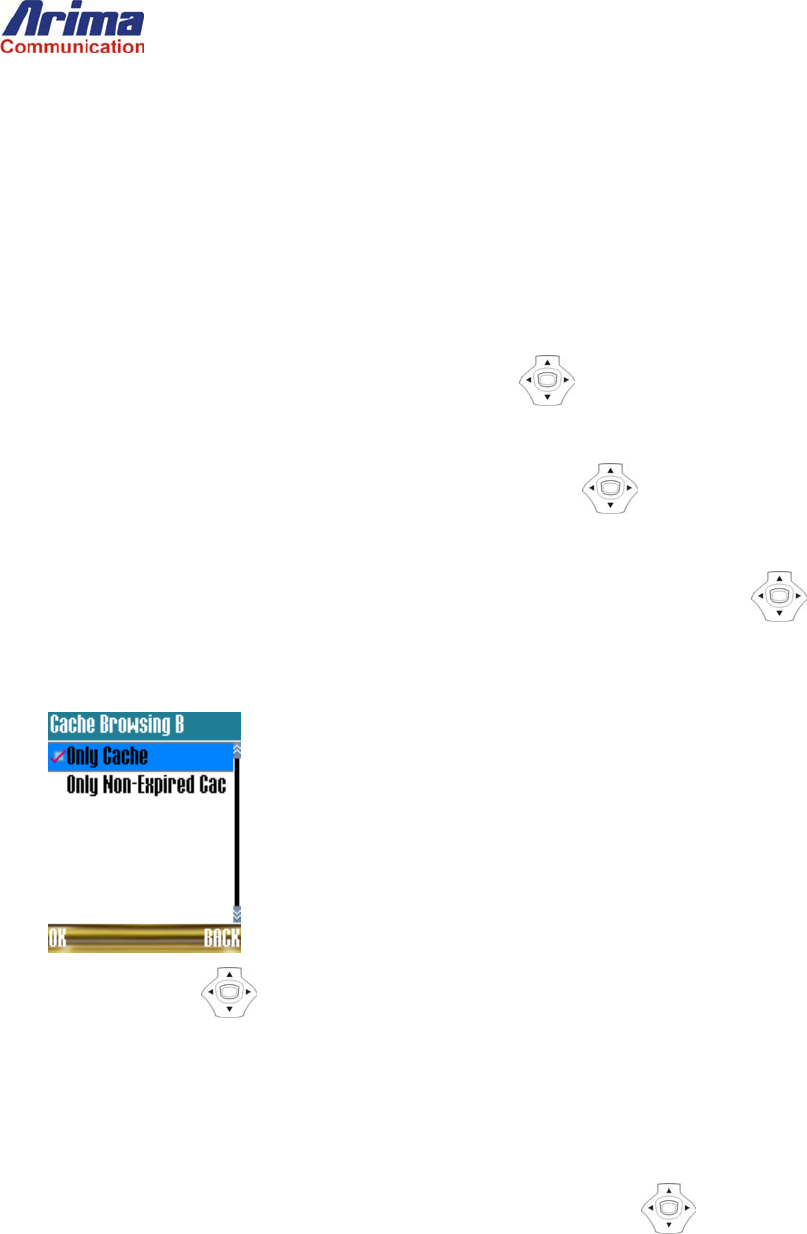
3. Press number 2 on the keypad to select the Cache Browsing Behavior or use Up/Down key to highlight Cache
Browsing Behavior and press the SELECT key to select it. The phone will display the following Cache Browsing
Behavior options:
4. Press the Up/Down key to highlight your chosen option, and press the OK key to complete the operation.
Delete the Cache
To erase all cached pages:
1. Follow steps 1 and 2 in the preceding subsection.
2. Press number 1 on the keypad to select the Delete Cache or use Up/Down key to highlight Delete Cache and press
the SELECT key to select it. The phone will display a CONFIRM screen.
3. Press the YES button to complete the operation.
Configure Browser Profiles
Up to five user profiles can be set up to access different wireless Internet services. Please follow your service provider’s
instructions to setup a profile.
To edit a profile:
1. From the idle screen, press the MENU key then use 4-Way key to highlight the WA P of main menu and press
SELECT to select the WA P menu.
2. Press number 6 on the keypad to select the Setting or use Up/Down key to highlight Setting and press the SELECT
key to select it.
3. Use the Up/Down key to select the profile you want to edit, and press the OPTIONS key to display the profile
Options menu.
4. Press number 3 on the keypad to select the Modify or use Up/Down key to highlight Modify and press the SELECT
key to select it.
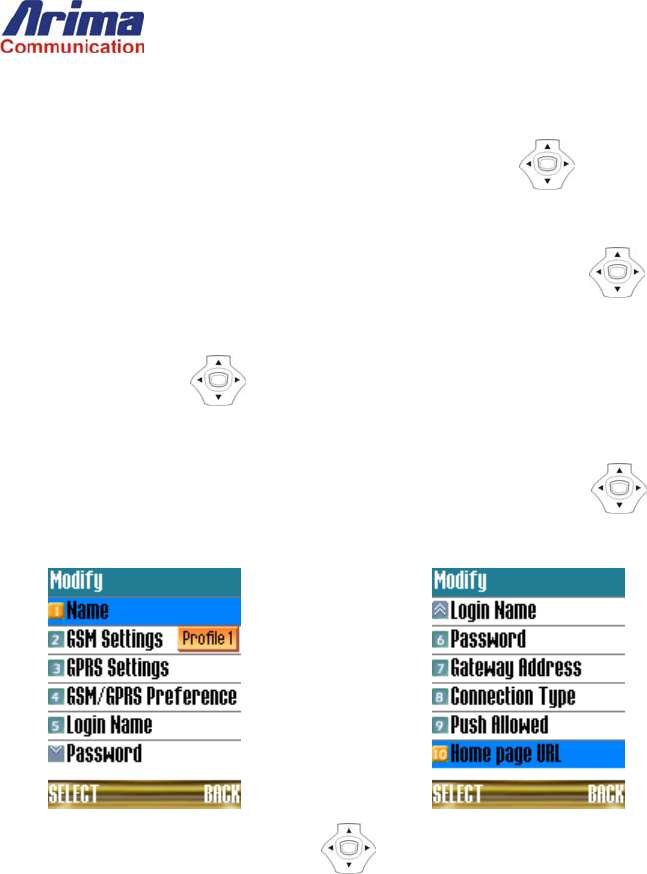
5. Press the number or use Up/Down key to highlight the item that corresponding to the setting you wish to modify and
press the SELECT key to select it.
8. Phone Settings
Set Call Answering Options
By default, you answer a call by pressing the key. You can change this to one of the following:
Answer by pressing any key
Answer by opening the phone flip
Auto Answer
Press Any Key to Answer
To select this mode:
1. From the idle screen, press the MENU key then use 4-Way key to highlight the Phone Settings of main menu and
press SELECT to select the Phone Settings menu.
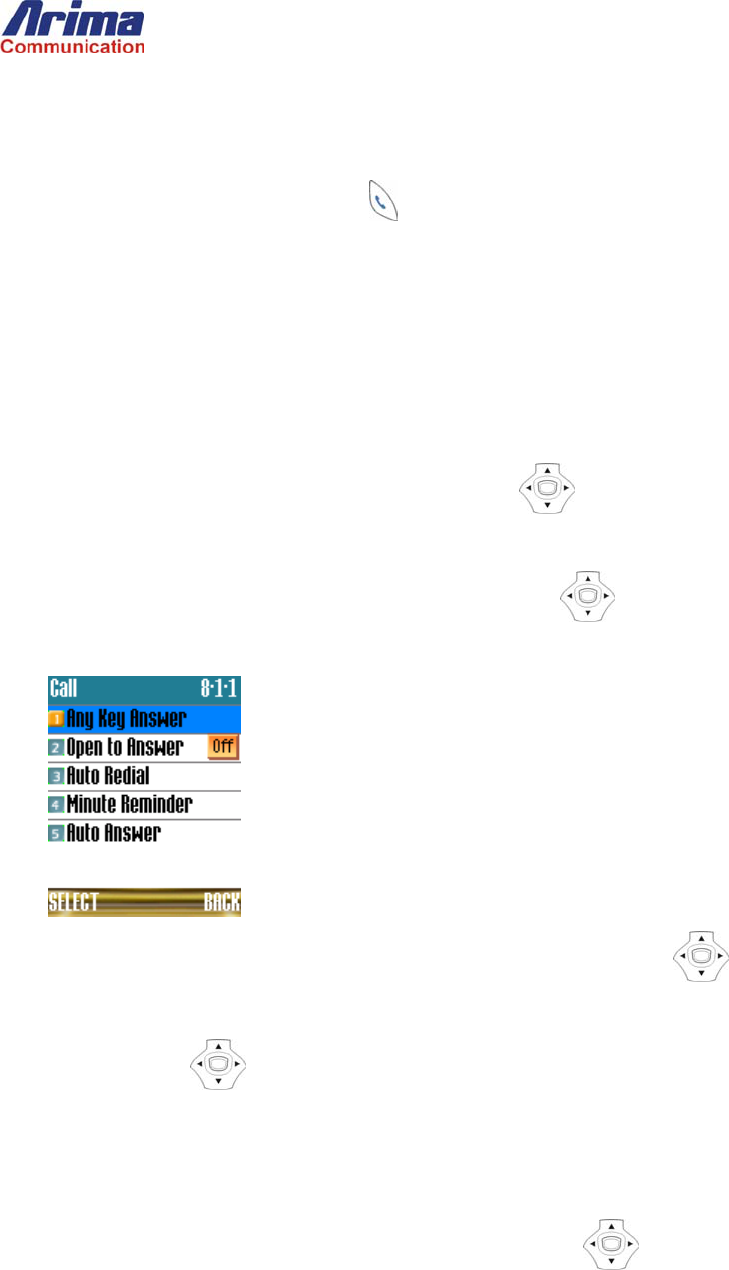
2. Press number1 on the keypad to select the Call or use Up/Down key to highlight Call and press the SELECT key to
select it. The phone will display following options.
3. Press number 1 on the keypad to select the Any Key Answer or use Up/Down key to highlight Any Key Answer
and press the SELECT key to select it
4. Use the Up/Down key to select On or Off, then press the OK key to complete the operation.
Open Lid to Answer
To set the phone to answer a call when you open the lid, follow the procedure in the preceding subsection, but in step 3 press
number 2 on the keypad to select the Open to Answer or use Up/Down key to highlight Open to Answer and press the
SELECT key to select it
Automatic Redial
To set the phone to Auto Redial, follow the procedure in the preceding subsection, but in step 3 press number 3 on the keypad to
select the Auto Redial or use Up/Down key to highlight Auto Redial and press the SELECT key to select it.
Auto-Answer
With the Auto Answer feature enabled, the phone will automatically answer a call after a specified time-out. This function is
available only on the first incoming call when the phone is in the idle state.
To configure auto-answer settings:
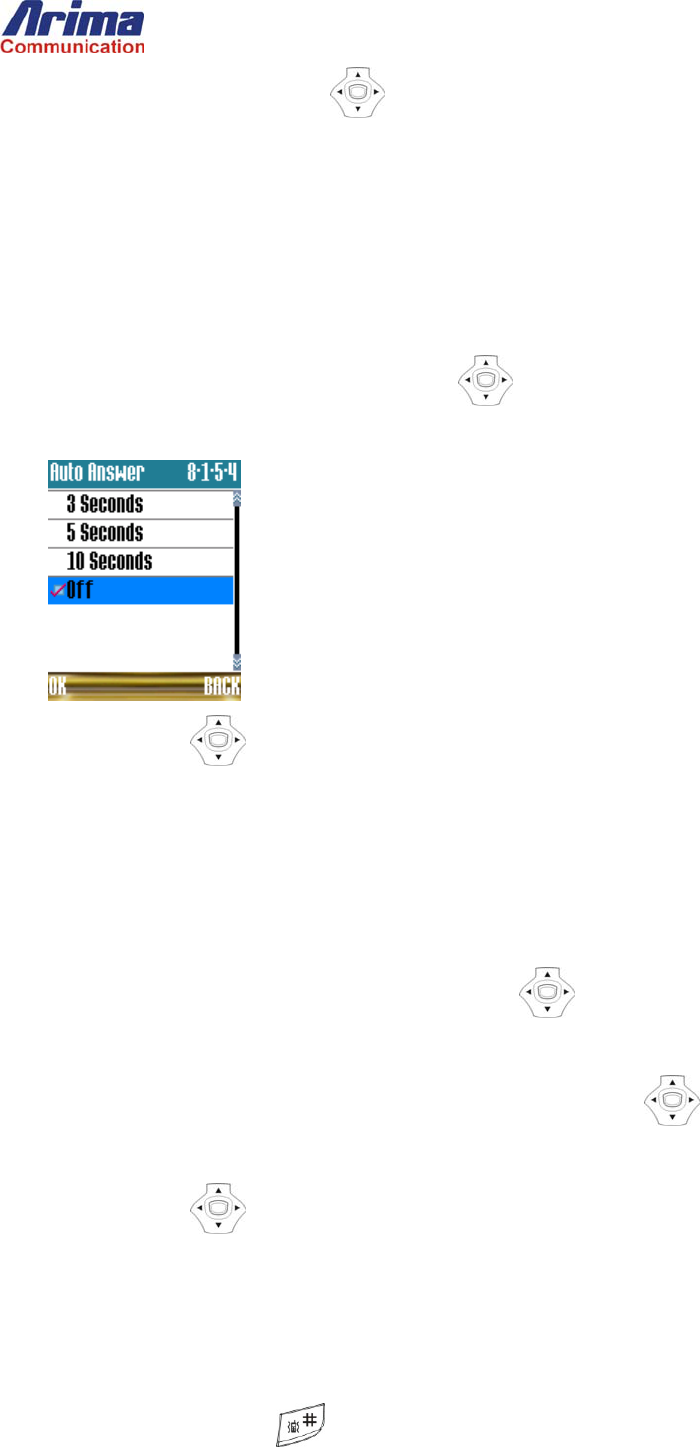
1. To set the phone to Auto Answer, follow the procedure in the preceding subsection, but in step 3 press number 5 on the
keypad to select the Auto Answer or use Up/Down key to highlight Auto Answer and press the SELECT key to
select it.
2. Use the Up/Down key to highlight the auto-answer option you require, and press the OK key to complete the
operation.
Keypad Lock
You can elect to lock the keypad after a timeout that you can specify.
To enable the keypad lock function:
1. From the idle screen, press the MENU key then use 4-Way key to highlight the Phone Settings of main menu and
press SELECT to select the Phone Settings menu.
2. Press number 3 on the keypad to select the Keypad Lock or use Up/Down key to highlight Keypad Lock and press
the SELECT key to select it.
3. Use the Up/Down key to highlight the Custom setting, and press the OK key. The phone will display a Keypad
Lock edit box where you can specify the timeout in minutes. This can be any value from 1 to 120.
4. Press the OK key to complete the operation.
Unlock a Locked Keypad
To unlock the keypad, long-press until the keypad unlocks and the Idle screen is displayed.

Remove the Keypad Lock
Repeat the same procedure as for setting the lock, but in step 3, highlight the Off entry in the Keypad Lock submenu instead of
the Custom entry.
Quick Keypad Lock
To prevent accidental calls, keypad can be locked any time with a long-press of the .
To unlock the keypad, long-press until the keypad unlocks and the Idle screen is displayed.
Reset the Phone to its Default Settings
You can reset the phone to its factory settings as follows:
1. From the idle screen, press the MENU key then use 4-Way key to highlight the Phone Settings of main menu and
press SELECT to select the Phone Settings menu.
2. Press number 4 on the keypad to select the Reset Setting or use Up/Down key to highlight Reset Setting and press
the SELECT key to select it.
3. To continue, press the YES button to complete the operation
Enable/Disable Welcome Message During Power-On
You can enable or disable the welcome message during power-on. To change the setting:
1. From the idle screen, press the MENU key then use 4-Way key to highlight the Phone Settings of main menu and
press SELECT to select the Phone Settings menu.
2. Press number 5 on the keypad to select the Welcome Message or use Up/Down key to highlight Welcome Message
and press the SELECT key to select it.
3. Press the number or use the Up/Down key to highlight the Message or Animation setting, and press the SELECT
key to complete the operation.
4. Use the Up/Down key to highlight the On or Off setting, and press the OK key to complete the operation.
9. Call Services
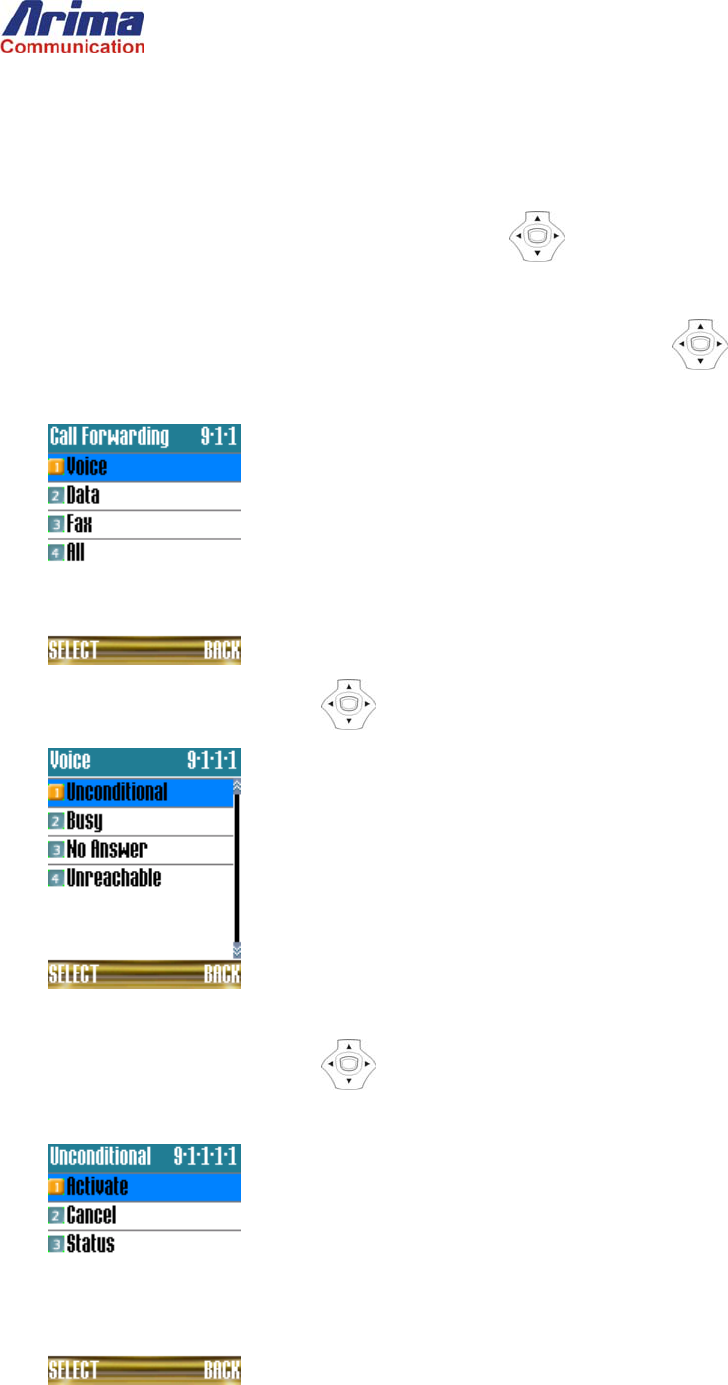
Call Forwarding Options
To enable call forwarding:
1. From the idle screen, press the MENU key then use 4-Way key to highlight the Call Services of main menu and press
SELECT to select the Call Services menu.
2. Press number 1 on the keypad to select the Call Forwarding or use Up/Down key to highlight Call Forwarding
and press the SELECT key to select it. The phone will display the options that will active call forwarding.
3. Press the number or use Up/Down key to highlight the item that you wish to select it.
4. Press the number or use associated with the conditions under which you want call forwarding to occur.
5. Press the number or use Up/Down key to highlight the item that you wish to select it. No. 1 to activate call
forwarding, No. 2 to cancel it, and No. 3 to determine your current call-forwarding settings.
6. Select the location where you want your calls forwarded.
7. If you select the Voicemail entry, your calls will be diverted there if voice mailbox is defined.
8. Select the To Phoneb ook entry if you want to divert calls to a number defined in one of your phonebooks.
9. If you select the To Other Number entry, the phone will display a screen where you can enter the number:
Cancel Call Forwarding
Perform steps 1-4 in the preceding sub-section and then select number 2 on the keypad to select the Cancel entry.
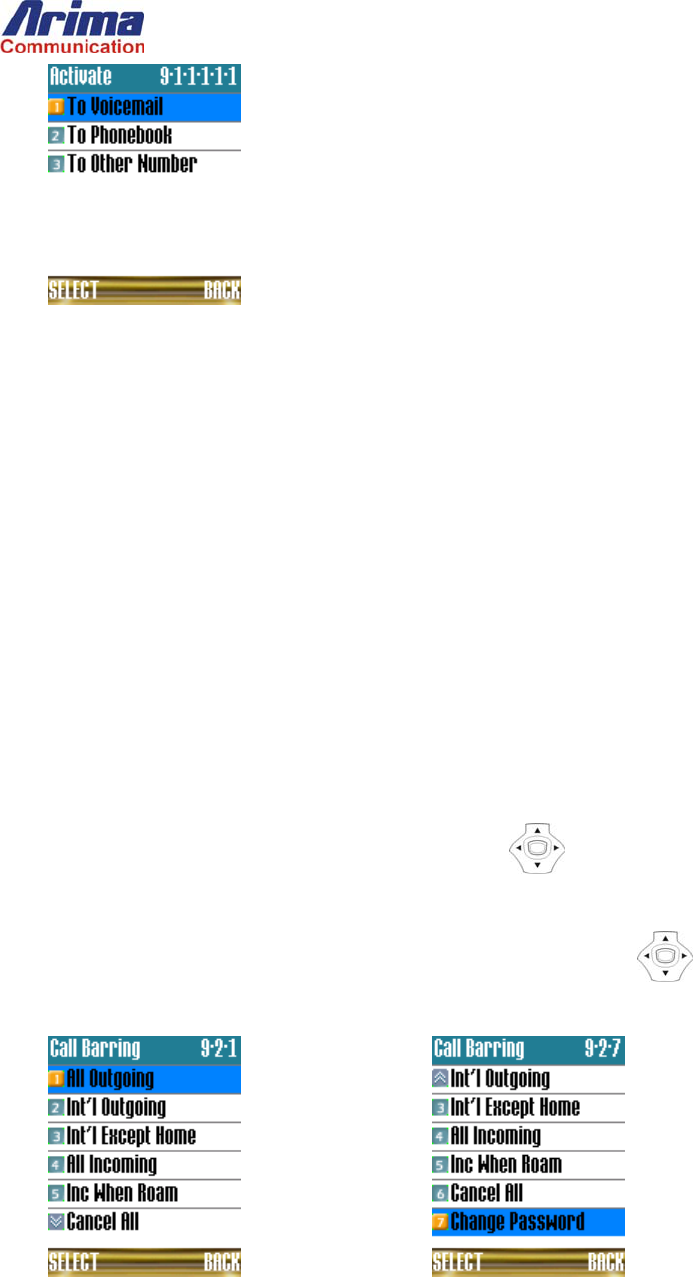
Use Call Barring
With the Call Barring feature you can prevent calls from being made or received.
All the above restrictions are controlled by a call-barring password.
Enable Call Barring
To impose call barring restrictions:
1. From the idle screen, press the MENU key then use 4-Way key to highlight the Call Services of main menu and press
SELECT to select the Call Services menu.
2. Press number 2 on the keypad to select the Call Barring or use Up/Down key to highlight Call Barring and press
the SELECT key to select it. The phone will display the conditions that will active call barring.
3. Enter the number in the range 1-5 corresponding to the call-barring condition you want to impose. The phone will display the
following submenu:
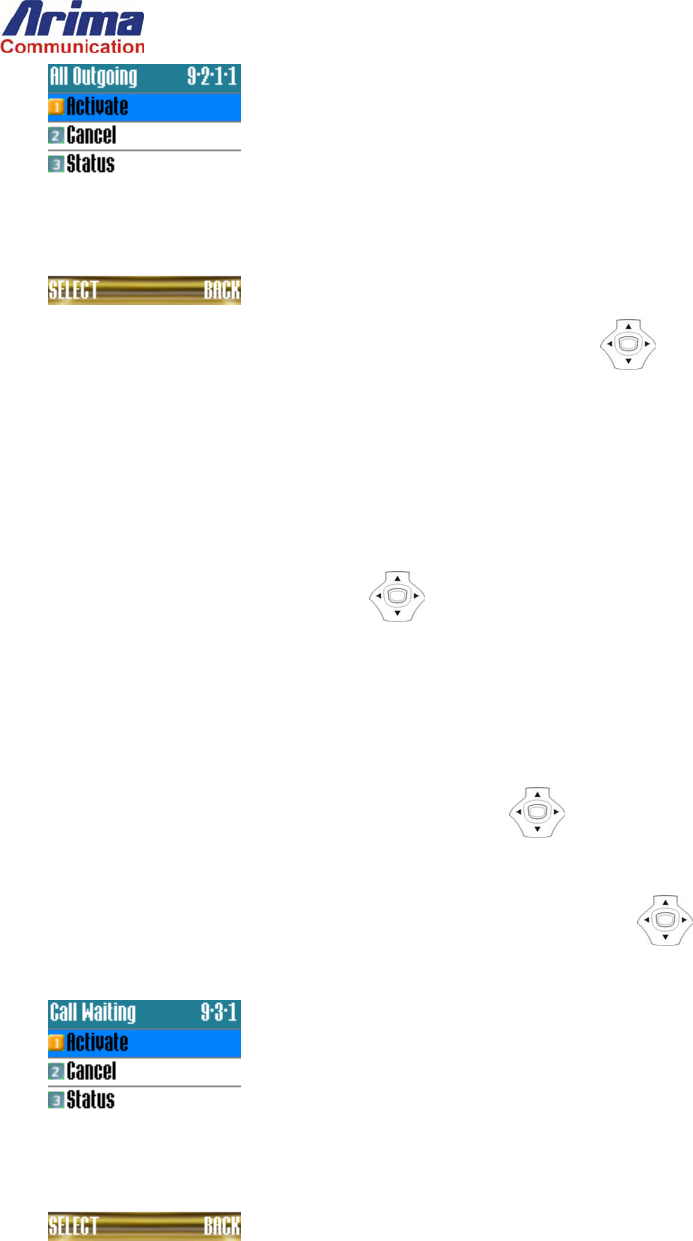
4. Press number 1 on the keypad to select the Activate or use Up/Down key to highlight Active and press the SELECT
key to select it. The phone will display a screen for you to enter the call-barring password.
5. Enter the password. The phone will display a dot for each character you enter. Press the OK key to complete the operation.
Cancel Call Barring
To cancel a single call barring restriction, perform all the steps in the preceding subsection, but in step 4, Press number 2 on the
keypad to select the Cancel or use Up/Down key to highlight Cancel and press the SELECT key to select it.
Call Waiting
The Call Waiting feature lets you receive notification of an incoming call while another call is active.
You can enable or disable call waiting as follows:
1. From the idle screen, press the MENU key then use 4-Way key to highlight the Call Services of main menu and press
SELECT to select the Call Services menu.
2. Press number 3 on the keypad to select the Call Waiting or use Up/Down key to highlight Call Waiting and press
the SELECT key to select it. The phone will display the submenu.
3. Select number 1 to activate call waiting, number 2 to cancel it, and number 3 to view your current setting.
Caller ID
Caller ID is an optional feature offered by your service provider.
To view your current caller ID status:
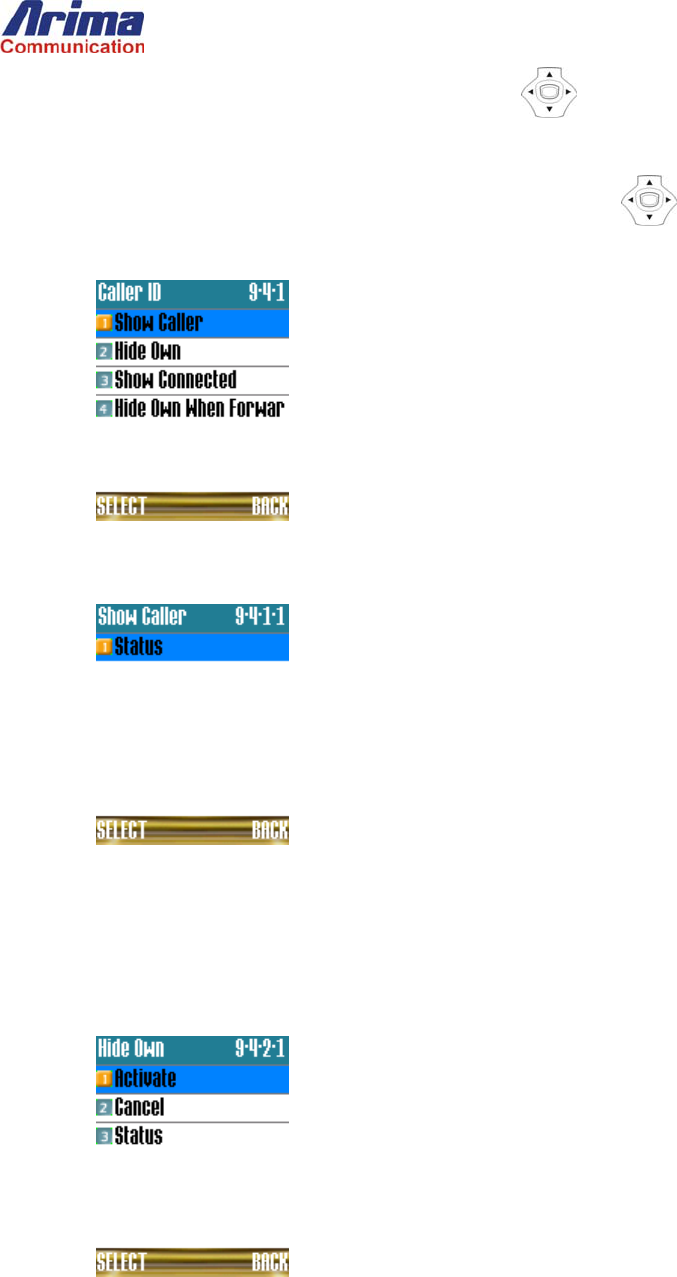
1. From the idle screen, press the MENU key then use 4-Way key to highlight the Call Services of main menu and
press SELECT to select the Call Services menu.
2. Press number 4 on the keypad to select the Caller ID or use Up/Down key to highlight Caller ID and press the
SELECT key to select it. The phone will display the submenu.
3. Select number 1 for show-caller (CLIP) information or number 3 for show-connected (COLP) information. The phone
will show a window as the following:
4. Press SELECT to retrieve your Caller ID settings. To change the settings, contact your service provider.
Show or Hide Your Own Caller ID
1. To hide your Caller ID, follow the procedure in the preceding subsection, but, in step 3, select number 2 for the Hide Own .
The phone will display the submenu:
2. Select number 1 to activate call waiting, number 2 to cancel it, and number 3 to view your current setting.
View or Change Your Network Settings
You can configure the following network settings on your phone:
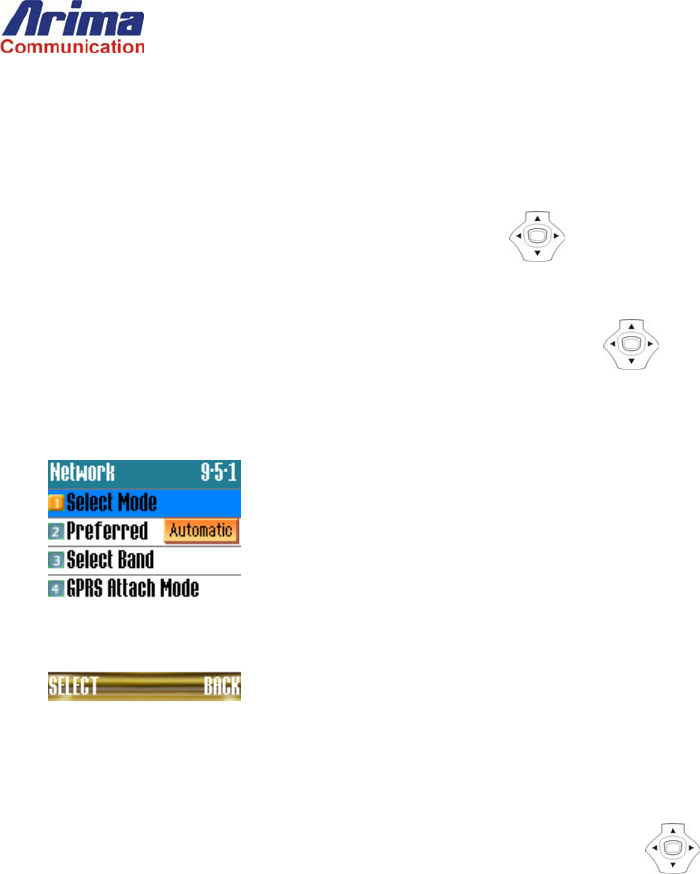
Configure the network-searching mode: Auto or manual.
View and edit your network list.
Select between GSM900/DCS1800 and PCS1900 network bands.
To access the network menu from the idle screen:
1. From the idle screen, press the MENU key then use 4-Way key to highlight the Call Services of main menu and press
SELECT to select the Call Services menu.
2. Press number 5 on the keypad to select the Network or use Up/Down key to highlight Network and press the
SELECT key to select it. The phone will display the submenu. Press number 8 on the keypad to select the Network
submenu.
Configure Network Searching Mode
1. Follow the procedure in the preceding subsection.
2. Press number 1 on the keypad to select the Select Mode or use Up/Down key to highlight Select Mode and press
the SELECT key to select it.
3. You can select between Automatic and Manual modes.
In automatic mode, the phone selects a PLMN (Public Land Mobile Network) in the Network Preferred List during the power-on
sequence. This is the recommended setting.
Manual mode lets you select a PLMN from the Network Preferred List.
After the searching, the network list for all available PLMNs, the phone will display the list on the screen. For each entry, if the
PLMN is recognized in the mobile ROM table, the PLMN name is displayed. Otherwise, the country is indicator is put in front
of the mobile network code: for example, FR 002.
When you select a network from the list, the phone will start registering to the network you selected. If successful, the phone
displays the idle screen; if not, the phone redisplays the network list so that you can try another selection.
If there is no network, the phone just displays the Searching… screen. If the phone loses the registered network, it will search the
network again and screen will return to Network Available screen, so that you can select another network again.
View and Edit Network List
1. Follow the procedure in the preceding subsection.
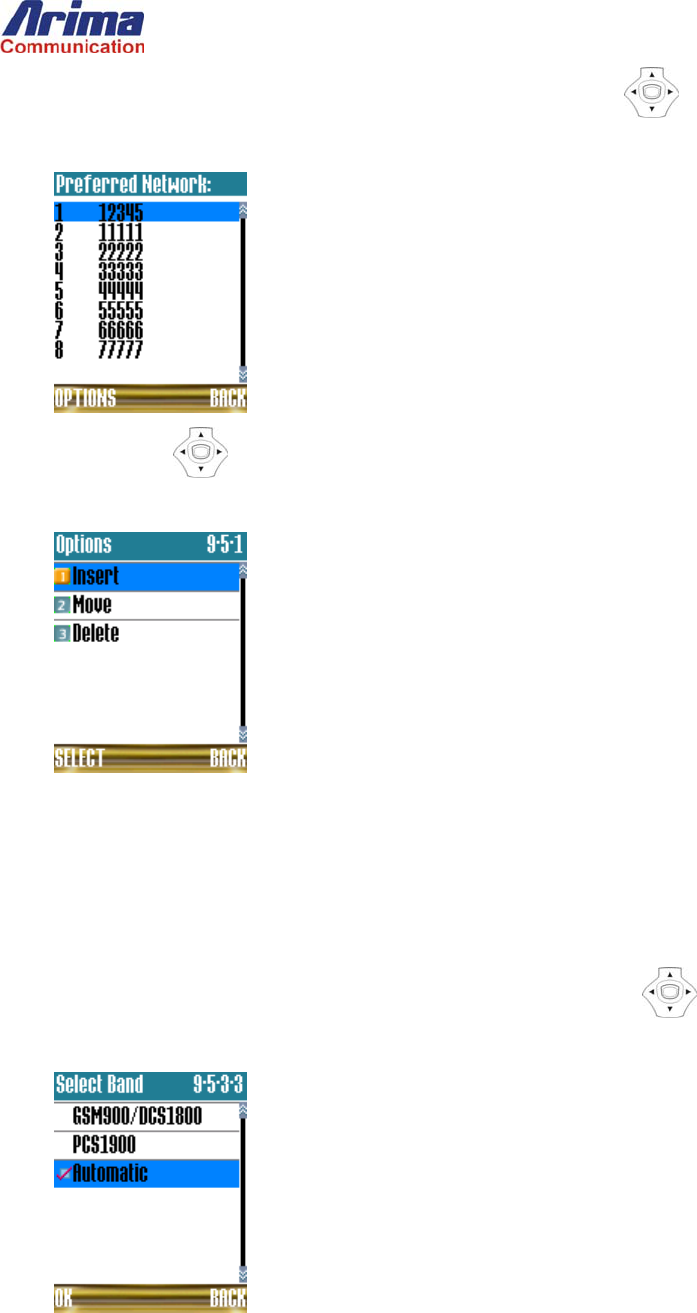
2. Press number 2 on the keypad to select the Preferred or use Up/Down key to highlight Preferred and press the
SELECT key to select it. The phone will display the preferred network list.
3. Use Up/Down key to highlight the selected network and press OPTIONS key to display the network Options
menu.
4. Select number 1 to Insert a new entry prior to the selected network, number 2 to Move the sequence of the entry, or number
3 to Delete the entry.
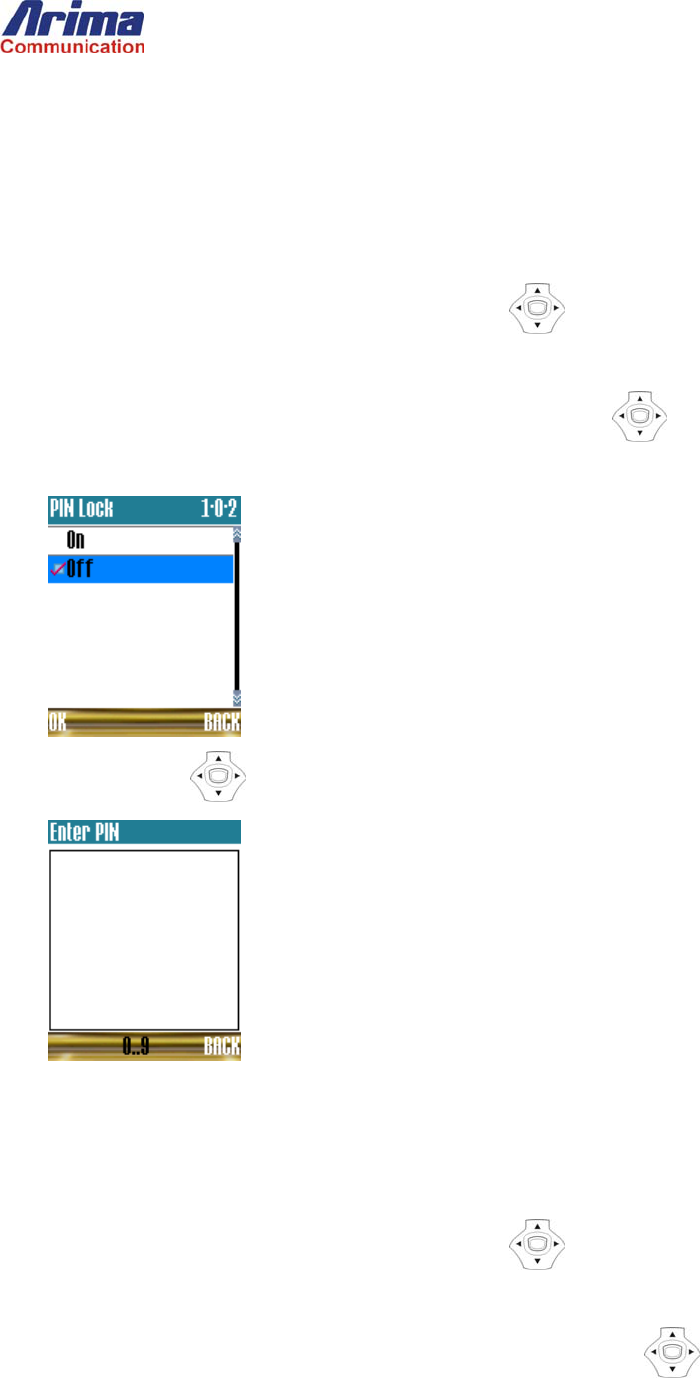
Band Selection
1. Follow the procedure in the preceding subsection.
2. Press number 3 on the keypad to select the Select Band or use Up/Down key to highlight Select Band and press
the SELECT key to select it.
3. You can select between GSM900/DCS1800 and PCS1900 network bands or Automatic select.
10. Security
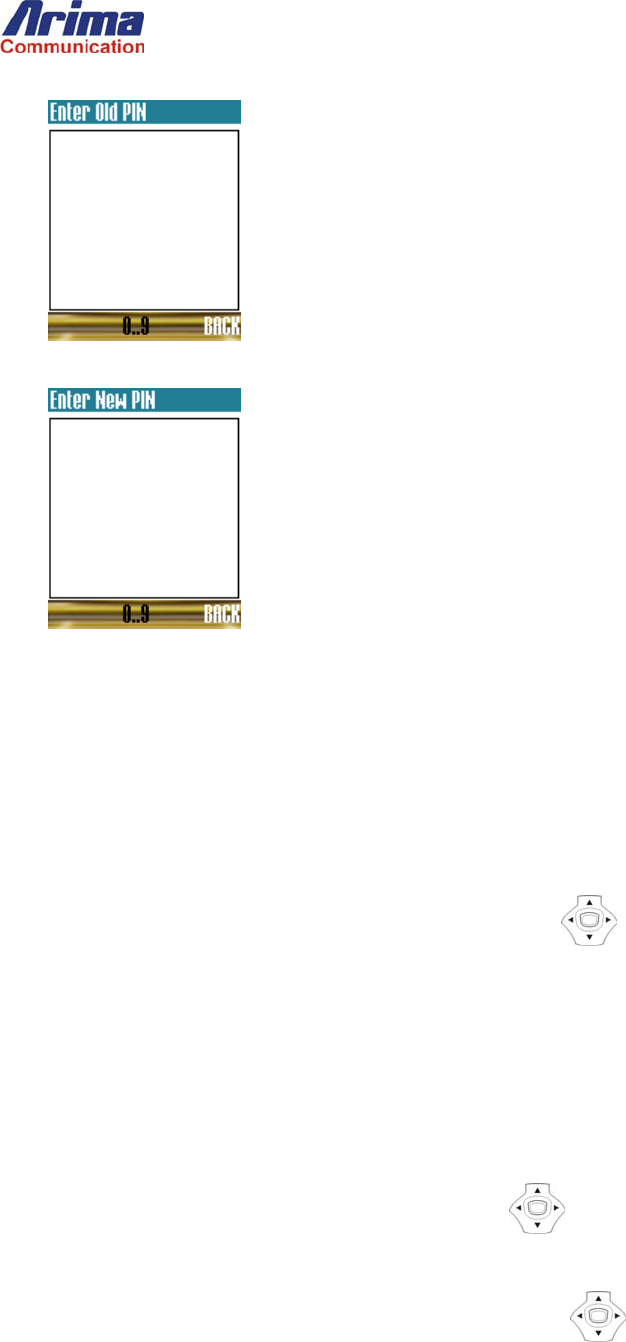
Force a PIN to Use the Phone
The PIN Lock feature lets you force a PIN (Pin Identification Number) entry when the phone is powered on – if you know the
PIN1 password. The default value is stored in the SIM card.
To toggle the state of the PIN Lock:
1. From the idle screen, press the MENU key then use 4-Way key to highlight the Security of main menu and press
SELECT to select the Security menu.
2. Press number 1 on the keypad to select the PIN Lock or use Up/Down key to highlight PIN Lock and press the
SELECT key to select it. The phone will display the PIN Lock screen.
3. Use the Up/Down key to highlight the On entry. The phone will prompt you for a PIN:
4. Enter the PIN1 password. If this is entered successfully, this PIN will be required to use the phone on power-up.
Change the Power-On PIN
If you already know the power-on PIN, and it is enabled as described in the previous subsection, you can change it as follows:
1. From the idle screen, press the MENU key then use 4-Way key to highlight the Security of main menu and press
SELECT to select the Security menu.
2. Press number 2 on the keypad to select the Change PIN1 or use Up/Down key to highlight Change PIN1 and press
the SELECT key to select it. The phone will display the PIN Lock screen. The phone will prompt for the current (old)
PIN.
3. Enter the current PIN and press the OK key. The phone will prompt you for the new PIN.
4. Enter the new PIN and enter the OK key. The phone will prompt you to verify the new PIN by entering it for a second time.
5. Enter the new PIN again and press the OK key to complete the operation.
Change the Call Log and Restricted Dialing PIN
PIN2 is the gateway to any changes to the call-cost log, and interactions with the Restricted Dialing list. Changing PIN2
requires you to know its current value.
The procedure for changing PIN2 is the same as for changing PIN1, the power-up PIN, except that in step 2, you must press
number 3 on the keypad to select the Change PIN2 or use Up/Down key to highlight Change PIN2 and press the
SELECT key to select it.
Enable Restricted Dialing Only
You can restrict the operation of your phone so that it will only be able to call a list of approved numbers, called the Fixed Dialing
Numbers (FDN). Up to 50 of these numbers can be stored in the SIM.
To restrict your phone to the FDN only:
1. From the idle screen, press the MENU key then use 4-Way key to highlight the Security of main menu and press
SELECT to select the Security menu.
2. Press number 4 on the keypad to select the FDN or use Up/Down key to highlight FDN and press the SELECT key
to select it. The phone will display FDN submenu.
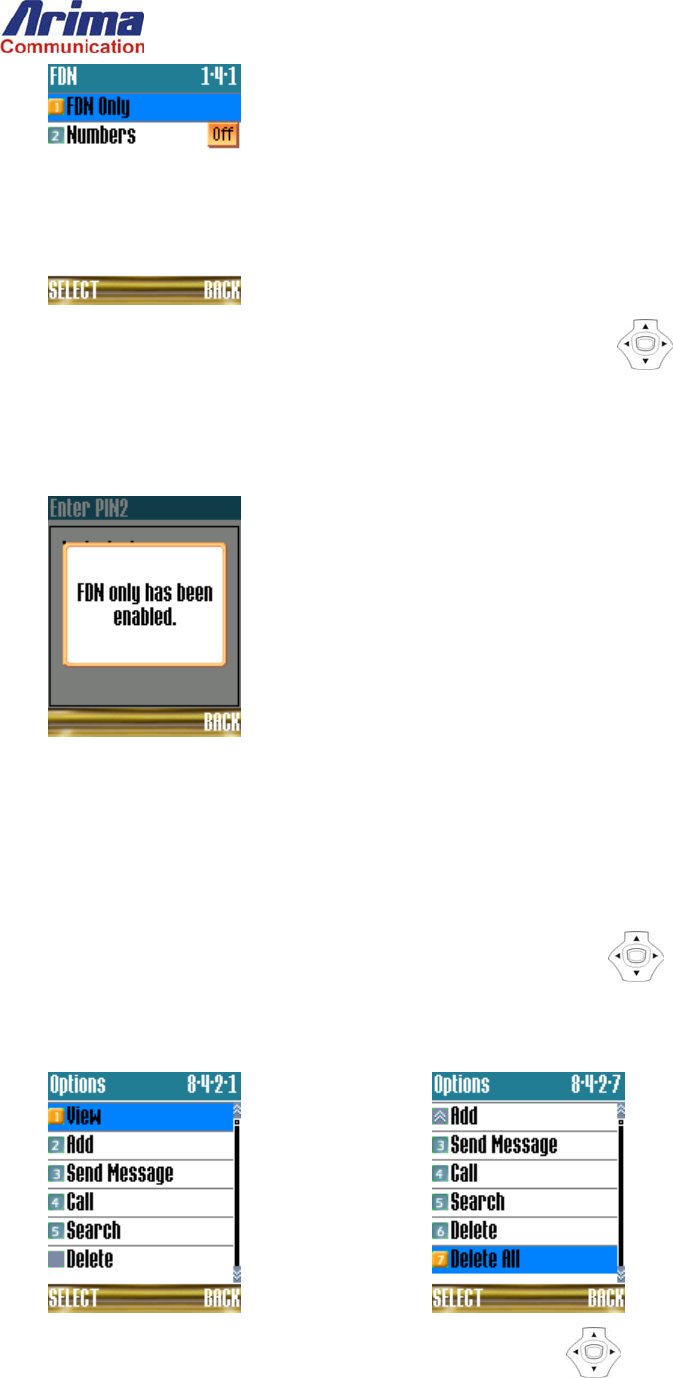
3. Press number 1 on the keypad to select the FDN Only or use Up/Down key to highlight FDN Only and press the
SELECT key to select it. The phone will prompt you for the PIN2 password.
4. Enter the PIN2 password and press the OK key. The phone will display the following information screen to confirm that
FDN-only operation has been enabled.
5. To revert to unrestricted dialing, follow the same procedure as above.
Enter a FDN Number Directly
To enter a number directly:
1. Perform the step 1-2 in the preceding subsection.
2. Press number 2 on the keypad to select the Numbers or use Up/Down key to highlight Numbers and press the
SELECT key to select it. The phone will display the names of current FDN entries.
3. Press the OPTIONS key to the FDN Options menu.
4. Press number 2 on the keypad to select the Add or use Up/Down key to highlight Add and press the SELECT key
to select it. The phone will display a screen for entering a name, followed by a screen for a number, in the same way as

when you are entering a number into the Phone or SIM phonebook.
Delete a Number
This operation is similar to deleting an entry from a phonebook, except that it is protected by the PIN2 password. Follow the
same procedure as in the preceding subsection, but, in step 4, press number 6 on the keypad to select the Delete or use Up/Down
key to highlight Delete and press the SELECT key to select it.
Delete Entire FDN List
This operation is similar to deleting all entries from a phonebook, except that it is protected by the PIN2 password. Follow the
same procedure as in the subsection “Enter a FDN Number Directly”, but in step 4, press number 7 on the keypad to select the
Delete All or use Up/Down key to highlight Delete All and press the SELECT key to select it.
Using the FDN
You can make calls, send messages, see details, and search for entries in the FDN. Perform these operations in the same way as
equivalent operations in the phonebook. These operations are not PIN protected.

General information
Battery care
Your phone is powered by a rechargeable battery.
• The battery can be charged and discharged hundreds of times but it will eventually wear out. When the operating time
(talk-time and standby time) is noticeably shorter than normal, you should buy a new battery at the time.
• Unplug the charger when not in use, and don’t leave the battery connected to a charger for longer than a week, since
overcharging may shorten its lifetime.
• Overcharging may shorten its lifetime, and if left unused a fully charged battery may discharge itself over time.
• Temperature extremes can affect the ability of your battery to charge.
• Do not use any charger or battery that is damaged in any way.
• Use the battery only for its intended purpose.
• Extreme temperatures will affect the charging capacity of your battery.
• Do not leave the battery in hot or cold places, such as in a car in summer or winter condition.
• Do not short-circuit the battery. Short-circuiting the terminals may damage the battery or the connecting object.
• Dispose of batteries according to local regulations. Always recycle. Do not dispose of batteries in a fire.
Access codes
PIN code (4 to 8 digits):
The PIN (Personal Identification Number) code protects your SIM card against unauthorized. Your SIM card usually supplies the
PIN code.
PIN2 code (4 to 8 digits)
The PIN2 code may be supplied with the SIM card. Some functions will require PIN2 support, such Set tariff.
PUK and PUK2 (8 digits)
The PUN (Personal Unblocking Key) code is required to change a blocked PIN code. The PUK2 code is required to change a
blocked PIN2 code.
Phone code (4 to 8 digits)
Phone code protects the phone against unauthorized use. It is not on when you buy the phone. You can change the phone code
(0000) to any four to eight-digit personal codes.
Care and Maintenance
Read this information before using your mobile phone.
Your mobile phone is a highly sophisticated electronic device. When using your phone, battery, charger or any accessory, please
read this first.
Product care
• Keep your mobile phone and all its parts out of young children’s reach.
• Keep your mobile phone dry.

• Avoid exposing your mobile phone to extreme hot or cold temperatures.
• Avoid placing your mobile phone close to lit cigarettes, naked flames or any heat source.
• Do not attempt to disassemble it. Non-expert handling of the device may damage it.
• Do not drop, knock or shake it. Rough handling can break internal circuit boards.
• Do not paint your mobile phone as the paint could obstruct the earphone, microphone or any moveable parts and prevent
normal use.
• Treat your mobile phone with care, keep it in a clean and dust free place.
Important Safety Information
Radio frequency energy
Your mobile phone is a radio transmitter and receiver. When the phone is turned on, it receives and transmits radio frequency (RF)
energy. Depending on the type of mobile phone you posses, it operates on different frequency ranges and employs commonly
used modulation techniques. The system that handles your call when you are using your phone controls the power level at which
your phone transmits.
Electronic devices
Most modern electronic equipment is shielded from RF energy. However, certain electronic equipment may not be shielded
against the RF signals from your wireless phone, therefore:
• Don not use your mobile phone near medical equipment without requesting permission.
Pacemaker
Mobile phones may affect the operation of some implanted cardiac pacemakers and other medically implanted equipment.
Pacemaker manufacturers recommend that a minimum separation of 20 cm (6 inches) be maintained between a hand-held
wireless phone and a pacemaker to avoid potential interference with the pacemaker. These recommendations are consistent with
the independent research by and recommendations of Wireless Technology Research.
Persons with pacemakers:
• Should always keep the phone more than 20 cm (6 inches) from their pacemaker when the phone is switched on;
• Should not carry the phone in a breast pocket;
• Should use the ear opposite the pacemaker to minimize the potential for interference.
• If you have any reason to suspect that interference is taking place, switch off your phone immediately.
Hearing aids
Some hearing aids might be disturbed by mobile phones. In the event of such disturbance, you may want to consult your service
provider, or call the customer services line to discuss alternatives.
Aircraft
• Turn off your mobile phone before boarding any aircraft.
• Do not use it on the ground without crew permission
To prevent interference with communication systems, you must not use your mobile phone while the plane is in the air.

Potentially explosive atmospheres
Switch off your phone when in any area with a potentially explosive atmosphere and obey all signs and instructions. It is rare, but
your phone or its accessories could generate sparks. Sparks in such areas could cause an explosion or fire resulting in bodily
injury or even death. Areas with a potentially explosive atmosphere are often, but not always, clearly marked. They include
fuelling areas, such as petrol station, below deck on boats, fuel or chemical transfer or storage facilities, and areas where the air
contains chemicals or particles, such as grain, dust, or metal powders.; and any other area where you would normally be advised
to turn off your vehicle engine.
Driving
Check the laws and regulations on the use of mobile phones in the areas where you drive. If you are going to use your phone
while driving, please:
• Give full attention to driving
• Use handsfree. Law in many countries requires vehicle handsfree.
• Pull off the road and park before making or answering a call if driving conditions so require.
RF energy may affect some electronic systems in motor vehicles such as car stereo, safety equipment etc. in addition, some
vehicle manufacturers do not allow use of mobile phones, unless the installation is supported by a handsfree kit with an external
antenna, in their vehicles. Check with your vehicle manufacturer’s representative to be sure that your mobile phone will not affect
the electronic systems in your vehicle.
Emergency calls
Important:
This phone, like any wireless phone, operates using radio signals, wireless and landline networks as well as user programmed
functions. Because of this, connections in all conditions cannot be guaranteed. Therefore, you should never rely solely upon any
wireless phone for essential communications (e.g. medical emergencies)
Emergency calls may not be possible on all wireless phone networks or when certain network services and/or phone features are
in use. Check with local service provider.

Warning Statement:
FEDERAL COMMUNICATIONS COMMISSION
This device complies with Part 15 of the FCC Rules. Operation is subject to the following two conditions:(1) this device
may not cause harmful interference, and (2) this device must accept any interference received, including interference
that may cause undesired operation.
NOTE
This equipment has been tested and found to comply with the limits for a Class B digital device, pursuant to Part 15 of
the FCC Rules. These limits are designed to provide reasonable protection against harmful interference in a
residential installation. This equipment generates, uses and can radiated radio frequency energy and, if not installed
and used in accordance with the instructions, may cause harmful interference to radio communications. However,
there is no guarantee that interference will not occur in a particular installation If this equipment does cause harmful
interference to radio or television reception, which can be determined by turning the equipment off and on, the user is
encouraged to try to correct the interference by one or more of the following measures:
-Reorient or relocate the receiving antenna.
-Increase the separation between the equipment and receiver.
-Connect the equipment into an outlet on a circuit different from that to which the receiver is connected.
-Consult the dealer or an experienced radio/TV technician for help.
Changes or modifications not expressly approved by the party responsible for compliance could void the user‘s
authority to operate the equipment.
The antenna(s) used for this transmitter must not be co-located or operating in conjunction with any other antenna or
transmitter.
This EUT is incompliance with SAR for general population /uncontrolled exposure limits in ANSI/IEEE C95.1-1999 and
had been tested in accordance with the measurement methods and procedures specified in OET Bulletin 65
Supplement C.
FCC RF Exposure Information
Body-worn Operation
This device was tested for typical body-worn operations. To comply with FCC RF exposure requirements, a minimum
separation distance of 1.5 cm must be maintained between the user’s body and the handset, including the antenna.
Third-party belt-clips, holsters, and similar accessories used by this device should not contain any metallic
components. Body-worn accessories that do not meet these requirements may not comply with FCC RF exposure
requirements and should be avoided.
For more information about RF exposure, please visit the FCC website at www.fcc.gov