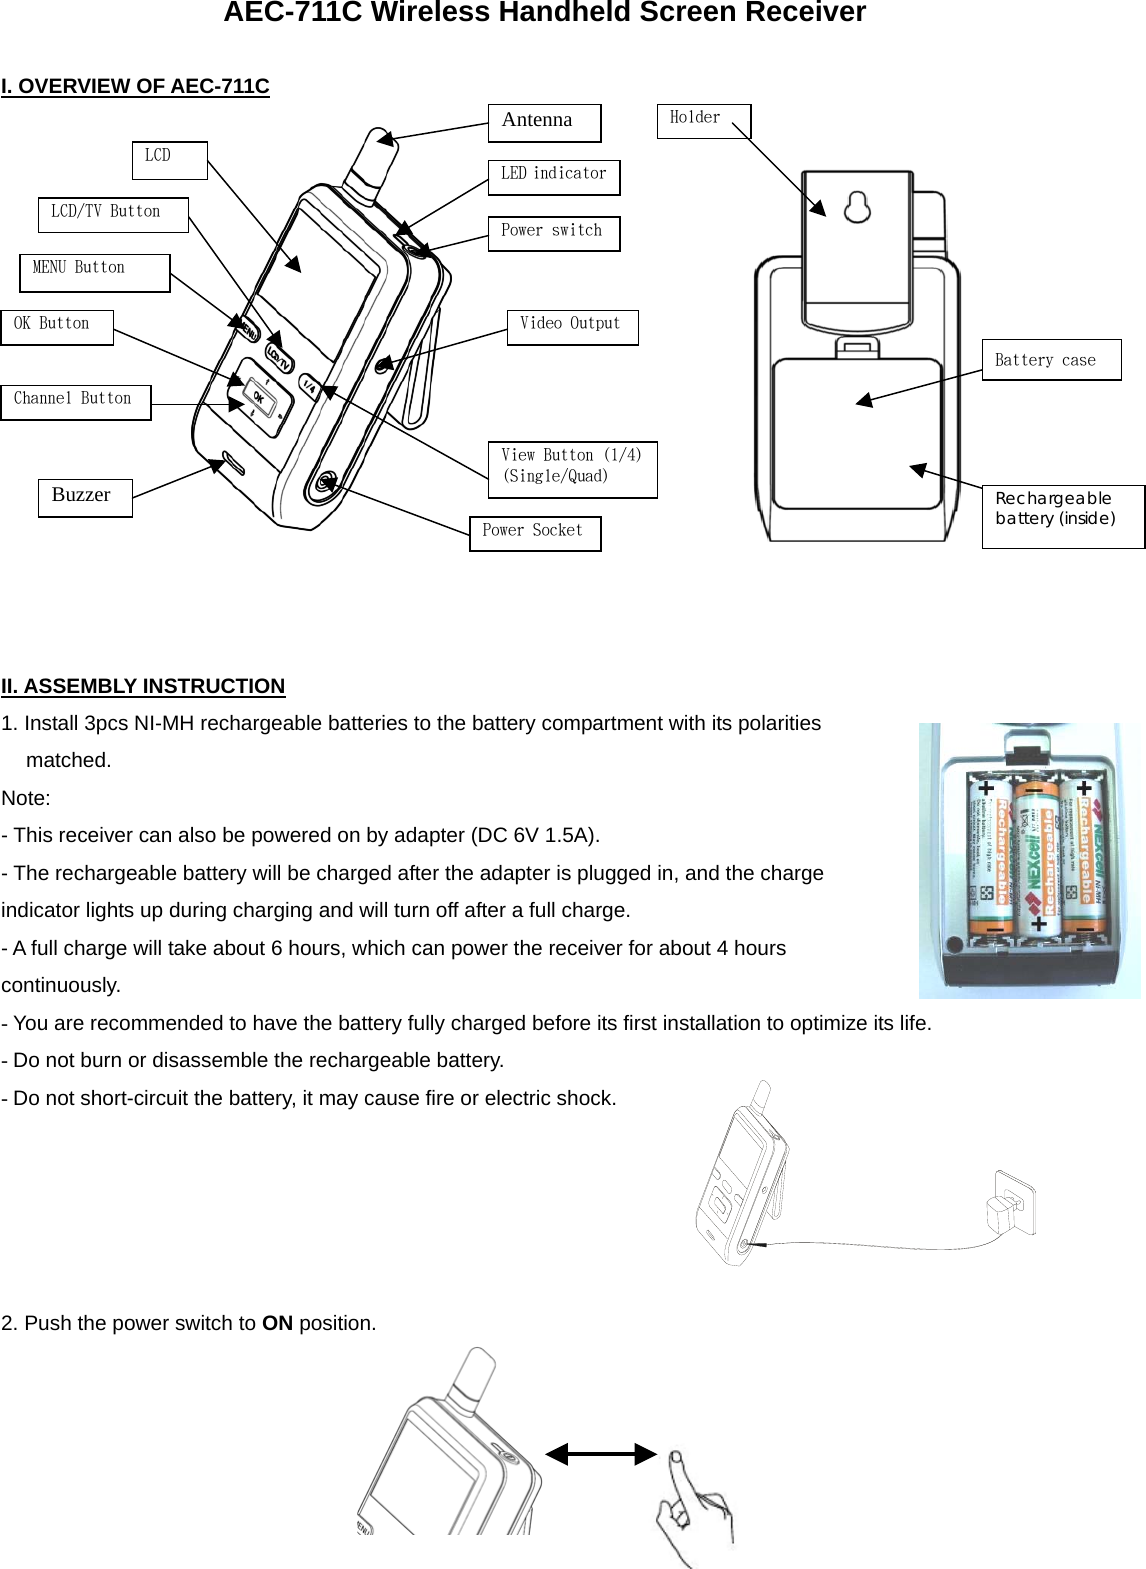
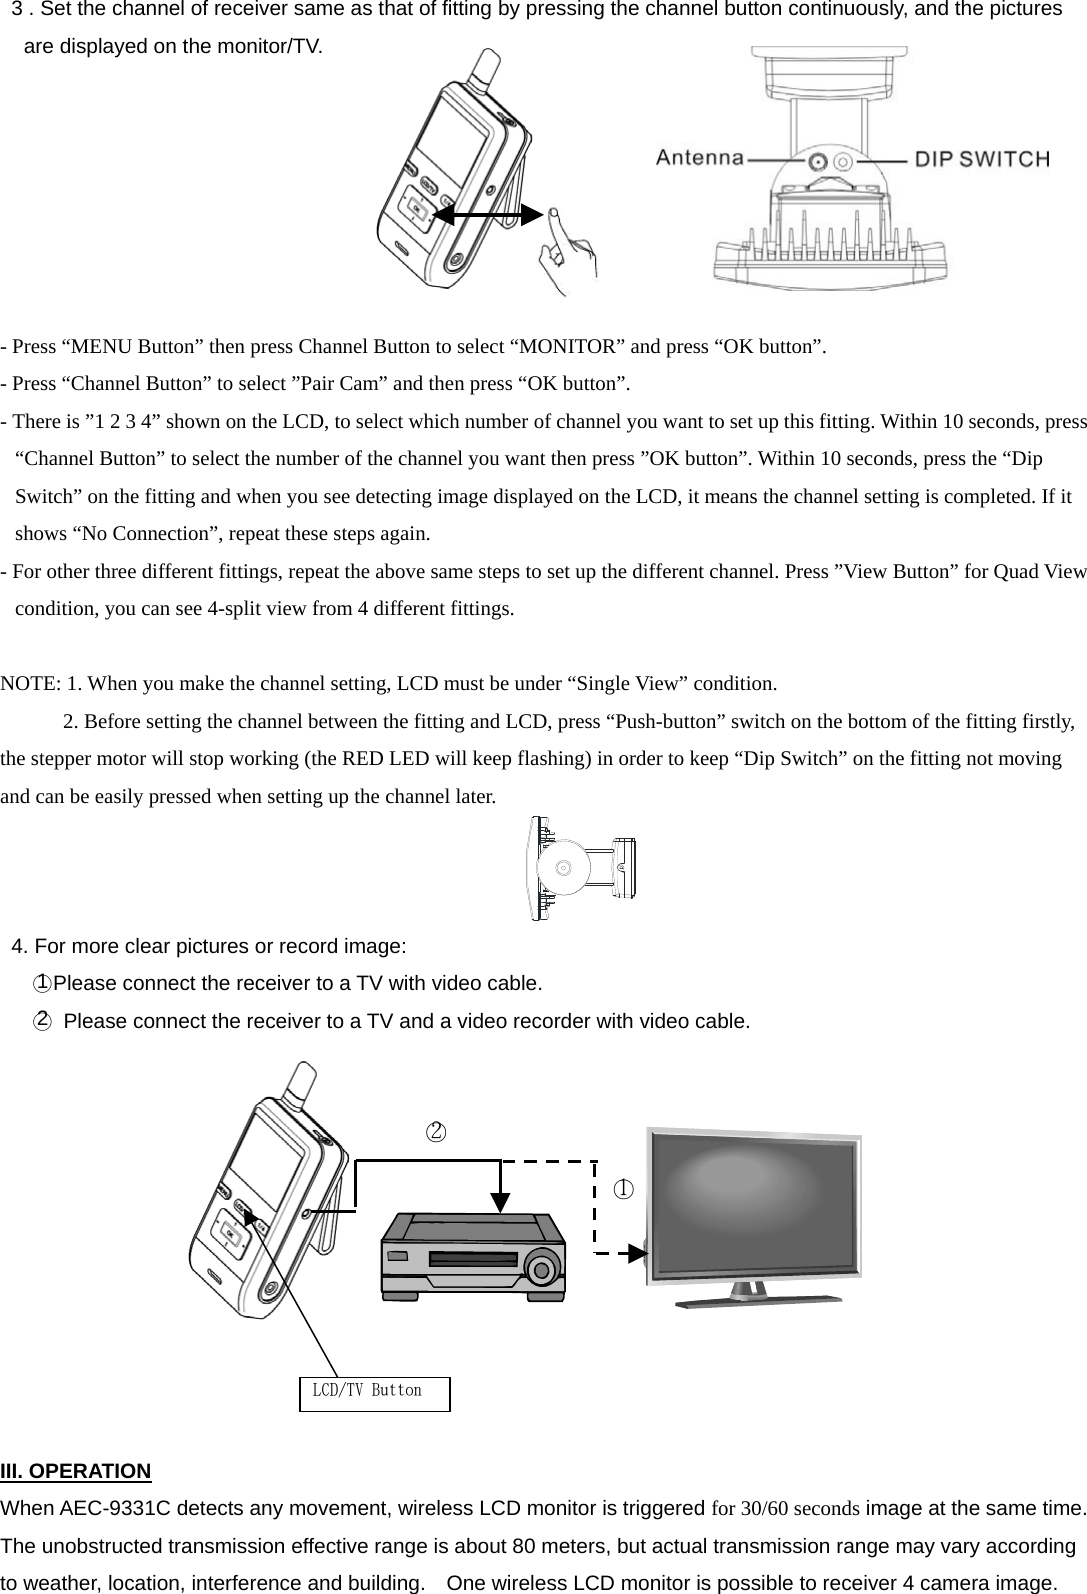
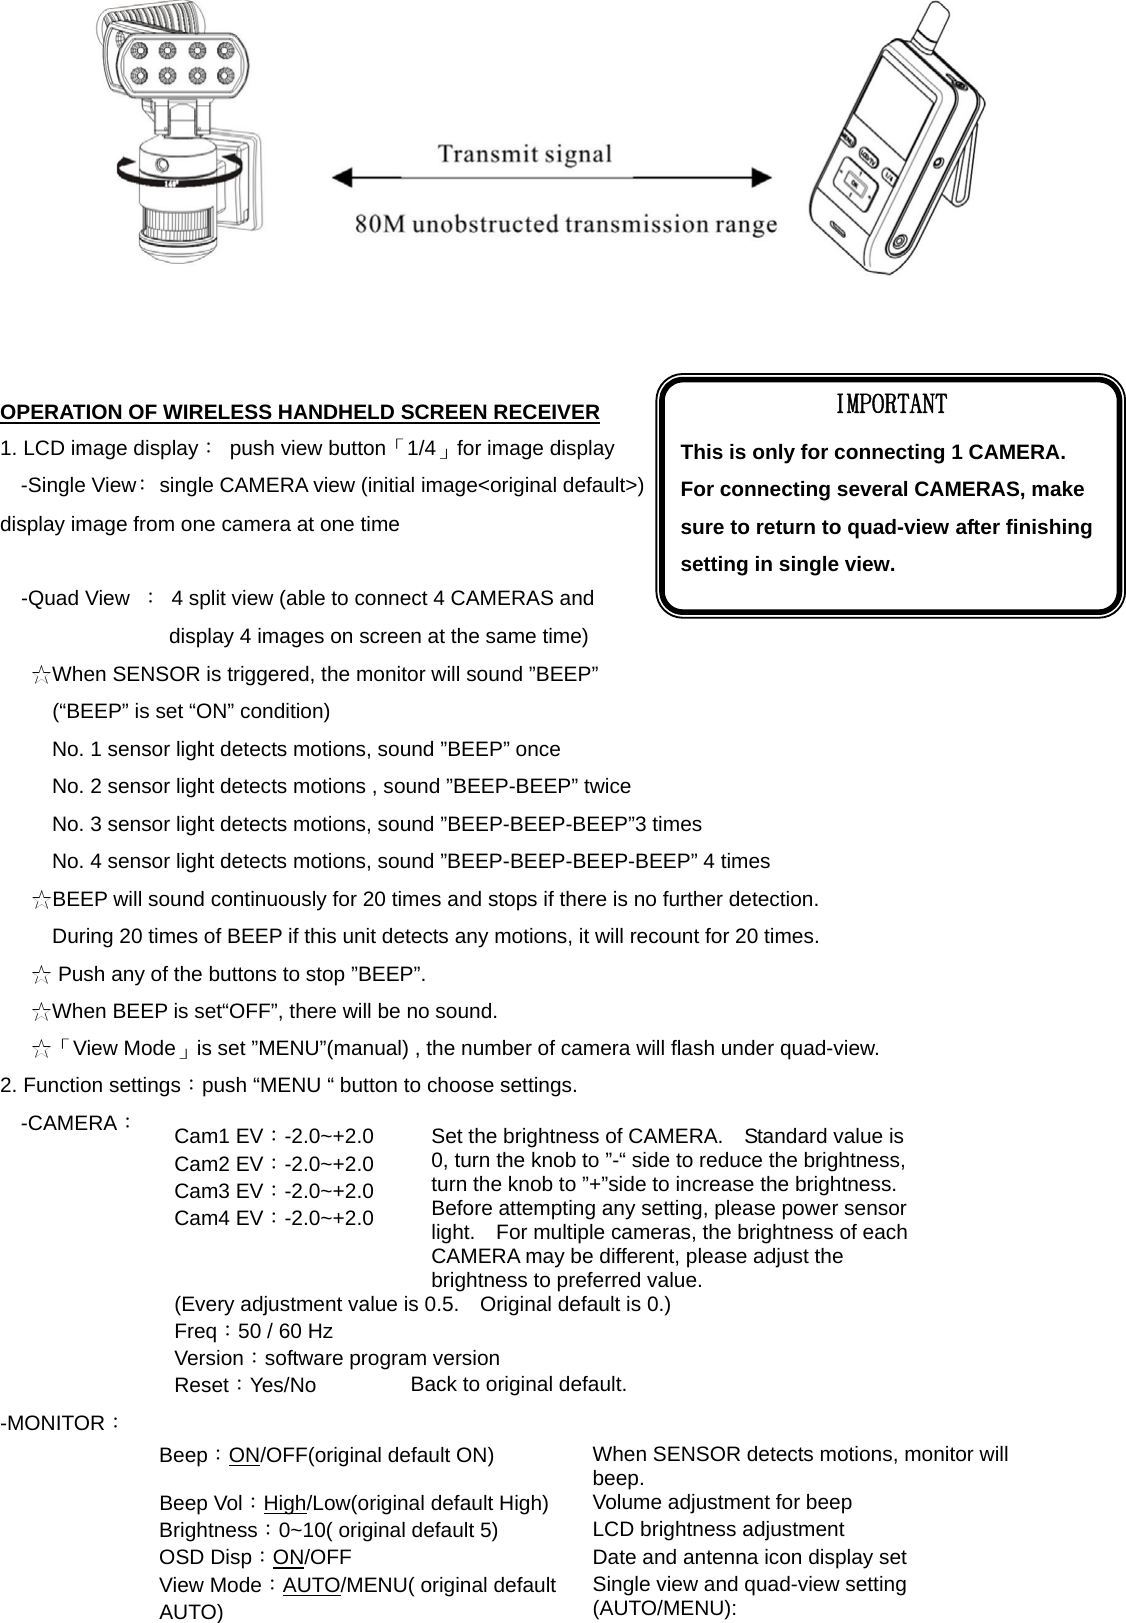
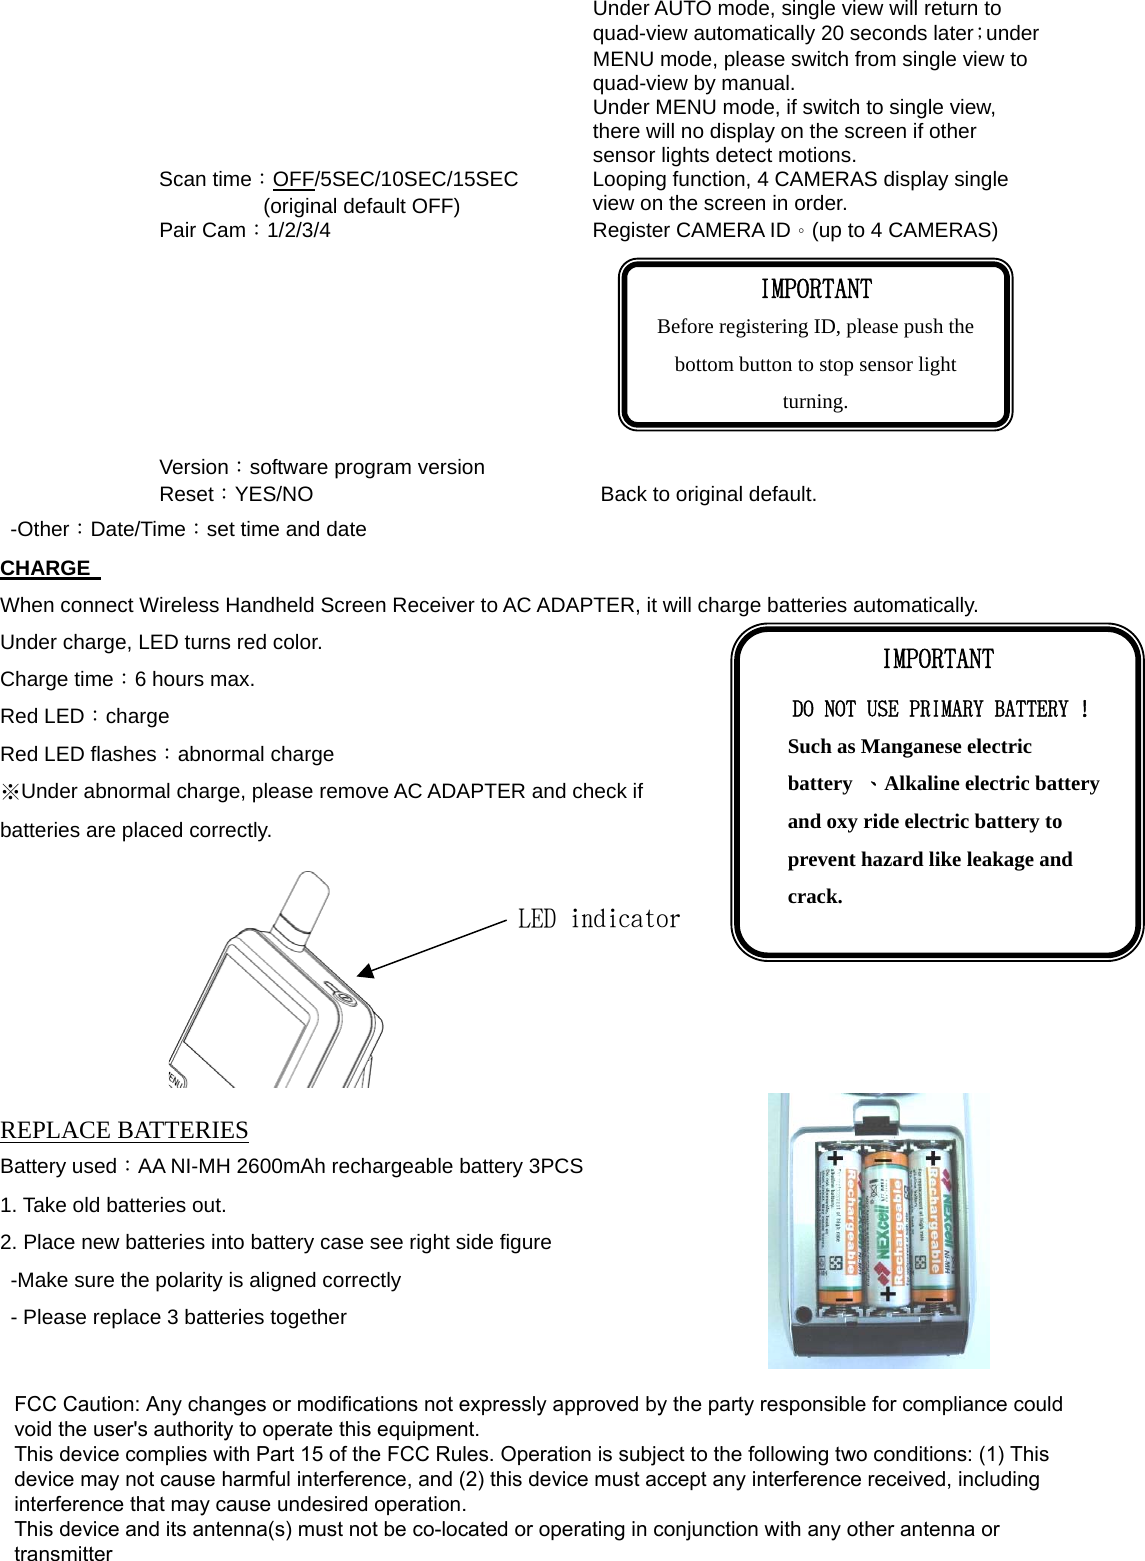
Aurum Electronics AEC711C Wireless Handheld Screen Receiver User Manual AEC 711C IM EU

Aurum Electronics Corp. Wireless Handheld Screen Receiver AEC 711C IM EU

User Manual

 AEC-711C Wireless Handheld Screen Receiver  I. OVERVIEW OF AEC-711C                II. ASSEMBLY INSTRUCTION 1. Install 3pcs NI-MH rechargeable batteries to the battery compartment with its polarities matched. Note:   - This receiver can also be powered on by adapter (DC 6V 1.5A). - The rechargeable battery will be charged after the adapter is plugged in, and the charge indicator lights up during charging and will turn off after a full charge.   - A full charge will take about 6 hours, which can power the receiver for about 4 hours continuously. - You are recommended to have the battery fully charged before its first installation to optimize its life. - Do not burn or disassemble the rechargeable battery. - Do not short-circuit the battery, it may cause fire or electric shock.        2. Push the power switch to ON position.        Battery caseRechargeable battery (inside)LCD LCD/TV Button MENU Button OK Button Channel Button Buzzer AntennaLED indicatorPower switchVideo OutputPower SocketHolder View Button (1/4)(Single/Quad)
 3 . Set the channel of receiver same as that of fitting by pressing the channel button continuously, and the pictures are displayed on the monitor/TV.        - Press “MENU Button” then press Channel Button to select “MONITOR” and press “OK button”.   - Press “Channel Button” to select ”Pair Cam” and then press “OK button”.     - There is ”1 2 3 4” shown on the LCD, to select which number of channel you want to set up this fitting. Within 10 seconds, press “Channel Button” to select the number of the channel you want then press ”OK button”. Within 10 seconds, press the “Dip Switch” on the fitting and when you see detecting image displayed on the LCD, it means the channel setting is completed. If it shows “No Connection”, repeat these steps again.   - For other three different fittings, repeat the above same steps to set up the different channel. Press ”View Button” for Quad View condition, you can see 4-split view from 4 different fittings.    NOTE: 1. When you make the channel setting, LCD must be under “Single View” condition.               2. Before setting the channel between the fitting and LCD, press “Push-button” switch on the bottom of the fitting firstly, the stepper motor will stop working (the RED LED will keep flashing) in order to keep “Dip Switch” on the fitting not moving and can be easily pressed when setting up the channel later.    4. For more clear pictures or record image: ○1Please connect the receiver to a TV with video cable. ○2  Please connect the receiver to a TV and a video recorder with video cable.            III. OPERATION When AEC-9331C detects any movement, wireless LCD monitor is triggered for 30/60 seconds image at the same time. The unobstructed transmission effective range is about 80 meters, but actual transmission range may vary according to weather, location, interference and building.    One wireless LCD monitor is possible to receiver 4 camera image. LCD/TV Button ○1○2
   OPERATION OF WIRELESS HANDHELD SCREEN RECEIVER 1. LCD image display:  push view button「1/4」for image display -Single View: single CAMERA view (initial image<original default>)             display image from one camera at one time  -Quad View  :  4 split view (able to connect 4 CAMERAS and display 4 images on screen at the same time)    ☆When SENSOR is triggered, the monitor will sound ”BEEP” (“BEEP” is set “ON” condition)      No. 1 sensor light detects motions, sound ”BEEP” once      No. 2 sensor light detects motions , sound ”BEEP-BEEP” twice      No. 3 sensor light detects motions, sound ”BEEP-BEEP-BEEP”3 times      No. 4 sensor light detects motions, sound ”BEEP-BEEP-BEEP-BEEP” 4 times BEEP will sound continuously for 20 times and stops if there is no further detection. ☆ During 20 times of BEEP if this unit detects any motions, it will recount for 20 times.    ☆ Push any of the buttons to stop ”BEEP”.    ☆When BEEP is set“OFF”, there will be no sound.    ☆「View Mode」is set ”MENU”(manual) , the number of camera will flash under quad-view. 2. Function settings:push “MENU “ button to choose settings. -CAMERA:         -MONITOR: Beep:ON/OFF(original default ON)  When SENSOR detects motions, monitor will beep. Beep Vol:High/Low(original default High)  Volume adjustment for beep Brightness:0~10( original default 5)  LCD brightness adjustment OSD Disp:ON/OFF  Date and antenna icon display set View Mode:AUTO/MENU( original default AUTO) Single view and quad-view setting (AUTO/MENU): Cam1 EV:-2.0~+2.0   Cam2 EV:-2.0~+2.0 Cam3 EV:-2.0~+2.0   Cam4 EV:-2.0~+2.0 Set the brightness of CAMERA.    Standard value is 0, turn the knob to ”-“ side to reduce the brightness, turn the knob to ”+”side to increase the brightness.   Before attempting any setting, please power sensor light.    For multiple cameras, the brightness of each CAMERA may be different, please adjust the brightness to preferred value. (Every adjustment value is 0.5.    Original default is 0.) Freq:50 / 60 Hz Version:software program version Reset:Yes/No  Back to original default. IMPORTANT This is only for connecting 1 CAMERA.   For connecting several CAMERAS, make sure to return to quad-view after finishing setting in single view.
Under AUTO mode, single view will return to quad-view automatically 20 seconds later;under MENU mode, please switch from single view to quad-view by manual. Under MENU mode, if switch to single view, there will no display on the screen if other sensor lights detect motions. Scan time:OFF/5SEC/10SEC/15SEC (original default OFF) Looping function, 4 CAMERAS display single view on the screen in order. Pair Cam:1/2/3/4  Register CAMERA ID。(up to 4 CAMERAS)  Version:software program version Reset:YES/NO  Back to original default. -Other:Date/Time:set time and date CHARGE   When connect Wireless Handheld Screen Receiver to AC ADAPTER, it will charge batteries automatically. Under charge, LED turns red color. Charge time:6 hours max. Red LED:charge Red LED flashes:abnormal charge ※Under abnormal charge, please remove AC ADAPTER and check if batteries are placed correctly.        REPLACE BATTERIES Battery used:AA NI-MH 2600mAh rechargeable battery 3PCS 1. Take old batteries out. 2. Place new batteries into battery case see right side figure   -Make sure the polarity is aligned correctly   - Please replace 3 batteries together IMPORTANT Before registering ID, please push the bottom button to stop sensor light turning. IMPORTANT DO NOT USE PRIMARY BATTERY ! Such as Manganese electric battery  、Alkaline electric battery and oxy ride electric battery to prevent hazard like leakage and crack. LED indicatorFCC Caution: Any changes or modifications not expressly approved by the party responsible for compliance could void the user's authority to operate this equipment. This device complies with Part 15 of the FCC Rules. Operation is subject to the following two conditions: (1) This device may not cause harmful interference, and (2) this device must accept any interference received, including interference that may cause undesired operation. This device and its antenna(s) must not be co-located or operating in conjunction with any other antenna or transmitter

Navigation menu