Autostart AS6601 Remote Transceiver User Manual
Autostart Remote Transceiver
UserManual.wiki
>
Autostart
>
AS6601 User Manual
User manual
Navigation menu
Upload a User Manual
Namespaces
Wiki Guide
HTML
PDF
Info
Views
User Manual
Discussion / Help
Navigation
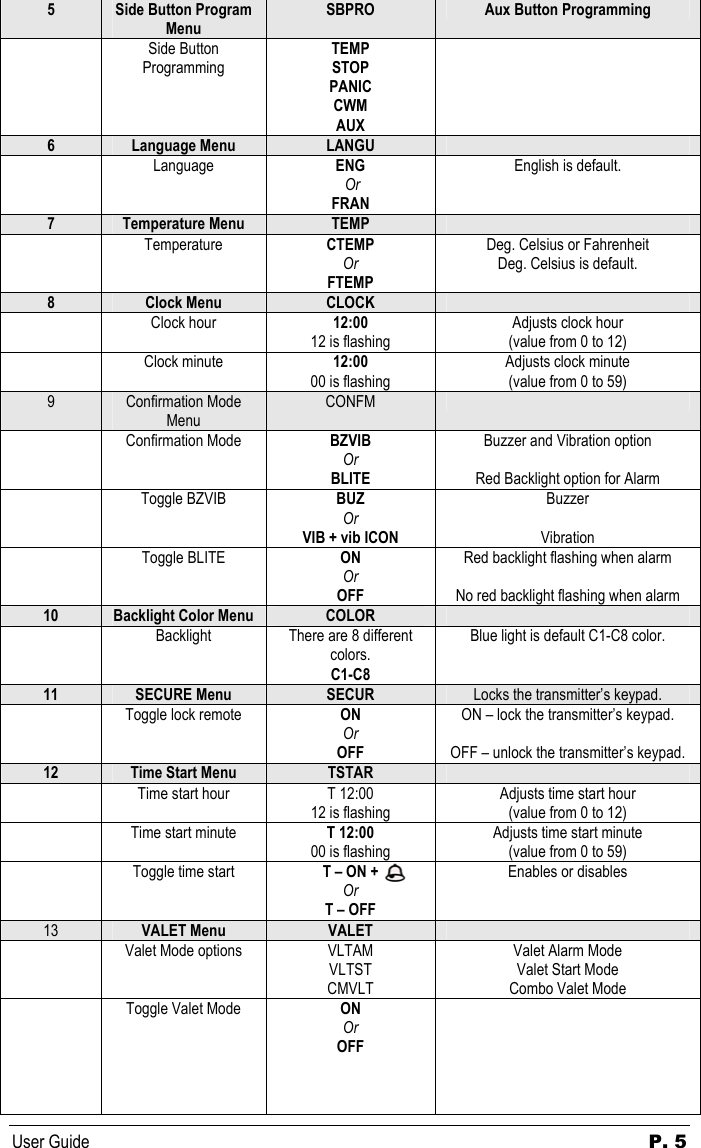
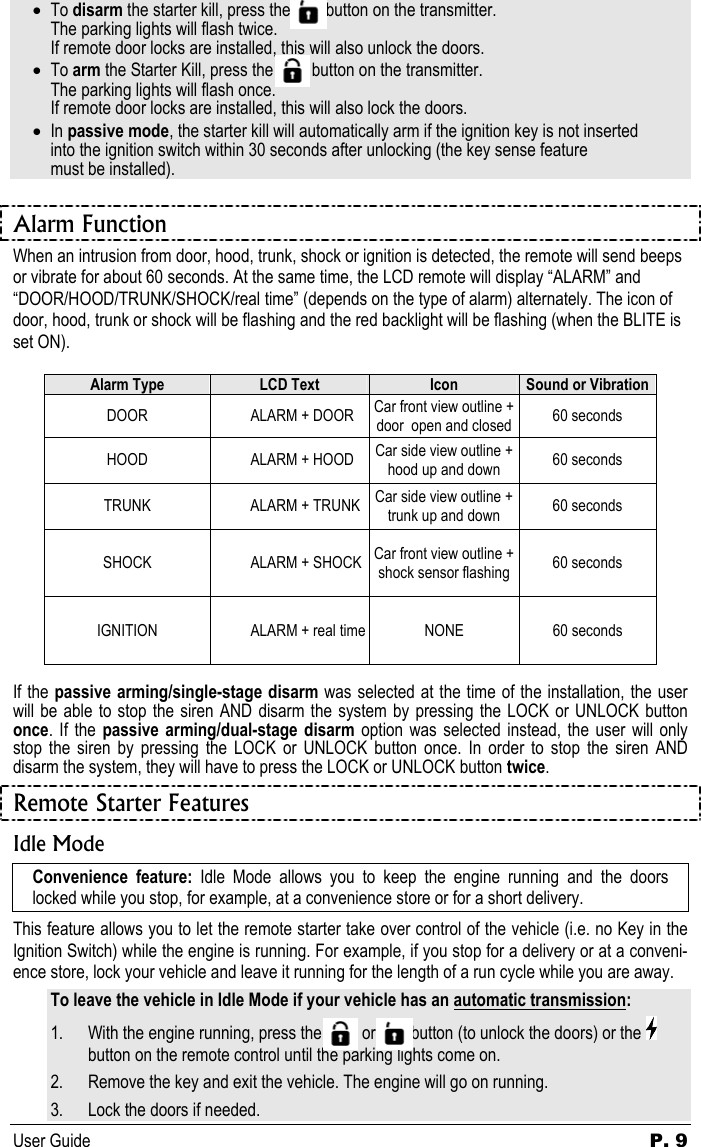
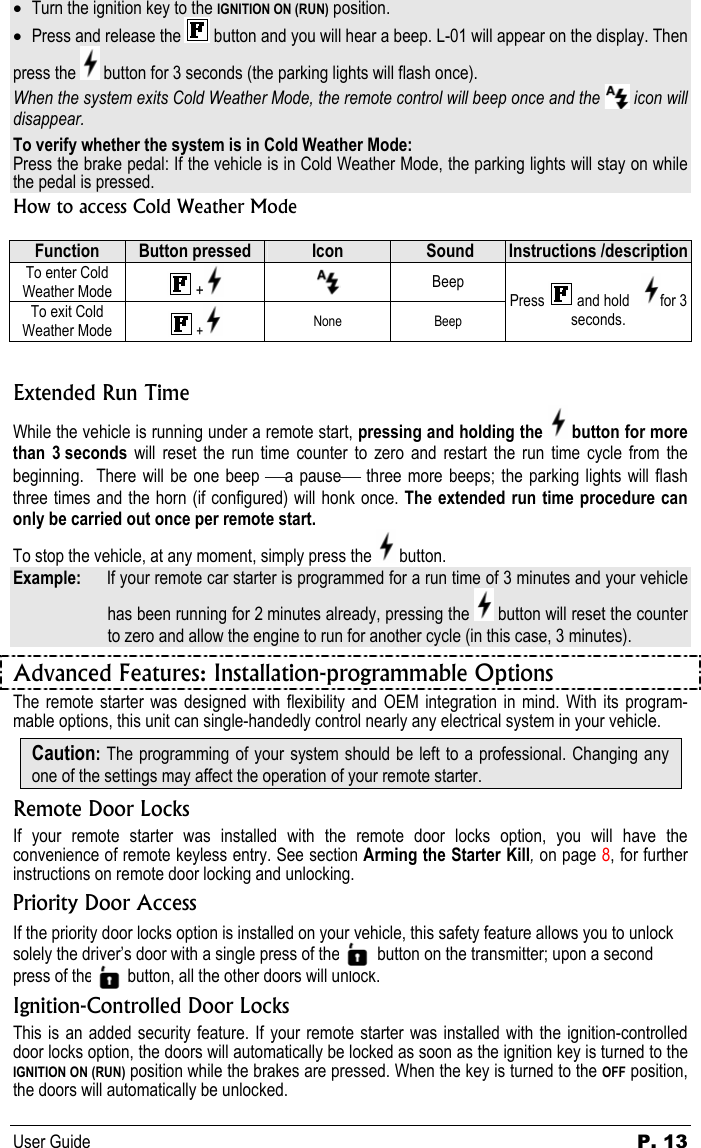

![User Guide P. 21 Diagnostics – Parking Light Flash Table Flashes Description 1 • Doors locked, Starter Kill armed. • Run time has expired. • TRUNK button pressed. • Start signal received by the module. • Cold Weather Mode cancelled. 2 • Remote start attempt cancelled by remote. • Doors unlocked, Starter Kill disarmed. • Exiting Ignition Valet. • Exiting Remote Valet. • Power-up reset. • Board set from manual to automatic; power ON. • Power ON to OFF (automatic transmission). 2 quick flashes continuously • Starter Kill ON / Alarm OFF. 3 • Entering Cold Weather Mode. • Extended run time. • Entering or exiting Ready Mode. • Entering Ignition Valet. • Entering Remote Valet. • Disabling LED. 3 slow flashes… …after a failed start attempt. The module did not detect a tach signal. 4 • +12 V detected on the brake input wire either while cranking or during run time. • Entering multi-speed tach programming. • Board set from automatic to manual; power ON. • Power ON to OFF (manual transmission). 5 Slow • Start attempt failed because no tach signal has been programmed. 5 Fast • Tach signal programmed. 6 • A remote start was attempted while a tach-before-crank signal was detected before cranking. 8 • Unit reset: occurs when the unit is reset to the factory defaults. 10 • A ground (-) signal was detected on the hood pin input wire. When pressing START/STOP 15 quick flashes… • The parking brake is connected to ground (automatic transmission). 1 pause 1pause 5 flashes • Transmitter has been programmed. [During the transmitter programming procedure.] 1 – pause – 2 • There was a remote start attempt while the vehicle was in Valet Mode. • Failed start: vehicle’s low battery voltage. …followed by 1 flash. Exiting Cold Weather Mode. ON SOLID for 3 seconds…. …followed by 3 flashes. Entering Cold Weather Mode. ON continuously • Idle Mode: Idle Mode is engaged. • Run time: The vehicle has been remote started and is in run time. ON continuously While the brake pedal is pressed. • Confirms that Cold Weather Mode is engaged. ON 2 seconds • The hood has been opened and a ground (-) signal has been detected on the hood pin input wire. ON 4 seconds • Locking or unlocking a door (with Door pulses configured to 4 sec.). ON 20 seconds • The hood pin has been flashed and you are now in the programming centre. Constant flashes for 25 sec. • Panic Mode is triggered.](https://usermanual.wiki/Autostart/AS6601/User-Guide-808713-Page-21.png)