Avantech Mobile CT8558 GSM/PCS Triple Band 900/1800/1900 MHz Mobile Phone User Manual Philips855 GB MKG 4311 255 58331
Avantech Mobile GSM/PCS Triple Band 900/1800/1900 MHz Mobile Phone Philips855 GB MKG 4311 255 58331
Contents
- 1. Users Manual
- 2. SAR Addendum to Users Manual
Users Manual


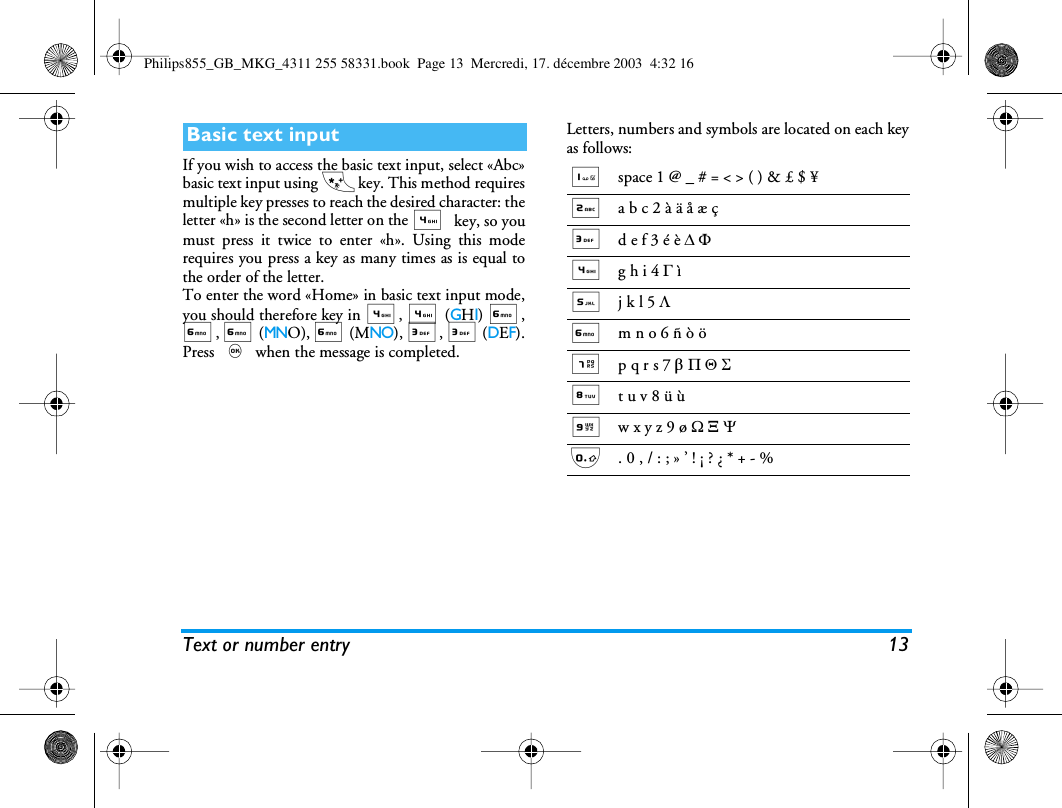


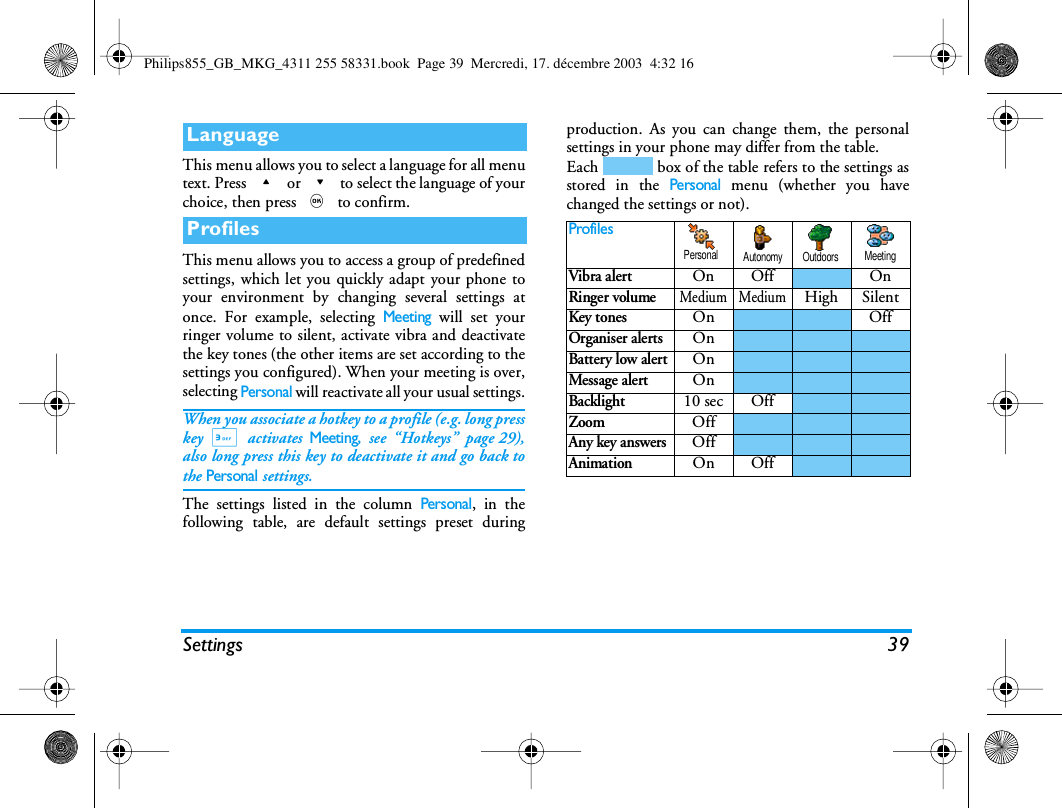
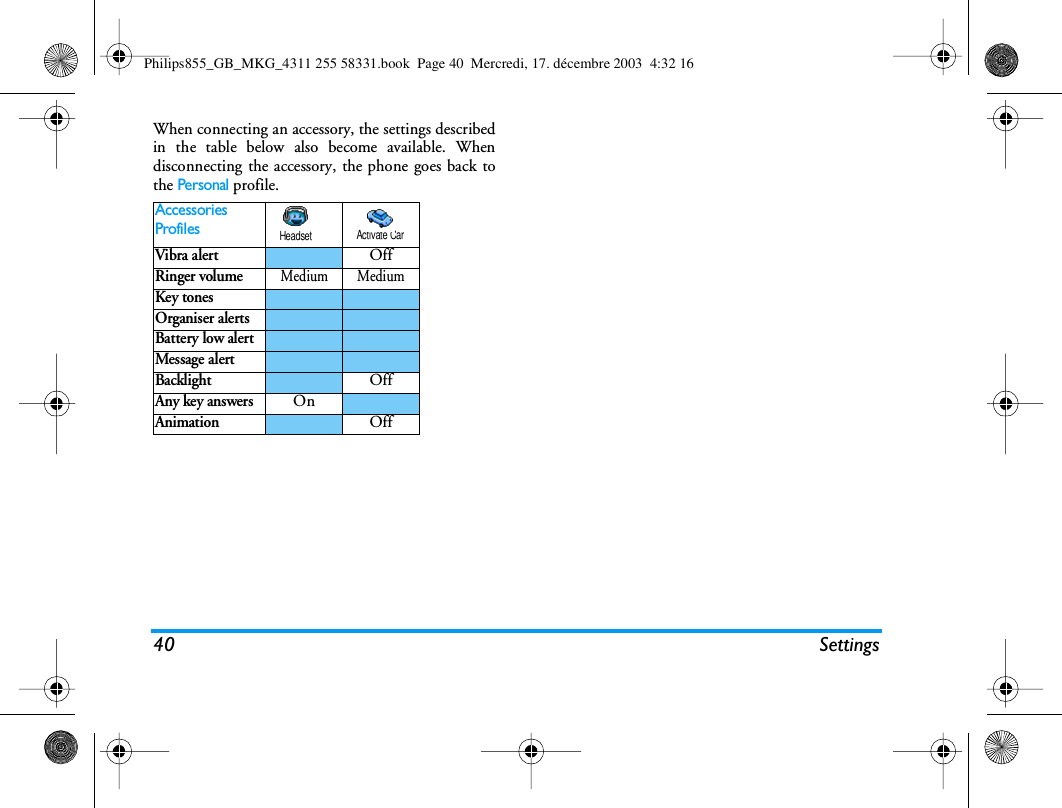


![50 MessagesAn e-mail without any attachment may beautomatically displayed in the details screen.Headers informationSelect a header, press ,, select Details and press, again to see the address it was sent from, the dateand time at which it was sent, its subject and the sizeof the attachment if any. The following status iconsmay appear in regards to each header:Download e-mailsSimply select one of the retrieved e-mailheaders and press ,. Then select Getmail and press , to download thee-mail. Repeat this operation to download each e-mailcorresponding to each selected header.You can also press , to access the e-mail headers’carousel and select Get mail from the available options.If the e-mail is too big (over 50 KB), it is rejected andthe download is cancelled.Get and store attachmentsIf the e-mail you have received contains attachments(JPEG picture, text file or another e-mail), they arecharacterised by a specific icon:[Noicon]The e-mail can be downloaded.The e-mail size is too large, it cannot bedownloaded.The e-mail is marked to be deleted (seepage 52).Get mailContains the details of the e-mail header(date and time, sender’s e-mail address, etc.),press , to display these details.The text of the e-mail itself can be viewed asan attachment, press , to read it. Thereisn’t any advanced options in this situation:it can be read, but not stored nor forwarded.A text file (text only, «.txt» format) is at-tached to the e-mail, press , to read it.There isn’t any advanced options in this sit-uation either.The application needed to manage thisattachment isn’t available in your phone, orthe e-mail is too large to be uploaded.Philips855_GB_MKG_4311 255 58331.book Page 50 Mercredi, 17. décembre 2003 4:32 16](https://usermanual.wiki/Avantech-Mobile/CT8558.Users-Manual/User-Guide-415156-Page-57.png)